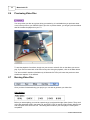
1
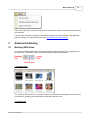
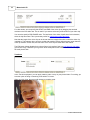
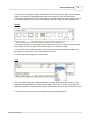
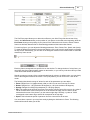
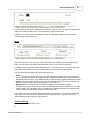
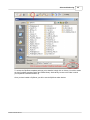
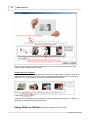
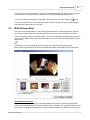
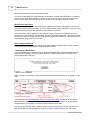
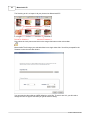
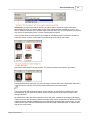
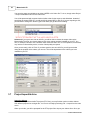
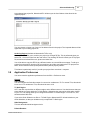
MemoriesOnTV User Guide Version 4.0 © 2007 CodeJam Pte Ltd I MemoriesOnTV Table of Contents Part I Introduction 1 1 System Requirements ................................................................................................................................... 1 2 Installing & Registering ................................................................................................................................... 2 Part II Basic Authoring 3 1 Organizing your ................................................................................................................................... disc 4 2 Importing Photos ................................................................................................................................... & Videos 5 3 Adding Background ................................................................................................................................... Music 7 4 Visual Effects................................................................................................................................... 8 5 Disc Menu ................................................................................................................................... 9 6 Previewing Video ................................................................................................................................... Disc 12 7 Burning Video ................................................................................................................................... Disc 12 Part III Advanced Authoring 15 1 Working With................................................................................................................................... Views 15 2 Customizing................................................................................................................................... Slides 16 3 Using ClipShows ................................................................................................................................... 24 4 Multi-Pictures ................................................................................................................................... Slide 27 5 Slideshow in................................................................................................................................... Slideshow 31 6 Exporting your ................................................................................................................................... Slideshow 34 7 Project Import/Archive ................................................................................................................................... 36 8 Application Preferences ................................................................................................................................... 37 Part IV Troubleshoot 39 1 CD/DVD Burning ................................................................................................................................... Problems 39 2 DVD Playback ................................................................................................................................... Problems 39 Part V Appendix A: List of countries using NTSC video system. 40 Part VI Appendix B: List of countries using PAL video system. 40 Index 0 © 2007 CodeJam Pte Ltd Introduction 1 1 Introduction User Guide version 4.0 Copyright © 2003-2007 CodeJam Pte Ltd. All rights reserved. No part of this publication may be reproduced or transmitted in any form or by any means, electronic or mechanical, including photocopying, recording or storing in a retrieval system, or translated into any language in any form without the express written permission of CodeJam. Mpeg Encoder © 1999/2000-2003 MainConcept AG CD recording software developed under license from Padus, Inc. MemoriesOnTV Pro uses FLV encoder from the FFMpeg project and ZIP library from 7-Zip project, which are licensed under LGPL. MemoriesOnTV Menu Template Backgrounds are created by Mike Swanson. Software License The software described in this document is furnished under a License Agreement which is included with the product, This Agreement specifies the permitted and prohibited uses of the product. About MemoriesOnTV MemoriesOnTV is an easy but powerful video CD/DVD authoring software that brings your digital photos & videos into the living room television. With MemoriesOnTV, you can archive your favorite pictures & videos into a professional CD/DVD that is playable on standard DVD players, and accessible on PC's and Mac's. 1.1 System Requirements System Requirements Microsoft Windows 98, ME, 2000, 2003, XP or Vista Intel Pentium2 Processor (or equivalent) and above 128 MB RAM (256MB Recommended) 36 MB of available hard drive space for program installation CD or DVD Burner (to burn discs) Windows-compatible display with at least 800 x 600 © 2007 CodeJam Pte Ltd 2 MemoriesOnTV Windows-compatible mouse or pointing device Windows-compatible sound card (recommended) File Format Support Input Formats: Image: BMP, GIF, JPG, PNG, TIF, PCX, PGM, PICT, TGA, WMF, EPS Video*: MPG, MOV, AVI, MP4 (MP4 on WinXP only), 3GP Audio: WAV, MP3, WMA (unprotected only) Output Formats: Video CD 2.0 (NTSC: 352x240, PAL: 352x288) Super Video CD (NTSC: 480×480, PAL: 480×576) DVD (NTSC: 720x480, PAL: 720x576) AVI** (Resolution dependent on codec) Web FLV** (Multiple resolution) * Video codec support is dependent on DirectX and QuickTime. Minimally, you will need DirectX 8.1 and Quicktime 7 to support most digital camera video clip formats. ** MemoriesOnTV Pro only. 1.2 Installing & Registering Installation Follow these steps to install MemoriesOnTV: 1. Download and save MemoriesOnTV from http://www.codejam.com/download.htm 2. Double-click the downloaded executable to start the installation. 3. Follow the on-screen instructions. If you are installing from an older version, we highly recommend that you uninstall any existing copies before installing the new one. Registration After installing MemoriesOnTV, you need to enter your registration key into the software to turn it into a fully registered copy. Otherwise, you will see a EVALUATION COPY watermark on your created videos. If you do not yet have a registration key, you can purchase from the MemoriesOnTV website: http://www.codejam.com/buy.htm If you already have your registration key, perform the following steps to register the software: 1. Start MemoriesOnTV. 2. Go to the Registration Box by clicking on the Register button on the startup screen that appear when you start the software, or by choosing Help > Enter serial number from the menu bar in MemoriesOnTV. 3. Enter your e-mail, according to the e-mail address you have used when you purchased the software. 4. Enter your registration key. It can be found on the invoice you received by e-mail. © 2007 CodeJam Pte Ltd Introduction 3 5. Click the OK button. You should receive the following message: Thank you for registering! Note that the registration key is tied to your e-mail address. You need to enter the originally registered e-mail at the time of purchase, even if you have already changed your e-mail address. Un-Installation Perform the following steps to remove MemoriesOnTV from your computer: 1. 2. 3. 4. 2 Choose Start > Settings > Control Panel > Add/Remove Programs. Choose MemoriesOnTV from the list. Select the Add/Remove button. Follow the on-screen instructions. Basic Authoring Overview MemoriesOnTV is an easy but powerful video authoring software. It organizes your photos and videos into albums or sub-albums (also known as tracks) on a single CD or DVD. Each album is a continuous slideshow selectable from the disc menu. Sub-albums allow you to group your photos and videos within an album, and can be selectable from the disc menu as well. The main application window is divided into 3 main panels. The Project Panel shows the structure of your video disc, and all its albums & sub-albums. The Main Panel shows either all your photos & videos in the currently selected album, or shows an extension of the Control Panel. The Control Panel gives you the authoring tools needed to customize your project, depending on the current task chosen. © 2007 CodeJam Pte Ltd 4 MemoriesOnTV Video authoring is simply a matter of going through 5 simple tasks: Import - Bring your photo & video files into your albums through drag & drop. Music - Sets the background music plays for each album or sub-album. Effects - Customize the panning/zooming (Kens Burns Effect), and the transition effect for each album. Disc Menu - Select the menu to use for your video disc. Burn - Generate the video & burn onto CD or DVD. 2.1 Organizing your disc If you have many photos & videos, you will find the need to organize them. MemoriesOnTV lets you group your photos & videos into albums and sub-albums (also known as tracks). Each album is represented by the film icon on the Project Panel, and represents a continuous slideshow selectable from the disc menu. Each sub-album (or track) is represented by the track icon . About Tracks Every album will have at least 1 track. If you have more than 1 track in an album, they will play consecutively one after another. Tracks can be selectable from the disc menu, if you enable so. The purpose of tracks is to allow finer organization within an album. You can make use of it to have a 2-level menu navigational structure on your disc. If you want, you can ignore tracks altogether. By default, the film icon representing the album is not expanded, so that the default track (every album has at least 1 track) is hidden from view. © 2007 CodeJam Pte Ltd Basic Authoring 5 Adding & Removing Album/Track You can add a new album or track by clicking on the + button. Upon clicking, you will receive a pop-up menu to determine whether you're adding a new album, or a new track to the existing album. Should you decide to remove any existing album or track, you can simply select it and click on the X button. Looping Album Playback If you want an album to repeatedly play on your DVD player, you can set it to loop. To do so, simply select the album you want, and click on the loop button. The film icon representing the album will show a small loop inside. Naming your Album/Track You can name your albums & tracks in any way you like. To re-name, simply select the album or track, and click on the existing name. Alternatively, you can click on the pen button at the bottom of the Project Panel. The names on your album will show on the disc menu, if the selected disc menu shows album names. Changing Album/Track position and hierarchy Albums & tracks are draggable. You can drag them to change their position, or to change their hierarchy. A much easier alternative is to use to up/down buttons at the bottom of the Project Panel. These, however, only allows you to change the position of the albums or tracks, and not their hierarchy. 2.2 Importing Photos & Videos You can import your photos & videos into MemoriesOnTV when the import task is selected. You can either use the built-in file explorer to drag & drop your photos/videos into the main panel, or use Windows Explorer. Adding photo/video to a specific position When you're in thumbnail view (default), any photos dropped will be added to the end of the album. If you wish to add photos to the dropped position instead, simply hold the SHIFT key on your keyboard when you perform the drag & drop. In the timeline view, photos are always added to the dropped position. Adding photo/video recursively When you drag a folder into the main panel, it will create a new album. Any sub-folders that you drag in will be created as an album as well. In this way, your folder of photos and videos are added recursively into the project, with each folder forming an album. Arranging your photo/video To arrange your photos and videos in the album, simply drag and drop them to the desired position. When in thumbnail mode, the order of the photo/video in the slideshow is from left to right, followed by top to bottom. When in detailed list mode, the order is from top to bottom. © 2007 CodeJam Pte Ltd 6 MemoriesOnTV Hiding the Control Panel To increase the workspace for your album's photos/videos, you can hide away the bottom control panel (showing the file explorer when in import mode) temporarily. To do so, simply click on the just above the control panel. Click on the same button to un-hide the control panel. Photo/Video Input Format MemoriesOnTV supports all the common photo & video formats: Photo: jpg, gif, bmp, png, tif, pcx, pgm, pct, pict, tga, wmf, eps Video: mpg, avi, mov, mp4 (mp4 on WinXP only) Note that video format support is dependent on the video codec's installed on your PC. In order to support mov (& mp4), you will need to have Apple's QuickTime 7 and above installed. For all other formats, you should have a relatively recent version of DirectX installed. At the minimum, you should have DirectX 8.1, to support the most common video clip formats used in most digital cameras. You can download the latest DirectX and QuickTime from the Microsoft's and Apple's website respectively: DirectX : http://www.microsoft.com/windows/directx/downloads/default.asp QuickTime : http://www.apple.com/quicktime/download/ Main Panel Toolbar The main panel toolbar provides some actions you can perform on your album or photo/video. The toolbar functions are described as follow, following the order shown above: New Text Slide Slide Settings Delete Slide Download ClipShows Load ClipShow Save as ClipShow Merge Slides Multi-Pictures Slide Randomize Adds a new empty slide, for the purpose of adding text captions. Configure the slide properties. You can also activate this by double-clicking on the slide. Remove the selected slides from the album. Download ClipShow templates. Create slides from ClipShow templates. Save selected slides as a ClipShow template (Pro edition only). Merge selected slides into a single video file. The purpose is to have a single video sequence that you can layer in a multi-pictures slide, resulting in a slideshow in slideshow effect (Pro edition only). Layers the selected slides into a single, or create a brand new multi-pictures slide. ( Pro edition only). Randomize the order of the selected slides.. Thumbnail View View slides in thumbnail mode. Timeline View View slides in timeline mode. Detail View View slides in details mode. © 2007 CodeJam Pte Ltd Basic Authoring 2.3 7 Adding Background Music For each album (or sub-album - track), you can add background music files to play along with the slideshow. To do so, click on the music button to set the control panel in music mode. After that, click on to add your music files. Alternatively, you can also drag & drop your music files into the music panel. You can re-arrange the order in which your music files play at any time, by dragging and dropping them to the desired position. Music Format Support You can use MP3, uncompressed WAV or unprotected WMA music format files in MemoriesOnTV. To use music files from your audio CD, you will need to "convert" them to one of these formats. There are many free tools available for this, such as CDEX: http://www.download.com/CDex/3000-2140-10226370.html If your music file is in another format, you will need to use a audio converter. One freeware audio converter is: http://www.any-audio-converter.com/ Music Tools The music panel comes with some nifty tools to help you manipulate your music files. When you click on , you will see a menu of all the tools you can use: Auto-Sync all music & slides Select this option when you want to adjust the delay of each slide proportionately such that the slideshow will end together with the background music. Auto-Sync only selected Select this option when you want to set the selected slides to the duration of your selected music file(s). This option is useful when music & slides you're synchronizing a group of slides to a particular song. Start selected music & slide Select this option to start a particular song on a particular slide. The delays of the slides before the selected one will be adjusted to achieve together this. Add silence Select this option to add a break between songs. Auto-trim silence from Select this option to trim away beginning & ending silence from your songs. selected music Manually trim selected music Select this option to invoke the mini Audio Editor to select a subsection of the song you want to use. Set auto-trim sensitivity Select this option to set the auto-trim silence sensitivity. Music Options You can apply a few options to your music files: Normalize, Fade In, Fade Out, and Loop. Normalize will analyze your music files' volume and normalize all to sound equally loud. Fade In and Fade Out are applied to the beginning and ending of the slideshow respectively, while Loop controls whether the set of music files repeat when their total length is shorter than your slideshow. If you have video files in your album, it is likely that some of your video files may have its own audio. When this happens, the audio will be played together with the background music. You can control how © 2007 CodeJam Pte Ltd 8 MemoriesOnTV loud the background music plays, by adjusting the volume slider: Applying Music Settings to all Albums If you have many albums and you wish to use the same music settings for all, you can click on . This will copy the settings to all your albums, which you can then edit individually for each album. 2.4 Visual Effects MemoriesOnTV includes some of the most visually stunning effects in slideshow software. There are 2 types of effects you can apply to your slideshow: Picture Effect : Picture Effects (also known as Ken Burns Effect) are effects that show when the picture is on display. This effect allows you to pan, zoom in/out or rotate your picture, and is very popular in TV Documentaries. When combined with simple transition effects (described next), it can look very pleasing. If you've selected the option to pan/zoom randomly for your Picture Effects, you can check the "Avoid Cropping Face(s)" option. This will force the detection of faces (upright & frontal) on your photos, and the random pan/zoom will be constrained such that it does not cut into the faces. Note that face detection is a lengthy process, and will take a while to complete for many pictures. It's recommended that you only check this option for selected pictures. You can adjust how long each picture stays on display, by setting the Picture Delay. This can be anything more than 1.00 seconds. IMPORTANT: Once you have configured the Picture Effect or the Picture Delay, you need to click for it to take effect. You will be able to choose to apply to all slides in the current track, or just the selected slides. Transition Effect : Transition Effects are effects that show when the picture is changing to the next one. Many of the existing transition effects are customizable, yielding almost an infinite number of possible transitions. To do so, click on: You can also customize the transition effects on a per-slide basis, so that each slide uses a different variant of a particular transition. This is set similarly in the slide's customization window. When you set the transition effect to Random, you can select the list of effects that will be randomly selected. To do so, set Transition Effect to Random, and click on Customize button. You can set the delay for each transition. The longer the delay, the slower a picture will change to the next one. To have no effects for the whole album, set the transition delay to 0.00. IMPORTANT: Once you have configured the Transition Effect or the Transition Delay, you need to click for it to take effect. You will be able to choose to apply to all slides in the current © 2007 CodeJam Pte Ltd Basic Authoring 9 track, or just the selected slides. Apply All : To apply your effects settings to all your albums, you can click on . You will get a pop-up menu that allows you to select which setting you want to apply to all your albums. The controls in the Effects control panel allows you to customize the effect for each album (or subalbum - tracks). To have finer control on each individual slide, refer to customizing slides. 2.5 Disc Menu MemoriesOnTV includes many disc menu templates that you can use for your disc. When you use a menu for your disc, the playback will start with the menu, and end with the menu after every slideshow. If you disable the use of the menu, playback will start from the first to the last album. You can disable the menu by selecting Do not create menu after clicking on . By default, MemoriesOnTV will create a 2-level menu if you have multiple tracks within an album. For albums with multi-tracks, the track menu will be shown when you activate the button for the album. If you only want a 1-level menu, select Create menu to select Albums, instead of Create menu to select Albums & Tracks in Albums, from the menu. For DVDs, MemoriesOnTV supports the creation of motion menus. A motion menu is one in which the background and/or any of the thumbnails are video clips. By default, the duration of a motion menu is set to 20 seconds, after which the menu will be looped back to the beginning. Do note that motion menus do take up additional space. The longer the motion menu duration, the more space will be needed for the menus, and hence leaving less available space for the slideshow proper. Also, the total size of all the disc menu cannot exceed 1GB. Customizing Menu Page Items Each item on the menu page is resizable and moveable. To resize, simply select the menu page item and drag its corner anchors. To move, drag the item to its desired location on the menu page. Should you decide to reset back the menu item positions to their original, click on menu layout selection). (next to the To configure other more advanced aspects for the menu page item, double-click on that item to bring up the configuration window. a. Editing Captions © 2007 CodeJam Pte Ltd 10 MemoriesOnTV From the Text tab, you can change the caption for the menu item as well as changing the appearance and alignment. Check the Text caption only checkbox if you do not want any picture thumbnail for this item. b. Setting the Thumbnail Picture The Picture tab is where the thumbnail visual can be configured. By default, the first item of the album will be used as the thumbnail. To customize it with your own image or video clip, select the Use the following image/video option, and locate your file in the explorer window that pops up. When a video clip is used, the video slider and the motion controls will be enabled. Drag the arrows on the video slider to specify the start/end of the desired portion for the video clip. The Length indicates the duration of the selected portion. Do note that this duration indicates the length of the clip for this menu item, and doesn't change the actual duration of the entire menu. To change the menu duration, use the Menu Length setting in the lower Disc Menu panel. You can also use a specific frame in a video clip as a still thumbnail image. To do this, set the video clip as the thumbnail, and uncheck the Enable Motion for this Thumbnail checkbox. You can then use the slider to locate the frame that you want. Finally, you can specify the orientation and aspect ratio (with respect to the menu item) for the thumbnail with the Rotate and Aspect settings. © 2007 CodeJam Pte Ltd Basic Authoring 11 c. Adding Thumbnail Effects The Effect tab allows you to add shadow and overlays to the thumbnail items. To add shadow effect to your menu page, check the Shadow checkbox. Overlays are used to add borders and other interesting visual effects to the thumbnail items. These are layered on top of the thumbnail and modify the way the thumbnail is being presented. Select the desired overlay from the pre-built list, or use your own image files. MemoriesOnTV supports 32-bits images, so you can have semi-or-fully transparent borders. To remove the overlay, click the X button. Other Menu Customization The bottom Disc Menu panel is where you set the background, music, layout and the duration of the menu pages: Menu Length This sets the duration for the menu page. When the end of the menu is reached, it will loop from the beginning until a menu button is activated. The duration can be sync to that of either the background (if video) or the music by clicking on . Do note that a longer motion menu takes up more space on the final DVD. The layout determines the number of albums (or tracks) that can be selected from the menu. Currently, you can have up to 12 albums/tracks per menu page. Backgrou You can either choose a background from the list of available templates, or specify your own background image. You can also specify a video clip to create a motion menu. In this nd Layout Music case, the button will be enabled, allowing you to manually trim the video clip to the desired portion. When the menu music is specified, it will play and loop until a menu button is activated. You can select a sub-section of the music file to play by clicking on . By default, all customizations on a menu page are copied over to all menu pages. If you wish to customize individual menu pages differently, click on Changes to All Menu Pages. © 2007 CodeJam Pte Ltd and un-check Always Apply 12 2.6 MemoriesOnTV Previewing Video Disc You can preview your disc at any time during your authoring. It is advisable that you preview at least once, before your burn your CD/DVD. When you click on preview button, you will get a preview window that will simulate the playback on your TV. To start the playback of an album, simply use your mouse to select & click on the album you want to play. If you need to return back to the menu at any time during the playback, click on the Menu button. The "show subtitle" checkbox (Available only in MemoriesOnTV Pro) will cause the preview to show subtitle text captions, if it is checked. 2.7 Burning Video Disc Once you have finished authoring your project, you can start to generate your video disc. Video Options Before you start anything, you need to ensure that you've selected the right Video Options. There are 2 main video standards used in the world: PAL and NTSC. NTSC is used in US and Japan, while Europe and most parts of the world use PAL. This setting will not matter if your DVD player is multi-system compatible. © 2007 CodeJam Pte Ltd Basic Authoring 13 You will also need to select the type of disc you want to create. The following table shows the features of each of these formats: Format Video Quality VCD Average DVD Player Compatibility Good SVCD Very Good Average DVD Excellent Excellent Requires CD writer + CD-R/CD-RW CD writer + CD-R/CD-RW DVD writer + DVD-R(W)/DVD+R(W) In evaluation mode, any produced CD/DVD will bear the EVALUATION COPY watermark on the created video. Burn Options The Burn Settings will show you a list of burners detected on your PC. If your burner is not listed, or it is unsupported, you can hook up MemoriesOnTV with Nero to do the burning behind the scene. This is detailed in the CD/DVD Burning Troubleshooting Guide. If you wish, you can simulate the burning first before the actual burn, by selecting Simulate first. However, this is usually unnecessary. Video Size Indicator Before you proceed to burn your CD or DVD, you should check that the size of your project does not exceed the disc capacity. At the bottom of the MemoriesOnTV window is a blue color size indicator. If you are burning a CD recordable, the limit is usually 650Mb or 700Mb. If you are burning a DVD recordable, the limit is 4.7Gb for single layer DVD, or 8.5 Gb for double layer DVD. On the right of the size indicator is a combo-box for choosing whether you want to store your original files on the same CD or DVD. You have the option not to store anything, store just the original photos, or store all your original photos & videos on the same CD or DVD. Do note that storing the original files on the same CD/DVD will increase the size of your project, and you should check that it is still within the capacity of your empty disc. If you store the original files, you will have an archive that you can use later for hard copy printout of your photos. Video Disc Creation © 2007 CodeJam Pte Ltd 14 MemoriesOnTV There are 2 main steps needed to create your video disc: 1. Video Generation - For each second of video, about 25-30 pictures have to be generated from your files, and then compressed using MPEG. This process will take quite a while to complete, especially on a slower PC. 2. CD/DVD Burning - After the video files are generated, they are burnt onto your empty discs using the built-in burning software. MemoriesOnTV allows you to perform the above steps separately, or as one single step. You have the following 3 choices: Generate video disc image performs only video generation, while Generate video disc image and burn into Disc performs both video generation and CD/DVD burning. Burn existing video disc image performs CD/DVD burning on a previously generated video. By default, MemoriesOnTV caches the output of every video generation. The next time a video disc image generation is requested, the program will only regenerate those slideshow albums that have been modified since the last video generation. This speeds up the process considerably, at the expense of more hard disk space usage. Should you need to do a complete rebuild of the video disc image for the entire project, check the Clear cache before generating disc image checkbox, and MemoriesOnTV will remove the previously cached files before proceeding with the video generation process. If you'd like to turn off caching altogether, you can do so via the Video Generation tab in the Application Preferences window. All generated video files are written into the Working Folder that you have specified. In the case of a (S)VCD, this will be in the form of a BIN/CUE format disc image named videocd.cue & videocd.bin if your project is Untitled. If your project is titled, the BIN/CUE image files will be named after your project filename (eg. MyProject.cue & MyProject.bin). In the case of DVD, the disc image will be in the form of standard DVD video folders named VIDEO_TS and AUDIO_TS. These folders are stored inside a newly created folder named after your project. Many DVD related software supports reading of the VIDEO_TS folder, for either DVD burning or video playback. Once you are ready, click on START to kick off the process. As mentioned, video generation is a time consuming process. To speed things up, you should avoid running too many background tasks when video generation is in progress. Generate video option To the right of the Burn panel is an Option menu button. This option menu allows access to additional action and configuration options. © 2007 CodeJam Pte Ltd Basic Authoring 15 Clear Cache Now entry remove the cache for the current project, and hence freeing up more space on your hard disk. The Edit Video Generation Preferences and Edit Burn Preferences entries will launch the application preference dialog. This is described further in the Application Preferences chapter. 3 Advanced Authoring 3.1 Working With Views For maximum flexibility, MemoriesOnTV supports 3 different type of VIEWS of your images/videos in the main panel. The different views are activated through the VIEW toolbar buttons: 1. Thumbnail View The Thumbnail View shows you your photos & videos as thumbnails in a rectangular area. This view is most suited for arranging your photos/videos into the order that you need. 2. Timeline View © 2007 CodeJam Pte Ltd 16 MemoriesOnTV The Timeline View shows your slideshow in a horizontal timeline, with respect to your music files. From the timeline, you can preview your slideshow from any photo/video, as well as make changes to the effects & delays of individual items. To change the effects or delays of any item, simply click on the desired box containing the value. A popup window will appear to allow you to make the change. You can also make use of the Timeline View to make quick changes to a selected group of pictures/ videos. For example, to change the transition effect of a group of pictures, simply select the pictures, and then click on the box containing the effect of ANY selected item. The new value will be applied to all the items in your selection. 3. Detail View The Detail View allows you to see your slides as a list of files. This view is useful for sorting the list based on Filename, Size, Type or Date. You sort your files by clicking on the column headers. This view also allows you to do limited editing. In particular, you can set the transition effects & picture delay in this view, by clicking on the appropriate cell. 3.2 Customizing Slides For each individual slide, there are many options you can customize. To customize, you can either double-click on the desired slide, or you can press the Settings button on the main panel toolbar: © 2007 CodeJam Pte Ltd Advanced Authoring 17 MemoriesOnTV allows you to preview your customization in real-time. Anytime you want to preview the slide you have customized, simply press on the play button, or drag the marker along the timeline. The timeline shows you the total duration of the slide, which includes the transition effect duration before and after the slide display. The pink region on the timeline indicates the region in which the slide is displayed. Transition from/to the previous/next slide occurs outside the highlighted pink region. General The General tab panel is different for photo slides and video slides. For photo slides, you can adjust the Brightness & Contrast of the current photo. You can also ask MemoriesOnTV to Auto-Enhance your photo. This is especially useful for photos that are over or under exposed. If you wish, you can also replace the photo with another. All your existing settings (eg. pan/ zoom or text captions) will remain after you have replaced the photo. © 2007 CodeJam Pte Ltd 18 MemoriesOnTV For video slides, you can specify that START and END of the video clip by dragging the start/end markers on the blue slider bar. This is useful if you want to select only a sub-section of your video clip. You can also specify a END PAUSE value. The last frame of the video clip will show for this duration, when the clip has ended. This is particularly useful for multi-pictures slide video clips. Note that the length of the video clip can be shorter than the length of the slide in which the video clip is added to. This happens when you have a slide with transition effects delays that are longer than the video clip duration. In this case, the last frame of the video clip will show after it has ended. The Edit button (shown disabled in the above figure) only applies if this is a multi-pictures slide video (pro version only). It will allow you to go back to the multi-picture slide creation screen to re-configure the multi-picture slide. Transform In the Transform tab panel, you can apply rotation, scale or crop on your picture/video. For scaling, you have the option of fitting or stretching to the whole TV screen. When you click Crop, the screen will change to cropping mode: © 2007 CodeJam Pte Ltd Advanced Authoring 19 You can crop out any region you want, and MemoriesOnTV will use only that region for the slideshow display. If you want your cropped photo/video to fill up the screen fully, then you should select Constrain to TV Aspect Ratio. This will ensure that your cropped rectangle is always confined to the TV screen width/height ratio. Once you're done cropping, click on End Crop to end the cropping mode. Overlay In the Overlay tab panel, you can apply a border mask onto your picture. An overlay is simply a image that you layer on top of your photo so as to either shape it, or to decorate its sides. You can either use the pre-built overlays, or use your own image files. MemoriesOnTV supports 32bits images, so you can have semi-or-fully transparent borders. To remove the overlay, simply click on the X button. Text The Text tab panel allows you to add text captions to your slide. Each text caption can have its own independent timing and effects. To add a new text caption, click on the "+" button. A new empty text caption will be added. To edit this new text caption, either double-click on it or select it and click on Edit . The text Tools menu allow you to do the following to your selected text captions: © 2007 CodeJam Pte Ltd 20 MemoriesOnTV Apply selected text style: This applies the selected text style to other slides. Assign random effects to selected : This sets each selected text caption to a random text effect. Reset selected to slide total timing: This sets the duration of each text caption to the slide's total time. Note that the slide's total time includes the transition effects of the current and next slide. Reset selected to slide display timing (exclude transition): This is the same as above, except that the text caption will only appear when the slide gets displayed, and not when it is in transition from/to other slides. Show TV Safe: When positioning your text captions on the slide, it's important that you place them within the TV safe region. Otherwise, they may be truncated by your TV set during playback. This setting, when selected, will show you the TV safe region on your slide. Note that this setting is not applicable, when you have already opted to scale all your slides within the TV safe region in the application preference. Effect In the Effects tab panel, you can set the effects & its duration for the current slide. The selected transition effect can be customized, so that it can have a different behavior (eg. different direction) compared to other slides with the same effect. For picture slides, you can adjust the slide delay in this panel as well. For video slides, the slide delay is auto-calculated to match the video duration, and cannot be adjusted. Pan/Zoom © 2007 CodeJam Pte Ltd Advanced Authoring 21 The Pan/Zoom panel allows you to add motion effects to your slide. Every slide has at least 2 key frames: the Start Frame shows you the position of your picture on the slide at the beginning, while the End Frame shows you the position of your picture on the slide at the end. Once the values of these frames are defined, MemoriesOnTV automatically generates all the intermediate frames. For each key frame, you can adjust the following parameters: Zoom, Rotate, Pan, Speed, and Opacity. To show the different key frames in the preview window, click on the < and > arrow buttons to navigate the key frames. Alternatively, you can click on the triangular markers on the timeline slider to select the desired key frame as well: Each key frame corresponds to a specific time on the timeline. To change the time of a key frame, you can either drag & scroll the triangular marker on the timeline, or you can key in the time value you want in the edit box that shows the time value. Should you want to reset any of the pan/zoom/rotate/opacity values to its default value, you can simply click on the triangular marker at the center. For the pan position, you can click on the x icon at the center. The following lists down the range of values for each of the parameters you can adjust: Zoom: Ranges from 0.12 (approximately 1/8th) to 8.00. You can zoom in/out up to 8 times. Rotate: Ranges from -1.00 (clockwise 180 degrees) to 1.00 (anti-clockwise 180 degrees). Opacity: Ranges from 0.00 (fully transparent) to 1.00 (fully opaque). Pan: This measures the offset of the center of the picture from the center of the screen. A x-value of -50.00 means that the center of the picture is on the extreme left edge, and a x-value of 50.00 means that the center of the picture is on the extreme right edge. Similarly, a y-value of -50.00 corresponds to the bottom edge, and 50.00 corresponds to the top edge. Speed: This indicates the speed of pan/zoom from the current frame to the next. You can achieve a pause in your key frame easily by hitting the Add button in Pause. The following window will be shown when you do this: © 2007 CodeJam Pte Ltd 22 MemoriesOnTV Drag the Pause slider to set how long you want the key frame to pause. If you drag it before the trianglular marker, then the pause will occur before the key frame. Otherwise, it will occur after the key frame. The length of the pause is constrained by the position of the previous and next key frames. Once you are done, MemoriesOnTV will add a new key frame with the same exact value as the current one, resulting in a pause in the pan/zoom motion. The menu in the pan/zoom panel allows you to perform the following additional tasks: Reset Pan/Zoom: This removes all motion from your current slide. All pan/zoom values are reset to their default in both the start/end key frames. All other key frames are removed. Assign Random Pan/Zoom: When this is selected, MemoriesOnTV will assign 2 key frames (start/ end) with random positions of your picture. The end result is that your picture will have random motion on the slide. Detect Faces and Pan to Each One: MemoriesOnTV will detect frontal & upright faces on your picture, and then create a pan/zoom setting for each detected face. This has the effect of panning/ zooming to each detected face, and is useful in showing each individual in a group picture. Distribute Frames Evenly: This spreads out all your key frames evenly on the timeline, and is useful after you have inserted or deleted a key frame. In particular, if the face detection misses out some faces (or incorrect detected faces), you can easily fix it by adding/removing new key frames and then re-distributing all the keyframes evenly on the timeline. Copy from Previous Frame: The previous key frame values for pan/zoom/rotate/opacity will be copied over to the current key frame. Copy from Next Frame: The next key frame values for pan/zoom/rotate/opacity will be copied over to the current key frame. Insert New Frame: This function will copy the currently selected key frame and add it after the currently selected one. This allows you to pan/zoom to different regions of your picture at different times during the slide playback. For example, if you have a group picture with many faces, you may want to pan/zoom to each individual faces on the picture. Remove Frame: This removes the currently selected key frame. The Start/End key frames cannot be removed. Background © 2007 CodeJam Pte Ltd Advanced Authoring 23 For each slide, you can set the background of the slide to either a color, or a image. The background image can stretch to fill the screen, or it can maintain its original aspect ratio. In addition, you can also check the "Shadow" option. This will add a shadow to the picture that's overlaid on top of the background. Music Each slide can have its own music file. This is useful when you're adding voice annotations to your slides. For video slides, the default music will be the music from the video (if it has any). To assign a new music file to the slide, simple click on "...". Similarly, click on X to remove the music. In the case of video slides, clicking on X will reset the music to the one from the video file. You can set the following parameters for the input music file: Offset: This controls the start time of the music with respect to the slide. You can use a negative value, if you want the music to start earlier than the current slide. By default, the music for the slide will end when the slide ends. If you want the music to continue playing, select Continue beyond slide. Volume: This controls the volume for the music. You can fade in your music at the beginning and fade it out when the slide ends, by selecting Fade in, then fade out. Background: When the slide music is playing, the background music may be playing simultaneously as well. You can set the volume of the background music to soften it when the slide music is playing. For a smoother effect, you should fade out the background music when the slide music is playing, and fade it back in when the slide music ends. In the Tools menu, you can set the duration of the slide to the duration of your music file so that they end together. You can also select a sub-section of the music file to use, or perform auto-trim to remove start/end silence from your input music file. Subtitle (DVD Only) (Available only in MemoriesOnTV Pro) © 2007 CodeJam Pte Ltd 24 MemoriesOnTV If you are creating a DVD disc, you can add subtitles to each individual slide in this panel (subtitles is NOT available for VCD/SVCD). Unlike text captions, subtitles can be turned on/off during playback, via the DVD remote control. By default, each slide has a subtitle that will display its filename. This is shown in the subtitle editor as a "%FILENAME" macro. Macros are simply special labels that will be replaced by the software with some pre-defined properties of the slide. From the Insert button menu, you can insert other macros such as the date of the slide, the current slide number, etc. Note that if you change the color of a subtitle text, it will be applied to all subtitles. This is due to a limitation of the DVD specification. Apply All For each tab panel setting, you can apply it to all selected slides, all slides in the same track, or all slides in the project. This is done via the Apply All -> Current Setting menu. If you select the action from the All Settings menu instead, all the settings from all tab panels will be applied. 3.3 Using ClipShows Creating Slides with ClipShows In many ways, ClipShows are similar to Clip Art packages for a graphical application. They are simply short sequences of slides that are pre-choreographed to achieve certain visual effects. You use ClipShows by simply replacing the default bundled pictures with your own. This allows you to create slideshows with interesting visual effect with very little work - the hard work has already been done for you. You can load a ClipShow by clicking on the Load ClipShow button as shown: © 2007 CodeJam Pte Ltd Advanced Authoring 25 To access the ClipShow templates package you've installed, simply click on Library. You will be shown the list of available templates within the installed library. Alternatively, browse to the folder in which your ClipShow is stored and load it up. Once you have loaded a ClipShow, you will be see the ClipShow editor window: © 2007 CodeJam Pte Ltd 26 MemoriesOnTV After you have replaced the default pictures with your own, click Finish and MemoriesOnTV will generate all the necessary slides. That's it! Adding pictures to ClipShow For many ClipShows, you can only replace the existing stock pictures within it. However, some of the ClipShows that come with the ClipShow Volume 1 package has the ability to allow you to add more pictures to it. For such ClipShows, you will see an additional Add Pictures tab: Clicking on the Add Pictures tab, you will have the ability to add/delete/move pictures, in addition to those that are already present in the default stock. Saving Slides as ClipShow (Available in MemoriesOnTV Pro only) © 2007 CodeJam Pte Ltd Advanced Authoring 27 You can save a consecutive sequence of slides as a ClipShow template. By doing so, you can easily create the same visual sequence with other pictures, saving a tremendous amount of time. To save your slides as a ClipShow, simply select them and click on the Save ClipShow button. The next time you want to re-create the same visual sequence, simply load up this saved ClipShow and replace the photos with your new ones. 3.4 Multi-Pictures Slide One of the most exciting features in this release of MemoriesOnTV is multi-picture slides. With this, you can layer multiple pictures on the same slide, and create some very interesting visual effects. There are 2 ways to create a multi-picture slide. If you have already imported the pictures you want to layer on 1 slide, select these pictures in MemoriesOnTV and click on the multi-picture slide tool on the main toolbar: Alternatively, you can just go ahead and click on the above without selecting any pictures. MemoriesOnTV will create a multi-pictures slide with placeholder images that you can replace later. Adding/Removing pictures In the multi-pictures slide window, you can easily add/remove pictures or videos by clicking Add or Delete in the Pictures tab panel. To replace a picture, click on Replace. You can also change the order of your slides, by dragging & dropping them into their desired positions. The last picture in the list will © 2007 CodeJam Pte Ltd 28 MemoriesOnTV be the top-most picture, when layered onto the slide. You can do simple editing for each imported picture/video by clicking on the Edit button. For pictures, you will be able to adjust its brightness, contrast, or crop a section of it for use in the multi-pictures slide. For video clips, you will be able to select a section of it by setting its start/end markers. Multi-Pictures slide effect The easiest way to create interesting multi-pictures slides is to use the pre-built effects. Once you've selected the pictures/videos you want, try out the different effects listed in the Effects combo-box. After selecting the effect, click on the play button on the timeline to preview it. Some effects can only be applied to a fixed range of number of pictures. For instance, the Circle Rotate effect requires that you have at least 2 pictures in the multi-pictures slide. If you have less than the minimum required number of pictures, placeholder images will be added. You will need to replace the placeholder images with your own later. Effect settings (Advanced) The settings tab panel allows you to configure the multi-pictures slide effect that you have selected. There are 2 types of effects that are used in multi-picture slides: a. Multi-Pic Ken Burns Effect These are effects that are created based on applying Ken Burns Effect (Pan/Zoom/Rotate/Opacity) differently on the different pictures. For these effects, you will see the following instruction in the settings tab panel the first time: When you click on Customize, you will get the pan/zoom/rotate/opacity control for each picture on the slide: If you're familiar with setting Ken Burns Effect for single picture slides, you should find the above controls familiar. Basically, it's the same as setting the pan/zoom/rotate/opacity for single pictures, except that now you can apply it to multiple pictures within the same slide. Like before, you have the ability of having multiple key frames per picture, and each key frame can have a time that is set independently from other key frames in other pictures on the same slide. © 2007 CodeJam Pte Ltd Advanced Authoring 29 It can sometimes be difficult to see on the preview which picture you are configuring, as there are many pictures on the same slide. You can select Preview selected picture only from the menu button, so that only the current picture is displayed. To reset the preview to show all pictures again, select Preview all pictures from the same menu button. b. Non Ken-Burns Effect These are effects that are coded by hand, and cannot be simulated by applying pan/zoom/rotate/ opacity values to the different pictures. For these effects, the settings available are dependent on the effect, and are usually simple tweaks of the effect parameters. Circle Rotate and Zoom Tile are examples of such effects. If you want, you can create your own multi-picture effects from scratch as well. If you select Custom from the list of available effects, you will be able to set each picture's pan/zoom/rotate/opacity independently. The difference between this and customizing an existing Multi-Pic Ken Burns Effect is that you will be starting entirely from pan/zoom/rotate/opacity values that have been reset to the default. Slide Duration You can control the speed of your slide by setting the Duration field. By default, this is set to 10 seconds. To change the value, just type in the new duration and hit Enter. Background In the Background tab panel, you can set the multi-pictures slide's background to either a fixed color, or a image file. Like in normal slides, you can choose to stretch the background image or have it maintain its original aspect ratio. Rendering the Multi-Pictures Slide Once you are done authoring your multi-pictures slide, click on Next at the bottom, and you will be shown the rendering screen. MemoriesOnTV will now prompt you to provide a video filename to save the multi-pictures slide in: © 2007 CodeJam Pte Ltd 30 MemoriesOnTV When specifying the Output Video File, you can save your video either as a MPG file (default) or as a AVI file. To save it as a AVI, you will need to change the Save as type to AVI when you get the save file dialog: Advanced: If you opt to save it as an AVI file, you will be able to choose the output video codec. MemoriesOnTV will let you choose whatever AVI video codecs you have installed on your PC. You can, for example, choose to use a lossless video codec like HUFFYUV. In our experience, XVID works very well as an intermediary codec for multi-pictures slides, in terms of both quality and speed. Once you are ready, click on Finish and MemoriesOnTV will proceed to render the frames for the multi-pictures slide. When this is done, you should see your new multi-picture slide in the main view : © 2007 CodeJam Pte Ltd Advanced Authoring 31 Should you need to re-edit the multi-pictures slide, double-click on the slide and click Edit in the General tab panel. You will return to the original multi-pictures slide configuration window: For some multi-pictures slide, it may be desirable to add a end pause to the created video clip. This is so that it will transition nicely to the next slide. You can do so in the above window. 3.5 Slideshow in Slideshow The ability to layer multiple slides into a single slide, coupled with the merge slide feature, allows you to create some very interesting slideshow in slideshow effects. This effect is similar to the picture in picture feature that is in many modern TV sets, in which you can watch 2 or more TV channels simultaneously on the same screen. The best way to illustrate slideshow in slideshow is through an example. In this example, we will create a show with 2 slideshows playing simultaneously. For simplicity, we will just use a set of 4 pictures for each slideshow. © 2007 CodeJam Pte Ltd 32 MemoriesOnTV The first thing to do is to import in all your pictures into MemoriesOnTV: Now, select the 1st 4 pictures and click on the merge slide button on the main toolbar: MemoriesOnTV will merge your selected slides into a single video slide. You will be prompted for the filename to save the new video slide in: You can save the video slide as a MPG (default) or a AVI file. To save it as a AVI, you will need to change the Save as type to AVI when you get the save file dialog: © 2007 CodeJam Pte Ltd Advanced Authoring 33 Advanced: If you opt to save it as an AVI file, you will be able to choose the output video codec. MemoriesOnTV will let you choose whatever AVI video codecs you have installed on your PC. You can, for example, choose to use a lossless video codec like HUFFYUV. In our experience, XVID works very well as an intermediary codec, in terms of both quality and speed. Click on Finish when you have specified your output file, and MemoriesOnTV will start to render the video slide. When it is done, it will replace your selected pictures with the video slide: Now, do the same thing for the next 4 slides. You will end up with 2 video slides in your album: Having prepared the 2 video clips, you are now ready to combine them into a single slide. Select the 2 video clips above, and click on the multi-pictures slide button on the main toolbar: The multi-pictures slide window will appear. In this example, we just want the 2 slideshows to play simultaneously, and do not want any fancy effects. Choose Custom for the effects, and go to the Settings tab panel. By default, the 2 video clips will be layered on top of each other, with the top one blocking the bottom one from our view. We will need to position and resize each of them, so that they can both be seen. By adjusting both the PAN and ZOOM values in the Settings tab, we will be able to achieve this. You will need to set the same PAN and ZOOM values for both the START and END frames, so that the video clips do not move around: © 2007 CodeJam Pte Ltd 34 MemoriesOnTV Once done, click on Next and you should get a screen that asks you to save the resulting clip. Like before, you can choose to save the resulting clip as a MPG or a AVI file. When MemoriesOnTV is done, it will replace your 2 video clips with the layered clip: Congratulations! You now have a slide with 2 slideshows in it playing simultaneously. 3.6 Exporting your Slideshow Exporting to Web (Available in MemoriesOnTV Pro only) MemoriesOnTV has the ability to export your slideshow to the Flash format, which is playable on 93% of all web browsers (on both PC and Mac), without the need for end-users to install anything at all. Once you have your slideshow ready, select Project -> Export to Web from the main menu. You will be prompted to provide the output HTML filename to save your slideshow in: © 2007 CodeJam Pte Ltd Advanced Authoring 35 There are a couple of Advanced Settings that you can configure for the web slideshow: Video Size: This specifies the output video resolution. It is not advisable that you set this to a high resolution, as the resulting video file will be huge, and it can take too long for your audience to stream it. Bitrate: The bitrate of the video specifies the amount of information stored in the video. The higher the bitrate, the clearer the video. This setting will usually depend on your chosen resolution, and it's best to leave it as Auto. Should you decide to make your video clearer, you can try to increase this parameter. Framerate: The framerate determines how fast the video frames refreshes. For video with lots of fast moving action, you will need a higher framerate to combat jerkiness. The default value will usually suffice for most cases. Audio Channels: You can choose to use mono or stereo. For bandwidth reasons, this is set to mono by default. Audio Sampling: The audio sampling rate determines the "resolution" of the audio. The higher the sampling rate, the clearer the audio. However, this comes at a expense of a bigger file size. Audio Bitrate: The audio bitrate determines the amount of information stored in the audio. A higher bitrate will result in clearer audio, but comes at the expense of file size. Once you are done, you can click on Finish to start the exporting process. MemoriesOnTV will output your specified HTML file, together with a few supporting files for the flash playback. The supporting files will be stored in the same folder as your HTML file, and you will need to upload them to your web host as well. Assuming you named your output HTML file as video.htm, the supporting files created are: video.flv: This is the FLASH video file that holds the content of your video. player.swf: This is the FLASH video player that will appear on your HTML page. Export to MPG/AVI (AVI export only available in MemoriesOnTV Pro only) © 2007 CodeJam Pte Ltd 36 MemoriesOnTV You can also export your slideshow to either a MPEG or AVI video file. To do so, simply select Project -> Export to MPG/AVI File from the main menu. You will be presented with a export window similar to that for the export to web slideshow. Instead of specifying the output HTML file, you will specify the output MPG or AVI file. If you are exporting to AVI, you will need to change the Save as type to AVI when you get the save file dialog: Advanced: If you opt to save it as an AVI file, you will be able to choose the output video codec. MemoriesOnTV will let you choose whatever AVI video codecs you have installed on your PC. You can, for example, choose to use a lossless video codec like HUFFYUV. In our experience, XVID works very well as an intermediary codec, in terms of both quality and speed. Once you are ready, click on Finish. If you have opted to save as a AVI file, you will get a window listing all the possible video codecs you can use. This will be dependent on the codecs you have installed on your PC: 3.7 Project Import/Archive Importing Albums If you have multiple MemoriesOnTV projects (PTV files), you may find the need to combine albums from different projects into a single disc. You can do so easily by selecting File -> Import from the main menu. When you do this, you will be prompted for the PTV project file to import your albums from. Once you © 2007 CodeJam Pte Ltd Advanced Authoring 37 have selected the project file, MemoriesOnTV will show you the list of albums it has found in the imported project: You can choose to import one of more of the albums found in the project. The imported albums will be appended to your existing project file. Archiving Project (Available in MemoriesOnTV Pro only) MemoriesOnTV allows you to archive your project into a single ZIP file. This is performed when you select File -> Archive Project from the main menu. The resulting ZIP file will contain your PTV project file, as well as all referenced music, picture and video files. You will be able to copy this ZIP file to a different location or even a different computer. To edit your project from the archive, simply un-ZIP your archive to any folder, and load up the PTV project from there. All the referenced files (music/pictures/videos) will be properly loaded. This feature is particularly useful, if you edit your project from more than 1 computer. 3.8 Application Preferences You can access the application preferences from the Edit -> Preference menu. General Video Aspect: You can configure the final video output for a normal or a widescreen TV. For normal TV's, this should be set to 4:3. For widescreen TV's, this should be set to 16:9. TV Safe Region: All TV sets will crop the video on different edges, and to different amount. You should ensure that your photo objects or text are within the TV Safe Region. Otherwise, they may not be visible when viewed on your TV. This setting allows you to configure the amount of TV Safe Region. For most TV's, this should be about 80%-90%. If you select Scale Slideshow on Disc to TV-Safe Region, MemoriesOnTV will add a border to your whole slideshow, so that your slideshow only occupies the TV-Safe region. Slide Background: This sets the default slide background color. Default Duration: © 2007 CodeJam Pte Ltd 38 MemoriesOnTV 1. Slide: This sets the default slide display duration, which is applied when you add new slides. 2. Effect: This sets the default transition duration, which is applied when you add new slides. 3. Audio Fade: This sets the default duration for the audio fade. It is used whenever you apply fading to your audio. Effects Transition Effect: When you select Use random settings for random transition effect, each assigned random transition will have a random setting, resulting in more variations in your transition. The Customize Random Effects button allows you to select the list of transition effects you want to use, when Random Effects are applied onto the slides. Face Detection: Face detection is performed when you apply a "Detect Faces and Pan to Each One" action on your slides. It is also performed in the EFFECTS panel, when you apply Random Pan/Zoom with Avoid Cropping Face(s) selected. The face detection algorithm currently detects frontal upright faces, and is > 90% accurate. The sensitivity slider here allows you to tweak the algorithm, in the event that it detect too few/many faces. Increase the sensitivity if you need more faces to be detected. Video Generation DVD Audio: You can choose the audio format that MemoriesOnTV uses on your DVD. Linear PCM (LPCM) is uncompressed audio, while Mpeg Audio (MP2) is compressed. MP2 will allow you to put more photos/ videos on your DVD. LPCM is supported on all DVD players, while MP2 is supported by all PAL DVD players and most (but not all) NTSC players. If you are creating a NTSC (US & Japan) DVD, it is safer to go with LPCM. DVD Color: 1. Menu Select Color: This sets the highlight color that are used when your menu buttons are selected. 2. Menu Activate Color: This sets the highlight color that are used when your menu buttons are activated. 3. Subtitle Text Color: This sets the default subtitle text color. 4. Subtitle Outline Color: This sets the default subtitle text outline color. Watermark: (Available in MemoriesOnTV Pro only) You can set a watermark image file for the entire slideshow. This is useful for adding your own copyright or company logo to the show. The watermark image is positioned using a screen resolution of 768x576 for 4:3 aspect ratio TV's, and 1024x576 for 16:9 aspect ratio TV's. Mpeg Encoder: (Available in MemoriesOnTV Pro only) You can use the default Mpeg Encoder, or hook up with the external TMpgEnc Plus encoder, if you have it installed. Cache Control: You can set MemoriesOnTV to not cache any of the generated output during video generation process by checking the Clear cache after each build checkbox. Burn Burn Driver: You can choose to use either the default Native driver or Nero driver. For Nero driver, you will need to have a licensed copy of Nero installed on your PC. Since the default native driver supports many CD/ DVD writers, you shouldn't have a need to use Nero drivers in most cases. © 2007 CodeJam Pte Ltd Advanced Authoring 39 Disc Label: This sets the default label that is assigned to the burnt disc. Output Folder: This sets the default folder that MemoriesOnTV will use to output your video files to, when it generates your video. 4 Troubleshoot 4.1 CD/DVD Burning Problems MemoriesOnTV supports a wide range of CD and DVD burners. If you get a burn error, or if your burner is not listed, it is possible that your burner is currently unsupported. If you have a licensed copy of Nero installed on your PC, you can set MemoriesOnTV to use Nero drivers in the application preference. As MemoriesOnTV outputs non-proprietary CD image files (BIN/CUE format) and DVD folder files ( VIDEO_TS), you can also use any other 3rd party burning software if they support these formats. For DVD, almost all DVD burning software supports importing of the VIDEO_TS folder contents. For (S) VCD, you can try any 3rd party burning software that supports BIN/CUE: 4.2 DVD Playback Problems (S)VCD Playback Problems (using CD-Recordables) Most playback problems are due to hardware compatibility. If you are creating (S)VCD (CDRecordable), you should ensure that: 1. Your DVD player can read either CD-RW or CD-R media. Note that some DVD players can read CD-RW and not CD-R, and vice versa. 2. Your DVD player supports VCD-2.0, or SVCD (if you're playing SVCD). Unfortunately, some players claim support, but doesn't implement it well. Your best option is to research on your player first, by using the following resource from VCDHELP: http://www.vcdhelp.com/dvdplayers.php Also, you may want to try playing your disc with a software DVD player on your PC & Mac, to verify that the disc has been created correctly. This requires that you have installed a software DVD player. Another quick check you can do is to see if you can find the following folders on your (S)VCD, and you insert it into your PC: MPEGAV\ (or MPEG2\), EXT\ SEGMENT\ etc. Lastly, note that some DVD players are sensitive to the CD recordable media used. You should avoid unbranded OEM CD-R, or CD-RW that has been written too many times. © 2007 CodeJam Pte Ltd 40 MemoriesOnTV DVD Playback Problems (using DVD-Recordables) Many DVD players support playing of DVD recordable. This is the most compatible format. However, different DVD players support reading of different DVD recordable media, and you must make sure you use the one that is compatible with your player. There are 6 main types of DVD recordable: DVD+R, DVD+RW, DVD+R DL, DVD-R, DVD-RW, DVD-R DL MemoriesOnTV supports writing to all the above formats. However, your DVD writer may only support writing to either DVD-R/DVD-RW or DVD+R/DVD+RW (Some DVD writers support both -/+ formats), or it may not support dual layers (DL) DVD discs. You must again ensure that you use only media that is supported by your DVD writer. Lastly, DVD writers are more sensitive to the brand of the DVD recordable media than CD writers. You may need some trial and error, but try consulting the following resource before you purchase your media: http://www.dvdrhelp.com/dvdmedia 5 Appendix A: List of countries using NTSC video system. Antigua Bahamas Barbados Barbuda Belize Bermuda Bolivia Burma Cambodia Canada Cayman Islands Chile Colombia Costa Rica Cuba 6 El Salvador Ecuador Guam Guatemala Haiti Honduras Jamaica Japan Mexico Midway Islands Netherland Antilles Nicaragua North Mariana Island Panama Peru Philippines Puerto Rico Saipan Samoa South Korea Saint Kitts Saint Lucia Saint Vincent Surinam Taiwan Tobago Trinidad United States Venezuela Virgin Islands Appendix B: List of countries using PAL video system. Afghanistan Guinea Poland © 2007 CodeJam Pte Ltd Appendix B: List of countries using PAL video system. © 2007 CodeJam Pte Ltd Albania Holland Portugal Algeria Hong Kong Qutar Angola Argentina ** Australia Austria Azores Baharain Bangladesh Belgium Botswana Brazil * Brunei Cameroon Canary Islands Cyprus Denmark Dubai England Ethiopia Faeroe Islands Finland Ghana Gibraltar Greece Greenland Iceland India Indonesia Ireland Israel Italy Jordan Kenya Kuwait Laos Liberia Madeire Malaysia Malta Mozambique Nepal New Guinea New Zealand Nigeria North Korea Norway Oman Pakistan Paraguay ** Romania Singapore Somalia South Africa S.W. Africa Spain Sri Lanka Sudan Swaziland Sweden Switzerland Tanzania Thailand Turkey Uganda United Arab Emirates United Kingdom Uruguay ** West Germany Yemen Yugoslavia Zambia Zimbabwe 41