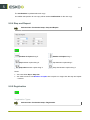
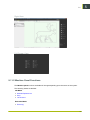
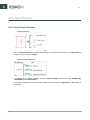
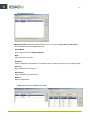
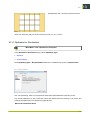
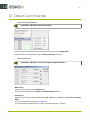
1
iPC
User Manual
10 - 2014
iPC
Contents
1. Preface.............................................................................................................................................................................................. 8
2. Change Record............................................................................................................................................................................. 9
3. Welcome........................................................................................................................................................................................ 10
4. Using this manual..................................................................................................................................................................... 11
4.1 Main Sections...................................................................................................................................................................11
4.2 Name Styles and Symbols..........................................................................................................................................12
4.3 Pictures and Illustrations..............................................................................................................................................12
5. System Description.................................................................................................................................................................. 14
5.1 Font size in User Interface..........................................................................................................................................14
5.2 Naming Conventions..................................................................................................................................................... 14
5.2.1 My Jobs View...................................................................................................................................................... 15
5.2.2 Selected Job View............................................................................................................................................. 15
5.2.3 Preview/Table View............................................................................................................................................ 16
5.2.4 Tool Configuration.............................................................................................................................................. 16
5.3 Main Menu.........................................................................................................................................................................16
5.3.1 File............................................................................................................................................................................ 17
5.3.2 Edit........................................................................................................................................................................... 18
5.3.3 View..........................................................................................................................................................................18
5.3.4 Selection.................................................................................................................................................................19
5.3.5 Job............................................................................................................................................................................19
5.3.6 Layer........................................................................................................................................................................ 20
5.3.7 Curves..................................................................................................................................................................... 21
5.3.8 Machine.................................................................................................................................................................. 22
5.3.9 Advanced...............................................................................................................................................................22
5.3.10 Help....................................................................................................................................................................... 23
5.4 My Jobs List..................................................................................................................................................................... 23
5.4.1 Compact View..................................................................................................................................................... 24
5.4.2 Extended View.....................................................................................................................................................24
5.4.3 Select a File..........................................................................................................................................................26
5.4.4 My Jobs Toolbar.................................................................................................................................................27
5.4.5 Preview Toolbar...................................................................................................................................................28
5.5 Selected Job.....................................................................................................................................................................29
5.5.1 Select a Job......................................................................................................................................................... 29
5.5.2 Create a Job........................................................................................................................................................ 30
5.5.3 Close a Job.......................................................................................................................................................... 30
5.5.4 Ready for Execution..........................................................................................................................................31
5.6 Selected Job, select Cutting Key.............................................................................................................................31
ii
Contents
5.7 Selected Job, Layers.....................................................................................................................................................32
5.7.1 Layer Window...................................................................................................................................................... 33
5.7.2 Select Layer..........................................................................................................................................................34
5.7.3 Include a Layer....................................................................................................................................................35
5.7.4 Layer Sequence.................................................................................................................................................. 35
5.7.5 Edit Selected Layer........................................................................................................................................... 36
5.7.6 Layer Types...........................................................................................................................................................37
5.7.7 Add new Layer.................................................................................................................................................... 38
5.7.8 Add Regmark Layer.......................................................................................................................................... 39
5.7.9 Copy Layer and Curves...................................................................................................................................41
5.7.10 Copy Layer, no Curves..................................................................................................................................41
5.7.11 Remove Layer................................................................................................................................................... 41
5.7.12 Remove Empty Layers...................................................................................................................................42
5.8 Selected Job, Production Setup...............................................................................................................................42
5.8.1 Number of Copies............................................................................................................................................. 42
5.8.2 Quality..................................................................................................................................................................... 43
5.8.3 Job Position..........................................................................................................................................................43
5.8.4 Step and Repeat................................................................................................................................................ 44
5.8.5 Registration........................................................................................................................................................... 44
5.8.6 Material Handling............................................................................................................................................... 47
5.8.7 Tool Head Parking............................................................................................................................................. 50
5.9 Table View Toolbar..........................................................................................................................................................51
5.9.1 Zoom....................................................................................................................................................................... 51
5.9.2 Zoom In..................................................................................................................................................................51
5.9.3 Zoom Out.............................................................................................................................................................. 52
5.9.4 Fit to Job............................................................................................................................................................... 52
5.9.5 Fit to Board.......................................................................................................................................................... 52
5.9.6 Fit to Table............................................................................................................................................................ 52
5.9.7 Edit Points.............................................................................................................................................................53
5.9.8 Curve Directions................................................................................................................................................. 53
5.9.9 Show Curve Points............................................................................................................................................53
5.9.10 Tool Path............................................................................................................................................................. 54
5.9.11 Vacuum Zones.................................................................................................................................................. 54
5.9.12 Parking Position............................................................................................................................................... 54
5.9.13 Table Rulers........................................................................................................................................................54
5.9.14 Reference Point................................................................................................................................................ 55
5.9.15 Job Size...............................................................................................................................................................55
5.9.16 Sheet Location..................................................................................................................................................55
5.10 Selected Job Properties Bar....................................................................................................................................56
5.10.1 Flute Direction................................................................................................................................................... 56
5.11 Machine Panel............................................................................................................................................................... 57
5.11.1 Machine Panel Views..................................................................................................................................... 58
5.11.2 Machine Panel Functions............................................................................................................................. 59
iii
iPC
5.11.3 Machine Panel Toolbar.................................................................................................................................. 68
5.12 Machine Connection................................................................................................................................................... 71
6. Before We Start......................................................................................................................................................................... 72
6.1 Introduction........................................................................................................................................................................72
6.2 About Table....................................................................................................................................................................... 72
6.3 Table Presets.................................................................................................................................................................... 73
6.4 About Registration.......................................................................................................................................................... 75
6.4.1 Adding Registration Marks............................................................................................................................. 75
6.4.2 Types of Registration Marks.......................................................................................................................... 76
6.4.3 Compensation Types........................................................................................................................................ 77
6.4.4 About Compensation Types...........................................................................................................................80
6.5 File Preparation for iPC................................................................................................................................................ 80
6.5.1 File Types...............................................................................................................................................................80
6.5.2 Defining Cut Paths.............................................................................................................................................81
6.6 Import Presets..................................................................................................................................................................82
6.6.1 Using Import Presets........................................................................................................................................ 82
6.6.2 Import Preset and Cutting Key.....................................................................................................................83
6.6.3 View Import Presets.......................................................................................................................................... 84
6.6.4 Select Import Preset......................................................................................................................................... 85
6.6.5 Manage Import Presets................................................................................................................................... 85
6.7 Cutting Keys......................................................................................................................................................................91
6.7.1 Select Cutting Keys...........................................................................................................................................92
6.7.2 Favorite Cutting Keys....................................................................................................................................... 94
6.7.3 Create new Cutting Key.................................................................................................................................. 96
6.7.4 Update Cutting Key...........................................................................................................................................97
6.7.5 Cutting Key Manager........................................................................................................................................98
6.7.6 Import Cutting Keys.......................................................................................................................................... 99
6.7.7 Global Cutting Keys........................................................................................................................................101
6.7.8 i-script Link.........................................................................................................................................................102
6.8 Configure Tools..............................................................................................................................................................103
6.9 Materials and Boards..................................................................................................................................................104
7. Get Started................................................................................................................................................................................ 106
7.1 Start Up Sequence...................................................................................................................................................... 106
7.2 Shut Down Sequence.................................................................................................................................................106
8. Work Flow.................................................................................................................................................................................. 107
8.1 File Import....................................................................................................................................................................... 107
8.1.1 My Jobs List...................................................................................................................................................... 107
8.1.2 Create Job.......................................................................................................................................................... 109
8.2 Selected Job.................................................................................................................................................................. 109
8.2.1 Selected Job View...........................................................................................................................................110
8.2.2 Selected Job Edit............................................................................................................................................ 110
8.3 Prepare for Production............................................................................................................................................... 111
iv
Contents
8.3.1 Layer settings, manual...................................................................................................................................111
8.3.2 Layer settings using Cutting Key.............................................................................................................. 112
8.3.3 Production Setup............................................................................................................................................. 112
8.4 Save Job.......................................................................................................................................................................... 115
8.5 Running a Job............................................................................................................................................................... 115
8.5.1 Execute a Job...................................................................................................................................................115
8.5.2 No Registration................................................................................................................................................. 116
8.5.3 Reading Registration Marks........................................................................................................................ 116
8.5.4 Registration using Laser Pointer............................................................................................................... 117
8.5.5 Edge Recognition............................................................................................................................................ 118
9. Optimal Production Workflow........................................................................................................................................... 119
10. Edit Job, Advanced.............................................................................................................................................................120
10.1 Job Modifications.......................................................................................................................................................120
10.1.1 Rotate 90 deg. CW...................................................................................................................................... 120
10.1.2 Rotate 90 deg. CCW................................................................................................................................... 120
10.1.3 Mirror Horizontal............................................................................................................................................ 120
10.1.4 Mirror Vertical..................................................................................................................................................121
10.1.5 Remove Double Lines and Sequence...................................................................................................121
10.1.6 Remove Double Lines and Join Across Gaps................................................................................... 122
10.1.7 Optimize for Production..............................................................................................................................123
10.1.8 Move Job to Reference Point.................................................................................................................. 132
10.1.9 Move Open Curves to Separate Layer.................................................................................................133
10.2 Curve Modifications.................................................................................................................................................. 133
10.2.1 Select a Curve................................................................................................................................................133
10.2.2 Move.................................................................................................................................................................. 134
10.2.3 Jog Curves.......................................................................................................................................................136
10.2.4 Scale Curve..................................................................................................................................................... 136
10.2.5 Mirror Curve.....................................................................................................................................................137
10.2.6 Rotate Curve................................................................................................................................................... 139
10.2.7 Merge Curves..................................................................................................................................................141
10.2.8 Invert Curve Direction..................................................................................................................................142
10.2.9 Lead-in/Lead-out........................................................................................................................................... 142
10.2.10 Tool Offset......................................................................................................................................................143
10.2.11 Optimize Shape........................................................................................................................................... 145
10.2.12 Remove Curves........................................................................................................................................... 146
10.3 Curve Segment Modifications...............................................................................................................................147
10.3.1 Select a Curve Segment............................................................................................................................ 147
10.3.2 Add Corner...................................................................................................................................................... 147
10.3.3 Add Arc............................................................................................................................................................. 148
10.3.4 Add Bezier........................................................................................................................................................148
10.3.5 Split Curve....................................................................................................................................................... 148
10.3.6 Close Curve..................................................................................................................................................... 149
v
iPC
10.3.7 Add Regmark.................................................................................................................................................. 150
10.4 Curve Point Modifications...................................................................................................................................... 151
10.4.1 Select a Point................................................................................................................................................. 151
10.4.2 Edit Point.......................................................................................................................................................... 152
10.4.3 Remove Point................................................................................................................................................. 152
10.4.4 Smooth.............................................................................................................................................................. 153
10.4.5 Add Regmark.................................................................................................................................................. 153
10.4.6 Use as Start Point........................................................................................................................................ 154
10.4.7 Add Lead-in/Lead-out................................................................................................................................. 154
10.4.8 Split Curve....................................................................................................................................................... 155
10.4.9 Close Curve..................................................................................................................................................... 156
10.5 Add new Geometry................................................................................................................................................... 157
10.5.1 Add Regmark.................................................................................................................................................. 157
10.5.2 Add Square......................................................................................................................................................158
10.5.3 Add Circle.........................................................................................................................................................159
10.5.4 Add Ellipse....................................................................................................................................................... 159
10.5.5 Add Rectangle................................................................................................................................................ 160
11. Job Alternatives, Advanced.............................................................................................................................................162
11.1 Step and Repeat........................................................................................................................................................ 162
11.2 Add Nested Layout................................................................................................................................................... 162
11.2.1 Configure Layout........................................................................................................................................... 163
11.2.2 Create Nested Layout................................................................................................................................. 165
11.2.3 Edit Nested Layout.......................................................................................................................................166
11.3 Jobs Longer than Table...........................................................................................................................................167
11.4 Jobs with Bar Codes............................................................................................................................................... 167
11.5 Job including Reverse Operation........................................................................................................................ 167
11.6 Stop at Tool Select....................................................................................................................................................168
11.7 Milling functions..........................................................................................................................................................168
12. Direct Commands................................................................................................................................................................ 172
13. Backup/Restore.....................................................................................................................................................................174
13.1 Backup System Parameters.................................................................................................................................. 174
13.2 Restore System Parameters..................................................................................................................................174
13.3 Backup Cutting Key..................................................................................................................................................175
13.4 Restore Cutting Key..................................................................................................................................................175
14. iPC Configurations...............................................................................................................................................................176
14.1 Table View Orientation............................................................................................................................................. 176
14.2 General........................................................................................................................................................................... 176
14.3 Production.....................................................................................................................................................................178
14.3.1 Table Presets...................................................................................................................................................178
14.3.2 Read Furthest Registration Mark first................................................................................................... 179
14.3.3 Step X-axis before Y-axis.......................................................................................................................... 179
vi
Contents
14.3.4 Break Long Lines.......................................................................................................................................... 179
14.4 Feeder Connection.................................................................................................................................................... 180
14.5 Lead-in/Lead-out........................................................................................................................................................ 180
14.6 Backup........................................................................................................................................................................... 182
14.7 Language....................................................................................................................................................................... 182
14.8 Reference Points........................................................................................................................................................ 183
14.8.1 Main Reference Point.................................................................................................................................. 184
14.8.2 User Defined Reference Points............................................................................................................... 185
15. Machine Connection and Configuration.................................................................................................................... 187
15.1 Machine Configuration.............................................................................................................................................187
15.1.1 Hardware Configuration.............................................................................................................................. 188
15.1.2 Setup.................................................................................................................................................................. 189
15.1.3 Installation.........................................................................................................................................................190
15.2 Tool Configuration......................................................................................................................................................191
15.2.1 Adjust Active Tool......................................................................................................................................... 192
15.2.2 More....................................................................................................................................................................194
15.3 Camera Operations................................................................................................................................................... 194
15.4 Service Menu...............................................................................................................................................................198
15.4.1 Message Display........................................................................................................................................... 198
15.4.2 Memory Dump................................................................................................................................................199
15.4.3 Position Display............................................................................................................................................. 200
15.4.4 Show vacuum dialog................................................................................................................................... 200
15.4.5 Emulate Panel.................................................................................................................................................201
15.4.6 Tool holder Select......................................................................................................................................... 201
15.5 About .............................................................................................................................................................................202
15.5.1 Maintenance Info........................................................................................................................................... 203
15.6 Terminate Machine Connection............................................................................................................................203
15.7 Logging...........................................................................................................................................................................203
15.7.1 General...............................................................................................................................................................203
15.7.2 Log Settings.................................................................................................................................................... 204
16. Install Software......................................................................................................................................................................205
16.1 File Save Structure.................................................................................................................................................... 205
17. About Licenses......................................................................................................................................................................206
18. Keyboard Shortcuts............................................................................................................................................................ 208
19. iPC Commands..................................................................................................................................................................... 209
20. Using ai-cut/i-cutCDR........................................................................................................................................................ 210
21. i-script........................................................................................................................................................................................211
vii
1
iPC
1. Preface
User Manual
for
i-cut Production Console
iPC
Note: We remind you that only the Esko staff, or persons having received appropriate training, are
allowed to handle, manipulate or do repairs on the system.
©Copyright 2014, Esko-Graphics Kongsberg AS, Norway
All Rights Reserved.
This copyright does not indicate that this work has been published.
This material, information and instructions for use contained herein are the property of Esko-Graphics
Kongsberg AS. There are no warranties granted or extended by this document. Furthermore, Esko-Graphics
Kongsberg AS does not warrant, guarantee or make any representations regarding the use, or the results
of the use of the system or the information contained herein. Esko-Graphics Kongsberg AS shall not be
liable for any direct, indirect, consequential or incidental damages arising out of the use or inability to use
the system or the information contained herein. The information contained herein is subject to change
without notice. Revisions may be issued from time to time to advise of such changes and/or additions.
No part of this system may be reproduced, stored in a data base or retrieval system, or
published, in any form or in any way, electronically, mechanically, by print, photoprint, microfilm
or any other means without prior written permission from Esko-Graphics Kongsberg AS.
This document supersedes all previous dated versions.
Correspondence regarding this publication should be forwarded to:
Global support
Esko-Graphics Kongsberg AS
Document no: D3389
Part no: 32599854
Esko-Graphics Kongsberg AS
www.esko.com
P.O.Box 1016, N-3601 Kongsberg, Norway
Tel: +47 32 28 99 00 Fax: +47 32 28 85 15 / 32 28 67 63
8
iPC
2. Change Record
By
Description
18-06-2014
jhbe
First edition of this document
15-10-2014
jhbe
About Licenses chapter has been modified.
Date
dd-mm-yy
9
2
3
iPC
3. Welcome
Welcome to the Kongsberg i-cut Production Console User Manual.
Throughout this manual, the abbreviation iPC is used for i-cut Production Console.
This manual will provide a complete and detailed description of all iPC functions.
It is aimed for operators of Kongsberg Cutting Tables and people preparing files for such equipment.
Note: Some of the functions and equipments described in this manual are optional.
10
iPC
4. Using this manual
4.1 Main Sections
The manual is divided into the following main sections:
System Description
• A short-form description of the User Interface.
• All menues and tool bars are described one by one.
Before We Start
In this chapter, important Basic Topics are discussed:
• File Preparation
• Import Presets
• Cutting Keys
• Registration
• Configure Tools
Workflow Description
A typical workflow is described, with detailed information about each step:
1.
2.
3.
4.
5.
6.
7.
8.
Get Started
File Import
Selected Job
Prepare for Production, Manually
Prepare for Production using Cutting Key
Edit Production Setup
Save a Job
Run a Job
Advanced Section
Optional functions for the Advanced User are available in the chapters:
• Edit Job - Possible modifications to the Selected Job.
• Job Alternatives - Additional processing alternatives available.
Backup/Restore
11
4
4
iPC
• How to configure a proper Backup regime.
• How to initiate a Backup.
• How to restore from Backup.
iPC Configuration
• Option settings, specifying the general behaviour of the system.
Appendices
• Install Software - a complete description on how to install iPC.
• Keyboard Shortcuts - a complete list of Keyboard Shortcuts available.
• iPC Commands - iPC command language.
4.2 Name Styles and Symbols
Name or style
Description
Pop-up dialog
This is the dialog that appears when you click the Right
Mouse Button.
Start button
The italic style indicates this is a button on the Operator
Panel.
OK
The bold style indicates this is a button or function in the
Graphical User Interface (GUI).
Machine Configuration
Link to topic.
Options->System Option
Menu selection: From the Options menu, select System
Option.
This symbol indicates that the function depends upon
actual hardware.
If hardware is not available, this functions is hidden.
This symbol indicates that the function is license
dependant.
4.3 Pictures and Illustrations
Orientation
In this document, pictures and illustrations related to the Cutting Table are viewed as shown here:
12
iPC
In the User Interface, several Viewing Options are available.
13
4
5
iPC
5. System Description
This chapter will explore the iPC User Interface in detail.
5.1 Font size in User Interface
Ensure your font size setting is 100%.
iPC will not work with bigger fonts.
5.2 Naming Conventions
The iPC User Interface appears in two different views, depending upon the mode you work in:
14
iPC
5.2.1 My Jobs View
1 - Main Menu
5 - My Jobs Toolbar
2 - Job Bar
6 - Preview Toolbar
3 - Select View
7 - Preview
4 - My Jobs List
8 - Machine Panel/Machine Panel Toolbar
9 - Windows Toolbar with Machine Connection icon
5.2.2 Selected Job View
10 - Job Settings. Comprises Layers and Production Setup.
11 - Job Properties Bar
15
5
5
iPC
12 - Table View Toolbar
13 - Table View, see below
5.2.3 Preview/Table View
The display area serves two purposes depending upon if you work in My Jobs List or if you work
with a Selected Job:
Preview
If you select a file in the My Jobs List, a preview of the selected file is shown.
If no file is selected, the Preview window is empty.
The Preview Toolbar is available at the top of the display area.
Table View
If you select a Job from the Job Bar, a preview of the Selected Job is shown.
The Table View Toolbar is available at the top of the display area.
5.2.4 Tool Configuration
Be aware the difference between Tool Configuration and Configure Tools:
Configure Tools
Edit Tool Settings to be used in a Layer
Tool Configuration
Maintain the Tool Configuration on the connected Cutting Table.
5.3 Main Menu
16
iPC
The following Main Menu entries are available:
• File
• Layer
• Edit
• Curves
• View
• Machine
• Selection
• Advanced
• Job
• Help
5.3.1 File
Main Menu->File
The following menu items are available:
New Job (Ctrl+N)
Save Job (Ctrl+S)
Create an empty Job.
Save selected Job.
You can add/edit geometry using the Table
View Edit functions.
The Job is saved using the iPC .cut format.
Add Job... (Ctrl+O)
Save Job As (Ctrl+Shift+S)
Open an Input File, add it to My Jobs List.
Save selected Job.
You are prompted for destination folder and file
name.
17
5
5
iPC
Add Nested Layout...
Export
Open the Add Nested Layout dialog.
Export Selected Job to pdf.
Create a Nested Layout for import to My Jobs
List
Close Job (Ctrl+W)
Exit
Close the selected Job.
Terminate iPC.
5.3.2 Edit
Main Menu->Edit
The following menu items are available:
Undo (Ctrl+Z)
Options
Undo previous operation(s).
• Options settings.
• Basic Configuration.
• Default value settings.
For more information, go here.
5.3.3 View
Main Menu->View
All View functions relates to Selected Job displayed in Table View window.
The following menu items are available:
Zoom Tool
Table View Orientation
By the mouse, define a zoom area.
Select viewpoint for Table View
Zoom In (Ctrl+Add)
Flute Direction
Click to zoom in.
The Flute Direction is indicated in the Table
View window.
Zoom Out (Ctrl+Subtract)
Reference Point
Click to zoom out.
18
iPC
The selected Reference Point is shown in the
Table View window.
Fit to Job (Ctrl+Shift+J))
Table Rulers
Selected Job will fill the Table View window.
Cutting Table Rulers are shown in the Table
View window (machine dependant).
Fit to Table (Ctrl+Shift+T)
Vacuum Zones
A picture of the Cutting Table including the
selected Job will fill the Table View window.
Selected Vacuum Zones are indicated in the
Table View window.
Curve Direction
Parking Position
An arrow on each curve indicates curve
direction.
Show current Parking Position as a symbol in
the Table View window.
Curve Points
Bounding Box
Curve Points are visible, available for edit.
Show a Bounding Box surrounding Selected
Job.
Tool Path
The Tool Path is shown.
5.3.4 Selection
Main Menu->Selection
All Selection functions relates to Selected Job.
The following menu items are available:
Select All Curves (Ctrl+A)
Deselect All Curves (Ctrl+D)
In Selected Job, select all Curves.
In Selected Job, deselect all Curves.
5.3.5 Job
Main Menu->Job
All Job functions relates to Selected Job.
19
5
5
iPC
The following menu items are available:
0
Rotate 90 CW
Remove Double Lines and Sequence
Rotate the entire Job.
Use this function to remove double lines and
optimize cutting sequence in a Job.
0
Rotate 90 CCW
Remove Double Lines, Join Across Gaps
Rotate the entire Job.
Double lines will be removed.
Gaps between consecutive lines that are below
a certain limit will be joined.
Mirror Horisontal
Optimize for Production...
Mirror Selected Job.
Opens the Optimize for Production dialog.
Mirror Vertical
Move Job to Reference Point
Mirror Selected Job.
The lower left corner of Selected Job will be
placed in currently selected Reference Point.
The corner is the lower left corner of the
surrounding rectangle.
Move Open Curves to Separate Layer
Use this function to separate open curves
from closed curves.
5.3.6 Layer
Main Menu->Layer
All Layer functions relates to Selected Job.
The following menu items are available:
20
Add Layer... (Ctrl+L)
Copy Layer(s) with Curves (Ctrl+Shift+C)
Opens the Add Layer dialog.
The currently selected Layer(s) are copied,
geometry included.
Add Regmark Layer...
Remove Layer(s) (Shift+Del)
Opens the Add Regmark Layer dialog.
The currently selected Layer(s) are removed.
iPC
Edit Layer...
Remove Empty Layers... (Ctrl+U)
Opens the Edit Layer... dialog.
Layer(s) with no geometry are removed.
Copy Layer(s) without Curves (Ctrl+C)
The currently selected Layer(s) are copied, no
geometry included.
5.3.7 Curves
Main Menu->Curves
All Curves functions relates to Selected Curve(s).
The following menu items are available:
Move... (Ctrl+M)
Merge Curves
Move Selected Curves
Merge Selected Curves
Jog Curves
Invert Curve Direction (Ctrl+Shift+I)
Jog Selected Curves
Invert Curve Direction for Selected Curves
Scale... (Ctrl+T)
Lead-in/Lead-out
Scale Selected Curves
Add Lead-in/Lead Out to Selected Curves
Mirror... (Ctrl+Shift+M)
Tool Offset...
Mirror Selected Curves
Apply Tool Offset to Selected Curves
Rotate... (Ctrl+Shift+R)
Optimize Shape
Rotate Selected Curves
Optimize Selected Curves
For more information, go here.
Edit Points
Remove Curves...
Enter Edit Point Mode
Remove Selected Curves
21
5
5
iPC
5.3.8 Machine
Main Menu->Machine
Functions for the connected Cutting Table.
The following menu items are available:
Connect
Set Table Top Reference
Connect to Cutting Table
On the Cutting Table, execute the Table Top
Reference wizard.
Start Spindle Warm Up
Adjust Tool Height
On the Cutting Table, a Spindle Warm Up
sequence is executed.
On the Cutting Table, execute the Adjust Tool
Height wizard.
Start Vacuum Cleaner
Material Measurement
Vacuum Cleaner on/off control.
On the Cutting Table, a Measure Material
Thickness sequence is executed.
Identify Tools
Vacuum Zones
On the Cutting Table, execute a Tool
Identification sequence.
Select Vacuum Sections suitable for Selected
Job.
Direct Commands
Select functions for immediate execution on
the Cutting Table
Note: For daily use, some of these functions are easy available also from Machine Panel.
5.3.9 Advanced
Main Menu->Advanced
The following menu items are available:
22
Materials and Boards...
Configure Tools...
Functions to maintain a list of available
Materials and Boards.
Functions to Configure Tools to be used in
Layers.
iPC
Cutting Keys
Backup Configuration...
Functions to maintain Cutting Keys.
Initiate a System Backup.
Manage Presets
Restore Configuration...
Functions to maintain Import Presets.
Initiate a System Restore.
5.3.10 Help
Main Menu->Help
The following menu items are available:
User Manuals... F1
Knowledge base...
i-cut Production Console User Manual
online...
Buy accessories online...
Kongsberg table User Manual online...
About i-cut Production Console...
Online Support...
License Manager...
5.4 My Jobs List
My Jobs List is a file list showing jobs you have imported into iPC. It can be seen as a "to do" list.
While working with My Jobs List, the content of the Job Preview window appears this way:
23
5
5
iPC
If a Job is selected, a preview of the Selected
Job is shown in the Job Preview window.
My Jobs List is available in two different views; Compact View and Extended View, selected from:
My Jobs Toolbar->Switch to Compact View
My Jobs Toolbar->Switch to Extended View
5.4.1 Compact View
My Jobs Toolbar->Show My Jobs->Show List
Each file is identified by an icon showing the geometry and its filename.
In addition, Job Size and Last Modified is available.
5.4.2 Extended View
My Jobs Toolbar->Show My Jobs->Show Columns
24
iPC
Each file is identified by it's file name.
In addition, the following columns are available:
•
•
•
•
•
•
File name and file path
Due Date
Customer
Job Size
Material
Material Thickness
•
•
•
•
•
Design Date
Designer Name
Flute Direction
Matrix - if this job require a matirx function
Modification Date
This information (metadata) is fetched from the Input File.
If the information is available or not, depends upon if the CAD system / Job Preparation software
used supports such data.
If a job is saved using the iPC .cut format, the metadata are stored as part of the .cut file.
Sort by Column
Double-click a Column header will sort the file list by the column content.
Another double-click will sort the content in opposite order.
Modify Columns displayed
While pointing at My Jobs List, click the Right Mouse Button.
25
5
5
iPC
Select columns to be displayed.
5.4.3 Select a File
Select a file in My Jobs List
Single Click
The file is selected, available for My Jobs Toolbar and My Jobs Bottom Toolbar functions.
A preview of the selected file is shown in the Job Preview window.
Double Click
From the selected file, a new Job is created, shown as a separate tag on the Job Bar.
The same function is achieved using the Create Job button in My Jobs Bottom Toolbar.
26
iPC
5.4.4 My Jobs Toolbar
The following toolbar entries are available:
Add a job to My Jobs List.
Remove the selected job from My Jobs List.
From the selected job in My Jobs List, create a new Job.
The new Job is shown as a separate tag on the Job Bar.
The same function is achieved by doubleclicking the Job in My Jobs List.
The following functions are available:
Add Job
Add a job to My Jobs List.
Add Nested Layout
Add a Nested Layout to My Jobs List.
Nested Layout is prepared in a separate dialog.
The result can be saved to My Jobs List.
Edit Nested Layout
Edit the selected Nested Layout
Remove Job
Remove the selected Job from My Jobs List.
Remove Unreferenced Jobs
Jobs in My Jobs List where the corresponding file is missing, will be removed
from My Jobs List.
Sort Jobs
This function is available in List View only
Sort My Jobs List by:
27
5
5
iPC
•
•
•
•
•
•
•
Added Date
Name
Modified Date
Size
Due Date
Ascending
Descending
5.4.5 Preview Toolbar
The following toolbar entries are available:
Preview of Selected File is shown inside a Cutting Table view.
Preview of Selected File fills the window.
Import Preset:
From the drop-down menu, select the Import Preset to use.
Open the View Import Preset dialog.
28
iPC
5.5 Selected Job
A Job is identified as a separate tab including the actual file name on the Job Bar.
You can have several Jobs opened, all identified with its own tab.
You can edit a Job while another job is executed on the Cutting Table. In this way, you can prepare
next Job for execution.
During execution, a Job is locked for editing.
A Job contains two main groups of information; Layers and Production Setup.
5.5.1 Select a Job
29
5
5
iPC
In the Job Bar, click a Job tag to select the Job.
The selected Job is highlighted.
A Preview of the selected Job is displayed in Table View.
5.5.2 Create a Job
You create a Job from My Jobs List:
In My Jobs List, double-click a file.
My Jobs Toolbar->Create Job.
A new Job is created based upon currently selected file in My Jobs List.
Creating an empty Job is available as:
Main Toolbar->File->New Job. A new, empty Job is created.
5.5.3 Close a Job
Closing a Job is available from:
Main Menu->File->Close Job.
Selected Job is closed.
Job Bar->Close on the selected Job tab.
If the Job to be closed has been modified, a Save As dialog appears.
The Job will be saved in the .cut - format regardless the format of the Input File.
30
iPC
In My Jobs List, the new .cut file will replace previous version.
5.5.4 Ready for Execution
To prepare a Job for execution, complete Layers and Production Setup.
To simplify this task, use Cutting Keys as described in next chapter.
In the Selected Job Status Bar, you find the status indicator for Job ready:
The Production Settings; Layers and Production Setup, are properly set.
The Job is ready for execution.
This Job is not properly prepared for execution.
For information about what is missing, click Read More...
Click to get information about missing Production Settings.
5.6 Selected Job, select Cutting Key
31
5
5
iPC
After a new job is created, no Cutting Key is selected, unless it is specified in the selected Import
Preset.
Leave Cutting Key = None to run without using Cutting Key.
Press none to open the Cutting Key selection dialog
5.7 Selected Job, Layers
iPC organizes all geometry and registration data into Layers and assigns a unique set of options
to each layer.
When importing a file, iPC separates the contents into Layers.
The separations are defined by the Import Mapping.
Layers defines tools, tool parameters and registration types.
32
iPC
When you run a job, iPC will produce that job based on the order, selection and configuration of
your Layers.
All Layers are located in the Job Settings section of Selected Job:
5.7.1 Layer Window
A sub-set of tool parameters are displayed in the Layer Window.
The number of parameters will change, depending upon the actual tool selected.
Invoke the Edit Layer dialog. All Layer parameters are available for
edit.
Indicates if this Layer is visible, and thereby included or not, see
Include a Layer.
33
5
5
iPC
Select Tool to be used for this Layer
Color used when the Layer geometry is displayed in Table View.
Click to open the Color Selection dialog.
Tool Icon showing the tool currently assigned to this Layer.
The Tool is mounted on the Cutting Table.
Tool Icon showing the tool currently assigned to this Layer.
The Tool is currently not mounted.
No Tool is currently selected for this Layer.
Use the Select Tool function to specify tool to use.
5.7.2 Select Layer
A Layer Window is selected by a Mouse Click inside the surrounding frame:
A selected Layer is identified by a highlighted frame.
34
iPC
5.7.3 Include a Layer
A - Include/exclude all Layers
B - Include/exclude this Layer
Click the button to change state:
Layer is included in Selected Job.
The geometry belonging to this Layer is visible in Table View.
The geometry belonging to this Layer will be included in the output processing.
Layer is excluded.
The geometry belonging to this Layer is not visible in Table View.
The geometry belonging to this Layer will not be included in the output processing.
5.7.4 Layer Sequence
The execution sequence on the Cutting Table is determined by the Layer sequence, starting from
the top of the list.
35
5
5
iPC
You can re-arrange the execution sequence by moving Layers up or down:
1. Select the actual Layer.
2. While you keep the Left Mouse Button down, move the Layer up or down.
3. When at wanted position, release the Left Mouse Button.
5.7.5 Edit Selected Layer
Selected Job->Layers->Edit Layer
Main Menu->Layer->Edit Layer
The content of the Edit Layer dialog will change depending upon Tool selection.
For Milling tool parameters, go here
36
Layer Name
Depth, Flute Dependant
Enter the name you want for the Layer.
If enabled, you can specify Depth Across and
Depth Along flute independently.
iPC
The original name is derived from the input file
and the Import Mapping.
Depth Along
Depth Across
Specify cutting/creasing depth along flute
direction.
Specify cutting/creasing depth across flute
direction.
The value can be entered as:
The value can be entered as:
• xx mm
• xx in
• xx %
• xx mm
• xx in
• xx %
Layer Type
Tool
Select Layer Type.
From the drop down list, select the tool to use
when this Layer is processed.
Note: Tools above the horisontal line are
currently available on the machine.
Registration Type
Reverse Operation
From the drop down list, select the wanted
Registration Type.
Specify if this Layer should be executed on the
reverse side of the sheet.
For details, see Registration.
Speed X/Y
Acceleration
Specify the execution speed for this Layer.
Specify the acceleration to be used as a % value of maximum acceleration available.
Layer Color
Select the color to use when this Layer is
displayed in Table View.
Press the Layer Color bar to open the Color
dialog.
5.7.6 Layer Types
Layer Types are used by Cutting Keys and some Advanced Job menu features.
Layer Type is a property of a Layer typically defining which operations (cut, crease, etc) to perform
on a layer.
37
5
5
iPC
Layer Type is assigned a layer in the Import Mapping based on certain properties in the input file,
like layer name, color or linetype.
Some design applications can also define the Layer Type directly.
Alternatively the Layer Type can be selected in the Edit layer dialog.
Layer Types
The following Layer Types are available:
• Unknown
• Cut
• Crease
• Partial Cut
• Perf Cut
• Bevel Cut
• V-notch
• Plot
• Drill
• Regmark
• Braille
• Crease across grain
• Reverse Crease
• Reverse Crease cross grain
• Wash Out
• Engraving
• Kiss Cut
• Free use 1, 2,3
5.7.7 Add new Layer
Main Menu->Layer->Add Layer
Selected Job->Layers->Add Layer
Note: Do not use this entry to create a Regmark Layer.
Layer Name
38
iPC
Enter the name you want for the Layer.
Layer Type
Select Layer Type.
Tool
From the drop down list, select the tool to use when this Layer is processed.
Note: Tools above the horisontal line are currently available on the machine.
Layer Color
Select the color to use when this Layer is displayed in Table View.
Press the Layer Color bar to open the Color dialog.
The Add Layer dialog box will change depending upon the Tool selected.
To fill in the other parameters for the Layer, see Edit Layer.
5.7.8 Add Regmark Layer
Main Menu->Layer->Add Regmark Layer
Normally, the position of the Registration Marks is included in the Input File.
If, for any reason, you have Input Files without Registration Mark information, you can use the
Regmark Layer to specify the size and position of Registration Marks relative to the corners of
the job.
Note: Registration Marks created this way are always circular.
Name
Enter the Name you want for the Layer.
39
5
5
iPC
Coordinates are Absolute
The coordinates for the Registration Marks are specified in the same coordinate system as the
geometry.
Coordinates are Distance from Corner of Work Area
The coordinates for the Registration Marks are relative to corner of the Work Area.
Coordinates are Distance from Corner of Enclosing Rectangle
The coordinates for the Registration Marks are relative to the corner of the enclosing rectangle.
40
Top Left
Top Right
Select if a top left Registration Mark should
be used.
Select if a top right Registration Mark should
be used.
iPC
Enter coordinates for the Registration Mark.
Enter coordinates for the Registration Mark.
Bottom Left
Bottom Right
Select if a bottom left Registration Mark
should be used.
Select if a bottom right Registration Mark
should be used.
Enter coordinates for the Registration Mark.
Enter coordinates for the Registration Mark.
Regmark Size
Enter the size of the Registration Mark.
5.7.9 Copy Layer and Curves
1. Select the Layer you want to copy.
2. The copy function is available as:
Main Menu->Layer->Copy Layer(s) With Curves
Selected Job->Layers->Copy Layer(s) Including Curves
5.7.10 Copy Layer, no Curves
1. Select the Layer you want to copy.
2. The copy function is available as:
Main Menu->Layer->Copy Layer(s) Without Curves
Selected Job->Layers->Copy Layer(s) Without Curves
5.7.11 Remove Layer
1. Select the Layer you want to delete.
2. The delete function is available as:
Main Menu->Layer->Remove Layer(s)
Selected Job->Layers->Remove Active Layer(s)
41
5
5
iPC
5.7.12 Remove Empty Layers
Main Menu->Layer->Remove Empty Layers...
All Layers without curves will be removed.
5.8 Selected Job, Production Setup
5.8.1 Number of Copies
Selected Job->Production Setup->Copies
Copies
Specify Number of Copies to produce.
Table
Displays the Job layout on Table 1 (X x Y)
42
iPC
X - Number of Copies along X.
Y - Number of Copies along Y.
5.8.2 Quality
Accuracy
The performance is optimized to achieve maximum accuracy.
Speed
The performance is optimized to achieve maximum speed. Less accuracy is a possible
consequence.
5.8.3 Job Position
Selected Job->Production Setup->Position
Reference Point
Select the Reference Point to use.
Move Job to Reference Point
The lower left corner of current Job will be placed in selected Reference Point.
Corner of surrounding rectangle.
Offset
If you want to place the job with an offset to selected Reference Point, add proper X/Y offset values.
Reset
Offset values are set to zero.
Update automatically
This is a function for Jobs containing Registration Marks and Multiple Copies are executed.
43
5
5
iPC
The Job Position is updated after each copy:
A modified start position for one copy will be used as Job Position for the next copy.
5.8.4 Step and Repeat
Selected Job->Production Setup->Step and Repeat
Number of Copies along X.
Number of Copies along Y.
Gap between copies along X.
Gap between copies along Y.
Step size between copies along X
Step size between copies along Y.
Notes:
• You enter either Gap or Step size.
• You need to enter a total Number of copies that is equal to or larger than the step and repeat
- numbers
5.8.5 Registration
Registration Types
Selected Job->Production Setup->Registration
44
iPC
From the drop down list, select wanted Registration Type: None, Registration Marks, Edge
Recognition.
Note: If the Selected Job includes a Regmark Layer, the None alternative is not available.
For more information, see Registration Types.
No Registration Marks
No Registration, the Job is executed at the position of the selected Reference Point + Offset, if any.
Use Registration Marks
Read Registration Marks.
Compensation Types
Select from the following Compensation Types:
•
•
•
•
•
Placement
Register Curve
Register Layer
Linear Compensation
Full Compensation
For more information, see Compensation Types.
Search Area
45
5
5
iPC
Different ways of Registration Mark search is available:
Manual
The center of every Registration Mark is defined manually using the arrow keys on your
keyboard and a live camera image or Laser Pointer.
Center Only
iPC attempts to locate each Registration Mark automatically. If it is unable to locate a
mark, you are prompted to manually position the camera using the arrow keys on your
keyboard. iPC will only recognize the intended Registration Mark if it is near the center
of the camera image.
Normal
This option is nearly identical to Center Only, except that the Registration Mark
doesn't need to be near the center of the camera image for iPC to recognize it.
As long as the mark is completely within the camera image, iPC will automatically
reposition the camera directly over the center of the mark before reading its position.
Extended
If the Registration Mark is not completely within the camera image, iPC expands the
field of view by moving the camera to up to four additional overlapping positions around
the original image.
Ask Confirmation for First Mark
For the first Register Mark in each Job, you will be asked for confirmation.
Adaptive Registration
Select this option to optimize Register Mark read, focusing on:
Accuracy
Read all Registration Marks available in order to achieve maximum accuracy.
Speed
Minimize the number of Registration Marks used in order to achieve maximum speed. Less
accuracy is a possible consequence.
Will take effect from the second Table of a job.
Use Edge Recognition
Use Edge Recognition to find correct job position.
46
iPC
Sheet Position
Specify the distance from Selected Reference Point where the camera should search for the sheet
corner.
Check Edge Distance
Specify the measuring distance to be used.
Check Direction
Select which direction to measure:
Corner and X
Sheet Corner and a position Check Edge Distance from corner in X-direction is
detected.
Corner and Y
Sheet Corner and a position Check Edge Distance from corner in Y-direction is
detected.
Corner, X and Y
Sheet Corner and a position Check Edge Distance from corner in both X and Ydirection is detected.
5.8.6 Material Handling
Selected Job->Production Setup->Material Handling
47
5
5
iPC
Function groups:
Table Preset
Material Feed
Skip Table
Material Measurement
Table Preset
Table Preset defines some basic behaviour of the system.
From the drop-down list, select one of the Table Presets available.
For more information about Table Preset, go here.
Material Feed Functions
Note: These features are available only when Sheet Feed Table Preset is selected.
Feed to front of table
Automatically feed sheets to the front of the table.
Sheet Feeding Length and Pre-Load Sheets options are disabled unless a Sheet Feed Table
Preset is selected.
48
iPC
The feeding length is calculated using the Table to Feeder distance and the Width parameters in
the Options dialog.
Notes: This function is for Sheet Feeder operations only.
Sheet Feeding Length
Sets the distance your device will feed the sheet(s) when using Sheet Feeder.
Setting the value properly ensures minimum feed time. The Feed Length is usually approximately
equivalent to the sheet length or slightly larger.
If multiple sheets are on the table at one time, the length may be set slightly smaller.
Multiple sheets on the table maximizes vacuum hold-down.
Note: This function is for Sheet Feeder operations only.
For more information, see User Manual for the Cutting Table.
Pre-load Sheets
Specify the number of sheets to be loaded at the start of your production.
Use this function when you have Multiple Sheets on the table, and you need to load more than
one sheet before production start.
Skip Table Functions
Note: These features are available only when Sheet Feed or Roll Feed Table Preset is selected.
49
5
5
iPC
Skip Table if Registration Mark is not found
If the Registration Mark is not found, iPC will automatically skip the Table during Sheet Feed or
Roll Feed productions.
The Skip Table feature allows iPC to run with less human intervention by automatically avoiding
production breaks due to mis-loaded sheets or damaged registration marks.
Note: If Registration Mark is not found on two successive sheets, the execution will stop.
Skip Table After
Entering a number of seconds in the Skip Table After field delays the skipping of the table
Use this function to provide some time for manual correction.
Material Measurement
Decide how to carry out the material thickness measurement.
From the drop-down list, select:
Optimized Measurement
• If No Registration - material is measured in two opposite corners of the material.
• If Registration - material is measured in the position of the first Registration Mark.
Measure at Laser Position
The material is measured in current Laser position.
Successive sheets are measured in the same postition.
Note: This function is available when No Registration is selected only.
5.8.7 Tool Head Parking
Selected Job->Production Setup->Tool Head Parking
Specify Park Position.
If current Production Setup contains a Park command, the machine will move to the specified Park
Position.
50
iPC
The specified Park Position (X &Y values) is relative to Main Reference Point.
5.9 Table View Toolbar
5.9.1 Zoom
Main Menu->View->Zoom
Table View Toolbar->Zoom
By the mouse, define a Zoom area.
5.9.2 Zoom In
Main Menu->View->Zoom In
Table View Toolbar->Zoom In
Ctrl+Add
Click to Zoom in.
51
5
5
iPC
5.9.3 Zoom Out
Main Menu->View->Zoom Out
Table View Toolbar->Zoom Out
Ctrl+Minus
Click to Zoom out.
5.9.4 Fit to Job
Main Menu->View->Fit to Job
Table View Toolbar->Fit to Job
Ctrl+Shift+J
Selected Job will fill Table View window.
5.9.5 Fit to Board
Table View Toolbar->Fit to Board
Ctrl+Shift+J
Selected Job will fill the board displayed in Table View window.
5.9.6 Fit to Table
Main Menu->View->Fit to Table
Table View Toolbar->Fit to Table
52
iPC
Ctrl+Shift+T
The Cutting Table including the selected Job will fill the Table View window.
5.9.7 Edit Points
Main Menu->View->Curve Points
Table View Toolbar->Curve Points
Enter Edit Point Mode.
On selected curve, the Curve Points are highlighted, available for edit.
5.9.8 Curve Directions
Main Menu->View->Curve Directions
Table View Toolbar->Curve Directions
Show Curve Direction.
An arrow at the start of each curve indicates Curve
Direction.
5.9.9 Show Curve Points
Main Menu->View->Curve Points
Table View Toolbar->Show Curve Points
All Curve Points are highlighted.
53
5
5
iPC
5.9.10 Tool Path
Main Menu->View->Tool Path
Table View Toolbar->Tool Path
Use this function to visualize the Tool Path of a Milling Tool.
5.9.11 Vacuum Zones
Main Menu->View->Vacuum Zones
Table View Toolbar->Vacuum Zones
Current Vacuum Zone configuration is shown in Table View.
5.9.12 Parking Position
Main Menu->View->Parking Position
Table View Toolbar->Parking Position
Current Parking Position is shown in Table View.
5.9.13 Table Rulers
Main Menu->View->Table Rulers
Table View Toolbar->Table Rulers
Cutting Table Rulers are shown in the Table View window.
54
iPC
5.9.14 Reference Point
Main Menu->View->Reference Point
Table View Toolbar->Reference Point
The selected Reference Point is shown.
5.9.15 Job Size
Main Menu->View->Job Size
Table View Toolbar->Job Size
The Bounding Box for the Selected Job is displayed.
5.9.16 Sheet Location
Table View Toolbar->Show Sheet Location
This function is used in conjunction with Step and Repeat to show the board correctly positioned.
55
5
5
iPC
5.10 Selected Job Properties Bar
The following information is available:
Curves:
Number of curves in Selected Job
Points:
Number of curve points in Selected Job
Size:
The size of Selected Job (X x Y).
This is the size of one copy of the Job; not influenced by Step and Repeat values.
Total Size:
The size of Selected Job (X x Y).
This is the size of of the complete Job; including Step and Repeat.
X:
Current Mouse Pointer position (X) relative to the selected Reference Point.
Y:
Current Mouse Pointer position (Y) relative to the selected Reference Point.
5.10.1 Flute Direction
This symbol indicates the Flute Direction for the displayed job.
This symbol indicates the Flute Direction for the displayed job.
56
iPC
No flute / grain direction specified
Normally, the Flute Direction is specified in the Input File.
Manually, the Flute Direction is altered from:
• Selected Job Properties Bar->Flute Direction drop-down menu.
5.11 Machine Panel
Machine Panel provides information about the Job currently executed on the Cutting Table.
The overall status of Job Execution is displayed as:
Edit Job / Idle mode - job preparation
In this mode, you can:
• Edit new jobs
• Start a new job
Execution Mode - execution is on-going
Error mode - error, execution has stopped.
iPC Message Box will provide more information.
57
5
5
iPC
5.11.1 Machine Panel Views
It is possible to configure how the Machine Panel is displayed on the screen:
Machine Panel->Select View
You can select the following views:
• at the bottom
• to the right
• fill the whole screen
The different views are shown below.
The numbers refers to Machine Panel Functions description.
Bottom View
58
iPC
Right View
Full Screen View
5.11.2 Machine Panel Functions
The Machine panel functions available will change depending upon the status of the system.
The following states are defined:
Idle Mode
• Material Replacement
• Stop
• Job finished
Execution Mode
• Executing
59
5
5
iPC
Error Mode
•
•
•
•
Error
Error/Pause
Safety stop
Regmark not found
Executing
1 Name of file executed.
2 Status of Current Job
• Inner circle - Current Table
• Outer circle - Current Job
3 Stop Production dialog
Stops production after Current Table.
Modify Job is then available.
5 - Number of Copies
Number of copies produced/Total number of
copies requested.
6 - Producing copy
Copy number currently prodused
9 - Finish all copies
Estimated time until all requested copies are
completed.
10 - Current table
Estimated time until Current Table is
completed.
Note: Not for first Table, visible for successive
Tables only.
11 - Performance information
• Time elapsed since start of Current Job
• Spindle Power
• Measured rotation speed (RPM)
• Measured material thickness
60
iPC
Pause
1 Name of file executed.
2 Status of Current Job
• Production paused by operator
• Press Start to continue.
3 Stop Production dialog
Stops production after Current Table.
Modify Job is then available.
5 - Number of Copies
Number of copies produced/Total number of
copies requested.
6 - Producing copy
Copy number currently prodused
8 - Machine Panel toolbar
11 - Performance information
• Time elapsed since start of Current Job
• Spindle Power
• Measured rotation speed (RPM)
• Measured material thickness
61
5
5
iPC
Material Replacement
1 Name of file executed.
2 Status of Current Job
• Replace material.
• Press Start to continue.
4 Start Production dialog
• Produce remaining copies.
• Restart from current Table
• Restart all.
5 - Number of Copies
Number of copies produced/Total number of
copies requested.
6 - Producing copy
Copy number currently prodused
8 - Machine Panel toolbar
11 - Performance information
• Time elapsed since start of Current Job
• Spindle Power
• Measured rotation speed (RPM)
• Measured material thickness
Note: This state is entered when:
• If Park after Table is enabled and the Table
is completed.
• Execution stop after this Table is enabled.
62
iPC
Stop
1 Name of file executed.
2 Status of Current Job
• Production stopped by operator.
• Machine moved to Park Position.
4 Start Production dialog
• Produce remaining copies.
• Restart from current Table
• Restart all.
5 - Number of Copies
Number of copies produced/Total number of
copies requested.
7 - Start on copy
Copy number that will be produced if you
continue execution.
8 - Machine Panel toolbar
11 - Performance information
• Time elapsed since start of Current Job
• Spindle Power
• Measured rotation speed (RPM)
• Measured material thickness
Note: This state is entered when:
• If Stop is pressed twice
• Execution is stopped from Machine Panel.
63
5
5
iPC
Error
1 Name of file executed.
2 Status of Current Job
Information about the error condition.
3 Stop Production dialog
Stops production.
8 - Machine Panel toolbar
11 - Performance information
• Time elapsed since start of Current Job
• Spindle Power
• Measured rotation speed (RPM)
• Measured material thickness
64
iPC
Safety stop
1 Name of file executed.
2 Status of Current Job
Machine stop due to safety error.
Information about the error condition.
3 Stop Production dialog
Stops production.
8 - Machine Panel toolbar
11 - Performance information
• Time elapsed since start of Current Job
• Spindle Power
• Measured rotation speed (RPM)
• Measured material thickness
Regmark not found
65
5
5
iPC
1 Name of file executed.
2 Status of Current Job
Machine stop due to Registration Mark not
found.
Information about the error condition.
3 Stop Production dialog
Stops production.
8 - Machine Panel toolbar
11 - Performance information
• Time elapsed since start of Current Job
• Spindle Power
• Measured rotation speed (RPM)
• Measured material thickness
66
iPC
Job finished
1 Name of file executed.
2 Status of Current Job
Job is completed.
8 - Machine Panel toolbar
11 - Performance information
• Time elapsed since start of Current Job
• Spindle Power
• Measured rotation speed (RPM)
• Measured material thickness
iPC stop functions
To stop job execution, press Stop on Operators Panel.
67
5
5
iPC
Stop in Execution Mode
Stop production after this Table:
• System enters Idle mode
• Modify job is available.
Stop when in Pause
When we press Stop while in Pause:
• System enters Idle mode
• Modify job is available.
5.11.3 Machine Panel Toolbar
68
iPC
Vacuum Zones
Main Menu->Machine->Vacuum Sections
Machine Panel Toolbar->Vacuum Sections
Select Vacuum Sections suitable for Selected Job.
Proper selection is important to achieve the best possible material hold down.
Table Top Reference
Main Menu->Machine->Table Top Reference
Machine Panel Toolbar->Table Top Reference
On the Cutting Table, execute the Table Top Reference wizard.
Updates table top level measurement in current Laser Pointer position.
Measure on top of Cutting Underlay; no material.
Adjust Tool Height
Main Menu->Machine->Adjust Tool Height
Machine Panel Toolbar->Tool Height
On the Cutting Table, execute the Adjust Tool Height wizard.
Camera View
Main Menu->Machine->Show Camera
Machine Panel Toolbar->Camera
Enter the Camera View dialog for manual camera picture inspection and adjustment..
69
5
5
iPC
Spindle Warm Up
Main Menu->Machine->Start Spindle Warm Up
Machine Panel Toolbar->Spindle
On the Cutting Table, a Spindle Warm Up sequence is executed.
Vacuum Cleaner
Main Menu->Machine->Start Vacuum Cleaner
Machine Panel Toolbar->Vacuum Cleaner
Vacuum Cleaner on/off control.
For machines with Milling Tool installed.
May be used for manual dust removal after job execution.
Material Thickness Measurement
Machine Panel Toolbar->Material Thickness
On the Cutting Table, a Measure Material Thickness sequence is executed.
Material thickness measurement is done as part of the job execution.
This function is typically used when you need to know the thickness of the material before you start
the job.
Measured thickness is displayed in the Performance information part of the Machine Panel.
Identify Tools
Main Menu->Machine->Identify Tools
70
iPC
Machine Panel Toolbar->Identify Tools
On the Cutting Table, a Tool Identification sequence is executed.
Use this after the insertion of a new tool.
5.12 Machine Connection
From Windows Toolbar, invoke Machine Connection.
For more information, go to Machine Connection and Configuration.
71
5
6
iPC
6. Before We Start
6.1 Introduction
In this chapter, we will describe some important concepts and parameters used in iPC that are
essential in order to achieve optimal performance on your machine:
• Table
• Table Preset
• Registration
• File Preparation
• Import Presets
• Cutting Keys
• Configure Tools
6.2 About Table
It is important to understand the term Table used in this manual:
Cutting Table
Do not get confused by the term Cutting Table, which is the machine we use when processing our
materials, as cutting, creasing, milling.
Table
The term Table describes the part of a job that fits into the Work Area of the Cutting Table.
Example 1
Ten copies of a printed or non-printed sheet is requested, only one sheet can be placed on the
Cutting Table at a time.
Such a request will be executed as ten Tables.
Manual or automatic feeding will be initiated between each Table, depending on Table Preset
selected.
A job is divided into two parts as it is longer than the table.
During execution, you complete the first Table. Then the material is fed forward to move the second
part of the job into the work area. Then, the second Table is execucted.
Example 2
A roll with printed decals should be cut.
72
iPC
The roll includes two columns of decals.
Three rows of decals fits within the Work Area of the Cutting Table.
In order to cut the roll, a Step and Repeat of 3 x 2 should be requested.
Each Table consist of 6 copies
When total Number of Copies is set to e.g. 100, a conveyor feed will be executed between each
Table, given that a Rollfeed Table Preset is selected.
6.3 Table Presets
Table Preset defines some basic behaviour of the system.
A set of standard Table Presets are installed by default.
In addition, you can add and delete presets to suit your need.
Select Table Preset
Selected Job->Production Setup->Material Handling->Table Preset
Maintain Table Preset
Main Menu->Edit->Options...->Production->Table Presets
Standard Table Presets
The following Table Presets are installed by default:
Park After Table
Before starting, the Operator must place first sheet on the table top.
When Start is pressed, this will happen:
• copy 1 will be produced, or
• the number of copies specified by Step and Repeat is produced.
Tool head will move to Park Position and display a message in Machine Panel.
73
6
6
iPC
Operator should replace material in same position, then press Start.
Remaining copies will be produced in the same way until specified Copies are produced.
Vacuum and blowback is integrated, meaning switched on / off automatically.
Park After Table Manual Vacuum
Operator must place first sheet on the table top before starting.
When Start is pressed copy 1, alternatively the number of copies given by Step and Repeat is
produced.
Tool head will move to Park Position and display a message in Machine Panel.
Operator should replace material in same position, then press Start.
Remaining copies will be produced in the same way until specified Copies are produced.
Vacuum and blowback is manual, to be controlled by the operator from Operators Panel.
Roll Feed
Requires conveyor. First copy on the roll must be placed on the table top before starting.
When Start is pressed, copy 1, alternatively the number of copies given by Step and Repeat is
produced.
Traverse will move to the back of the table to transport the conveyor and the roll forward.
Second copy is produced. (First regmarks will have to be identified manually unless Step distance
is specified correctly.) (Sjekk med Stian om dette er riktig)
Traverse will feed next copy (Regmarks will now be identified automatically.) Sequence continues
until specified Copies are produced.
Vacuum and blowback is integrated, meaning switched on / off automatically.
Sheet Feed
Requires Sheet Feeder and conveyor.
Start without any sheet on the table top.
When Start is pressed, the number of sheets defined by Pre-load Sheets (default 1) is loaded on
to the table top by help of the Sheet Feeder and the conveyor + traverse.
Feeding distance is defined by Sheet Feeding Length, alternatively fed to front of table if Feed
to front of table is selected.
First sheet, alternatively the number of copies given by Step and Repeat in Y direction, is produced
while Sheet Feeder is picking up the next sheet. First regmarks will have to be identified manually.
Traverse will move to the back of the table to transport the conveyor and the sheet forward.
74
iPC
Second copy is produced. Normally the regmarks are now found automatically. Sheet Feeder will
simultaneously pick next sheet, but is during first copies learning when operation should start to
present the sheet in due time.
Traverse will feed next sheet. Sequence continues until specified Copies are produced.
Vacuum and blowback is integrated, meaning switched on / off automatically.
6.4 About Registration
6.4.1 Adding Registration Marks
In order to achieve perfect print to cut alignment, all printed jobs destined for finishing with your iPC
device should contain Registration Marks.
By adding Registration Marks to both the print and cut files, you are providing iPC with the
necessary information to register the Cut Path to the Printed Graphic.
The placement and total number of Registration Marks depends upon the required cutting tolerance
and the predicted amount of distortion.
i-cut Layout is a software package from Esko that has functions to automate the process of adding
Registration Marks.
The same algorithm is used in ai-cut; is a special plug-in for Illustrator® and CorelDraw®, available
from Esko.
Using those tools greatly simplifies the process of adding Registration Marks, but you should still
understand the basic concepts explained in this section.
For more information about ai-cut, go here.
Poor triangulation of distorted graphics with only Improved triangulation of distorted graphics with
four Registration Marks.
eight Registration Marks.
Understanding the Registration capabilities of iPC will help you decide how many marks to add to
your job, and where to place those marks. Review the Registration Types section of this manual
for more information on Registration.
75
6
6
iPC
For the best possible compensation, Registration Marks should be placed around, and inside (if
possible) the cut path in a triangular relationship to one another. Jobs with tighter cutting tolerances
require more Registration Marks.
The more marks, the smaller each triangulated area becomes, and the more accurately iPC will be
able to compensate for distortion in that area.
If there are specific areas within the job that are more critical than others, more Registration Marks
should be added to those areas. It's difficult to accurately predict the amount of distortion that will
occur in any printed job; therefore we suggest you always include more Registration Marks than
you think you will need.
You can always remove unnecessary Registration Marks later in iPC, but once the job is printed it
is impossible to add more Registration Marks.
Jobs longer than your cutting table will be divided and produced by iPC in sections. Adding
Registration Marks along these divisions will improve registration and alignment of cut paths
between sections.
6.4.2 Types of Registration Marks
Circle:
3 mm < D < 12 mm
1/8 in. < D < 1/2 in.
Donut:
4 mm < D < 12 mm
5/32 in. < D < 1/2 in.
1 mm < T < D/4
3/64 in. < T < D/4
4 mm < D < 15 mm
5/32 in. < D < 19/32 in.
1 mm < T < D/4
3/64 in. < T < D/4
Cross:
iPC supports three types of Registration Marks; circle, donut and cross.
The machine will search for Registration Marks and detect any of these automatically.
Thus, there is no function to specify type of Registration Marks.
A circle is the best choice for nearly all scenarios. If there is a high amount of reflection or insufficient
contrast between the color of the printed Registration Marks and the background, a donut shape
may provide iPC with a better regmark reading result.
76
iPC
6.4.3 Compensation Types
The Compensation Type dictate how iPC will register and modify Cut Paths based on the
information it collects from reading Registration Marks.
The following Compensation Types are available:
• Placement
• Register Curve
• Register Layer
• Linear Compensation
• Full Compensation
In order to complete the picture, we have included here also the description of two registration
methods not using Registration Marks:
• No Registration Marks, use Ruler
• Edge Recognition
No Registration Marks, use Ruler
Sheet positioning against the Ruler ensures
correct cut-out.
It is a pre-requisite that the graphics is correctly
positioned relative to sheet corner.
Notes:
• It is a pre-requisite that the Cutting table is equipped with Rulers.
• The distance from Reference Point to geometry must be known.
• This method is not recommended if the job contains graphics that the cut-out must align to.
Edge Recognition
77
6
6
iPC
Sheet Position is unknown,
cut-out is wrong
Sheet Position is obtained by
Edge Recognition
Cut-out is perfect
It is a pre-requisite that the
graphics is correctly positioned
relative to sheet corner.
Notes:
• The distance from sheet edge to geometry must be known (the bounding box of the job).
• A straight sheet corner is presumed.
• This method is not recommended, as there is no compensation involved.
Placement
This simplest form of Registration rotates and positions all curves in all layers as one.
Size, shape and relative positioning of the curves all remain intact.
The position and rotation of the graphics is
unknown
Using Registration Marks to obtain correct
positioning.
Register Curve
Each curve is produced at the exact size and shape defined by the file, but registered individually
from all other curves in the file; compensating for positional and rotational changes in the printed job.
78
iPC
The position and the rotation of the graphics is
not known.
Using Registration Marks to modify the
position and rotation of each curve individually.
Register Layer
Similar to Register Curve, this registration type compensates each Layer individually. All curves
in each Layer will maintain exact size, shape and relative positioning.
Linear Compensation
This Registration Type offers the second highest level of compensation.
When Linear Compensation is selected, iPC applies an average compensation for each curve.
The size, shape, offset and rotation of all curves are altered to compensate for linear distortion in
the printed graphic. Linear Compensation is rarely used because Full Compensation provides
superior registration and compensation, but is still included as an option.
The position, rotation and size of the graphics is Using Registration Marks to modify position,
unknown.
rotation and scale of the cut-out.
Full Compensation
When selected, iPC adjusts the position of each point on every curve individually according the
positions of the three Registration Marks closest to those points.
This feature compensates for all types of distortion, including: offset, scale, rotation, skew and
compound distortion. Full Compensation offers the highest level of compensation available and
provides the closest possible match of cut path to printed graphic.
79
6
6
iPC
Position and shape of graphics is unknown
Using Registration Marks to re-calculate the
shape of the graphics.
6.4.4 About Compensation Types
One Registration Type is selected for each Job (Selected Job->Production Setup->Registration).
Jobs printed with large amounts of bleed or jobs that must maintain an exact overall size, or
contain cuts that must maintain an exact relative size may require using Placement, Register Curve,
Register Layer.
Just a few marks around the outer edge of each path or group of paths provide sufficient information
for these Registration Types.
Jobs that require precise Cut to Print Registration, or precise outer border width should be
produced with Full Compensation.
Unstable materials such as flexible or applied graphics also most often require Full Compensation
for proper Registration.
Jobs produced with traditional printing methods, like screen printing, contains the greatest amount
of distortion.
Digitally printed jobs generally contain less distortion, but accuracy varies greatly from printer to
printer. Producing digitally printed jobs with tight tolerances still requires compensation, especially
if the job is printed on a flexible substrate.
6.5 File Preparation for iPC
6.5.1 File Types
iPC Input Files
The following file types are available for iPC import:
80
iPC
• iPC files: .cut, .script, .nest.
• Curve files: .acm, .ard, .mfg, .dxf, .ai, .pdf, .cf2, .ds2.
.script
Output from the i-script work flow.
Contains cut data separated from a graphics file.
For more information, go here.
.nest
This file type contains a saved Nested Layout.
Adobe Illustrator® is widely used for file preparation, but any vector-based design or drafting software
capable of outputting one or more of the compatible file types may be used.
iPC Output Files
.cut
A Job saved as a .cut file contains all settings made to the file.
Thus, no Import Presets are active when importing such files.
Note: Often, i-script files use the extension .cut instead of .script.
6.5.2 Defining Cut Paths
Every job imported into iPC requires cut paths, which are vector curves made of line segments, arcs,
Bezier points, etc. These paths are normally created or defined in your Design Software.
The cut quality of your finished jobs is the direct result of the quality of the cut paths you create.
iPC has some basic tools for optimizing cut path quality and improving processing speed, but poorly
drawn paths will produce poor cutting results.
The best cut paths are smooth curves that wrap perfectly around the simplest and most intricate
details.
Poor cut paths consist of curves that wander in and out of registration, or rough curves made from
an excessive number of points. Vectorization of raster graphics often generates poor curves that
must be refined manually before cutting. To ensure proper registration between printed graphic and
cut, each cut path and registration mark must be perfectly aligned to the associated graphic and
registration mark in the print file.
Jobs generated from Structural Design Systems like ArtiosCAD will be optimized for best cutting
quality and no additional optimization is necessary.
Normally the cut and print data are created at the same time and separated into two files before the
job is produced. This file separation can be done manually before printing or, if the job is going to be
digitally printed, the i-script workflow enables compatible RIP softwares to automatically separate
the files before outputting to the printing device.
81
6
6
iPC
6.6 Import Presets
6.6.1 Using Import Presets
Basic function
We use Import Presets to automate the process of converting the geometry in the Input File into
ready to cut curves in iPC Layers.
Import Preset Options
In addition to the basic mapping function, Import Presets can include also Cutting Key,
Optimization and a Description.
Using this combination will automate the whole job of converting an Input File to a Job ready for
execution.
82
iPC
6.6.2 Import Preset and Cutting Key
Import Preset Function
This figure shows the basic operation of Import Preset.
The iPC Layers created by this process must be modified with tool settings.
Using Cutting Key, sample 1
In this case, the Input file content is organized into Layers.
Layer names in the Input file are compared to Layer names in the Import Preset.
The corresponding Layer Type is used to select the proper Cutting Key.
If properly prepared, the iPC Layers created by this process are complete, with Tool selection and
tool settings in place.
83
6
6
iPC
Using Cutting Key, sample 2
In this case, the Input file content is organized using Tool numbers, used for file format ACM.
Tool numbers in the Input file are compared to Tool numbers in the mapping part of the Import
Preset.
The corresponding Layer Type is used to select the proper Cutting Key.
If properly prepared, the iPC Layers created by this process are complete, with Tool selection and
tool settings in place.
6.6.3 View Import Presets
Main Menu->File->Add Job->View Preset
Main Menu->Advanced->Manage Presets->Import Presets->View
Preview Toolbar->View Preset
Use this function to explore the content of
selected Import Preset.
For information about the different parameters,
see Create...
84
iPC
6.6.4 Select Import Preset
Main Menu->File->Open->Import Preset
Preview Toolbar->Job Preset
The selected Import Preset is used when reading the selected Input File.
6.6.5 Manage Import Presets
Main Menu->Advanced->Manage Presets->Import Presets
New...
Create a new Import Preset.
For more information, go here.
View/Edit
View/Edit selected Import Preset.
View button is available for all Esko Import
Presets.
Edit button is available for all Self-defined
Import Presets.
Esko Import Presets are not available for
editing.
Copy...
Create a new Import Preset based upon an
existing one.
Delete
Delete selected Import Preset.
Note: You are not allowed to delete any Esko
Import Presets.
Create new Import Preset
Main Menu->Advanced->Manage Presets->Import Presets->New...
85
6
6
iPC
Go through each Category to enter relevant information:
General
Preset Name
Enter the name of the new Import Preset.
Description
Enter a description.
The description is used to recognize the Import Preset for later use.
Mapping
File Type
This is a list of supported File Types.
Select the File Type to use and select Mapping Preset:
Mapping Preset
Open the drop down list to see all alternatives available.
Initially, the factory default mapping is used for each file format.
If you have created your own Import Preset Mapping, it will be available from this menu.
For more information, go here.
86
iPC
View
View the selected Import Preset Mapping.
Cutting Key
Use Cutting Key
Enable and select a Cutting Key to combine Import Preset Mappings and Cutting Keys.
Using this combination correct will automate the entire process of reading an Input File and convert
it to a proper Layer setting.
The link between Import Mappings and Cutting Keys is Layer Types.
The Import Mapping will result in a number of Layers with certain Layer Types.
Selected Cutting Key also includes Layers with defined Layer Types.
These two sets of Layers will be matched based on Layer Types.
Keep Original Layer Colors
If relevant, the Layer Colors from the Input File are kept.
Create Unmatched Layers
When this function is selected:
If the Cutting Key include Layers that is not populated from the input file / selected mapping, these
Layers are created as empty layers. Can be useful if geometry has to be moved between Layers
after import.
When this function is disabled:
Such data is ignored.
87
6
6
iPC
Optimize Curves
Add Optimize Curves functions. For details, go here.
Please note that for Import Presets there are one more Optimizing Type available, called "No
Optimization".
This option should be selected when the geometry is already optimized for cutting in the source
application, typically CAD systems like ArtiosCAD.
Mapping Import Presets
Main Menu->Advanced->Manage Presets->Mapping Presets...
+
From the list of supported File Formats, select actual format and press the + sign in front of the
requested File Format.
The view is expanded to show all defined Mapping Presets for the selected format.
New...
Create a new Mapping Preset.
From the list of supported file formats, select actual format and press New...
For more information, go here.
View/Edit...
88
iPC
The Default Mapping Preset is available for viewing only.
To modify a default Mapping Preset, make a copy of it, edit and save it using a new name.
User Defined Mapping Presets are available for editing.
For more information, go here.
Copy...
Create a copy of an existing Mapping Preset.
From the list of supported File Formats, select actual format and press Copy....
For more information, go here.
Delete
Delete the selected Mapping Preset.
Create a new Mapping Preset
Main Menu->Advanced->Manage Presets->Mapping Presets->New...
Create a new Mapping Preset
From the list of supported File Formats, select actual format and press New...
The new Mapping Preset will be added to the already existing Mapping Presets for the actual
format.
89
6
6
iPC
Edit Mapping Preset
Mapping Preset is basically a table of rules for how to convert the Input File into iPC Layers.
There are different rules for different formats.
Preset Name
Enter a name for the new Mapping Preset.
New
Add a new line to the table.
Duplicate
Create a duplicate of selected line in the table in order to make a similar entry in the mapping table.
Move Up
Move selected line one step up.
Move Down
Move selected line one step down.
Remove
Remove selected line.
Mapping Preset for different formats
90
iPC
ACM format Mapping Preset
PDF format Mapping Preset (color based)
Ignore text
Text in the input file is omitted
Import trim box
Specify if a trim box should be included.
Trim box = bounding rectangle.
i-cut Layer name
i-cut Layer name for trim box.
Trim box Layer type
Layer Type for trim box.
General
Input file parameters will differ, depending upon the different file formats.
i-cut Layer Name
Layer Name to use in iPC.
i-cut Layer Type
Layer Type to use in iPC.
6.7 Cutting Keys
Main Menu->Advanced->Cutting Keys
A specific setup of Layers can be saved for later re-use.
Such a data set is called a Cutting Key.
Each Cutting Key is identified by
• Material
• Material Thickness
• Details description
• Tool description
Please note that it is up to the user to decide which of these parameters to use and how. In particular,
the Details parameters are designed for "free purpose".
Thus a list of Cutting Keys will look like this:
91
6
6
iPC
As seen from the illustration, a Cutting Key contains more fields than the selection fields.
The Layers parameters contained in a Cutting Key are not visible until the Cutting Key is applied
to a Job
Use Cutting Keys to ensure uniform processing and repeatable quality of the products produced.
Using the features provided, you maintain a library of Cutting Keys for the substrates you most
often produce.
iPC includes a standard library of Cutting Keys for common materials that may be edited and
customized.
In addition, you can download new libraries from your iPC dealer.
6.7.1 Select Cutting Keys
Selected Job->Layers->Cutting Key
Click none to invoke Cutting Key selection
dialog.
The Cutting Keys listed above the horisontal
line are the Favorite Cutting Keys.
See below for more details.
Select Cutting Key by Attributes
If the actual Cutting Key is not available
among the Favorites, you can select by
Attributes.
92
iPC
Select Cutting Key by Attributes
Specify the different selection criterias in order to decide correct Cutting Key:
Material
From the drop down list, select the material you
are about to process.
Note: If this list is empty, you have to import a
set of Cutting Keys in order to continue.
Import Cutting Keys
Thickness
From the drop down list, select material
thickness.
Details
From the drop down list, select the description
that fits your job.
Tool
From the drop down list, select tooling.
Keep Original Layer Colors
When this function is selected:
Layer colors used in the Input file are kept.
Create Unmatched Layers
When this function is selected:
If the Cutting Key include Layers that is
not populated from the input file / selected
mapping, these Layers are created as empty
layers. Can be useful if geometry has to be
moved between Layers after import.
When this function is disabled:
Such data is ignored.
If the Layer and Production Setup is as wanted, you are now ready to execute the job.
If your preferred configuration is not available as a Cutting Key:
• Manually edit current Layer settings to suit your need.
• Save it as a new Cutting Key:
93
6
6
iPC
Selected Job->Layers->Cutting Key->Save Cutting Key
Main Menu->Advanced->Cutting Keys->Save as Cutting Key....
6.7.2 Favorite Cutting Keys
Select Favorite Cutting Key
The Cutting Keys listed above the horisontal
line are the Favorite Cutting Keys.
From the list, select the preferred Favorite
Cutting Key.
Select this Cutting Key
Press button to accept this Cutting Key.
Cancel this selection
94
iPC
Add to Favorite Cutting Keys
Select the Cutting Key as described above.
Press the Cutting Key again to invoke the
dialog:
From this dialog, you can:
Add to Favorites
The selected Cutting Key will be added to list
of Favorites.
Save Cutting Key
The selected Cutting Key will be saved.
Remove from Favorite Cutting Keys
Main Menu->Advanced->Cutting Key->Manage
1. Select the Cutting Key you want to remove
from list.
2. Select Edit to enter the Edit Cutting Key
dialog.
95
6
6
iPC
In the dialog, disable Show as favorite.
6.7.3 Create new Cutting Key
A new Cutting Key is created based upon Selected Job.
Thus, to create a new Cutting Key, follow these steps:
1. Open the actual Job.
2. Complete Edit Layers settings to suit your need.
3. Save the setting as a new Cutting Key:
Selected Job->Layers->Cutting Key->Save Cutting Key
Main Menu->Advanced->Cutting Keys->Save as Cutting Key....
96
iPC
Material
Show Tool Image
From the drop down list, select material to use.
Select this option if you want to illustrate this
Cutting Key alternative using an image.
If actual material is not available:
1. Click New Material.
2. Enter the name of the new material.
3. Click OK.
Browse for the image file.
Thickness
Show Cutting Key Text
From the drop down list, select material to use.
Select this option if you want to describe in
more detail the content or how to use this
Cutting Key.
If actual thickness is not available, click New
Thickness and enter wanted thickness.
Note: To avoid creating Cutting Keys for each
material thickness, use a more general name.
Enter wanted text in the edit box.
Details
Save
From the drop down list, select the details
description that suits your job.
Click Save to create the new Cutting Key.
If not found, click New Details and enter
wanted details description.
All Layer parameters are saved as part of this
Cutting Key.
Tool
Enter a description of the actual tool
configuration
6.7.4 Update Cutting Key
To modifiy an existing Cutting Key, follow these steps:
1.
2.
3.
4.
5.
6.
Open a job.
Select the Cutting Key to use.
Modify Layers to suit your need.
Apply the modifications (Selected Job->Layers->Apply)
Select the Cutting Key again.
Update the Cutting Key with the modified parameters:
Selected Job->Layers->Cutting Key->Save Cutting Key...
97
6
6
iPC
Main Menu->Advanced->Cutting Keys->Save Cutting Key...
6.7.5 Cutting Key Manager
Main Menu->Advanced->Cutting Keys->Manage...
A list of all Cutting Keys available is displayed:
Edit
1. Select one Cutting Key by highlighting the actual line in the table.
2. Click the Edit button.
3. In the Edit Cutting Key dialog, update relevant information:
Material
Update material information.
Thickness
Update thickness information.
Detail
98
iPC
Update details description.
Tool
Update tool information.
Show Tool Image
Update if you want to illustrate this Cutting Key using an image.
Browse for the image file.
Show Cutting Key Text
Update if you want to describe this Cutting Key using text.
Enter wanted text in the edit box.
Note: To edit the Layer Parameters, go to Update Cutting Key.
Delete
1. Select one Cutting Key by highlighting the actual line in the table.
2. Click the Delete button.
Export
Using a common set of Cutting Keys inside a company or between co-operating companies will
standardize the production process and secure the quality of the products produced.
Use the Export function to distribute Cutting Keys used.
1. Select one or more Cutting Keys by highlighting the actual line(s) in the table.
2. Click the Export button.
3. You are asked for a destination folder and file name.
Import
For more information, see Import Cutting Keys.
6.7.6 Import Cutting Keys
Main Menu->Advanced->Cutting Keys->Manage...
Use this function to:
• Include Cutting Keys received from co-operating sites.
• Import/include Cutting Keys provided by the supplier.
By default, Cutting Keys are stored in this folder:
C:\Users\UserName\My Documents\i-cut Production Console\CuttingKeys
Backup Cutting Keys files are stored in this folder:
99
6
6
iPC
C:\Users\UserName\My Documents\i-cut Production Console\CuttingKeyBackup
Select Import
Replace Library
Current set of Cutting Keys is completely
replaced by the imported keys.
Update Library
Existing Cutting Keys are updated.
New Cutting Keys are added.
Expand Library
Add only new Cutting Keys.
Existing Cutting Keys are kept unchanged.
Merge Library
All imported Cutting Keys are added to current
set of keys.
In case of conflicts, the imported Cutting Key
name is modified.
Enter Yes if ok
100
iPC
The list of available Cutting Keys is updated.
6.7.7 Global Cutting Keys
Main Menu->Advanced->Cutting Keys->Global Cutting Keys...
Cutting keys are key elements in iPC.
Use Global Cutting Keys to standardize the workflow towards the Cutting Table.
Using the same Cutting Keys within a work group for instance, will ensure a common solution to
common tasks.
Use Global Cutting Keys
Enable use of Global Cutting Keys.
Path
Browse for the global destination folder.
101
6
6
iPC
Copy Global Cutting Keys to Local
Global Cutting Keys will be copied to your local destination.
Before copy, your current local Cutting Keys will be backed up.
Copy Local Cutting Keys to Global
Local Cutting Keys will be copied to your global destination.
Before copy, the current Global Cutting Keys will be backed up.
6.7.8 i-script Link
Main Menu->Advanced->Cutting Keys->i-script Link...
Some RIP and layout applications allow you to include material names in the i-script files they
generate for iPC.
When you open a file containing a material name in iPC, you are prompted to associate (link) that
name to a specific Cutting Key.
Once the material name is associated, each time a file containing that material name is opened, the
associated Cutting Key will be loaded automatically.
The i-script Link feature allows you to edit or remove these associations using the i-script Link
dialog.
Current associations appear in the Cutting Key name list.
To edit or remove an association, select it, then click the Edit or Remove button.
Selecting Edit allows you to choose a Cutting Key using the standard Material/Thickness/Details/
Tool menus.
102
iPC
6.8 Configure Tools
Main Menu->Advanced->Configure Tools
Use this function to maintain your Tool Settings.
The Tool Settings provided in this dialog will be used for the initial setting when tools are selected
for the different Layers.
Initial settings are twofold:
1. Is the setting relevant for the tool
2. If yes, what should the default value be
Please note that these settings are carefully defined by the supplier for each tool, and should be
changed by qualified personell only.
When used in a Layer, the Tool Settings can be modified to suit that particular job.
A modification of Tool Settings within a Layer will not modify the general Tool Settings maintained
from this dialog.
The type and number of parameters in this dialog will change depending upon the selected tool.
We do not show the dialogs for each tools, but a list of parameters covering all tools is provided:
Name
From the drop-down list, select the Tool you want to edit.
Note: In the drop-down list, all possible tools are shown.
Normally, at a customer site, just a sub-set is available.
Type
From the drop down list, select the Tool Type used for this Tool.
For some Tools, correct Tool Type is required when using Cutting Keys.
Velocity
Specify the Execution Speed for this Tool.
103
6
6
iPC
Acceleration
Specify the Acceleration to be used as a % - value of maximum acceleration available.
Depth, Flute Dependant
If enabled, you can specify Depth Across Flute and Depth Along Flute independently.
Knife Overcut
Add an offset to the Start and End point of a line.
Use this function to achieve correct cut in corners.
Both positive and negative values are allowed.
Depth Referenced from Top
If enabled, depth is referenced from Top of Material.
If disabled, depth is referenced from Top of Cutting Underlay.
Depth Along
Specify cutting/creasing depth Along Flute direction.
Can be specified as % of Material Thickness or mm / inch.
Depth Across
Specify cutting/creasing depth Across Flute direction.
Can be specified as % of Material Thickness or mm / inch.
Reverse Operation
Specify if this layer should be executed on the reverse side of the sheet.
Tool Up Angle
If a direction change is above this angle, the tool will be lifted in the corner.
Stop at Tool Select
Execution will stop when this tool is selected; waiting for operator intervention.
In the Edit Field, add the text to be displayed when execution stops.
If the Edit Field is emptly, a default text is displayed.
6.9 Materials and Boards
Main Menu->Advanced->Materials and Boards...
104
iPC
In Table View, it is a prerequisite for correct display of job relative to the actual board, that the material
and board information is correctly specified.
Use the shown dialog to select and maintain materials and boards available.
Notes:
1. For some functions, as Nested Layout, correct material information is mandatory.
2. This function is not fully implemented yet.
Materials
List of defined materials.
• Materials do not have size.
Material Name
Name of selected material.
Boards
List of defined boards.
• Boards have size.
• One material can have several boards.
Board Name
Name of selected board.
Length
Length of selected board.
Roll feed
Specify if this is a roll of material.
Width
Width of selected board.
Thickness
Thickness of selected board
Structural direction
Select between:
• None
• Along Length
• Along Width
Add new material or board.
Remove selected material or board
Duplicate
Duplicate selected material.
105
6
7
iPC
7. Get Started
Instructions about software installation is available in a separate chapter - Install software.
Once installation is completed, iPC may be opened for the first time.
Launch the program using the Desktop Icon or Windows Start menu.
7.1 Start Up Sequence
If the PC is connected to a Cutting Table, follow this start-up sequence:
1. Ensure the Cutting Table is free from obstructions and ready to run.
2. Power up the Cutting Table according to the User Manual for the table.
3.
From Desktop, double-click the iPC icon.
4. On the Cutting Table, complete the start-up sequence as described in the User Manual.
5. The iPC User Interface will now appear on the PC screen and you are ready to start.
7.2 Shut Down Sequence
Follow these steps to properly shut down your system:
1. Shut down the Cutting Table according to description in the User Manual.
2. Close iPC using Main Menu->File->Exit.
106
iPC
8. Work Flow
There are three different ways to get ready for production:
1. Open an already prepared and saved cut file-> produce
2. Create a job using Esko default Import Preset.
• Apply a Cutting Key or manually apply Layer information.
• Optimize if necessary and produce.
3. Create a job with a customized Import Preset-> produce
The basic workflow is illustrated in this figure:
In the following chapters, each step is described.
8.1 File Import
8.1.1 My Jobs List
Import Files to My Jobs List
Main Menu->File->Add Job
My Jobs Toolbar->Add Job
My Jobs Bottom Toolbar->Add Job
107
8
8
iPC
Import Preset
Select Import Preset to use when importing selected Input File.
The different Import Preset selections available in the File Open dialog specifies different rules for
how to transfer information from the Input File to the iPC Job.
The following Import Presets are included from factory:
Esko Default
Layer based; layers in the Input File are converted to Layer Types.
Specify default Import Preset
You can specify which Import Preset should be the default selection.
For more information, go here.
Create your own Import Preset
You can create your own Import Preset as well as copy and modify the default setup.
For more information, see Manage Import Presets.
View Import Preset
This is a link to the Edit Import Preset dialog.
My Jobs List Options
Several options are available to the files in My Jobs List:
• Different List Views
108
iPC
• Add or remove files from the list
• Sort by different parameters
• Different Preview alternatives
• Select Import Preset
• Create Job
For more information, see My Jobs List.
8.1.2 Create Job
In My Jobs List, double-click a file.
My Jobs Toolbar->Create Job.
A new Job is created based upon currently selected file in My Jobs List.
My Jobs Bottom Toolbar->Create Job.
For more information, go here
8.2 Selected Job
Job Bar->Select Job
The Selected Job is highlighted on the Job Bar:
109
8
8
iPC
8.2.1 Selected Job View
A range of view possibilities are available to Selected Job:
• Define a Zoom Area
• Show Curve Points
• Zoom In
• Show Tool Path
• Zoom Out
• Show Flute Direction
• Make Job fill the window
• Show Reference Point
• Make the Cutting Table fill the window
• Show Cutting Table Rulers
• Show Rulers
• Show Vacuum Zones
• Show Curve Direction
• Show Parking Position
8.2.2 Selected Job Edit
A range of edit possibilities are available to Selected Job:
• Job Modifications - edit the entire Job.
• Curve Modifications - edit single curves.
• Curve Point Modifications - edit single points.
110
iPC
8.3 Prepare for Production
Prepare for Production consist of two main tasks:
• Ensure the Layer settings are proper.
• Ensure the Production Setup is proper.
8.3.1 Layer settings, manual
Not using Cutting Keys
Invoke the Apply Cutting Key dialog.
Disable Use Cutting Keys.
Edit Layers
For each Layer, specify the Tool and Tool Parameters to use.
Note: Layer Type is not required when running without using Cutting Keys
For more information, see Selected Job, Layers.
111
8
8
iPC
8.3.2 Layer settings using Cutting Key
Select Cutting Keys
Click none to invoke Cutting Key selection
dialog.
The Cutting Keys listed above the horisontal
line are the Favorite Cutting Keys.
Select Cutting Key by Attributes
If the actual Cutting Key is not available
among the Favorites, you can select by
Attributes.
Modify Layers
You can modify Layer settings.
For more information, see Selected Job, Layers.
8.3.3 Production Setup
112
iPC
Number of Copies
Selected Job->Production Setup->Copies and Quality
From this dialog, set:
• Copies - specify number of copies to produce. More information.
• Quality - select wanted performance. More information.
Position
Selected Job->Production Setup->Position
From this dialog, set:
• Reference Point - select what Reference Point to use.
• Move Job to Reference Point - regardless the reference point used in the actual job, place the
job in selected Reference Point.
• Offset - If there is an offset from selected Reference Point to the job, add values for X and Y.
• Update Automatically - The Job Position is updated after each copy.
For more information, go here.
Step and Repeat
Selected Job->Production Setup->Step and Repeat
From this dialog, specify the number of copies along X and Y to be laid out on one Table.
Specify Step or Gap values.
For more information, go here.
Registration
Selected Job->Production Setup->Registration
113
8
8
iPC
From this dialog, specify:
• Registration Type - select to use Registration Marks or Edge Detection.
Use Registration Marks
• Compensation Type - select Compensation Type.
• Search Area - select the size of the area where the camera will search for Registration Marks.
• Ask Confirmation for First Mark - on the first Registration Marks in a job, always wait for
confirmation.
• Adaptive Registration - Select if registration optimization is wanted; high Speed or high
Accuracy.
Use Edge Recognition
• Sheet Position - specify the distance from Main Reference Point to the surrounding rectangle
for the job.
• Check Edge Distance - specify the measuring distance to be used.
• Check Direction - select which direction to measure.
For more information, go here.
Material Handling
Selected Job->Production Setup->Material Handling
From this dialog, specify functions for Conveyor Feed operations:
• Table Preset - Select the Table Preset function to use.
• Feed to front of table - the sheet is moved to the front of the Cutting Table. (Table Preset
dependant)
• Sheet Feeding Length - specify the lenght to feed the material. (Table Preset dependant)
• Pre-load Sheets - specify how many sheets to pre-load before execution start. (Table Preset
dependant)
• Skip table if Registration Mark is not found - specify to avoid unwanted stops. (Table Preset
dependant)
• Skip Table After - adding a delay allows the operator to fix the problem. (Table Preset dependant)
• Material Mesurement - decide how to carry out the measuring sequence.
For more information, go here.
114
iPC
Tool Head Parking
Selected Job->Production Setup->Tool Head Parking
Specify a park position after Job is finished.
For more information, go here.
8.4 Save Job
At any stage in the Prepare for Production process, you can save the Selected Job for later use:
Main Menu->File->Save Job
Main Menu->File->Save Job As...
Selected Job will be saved using iPC .cut file format.
It is recommended to save the job when any modifications to Layers, Production Setup or geometry
is changed within iPC.
All relevant information is kept in the .cut format, which is not the case for any external format.
To open a saved Job File, use the standard File Open functions.
8.5 Running a Job
8.5.1 Execute a Job
To start a Selected Job, press Start on Operators Panel.
115
8
8
iPC
Execution will start if:
- The Cutting Table is up and running, ready for execution
See Cutting Table User Manual.
- The Job is properly prepared
See Ready for Execution.
8.5.2 No Registration
These are the specific steps to follow to execute a Job not using Registration Marks:
1. The Job contains no Regmark Layer.
2. Place the Sheet of Material onto the Cutting Table.
3. If you use a Fixed Reference Point, position the Sheet of Material correct relative to the
reference point. If available, we recommend using Table Rulers for this purpose.
4. If User Defined Reference Point is used, ensure the reference point is correctly positioned on
the sheet.
For more information, see Cutting Table User Manual.
8.5.3 Reading Registration Marks
These are the specific steps to follow to execute a Job using Registration Marks:
1. The Job contains a Regmark Layer with Tool Type = Camera.
2. Registration using Registration Marks is enabled.
3. A proper Compensation Type is selected.
116
iPC
Confirm Registration Mark
Select between:
• Automatic camera detection
• Manual registration
It is important that the Registration Mark
found on the material is the same as the one
highlighted in Job View
Jog to the correct mark, by keyboard arrows, or
by Operator panel.
Confirm when correct mark is found.
Confirm that this is correct Registration Mark
The same confirmation is available as:
• Enter from PC keyboard.
• Start on Operator Panel.
Move between Registration Marks
Move to the last Registration Mark
Move to the first Registration Mark
8.5.4 Registration using Laser Pointer
These are the specific steps to follow to execute a Job using Registration Marks and Laser Pointer:
1. The Job contains a Regmark Layer with Tool Type = Laser Pointer.
2. Registration using Registration Marks is enabled.
3. A proper Compensation Type is selected.
For more information, see Cutting Table User Manual.
117
8
8
iPC
8.5.5 Edge Recognition
These are the specific steps to follow to execute a Job using Edge Recognition:
1. The Job has a defined distance between Sheet Edge and geomety (surrounding rectangle).
The distance is entered as Production Setup->Position->Offset.
2. Registration using Edge Recognition is enabled.
For more information, see Cutting Table User Manual.
118
iPC
9. Optimal Production Workflow
Standardize each step to achieve the Optimal
Production Workflow:
1 Import Input File
Combine Import Preset and Cutting Key
2 Create Job
Use Cutting Key to establish correct Layer
configuration.
3 Modify Production Setup.
The Job is ready for execution.
4 Ensure material is in place
Sheets of Material - Vacuum hold down
Roll Feed - Enter material
Sheet Feeder - Load material
5 Press Start to execute
119
9
10
iPC
10. Edit Job, Advanced
All drawing and editing of curves is normally completed in the CAD system / Job Preparation software
used before the file is imported to iPC.
Although iPC is not intended to be a design program, it does provide some basic tools for making
minor corrections to imported files.
The tools are grouped into three different levels:
• Job Modifications
• Curve Modifications
• Curve Point Modifications
10.1 Job Modifications
The Job Modification functions will modify the Selected Job as one entity.
10.1.1 Rotate 90 deg. CW
Main Menu->Job->Rotate 90 deg CW
Selected Job is rotated.
10.1.2 Rotate 90 deg. CCW
Main Menu->Job->Rotate 90 deg CCW
Selected Job is rotated.
10.1.3 Mirror Horizontal
Main Menu->Job->Mirror Horizontal
120
iPC
Selected Job is mirrored.
10.1.4 Mirror Vertical
Main Menu->Job->Mirror Vertical
Selected Job is mirrored.
10.1.5 Remove Double Lines and Sequence
Main Menu->Job->Remove Double Lines and Sequence
To explain this function, we use an example:
We have a job that consist of a set of squares,
programmed to be completed one by one.
Use the Remove Double Lines and Sequence
function to:
• Improve cutting quality by removing double
lines.
• Improve cutting quality by reducing number
of corner passings.
• Increase overall performance by reducing tool
operations and corner passings.
• Increase overall performance by reducing tool
up movements.
Line segments along a straight line will be
executed one by one.
All X-axis lines will be executed first.
121
10
10
iPC
Subsequently, the Y-axis lines will be executed.
10.1.6 Remove Double Lines and Join Across Gaps
Main Menu->Job->Remove Double Lines and Join Across Gaps
To explain this function, we use an example:
We have a job that consist of a set of squares,
designed to be completed one by one.
Between each square, there is a gap.
Lines can be extended across gaps as this area
is waste.
Use the Remove Double Lines and Join
Across Gaps function to:
• Improve cutting quality by removing double
lines.
• Improve cutting quality by reducing number
of corner passings.
• Increase overall performance by reducing tool
operations and corner passings.
• Increase overall performance by reducing tool
up movements.
Line segments along a straight line will be
combined into one, continous line.
All X-axis lines will be executed first.
122
iPC
Subsequently, the Y-axis lines will be executed.
Note: The maximum gap size for this function to work is 1 mm / 0.04 in.
10.1.7 Optimize for Production
Main Menu->Job->Optimize for Production
In the Optimize for Production dialog, select Optimizing Type:
• Standard
• Sample Making
Note: Optimizing Type = No Optimization selection is available only as part of Import Preset.
No Optimization
Use "No Optimizing" when curve sequences have been optimized before importing to iPC.
Any manual operations on the curves after import will therefore issue a warning. If you ignore this
warning, the optimized curve sequencing might be lost.
Move Job to Reference Point
123
10
10
iPC
The lower left corner of the job will be placed in currently selected Reference Point.
Any offset from (0,0) used in the Input File is ignored.
Use this function to place the Job correctly on your material.
Optimize, Standard
Standard Optimization is mainly used to optimize files used in a graphical workflow.
Connect Open Curves
Curve segments that are close to each other are connected.
Select Connect Open Curves to:
• Increase performance.
124
iPC
• Improve cutting quality.
Specify d = Maximum Distance where curve connection is allowed.
Reject Small Curves
Small, freestanding curve elements are omitted.
Select Reject Small Curves to:
• Remove unwanted curves and stray points.
• Increase performance.
• Improve cutting quality.
Specify d = Maximum Size of a curve segment that can be omitted.
Avoid Overcuts
The cut direction will be modified if the angle is above a specified limit.
This to avoid visible knife overcuts.
Set Curve Direction
Specify an overall rule for curve execution direction.
Typical use:
Often, when milling, the left side of the path has a smoother surface compared to the right side.
Use this function to optimize the quality of your product.
Invert Curve Direction for Inside Curves
125
10
10
iPC
Specify an overall rule for curve execution direction.
This is an extension to the Set Curve Direction function, see above.
If the blue part is your product and you want a smooth surface outside and inside, you have to
invert the curver direction for the inner curve.
Move Job to Reference Point
The lower left corner of the job will be placed in currently selected Reference Point.
Any offset from 0,0 used in the Input File is ignored.
Use this function to place the Job correctly on your material.
Optimize, Sample Making
Optimize for Sample Making is normally used to achieve maximum cutting and creasing quality for
Corrugated and Folding Carton designs.
Please note that:
• Most Sample Making operations will be applies on Layer Type Cut and Crease only.
• The relevance of this feature is dependant upon whether any optimization is performed during
output from the CAD / Job Preparation software.
Features available in Optimize for Sample Making are similar to optimizing features in ArtiosCAD
from Esko.
Select parameters in the following Categories:
126
iPC
• General - general optimizing functions.
• Round Slots - functions to avoid tear in narrow slots.
• Overcut & Corners - functions to avoid tear and overcut in corners.
• Over-Crease - functions to improve performance during crease.
General
Crease Cut Back
Increased crease quality; avoid crease line outside wanted position.
d - distance to use when shortening the crease lines.
Cut Across Gaps
127
10
10
iPC
Increased performance.
Connect Open Curves
Curve segments that are close to each other are connected.
Select Connect Open Curves to:
• Increase performance.
• Improve cutting quality.
Specify d = Maximum Distance where curve connection is allowed.
Reject Small Curves
Small, freestanding curve elements are omitted.
Select Reject Small Curves to:
• Remove unwanted curves and stray points.
• Increase performance.
• Improve cutting quality.
Specify d = Maximum Size of a curve segment that can be omitted.
Move Job to Reference Point
The lower left corner of the job will be placed in currently selected Reference Point.
Any offset from 0,0 used in the Input File is ignored.
Use this function to place the Job correctly on your material.
128
iPC
Round Slots
Round Slot Method, Continous Cut
Risk for material tear.
d - Tear Distance. The maximum distance where the Round Slot Method will work.
a - Tear Angle. The maximum angle where the Round Slot Method will work.
Round Slot Method, Reverse Last Line
Risk for material tear is reduced.
Round Slot Method, Cut "Short" Line Last
129
10
10
iPC
Risk for material tear is reduced.
Overcut & Corners
Reverse at T-junctions
Risk for material tear is reduced.
Split Lines connection Corners
130
iPC
Improve cutting quality in corners.
Automatically Round Corners
Improve cutting quality in corners.
r - Radius. Corner radius.
L - Length of adjacent line segments. This function will work on corners where L is above specified
value.
Over-Crease
Maximum Length of Cut to Over-crease
131
10
10
iPC
A crease line will continue on top of a cut line.
Increased performance.
L - Maximum length of line element where this function will work.
Maximum Gap to Over-crease
A crease line will continue across a gap.
Increased performance.
L - Maximum length of gap where this function will work.
10.1.8 Move Job to Reference Point
Main Menu->Job->Move Job to Reference Point
Move Job to Reference Point
132
iPC
The lower left corner of the job will be placed in currently selected Reference Point + Offset, both
defined in Production Setup.
Any offset from 0,0 used in the Input File is ignored.
Use this function to place the Job correctly on your material.
10.1.9 Move Open Curves to Separate Layer
Main Menu->Job->Move Open Curves to Separate Layer
Some functions, as Wash Out using the Milling Tool, requires closed curves in order to operate
properly.
Use this function to separate open curves from closed curves.
10.2 Curve Modifications
Curve Modifications are carried out on Selected Curve(s) in a Selected Job.
10.2.1 Select a Curve
Select one Curve
133
10
10
iPC
Using the Mouse Pointer, select the curve you want to modify.
The Selected Curve is highlighted.
Select Multiple Curves
1) While Ctrl is active, use the Mouse Pointer to select the curves you want to modify.
2) Use the Mouse Pointer to draw a rectangle around wanted curves.
The Selected Curves are highlighted.
10.2.2 Move...
Main Menu->Curves->Move...
Ctrl+M
The indicated direction refers to the selected Table View Orientation.
If standard view is selected, this is the +X direction.
If standard view is selected, this is the +Y direction.
Select between Distance or Position:
134
iPC
Distance
Specify the distance to move the Selected Curve(s).
Position
Specify the new coordinates (X and Y) for the Selected Curve(s).
Center of Curve(s)
The coordinates specified are relative to the center of the Selected Curve(s):
Lower left of Curve(s)
The coordinates specified are relative to the lower left corner of the Selected Curve(s):
Keep Original
The original, Selected curve(s) are kept unchanged. A copy of the Selected curve(s) is made,
ready to be moved:
135
10
10
iPC
10.2.3 Jog Curves
Main Menu->Curves->Jog Curves...
Alt + Left, Alt + Right, Alt + Up, Alt + Down
Use Keyboard Arrows to move the Selected Curve(s):
10.2.4 Scale Curve
Main Menu->Curves->Scale...
Ctrl+T
136
iPC
Scale by Factor or Size:
Scale
Specify a scale factor to use when scaling the Selected Curve(s).
Size
Specify the new, overall size for the Selected Curve(s).
Maintain Aspect Ratio
When checked, the X/Y relationship of the original curves is kept.
Extend from Center of Curve(s)
Scale is carried out relative to the center of the Selected Curve(s):
Extend from Lower Left of Curve(s)
Scale is carried out relative to the lower left corner of the Selected Curve(s):
Keep Original
The original, Selected Curve(s) are kept unchanged.
A copy of the Selected Curve(s) is made, ready to be scaled.
10.2.5 Mirror Curve
Main Menu->Curves->Mirror...
137
10
10
iPC
Ctrl+Shift+M
Mirrors/flips the Selected Curve(s) according to the selected options.
Curves may be mirrored Vertically or Horizontally.
Vertical (up/down)
Specify vertical mirroring.
Horizontal (left/right)
Specify horizontal mirroring.
Center of Selected Curve(s)
Selected mirroring is carried out around the center of the Selected Curve(s):
Center of All Curve(s)
Selected mirroring is carried out around the center of the All Curve(s):
138
iPC
Center of Work Area
Selected mirroring is carried out around the center of actual Work Area:
Keep Original
The original, Selected Curve(s) are kept unchanged.
A copy of the Selected Curve(s) is made, ready to be mirrored.
10.2.6 Rotate Curve
Main Menu->Curves->Rotate...
Ctrl+Shift+R
139
10
10
iPC
Note: Rotataing curves or the entire job will not change the flute/grain direction of the job.
However, if you want to change the flute/grain direction, this can be done from Main Menu->Jobo
>Rotate 90 CW or CCW.
Clockwise/Counter Clockwise
Specify rotation direction.
Center of Selected Curve(s)
Rotation is carried out around center of Selected Curve(s):
Center of All Curve(s)
Rotation is carried out around center of All Curve(s):
140
iPC
Center of Work Area
Rotation is carried out around center of Work Area:
Keep Original
The original, Selected Curve(s) are kept unchanged. A copy of the Selected Curve(s) is made,
ready to be rotated.
10.2.7 Merge Curves
Main Menu->Curves->Merge...
Multiple overlapping curves can be combined into a single continuous curve using the Merge Curves
feature.
This can be useful in creating a single shape from multiple objects such as overlapping letter shapes.
Replace Existing Curves
141
10
10
iPC
The new curve(s) replaces existing curves:
Generate New Layer
The new curve(s) are placed in a new Layer.
Specify the Name of the new Layer.
10.2.8 Invert Curve Direction
Main Menu->Curves->Invert Curve Direction
Ctrl+Shift+I
The execution direction for the Selected Curve(s) is inverted.
This function is useful in combination with other Edit features like Split Curve to optimize cutting
directions.
10.2.9 Lead-in/Lead-out
Main Menu->Curves->Lead-in/Lead-out
142
iPC
10.2.10 Tool Offset
Main Menu->Curves->Tool Offset...
Tool Offset
143
10
10
iPC
Tool Offset can be used to achieve correct size of the final product when milling.
Please note that normally, the compensation for milling bit diameter is done with the Layer
parameters Tool Offset and Tool Diameter.
The main reason for using this Edit function is to keep the Layer Offset values for later use.
Can also be used for e.g. adding a Cut Layer with a certain offset outside a Kiss Cut layer.
Tool Diameter
Specify the diameter of the tool to use. The offset is set to half the diameter.
Where
Specify if the tool should be Outside or Inside the closed curve.
Wash Out. See below.
Wash Out Small Curves
Wash Out is a function to mill the entire area of a closed curve into chips. Useful as small pieces
of waste may block the suction system..
Use this function to wash out all closed curves smaller than the Treshold value.
For more information, see below.
Direction
Specify the execution direction for the tool.
Replace Existing Curve(s)
The new curve(s) replaces existing curve(s):
Generate New Layer
The new curve(s) are placed in a new Layer.
Specify the Name of the new Layer.
Wash Out
Main Menu->Curves->Tool Offset->Where->Wash Out
144
iPC
Wash Out is a function to mill the entire area of a closed curve.
Use this function to wash out the Selected Curve.
10.2.11 Optimize Shape
Main Menu->Curves->Optimize Shape...
Optimizing improves the cutting performance of curves by re-drawing them to a specified tolerance
as lines and arcs.
Curves are automatically optimized when producing, but the Optimize Curves feature is available for
optimization of curves before production occurs, and provides greater control over the optimization
of your curves.
Tolerance
Curves are automatically optimized using the specified Tolerance.
A low value will maintain the quality of the input file.
A high value will increase performance, but the cutting quality might be reduced, depending upon
the material used.
145
10
10
iPC
Break Long Lines
This function divides a (long) line into line segments with specified length.
One example:
You are about to cut a big rectangle in a flexible material, with a high demand for Print to Cut
alignment.
By compensation to the corners of the rectangle only, the result is not optimal, despite a high
number of Registration Marks.
Shorter lines allows for more accurate Print to Cut alignment.
Note: Break Long Lines can be applied for all jobs from Main Menu->Edit->Options->Production.
Make Sharp Corners
Rounded Corners with specified Radius are converted to Sharp Corners.
Make Rounded Corners
Sharp Corners are converted to Rounded Corners with specified Radius.
Replace Existing Curves
The new curve(s) replaces existing curves:
Generate New Layer
The new curve(s) are placed in a new Layer.
Specify the Name of the new Layer.
10.2.12 Remove Curves
Main Menu->Curves->Remove Curves...
Del
Remove Selected Curve.
Confirm to complete:
146
iPC
10.3 Curve Segment Modifications
10.3.1 Select a Curve Segment
Enter Edit Point Mode
Table View Toolbar->Edit Points
Main Menu->Curves->Edit Point
Select Curve Segment
Select Curve Segment using the Mouse Pointer:
Edit Curve Segment Menu
While pointing at the Curve Segment, press the Right Mouse Button.
The Edit Curve Segment Menu appears:
•
•
•
•
•
•
Add Corner
Add Arc
Add Bezier
Split Curve
Close Curve
Add Regmark
10.3.2 Add Corner
Selected Curve Segment->Right Mouse Button Menu->Add Corner
147
10
10
iPC
Add a Corner Point in Current Position.
Current Position - using the Mouse Pointer, point to a position on the Selected Curve.
10.3.3 Add Arc
Selected Curve Segment->Right Mouse Button Menu->Add Arc
Add an Arc Point in Current Position.
Current Position - using the Mouse Pointer, point to a position on the Selected Curve.
10.3.4 Add Bezier
Selected Curve Segment->Right Mouse Button Menu->Add Bezier
Add a Bezier Point in Current Position.
Current Position - using the Mouse Pointer, point to a position on the Selected Curve.
10.3.5 Split Curve
Selected Curve Segment->Right Mouse Button Menu->Split Curve
Selected Curve Point->Right Mouse Button Menu->Split Curve
Remove Curve Segment
Remove the Curve Segment currently pointed at.
148
iPC
Gap
A Gap with length Gap Size is inserted in Current Position.
Current Position - using the Mouse Pointer, point to a position on the Selected Curve.
10.3.6 Close Curve
Selected Curve Segment->Right Mouse Button Menu->Close Curve
Selected Curve Point->Right Mouse Button Menu->Close Curve
The Selected Open Curve is closed.
149
10
10
iPC
10.3.7 Add Regmark
Selected Curve Segment->Right Mouse Button Menu->Add Regmark
Selected Curve Point->Right Mouse Button Menu->Add Regmark
Table View->Right Mouse Button Menu->Add Regmark
A new Registration Mark will be created in the Mouse Pointer position:
Position X and Y
Specify the coordinates for the new Registration Mark.
Entering values here will override the Mouse Pointer position.
150
iPC
Center / Lower Left
Specify if the coordinates are relative to the center or the lower left corner of the Job.
Size
Specify the size of the new Registration Mark.
Layer
Specify the Layer for the new curve.
The Regmark Layer is default.
10.4 Curve Point Modifications
10.4.1 Select a Point
Enter Edit Point Mode
Table View Toolbar->Edit Points
Main Menu->Curves->Edit Point
Select Curve Point
Select Curve Point using theMouse Pointer:
Edit Curve Segment Menu
While pointing at the Curve Point, press the Right Mouse Button.
The Edit Curve Point menu appears:
• Edit Point
151
10
10
iPC
• Remove Point
• Smooth
• Add Regmark
• Use as Start Point
• Add Lead-in/Lead-out
• Split Curve
• Close Curve
10.4.2 Edit Point
Selected Point->Right Mouse Button Menu->Edit Point
Move Selected Point to a new position.
X/Y
Specify the coordinates for the new position.
Type
Specify the corner type:
• Corner
• Arc - the new point is a point on an arc
• Bezier - the new point is a point on a Bezier curve
• True Type
• Bow
• Tangent
10.4.3 Remove Point
Selected Point->Right Mouse Button Menu->Remove Point
152
iPC
The Selected Point is deleted.
10.4.4 Smooth
Selected Point->Right Mouse Button Menu->Smooth
10.4.5 Add Regmark
Selected Curve Segment->Right Mouse Button Menu->Add Regmark
Selected Curve Point->Right Mouse Button Menu->Add Regmark
Table View->Right Mouse Button Menu->Add Regmark
A new Registration Mark will be created in the Mouse Pointer position:
Position X and Y
Specify the coordinates for the new Registration Mark.
Entering values here will override the Mouse Pointer position.
Center / Lower Left
Specify if the coordinates are relative to the center or the lower left corner of the Job.
153
10
10
iPC
Size
Specify the size of the new Registration Mark.
Layer
Specify the Layer for the new curve.
The Regmark Layer is default.
10.4.6 Use as Start Point
Selected Point->Right Mouse Button Menu->Use as Start Point
The Selected Point is used as Start Point:
10.4.7 Add Lead-in/Lead-out
Selected Point->Right Mouse Button Menu->Add Lead-in/Lead-out
154
iPC
10.4.8 Split Curve
Selected Curve Segment->Right Mouse Button Menu->Split Curve
Selected Curve Point->Right Mouse Button Menu->Split Curve
Remove Curve Segment
Remove the Curve Segment currently pointed at.
155
10
10
iPC
Gap
A Gap with length Gap Size is inserted in Current Position.
Current Position - using the Mouse Pointer, point to a position on the Selected Curve.
10.4.9 Close Curve
Selected Curve Segment->Right Mouse Button Menu->Close Curve
Selected Curve Point->Right Mouse Button Menu->Close Curve
The Selected Open Curve is closed.
156
iPC
10.5 Add new Geometry
Table View->Right Mouse Button Menu
The following menu items are available:
• Add Regmark
• Add Square
• Add Circle
• Add Ellipse
• Add Rectangle
10.5.1 Add Regmark
Selected Curve Segment->Right Mouse Button Menu->Add Regmark
Selected Curve Point->Right Mouse Button Menu->Add Regmark
Table View->Right Mouse Button Menu->Add Regmark
157
10
10
iPC
A new Registration Mark will be created in the Mouse Pointer position:
Position X and Y
Specify the coordinates for the new Registration Mark.
Entering values here will override the Mouse Pointer position.
Center / Lower Left
Specify if the coordinates are relative to the center or the lower left corner of the Job.
Size
Specify the size of the new Registration Mark.
Layer
Specify the Layer for the new curve.
The Regmark Layer is default.
10.5.2 Add Square
Table View->Right Mouse Button Menu->Add Square
Add a Square in Mouse Pointer Position.
Position X and Y
Specify the coordinates for the new Square.
Entering values here will override the Mouse Pointer position.
158
iPC
Center/Lower Left
Specify if the coordinates are relative to the Center or the Lower Left Corner of theJob.
Size
Specify the size of the Square.
Layer
Specify the Layer for the new curve.
10.5.3 Add Circle
Table View->Right Mouse Button Menu->Add Circle
Add a Circle in Mouse Pointer Position.
Position X and Y
Specify the coordinates for the new Circle.
Entering values here will override the Mouse Pointer position.
Center / Lower Left
Specify if the coordinates are relative to the center or the lower left corner of the Job.
Size
Specify the size (diameter) of the new Circle.
Layer
Specify the Layer for the new curve.
10.5.4 Add Ellipse
Table View->Right Mouse Button Menu->Add Ellipse
159
10
10
iPC
Add an Ellipse in Mouse Pointer Position.
Position X and Y
Specify the coordinates for the new Ellipse.
Entering values here will override the Mouse Pointer position.
Center / Lower Left
Specify if the coordinates are relative to the center or the lower left corner of the Job.
Size
Specify the size (X/Y) of the new Ellipse.
Layer
Specify the Layer for the new curve.
10.5.5 Add Rectangle
Table View->Right Mouse Button Menu->Add Rectangle
Add a Rectangle in Mouse Pointer Position.
Position X and Y
Specify the coordinates for the new Rectangle.
Entering values here will override the Mouse Pointer position.
Center / Lower Left
Specify if the coordinates are relative to the center or the lower left corner of the Job.
160
iPC
Size
Specify the size (X/Y) of the new Rectangle.
Layer
Specify the Layer for the new curve.
161
10
11
iPC
11. Job Alternatives, Advanced
11.1 Step and Repeat
Selected Job->Production Setup->Step and Repeat
Use Step and Repeat when you want more than one copy of Selected Job:
For more information, go here.
11.2 Add Nested Layout
Main Toolbar->File->Add Nested Layout...
My Jobs Toolbar->Add Nested Layout...
Use Add Nested Layout when you want to merge different designs together and treat these as one
job.
Normally, this function is relevant for non-printed material only.
Note: This function is not fully implemented yet.
A separate Nesting Window appears, where all Nesting functions are maintained:
162
iPC
Available Jobs
This is My Jobs List as you know it from before, with the possibility to Add, Remove and Sort
files in the list.
Used Jobs
This is a list of Files selected for Nesting , and the number of Copies currently specified.
Use the + and - buttons to modify number of copies.
Layout
Configure Layout.
Auto Nest
Not Implemented Yet.
Add to Nest
Add Selected File to Nested Layout.
For more information, go here.
11.2.1 Configure Layout
Nesting Window->Layout
163
11
11
iPC
From this dialog, configure the overall rules for this Nested Layout.
When creating a new Nested Layout, this dialog is the start point.
Board
From the drop down list, select actual Board
This function is not implemented yet.
Trim and Gap
Specify the Trim and Gap values:
Stack in X/Y
Specify if the Nested Layout should start placing jobs along X or Y.
Allow Rotation
Specify if Rotation is allowed.
180 - the only Rotation Angle allowed.
90 - the only Rotation Angle allowed.
Free - You can specify Rotation Angle to use.
Snap
Specify a Snap Distance.
164
iPC
If two jobs are moved closer to each other than the Snap Distance, they will be moved together
to use one common line.
11.2.2 Create Nested Layout
Double-click a file in the Available Jobs List.
Nesting Window->Add To Nest
Start creating a new Nested Layout by adding files to the Layout using the above commands.
When files are loaded and placed as wanted, press OK to save the Nested Layout.
The Nested Layout can be re-opened for later edit.
The new Nested Layout will be added to My Jobs List, ready to be handled in the same way as
any other file.
That means you can add Nested Layouts into new Nested Layouts.
By the above commands, the Copy dialog is invoked.
Layout is available in two ways, by Copies or Step and Repeat:
Copies
Specify Number of Copies.
The copies are distributed according to the rules in Layout Configuration.
165
11
11
iPC
Step and Repeat
Specify how many Copies you want along X and Y.
11.2.3 Edit Nested Layout
Select a Copy for Edit
Use the Mouse Pointer to select a copy for edit.
The Selected Copy is surrounded by a frame.
Edit a Selected Copy
Move
With the Mouse Pointer, point inside the Selected Copy.
Keep left Mouse Button down and move the Selected Copy to wanted position.
Release the button.
Delete
Right-click inside the Selected Copy.
166
iPC
From the menu, select Delete.
Add Copy
Right-click inside the Selected Copy.
From the menu, select Add Copy.
Number of Copies...
Right-click inside the Selected Copy.
From the menu, select Number of Copies....
The Copy dialog is opened.
11.3 Jobs Longer than Table
If your cutting device is equipped with an automated conveying system, you may be able produce
jobs that are larger than your cutting table.
iPC supports production of jobs longer than the table by dividing the job into multiple sections and
producing those sections automatically.
This function is enabled, ready to execute as soon as a job longer than the table is processed.
11.4 Jobs with Bar Codes
Not implemented yet.
11.5 Job including Reverse Operation
Main Menu->Advanced->Configure Tools
167
11
11
iPC
Workflow
Step 1 - the sheet is aligned towards the right
ruler.
Step 2 - the sheet is aligned towards the left
ruler.
Reverse Operations are completed.
The rest of the job is completed.
A typical use of Reverse Operation is when you want to add a crease line on the front side of a
material that you normally prepare from the rear side.
This function requires that the table is equipped with left and right rulers.
Note: Reverse Operation is not available on machines with conveyor belt.
11.6 Stop at Tool Select
Main Menu->Advanced->Configure Tools
Use this function to stop execution before the actual Layer is executed.
One example of use is if you want to change a milling bit in the middle of a job.
For more information, go here.
11.7 Milling functions
Selected Job->Layers->Edit Layer
Main Menu->Layer->Edit Layer
168
iPC
General
All settings are maintained from Edit Layer dialog.
Layer Type
Layer type Cut is used for milling.
Tool
Select the Milling Tool available.
Stop at Tool Select
Stop at Tool Select will make the machine
stop before the execution of the actual Layer is
started.
The text entered in the Stop at Tool Select
field will be displayed.
Use this function in jobs with multiple milling
operations requiring different milling bits.
Use the text field to describe the new milling bit
to be entered.
Spindle RPM
Specify RPM.
Tool Offset
Specify if the router bit should be inside or outside the closed curve, or in the center of the line.
For closed curves, we also have the Wash Out function available.
Direction
Specify the milling direction around a closed curve.
This setting has huge impact on the finished product quality.
Note: This function will override the original direction of the curve.
Tool diameter
Specify the router bit diameter.
All closed curves will be offset half the value, outside or inside, dependant upon Tool Offset
selection.
Wash Out Small Curves
Use this function to wash out all closed curves smaller than the Treshold value.
Multi-pass depth
Specify the maximum depth to be milled in each pass.
Recommendation: This value should be limited to 1 - 1.5 times the Router bit diameter.
169
11
11
iPC
Measure / Material Thickness
Specify if the material thickness should be taken from the material thickness measurement
performed at the beginning of the job.
If not, specify the thickness.
Material thickness is used when calculating the depth of each pass.
Web Thickness
When producing a job with multiple passes, specifying a Web Thickness offsets the depths of all
passes so that only a thin amount of material is left for an additional final pass.
The vacuum hold-down strength of all cutting devices have limitations, and small parts may shift
on the cutting surface when they are routed.
The result is an undesired cut on the edge of the part where the router bit made contact during
the shift.
This effect is eliminated or greatly reduced using Web Thickness.
When the router bit has less material to cut on the final pass, there is less chance of the part moving
when the cut is completed because there is less force applied to the part by the router bit.
Finishing Pass offset
Spesify the offset to be used for the last finishing pass.
Drill holes
Select this option to drill holes.
Multi pass milling
1. pass
2. pass
3. pass - mill through and clean
the path (Web Thickness).
Multi Pass Milling is required if you want to mill through a material where the thickness is bigger
than 1 - 1.5 times the Router bit diameter.
170
iPC
Finishing Pass Milling
A Finishing Pass is the last pass of a multi-pass
production.
This pass is slightly offset, or contracted, from
the other passes.
The result is a final pass that shaves the entire
edge of the part; removing any evidence of the
multi-pass production and producing a smooth
edge.
iPC will automatically increase the Tool Offset to
compensate for the Finishing Pass and produce
the curves at the intended size.
Wash Out
Use Layer Type: Wash Out
Wash Out is a function to mill the entire area of a
closed curve.
Use this function to wash out the closed curves
in the Layer.
Drill holes
Use Layer Type: Drill
When you specify that a Layer should drill
holes, holes will be drilled in the center of closed
curves.
A typical example is shown at left.
Geometry (circles) will be converted into holes
and drilled.
171
11
12
iPC
12. Direct Commands
Direct Commands Menu
Main Menu->Machine->Direct Commands
Use this menu to select functions for immediate execution on the Cutting Table.
Each menu item is configurable, using the Edit Commands... function:
Edit Commands...
Main Menu->Machine->Direct Commands->Edit Commands......
Menu Text 1
Specify the text that describes Command 1.
This text will be displayed in the Direct Commands Menu, Line 1.
Command 1
Specify the command to be executed when Line 1 (Ctrl+1) is selected in the Direct Commands
Menu.
For a list of available commands, see Appendix.
You can edit the command directly or add a command using the + function.
172
iPC
Menu Text 2-4, Commands 2-4
Description similar to Menu Text 1 and Command 1.
For further information, see Table Preset.
173
12
13
iPC
13. Backup/Restore
After your system has been fully configured, you should back it up using the Backup and Restore
system.
Performing a backup will save all of iPC's essential parameters into a number of files.
If your system stops performing properly or you accidentally alter your configuration, you can easily
restore all settings to their exact state as when the backup was performed. Backups may be
performed either manually or automatically.
Please note:
• iPC backup stores all iPC configuration settings to a number of files on the file system.
• Backup of the file system is the responsibility of the customer.
For information about how to configure an automatic backup sequence, see Backup, schedule.
13.1 Backup System Parameters
Manual Backup of System Parameters
Main Menu->Advanced->Backup Configuration...
Each time Manual Backup is invoked, you enter a File Save dialog.
Specify a proper file name and click Save.
Use this function to backup your system both before and after performing upgrades.
13.2 Restore System Parameters
Restore System Parameters
Main Menu->Advanced->Restore Configuration...
Each time Restore is invoked, you enter a File Open dialog.
Select the file you would like to restore and click Open.
We strongly recommend you always backup your system manually before performing a restore.
174
iPC
13.3 Backup Cutting Key
Main Menu->Advanced->Cutting Keys->Backup...
Use this function to complete a manual backup of the complete set of Cutting Keys.
You are asked for a destination folder and file name.
Scheduled backups will follow the selected sequence, independent from any manual backup.
13.4 Restore Cutting Key
Main Menu->Advanced->Cutting Keys->Restore......
Use this function to restore the complete set of Cutting Keys.
For more information, see Import Cutting Keys.
175
13
14
iPC
14. iPC Configurations
The iPC Configuration setting is a set of options specifying the general behaviour of the system.
After first installation, you should go through each option in order to ensure proper setting.
14.1 Table View Orientation
Main Menu->View->Table View Orientation
Select viewpoint for Table View.
Alternatives:
o
• 0
o
• 90
• 180
o
• 270
o
Viewpoint and Operator Panel position should be co-ordinated, in order to get correct jog direction.
For more information, see Hardware Configuration.
14.2 General
Main Menu->Edit->Options...->General
176
iPC
Machine Type
The Machine Type connected is displayed.
Work Area Length:
The measured length of the Work Area.
Work Area Width:
The measured width of the Work Area.
Table to Feeder Distance
This value, which is relevant only if a Sheet Feeder is connected, affects the Feed to front of table
option in the Production Manager.
The sum of the Table to Feeder Distance and Width parameter defines the feed length required
to feed a sheet of material to the front of your device's work area.
Units
Select Units to be used in the User Interface (mm or inch).
Speed Units
Select Units to be used for speed in the User Interface (m/min or ips).
Import Units
Select Units to be used for File Import.
Units specified in the Input File will override this setting for that particular file.
Default Import Preset
Select Default Import Preset to be used for File Import.
Ask for confirmation when creating jobs with the Default Import Preset
When enabled, you will be asked for confirmation each time a file is imported using the Default
Import Preset.
177
14
14
iPC
Use this function to avoid unintended use of the Default Import Preset.
14.3 Production
Main Menu->Edit->Options...->Production
14.3.1 Table Presets
General
Table Preset is a set of commands that is sent to the Cutting Table each time a Job is executed.
You select the Table Preset to use from the Production Setup->Material Handling dialog.
By default, several Table Presets that are suitable for most production scenarios are installed.
More factory made Table Presets are available in the folder
My Documents->i-cut Production Console->Production Options.
If needed, add these to existing presets using the Load function.
Note: Only Table Presets configured for current Machine Configuration can be installed.
Use these functions to maintain Table Presets:
Delete
Delete selected Table Preset.
Load...
Load Table Preset from file.
178
iPC
14.3.2 Read Furthest Registration Mark first
Define Registration Mark read sequence:
Un-checked
Normal sequence.
Checked
The sequence is:
1. Read the Registration Mark in the furthest X-position.
2. Read the rest of the Registration Marks using the normal sequence.
This function helps iPC calculate placement and rotation of curves on large sheets, but it will increase
the execution time.
14.3.3 Step X-axis before Y-axis
Define Step and Repeat priority:
Un-checked
The entire column (Y) will be executed first before moving to next column.
Checked
The entire row (X) will be executed first before moving to next row.
14.3.4 Break Long Lines
This function divides a (long) line into line segments with specified length.
By this, optimization is improved.
One example:
You are about to cut a big rectangle in a flexible material, with a high demand for Print to Cut
alignment.
By compensation to the corners of the rectangle only, the result is not optimal, despite a high number
of Registration Marks.
Shorter lines allows for more accurate Print to Cut alignment.
179
14
14
iPC
14.4 Feeder Connection
Main Menu->Edit->Options...->Feeder Connection
iPC may communicate with a Sheet Feeder through a serial line.
If necessary, provide relevant parameters.
To establish communication between iPC and your feeder, follow these instructions:
1. Connect the feeder to your computer using an available serial COM port, or USB-to-Serial adapter
2. From your Windows Device Manager, locate the COM port settings of the port to which the
sheet feeder is connected.
3. Change the settings to: COM Port Number: As found in (2), Bits per second: 9600, Data bits: 8,
Parity: Odd, StopBits: 1, Flow control: None
4. In the Feeder Connection dialog, adjust the parameters to match the corresponding values in
your Device Manager.
5. Enable iPC communication on your sheet feeder's touch screen interface.
6. Open your iPC Configuration window and verify that the Feeder option is presently available. If it
is not, contact your iPC dealer to request a license upgrade.
14.5 Lead-in/Lead-out
Main Menu->Edit->Options...->Lead-in/Lead-out
180
iPC
The Lead-in/Lead-out feature is primarily used for routing.
Adding Lead-in/Lead-out to a curve opens and extends the curve dynamically at production time
so that cutting begins and ends inside or outside the path.
This is important for routing because the initial plunge into, and final lift out of the material may
produce cutting results which are inconsistent with the rest of the part.
For information about how to apply Lead-in and/or Lead-out, see:
1. Curve modifications.
2. Curve Point modifications.
In the Lead-in/Lead-out option dialog described here, specify default values to use when Lead-in
and/or Lead-out is applied.
The following parameters are available:
Outside
Lead-ins and Lead-outs are added to the outside of the curve(s) to which they are applied.
Inside
Lead-ins and Lead-outs are added to the inside of the curve(s) to which they are applied.
Depend on Tool
Both the inside or outside position and the radius of the Lead-ins and Lead-outs depends upon
the tool parameters in the Edit Layer dialog for the layer(s) on which the intended curves reside.
Lead-in/Lead-out
Select whether Lead-ins and/or Lead-outs will be applied.
Radius
181
14
14
iPC
The Lead-ins and Lead-outs are always generated as absolute arcs, with the Radius defining the
size. The Radius should be large enough to account for the diameter of the router bit or laser beam.
Show this dialog when applying Lead-in/Lead-out
When enabled, this dialog is displayed when the Lead-ins and Lead-outs are applied from the Edit
Curve and Edit Curve Point dialogs.
14.6 Backup
Main Menu->Edit->Options...->Schedule Backup
Use this dialog to configure the automatic Backup Sequence.
For System Backup, choose automatic backups to occur Daily, Weekly or Monthly.
For more information, see Backup/Restore.
14.7 Language
Main Menu->Edit->Options...->Language
182
iPC
Windows Default Language
The language displayed in the User Interface defaults to the Windows Operating System
language.
Enforce Language
Select this option if:
1. Your current Windows language is not supported by iPC.
2. You prefer to select a different language.
Select the desired language from the corresponding drop-down list and click OK.
Restart iPC to activate the new language setting.
14.8 Reference Points
Main Menu->Edit->Options...->Reference Points
183
14
14
iPC
About Reference Points
To position a job on the table, Reference Points are used.
For the actual job, the selected Reference Point has co-ordinates X=0, Y=0.
14.8.1 Main Reference Point
The Main Reference Point (R) is a fixed reference point on the table.
You can select it from the list of Reference Points in the dialog, but not modify or delete this
Reference Point.
184
iPC
14.8.2 User Defined Reference Points
Create User Defined Reference Points
1. Click the New button to create a new User Defined Reference Point.
2. Enter the name of the reference point in the Name edit field.
3. Set the reference point position by:
a. Enter X/Y - co-ordinates into the Position fields in the dialog.
The co-ordinates are relative to the Main Reference Point.
b. Click the Update button to set coordinates of the Reference Point in current Laser Position.
Click OK to activate the new Reference Point setting.
Delete a User Defined Reference Point
1. In the list of reference points, highlight the User Defined Reference Point you want to delete.
2. Click Delete.
Panel Reference Point
The Panel Reference Point is a special version of User Defined Reference Points.
It is selected from the list of reference points in the dialog.
You can set the Panel Reference Point in three different ways:
1. Enter X/Y - co-ordinates into the Position fields in the dialog.
The co-ordinates are relative to the Main Reference Point.
2. Click the Update button to set Panel Reference Point in current Laser Position.
3. Press the Set Ref. button on Operators Panel.
Panel Reference Point is set to current Laser Position.
185
14
14
iPC
Set Ref. button on C-series
Set Ref. button on XL, XN, XE, XP, V-series
186
iPC
15. Machine Connection and
Configuration
From Windows Toolbar, invoke Machine Connection.
The following menu items are available:
• Machine Configuration
• Tool Configuration
• Service Menu
• About...
• Terminate Machine Connection
Note: These functions covers basic system settings, normally done once.
To be maintained by Trained Personnel only.
15.1 Machine Configuration
187
15
15
iPC
15.1.1 Hardware Configuration
Machine Connection->Machine Configuration->HW Configuration
2 Vacuum Pumps
Use Pumps for blow back
Specify if this system is configured with 2
Vacuum Pumps.
This system is configured with 2 Vacuum
Pumps and the pumps provides blow back.
Vacuum Setup
Rulers Mounted
From this dialog, select the hardware vacuum
configuration you have on your Cutting Table;
number of vacuum sections.
Specify if this system has Cutting Table
Rulers mounted.
Operator Panel
Camera Setup
Specify Operator Panel position.
Enter the Camera Setup dialog.
This information will define Jog direction for
the jog buttons on the Operator Panel.
For more information, go here
Conveyor
Router Setup
Specify if this system has Conveyor Belt.
Enter the Router Setup dialog.
For more information about these settings, see User Manual for the Cutting Table.
188
iPC
15.1.2 Setup
Machine Connection->Machine Configuration->Setup
Vacuum/Blow Back
Specify installed Vacuum/Blow Back solution.
• Standard blowback using fan
Blow back is provided by a separate fan.
• Vacuum based blowback
Blow back is provided by the Vacuum pump
Jog Speed
Specify low and high Jog Speed as a percent of maximum speed.
Incremental Jog
Specify the Step Size for low and high Incremental Jog
Split Sheet Feed
Normally, material feed is carried out as one continous movement.
Select this option to divide the material feed into two separate movements.
Useful to avoid unwanted safety breaks for certain material sizes.
Sheet Feed Correction
189
15
15
iPC
Add a correction value.
A positive value will increase the movement.
Conveyor Speed
Specify Conveyor Speed as a percent of maximum allowed speed.
For optimal feed operation, some materials requires a reduced conveyor speed.
Conveyor Acceleration
Specify Conveyor Acceleration as a percent of maximum allowed acceleration.
For optimal feed operation, some materials requires a reduced conveyor acceleration.
Tool height calibration mode
Select calibration mode:
• Manual adjustment - use the manual procedure for tool height calibration.
• Automatic measurement - use X-pad for tool height calibration
Note: this choice is relevant on machines with X-pad only.
Default
All parameters are set to factory default.
For more information about these settings, see User Manual for the Cutting Table.
15.1.3 Installation
Machine Connection->Machine Configuration->Installation
190
iPC
Set Main Reference Position
Invoke the Set Reference Point wizard.
Follow wizard instructions.
Note: Complete this function for all Tool holders.
Register Table Size
Invoke the Register Table Size wizard.
Follow wizard instructions.
Adjust X1 to X2 angle
Invoke the Adjust X1 to X2 angle wizard.
Follow wizard instructions.
Set Ruler Position
Invoke the Set Ruler Position wizard.
Follow wizard instructions.
Map Table Top Surface
Invoke the Map Table Top Surface wizard.
Execute on top of the Vacuum Table, no Cutting Underlay or Conveyor Belt.
Follow wizard instructions.
Table Top Reference
Update table top level measurement in current Laser Pointer position.
Measure on top of cutting underlay; no material.
Calibrate Measuring Pad
Invoke the Calibrate Measuring Pad wizard.
Follow wizard instructions.
For more information about these settings, see User Manual for the Cutting Table.
15.2 Tool Configuration
Machine Connection->Tool Configuration
191
15
15
iPC
Identified Tools
The tools currently mounted on the Cutting Table are displayed.
Select a Tool
By the radio buttons, select the Tool to update.
Identify Tools
Complete a Tool identification sequence.
15.2.1 Adjust Active Tool
General
Tool adjustment is carried out using wizards.
All tools need to be adjusted in the Tool holder position they will be used.
We recommend to use a sheet of quality carton or corrugated to perform these wizards.
About adjustments
192
iPC
Tool Height
The tool tip should touch the material surface.
Lag setting
The knife lag depends upon the blade adapter.
Rotation adjustment
Adjust tool angle tangential to moving direction.
Center offset adjustment
Adjust tool sideways until centered.
Camera Calibration
Compensate for camera offset and lens distortion.
For more information, go here.
Offset Adjustment
Adjust offset relative to laser pointer.
193
15
15
iPC
For more information about tool adjustment, see Cutting Table User Manual.
15.2.2 More
The More.. dialog contains selections to Ignore, Delete or Add to the Tool List.
The Tool List contains Tools that you can select for the available Tool Positions.
Ignore Automatic Tool Identification
Ignore Automatic Tool Identification may be used when the Automatic Tool Detection fails, and
manual tool selection is necessary.
If Ignore Automatic Tool Identification is checked, Tool Setup remains unchanged after:
• Table Zero Position sequence
• Identify Tools function
Delete Tool
Use Delete Tool when a Tool is no longer in use.
The deleted Tool will no longer be available in the Tool List in the Edit Layer dialog.
Add Tool
Use Add Tool to
• Add new Tools
• Add tools that fails during Automatic Tool Detection
The Tool is added to the Tool List.
15.3 Camera Operations
194
iPC
Show Camera
Main Menu->Machine->Show Camera
Machine Panel Toolbar->Show Camera
Camera Setup
Machine Connection->Machine Configuration->HW Configuration->Camera Setup
Prerequisites:
• The camera has to be visible as an imaging device from device manager.
• Necessary camera driver has to be installed ( Epix driver if i-cut camera).
• If using i-cut camera, select add i-cut
camera.
• In the list of cameras, select the one currently
connected
• Select Edit
• Give the camera a proper name
• Select type of camera (Tool head, In-stack)
• Select OK to save your settings.
The connected Tool head is marked by a (*) in
front of the name.
Offset Adjustment
Machine Connection->Tool Configuration->Adjust Active Tool->Offset Adjustment
Two initial steps are mandatory:
• Complete Offset Adjustment between Laser
pointer and all tool positions.
• Select one tool, preferably a knife tool, as
the common reference tool between Laser
pointer and Camera.
195
15
15
iPC
Select Offset Adjustment and complete the
wizard.
Camera Calibration
Machine Connection->Tool Configuration->Adjust Active Tool->Camera Calibration
For this procedure, use the same reference tool
as in previous chapter.
Select Camera and Adjust active tool
Follow the instructions given by the wizard, step
by step.
Select Camera Calibration.
196
iPC
Follow the steps in the wizard:
1. Select the reference tool, preferably the
same tool as used during the previous offset
adjustment.
2. Place a sheet of thin material on the table.
3. Fixate the sheet using Vacuum on.
4. Jog the Laser Pointer into a proper position
on the sheet.
5. Press Start to create the Reference Mark.
While the sheet is kept in place by vacuum on,
do:
1. Jog the tool head away.
2. Carefully remove the cutout from the
Reference Mark.
3. Press Next.
1. Verify that the mark is correctly detected.
2. Press Next.
197
15
15
iPC
The Camera Calibration wizard will now
complete.
Correct completion is indicated as displayed.
Press Finish.
Press Close to terminate the procedure.
Note: Camera view will be oriented according to
Table view.
15.4 Service Menu
Note:
The Service Menu functions are available for certified service personnell only.
They are not aimed for table operators.
15.4.1 Message Display
Machine Connection->Service Menu->Message Display
198
iPC
Popup on Warnings
Select if you want the Message Display window displayed for each warning message.
Error messages are always displayed.
Always on Top
Select if you want the Message Display on top of your Desktop.
Log Messages
When enabled, all messages are logged for later examination.
Useful for trouble shooting.
Show
Specify at what level messages are shown:
• All - all kind of messages are displayed.
• Important Only
• Critical Only
15.4.2 Memory Dump
Machine Connection->Service Menu->Memory Dump
Invoke the Memory Dump application.
To be used for Software Maintenance.
199
15
15
iPC
For more information, see Hwtest User Manual
15.4.3 Position Display
Machine Connection->Service Menu->Position Display
For more information, see User Manual for Cutting Table .
15.4.4 Show vacuum dialog
200
iPC
Select Vacuum Sections suitable for Selected Job.
Note: This dialog is available from: Machine Panel Toolbar->Vacuum Sections
15.4.5 Emulate Panel
Machine Connection->Service Menu->Emulate Panel
A function for Software Maintenance.
15.4.6 Tool holder Select
Machine Connection->Service Menu->Tool Holder Select
201
15
15
iPC
Select Tool holder for test.
This function is available when iPC is dis-connected from Cutting Table only.
15.5 About ...
202
System Version
Machine Size
Version number and date of the installed
software.
Machine size as obtained by the Register
Table Size function
Machine Type
Work Area all Tools
Type name of connected Cutting Table.
Nominal Work Area available for all tools in the
currently mounted Tool holder.
iPC
15.5.1 Maintenance Info
Current Status
Date
Todays date.
First Time Started
Date when the system was running for the first
time.
Run Time
Total number of hours the machine has been
running (executing).
Maintenance
Date
Date when last maintenance was carried out.
By
Initials of the person who completed last
maintenance.
Run Time
Hour counter when last maintenance was
carried out.
Since Last Maintenance
Number of execution hours since last
maintenance.
15.6 Terminate Machine Connection
Use this function to terminate the connection to the Cutting Table.
15.7 Logging
15.7.1 General
Bug report
A bug report should consist of:
•
•
•
•
A detailed, step by step description of what happened.
If found at a customer site also a confirmation that the bug can be reproduced in the lab.
Sometimes a description of the expected behavior will also be a help.
A .zip file of the log folder, with at least the files:
203
15
15
iPC
• •
•
•
•
i-cut Production Console.log
iPcDeveloperLog.txt Last KB ACM file.log
Last KB Mat file.log
MCDeveloperLog.txt.
15.7.2 Log Settings
Ctrl + Alt + Shift + L
From this dialog, specify the logg level.
For log settings to take effect, restart iPC.
The default setting will always be Service Log.
Initiating a log should be carried out only if requested by Esko personnel.
Procedure
To invoke logging:
In the Log Settings dialog, check Use integrated logging system and Log to file.
To reduce the size of the log file, please do as little as possible:
•
•
•
•
Start iPC.
Do the test and nothing else.
Stop iPC.
Zip the log folder and copy to your server.
Notes:
• Log type Debug or Trace will seriously affect performance and must be used for short periods
of time.
• Never leave a machine in any other setting than Service Log.
204
iPC
16. Install Software
For information about software installation, see the Installation Manual for the actual machine.
Available on the Documentation DVD.
16.1 File Save Structure
Computer->xxx->My Documents->i-cut Production Console
This is the default file save structure.
Backup
Cutting Keys
Exports
MC
Production Options
Sample Files
User Manual
205
16
17
iPC
17. About Licenses
iPC has three main licenses.
i-cut Production Console Sign
Sign license is the main license that covers all features in iPC software.
i-cut Production Console Packaging Production
Packaging Production license cover all main topics for production, but less functionality regarding
edit, milling and camera distortion compensations.
i-cut Production Console Basic
Basic license cover only basic functions. No camera functions.
206
Feature
Basic
Pack
Prod
Sign Std Sign
Prod
Details
Base
x
x
x
x
Enable all base functionality including
start of application
Line_edit
x
x
x
Enable all manual geometry editing.
Basic version will be "read only", like
XL-Guide
Avoid_overcut
x
x
Enable layer feature to automatically
split lines and change cut directions,
mainly for printed materials
Registration_and_ placement
x
x
x
Enable edge / regmark reg. and
placement (position / rotation)
compensation. Registration device is
HW dependant
Barcode
x
x
Enable use of camera for reading
barcodes, which enables automated
workflow. Barcode scanner always
supported
Linear
x
x
x
Enable linear and differential scale
Non_linear
x
x
Enable non linear (full) distortion
compensation
Intelligent Marks x
x
Enable Adaptive registration
Non Stop
x
x
Enable more than 1 copy (table)
productions
Milling
x
x
Enable advanced milling features like
lead in/out, multipass, washout, tool
diameter compensation
Add_Nested_Layout
x x
x
x
Enable dialog for merging designs
onto same board based on bounding
boxes or manual positioning
Step_and_repeat
x
x
x
Enable step and repeat the "i-cut way"
x
iPC
207
17
18
iPC
18. Keyboard Shortcuts
Alt + Click
Select All Curves
Alt + Left
Alt + Right
Alt + Up
Jog Selected Curve(s)
Alt + Down
208
CTRL + -
Zoom Out
CTRL + +
Zoom In
CTRL + 0
Fit to Data
CTRL + A
Select All Curves
CTRL + Alt + Shift + L
Log Options
CTRL + Alt + M
Maintenance Interval update
CTRL + C
Copy Layer(s)
CTRL + D
Deselect All Curves
CTRL + L
Add Layer
CTRL + M
Move Selected Curves
CTRL + N
New File
CTRL + O
Open File
CTRL + S
Save File
CTRL + Shift + A
Select All Layers
CTRL + Shift + C
Copy Layer(s) with Curves
CTRL + Shift + D
Deselect All Layers
CTRL + Shift + I
Invert Curve Direction
CTRL + Shift + J
Fit to Job
CTRL + Shift + M
Mirror Selected Curves
CTRL + Shift + R
Rotate Selected Curves
CTRL + Shift + S
Save File As
CTRL + Shift + T
Fit to Table
CTRL + T
Scale Selected Curves
CTRL + U
Remove Unused Layers
CTRL + W
Close File
CTRL + Z
Undo
Delete
Remove Selected Curves
F1
Help
Shift + Delete
Remove Layers
iPC
19. iPC Commands
Use iPC Commands to prepare:
• Direct Commands
Conveyer belt Speed and Acceleration
(%SSA)
Sheet Feed (%SHF )
Syntax: %SSA <speed> <acceleration>.
Command to limit belt speed and acceleration.
Values are percentage of maximum.
Command to move the conveyer belt the
specified distance. Start position is optional.
Value specified in 1/1000 mm.
i-cut Delay (I-SD)
Sheet Feeder Communication On (I-FM 1)
Syntax: I-SD <time>;
Syntax: I-FM 1;
Execution is delayed <time> msec.
Sheet feeder communication enabled.
i-cut Message (I-MS)
Sheet Feeder Communication Off (I-FM 0)
Syntax: I-MS <message>.
Syntax: I-FM 0;
Dispaly a <message> to the Operator.
Sheet feeder communication disabled.
i-cut Park (I-PK)
Vacuum pump, start and stop of (%PMP)
Syntax: I-PK.
Syntax: %PMP <on/off>.
Move to Park Position.
Command to turn the vacuum pump on and
off.
Reference Point selection(%SRE)
Vacuum suction direction control (%SUC)
Syntax: %SRE<1>/<X>.
Syntax: %SUC<on/off>.
Switches between main fixed reference point
(1) and panel defined reference point (X)
Switches between suction (on) and Quick
Release / Blow Back (off)
Syntax: %SHF <distance> <start position>
209
19
20
iPC
20. Using ai-cut/i-cutCDR
ai-cut is an addon to Adobe Illustrator.
i-cutCDR is an addon to Corel Draw versions X3, X4 and X5.
These addons provides tools to automatically add iPC Register Marks to designs.
For more information, see separate User Manuals.
210
iPC
21. i-script
In a traditional workflow, image data and cut data are generated as separate files out from the Design
station.
i-script is a workflow where image data and cut data are separated in the RIP process.
The big advantage is that modifications made during the RIP process are maintained both for the
image data and the cut data.
i-script is adapted by leading RIP and printer producers.
211
21