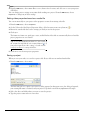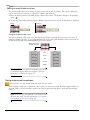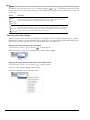
1
After the Vegas software is installed and you start it for the first time, the registration wizard appears. This
wizard offers easy steps that allow you to register the software online with Sony Pictures Digital Media
Software and Services. Alternatively, you may register online at http://www.sony.com/mediasoftware at any
time.
Registering your product will provide you with exclusive access to a variety of technical support options,
notification of product updates, and special promotions exclusive to Vegas registered users.
Registration Assistance
If you do not have access to the Internet, registration assistance is available during normal weekday business
hours. Please contact our Customer Service Department by dialing one of the following numbers:
Telephone/Fax
Country
1-800-577-6642 (toll-free)
US, Canada, and Virgin Islands
+608-204-7703
for all other countries
1-608-250-1745 (Fax)
All countries
Customer Service/Sales
For a detailed list of Customer Service options, we encourage you to visit
http://mediasoftware.sonypictures.com/support/custserv.asp. Use the following numbers for telephone
support during normal weekday business hours:
Telephone/Fax/E-mail
Country
1-800-577-6642 (toll-free)
US, Canada, and Virgin Islands
+608-204-7703
for all other countries
1-608-250-1745 (Fax)
All countries
http://mediasoftware.sonypictures.com/custserv
Technical Support
For a detailed list of Technical Support options, we encourage you to visit
http://mediasoftware.sonypictures.com/support/default.asp.
• To listen to your support options, please call 608-256-5555.
• Customers who have purchased the full version of Vegas software receive 60 days of complimentary phone
support. The complimentary support begins the date of your first call. (Registration is required to receive
this complimentary support.) Please call (608) 204-7704 if you need assistance with your full version
product.
Sony Pictures Digital Inc.
Media Software and Services
1617 Sherman Avenue
Madison, WI 53704
USA
The information contained in this manual is subject to change without notice and does not represent a
guarantee or commitment on behalf of Sony Pictures Digital Inc. in any way. All updates or additional
information relating to the contents of this manual will be posted on the Sony Pictures Digital Media
Software web site, located at http://www.sony.com/mediasoftware. The software is provided to you under the
terms of the End User License Agreement and Software Privacy Policy, and must be used and/or copied in
accordance therewith. Copying or distributing the software except as expressly described in the End User
License Agreement is strictly prohibited. No part of this manual may be reproduced or transmitted in any
form or for any purpose without the express written consent of Sony Pictures Digital Inc.
Vegas, Vegas+DVD, DVD Architect, ACID, ACIDized, and Sound Forge are trademarks or registered
trademarks of Sony Pictures Digital Inc. or its affiliates in the United States and other countries. ASIO is a
trademark and VST is a registered trademark of Steinberg Media Technologies AG. All other trademarks or
registered trademarks are the property of their respective owners in the United States and other countries.
Copyright 2004. Sony Pictures Digital Inc.
Program Copyright 2004. Sony Pictures Digital Inc. All rights reserved.
1
Table of Contents
Introduction. . . . . . . . . . . . . . . . . . . . . . . . . . . . . . . . . . . . . . . . . . . . . 15
Welcome . . . . . . . . . . . . . . . . . . . . . . . . . . . . . . . . . . . . . . . . . . . . . . . . . . . . . . . . . . . . . . .15
System requirements . . . . . . . . . . . . . . . . . . . . . . . . . . . . . . . . . . . . . . . . . . . . . . . . . . . . 15
Technical support. . . . . . . . . . . . . . . . . . . . . . . . . . . . . . . . . . . . . . . . . . . . . . . . . . . . . . . . 15
Installing Vegas software. . . . . . . . . . . . . . . . . . . . . . . . . . . . . . . . . . . . . . . . . . . . . . . . . 16
Registration. . . . . . . . . . . . . . . . . . . . . . . . . . . . . . . . . . . . . . . . . . . . . . . . . . . . . . . . . . . . . 16
Using online help. . . . . . . . . . . . . . . . . . . . . . . . . . . . . . . . . . . . . . . . . . . . . . . . . . . . . . . . 16
Overview . . . . . . . . . . . . . . . . . . . . . . . . . . . . . . . . . . . . . . . . . . . . . . . . . . . . . . . . . . . . . . .18
Main window . . . . . . . . . . . . . . . . . . . . . . . . . . . . . . . . . . . . . . . . . . . . . . . . . . . . . . . . . . . . . . . . . . . . . . .18
Toolbar . . . . . . . . . . . . . . . . . . . . . . . . . . . . . . . . . . . . . . . . . . . . . . . . . . . . . . . . . . . . . . . . . . . . . . . . . . . . .18
Time display . . . . . . . . . . . . . . . . . . . . . . . . . . . . . . . . . . . . . . . . . . . . . . . . . . . . . . . . . . . . . . . . . . . . . . . .19
Ruler . . . . . . . . . . . . . . . . . . . . . . . . . . . . . . . . . . . . . . . . . . . . . . . . . . . . . . . . . . . . . . . . . . . . . . . . . . . . . . .19
Marker bar . . . . . . . . . . . . . . . . . . . . . . . . . . . . . . . . . . . . . . . . . . . . . . . . . . . . . . . . . . . . . . . . . . . . . . . . . .19
Command bar . . . . . . . . . . . . . . . . . . . . . . . . . . . . . . . . . . . . . . . . . . . . . . . . . . . . . . . . . . . . . . . . . . . . . . .19
CD layout bar . . . . . . . . . . . . . . . . . . . . . . . . . . . . . . . . . . . . . . . . . . . . . . . . . . . . . . . . . . . . . . . . . . . . . . .20
Track list . . . . . . . . . . . . . . . . . . . . . . . . . . . . . . . . . . . . . . . . . . . . . . . . . . . . . . . . . . . . . . . . . . . . . . . . . . . .20
Timeline . . . . . . . . . . . . . . . . . . . . . . . . . . . . . . . . . . . . . . . . . . . . . . . . . . . . . . . . . . . . . . . . . . . . . . . . . . . .20
Transport bar controls . . . . . . . . . . . . . . . . . . . . . . . . . . . . . . . . . . . . . . . . . . . . . . . . . . . . . . . . . . . . . . .20
Status bar . . . . . . . . . . . . . . . . . . . . . . . . . . . . . . . . . . . . . . . . . . . . . . . . . . . . . . . . . . . . . . . . . . . . . . . . . . .20
Scrub control . . . . . . . . . . . . . . . . . . . . . . . . . . . . . . . . . . . . . . . . . . . . . . . . . . . . . . . . . . . . . . . . . . . . . . . .21
Window docking area and floating window docks . . . . . . . . . . . . . . . . . . . . . . . . . . . . . . . . . . . . . .21
Saving and recalling window layouts - Ctrl+Alt+D or Ctrl+D . . . . . . . . . . . . . . . . . . . . . . . . . . . . . .25
Keyboard command reference . . . . . . . . . . . . . . . . . . . . . . . . . . . . . . . . . . . . . . . . . . . . . . . . . . . . . . . .26
Cursor indications . . . . . . . . . . . . . . . . . . . . . . . . . . . . . . . . . . . . . . . . . . . . . . . . . . . . . . . . . . . . . . . . . . .32
Using a control surface . . . . . . . . . . . . . . . . . . . . . . . . . . . . . . . . . . . . . . . . . . . . . . . . . . . . . . . . . . . . . . .33
Audio signal flow. . . . . . . . . . . . . . . . . . . . . . . . . . . . . . . . . . . . . . . . . . . . . . . . . . . . . . . . 34
Video signal flow . . . . . . . . . . . . . . . . . . . . . . . . . . . . . . . . . . . . . . . . . . . . . . . . . . . . . . . . 35
About your rights in Vegas software. . . . . . . . . . . . . . . . . . . . . . . . . . . . . . . . . . . . . . . 36
About Your Privacy . . . . . . . . . . . . . . . . . . . . . . . . . . . . . . . . . . . . . . . . . . . . . . . . . . . . . . . . . . . . . . . . . .36
Proper Use of Software . . . . . . . . . . . . . . . . . . . . . . . . . . . . . . . . . . . . . . . . . . . . . . . . . . . . . . . . . . . . . .36
TABLE OF CONTENTS
2
Getting Started . . . . . . . . . . . . . . . . . . . . . . . . . . . . . . . . . . . . . . . . . . 37
Creating projects . . . . . . . . . . . . . . . . . . . . . . . . . . . . . . . . . . . . . . . . . . . . . . . . . . . . . . . . 37
Setting video properties based on a media file . . . . . . . . . . . . . . . . . . . . . . . . . . . . . . . . . . . . . . . . . . 38
Saving a project . . . . . . . . . . . . . . . . . . . . . . . . . . . . . . . . . . . . . . . . . . . . . . . . . . . . . . . . . . . . . . . . . . . . . 38
Renaming a project (using Save As) . . . . . . . . . . . . . . . . . . . . . . . . . . . . . . . . . . . . . . . . . . . . . . . . . . . 39
Getting media files . . . . . . . . . . . . . . . . . . . . . . . . . . . . . . . . . . . . . . . . . . . . . . . . . . . . . . 39
Selecting media . . . . . . . . . . . . . . . . . . . . . . . . . . . . . . . . . . . . . . . . . . . . . . . . . . . . . . . . . . . . . . . . . . . . . 40
Previewing a media file . . . . . . . . . . . . . . . . . . . . . . . . . . . . . . . . . . . . . . . . . . . . . . . . . . . . . . . . . . . . . . 40
Using the Media Pool . . . . . . . . . . . . . . . . . . . . . . . . . . . . . . . . . . . . . . . . . . . . . . . . . . . . . . . . . . . . . . . . 41
Adding media to the timeline . . . . . . . . . . . . . . . . . . . . . . . . . . . . . . . . . . . . . . . . . . . . . . . . . . . . . . . . . 46
Working with events. . . . . . . . . . . . . . . . . . . . . . . . . . . . . . . . . . . . . . . . . . . . . . . . . . . . . 48
Understanding files and events . . . . . . . . . . . . . . . . . . . . . . . . . . . . . . . . . . . . . . . . . . . . . . . . . . . . . . . 48
Moving events along the timeline . . . . . . . . . . . . . . . . . . . . . . . . . . . . . . . . . . . . . . . . . . . . . . . . . . . . . 48
Working with tracks . . . . . . . . . . . . . . . . . . . . . . . . . . . . . . . . . . . . . . . . . . . . . . . . . . . . . 50
Using the track view . . . . . . . . . . . . . . . . . . . . . . . . . . . . . . . . . . . . . . . . . . . . . . . . . . . . . . . . . . . . . . . . . 50
Using the track list . . . . . . . . . . . . . . . . . . . . . . . . . . . . . . . . . . . . . . . . . . . . . . . . . . . . . . . . . . . . . . . . . . . 52
Playing back and previewing . . . . . . . . . . . . . . . . . . . . . . . . . . . . . . . . . . . . . . . . . . . . . 54
Playing your project . . . . . . . . . . . . . . . . . . . . . . . . . . . . . . . . . . . . . . . . . . . . . . . . . . . . . . . . . . . . . . . . . 54
Scrubbing . . . . . . . . . . . . . . . . . . . . . . . . . . . . . . . . . . . . . . . . . . . . . . . . . . . . . . . . . . . . . . . . . . . . . . . . . . 55
Previewing to media player . . . . . . . . . . . . . . . . . . . . . . . . . . . . . . . . . . . . . . . . . . . . . . . . . . . . . . . . . . . 56
Prerendering video previews . . . . . . . . . . . . . . . . . . . . . . . . . . . . . . . . . . . . . . . . . . . . . . . . . . . . . . . . . 56
Rendering a project. . . . . . . . . . . . . . . . . . . . . . . . . . . . . . . . . . . . . . . . . . . . . . . . . . . . . . 57
Creating a movie . . . . . . . . . . . . . . . . . . . . . . . . . . . . . . . . . . . . . . . . . . . . . . . . . . . . . . . . . . . . . . . . . . . . 57
Basic Editing Techniques . . . . . . . . . . . . . . . . . . . . . . . . . . . . . . . . . 59
Getting around. . . . . . . . . . . . . . . . . . . . . . . . . . . . . . . . . . . . . . . . . . . . . . . . . . . . . . . . . . 59
Moving the cursor . . . . . . . . . . . . . . . . . . . . . . . . . . . . . . . . . . . . . . . . . . . . . . . . . . . . . . . . . . . . . . . . . . . 59
Changing focus . . . . . . . . . . . . . . . . . . . . . . . . . . . . . . . . . . . . . . . . . . . . . . . . . . . . . . . . . . . . . . . . . . . . . 59
Making selections . . . . . . . . . . . . . . . . . . . . . . . . . . . . . . . . . . . . . . . . . . . . . . . . . . . . . . . 60
Selecting multiple events . . . . . . . . . . . . . . . . . . . . . . . . . . . . . . . . . . . . . . . . . . . . . . . . . . . . . . . . . . . . . 60
Selecting a time range . . . . . . . . . . . . . . . . . . . . . . . . . . . . . . . . . . . . . . . . . . . . . . . . . . . . . . . . . . . . . . . 61
Looping playback . . . . . . . . . . . . . . . . . . . . . . . . . . . . . . . . . . . . . . . . . . . . . . . . . . . . . . . . . . . . . . . . . . . . 62
Selecting events and a time range . . . . . . . . . . . . . . . . . . . . . . . . . . . . . . . . . . . . . . . . . . . . . . . . . . . . . 62
Selecting tracks . . . . . . . . . . . . . . . . . . . . . . . . . . . . . . . . . . . . . . . . . . . . . . . . . . . . . . . . . . . . . . . . . . . . . 62
Selecting groups of composited tracks . . . . . . . . . . . . . . . . . . . . . . . . . . . . . . . . . . . . . . . . . . . . . . . . . 63
Editing events. . . . . . . . . . . . . . . . . . . . . . . . . . . . . . . . . . . . . . . . . . . . . . . . . . . . . . . . . . . 63
Copying events . . . . . . . . . . . . . . . . . . . . . . . . . . . . . . . . . . . . . . . . . . . . . . . . . . . . . . . . . . . . . . . . . . . . . . 63
Cutting events . . . . . . . . . . . . . . . . . . . . . . . . . . . . . . . . . . . . . . . . . . . . . . . . . . . . . . . . . . . . . . . . . . . . . . . 64
Pasting events . . . . . . . . . . . . . . . . . . . . . . . . . . . . . . . . . . . . . . . . . . . . . . . . . . . . . . . . . . . . . . . . . . . . . . 65
Duplicating events . . . . . . . . . . . . . . . . . . . . . . . . . . . . . . . . . . . . . . . . . . . . . . . . . . . . . . . . . . . . . . . . . . . 67
TABLE OF CONTENTS
3
Inserting empty events and time . . . . . . . . . . . . . . . . . . . . . . . . . . . . . . . . . . . . . . . . . . . . . . . . . . . . . .67
Trimming events . . . . . . . . . . . . . . . . . . . . . . . . . . . . . . . . . . . . . . . . . . . . . . . . . . . . . . . . . . . . . . . . . . . .67
Splitting events . . . . . . . . . . . . . . . . . . . . . . . . . . . . . . . . . . . . . . . . . . . . . . . . . . . . . . . . . . . . . . . . . . . . . .69
Slipping and sliding events . . . . . . . . . . . . . . . . . . . . . . . . . . . . . . . . . . . . . . . . . . . . . . . . . . . . . . . . . . .71
Deleting events . . . . . . . . . . . . . . . . . . . . . . . . . . . . . . . . . . . . . . . . . . . . . . . . . . . . . . . . . . . . . . . . . . . . . .72
Applying post-edit ripples . . . . . . . . . . . . . . . . . . . . . . . . . . . . . . . . . . . . . . . . . . . . . . . . 73
Applying a post-edit ripple manually . . . . . . . . . . . . . . . . . . . . . . . . . . . . . . . . . . . . . . . . . . . . . . . . . . .74
Applying a post-edit ripple automatically . . . . . . . . . . . . . . . . . . . . . . . . . . . . . . . . . . . . . . . . . . . . . . .74
Shuffling events . . . . . . . . . . . . . . . . . . . . . . . . . . . . . . . . . . . . . . . . . . . . . . . . . . . . . . . . . . . . . . . . . . . . .75
Crossfading events . . . . . . . . . . . . . . . . . . . . . . . . . . . . . . . . . . . . . . . . . . . . . . . . . . . . . . 75
Using automatic crossfades . . . . . . . . . . . . . . . . . . . . . . . . . . . . . . . . . . . . . . . . . . . . . . . . . . . . . . . . . .75
Manually setting a crossfade . . . . . . . . . . . . . . . . . . . . . . . . . . . . . . . . . . . . . . . . . . . . . . . . . . . . . . . . . .76
Changing crossfade curves . . . . . . . . . . . . . . . . . . . . . . . . . . . . . . . . . . . . . . . . . . . . . . . . . . . . . . . . . . .76
Sliding a crossfade . . . . . . . . . . . . . . . . . . . . . . . . . . . . . . . . . . . . . . . . . . . . . . . . . . . . . . . . . . . . . . . . . . .76
Using undo and redo . . . . . . . . . . . . . . . . . . . . . . . . . . . . . . . . . . . . . . . . . . . . . . . . . . . .77
Using undo . . . . . . . . . . . . . . . . . . . . . . . . . . . . . . . . . . . . . . . . . . . . . . . . . . . . . . . . . . . . . . . . . . . . . . . . .77
Using redo . . . . . . . . . . . . . . . . . . . . . . . . . . . . . . . . . . . . . . . . . . . . . . . . . . . . . . . . . . . . . . . . . . . . . . . . . .78
Clearing the edit history . . . . . . . . . . . . . . . . . . . . . . . . . . . . . . . . . . . . . . . . . . . . . . . . . . . . . . . . . . . . . .78
Adding project markers and regions. . . . . . . . . . . . . . . . . . . . . . . . . . . . . . . . . . . . . . . 78
Working with markers . . . . . . . . . . . . . . . . . . . . . . . . . . . . . . . . . . . . . . . . . . . . . . . . . . . . . . . . . . . . . . . .79
Working with regions . . . . . . . . . . . . . . . . . . . . . . . . . . . . . . . . . . . . . . . . . . . . . . . . . . . . . . . . . . . . . . . .80
Working with command markers . . . . . . . . . . . . . . . . . . . . . . . . . . . . . . . . . . . . . . . . . . . . . . . . . . . . .82
Working with CD layout markers . . . . . . . . . . . . . . . . . . . . . . . . . . . . . . . . . . . . . . . . . . . . . . . . . . . . . .85
Working with the marker tool . . . . . . . . . . . . . . . . . . . . . . . . . . . . . . . . . . . . . . . . . . . . . . . . . . . . . . . . .85
Using an external audio editing program . . . . . . . . . . . . . . . . . . . . . . . . . . . . . . . . . . 85
Setting up an audio editing program . . . . . . . . . . . . . . . . . . . . . . . . . . . . . . . . . . . . . . . . . . . . . . . . . .85
Opening an audio editor from Vegas software . . . . . . . . . . . . . . . . . . . . . . . . . . . . . . . . . . . . . . . . . .87
Advanced Editing Techniques . . . . . . . . . . . . . . . . . . . . . . . . . . . . 89
Snapping events . . . . . . . . . . . . . . . . . . . . . . . . . . . . . . . . . . . . . . . . . . . . . . . . . . . . . . . . 89
Turning snapping on and off . . . . . . . . . . . . . . . . . . . . . . . . . . . . . . . . . . . . . . . . . . . . . . . . . . . . . . . . . .89
Quantizing to frames . . . . . . . . . . . . . . . . . . . . . . . . . . . . . . . . . . . . . . . . . . . . . . . . . . . . . . . . . . . . . . . . .89
Using the event snap offset . . . . . . . . . . . . . . . . . . . . . . . . . . . . . . . . . . . . . . . . . . . . . . . . . . . . . . . . . .90
Snapping to the cursor or a selection . . . . . . . . . . . . . . . . . . . . . . . . . . . . . . . . . . . . . . . . . . . . . . . . . .90
Pitch shifting audio events. . . . . . . . . . . . . . . . . . . . . . . . . . . . . . . . . . . . . . . . . . . . . . . . 91
Editing from the timeline . . . . . . . . . . . . . . . . . . . . . . . . . . . . . . . . . . . . . . . . . . . . . . . . . . . . . . . . . . . . .91
Editing in the Event Properties dialog . . . . . . . . . . . . . . . . . . . . . . . . . . . . . . . . . . . . . . . . . . . . . . . . . .92
Time compressing/stretching events . . . . . . . . . . . . . . . . . . . . . . . . . . . . . . . . . . . . . . 93
Time compressing/stretching video . . . . . . . . . . . . . . . . . . . . . . . . . . . . . . . . . . . . . . . . . . . . . . . . . . .93
TABLE OF CONTENTS
4
Working with takes . . . . . . . . . . . . . . . . . . . . . . . . . . . . . . . . . . . . . . . . . . . . . . . . . . . . . . 94
Adding takes . . . . . . . . . . . . . . . . . . . . . . . . . . . . . . . . . . . . . . . . . . . . . . . . . . . . . . . . . . . . . . . . . . . . . . . . 94
Selecting takes . . . . . . . . . . . . . . . . . . . . . . . . . . . . . . . . . . . . . . . . . . . . . . . . . . . . . . . . . . . . . . . . . . . . . . 94
Previewing and selecting takes . . . . . . . . . . . . . . . . . . . . . . . . . . . . . . . . . . . . . . . . . . . . . . . . . . . . . . . . 95
Deleting takes . . . . . . . . . . . . . . . . . . . . . . . . . . . . . . . . . . . . . . . . . . . . . . . . . . . . . . . . . . . . . . . . . . . . . . . 95
Working with take names . . . . . . . . . . . . . . . . . . . . . . . . . . . . . . . . . . . . . . . . . . . . . . . . . . . . . . . . . . . . 95
Using the Trimmer window . . . . . . . . . . . . . . . . . . . . . . . . . . . . . . . . . . . . . . . . . . . . . . 96
Opening a file in the Trimmer . . . . . . . . . . . . . . . . . . . . . . . . . . . . . . . . . . . . . . . . . . . . . . . . . . . . . . . . . 96
Moving frame-by-frame in the Trimmer window . . . . . . . . . . . . . . . . . . . . . . . . . . . . . . . . . . . . . . . 97
Making selections in the Trimmer . . . . . . . . . . . . . . . . . . . . . . . . . . . . . . . . . . . . . . . . . . . . . . . . . . . . . 97
Adding selections to the timeline . . . . . . . . . . . . . . . . . . . . . . . . . . . . . . . . . . . . . . . . . . . . . . . . . . . . . . 97
Adding and saving regions and markers to a media file . . . . . . . . . . . . . . . . . . . . . . . . . . . . . . . . . 99
Opening a file in an external audio editor from the Trimmer . . . . . . . . . . . . . . . . . . . . . . . . . . . . 100
Creating a subclip . . . . . . . . . . . . . . . . . . . . . . . . . . . . . . . . . . . . . . . . . . . . . . . . . . . . . . . . . . . . . . . . . . 100
Selecting a subclip in its parent media . . . . . . . . . . . . . . . . . . . . . . . . . . . . . . . . . . . . . . . . . . . . . . . . 101
Using the Edit Details window . . . . . . . . . . . . . . . . . . . . . . . . . . . . . . . . . . . . . . . . . . . 101
Viewing the Edit Details window . . . . . . . . . . . . . . . . . . . . . . . . . . . . . . . . . . . . . . . . . . . . . . . . . . . . . 102
Customizing the Edit Details window . . . . . . . . . . . . . . . . . . . . . . . . . . . . . . . . . . . . . . . . . . . . . . . . . 104
Working with Tracks . . . . . . . . . . . . . . . . . . . . . . . . . . . . . . . . . . . . 105
Managing tracks . . . . . . . . . . . . . . . . . . . . . . . . . . . . . . . . . . . . . . . . . . . . . . . . . . . . . . . 105
Inserting an empty track . . . . . . . . . . . . . . . . . . . . . . . . . . . . . . . . . . . . . . . . . . . . . . . . . . . . . . . . . . . . . 105
Duplicating a track . . . . . . . . . . . . . . . . . . . . . . . . . . . . . . . . . . . . . . . . . . . . . . . . . . . . . . . . . . . . . . . . . . 106
Deleting a track . . . . . . . . . . . . . . . . . . . . . . . . . . . . . . . . . . . . . . . . . . . . . . . . . . . . . . . . . . . . . . . . . . . . . 106
Naming or renaming a track . . . . . . . . . . . . . . . . . . . . . . . . . . . . . . . . . . . . . . . . . . . . . . . . . . . . . . . . . 106
Organizing tracks. . . . . . . . . . . . . . . . . . . . . . . . . . . . . . . . . . . . . . . . . . . . . . . . . . . . . . . 107
Reordering tracks . . . . . . . . . . . . . . . . . . . . . . . . . . . . . . . . . . . . . . . . . . . . . . . . . . . . . . . . . . . . . . . . . . . 107
Changing track color . . . . . . . . . . . . . . . . . . . . . . . . . . . . . . . . . . . . . . . . . . . . . . . . . . . . . . . . . . . . . . . . 107
Changing track height . . . . . . . . . . . . . . . . . . . . . . . . . . . . . . . . . . . . . . . . . . . . . . . . . . . . . . . . . . . . . . . 108
Using the track list. . . . . . . . . . . . . . . . . . . . . . . . . . . . . . . . . . . . . . . . . . . . . . . . . . . . . . 108
Using the volume fader (audio only) . . . . . . . . . . . . . . . . . . . . . . . . . . . . . . . . . . . . . . . . . . . . . . . . . . 109
Using the multipurpose slider (audio only) . . . . . . . . . . . . . . . . . . . . . . . . . . . . . . . . . . . . . . . . . . . .110
Assigning audio tracks to assignable effects chains . . . . . . . . . . . . . . . . . . . . . . . . . . . . . . . . . . . . 111
Assigning audio tracks to busses . . . . . . . . . . . . . . . . . . . . . . . . . . . . . . . . . . . . . . . . . . . . . . . . . . . . . 111
Adjusting the composite level (video only) . . . . . . . . . . . . . . . . . . . . . . . . . . . . . . . . . . . . . . . . . . . .112
Selecting the compositing mode . . . . . . . . . . . . . . . . . . . . . . . . . . . . . . . . . . . . . . . . . . . . . . . . . . . . . 112
Bypassing motion blur envelopes (video only) . . . . . . . . . . . . . . . . . . . . . . . . . . . . . . . . . . . . . . . . .113
Using track motion (video only) . . . . . . . . . . . . . . . . . . . . . . . . . . . . . . . . . . . . . . . . . . . . . . . . . . . . . . 113
Phase inverting a track (audio only) . . . . . . . . . . . . . . . . . . . . . . . . . . . . . . . . . . . . . . . . . . . . . . . . . . . 113
Muting a track . . . . . . . . . . . . . . . . . . . . . . . . . . . . . . . . . . . . . . . . . . . . . . . . . . . . . . . . . . . . . . . . . . . . . . 113
Muting all audio or video tracks . . . . . . . . . . . . . . . . . . . . . . . . . . . . . . . . . . . . . . . . . . . . . . . . . . . . . . 113
Soloing a track . . . . . . . . . . . . . . . . . . . . . . . . . . . . . . . . . . . . . . . . . . . . . . . . . . . . . . . . . . . . . . . . . . . . . 113
TABLE OF CONTENTS
5
Setting default track properties. . . . . . . . . . . . . . . . . . . . . . . . . . . . . . . . . . . . . . . . . . .114
Track automation envelopes. . . . . . . . . . . . . . . . . . . . . . . . . . . . . . . . . . . . . . . . . . . . .114
Using audio bus tracks . . . . . . . . . . . . . . . . . . . . . . . . . . . . . . . . . . . . . . . . . . . . . . . . . .114
Adding envelopes to an audio bus track . . . . . . . . . . . . . . . . . . . . . . . . . . . . . . . . . . . . . . . . . . . . . .114
Adding effects to audio bus tracks . . . . . . . . . . . . . . . . . . . . . . . . . . . . . . . . . . . . . . . . . . . . . . . . . . . .114
Muting or soloing an audio bus track . . . . . . . . . . . . . . . . . . . . . . . . . . . . . . . . . . . . . . . . . . . . . . . . .115
Resizing audio bus tracks . . . . . . . . . . . . . . . . . . . . . . . . . . . . . . . . . . . . . . . . . . . . . . . . . . . . . . . . . . . .115
Using video bus tracks . . . . . . . . . . . . . . . . . . . . . . . . . . . . . . . . . . . . . . . . . . . . . . . . . .115
Adding keyframes to the video bus track . . . . . . . . . . . . . . . . . . . . . . . . . . . . . . . . . . . . . . . . . . . . . .115
Adding envelopes to the video bus track . . . . . . . . . . . . . . . . . . . . . . . . . . . . . . . . . . . . . . . . . . . . . .115
Adding effects to video bus tracks . . . . . . . . . . . . . . . . . . . . . . . . . . . . . . . . . . . . . . . . . . . . . . . . . . . .115
Muting the video output . . . . . . . . . . . . . . . . . . . . . . . . . . . . . . . . . . . . . . . . . . . . . . . . . . . . . . . . . . . . .115
Bypassing video effects and envelopes . . . . . . . . . . . . . . . . . . . . . . . . . . . . . . . . . . . . . . . . . . . . . . .116
Resizing video bus tracks . . . . . . . . . . . . . . . . . . . . . . . . . . . . . . . . . . . . . . . . . . . . . . . . . . . . . . . . . . . .116
Rendering to a new track . . . . . . . . . . . . . . . . . . . . . . . . . . . . . . . . . . . . . . . . . . . . . . . .116
Using Automation. . . . . . . . . . . . . . . . . . . . . . . . . . . . . . . . . . . . . . 119
Showing or hiding automation controls. . . . . . . . . . . . . . . . . . . . . . . . . . . . . . . . . . .119
Track automation. . . . . . . . . . . . . . . . . . . . . . . . . . . . . . . . . . . . . . . . . . . . . . . . . . . . . . .119
Mute automation (audio and video) . . . . . . . . . . . . . . . . . . . . . . . . . . . . . . . . . . . . . . . . . . . . . . . . . .119
Volume or pan automation (audio only) . . . . . . . . . . . . . . . . . . . . . . . . . . . . . . . . . . . . . . . . . . . . . . .120
Assignable effects automation (audio only) . . . . . . . . . . . . . . . . . . . . . . . . . . . . . . . . . . . . . . . . . . . .121
Bus automation (audio only) . . . . . . . . . . . . . . . . . . . . . . . . . . . . . . . . . . . . . . . . . . . . . . . . . . . . . . . . .122
Adding or removing track effect automation . . . . . . . . . . . . . . . . . . . . . . . . . . . . . . . . . . . . . . . . . . .122
Composite level automation (video only) . . . . . . . . . . . . . . . . . . . . . . . . . . . . . . . . . . . . . . . . . . . . . .124
Adding a motion blur envelope . . . . . . . . . . . . . . . . . . . . . . . . . . . . . . . . . . . . . . . . . . . . . . . . . . . . . .125
Adding a video supersampling envelope . . . . . . . . . . . . . . . . . . . . . . . . . . . . . . . . . . . . . . . . . . . . . .125
Working with track envelopes. . . . . . . . . . . . . . . . . . . . . . . . . . . . . . . . . . . . . . . . . . . .126
Hiding track envelopes . . . . . . . . . . . . . . . . . . . . . . . . . . . . . . . . . . . . . . . . . . . . . . . . . . . . . . . . . . . . . .127
Removing track envelopes . . . . . . . . . . . . . . . . . . . . . . . . . . . . . . . . . . . . . . . . . . . . . . . . . . . . . . . . . .128
Using the Envelope Edit tool . . . . . . . . . . . . . . . . . . . . . . . . . . . . . . . . . . . . . . . . . . . . . . . . . . . . . . . . .128
Locking envelopes to events . . . . . . . . . . . . . . . . . . . . . . . . . . . . . . . . . . . . . . . . . . . . . . . . . . . . . . . . .129
Automating 5.1 surround projects. . . . . . . . . . . . . . . . . . . . . . . . . . . . . . . . . . . . . . . .129
Automation recording modes. . . . . . . . . . . . . . . . . . . . . . . . . . . . . . . . . . . . . . . . . . . .129
Recording automation settings . . . . . . . . . . . . . . . . . . . . . . . . . . . . . . . . . . . . . . . . . . . . . . . . . . . . . . .130
Editing sections of your recorded settings in Touch mode . . . . . . . . . . . . . . . . . . . . . . . . . . . . . .130
Overwriting recorded settings in Latch mode . . . . . . . . . . . . . . . . . . . . . . . . . . . . . . . . . . . . . . . . . .131
Editing individual envelope points or keyframes . . . . . . . . . . . . . . . . . . . . . . . . . . . . . . . . . . . . . . .131
Setting the automation recording mode for a track . . . . . . . . . . . . . . . . . . . . . . . . . . . . . . . . . . . . .131
TABLE OF CONTENTS
6
Working with Events . . . . . . . . . . . . . . . . . . . . . . . . . . . . . . . . . . . . 133
Setting event switches . . . . . . . . . . . . . . . . . . . . . . . . . . . . . . . . . . . . . . . . . . . . . . . . . . 133
Mute . . . . . . . . . . . . . . . . . . . . . . . . . . . . . . . . . . . . . . . . . . . . . . . . . . . . . . . . . . . . . . . . . . . . . . . . . . . . . . 133
Lock . . . . . . . . . . . . . . . . . . . . . . . . . . . . . . . . . . . . . . . . . . . . . . . . . . . . . . . . . . . . . . . . . . . . . . . . . . . . . . .133
Loop . . . . . . . . . . . . . . . . . . . . . . . . . . . . . . . . . . . . . . . . . . . . . . . . . . . . . . . . . . . . . . . . . . . . . . . . . . . . . . 133
Invert phase (audio only) . . . . . . . . . . . . . . . . . . . . . . . . . . . . . . . . . . . . . . . . . . . . . . . . . . . . . . . . . . . . 134
Normalize (audio only) . . . . . . . . . . . . . . . . . . . . . . . . . . . . . . . . . . . . . . . . . . . . . . . . . . . . . . . . . . . . . .134
Maintain aspect ratio (video only) . . . . . . . . . . . . . . . . . . . . . . . . . . . . . . . . . . . . . . . . . . . . . . . . . . . . 135
Reduce interlace flicker (video only) . . . . . . . . . . . . . . . . . . . . . . . . . . . . . . . . . . . . . . . . . . . . . . . . . . 135
Resample (video only) . . . . . . . . . . . . . . . . . . . . . . . . . . . . . . . . . . . . . . . . . . . . . . . . . . . . . . . . . . . . . . 135
Accessing event properties. . . . . . . . . . . . . . . . . . . . . . . . . . . . . . . . . . . . . . . . . . . . . . 136
Adjusting audio channels . . . . . . . . . . . . . . . . . . . . . . . . . . . . . . . . . . . . . . . . . . . . . . . 136
Copying and pasting event attributes. . . . . . . . . . . . . . . . . . . . . . . . . . . . . . . . . . . . . 137
Using audio event envelopes (ASR) . . . . . . . . . . . . . . . . . . . . . . . . . . . . . . . . . . . . . . 137
Setting an audio event’s volume . . . . . . . . . . . . . . . . . . . . . . . . . . . . . . . . . . . . . . . . . . . . . . . . . . . . . 137
Setting an event’s fade in and out . . . . . . . . . . . . . . . . . . . . . . . . . . . . . . . . . . . . . . . . . . . . . . . . . . . . 138
Using video event envelopes . . . . . . . . . . . . . . . . . . . . . . . . . . . . . . . . . . . . . . . . . . . . 138
Using opacity envelopes . . . . . . . . . . . . . . . . . . . . . . . . . . . . . . . . . . . . . . . . . . . . . . . . . . . . . . . . . . . . 139
Using velocity envelopes . . . . . . . . . . . . . . . . . . . . . . . . . . . . . . . . . . . . . . . . . . . . . . . . . . . . . . . . . . . . 139
Grouping events . . . . . . . . . . . . . . . . . . . . . . . . . . . . . . . . . . . . . . . . . . . . . . . . . . . . . . . 141
Creating a new group . . . . . . . . . . . . . . . . . . . . . . . . . . . . . . . . . . . . . . . . . . . . . . . . . . . . . . . . . . . . . . . 141
Adding an event to an existing group . . . . . . . . . . . . . . . . . . . . . . . . . . . . . . . . . . . . . . . . . . . . . . . . . 142
Removing events from a group . . . . . . . . . . . . . . . . . . . . . . . . . . . . . . . . . . . . . . . . . . . . . . . . . . . . . . 142
Clearing a group . . . . . . . . . . . . . . . . . . . . . . . . . . . . . . . . . . . . . . . . . . . . . . . . . . . . . . . . . . . . . . . . . . . . 142
Selecting all members of a group . . . . . . . . . . . . . . . . . . . . . . . . . . . . . . . . . . . . . . . . . . . . . . . . . . . . 142
Suspending grouping temporarily . . . . . . . . . . . . . . . . . . . . . . . . . . . . . . . . . . . . . . . . . . . . . . . . . . .142
Cutting, copying, or deleting grouped events . . . . . . . . . . . . . . . . . . . . . . . . . . . . . . . . . . . . . . . . . . 142
Using the Mixer . . . . . . . . . . . . . . . . . . . . . . . . . . . . . . . . . . . . . . . . 143
Using the Mixer window . . . . . . . . . . . . . . . . . . . . . . . . . . . . . . . . . . . . . . . . . . . . . . . . 143
Viewing the Mixer window . . . . . . . . . . . . . . . . . . . . . . . . . . . . . . . . . . . . . . . . . . . . . . . . . . . . . . . . . .143
Using the Mixer toolbar . . . . . . . . . . . . . . . . . . . . . . . . . . . . . . . . . . . . . . . . . . . . . . . . . . . . . . . . . . . . . 144
Using the Mixer Preview fader . . . . . . . . . . . . . . . . . . . . . . . . . . . . . . . . . . . . . . . . . . . . . . . . . . . . . . .144
Using busses . . . . . . . . . . . . . . . . . . . . . . . . . . . . . . . . . . . . . . . . . . . . . . . . . . . . . . . . . . 145
Adding busses to a project . . . . . . . . . . . . . . . . . . . . . . . . . . . . . . . . . . . . . . . . . . . . . . . . . . . . . . . . . .145
Deleting busses from a project . . . . . . . . . . . . . . . . . . . . . . . . . . . . . . . . . . . . . . . . . . . . . . . . . . . . . . .147
Routing a bus to another bus . . . . . . . . . . . . . . . . . . . . . . . . . . . . . . . . . . . . . . . . . . . . . . . . . . . . . . . . 147
Routing busses to hardware . . . . . . . . . . . . . . . . . . . . . . . . . . . . . . . . . . . . . . . . . . . . . . . . . . . . . . . . . 147
Working with busses . . . . . . . . . . . . . . . . . . . . . . . . . . . . . . . . . . . . . . . . . . . . . . . . . . . . . . . . . . . . . . . . 148
Assigning audio tracks to busses . . . . . . . . . . . . . . . . . . . . . . . . . . . . . . . . . . . . . . . . . . . . . . . . . . . . . 149
TABLE OF CONTENTS
7
Using assignable effects chains . . . . . . . . . . . . . . . . . . . . . . . . . . . . . . . . . . . . . . . . . .150
Assigning audio tracks to assignable effects chains . . . . . . . . . . . . . . . . . . . . . . . . . . . . . . . . . . . .151
Routing assignable effects chains to busses . . . . . . . . . . . . . . . . . . . . . . . . . . . . . . . . . . . . . . . . . . .152
Automating busses and assignable effects . . . . . . . . . . . . . . . . . . . . . . . . . . . . . . . .152
Viewing bus tracks . . . . . . . . . . . . . . . . . . . . . . . . . . . . . . . . . . . . . . . . . . . . . . . . . . . . . . . . . . . . . . . . . .152
Adding track envelopes . . . . . . . . . . . . . . . . . . . . . . . . . . . . . . . . . . . . . . . . . . . . . . . . . . . . . . . . . . . . .152
Modifying track envelopes . . . . . . . . . . . . . . . . . . . . . . . . . . . . . . . . . . . . . . . . . . . . . . . . . . . . . . . . . . .152
Adding Audio Effects . . . . . . . . . . . . . . . . . . . . . . . . . . . . . . . . . . . 153
Using audio effects . . . . . . . . . . . . . . . . . . . . . . . . . . . . . . . . . . . . . . . . . . . . . . . . . . . . .153
Using plug-in chains . . . . . . . . . . . . . . . . . . . . . . . . . . . . . . . . . . . . . . . . . . . . . . . . . . . .154
Creating a plug-in chain . . . . . . . . . . . . . . . . . . . . . . . . . . . . . . . . . . . . . . . . . . . . . . . . . . . . . . . . . . . . .154
Adding plug-ins to a plug-in chain . . . . . . . . . . . . . . . . . . . . . . . . . . . . . . . . . . . . . . . . . . . . . . . . . . . .154
Saving customized plug-in presets . . . . . . . . . . . . . . . . . . . . . . . . . . . . . . . . . . . . . . . . . . . . . . . . . . .156
Arranging the order of plug-ins . . . . . . . . . . . . . . . . . . . . . . . . . . . . . . . . . . . . . . . . . . . . . . . . . . . . . .156
Bypassing plug-ins on the chain . . . . . . . . . . . . . . . . . . . . . . . . . . . . . . . . . . . . . . . . . . . . . . . . . . . . . .157
Removing plug-ins from a chain . . . . . . . . . . . . . . . . . . . . . . . . . . . . . . . . . . . . . . . . . . . . . . . . . . . . .157
Saving plug-in chains . . . . . . . . . . . . . . . . . . . . . . . . . . . . . . . . . . . . . . . . . . . . . . . . . . . . . . . . . . . . . . .159
Editing saved plug-in chains . . . . . . . . . . . . . . . . . . . . . . . . . . . . . . . . . . . . . . . . . . . . . . . . . . . . . . . . .159
Organizing your plug-ins . . . . . . . . . . . . . . . . . . . . . . . . . . . . . . . . . . . . . . . . . . . . . . . . . . . . . . . . . . . .160
Automating effects parameters . . . . . . . . . . . . . . . . . . . . . . . . . . . . . . . . . . . . . . . . . .160
Applying non-real-time event effects . . . . . . . . . . . . . . . . . . . . . . . . . . . . . . . . . . . . .160
Bypassing all audio effects. . . . . . . . . . . . . . . . . . . . . . . . . . . . . . . . . . . . . . . . . . . . . . .161
Recording Audio . . . . . . . . . . . . . . . . . . . . . . . . . . . . . . . . . . . . . . . 163
Setting up your equipment . . . . . . . . . . . . . . . . . . . . . . . . . . . . . . . . . . . . . . . . . . . . . .163
Basic setup . . . . . . . . . . . . . . . . . . . . . . . . . . . . . . . . . . . . . . . . . . . . . . . . . . . . . . . . . . . . . . . . . . . . . . . . .163
Setup with mixer . . . . . . . . . . . . . . . . . . . . . . . . . . . . . . . . . . . . . . . . . . . . . . . . . . . . . . . . . . . . . . . . . . .164
Setup with digital multitrack . . . . . . . . . . . . . . . . . . . . . . . . . . . . . . . . . . . . . . . . . . . . . . . . . . . . . . . . .164
Preparing to record . . . . . . . . . . . . . . . . . . . . . . . . . . . . . . . . . . . . . . . . . . . . . . . . . . . . .165
Arming the track for recording . . . . . . . . . . . . . . . . . . . . . . . . . . . . . . . . . . . . . . . . . . . . . . . . . . . . . . .165
Selecting recording settings . . . . . . . . . . . . . . . . . . . . . . . . . . . . . . . . . . . . . . . . . . . . . . . . . . . . . . . . .166
Using the metronome . . . . . . . . . . . . . . . . . . . . . . . . . . . . . . . . . . . . . . . . . . . . . . . . . . . . . . . . . . . . . . .167
Recording . . . . . . . . . . . . . . . . . . . . . . . . . . . . . . . . . . . . . . . . . . . . . . . . . . . . . . . . . . . . .167
Recording into an empty track . . . . . . . . . . . . . . . . . . . . . . . . . . . . . . . . . . . . . . . . . . . . . . . . . . . . . . .167
Recording into a time selection . . . . . . . . . . . . . . . . . . . . . . . . . . . . . . . . . . . . . . . . . . . . . . . . . . . . . . .168
Recording into an event . . . . . . . . . . . . . . . . . . . . . . . . . . . . . . . . . . . . . . . . . . . . . . . . . . . . . . . . . . . . .168
Recording into an event with a time selection . . . . . . . . . . . . . . . . . . . . . . . . . . . . . . . . . . . . . . . . . .169
Triggering from MIDI timecode . . . . . . . . . . . . . . . . . . . . . . . . . . . . . . . . . . . . . . . . . . . . . . . . . . . . . .170
Working with multiple recorded takes . . . . . . . . . . . . . . . . . . . . . . . . . . . . . . . . . . . .170
TABLE OF CONTENTS
8
Specifying where recordings are stored . . . . . . . . . . . . . . . . . . . . . . . . . . . . . . . . . . 170
Changing where recorded files are stored when arming a track . . . . . . . . . . . . . . . . . . . . . . . . . 170
Changing where recorded files are stored when starting to record . . . . . . . . . . . . . . . . . . . . . . . 171
Changing where recorded files are stored in the Project Properties dialog . . . . . . . . . . . . . . . . 171
Monitoring audio levels . . . . . . . . . . . . . . . . . . . . . . . . . . . . . . . . . . . . . . . . . . . . . . . . . . . . . . . . . . . . . 171
Using record input monitoring . . . . . . . . . . . . . . . . . . . . . . . . . . . . . . . . . . . . . . . . . . . . . . . . . . . . . . .171
Working with 5.1 Surround . . . . . . . . . . . . . . . . . . . . . . . . . . . . . . 173
What is 5.1 surround?. . . . . . . . . . . . . . . . . . . . . . . . . . . . . . . . . . . . . . . . . . . . . . . . . . . 173
Setting up surround hardware. . . . . . . . . . . . . . . . . . . . . . . . . . . . . . . . . . . . . . . . . . . 174
Setting up surround projects . . . . . . . . . . . . . . . . . . . . . . . . . . . . . . . . . . . . . . . . . . . . 174
Routing to hardware in the mixer . . . . . . . . . . . . . . . . . . . . . . . . . . . . . . . . . . . . . . . . . . . . . . . . . . . . 175
Assigning audio to the LFE channel . . . . . . . . . . . . . . . . . . . . . . . . . . . . . . . . . . . . . . 176
Adjusting volume . . . . . . . . . . . . . . . . . . . . . . . . . . . . . . . . . . . . . . . . . . . . . . . . . . . . . . 176
Adjusting track volume . . . . . . . . . . . . . . . . . . . . . . . . . . . . . . . . . . . . . . . . . . . . . . . . . . . . . . . . . . . . . .176
Adjusting assignable effects send or bus send levels . . . . . . . . . . . . . . . . . . . . . . . . . . . . . . . . . . . 177
Adjusting channel levels . . . . . . . . . . . . . . . . . . . . . . . . . . . . . . . . . . . . . . . . . . . . . . . . . . . . . . . . . . . . 177
Panning audio . . . . . . . . . . . . . . . . . . . . . . . . . . . . . . . . . . . . . . . . . . . . . . . . . . . . . . . . . 178
Panning tracks . . . . . . . . . . . . . . . . . . . . . . . . . . . . . . . . . . . . . . . . . . . . . . . . . . . . . . . . . . . . . . . . . . . . . 178
Panning mixer controls . . . . . . . . . . . . . . . . . . . . . . . . . . . . . . . . . . . . . . . . . . . . . . . . . . . . . . . . . . . . . 179
Using the Surround Panner window . . . . . . . . . . . . . . . . . . . . . . . . . . . . . . . . . . . . . . . . . . . . . . . . . . 180
Automating panning . . . . . . . . . . . . . . . . . . . . . . . . . . . . . . . . . . . . . . . . . . . . . . . . . . . 182
Turning on panning keyframes . . . . . . . . . . . . . . . . . . . . . . . . . . . . . . . . . . . . . . . . . . . . . . . . . . . . . . 182
Adding panning keyframes . . . . . . . . . . . . . . . . . . . . . . . . . . . . . . . . . . . . . . . . . . . . . . . . . . . . . . . . . . 182
Working with keyframes . . . . . . . . . . . . . . . . . . . . . . . . . . . . . . . . . . . . . . . . . . . . . . . . . . . . . . . . . . . . 183
Rendering surround projects . . . . . . . . . . . . . . . . . . . . . . . . . . . . . . . . . . . . . . . . . . . . 185
Creating a DVD with DVD Architect Software. . . . . . . . . . . . . . . . . . . . . . . . . . . . . . 186
Using Advanced Video Features . . . . . . . . . . . . . . . . . . . . . . . . . 187
Cropping video . . . . . . . . . . . . . . . . . . . . . . . . . . . . . . . . . . . . . . . . . . . . . . . . . . . . . . . . 187
Cropping . . . . . . . . . . . . . . . . . . . . . . . . . . . . . . . . . . . . . . . . . . . . . . . . . . . . . . . . . . . . . . . . . . . . . . . . . . 188
Bézier masks . . . . . . . . . . . . . . . . . . . . . . . . . . . . . . . . . . . . . . . . . . . . . . . . . . . . . . . . . . . . . . . . . . . . . . . 189
Rotating . . . . . . . . . . . . . . . . . . . . . . . . . . . . . . . . . . . . . . . . . . . . . . . . . . . . . . . . . . . . . . . . . . . . . . . . . . .191
Adding animation . . . . . . . . . . . . . . . . . . . . . . . . . . . . . . . . . . . . . . . . . . . . . . . . . . . . . . . . . . . . . . . . . . 192
Working with still images . . . . . . . . . . . . . . . . . . . . . . . . . . . . . . . . . . . . . . . . . . . . . . . 192
Creating still images for use in Vegas software . . . . . . . . . . . . . . . . . . . . . . . . . . . . . . . . . . . . . . . . 192
Capturing a timeline snapshot . . . . . . . . . . . . . . . . . . . . . . . . . . . . . . . . . . . . . . . . . . . . . . . . . . . . . . . 193
Creating a slide show . . . . . . . . . . . . . . . . . . . . . . . . . . . . . . . . . . . . . . . . . . . . . . . . . . . . . . . . . . . . . . . 194
TABLE OF CONTENTS
9
Creating titles . . . . . . . . . . . . . . . . . . . . . . . . . . . . . . . . . . . . . . . . . . . . . . . . . . . . . . . . . .194
Creating titles from images . . . . . . . . . . . . . . . . . . . . . . . . . . . . . . . . . . . . . . . . . . . . . . . . . . . . . . . . . .195
Fading titles . . . . . . . . . . . . . . . . . . . . . . . . . . . . . . . . . . . . . . . . . . . . . . . . . . . . . . . . . . . . . . . . . . . . . . . .196
Adding closed captioning to Windows Media Video (WMV) files . . . . . . . . . . . .196
Adding closed captioning line-by-line . . . . . . . . . . . . . . . . . . . . . . . . . . . . . . . . . . . . . . . . . . . . . . . . .196
Adding closed captioning from a script . . . . . . . . . . . . . . . . . . . . . . . . . . . . . . . . . . . . . . . . . . . . . . .196
Displaying closed captioning . . . . . . . . . . . . . . . . . . . . . . . . . . . . . . . . . . . . . . . . . . . . . . . . . . . . . . . .198
Resampling video . . . . . . . . . . . . . . . . . . . . . . . . . . . . . . . . . . . . . . . . . . . . . . . . . . . . . .199
Using Edit Decision Lists (EDL). . . . . . . . . . . . . . . . . . . . . . . . . . . . . . . . . . . . . . . . . . .200
Creating an EDL . . . . . . . . . . . . . . . . . . . . . . . . . . . . . . . . . . . . . . . . . . . . . . . . . . . . . . . . . . . . . . . . . . . .200
Opening an EDL . . . . . . . . . . . . . . . . . . . . . . . . . . . . . . . . . . . . . . . . . . . . . . . . . . . . . . . . . . . . . . . . . . . .200
Working in DV format. . . . . . . . . . . . . . . . . . . . . . . . . . . . . . . . . . . . . . . . . . . . . . . . . . .200
Selecting source media . . . . . . . . . . . . . . . . . . . . . . . . . . . . . . . . . . . . . . . . . . . . . . . . . . . . . . . . . . . . .201
Setting project properties . . . . . . . . . . . . . . . . . . . . . . . . . . . . . . . . . . . . . . . . . . . . . . . . . . . . . . . . . . . .201
Selecting templates . . . . . . . . . . . . . . . . . . . . . . . . . . . . . . . . . . . . . . . . . . . . . . . . . . . . . . . . . . . . . . . . .201
Eliminating out-of-range colors . . . . . . . . . . . . . . . . . . . . . . . . . . . . . . . . . . . . . . . . . . . . . . . . . . . . . .202
Modifying video properties . . . . . . . . . . . . . . . . . . . . . . . . . . . . . . . . . . . . . . . . . . . . . .203
Modifying project video properties . . . . . . . . . . . . . . . . . . . . . . . . . . . . . . . . . . . . . . . . . . . . . . . . . . .203
Modifying media file properties . . . . . . . . . . . . . . . . . . . . . . . . . . . . . . . . . . . . . . . . . . . . . . . . . . . . . .204
Modifying output properties . . . . . . . . . . . . . . . . . . . . . . . . . . . . . . . . . . . . . . . . . . . . . . . . . . . . . . . . .205
Using Video FX, Compositing, and Masks . . . . . . . . . . . . . . . . 207
Using video effects . . . . . . . . . . . . . . . . . . . . . . . . . . . . . . . . . . . . . . . . . . . . . . . . . . . . .207
Adding a video effects plug-in . . . . . . . . . . . . . . . . . . . . . . . . . . . . . . . . . . . . . . . . . . . . . . . . . . . . . . .208
Working with video effects plug-in chains . . . . . . . . . . . . . . . . . . . . . . . . . . . . . . . . . . . . . . . . . . . . .210
Modifying a video effects plug-in . . . . . . . . . . . . . . . . . . . . . . . . . . . . . . . . . . . . . . . . . . . . . . . . . . . . .212
Saving custom plug-in settings as a preset . . . . . . . . . . . . . . . . . . . . . . . . . . . . . . . . . . . . . . . . . . . .212
Using keyframe animation with plug-ins . . . . . . . . . . . . . . . . . . . . . . . . . . . . . . . . . . . . . . . . . . . . . .212
Using generated media . . . . . . . . . . . . . . . . . . . . . . . . . . . . . . . . . . . . . . . . . . . . . . . . .213
Adding a generated media event . . . . . . . . . . . . . . . . . . . . . . . . . . . . . . . . . . . . . . . . . . . . . . . . . . . . .213
Duplicating a generated media event . . . . . . . . . . . . . . . . . . . . . . . . . . . . . . . . . . . . . . . . . . . . . . . . .214
Compositing . . . . . . . . . . . . . . . . . . . . . . . . . . . . . . . . . . . . . . . . . . . . . . . . . . . . . . . . . . .214
Understanding the parent/child track relationship . . . . . . . . . . . . . . . . . . . . . . . . . . . . . . . . . . . . . .214
Selecting compositing modes . . . . . . . . . . . . . . . . . . . . . . . . . . . . . . . . . . . . . . . . . . . . . . . . . . . . . . .215
Using a 2-to-1 transform plug-in to customize compositing . . . . . . . . . . . . . . . . . . . . . . . . . . . . .218
3D Compositing . . . . . . . . . . . . . . . . . . . . . . . . . . . . . . . . . . . . . . . . . . . . . . . . . . . . . . . .218
Single-track 3D motion . . . . . . . . . . . . . . . . . . . . . . . . . . . . . . . . . . . . . . . . . . . . . . . . . . . . . . . . . . . . . .218
Composited group 3D motion . . . . . . . . . . . . . . . . . . . . . . . . . . . . . . . . . . . . . . . . . . . . . . . . . . . . . . .220
Changing editing options . . . . . . . . . . . . . . . . . . . . . . . . . . . . . . . . . . . . . . . . . . . . . . . . . . . . . . . . . . . .221
TABLE OF CONTENTS
10
Creating masks . . . . . . . . . . . . . . . . . . . . . . . . . . . . . . . . . . . . . . . . . . . . . . . . . . . . . . . . 222
Creating image masks . . . . . . . . . . . . . . . . . . . . . . . . . . . . . . . . . . . . . . . . . . . . . . . . . . . . . . . . . . . . . . 222
Creating video masks . . . . . . . . . . . . . . . . . . . . . . . . . . . . . . . . . . . . . . . . . . . . . . . . . . . . . . . . . . . . . . . 224
Fine-tuning masks . . . . . . . . . . . . . . . . . . . . . . . . . . . . . . . . . . . . . . . . . . . . . . . . . . . . . . . . . . . . . . . . . . 225
Using the Mask Generator . . . . . . . . . . . . . . . . . . . . . . . . . . . . . . . . . . . . . . . . . . . . . . . . . . . . . . . . . . . 226
Chroma keying . . . . . . . . . . . . . . . . . . . . . . . . . . . . . . . . . . . . . . . . . . . . . . . . . . . . . . . . . . . . . . . . . . . . . 228
Adding Video Transitions and Motion . . . . . . . . . . . . . . . . . . . . 231
Understanding basic transitions . . . . . . . . . . . . . . . . . . . . . . . . . . . . . . . . . . . . . . . . . 231
Cuts . . . . . . . . . . . . . . . . . . . . . . . . . . . . . . . . . . . . . . . . . . . . . . . . . . . . . . . . . . . . . . . . . . . . . . . . . . . . . . .231
Crossfades . . . . . . . . . . . . . . . . . . . . . . . . . . . . . . . . . . . . . . . . . . . . . . . . . . . . . . . . . . . . . . . . . . . . . . . . . 231
Using transition effects. . . . . . . . . . . . . . . . . . . . . . . . . . . . . . . . . . . . . . . . . . . . . . . . . . 231
Adding a transition . . . . . . . . . . . . . . . . . . . . . . . . . . . . . . . . . . . . . . . . . . . . . . . . . . . . . . . . . . . . . . . . . 232
Adding a transition to the end of an event . . . . . . . . . . . . . . . . . . . . . . . . . . . . . . . . . . . . . . . . . . . . . 232
Adding a transition to all selected events . . . . . . . . . . . . . . . . . . . . . . . . . . . . . . . . . . . . . . . . . . . . . . 233
Adding a transition progress envelope . . . . . . . . . . . . . . . . . . . . . . . . . . . . . . . . . . . . . . . . . . . . . . . .233
Understanding track layers . . . . . . . . . . . . . . . . . . . . . . . . . . . . . . . . . . . . . . . . . . . . . . . . . . . . . . . . . .234
Converting a cut to a transition . . . . . . . . . . . . . . . . . . . . . . . . . . . . . . . . . . . . . . . . . . . . . . . . . . . . . . .234
Converting a crossfade or transition to a cut . . . . . . . . . . . . . . . . . . . . . . . . . . . . . . . . . . . . . . . . . . . 235
Previewing a transition . . . . . . . . . . . . . . . . . . . . . . . . . . . . . . . . . . . . . . . . . . . . . . . . . . . . . . . . . . . . . .235
Modifying a transition . . . . . . . . . . . . . . . . . . . . . . . . . . . . . . . . . . . . . . . . . . . . . . . . . . . . . . . . . . . . . . . 236
Saving custom settings as a preset . . . . . . . . . . . . . . . . . . . . . . . . . . . . . . . . . . . . . . . . . . . . . . . . . . . 236
Using keyframe animation . . . . . . . . . . . . . . . . . . . . . . . . . . . . . . . . . . . . . . . . . . . . . . 237
Understanding the keyframe controller . . . . . . . . . . . . . . . . . . . . . . . . . . . . . . . . . . . . . . . . . . . . . . . 237
Adding keyframes . . . . . . . . . . . . . . . . . . . . . . . . . . . . . . . . . . . . . . . . . . . . . . . . . . . . . . . . . . . . . . . . . . 238
Deleting keyframes . . . . . . . . . . . . . . . . . . . . . . . . . . . . . . . . . . . . . . . . . . . . . . . . . . . . . . . . . . . . . . . . . 238
Navigating in the keyframe controller . . . . . . . . . . . . . . . . . . . . . . . . . . . . . . . . . . . . . . . . . . . . . . . . . 238
Modifying keyframes . . . . . . . . . . . . . . . . . . . . . . . . . . . . . . . . . . . . . . . . . . . . . . . . . . . . . . . . . . . . . . . 238
Working with keyframes in track view . . . . . . . . . . . . . . . . . . . . . . . . . . . . . . . . . . . . . . . . . . . . . . . . 240
Sample uses for keyframe animation. . . . . . . . . . . . . . . . . . . . . . . . . . . . . . . . . . . . . 241
Animating event panning and cropping . . . . . . . . . . . . . . . . . . . . . . . . . . . . . . . . . . . . . . . . . . . . . . . 241
Animating video effects plug-ins . . . . . . . . . . . . . . . . . . . . . . . . . . . . . . . . . . . . . . . . . . . . . . . . . . . . . 243
Animating generated text . . . . . . . . . . . . . . . . . . . . . . . . . . . . . . . . . . . . . . . . . . . . . . . . . . . . . . . . . . . 244
Adding track motion. . . . . . . . . . . . . . . . . . . . . . . . . . . . . . . . . . . . . . . . . . . . . . . . . . . . 245
Controlling track motion . . . . . . . . . . . . . . . . . . . . . . . . . . . . . . . . . . . . . . . . . . . . . . . . . . . . . . . . . . . . . 245
Using the track motion shortcut menu . . . . . . . . . . . . . . . . . . . . . . . . . . . . . . . . . . . . . . . . . . . . . . . .246
Changing editing options . . . . . . . . . . . . . . . . . . . . . . . . . . . . . . . . . . . . . . . . . . . . . . . . . . . . . . . . . . . . 246
Using keyframes in track motion . . . . . . . . . . . . . . . . . . . . . . . . . . . . . . . . . . . . . . . . . . . . . . . . . . . . . 247
Creating a picture-in-picture effect . . . . . . . . . . . . . . . . . . . . . . . . . . . . . . . . . . . . . . . . . . . . . . . . . . . . 250
Animating the overlay . . . . . . . . . . . . . . . . . . . . . . . . . . . . . . . . . . . . . . . . . . . . . . . . . . . . . . . . . . . . . . 250
TABLE OF CONTENTS
11
Previewing and Analyzing Video . . . . . . . . . . . . . . . . . . . . . . . . . 253
Understanding the Video Preview window. . . . . . . . . . . . . . . . . . . . . . . . . . . . . . . .253
Using the Video Preview window shortcut menu . . . . . . . . . . . . . . . . . . . . . . . . . . . . . . . . . . . . . .254
Optimizing the Video Preview window. . . . . . . . . . . . . . . . . . . . . . . . . . . . . . . . . . . .255
Reducing preview quality . . . . . . . . . . . . . . . . . . . . . . . . . . . . . . . . . . . . . . . . . . . . . . . . . . . . . . . . . . . .255
Prerendering video . . . . . . . . . . . . . . . . . . . . . . . . . . . . . . . . . . . . . . . . . . . . . . . . . . . . . . . . . . . . . . . . .255
Building dynamic RAM previews . . . . . . . . . . . . . . . . . . . . . . . . . . . . . . . . . . . . . . . . . . . . . . . . . . . . .256
Using split-screen previewing. . . . . . . . . . . . . . . . . . . . . . . . . . . . . . . . . . . . . . . . . . . .257
Previewing affected and unprocessed video . . . . . . . . . . . . . . . . . . . . . . . . . . . . . . . . . . . . . . . . . . .257
Showing the video at the cursor position and the contents of the clipboard . . . . . . . . . . . . . . .258
Changing the selection for displaying split-screen views . . . . . . . . . . . . . . . . . . . . . . . . . . . . . . . .258
Identifying safe areas . . . . . . . . . . . . . . . . . . . . . . . . . . . . . . . . . . . . . . . . . . . . . . . . . . .258
Viewing the grid. . . . . . . . . . . . . . . . . . . . . . . . . . . . . . . . . . . . . . . . . . . . . . . . . . . . . . . .259
Isolating color channels . . . . . . . . . . . . . . . . . . . . . . . . . . . . . . . . . . . . . . . . . . . . . . . . .259
Monitoring video with scopes. . . . . . . . . . . . . . . . . . . . . . . . . . . . . . . . . . . . . . . . . . . .259
Displaying chrominance using the vectorscope monitor . . . . . . . . . . . . . . . . . . . . . . . . . . . . . . . .260
Displaying luminance using the waveform monitor . . . . . . . . . . . . . . . . . . . . . . . . . . . . . . . . . . . .261
Displaying color levels and contrast using the histogram monitor . . . . . . . . . . . . . . . . . . . . . . .262
Displaying RGB components with RGB parade monitor . . . . . . . . . . . . . . . . . . . . . . . . . . . . . . . .263
Adjusting video scope settings . . . . . . . . . . . . . . . . . . . . . . . . . . . . . . . . . . . . . . . . . . . . . . . . . . . . . . .264
Previewing in a player. . . . . . . . . . . . . . . . . . . . . . . . . . . . . . . . . . . . . . . . . . . . . . . . . . .265
Using an external monitor. . . . . . . . . . . . . . . . . . . . . . . . . . . . . . . . . . . . . . . . . . . . . . .266
Setting up an external monitor . . . . . . . . . . . . . . . . . . . . . . . . . . . . . . . . . . . . . . . . . . . . . . . . . . . . . . .266
Configuring an external monitor . . . . . . . . . . . . . . . . . . . . . . . . . . . . . . . . . . . . . . . . . . . . . . . . . . . . .267
Verifying the external monitor configuration . . . . . . . . . . . . . . . . . . . . . . . . . . . . . . . . . . . . . . . . . . .267
Saving, Rendering, and Printing Projects. . . . . . . . . . . . . . . . . . 269
Saving a project . . . . . . . . . . . . . . . . . . . . . . . . . . . . . . . . . . . . . . . . . . . . . . . . . . . . . . . .269
Creating a copy of a project (using Save As...) . . . . . . . . . . . . . . . . . . . . . . . . . . . . . . . . . . . . . . . . .270
Saving a project with media . . . . . . . . . . . . . . . . . . . . . . . . . . . . . . . . . . . . . . . . . . . . . . . . . . . . . . . . .270
Autosaving a project . . . . . . . . . . . . . . . . . . . . . . . . . . . . . . . . . . . . . . . . . . . . . . . . . . . . . . . . . . . . . . . .271
Rendering a project . . . . . . . . . . . . . . . . . . . . . . . . . . . . . . . . . . . . . . . . . . . . . . . . . . . . .271
Selecting a file format . . . . . . . . . . . . . . . . . . . . . . . . . . . . . . . . . . . . . . . . . . . . . . . . . . .272
More about the MPEG format . . . . . . . . . . . . . . . . . . . . . . . . . . . . . . . . . . . . . . . . . . . . . . . . . . . . . . . .273
More about the Wave64 and Perfect Clarity Audio formats . . . . . . . . . . . . . . . . . . . . . . . . . . . . . .273
More about video formats . . . . . . . . . . . . . . . . . . . . . . . . . . . . . . . . . . . . . . . . . . . . . . . . . . . . . . . . . . .273
Customizing the rendering process. . . . . . . . . . . . . . . . . . . . . . . . . . . . . . . . . . . . . . .275
Customizing the Render As settings . . . . . . . . . . . . . . . . . . . . . . . . . . . . . . . . . . . . . . . . . . . . . . . . . .275
Saving custom settings as a template . . . . . . . . . . . . . . . . . . . . . . . . . . . . . . . . . . . . . . . . . . . . . . . . .276
TABLE OF CONTENTS
12
Creating custom rendering settings for AVI files . . . . . . . . . . . . . . . . . . . . . . . . . . . 276
Project tab . . . . . . . . . . . . . . . . . . . . . . . . . . . . . . . . . . . . . . . . . . . . . . . . . . . . . . . . . . . . . . . . . . . . . . . . . 276
Video tab . . . . . . . . . . . . . . . . . . . . . . . . . . . . . . . . . . . . . . . . . . . . . . . . . . . . . . . . . . . . . . . . . . . . . . . . . . 276
Audio tab . . . . . . . . . . . . . . . . . . . . . . . . . . . . . . . . . . . . . . . . . . . . . . . . . . . . . . . . . . . . . . . . . . . . . . . . . . 278
Rendering with networked computers. . . . . . . . . . . . . . . . . . . . . . . . . . . . . . . . . . . . 279
Setting up your computers for network rendering . . . . . . . . . . . . . . . . . . . . . . . . . . . . . . . . . . . . .279
Printing with Video Capture . . . . . . . . . . . . . . . . . . . . . . . . . . . . . . . . . . . . . . . . . . . . . 283
Printing to DV tape . . . . . . . . . . . . . . . . . . . . . . . . . . . . . . . . . . . . . . . . . . . . . . . . . . . . . 283
Establishing a connection to the recording device . . . . . . . . . . . . . . . . . . . . . . . . . . . . . . . . . . . . . . 283
Printing to DV tape from the timeline . . . . . . . . . . . . . . . . . . . . . . . . . . . . . . . . . . . . . . . . . . . . . . . . . 284
Customizing Vegas software. . . . . . . . . . . . . . . . . . . . . . . . . . . . . 285
Displaying frame numbers . . . . . . . . . . . . . . . . . . . . . . . . . . . . . . . . . . . . . . . . . . . . . . 285
Changing the ruler format. . . . . . . . . . . . . . . . . . . . . . . . . . . . . . . . . . . . . . . . . . . . . . . 285
Editing the ruler offset . . . . . . . . . . . . . . . . . . . . . . . . . . . . . . . . . . . . . . . . . . . . . . . . . . . . . . . . . . . . . . . 286
Changing grid spacing. . . . . . . . . . . . . . . . . . . . . . . . . . . . . . . . . . . . . . . . . . . . . . . . . . 287
Using the Time Display window . . . . . . . . . . . . . . . . . . . . . . . . . . . . . . . . . . . . . . . . . 287
Changing the time display settings . . . . . . . . . . . . . . . . . . . . . . . . . . . . . . . . . . . . . . . . . . . . . . . . . . .287
Changing the time display colors . . . . . . . . . . . . . . . . . . . . . . . . . . . . . . . . . . . . . . . . . . . . . . . . . . . . . 288
Setting the time display to monitor MIDI timecode . . . . . . . . . . . . . . . . . . . . . . . . . . . . . . . . . . . . . 288
Working with project properties. . . . . . . . . . . . . . . . . . . . . . . . . . . . . . . . . . . . . . . . . . 289
Video tab . . . . . . . . . . . . . . . . . . . . . . . . . . . . . . . . . . . . . . . . . . . . . . . . . . . . . . . . . . . . . . . . . . . . . . . . . . 289
Audio tab . . . . . . . . . . . . . . . . . . . . . . . . . . . . . . . . . . . . . . . . . . . . . . . . . . . . . . . . . . . . . . . . . . . . . . . . . . 289
Ruler tab . . . . . . . . . . . . . . . . . . . . . . . . . . . . . . . . . . . . . . . . . . . . . . . . . . . . . . . . . . . . . . . . . . . . . . . . . . . 290
Summary tab . . . . . . . . . . . . . . . . . . . . . . . . . . . . . . . . . . . . . . . . . . . . . . . . . . . . . . . . . . . . . . . . . . . . . . 290
Audio CD tab . . . . . . . . . . . . . . . . . . . . . . . . . . . . . . . . . . . . . . . . . . . . . . . . . . . . . . . . . . . . . . . . . . . . . . . 290
Using the toolbar. . . . . . . . . . . . . . . . . . . . . . . . . . . . . . . . . . . . . . . . . . . . . . . . . . . . . . . 290
Hiding and displaying the toolbar . . . . . . . . . . . . . . . . . . . . . . . . . . . . . . . . . . . . . . . . . . . . . . . . . . . . 290
Reordering toolbar buttons . . . . . . . . . . . . . . . . . . . . . . . . . . . . . . . . . . . . . . . . . . . . . . . . . . . . . . . . . . 291
Adding buttons to the toolbar . . . . . . . . . . . . . . . . . . . . . . . . . . . . . . . . . . . . . . . . . . . . . . . . . . . . . . . . 291
Removing buttons from the toolbar . . . . . . . . . . . . . . . . . . . . . . . . . . . . . . . . . . . . . . . . . . . . . . . . . . 291
Setting preferences. . . . . . . . . . . . . . . . . . . . . . . . . . . . . . . . . . . . . . . . . . . . . . . . . . . . . 292
General tab . . . . . . . . . . . . . . . . . . . . . . . . . . . . . . . . . . . . . . . . . . . . . . . . . . . . . . . . . . . . . . . . . . . . . . . . 292
Video tab . . . . . . . . . . . . . . . . . . . . . . . . . . . . . . . . . . . . . . . . . . . . . . . . . . . . . . . . . . . . . . . . . . . . . . . . . . 294
Video device tab . . . . . . . . . . . . . . . . . . . . . . . . . . . . . . . . . . . . . . . . . . . . . . . . . . . . . . . . . . . . . . . . . . . . 294
Audio tab . . . . . . . . . . . . . . . . . . . . . . . . . . . . . . . . . . . . . . . . . . . . . . . . . . . . . . . . . . . . . . . . . . . . . . . . . . 295
Audio Device tab . . . . . . . . . . . . . . . . . . . . . . . . . . . . . . . . . . . . . . . . . . . . . . . . . . . . . . . . . . . . . . . . . . . 295
MIDI Tab . . . . . . . . . . . . . . . . . . . . . . . . . . . . . . . . . . . . . . . . . . . . . . . . . . . . . . . . . . . . . . . . . . . . . . . . . . . 297
Editing tab . . . . . . . . . . . . . . . . . . . . . . . . . . . . . . . . . . . . . . . . . . . . . . . . . . . . . . . . . . . . . . . . . . . . . . . . . 297
Display tab . . . . . . . . . . . . . . . . . . . . . . . . . . . . . . . . . . . . . . . . . . . . . . . . . . . . . . . . . . . . . . . . . . . . . . . . . 298
TABLE OF CONTENTS
13
CD Settings tab . . . . . . . . . . . . . . . . . . . . . . . . . . . . . . . . . . . . . . . . . . . . . . . . . . . . . . . . . . . . . . . . . . . . .298
Sync tab . . . . . . . . . . . . . . . . . . . . . . . . . . . . . . . . . . . . . . . . . . . . . . . . . . . . . . . . . . . . . . . . . . . . . . . . . . .299
Keyboard tab . . . . . . . . . . . . . . . . . . . . . . . . . . . . . . . . . . . . . . . . . . . . . . . . . . . . . . . . . . . . . . . . . . . . . . .300
External Control & Automation tab . . . . . . . . . . . . . . . . . . . . . . . . . . . . . . . . . . . . . . . . . . . . . . . . . . .301
Burning CDs . . . . . . . . . . . . . . . . . . . . . . . . . . . . . . . . . . . . . . . . . . . 303
Understanding track-at-once and disc-at-once . . . . . . . . . . . . . . . . . . . . . . . . . . . . .303
Track-at-once . . . . . . . . . . . . . . . . . . . . . . . . . . . . . . . . . . . . . . . . . . . . . . . . . . . . . . . . . . . . . . . . . . . . . . .303
Disc-at-once (Single Session or Red Book) . . . . . . . . . . . . . . . . . . . . . . . . . . . . . . . . . . . . . . . . . . . .303
Understanding tracks and indices . . . . . . . . . . . . . . . . . . . . . . . . . . . . . . . . . . . . . . . .303
Setting up to burn audio CDs . . . . . . . . . . . . . . . . . . . . . . . . . . . . . . . . . . . . . . . . . . . .304
Viewing the ruler and time display . . . . . . . . . . . . . . . . . . . . . . . . . . . . . . . . . . . . . . . . . . . . . . . . . . .304
Setting project properties . . . . . . . . . . . . . . . . . . . . . . . . . . . . . . . . . . . . . . . . . . . . . . . . . . . . . . . . . . . .304
Setting preferences . . . . . . . . . . . . . . . . . . . . . . . . . . . . . . . . . . . . . . . . . . . . . . . . . . . . . . . . . . . . . . . . .304
Importing CD Architect files. . . . . . . . . . . . . . . . . . . . . . . . . . . . . . . . . . . . . . . . . . . . . .304
Creating audio CD layout projects . . . . . . . . . . . . . . . . . . . . . . . . . . . . . . . . . . . . . . . .305
Adding media as CD tracks to a new project . . . . . . . . . . . . . . . . . . . . . . . . . . . . . . . . . . . . . . . . . . .305
Marking tracks in an existing project . . . . . . . . . . . . . . . . . . . . . . . . . . . . . . . . . . . . . . . . . . . . . . . . . .306
Working with tracks and indices. . . . . . . . . . . . . . . . . . . . . . . . . . . . . . . . . . . . . . . . . .307
Navigating to and selecting tracks and indices . . . . . . . . . . . . . . . . . . . . . . . . . . . . . . . . . . . . . . . . .307
Moving track and index markers . . . . . . . . . . . . . . . . . . . . . . . . . . . . . . . . . . . . . . . . . . . . . . . . . . . . .307
Renaming track and index markers . . . . . . . . . . . . . . . . . . . . . . . . . . . . . . . . . . . . . . . . . . . . . . . . . . .307
Deleting track and index markers . . . . . . . . . . . . . . . . . . . . . . . . . . . . . . . . . . . . . . . . . . . . . . . . . . . . .307
Editing markers using the Edit Details window . . . . . . . . . . . . . . . . . . . . . . . . . . . . . . . . . . . . . . . . .308
Copying a track list from the Edit Details window . . . . . . . . . . . . . . . . . . . . . . . . . . . . . . . . . . . . . .308
Burning audio CDs. . . . . . . . . . . . . . . . . . . . . . . . . . . . . . . . . . . . . . . . . . . . . . . . . . . . . .308
Burning single tracks (track-at-once) . . . . . . . . . . . . . . . . . . . . . . . . . . . . . . . . . . . . . . . . . . . . . . . . . .308
Burning a disc (disc-at-once) . . . . . . . . . . . . . . . . . . . . . . . . . . . . . . . . . . . . . . . . . . . . . . . . . . . . . . . . .309
Burning video CDs. . . . . . . . . . . . . . . . . . . . . . . . . . . . . . . . . . . . . . . . . . . . . . . . . . . . . .310
Creating a multimedia CD . . . . . . . . . . . . . . . . . . . . . . . . . . . . . . . . . . . . . . . . . . . . . . .312
Using Scripting. . . . . . . . . . . . . . . . . . . . . . . . . . . . . . . . . . . . . . . . . 313
Running a script . . . . . . . . . . . . . . . . . . . . . . . . . . . . . . . . . . . . . . . . . . . . . . . . . . . . . . . .313
Adding scripts to the Scripting menu . . . . . . . . . . . . . . . . . . . . . . . . . . . . . . . . . . . . .314
Creating a script . . . . . . . . . . . . . . . . . . . . . . . . . . . . . . . . . . . . . . . . . . . . . . . . . . . . . . . .314
Editing an existing script . . . . . . . . . . . . . . . . . . . . . . . . . . . . . . . . . . . . . . . . . . . . . . . .314
TABLE OF CONTENTS
14
Troubleshooting. . . . . . . . . . . . . . . . . . . . . . . . . . . . . . . . . . . . . . . . 317
Troubleshooting resources. . . . . . . . . . . . . . . . . . . . . . . . . . . . . . . . . . . . . . . . . . . . . . 317
Common questions . . . . . . . . . . . . . . . . . . . . . . . . . . . . . . . . . . . . . . . . . . . . . . . . . . . . 317
Why are some of my DirectX plug-ins not working correctly? . . . . . . . . . . . . . . . . . . . . . . . . . . . 317
Why do I hear gaps in my audio playback? . . . . . . . . . . . . . . . . . . . . . . . . . . . . . . . . . . . . . . . . . . . . 317
Why do mono events increase 6 dB when panning a track hard? . . . . . . . . . . . . . . . . . . . . . . . . 318
Why do buffer underruns occur during a test or real write to a CD? . . . . . . . . . . . . . . . . . . . . . . 318
Why can’t I work with footage captured using an MJPEG card? . . . . . . . . . . . . . . . . . . . . . . . . . 319
Trouble-free video: software solutions. . . . . . . . . . . . . . . . . . . . . . . . . . . . . . . . . . . . 320
Trouble-free video: hardware solutions . . . . . . . . . . . . . . . . . . . . . . . . . . . . . . . . . . . 320
Video subsystem . . . . . . . . . . . . . . . . . . . . . . . . . . . . . . . . . . . . . . . . . . . . . . . . . . . . . . . . . . . . . . . . . . . 320
Hard disk . . . . . . . . . . . . . . . . . . . . . . . . . . . . . . . . . . . . . . . . . . . . . . . . . . . . . . . . . . . . . . . . . . . . . . . . . . 321
CPU and RAM (memory) . . . . . . . . . . . . . . . . . . . . . . . . . . . . . . . . . . . . . . . . . . . . . . . . . . . . . . . . . . . . 321
Audio proxy files (.sfap0). . . . . . . . . . . . . . . . . . . . . . . . . . . . . . . . . . . . . . . . . . . . . . . . 322
Interlacing and field order . . . . . . . . . . . . . . . . . . . . . . . . . . . . . . . . . . . . . . . . . . . . . . . 322
Timecode . . . . . . . . . . . . . . . . . . . . . . . . . . . . . . . . . . . . . . . . . . . . . . . . . . . . . . . . . . . . . 324
SMPTE timecode types . . . . . . . . . . . . . . . . . . . . . . . . . . . . . . . . . . . . . . . . . . . . . . . . . . . . . . . . . . . . . 324
Timecode in Vegas software . . . . . . . . . . . . . . . . . . . . . . . . . . . . . . . . . . . . . . . . . . . . . . . . . . . . . . . . . 325
Troubleshooting DV hardware issues . . . . . . . . . . . . . . . . . . . . . . . . . . . . . . . . . . . . 326
Glossary . . . . . . . . . . . . . . . . . . . . . . . . . . . . . . . . . . . . . . . . . . . . . . . 327
Index . . . . . . . . . . . . . . . . . . . . . . . . . . . . . . . . . . . . . . . . . . . . . . . . . . . . .i
TABLE OF CONTENTS
15
CHAPTER
Introduction
1
Welcome
Vegas® software from Sony Pictures Digital is an innovative and advanced multitrack media-editing system.
Vegas software was designed to create an efficient audio/video production environment without sacrificing
the quality and processing power that you expect from Sony Pictures Digital. Whether it’s the standard and
familiar Microsoft® Windows® navigation commands or the clean and uncluttered interface, you’ll find
Vegas software to be a tool that will be mastered in minutes. Beneath the unique and customizable interface,
you’ll find a product that is both powerful and flexible.
System requirements
In order to use Vegas software, your computer must satisfy the following minimum specifications:
•
•
•
•
•
•
•
•
•
•
•
•
400 MHz processor
Microsoft Windows-compatible sound card
Supported CD-R/RW drive (for CD burning)
7200 RPM hard-disk drive
IEEE-1394 capture card (for DV capture and print-to-tape tools only)
24-bit color display recommended
128 MB RAM
40 MB hard-disk space for program installation
Microsoft Windows 2000 or Windows XP
Microsoft DirectX® 8 or later (included on CD-ROM)
Microsoft Internet Explorer 5.0 or later (included on CD-ROM)
Microsoft .NET Framework
Technical support
The Web site at http://mediasoftware.sonypictures.com/support/default.asp has technical support, reference
information, program updates, tips and tricks, user forums, and a knowledge base.
CHP. 1
INTRODUCTION
16
Installing Vegas software
1. Insert the CD-ROM. The setup screen appears (if CD-ROM AutoPlay is enabled).
If CD-ROM AutoPlay is not enabled, click the
button and choose Run. In the Run window that
appears, type the CD-ROM drive’s letter and add :\setup.exe. Click OK to start the installation.
2. Click Install Vegas 5.0. The installation process begins.
3. Follow the screen prompts and enter the necessary information when required.
4. At the last screen prompt, click
to conclude the installation.
Note: Windows Installer is used for all versions of
Windows. Windows Installer is installed and then you are
asked to restart your system.
Registration
The registration dialog that appears when you start the software allows you to quickly and easily register:
• Choose Register online to instantly register the product over the Internet.
• Choose Register from another computer if the computer you’ve installed the software on does not have an
Internet connection, but you have another computer that does.
• Choose Register over the phone to call Sony Pictures Digital to register manually.
• Choose Register later to continue using the software for a limited time without registering.
Follow the instructions in the registration dialog to complete your registration.
Using online help
You can access two varieties of help:
• Online help
• What’sThis? help (also referred to as context-sensitive help)
Online help
To access online help, choose Contents and Index from the Help menu or press
F1
.
Note: To view online help, Internet Explorer 4.0 or later
must be installed on your system. Internet Explorer 5.0 is
included on the Vegas software CD-ROM for your
convenience.
The online help window has four tabs that you can use to find the information that you need.
INTRODUCTION
CHP. 1
17
Toolbar
Tabs
Information
pane
The Contents tab provides a list of available help topics. Double-click a closed book ( ) to open the pages
and then click a topic page ( ).
The Index tab provides a complete listing of the help topics available. Scroll through the list of available
topics or type a word in the Type in the keyword to find box to quickly locate topics related to that word. Select
the topic and click
.
The Search tab allows you to enter a keyword and display all of the topics in the online help that contain the
. Select
keyword you have entered. Type a keyword in the Type in the word(s) to search for box and click
the topic from the list and click
.
The Favorites tab allows you to keep topics that you revisit often in a separate folder. To add a topic to your
favorites, click
on the Favorites tab.
What’sThis? help
What’sThis? help allows you to view pop-up descriptions of menus, buttons, and dialog boxes.
1. Click the What’s This Help button (
) in the toolbar or the question mark ( ) in the upper-right corner of
a dialog box. Alternately, you can choose What's This? from the Help menu or press Shift + F1 . The cursor
changes to a question mark icon ( ).
2. Click an item in the program’s interface. A pop-up description of the item appears.
Help on the Web
Additional help and information is available on the Sony Pictures Digital Media Software and Services Web
site. From the Help menu, choose Sony on the Web to view a listing of Web pages pertaining to Vegas
software and Sony Pictures Digital.
CHP. 1
INTRODUCTION
18
Overview
Vegas software is designed to be an easy-to-use program with many tools that provide power and flexibility
when creating and working with multimedia files. Many operations, menu items, and shortcut keys are
consistent with other popular Microsoft Windows software applications.
The following sections provide a graphical tour of the Vegas workspace.
Main window
This is the window that appears when the software is opened. The work area is subdivided into three primary
areas: the track list, the track view (or timeline), and the window docking area.You can resize the track list,
track view, and window docking area by dragging the dividers between them.
Menu bar
Toolbar
Marker bar
Ruler
Time display
Track view
(timeline)
Track list
Scrub control
Window
docking
area
Status bar
Transport bar
Toolbar
The toolbar allows you to quickly access the most commonly used functions and features. From the Options
menu, choose Customize Toolbar to specify which buttons are displayed.
Create new project
Enable automatic crossfades
Open existing project
Enable automatic ripple editing
Save project
Lock envelopes to events
Open project properties
Ignore event grouping
Cut selected events or time range
Normal edit tool
Copy selected events or time range
Envelope edit tool
Paste items from clipboard into
project
Selection edit tool
Undo
Zoom edit tool
Redo
What’s This? help
Enable snapping to grid lines
INTRODUCTION
CHP. 1
19
Time display
The Time Display window reflects the cursor’s position on the timeline and the end point of a time selection.
You can customize time display settings, including what time the window displays and colors are used in the
display. For more information, see Using the Time Display window on page 287.
You can move the Time Display window from its docked position above the track list to float on the
workspace or dock in the window docking area.
Docked position
Floating window
Docked in window docking area
Ruler
The ruler is the timeline for your project. You may specify how the ruler measures time: seconds, measures
and beats, frames, etc. For more information, see Changing the ruler format on page 285.
Marker bar
The marker bar is the area where you can place, name, and position markers and regions along the project’s
timeline. These informational tags can serve as cues or reminders highlighting important events in your
project. For more information, see Adding project markers and regions on page 78.
Command bar
The command bar displays when you add a command to your project. Commands add metadata to media
files to create effects such as closed captioning. For more information, see Adding project markers and regions on
page 78.
CHP. 1
INTRODUCTION
20
CD layout bar
The CD layout bar displays tracks and indices in an audio CD layout project for disc-at-once (DAO) CD
burning. For more information, see Burning CDs on page 303.
Track list
This area identifies the track order in your project and contains controls used to determine track
compositing and mixing. For more information, see Using the track list on page 52.
Track minimize
and maximize
Parent/child
compositing
control
Selected track
Video tracks
Track number
Audio track
Timeline
All arranging and editing is done in the timeline or track view. This area contains all of a project’s events.
For more information, see Using the track view on page 50.
Transport bar controls
The transport bar contains the playback and cursor positioning buttons frequently used while working on
and previewing your project.
Record into track
Pause project playback
Loop playback
Stop playback
Play from beginning of project
Move cursor to start of project
Play project from cursor position
Move cursor to end of project
Status bar
The status bar is located at the bottom of the main program window and displays
information about roughly how much space is left on your computer to record audio
(Record Time). During the rendering processes, the left side of the status bar also
contains information about the progress of the render.
INTRODUCTION
CHP. 1
21
The Video Preview window also has its own status bar that displays project specific information. For more
information, see Understanding the Video Preview window on page 253.
Scrub control
The scrub control is used to play your project forward or
backward for editing purposes. You may adjust playback speed
by setting the speed control marker located beneath the scrub
control. For more information, see Scrubbing on page 55.
Drag either forward or
backward for playback
Set playback speed
Window docking area and floating window docks
This area allows you to keep frequently used windows available but out of the way while you are working
with a project. Windows can be docked next to each other, subdividing the docking area, or they can be
docked in a stack in the window docking area or in a separate floating docking window. When stacked, each
window has a tab at the bottom with its name on it. Click the window’s tab to bring it to the top.
Close window
Expand window
Drag the handle away from the
docking area to float the window.
• To dock a window, drag it to the docking area.
• Drag the handle on the left side of a docked window to remove a window from the docking area and float
it.
• To prevent a window from docking when you drag it, hold the Ctrl key.
• To expand a docked window so it fills the docking area, click the Maximize button ( ). Click again to
restore the window to its previous size.
• To remove a window from the docking area or a floating dock, click the Close button ( ).
CHP. 1
INTRODUCTION
22
Explorer window - Alt+1
The Explorer window is similar to the Microsoft Windows Explorer. Use the Explorer window to select
media files to drag to the project timeline or add to the Media Pool. You can also use the Explorer to perform
common file management tasks such as creating folders, renaming files and folders, deleting files and folders.
Use the Start Preview ( ) and Auto Preview ( ) buttons to preview files before adding them to the project.
Preview selected
media files before
placing them
in the project.
Select drive
or folder
Select media to place
in the project by dragging
or double-clicking.
Add media to the Media Pool
by right-clicking a file and
choosing Add to Media Pool
from the shortcut menu.
Trimmer window - Alt+2
The Trimmer window is a good place to edit any media file. When a media file is placed in the Trimmer
window, you can place portions of the file on separate tracks by dragging and dropping. For more information,
see Using the Trimmer window on page 96.
Mixer window - Alt+3
The Mixer window gives you access to your project’s audio properties, bus assignments, output levels, and
plug-in chains. For more information, see Using the Mixer window on page 143.
INTRODUCTION
CHP. 1
23
Video Preview window - Alt+4
This window displays a project’s video during project editing and playback. For more information, see
Previewing and Analyzing Video on page 253.
Video appears during
project playback or as
the cursor is moved
during editing.
Right-click to
change Video
Preview settings
Media Pool - Alt +5
The Media Pool helps you organize the media files you’re using in a project. The information about these
files is displayed in a highly flexible database that can be instantly sorted. You can also use the Media Pool to
apply effects and plug-ins to media files and set the specific properties of these files. For more information, see
Using the Media Pool on page 41.
CHP. 1
INTRODUCTION
24
Edit Details window - Alt+6
This window serves as a highly detailed and customizable database of all of the events in a project. The
database can be organized and sorted according to a large number of attributes. For more information, see
Using the Edit Details window on page 101.
Transitions window - Alt+7
The Transitions window contains all of the transitions available. The thumbnails display animated examples
of each transition. You can drag transitions from this window to replace the crossfade between two video
events or to replace the fade-in or fade-out region of a video event. For more information, see Understanding
basic transitions on page 231.
Video FX window - Alt+8
The Video FX window contains the video effects available. The thumbnails display animated examples of
each plug-in preset. You can drag plug-ins from this window to an event, track, or to the Video Preview
window (video output effects). For more information, see Using video effects on page 207.
INTRODUCTION
CHP. 1
25
Media Generators window - Alt+9
The Media Generators window contains the different media generators provided. Media generators make it
easy to create events containing text, credit rolls, test patterns, color gradients, and solid color backgrounds.
You can drag a media generator to the timeline to create a new generated media event. For more information,
see Using generated media on page 213.
Plug-In Manager- Ctrl+Alt+1
This window organizes all of the plug-ins available, including video and audio effects, media generators, and
transitions. The plug-ins, which are organized in a folder structure, can be dragged into the project. For more
information, see Using audio effects on page 153 or Using video effects on page 207.
Saving and recalling window layouts - Ctrl+Alt+D or Ctrl+D
A window layout stores the sizes and positions of all windows and floating window docks in the Vegas
workspace. You can store up to ten window layouts so you can quickly recall customized layouts for specific
editing tasks.
Saving a window layout
1. Arrange the windows and docked windows as desired.
2. Press Ctrl+Alt+D, and then release the keys.
3. Press a number on your keyboard (not the numeric keypad) to save the layout in that space.
Recalling a saved layout
1. Press Alt+D, and then release the keys.
2. Press a number on your keyboard (not the numeric keypad) to recall the layout saved in that in that space.
CHP. 1
INTRODUCTION
26
Keyboard command reference
Project file commands
Description
Keys
Create new project
Create new project and bypass Project
Properties dialog
Open existing project or media file
Save project
Open project’s properties
Close current project
Exit Vegas software
Ctrl+N
Ctrl+Shift+N
Ctrl+O
Ctrl+S
Alt+Enter
Ctrl+F4
Alt+F4
Window view commands
Description
Keys
Description
Keys
Focus to track view
Alt+0
Alt+9
Explorer (show/hide
window if not docked)
Trimmer (show/hide
window if not docked)
Alt+1
Mixer (show/hide window if
not docked)
Video Preview (show/hide
window if not docked)
Media Pool (show/hide
window if not docked)
Edit Details (show/hide
window if not docked)
Alt+3
Alt+4
Media Generators (show/
hide window if not docked)
Plug-ins (show/hide window
if not docked)
Video Scopes (show/hide
window if not docked;
available only in the full
version of Vegas software)
Surround Panner (show/hide
window if not docked)
Next window
Alt+5
Previous window
Shift+F6 or Ctrl+Shift+Tab
Alt+6
Tab
Transitions (show/hide
window if not docked)
Alt+7
Video FX (show/hide
window if not docked)
Alt+8
Toggle focus between track
list and timeline (and bus
track list and timeline if bus
tracks are visible)
Show/hide audio bus tracks
(available only in the full
version of Vegas software)
Show/hide video bus track
(available only in the full
version of Vegas software)
Alt+2
Ctrl+Alt+1
Ctrl+Alt+2
Ctrl+Alt+3
F6 or Ctrl+Tab
B
Ctrl+Shift+B
Playback, recording, and preview commands
Description
Keys
Description
Keys
Start/stop playback
Play from start
Spacebar
Shift+Spacebar or
Shift+F12
Esc
Q or
Ctrl+Shift+L
Enter or
Ctrl+F12
Ctrl+R
Ctrl+Alt+R
Ctrl+Alt+ Shift+R
Scrub playback
Build dynamic RAM preview
J/K/L (pg. 56)
Shift+B (pg. 256)
Preview in player
Prerender video
Ctrl+Shift+M
Shift+M
Generate MIDI timecode
F7
Generate MIDI clock
Trigger from MIDI timecode
Preview cursor position
Shift+F7
Ctrl+F7
Numeric keypad 0
Stop playback
Looped playback mode
Play/pause
Record
Arm track for record
Arm for record and set
recording path
Specify the length of time that will play using
the Cursor preview duration field on the Editing
tab of the Preferences dialog.
Play back from any window Ctrl+Spacebar or F12
INTRODUCTION
CHP. 1
27
Edit commands
Description
Keys
Description
Keys
Undo
Ctrl+Z or
Alt+Backspace
Ctrl+Shift+Z or
Ctrl+Y
Ctrl+X or
Shift+Delete
Ctrl+C or
Ctrl+Insert
Ctrl+V or
Shift+Insert
Ctrl+B
Ctrl+Shift+V
Delete selection
Delete
Split event(s)
S
Trim/crop selected events
Ctrl+T
Normal Edit Tool
Ctrl+D
Switch to next editing tool
D
Redo
Cut selection
Copy selection
Paste
Paste repeat
Paste insert
Switch to previous editing tool Shift+D
Open in audio editor
Ctrl+E
Cursor placement commands
Description
Keys
Go to beginning of selection
Home
or view (if no selection)
Go to end of selection or view End
(if no selection)
Go to beginning of project
Ctrl+Home or W
Go to end of project
Ctrl+End or E
Move left by grid marks
Page Up
Move right by grid marks
Page Down
Go to
Ctrl+G
Jump to Marker #
0-9 keys (not
numeric keypad)
Alt+Left or Right
Arrow
\
F3/F9
Move one frame
Center in View
Jog left/right (when not in
edge-trimming mode or
during playback)
CHP. 1
Description
Keys
Move left to marker(s)
Ctrl+Left Arrow
Move right to marker(s)
Ctrl+Right Arrow
Move left to event edit
points including fade edges
Move right to event edit
points including fade edges
Nudge cursor one pixel on
timeline (when Quantize to
Frames is turned off)
Jump to next audio CD track
region or index
Jump to previous audio CD
track region or index
Jump to next audio CD track
region
Jump to previous audio CD
track region
Ctrl+Alt+Left Arrow
Ctrl+Alt+Right Arrow
Left or Right Arrow
Period
Comma
Ctrl+Period
Ctrl+Comma
INTRODUCTION
28
Time selection commands
Note: Many of the preceding cursor placement commands,
when combined with the Shift key, are also selection
commands.
Description
Keys
Snap select to event edge
Select loop region
Recover previous 5 selection areas
Select left by grid marks
Select right by grid marks
Mark in/out locations
Create time selection while dragging on an event
Expand selection one frame
Select to next audio CD track marker
Select to previous audio CD track marker
Enter location for end of selection
Ctrl+Shift+Alt+Left or Right Arrow
Shift+Q
Backspace
Shift+Page Up
Shift+Page Down
I (in) and O (out)
Ctrl+Shift+drag with mouse
Shift+Alt+Left or Right Arrow
Shift+. (period)
Shift+, (comma)
Ctrl+Shift+G
View commands
Description
Keys
Description
Keys
Increase track height
Decrease track height
Minimize all tracks
Set track height smaller
Set track heights to default size
Zoom in time (incremental)
Ctrl+Shift+Up Arrow
Ctrl+Shift+Down Arrow
`
Shift+`
Ctrl+`
Up Arrow
Shift+Down Arrow
Ctrl+Up Arrow
Ctrl+Down Arrow
F11 or Alt+`
Shift+F11 or Shift+Alt+`
Ctrl+F11
Zoom in time until each video
thumbnail represents one frame
Zoom out time (incremental)
Zoom in on audio waveforms
Alt+Up Arrow
Zoom out on audio waveforms
Zoom in
Zoom out
Show/hide window docking area
Show/hide track list
Show/hide window docking area
and track list
Recall window layout
Save window layout
Ctrl+Alt+D, then press 0-9
Down Arrow
Shift+Up Arrow
Alt+D, then press 0-9
Event commands
Description
Keys
Description
Keys
Move or trim selected event(s) left/right Numeric keypad 4/6
one pixel
Enter edge-trimming mode and select Numeric keypad 7 or
event start; move to previous event edge [
Move or trim selected events one frame Numeric keypad 1/3
left/right
In this mode, 1, 3, 4, and 6 on the
numeric keypad trim the selected event
edge
Enter edge-trimming mode and select Numeric keypad 9 or
event end; move to next event edge
]
Move selected event(s) left/right on grid Ctrl+numeric keypad
4/6
Move selected event(s) left/right by the Alt+Right Arrow
project frame period
numeric keypad 4/6
Move selected event(s) left/right by the Ctrl+Alt+Right Arrow
first selected event’s length
numeric keypad 4/6
Move selected event(s) up/down one
Numeric keypad 8/2
track
INTRODUCTION
In this mode, 1, 3, 4, and 6 on the
numeric keypad trim the selected event
edge
Trim left/right (when in edge-trimming F3/F9
mode
Exit edge-trimming mode
Numeric keypad 5
Select next take
T
Select previous take
Shift+T
CHP. 1
29
Event editing commands
Description
Keys
Description
Keys
Slip: move media within
event without moving the
event
Slip Trim: move the media
with the edge as it is
trimmed
Slide: trim both ends of
event simultaneously
Slide Crossfade: move
crossfade
Trim Adjacent: trim selected
event and adjacent event
simultaneously
Stretch (compress) the media
in the event while trimming
Open in audio editor
Alt+drag inside the
event
Raise pitch one semitone
= (not numeric
keypad)
Alt+drag edge of event
Raise pitch one cent
Ctrl+=
Ctrl+Alt+drag middle
of event
Ctrl+Alt+drag over a
crossfade
Ctrl+Alt+drag edge of
event
Raise pitch one octave
Shift+=
Lower pitch one semitone
- (not numeric keypad)
Lower pitch one cent
Ctrl+-
Lower pitch one octave
Shift+-
Reset pitch
Ctrl+Shift+= or
Ctrl+drag edge of
event
Ctrl+E
Ctrl+Shift+-
Event selection commands
CHP. 1
Description
Keys
Range selection
Multiple selection
Select all
Unselect all
Select all events in group
Shift+click range of objects
Ctrl+click individual objects
Ctrl+A
Ctrl+Shift+A
Shift+G
INTRODUCTION
30
Track commands
Description
Keys
Description
Keys
New audio track
Ctrl+Q
Ctrl+F
New video track
Ctrl+Shift+Q
Enable/disable snapping
Quantize to frames
Snap to markers
Snap to grid
Ripple edit mode
Auto crossfade mode
Normal edit tool
Next tool
F8
Alt+F8
Shift+F8
Ctrl+F8
Ctrl+L
Ctrl+Shift+X
Ctrl+D
D
Previous tool
Shift+D
Mix to new track
Ctrl+M
Post-edit ripple affected tracks, bus tracks,
markers, and regions
Post-edit ripple all tracks, markers, and
regions
Group selected events
Remove event(s) from group
Clear group (without deleting events)
Insert/show/hide track volume envelope
Remove track volume envelope
Insert/show/hide track panning envelope
Remove track panning envelope
Make fine envelope point or segment
adjustments without changing envelope
points’ timeline positions
Make normal envelope point or segment
adjustments without changing envelope
points’ timeline positions
Adjust envelope point’s timeline position
without changing its value
Insert region
R
Insert marker
Insert command marker
M
C
Insert audio CD track region
Insert audio CD track index
N
Shift+N
Insert transition
/, *, - (numeric
keypad)
Ctrl+*, - (numeric
keypad)
Ctrl+/ (numeric
keypad)
E or Shift+E
Change the track that has focus
Alt+Shift+Up/Down
Arrow
Mute selected tracks
Z
Mute selected tracks and remove other Shift+Z
tracks from mute group
Solo selected tracks
X
Solo selected track and remove other
Shift+X
tracks from solo group
Change audio track volume or video track Right/Left Arrow
compositing level (when focus is on track
Ctrl+Shift+F
G
U
Ctrl+U
V
Shift+V
P
Shift+P
Ctrl+drag envelope
point or segment
Ctrl+Alt+drag
envelope point or
segment
Alt+drag
list)
Change audio track panning or video track Shift+Left/Right Arrow
fade-to-color setting (when focus is on
track list)
Override snapping
Shift+drag
Insert cut transition
Bypass snapping
Shift+drag
Convert crossfade or transition to cut
Post-edit ripple affected tracks
F
Cycle through effect automation
envelopes
Trimmer commands
Tip: Many of the shortcuts that apply to the timeline (e.g.,
cursor placement, selection commands, etc.) also work in the
Trimmer.
Description
Keys
Description
Keys
Add Media From Cursor
A
Toggle audio/video stream height
Add Media to Cursor
Transfer time selection from timeline to
Trimmer after cursor
Transfer time selection from timeline to
Trimmer before cursor
Toggle selected stream: audio/video/
both
Shift+A
T
Sort Trimmer history
Clear Trimmer history
Ctrl+Shift+Up/
Down Arrow
H
Ctrl+Shift+H
Shift+T
Save markers/regions
S
Tab
Open in audio editor
Ctrl+E
INTRODUCTION
CHP. 1
31
Track Motion window shortcuts
Description
Keys
Change 3D layout
Lock aspect ratio
Scale about center
Edit in object space
Prevent movement
Prevent scaling
Enable snapping
Enable rotation
1-6 (not numeric keypad)
A
C
O
X, Y, and Z
Shift+X, Shift+Y, and Shift+Z
F8
Shift+F8
Surround panner commands
For finer, more precise movements on the shortcuts in this section, add the
Description
Ctrl
key.
Keys
Constrain motion to a line through the center of the surround Shift+drag the pan point (only when Move Freely
is selected)
panner
Constrain motion to a constant radius from the center
Alt+drag the pan point (only when Move Freely
is selected) or Alt+mouse
wheel
Constrain motion to the maximum circle that will fit in the
Alt+Shift+drag the pan point (only when Move Freely
is selected) or
Surround Panner
Alt+Shift+mouse wheel
Move the pan point forward/back (when the pan point is
Up/down arrow or Page Up/Page Down or mouse wheel
selected)
Move the pan point left/right (when the pan point is selected) Left/Right Arrow or Shift+Page Up/Page Down or Shift + mouse wheel forward/
back
Move the pan point to a corner, edge, or center of the
Numeric Keypad
Surround Panner (when the pan point is selected)
Move the pan point to a corner on the largest circle that will Ctrl+Numeric Keypad 1,3,7,9
fit in the Surround Panner (when the pan point is selected)
Miscellaneous commands
CHP. 1
Description
Keys
Description
Keys
Online help
What’s This? help
Change relative keyframe
spacing
Make fine fader/slider
adjustments
F1
Shift+F1
Alt+drag
keyframes
Ctrl+drag
fader/slider
Shortcut menu
Rebuild audio peaks
Move both region markers or audio CD
track region markers
Shift+F10
F5
Alt+drag region
marker
INTRODUCTION
32
Multimedia keyboard shortcuts
Description
Keys
Play/Pause
Play from start
Stop
Mute track
Mute track and remove other tracks from mute group
Solo track
Solo track and remove other tracks from solo group
Change audio track volume or video track compositing level (when focus is on track
Play/Pause
Shift+Play/Pause
Stop
Mute
Shift+Mute
Ctrl+Mute
Ctrl+Shift+Mute
Volume Up/Down
list)
Change audio track panning or video track fade-to-color setting (when focus is on
Shift+Volume Up/Down
track list)
Change track focus
Next/Prev Track
Mouse wheel shortcuts
Description
Keys
Zoom in/out on timeline
Zoom in/out in Event Pan/Crop or Track
Motion windows
Vertical scroll
Horizontal scroll
Move the cursor in small increments
Move cursor one frame at a time
Auto-scroll
Move fader/slider
Move fader/slider with fine control
Default mouse wheel behavior
Default mouse wheel behavior
Ctrl+wheel
Shift+wheel
Ctrl+Shift+wheel
Ctrl+Shift+Alt+wheel
Press mouse wheel and move mouse left or right
Hover over fader and use wheel
Ctrl+hover over fader and use wheel
Cursor indications
The cursor changes depending on which functions are available.
Cursor
INTRODUCTION
Indicates
Modifier
Description
Standard
none
This is the standard arrow cursor that means events can be
dragged.
Trim
none
Position the cursor over the edge of an event and drag to trim
the event shorter or longer.
Slip Trim
Alt
Stretch
Ctrl
Position the cursor over the edge of an event, press Alt, and drag to
trim. The media within the event moves with the edge. This is useful
to preserve the beginning or end of an event while trimming.
Position the cursor over the edge of an event, press Ctrl, and
drag the edge to stretch or compress it. This makes the media
in the event play slower or faster.
Slip
Alt
Press Alt and drag on the middle of a clip to move the media
within the event without moving the event itself.
Trim
Adjacent
Ctrl+Alt
Slide
Ctrl+Alt
Position the cursor over the boundary between two adjacent
events, press Ctrl+Alt, and drag. Both events are edge
trimmed simultaneously.
Position the cursor over the middle of an event, press Ctrl+Alt, and
drag to simultaneously trim both ends.
Slide
Crossfade
Ctrl+Alt
Position cursor over a crossfade, press Ctrl+Alt, and drag on a
crossfade to move it.
CHP. 1
33
Using a control surface
A control surface is a hardware device that uses knobs, faders, and buttons to control user interface elements
that are normally controlled with a mouse. Using a control surface lends a tactile feel to your editing
sessions.
Unlike keyboard shortcuts—which determine the shortcut's behavior based on the portion of the Vegas
window that has focus—a control surface's mapped functions work no matter what part of the application
has focus.
You can use one Mackie® Control Universal or up to five generic control surfaces with Vegas software. For
more information about setting up a control surface, please see External Control & Automation tab on page
301.
CHP. 1
INTRODUCTION
34
Audio signal flow
Multiple audio busses and assignable effects are only available in the full version of Vegas software.
INTRODUCTION
CHP. 1
35
Video signal flow
Track signal flow
Composited track signal flow
CHP. 1
INTRODUCTION
36
About your rights in Vegas software
Vegas software is licensed to you under the terms of the End User License Agreement. The End User License
Agreement is first presented to you when you install the software. Please review the End User License
Agreement carefully as its terms affect your rights with respect to the software. For your reference, a copy of
the End User License Agreement for Vegas software is located at http://www.sony.com/mediasoftware.
About Your Privacy
Sony Pictures Digital respects your privacy and are committed to protecting personal information. Your use
of the software is governed by the Software Privacy Policy. A copy of this policy is incorporated into the
registration process and you are asked to agree to its terms prior to accepting the terms of the End User
License Agreement. Please review its contents carefully as its terms and conditions affect your rights with
respect to the information that is collected by the software. For your reference, a copy of the Software
Privacy Policy is located at http://www.sony.com/mediasoftware.
Proper Use of Software
The Vegas software is not intended, and should not be used for, illegal or infringing purposes, such as the
illegal copying or sharing of copyrighted materials. Using Vegas software for such purposes is, among other
things, against United States and international copyright laws and contrary to the terms and conditions of
the End User License Agreement. Such activity may be punishable by law and may also subject you to the
breach remedies set forth in the End User License Agreement.
INTRODUCTION
CHP. 1
37
CHAPTER
Getting Started
2
Vegas® software is a new way of creating multimedia productions. Whether you are an experienced
multimedia author or a budding novice, the powerful features and capabilities of Vegas software are
organized to increase your creativity and productivity. The following chapter summarizes the software’s basic
functions and operations.
Creating projects
The process of creating a multimedia production can be a complicated undertaking, involving hundreds of
shots, takes, voiceovers, music beds, audio tracks, and special effects. Organization is a critical issue in this
process. In the software, organization is handled by a small project file (VEG) that saves information about
source file locations, edits, cuts, insertion points, transitions, and special effects. This project file is not a
multimedia file, but is instead used to create (render) the final file when editing is finished.
Because Vegas software edits a project file and not the original source files, you can edit without worrying
about corrupting your source files. This not only gives you a strong sense of security, but it also gives you the
freedom to experiment.
1. From the File menu, choose New. The New Project dialog appears.
Note: The first time you run the software, a new project will
automatically be started for you.
2. Enter your project settings on the various tabs. For more
information, see Working with project properties on page 289.
• The Video tab allows you to select the video format and
other video parameters.
• The Audio tab allows you to set up the basic audio
settings.
• The Ruler tab allows you to choose the way the ruler is
delineated (beats, seconds, etc.).
• The Summary tab allows you to enter any relevant
information and reminders about your project.
• The Audio CD tab allows you to enter information for
burning audio CDs.
Tip: The easiest way to set the often-complex properties on
the Video tab is to select a template that matches your media
(e.g., NTSC DV (720x480, 29.970 fps)).
3. Click OK.
CHP. 2
GETTING STARTED
38
4. From the File menu, choose Save. Enter a name, browse for a location, and click Save to save your project
(VEG file).
You can change project settings at any time while working on a project. From the File menu, choose
to change any of these settings.
Properties
Setting video properties based on a media file
You can automatically set your project video properties to match an existing video file.
1. From the File menu, choose Properties.
2. On the Video tab of the Project Properties dialog, click the Match Media Settings button (
).
3. Browse for a media file that has the settings you wish you use for the project.
4. Click Open.
The frame size, frame rate, pixel aspect ratio, and field order of this file are automatically detected and the
project properties are set to match.
Tip: To save this information for future use, enter a name in
the Template box and click the Save Template button ( ). If
your projects typically use these settings, select the Start all
new projects with these settings check box.
5. Click OK to save the new project properties.
Saving a project
When you save your work, it is saved in a project file. Project files are not rendered media files.
1. From the File menu, choose Save.
The first time you save a project, the Save As dialog appears. In subsequent saves, the dialog is bypassed,
your existing file name is retained, and your project is updated to include any implemented changes.
2. Select the drive and folder where you want to store the project.
3. Type the project name in the File Name box.
GETTING STARTED
CHP. 2
39
4. Click Save.
Tip: Select the Copy and trim media with project check box to
save the project file and copies of the media files to a common
location. For more information, see Saving a project with
media on page 270.
Renaming a project (using Save As)
After you have been working with your project, you can use the Save As command in the File menu to save
a copy of a project with a new name. This is useful for backing up different versions of a project. For more
information, see Creating a copy of a project (using Save As...) on page 270.
Getting media files
You can add media from a variety of sources to your project. You can add audio and video files, record audio
into a track, capture video from a video camera, or extract music from your own CD. You can also create
media such as text overlays, backgrounds, and credit rolls from within the software. For more information, see
Using generated media on page 213.
Note: To have pulldown fields automatically removed when
opening 24 fps progressive-scan DV video files, select the
Allow pulldown removal when opening 24p DV check box on
the General tab of the Preferences dialog. To open your 24p
DV video files as 29.97 fps interlaced video (60i), clear this
check box.
CHP. 2
GETTING STARTED
40
Selecting media
Vegas software supports a wide range of media file types. You may select any of the media file types listed
below to add to your project.
Format
Extension Definition
GIF
.gif
JPEG
Macintosh® Audio
Interchange File Format
File
MPEG-1 and MPEG-2
.jpg
.aif
MPEG Layer 3
Ogg Vorbis
.mp3
.ogg
Photoshop
Portable Network Graphic
QuickTime™
Perfect Clarity Audio®
.psd
.png
.mov, .qt
.pca
Wave 64™
.w64
TARGA
.tga
TIFF
.tif
Video for Windows®
.avi
Wave (Microsoft®)
Wave (Scott Studios)
Windows Bitmap
.wav
.wav
.bmp
Windows Media® Audio
.wma
Windows Media Format
.wmv
.mpg
256 index color, lossless image and animation format widely used on
the Internet.
True color, lossy Internet image format.
Standard audio format developed by Apple® and used on Macintosh®
computers.
MPEGs, files compressed using a lossy audio/video compression
method, can be used with Vegas software.
Highly compressed audio file.
A patent-free audio encoding and streaming technology.
Adobe® Photoshop® proprietary image format (flattened).
True color or indexed color, lossy or lossless Internet image format.
QuickTime standard audio/video format.
A proprietary lossless audio compression format from Sony Pictures
Digital.
Sony Pictures Digital proprietary Wave64 audio file that does not
have a limited file size (unlike Windows WAV files that are limited to
~2GB).
True color, lossless image format that supports alpha channel
transparency.
Tagged Image File Format, a common bitmap format. You must have
QuickTime installed to use TIFF files in Vegas software.
Standard audio/video format used on Microsoft® Windows®-based
computers.
Standard audio format used on Microsoft Windows-based computers.
Standard audio format used with Scott Studios systems.
Standard graphic format used on Microsoft Windows-based
computers.
The Microsoft audio-only format used to create files for streaming or
downloading via the Web.
The Microsoft standard used for streaming audio and video media via
the Web.
Previewing a media file
You may preview files before placing them in your project. The Explorer window has a mini-transport bar
with Play, Stop, and Auto Preview buttons (
). When you preview a file, its stream is sent to the Mixer
window’s preview bus (for audio files) or to the Video Preview window (for video files).
Tip: You can use the same mini-transport bar buttons in the
Media Pool window to preview files in the Media Pool.
1. Select a file in the Explorer window.
2. Click the Play button (
3. Click the Stop button (
) to listen to the file.
) or select a different file to stop previewing the file.
Tip: To automatically preview selected files, click the Auto
Preview
button (
) on the Explorer window’s transport
bar.
GETTING STARTED
CHP. 2
41
Using the Media Pool
Media files, both video and audio, tend to be the
largest files on your hard drive. It is therefore not
always easy to move them around and impractical
to store multiple copies of these files. You can
add media files to the Media Pool to organize
them before any editing begins. Once you begin
working on a project, all files you add to the
timeline are automatically included in the Media
Pool. From the View menu, choose Media Pool to
open this window if it is not already visible.
Using Media Pool views
You can control the information that is displayed in the Media Pool by clicking the Views button (
and selecting a view.
)
The Detailed view displays all the properties for each file. The information is presented in a table format. You
can customize the information displayed:
• Reorder columns (fields) by dragging the column label to a new position.
• Hide a column by dragging the column label off of the Media Pool window. To display a hidden column,
right-click the Media Pool, choose View from the shortcut menu, and choose the column name from the
submenu.
• Sort the files in the Media Pool according to a category by clicking the column label for that category.
• Use the Comments field to add your own annotations to a file’s entry in the Media Pool. Double-click the
field to enter text. This information is saved with the project and is not saved with the media file itself.
Adding media to the Media Pool
1. Click the Import Media button (
) in the Media Pool. The Import Media dialog appears.
2. Navigate to and select a media file to add to the Media Pool. You can use
Ctrl
or
Shift
to select multiple
files.
3. Click Open.
The media file is added to the Media Pool.
Adding media to the Media Pool from the Explorer window
1. Navigate to and select a file to add to the Media Pool. You can use
Ctrl
or
Shift
to select multiple media
files.
2. Right-click the file and choose Add to Media Pool from the shortcut menu.
The selected file is added to the Media Pool.
Replacing media in the Media Pool
You may replace a file in the Media Pool with a different file. When changing the media file that an event
contains, every occurrence of the event on the timeline is updated with the new media file contents.
1. Right-click a file in the Media Pool.
2. Choose Replace from the shortcut menu.
3. In the Replace Media File dialog, browse for and select the file that you want to replace the current file.
4. Click Open. The selected file replaces the old file in the Media Pool, and any events in the timeline
containing the old file are updated to contain the new media file.
CHP. 2
GETTING STARTED
42
Capturing video
You can use the Sony Pictures Digital Video Capture application (installed with Vegas software) to capture
video clips from your video camera and add them to the Media Pool window.
Note: You must have an IEEE-1394/OHCI-compliant
video capture card installed to use Video Capture.
1. If you have not already done so, connect your video camera to your video capture card using the cable
provided with the card.
2. In the Media Pool window, click the Open Video Capture button (
). The Sony Pictures Digital Video
Capture application starts.
Note: If your video camera is properly connected, the Video
Preview window in the center of the application area should
display “Device connected.”
3. Capture your video. For information on capturing video with Sony Pictures Digital Video Capture, choose
Contents and Index
from the Help menu within Video Capture to display Video Capture online help.
Once you have captured your video, Video Capture adds the file(s) to the Media Pool window. If any
captured clips go offline, you can recapture the clips using Video Capture. Right-click an offline file in the
Media Pool and choose Recapture from the shortcut menu.
Getting images
You can bring images directly into the software from your scanner, digital camera, or other TWAIN device.
The images are added to the Media Pool as JPEG image files.
1. Make sure your device (scanner or digital camera) is on and connected to your computer.
2. In the Media Pool window, click the Get Photo button (
). The software is started for the device.
3. Use the device software to get an image and send it to Vegas
software. Once the image has been sent, the Scanned Files
dialog appears.
• Click Rename to give the new image a more meaningful
name.
• Click Delete to cancel the process of adding the image.
4. Click Done. The new JPEG file is added to the Media Pool.
GETTING STARTED
CHP. 2
43
Extracting audio from a CD
You can extract tracks from a CD and add them to the Media Pool window as WAV files.
Vegas software is not intended for, and should not be used
for, illegal or infringing purposes, such as the illegal copying
or sharing of copyrighted materials. Using Vegas software for
such purposes is, among other things, against United States
and international copyright laws and contrary to the terms
and conditions of the End User License Agreement. Such
activity may be punishable by law and may also subject you
to the breach remedies set forth in the End User License
Agreement.
CD audio extraction is only available in the full version of Vegas software.
1. Insert the audio CD.
2. In the Media Pool window, click the Extract Audio from
CD button (
appears.
). The Extract Audio from CD dialog
3. From the Action drop-down list, choose the method you
want to use for extracting the CD audio:
• Read by track - Use this option to choose the tracks
you want to extract from the CD.
• Read entire disc - Use this option to automatically
extract all tracks on the disc. The entire CD is
extracted into one new file in the Media Pool.
• Read by range - Use this option to extract audio from
a specified range of time.
4. If you chose either the Read by track or Read by range
option, specify the track(s) or range to extract:
• For Read by track, click the track(s) you want to extract in the Tracks to read list. Use the Ctrl or Shift
keys to select more than one track. Each track is extracted into a separate file in the Media Pool.
• For Read by range, enter a time in the Range start field and either the Range end or Range length fields.
The range of audio is extracted into one new file in the Media Pool.
Note: If you want to extract multiple tracks to a single file,
choose Read by track from the Action drop-down list to select
your tracks, and then choose Read by range from the Action
drop-down list. The appropriate time range for the tracks you
selected will automatically be inserted and the time range will
be extracted to a single file.
5. From the Drive drop-down list, choose the drive containing the audio CD from which you want to extract.
6. From the Speed drop-down list, choose the speed at which you want to extract the audio. If you
experience any problems extracting audio, you can try decreasing the selected speed, or you can click
Configure to adjust the Audio extract optimization setting.
CHP. 2
GETTING STARTED
44
Note: To eject the CD at any time prior to beginning the
extraction process, click the Eject button.
7. Click OK. The Save As dialog appears.
8. Select a name and location for the new WAV file.
9. Click Save to begin extracting the audio.
The track is extracted and a progress meter is displayed to indicate the percent complete. Once extraction is
complete, the new WAV file appears in the Media Pool.
The option of automatically naming extracted tracks is provided for you. To enable this option, choose
from the Options menu, and on the CD Settings tab, select the Autoname extracted tracks check
box. For more information, see CD Settings tab on page 298.
Preferences
Adding a still-image sequence
If you’ve exported a video clip as a still-image sequence using another application (a 3D-rendering
application, for example), the sequence can be added to the Media Pool and treated as a single media file.
Each image in the sequence will be displayed for one frame in the event.
1. Click the Import Media button (
) in the Media Pool
window. The Import Media dialog appears.
2. Choose the folder where the sequence you want to open
is stored.
3. Select the first image in the sequence (or the image you
want to start the event).
4. Select the Open still-image sequence check box.
5. In the Range field, enter the number of the last image you
want to open. For example, if you'd selected
AnimationOne_00001.tga in step 3, you could enter 120
in this box to create a new image sequence using
AnimationOne_00001.tga to AnimationOne_00120.tga.
6. Click Open. The still-image sequence is added to the
Media Pool.
Sorting media with bins
The detailed view of the Media Pool window helps you sort your media files using their attributes, but for
more control, you can create bins. Bins are folders within projects that you can use to organize your media
files.
Media bins are virtual folders that are saved with your project. They do not affect the way media is saved on
your computer.
Creating bins
Right-click the parent bin where you want to create a new bin and choose Create New Bin from the shortcut
menu.
Adding media to a bin
1. Browse your existing bins to find the media file you want to move. The All Media Folder contains all
media files in your project.
2. Drag a file from the right-hand pane to a bin.
GETTING STARTED
CHP. 2
45
Searching media bins
1. Right-click in the Media Pool window and choose Search Media Bins from the shortcut menu. The Search
Media Bins dialog is displayed.
2. Use the drop-down lists in the Search Media Bins dialog to set your search conditions and click the Search
button. The selected bin and all sub-bins will be searched.
3. Click the Search Results icon to view the matching files.
Hint: Right-click the Search Results icon and choose Save as
Bin from the shortcut menu to save the results of your search
as a new media bin.
Automatically adding recorded files to a media bin
Select a media bin if you want to automatically add your recorded audio to a media bin.
Deleting media from a bin
1. Select a media file.
2. Press
Delete
on your keyboard.
3. If the All Media Folder is selected, the file will be removed from your project.
4. If a media bin is selected, the file is removed from the bin, but remains part of your project. The file is still
available in the All Media Folder.
Configuring 24p pulldown removal
Right-click a DV AVI file in the Media Pool and choose File Format Properties from the shortcut menu to
edit file settings from the file format plug-in associated with the media file type.
For 24p NTSC DV AVI files with 2-3 pulldown , you can use this dialog to configure removal of pulldown
fields.
In most cases, you will not need to edit pulldown removal settings. However, if the settings were not properly
set in the DV header when your video was captured, you can fine-tune pulldown removal without
recapturing your video.
1. Right-click an AVI file in the Media Pool and choose File Format Properties from the shortcut menu. The
AVI/DV Media Properties dialog is displayed.
This command is not available for non-24p NTSC video or for 24p NTSC video using 2-3-3-2 pulldown.
2. Select the Enable 2-3 pulldown removal check box.
You can clear this check box if you want to override pulldown
removal for individual files when the Enable pulldown removal
when opening 24p DV check box is selected on the General
tab of the Preferences dialog.
3. Choose a setting from the Starting frame timecode offset drop-down list to indicate what timecode numbers
represent which frame in the video sequence.
For example, if you have an NTSC DV file with 2-3 pulldown created on a Sony JH3 HDCAM deck, the
default settings for timecode offset use 0 for the Starting frame timecode offset.
If you have changed the timecode offsets on the deck (or if you have material with pulldown from another
source) you will have to experiment with the settings to determine the correct offset.
CHP. 2
GETTING STARTED
46
4. Check for interlacing:
a. In the Project Properties dialog, choose a NTSC DV 24p template from the Template drop-down list.
b. Choose the Best (Full) setting in the Video Preview window to show full frames.
c. Step though the clip and look for interlace lines in moving objects or backgrounds.
d. If you see interlace lines, repeat from step 3 and choose a different offset value.
e. When no interlace lines appear, the offset is set correctly.
Adding media to the timeline
Media files may be added to your project from the Explorer or Media Pool by double-clicking them or by
dragging them. Either method places the media file in an event in its entirety in the timeline.
Dragging a media file to the timeline
You can create a new track by dragging a media file to a blank area on the timeline and dropping it in place.
Tracks can contain multiple events, so you can place different events next to each other on a track.
Note: Video and audio events cannot be placed on the same
track.
1. Locate a media file in the Explorer or Media Pool.
2. Drag the media file to the timeline.
An event for the media file appears where you released the mouse.
Dragging multiple media files to the timeline
1. Select multiple media files in the Explorer or Media Pool. Select a range of adjacent media files by
pressing
pressing
Shift
Ctrl
and clicking the first and last files in the range or select files that are not adjacent by
and clicking individual files.
2. Right-click and drag the files to the track view (timeline).
3. When you release the mouse, a shortcut menu appears. Select a placement option from the menu.
• Add Across Time
• Add Across Tracks
• Add As Takes
You will see one event on the track.
The other events are listed at takes “beneath” the
the topmost event.
For more information, see Working with takes on page 94.
GETTING STARTED
CHP. 2
47
• Video Only and Audio Only allow you to isolate either the video or audio, and add that stream from a
multimedia file either across tracks, across time, or as takes.
Tip: A left-click drag-and-drop automatically inserts files
across time. However, you can cycle through placement
modes by right-clicking (without releasing the left mouse
button) while performing the drag-and-drop operation.
Double-clicking a media file
This method places the event at the cursor’s position in the selected track. If the selected track is a video
track, and you double-click an audio event (or vice versa), a new track is created for the event. Once an
event is placed, you can move it from one track to another or change its position on the timeline.
Inserting a video file with associated audio
Media files with video frequently include associated audio. When you insert a media file into the timeline,
the associated audio is automatically inserted into a separate audio track below the video track. The two
associated events are grouped together and behave as a single unit when moved or otherwise edited. You can
ungroup the events to move them independently. For more information, see Clearing a group on page 142.
Two events that contain the video (top)
and audio (bottom) streams from a single
multimedia video file; each event is
inserted on a separate track.
Automatically crossfading inserted events
When inserting multiple events across time, the events (both video and audio) may be set to automatically
crossfade. Two options must be enabled in order to create crossfades automatically when adding multiple
events. First, verify that a check mark appears next to Automatic Crossfades in the Options menu. Second,
from the Options menu, choose Preferences, and on the Editing tab, select Automatically overlap multiple
selected media when added. For more information, see Using automatic crossfades on page 75.
CHP. 2
GETTING STARTED
48
Working with events
Events are the most basic objects in a project. An event is something that happens in time, has a specific
duration, and can be video or audio.
Understanding files and events
The objects you work with are referred to as media files and events.
• Files are objects that are stored on your hard disk. In Vegas software, you will work with media files, such
as music and video files. These files are neither operated on nor changed. You can access files from the
Vegas Explorer window.
• Events are periods of time on the timeline that act as windows into media files, either whole or in part.
When you drag a media file onto the timeline, you automatically create an event that contains that file’s
contents. An event can contain video, audio, still images, or generated media. The event window may
contain only a small portion of a much larger media file. A single media file can be used repeatedly to
create any number of different events, since each event can be trimmed independently.
The original media file.
An event trimmed from the original media file.
The event as it appears in the Vegas timeline.
Audio events are created from audio files on your computer (e.g., WAV, MP3) or can be a part of a video
file (e.g., AVI). You can change many characteristics of an audio event, such as speed, volume, and
equalization. Audio events can be mixed with other audio events.
Video events are created from video files captured to your computer (typically AVI, MOV, QT) or images
(BMP, JPEG, PNG, or TGA). You can change many characteristics of a video event, such as speed, color,
and size. Video events can overlay other video events and are visual elements that appear on top of a
background video, image, or color.
Moving events along the timeline
You can move events along the timeline individually or as a group. Events may overlap each other or be
placed on top of each other. You can crossfade overlapping events automatically or with envelopes.
Moving an event
You can move an event along the timeline within a track or move it to a different track.
1. Drag the event along the timeline.
If you move the event along the original track’s timeline, the event’s appearance (color) remains the
same.
GETTING STARTED
CHP. 2
49
However, you may move the event to a different track. When you do, the event appears as a simple
outline and you will see its original track and position on the timeline. Once you release the mouse, the
event assumes the new timeline position and track color.
Original track position
New track and position
2. Release the mouse to place the event.
Moving multiple events
You can move multiple events along the timeline within a track or move them to a different track. Selected
events do not need to be within the same track. Use the Ctrl key, the Shift key, or the Selection Edit Tool
( ) to select multiple events and drag them. To select all events on the track after a given event, rightclick the event and choose Select Events to End. For more information, see Selecting multiple events on page 60.
Moving events by small increments
To move an event more precisely, click the event and press 4 or 6 on the numeric keypad to nudge it by
small increments. The amount of movement caused by each nudge is determined by how far the timeline is
zoomed in or out. You can also click the event and press 1 or 3 on the numeric keypad to nudge the event by
frames.
Moving grouped events
Groups allow you to move multiple events within their tracks as a single unit. While you can create your
own groups as needed, groups are automatically created for you when video files with associated audio (e.g.,
AVI) are added to a project. When you add these video files, the audio portion of the video file is inserted
into the timeline as a separate audio event. The video and audio events are grouped and can be moved as a
single unit within their respective tracks.
To move grouped events, drag any event in the group to a new position. For more information, see Grouping
events on page 141.
CHP. 2
GETTING STARTED
50
Working with tracks
A project consists of multiple audio and video tracks. The track view is the timeline in which all events
appear. The track list provides information about the track and contains controls that affect all events in the
track.
Using the track view
Numerous options are provided for viewing and navigating in track view.
Scrolling and zooming
There are several ways to scroll and zoom in the track view.
• Click the scroll bar arrows or drag the scroll bars to move up and down the tracks or to move forward and
back along the timeline.
• Click the Zoom buttons (
) to reveal more or less of the timeline.
• Drag the edge of the scroll box, found on the scroll bar, to zoom.
• Press
and
to zoom in and out along the timeline.
• Click the Zoom Edit Tool ( ) button or, from the Edit menu, choose
Editing Tool and then choose Zoom. In this mode, drag on the
timeline to draw a rectangle that defines the zoom region.
Scroll box
Zoom
tools
Tip: You can also access the Zoom Edit Tool from the lower-
right corner of the track view ( ).
Mouse wheel control is also supported. The default behavior of the wheel is to zoom horizontally.
• Shift +wheel scrolls horizontally (through time).
• Ctrl +wheel scrolls vertically.
• Ctrl + Shift +wheel moves the cursor in small increments.
• Ctrl + Shift + Alt +wheel moves the cursor in one-frame increments.
• Clicking the mouse wheel turns auto-panning on and off.
Zooming directly controls the accuracy of your editing. Each video event has thumbnail representations of
the frames within the event. Depending on how far you have zoomed in on a video event, a thumbnail can
represent the entire event or a single frame in the event.
Tip: You can choose to display frame numbers, time, or
timecode on video event thumbnails. For more information,
see Displaying frame numbers on page 285.
GETTING STARTED
CHP. 2
51
Changing track height
You can change the height of individual tracks by dragging their borders in the track list. In the example
below, the main video track is fairly large to show the details of the scene while the two tracks above it,
which are overlays, have been resized to a shorter height. For more information, see Changing track height on
page 108.
CHP. 2
GETTING STARTED
52
Using the track list
This section describes the different controls in the track header of each track. Some controls are specific to
either video or audio tracks.
Video track header
Button or
Control
Name
Description
Make
compositing
child
Creates a parent/child compositing relationship with the track above. Used when creating
masks. For more information, see Understanding the parent/child track relationship on
page 214.
Track number
and color
Track numbers and colors help organize a multitrack project. For more information, see
Managing tracks on page 105.
Minimize track Minimizes track height. For more information, see Changing track height on page 108.
height
Maximize track Maximizes track height. For more information, see Changing track height on page 108.
height
Expand track
keyframes
Displays track keyframes on the timeline. For more information, see Working with
keyframes in track view on page 240.
Bypass motion Bypasses motion blur envelope for a track. For more information, see Using video bus
blur
tracks on page 115.
Track motion
Track motion is used to move a video track across a background. Picture-in-picture
effects and scrolling title sequences are two simple cases where this tool is important. For
more information, see Adding track motion on page 245.
Track FX
Adds track effects plug-ins. For more information, see Using video effects on page 207.
Mute
Temporarily suspends playback of the track so that you can focus on other tracks. For
more information, see Muting a track on page 113.
Solo
Isolates a track for playback by muting the other tracks. For more information, see
Soloing a track on page 113.
Track name
Allows you name a track. To name a track, double-click the scribble strip and type the
(scribble strip) track’s name. For more information, see Naming or renaming a track on page 106.
GETTING STARTED
Composite
level slider
Determines the opacity/transparency of the video track. Drag the slider to control the
transparency or blending of the track. Left is 100% transparent and right is 100%
opaque. You can also double-click the label to enter a specific numeric percentage.
Compositing
mode
Determines how the transparency in a video track is generated. For more information,
see Selecting compositing modes on page 215.
CHP. 2
53
Audio track header
Button or Control Name
Description
Track number
and color
Track numbers and colors help organize a multitrack project. For more information,
see Managing tracks on page 105.
Minimize track
height
Minimizes track height. For more information, see Changing track height on page
108.
Maximize track Maximizes track height. For more information, see Changing track height on page
height
108.
Track name
(scribble strip)
Allows you name a track. To name a track, double-click the scribble strip and type the
track’s name. For more information, see Naming or renaming a track on page 106.
Arm for record Prepares a track for recording. You may record directly into audio tracks. A track is
ready when you see the recording meter appear on it. For more information, see
Arming the track for recording on page 165.
Bus assignment Assigns an audio track to a specific output bus. This option is available for projects
being mixed for multiple stereo busses. For more information, see Assigning audio
tracks to busses on page 149.
CHP. 2
Invert Track
Phase
Inverts the audio track at its baseline, in effect reversing its polarity. For more
information, see Phase inverting a track (audio only) on page 113.
Track FX
Adds track effects plug-ins. For more information, see Using audio effects on page
153.
Mute
Temporarily mutes playback of the track so that you can focus on other tracks. For
more information, see Muting a track on page 113.
Solo
Isolates a track for playback by muting the other tracks. For more information, see
Soloing a track on page 113.
Volume fader
Controls the audio track volume relative to the other tracks. Drag the fader left or
right to adjust the volume. For more information, see Using the volume fader (audio
only) on page 109.
Multipurpose
slider
Controls several features, including track panning, bus send levels, and assignable
effects send levels. Select what the slider controls by clicking the label. Each item’s
slider position is independent from the others. For more information, see Using the
multipurpose slider (audio only) on page 110.
GETTING STARTED
54
Playing back and previewing
You can play back your project in two ways: directly from the timeline from within the software or by mixing
the entire project to a preview file.
Playing your project
The transport bar allows you to play back your entire project or portions of your project based on a time
selection or the current cursor position.
If your project includes video, make sure the Video Preview window is displayed for playback: from the View
menu, choose Video Preview or press Alt + 6 .
Playing an entire project
1. Click the Play From Start button (
2. Click the Stop button (
) to begin playback at the beginning of the project.
) to stop playback.
Most of the time, you will only want to preview a small portion of the project to perfect a section. You can do
this by creating a time selection.
Playing a time selection
1. Place the mouse pointer above the ruler on the marker bar. The mouse pointer
changes to include a left/right arrow cursor (
Loop bar
).
2. Drag to select the time region. To increase or decrease the time selection, drag
its start and end points. The time selection is highlighted and the loop bar
appears above the ruler on the timeline.
3. Click the Play button (
) to begin playback. Only the non-muted tracks and
events within the time selection play back.
4. Click the Loop Playback button (
) to continually play back the events within
the time selection. Click the button again to toggle this feature off.
5. Click the Stop button (
) to stop playback.
By looping the playback, you can repeatedly watch the same section of the project over and over as you make
changes to filters and effects in real time. You can define selection areas automatically, depending on what
you would like to preview. For more information, see Selecting a time range on page 61 and Time selection
commands on page 28.
GETTING STARTED
CHP. 2
55
Playback reference
The following table describes all the transport bar buttons and their keyboard equivalents. You may use these
playback functions at any time while working in your project.
Note: The use of many multimedia keyboards is also
supported for controlling playback.
Button Keyboard
Function
Ctrl + R
Begin recording into record-enabled tracks
Q
Turn on/off loop playback during time selection playback
Shift + Space
Begin playback from the start of the project
Space
Begin playback from cursor position
Enter
Pause playback, cursor stops and holds at pause position
Space or Esc
Stop playback, cursor stops and returns to prior cursor position
Ctrl + Home
Place cursor at the beginning of project
Ctrl + End
Place cursor at the end of the project
Tip: You can use the spacebar to stop or pause playback,
depending on your preference. From the Options menu,
choose Preferences, and on the General tab, select Make
spacebar and F12 Play/Pause instead of Play/Stop to change
the setting.
Scrubbing
Scrubbing is a type of timeline playback that gives you precise control over the speed and direction of
playback. Both linear and logarithmic scale scrubbing are allowed. For more information, see General tab on
page 292.
The use of multimedia controllers is supported for scrubbing. For more information on using the software
with multimedia controllers, please see the online help. To access help, choose Contents and Index from the
Help menu.
Tip: Choose a setting from the JKL / shuttle speed drop-down
list on the Editing tab of the Preferences dialog to control the
scrub speed and range when using the keyboard or multimedia
controllers.
Three methods of scrubbing are provided.
Scrubbing with the scrub control slider
The scrub control slider can be dragged back and forth. The farther from
the center that the slider is dragged, the faster the playback, both forward
and in reverse. Below the slider is a small yellow marker that can be used to
set the normal rate playback speed. This is the speed at which the project
plays when you click the Play button on the transport bar.
CHP. 2
Scrub control slider
GETTING STARTED
56
Scrubbing on the timeline
The second way that a project can be scrubbed is by positioning the mouse
pointer over the timeline cursor at a location that is not over any events and
pressing Ctrl . The cursor changes to a speaker icon. Now, when you left-click,
the cursor icon changes again to a pan/scrub icon. Drag the mouse left or right
to scrub the timeline.
Press Ctrl over
timeline cursor
Left-click and
drag to scrub
Tip: You can also choose to enable timeline scrubbing when
the mouse is positioned over events. From the Options
menu, choose Preferences, and select Allow Ctrl+drag cursor
style scrub over events on the General tab.
Scrubbing with the keyboard
Three letters (JKL) are used as a keyboard scrub control.
Keyboard scrub letters
Note: Choose a setting from the JKL / shuttle speed drop-
down list on the Editing tab of the Preferences dialog to control
the scrub speed and range.
Press J for reverse and
playback.
L
for forward playback. Press
K
J
K
L
Reverse
Pause
Forward
to pause
There are several ways to adjust playback speed:
• Adjust the JKL / shuttle speed selection on the Editing tab of the Preferences dialog.
• Hold K while pressing J or L to emulate a shuttle knob mode. Press K + J to turn the knob to the left
or K + L to turn the knob to the left. Press K again or Space to return to normal mode.
Previewing to media player
A project can be previewed in a media player by mixing and rendering the project according to the project’s
properties and playing back using the media player associated with the file type you select.
1. From the Tools menu, choose Preview in Player. The Preview dialog appears.
2. Select the file type from the drop-down list.
3. Click OK to begin the mixing and rendering process. A progress dialog appears indicating the percent
complete of the new file.
Note: You may cancel the preview by clicking the Cancel
button on the status bar.
When mixing is completed, the associated media player opens and begins playback.
Prerendering video previews
Playing a project using the transport controls can instantly show how a project is progressing, but it does not
actually render your project in its final form. The preview you see in the Video Preview window may be
different from your final project in a number of ways: frame size, frame rate, and quality. In most cases, the
Video Preview is all you need for checking the timing of events in your project. Eventually, however, you
may need to output a full-quality preview of a section of your project. To do this, from the Tools menu,
choose Selectively Prerender Video. For more information, see Prerendering video on page 255.
GETTING STARTED
CHP. 2
57
Rendering a project
Rendering refers to the process of creating a new media file from a Vegas project. The project file is not
affected (overwritten, deleted, or altered) during the rendering process. You may return to the original
project to make edits or adjustments and render it again. The following table describes the formats available
for rendering your project:
Format Name
Extension Definition
Audio Interchange File Format
.aif
MPEG-1 and MPEG-2
.mpg
MPEG Layer 3
.mp3
OggVorbis
QuickTime
RealMedia®
.ogg
.mov
.rm
Scott Studios Wave
AC-3
.wav
.ac3
Perfect Clarity Audio
.pca
Wave64
.w64
Video for Windows
.avi
Wave (Microsoft)
Windows Media Audio
.wav
.wma
Windows Media Format
.wmv
The standard audio file format developed by Apple® and used on
Macintosh® computers.
MPEG-1 and MPEG-2 file creation are supported through the use of
MainConcept® MPEG technology.
Compressed audio format. You may render up to 20 .mp3 files without
registering the optional plug-in.
A patent-free audio encoding and streaming technology.
Apple QuickTime multimedia format.
The RealNetworks® standard for streaming media via the Web. This option
renders both audio and video into one file.
Standard audio format used with Scott Studios systems.
Encoded Dolby Digital surround sound format. This option creates six mono
files (WAV or AIFF) that your authoring application can use to create DVDVideo or 5.1-channel music projects.
A proprietary format from Sony Pictures Digital that is compressed and
completely lossless.
A Sony Pictures Digital proprietary format that allows wave files that are
(practically) unrestricted by file size.
The standard video file format used on Microsoft® Windows®-based
computers. This option renders both audio and video into one file.
The standard audio file format used on Microsoft Windows-based computers.
The Microsoft audio-only format used to create files for streaming or
downloading via the Web.
The Microsoft standard used for streaming audio and video media via the
Web.
More detailed instructions for rendering to a specific format appear later in this manual. For more
information, see Saving, Rendering, and Printing Projects on page 269.
Creating a movie
To create a movie, you render the project into an appropriate media file output. The final output format
depends on the destination of the new media file. Some examples are AVI, MOV, and WMV.
1. From the File menu, choose Render As.
2. In the Render As dialog box, choose the appropriate option from the Save as type drop-down list.
3. Click Custom to select custom compression settings. The default compression options are set
automatically according to your project’s properties. For more information, see Customizing the rendering
process on page 275.
4. Enter a name and browse for a destination for your file.
5. Click OK.
CHP. 2
GETTING STARTED
58
GETTING STARTED
CHP. 2
59
CHAPTER
3
Basic Editing
Techniques
Vegas® projects are multitrack compilations of events that occur over time. The events in your project are
references (pointers) to source media files. Vegas software is a nondestructive editor, so editing events in
your project does not alter the source media files in any way.
Getting around
When editing and playing back the project, the cursor identifies where you are along the project’s timeline.
Moving the cursor
Use the following keyboard commands to move the cursor in the timeline.
Description
Keys
Description
Keys
Go to beginning of project
Ctrl+Home
or W
Ctrl+End
or E
Home
Move left/right to marker(s)
Ctrl+Left/Right Arrow
Move to marker #
0-9 keys (not numeric
keypad)
Ctrl+Alt+Left/Right
Arrow
Left or Right Arrow
Go to end of project
Go to beginning of selection
or view (if no selection)
Go to end of selection or view End
(if no selection)
Page Down
Move right by grid marks
Move left by grid marks
Page Up
Go to
Ctrl+G
Move left/right to event edit points
including fade edges (see figure below)
Nudge cursor on timeline
Move left/right one frame
Move left/right one frame
Center in view
Alt+Left/Right Arrow
Ctrl+Alt+Shift+Mouse
wheel
\
Event edit point cursor jumps
Changing focus
Focus is used to describe which objects have the attention of a program. For example, when you click a file in
the Media Pool, the Media Pool window has focus. To instantly switch the program’s focus to the track view
(timeline), press Alt + 0 or, from the View menu, choose Focus to Track View.
In Vegas software, it matters which track has focus when you perform a task. For example, when you doubleclick a media file in the Explorer, it is inserted into the track that has focus. You can click a track on its track
number to make it the focus track. A blinking white line under the track number and shading in the track
list indicates a track has focus.
CHP. 3
BASIC EDITING TECHNIQUES
60
Making selections
You have the flexibility to select one or more events, a time range, or events and a time range. All selection
options can apply to a single track or to multiple tracks.
To select an event, click it.
Selecting multiple events
You can select multiple events in your project using several methods.
Tip: Once you have selected multiple events, you can group
them together. For more information, see Grouping events on
page 141.
Note: You can select multiple video events, multiple audio
events, or a combination of both video and audio events.
However, you can only use commands and operations that
apply to both types of events for selections composed of both
audio and video events.
Selecting nonadjacent events
1. Hold the
Ctrl
Selected events
key.
2. Select the events by clicking them.
To deselect an event, simply click it again to
toggle the event selection on or off.
Selecting a range of events
1. Hold the
Shift
key.
2. Click the first event that you want to select.
3. Click the last event that you want to select.
All events between the first and last selected
events are highlighted and selected.
Selected events
Selecting a block of events
1. Click the Selection Edit Tool button (
).
2. Position the cursor in a corner of the area that you want to select.
3. Click and hold the left mouse button.
BASIC EDITING TECHNIQUES
CHP. 3
61
4. Drag the cursor to the opposite corner of the area you want to select. A rectangle is drawn on the
workspace. All events within this rectangle are selected.
Hold the left mouse button and right-click to toggle through the three types of selection boxes: free,
vertical, or horizontal.
Tip: You may include or exclude events from a selection area
by pressing Ctrl and clicking an event. To deselect all events,
click anywhere in the workspace outside of the selected
events.
Selecting all events to the end of the track
1. Right-click an event. A shortcut menu appears.
2. From the shortcut menu, choose Select Events to End. All events on the track after the selected event are
selected.
Tip: To move large blocks of events, you can use Select
with events selected on different tracks. Press
and click to select events on different tracks, and then
right-click to access the shortcut menu.
Events to End
Ctrl
Selecting all events that refer to a specific media file
Right-click a file in the Media Pool and choose Select Timeline Events from the shortcut menu. All events
that use the selected media file in the active take are selected.
Hold Ctrl or Shift while choosing Select Timeline Events from the shortcut menu to add the events to the
current selection.
Selecting a time range
Time selections are indicated by a shaded box and a bar that
appears on the top of the timeline. You can use the time
selection bar for playing back a smaller portion of your project or
to apply cross-track edits.
Time selection
Only the events within
the time selection are
affected by edits or
played back.
Note: Unless an event is locked, a selected time range
affects all events, or portions of events, that occur within the
range.
Dragging to select a time range
1. Position the mouse pointer above the ruler (on the marker bar). The mouse pointer changes to a left/right
arrow cursor (
).
2. Drag to select a region. All events, or portions of events within the region are highlighted.
3. Drag the yellow handles on either end of the time selection to increase or decrease your time range
selection.
Tip: You can move the entire selection range by dragging the
time selection bar.
CHP. 3
BASIC EDITING TECHNIQUES
62
Selecting a time range during playback
1. Click the Play (
) or the Play From Start (
) button to begin playback.
2. Press
I
where you want the time selection to begin.
3. Press
O
where you want the time selection to end.
4. Click the Stop button (
) to stop playback.
Using shortcuts for time selections
These shortcuts can speed up the process of making precise time selections.
Description
Shortcut
Set time selection duration equal to an
event’s duration
Extend selection to the end of the
currently selected event edge
Extend selection to the beginning of the
currently selected event edge
Drag a time selection on an event without
selecting/deselecting the event
Double-click the event
Tip: Press
Backspace
Ctrl+Shift+Alt+Right Arrow
Ctrl+Shift+Alt+Left Arrow
Ctrl+Shift+drag on the event
to recall the last five time selection
areas.
Looping playback
If you want to play back the time range, click Play ( ) to play only the events within the time range. Click
the Loop Playback button ( ) or press Q to toggle loop playback on and off. Vegas software continually plays
back the portion of the timeline within the time selection when loop playback is toggled on.
Selecting events and a time range
Selecting a time range does not automatically
select events. Excluding locked events, all items
within the time range play back and are affected by
Edit menu commands. However, you may select
specific events to edit, and then select a time
range.
1. Select the events you wish to edit. For more
information, see Selecting multiple events on page
60.
2. Place the mouse pointer above the ruler (on the
Time selection
Selected
event
Unselected
event
Selected
event
Unselected
event
Selected
event
Unselected
event
marker bar). The mouse pointer changes to a
left/right arrow cursor ( ).
3. Drag to select the region. Notice that events
that were not initially selected in step 1 remain
unselected (not highlighted).
Selecting tracks
Click a track header to select it. Hold
BASIC EDITING TECHNIQUES
Ctrl
or
Shift
to select multiple tracks.
CHP. 3
63
Selecting groups of composited tracks
Click the vertical bar below a parent track to select a group of composited tracks. For example, clicking the
area marked A in the following track list to select tracks 2 through 6. Clicking the area marked B selects
tracks 5 and 6.
A
B
Editing events
Copying events
You can copy events, or portions of events, to the clipboard and paste them into your project. You may copy
a single event or multiple events. Copying preserves the original event information, edits, and other
modifications.
1. Select the events to be copied. For more information, see Selecting multiple events on page 60.
2. Select a time range, if applicable.
3. Click the Copy button (
).
Copying selected events
When copied, selected events are reproduced and placed on the clipboard. Time information is also placed
on the clipboard.
Events before copy
Clipboard contents
Events after copy
The original events are not
affected and do not
change.
CHP. 3
BASIC EDITING TECHNIQUES
64
Copying a time selection
Events within the time selection and across all tracks are reproduced and placed on the clipboard. Time
information is also placed on the clipboard.
Events before copy
Clipboard contents
Events after copy
The original events are not
affected and do not
change.
Copying a time selection and events
Events and portions of selected events within the time selection are reproduced and placed on the clipboard.
Time information is also placed on the clipboard.
Events before copy
Clipboard contents
Events after copy
The original events are not
affected and do not
change.
Cutting events
Cutting events removes them from their respective tracks, but places the cut information (events and time)
on the clipboard. Once on the clipboard, you may paste the information into your project.
Tip: You can apply a ripple edit after cutting. For more
information, see Applying post-edit ripples on page 73.
1. Select events or a time range. For more information, see Making selections on page 60.
2. Click the Cut button (
).
Cutting selected events
When cut, selected events are removed from the timeline and placed on the clipboard. Time information is
also placed on the clipboard.
Events before cut
BASIC EDITING TECHNIQUES
Clipboard contents
Events after cut
Events after cut in
post-edit ripple mode
CHP. 3
65
Cutting a time selection
Events within the time selection are reproduced and placed on the clipboard. Time information is also
placed on the clipboard. When cutting a time selection, ripple edit mode affects the position of material on
all tracks or affected tracks after the cut.
Events before cut
Clipboard contents
Events after cut
Events after cut in
post-edit ripple mode
Cutting a time selection and events
Events and portions of selected events within the time selection are reproduced and placed on the clipboard.
Time information is also placed on the clipboard. When cutting a combination of time selection and event
selection, post-edit ripple mode affects the position of material on all tracks or the tracks of selected events
after the cut.
Events before cut
Clipboard contents
Events after cut
Events after cut in
post-edit ripple mode
Pasting events
Once information is copied to the clipboard, you may choose a variety of ways to paste the clipboard items.
Items are always pasted from the cursor’s position along the timeline.
When post-edit ripple mode is enabled, material is pushed down the track to make room for pasted material.
The exact behavior of the ripple depends on what is being pasted, and the type of ripple edit you chose to
perform. If one or more events are pasted, only those tracks where pasted material appears are ripple edited.
Tip: You can apply a ripple edit after pasting. For more
information, see Applying post-edit ripples on page 73.
1. Move the cursor to the desired location on the timeline.
2. Click either the track number or within the track where you want to paste the event. This track is the
focus track; there can be only one focus track at a time.
Note: If you are pasting multiple events from different
tracks, new tracks are automatically created as needed.
3. Click the Paste button (
CHP. 3
).
BASIC EDITING TECHNIQUES
66
Clipboard events are pasted at the cursor position on the track. Existing track events can be overlapped
with newly pasted information.
Using paste repeat
Use paste repeat to specify how many times clipboard events are pasted at the cursor position on the selected
track and to specify the space between pasted events.
1. Copy a selection to the clipboard.
2. From the Edit menu, choose Paste Repeat. The Paste Repeat
dialog appears.
3. Specify the number of times to paste the clipboard contents
and the space between successive copies.
4. Click OK.
Using paste insert
When using paste insert, clipboard events are placed at the cursor position on the selected track and existing
events on all tracks are moved further down the timeline by the total length of pasted information. This
action differs from post-edit ripple mode because pasting in post-edit ripple mode affects only the tracks in
which material is pasted, while paste insert affects all tracks in the project.
1. Copy a selection to the clipboard.
2. From the Edit menu, choose Paste Insert
Clipboard contents
Events before paste insert
Events after paste insert
Events on all tracks (not just tracks with
pasted material) are pushed down the timeline.
Punching-in and crossfading events
You can insert events into the middle of (on top of) existing events without altering the timing of the
project. When the inserted event ends, the original event continues playing as if it had never stopped.
You can choose the duration of crossfades for punched-in audio events.
1. From the Options menu, choose Preferences. The Preferences dialog appears.
2. Click the Editing tab.
3. Select Quick fade length of audio events. Specify a duration for each transition.
BASIC EDITING TECHNIQUES
CHP. 3
67
Events that have previously been inserted or punched-in are not affected by this change. The concept of
punching in and out only applies when you are inserting an event that is shorter than the event that it is
being inserted into. In the following illustration, every frame is numbered so that you can see how the
original event continues after the inserted event ends, as if it continued to play underneath the original.
Punched-in event
Duplicating events
Duplicating is a combination of copying and pasting in one action. The process is like moving the event to a
new position while leaving a copy behind.
1. Press
Ctrl
.
2. Drag the event you want to duplicate to the place where you want the new event to be positioned.
Inserting empty events and time
You can insert events into the timeline that do not have any contents and are not references to any media
files. Empty events are useful as placeholders in the timeline that can be filled with media or recorded into at
a later time. In either case, the new media is added to the empty event as a take. For more information, see
Working with takes on page 94. To add an empty event to a track, from the Insert menu, choose Empty Event.
You can also make space in a project by inserting a length of time across all tracks. To insert a period of time
into the timeline, from the Insert menu, choose Time.
Trimming events
This section describes simple ways to trim events. For more information, see Using the Trimmer window on page
96.
Tip: You can apply a ripple edit after trimming an event. For
more information, see Applying post-edit ripples on page 73.
Trimming an event
During the trimming process for a video event, both the last thumbnail image on the event and the Video
Preview window show the last frame in the event, allowing you to edit events very accurately.
1.Move the cursor over the edge of the event. The cursor changes
when properly positioned ( ).
2.Drag the edge of the event to trim it.
Trimming
grouped events
at the same time
CHP. 3
Since a multimedia file often has both a video and an audio
component, both events are trimmed (or extended) as a group
unless you ungroup them or temporarily suspend grouping by
clicking the Ignore Event Grouping button ( ). For more information,
see Grouping events on page 141.
BASIC EDITING TECHNIQUES
68
Trimming an event beyond its end
You can trim an event beyond its end, extending it as a result. Once extended, the event loops as a default.
A notch indicates where the looped event repeats.
Alternately, you can turn looping off and make the last frame of an event’s media repeat for the duration of
the event (a freeze frame). A notch appears at the point in the event where the video ends and the freeze
frame begins. For more information, see Loop on page 133.
Trimming adjacent events
You can trim adjacent events simultaneously. Press Ctrl +
adjacent events. The trim adjacent cursor appears ( ).
Press Ctrl+Alt over the
boundary between two events...
Alt
...and drag left...
while dragging the common edge between two
...or right to trim both events at once.
Trimming a time selection
Trimming events removes all media outside the time selection. The removed information is not placed on
the clipboard. Trimming is different from cutting in that the events within the time selection are preserved.
1. Select a time range. For more information, see Selecting a time range on page 61.
2. Press
Ctrl + T
or, from the Edit menu, choose Trim.
The material outside the time selection (across all tracks) is removed from the project. However, the time
information (space) between events is not removed.
Events before trim
Clipboard contents
Events after trim
Trimmed information is not
placed on the clipboard.
Trimming a time and event selection
1. Select the events to be trimmed.
2. Select a time range. For more information, see Selecting events and a time range on page 62.
3. Press
Ctrl + T
or, from the Edit menu, choose Trim.
Only the portion of selected events outside the time selection is trimmed. Unselected events remain. The
time information (space) between events is not removed.
Events before trim
Clipboard contents
Events after trim
Trimmed information is not
placed on the clipboard.
BASIC EDITING TECHNIQUES
CHP. 3
69
Edge trimming events using the keyboard
With this method, you can quickly jump through your project and adjust cuts until they're perfectly
synchronized. If you have an external multimedia controller, it's even easier.
1. If you want downstream events to ripple as you trim, click the Auto Ripple button (
) to turn on Auto
Ripple mode.
2. Select the event you want to trim.
3. Press 7 or 9 on the numeric keypad to move the cursor to the event edge you want to trim. 7 selects the
beginning of an event or moves to the previous event edge. 9 selects the end of the event or moves to the
next event edge. A red bracket is displayed to indicate which event edge will be trimmed.
Note: You can also perform this step using the [ or ] keys.
4. Use the 1, 3 and 4, 6 keys on the numeric keypad to trim the current event edge:
• Press 1 to trim one video frame left, or press 3 to trim one video frame right (or hold Ctrl + Shift + Alt
while rolling the mouse wheel).
• Press 4 to trim one pixel left, or press 6 to trim one pixel right (or hold Ctrl + Shift while rolling the
mouse wheel). Depending on the current zoom level, the trim duration will vary.
Note: Pressing 5 on the numeric keypad exits edge-trimming
mode. If you are not in edge-trimming mode, 1, 3, 4, and 6
on the numeric keypad to nudge events on the timeline by
frame (1 and 3) or by pixel (4 and 6).
5. Repeat steps 3 and 4 as necessary.
Splitting events
You are allowed to create multiple, independently functioning events from a single event by splitting it.
Splitting creates a new ending point for the original event and creates a starting point for the newly created
event.
Splitting an event does not alter the original media. The
original media file’s information is there, but is omitted for
playback based on where the event’s starting or ending point
occurs on the timeline.
When split, the two new events are flush against one another.
The two events can be moved independently.
One event
Split position
Two events after split
Splitting an event
1. Select the event(s) to be split. For more information, see
Making selections on page 60.
The two new events
can be moved
independently.
2. Place the cursor at the timeline position where the split will
occur.
3. From the Edit menu, choose Split, or press
CHP. 3
S
.
BASIC EDITING TECHNIQUES
70
Splitting all events at the cursor
All events are split at the cursor’s position (unless an event is locked). The split occurs across all tracks (if no
events are selected).
Events before splitting
Events after splitting
Splitting selected events
Only the selected events are split at the cursor’s position.
Events before splitting
Events after splitting
Splitting a time selection
Unless locked, all events within the time selection are split at the starting and ending points of the time
range, meaning that two splits are made. The split occurs across all tracks.
Events before splitting
BASIC EDITING TECHNIQUES
Events after splitting
CHP. 3
71
Splitting a time selection across selected events
Only selected events within the time selection are split at the starting and ending points of the time range.
Events before splitting
Events after splitting
Slipping and sliding events
To help you picture what happens when you slip and slide events, think of an event as a window to a media
file. The window can display the entire media file or a small section. When the window displays only a
portion of the media file, you can move either the window or the underlying media to adjust the media that
is played by an event:
• When you slip an event, your event maintains its place on the timeline, but the media file moves in the
direction you drag.
• When you slide an event, the media file maintains its place on the timeline, but the event moves in the
direction you drag.
Tip: You can also slip or slide grouped events (at the same
time) or slide a crossfade between two events. For more
information, see Grouping events on page 141 or Sliding a
crossfade on page 76.
Shifting the contents of (slipping) an event
Press
Alt
while dragging an event. The slip cursor appears (
).
As you drag the event, the contents of the event shift, but the event does not move. You can use this
technique when you want to maintain an event’s length and position, but have the event play a different
section of the source media file.
Slip-trimming an event
Press
Alt
while dragging the right or left edge of an event. The slip-trim cursor appears (
).
As you drag the event edge, the media moves with the event edge.
CHP. 3
BASIC EDITING TECHNIQUES
72
Sliding an event
Press
while dragging an event. The slide cursor appears (
Ctrl + Alt
).
As you drag, the relative position of the media remains fixed on the track, and the event position changes.
You can use this technique when you want to maintain an event’s length, but have the event play a different
section of the source media file at a different point in your project.
Tip: You can apply a ripple edit after slip-trimming or sliding
an event. For more information, see Applying post-edit
ripples on page 73.
The original
media file.
The event on the timeline
with original frames.
Slipping the event two
frames to the right.
Slip-trimming the event
two frames to the right.
Sliding the event two
frames to the right.
Deleting events
Deleting an event removes it from its track. Multiple events can be deleted and time selections can be used
to modify the process. Ripple editing also applies to delete actions. Deleting operates exactly like a cutting
operation, but the removed information is not placed on the clipboard. For more information, see Cutting
events on page 64.
1. Select the events to be deleted.
2. Press
Delete
.
BASIC EDITING TECHNIQUES
CHP. 3
73
Applying post-edit ripples
You can apply a post-edit ripple that affects either the edited track(s), the track(s) and certain project
elements, or everything in the timeline. The power lies in the fact that you can apply this post-edit ripple to
a wide variety of editing tasks, such as trimming, crossfading, cutting, pasting, and deleting events. You can
also choose to apply your ripple edits manually or automatically.
You can ripple the contents of the timeline following an edit after performing these tasks:
•
•
•
•
•
trimming (pg. 67), slip-trimming (pg. 71), and sliding (pg. 72) events
time compressing/stretching events (pg. 93)
cutting events (pg. 64)
pasting events (pg. 65)
deleting events (pg. 72)
Ripple editing also affects how material is added from the Trimmer window. For more information, see Using
the Trimmer window on page 96.
The original four events
Trimming the second event
After applying a post-edit ripple, the third and fourth events close the gap
A quick and easy method is also provided for shuffling a sequence of events on a track. Decide that the third
event in a series should really be the second instead? You can drag the event to a new position and instruct
the software to shuffle the events into their new order.
CHP. 3
BASIC EDITING TECHNIQUES
74
Applying a post-edit ripple manually
1. Perform one of edits discussed above. Above the timeline, an arrow indicates
where the post-edit ripple will occur and the direction the affected events will
move.
2. From the Edit menu, choose Post-Edit Ripple, and choose a command from the submenu:
• Affected Tracks ripples only the track(s) where you performed the edit.
• Affected Tracks, Bus Tracks, Markers, and Regions ripples the track(s) where you performed the edit and
ripples any keyframes or envelopes on those tracks. This command also ripples any markers, regions, CD
layout markers, and command markers in the project.
• All Tracks, Markers, and Regions ripples all tracks and all keyframes and envelopes on those tracks. This
command also ripples any markers, regions, CD layout markers, and command markers in the project.
The timeline is rippled after the edit according to the option you choose.
Tip: You can press F after an edit to ripple the affected
tracks, or you can press Ctrl + F to ripple markers,
keyframes, and envelopes too. To ripple everything after an
edit, press Ctrl + Shift + F .
Applying a post-edit ripple automatically
1. Click the arrow button next to the Auto Ripple button (
) and choose a ripple type:
• Affected Tracks ripples only the track(s) where you performed the edit.
• Affected Tracks, Bus Tracks, Markers, and Regions ripples the track(s) where you performed the edit and
ripples any keyframes or envelopes on those tracks. This command also ripples any markers, regions, CD
layout markers, and command markers in the project.
• All Tracks, Markers, and Regions ripples all tracks and all keyframes and envelopes on those tracks. This
command also ripples any markers, regions, CD layout markers, and command markers in the project.
2. Perform one of edits discussed above. Above the timeline, an arrow indicates
where the post-edit ripple will occur and the direction the affected events will
move.
3. The timeline is rippled after the edit according to the ripple type you choose.
BASIC EDITING TECHNIQUES
CHP. 3
75
Shuffling events
A quick way to change the order of a sequence of events in a track is provided. Right-click and drag an event
to a new location in the track and choose Shuffle Events from the shortcut menu that appears. The events are
shuffled into the new order.
The original four events
Right-click and drag event three between events one and two
The four events after the shuffle
Crossfading events
You are allowed to crossfade between two events on the same
track. For audio events, crossfading fades out one audio event’s
volume while another event’s volume fades in. For video
events, crossfading creates a transition between two events,
one fading out while the other fades in. Lines appear indicating
how and when the event’s volume or transparency is being
affected.
Fade in
volume line
Fade out
volume line
Using automatic crossfades
The automatic crossfade feature turns the overlapping portions of two events into a smooth crossfade. This
feature is turned on as a default. Click the Automatic Crossfades button ( ) or press Ctrl + Shift + X to turn
automatic crossfades on and off.
Events before crossfade
Events after crossfade
Drag one event to
overlap the other
An option is provided for creating automatic crossfades when you add multiple media files to a track. For
more information, see Automatically crossfading inserted events on page 47.
CHP. 3
BASIC EDITING TECHNIQUES
76
Manually setting a crossfade
An automatic crossfade is not inserted if a shorter event is placed on top of and within the same time frame
of a longer event. In this case, the longer event begins playing, then the shorter event plays, and then the
longer event resumes playing at the timeline position. You can manually create a crossfade to fade in and out
of the shorter event.
1. Place the mouse pointer on one of the shorter event’s handles. The envelope cursor appears (
).
2. Drag the handle to the desired position.
Events without crossfade
Events with manual crossfade
This is a fast and effective method of inserting a voiceover on top of a background music track (although the
music fades out completely) or to replace a bad section of audio. For more information, see Punching-in and
crossfading events on page 66.
Changing crossfade curves
You can change the crossfade curves that are used to fade in and out between two events.
Right-click a crossfade to
choose a different crossfade curve.
1. Right-click anywhere in the crossfade region to display a shortcut menu.
2. From the shortcut menu, choose Fade Type, and choose the desired fade type from the submenu.
Tip: If you use the same crossfade curve frequently, you can
set it as a default for all new audio or video crossfades. For
more information, see Editing tab on page 297.
Sliding a crossfade
You can slide a crossfade between two events without affecting the total length of the two overlapping
events. This process is similar to sliding and slipping events. For more information, see Slipping and sliding
events on page 71.
Press Ctrl
( ).
+ Alt
while dragging the overlapping area between two events. The slide crossfade cursor appears
BASIC EDITING TECHNIQUES
CHP. 3
77
As you drag, the relative position of the media remains fixed on the track, and the crossfade position
changes, effectively trimming the edge of the event in the direction you drag. You can use this technique
when you want to maintain the length of two combined events but want the transition to occur earlier or
later.
Two events with a
crossfade.
Sliding the crossfade
to the left...
...and to the right.
Using undo and redo
You are given unlimited undo and redo functionality while working on your project, even to the extent of
being able to undo changes made before the last time a project was saved (but not closed). While you are
working with a project, an undo history of the changes that you have performed is created. Each time you
undo something, that change is placed in the redo history.
When you close the project or exit the software, both the undo and redo histories are cleared.
Using undo
Pressing Ctrl + Z or clicking the Undo button ( ) reverses the last edit performed. Repeatedly using the
keyboard command or toolbar button continues undoing edits in reverse order, from most recent to oldest.
In addition, you may undo the last edit by choosing it from the Edit menu.
Undoing a series of edits
You can undo a series of edits by using the drop-down list on the Undo button.
1. Click the arrow to the right of the Undo button (
).
2. From the drop-down list, choose the edit that you want to undo. Items above it (subsequent edits) are
selected automatically. Your project is restored to the state prior to those edits.
Use the mouse
to select
a series of edits.
When you undo an edit or a series of edits, they are added to the redo history. This feature allows you to
restore your project to a previous state.
Tip: From the Edit menu, choose Undo All to undo all edits
in the history. All edits are undone and added to the redo
history.
CHP. 3
BASIC EDITING TECHNIQUES
78
Using redo
Pressing Ctrl + Shift + Z or clicking the Redo button ( ) redoes the last undo performed. Repeatedly using
the keyboard command or toolbar button continues redoing undos in reverse order, from most recent to
oldest. In addition, you may redo the last edit by choosing it from the Edit menu.
Redoing a series of edits
You can view the redo history by clicking the arrow on the right side of the Redo button (
). The top
item in the list that appears is the most recent undo edit. If you redo a specific edit that appears farther down
the list, all subsequent edits above it are redone as well.
When you redo an edit or a series of edits, they are added to the undo history again. The redo history is
cleared when a new edit is performed.
Clearing the edit history
You can clear both undo and redo histories without closing your project or exiting the software. Once the
histories have been cleared, a new edit history is created as you continue working on the project. While
clearing the edit history is not usually necessary, it can free up disk space. To clear the edit history, choose
Clear Edit History from the Edit menu.
Adding project markers and regions
Several types of project markers are provided that identify parts of your project, serve as cues, and provide
additional functionality:
• Markers are points that you mark along the project’s timeline. They are typically used to mark locations
in the project for later reference or to mark timing cues.
• Regions are ranges of time that you mark along the timeline. Regions identify ranges of time for your
reference and can function as permanent time selections.
• Command markers are markers that enable metadata in streaming media files. These markers can be used
to display headlines or closed captions, link to Web sites, or perform any other function you define. For
more information, see Adding closed captioning to Windows Media Video (WMV) files on page 196. In addition,
these markers can be used to embed Scott Studios data information, which is used extensively in
broadcasting. The Sony Pictures Digital Media Software and Services Web site (http://www.sony.com/
mediasoftware) has a number of metadata examples complete with source code.
• CD layout markers are markers that indicate tracks and indices for an audio CD layout. These marks are
used to create tracks and index points when burning an audio CD. For more information, see Understanding
tracks and indices on page 303.
Tip: You can use ripple editing to automatically move
markers and regions as you edit in the timeline. For more
information, see Applying post-edit ripples on page 73.
BASIC EDITING TECHNIQUES
CHP. 3
79
Working with markers
Markers are useful for identifying and navigating to specific locations in longer projects. As you place
markers in your project, they are automatically numbered (up to 99) in the order that they are placed.
Markers appear as orange tags above the ruler. You may name them and reposition them along the project’s
timeline.
Markers
Right-click the marker bar
Marker
bar
Inserting a marker at the cursor
1. Position the cursor where you want to place the marker.
2. From the Insert menu, choose Marker, or press
3. Type a name for the marker and press
Enter
M
.
. If you do not want to name the marker, simply press
Enter
.
Inserting a marker during playback
During playback, press
been set.
M
. The marker appears on the marker bar. You may name the marker after it has
Naming (or renaming) a marker
1. Place the mouse pointer on the marker you want to name or rename. The pointer changes to a hand icon
( ).
2. Right-click to display a shortcut menu.
3. From the shortcut menu, choose Rename. A text box opens next to the marker.
4. Type the marker name.
5. Press
Enter
to set the marker’s name.
You can also double-click an existing name or double-click the space just to the right
of a marker to rename it.
Moving markers
You can reposition a marker by dragging it on the marker bar.
Navigating to markers
You can jump the cursor to any marker on the timeline by clicking the marker. You can also jump to a
marker by pressing the number keys along the top of the keyboard (not the numeric keypad).
Tip: Jump the cursor to the next or previous marker by
pressing
CHP. 3
Ctrl +
or
Ctrl +
.
BASIC EDITING TECHNIQUES
80
Deleting markers
1. Place the mouse pointer on the marker that you want to delete. The pointer changes to a hand (
).
2. Right-click to display a shortcut menu.
3. From the shortcut menu, choose Delete. The marker is removed from your project.
The tags are not renumbered as you remove them. For example, if you have five markers in your project and
delete markers 3 and 4, the remaining markers will be listed as 1, 2 and 5. However, as you add markers
again, Vegas software begins numbering the missing sequence first, in this case 3 and 4, then 6, 7, 8, etc.
Deleting all markers and regions
1. Right-click the marker bar.
2. From the shortcut menu, choose Markers/Regions, and choose Delete All from the submenu.
Working with regions
Regions identify ranges of time and provide a way to subdivide your project. A region is defined as the area
between two region markers that share the same number. Regions can function as semi-permanent time
selections. You can view region information in the Explorer by clicking the arrow next to the View button
(
) and selecting Region View.
Inserting regions
1. Make a time selection. For more information, see Selecting a time range on page 61.
2. From the Insert menu, choose Region, or press
3. Type a name for the region and press
Enter
R
.
. If you do not want to name the region, simply press
Enter
.
Region markers display at the beginning and end points of a time selection.
Region start
Right-click the marker bar
Region end
Marker
bar
Moving regions
Drag a region marker to reposition it. To move both region markers (start and end markers) at once, hold
while dragging a region marker.
BASIC EDITING TECHNIQUES
Alt
CHP. 3
81
Naming regions
1. Place the mouse pointer on the left region marker you want to name or rename. The pointer changes to a
hand icon ( ).
2. Right-click to display a shortcut menu.
3. From the shortcut menu, choose Rename. A text box appears next to the region marker.
4. Type the region’s name.
5. Press
Enter
or click anywhere in the track view to set the name.
Selecting regions
You may select the events, across all tracks, within the region for editing or playing back.
1. Right-click one of the region markers to display a shortcut menu.
Selected region
2. From the shortcut menu, choose Select Region.
Tip: You can also select a region by pressing a number on
your keyboard (not the numeric keypad) or by doubleclicking a region marker.
Navigating to regions
You can move the cursor to the start or end of a region by clicking either region marker. You may press
Ctrl +
or Ctrl + to move the cursor to the next or previous region markers.
Right-click a region marker to display a shortcut menu that allows you to navigate to the beginning (Go to
the end (Go to End) of a region.
Start) or
Deleting regions
1. Place the mouse pointer on the region marker’s starting or ending point. The pointer changes to a hand
icon ( ).
2. Right-click to display a shortcut menu.
3. From the shortcut menu, choose Delete. The region is removed from your project.
The tags are not renumbered as you remove them. For example, if you have five regions in your project and
delete region 3 and 4, the remaining regions are listed at 1, 2 and 5. However, as you add regions again, Vegas
software begins numbering the missing sequence first, in this case 3 and 4, and then 6, 7, 8, etc.
Deleting all regions and markers
1. Right-click the marker bar.
2. From the shortcut menu, choose Markers/Regions, and choose Delete All from the submenu.
CHP. 3
BASIC EDITING TECHNIQUES
82
Working with command markers
Command markers add interactivity to a multimedia presentation streamed over the Internet by inserting
metadata into streaming media files. As your video plays, any number of other actions can be programmed to
occur. These commands are a part of the Microsoft® Windows Media® and RealMedia® streaming formats.
Most frequently, these actions add text or open a related Web site where the viewer can find more
information about the topic at hand. The specific commands available vary depending on the final format of
your project.
Note: Windows Media Player 9 will ignore metadata
commands unless the Run script commands when present
check box is selected on the Security tab of the player's
Preferences dialog. Be sure to instruct your audience to select
this check box before playing your file.
You can use command markers to add closed captions to your project. For more information, see Adding closed
captioning to Windows Media Video (WMV) files on page 196.
Command markers can also indicate when an instruction (function) will occur in a WAV file being used in a
radio broadcast environment (Scott Studios data). The following two sections define the markers for both
streaming media and Scott Studios files.
Note: While streaming media files can be played on any hard
drive or CD-ROM, they require a special streaming media
server (provided by your Internet service provider) to stream
properly across the Internet.
BASIC EDITING TECHNIQUES
CHP. 3
83
Defining streaming media commands
In a streaming media file, command markers can be used to display headlines, show captions, link to Web
sites, or any other function you define. Several command types are included that you may add to a streaming
media file. Some command types are exclusive to either the Windows Media or the RealMedia player.
Command
Player type
Description
URL
Windows Media
and RealMedia
Text
Windows Media
Indicates when an instruction is sent to the user’s internet browser to change the
content being displayed. With this command, you enter the URL that displays at a
specific time during the rendered project’s playback.
Displays text in the captioning area of the Windows Media Player located below the
video display area. You enter the text that will display during playback.
WMClosedCaption
Windows Media
WMTextBodyText
WMTextHeadline
Title
Window Media
Windows Media
RealMedia
Note: To view captions during playback in Windows Media Player 9, choose Captions
and Subtitles from the Windows Media Player Play menu, and then choose On if
Available from the submenu.
Displays the entered text in the captioning window that is defined by an HTML layout
file.
Displays the entered text in the text window that is defined by an HTML layout file.
Displays the entered text in the headline window that is defined by an HTML layout file.
Displays the entered text on the RealPlayer’s title bar.
Note: When rendering Windows Media files, title information is based on the settings
on the Summary tab of the Project Properties dialog or the Index/Summary tab of the
Custom Template dialog. The summary information from the Project Properties dialog
will be used if information has been specified in both places.
Author
RealMedia
To view this information during playback, choose Now Playing Options from the
Windows Media Player View menu and select the items you want to display.
Displays the entered text (Author’s name) when a user selects About This
Presentation from the RealPlayer’s shortcut menu.
Note: When rendering Windows Media files, author information is based on the
settings on the Summary tab of the Project Properties dialog or the Index/Summary
tab of the Custom Template dialog. The summary information from the Project
Properties dialog will be used if information has been specified in both places.
Copyright
RealMedia
To view this information during playback, choose Now Playing Options from the
Windows Media Player View menu and select the items you want to display.
Displays the entered copyright information when a user selects About This
Presentation from the RealPlayer’s shortcut menu.
Note: When rendering Windows Media files, copyright information is based on the
settings on the Summary tab of the Project Properties dialog or the Index/Summary
tab of the Custom Template dialog. The summary information from the Project
Properties dialog will be used if information has been specified in both places.
HotSpotPlay
RealMedia
HotSpotBrowse
RealMedia
HotSpotSeek
RealMedia
To view this information during playback, choose Now Playing Options from the
Windows Media Player View menu and select the items you want to display.
Displays the RealMedia file specified in the Parameter box when users click the
RealPlayer video display.
Displays the Web page specified in the Parameter box when users click the RealPlayer
video display.
Jumps to the time specified in the Parameter box when users click the RealPlayer
video display.
Defining Scott Studios data commands
For WAV files using Scott Studios data, command markers can be used to define information about the
WAV file.
Command
Description
SCOTT EOM
Calculates when the next queued clip starts playing in a Scott Studios system. For more information,
please refer to your Scott Studios documentation.
Set the beginning of a file in a Scott Studios System without performing destructive editing. For more
information, please refer to your Scott Studios documentation.
SCOTT Cue In
CHP. 3
BASIC EDITING TECHNIQUES
84
Inserting command markers
Command markers appear as blue tags on the command bar, which is above the marker bar.
Right-click to place a command marker
on the command bar
Command bar
Marker bar
1. Position the cursor where you want to place the command marker.
2. From the Insert menu, choose Command, or press
C
.
3. Complete the Command Properties dialog:
• If desired, choose a custom template from the
Template drop-down list. For more information, see
Saving command properties as a custom template on page
84.
• Choose the type of command from the Command
drop-down list.
• In the Parameter box, enter parameters to define the
behavior of the command.
• Enter your own notes or comments in the Comments box.
• Specify the timing of the command in the Position box. Otherwise, command markers are automatically
set to the current cursor position.
4. Click OK. The new command marker appears on the command bar.
Editing command properties
Double-click any command marker to open the Command Properties dialog and edit its contents. You can
also right-click a command marker and choose Edit from the shortcut menu.
Saving command properties as a custom template
If you plan to use a command more than once, you can save command properties as a template. You can then
reuse the command properties by choosing the template from the Template drop-down list.
1. Create a command and complete the Command Properties dialog.
2. Enter a name for the template in the Template box.
3. Click the Save Template button (
).
Note: Your metadata command templates are saved in the
cmdtemp.xml file in the program folder. You can edit this file
directly to modify your templates.
BASIC EDITING TECHNIQUES
CHP. 3
85
Deleting command markers
1. Place the mouse pointer on the command marker. The pointer changes to a hand icon (
).
2. Right-click to display a shortcut menu.
3. From the shortcut menu, choose Delete. The command marker is removed from your project.
Working with CD layout markers
Markers on the CD layout bar indicate the locations of tracks and indices in an audio CD layout project.
These markers are discussed in a later chapter. For more information, see Understanding tracks and indices on
page 303.
Working with the marker tool
You can use the marker tool to navigate the marker bars and edit multiple selected markers.
1. Click the Marker Tool button
in the top-right corner of the timeline.
2. Select the markers you want to edit:
• Press the Left Arrow/Right Arrow keys to move to the previous/next marker in the active bar (marker/
region bar, CD layout bar, or command bar).
• Press Shift+Left Arrow/Right Arrow keys to extend the selection to the previous/next marker.
• Press Shift while clicking two marker tags to select all markers between the two tags.
• Press Ctrl while clicking marker tags to select or deselect individual markers.
3. Edit your markers:
• Dragging any selected marker will move all selected markers in the active bar as a group.
• Pressing Delete will remove all selected markers in the active bar.
The marker tool is inactive when you change focus to another portion of the Vegas window.
Using an external audio editing program
Vegas software is a nondestructive editing environment, which means that the original source files remain
unchanged by any editing done in the software. Destructive (constructive) edits that modify the actual
source media file may be done in a separate application such as Sound Forge® software from Sony Pictures
Digital. By setting up a separate audio editor, you can quickly access the program from Vegas software via the
Tools menu or by pressing Ctrl + E .
Setting up an audio editing program
If you already have Sound Forge software loaded on your computer when you installed Vegas software, the
installation should have detected it and made it your default audio editing program. However, if you do not
have Sound Forge software or want to specify a different audio editor, you may do so in the Preferences
dialog.
CHP. 3
BASIC EDITING TECHNIQUES
86
1. From the Options menu, choose Preferences. The
Preferences dialog appears.
2. In the Preferences dialog, click the Audio tab.
3. Click the Browse button to the right of the Preferred
audio editor box.
The Preferred Audio Editor dialog
appears.
4. From this dialog, navigate to the application to use for
editing audio files.
5. Select the application’s executable icon (.exe) and
click Open to set the application as your default audio
editor.
The application’s path displays in the Preferred audio
box.
editor
BASIC EDITING TECHNIQUES
CHP. 3
87
Opening an audio editor from Vegas software
All events in your project are references to media files on a storage device. When you edit an audio event in
an audio editor, you can choose to open the original media file or a copy of the file.
Opening a file in an audio editor
You can directly edit the media file to which an audio event is referenced. Any changes you make and save
in the audio editor are permanent and are reflected in the event in your project.
1. Select the event to be edited.
2. From the Tools menu, choose Audio, and choose Open in Audio Editor from the submenu.
Your selected audio editing application opens the event’s referenced media file. Make the necessary changes
and save the file in the audio editor. If you keep the media file’s name and location the same, its event is
updated immediately in your project. However, if you change the media file’s name or location (by using
Save As), you must import the edited (new) file into Vegas software.
Opening a copy of a file in an audio editor
You can also create a copy of an audio file and open it in an audio editor. Opening a copy of a file has the
advantage of preserving the original file unchanged. The modified copy is inserted into the event as a take
and is automatically added to the Media Pool.
1. Select the event to be edited.
2. From the Tools menu, choose Audio, and choose Open Copy in Audio Editor from the submenu.
When you are finished editing, save the file. “Take X” is added to the end of the filename to distinguish it
from the original and adds it to the project as a take. If you save it to a new file (by using Save As), you must
manually add it as a take into the project. For more information, see Working with takes on page 94.
CHP. 3
BASIC EDITING TECHNIQUES
88
BASIC EDITING TECHNIQUES
CHP. 3
89
CHAPTER
4
Advanced Editing
Techniques
This chapter builds on the techniques that were introduced in the last chapter. Ripple editing, pitch shifting,
and takes are just three of the more advanced editing topics that are covered in this chapter.
Snapping events
Vegas® software is preset to snap events into place as you drag them.
Events can snap to another event’s edges, to the cursor position, or to a
time selection. Events are allowed to snap to grid lines and markers. As you
move an event along the timeline, its edge automatically aligns to
designated snap points. At the highest level, all features can quantize to
individual frames.
Snap points
Turning snapping on and off
You can quickly turn snapping on and off by clicking the Enable Snapping button (
selectively turn snapping options on and off in the Options menu:
• Enable Snapping controls all snapping behavior except
quantizing to frames.
• Snap To Grid controls snapping to grid markers. A variety of
grid measurements are provided. For more information, see
Changing grid spacing on page 287.
• Snap To Markers controls snapping to markers. This command
applies to markers, regions, command markers, and CD layout
markers. For more information, see Adding project markers and
regions on page 78.
). You can also
All enabled
Quantizing to frames
The Quantize To Frames command in the Options menu takes snapping one step further. With this feature
enabled, everything snaps to the starting edge of individual project frames. Quantizing affects how you can
move events, place markers, make selections, and position the cursor.
Quantizing to frames means that
the position of markers, regions,
events, and the cursor are limited
to the start of an individual video frame.
Track zoomed
in so that one
thumbnail = one frame
CHP. 4
ADVANCED EDITING TECHNIQUES
90
Using the event snap offset
Each event in your project has a snap offset flag that can be moved along the length of the event. The flag is
the white triangle that is located in the lower-left corner of each event. This flag allows you to designate
where snapping occurs. This is useful if you need to align the snap with a beat in the event instead of the
edge.
Snap offset flag
1. Place the mouse pointer on the snap offset triangle. The pointer changes to a hand icon (
).
2. Drag the snap offset flag to the new position in the event. As the flag moves, a time display appears. This
time display indicates where the snap offset flag occurs in time in the event.
3. Release the mouse to set the snap offset flag.
Snapping to the cursor or a selection
You can snap two clips in the same track end-to-end, but how can you snap two events on separate tracks?
You can easily snap to specific event boundaries in any track by making a time selection for the event.
1. Double-click the event you want to snap to. The time selection area on the
ruler sets to the length of the event.
2. Drag another clip in a different track near the end of the first clip. It snaps
into position.
In this example, the second event snaps to the edge of the time selection.
Because events also snap to the cursor, you could accomplish the same task by
pressing Ctrl + Alt + or Ctrl + Alt + to position the cursor on the edge of
the first event. Once the cursor is on the event edge, you can snap the second
event to the cursor.
ADVANCED EDITING TECHNIQUES
CHP. 4
91
Pitch shifting audio events
Pitch shifting while preserving length is only available in the full version of Vegas software.
A pitch shift is a way to raise or lower the pitch of an audio event. The semitone range is -24 to 24. Twelve
semitones equal one octave, so you may increase or decrease the pitch of an event within a two-octave
range. Within each semitone is a finer pitch adjustment called cents. There are one hundred cents in one
semitone.
Change length and pitch
Original event
Event with pitch shift
of 12 or one octave speeds up
Event with pitch shift
of -12 or one octave slows down
Editing from the timeline
1. Select an event.
2. Use the = and - keys on your keyboard (not the numeric keypad) to adjust pitch:
Key
=
Ctrl+=
Shift+=
Ctr+Shift+=
Ctrl+ Shift+ Ctr+Shift+ -
Result
Raise pitch one semitone.
Raise pitch one cent.
Raise pitch one octave.
Reset pitch.
Lower pitch one semitone.
Lower pitch one cent.
Lower pitch one octave.
Reset pitch.
If the Show active take information in events check box is selected on the General tab of the Preferences dialog,
the event's pitch shift is displayed in the bottom-left corner of the event. If the media has a known root note,
the new root is displayed in parentheses:
CHP. 4
ADVANCED EDITING TECHNIQUES
92
Editing in the Event Properties dialog
1. Right-click the event and choose Properties from the shortcut menu.
2. On the Audio Event tab, choose a setting from the Method drop-down list to specify how you want to pitch-
shift the event, or choose None if you want to preserve the event pitch.
3. If you selected Classic from the Method drop-down list, indicate the new event length and amount of pitch
shifting you want to apply:
a. Type the desired event length in the New length box.
b. Type the desired pitch shift (in semitones) in the Pitch change box.
If you want to change the event length without changing pitch, type 0 in the box.
If you want the pitch to be determined by the amount of time stretching, select the Lock to stretch box.
For example, doubling an event's length will raise its pitch by one octave.
c. Choose a setting from the Stretch Attributes drop-down list to specify how you want to divide and
crossfade the file to prevent artifacts. Depending on your source material, you may need to experiment
with different crossfade types.
4. If you selected ACID from the Method drop-down list, indicate the new event tempo and the amount of
pitch shifting you want to apply:
a. Type the desired event length in the New tempo box.
b. Type the desired pitch shift (in semitones) in the Pitch change box.
If you want to change the event length without changing pitch, type 0 in the box.
If you want the pitch to be determined by the new event tempo, select the Lock to stretch box. For
example, doubling an event's tempo will raise its pitch by one octave.
5. Click OK.
ADVANCED EDITING TECHNIQUES
CHP. 4
93
Time compressing/stretching events
Time compressing/stretching audio while maintaining pitch is only available in the full version of Vegas software.
Time stretching and compressing events is the process of using the same amount of source media to fill a
shorter or longer event. While this can be done to both video and audio events, the two cases are
fundamentally different.
Press Ctrl and drag the edge of the event toward the center of the event to compress (shorten) it or drag the
edge out away from the center to stretch (lengthen) it.
You can see the results of the time compression or stretching by viewing the properties of the event. Rightclick the event and choose Properties from the shortcut menu. Time compressing/stretching an audio event
affects the Time stretch/pitch shift settings, while Time compressing/stretching a video event affects the
Playback rate setting.
Tip: You can time compress/stretch several events at once by
grouping them first. You can also apply a ripple edit after time
compressing or stretching events. For more information, see
Grouping events on page 141 or Applying post-edit ripples on
page 73.
Time compressing/stretching video
Time stretching video allows you to fill a given duration with a set amount of actual video, sometimes called
fit-to-fill. For example, if you have a five-second video event and you want this event to fill an eight-second
slot, press Ctrl and drag the edge of the event to eight seconds. The resulting video is in slow motion, but the
contents (footage) remain the same. If you had used a velocity envelope to slow the video to the same rate,
the event would also be in slow motion, but its duration would remain unchanged at five seconds. Stretched
video has a zigzag line between thumbnails. Video can also be compressed (sped up and shortened in length)
by using this method.
When stretching video events or slowing video down, a set number of frames are extended across a period of
time. For example, if you take source footage at 30 frames in a second and slow it so that only 15 source
frames run during that same second, an additional 15 frames must be created to maintain the project’s 30 fps
frame rate. Simply duplicating frames is the easiest way to do this. A more sophisticated method is to
resample the frames of an event, allowing Vegas software to interpolate and redraw these intervening frames.
For more information, see Resample (video only) on page 135 and Resampling video on page 199.
CHP. 4
ADVANCED EDITING TECHNIQUES
94
Working with takes
A take is a version of a scene or audio recording, as in “Scene 10, Take 7”, which means the seventh time
that scene number ten has been shot. A number of takes can be included in the same location (event) of the
project. You can then rapidly switch between these separate takes to see which one fits into the project the
best. Although this is what takes are designed for, you can actually use any media files you want as a take,
even completely different sounds or scenes. Since an event is just a container of a specific length and at a
specific location, the actual content (media file) is easily changed.
Adding takes
You can add multiple media files to the timeline at the same time to a single event as takes. You can also add
regions within media files as takes. For more information, see Adding regions as takes on page 99.
Adding media files to the timeline as takes
1. Locate the media files that you want to insert as takes in the Explorer and select them. Select a range by
pressing Shift and clicking the first and last file in the range, or select nonadjacent files by pressing
and clicking the various clips individually.
Ctrl
2. Right-click and drag one of the selected clips in the group to the timeline.
3. From the shortcut menu, choose Add as Takes.
Tip: To add either just the audio or just the video portions of
files as takes, choose Video Only: Add Video as Takes
Only: Add Audio as Takes from the shortcut menu.
or Audio
Adding takes to existing events
You can add media files to existing events as takes.
1. Right-click a media file in the Explorer and drag it to an existing event.
2. From the shortcut menu, choose Add as Takes.
Selecting takes
When you add an event with multiple takes, a single event is inserted into a track. The length of the event is
set according to the last clip that was selected. This last clip is set as the active take.
1. Right-click an event with multiple takes.
2. From the shortcut menu, choose Take, and choose Next Take or Previous Take from the submenu.
Alternately, choose the name of the take from the list at the bottom of the submenu.
Tip: Click an event and press
Shift + T
T to select the next take or
to select the previous take.
ADVANCED EDITING TECHNIQUES
CHP. 4
95
Previewing and selecting takes
You can preview the takes for a given event.
1. Select an event containing multiple takes.
2. Right-click to display a shortcut menu or, from the Edit menu, choose Take to display a submenu.
3. Choose Choose Active... from the submenu. The Take Chooser
dialog appears.
4. Select the take that you want to preview and use the Play (
Stop
(
) and
) buttons within the dialog.
5. To use a take, select it and click OK. The selected take is now the
active take.
Deleting takes
You can delete individual takes from an event at any time.
1. Right-click an event with multiple takes.
2. From the shortcut menu, choose Take, and choose Delete Active from the submenu to immediately remove
the active take. Alternately, choose Delete to open a dialog with a list of all of the takes contained in this
event.
Working with take names
Displaying take names on events
Take names may be displayed on the events in the timeline.
1. From the Options menu, choose Preferences. The Preferences dialog
appears.
2. On the General tab, select the Show active take information in events
Without take name
With take name
check box.
3. Click OK.
Changing take names
Changing the name of a take does not affect the source media file in any way. Typically, you may want to
change an event’s name after recording multiple takes into a track or event. For more information, see
Working with multiple recorded takes on page 170.
1. Select the take to be renamed. For more information, see Selecting takes on page 94.
2. Right-click the event to display a shortcut menu.
3. From the shortcut menu, choose Properties. The Properties dialog opens.
4. Type the new name in the Active take name box.
5. Click OK to set the new take name.
CHP. 4
ADVANCED EDITING TECHNIQUES
96
Using the Trimmer window
The Trimmer allows you to work with and edit one media file at a time. The entire file is opened into the
Trimmer, in contrast to events on the timeline that may only contain a portion of the actual source file.
The main function of the Trimmer window is to allow you to trim a media file and place portions of it on a
track. You can also add regions and markers to a file, preview the media file, or open it in an external audio
editing program.
Clear Trimmer
History
Sort Trimmer
History
Trimmer
history
Remove Current Media From
Trimmer History
Save Markers/Regions
Open in
Audio Editor
Select Parent Media
Marker
Create subclip
Media file
Loop region or
Selection area
Zoom controls
Loop
Playback Cursor
controls navigation
Add media
from cursor
Add media
up to cursor
You can open any number of files in the Trimmer at the same time, selecting the one you currently want to
work on from the Trimmer history drop-down list.
From the View menu, choose Trimmer or press Alt + 2 to display the Trimmer window, if it is not already
visible. You can dock the Trimmer window in the window docking area or float it over the work area. For
more information, see Window docking area and floating window docks on page 21.
Opening a file in the Trimmer
1. Right-click an event. A shortcut menu appears.
2. Choose Open in Trimmer.
You can also drag files to the Trimmer from the Explorer or the Media Pool.
Double-clicking a file to open it in the Trimmer
You can set the software to open a file in the Trimmer when you double-click the file in the Media Pool or
Explorer windows.
1. From the Options menu, choose Preferences.
2. Click the General tab.
3. Choose Double click on media file loads into Trimmer instead of tracks.
ADVANCED EDITING TECHNIQUES
CHP. 4
97
Moving frame-by-frame in the Trimmer window
As you navigate through a video file in the Trimmer, the exact frame that the cursor is over in time is
displayed as in a thumbnail image under the cursor. When using the left and right arrow keys, this allows you
to edit with frame accuracy. Make sure Animate video frames in Trimmer is selected in the Preferences dialog to
use this feature.
Making selections in the Trimmer
After you have opened a media file in the Trimmer, you may select a segment of it and place it in your
project. Make a time selection to select a segment in the Trimmer in the same way you do in the project
timeline. For more information, see Selecting a time range on page 61.
You can make a selection during playback by using the keyboard. Press
selection, and press O or ] to mark the end.
I
or
[
to mark the start of the
If you know the exact timecode of the point where you want to begin and end a time selection, you can enter
it into the boxes at the lower right corner of the Trimmer window.
Double-click to enter a value.
Selection Selection Selection
Start
End
Length
Tip: Press
Backspace
to recall the last five time selection
areas in the Trimmer.
Adding selections to the timeline
You can use the Trimmer window to do traditional three-point and two-point editing. These editing
techniques allow you to add smaller sections of files to the timeline.
Post-edit ripple mode affects how a selection is added to the timeline from the Trimmer. When the Auto
Ripple button ( ) is selected, adding a selection from the Trimmer selection affects the position of later
events on the track. When not in post-edit ripple mode, adding a selection from the Trimmer has no effect
on the position of other events. For more information, see Editing events on page 63.
CHP. 4
ADVANCED EDITING TECHNIQUES
98
Adding selections at the cursor
1. Open a media file in the Trimmer.
2. Make a time selection in the Trimmer.
3. Select the track in the timeline where the selection will be added.
4. Position the cursor in the timeline at either the start or end point where you want to add the selection.
5. Add the selection to the timeline in one of the following ways:
• Click the Add Media from Cursor button (
• Click the Add Media up to Cursor button (
) or press A to insert the event after the cursor.
) or press Shift + A to insert the event before the cursor.
Alternately, you can drag the selection from the Trimmer to the
timeline
Drag from the
Trimmer...
...to a project
track
Note: Post-edit rippling (if enabled) applies to clips inserted
from the Trimmer. For more information, see Editing events
on page 63.
Filling a time selection on the timeline
You can select a range of time on the project timeline and then fill it with the same length selection from the
Trimmer.
1. Create a time selection in the timeline where you want to add the event. This sets the duration and
position of the event that you will create.
2. Open the media file you want to use to fill the time selection in the Trimmer window.
3. Right-click the file in the Trimmer window and choose Sync Track View Selection Time from Cursor or Sync
Track View Selection Time up to Cursor from
the shortcut menu. A time selection is created in the file in
the Trimmer window to match the time selection in the timeline.
4. Adjust the location of the time selection in the Trimmer as needed by dragging the time selection (the
area between the yellow triangles) on the Trimmer marker bar.
5. Drag the event from the Trimmer to the timeline and allow it to snap into place within the time
selection.
Adding selections from a media file with audio and video
You can open a file in the Trimmer that has both audio and video streams (e.g., AVI). When you add a
selection from this type of file to the timeline, both streams are added:
• If you select a video track before adding the selection, the video is added to the selected track and the
associated audio is added to the track below it.
• If you select an audio track before adding the selection, the audio is added to the selected track and the
associated video is added to the track above it.
New tracks are created for the added media if necessary.
ADVANCED EDITING TECHNIQUES
CHP. 4
99
Adding and saving regions and markers to a media file
The Trimmer allows you to add markers and regions to a media file in the same way that you add them to
your project. Media file markers and regions are different from project markers and regions. The difference
between the two is that project markers and regions affect a project, while media file markers and regions are
embedded in, and saved with, a media file. For more information, see Adding project markers and regions on page
78.
The markers and regions you add in the Trimmer are only temporary. You must save them by clicking the
Save button ( ) in the Trimmer window if you want to use them again after you close the project. After the
markers and regions are added and saved to the media file, they are available when you open the media file
in an audio editor program or in the Trimmer.
Note: You cannot save markers to read-only media files.
Change a file’s properties to make the file writable before
saving markers.
Automatically saving Trimmer markers and
regions with media files
Marker
Region
1. From the Options menu, choose Preferences.
2. On the General tab, select Automatically save
trimmer markers and regions with media file.
Adding regions as takes
Once regions are saved with a media file, either in the Trimmer window or in another application, you can
add the regions as takes to the timeline from the Explorer window. In the Explorer window, click the arrow
next to the View button and select Region View from the drop-down list. A single media file may contain a
number of separate regions. You can select these regions individually or as groups and insert them as takes
into the timeline. This is especially useful when loop-recording numerous takes to a single file. For more
information, see Working with takes on page 94.
CHP. 4
ADVANCED EDITING TECHNIQUES
100
Viewing media markers and regions in events
From the View menu, choose Event Media Markers to toggle the display markers and regions that are saved in
a media file. These markers are displayed in the timeline in events that refer to the media file.
Media markers and regions cannot be edited within the event. However, when you edit the markers in
markers and regions in the Trimmer window or in an external audio editor, the event will reflect your
changes.
Media markers in Trimmer
Media markers in event
Tip: When media markers are displayed, you can use them
as snap points for positioning the cursor and for edgetrimming if Snap to Markers is selected on the Options
menu. If a media file's frame rate does not match your project
frame rate, frame quantization will occur after the snap if
Quantize to Frames is selected on the Options menu.
Opening a file in an external audio editor from the Trimmer
The Trimmer allows you to open your selected audio editing application (e.g., Sound Forge) to perform
permanent edits to the media file. After you make the necessary changes and save the file in the audio editor,
the event is automatically updated. Make sure that the media file’s name and location remain the same. For
more information, see Using an external audio editing program on page 85.
To open the audio editor from the Trimmer, click the Open in Audio Editor button (
).
Creating a subclip
1. Create a selection in the Trimmer window.
2. Click the Create Subclip button
. The Create Subclip dialog is displayed.
Tip: You can also right-click an event in the timeline and
choose Create Subclip from the shortcut menu.
3. In the Name box, type the name you want to use to identify the subclip in the Media Pool. For more
information, see Using the Media Pool on page 41. By default, the file name is used with a subclip number
appended.
4. Select the Reverse check box if you want the subclip to be played backward when you add it to your
project.
5. Click OK to create the subclip. You can then create events from subclip via the Media Pool.
ADVANCED EDITING TECHNIQUES
CHP. 4
101
Selecting a subclip in its parent media
1. Right-click a subclip in the Media Pool and choose Open in Trimmer from the shortcut menu.
2. Click the Select Parent Media button
in the Trimmer window. The subclip's original media file is
opened in the Trimmer, and the portion of the media that represents the subclip is selected.
Using the Edit Details window
The Edit Details window displays a database for all of the media in your project. It shows information about
how the files are being used and allows you to modify many of those properties. You may sort, add or change
information, rearrange columns, and edit items in the project.
This window provides an alternate method for working with events, audio CD track list items, command
markers, markers, and regions after they are placed in your project.
You can dock the Edit Details window in the window docking area or float it on the workspace. For more
information, see Window docking area and floating window docks on page 21.
CHP. 4
ADVANCED EDITING TECHNIQUES
102
Viewing the Edit Details window
To view the Edit Details window, choose Edit Details from the View menu or press Alt + 4 . The Show dropdown list allows you to view categorized project information. You can edit most entries by double-clicking
them or by right-clicking them to display a shortcut menu.
Right-click an
entry to display
a shortcut menu,
or double-click
an entry to edit it.
Use the scroll bar to view other
columns in the window.
Audio CD track list
The Audio CD track list category displays information about the track and index markers placed on the CD
layout bar. This information is used to burn audio CDs. For more information, see Understanding tracks and
indices on page 303.
Commands
The Commands category displays information about commands that are placed along the project’s timeline.
This category displays four columns: the command’s position along the timeline, the command type, its
parameters, and any comments that were entered when the command marker was placed in your project.
Right-click a command entry to display a shortcut menu. For more information, see Working with command
markers on page 82.
ADVANCED EDITING TECHNIQUES
CHP. 4
103
Events
The Events category displays information about all of the events in your project. You may sort any of the
information by clicking a column’s header. The number of columns in the Events category requires that you
use the scroll bar to view them all.
The following table explains each column in the Events category and describes its function.
Column
Description
Track
Displays the track number where
the event is located.
Start
Displays when on the timeline the
event starts playback.
End
Displays when on the timeline the
event ends playback.
Length
Displays the total length of the
event.
Number of Takes Displays the amount of recorded
takes contained in the event.
Active Take Name Displays the event’s current take
name.
Take Start
Displays the offset into the source
media file when the placed event
begins playback.
Timecode In
Displays the media file timecode at
the start of the event.
Timecode Out
Displays the media file timecode at
the end of the event.
File Path
Displays the path of the event’s
media file.
Tape Name
Displays the name of the source
media tape name.
Select
Displays whether the event is
selected in the project.
Mute
Displays whether the event is
muted.
Loop
Displays whether the event is
looped for playback.
Lock
Displays whether the event is
locked.
Normalize
Displays whether the event is
normalized.
Snap Offset
Displays when in the event the snap
offset is positioned.
Edit function
Move the event to a different location by entering a different track
number (pg. 48).
Enter a different value to cause the event to begin playback sooner or
later in the project (pg. 48).
Enter a different value to cause the event to end playback sooner or
later in the project (pg. 48).
Enter a different value to increase or decrease the event’s playback
time.
Cannot be edited (display only).
Enter a different name for the current take (pg. 95).
Enter a different value to cause the take to playback sooner or later
from the source media file.
Display only (cannot be edited).
Display only (cannot be edited).
Enter a new media file reference path for the event to use.
Change the tape name here or in the properties dialog for the media
file (pg. 204).
Toggle the event’s selection by clicking the check box. A check mark in
the box indicates that the event is selected (pg. 60).
Toggle the event’s mute switch by clicking the check box. A check
mark in the box indicates that the event is muted (pg. 133).
Toggle the event’s loop switch by clicking the check box. A check mark
in the box indicates that the event is looped for playback (pg. 133).
Toggle the event’s lock switch by clicking the check box. A check mark
in the box indicates that the event is locked (pg. 133).
Toggle the event’s normalize switch by clicking the check box. A check
mark in the box indicates that the event is normalized (pg. 134).
Enter a different value to change the snap offset position in the event
(pg. 90).
Markers
The Markers category displays information about markers on the project’s timeline. This category displays
two columns: the marker’s position on the timeline and the marker’s name. For more information, see Working
with markers on page 79.
Regions
The Regions category displays information about regions on the project’s timeline. This category displays
four columns: the region’s start position, end position, length, and name. For more information, see Working
with regions on page 80.
Selected Events
The Selected Events category is visually identical to the Events category except that the Edit Details window
only displays information about events that are selected in your project.
CHP. 4
ADVANCED EDITING TECHNIQUES
104
Customizing the Edit Details window
You may arrange and delete columns from each category and save the changes to a personal template. One
template is available from which you may create your own display options.
1. From the Show drop-down list, choose the category that you want to customize.
2. Drag a column’s header to the new position. The cursor changes to a column icon (
) as you move the
column. If you want to remove the column from the display, drag the icon off the Edit Details window.
Release the mouse to drop the column in its new position.
3. The Template drop-down name changes to “Untitled.” Enter a new name in the Template drop-down.
4. Click the Save button (
) on the Edit Details window to save the custom display.
Tip: You can delete a custom display by selecting it from the
template drop-down list and clicking the Delete button (
ADVANCED EDITING TECHNIQUES
).
CHP. 4
105
CHAPTER
Working with Tracks
5
Tracks contain the media events on the timeline of a project. There are two types of tracks in a Vegas®
project: video and audio. Each type of track has its own features and controls. While tracks can be organized
and mixed in any order, track hierarchy can be important in determining the final output for video. Because
tracks are containers for events, effects that are applied to a track apply to every event in that track.
Managing tracks
Once you have added a track to your project, you may perform basic editing tasks on it such as duplicating,
deleting, and renaming.
Inserting an empty track
Tracks are created for you when you drag events to empty spaces in the timeline. You can also add empty
(eventless) tracks to a project. You can record into these tracks or use them as placeholders for specific media
that you will add later. For example, you may want to create an empty track and then record a voiceover
directly into a project.
1. Right-click in the track view or the track list to display a shortcut menu.
2. Choose Insert Audio Track or Insert Video Track.
You may also add an empty track from the Insert menu by choosing Audio Track or Video Track. An empty
track is added at the bottom of the track list.
CHP. 5
WORKING WITH TRACKS
106
Duplicating a track
You can duplicate a track in your project including all of the events contained on it. When you duplicate a
track, the duplicate is placed directly below the original track. You can duplicate one track or select multiple
tracks to duplicate.
1. Click the track that you want to duplicate. To select multiple tracks, click each one while pressing
to select adjacent tracks or
Ctrl
Shift
to select nonadjacent tracks.
2. Right-click and choose Duplicate Track from the shortcut menu.
Deleting a track
You can delete a track from your project and all of the events contained on it. You can delete one track or
select multiple tracks to delete.
1. Select the track that you want to delete. To select multiple tracks, click each one while pressing
select a range of adjacent tracks or
Ctrl
Shift
to
to select discontinuous tracks.
2. From the Edit menu, choose Delete.
Tip: You can also delete a track by selecting it and pressing
Delete
.
Naming or renaming a track
Every track in your project has a scribble strip where you can type a name for the track. The track name may
be up to 255 characters long. If the scribble strip is not visible, you may need to increase the height or width
of the track by dragging the track’s edge to reveal it. For more information, see Changing track height on page
108.
1. Double-click the scribble strip. Any existing name is highlighted on the
strip.
2. Type the new track name.
3. Press
Enter
Double-click and type track name
to save the track’s name.
WORKING WITH TRACKS
CHP. 5
107
Organizing tracks
Vegas software is flexible in how tracks can be organized. You can arrange and resize tracks to fit your
particular needs.
Reordering tracks
When you create tracks, they are arranged in the order that they were added. It is a simple process to reorder
tracks to fit your needs. You may reorder one or more tracks at a time.
Note: Track hierarchy can be critical in video compositing.
For more information, see Compositing on page 214.
1. In the track list, place the mouse pointer on the track that you want to move.
2. Drag the track to the new position in the track list.
Tip: When moving a track, you may want to place the
mouse pointer on the track number when dragging. This helps
avoid accidental modifications to other track list controls.
Changing track color
When you add a track, it is automatically assigned a color. This color is easily changed. This feature is useful
if you want to use color to organize similar tracks.
1. In the track list, right-click a track to display a shortcut menu.
2. From the shortcut menu, choose Track Display Color, and choose a color from the submenu.
To change the available colors, use the Display Tab in the
Preferences dialog.
CHP. 5
WORKING WITH TRACKS
108
Changing track height
You can control track height by dragging the bottom edge of a track in the track list. You can also change
track height by clicking the buttons on the track list.
Action
Button
Resulting Track height
Minimize/
Restore
Track Height
Restored Track Height
Maximize/
Restore
Track Height
You can also use several different keyboard shortcuts to change all track heights at once:
• Press
• Press
• Press
or Ctrl + Shift +
to change the height of all tracks in your project at once.
to minimize all tracks. Press the key again to restore the tracks to their previous height.
Ctrl + ` to make all tracks the default height.
Ctrl + Shift +
`
Resizing a track
You can resize a track by dragging its bottom or right border. Place the mouse pointer at the bottom of the
track. The cursor turns into an up/down arrow ( ). Drag up or down and release the mouse to set the
desired track size. You can resize the width of the track list in a similar way.
Drag to change track height...
...or to change track list width.
Using the track list
Each track in your project has its own controls, faders, and sliders that are contained in the track list on the
left side of the track. You can work with these controls to affect the events on the track.
The controls in the track list can function as trim controls or automation controls for track volume, panning,
assignable effects send, and bus send levels. Adjusting the trim control affects the level of the entire track.
When a track does not use envelopes (or when the track automation mode is set to Off), the trim level is
added to the track fader. For example, setting the track volume fader to +3 dB and the trim control to -3 dB
produces a gain of 0 dB.
When a track uses envelopes, the trim level is added to the envelope so your envelope is preserved, but with
a boost or cut applied. For example, setting the trim control to -3 dB has the same effect as decreasing every
envelope point by 3 dB.
WORKING WITH TRACKS
CHP. 5
109
To adjust trim levels, click the Automation Settings button and verify Show Automation Controls is not
selected. When Show Automation Controls is selected, the volume fader and multipurpose slider adjust
automation settings.
Using the volume fader (audio only)
The fader in the track header can function as a trim control that adjusts the overall volume of the track, or it
can adjust track volume automation settings. For more information, see Volume or pan automation (audio only)
on page 120.
The trim level is added to the volume automation settings so your envelope is preserved, but with a boost or
cut applied. For example, setting the trim control to -3 dB has the same effect as decreasing every envelope
point by 3 dB.
1. Click the Automation Settings button
and verify Show Automation Controls is not selected.
2. Drag the Vol fader to control how loud a track is in the mix. If multiple tracks are selected, all selected
tracks are adjusted.
As you drag the fader, the volume level displays to the left of the fader. Double-click the fader to set it to
0.0 dB, or double-click the current volume value to enter a specific number.
Drag to change volume.
Double-click the fader
to set to 0.0 dB.
Double-click the current level to
enter a value.
Tip: Press
Ctrl while dragging or use the mouse wheel for
finer control of the fader. You can also move the fader by
using the right or left arrow keys.
Volume envelopes allow you to automate track volume changes. For more information, see Volume or pan
automation (audio only) on page 120.
CHP. 5
WORKING WITH TRACKS
110
Using the multipurpose slider (audio only)
This slider controls several features, including panning, bus
send levels, and assignable effects send levels. The options for
the multipurpose slider depend on what your project contains
(e.g., busses, assignable effects, etc.). You can select what the
slider controls by clicking the slider label. Each item’s slider
position is independent from the others.
Click the slider
label to select
a control
Tip: If you do not see this slider on a track, increase the track
height. For more information, see Resizing a track on page
108.
You can move the slider by pressing Shift +the right or left
arrow keys.
Adjusting stereo panning
The multipurpose slider in the track header can function as a trim control that adjusts the overall panning of
the track, or it can adjust track panning automation settings. For more information, see Adjusting volume or pan
automation settings on page 120.
The trim level is added to the pan automation settings so your envelope is preserved, but with a boost or cut
applied. For example, setting the trim control to -9% left has the same effect as moving every envelope point
9% to the left.
1. Click the Automation Settings button
and verify Show Automation Controls is not selected.
2. Drag the Pan slider to control the position of a track in the stereo field. If multiple tracks are selected, all
selected tracks are adjusted.
You can further control the panning by right-clicking the multipurpose slider and selecting an option from
the shortcut menu:
• The Add Channels panning model is most useful for panning
stereo source material. This model makes the stereo image
appear to move as a unit between the speakers. As the fader is
moved from the center to a side, more and more of the signal
from the opposite side is folded into the side you are panning
towards, until at the extreme, both channels are fed at full
intensity into a single channel. This panning model uses a
linear panning curve.
• The Balance panning model is most useful for adjusting the relative signal levels of the right and left
channels in stereo source material. In this model, moving from the center to a side, the opposite side starts
at a base dB level (either 0 dB, -3 dB, or -6 dB) and decays to no signal level. The signal in the side you
are panning towards starts at the base dB level (either 0 dB, -3 dB, or -6 dB) and increases to 0 dB. This
panning model uses a linear panning curve.
• The Constant Power panning model is most useful for panning mono source material. As you move the
fader from side to side, this model creates the illusion of the source moving around the listener from one
side to the other in a semi-circle. This model uses a constant-power panning curve.
You can add a pan envelope to automate panning changes. For more information, see Composite level
automation (video only) on page 124.
WORKING WITH TRACKS
CHP. 5
111
Assigning audio tracks to assignable effects chains
Assignable effects are only available in the full version of Vegas software.
Assignable effects chains are made up of one or more plug-ins that are used to add audio effects to a track’s
signal. You can adjust the level of a track that is sent to an assignable effects chain using the multipurpose
slider in the track list. The multipurpose slider can function as a trim control that adjusts the overall
assignable effects send level for the track, or it can adjust assignable effects automation settings. For more
information, see Adjusting assignable effects automation levels on page 121.
1. Click the Automation Settings button
Controls
and verify Show Automation
is not selected.
2. Click the label on the multipurpose slider to display a drop-down list.
3. Choose the assignable effects chain that the track will use.
4. Drag the slider to adjust the level of the track sent to the assignable effects
chain.
Note: Assignable effect sends are post-volume by default.
To change to pre-volume, right-click the multipurpose slider
and choose Pre Volume from the shortcut menu.
Assigning audio tracks to busses
If your project contains multiple busses, you can assign a track to a specific bus.
Multiple audio busses are only available in the full version of Vegas software.
1. Click the Bus button ( ) in the track list to display a drop-down list of available busses. This button
appears only if the project contains multiple busses. For more information, see Adding busses to a project on
page 145.
2. From the drop-down list, choose the bus for the track’s output.
Select a bus
for playback
CHP. 5
WORKING WITH TRACKS
112
Adjusting bus send levels
When a track is routed to a bus, you can control the level of tracks sent to the bus using the multipurpose
slider. The multipurpose slider in the track header can function as a trim control that adjusts the overall send
level of the track, or it can adjust bus send automation settings. For more information, see Adjusting bus
automation levels on page 122.
1. Click the Automation Settings button
and verify Show Automation Controls is not selected.
2. Click the label on the multipurpose slider and choose an assignable effects
chain from the menu.
3. Drag the FX fader to control the level of the track sent to each of the
assignable FX chains that you have created. Dragging the fader to the left
cuts the volume; dragging to the right boosts the volume.
You can hold Ctrl while dragging a fader to adjust the setting in finer
increments, or double-click the fader to return it to 0 dB.
If multiple tracks are selected, the trim level of all selected tracks is adjusted.
Note: Bus sends are pre-volume by default. To change to
post-volume, right-click the multipurpose slider and choose
Post Volume from the shortcut menu.
For more information, see Adjusting a bus send level on page 149 or Assigning audio tracks to assignable effects
chains on page 151.
Note: Multiple busses and assignable effects are only
available in the full version of Vegas software.
Adjusting the composite level (video only)
The Level slider in the track header determines the opacity of the video track. The slider can function as a
trim control that adjusts the overall opacity of the track, or it can adjust track composite level automation
settings. For more information, see Adjusting the composite level automation settings on page 124.
The trim level is added to the composite level automation settings so your envelope is preserved, but with a
boost or cut applied. For example, setting the trim control to -3% has the same effect as decreasing every
envelope point by 3%.
1. Click the Automation Settings button
and verify Show Automation Controls is not selected.
2. Drag the slider to control the transparency or blending of each track. Left is
100% transparent and right is 100% opaque. You can also double-click the
percent to enter a specific value.
Selecting the compositing mode
Click the Parent Overlay Mode or Compositing Mode button and choose a
mode from the menu to determine how the transparency in a video track is
generated. Since lower tracks show through higher tracks, it is the
compositing mode of the higher track that determines how much of the
lower track shows though. The compositing mode of the lowest video track
adjusts its transparency against the background.
For more information, see Compositing on page 214.
WORKING WITH TRACKS
Parent Overlay Mode
Compositing Mode
CHP. 5
113
Bypassing motion blur envelopes (video only)
If you applied a motion blur envelope to your video bus track (available only in the full version of Vegas
software), this envelope affects all tracks. You can select specific tracks to bypass this envelope by clicking a
track’s Bypass Motion Blur button ( ). For more information on motion blur envelopes, see Adding a motion blur
envelope on page 125.
Using track motion (video only)
Use the Track Motion button ( ) to move a video track over another track (i.e., picture-in-picture). For
more information on adding track motion, see Adding track motion on page 245.
Phase inverting a track (audio only)
The Invert Track Phase button ( ) inverts the audio track at its baseline, in effect reversing its polarity.
Inverting a track, while creating little audible difference, is occasionally useful for matching transitions
when mixing audio on separate tracks or fine-tuning a crossfade.
You can also phase invert an audio event. If an event on a track is inverted and you invert the track, the
event is doubly-inverted (restored to its original state). For more information, see Invert phase (audio only) on
page 134.
Muting a track
The Mute button ( ) in the track list temporarily suspends playback of the track so that you can focus on
another track. When a track is muted, it appears grayed out on the track view. You can mute more than one
track at a time. The Mute button can mute a track or change its mute automation state. For more information,
see Mute automation (audio and video) on page 119.
To mute a track, click the Automation Settings button
selected. Next, click the Mute button.
and verify Show Automation Controls is not
To mute several tracks, select the tracks and click the Mute button on any of the selected tracks. Click the
button again to restore the track(s).
Mute
Tip: Press Ctrl and click the Mute button to mute only the
selected track (and restore any other muted tracks). If the
selected track is already muted, press Ctrl and click the Mute
button to restore all tracks.
Muting all audio or video tracks
You may mute either all audio or all video tracks in a project. From the Options menu, choose Mute All
Audio or Mute All Video.
Soloing a track
The Solo button ( ) in the track list isolates a track’s events for playback. This allows you to focus on a track’s
contents without the distraction of other tracks. You can solo more than one track at a time.
CHP. 5
WORKING WITH TRACKS
114
To solo a track, click the Solo button on that track. To solo several tracks, select the tracks and click the Solo
button on any of the selected tracks. Click the Solo button again to restore the track(s) for playback.
Tip: Press
and click the Solo button to solo only the
selected track (and restore any other soloed tracks). If the
selected track is already soloed, press Ctrl and click the Solo
button to restore all tracks.
Ctrl
Setting default track properties
You can use the settings of a selected track to determine the
default settings for all new tracks in your project. Properties
that can be set appear in the Set Default Track Properties
dialog.
1. Set up a track in your project with the properties to use as
default settings for new tracks.
2. Right-click the track number and choose Set Default Track
Properties.
The Set Default Track Properties dialog
appears.
3. Select the check boxes that you want to set as defaults.
4. Click OK.
Any new tracks created in the project will have these defaults. To return to the original settings for new
tracks, select the Restore original defaults check box in the Set Default Track Properties dialog.
Track automation envelopes
Track automation envelopes allow you to control volume, audio panning, opacity, and fade to color effects of
a particular track over time. For more information, see Working with track envelopes on page 126.
Using audio bus tracks
Audio bus tracks are only available in the full version of Vegas software.
From the View menu, choose Audio Bus Tracks to toggle the display of audio bus tracks at the bottom of the
track view. An audio bus track exists for each bus or assignable effects chain in your project and serves as a
timeline representation of each bus or assignable effects chain.
You can use bus tracks to automate volume, panning, and effect parameters using envelopes. For more
information, see Bus automation (audio only) on page 122.
Adding envelopes to an audio bus track
Adding volume, panning, and effect automation envelopes to a bus track is just like adding an envelope to a
standard track. For more information, see Composite level automation (video only) on page 124.
Adding effects to audio bus tracks
Click the Bus FX button ( ) in the bus track header to add or edit bus effects. If there are no effects on the
bus, clicking this button displays the Plug-In Chooser. If an audio bus already has effects assigned, clicking
this button displays the Audio Plug-In window.
WORKING WITH TRACKS
CHP. 5
115
Clicking this button has the same effect as clicking the button on a bus control in the Mixer window or the
Video Preview window.
If the bus effects chain includes plug-ins with automatable parameters, the Bus FX button is displayed as a
.
Muting or soloing an audio bus track
Click the Mute ( ) or Solo ( ) button in the bus track header to mute or solo a bus.
Clicking these buttons on a bus track has the same effect as clicking the buttons on a bus control in the
Mixer window.
Resizing audio bus tracks
You can drag the horizontal splitter between the track list and bus tracks to increase or decrease the space
allocated to bus tracks. Perform any of the following actions to resize individual bus tracks:
•
•
•
•
Drag a bus track's bottom border to set its height.
Click Minimize ( ) to minimize a track vertically.
Click Maximize ( ) to zoom in vertically so a bus track fills the lower portion of the timeline.
After minimizing or maximizing a bus track, click either button again to return a bus track to its previous
height.
• Press Ctrl + Shift + / when the bus track area has focus to resize all bus tracks at once.
Using video bus tracks
Video bus tracks are only available in the full version of Vegas software.
From the View menu, choose Video Bus Track to toggle the display of the video bus track at the bottom of
the track view. A single bus track exists as a timeline representation of the main video output.
You can use bus tracks to animate video output effects using keyframes, add motion blur envelopes, or video
supersampling envelopes.
Adding keyframes to the video bus track
Adding keyframes to the video bus track is just like working with any other video track. Use video bus track
keyframes to animate video output effects. For information on adding keyframes, see Using keyframe animation
on page 237.
Adding envelopes to the video bus track
You can add fade-to-color, motion blur amount, and video supersampling envelopes to the video bus track to
affect your video output. For more information, see Working with track envelopes on page 126.
Adding effects to video bus tracks
Click the Video Output FX button ( ) in the bus track header to add or edit video output effects. If there are
no video output effects, clicking this button displays the Plug-In Chooser. If you've already set up video
output effects, clicking the button displays the Video Output FX window.
Muting the video output
Click the Mute button ( ) in the bus track header to mute all video output.
CHP. 5
WORKING WITH TRACKS
116
Bypassing video effects and envelopes
Click the Bypass FX and Envelopes button ( ) in the bus track header to bypass all video output effects and
bus track envelopes.
Resizing video bus tracks
You can drag the horizontal splitter between the track list and bus tracks to increase or decrease the space
allocated to bus tracks. Perform any of the following actions to resize individual bus tracks:
•
•
•
•
Drag a bus track's bottom border to set its height.
Click Minimize ( ) to minimize a track vertically.
Click Maximize ( ) to zoom in vertically so a bus track fills the lower portion of the timeline.
After minimizing or maximizing a bus track, click either the Minimize or Maximize button again to restore a
bus track to its previous height.
• Press Ctrl + Shift + / when the bus track area has focus to resize all bus tracks at once.
Rendering to a new track
Rendering to a new track is only available in the full version of Vegas software.
Rendering or mixing multiple tracks to a single track can be a good method of decreasing the complexity of a
project and speeding up future renders. The original tracks and their events are unaffected when you render
(mix) to a single track.
Typically, you would use this feature when you are finished refining a few tracks and want to combine them.
When you render multiple tracks, any envelope or track effects that you have applied are rendered into the
new track. The original source files remain unaffected and the new track(s) are saved to a new file.
When working with DV files, select a DV template to avoid any loss of quality. For more information, see
Working in DV format on page 200.
Note: Every video render that uses compression results in a
loss of quality from the original source material. To minimize
loss of quality, minimize the number of video renders that use
compression.
1. Select the tracks that you want to combine. To mix specific events, make a time selection.
2. From the Tools menu, choose Render to New Track or press
Ctrl + M .
The Render to New Track dialog
appears.
3. Complete the dialog as follows:
• From the Save in drop-down list, select the drive or folder to save the new media file.
• Type a file name in the File name box.
• From the Save as type drop-down list, choose the file format (e.g., .wav for audio or .avi for video).
• From the Template drop-down list, choose a format from the template list. Alternately, click Custom to
set custom rendering settings. For more information, see Customizing the rendering process on page 275.
• Select Render loop region only if you only want to render the time selection area.
• Select Stretch video to fill output frame size (do not letterbox) to adjust the aspect ratio so the output frame is
filled on all edges. When the check box is cleared, the current aspect ratio is maintained and black
borders are added to fill the extra frame area (letterboxing).
WORKING WITH TRACKS
CHP. 5
117
4. Click Save to render to a new track.
As the tracks are being rendered (mixed down), a small dialog appears displaying the progress of the
render. A status bar also appears in the lower-left portion.
Tip: You can cancel the rendering process by clicking the
Cancel
button on the status bar.
After the new track is rendered, it appears at the top of the track view. If you render the entire project,
you may delete (or mute) the other tracks from the project, since they are all contained on the new track.
CHP. 5
WORKING WITH TRACKS
118
WORKING WITH TRACKS
CHP. 5
119
CHAPTER
Using Automation
6
Automation allows you to control audio and video levels, panning, and effect parameter automation over
time. You can create fades, apply stereo panning, and vary effect parameters throughout your project.
Automation is represented on the Vegas® timeline as an envelope or set of keyframes. You can create
automation by adding envelopes or keyframes to your tracks (including bus tracks), or you can record
automation parameters by adjusting controls in the Vegas interface (or on a control surface) during playback.
Showing or hiding automation controls
The controls in the track list can function as trim controls or automation controls for track volume,
panning, assignable effects send, and bus send levels. Adjusting the trim control affects the level of the entire
track.
To display trim controls in the track header, click the Automation Settings button
and select Show
Automation Controls.
Track automation
Track automation will always affect all events on the track. This means that any event envelopes will be
calculated after the track automation. For more information, see Using audio event envelopes (ASR) on page
137.
Tip: Choose a fade type from the Audio default drop-down
list on the Editing tab of the Preferences dialog to set the
default fade type that will be used when you add volume and
panning envelopes. This setting is used only when you create
new envelopes—when you add a point to an existing
envelope, the new point always uses the same fade type as the
preceding envelope point. Also, this setting is not used for
event envelopes.
Mute automation (audio and video)
Mute automation changes a track’s mute state throughout your project. Mute automation is either on or off
with no fade between. If you want to use fades, apply volume automation.
When you apply mute automation to a track, it’s possible to have a track that is muted and soloed
simultaneously. The mute state overrides the solo state:
• If a track’s Solo button is selected, the track is included in the solo group, but it will be muted whenever
the mute automation is set to mute the track.
• If the track’s Mute button is selected, the track is muted regardless of the mute automation settings.
CHP. 6
USING AUTOMATION
120
Adding or removing mute automation
1. Select a track.
2. From the Insert menu, choose Audio Envelopes or Video Envelopes, or right-click in the track list and
choose Insert/Remove Envelope from the shortcut menu.
3. From the submenu, choose Mute. A check mark is displayed next to the command, and an envelope is
added to the timeline.
4. You can adjust the automation by editing the envelope in the timeline or by using the Mute button
in
the track header when Show Automation Controls is selected.
Adjusting mute automation settings
1. Click the Automation Settings button
displayed as
and select Show Automation Controls. The Mute button is
.
2. Click the Mute button to change the track's mute automation state.
The button behaves differently depending on the track automation recording mode:
• When the track automation mode is set to Off, the button mutes the entire track.
• When the track has a mute envelope and the track automation mode is set to Read, the button changes
state to reflect the envelope setting during playback but cannot be adjusted.
• When the track has a mute envelope and the track automation mode is set to Touch or Latch, the button
edits the envelope setting at the cursor position.
If you click the Mute button during playback, the behavior varies depending on the selected
automation recording mode. For more information, see Automating 5.1 surround projects on page 129.
Volume or pan automation (audio only)
You can change a track’s volume or position in the stereo field throughout a project using automation
envelopes.
Adding or removing volume or pan automation
1. Select an audio track.
2. From the Insert menu, choose Audio Envelopes, or right-click in the track list and choose Insert/Remove
Envelope from
the shortcut menu.
3. From the submenu, choose Volume or Pan. A check mark is displayed for the automation types that are
used on the selected track.
Panning envelopes will use the current panning mode for the
Pan slider in the track list. For more information, see
Adjusting stereo panning on page 110.
Adjusting volume or pan automation settings
1. Click the Automation Settings button and select Show Automation Controls. The fader/slider handle is
displayed as a
in automation mode.
2. Drag the Vol fader to control how loud a track is in the mix or drag the Pan slider to control the position of
the track in the stereo field.
The fader and the slider behave differently depending on the track automation recording mode:
• When the track automation mode is set to Off, the fader adjusts the volume of the entire track and the
slider pans the entire track. In this mode, the automation control acts as a second trim control.
USING AUTOMATION
CHP. 6
121
• When the track has a volume envelope and the track automation mode is set to Read, the fader/slider
will follow the envelope during playback but cannot be adjusted.
• When the track automation mode is set to Touch or Latch, the fader/slider edits the envelope setting at
the cursor position. If the track does not have a volume/pan envelope, an envelope will be added when
you adjust the fader/slider.
If multiple tracks are selected, all selected tracks are adjusted.
If you adjust the fader/slider during playback, the behavior varies depending on the selected automation
recording mode. For more information, see Automating 5.1 surround projects on page 129.
Assignable effects automation (audio only)
You can use assignable effects automation to vary the level of a track sent to an assignable effects chain.
Adding or removing assignable effects automation
Before you can add an assignable effects envelope, you'll need to add an assignable effects chain to your
project. For more information, see Creating an assignable effects plug-in chain on page 154.
1. Select an audio track.
2. From the Insert menu, choose Audio Envelopes, or right-click in the track list and choose Insert/Remove
Envelope
from the shortcut menu.
3. From the submenu, choose the effects chain where you want to send the selected track. A check mark is
displayed for each assignable effects chain that is automated for the selected track.
Adjusting assignable effects automation levels
1. Click the Automation Settings button
displayed as a
and select Show Automation Controls. The fader handle is
in automation mode.
2. Click the label on the multipurpose slider and choose an assignable effects chain from the menu.
3. Drag the FX fader to control the level of the track sent to each of the assignable FX chains that you have
created.
The fader behaves differently depending on the track automation recording mode:
• When the track has an assignable effects envelope and the track automation mode is set to Off, the fader
adjusts the send level of the entire track. In this mode, the automation control acts as a second trim
control.
• When the track has an assignable effects envelope and the track automation mode is set to Read, the
fader will follow the envelope during playback but cannot be adjusted.
• When the track has an assignable effects envelope and the track automation mode is set to Touch or
Latch, the fader edits the envelope setting at the cursor position. If the track does not have an envelope,
one will be created when you adjust the fader.
If multiple tracks are selected, all selected tracks are adjusted.
If you adjust the fader during playback, the behavior varies depending on the selected automation recording
mode. For more information, see Automating 5.1 surround projects on page 129.
CHP. 6
USING AUTOMATION
122
Bus automation (audio only)
You can use bus automation envelopes to vary the level of a track sent to a bus.
Adding or removing a bus automation envelope
Before you can add a bus envelope, you'll need to specify the number of busses for your project.
1. Select an audio track.
2. From the Insert menu, choose Audio Envelopes, or right-click in the track list and choose Insert/Remove
Envelope from
the shortcut menu.
3. From the submenu, choose the bus where you want to send the selected track. A check mark is displayed
for each bus send level that is automated for the selected track.
Adjusting bus automation levels
1. Click the Automation Settings button
displayed as a
and select Show Automation Controls. The fader handle is
in automation mode.
2. Click the label on the multipurpose slider and choose a bus from the menu.
3. Drag the fader to control the level of the track sent to each of the assignable FX chains that you have
created. Dragging the fader to the left cuts the volume; dragging to the right boosts the volume.
The fader behaves differently depending on the track automation recording mode:
• When the track automation mode is set to Off, the fader adjusts the send level of the entire track. In this
mode, the automation control acts as a second trim control.
• When the track has a bus envelope and the track automation mode is set to Read, the fader will follow
the envelope during playback but cannot be adjusted.
• When the track has a bus envelope and the track automation mode is set to Touch or Latch, the fader
edits the envelope setting at the cursor position. If the track does not have an envelope, one will be
created when you adjust the fader.
If multiple tracks are selected, all selected tracks are adjusted.
If you adjust the fader during playback, the behavior varies depending on the selected automation recording
mode. For more information, see Automating 5.1 surround projects on page 129.
Adding or removing track effect automation
If a plug-in supports automation, you can dynamically adjust effect parameters over time.
This feature is only available in the full version of Vegas software.
Adding or removing effect automation envelopes
If a plug-in supports automation, you can use envelopes to adjust effect parameters over time. The
appearance of the plug-in in the Plug-In Chooser window indicates whether the plug-in supports
automation. Plug-ins with this icon ( ) support automation, while plug-ins with this icon ( ) do not. In
addition, you can quickly locate plug-ins that support automation in the Automatable subfolder.
Effect automation envelopes are only available in the full version of Vegas software.
USING AUTOMATION
CHP. 6
123
1. Click the Track FX button (
) on a track to open the Audio Plug-In window.
If no track effects exist, clicking the Track FX button displays the Plug-In Chooser. Use the Plug-In
Chooser to create an effect chain including an automatable plug-in.
2. Click the Configure FX Automation button (
) to display the FX Automation Chooser.
3. Click a plug-in at the top of the FX Automation Chooser. A list of the effect’s automatable parameters
appears.
4. Select the check box for each parameter that you want to control with an envelope. You can use the
Select All and Select None buttons
to quickly change your selections to all or none of the parameters.
If you're working with a 5.1 surround project, you can select
the Enable check boxes to determine which channels will be
affected by the plug-in. An automation envelope is added to
the timeline for each selected channel so you can enable or
bypass the plug-in during the project. If you want to use
distinct plug-in settings for each channel (separate EQ
settings for the front and surround speakers, for example),
you can add multiple instances of the plug-in to the track
effects chain and select the Enable check boxes for the
channels you want each instance of the plug-in to affect.
5. Click OK to close the FX Automation Chooser.
Envelopes are displayed on the track for parameters that you selected in the FX Automation Chooser. To
control which effect parameter envelopes are displayed on the track, click the arrow adjacent to the Track
FX button ( ) and choose an envelope from the menu.
Press
CHP. 6
E
to toggle through the display of all effect parameter automation envelopes.
USING AUTOMATION
124
Adjusting effect automation settings
You can adjust automated effect parameters by editing the envelopes in the timeline or by recording
automation with the controls in the Audio Plug-In Window.
If you've enabled the Bypass parameter for a plug-in, you can click the Bypass button in the plug-in's banner
to toggle the Bypass envelope at the cursor position.
Note: When you automate an effect’s frequency parameter,
such as the frequency parameters in the track EQ effect, you
may notice that the frequency changes are more apparent
when moving through the lower frequencies. This is because
frequency scales in track EQ and other plug-ins use a
logarithmic scale, but effect automation uses linear
interpolation. To make the automated frequency changes
sound more natural, change the fade curve types to change
the interpolation rates between envelope points. For high-tolow frequency sweeps, use a fast fade curve; for low-to-high
frequency sweeps, use a slow curve. For more information,
see Changing envelope fade curves on page 127.
Composite level automation (video only)
You can use the composite level automation envelopes to adjust the opacity of a track over time.
Adding or removing composite level automation
1. Select a video track.
2. From the Insert menu, choose Video Envelopes, or right-click in the track list and choose Insert/Remove
Envelope from
the shortcut menu.
3. Choose Track Composite Level from the submenu or shortcut menu.
4. You can adjust the envelope by editing the envelope in the timeline or by adjusting the slider in the track
header when Show Automation Controls is selected.
Adjusting the composite level automation settings
1. Click the Automation Settings button
displayed as a
and select Show Automation Controls. The slider handle is
in automation mode.
2. Drag the slider to control the transparency or blending of each track. Left is
100% transparent and right is 100% opaque. You can also double-click the
percent to enter a specific value.
• When the track automation mode is set to Off, the slider adjusts the send
level of the entire track. In this mode, the automation control acts as a second trim control.
• When the track has a composite level envelope and the track automation mode is set to Read, the slider
will follow the envelope during playback but cannot be adjusted.
• When the track has a composite level envelope and the track automation mode is set to Touch or Latch,
the slider edits the envelope setting at the cursor position. If the track does not have an envelope, one
will be created when you adjust the slider.
If multiple tracks are selected, all selected tracks are adjusted. If you adjust the slider during playback, the
behavior varies depending on the selected automation recording mode. For more information, see
Automating 5.1 surround projects on page 129.
USING AUTOMATION
CHP. 6
125
Adding a motion blur envelope
Motion blur can help you make computer-generated animation look more realistic. For example, if you use
track motion or event pan/crop to move a clip across the frame, each frame is displayed clearly when no
motion blur is applied. Turning on motion blur adds a motion-dependent blur to each frame to create the
appearance of smooth motion in the same way a fast-moving subject is blurred when you take a photograph
with a slow shutter speed.
Note: Motion blur significantly increases your rendering
time. Adjust the envelope to apply motion blur only where
necessary.
1. Right-click the video bus track, choose Insert/Remove Envelope from the shortcut menu, and then choose
Motion Blur Amount
from the submenu.
2. Add and adjust envelope points as necessary to set the time interval that will be used for blurring.
Increasing the value emphasizes the blur effect. For example, setting the envelope to 0 means no blurring
will occur; setting the envelope to 1 second means that each frame will be blurred for one-half second
before and after the frame.
3. The motion blur envelope affects all tracks. To bypass motion blur for a track, select the Bypass Motion
Blur button ( ) in the track header.
4. To change blur type, choose a setting from the Motion blur type drop-down list on the Video tab in the
Project Properties dialog. This setting determines the shape of the blur and the opacity of the frames.
Adding a video supersampling envelope
Video supersampling can improve the appearance of computer-generated animation by calculating
intermediate frames between the project's frame rate, allowing you to create smoother motion blurring or
motion from sources such as track motion, event pan/crop, transitions, or keyframable effects.
Note: The effect of video supersampling is less apparent with
video that contains fast motion, and supersampling cannot
improve the appearance of existing video.
1. Right-click the video bus track, choose Insert/Remove Envelope from the shortcut menu, and then choose
Motion Blur Subsampling
from the submenu.
2. Add and adjust envelope points as necessary to indicate how many frames will be calculated between
frames (using the project’s frame rate) to create the blur.
Note: Video supersampling significantly increases your
rendering time. For example, when you set the video
supersampling envelope to 2, Vegas software renders twice as
many frames as it would without supersampling. Adjust the
envelope to apply supersampling only where necessary.
CHP. 6
USING AUTOMATION
126
Working with track envelopes
Envelopes represent volume, audio panning, opacity, and fade to color automation settings in the timeline.
Track Type Envelope type
Description
Color
Audio
Volume
Controls track volume.
Blue
Audio
Bus send volume
Controls track level sent to bus.
Audio
Assignable effects send volume Controls track level sent to assignable effects control.
Lilac
Green
Audio
Pan
Controls the position of a track in the stereo field (pan).
Red
Video
Composite level
Controls track opacity/transparency.
Blue
Video
Fade to color
Controls fading of a track to color. Designate a top and
bottom color by right-clicking the track, choosing Fade
Colors from the shortcut menu, and choosing Top or
Bottom from the submenu.
Red
Video bus
Motion blur
Adds a motion-dependent blur to each frame to smooth
computer-generated animation.
Lilac
Video bus
Video supersampling
Calculates intermediate frames between the project frame Rust
rate to create smooth motion blurring.
Composite Level envelopes and Fade to Color envelopes are only available in the full version of Vegas software.
Adding envelope points
Once you add an envelope to a track, you may add points to it. These points are used to edit the envelope
line in order to automate the control.
1. Place the mouse pointer on the envelope’s line.
The pointer changes to a hand icon ( ).
2. Right-click and choose Add Point from the
shortcut menu or double-click to add an
envelope point. A square point appears on the
envelope line.
Tip: You can use ripple editing to automatically
move envelope points as you edit in the timeline.
For more information, see Applying post-edit
ripples on page 73.
Thinning envelope points
Thinning envelope points decreases the number of points on an envelope while retaining the envelope’s
overall settings. Right-click an envelope and choose Thin All Points from the shortcut menu to thin the entire
envelope.
To apply thinning to a section of the envelope, create a time selection, right-click the envelope, and then
choose Thin Selected Points from the shortcut menu.
Deleting envelope points
You can delete a point by right-clicking it and choosing Delete from the shortcut menu. If you want to delete
all envelope points, right-click a point and choose Reset All from the shortcut menu.
USING AUTOMATION
CHP. 6
127
Moving envelope points
Once you have added envelope points, you can raise and lower them to different levels along the timeline, or
you can adjust the envelope’s location along the timeline by dragging it right or left. You can move one
point at a time, even during playback and check the results in real time. If snapping is enabled, the envelope
point snaps to time divisions as you drag. Hold Shift while dragging to override snapping.
Tip: You can move multiple envelope points at once using the
Envelope Edit tool. For more information, see Using the
Envelope Edit tool on page 128.
1. Place the mouse pointer on an envelope point. The pointer changes to a hand icon ( ).
2. Drag the point to the desired position. As you move an envelope point, a ToolTip displays both the
point’s location on the timeline and its decibel level/percent pan.
3. Click the Play (
) or Play From Start (
) button to play the project and check the timing of the envelope.
Tip: You can also set the value of the point by right-clicking
an envelope point and choosing a setting from the shortcut
menu.
Changing envelope fade curves
You can set the type of fade curve used after each envelope point: linear, fast, slow, smooth, or sharp. You
can select either a point or a portion of the envelope to set the fade curve. If you select a portion of the
envelope, the fade curve is applied to that envelope segment. If you select a point, the fade curve is applied
to the segment of the envelope after the selected point.
1. Right-click a point or a portion of the envelope to display a shortcut menu.
2. From the shortcut menu, choose the curve type.
Tip: If you use the same fade curve frequently, you can set it
as a default all new audio or video envelopes. For more
information, see Editing tab on page 297.
Hiding track envelopes
After you have set your envelopes on the tracks, you can hide them from the track view. Hiding track
envelopes does not affect playback. The points that you set still automate the controls, even though the
envelopes are not visible.
1. From the View menu, choose either Audio Envelopes or Video Envelopes. A submenu appears. Envelopes
that are currently displayed are selected in the submenu.
2. From the submenu, choose an envelope name. All envelopes in your project of that type no longer appear
in the track view.
CHP. 6
USING AUTOMATION
128
If you've added effect automation envelopes to a track, the track can get cluttered. Click the down arrow
and choose an envelope from the drop-down list to select which envelope
next to the Track FX button
you want to display.
Removing track envelopes
When an envelope is removed, the events on the track no longer have automated control and the envelope
line no longer displays.
1. Select the track(s) from which you want to remove envelopes.
2. From the Insert menu, choose either Audio Envelopes or Video Envelopes. A submenu appears. Envelopes
that are currently displayed are selected.
3. From the submenu, click an envelope name. The envelope of that type is removed from the selected track.
Alternatively, right-click an empty area of a track, choose Insert/Remove Envelope from the shortcut menu,
and choose an envelope type from the submenu to remove that envelope.
Note: When you remove a track envelope from a track and
then add it again, all points are reset.
Using the Envelope Edit tool
You can also edit envelope points using the Envelope Edit tool. To use this tool, click the Envelope Edit Tool
button ( ). The advantage of switching to this tool to edit envelopes is that events cannot be moved when
this tool is selected, thereby protecting them from changes. This effectively locks all of the events and effects
in a project while you modify envelopes.
Selecting and adjusting envelope points
1. Select the Envelope Edit Tool button (
).
2. Click within a track to select it.
3. Drag along the timeline to select envelope points.
4. Drag the selected envelope points to a new position.
To deselect envelope points, click anywhere in the event that is not part of
the envelope.
Drag to select envelope points.
Cutting, copying, and pasting envelope points
1. Select the Envelope Edit Tool button ( ).
2. Click within a track to select it.
3. Drag along the timeline to select envelope points.
4. From the Edit menu, choose Cut or Copy.
5. Click to position the cursor where you want to paste envelope points. Click within a different track if you
want to paste envelope points to another track.
6. From the Edit menu, choose Paste. The envelope points are pasted in the new position.
USING AUTOMATION
CHP. 6
129
Copying an envelope to another track
1. Select the Envelope Edit Tool button ( ). The Envelope Edit tool is active.
2. Click within a track to select it.
3. From the Edit menu, choose Select All.
4. From the Edit menu, choose Copy.
5. Click within a track to select it.
The original
envelope...
...and the newly
pasted copy.
6. Click Go to Start (
) if you want the envelope to appear exactly as it was in the original track, or click to
position the cursor where you want the envelope to start.
7. From the Edit menu, choose Paste. The envelope is pasted on the track.
Locking envelopes to events
Track envelopes extend for the length of a track and are independent of the events on the track. This means
that the envelope remains in place when you move the events in the track. However, track envelopes can be
set to move with the underlying events, thus preserving the timing of envelope points in relation to events.
To lock all of the envelopes in a project to the events in which they occur, click the Lock Envelopes to Events
button ( ) or, from the Options menu, choose Lock Envelopes to Events. You can turn this feature off by
clicking the button again.
The original event
Moving the event with
Lock Envelopes to Events
turned on
Moving the event with
Lock Envelopes to Events
turned off
Automating 5.1 surround projects
In a 5.1 surround project, you can automate the center channel’s volume and surround panning using
keyframes. For more information, see Working with 5.1 Surround on page 173.
Automation recording modes
Automation recording allows you to edit envelope and keyframe settings by using the controls in the Vegas
interface. When combined with a control surface, you can create fades and adjust control parameters with a
level of control that only a tangible control can provide.
Automation recording is available for the following settings:
•
•
•
•
•
•
•
CHP. 6
Audio track envelopes (using the controls in the track header).
Audio track effect parameters for automatable effects (using the controls in Audio Plug-In window).
Surround panning keyframes.
Video track envelopes (using the controls in the track header).
Video track effect parameters (using the controls in Video Track FX window).
Parent track overlay mode plug-in settings (using the controls in Parent Track Overlay window).
Track-level mask generator plug-in settings (using the controls in Video Mask FX window).
USING AUTOMATION
130
If you want to thin envelope points after recording
automation, you can select the Smooth and thin automation
data after recording check box on the External Control &
Automation tab of the Preferences dialog or right-click the
envelope and choose Thin Points from the shortcut menu.
Recording automation settings
1. Add an envelope or automatable/keyframeable effect to a track.
For automatable audio track effects, you must add and effect automation envelope for each parameter you
want to automate.
2. Click the Automation Settings button
in the track header and select Show Automation Controls.
3. Click the Automation Settings button and choose Automation Write (Touch) or Automation Write (Latch)
from the menu.
Automation Recording Track Icon
Mode
Description
Automation Write (Touch)
Envelope points or keyframes are created only while a control is being adjusted.
When you stop adjusting the control, automation recording stops and the
existing envelope points/keyframes are unaffected.
Automation Write (Latch)
Envelope points or keyframes are created when you change a control setting,
and recording continues until you stop playback. When you stop adjusting the
control, the control's current setting overwrites the existing envelope points/
keyframes.
4. Click to position the cursor in the timeline, and click the Play button
to start playback.
5. Adjust the control that corresponds to the envelope point or keyframe you want to adjust.
During playback, adjusting a control will create envelope points or keyframes at the cursor position. As
long as you're adjusting the control, new envelope points/keyframes will be created for each change of the
play cursor's position.
6. Click Stop
to end playback and stop recording automation.
Editing sections of your recorded settings in Touch mode
In Touch recording mode, envelope points or keyframes are created only while a control is being adjusted.
When you stop adjusting the control, automation recording stops and the existing envelope points/
keyframes are unaffected.
Use Touch mode for touching up sections of your recorded automation settings.
1. Click the Automation Settings button
in the track header and select Show Automation Controls.
2. Click the Automation Settings button
and choose Automation Write (Touch) from the menu. The icon in
the track header is displayed as a
.
3. Click to position the cursor in the timeline, and click the Play button
to start playback.
4. When you're ready to start editing, adjust the control that corresponds to the envelope point or keyframe
you want to adjust. Envelope points/keyframes are updated at the cursor position, and when you stop
adjusting the control, the original settings are preserved.
5. Click Stop
USING AUTOMATION
to end playback and stop recording automation.
CHP. 6
131
Overwriting recorded settings in Latch mode
In Latch mode, envelope points or keyframes are created when you change a control setting, and recording
continues until you stop playback. When you stop adjusting the control, the control's current setting
overwrites the existing envelope points/keyframes.
Use Latch mode to overwrite automation settings with new values.
1. Click the Automation Settings button
in the track header and select Show Automation Controls.
2. Click the Automation Settings button
and choose Automation Write (Latch) from the menu. The icon in
the track header is displayed as a
.
3. Click to position the cursor in the timeline, and click the Play button
to start playback.
4. When you're ready to start editing, adjust the control that corresponds to the envelope point or keyframe
you want to adjust.
Envelope points/keyframes are updated at the cursor position until you stop playback.
5. Click Stop
to end playback and stop recording automation.
Editing individual envelope points or keyframes
Editing individual envelope points or keyframes gives you fine control over your recorded settings.
1. Click the Automation Settings button
on the track you want to edit and select Show Automation
Controls.
2. Click the Automation Settings button
and choose Automation Write (Touch) or Automation Write (Latch)
from the menu.
3. Select the parameter you want to edit:
• For a track envelope, select the envelope tool
and click the envelope point you want to edit. You can
right-click a point and choose Properties from the shortcut menu to display an effect's property page.
• For a keyframe, click the Expand/Collapse Track Keyframes button to expand track keyframe rows, and
then double-click a keyframe to open its property page. For more information, see Using video effects on
page 207.
4. Adjust the control that corresponds to the envelope point or keyframe you want to adjust. The selected
envelope point/keyframe is edited, and all others are unaffected.
For track envelopes, you can also edit the envelope directly in the timeline.
Setting the automation recording mode for a track
1. Click the Automation Settings button
in the track header and select Show Automation Controls.
2. Click the Automation Settings button
and choose a command from the menu to choose the automation
mode.
Mode
Off
Track Icon
Description
Automated parameters are ignored during playback.
When you switch to Off mode, the control setting from the cursor position is
used as a static setting, and the envelope/keyframe is dimmed to indicate that it
is unavailable.
Read
The envelope/keyframe value is applied during playback, and the control reflects
the envelope/keyframe settings at the cursor position.
Adjustments to the control are not recorded.
CHP. 6
USING AUTOMATION
132
Mode
Automation Write (Touch)
Track Icon
Description
The envelope/keyframe value is applied during playback, and the control follows
the envelope/keyframe settings during playback and when you position the
cursor.
Envelope points or keyframes are created only while a control is being adjusted.
When you stop adjusting the control, automation recording stops and the
existing envelope points/keyframes are unaffected.
Automation Write (Latch)
The envelope/keyframe value is applied during playback, and the control follows
the envelope/keyframe settings during playback and when you position the
cursor.
Envelope points or keyframes are created when you change a control setting,
and recording continues until you stop playback. When you stop adjusting the
control, the control's last setting overwrites the existing envelope points/
keyframes.
USING AUTOMATION
CHP. 6
133
CHAPTER
Working with Events
7
Events are windows into media files in a project and are the most basic unit of editing in Vegas® software.
Media files that are inserted into the timeline are automatically contained within an event. Trimming and
editing an event does not affect the source media file in any way.
Setting event switches
Event switches are important functions that are used to determine the basic behavior of events. You can set
switches for a single event or multiple events at the same time.
1. Right-click an event.
2. From the shortcut menu, choose Switches, and choose the desired switch from the submenu.
Active switches have a check mark next to them. Choose an active switch on the menu to turn it off.
Tip: You can also set switches in the Edit menu, in the Edit
Details window, or by right-clicking an event and choosing
Properties.
Mute
Use the Mute switch to mute an event. This prevents the event from playing back.
Lock
The Lock switch locks an event to prevent it from being moved or edited.
Loop
You can loop an event so that you can extend it along the timeline by dragging the right edge of the event.
Notches appear in the top of the event to mark where the media in the event ends and then repeats.
Looping notches
Drag the right edge
to extend the event
Selected event
before loop
CHP. 7
Selected event after
loop is applied
WORKING WITH EVENTS
134
For video events, turning off the Loop switch makes the last frame repeat for the duration of the event
beyond its original length, creating a freeze frame effect (as in the middle example below). The Loop switch
is enabled for the event in the last example below.
The original three frame clip.
Looping is off. The elongated event repeats (freezes) the final frame.
Looping is on. The entire event repeats.
Invert phase (audio only)
This switch inverts the audio event at its baseline, in effect reversing its polarity. Inverting an event, while
creating no audible difference, is occasionally useful for matching transitions when mixing audio on separate
tracks or fine-tuning a crossfade.
You can also phase invert a track. If a track is inverted and you invert an event on the track, the event is
doubly-inverted (restored to its original state). For more information, see Phase inverting a track (audio only) on
page 113.
Normalize (audio only)
You may normalize an event to maximize its volume, based on the waveform’s highest peak, without clipping
the event during playback.
Selected event
before normalize
Selected event after
normalize is applied
Recalculating the normalization
When you normalize an event, the event is
analyzed and the volume is raised based on the
waveform’s highest peak and then adjusts the
rest of the event accordingly. If you have
adjusted the edge of an event to exclude the
(formerly) highest waveform peak, you may
want to recalculate the event’s normalization.
Highest peak used
for normalization
before editing
Highest peak used
for recalculating the
normalization
Event edited after
normalization
1. Right-click the event to display a shortcut
menu.
2. From the shortcut menu, choose Properties.
The Properties dialog opens.
WORKING WITH EVENTS
CHP. 7
135
3. Click Re-calculate to normalize the event again.
Tip: You can set the maximum decibel level used to calculate
the event during normalization. For more information, see
Audio tab on page 289.
Maintain aspect ratio (video only)
Video and image files of various sizes and formats can be included in a single project. The project itself may
have a different frame size aspect ratio from the source media files. This is not a problem, but you must
specify how these differences are handled. If the length-to-width ratio of the source media and the project’s
frame size are the same (e.g., source media at 320x240 and project frame size of 640x480), no aspect ratio
distortion occurs. If the ratios are not the same, the source material may become distorted (stretched or
compressed). By maintaining the aspect ratio of the original, the video is kept from becoming distorted by
letterboxing or pillarboxing around the edges. This is the default setting.
The BMP media file in this
example is 320x100, while the
project is set to 320x240.
Reduce interlace flicker (video only)
This switch can be useful in cases where the source material didn’t originate as video and contains extremely
high spatial or temporal frequencies. When you watch the rendered (interlaced) output on video of this sort
of media, you may see flickering or crawling edges if this switch is not applied.
Resample (video only)
Resampling allows Vegas software to interpolate frames in an event when the frame rate of a media file is
significantly different from the project’s frame rate. Resampling may solve some interlacing problems and
other jittery output problems. For more information, see Resampling video on page 199.
Three options are provided for event-level resampling:
• Smart resample: Only resamples the event when the event frame rate does not match the project output
frame rate. This can occur either because the event has a velocity envelope or because the frame rate of
the original media is different than the project frame rate. Smart resample is the standard setting.
• Force resample: Always resamples the event, regardless of its frame rate or the project’s frame rate.
• Disable resample: Does not resample the event.
CHP. 7
WORKING WITH EVENTS
136
Accessing event properties
The properties of an event are automatically determined based on the properties of the source media file. In
addition to the event switches (mute, loop, etc.) described in the previous section, event properties include
playback and undersample rates for video and pitch shifting for audio.
1. Right-click an event to display a shortcut menu.
2. From the shortcut menu, choose Properties. The Properties dialog appears.
The first tab in the dialog, either Audio Event or Video Event, contains the properties that are exclusively
related to your Vegas project. The second tab, the Media tab, contains many properties that are an inherent
part of the media file itself.
In addition to the event switches discussed in this chapter, event properties include the following:
• The Playback rate box sets the rate of playback. For example, a playback rate of 1 plays at normal speed,
while a playback rate of 0.5 plays at half speed. For more information, see Time compressing/stretching events
on page 93.
• The Undersample rate box allows you to simulate a lower frame rate. For example, an undersample rate of
0.5 plays the event at half its original frame rate. Each frame plays twice as long as in the original media
file, creating a strobe effect.
• The Time stretch/pitch shift section of the dialog allows you to change the pitch, duration, or both pitch and
duration of an audio event. For more information, see Pitch shifting audio events on page 91.
Pitch shifting while preserving length and time stretching while preserving pitch are only available in the full version of
Vegas software.
Adjusting audio channels
A stereo audio event has two channels: right and left. You can adjust how these channels are played by rightclicking an event, choosing Channels from the shortcut menu and choosing one of the following commands
from the submenu:
•
•
•
•
Both plays both channels in stereo. This is the default setting.
Left Only plays only the left channel. Playback is mono and is centered between the two channels.
Right Only plays only the right channel. Playback is mono and centered.
Combine adds the two channels into a single channel and divides the level in half to prevent clipping.
Playback is mono and is centered between the two channels.
• Swap exchanges the right and left channels (stereo playback).
You can also pan from one channel to the other using either the multipurpose slider or a pan envelope. For
more information, see Adjusting stereo panning on page 110.
WORKING WITH EVENTS
CHP. 7
137
Copying and pasting event attributes
You’ve set up one event exactly the way you want it, and now you want to apply the same attributes to
another event. A quick way to copy the attributes of one event and paste them onto another is provided.
You can copy and paste multiple event attributes, including:
•
•
•
•
Properties (pg. 136), including audio pitch shift (pg. 91) and video playback rate (pg. 93)
Switches (pg. 133)
Video event plug-ins (pg. 207)
Cropping (pg. 187)
1. Click the event with the attributes you wish to copy and click the Copy button (
).
2. To paste the event attributes to multiple events, select the events. For more information, see Selecting
multiple events on page 60.
3. Right-click an event and choose Paste Event Attributes from the shortcut menu. The attributes are pasted
onto the selected event(s).
Using audio event envelopes (ASR)
You may apply envelopes to individual events. Envelopes, also known as ASRs (attack, sustain, and release),
give you the ability to control an audio event’s fade-in, fade-out, and overall volume level.
Note: Event envelopes only affect an event. Track
envelopes affect the entire track. For more information, see
Composite level automation (video only) on page 124.
When you add an event to your project, handles are added that are used to set the envelope. As you use
these handles on audio events, a volume envelope appears indicating how the event is being affected.
Envelope
handles
Audio event
envelope
Setting an audio event’s volume
When you place the mouse pointer at the top of the event, the pointer changes to a hand cursor ( ) that
you can use to lower the event’s overall volume.
1. Place the mouse pointer at the top of the event.
Volume line
2. When you see the envelope cursor ( ), drag the volume envelope
to the desired level. As you drag, the event’s decibel level is
displayed.
Decibel level
Note: When you have multiple events selected, the gain of
all selected events is adjusted simultaneously.
CHP. 7
WORKING WITH EVENTS
138
Setting an event’s fade in and out
The event handles allow you to change an audio event’s fade in and out volume. You can also change the
type of curve that the event uses to control the volume’s fade in or out.
1. Place the mouse pointer on a handle (upper corners of the event). The pointer changes to the envelope
cursor (
).
2. As you drag, the volume envelope appears. Both the time in the event and the decibel level are displayed.
Fade in
Fade out
Changing an event’s fade curve
You can set the shape of the fade curve (fast, linear, slow, sharp, or smooth) that an event uses to raise or
lower the volume over time. To access the different fade curves, right-click anywhere in the event’s fade-in
or fade-out region and choose Fade Type from the shortcut menu.
Right-click to select
the fade curve type
Fast
Linear
Slow
Smooth
Sharp
Tip: If you use the same fade curve frequently, you can set it
as a default for all new audio event envelopes. For more
information, see Editing tab on page 297.
Using video event envelopes
Velocity envelopes are only available in the full version of Vegas software.
Video envelopes allow you to control an event’s opacity or velocity over time. Envelopes appear as lines on
an event. With a velocity envelope, you have the added control of being able to create and edit envelope
points.
Note: Event envelopes only affect an event. Track envelopes
affect the entire track. For more information, see Composite
level automation (video only) on page 124.
WORKING WITH EVENTS
CHP. 7
139
Using opacity envelopes
Opacity envelopes set the overall opacity and
allow you to fade video events in and out. This
affects the transparency of the event in relation
to background events on lower tracks. These
background events can be other video events or
background colors. For more information, see
Using generated media on page 213.
Setting a video event’s opacity
When you place the mouse pointer at the top of
the event, the pointer changes to a hand cursor
( ) that you can use to lower the event’s
overall opacity.
1. Place the mouse pointer at the top of the event.
2. When you see the envelope cursor ( ), drag the opacity envelope to the desired level. As you drag, the
event’s opacity level is displayed.
Note: When you have multiple events selected, the opacity
of all selected events is adjusted simultaneously.
Setting an event’s fade in and out
The event handles allow you to change a video event’s fade in and out. You can also change the type of
curve that the event uses to control the fade in or out.
1. Place the mouse pointer on a handle (upper corners of the event). The
pointer changes to the envelope cursor (
).
2. As you drag the cursor, the opacity envelope appears. Both the time in
the event and the opacity level are displayed as you drag.
Changing an event’s fade curve
You can set the shape of the fade curve (fast, linear, slow, sharp, or
smooth) that an event uses to increase or decrease the opacity over time. To access the different fade curves,
right-click anywhere in the event’s fade-in or -out region and choose Fade Type from the shortcut menu.
Tip: If you use the same fade curve frequently, you can set it
as a default for all new video event envelopes. For more
information, see Editing tab on page 297.
Using velocity envelopes
Velocity envelopes are only available in the full version of Vegas software.
You can use velocity envelopes to change the speed of a video event over time. To view a velocity envelope,
right-click the event and choose Insert/Remove Velocity Envelope.
1. Right-click an event and choose Insert/Remove Velocity Envelope. The velocity envelope appears on the
event as a blue line.
2. To increase the speed, drag the envelope up. To slow the video down, drag the envelope down.
CHP. 7
WORKING WITH EVENTS
140
Adding velocity envelope points
When combined with points, envelopes can be used to animate velocity changes.
1. Double-click the envelope where you want to add a
Envelope points
point.
2. Drag the point to adjust it. The time and velocity level
of the point are displayed as you drag.
3. Right-click the envelope between two points to choose
a fade type (linear, fast, slow, smooth, or sharp) to set
the shape of the curve.
Tip: To delete a point, right-click the point and choose
Delete.
Making a video play at twice its normal speed makes the duration of the video half as long. Likewise, slowing
a video down makes it longer (with 0% being an infinite freeze frame). For example, if you decrease the
speed of a ten-second video event by 50%, only five seconds of video play (played over the course of the tensecond event), meaning that only half as much actual footage from the original event plays. On the other
hand, if the speed is increased 200%, the ten seconds of content play in only five seconds. The remaining
five seconds of the event are filled either with a freeze of the last frame or with ten additional seconds of
video content from the longer file.
You may want to resample the frame rate of an event that has been significantly slowed. To resample an
event, right-click the event and choose Properties. Then, on the Video Event tab, select the Resample check
box. For more information, see Resampling video on page 199.
Using the Envelope Edit Tool
While you can edit envelopes using the Normal Edit tool ( ), you can limit your editing to envelopes only
by clicking the Envelope Edit Tool button ( ). You cannot move, trim, or otherwise modify events with this
tool, which allows you to edit envelope points without making any other unwanted changes. For more
information, see Using the Envelope Edit tool on page 128.
Reversing a video event
Setting the velocity to a negative value reverses the video, working backwards from the point where the
negative value occurs. An event that has been reversed plays backwards until it gets to the first frame and
then holds that frame for the duration of the event.
1. Right-click an event and choose Insert/Remove Velocity Envelope.
2. Trim the beginning of the video event to the place where you want the reversal to begin (e.g., the last
frame in the media file that you want to play if it were playing forward).
WORKING WITH EVENTS
CHP. 7
141
3. Drag the velocity down to -100% for a normal speed reversal.
This is the original, untrimmed, event. The horses run from left to right.
The event is edge trimmed to the frame where the reversal will begin.
The velocity envelope is added and set to -100%. The thumbnails reflect the change and
the horses run backwards. The event can now be repositioned to fit the project.
Removing a velocity envelope
To remove a velocity envelope and all of its settings, right-click the event and choose Insert/Remove Velocity
the shortcut menu.
Envelope from
Grouping events
You are allowed to group events together within tracks or across separate
tracks. Once you create a group, you can move all the events in the group
within their tracks as a unit and apply event-specific edits at the same
time.
You can still edit properties of individual events within a group without
affecting the other events in a group.
Creating a new group
Dragging one event in a group
moves all events in the group.
Grouping is useful when you want to preserve timing of events and move events together along the timeline.
1. Select the events you want to group. For more information, see Selecting multiple events on page 60.
2. From the Edit menu, choose Group, and choose Create New from the submenu.
CHP. 7
WORKING WITH EVENTS
142
Adding an event to an existing group
1. Right-click an event in the existing group, choose Group from the shortcut menu, and choose Select All
from the submenu to select all of the members of the group.
2. Press
Ctrl
and click the event to be added to the group.
3. Right-click the event, choose Group from the shortcut menu, and choose Create New from the submenu.
Note: Events can only be in one group at a time. Adding an
event to an existing group essentially clears the old group and
creates a new one that includes all of the selected events.
Removing events from a group
You can remove individual events from a group without affecting the other members of the group. An event
you remove from the group is not deleted from the project and remains on the timeline.
1. Right-click the event you want to remove from the group.
2. From the shortcut menu, choose Group, and choose Remove From from the submenu. The event is
removed from the group. The rest of the grouped events remain intact.
Clearing a group
You may ungroup all events by clearing the entire group. Clearing a group does not remove events from your
project.
1. Right-click one of the members of the group.
2. From the shortcut menu, choose Group, and choose Clear from the submenu.
Selecting all members of a group
While grouped events move together within their tracks, selecting one member of a group does not
automatically select every member of that group.
1. Right-click one of the members of the group.
2. From the shortcut menu, choose Group, and choose Select All from the submenu.
With all events in a group selected, you can move the group to other tracks, or cut and paste the group to
a new location.
Suspending grouping temporarily
You can temporarily suspend the grouping behavior of all groups (including video media files with included
audio streams) by clicking the Ignore Event Grouping ( ) button.
Cutting, copying, or deleting grouped events
1. Select the events you want to cut or delete.
2. From the Edit menu, choose Group, and choose Cut All, Copy All, or Delete All from the submenu. The
selected events and any events that are grouped with the selected events are deleted or copied/cut to the
clipboard.
WORKING WITH EVENTS
CHP. 7
143
CHAPTER
Using the Mixer
8
The Mixer window is where you control the project’s busses and assignable effects chains.
Multiple audio busses and assignable effects chains are only available in the full version of Vegas® software.
Using the Mixer window
The Mixer is a dockable window where you can control audio busses and assignable effects chains within
your project and adjust the outgoing signal’s volume and routing.
Viewing the Mixer window
The Mixer window appears in the window docking area by default when you first start Vegas software.
However, you can drag the Mixer within the workspace at any time to float it. For more information, see
Window docking area and floating window docks on page 21.
To hide/view the Mixer window, choose Mixer from the View menu or press
Preview
(display optional)
Busses
Alt + 3
.
Assignable effects
Float handle
CHP. 8
USING THE MIXER
144
Using the Mixer toolbar
The Mixer’s toolbar allows you to access project properties, add busses, and add assignable effects chains to
the Mixer.
Button
Description
The Project Audio Properties button accesses the project properties dialog
(pg. 289).
The Downmix Output button downmixes your audio from 5.1 surround to stereo or
from stereo to mono so you can ensure your mix will sound the way you intended it,
even when your audience’s hardware has fewer channels than the original mix. The
button represents the current playback mode:
5.1 surround output
Stereo output
Mono output
The Dim Output button attenuates the volume of all busses that are routed to
hardware outputs by 20 dB. Click again to restore original volume.
The Insert Assignable FX button adds an assignable effects chain to your project.
You can route tracks to the assignable effects chain (pg. 151).
The Insert Bus button adds a bus to your project. You can route tracks or assignable
effects chains to the bus (pg. 149).
Using the Mixer Preview fader
The Preview fader allows you to adjust the volume and monitor output levels of media files when you
preview them from the Explorer window or Media Pool, or play them back from the Trimmer window. The
Preview fader also controls the metronome volume. For more information, see Using the metronome on page
167.
Viewing/hiding the Preview fader
The Preview fader is hidden as a default to
make more room for other busses and assignable
effects chains. To view or hide the Preview
fader, simply right-click anywhere within the
Mixer and choose Show Preview fader from the
shortcut menu.
Adjusting the Preview fader
You can adjust the Preview fader while you are
previewing a media file from the Explorer
window. Drag the fader up or down, or press
Ctrl while dragging to move in smaller increments. Double-click the fader to reset it.
You can select a preferred meter resolution at which the Preview fader displays the media file’s volume level.
For more information, see Changing bus meter resolution on page 148. You can also adjust the Preview fader to
correct clipping in the same way you adjust a bus. For more information, see Adjusting a bus for clipping on page
148.
USING THE MIXER
CHP. 8
145
Using busses
Multiple audio busses are only available in the full version of Vegas software.
A bus is a master control for the audio-signal mix of one or more tracks. You can assign tracks to play back
on a specific bus. For more information, see Assigning audio tracks to busses on page 149.
However, to assign a track to a bus, you must have more than one bus in your project. Each project has a
Master bus as a default, but you may add up to 25 additional busses to the Mixer window. A bus is the last
stage in the signal’s flow through Vegas software. For more information, see Audio signal flow on page 34.
You can configure each bus to use a specific hardware output. For more information, see Audio tab on page 295.
Automation
settings
Mute
Solo
Fader
Name
Pan
The controls in the bus control list can function as
trim controls or automation controls for bus
volume, panning, and muting. Click the button
and verify Show Automation Controls is not
selected if you want the bus control to function as
a trim control. Adjusting a trim control affects the
entire track. Click the button and choose Show
Automation Controls to adjust automation
settings. For more information, see Using
Automation on page 119.
Prevents playback of the bus (pg. 148). When
Show Automation Controls is selected, the button
is displayed as a
,and you can use the button to
edit mute automation on the bus’s bus track.
Plays only the output of that bus (pg. 149).
Bus control in Mixer Window
Name
Playback
device
Bus FX
Mute
Automation
settings
Solo
Pan slider
Fader
Meter
Bus control
Bus control showing
automation controls
Adjusts the bus’s volume on two stereo channels
(pg. 148). When Show Automation Controls is
selected, the thumb is displayed as a , and you
can use the fader to edit volume automation on
the bus’s bus track. Tip: Right-click the thumb and
choose Pre FX or Post FX from the shortcut menu
to specify whether the bus level is applied before
or after the bus effects chain.
Name of the bus. Double-click the name to edit it
(pg. 149).
Drag to ajust the overall panning of the track.
When Show Automation Controls is selected, the
thumb is displayed as a
, and you can use the
slider to edit pan automation on the bus’s bus
track.
Playback device Allows you to select the device that the bus uses
for playback.
Displays the Bus FX window and allows you to
Bus FX
adjust the audio effects plug-ins.
Displays the playback level of the bus (pg. 148).
Meter
Adding busses to a project
You can add up to 25 busses at any time during the development of your project.
Adding a bus
Click the Insert Bus button (
CHP. 8
) on the Mixer window.
USING THE MIXER
146
Adding multiple busses
1. Click the Audio Properties button ( ) on the Mixer window. The Project Properties dialog appears with
the Audio tab displaying.
2. In the Number of stereo busses box, enter the desired number of busses (up to 25) to appear in the Mixer
window.
Enter the number
of busses
3. Click OK to add the specified number of busses and close the Project Properties dialog.
The new busses appear in the Mixer window.
USING THE MIXER
CHP. 8
147
Deleting busses from a project
You can remove busses from your project at any time. When you remove a bus from a project, any tracks
assigned to it are reassigned to the Master bus.
Deleting a bus
Right-click the bus to be deleted in the Mixer window and choose Delete from the shortcut menu.
Deleting multiple busses
1. Click the Audio Properties button ( ) on the Mixer window. The Project Properties dialog appears with
the Audio tab displaying.
2. In the Number of stereo busses box, enter the desired number of busses to appear in the Mixer window.
3. Click OK. All tracks assigned to a deleted bus are reassigned to the Master bus in the Mixer window.
Routing a bus to another bus
If you have multiple busses, you can use bus-to-bus routing to create subgroups.
1. Add busses to your project. For more information, see Adding busses to a project on page 145.
2. In the Mixer window, click the Playback Device Selector button on the bus you want to route and choose a
bus from the menu.
• The button is displayed as a
when a bus is routed to the master bus.
• The bus letter is displayed ( , , and so on) when a bus is routed to another bus.
• The button is displayed as a when a bus is routed to a hardware output.
Routing busses to hardware
You can assign busses to use specific hardware for output. When you installed the software, it automatically
detected the hardware available for output on your computer. For more information, see Audio tab on page 295.
1. From the Options menu, choose Preferences and click the Audio device tab.
From the Audio device type drop-down list, choose Windows Classic Wave Driver or an ASIO™ driver.
Note: If you select Microsoft Sound Mapper in the Audio
drop-down list on the Audio tab, you will not be
able to assign the bus to a different device.
device type
2. Click OK to close the Preferences dialog.
3. In the Mixer window, click the Playback Device Selector button on the bus you want to route.
4. Choose a hardware device from the menu.
• The button is displayed as a when a bus is routed to the master bus.
• The bus letter is displayed ( , , and so on) when a bus is routed to another bus.
• The button is displayed as a when a bus is routed to a hardware output.
Note: You can map multiple busses to a single sound card.
CHP. 8
USING THE MIXER
148
Working with busses
Busses in the Mixer window are fully independent and may be adjusted separately. You can adjust the bus
volume, change the bus meter resolution, and adjust the bus fader to eliminate clipping.
Adjusting bus volume
You can adjust a bus’s volume during project playback by dragging the fader. The fader on a stereo bus is split
so that you can adjust the levels of the two stereo channels independently.
The fader can function as a trim control that adjusts the overall level of the bus, or it can adjust volume
automation settings on the bus track. Click the Automation Settings button
and verify Show Automation
Controls is not selected if you want the fader to function as a trim control.
The faders are locked (ganged) so that the left and right channels of stereo files move together. Click the
button ( ) to unlock or lock the faders. You can also press Shift while dragging a
fader to temporarily override a fader’s locked or unlocked state.
Lock/Unlock Fader Channels
Tip: Double-click a fader to reset it to 0.0 dB. If you have set
each channel independently, double-click either the left or
right fader to have the other fader match the other’s volume
setting.
If you want to adjust volume automation settings on the bus’s bus track, click the Automation Settings button
and select Show Automation Controls. For more information, see Adjusting volume or pan automation settings
on page 120. The fader handle is displayed as in Automation mode.
You can adjust the volume of several busses simultaneously by selecting the busses and adjusting any of their
faders. If you select an assignable effect along with the busses, the output fader of the assignable effect moves
along with the bus volume faders.
Changing bus meter resolution
You can select a meter resolution at which a bus displays the signal levels that are being mixed. When you
change the meter resolution on this control, the other meters (assignable effects and preview) automatically
change to match.
To change bus meter resolution, right-click a meter and choose a meter resolution from the shortcut menu.
Adjusting a bus for clipping
If the volume level is set too high, it may cause clipping. The clipping displays in red at the top of the meter
with the clipping value displayed in decibels (dB). Adjust the fader and click the red clipping value to reset
the meter. Continue to adjust the fader and reset the meter until you eliminate the clipping.
You can set the meter to remember and display the highest and lowest levels by right-clicking and selecting
Hold Peaks and Hold Valleys.
Muting a bus
Muting allows you to temporarily suspend playback of the bus. When a bus is muted, the word Muted appears
at the bottom of the meter. You can mute more than one bus at a time.
The Mute button can mute the bus, or it can adjust mute automation on the bus’s bus track. To must the bus,
click the Automation Settings button
and verify Show Automation Controls is not selected. Click the Mute
button ( ) to mute the bus, and click it again to restore playback.
and select Show Automation Controls.
To adjust mute automation, click the Automation Settings button
The Mute button is displayed as
in Automation mode. Click to turn mute automation on, or click it again
to turn mute automation off. For more information, see Adding or removing mute automation on page 120.
USING THE MIXER
CHP. 8
149
Soloing a bus
Soloing isolates a bus’s playback so that you can focus on a specific output. You can solo more than one bus at
a time. To solo the bus, click the Solo button ( ). Click the button again to turn off soloing.
Naming or renaming a bus
Every bus in the Mixer window has an editable name.
1. Double-click the bus name.
2. Type a new name.
3. Press
Enter
to save the name.
Panning a bus
Like volume, the pan slider in the track header can function as a trim control that adjusts the overall
panning of the track, or it can adjust track panning automation settings. For more information, see Adding or
removing volume or pan automation on page 120.
Assigning audio tracks to busses
If your project contains multiple busses, you can assign a track to a specific bus. For more information, see
Assigning audio tracks to busses on page 111.
Multiple audio busses are only available in the full version of Vegas software.
Adjusting a bus send level
You can adjust the level of a track sent to a bus by using the multipurpose slider in the track list. For more
information, see Assigning audio tracks to busses on page 111.
CHP. 8
USING THE MIXER
150
Using assignable effects chains
Assignable effects are only available in the full version of Vegas software.
Assignable effects allow you to send various levels of multiple tracks to a single audio effect chain. Like
busses, these controls reside in the Mixer window and support plug-in chains. In addition, you can route
assignable effects outputs to project busses.
Click the Insert Assignable FX button ( ) in the
Mixer window to add an assignable effects chain to
your project. For more information, see Adding Audio
Effects on page 153.
Number/Name
Automation settings
Mute
Solo
Assignable FX
Bus Pan
Bus assignment
Input Fader
Output Fader
Meter
Lock/Unlock Fader
Channels
USING THE MIXER
Number and name of assignable effects.
Double-click the name to edit it.
The controls in the assignable effects
control list can function as trim controls
or automation controls for output level,
panning, and muting. Click the button
and verify Show Automation Controls is
not selected if you want the bus control
to function as a trim control. Adjusting a
trim control affects the entire track. Click
the button and choose Show Automation
Controls to adjust automation settings.
For more information, see Using
Automation on page 119.
Prevents the assignable effects chain
from processing the track’s signal. When
Show Automation Controls is selected,
Assignable Effects in Mixer Window
Automation
Number/Name
Pan
slider
settings
Mute
Solo
Bus
assignment
Assignable FX
Input
Fader and
Meter
Output
Fader and
Meter
Assignable effects
Lock/Unlock
Fader
Channels
Assignable effects showing
automation controls
the button is displayed as
, and you
can use the button to edit mute
automation on the chain’s bus track.
Plays only the output of that assignable
effects chain.
Displays the Assignable FX window and
allows you to adjust the plug-in settings.
Drag to adjust the overall panning of the
assignable effects chain. When Show
Automation Controls is selected, the
thumb is displayed as
, and you can
use the slider to edit pan automation on
the chain’s bus track.
Allows to you assign the assignable
effects chain to a bus.
Adjusts the input volume.
Adjusts the output volume. When Show
Automation Controls is selected, the
thumb is displayed as , and you can use
the fader to edit volume automation on
the chain’s bus track.
Displays the incoming and outgoing signal
level to the assignable effects chain.
Locks the faders so the left and right
channels of stereo files always move
together. Click again to unlock the faders.
CHP. 8
151
Tip: To use the output fader to control the wet/dry mix of the
assignable effects chain, set each plug-in to 100% wet. Use
the output (effects return) fader to balance the dry track
signal with the wet plug-in signal.
You can work with assignable effects controls in much the same way you work with busses. Use the same
methods described earlier in this chapter for adjusting volume, adjusting for clipping, muting, soloing, and
renaming. For more information, see Working with busses on page 148.
Assigning audio tracks to assignable effects chains
Assignable effects are only available in the full version of Vegas software.
You can adjust the level of a track that is sent to an assignable effects chain using the multipurpose slider in
the track list. For more information, see Assigning audio tracks to assignable effects chains on page 111.
CHP. 8
USING THE MIXER
152
Routing assignable effects chains to busses
When you add assignable effects to your project, you can assign them to a specific bus for output. The bus
mixes the assignable effects chain’s plug-ins along with any tracks that may be routed to the same bus. For
more information, see Audio signal flow on page 34.
This option is only available if the project contains multiple busses. For more information, see Adding busses to
a project on page 145.
1. Click the Bus button (
) on the assignable effect control. A menu displays
all the busses in your project.
2. Choose the bus to which you want to route the assignable effects chain.
The assignable effects chain displays the letter of the bus to which it is
routed.
Automating busses and assignable effects
You can automate busses and assignable effect chains in the track view. You can
view each of these controls on bus tracks at the bottom of the track view and to add envelopes to automate
functions such as volume, pan, and assignable effect chain input/output levels. For more information, see
Using Automation on page 119.
If you have the full version of Vegas software, you can also add envelopes to automate effect parameters for
plug-ins that support automation. For more information, see Adding or removing effect automation envelopes on
page 122.
Viewing bus tracks
From the View menu, choose Show Bus Tracks or press U . The bus tracks appear at the bottom of the track
view. A bus track appears for each bus or assignable effect chain in your project.
Adding track envelopes
Right-click the track header in the track list, choose Insert/Remove Envelope from the shortcut menu, and
choose the appropriate envelope type from the submenu.
Modifying track envelopes
You can modify a track envelope for a bus or assignable effect in the same way you do with any other track.
For more information, see Working with track envelopes on page 126.
USING THE MIXER
CHP. 8
153
CHAPTER
Adding Audio
Effects
9
You can use audio effects, or plug-ins, to improve the quality of the audio in a production or to create special
artistic effects. In addition to the DirectX® plug-in effects included with Vegas® software, you can also use
other Sony Pictures Digital plug-ins and third-party plug-ins.
Using audio effects
There are three ways to use audio plug-ins: track effects, bus effects, and assignable effects. You can access
these plug-ins by clicking the Track FX, Bus FX or Assignable FX buttons ( ). The combination of these
various methods of applying audio effects is important to the final mix of a project. For more information, see
Audio signal flow on page 34.
Track FX
Bus FX
Assignable FX
• Track effects are applied to all events in a single track.
• Bus effects are applied to a bus (including the Master bus). When you add plug-ins to a bus, the tracks
that are assigned to the bus are processed by the plug-in(s). Since multiple tracks can be assigned to a
single bus, using bus-level audio effects is an efficient method of applying carefully customized chains of
audio effects to multiple tracks. If plug-ins are assigned at the track level, the track’s signal flows through
the track’s plug-in(s) before the bus plug-ins. For more information, see Using busses on page 145.
• Assignable effects allow you to send various levels of multiple tracks to a single effect chain. Like busses,
these controls reside in the Mixer window and support plug-in chains. In addition, assignable effects
outputs can be routed to busses. Click the Insert Assignable FX button ( ) in the Mixer window to add an
assignable effect chain to your project. For more information, see Using assignable effects chains on page 150.
CHP. 9
ADDING AUDIO EFFECTS
154
Using plug-in chains
A plug-in chain is a sequence of plug-ins to be applied to
tracks, busses, or assignable effects. A plug-in chain can
contain one or more plug-ins. The same plug-in can be added
to a chain more than once.
Plug-ins in a chain
After the plug-in chain is created, the audio is processed by
each plug-in in order. The plug-ins are cumulative so, in some cases, you may want to rearrange their order to
achieve the desired effect.
If you’re working with a 5.1 surround project, you can use
distinct plug-in settings for each channel (separate EQ
settings for the front and surround speakers, for example)
using effect automation. Add multiple instances of the plug-in
to the track effects chain and select the Enable check boxes in
the FX Automation Chooser for the channels you want each
instance of the plug-in to affect.
Creating a plug-in chain
Audio tracks have a built-in plug-in chain with three default plug-ins applied as a default. For bus effects and
assignable effects, however, you must first create a plug-in chain.
Creating a bus effects plug-in chain
1. Click the Bus FX button ( ) on a bus in the Mixer window. The Plug-In Chooser dialog appears.
2. Select a plug-in and click OK. The Audio Plug-In window displays with your selected plug-in as the first in
the new plug-in chain.
3. Adjust the settings for the plug-in to create the desired effect and click the Close button ( ) in the upper-
right corner to close the window.
Creating an assignable effects plug-in chain
1. Click the Insert Assignable FX button (
) on the Mixer window. The Plug-In Chooser dialog appears.
2. Select a plug-in and click OK. The Audio Plug-In window displays with your selected plug-in as the first in
the new plug-in chain.
3. Adjust the settings for the plug-in to create the desired effect and click the Close button ( ) in the upper-
right corner to close the window. The new assignable effect control appears in the Mixer window.
Adding plug-ins to a plug-in chain
There are two ways to add plug-ins to a chain: via the Plug-In Chooser dialog and via the Audio Plug-In
window.
Adding plug-ins via the Plug-In Chooser dialog
You can access the Plug-In Chooser dialog from the track, bus, or assignable effects chain to which you are
adding the plug-in.
1. Click the Track FX, Bus FX or Assignable FX button ( ). The appropriate FX window (Audio Plug-In or
Video Track FX) appears.
ADDING AUDIO EFFECTS
CHP. 9
155
2. Click the Plug-In Chain button ( ) on the window. The Plug-In Chooser dialog appears. Plug-ins already
in the chain appear at the top of the dialog.
Plug-ins already
contained in
the chain
3. Select a plug-in and click Add.
4. Repeat step three to add as many plug-ins as you need to create the desired effect.
5. Click OK to close the Plug-in Chooser dialog. The plug-in chain appears just below the title bar in the
appropriate FX window (Audio Plug-In or Video Track FX).
Adding plug-ins via the Plug-In Manager
The Plug-In Manager is a dockable window that allows you to view and choose plug-ins to be added to a
track, bus, or assignable effects chain.
1. If the Plug-In Manager is not displayed, press
Ctrl + Alt + 1
.
2. In the Plug-In Manager, navigate to the Audio folder and select one of the FX folders.
CHP. 9
ADDING AUDIO EFFECTS
156
3. Drag a plug-in to a track, bus, or assignable effects chain.
Tip: You can select multiple plug-ins and add them at the
same time by dragging them to the desired location.
4. Confirm that the plug-ins were added by clicking the Track FX, Bus FX or Assignable FX button (
) to view
the appropriate FX window (Audio Plug-In or Video Track FX). You can customize the settings for the
effects at this time.
Saving customized plug-in presets
Each plug-in has a number of presets that you can use to set the behavior of the plug-in. However, you can
also adjust the controls for the plug-in manually to create custom settings. You can then save the effect
settings as a new preset.
1. Click the Track FX, Bus FX or Assignable FX button (
). The appropriate FX window (Audio Plug-In or
Video Track FX) appears.
2. In the plug-in chain at the top of the window, click the plug-in you want to customize.
3. Adjust the settings for the effect.
4. Enter a preset name in the Preset box.
5. Click the Save button (
) to save the preset.
Tip: You can delete a saved preset by selecting it from the list
and clicking the Delete button (
).
Arranging the order of plug-ins
Plug-ins are cumulative during playback. Because of this cumulative effect, you may need to arrange plug-ins
in a certain order so that one plug-in’s processing does not adversely affect the next plug-in on the chain.
There is no right or wrong way to order plug-ins, but some plug-ins work better when arranged in a particular
order.
You can arrange the order of plug-ins in a chain in either the appropriate FX window or the Plug-In Chooser
dialog.
Arranging the plug-in order in the FX window
1. Click the Track FX, Bus FX or Assignable FX button ( ). The appropriate FX window (Audio Plug-In or
Video Track FX) appears.
2. On the plug-in that you want to move, right-click and choose Move Left or Move Right from the shortcut
menu. Alternately, drag a plug-in to a new position.
ADDING AUDIO EFFECTS
CHP. 9
157
3. Once the chain’s plug-ins are in the order that you want, click the Close button (
) in the upper-right
corner to close the window.
Arranging the plug-in order from the Plug-In Chooser dialog
1. Click the Track FX, Bus FX or Assignable FX button (
). The appropriate FX window (Audio Plug-In or
Video Track FX) appears.
2. Click the Plug-In Chain button ( ). The Plug-In Chooser dialog appears with the plug-in chain displayed
at the top.
3. Drag a plug-in to a new location in the chain, or select a plug-in and click either the Shift Plug-In Left (
or Shift Plug-In Right (
)
) button.
4. Click OK to close the Plug-In Chooser dialog.
Bypassing plug-ins on the chain
You can bypass plug-ins on the chain by clearing the check box on a specific plug-in or by right-clicking the
plug-in and choosing Bypass from the shortcut menu. The plug-in remains bypassed until you enable it
again. Bypassing a plug-in prevents it from being processed on the mixer, track or bus.
Effect enabled
Effect bypassed
To enable the plug-in again, click its
check box or choose Bypass from
the shortcut menu.
You can bypass plug-ins from the appropriate FX window or from the Plug-In Chooser dialog.
Removing plug-ins from a chain
You can remove plug-ins from a chain in either the appropriate FX window or the Plug-In Chooser dialog.
CHP. 9
ADDING AUDIO EFFECTS
158
Removing a plug-in from the chain in the FX window
1. Click the Track FX, Bus FX or Assignable FX button (
). The appropriate FX window (Audio Plug-In or
Video Track FX) appears.
2. Select the plug-in that you want to remove.
3. Click the Remove Selected Plug-In button (
).
Removing a plug-in from the chain in the Plug-In Chooser dialog
1. Click the Track FX, Bus FX or Assignable FX button (
). The appropriate FX window (Audio Plug-In or
Video Track FX) appears.
2. Click the Plug-In Chain button ( ). The Plug-In Chooser dialog appears with the plug-in chain displayed
at the top.
3. Select the plug-in that you want to remove and click Remove to remove it from the chain.
4. Click OK to close the Plug-In Chooser dialog.
ADDING AUDIO EFFECTS
CHP. 9
159
Saving plug-in chains
You can save and edit the plug-in chains that you add to tracks or busses or create as assignable effects
chains. Saved chains retain the order of plug-ins and the settings that you have applied. These chains are
stored as effect packages for use in future projects. If you use the same plug-in chains regularly, saving them as
packages is faster and more consistent than recreating the chain manually.
Once you save a chain as a package, you can use it as either a track, bus or assignable effects plug-in chain.
Saved plug-in chain packages appear in the Plug-In Chooser dialog.
Plug-in chain packages that
you have created and saved
1. Click the Track FX, Bus FX or Assignable FX button ( ). The appropriate FX window (Track FX, Bus FX, or
Assignable FX) appears.
2. Click the Plug-In Chain button (
). The Plug-In Chooser dialog appears with the plug-in chain displayed
at the top.
3. Click Save As. The Save Plug-in Package dialog appears.
4. Enter a name for the package.
5. Click OK or press
Enter
to save the package.
Editing saved plug-in chains
You can add, delete, or rearrange plug-ins in a saved package at any time. You can then save your changes to
the package, or enter a new name to save the chain as a new package.
1. Click the Track FX, Bus FX or Assignable FX button (
). The appropriate FX window (Audio Plug-In or
Video Track FX) appears.
2. Click the Plug-In Chain button ( ). The Plug-In Chooser dialog appears with the package in the chain
area.
3. Add, delete, rearrange, or change the settings of plug-ins in the package chain.
4. In the Plug-In Chooser dialog, click Save As to save the modified package.
5. To save the package with a new name, enter a name in the Name box. To save the changes to the existing
package, choose the name of the package from the Name drop-down list.
6. Click OK or press
CHP. 9
Enter
to save the new settings.
ADDING AUDIO EFFECTS
160
Organizing your plug-ins
Within the Plug-in Chooser
dialog, you can create folders
to organize the plug-ins. This
can help you organize large
numbers of plug-ins on your
system. You can create
folders and then drag plugins to the folders.
Automating effects parameters
Automation allows you to control audio and video levels, panning, and effect parameter automation over
time. You can create fades, apply stereo panning, and add effects that come and go as you please.
Automation is represented on the Vegas timeline as an envelope or set of keyframes. You can create
automation by adding envelopes or keyframes to your tracks (including bus tracks), or you can record
automation parameters by adjusting controls in the Vegas interface (or on a control surface) during playback.
For more information, see Using Automation on page 119.
Applying non-real-time event effects
Non-real-time event effects are a different method of applying audio effects. In all other cases, event editing
is nondestructive, meaning that edits and effects are applied to events in real time and not to the source
media files, which remain unaltered. There may be times, however, when you want to create a permanent
file using an effect or effects. This may be useful in a very complicated project or when a slower computer
cannot process the effects quickly enough for a real-time preview.
By applying non-real-time event effects, you can make a new copy of a media file with the effects applied to
it. This new media file is saved and added to the project as a take. For more information, see Working with takes
on page 94.
1. Select an audio event.
2. From the Tools menu, choose Audio, and choose Apply Non-Real-Time Event FX from the submenu.
3. In the Plug-In Chooser dialog, add plug-ins to create a plug-in chain. For more information, see Adding plug-
ins via the Plug-In Manager on page 155.
4. Click OK.
5. In the Take window, adjust the settings for the plug-in(s) to create the desired effect.
6. Preview the effect by clicking the Preview button (
) in the Non-Real-Time Event FX window.
7. Click OK.
8. In the Take dialog, click Save to save the newly processed media file.
The new media file is saved and added to the project as a take.
ADDING AUDIO EFFECTS
CHP. 9
161
Bypassing all audio effects
From the Options menu, choose Bypass All Audio FX to omit all audio effects (track, bus, and assignable
effects) during playback.
Bypassing effects allows you to quickly compare your project with and without effects and conserve
processing power to avoid playback problems.
When effects are bypassed, you can choose whether bypassed effects remain open. When the Keep bypassed
box on the General tab of the Preferences dialog is selected, effects remain open so you can
bypass/enable effects with no pause for A/B testing. When the check box is cleared, effects are fully bypassed,
conserving processing power.
FX running check
CHP. 9
ADDING AUDIO EFFECTS
162
ADDING AUDIO EFFECTS
CHP. 9
163
CHAPTER
Recording Audio
10
Vegas® software can record audio into multiple mono or stereo audio tracks while simultaneously playing
back existing audio and video tracks. You are limited only by the performance of your computer system and
audio hardware. Audio is recorded to a media file on your computer and into an event on the timeline. You
may record into an empty track, a time selection, an event, or a combination of time and event selection.
Audio output from your computer during recording is not necessarily recorded with the new audio.
Recording does not alter any of the source media files in your project. Even when recording into an existing
event, you are not overwriting the data in that event. Instead, the data is recorded into a new take for that
event and saved to a media file on your hard drive.
Setting up your equipment
There are numerous ways to connect your equipment to your system. Refer to your equipment’s
documentation for specific setup instructions. The following are some possible general configurations.
Basic setup
This setup includes a simple microphone and speaker that are connected to the computer’s sound card. With
a more sophisticated microphone, you would typically want to use a preamplifier for input to the sound card.
Sound card out
Sound card in
CHP. 10
RECORDING AUDIO
164
Setup with mixer
This setup includes a mixer where the speaker and microphone connect. The mixer is then connected to the
computer’s sound card. Mixers usually have pre-amps built into them. This diagram does not show you an
instrument or a physical preamplifier, such as a rack-mounted component. The reason for this omission is
because these types of setups vary widely based on your mixer, instrument, and pre-amp type. Refer to your
components’ documentation for specific setup configurations.
Mixer out
Sound card out
Sound card in
Mixer in
Mixer
Setup with digital multitrack
This setup includes a digital multitrack recorder with an optional MIDI synchronization component. Usually
you would have a mixer, a microphone, etc. connected to these components. Your particular setup will vary
depending on your equipment. Refer to your components’ documentation for specific setup configurations.
Digital out
Digital card
Digital in
MIDI card
Sync. out
Sync. in
The dashed line indicates
an option if you are synching
Vegas software to tape via a
MIDI timecode.
Digital
multitrack
MTC converter
Synchronizing MIDI timecode
Vegas software can generate (output) MIDI timecode to synchronize external devices with project playback
or can be triggered by MIDI timecode generated by an external device. To output MIDI, from the Options
menu, choose Timecode, and choose Generate MIDI Timecode from the submenu. To allow Vegas software to
be triggered by an external MIDI device, choose Trigger from MIDI Timecode from the same submenu. For
more information, see Triggering from MIDI timecode on page 170 and Sync tab on page 299.
RECORDING AUDIO
CHP. 10
165
Preparing to record
Before you record, you must arm the tracks into which you will record the new audio. You must also select
the recording settings for the tracks. You have the additional options of using a metronome or turning off
playback during recording.
You may record into an empty track, a time selection, an event, or a combination of time and event
selection. You can also record multiple takes for an event so you can maintain multiple versions of an event
that you may play back and edit.
Tip: Select a media bin before recording if you want to
automatically add your recorded audio to a media bin. To
save track effects with your recorded files, create an effects
package of the track effect settings and apply the chain to the
event as a non-real time event effect.
Arming the track for recording
Whether recording into an existing track, an empty track, a selected event, or a time selection, you must
prepare a track for recording. You can arm multiple tracks prior to recording.
1. Click the Arm for Record button (
) in the track list.
The first time you arm a track to record in a project, the Project
Recorded Files Folder dialog displays.
2. Browse to the location where you want to save your recorded
audio files.
3. Click OK.
Tip: You can change the location where recorded files are
saved at any time. For more information, see Specifying
where recordings are stored on page 170.
Once a track is armed, a record meter appears in the track list. Depending on your hardware, a record gain
fader may also appear.
Arm the track first.
CHP. 10
Track is ready for recording
using the Sound Mapper.
Track is ready for recording
from a specific device.
RECORDING AUDIO
166
In addition, one of two Record Device Selector buttons appears: ( ) or ( ). The button that appears is based
on the Audio device type selected in the Audio tab of the Preferences dialog. For more information, see Audio tab
on page 295.
Button
Stereo
Mono left
Description
This button appears when Use Microsoft® Sound Mapper™ has been selected as the audio device type on
the Preferences Audio tab. The Sound Mapper allows you to choose how the signal will be recorded:
stereo or mono. Click this button to view a menu with Stereo, Left, or Right.
Mono right
Stereo
Mono left
Mono right
This button appears when Windows® Classic Wave Driver has been selected as the audio device type on
the Preferences Audio tab. When you choose this option, you can specify which device (e.g., sound card)
you will record from on any given track prior to recording. Click this button to view a menu with Stereo
or Mono, and a submenu with all available devices for either option.
Selecting recording settings
After the track has been armed for recording, select whether the track records the signal in stereo, in mono
from the left channel, or in mono from the right channel. If you are using the Microsoft® Windows® Classic
Wave Driver, you also must select the device from which the track will record.
Selecting recording settings for Sound Mapper
1. Click the Record Device Selector button (
). A menu appears.
2. From the menu, choose the recording method (Stereo, Left, or Right).
Selecting recording settings for Windows Classic Wave Driver.
1. Click the Record Device Selector button (
). A menu appears.
2. Choose either Stereo or Mono from the menu.
3. From the submenu, choose the input device
RECORDING AUDIO
CHP. 10
167
Using the metronome
A built-in metronome marks time to help with the timing and tempo when recording a performance. The
metronome’s sound is not mixed in the final rendering of the project. Use the Preview fader in the Mixer
window to control the metronome volume. For more information, see Using the Mixer Preview fader on page
144.
To use the metronome, from the Options menu, choose Metronome.
Tip: You can customize the sound of the metronome in the
Audio tab
of the Preferences dialog. For more information,
see Audio tab on page 295.
Recording
You may record into an empty track, a time selection, an event, or a combination of time and event
selection. The recording is added to the timeline as new take and saves it to a media file on your hard drive.
Triggering recording from MIDI timecode is also supported.
Recording into an empty track
1. Select a track. Alternately, to record to a new track, choose Audio Track from the Insert menu.
2. Place the cursor on the timeline where you want to begin recording.
3. Arm the track by clicking the Arm for Record button (
) on the track.
If this is the first time you arm a track for recording in this project, you will be prompted to identify the
location where the new audio files will be saved. For more information, see Arming the track for recording on
page 165.
4. Start recording by clicking the Record button (
) on the transport bar.
Depending on the recording selection, a waveform is created along the timeline as you record into the
armed track(s).
Start/stop
recording
Stop recording
5. Stop recording by clicking the Record button (
Recorded waveform
) again or the Stop button (
) on the transport bar.
6. A small dialog opens displaying the name and location of the file or files that were just created. Click
Done
CHP. 10
to return to the main workspace.
RECORDING AUDIO
168
Delete—removes selected file
Rename—changes the name of a selected file
Delete All—removes all files in dialog
Done—returns to track view
When a check mark appears in this box,
Vegas software displays this dialog after
each recording session.
Note: The Recorded Files dialog does not appear if you are
triggering from MIDI timecode, as this would interrupt the
synchronizing. Instead, files are automatically named and
saved according to your preferences.
Recording into a time selection
By making a time selection, you specify where along the
timeline to record. The time selection also determines how
long the software records. Any selected events that occur
within the time selection are split and the recorded data is
placed into the time selection.
Recorded waveform
The event’s waveform is displayed as it is recorded and
automatically stops recording when the cursor reaches the end of the time selection.
Recording into an event
By recording into an event, you automatically create a new take containing the recorded material that is the
same duration as the selected event. The edges of the selected event serve as the punch-in and -out points
that are used for recording. Recording into an event allows you to establish a pre-roll before recording, which
gives you time to prepare before recording starts.
Because the entire recording is saved to the media file (not just the material between the edges of the take),
you are not limited to the recorded material contained in the length of the new take. You can adjust the
edges of the event or slip the contents of the event if necessary. For more information, see Shifting the contents
of (slipping) an event on page 71.
The existing event that you record into is not affected or deleted. Instead, the event now contains two media
files, each listed as a separate take in the event. For more information, see Working with multiple recorded takes
on page 170.
1. Place the cursor before the event to allow for pre-roll.
2. Press
Ctrl
and click the event to select it.
Tip: You can record into multiple events by pressing
Ctrl
and making selections.
RECORDING AUDIO
CHP. 10
169
3. Click the Arm for Record button (
) on the event’s track. When recording into multiple selected events,
arm their respective tracks at this time.
4. Click the Record button (
) on the transport bar to begin recording.
5. Click the Record button (
) again or the Stop button (
) on the transport bar to stop recording.
Recording into an event with a time selection
Recording into a time selection allows for a pre- and post- roll during recording. The time selection is
adjustable to increase or decrease the pre- and post-roll duration. During recording, the selected event’s
edges serve as the punch-in and -out points. You can create multiple punch-in and -out points by selecting
more events within the time selection.
You may need to split an existing event into three pieces so that you can select a smaller portion of the event
to record into. For more information, see Splitting events on page 69.
1. Click the Arm for Record button ( ) on the desired track(s).
2. Select the event to record into.
Tip: You may record into multiple events by pressing
Ctrl
and making your selections.
3. On the marker bar, drag a time selection. You may adjust the time selection by dragging the selection
bar’s starting and ending points. Make the time selection start before the event for a pre-roll.
4. Click the Record button (
) on the transport bar to begin recording.
If input monitoring is turned on, the track’s original audio is played until the cursor reaches the selected
event. When the cursor plays through the selected event, you’ll hear your recording input, and the track’s
original audio is played again when the cursor moves past the selected event.
Using pre-roll
The previous technique allows you to define the playback region with a time selection and sets the punch-in
and punch-out points in the recording to the event boundaries. When you click the Record button, playback
begins at the beginning of the time selection. The event is then filled with the newly recorded material. The
audio file that is recorded to your hard disk is the full duration of the time selection. The event only contains
a portion of the full recorded performance and can therefore be trimmed (both shorter and longer) and
repositioned within the event.
Time selection bar defines the recorded
audio file’s duration.
Pre-roll
Punch-in
CHP. 10
Post-roll
Punch-out
RECORDING AUDIO
170
Triggering from MIDI timecode
Recording can be triggered and synchronized by an external MIDI device that outputs (generates) MIDI
timecode (MTC). When triggering from MIDI timecode, you should have your audio devices connected
together via a master digital word clock. The word clock keeps the audio hardware locked together,
eliminating the need for the software to constantly vary its playback rate to stay synchronized. The incoming
timecode is only used for an absolute time reference. For more information, see Sync tab on page 299.
1. From the Options menu, choose Preferences and go to the Sync tab.
2. From the Trigger from MIDI Timecode settings drop-down list, select the device that you want to trigger Vegas
software.
3. Click OK. The Preferences dialog closes.
4. Click the Arm for Record button (
) on the desired track(s).
5. Right-click the time display and choose MIDI Timecode In. The time display now shows the timecode
being generated from your MIDI device. The top of the display reads MTC Input Waiting.
6. Begin generating MTC from your MIDI device. The top of the time display now reads MTC Input Locked,
the time updates from the MIDI device, and recording automatically begins. Typically, there is a short
delay between when you begin generating MTC and synchronization.
Working with multiple recorded takes
Clicking the Loop Playback button ( ) on the transport bar enables you to continually create takes during
recording. Takes are different versions of a recorded event that you can quickly switch between to choose the
best one. Each take within an event references a different source media file.
During recording with loop playback enabled, the time selection continually repeats and starts recording a
new take until you stop recording. You can preview, select, rename, and delete takes. For more information,
see Working with takes on page 94.
Specifying where recordings are stored
When you record, the event appears on the timeline while its media source file is written to your hard drive.
The first time you arm a track to record in a project, you are prompted to identify the location where the
recordings will be stored.
Changing where recorded files are stored when arming a track
1. Press
Shift
and click the Arm for Record button (
) on a track. The Project Recorded Files Folder dialog
appears.
2. Browse for the location where you want to save recorded files.
3. Click OK.
RECORDING AUDIO
CHP. 10
171
Changing where recorded files are stored when starting to record
1. Press
Shift and click the Record button (
dialog appears.
Tip: You can also press
) on the transport bar. The Project Recorded Files Folder
to specify the
location for recorded files when starting to record.
Ctrl + Shift + R
2. Browse for the location where you want to save recorded files.
3. Click OK.
Changing where recorded files are stored in the Project Properties dialog
1. From the File menu, choose Properties. The Project Properties dialog appears.
2. Click the Audio tab to display the project’s audio properties.
3. Click Browse. The Recorded Files Folder dialog appears.
4. Browse for the location where you want to save recorded files.
5. Click OK.
Tip: You can select Start all new projects with these settings
in the Project Properties dialog to store recorded media source
files to the same location in every new project.
Monitoring audio levels
While you're recording, a responsive meter is provided in the track
header to monitor the incoming signal level of the selected recording
device. It is important that you record with the highest signal possible
without clipping.
A reading of 0 dB is the maximum for a digital signal. Clipping occurs when the incoming signal is too high
to be represented as a digital value. The result is distortion in the recording. A clipped signal will be
indicated by a red Clip warning at the top of the meters.
Right-click the meters and choose a command from the shortcut menu to adjust the display of the meters.
Using record input monitoring
If you want to hear your recording signal with real-time track effects, you can turn on input monitoring.
Input monitoring is only available in the full version of Vegas software.
To turn on input monitoring, click the Record Device Selector button ( or ) and choose Input Monitor
from the menu, and then choose Auto or On from the submenu. During recording, your signal will be played
back with the current track effects chain, but a dry (unprocessed) signal is recorded.
When Auto is selected, you will hear the input monitor signal when playback is stopped and during
recording. If you're recording into selected events, you'll hear the input monitor signal only when the cursor
passes over the selected events.
CHP. 10
RECORDING AUDIO
172
When On is selected, the behavior is similar to Auto mode, but you will always hear the input monitor during
recording—monitoring is not toggled on and off when recording in to a selected event.
Note: Your ability to monitor effects in real time is
dependent on your computer's performance. Effect
automation envelopes are bypassed during record monitoring.
RECORDING AUDIO
CHP. 10
173
CHAPTER
11
Working with 5.1
Surround
Vegas® software allows you to create 5.1-channel mixes to prepare audio for DVD-Video.
5.1-channel mixing is only available in the full version of Vegas software.
Note: Vegas software plays and mixes uncompressed 5.1channel audio. Authoring software such as the Sony Pictures
Digital 5.1 Surround Plug-In Pack is required to encode 5.1channel audio to AC-3 for use in DVD authoring.
What is 5.1 surround?
5.1 surround is a standard format consisting of three speakers across the front and two speakers in the rear.
The “.1” is a sixth channel called low-frequency effects (LFE) that enhances the bass levels in the mix.
5.1 surround includes five main channels...
Left
Left
Surround
Center
Right
...and a sixth channel for low-frequency effects.
LFE
Right
Surround
The LFE channel is commonly used in motion pictures to enhance low audio frequencies for effects such as
explosions or crashes. Audio in this channel is commonly limited to a range from about 25 Hz to 120 Hz.
Unlike the five primary channels, the LFE channel adds no directional information. Depending on the
speaker setup and audio levels, the sound assigned to the LFE channel may be routed among the five main
speakers or to an additional subwoofer.
CHP. 11
WORKING WITH 5.1 SURROUND
174
Setting up surround hardware
Before you create surround projects, you should set up your system to provide 5.1 surround playback. To play
a 5.1 surround project, you must have an appropriate speaker setup such as:
• Six powered speakers
• Six passive speakers with a six-channel amplifier
Your system must also have an appropriate sound card setup such as:
• 5.1-compatible sound card
• Sound card with three stereo outputs
• Three stereo sound cards
There are several ways to set up your system, depending on the sound card and speaker setup you are using.
Six powered speakers
5.1-compatible
sound card
Sound card with
three stereo
outputs
Three stereo
sound cards
Six passive speakers with a six-channel amplifier
Connect powered speakers to your sound card’s
outputs as indicated by your sound card’s
documentation.
Connect your sound card’s front, rear, and center/subwoofer
outputs to the appropriate inputs on a six-channel amplifier/
home theater receiver. Connect front, rear, center, and LFE
speakers to the amplifier.
Connect powered speakers to your sound card’s
Connect your sound card’s outputs to the appropriate inputs on
outputs where you have routed each of the pairs of
a six-channel amplifier/home theater receiver. Connect front,
channels. The left channel of the Center/LFE pair is the rear, center, and LFE speakers to the amplifier.
center channel; the right channel is the LFE channel.
Connect powered speakers to your sound cards’
Connect your sound card’s outputs to the appropriate inputs on
outputs where you have routed each of the pairs of
a six-channel amplifier/home theater receiver. Connect front,
channels. The left channel of the Center/LFE pair is the rear, center, and LFE speakers to the amplifier.
center channel; the right channel is the LFE channel.
Setting up surround projects
You can configure a Vegas project to use 5.1 surround in the Project Properties dialog. You can also choose
to apply a low-pass filter for the LFE channel. Applying a low-pass filter approximates the bass-management
system in a 5.1 decoder and ensures that you’re sending only low-frequency audio to the LFE channel.
1. From the File menu, choose Properties.
2. Click the Audio tab.
3. From the Master bus mode drop-down list, choose 5.1 surround.
4. To limit the audio sent to the LFE channel, do the following:
• Select the Enable low-pass filter on LFE check box and enter a value in the Cutoff frequency for low-pass filter
box. The low-pass filter isolates the audio sent to the LFE channel by limiting it to frequencies lower
than the value entered in the Cutoff frequency for low-pass filter box.
• Choose a setting from the Low-pass filter quality drop-down list to determine the sharpness of the filter’s
rolloff curve. Best produces the sharpest curve.
Note: Before rendering your surround project, check your
surround authoring application’s documentation to determine
its required audio format. Some encoders require a specific
cutoff frequency and rolloff, while other encoders require that
no filter be applied before encoding.
WORKING WITH 5.1 SURROUND
CHP. 11
175
5. Click OK.
The track list and Mixer window switch to 5.1 surround mode. The Master bus becomes the Surround
Master bus, which contains faders for each of the six surround channels. Surround panners appear on
tracks and mixer controls. Tracks routed to mixer controls (busses or assignable effects) do not have
surround panners; panning for these tracks takes place on the mixer control.
Track list in 5.1 surround mode
Mixer in 5.1 surround mode
Surround
panner
Track routed
to LFE
Track routed
to Bus
Front L/R
Rear L/R
Center LFE
Surround panners
Routing to hardware in the mixer
You must route the surround audio to the correct output in the mixer.
1. From the Options menu, choose Preferences.
2. Click the Audio tab.
3. From the Audio device type drop-down list, choose an audio device type other than Microsoft Sound Mapper
(such as Windows Classic Wave Driver).
4. Choose the playback devices for the six surround channels:
• From the Default Stereo and Front playback device drop-down list, choose the appropriate device for the
front left and right surround channels.
• From the Default Rear playback device drop-down list, choose the appropriate device for the rear left and
right surround channels.
• From the Default Center and LFE playback device drop-down list, choose the appropriate device for the
center and LFE surround channels.
5. Click OK.
Overriding the default device routing
By setting up the device routing in the Audio tab of the Preferences dialog, you have set the defaults for
surround routing. However, you can override the default device routing at any time using the Surround
Master bus in the Mixer window.
1. In the Mixer window, click the Audio Device Selector button (
) on the Surround Master bus. A menu of
surround channels (Front L/R, Rear L/R, and Center/LFE) appears.
2. In the submenu, match a surround pair with the appropriate output.
3. Repeat steps one and two to match each surround pair to the appropriate output.
CHP. 11
WORKING WITH 5.1 SURROUND
176
Assigning audio to the LFE channel
Once the project is in 5.1 surround mode, you must decide whether a track will provide the “5” (surround
panning) or the “1” (LFE channel) in 5.1 surround. Initially, all tracks in a surround project are set to
provide surround panning, but you can assign a track to the LFE channel instead.
You can assign an individual track to the LFE channel or you can route the track to a mixer control (bus or
assignable effect chain) and assign the mixer control to the LFE channel.
To assign audio to the LFE channel, right-click the surround panner on the track header or mixer control
and choose LFE Only from the shortcut menu. The track or mixer control is assigned to the LFE channel.
Right-click the surround panner and choose LFE Only...
...to assign the track or mixer control to the LFE channel.
To change a track or mixer control back to surround panning, right-click the LFE indicator and choose
Surround Pan from the shortcut menu.
Note: Before rendering your surround project, check your
surround authoring application’s documentation to determine
its required audio format with respect to the LFE channel.
For more information, see Setting up surround projects on
page 174.
Adjusting volume
Adjusting track volume for 5.1 surround projects behaves almost identically to stereo projects. The controls
in the track headers and Mixer window can function as trim controls that adjust the overall volume of the
track, bus, or assignable effects chain, or they can adjust volume automation settings. For more information,
see Track automation on page 119.
Adjusting track volume
You can adjust track volume using the Vol fader in the track header the same way you do in stereo projects.
Click the Automation Settings button ( ) on the track header and verify Show Automation Controls is not
selected if you want to adjust trim levels.
Track header in trim mode
Select Show Automation Controls if you want to adjust volume automation. The fader handle is displayed as a
in automation mode.
Track header in automation mode
WORKING WITH 5.1 SURROUND
CHP. 11
177
Adjusting assignable effects send or bus send levels
You can adjust send levels for busses or assignable effects chains using the multipurpose fader in the track
header. Click the fader label and choose an assignable effects chain or bus from the menu. The fader in the
track header can function as a trim control that adjusts the overall send level of the track, or it can adjust
send level automation settings.
Click the Automation Settings button ( ) on the track header and verify Show Automation Controls is not
selected if you want to adjust trim levels.
Select Show Automation Controls if you want to adjust volume automation. The fader handle is displayed as a
in automation mode.
Adjusting channel levels
Use the Surround Master bus control in the Mixer window to adjust the individual levels of the 5.1
channels. The faders in the track bus control can function as trim controls that adjust the overall level of
each channel, or you can automate the master volume of the Surround Master bus (individual channel levels
cannot be automated).
Click the Automation Settings button ( ) in the bus control or bus track and verify Show Automation
Controls is not selected if you want to adjust trim levels.
Mixer controls in trim mode
Select Show Automation Controls if you want to adjust volume automation. The fader handle is displayed as a
in automation mode.
Mixer controls in automation mode
CHP. 11
WORKING WITH 5.1 SURROUND
178
Panning audio
You can pan audio in a 5.1 surround project in two ways:
• Pan tracks individually using the Surround Panner window.
• Route tracks to mixer controls (busses, assignable effect chains) and pan the mixer controls using the
Surround Panner window.
Panning tracks
1. Click the Automation Settings button ( ) on the track you want to pan and verify Show Automation
Controls
is not selected.
2. Double-click the surround panner on the track you wish to pan. The Surround Panner window appears.
Double-click to display
the Surround
Panner window
3. Adjust the panning settings. For more information, see Using the Surround Panner window on page 180.
4. Close the Surround Panner window.
Tip: You can also use the surround panner in the track
header to pan your track.
WORKING WITH 5.1 SURROUND
CHP. 11
179
Panning mixer controls
You may choose to route tracks to busses or other mixer controls (such as assignable effect chains) and pan
them as a group rather than panning each track individually.
Note: When you route a track to a bus, stereo (twochannel) output is sent to the mixer control and the mixer
control sends 5.1 (six-channel) output to the Surround
Master bus.
1. Add a bus or assignable effect chain to the project. For more information, see Using the Mixer on page 143.
2. Route tracks to the bus or assignable effect chain. For more information, see Using the Mixer on page 143.
3. Click the Automation Settings button ( ) on the mixer control you want to pan and verify Show
Automation Controls
is not selected.
4. Double-click the surround panner on the mixer control to display the Surround Panner window.
Double-click to display
the Surround
Panner window
5. Adjust the panning settings. For more information, see Using the Surround Panner window on page 180.
6. Close the Surround Panner window.
Tip: You can also use the surround panner on the mixer
control to pan your track.
CHP. 11
WORKING WITH 5.1 SURROUND
180
Using the Surround Panner window
Whether you’re adjusting track panning or mixer control panning, you use the same controls in the
Surround Panner window.
View the Surround Panner window by double-clicking a surround panner on a track header or mixer control.
Once the Surround Panner window is open, you can dock it in the workspace. For more information, see
Window docking area and floating window docks on page 21.
Tip: You can also choose Surround Panner from the View
menu to display the Surround Panner window. Once the
Surround Panner window is displayed, double-click the
surround panner for a track or mixer control to view its pan
settings.
Toggle options for constraining
pan point movement
Assign track/bus to LFE channel
= Muted channel
= Active (included) channel
Pan point
Pan type indicator
1. Click the speaker icons to mute or include channels.
Muting a channel ensures that no audio bleeds through a channel. For example, you might want to mute
all but the center channel when you’re panning dialogue to the center channel.
Tip:
Ctrl
+ click a speaker icon to solo the channel.
2. Drag the pan point to position the sound within the sound field. For more information, see Moving the pan
point on page 181.
3. Click the center speaker icon to include the center channel and drag the Center fader to apply a gain to
the center channel.
Applying a gain to the center channel may make dialogue more present in the mix.
Note: When automating panning using keyframes, you
cannot automate the gain applied using the Center fader. For
more information, see Automating panning on page 182.
4. Drag the Smoothness slider to adjust the smoothness of the interpolation path between panning
keyframes. The smoothness setting appears only when you are automating panning using keyframes. For
more information, see Adjusting the Smoothness slider on page 184.
WORKING WITH 5.1 SURROUND
CHP. 11
181
Moving the pan point
A variety of methods are provided to help you position the pan point in the Surround Panner window.
Method
Double-click
Ctrl+drag
Shift+drag
Alt+drag
Shift+Alt+drag
Arrow keys
Ctrl+Arrow keys
Page Up/Page Down
Shift+Page Up/Page Down
Numeric keypad 1-9
Ctrl+Numeric keypad 1,3,7, 9
Mouse wheel
Shift+mouse wheel
Ctrl+mouse wheel
Ctrl+Shift+mouse wheel
Description
Click to toggle through three options for constraining pan point motion as
you drag: Move Freely ( ), Move Left/Right Only ( ), and Move Front/
Back Only ( ).
Double-clicking the pan point resets it to the center front of the surround
panner.
Double-clicking in the Surround Panner window moves the pan point to
the double-click location.
Makes fine adjustments.
Constrain m.otion to a line through the center of the surround panner
Constrains motion to a constant radius from the center of the surround
panner.
Constrains motion to the maximally inscribed circle (a constant radius at
the greatest possible distance from the center of the surround panner).
Moves front/back/left/right.
Makes fine adjustments.
Moves front/back.
Moves left/right.
Jumps to a corner, edge, or center of the surround panner.
Jumps to a location on the maximally inscribed circle (a constant radius at
the greatest possible distance from the center of the surround panner).
Moves front/back.
Moves left/right.
Makes fine front/back adjustments.
Makes fine left/right adjustments.
Choosing pan types
When you pan a track or mixer control, you can choose among several pan types to determine how to pan
the audio. The current pan type appears at the bottom of the Surround Panner window.
Right-click the Surround Panner window and choose a pan type from the shortcut menu.
• The Add Channels pan type makes the audio appear to move as a unit among the surround channels. As
you move the pan point toward a channel (speaker icon), more and more of the signal from the other
channels are folded into the channel you are panning towards, until at the extreme, all channels are fed
at full intensity into a single channel. This pan type uses a linear panning curve.
• The Balance pan type is most useful for adjusting the relative signal levels of the channels. In this pan
type, as you move the pan point from the center to a channel, the signal in the channel you are panning
towards starts at the base dB level (either 0 dB, -3 dB, or -6 dB) and increases to 0 dB. The signal in the
channel you are panning away from starts at a base dB level (either 0 dB, -3 dB, or -6 dB) and decays to
no signal level. For example, when you pan fully to the right, only the right channel is audible. This pan
type uses a linear panning curve.
• The Constant Power pan type maintains a constant volume as you move the pan point from channel to
channel. This pan type, which uses the constant-power panning curve, is most useful for panning
monaural source media.
• The Film pan type allows you to pan between pairs of speakers using a constant-power panning curve.
As you drag the pan point to the center speaker, the sound becomes diffused through the front and rear
speakers. When the track is panned fully to the center speaker, there is no sound from the front and rear
speakers.
CHP. 11
WORKING WITH 5.1 SURROUND
182
Using the grid to monitor panning
The grid in the Surround Panner window helps you to visualize how your panning will sound. The grid's
spacing changes to match the current pan type.
The vertical lines represent the points where the left-to-right signal ratio is 6 dB, 0 dB, and -6 dB
respectively: at the far-left line, the left channel is 6.0 dB louder than the right channel.
The horizontal lines represent the points where the front-to-rear signal ratio is 6 dB, 0 dB, and -6 dB
respectively. As you adjust the Center fader, the lines move forward or backward to compensate for the
center-channel gain.
Note: The grid assumes that you're using a correctly set-up
surround system (matched speakers and ideal positioning).
Variations in your monitoring system will cause
inconsistencies between the graph and perceived output.
Automating panning
You can automate panning on a track or mixer control by adding keyframes. Keyframes are similar to
envelope points in that they specify a settings state at a point in time. However, unlike envelope points,
keyframes appear just below the track to which they apply.
To add panning keyframes to a mixer control, you must first view the mixer control in track view. From the
View menu, choose Show Bus Tracks to view the bus track at the bottom of the track view. For more
information, see Viewing bus tracks on page 152.
Turning on panning keyframes
Before adding individual keyframes, you must first turn on the panning keyframes for the track or bus track.
1. Select the track or bus track for which you want to automate panning.
2. From the Insert menu, choose Audio Envelopes, and choose Surround Pan Keyframes from the submenu.
An additional row appears below the track with a single keyframe positioned at the beginning of the
project. This single keyframe represents the current panning settings for the track.
Keyframe
Adding panning keyframes
With panning keyframes turned on, you can add keyframes at any location along the track or bus track.
1. Position the cursor where you want to begin panning the track.
2. Click the Automation Settings button ( ) on the track you want to pan and select Show Automation
Controls.
3. Double-click the surround panner to display the Surround Panner window.
4. Adjust the panning settings. For more information, see Using the Surround Panner window on page 180.
Note: You cannot automate muting/including channels.
WORKING WITH 5.1 SURROUND
CHP. 11
183
5. Close the Surround Panner window.
A keyframe with the pan settings you created appears below the track at the cursor position.
New keyframe
Tip: You can also add keyframes by double-clicking the
keyframe row or by right-clicking the row and choosing Add
Point from the shortcut menu. Once you’ve added the
keyframe, double-click it to adjust panning settings in the
Surround Panner window.
As you add keyframes to a track or bus track, the Surround Panner window shows the path of the panning
keyframes. The Smoothness slider controls the smoothness of the interpolation path between the
keyframes. For more information, see Adjusting the Smoothness slider on page 184.
The Surround Panner window shows the path of the panning keyframes.
Working with keyframes
After you add keyframes, you can work with them in much the same way as envelope points. For more
information, see Composite level automation (video only) on page 124.
Moving keyframes
Drag a keyframe to a new position below its track.
Duplicating keyframes
Hold
Ctrl
and drag a keyframe to a new position below its track.
Editing keyframes
1. Double-click a keyframe to open the Surround Panner window.
2. Adjust the panning settings as desired and close the window.
CHP. 11
WORKING WITH 5.1 SURROUND
184
Changing keyframe interpolation curves
To control how the pan is interpolated between keyframes, right-click a keyframe and choose an
interpolation curve type from the shortcut menu. Keyframe interpolation curves control how the pan occurs
over time. The keyframe color changes according to the interpolation curve you have chosen.
Keyframe
Interpolation curve
Description
Hold
No interpolation takes place. The keyframe's settings are maintained until the next keyframe.
Linear
Panning is interpolated in a linear path.
Fast
Panning is interpolated in a fast logarithmic path.
Slow
Panning is interpolated in a slow logarithmic path.
Smooth
Panning is interpolated along a smooth, natural curve.
Adjusting the Smoothness slider
The Smoothness slider controls the perceived motion of sound within the sound field among three or more
keyframes. When you drag the Smoothness slider to 0, Vegas software interpolates the changes between
keyframes along a linear path. As you increase the smoothness value, the path between keyframes grows
more curved and smooth.
1. Double-click a keyframe. The Surround Panner window appears.
Smoothness slider
2. Drag the Smoothness slider to adjust the smoothness of the spatial interpolation path leading up to this
keyframe.
Three keyframes with
smoothness=100...
...and the same three keyframes
with smoothness=0.
Locking keyframes to events
If you want keyframes to move with an event when it is moved along the timeline, choose Lock Envelopes to
Events from the Options menu.
WORKING WITH 5.1 SURROUND
CHP. 11
185
Hiding keyframes
1. Select the track for which you want to hide keyframes.
2. From the View menu, choose Show Audio Envelopes, and choose Surround Pan Keyframes from the
submenu.
Deleting keyframes
Right-click a keyframe and choose Delete from the shortcut menu.
Rendering surround projects
5.1 surround projects are rendered to produce six monaural files (AIFF, WAV, W64, or PCA) or a single 5.1channel file (AC-3, WMA, and WMV). You can then use an authoring application to create the final
DVD-Video or 5.1-channel music project from the rendered files.
Note: Before rendering your surround project, check your
surround authoring application’s documentation to determine
its required audio format with respect to the LFE channel.
For more information, see Setting up surround projects on
page 174.
1. From the File menu, choose Render As. The Render As dialog appears.
2. From the Save in drop-down list, choose the drive and folder where the file will be saved.
3. Enter a new name for the project in the File name box.
4. From the Save as type drop-down list, choose the desired file format.
5. Choose 44,100 Hz, 16 Bit, Mono, PCM (all busses) from the Template drop-down list if you want to render six
monaural files, or choose an appropriate 5.1-channel template if the selected file type supports it.
6. If necessary, click Custom to customize the rendering settings. For more information, see Customizing the
rendering process on page 275.
7. Select the Render loop region only check box if you want to save only the portion of the project that is
contained within the loop region. Loop Playback does not need to be selected on the workspace for this
option to work.
8. If the selected file type supports it, you can select the Save project markers with media file check box to
include markers, regions, and command markers in the rendered media file. If the information cannot
save in your media file, it will create an .sfl file (using the same base name as your media file).
CHP. 11
WORKING WITH 5.1 SURROUND
186
9. Click Save.
Rendering the surround project SampleProject.wav...
...results in six WAV files.
Note: You can use an application such as the Sony Pictures
Digital 5.1 Surround Plug-In Pack to encode 5.1-channel
audio to AC-3 for use in DVD authoring.
Creating a DVD with DVD Architect Software
If you have DVD Architect™ software from Sony Pictures Digital, you can create menu-based DVDs, music
compilations, picture compilations, or a single-movie DVD that will play back automatically in your DVD
player.
DVD Architect software includes support for many file types and can convert your media to the formats
required for DVD as needed. However, for best performance (decreased disc preparation time and
recompression), render your files in the appropriate format.
MPEG-2 video files rendered with the DVD NTSC or DVD PAL templates will not need to be
recompressed. Audio will not need to be recompressed if rendered as stereo or surround AC-3 files with a
bitrate of less than 448 kbps or as stereo, 48-kHz, 16-bit, WAV (PCM) files.
Note: AC-3 audio may not play back on some PAL DVD
players. To ensure compatibility with PAL DVD players, use
48-kHz, 16-bit, WAV (PCM) files for audio.
WORKING WITH 5.1 SURROUND
CHP. 11
187
CHAPTER
12
Using Advanced
Video Features
While simple to learn, Vegas® software is a powerful application with many advanced features. This chapter
covers some of the advanced video features of this powerful tool.
Cropping video
With the Event/Pan Crop window, you can resize media in a video event or selectively crop media without
resizing. The Stretch to fill frame drop-down list allows you to resize the media to fill the output frame (when
Yes is selected), or to crop out a portion of the media without resizing (when No is selected).
When keyframes are added, you can use this window to create scrolling, panning, or zooming effects. For
more information, see Using keyframe animation on page 237.
Tip: If you apply plug-ins to a event with panning or
cropping, you can choose whether to process the plug-ins
before or after the panning or cropping. For more
information, see Processing plug-ins on events with panning
or cropping on page 211.
CHP. 12
USING ADVANCED VIDEO FEATURES
188
Open the Event Pan/Crop window by clicking the Event Pan/Crop button ( ) on the event.
Presets
Show Properties
Normal Edit Tool
Zoom Edit Tool
Enable Snapping
Lock Aspect Ratio
Rotation area
Size About Center
Move Freely or
Move in X or Y only
Selection area
Smoothness
Handles
Keyframe controller
Note: If any controls shown in the figure above are not
visible, enlarge the Event Pan/Crop window by dragging the
lower right corner until all controls are revealed.
The Smoothness control and the keyframe controller are used when adding keyframe animation to create
panning, zooming, or scrolling effects. For more information, see Animating event panning and cropping on page
241.
Cropping
Cropping is the process of removing the outside edges from an image or video, thereby re-framing the
subject. In the following example, the Event Pan/Crop window on the left has been used to create a selection
area around the subject, removing extraneous information from the outside of the video. This creates a zoom
effect that is similar to zooming in with a camcorder. The Video Preview window on the right displays the
event after cropping.
Crop Area
Preview
output
USING ADVANCED VIDEO FEATURES
CHP. 12
189
1. Click the Event Pan/Crop button (
) on the event.
2. Drag the handles (small boxes) located around the perimeter of the selection area to change the size.
3. Move the mouse to middle of the selection area until the cursor changes to a move icon (
). Drag the
selection area to reposition it.
Be aware of the following as you crop a video event:
•
•
•
•
To keep the selection area centered as you resize, select the Size About Center button ( ).
To maintain the proportion of the selection area, select the Lock Aspect Ratio button ( ).
To prevent distortion of the source media file, ensure that Maintain aspect ratio is is set to Yes.
To restore the selection area to full frame, right-click the image and choose Restore from the shortcut
menu.
• To set the selection area to a standard aspect ratio proportion, choose a preset from the Preset drop-down
list.
• When using photographs or other media that is not the same frame aspect as your video, you'll see black
bars on the sides or above and below the image. To create a crop rectangle that matches the project frame
aspect, right-click the image and choose Match Output Aspect from the shortcut menu.
The cropping occurs instantly and the results are updated in the Video Preview window. Cropping applies to
the entire event and can be animated with keyframes. For more information, see Using keyframe animation on
page 237.
Bézier masks
Use the controls in the Path heading on the left side of the Event Pan/Crop dialog to create masks using
Bézier curves. Each event can contain multiple Bézier masks.
When you use a single setting for the duration of an event, you are masking the contents of the event. You
can add keyframes to change the shape, size, or position of the mask to create an animated effect.
Tracks
Mask
Output
Creating a Bézier mask
1. From the Tools menu, choose Video, and choose Video Event Pan/Crop (or click the Event Pan/Crop button
(
) on the event). The Event Pan/Crop window is displayed.
2. Select the Mask row in the keyframe controller. When the Mask row is selected, Bézier curve-drawing
tools are displayed so you can create your mask.
3. Select the Mask check box to apply the mask so you can see the results of your masking in the Video
Preview window, or clear the check box to bypass the mask.
CHP. 12
USING ADVANCED VIDEO FEATURES
190
4. Select the anchor creation tool (
) on the left side of the Event Pan/Crop window and click in the
workspace to create a mask. See the following table for a description of the tool's behavior.
Tip: Right-click the curve, choose Initialize Tangents, and
choose a command from the submenu to smooth the path (or
portions of the path) to help you get started with your editing.
Editing the path
Use the tools on the left edge of the Event Pan/Crop window to edit your mask.
Icon
Tool
Description
Normal Edit Use to select and edit control points and tangents.
Click a point to select it, or drag to move the point.
Hold Ctrl while clicking to select/deselect multiple points.
Hold Alt and click a segment to select all points on the path. The pointer is displayed as a .
Hold Alt + Shift while clicking an anchor point to invert the selection state of each anchor on the path. The
pointer is displayed as a .
Drag a segment between two anchor points to modify the tangents on each side of the segment. The pointer is
displayed as a .
Hold Ctrl while clicking an existing point in a closed path to show or hide the tangents. The pointer is
displayed as a .
Drag a tangent control to manipulate the curve. Both sides of the tangent control move about the anchor point.
The pointer is displayed as a .
Hold Ctrl while dragging a tangent control to split the halves of the control and adjust them independently or
join the two halves of the control if the tangent was previously split.
Anchor
Creation
Use to create control points.
Click to create an anchor point. Drag before releasing the mouse button to modify the tangents of the new
point.
Click the first or last point of an open path to close the path. The tool is displayed as a
releasing the mouse button to move the entire path.
Click between two anchor points to create a new point. The tool is displayed as a
. Drag before
.
If all paths are closed, click to create a new path.
Anchor
Deletion
Use to remove control points.
Split
Tangent
Use to adjust control point tangents.
Click a point to display tangent controls, or click the center of a tangent control to reset it.
Drag center of the tangent control to manipulate the curve. Both sides of the tangent control move about the
anchor point. The pointer is displayed as a .
Drag the point at either end of the tangent control to manipulate that half of the curve. The pointer is displayed
as a .
Hold Shift while dragging a tangent control to split the halves of the control and adjust them independently or
join the two halves of the control if the tangent was previously split.
USING ADVANCED VIDEO FEATURES
CHP. 12
191
Setting path options
1. Select a path with the Normal Edit tool
.
2. Expand the Path heading on the left side of the window to set options for the selected path.
3. Choose a setting from the Mode drop-down list to choose the selected path's masking behavior.
• Positive — The area inside the path is visible in your video output.
• Negative — The area outside the path is visible in your video output. The area inside the path is
transparent.
• Disabled — The path is bypassed.
4. Select the Anti alias box and choose Yes or No from the drop-down list to indicate whether you want to
apply an anti alias filter to smooth the edges of the path.
5. Select the Opacity box and type a value in the box (or click the
to display a slider) to set the opacity of
the area inside the path.
6. Select the Feather type box and choose a setting from the drop-down list to fade the edges of the path.
• In — Feathering is applied to the inside edge of the path.
• Out — Feathering is applied to the outside edge of the path.
• Both — Feathering is applied to both sides of the path.
• None — No feathering is applied.
7. Select the Feather % box and type a value in the box (or click the
to display a slider) to set the amount
of feathering that is applied to the path.
Rotating
You can also rotate the selection area in the Event Pan/Crop
window. If you rotate the entire frame, the background
behind the video shows through. Position, size, and rotation
can all be animated with keyframes. For more information, see
Using keyframe animation on page 237.
1. Click the Event Pan/Crop button (
) on the event.
2. Resize and move the selection area as desired. For more
information, see Cropping on page 188.
3. Move the mouse outside the selection area until it
becomes a rotate icon ( ). Drag to rotate the selection
area. Alternately, you may enter precise rotation values in
the Angle (degrees) box.
CHP. 12
USING ADVANCED VIDEO FEATURES
192
Adding animation
Keyframe animation dramatically increases the variety of panning, zooming, and rotating effects you can
create using the Event Pan/Crop window. A later chapter provides examples of zooming in on a still image
and using pan-and-scan techniques. For more information, see Animating event panning and cropping on page
241.
Working with still images
You can use still images for a number of purposes including slide shows, overlay graphics, and titles. You can
insert still images into projects just like any other media files. The default length for a still image event when
it is first added to a track is five seconds (this is an adjustable preference), but this duration can be modified
by dragging the edges to create a still image event of any length. Images cannot be looped, but share many
characteristics with video files, including transparency. In addition, you can use many of the same tools on
image events that you can on video events, such as track motion, panning and cropping, and video effects
plug-ins. For more information, see Zooming in on a still image on page 241.
Creating still images for use in Vegas software
Many image formats can be imported: BMP, GIF, JPG, PNG, TIFF (requires QuickTime), PSD (flattened),
and TGA. If you have the option to create PNG files in your graphics software, this is the recommended file
type. PNG files use lossless compression and can also include alpha channel information, which is one of the
cleanest methods of creating transparency for overlays. an alpha channel can automatically be detected, if
present, in PNG files.
Note: The alpha channel may not be automatically detected
in TGA images. Right-click a TGA image in the Media Pool
or an event on the timeline and choose Properties. Then, in
the Media Properties dialog, select the type of alpha channel
from the list.
If you know your media file has an alpha channel and it is not detected properly, right-click the media file in
the Media Pool or an event on the timeline and choose Properties from the shortcut menu. Then, in the
Media tab, select the appropriate alpha channel type from the Alpha channel drop-down list. Premultiplied is
the recommended setting. You can save this setting so that the alpha channel is properly detected on other
media files with the same properties. For more information, see Setting custom stream properties on page 205.
USING ADVANCED VIDEO FEATURES
CHP. 12
193
Correcting images for DV pixel aspect ratios
For best results when importing still images, create images that account for the pixel aspect ratio of your
desired output format. Vegas software does a good job stretching images to fit the output format, but some
distortion occurs if the pixel aspect ratio for the source format does not match the destination format.
To calculate pixel aspect ratio correction, use this formula:
Output frame pixel width X Output format pixel aspect ratio = Still image pixel width
For example, this is the formula for NTSC DV format:
720 (DV screen frame pixel width) X .9091 (DV pixel aspect ratio)= 655 (pixel width)
Use these figures as a guide when creating images:
• Full frame, pixel-aspect-corrected still images for use in NTSC DV projects are 655x480.
• Full frame, pixel-aspect-corrected still images for use in PAL DV projects are 787x576.
Capturing a timeline snapshot
You can create still images of a single frame of your project. Once saved, the snapshot can be used just like
any other still image.
1. Position the cursor on the frame of the project you wish to capture as a still image.
2. Click the Save Snapshot to File button ( ) on the Video Preview window. The Image Filename dialog
appears.
3. Select a file format (JPEG or PNG) and enter a name for the new still image file.
4. Click Save. The image is added to the Media Pool.
CHP. 12
USING ADVANCED VIDEO FEATURES
194
Creating a slide show
A slide show composed of still images and an accompanying soundtrack can be an excellent way to show off
your pictures. You can insert multiple images to instantly create a slide show, complete with crossfades.
Importing high-resolution still images and using panning, cropping, and track motion tools can add interest
to an otherwise static slide show. For more information, see Cropping video on page 187 and Adding track motion
on page 245.
1. In the Options menu, verify that Automatic Crossfades is selected.
2. From the Options menu, choose Preferences. Adjust the following settings on the Editing tab:
• Enter the length for the still images in the New still image length box.
• Select Automatically overlap multiple selected media when added.
• Enter the length of the automatic overlap in the Amount box in the Cut-to-overlap conversion section of
the dialog.
3. Click OK. The Preferences dialog closes.
4. Select all of the images you want to use in the Explorer.
5. Right-click and drag these files to the timeline.
6. From the shortcut menu, choose Add Across Time.
If you want, you can replace the crossfades between images by dragging transitions to the crossfade regions at
a later time. For more information, see Using transition effects on page 231.
Note: When using photographs or other media that is not the
same frame aspect as your video, you'll see black bars on the
sides or above and below the image. To create a crop
rectangle that matches the project frame aspect, right-click the
image and choose Match Output Aspect from the shortcut
menu.
Creating titles
Most video projects include titles and credits. There are two ways to add text to your project. You can use the
titling engine (text generator) or you can use an external image-editing program to create titles. For more
information, see Using generated media on page 213.
USING ADVANCED VIDEO FEATURES
CHP. 12
195
Creating titles from images
While every software application is slightly different, the general procedure for creating titles with a
transparent background is as follows.
1. Start your image-editing application.
2. From the File menu, choose New. Set the dimensions of the new image to be the same as the frame size for
the project. For more information, see Correcting images for DV pixel aspect ratios on page 193. Make the
default canvas (background) color a solid color. The background will be transparent in the final image, so
any solid color works.
3. Select the Text tool and enter the text for your title.
Note: Size and position your titles carefully to fit within the
Title Safe Area or the titles may extend beyond the edges of
your television. For more information, see Identifying safe
areas on page 258.
4. From the File menu, choose Save As.
5. From the Save as type drop-down list, choose TGA, PNG, PSD or BMP (PNG is recommended). Make
sure that you save the alpha channel information (for TGA and PNG), which is used for transparency.
6. Enter a name and click Save.
7. Insert the image in a track just above the one with the video that will be in the background.
8. Click the Compositing Mode button (
) on the title track and choose Source Alpha if your image has an
alpha channel associated with it. If it does not, you may need to add a chroma key filter to the image and
key out the background. For more information, see Chroma keying on page 228.
The alpha channel is saved as a selection area in some
programs. If you cannot save the alpha channel, use a black
background and a mask will be created from the background.
The alpha channel of TGA images may not be detected
automatically. For more information, see Modifying media
file properties on page 204.
CHP. 12
USING ADVANCED VIDEO FEATURES
196
Fading titles
Another common technique is to fade a still title in and out. You can create this effect by using an opacity
envelope on a title event. For more information, see Using opacity envelopes on page 139.
You can also create multiple title images and then use crossfades or custom transitions between them. For
more information, see Using transition effects on page 231.
Adding closed captioning to Windows Media Video (WMV) files
Closed captioning makes your final video accessible to a wider audience. You can use text commands to add
captions line-by-line to a Windows Media® Video (WMV) file, or for longer projects, you can add
captioning from a script.
Adding closed captioning line-by-line
1. Position the cursor where you want the closed captioning
text to appear.
2. From the Insert menu, choose Command. The Command
Properties dialog appears.
3. From the Command drop-down list, choose Text.
4. In the Parameter box, enter the closed captioning text you
want to display.
5. Click OK.
6. Repeat steps 1-5 for each line of closed captioning text you want to add.
7. Render your file in Windows Media Video format. For more information, see Rendering a project on page 271.
Tip: Take steps to ensure that the closed captioning displays
when the video is played. For more information, see
Displaying closed captioning on page 198.
Adding closed captioning from a script
Using a script to generate closed captioning involves several steps. First, you must copy and paste the lines
from the script into a spreadsheet. You can create the spreadsheet from scratch (using the steps that follow)
or use the sample shell (Vegas Captioning Shell.txt) provided in the Samples folder on the Vegas software
CD. You can open this tab-delimited shell with a spreadsheet application or, in the absence of a spreadsheet
application, any text editor.
Once the spreadsheet is complete, you can copy and paste the lines into the Edit Details window. You can
set the position for each line of closed captioning during playback.
USING ADVANCED VIDEO FEATURES
CHP. 12
197
Creating a script spreadsheet
1. Create a four-column, tab-delimited spreadsheet.
2. In the first column, enter 00:00:00:00 in each of the cells as a placeholder. You will set the actual position
of each line during playback.
3. In the second column, enter TEXT in each of the cells to specify the command type.
4. In the third column, enter the text that you want to display as a closed caption. Enter each line in its own
cell.
Tip: If you have a script, you can copy and paste individual
lines into the cells.
5. In the fourth column, enter a label to identify your captions. An entry such as Line 001 can help you sort
the captions once you paste them into your Vegas project.
Note: The final caption displays in the Microsoft® Windows
Media® Player until the end of the video. To clear the final
caption sooner, add a final command with no text (as shown
above).
CHP. 12
USING ADVANCED VIDEO FEATURES
198
Copying and pasting captions into Vegas software
1. Select the cells in the spreadsheet and copy them.
2. Switch to Vegas software and choose Edit Details from the View menu. The Edit Details window appears.
3. From the Show drop-down list, choose Commands.
4. Right-click the gray box in the upper-left corner and choose Paste from the shortcut menu. The
spreadsheet data is pasted into the Edit Details window.
5. Click the column header for the Comments column. This sorts the captions by line number.
Right-click to paste the spreadsheet
contents into the Edit Details window.
Click the Comments column header
to sort the captions by line number.
Setting closed captioning timing
1. Position the cursor shortly before where you want the first caption to occur.
2. Select the row for the first caption in the Edit Details window.
3. Click the Play button (
) to start playback.
4. When playback reaches the place where the first caption should
occur, press Ctrl + K . The first caption is inserted at the cursor
position, updates the Position setting in the Edit Details window,
and selects the next caption.
5. Press
Ctrl + K
to insert each subsequent caption.
6. Render your file in Windows Media Video format. For more information, see Rendering a project on page 271.
Displaying closed captioning
You may use one of two methods for displaying the closed captioning when the video is played:
• Instruct your audience to turn on captioning. In Windows Media Player 7 and 8, choose Now Playing
Tools from the View menu and choose Captions from the submenu.
• Create an HTML page with the Windows Media Player embedded in it. See the online help for a
sample HTML page.
USING ADVANCED VIDEO FEATURES
CHP. 12
199
Resampling video
Resampling allows Vegas software to interpolate frames in an event when the frame rate of a media file is
lower than the project’s frame rate. With resampling, the intervening frames are interpolated from the
source frames, much like a crossfade between the original frames.
You can instruct Vegas software to resample the video of a single video event or to resample the entire
project at the time of final rendering:
• To resample an event, right-click a video event and choose Properties from the shortcut menu. In the
Video Event tab of the Properties dialog, choose the Smart resample, Force resample, or Disable resample radio
button. For more information, see Accessing event properties on page 136.
• To resample the project, choose Render As from the File menu. In the Render As dialog, click the Custom
button to access custom rendering settings. Select the Resample the frame rate of all video check box. For
more information, see Customizing the rendering process on page 275.
The original media file looks
something like this over
three frames.
To convert these three frames into nine frames for a faster frame rate, Vegas software must generate
the intervening frames.
Without resampling, the intervening frames are simply the previous frame repeated.
With resampling, the intervening frames are interpolated from the source frames.
It is similar to a crossfade effect between the original frames.
Resampling at either the event or project level perform the same function. There are few cases where
resampling may be particularly important:
• When the frame rate of the source media for an event is slower than the project’s frame rate. For example,
when you are using a source media file that has a 10 fps rate in a 29.97 fps rate project, resampling is
recommended.
• When changing the speed of a video event. For example, when slowing a clip to 30% using a velocity
envelope, resampling is recommended.
• When creating vertically scrolling titles.
CHP. 12
USING ADVANCED VIDEO FEATURES
200
When any of the above situations are true, there are only ten frames of source material for every second of
project time. When the project is rendered, there must be roughly thirty frames in each second. The frames
must be created between the source media frames, sometimes known as padding. The easiest way to do this is
to simply duplicate the previous frame. This can result in less than smooth video playback. Resampling
allows Vegas software to interpolate the intervening frames more smoothly.
Using Edit Decision Lists (EDL)
Vegas Edit Decision Lists (EDL) are text lists of all of the media files used, where they are placed, and how
they are trimmed. Vegas EDLs are not the same as those used in traditional linear editing suites and are not
intended as a project interchange for other editing applications.
Creating an EDL
1. From the File menu, choose Save As. The Save As dialog appears.
2. From the Save as type list choose EDL Text File (.txt).
3. Enter a name for the file and browse for a destination.
4. Click Save.
You can open EDLs created in another application in order to work with a rough copy of a project. For
example, you could create an EDL from a project in a third-party editing application and then import the
project into Vegas software via the EDL. For best results, save the EDL file and source media files in a single
folder before opening the EDL.
Opening an EDL
1. From the File menu, choose Open.
2. Locate the EDL file, select it, and click the Open button. If you are working on another project, you are
prompted to save your work before a new project is opened.
Note: EDLs do not contain any information about the
location of source media. Therefore, the EDL file should be
saved in the same directory as the source media. If it is not, or
if media is stored in a number of different locations, you are
prompted to relink these files when the EDL is imported.
Because of the significant differences between editing applications, third-party EDL files may not bring all of
the project data into Vegas software. Among other differences, events are inserted into the timeline on a
single track, all transition effects are replaced with crossfades, and only four audio tracks can be imported.
Working in DV format
Vegas software is optimized for DV editing. If your project is destined for tape or television, the DV format is
an excellent choice. The Sony Pictures Digital DV codec provides video with excellent image quality, even
over multiple generations, and provides audio that is better than CD-quality. If you start with well-shot DV
footage and stay within the DV format throughout the editing process, you can output broadcast-quality
video programs. This section provides guidelines for working in the DV format.
USING ADVANCED VIDEO FEATURES
CHP. 12
201
Selecting source media
Wherever possible, use DV source video clips. You can capture video from DV cameras and decks using an
IEEE-1394 card with no quality loss. You can also convert analog footage to DV using a media converter or
by passing the video through a DV camcorder.
Setting project properties
Set your project to match the DV format of your final output. This provides a true WYSIWYG view of the
project when you use an external monitor for previewing. This also prevents you from stretching output or
changing field order unnecessarily. You can match the project settings to a DV source file by using the Match
) in the Project Properties dialog. For more information, see Setting video properties
Media Settings button (
based on a media file on page 38 and Modifying project video properties on page 203.
Selecting templates
Always select a DV template when performing any of the following tasks in a DV project:
•
•
•
•
prerendering video (pg. 255)
rendering to a new track (pg. 116)
printing video to tape from the timeline (pg. 283)
rendering a project (pg. 271)
Rendering to a new track and printing video to tape from the timeline are only available in the full version of Vegas
software.
When prerendering video or rendering to a new track, a DV template not only optimizes playback
performance, but also helps you avoid needless recompression of DV footage. DV material is recompressed
only when necessary. Cuts-only DV sequences are not recompressed when you output the project to DV
from the timeline or in Video Capture.
The DV templates are designed to provide high quality, pixel aspect-correct, DV-compliant renders when
rendering a project or printing to tape from the timeline. Do not select an uncompressed setting when
choosing rendering or print-to-tape options. An uncompressed setting produces a large file that will not
print back to DV tape from Video Capture or from the timeline.
CHP. 12
USING ADVANCED VIDEO FEATURES
202
Eliminating out-of-range colors
The DV format allows color values to exceed broadcast
NTSC and PAL color level standards. If you have a
scene whose colors are too hot, or if you want to be sure
that your video stays within legal broadcast levels, apply
the Broadcast Colors effect to specific events or the
entire project.
Be aware that applying the Broadcast Colors effect
results in recompression of the video. As a result, render
times can increase significantly when the effect is
applied to the entire project.
USING ADVANCED VIDEO FEATURES
CHP. 12
203
Modifying video properties
Modifying project video properties
You can access project video properties by clicking the File menu and choosing Properties or by clicking the
Project Video Properties button ( ) on the Video Preview window. Many of these settings are identical to the
settings found on the Project tab of the Custom Template dialog. Final render properties set up in the Custom
Template dialog override the following Project Properties settings. For more information, see Video tab on page
276.
These properties control all of the default settings for your project. Without making any changes, these are
also the settings that are used to create a final rendered movie file.
• Select a preset template from the Template drop-down
list to automatically configure the remaining video
controls in this dialog. Many popular formats are
included, but you should consult your hardware manuals
if you have any questions. You can also save your own
custom template.
• Click the Match Media Settings button ( ) to set your
project properties to match the properties of a media file
of your choosing.
• The values in the Width and Height boxes set the frame
size of your final movie.
• Choose an option from the Field Order drop-down list to
set the field order. Choose None (Progressive) for video to
be viewed on a computer monitor. For DV output,
choose Lower Field First. If the output is jittery or shaky,
or your hardware’s manual specifies it, choose Upper Field
First. For more information, see Interlacing and field order
on page 322.
• Choose the pixel aspect ratio for the final movie’s destination from the Pixel aspect ratio drop-down list.
For more information, see Pixel Aspect Ratio on page 333.
• Choose a frame rate for the final movies destination from the Frame rate drop-down list. For more
information, see Frame Rate (Video) on page 331.
• Choose a rendering quality level from the Full resolution rendering quality drop-down list. For most projects,
Good is the recommended setting. If you have critical material where nothing but the highest quality
rendering will do, select Best. Please note that rendering time may increase dramatically as large amounts
of extra processing is required for the Best setting.
• Some effects and transitions can involve motion or animation. The Motion blur type drop-down list allows
you to select whether the frames are blurred slightly to create the illusion of motion on individual frames.
This can make computer generated animation appear more smooth and natural. Gaussian is the best
choice in most situations where blurring is required.
• The Deinterlace method drop-down list provides several options relating to interlacing. Source video from a
television is interlaced. When Vegas software renders effects, it needs to deinterlace the two fields that
make up a frame. You can choose the exact method used in this list. If you choose the None option, the
fields are left interlaced. If you choose the Blend option, contents are used from both fields, which is a
good choice for high-detail, low-motion material. If you choose the Interpolate option, a single field is used
at a time, which is good for low-detail, high-motion material.
• Choose the location for saving prerendered preview files in the Prerendered files folder box. For more
information, see Prerendering video on page 255.
• Select the Start all new projects with these settings check box to always use these settings for new projects.
CHP. 12
USING ADVANCED VIDEO FEATURES
204
Modifying media file properties
Vegas software tries to automatically detect the properties of your media files. In most cases, these properties
do not need to be modified, but there are times when you may need manual control over some of these
attributes, depending on the type of file and your specific hardware configuration.
1. Right-click a file in the Media Pool or an event on the timeline and, from the shortcut menu, choose
Properties.
2. Modify the parameters on the Media tab as needed. See Setting
general media properties on page 204 and Setting custom stream
properties on page 205.
3. Click OK.
Setting general media properties
The following general properties appear in the top of the Media
tab:
• The File name box displays the file name (cannot be edited).
• The Tape name box displays the name of the tape for media files
captured in Video Capture. You can edit the name here or in
the corresponding column in the Edit Details window.
Setting timecode media properties
These properties appear in the Timecode section of the Media tab:
• The Use timecode in file radio button is the default setting,
where the media file’s timecode is used.
• The Use custom timecode radio button allows you to set the
media file’s timecode manually.
• If you have selected the Use Custom timecode radio button, a drop-down list contains the available
timecode formats. SMPTE Drop (29.97 fps, Video) for example, is the timecode format for NTSC DV.
Changing the timecode format does not change the source media file in any way. It merely changes how
the file is measured in time. For more information, see Timecode on page 324.
USING ADVANCED VIDEO FEATURES
CHP. 12
205
Setting custom stream properties
Media files are opened with a set of default values based on the media file type. When you change any of the
values for a media file, these changes are saved for that file in the current project only. If you want to change
the default settings for a particular type of video file whenever that type of file is used, click the Save settings
to video profiles for future auto-detection button ( ) to the right of the Stream list. This adds an entry to a file
called vegas video profiles.ini that can be referenced for future use.
The following properties appear in the Stream properties section of the Media tab:
• If the file has more than one stream of the given type, you can choose the particular stream to work with
from the Stream drop-down list.
• The Attributes, Format, and Frame rate boxes display basic information about the file.
• Choose an option from the Field order drop-down list to control how the video field order is handled on a
television monitor. Choose None (Progressive) for video to be viewed on a computer monitor. For DV
output, choose Lower Field First. If the output is jittery or shaky, or your hardware’s manual specifies it,
choose Upper Field First. For more information, see Interlacing and field order on page 322.
• While you can choose a different value from the Pixel aspect ratio drop-down list, this value should always
match the source video’s properties.
• The option selected in the Alpha channel drop-down list determines how transparency is handled in a file.
The default alpha channel setting for most video files is None. PNG image files can have an alpha channel
that is automatically detected. The options in this drop-down list are described below.
Alpha channel option
Description
Undefined
Because the image format provides no alpha channel information, this
setting ignores any alpha channel information in the file.
Either there is no alpha channel or there is an alpha channel but it’s
completely opaque (solid).
Transparency information is maintained in only the alpha channel. Alpha
information must be applied to the RGB channels before compositing.
The standard method of handling alpha information. Transparency
information is maintained in the alpha and RGB channels, and the image is
ready for compositing. No RGB component exceeds the alpha value.
Similar to Premultiplied, but RGB components may exceed the alpha
value. This option is used mainly for images created by 3D applications
involving compositing of 3D images over a non-solid color image
background.
None
Straight (unmatted)
Premultiplied
Premultiplied (dirty)
Modifying output properties
You can adjust final output properties when you render your movie. For more information, see Creating custom
rendering settings for AVI files on page 276.
CHP. 12
USING ADVANCED VIDEO FEATURES
206
USING ADVANCED VIDEO FEATURES
CHP. 12
207
CHAPTER
13
Using Video FX,
Compositing, and
Masks
Video plug-ins in Vegas® software include effects and generators. Effects cover a broad range of electronic
modifications that can be used to improve substandard video or artistically enhance a production.
Generators can be used to create custom video events such as credit rolls or gradient overlays.
A variety of options are provided in compositing video and using masks. Compositing involves mixing visual
elements together into a final output. Multiple compositing modes are provided from which to choose.
Masks, which are used extensively in television and movies, are an important part of creating overlays.
Together, these professional tools can help you polish your productions.
Note: The compositing model in Vegas 5.0 software differs
significantly from the Vegas 4.0 model. To reproduce the
Vegas 4.0 parent/child masking behavior, set the compositing
mode of the parent track to Multiply, and then apply the
Mask Generator plug-in as a track effect on the parent track.
Using video effects
A great variety of video effects plug-ins are provided that are
ready for you to drag-and-drop onto your projects, media
files, tracks, and events. Previews of the different effect
presets appear in the Video FX window. In addition to the
presets, each plug-in has individual controls that allow you
to customize the effects in precise detail. You can also
animate video effects using keyframes. For more information,
see Using keyframe animation on page 237.
The mix of video effects applied at different levels (to
events, tracks, files, etc.) is important to the final mix of a
project. For more information, see Video signal flow on page 35.
In general, effects are applied in the following order:
•
•
•
•
CHP. 13
to files in the Media Pool
to events
to tracks
to the project (video output effects)
USING VIDEO FX, COMPOSITING, AND MASKS
208
Adding a video effects plug-in
You can apply video effects to events, tracks, files in the Media Pool, or to an entire project. You can add a
plug-in by selecting it in the Plug-In Chooser dialog, or you can drag-and-drop the plug-in from the Video
FX or Plug-Ins windows.
Adding a plug-in using the Plug-In Chooser
1. Click the Video FX button (
) in one of the following locations (see the illustration):
• Media FX are applied before a media file is inserted into an event on the timeline. Every occurrence of
this media file in a project has the effect applied to it.
• Event FX are applied to events on the timeline.
• Track FX are applied to the output of a particular track.
• Video Output FX are applied to the final output and affect every event in a project.
Track FX
Event FX
Media FX
Video Output FX
2. In the Plug-In Chooser dialog, select the effect that you would like to apply and click OK.
3. Modify the effect in the Video FX window and close the window when you are finished. For help on the
different controls in the Video FX window, click the Plug-In Help button (
USING VIDEO FX, COMPOSITING, AND MASKS
) to access online help.
CHP. 13
209
Adding a plug-in from the Video FX or Plug-In Manager window
1. If the Video FX or Plug-In Manager window is not currently visible, choose either Video FX or Plug-In
Manager from
the View menu to view the appropriate window.
2. Drag a plug-in from the window to one of the following locations:
• file in the Media Pool
• event
• track list or empty section of a track
• Video Preview window (video output effects)
3. Modify the effect in the Video FX window and close the window when you are finished. For help on the
different controls in the Video FX window, click the Plug-In Help button (
CHP. 13
) to access online help.
USING VIDEO FX, COMPOSITING, AND MASKS
210
Working with video effects plug-in chains
You can apply plug-ins in chains of two or more for even greater flexibility. A plug-in chain is a sequence of
all of the plug-ins to be applied to a media file, event, track, or project. The same plug-in can be added to a
chain more than once. Use the same steps to add additional plug-ins to a chain as you use to add a single
plug-in. For more information, see Adding a video effects plug-in on page 208.
After you apply a plug-in chain, the video is processed by each plug-in in order. The plug-ins are cumulative
so, in some cases, you may want to rearrange their order to achieve the desired effect.
To view and work with a plug-in chain, click the Video FX button (
or Video Preview window to open the Video FX window.
) for the event, track, Media Pool file,
Plug-in chain
Click a plug-in to
modify its settings
in the lower part of
the window.
Clear the check box
on a plug-in to
bypass the plug-in.
Drag a plug-in
to move it
within the chain.
Bypassing plug-ins
Video effects plug-ins can also be temporarily bypassed (turned off) by deselecting them (clearing the check
box on the plug-in). Since the effects are rendered very quickly in the Video Preview window, turning a
plug-in on and off allows you to see the results of the plug-in on your project.
Changing the plug-in order
Plug-in chain
Shift Plug-In Left/Right
Video effects plug-ins are applied in the order that
they appear in the chain. You can change this order
by dragging a plug-in to a new location in the chain.
Alternately, you can click the Plug-In Chain button
( ) in the Video FX window and reorder the plugins in the Plug-In Chooser dialog.
In the following illustration, you can see how the
order of plug-ins is important.
USING VIDEO FX, COMPOSITING, AND MASKS
CHP. 13
211
The goal of the above example is to use video effects plug-ins to create a very high-contrast mask out of a
video clip of fire. In the image on the left, a Brightness and Contrast plug-in is applied first and then a Black
and White plug-in. In the image on the right, the Black and White plug-in was applied first, removing the
color, and then the Brightness and Contrast plug-in was applied. The mask created by the second example is
much cleaner, even though all of the settings of the two plug-ins are identical.
Processing plug-ins on events with panning or cropping
When you add a plug-in to a video event that has panning or cropping applied to it, you have the choice of
processing the plug-in before or after the pan/crop. For example, you might want to apply a Radial Blur plugin before the video is cropped and then a Noise plug-in is applied after the cropping is complete.
You can choose whether an effect is applied pre- or post-pan/crop in the keyframe controller at the bottom
of the Video FX window. Click the Before/After Pan/Crop button to the left of the effect name to determine
whether the effect is processed before ( ) or after ( ) Vegas software pans or crops the event.
Here, the Deform plug-in is
applied before the pan/crop.
The Glow and Color Curves
plug-ins are applied after
the pan/crop.
Removing a plug-in
1. Click the FX button (
) on the event, track, Media Pool file, or Video Preview window that has the
plug-in applied to it. The Video FX window appears.
2. Click the plug-in that you want to remove.
3. Click the Remove Selected Plug-In button.
CHP. 13
USING VIDEO FX, COMPOSITING, AND MASKS
212
Modifying a video effects plug-in
Video effects plug-ins are highly customizable. You can select from a variety of presets or adjust the settings
for custom effects. You can also save custom settings to be used again as a new preset.
1. Click the FX button (
) on the event, track, Media Pool file, or Video Preview window that has the
plug-in applied to it. The Video FX window appears.
2. Select a preset from the Preset drop-down list or adjust the parameters as needed. For help on the different
controls in the Video FX window, click the Plug-In Help button (
) to access online help.
Changes you make are automatically updated in the Video Preview window, using the current cursor
position as the example. To see the effect as applied to the video in motion, create a time selection (looped
region) and preview in loop playback.
Saving custom plug-in settings as a preset
1. Click the Preset text box. The name of the current preset is highlighted.
2. Type a new name for the preset and click the Save button (
).
Tip: To use a saved custom preset, simply choose it from the
drop-down list.
Using keyframe animation with plug-ins
You can use keyframe animation to control a plug-in over time. Keyframes are added to the keyframe
controller at the bottom of the Video FX window. Since a number of plug-ins can be added to a single event,
track or project, click the plug-in’s button in the chain and modify the particular attributes and keyframe
controller for that plug-in. For more information, see Using keyframe animation on page 237 and Animating video
effects plug-ins on page 243.
USING VIDEO FX, COMPOSITING, AND MASKS
CHP. 13
213
Using generated media
Generated media plug-ins are a special class of plugin that creates virtual media files contained in
events on the timeline. These virtual files are stored
in the Media Pool, where their properties can be
viewed and modified.
Generated media provide an easy way to add text,
backgrounds, or test patterns to your project. You
can view the generators by choosing Media
Generators from the View menu to display the Media
Generators window.
Generated media events can be animated using
keyframes. For more information, see Using keyframe
animation on page 237 and Animating generated text on
page 244.
Generated media Description
Checkerboard
Color gradient
Credit roll
Noise texture
Solid color
Test pattern
Text
Creates checked and striped patterns.
Creates gradient colored events to be used behind overlays, as
masks, or for fades.
Creates events that format your text into credits. Text can be
formatted within the Video Event FX dialog in Vegas software, or
pasted into this dialog from a word processing processing
program.
Creates realistic-looking textures.
Creates solid colored events to be used behind overlays or for
fades.
Creates standard test patterns that can be used to calibrate your
video output stream. Many studios and broadcast facilities require
a color bar pattern at the beginning of your video so that
engineers can calibrate their equipment.
Creates events containing text for titles or simple credits. Text can
be formatted with color, shadows, and other effects.
Adding a generated media event
You can add a generated media event by choosing Generated Media from the Insert menu. This adds the
event at the cursor position in the selected track. However, perhaps the simplest way to add generated media
is through drag-and-drop.
1. From the View menu, choose Media Generators. The Media Generators window displays.
2. Drag a generator from the Media Generators window to the project. The mouse cursor changes to indicate
when you can drop the generator.
3. Modify the generator in the Video FX window and close the window when
you are finished. To modify settings at a later time, click the Generated Media
button ( ) on the event. For help on the different controls in the Video FX
window, click the Plug-In Help button ( ) to access online help.
Generated
Media
button
Tip: A generated media event is ten seconds long as a
default. However, you can trim the event to any length. For
more information, see Trimming an event on page 67.
CHP. 13
USING VIDEO FX, COMPOSITING, AND MASKS
214
Duplicating a generated media event
Once you have added a generated media event and modified its settings, you can duplicate it. For more
information, see Duplicating events on page 67.
When you duplicate a generated media event, you have two options:
• Select the Create a new copy of the source media radio button if
you want the new event to be modified on its own. The new
event is completely independent of the original event.
• Select the Create a reference to the original media radio button
to keep the new event linked to the original generated media
event. Any change to either event is mirrored in the other.
Compositing
Compositing is the process of mixing visual elements together into a final output. In Vegas software, this
means mixing tracks together vertically. Masks, generated text, and chroma keying all involve compositing.
Understanding how compositing works is important to understanding these and many other video track
mixing techniques.
Understanding the parent/child track relationship
The key to understanding overlays, masks, transparency, and compositing is to
understand the parent/child relationship between tracks. In general terms, the
parent track is the highest track in a group of tracks (often only two) and the
behavior of the child tracks (i.e., how they are composited together) is
determined by the parent track.
You can also produce complex compositing by creating nested parent/child
groups with compositing parents and children at various levels.
When you have multiple levels of parent and child tracks, clicking the Make
Compositing Child button ( ) moves the track in one level and clicking the
Make Compositing Parent button ( ) moves out one level.
Hold Ctrl while clicking the Make Compositing Child button to move a track
and all its child tracks in one level.
The following three examples demonstrate different compositing relationships.
The first example shows two independent tracks. The top track contains a
generated text event that has a transparent background. The second track
therefore shows through the transparent areas in the Video Preview window.
Since the second track does not have any transparent areas, any tracks below it
would be completely obscured.
USING VIDEO FX, COMPOSITING, AND MASKS
CHP. 13
215
In the second example, track two is the child track of track one (the parent track), and the compositing
mode of track one is set to Mask. This parent/child relationship was set up by clicking the Make Compositing
Child button ( ) in the track list for track two. This makes the text in track one act as a mask over track two,
allowing the fire to show through the mask (i.e., the text). The region outside of the text is still transparent,
but there is nothing below these tracks, so it appears black.
Parent/child video track grouping using the Make Compositing Child button is only available in the full version of Vegas
software.
Parent track
Make Compositing
Child button
Child track
In the third example, a generated media event was added to the track below the first two tracks, which are
already paired in a parent/child relationship. The color gradient event in track three shows through the
transparent area of the top two paired tracks.
Selecting compositing modes
The Compositing Mode button ( ) determines how the
transparency in a video track is generated. Since lower tracks
show through higher tracks, it is the compositing mode of the
higher track that determines how much of the lower track shows
though.
Click to choose a
compositing mode
Note: The compositing mode of the lowest video track is a
special case. Selecting a mode for the lowest track affects its
transparency against a black background.
To select a compositing mode, click the Compositing Mode button and choose a mode from the menu that
appears, or choose Custom to customize compositing with a 2-to-1 transform plug-in.
CHP. 13
USING VIDEO FX, COMPOSITING, AND MASKS
216
The sample below uses a generated text event that is partially transparent. For more information, see Using
generated media on page 213.
Set compositing
mode for
overlay track
Overlay track
Background track
The following table shows how these two sample tracks are blended using each of the compositing modes.
Compositing mode
Sample
Description
Add
Adds the overlay color values to the background.
Subtract
Subtracts the overlay color values from the background.
Multiply (Mask)
Multiplies the overlay color values by the background color values. This
makes overlay colors stronger and more present and results in a darker
video image. The opposite of this mode is Screen.
Source Alpha
Uses the alpha channel to determine transparency in the overlay.
This compositing mode is based on the alpha channel characteristics of an
event or media file. If no alpha channel is present in the overlay, the Source
Alpha compositing mode has no effect.
Cut
Cuts out the overlay color values from the background.
Screen
Multiplies the inverse of the overlay color values with the background color
values. This makes overlay colors weaker and less present and results in a
lighter video image. The opposite of this mode is Multiply.
USING VIDEO FX, COMPOSITING, AND MASKS
CHP. 13
217
Compositing mode
Sample
Description
Overlay
Heightens contrast by using Multiply mode on darker colors and Screen
mode on lighter colors.
Hard Light
Adds overlay colors as if the overlay were lit by a bright, focused spotlight.
Dodge
Brightens the background based on the overlay color values.
Burn
Darkens the background based on the overlay color values.
Darken
Compares the overlay and background pixel by pixel and selects the darker
color value for each pixel.
Lighten
Compares the overlay and background pixel by pixel and selects the lighter
color value for each pixel.
Difference
Compares the overlay and background pixel by pixel and subtracts the
darker color value from the lighter color to generate a new color value
(difference).
Difference Squared
Remaps color values along a parabolic curve. The color values of the layers
in the composite group are subtracted, and then the subtracted values are
squared.
The resulting image will have less extreme changes in color values as the
colors approach black (RGB 0,0,0) and more extreme changes in color
values as colors approach white (RGB 255,255,255).
Adjusting opacity with the composite level slider
You can precisely control the transparency or blending of the overlay with the
composite level slider. Left is transparent and right is 100% opaque. You can
also double-click the current value to enter a specific numeric percentage.
Composite level slider
CHP. 13
USING VIDEO FX, COMPOSITING, AND MASKS
218
Using a 2-to-1 transform plug-in to customize compositing
Click the Parent Composite Mode ( ) or Composite Mode button and choose Custom from the menu to use
plug-ins to control how the parent track modifies the tracks in its composite group.
The included Displacement Map, Height Map, and Bump Map plug-ins can create interesting lens, mirror,
water, fire, and other light-bending effects. These plug-ins are explained below:
• Displacement Map: Uses the parent image as a guide to offset the pixels in the composited child tracks
along the horizontal and vertical axes. The X and Y offsets are independently encoded in the image color
channels.
• Height Map: Uses the parent image as a guide to offset the pixels in the composited child tracks. The
gradient of the image in the parent track is used to determine the amount of offset for the image displayed
at that location, much like how light bends through a lens.
• Bump Map: Uses the parent image as a guide to add texture and lighting to the composited child tracks.
The texture of the bump map is applied to the composited child tracks: light sections of the map represent
high areas, and dark sections represent low areas.
3D Compositing
With 3D compositing, you can move video tracks anywhere in space to simulate realistic motion and
lighting.
Single-track 3D motion
1. Click the Track Motion button (
) on the track that contains the overlay that you want to animate. The
Track Motion window is displayed.
2. From the Compositing Mode drop-down list, choose 3D Source Alpha.
3. Choose a setting from the Layout drop-down list to choose the workspace display that you want to use. The
Layout
setting allows you to see your track from various points of view.
USING VIDEO FX, COMPOSITING, AND MASKS
CHP. 13
219
4. Adjust the selection area to change the viewable area of the track and its position in space. Guides are
displayed in bold to indicate how the track will be moved or rotated:
Moving closer to or farther
from viewer. Drag across
corners to flip the track.
Dragging the track.
Rotating left to right
around the Y axis.
Rotating forward or
backward around the
X axis.
Rotating counterclockwise
around the Z axis.
5. Use the buttons at the top of the dialog to allow or prevent movement or scaling. For more information, see
Changing editing options on page 221.
Tip: Right-click the workspace to display a shortcut menu
that displays commands to restore, center, or flip the selection
box. You can also force the box to match the source media's
aspect ratio or your project's output aspect ratio. Matching
the output aspect ratio can prevent black bars from appearing
when you use source media (such as photographs) that does
not match your project's aspect ratio.
6. The 3D track motion occurs instantly, and the results are updated in the Video Preview window.
7. Use the keyframe controller at the bottom of the Track Motion window to establish distinct track motion
settings throughout the duration of the track.
During playback, immediate frames are interpolated to create smooth motion. Expand the Keyframe
interpolation heading on the left side of the window and drag the Smoothness slider to adjust the
interpolation. For more information, see Using keyframe animation on page 237.
CHP. 13
USING VIDEO FX, COMPOSITING, AND MASKS
220
Composited group 3D motion
1. Click the Make Compositing Child button ( ) on the tracks you want to
group to create a compositing group. For more information, see Understanding
the parent/child track relationship on page 214.
2. Click the Parent Composite Mode button ( ) on the parent track and choose
3D Source Alpha.
3. Click the Parent Motion button (
) on the parent track. The Track Motion
window is displayed.
Parent track motion affects the parent track and all child tracks.
In the sample track list, parent track motion on track 1 will affect tracks 1
through 6.
Parent track motion applied to track 4 will affect only tracks 4 through 6.
4. Choose a setting from the Layout drop-down list to choose the workspace
display you want to use. The Layout setting allows you to see your track from
various points of view.
5. Adjust the selection area to change the viewable area of the track and its
position in space. Guides are displayed in bold to indicate how the track will
be moved or rotated:
Moving closer to or farther
from viewer. Drag across
corners to flip the track.
Dragging the track.
Rotating left to right
around the Y axis.
Rotating forward or
backward around the
X axis.
Rotating counterclockwise
around the Z axis.
6. Use the buttons at the top of the dialog to allow or prevent movement or scaling. For more information, see
Changing editing options on page 221.
Tip: Right-click the workspace to display a shortcut menu that
displays commands to restore, center, or flip the selection box.
You can also force the box to match the source media's aspect
ratio or your project's output aspect ratio. Matching the output
aspect ratio can prevent black bars from appearing when you use
source media that does not match your project's aspect ratio.
7. The 3D track motion occurs instantly, and the results are updated in the Video Preview window.
8. Use the keyframe controller at the bottom of the Track Motion window to establish distinct track motion
settings throughout the duration of the track.
During playback, immediate frames are interpolated to create smooth motion. Expand the Keyframe
on the left side of the window and drag the Smoothness slider to adjust the
interpolation. For more information, see Using keyframe animation on page 237.
interpolation heading
USING VIDEO FX, COMPOSITING, AND MASKS
CHP. 13
221
Note: When you have a 2D track in the track list, tracks below
that track are rendered in 3D and then composited as a 2D image.
In the following examples, both text tracks have been rotated in 3D.
In the first example, the two tracks intersect along their rotation
axis. In the second example, adding a 2D track above the “cool”
track causes it to be rotated in 3D and composited as a 2D image so
the “hot” text is displayed above it without intersecting.
Changing editing options
Use the toolbar at the top of the Track Motion window to change your editing options.
Icon
Command
Description
Enable Rotation
Select this button if you want to be able to rotate, or spin, the video.
When the button is not selected, video is locked so you can move it along the X, Y, or Z axis, but the event will
not rotate.
Enable Snapping to Grid Select this button if you want your editing to snap to the grid.
Edit in Object Space
Select this button if you want to edit in the object's space rather than the camera's space.
For example, if a video object is rotated, its X axis may not correspond to the X axis of the of the Video Preview
window. Selecting the Edit in Object Space button in conjunction with the Prevent Movement buttons allows
you to move the object along its own X, Y, and Z axes.
Prevent Movement (X)
Select this button if you want to prevent horizontal movement of the track.
Prevent Movement (Y)
Select this button if you want to prevent vertical movement of the track.
Prevent Movement (Z)
Select this button if you want to prevent movement of the track along the Z axis (closer to or farther from the
viewer).
Lock Aspect Ratio
Select this button if you want the selection box to retain its aspect ratio during resizing.
Scale About Center
Select this button if you want the selection box to retain its center point when you resize the box by dragging
its edges.
When the button is not selected, the height and width can be resized independently.
When the button is not selected, the opposite side of the selection box will remain anchored when you drag the
edges to resize it.
CHP. 13
Prevent Scaling (X)
Select this button if you want to lock the horizontal dimension of the selection box.
Prevent Scaling (Y)
Select this button if you want to lock the vertical dimension of the selection box.
Prevent Scaling (Z)
Select this button if you want to lock the Z-axis dimension of the selection box.
USING VIDEO FX, COMPOSITING, AND MASKS
222
Creating masks
Masks are used to create overlays, limit the effects of a filter, and to create transparent titles. In their simplest
form, masks work by making a particular color in an image or video transparent. More complex effects can be
created with gradients (smoothly blending transparent areas together) and by altering the sensitivity of the
mask.
Parent/child video track grouping using the Make Compositing Child button is only available in the full version of Vegas
software.
Creating image masks
You can use media generated by Vegas software to create simple masks. You can also create masks from just
about any image file.
Masks created
using color
gradient
generated
media events
1. Create an image of a solid white circle on a black background in any paint program. This will be the mask.
2. Add the mask image file as an event into the top-most track on the timeline.
3. Insert a video event just below the mask track. This is the background video behind the mask and is the
event that is masked.
4. Click the Make Compositing Child button ( ) located in the track list of the background video (lower)
track. This makes the lower track the child of the mask track (the parent track).
In the following example, the white circle is a BMP image file. Black is 100% opaque and white is
completely transparent.
Compositing
Child indicator
Compositing
Child button
Masks can also be partially transparent. By using gradients and grayscale images, you can achieve smooth
blending. Black is still 100% transparent and white is opaque, but the grays in between are only partially
opaque.
USING VIDEO FX, COMPOSITING, AND MASKS
CHP. 13
223
The effects of the masks are very clear in these examples, but this is not how they would actually be used in a
real production. Masks are commonly used to isolate a portion of the video from an effect. Masks do not
need to be black and white, or grayscale, nor do they need to be still images.
Tip: It is best to use images that are the same size as your
project’s frame size. You may also need to change the pixel
aspect ratio of an image file to get it to display correctly. For
more information, see Correcting images for DV pixel aspect
ratios on page 193 and Modifying media file properties on
page 204.
CHP. 13
USING VIDEO FX, COMPOSITING, AND MASKS
224
Creating video masks
You can also use video files to create masks, although the process can be more complicated than using an
image as a mask. The key to any mask is contrast. You can increase the difference between the light and dark
areas of a video file using video effects plug-ins.
1. Insert the video that you want to use as a mask into a video track.
2. Drag a Black and White plug-in from the Video FX window to the event to remove the color. For more
information, see Adding a video effects plug-in on page 208.
3. Drag a Brightness and Contrast plug-in from the Video FX window to the event.
4. Adjust the Brightness and Contrast to create the
mask. Watch the Video Preview window for a realtime preview of the mask. Adjust the effect so that
parts of the video are completely black (opaque)
and other parts are completely white (transparent).
This can often mean increasing the contrast while
decreasing the brightness.
5. If necessary, mask areas can be inverted (reversing
the black and white areas) with an Invert plug-in or
by selecting the Invert check box in the Mask Generator window. For more information, see Using the Mask
Generator on page 226.
Original color event
Black and White
plug-in
Brightness and Contrast
plug-in
Invert plug-in
After you have created the mask, place it in the highest track. Add another video event to another track
below the mask and click the Make Compositing Child button ( ) on that track. Any video that appears in a
lower track below the Parent mask track and its Child shows through the areas outside of the mask. The
entire setup is pictured in the following illustration.
Mask track
(Parent)
Masked video
(Child)
Background
USING VIDEO FX, COMPOSITING, AND MASKS
CHP. 13
225
Fine-tuning masks
Depending on the source material, creating a clean mask can be a tricky exercise. There are a few tools and
tricks you can use to fine tune a mask.
• Solo the track: Click the Solo button ( ) in the track list to isolate the masked track. This allows you to
concentrate exclusively on the mask.
• Toggle effects: Turn individual plug-ins on and off to isolate
effects in a plug-in chain. Keep in mind that the order of the
plug-ins in the chain is important in determining the final
composited output.
• Isolate channels: Isolate individual color channels in the Video Preview
window by clicking the Overlays button (
). Click the arrow on the button to
select the specific channel to be isolated and whether to display this channel in
grayscale only. Then click the main button to toggle the channel display on and
off. The Alpha as Grayscale option isolates the alpha channel mask and displays
it in grayscale. For more information, see Understanding the Video Preview window
on page 253.
CHP. 13
USING VIDEO FX, COMPOSITING, AND MASKS
226
Using the Mask Generator
The Mask Generator is a plug-in that controls the transparency of events to be used as masks when you use
events that are not grayscale. Apply the plug-in to an event (or a track) in the same way as any other plug-in:
just drag-and-drop. The Mask Generator plug-in can be found in the Video FX window (from the View
menu, choose Video FX).
The Mask Generator and parent/child video track grouping is only available in the full version of Vegas software.
USING VIDEO FX, COMPOSITING, AND MASKS
CHP. 13
227
How the Mask Generator works
The following illustration demonstrates some of the effects of the Mask Generator. The background image is
the original mask. There are five ellipses on the mask: white, red, green, blue and an invisible alpha channel.
Note especially the checkered ellipse in the lower left of the mask; this is the alpha channel. You can base
the alpha channel on a color or define the alpha channel in a graphics program that supports alpha channel
creation. Masks with alpha channels must be saved in a format that supports this method of transparency,
such as PNG or TGA. As in this example, the alpha channel may be invisible in the actual mask.
Mask track
(Parent)
Luminance
Masked track
(Child)
Blue
The top-right example uses luminance to determine the transparency in the mask. The white area is
completely transparent. Since white is made up of 100% values of red, green, and blue (255,255, and 255),
those three colors are all 33% transparent as well. In the lower-right example, blue is the selected
transparent index. The blue area is 100% transparent and so are all areas that have a value of 255 for blue
(0,0,255), including white (255,255,255).
CHP. 13
USING VIDEO FX, COMPOSITING, AND MASKS
228
Chroma keying
Chroma keying or bluescreening is a special case of overlay transparency. A color key is a specific color or a
range of similar colors in an image that are made transparent, allowing a background video to show through.
The idea is to take a video subject and film it against a solid, uniform background color. It is critical that the
color be smooth and uniformly lit with no shadows, and that the color chosen for the background not be
used in the subject.
The most important factors in successful blue screening
happen during shooting, well before the footage is imported
into Vegas software. Compression of the source video is
also an important consideration. While almost all video is
compressed in some way, highly compressed video does not
key well because colors can be smeared together and edges
tend to not be very sharp.
If your source footage is good and the captured video file is
also of high quality, color keying is an easy process.
Magnified
area
Uncompressed video
1. Insert a video with a blue (or any solid colored)
background into a track. This is the overlay video.
Compressed video
2. Insert the background video that will show through the
blue areas into the next lower track.
Note: You do not need to set the lower track as a child track
when using the Chroma Keyer plug-in as you would with a
mask.
3. Click the overlay video (foreground, higher track) to select it.
4. Drag a Chroma Keyer plug-in from the Video FX window onto the overlay video. The Video Event FX
window displays.
5. Click the down arrow to the left of the Split Screen View button (
) on the Video Preview window and
choose FX Bypassed. This will bypass the effect of the Chroma Keyer plug-in until you are ready to view
the effect.
USING VIDEO FX, COMPOSITING, AND MASKS
CHP. 13
229
6. In the Video Event FX window, click the Eyedropper button
( ). The cursor changes to an eyedropper icon.
7. Draw (click and drag) a small rectangular selection area
around the color(s) to key out. Although you can select the
color range from just about anywhere, the Video Preview
window is the best location.
Note: Other effects that can change the color of the event
should be bypassed when using the Eyedropper tool.
8. Click the Split Screen View button (
) on the Video
Preview window to restore the video effects. The Video
Preview window shows the result of the Chroma Keyer
plug-in.
When a subject is
filmed against a solid colored background in a studio, you can key out
the background color using the Mask Generator or the Chroma Keyer
plug-in. You can select a wider range of colors using the Chroma
Keyer plug-in, making it the perfect tool for less-than-perfect blue
screens.
This procedure selects a small range of colors to use as a key. In the
example above, the blue sky around the dome is far from uniform and
it would be difficult to key it out with a traditional blue screen key.
The color is uniform enough, however, that a range of blues can be
selected directly from the preview image. Use the controls at the bottom of the dialog box to determine the
sensitivity of the colors selected. Since the filter selects a range of colors, it is a good idea to try to select a
relatively small range of similar colors. Drawing a color selection area that spans both blue and red colors
would make very large sections of an overlay transparent.
Tip: It is possible to use multiple Chroma Keyer plug-ins on
a single event, keying out the blues with one and the reds with
the other, without keying out any colors between blue and
red.
CHP. 13
USING VIDEO FX, COMPOSITING, AND MASKS
230
USING VIDEO FX, COMPOSITING, AND MASKS
CHP. 13
231
CHAPTER
14
Adding Video
Transitions and
Motion
Want something other than a cut or crossfade between video events? Vegas® software provides a wide
variety of transitions you can add to your project. This chapter also covers track motion and keyframe
animation, which allows you to automate video effects, media generators, cropping, panning, and more.
Understanding basic transitions
Transitions occur between two video events. Most professional productions, on television or on the big
screen, use only two types of transitions. The first is a simple cut, where one scene immediately cuts to the
other without delay or effects. The other is a fade, otherwise known as a crossfade or a dissolve.
Cuts
A cut is actually not a transition. Instead, the last frame from an event is immediately followed by the first
frame of the next event. This is what happens with two adjacent events on the timeline, either in the same
track or in different tracks. This can also happen when an event is punched into another (with fade edge
edits turned off).
Adjacent events
Events on different tracks
Punch-in events
Crossfades
You can fade one event out and fade into the next event by simply overlapping the two. The duration of the
transition is determined by the amount of overlap. For more information, see Crossfading events on page 75.
Using transition effects
Transition effects are more complex than a simple cut or crossfade. You can replace a crossfade with a
transition and then customize the transition to meet your needs.
CHP. 14
ADDING VIDEO TRANSITIONS AND MOTION
232
Adding a transition
1. Insert a video event onto the timeline.
2. Insert another event so that it overlaps the first to create an
automatic crossfade.
3. In the Transitions window, browse for a transition effect. If the
Transitions window is not visible, choose Transitions from the
View menu.
4. Drag the effect onto the crossfade between the two events.
Note: The duration of a transition is automatically
determined by the amount of overlap between the two events.
As with other events, you can control the precise duration of
a transition by dragging the edges in and out. You can also
slide a transition for more precise control. For more
information, see Sliding a crossfade on page 76.
The original crossfade...
...and the new transition effect.
Tip: Some transitions also have their own shortcut keys. On
the numeric keypad, press / to insert a crossfade, * to
insert a dissolve, and - to insert a linear wipe. Hold Ctrl
while pressing / to convert the transition to a cut at the
cursor position.
Adding a transition to the end of an event
Typically, a transition occurs between two events on a track, but you can also use
transitions to fade to and from the background, whether that is an underlying
image, video, or background color. For example, you can drag a Clock Wipe
transition to the end of a video event and have the wipe go from the video event to
black.
ADDING VIDEO TRANSITIONS AND MOTION
CHP. 14
233
Adding a transition to all selected events
If you tend to use the same transitions often, you can save yourself some time by adding a transition to all
selected events at once.
1. Select the events where you want to add the transition.
2. From the View menu, choose Transitions to display the
Transitions window.
3. Select a transition from the list on the left side of the window.
The thumbnail images on the right side of the window represent
each of the existing presets for the selected transition. Hover
your cursor over a preset to see an animated example.
4. After you've found the setting that you want to use, drag it to
the position where you want it to occur on the timeline.
5. The Video Event FX dialog is displayed to allow you to edit the
transitions settings, and a
is displayed in the timeline to
show you where the transition takes place. You can also click
this icon to edit the transition's settings.
Dropping on existing cuts, crossfades, or transitions
• If you drop the preset on an existing transition, only transitions within the selection will be changed. Cuts
and crossfades are preserved.
• If you drop the preset on an existing crossfade, only crossfades and transitions within the selection will be
changed. Cuts are preserved.
• If you drop the preset on an existing cut, all cuts, crossfades, and transitions within the selection will be
changed.
Dropping on event edges
• If you drop the preset on a transition that is at the beginning or end of an event (but does not span two
events), only single-event transitions that occur on the same end of the event within the selection will be
changed.
• If you drop the preset on an event fade-in or -out, event fade-ins/outs and single-event transitions that
occur on the same end of the event within the selection will be changed.
• If you drop the preset on an event edge with no fade, all other event edges, event fade-ins/outs, and singleevent transitions that occur on the same end of the event within the selection will be changed.
Note: To change the length of the transition for cuts that are
converted to transitions, use the Cut-to-overlap conversion
settings on the Editing tab of the Preferences dialog.
Adding a transition progress envelope
Normally, a transition progresses from 0 to 100% in a linear fashion over the length of the transition. A
transition progress envelope gives you complete control over a transition: you can hold, reverse, and repeat
individual transitions.
1. Right-click a transition.
2. From the shortcut menu, choose Insert/Remove Envelopes, and then choose Transition Progress from the
submenu. An envelope is added to your transition.
CHP. 14
ADDING VIDEO TRANSITIONS AND MOTION
234
3. Add points and adjust the fade curves as desired. For more information, see Using the Envelope Edit tool on
page 128.
In the following example, the transition starts, progresses to 50%, reverses direction, and then finishes.
Understanding track layers
If you want, you can view and modify transitions in an A/B roll
mode. Right-click the track header and choose Expand Track
Layers from the shortcut menu to expand the track to reveal
three layers within the main track. These layers are called the
A roll, the B roll, and the transition roll.
Transition direction arrow
A roll
Transition roll
B roll
The concept of an A/B roll is fundamentally different from the multitrack
philosophy. Every track is in some way mixed (composited) into the final
output in a multitrack system, but events are not mixed on the A/B roll.
Instead, either the A roll or the B roll is playing, with the two trading places
during a transition. You could mix the two for as long as you want with a
transition, but they do not blend without an intervening transition.
Transitions move from one roll and into the other. This could be from A to B
or from B to A. The direction of the transition is automatically set. The small
arrows on the side of the transition event indicate this direction.
As the sequence at the right
shows, the video output can shift from the A to the B and
back to A many times during a production, but there is only
one video output from any particular roll at a time. This
means that the A and B rolls are not composited.
Converting a cut to a transition
The transition between two events that are adjacent to each other on the same track is instantaneous and is
called a cut. However, if the first event is trimmed back from the end and the second event is trimmed back
from the beginning (in other words, both have enough media to overlap), you can transform the cut into a
transition effect using this extra media.
1. Right-click the line between two adjacent events at the cut position.
2. From the shortcut menu, choose Transition and then choose the transition that you want to insert (e.g.,
Insert Sony Iris).
You can also drag a transition to the cut from the Transitions window.
ADDING VIDEO TRANSITIONS AND MOTION
CHP. 14
235
The duration of the newly inserted transition event is determined by the Cut-to-overlap conversion time set in
the Editing tab of the Preferences dialog. To access this dialog, choose Preferences from the Options menu.
This event’s media is
longer than the trim.
After the conversion, both events are
longer and extend into the transition.
Cut
This event’s media extends
before the beginning.
Note: There must be enough media in the respective events
to cover the transition (e.g., the end of the first event must
not be the end of the media file).
Tip: You can also convert cuts between audio events to
crossfades. Click the cut and press / on the numeric keypad
to create a crossfade. There must be enough media on either
side of the cut to create the crossfade.
Converting a crossfade or transition to a cut
1. Click to position the cursor within the transition.
2. Hold
Ctrl
while pressing the
/
key on your numeric keypad.
The transition will convert to a cut, using the Cut-to-overlap conversion settings on the Editing tab of the
Preferences dialog to determine where the cut occurs.
Previewing a transition
The easiest way to preview a transition is to set the loop region to the duration of the transition and then
loop the playback. This allows you to adjust the transition while it is playing and make changes in real time.
1. Double-click the transition. This automatically creates a time selection equal to
the length of the transition.
2. Click the Loop Playback button (
) to turn loop playback on. The selection area
bar is dark blue when loop playback is turned on.
3. Click the Play button (
).
To preview complicated transitions, you may want to build a dynamic RAM preview
or prerender the effect. For more information, see Building dynamic RAM previews on
page 256 or Prerendering video on page 255.
CHP. 14
ADDING VIDEO TRANSITIONS AND MOTION
236
Modifying a transition
All of the transitions include several presets that create standard transitions. If a preset doesn’t meet your
needs, you can customize a transition to suit your taste.
Tip: You can also animate the parameters of a transition with
keyframes. For more information, see Using keyframe
animation on page 237.
1. Click the Transition Properties button
( ) on the transition or right-click the
transition and choose Transition
Properties from the shortcut menu. The
Video Event FX window appears.
2. Change the parameters. Changes
update in real time in the Video
Preview window. For help on the
different controls in the Video FX
window, click the Plug-In Help button
( ) to access online help.
Transition
parameters
Saving custom settings as a preset
After you modify a transition, you can save
your settings as a preset for use at a later
time. You can apply presets by choosing
them from the Preset drop-down list.
Keyframe
controller
1. Modify the settings in the window to
create your desired transition effect. For
help on the different controls in the
window, click the Plug-In Help button ( ) to access online help.
2. Click the name in the Preset drop-down list. The current text is highlighted.
3. Enter a name for the new preset.
4. Click the Save Preset button (
).
You can save any additional changes to the custom preset by clicking the Save Preset button.
ADDING VIDEO TRANSITIONS AND MOTION
CHP. 14
237
Using keyframe animation
Keyframe animation is a technique that computer artists
use to quickly make complex animated sequences.
Instead of drawing every frame of a title scrolling in from
top to bottom by hand, an animator simply has to set a
starting and ending position for the animation and let the
computer interpolate the intermediate frames. The
animation pictured on the right has three keyframes: a
starting, middle, and ending keyframe. More complex
animations use more keyframes.
While keyframing motion may be the most obvious use
for keyframe animations, just about any parameter of an
effect can be animated with keyframes. Keyframe
animation techniques are used in many areas, including
transition effects, video effects, event panning and
cropping, generated media, and track motion. You can
animate color, brightness, transparency, motion, size,
perspective, and many other parameters with keyframes.
These three frames show the progression
of a title across three keyframes.
Understanding the keyframe controller
The keyframe controller appears at the bottom of the Video FX window (used for transitions, effects, and
generated media), the Track Motion window, and the Event Pan/Crop window.
Cursor position
Keyframes
Each effect
in a video effects
chain can have
its own keyframes.
Delete
Create
Sync Cursor
First
Last
Previous
Next
The cursor position is marked by a flashing line on the controller. This position can also be automatically
updated on the timeline, with the Video Preview window also updating in real time to reflect changes. Click
the Sync Cursor button ( ) on the keyframe controller to sync the keyframe cursor with the timeline cursor.
CHP. 14
ADDING VIDEO TRANSITIONS AND MOTION
238
Adding keyframes
Every effect has a starting keyframe at the beginning (left side) of the keyframe controller. This sets the
initial parameters for the effect. In order to animate the effect, you must add another keyframe to the effect
and change some of the parameters. When you first add a new keyframe, it has the same settings (for the
transition, effect, pan/crop, etc.) as the first keyframe. You can then modify the settings of the new keyframe
to create the animation from the first keyframe settings to the second.
1. Click the keyframe controller timeline to move the cursor where you want to add a keyframe. The current
position is marked by a blinking cursor.
2. Click the Create Keyframe button (
).
3. Modify the settings in the window for the new keyframe as desired.
Tip: You can also add a new keyframe by positioning the
cursor in the keyframe controller and changing any
parameters in the window. A keyframe is added with the new
settings at the cursor position.
Deleting keyframes
1. Select a keyframe in the keyframe controller.
2. Click the Delete Keyframe button (
).
Navigating in the keyframe controller
Use the keyframe navigation buttons (First, Previous, Next, and Last) to quickly jump to a keyframe.
Alternately, press Ctrl + or Ctrl + to move to the previous or next keyframe.
Modifying keyframes
After you create your keyframes, you can move them, copy and paste them, and change the interpolation
curves between them.
Moving keyframes
You can move a keyframe within the keyframe controller by dragging it to a new position. For track-level
keyframes, you can also move the keyframes in the track view. For more information, see Working with
keyframes in track view on page 240.
Copying and pasting keyframes
Keyframes on the controller can be copied, pasted, and duplicated.
1. Right-click a keyframe.
2. From the shortcut menu, choose Copy.
3. Right-click the keyframe controller at the position where you want to paste the keyframe.
4. From the shortcut menu, choose Paste.
Duplicating keyframes
1. Right-click and drag a keyframe to a new position.
2. From the shortcut menu, choose Copy. A duplicate keyframe is created at the new position.
You can also duplicate a keyframe by holding the
ADDING VIDEO TRANSITIONS AND MOTION
Ctrl
key while dragging it.
CHP. 14
239
Changing the interpolation curve
The interpolation curve determines the rate at which Vegas software animates between two keyframe
settings. You can right-click a keyframe to choose a different shape for the interpolation curve. The shortcut
menu provides six options: Linear, Fast, Slow, Smooth, Sharp, and Hold. Selecting Hold from the shortcut
menu prevents any animation from being interpolated between two keyframes. The color of the keyframe
indicates which interpolation curve is being used.
Linear (gray)
Fast (green)
Slow (gold)
Smooth (lilac)
Sharp (pink)
Hold (red)
Changing the relative spacing of keyframes
You can change the relative positions of the keyframes as a group. This can be useful if you need to change
the overall length of an animated sequence or if you need to copy a set of keyframes to another event that
has a different duration than the original.
1. Click on the first keyframe, hold the
Shift
key, and click on the last keyframe in the sequence to select all
of the keyframes.
2. Hold
Alt
and drag the first or last keyframe to scale the keyframes.
When copying keyframes from longer events to shorter events, you must temporarily lengthen the duration
of the shorter event so that all of the keyframes appear on the keyframe controller. Once you have pasted the
keyframes, you can rescale the keyframes using the above procedure, and then resize the event to its original
length.
CHP. 14
ADDING VIDEO TRANSITIONS AND MOTION
240
Working with keyframes in track view
You can move and modify track keyframes in track view. These keyframes are used in the following three
track-level effects:
• Track effects plug-in (pg. 208)
• Track motion (pg. 245)
• Mask generator plug-in on a parent compositing track (pg. 226)
Viewing and moving track keyframes
Once you have added keyframes to one of these track-level effects, the track keyframes appear at the bottom
of the track on the timeline. Click the Expand Track Keyframes button ( ) to view the keyframes.
You can drag a keyframe on the track in the same way you would in the keyframe controller. To move several
keyframes at once, use the Envelope Edit tool ( ) to select and drag multiple keyframes.
Expand Track Keyframes button
With track keyframes
collapsed, keyframes
are minimized.
Keyframe
Collapse Track Keyframes button
With track keyframes
expanded, each
set of keyframes
displays. You can
move any keyframe
by dragging it to a
new position.
Keyframe
Tip: You can use ripple editing to automatically move track
keyframes as you edit in the timeline. For more information,
see Applying post-edit ripples on page 73.
Adding new track keyframes
You can add new track keyframes to an existing track-level effect by double-clicking the track keyframe area.
Editing track keyframes
Double-click a track keyframe to open the associated window and adjust the settings. To change a keyframe
interpolation curve, right-click the keyframe and choose a curve type from the shortcut menu.
Locking track keyframes to events
When track keyframes are locked, you can move events along the track and the keyframes move along with
them. Only keyframes that occur within the selected events move.
Select the Lock Envelopes to Events button (
) to lock track keyframes to the events on the track.
Hiding track keyframes
If track view becomes too cluttered, you can hide track keyframes from view. From the View menu, choose
Show Video Envelopes, and choose Track Keyframes from the submenu to hide track keyframes.
ADDING VIDEO TRANSITIONS AND MOTION
CHP. 14
241
Sample uses for keyframe animation
The following section provides several examples of how keyframe animation can be used with features such
as event panning and cropping, video effects plug-ins, and generated text events.
Animating event panning and cropping
You can combine event panning and cropping tools with keyframe animation to create several special
effects. For more information, see Cropping video on page 187.
Zooming in on a still image
By using keyframe animation in the Event Pan/Crop window, you can zoom in and out on a still image. In
this example, four keyframes are used to zoom in on faces in an old photograph and zoom back out again. A
generated color gradient event masks the edges of the image during the zoom to enhance the effect. For more
information, see Using generated media on page 213.
1. Click the Event Pan/Crop button (
) on the still image event.
2. Click the keyframe controller to position the cursor for the second keyframe.
3. Click the Add Keyframe button (
). Resize and move the selection area to zoom in on a portion of the
image.
4. Click the keyframe controller to position the cursor for the third keyframe.
5. Click the Add Keyframe button (
). Resize and move the selection area to zoom in on a different portion
of the image.
6. Click in the keyframe controller near the end of the event to place the final keyframe.
7. Click the Add Keyframe button (
).
8. Right-click in the selection area and choose Restore from the shortcut menu. The selection area is zoomed
out to include the full image for the last keyframe.
CHP. 14
ADDING VIDEO TRANSITIONS AND MOTION
242
9. Preview the event in the Video Preview window. Adjust the settings in the Event Pan/Crop window as
you preview the zoom effect.
First keyframe
Second keyframe
Third keyframe
Last keyframe
Using pan-and-scan
Another way to use keyframe animation in the Event Pan/Crop window is panning, or pan-and-scan. Panand-scan is a technique commonly used when film is converted for television. Movie screens and film are
usually wider (~2.35:1) than television (~1.33:1). When you transfer the film to video, you have four
choices: (1) squash the film horizontally to fit, distorting it in the process; (2) crop it, possibly losing
information on the sides; (3) letter box it so the top and bottom have black areas and the picture is shorter
overall; and (4) pan-and-scan. Pan-and-scan is a variation of cropping, where someone goes through the
movie and moves the crop area back and forth to follow the action or subject.
1. Click the Event Pan/Crop button (
) on the event. The Event Pan/Crop window appears.
2. Confirm that the Stretch to fill frame check box is selected.
3. Right-click the selection area and choose Match Output Aspect from the shortcut menu.
4. Select a starting position, size, and angle of rotation for the crop rectangle. This is the start position (first
keyframe).
5. Click in the keyframe controller and press
6. Click the Create Keyframe button (
Ctrl + End
. This moves the cursor to the end of the event.
). A new keyframe appears in the keyframe controller at the end of
the event.
7. Change the position, size, and angle of rotation. This is the final position (last keyframe).
ADDING VIDEO TRANSITIONS AND MOTION
CHP. 14
243
8. Preview the event. Add and adjust keyframes as needed to create the desired effect. You can adjust both
temporal and spatial interpolation for each keyframe:
• Temporal interpolation (how the pan occurs over time) is controlled by the keyframe interpolation
curve type. Experiment with temporal interpolation by right-clicking a keyframe to change the
interpolation curve type (hold, linear, fast, slow, smooth) and previewing the result. For more
information, see Changing the interpolation curve on page 239.
• Spatial interpolation (how the pan occurs within the video image) is controlled by the Smoothness
setting of each keyframe. If you have three or more keyframes, the blue arc in the window shows the
path of the center of the frame during the panning. A smoothness value of 0 makes the movement
linear from one keyframe to the next. A higher smoothness value makes the path of the pan more
curved. Select a keyframe and change the Smoothness value to adjust spatial interpolation.
Animating video effects plug-ins
You can use keyframe animation to smoothly and gradually apply an effect to an event. This example uses
the Add Noise plug-in. The Add Noise plug-in adds static or noise to a video sequence. When added to a
simple solid-colored background with a monochrome setting and animated, a pattern is produced that is
similar to a television that is not tuned to any station.
1. Add an Add Noise plug-in to an event. For more information, see Adding a video effects plug-in on page 208.
The Video FX window appears with the keyframe controller at the bottom of the window.
2. Add two keyframes to the event for a total of three including the one at the beginning. New keyframe
attributes are copied from the previous keyframe.
3. Click the first keyframe to select it. Drag the Noise level slider to 0.
4. Click the last keyframe to select it. Drag the Noise level slider to 0.
5. Click the second keyframe to select it. From the Preset drop-down list, select Grainy.
6. Hold
Ctrl and drag the second keyframe to duplicate it. Position this new keyframe between the second
and final keyframes.
The effect is off at the first keyframe and smoothly transitions to a grainy effect at the second keyframe, at
which point the effect remains constant until the third keyframe. Then the effect gradually fades out until it
reaches a minimum value at the last keyframe.
Keyframe 1
Noise = None
Keyframes 2 and 3
Noise = Grainy
Keyframe 4
Noise = None
The results of gradually transitioning into an effect using keyframe animation.
CHP. 14
ADDING VIDEO TRANSITIONS AND MOTION
244
Animating generated text
You can add a generated text event to a project by dragging a text generator from the Media Generator
window. For more information, see Using generated media on page 213. You can then animate the text by adding
keyframes.
Not all attributes of generated text media can be animated using keyframes, however. You cannot, for
example, morph one text message into a different one. Some aspects can be easily and smoothly animated
using the keyframe controller, such as text, color, transparency, leading, tracking, and position.
Other aspects of generated text do not allow interpolated keyframe animation. For example, if you set the
text to “One” initially and then at five seconds change it to “Two”, the text will suddenly jump to the new
value at the five second keyframe. This behavior is different from the behavior of other keyframe animation
techniques.
In this example, keyframes are used to make a title appear one letter at a time across the screen.
1. Drag a text generator from the Media Generator window to the timeline.
2. Right-click the new event and choose Edit Generated Media.
3. Enter the first letter of the title, for example “T”.
4. Click the keyframe controller at the 1.000 second mark and enter the second letter, for example “y”. The
title now reads “Ty”. A new keyframe appears in the keyframe controller at the 1.000 second mark.
5. Proceed down the keyframe controller to 2.000 and enter the letter “p”.
6. Proceed down the keyframe controller repeating this process until the title is finished: “Typing”.
7. Preview the event in the Video Preview window. The word “Typing” appears one letter per second until
finished.
Text box
Keyframe
Controller
ADDING VIDEO TRANSITIONS AND MOTION
CHP. 14
245
Adding track motion
The Track Motion window (accessible by clicking the Track Motion button
on any video track) is used to
move a video track across a background. This background can be a solid color, another video event, or an
image. Picture-in-picture effects and scrolling title sequences are two simple cases where this tool is
important.
The gray area in the center of the window (covered by the blue/gray rectangle) represents the actual screen
or area that is visible in the movie. The area outside of the main screen, which is filled with dotted lines, is
the general workspace. The video you are moving can be positioned off of the visible screen and then
animated onto and across the screen. The dots are markers to help position the video window. If snapping is
enabled, these serve as snapping points.
The main window allows you to control the placement, size, and orientation of the overlay video through
time. The blue and gray rectangular overlay in the middle represents the video on the track. The selection
box in the workspace is used to represent the orientation of the track.
You can also use 3D compositing to move tracks through space. For more information, see 3D Compositing on
page 218.
Properties Controls
Track area
Keyframe controller
Controlling track motion
1. Click the Track Motion button (
) on the track that contains the overlay that you want to animate. The
Track Motion window is displayed.
2. Adjust the selection area to change the viewable area of the track and its position in space. Guides are
displayed in bold to indicate how the track will be moved or rotated:
Moving closer to or farther
from viewer. Drag across
corners to flip the track.
CHP. 14
Dragging the track.
Rotating counterclockwise
around the Z axis.
ADDING VIDEO TRANSITIONS AND MOTION
246
3. Use the buttons at the top of the dialog to allow or prevent movement or scaling. For more information, see
Changing editing options on page 246.
4. The track motion occurs instantly, and the results are updated in the Video Preview window.
5. Use the keyframe controller at the bottom of the Track Motion window to establish distinct track motion
settings throughout the duration of the track.
During playback, immediate frames are interpolated to create smooth motion. Expand the Keyframe
on the left side of the window and drag the Smoothness slider to adjust the
interpolation. For more information, see Using keyframe animation on page 237.
interpolation heading
Using the track motion shortcut menu
When you right-click anywhere in the Track Motion window, a shortcut menu
appears:
• Restore View returns the workspace display to its original state.
• Restore Box returns the overlay to its original state (size, rotation, and
position).
• Restore Rotation returns the overlay to its unrotated state.
• Restore Size returns the overlay to its original size.
• Restore Center moves the overlay to the center of the frame.
• Flip Horizontal flips the overlay backwards or left to right.
• Flip Vertical flips the overlay upside-down.
• Match Output Aspect sets the aspect ratio to the frame value.
• Make Square Aspect sets selection box to a square aspect.
Changing editing options
Use the toolbar at the top of the Track Motion window to change your editing options.
Icon
Command
Description
Enable Rotation
Select this button if you want to be able to rotate, or spin, the video.
When the button is not selected, video is locked so you can move it horizontally or vertically, but the track
cannot be rotated.
Enable Snapping to Grid Select this button if you want your editing to snap to the grid.
Edit in Object Space
Select this button if you want to edit in the object's space rather than the camera's space.
For example, if a track is rotated, its X axis may not correspond to the X axis of the of the Video Preview
window. Selecting the Edit in Object Space button in conjunction with the Prevent Movement buttons allows
you to move the object along its own X and Y axes.
Prevent Movement (X)
Select this button if you want to prevent horizontal movement of the track.
Prevent Movement (Y)
Select this button if you want to prevent vertical movement of the track.
Lock Aspect Ratio
Select this button if you want the selection box to retain its aspect ratio during resizing.
When the button is not selected, the height and width can be resized independently.
Scale About Center
Select this button if you want the selection box to retain its center point when you resize the box by dragging
its edges.
When the button is not selected, the opposite side of the selection box will remain anchored when you drag the
edges to resize it.
Prevent Scaling (X)
Select this button if you want to lock the horizontal dimension of the selection box.
Prevent Scaling (Y)
Select this button if you want to lock the vertical dimension of the selection box.
ADDING VIDEO TRANSITIONS AND MOTION
CHP. 14
247
Using keyframes in track motion
Keyframes are what create the motion in the track motion feature. You can create, modify, and remove
keyframes in the keyframe controller in the same way as with any other feature that uses keyframes. For more
information, see Using keyframe animation on page 237.
The keyframe controller in the Track Motion window has three attributes that can be animated: position,
shadow, and glow. Each effect can be animated independently. The shadow and glow effects can be turned
on and off. Each effect has its own set of controls that appear on the left-hand side of the window. You can
access these controls by clicking the respective item on the keyframe controller.
Tip: If any controls described in this section are not visible on
the screen, enlarge the Track Motion window by dragging the
lower right corner until all controls are revealed.
Position
You can control the position of the overlay in the main window by
dragging the selection box or editing the controls on the left side of
the window. However, the Position, Orientation, and Rotation controls in
the window are invaluable when you need precision in resizing,
moving, or rotating the overlay.
The Smoothness box allows you to modify the smoothness of the
interpolation curve among three or more keyframes.
You can use the Workspace controls to adjust the magnification and
viewable area of the workspace. Use the Snap Settings controls to adjust
the grid in the workspace.
2D Shadow
This creates a simple drop shadow that appears under the entire window or only under the opaque
(nontransparent) parts of the overlay. You can control the size and offset of the shadow as well as the shadow
color. A shadow is especially effective under a picture-in-picture window or to emphasize text and titles. Use
the Eyedropper tool to select a specific color from anywhere on the screen.
The shadow effect creates a drop shadow under an object, window, or title. A shadow is especially effective
under a picture-in-picture window.
1. Select the 2D Shadow row in the keyframe controller. When the 2D Shadow row is selected, shadow
controls are displayed in the Track Motion dialog.
Select the 2D Shadow check box to apply the shadow so you can see the results of your shadow in the
Video Preview window, or clear the check box to bypass the shadow.
2. Use the 2D Shadow controls on the left side of the window to set the color and appearance of the shadow:
• Blur % — type a number in the box or click the
button to display a slider you can use to soften the
edge of the shadow. Set to 0 for a hard edge, or increase the setting to feather the edge of the shadow.
CHP. 14
ADDING VIDEO TRANSITIONS AND MOTION
248
• Intensity — type a number in the box or click the button to display a slider you can use to establish
the transparency of the shadow's blurred edge. Decrease the setting for a translucent shadow, or increase
the setting for a more opaque shadow.
• Color — click the down arrow next to the color swatch to display a color picker. Use the sliders or edit
boxes in the color picker to set the shadow color, or use the eyedropper tool ( ) to sample a color from
your screen.
3. Adjust the size position of the shadow by dragging the box in the workspace or using the Position,
Orientation, and Rotation controls on the left side of the window. For more information about manipulating
the selection box, see Controlling track motion on page 245.
Cropped video
Shadow
4. To animate the shadow, click in the 2D Shadow row of the Keyframe Controller to set the cursor to a later
time and adjust the shadow settings.
2D Glow
Glow is a bright haze surrounding an overlay. In general, light colors are used for glow effects, but you can
emphasize bright text on complex backgrounds by using a very small black glow, with little or no feathering,
and 100% intensity.
1. Select the 2D Glow row in the keyframe controller. When the 2D Glow row is selected, glow controls are
displayed in the Track Motion dialog.
Select the 2D Glow check box to apply the glow so you can see the results of your shadow in the Video
Preview window, or clear the check box to bypass the glow.
ADDING VIDEO TRANSITIONS AND MOTION
CHP. 14
249
2. Use the 2D Glow controls on the left side of the window to set the color and appearance of the glow:
• Blur % — type a number in the box or click the
button to display a slider you can use to soften the
edge of the glow effect. Set to 0 for a hard edge, or increase the setting to feather the edge of the glow.
• Intensity — type a number in the box or click the button to display a slider you can use to establish
the transparency of the glow’s blurred edge. Decrease the setting for a translucent glow, or increase the
setting for a more opaque glow.
• Color — click the down arrow next to the color swatch to display a color picker. Use the sliders or edit
boxes in the color picker to set the glow color, or use the eyedropper tool ( ) to sample a color from
your screen.
3. Adjust the size position of the glow by dragging the box in the workspace or using the Position, Orientation,
and Rotation controls on the left side of the window. For more information about manipulating the
selection box, see Controlling track motion on page 245.
Cropped video
Glow
4. To animate the glow, click in the 2D Glow row of the Keyframe Controller to set the cursor to a later time
and adjust the glow settings.
CHP. 14
ADDING VIDEO TRANSITIONS AND MOTION
250
Creating a picture-in-picture effect
Picture-in-picture is an easy effect to reproduce using track motion.
1. Insert the background video into a track.
2. Insert the overlay video into another track just above the background video track.
3. Click the Track Motion button ( ) on the upper overlay track.
4. In the Track Motion window, position and resize the track area.
The illustration below shows some of the relevant parts of this procedure. Note the shadow cast by the
overlay video. This is added by selecting the 2D Shadow check box on the keyframe controller. The Video
Preview window displays the results.
Tip: While overlay picture-in-picture windows are often
completely opaque, you can fade them in and out using
opacity envelopes. For more information, see Using opacity
envelopes on page 139.
Animating the overlay
You can animate many aspects of an overlay using the keyframes at the bottom of the Track Motion window.
1. Insert a video event onto the timeline.
2. Click the Track Motion button ( ) in the track list.
3. In the Track Motion window, resize the overlay by dragging the handles at the edges of the overlay.
4. Drag the middle of the overlay to position it. This will be the size and position for the start of the
animation.
ADDING VIDEO TRANSITIONS AND MOTION
CHP. 14
251
5. Click the timeline of the keyframe controller at a later time to move the cursor to that position.
Tip: With the Sync Cursor button (
) enabled, you can
also navigate to a new position on the main timeline. The
cursor is automatically moved on the keyframe controller to
the same location.
6. Reposition the overlay. A new keyframe is automatically added to the keyframe controller at the new
cursor position.
When you preview the video, the position of the overlay interpolates between the two keyframes with a
smooth animation.
CHP. 14
ADDING VIDEO TRANSITIONS AND MOTION
252
ADDING VIDEO TRANSITIONS AND MOTION
CHP. 14
253
CHAPTER
15
Previewing and
Analyzing Video
As you work in Vegas® software, you can preview your video by using the Video Preview window or by
connecting to an external monitor. You can optimize previews by adjusting preview quality, prerendering
video, or building a dynamic RAM preview. The Video Preview window also provides features such as safe
area overlays, grid overlays, and isolated color channel displays to further enhance your productivity.
Dynamic RAM previews are only available in the full version of Vegas software.
Understanding the Video Preview window
The workspace for editing video can get quite crowded, so the Video Preview window can be configured in a
number of ways to make it more useful. The Video Preview window can be used on a separate monitor (if
your video hardware supports this feature), docked at the bottom of the workspace, or floated freely on the
screen.
Docked window
CHP. 15
Floating window
PREVIEWING AND ANALYZING VIDEO
254
Preview Quality
Overlays
Split-Screen View
Video Output FX
Save Snapshot to File
Project Video Properties
Preview on External Monitor
Copy Snapshot to Clipboard
Properties status bar
Button
Description
Project Video
Properties
Preview on External
Monitor
Video Output FX
Split-Screen View
Displays the project’s properties (pg. 203).
Preview Quality
Overlays
Copy Snapshot to
Clipboard
Save Snapshot to File
Sends the preview out to an external monitor. This only functions if your hardware supports this
feature (pg. 294).
Opens the Video Output FX window for adding video effects plug-ins for the entire project (pg. 207).
Turns split-screen previews on or off. Split-screen previews allow you to split the preview window so
you can see your affected and unaffected video or your video and the contents of your clipboard at the
same time.
Changes the preview resolution and display size. You can choose a lower resolution to drop fewer
frames during playback. Choose an Auto option to display the preview at the current Video Preview
window size; choose a Full option to display the preview at project size.
Note: If your project properties are set to either the Blend or Interpolate deinterlace method, you will
not see the effects of deinterlacing in Draft and Preview quality preview modes. Deinterlacing only
occurs in the Good and Best quality preview modes.
Options include safe areas, grids, and individual channels.
Copies the contents of the frame to the clipboard
Saves the contents of the preview window as a JPEG or PNG. The new image file is automatically
saved to the Media Pool (pg. 193).
Using the Video Preview window shortcut menu
Right-click the Video Preview window to adjust the following options:
• Choose Default Background, Black Background, or White Background to set the background color for the
window.
• Simulate Device Aspect Ratio displays the output in square pixels. This can prevent distortion of the
preview when using sources with rectangular pixels. This does not affect the final render.
• Show Toolbar toggles the toolbar at the top of the window.
• Show Status Bar toggles the information display at the bottom of the window.
PREVIEWING AND ANALYZING VIDEO
CHP. 15
255
Optimizing the Video Preview window
Timing and synchronization are critical aspects of any multimedia production. Because complex multimedia
projects are challenging for any computer, a number of tools are provided to maintain real-time playback
even though the computer may not be able to process the data quickly enough.
Reducing preview quality
You can adjust the resolution of the Video Preview window and the quality of the preview rendering in order
to improve playback. Lower-resolution previews are less clear but allow more frames to be displayed per
second. This may be particularly important with projects that use overlays, transitions, and effects. Click the
Preview Quality button to choose different preview resolutions.
Note: To view the effects of the deinterlacing method you
chose in your project properties, you will need to use the Good
or Best quality preview mode. The Draft and Preview quality
preview modes do not deinterlace.
Prerendering video
There are times where nothing but a full, high-quality preview will do. In these cases, Vegas software can
take the time necessary to selectively render only the portions of your project that need extra processing.
These sections are prerendered and short files are created to use for previews. The prerendering can take
anywhere from a few seconds to a few minutes, depending on the length and complexity of the video.
Once these temporary files have been created, they are used whenever those sections of the project are
played back, increasing playback quality and performance. As long as no changes are made to the events in
the prerendered sections, the newly created files continue to be used for previews, even if changes are made
to other sections of the project.
1. To prerender a portion of the project, create a selection containing the portion you want to prerender.
2. From the Tools menu, choose Selectively Prerender Video. The Prerender Video dialog appears.
3. Select the type of prerender file to create in the Prerender as drop-down list. Click Custom to configure any
custom compression options.
4. To preview just a portion of the project, verify that Render loop region only is selected. To create a
prerender of the entire project, clear this check box.
5. Click OK. A progress bar displays the progress of the render.
CHP. 15
PREVIEWING AND ANALYZING VIDEO
256
When prerendering is complete, green bars appear at the top of the timeline indicating the sections that
have been prerendered.
Prerendered sections
As a default, these preview files are saved when a project is closed. To delete these files when you close the
project, from the Options menu, choose Preferences and, on the General tab, clear the Save active previews on
project close check box.
You can set the location of these preview files by clicking the Properties button ( ) and choosing a
in the Project Properties dialog. Ideally, this folder should be on a different physical
drive from where Windows is installed. You can delete prerendered preview files from your hard disk by
choosing Clean Up Prerendered Video from the Tools menu.
Prerendered files folder
Note: Each prerendered section will consist of no more than
10 seconds (approximately 40 megabytes). Because selective
prerendering creates multiple files, minor editing on the
timeline will not invalidate all of your prerendered video—
only the sections you modify will need to be rerendered.
Building dynamic RAM previews
Dynamic RAM previews are only available in the full version of Vegas software.
Video frames are automatically dropped when previewing if the computer can’t keep up with processing
demands. This means that you may not be seeing all video frames as you preview your project. If you prefer
not to prerender your project, there is another option for improving previews of selected portions of a
project. A portion of your RAM is dedicated to cache video frames that Vegas software cannot render in real
time.
A cache of 16 MB is automatically maintained for dynamic RAM previews. To change the cache amount,
choose Preferences from the Options menu and change the Dynamic RAM Preview Max value on the Video tab.
Note: Although not all frames appear in previews of a
project, all frames are included when you render a file. For
more information, see Rendering a project on page 271.
You can make a time selection and add each frame in the selection to the cache. Once the frames are
cached, all video frames can display in a selection.
1. Select a region containing the frames you want to cache.
2. From the Tools menu, choose Build Dynamic RAM Preview.
Vegas software plays through the time selection and builds the cache frame by frame.
PREVIEWING AND ANALYZING VIDEO
CHP. 15
257
Using split-screen previewing
Click the Split-Screen View button (
) in the Video Preview window to turn split-screen previews on or off.
Split-screen previews allow you to split the Video Preview window so you can see your affected and
unaffected video or your video and the contents of the clipboard at the same time. Use split-screen previews
to fine-tune video effects or to match colors for color correction.
Note: The Video Preview window temporarily enters split-
screen preview mode when you slip-trim a video event. This
temporary split-screen mode allows you to see the event's first
and last frame as you trim. You can toggle this preview mode
by selecting or clearing the Show video event edge frames in
Video Preview window during edits check box on the General
tab of the Preferences dialog.
Previewing affected and unprocessed video
1. Click the down arrow next to the Split-Screen View button (
2. Select the Split-Screen View button (
) and choose FX Bypassed from the menu.
). The cursor is displayed as a
.
3. Choose a preset selection or drag in the Video Preview section to create a selection. This selection will
display the unprocessed video. In the following example, the Add Noise plug-in was applied to the event,
and the selection displays the original video.
Tip: Double-click in the Video Preview window to select the
full window, or drag again to replace the existing selection.
CHP. 15
PREVIEWING AND ANALYZING VIDEO
258
Showing the video at the cursor position and the contents of the clipboard
1. Position the cursor on the timeline and click the Copy Snapshot button (
) in the Video Preview window
to copy a frame to the clipboard.
2. Position the cursor at another point on the timeline.
3. Click the down arrow next to the Split-Screen View button (
4. Select the Split-Screen View button (
) and choose Clipboard from the menu.
).
5. Choose a preset selection or drag in the Video Preview section to create a selection. This selection will
display the contents of the clipboard.
Tip: Double-click in the Video Preview window to select the
full window, or drag again to replace the existing selection.
Changing the selection for displaying split-screen views
Click the down arrow next to the Split-Screen View button (
) and choose Select Right Half, Select Left Half,
or Select All to indicate which portion of the Video Preview window you want to use to display unprocessed
video or the contents of the clipboard.
When the Split-Screen View button ( ) is selected, the cursor is displayed as a
Video Preview window to create a custom selection.
. Drag a rectangle in the
Identifying safe areas
The Video Preview window displays the entire video frame data. However, most television monitors do not
display all of this data. Previewing the video on a television monitor is the only way to verify what frame
information will display. You should also note that individual television monitors vary in what they display.
While there is no substitute for previewing on a television, safe areas are a good method of estimating the
extent of the masking.
1. Click the down arrow next to the Overlays button (
)
and choose Safe Areas.
2. Click the Overlays button to toggle the safe areas display on
or off. The display shows two areas:
• The safe action area is the frame area that is visible on a
television screen.
• The safe title area is a suggested area to limit the extent of
titles. It is always smaller than the safe action area.
Tip: To customize safe area sizes, choose Preferences on the
Options menu, and on the Video tab, enter the Action safe
area and Title safe area values as a percent of the frame size.
For more information, see Video tab on page 289.
PREVIEWING AND ANALYZING VIDEO
Safe title
Safe action
CHP. 15
259
Viewing the grid
The Video Preview window can display vertical and horizontal lines over your video. You can use the grid to
help you align objects. To view the grid, click the down arrow next to the Overlays button (
) and choose
Grid.
Set the grid spacing using the Horizontal grid divisions and Vertical grid divisions settings on the Video tab in the
Preferences dialog.
Isolating color channels
The Video Preview window allows you to select a specific channel to be isolated and whether the channel
should be displayed in grayscale only. To display a channel, click the down arrow next to the Overlays button
(
) and choose a color channel.
Note: Use the Alpha as Grayscale setting to isolate the Alpha
channel mask and display it in grayscale.
Monitoring video with scopes
Video scopes are only available in the full version of Vegas software.
From the View menu, choose Video Scopes to toggle the display of the Video Scopes window.
Broadcast video uses a narrower range of color than the RGB you see on your computer. When you broadcast
a project that contains out-of-range colors, you can introduce image problems or even noise into the audio
stream.
Use the scopes to analyze the your video and adjust accordingly with the Brightness and Contrast, Broadcast
Colors, Color Corrector, Color Corrector (Secondary), and Levels plug-ins before rendering.
Choose a setting from the drop-down list to choose which scope you want to display.
Choose setting
Display video scopes settings
Update scopes
while playing
CHP. 15
PREVIEWING AND ANALYZING VIDEO
260
Note: If your video hardware will add a 7.5 IRE setup, click
the Settings button ( ) and select the 7.5 IRE Setup check
box in the Video Scopes Settings dialog. Black will be
displayed as 7.5 in the waveform monitor. If your video
hardware does not add a 7.5 setup, clear the check box, and
black will be displayed as 0.
Displaying chrominance using the vectorscope monitor
The vectorscope monitor in the Video Scopes window allows you to monitor the chrominance (color
content) of your video signal. The monitor plots hue and saturation on a color wheel.
The vectorscope displays targets for broadcast-legal saturations of red (R), magenta (Mg), blue (B), cyan
(Cy), green (G), and yellow (Yl). Individual colors in your video signal are displayed as dots in the
vectorscope. A dot's distance from the center of the scope represents its saturation, and the angle of the line
from the dot to the center of the scope represents its hue.
For example, if an image has a blue cast, the distribution of dots in the vectorscope will be concentrated
toward the blue portion of the color wheel. If the image includes out-of-range blue values, vectorscope
display will extend beyond the blue target.
You can use the vectorscope to calibrate color between scenes. Without calibration, you may see noticeable
color differences between scenes from multicamera shoots.
1. From the View menu, choose Video Scopes to toggle the display of the Video Scopes window.
2. Choose Vectorscope from the drop-down list.
3. Position the cursor in the frame you want to analyze. If the Update Scopes While Playing button (
) is
selected, you can monitor your video during playback.
4. The vectorscope monitor displays the chrominance of the video signal:
Frame
PREVIEWING AND ANALYZING VIDEO
Vectorscope display of frame
CHP. 15
261
5. Hover over a portion of the monitor to display the chroma value at the pointer position:
Chroma value
Displaying luminance using the waveform monitor
The waveform monitor in the Video Scopes window allows you to monitor the luminance (brightness or Y
component) of your video signal. The monitor plots luminance on the vertical axis and the width of the
current frame on the horizontal axis.
If you want to include chroma (color or C component) information in the waveform monitor, choose
Composite from the drop-down list at the top of the monitor window. When you choose Luminance, chroma
information is omitted.
1. From the View menu, choose Video Scopes to toggle the display of the Video Scopes window.
2. Choose Waveform from the drop-down list.
3. Position the cursor in the frame you want to analyze. If the Update Scopes While Playing button (
) is
selected, you can monitor the waveform during playback.
4. The waveform monitor displays the luminance of the video signal:
Frame
CHP. 15
Waveform display of frame
PREVIEWING AND ANALYZING VIDEO
262
5. Hover over a portion of the monitor to display the luma value at the pointer position:
Luma value
Displaying color levels and contrast using the histogram monitor
The histogram monitor in the Video Scopes window allows you to monitor color levels and contrast of your
video. Use the histogram before rendering your project to find and correct out-of-range values that could
cause problems on the destination playback device.
The bar graph plots the number of pixels that exist for each color intensity. For example, when using the
Blue setting, the vertical axis represents the number of pixels, and the horizontal axis represents the RGB
color range from 0,0,0 to 0,0,255.
To get acquainted with the histogram, use an external monitor to preview your video and watch the video
output and histogram as you use plug-ins to modify the colors.
1. From the View menu, choose Video Scopes to toggle the display of the Video Scopes window.
2. Choose Histogram from the drop-down list.
3. Choose a histogram type from the menu:
• Luminance: charts the luminance or brightness of colors in your video.
• Red: charts the red tones in your video.
• Green: charts the green tones in your video.
• Blue: charts the blue tones in your video.
• Alpha: charts the alpha channel (transparency) in your video.
• Luminance/R/G/B: stacks luminance and RGB charts.
4. Position the cursor in the frame you want to analyze. If the Update Scopes While Playing button (
) is
selected, you can monitor your video during playback.
5. Use the histogram to evaluate the colors in your video. The Mean value indicates the average intensity of
all pixels in the graph, and the Standard Deviation value indicates the average percentage by which pixels in
the graph vary from the Mean value.
PREVIEWING AND ANALYZING VIDEO
CHP. 15
263
6. Use plug-ins such as Brightness and Contrast, Broadcast Colors, and Levels to adjust the color. For more
information, see Using video effects on page 207.
Histogram display of frame
Frame
Graph
Mean and
standard
deviation
hues
Displaying RGB components with RGB parade monitor
The RGB parade monitor in the Video Scopes window displays waveforms for the red, green, and blue
components of your video signal. The monitor plots RGB values from 0-255 on the vertical axis and three
times on the horizontal axis.
The parade monitor helps you determine whether the individual RGB components of your video signal are
within limits and whether the total video signal is clipping.
1. From the View menu, choose Video Scopes to toggle the display of the Video Scopes window.
2. Choose RGB Parade from the drop-down list.
3. Position the cursor in the frame you want to analyze. If the Update Scopes While Playing button (
) is
selected, you can monitor your video during playback.
4. The waveform monitor displays the RGB values of the video signal. Hover over the monitor to display the
RGB value at the pointer position:
RGB value
CHP. 15
PREVIEWING AND ANALYZING VIDEO
264
Adjusting video scope settings
Click the Settings button ( ) in the Video Scopes window to set your display options. These options adjust
the display of data in the Video Scopes window and have no effect on your data.
7.5 IRE setup
If your video hardware will add a 7.5 IRE setup, you can configure the Video Scopes window so the display
will be consistent with an external scope connected to a device that adds 7.5 IRE setup.
NTSC video in the United States adds 7.5 IRE setup to convert black to 7.5 IRE. Consumer video hardware
typically does not add 7.5 IRE setup, and most professional hardware allows you to turn 7.5 IRE setup on or
off. PAL video and NTSC video in Japan do not add setup.
Refer to your video hardware documentation to determine whether your hardware adds 7.5 IRE setup.
1. Click the Settings button ( ) in the Video Scopes window.
2. Select the 7.5 IRE Setup check box in the Video Scopes Settings dialog.
Black will be displayed as 7.5 in the waveform monitor. If your video hardware does not add 7.5 setup,
clear the check box.
Studio RGB display
RGB values on your computer can range from 0 to 255. Studio RGB values range from 16 to 235. If you want
to limit the display of the Video Scopes window to studio RGB standards, perform the following steps:
1. Click the Settings button ( ) in the Video Scopes window.
2. Select the Studio RGB (16 to 235) check box in the Video Scopes Settings dialog.
Whether you need to use the Studio RGB (16 to 235) setting depends on the DV codec you will use to
render your video before printing to tape. Suggested settings follow. Refer to the codec's documentation to
determine whether the Studio RGB (16 to 235) check box should be selected.
Codec
Studio RGB Setting
Sony Pictures Digital DV
Microsoft® DV
Matrox® DV
MainConcept™ DV
Canopus®
Apple® QuickTime™ DV
On
Off
Off
Off
On
Off
If the Use Microsoft DV codec check box is selected on the General tab of the Preferences dialog, the Microsoft
DV codec will be used.
If the Ignore third-party DV codecs check box is selected and the Use Microsoft DV codec check box is cleared on
the General tab of the Preferences dialog, the Sony Pictures Digital DV codec will be used.
You can render using a third-party DV codec by choosing a specific codec from the Video format drop-down
list on the Video tab of the Custom Template dialog.
PREVIEWING AND ANALYZING VIDEO
CHP. 15
265
Previewing in a player
You can create a full-quality preview that automatically plays in the appropriate media player. You can
preview the entire project or select a portion.
1. To preview a portion of the project, create a selection containing the portion you want to preview.
2. From the Tools menu, choose Preview in Player.
3. Select the type of preview file to create. Select a
template or click Custom to configure any compression
options.
4. To preview just a portion of the project, verify that
is selected. To create a preview of
the entire project, clear this check box.
Render loop region only
5. Click OK.
A progress bar displays the progress of the render. When
finished, the file automatically plays in the appropriate
media player.
CHP. 15
PREVIEWING AND ANALYZING VIDEO
266
Using an external monitor
You can feed video directly from the timeline to a television monitor. With this feature, you can make your
final editing decisions on a broadcast monitor (which differs significantly from a computer monitor) before
printing the project to tape. To use an external monitor, you must have:
• OHCI-compliant IEEE-1394 DV card
• DV camcorder or DV-to-analog converter box
While configuring your computer for DV external monitor previewing is not difficult, the setup may require
some troubleshooting. The Vegas forum is a good resource for peer-to-peer system troubleshooting:
http://mediasoftware.sonypictures.com/forums
Setting up an external monitor
The diagram below shows the preferred setup for sending video from the timeline to an external television
monitor.
Computer
1394 card
Sound card
Video to
camcorder
Camcorder or
Media converter
Analog to
television
Television monitor
Audio to
speakers
Speakers
The video conforms to DV format and feeds through the 1394 card to the DV device (camcorder or DV-toanalog media converter). The DV device sends analog output to the television monitor.
Note: The DV device must support pass-through in order to
use an external monitor. Some PAL camcorders do not
support this feature.
Previewing audio
External monitor previewing differs in one respect from printing to tape from the timeline: no audio is sent
through the 1394 card. As shown in the illustration above, the audio is routed to the sound card and then on
to the mixer (if present) and speakers. This allows you to mix your audio on better speakers than are typically
found in television monitors.
Before printing to tape, you may wish to preview the audio through the television monitor speakers to ensure
a good TV mix. You can use the print-to-tape feature to send the full video and audio to the external
monitor. Follow the steps for printing to tape from the timeline (pg. 284) but do not set the camcorder to
record. Both the video and audio are sent through the 1394 card to the external monitor.
PREVIEWING AND ANALYZING VIDEO
CHP. 15
267
Optimizing preview quality
Keep in mind that complex effects and/or transitions may not play back in real time from the timeline. What
effects can and cannot be played back depends on the speed of your computer. You may want to prerender
more complex portions of a project. For more information, see Prerendering video on page 255.
Note: The compression settings used to create the
prerendered video must be identical to your captured files for
timeline playback to work.
Configuring an external monitor
1. Connect your camera to the IEEE-1394 card and turn it on in VTR mode.
2. Run Vegas software.
3. From the Options menu, choose Preferences.
4. Click the Video Device tab.
5. Select your device from the Device list (e.g., OHCI Compliant IEEE-1394/DV).
The output is directed to the camcorder through the IEEE-1394 card. You can preview this output on the
camcorder’s LCD screen or connect the camera to a television monitor to preview the output there. Once
you have verified that the external monitor settings are working correctly, you can use it to preview your
project.
Verifying the external monitor configuration
1. Click the Preview on External Monitor button (
) on the Video Preview window.
2. Open a properly formatted AVI (e.g., a DV AVI) file in the Trimmer window.
3. Click the Play button (
) in the Trimmer window to test the output.
This can be a complex hardware issue. You can find more detailed information at the Sony Pictures Digital
Media Software and Services Web site (http://www.sony.com/mediasoftware).
For more information, see Video device tab on page 294.
CHP. 15
PREVIEWING AND ANALYZING VIDEO
268
PREVIEWING AND ANALYZING VIDEO
CHP. 15
269
CHAPTER
16
Saving, Rendering,
and Printing Projects
Vegas® software allows you to save and render projects into many different multimedia formats. When you
render your Vegas project, the project itself is not altered, but rather can be rendered in any number of
different formats.
This chapter explains saving a project and using the Save As and Render As functions. In addition, you will
find reference information for the rendering options available. This chapter also describes the different
options for delivering your projects, such as printing to DV tape, burning a Video CD, or burning a
multimedia CD.
Using custom settings to render to streaming media formats is available only in the full version of Vegas software.
Printing to tape from the timeline and CD burning are only available in the full version of Vegas software.
Saving a project
A Vegas project is saved as a small VEG file. This file contains all of the information needed to recreate your
project: source file locations, trimming, track and bus plug-ins, volume and panning envelopes, bus
assignments, assignable effects settings, etc. This is not the same as creating a final media file, which is done
with the Render As command.
Note: The option is also provided of saving a project as an
Edit Decision List (EDL). For more information, see
Creating an EDL on page 200.
1. Click the Save button (
). The first time a project is
saved, the Save As dialog appears.
In subsequent saves, the Save As dialog is bypassed,
your existing file name is retained, and your project is
updated to include any changes.
2. Select Vegas Project File (.veg) from the Save as type list
(default).
3. Select the drive and folder where you want to store the
project.
4. Type the project name in the File name box.
5. Click Save.
CHP. 16
SAVING, RENDERING, AND PRINTING PROJECTS
270
Creating a copy of a project (using Save As...)
After you have been working with your project, you can use the Save As command in the File menu to create
a copy of the small project file with a different name. Since multimedia projects can be very complex, and
since Vegas project files are so small, saving a number of different versions of a project is a low-risk way to try
new techniques.
1. From the File menu, choose Save As. The Save As dialog appears.
2. Select the drive and folder where you want to store the project.
3. Type a new name in the File name box.
4. Click the Save button on the Save As dialog.
Saving a project with media
The option of saving both the project file (VEG) and the media files to a common location is also provided.
You can choose to save all media files along with the project file or allow Vegas software to consolidate and
trim the media for you. With this second option, media storage is optimized by saving only those portions of
files that are used in the project and by eliminating unused takes.
The option to consolidate and trim media when saving is only available in the full version of Vegas software.
Note: Peak files (.sfk) and audio proxy files (.sfap0) are not
saved with the project when Copy and trim media with project
is selected. Because these files can regenerate as needed, they
do not need to be archived. For more information, see Peak
File (.sfk) on page 333 or Audio proxy files (.sfap0) on page
322.
1. From the File menu, choose Save As. The Save As dialog appears.
2. Select the drive and folder where you want to store the project.
3. Type the project name in the File name box.
4. Select the Copy and trim media with project check box.
5. Click Save. The Copy Media Options dialog appears.
6. Select the appropriate option:
• Select the Copy all media radio button to copy all media files to the
same location as the Vegas project file.
• Select the Create trimmed copies of source media radio button to
optimize media storage by saving only those portions of media files
used in events and discarding unused takes. Audio files are saved as
Wave format if under 2 GB (as Wave64 if over 2 GB) and DV
video is saved as AVI. Non-DV video files are copied in full.
Enter an Extra head and tail (seconds) value to indicate how much time should be included before and after
the trimmed media. For example, if the project contains a 2-minute media file, but the event on the
timeline for that file lasts only from 1:00 to 1:20, you could enter 5 seconds in the Extra Head and Tail box
to have the media file saved from 0:55 to 1:25 (5 seconds added to the head and tail of the event).
Including this extra material allows space for future edits.
7. Click OK. The project file is saved and the related media files to the location you specified.
SAVING, RENDERING, AND PRINTING PROJECTS
CHP. 16
271
Autosaving a project
A backup copy of your project is automatically saved every five minutes. If your system crashes, you are
prompted to open the backup file the next time you start the program.
Backup files are saved in the location specified in the Temporary files folder box on the General tab of the
Preferences dialog. Files are saved with the .autosave.veg extension and are deleted when you close Vegas
software.
If you prefer not to autosave your project, you can clear the Enable autosave check box on the General tab of
the Preferences dialog.
Vegas software also creates .veg-bak files in your project folder when you save a project to allow you to return
to the project's last-saved state. Creation of .veg-bak files is independent of autosaving.
Rendering a project
Rendering refers to the process of converting a project into a single new multimedia file and formatting it for
the desired playback method: media player, Internet streaming media, CD-ROM, video tape, etc. The
project file is not overwritten, deleted, or altered during the rendering process. You can return to the original
project to make edits or adjustments and render it again later.
Rendering a video file can take quite a bit of time, depending on the complexity of your project, the speed of
your CPU, and the final format you have selected. For longer projects, you might want to plan to render your
movie overnight or when you are not using your computer.
The process for rendering a project is essentially the same, regardless of the final format of the rendered file.
Note: For specific information on 5.1 surround projects, see
Rendering surround projects on page 185.
1. From the File menu, choose Render As. The Render As dialog appears.
2. Select the drive and folder where you want to save the rendered file.
3. Type a new name in the File name box, if necessary.
4. In the Save as type drop-down list, choose the
appropriate format. For more information, see Selecting a
file format on page 272.
5. In the Template drop-down list, select the appropriate
template.
Tip: If your source media is in DV format, select a DV
template. For more information, see Working in DV format
on page 200.
You can customize the rendering settings by clicking
Custom. For more information, see Customizing the
rendering process on page 275.
CHP. 16
SAVING, RENDERING, AND PRINTING PROJECTS
272
6. Select any check boxes as needed:
• Select the Render loop region only check box to render only the portion of your project within the loop
selection.
• Select the Stretch video to fill output frame size (do not letterbox) check box to adjust the aspect ratio so the
output frame is filled on all edges. Clear the check box to maintain the current aspect ratio and add
black borders to fill the extra frame area (letterbox). This option is useful when the desired output
format does not match the frame aspect ratio of your project.
• Select the Save project markers in media file check box to save any regions and markers in your project to
the final rendered file.
• Select the Render using networked computers check box if you want to queue multiple renders on a single
computer or to harness the power of those other computers to speed up your rendering times. For more
information, see Rendering with networked computers on page 279.
7. Click Save. A small dialog box appears, displaying the progress of the render. You can cancel the
rendering process by clicking the Cancel button in the dialog box. You can also view the progress of the
render or cancel the render using the status bar in the lower-left corner of the window.
Selecting a file format
The following table describes the formats available for rendering your project:
Format Name
Extension Definition
Audio Interchange File Format
MPEG-1 and MPEG-2
.aif
.mpg
MPEG Layer 3
.mp3
OggVorbis
QuickTime™
RealMedia®
.ogg
.mov
.rm
Perfect Clarity Audio®
.pca
Wave64™
.w64
Video for Windows®
.avi
Wave (Microsoft)
Wave (Scott Studios)
Windows Media® Audio
.wav
.wav
.wma
Windows Media Format
.wmv
An audio file format developed by Apple®.
Some versions of Vegas software also support MPEG-1 and MPEG-2 file
creation through the use of MainConcept® MPEG technology (see notes
following table).
Compressed audio format. You may render up to 20 .mp3 files without
registering the optional plug-in.
A patent-free audio encoding and streaming technology.
Apple® QuickTime multimedia format.
The RealNetworks® standard for streaming media via the Web. This option
renders both audio and video into one file.
A proprietary format from Sony Pictures Digital that is compressed and
completely lossless (see notes following table).
A Sony Pictures Digital proprietary format that allows wave files that are
(practically) unrestricted by file size (see notes following table).
The standard video file format used on Microsoft® Windows®-based
computers. This option renders both audio and video into one file.
The standard audio file format used on Microsoft Windows-based computers.
Standard audio format used with Scott Studios systems.
The Microsoft audio-only format used to create files for streaming or
downloading via the Web.
The Microsoft standard used for streaming audio and video media via the
Web.
SAVING, RENDERING, AND PRINTING PROJECTS
CHP. 16
273
More about the MPEG format
MPEG renders can sometimes take more time than renders with some other formats. MPEG video files can
be played back on most computer systems. MPEG video files can also be burned to CDs or DVDs for
playback in standalone VCD, SCVD, and DVD players. Sony Pictures Digital cannot guarantee the
compatibility of MPEG files with VCD/DVD authoring software or VCD, SCVD, and DVD standalone
players. Consult your specific authoring software’s documentation for information on what constitutes a
valid file and then customize the MPEG rendering properties to match.
Note: For information on preparing files for DVD
Architect™ projects, please see the DVD Architect
documentation.
More about the Wave64 and Perfect Clarity Audio formats
The Wave64 (.w64) and Perfect Clarity Audio (.pca) formats are proprietary formats developed by Sony
Pictures Digital to work around some limitations inherent in other formats. Currently, neither is compatible
with many other applications and may not be playable in other media players, but both are excellent choices
for Sony Pictures Digital projects.
• Wave64 files work around the maximum file size limitation inherent in the WAV format. The Wave64
format has no maximum file size and is useful in long format productions.
• Perfect Clarity Audio is a compressed format that is completely lossless. Unlike MP3 and other highly
compressed formats which are lossy, 100% of the quality of your audio is maintained by using the PCA
format.
More about video formats
When you create a final movie, you will find that there are dozens of formats to choose from, each having
many customization options. The destination of your final movie is the most important factor in selecting a
format. Movies created for broadcast television must be of the highest quality, but for many other
destinations, such as a CD-ROM or the Internet, you may have to sacrifice some quality when you render
the file. Heavy compression may create visible artifacts in the video, such as when you create streaming
video for the Internet. Every case is different and it is necessary to experiment to obtain the best results.
VCR or television
If you are creating a movie that you want to send back out to a television, a VCR or a camcorder, there is
only one choice: use the same settings as the original video.
There is no way to improve upon the quality of your original video (as far as compression is concerned). If
you have captured your video at 640X480, at 24 fps in an MJPEG codec, then that is how you should set up
your final movie. This is the only way to maintain 100% quality. For more information, see Working in DV
format on page 200.
Computer
This can be the most complicated case because you have to decide exactly which computer it is going to be
played back on, how fast it is, what software is installed, and how you are going to get it there (e.g., burn to a
CD). Your biggest concern with creating a video file is compatibility. When you create a movie, you must
select a specific codec to compress the video. That same codec must then be used to view the movie. This is
not a problem if you are viewing the movie on your own computer, since the appropriate codec is already
installed. To ensure that your audience has the appropriate software, you should use a fairly universal codec.
Intel Indeo, Cinepak, and QuickTime (which is not a codec, but installs with a number of different codecs)
are all widely available.
CHP. 16
SAVING, RENDERING, AND PRINTING PROJECTS
274
Internet
When video on the Internet is discussed, people almost always mean streaming. There are two streaming
media formats that come with Vegas software: RealMedia and Windows Media Format. There is nothing
particularly magical about streaming video, and the three rules of creating video files for the Internet are as
follows: compress, compress, and compress. The smaller the file size the better, and this inevitably results in a
loss of quality. There are two main places where you can save space: frame dimensions and frame rate.
Typical Internet video files should be about 160X120 and should rarely exceed 320X240. This is not very
big, and video with lots of detail does not translate well to this frame size. The frame rate should also be as
low as possible, with 15 fps being a good maximum. Fast action, pans, and moving backgrounds (e.g., tree
leaves or ocean waves) do not compress well. Streaming media files must be placed on a special Internet
server in order to stream properly.
SAVING, RENDERING, AND PRINTING PROJECTS
CHP. 16
275
Customizing the rendering process
Every media file format has different variables and controls. You can use a template to automatically
configure a particular format for a particular destination.
You can also choose to create custom settings for your render by clicking Custom. Once you have customized
the settings, you can create your own template so that you can reuse the custom settings at a later time.
Selected rendering
format
Selected template
and description
Click Custom
to change
control settings
or create/delete
a template
Customizing the Render As settings
1. From the File menu, choose Render As.
2. In the Render As dialog, choose the format [e.g., Video for Windows (.avi)].
3. Click Custom. The Custom Template dialog appears.
Note: Built-in templates cannot be edited.
4. Adjust the settings in each of the tabs as desired.
Note: When determining bit rates, 1K=1024.
5. Click OK to close the Custom Template dialog.
6. Enter a name and location for the new file and click Save.
CHP. 16
SAVING, RENDERING, AND PRINTING PROJECTS
276
Saving custom settings as a template
You can save customized rendering settings for future use. One of the most important reasons to save a new
template is to save the specific compression codec used to create the final media file, since this is not
predetermined by the project properties.
1. Modify the parameters in the Custom Template dialog.
Note: When determining bit rates, 1K=1024.
2. In the Template drop-down list, enter a name for the new template.
Note: Built-in templates cannot be edited.
3. Click the Save Template button (
).
To use the new template in the future, choose it from the Template list in the Save As dialog.
Tip: To delete a template, select it from the drop-down list
and click the Delete button (
).
Creating custom rendering settings for AVI files
The options that appear in the Custom Template dialog depend on which format you choose for your
rendered file. This section provides descriptions of the Custom Template options for creating a Video for
Windows (AVI) file. For descriptions of the options used to customize other formats, use the What’s This
button ( ) in the specific Custom Template dialog for that format. For more information, see What’sThis? help
on page 17.
Some of the rendering settings are identical to your Project Properties and can be saved as a part of a project
template. Final render settings override Project Properties settings. For more information, see Modifying project
video properties on page 203.
The Custom Template dialog for rendering to an AVI file has three tabs: Project, Video, and Audio.
Project tab
Video rendering quality
Higher quality settings result in longer rendering times. Good is the default.
Video tab
Include video
Select this check box to include the video stream and enable the remaining fields on the dialog. If you do not
want to include the video stream, clear this check box.
Frame size
Frame size contributes to quality and file size. The appropriate frame size is determined by the final
destination of the movie. See your video capture card’s documentation for more information. The final
frame size of the movie can be different from the project’s default settings.
SAVING, RENDERING, AND PRINTING PROJECTS
CHP. 16
277
Frame rate
Frame rate is important in determining the quality and size of the final media file. The appropriate frame rate
is determined by the final destination of the movie. See your video capture card’s manual for more
information. The final rendered multimedia file can have a different frame rate from the project itself.
Field order
Video that is displayed on a television monitor is interlaced. This means that every frame of video is actually
composed of two fields, each of which is made up of half of the lines that make the final frame. These two
fields are woven together in alternate lines, but which of the two fields is displayed first can be important.
Choose None (progressive scan) to ignore interlacing for video to be displayed on a computer. For video on a
television, most hardware supports Lower Field First. If the output is jittery or shaky on a television, or your
hardware’s manual specifies it, choose Upper Field First.
Pixel aspect ratio
A pixel is a single picture element or dot on a television or computer screen. Computers display pixels as
squares: 1.0. Televisions display individual pixels as rectangles: 0.909, 0.899, or anything other than square.
Using the wrong pixel aspect ratio can result in distortions or stretching of the video. Select the aspect ratio
for the final movie’s destination. Consult your hardware manual if you are in doubt about the appropriate
ratio. The pixel aspect ratio and frame size determine the frame’s aspect ratio.
Video format
Codec, which stands for COmpressor/DECompressor, is the mathematical algorithm used to compress a
media file. The codec directly determines the size and quality of the movie, as well as its compatibility with
various playback devices. The final destination for the movie dictates the choice of codec. Many of the
codecs used for specific rendering formats are updated periodically by their creators. For information about
specific codecs, contact the codec’s manufacturer.
Each codec is a small program that may have additional custom controls used to fine tune the output. Click
Configure to adjust these parameters manually.
Quality slider
If the codec you choose in the Video format drop-down list supports it, use this slider to adjust the quality of
the compression applied by the codec.
Interleave every
This control allows you to specify how often the audio and video streams are interleaved. Interleaving relates
directly to how the data is saved in the file. For example, during the rendering process, the audio data is
written in between the video data based on the frame setting that you specified. Interleaving allows for
optimal playback of the AVI file.
Keyframe every
If the codec you choose in the Video format drop-down list supports compression keyframes, select this option
to set compression keyframes to adjust the quality of the compression. More keyframes typically produce
higher quality video, but a larger file size (and thus a higher data rate).
Data rate
If the codec you choose in the Video format drop-down list supports a data rate ceiling, select this option and
enter a maximum data rate for the final file.
Render alpha channel
If the codec you choose in the Video format drop-down list supports alpha channel transparency, select this
option to save this information with the file.
CHP. 16
SAVING, RENDERING, AND PRINTING PROJECTS
278
Create an OpenDML (AVI version 2.0) compatible file
Select this check box if you want to save your file as an OpenDML file. OpenDML files allow you to create
files that are limited in size only by the format of your hard disk: 2GB using FAT32 or 4GB using NTFS.
Audio tab
Include audio
Select this check box to include the audio stream and enable the remaining fields on the dialog. If you do not
want to include the audio stream, clear this check box.
Audio format
This lists the audio rendering codecs that are available.
Attributes
If the codec you choose in the Audio format drop-down list supports it, select the appropriate attributes for the
codec from this list.
Sample rate
The sample rate directly affects the audio’s quality. The sample rate is defined as the number of times a
second that data is sampled in an audio file. It is similar to the concept of resolution in an image file. The
higher the setting you choose, the better the quality, but the larger the file size.
Bit depth
The bit depth directly affects the audio’s quality. The bit depth is defined as how much data is used to save
each sample. The higher the setting you choose, the better the quality, but the larger the file size.
Channels
You can render a project in either stereo or mono.
SAVING, RENDERING, AND PRINTING PROJECTS
CHP. 16
279
Rendering with networked computers
Network rendering allows you to designate a specific computer to render the entire output file, or you can
distribute a single rendering job among several computers.
• Distributed network rendering splits the video into segments that are rendered by multiple computers. In
this mode, each computer renders a portion of the project, and the rendered sections are then reassembled
into a single file by the one computer (called the stitch host).
Distributed rendering is a good way to reduce the time it takes to render a project containing a significant
amount of processed video (video effects, transitions, panning/cropping, track motion, and compositing).
However, distributed rendering requires increased disk space and network traffic because each segment
must be saved before the final output can file be generated.
Nontemporal video output formats, such as DV or uncompressed AVI, are also well suited for distributed
network rendering because segments can be reassembled without re-encoding.
• Nondistributed network rendering behaves very much like standard rendering, but you can choose which
computer you want to render the project. In this mode, each computer renders a complete file from a
Vegas project or the loop region.
If you want to encode the same project to multiple streaming formats and bit rates, it is best to queue up
multiple nondistributed jobs because streaming formats use temporal compression and you can assign
different renderers to different output formats. If you have a project or output format with audio only,
choose nondistributed rendering because only video is rendered in the first phase of a distributed job.
Both distributed and nondistributed rendering jobs can be queued to be performed as computing resources
become available so you can render multiple projects or render the same project in multiple formats.
Rendering using a computer other than your main editing computer allows you to continue working without
waiting for the render job to complete.
Setting up your computers for network rendering
The computer that initiates and manages a network render is considered the owner of the job. Each
networked computer that you use for rendering is called a renderer. The computer that reassembles rendered
segments in a distributed rendering job is called the stitch host. The computer that is designated to perform a
nondistributed network render job is called the render host.
To use network rendering effectively, we recommend the following:
• 256 MB RAM in each renderer.
• 100 Mbps switched local area network.
• Your Vegas project file (.veg), media files, and output file must be in shared folders, preferably on a
dedicated file server, All renderers must have permission to read, write, create, and delete files in the
shared folders.
Setting up a rendering computer
1. Install Vegas software as a render-only client.
You can install Vegas software as a render-only client on two computers for each Vegas license you
purchase. However, certain file formats, such as MPEG-2, AC-3, and MP3, cannot be used on render-only
clients.
CHP. 16
SAVING, RENDERING, AND PRINTING PROJECTS
280
2. Start the Vegas Network Render Service application (VegSrv50.exe). The service must be running and
you must be logged into the computer before you can use it for rendering.
3. If necessary, you can change the TCP port the render service uses to communicate with other renderers:
a. Exit the Vegas Network Render Service application if it is running.
b. Open the NetRenderService.config file in a text editor. This file is located in the Vegas 5.0 installation
folder.
c. Edit the <channel ref="tcp" port="53704" /> tag in the file to reflect the port you want to use.
d. Save the file.
e. Restart the Vegas Network Render Service application.
Adding renderers to a host
1. Start the Vegas Network Render Service application (VegSrv50.exe) on the computer you will use to
initiate network rendering.
If you do not start the service before starting a rendering job, it will start automatically, but it will not be
visible. Right-click the icon in the system tray and choose Show from the menu to display the window.
2. Select the Renderers tab. This tab allows you to edit the list of computers running the render service.
Note: A computer will be displayed on the Renderers tab
only if you have logged on to Windows and the Vegas
Network Render Service is running. If the computer is not in
an area you can monitor easily, you can use
Ctrl+Alt+Delete to lock the computer after logging on and
starting the service.
3. Click the Host box of a blank row in the table, and then type the IP address or name of the computer you
want to use as a renderer.
To find your computer name, right-click My Computer and choose Properties from the shortcut menu to
display the System Properties dialog. Click the Computer Name tab, and your computer name is displayed
in the Full computer name entry.
4. Press
Enter
to connect to the renderer. If the connection is made, the Status column will display Ready.
Using nondistributed network rendering
1. Save your project.
2. If you want to render only a portion of your project, create a time selection that includes the portion you
want to render.
SAVING, RENDERING, AND PRINTING PROJECTS
CHP. 16
281
3. From the File menu, choose Render As.
4. Use the Render As dialog to choose the file format and location where you want to save your file. The
location of the output file must be in a shared folder.
5. Select the Render loop region only check box in the Render As dialog if you want to render the selected
portion of your project.
6. Select the Render using networked computers check box in the Render As dialog, and then click the Save
button. The Network Render dialog is displayed.
7. From the Render Host drop-down list, choose the URL of the renderer you want to use to render your
project.
8. Click OK to start rendering.
9. To add a project to the queue, open the project and repeat steps 1 through 8.
You can choose a different renderer for each project or time selection if you want to render the files
concurrently on separate computers. If you choose the same renderer, the rendering jobs will be queued to
run sequentially on that computer.
Using distributed network rendering
1. Save your project.
2. From the File menu, choose Render As.
3. Use the Render As dialog to choose the file format and location where you want to save your file. The
location of the output file must be in a shared folder.
4. Select the Render using networked computers check box in the Render As dialog, and then click the Save
button. The Network Render dialog is displayed.
5. Select the Distribute Rendering Among Peers check box in the Network Render dialog.
6. From the Stitch Host drop-down list, choose the computer you want to use to assemble the rendered
segments.
7. Choose a file format for your rendered segments.
• Select the Use Final Render Template check box if you want to render segments using the format you
chose for your final output in the Render As dialog.
Use this option when you're working with uncompressed or DV files. Using the final rendering template
for rendered segments makes the final stitching process fast because the segments can be copied and
assembled without being re-encoded.
• Clear the Use Final Render Template check box and choose settings from the Save as Type and Template
drop-down lists if you want to render segments using a format other than your final output format.
Use this option when you're rendering to a format that uses temporal compression, such as QuickTime,
RealMedia, or Windows Media. Rendering segments as uncompressed or DV AVI files allows
transitions and composited tracks to be rendered in a high-quality format. When the segments are
stitched, the project is re-encoded using the format you chose for your final output in the Render As
dialog.
8. Click OK to start rendering.
Monitor rendering progress
1. Right-click the
icon in your system tray and choose Show from the menu to display the Sony Vegas
Network Render Service window.
CHP. 16
SAVING, RENDERING, AND PRINTING PROJECTS
282
2. Select the Progress tab. The Progress tab displays a list of the segments that are queued to render, the
assigned peer, and the status.
3. Choose Details or Summary from the drop-down list in the Progress tab to see more or less information.
Set file mappings
File mappings help remote renderers find the media used in your project. When you import media from a
local disk, the file paths saved in your project are often valid only on the local machine. This can be the case
even if the media resides in a shared folder.
Use the File Mappings tab to map local folders to universal paths.
1. Right-click the
icon in your system tray and choose Show from the menu to display the Sony Vegas
Network Render Service window.
2. Select the File Mappings tab. The tab displays a list of local folders and their universal paths.
3. Click in blank row in the table.
4. In the Local box, type the path to the local folder (c:\media, for example).
5. In the Universal box, type the UNC path or mapped drive letter to the folder (\\renderer\media\, for
example).
Set render service options
1. Right-click the
icon in your system tray and choose Show from the menu to display the Sony Vegas
Network Render Service window.
2. Select the Options tab.
Item
Description
Enable rendering
Automatically run
after login
Exit service when
window is closed
Exit Vegas when idle
Select this check box if you want the local computer to be available as a renderer.
Select this check box if you want to start the service automatically after logging in to the Windows operating
system.
Select this check box if you want to keep the service running after closing the window. If the check box is
cleared, the service is minimized to the system tray when you close the window.
Select this check box if you want to close the instance of Vegas software that is launched by the network render
service when no jobs are in the queue.
Remove completed
jobs from progress
display after
Default segment
length
If the check box is cleared, the application continues running until you close it or exit the service.
Choose a setting to indicate how long jobs should be maintained on the Progress tab of the Sony Vegas
Network Render Service window.
Choose a setting to indicate the number of frames per segment when using distributed rendering.
Adjusting this value can increase performance slightly depending on the complexity of the project and your
specific rendering computers.
If the setting yields more than 90 segments for a rendering job, the segment length for that job is automatically
increased to limit the number of segments.
SAVING, RENDERING, AND PRINTING PROJECTS
CHP. 16
283
Printing with Video Capture
Once you have rendered your project, you can use the Sony Pictures Digital Video Capture application
(installed with Vegas software) to print your finished video onto DV tape in your video camera or VTR.
Note: You must have an IEEE-1394/OHCI-compliant
video capture card installed to use Video Capture.
1. If you have not already done so, connect your video camera to your video capture card using the cable
provided with the card.
2. In the Media Pool window, click the Capture Video button (
). The Video Capture application starts.
Note: If your video camera is properly connected, the Video
Preview window in the center of the application area should
display “Device connected.”
3. Follow the instructions for printing to tape provided in the Video Capture online help. To access online
help, click the Help menu within the Video Capture application, and choose Contents and Index. The
Video Capture online help file displays.
Printing to DV tape
Print to tape from the timeline is only available in the full version of Vegas software.
You can print either a portion of your project or the entire video right from the project timeline. Your project
is examined, any complex portions are prerendered, and then printed to DV tape all in one action. For more
information, see Prerendering video on page 255.
Note: Printing to tape from the timeline can require
significant drive space for temporary prerendered files. Set the
Prerendered files folder on the Video tab of the Project
Properties dialog to an A/V-capable drive with sufficient
space. Prerendering a DV project uses approximately 228
MB/minute, so plan accordingly.
To print to DV tape, you must first establish a connection to the video camera or VTR to which you will
print. For more information, see Video device tab on page 294.
Establishing a connection to the recording device
1. On the Tools menu, choose Preferences. The Preferences dialog appears.
2. Click the Video Device tab.
3. In the Device drop-down list, select OHCI Compliant IEEE
1394/DV.
4. Click OK. The Preferences dialog closes.
CHP. 16
SAVING, RENDERING, AND PRINTING PROJECTS
284
Printing to DV tape from the timeline
1. To print just a portion of your project, make a time selection in the timeline.
2. From the Tools menu, choose Print Video to DV Tape. The Conform Timeline to DV Format dialog
appears. Complete the following information:
• In the DV Template drop-down list, choose the appropriate template for rendering your video or click
Custom to select custom settings. For more information, see Customizing the rendering process on page 275.
Note: If you are working with a 24p progressive-scan project
or you have the Allow pulldown removal when opening 24p DV
check box selected on the General tab of the Preferences
dialog, you will need to insert pulldown by choosing the
appropriate 24p DV template from the list.To use the video
footage later, choose the NTSC DV 24p (inserting 2-3-3-2
pulldown) template.
If you are not working with a 24p progressive-scan project
and you cleared the Allow pulldown removal when opening
24p DV check box on the General tab of the Preferences dialog,
you can use any DV template.
• To print just a portion of your project, select the Render loop region only check box.
3. Click Next. The Leader and Trailer dialog appears. Complete the following information:
• In the Leader section, choose a test pattern, and indicate the test pattern and black duration that will
precede the video. To print without a test pattern or black leader, enter 0 for the Duration value. Select
the Play 1 kHz tone with test pattern check box to include a tone in the leader.
• In the Trailer section, indicate the duration of the black to follow the video. To print without a trailer,
enter 0 for the Duration value.
4. Click Next. The Device Setup dialog appears. Choose the device control mode:
• Choose the Manual radio button to cue the device manually and set it to record.
• Choose the Use device control radio button to cue the device automatically based on a timecode value.
Enter the timecode for recording to begin in the Device timecode box. The device must support OHCI
1394-DV device control to use this option.
5. Click Finish. The selected video begins printing to the device. A progress meter appears indicating the
percent completed.
Note: The tone that you can include in the leader is fixed at 20 dB. If you need a different tone level (to match your audio
mix), create a test pattern and tone clip that is calibrated to
your record deck.
SAVING, RENDERING, AND PRINTING PROJECTS
CHP. 16
285
CHAPTER
17
Customizing Vegas
software
You can customize Vegas® software to suit your project needs and working preferences. Many of the settings
depend on your equipment or studio setup. Vegas software can be set to work with the components that you
use in your studio.
In this chapter, you will find information about functions that allow you to customize the appearance of
Vegas software, set a project’s properties, and set the application’s preferences.
Displaying frame numbers
You can display frame numbers on video events. Once you
have enabled frame numbering, a small box appears at the
bottom of the event thumbnail with the frame offset, time or
timecode. The small black arrow marks the exact position of
that frame in time.
When the workspace is zoomed in far enough, each thumbnail
represents a single numbered frame in the source video file. At
intermediate zoom levels, marks between the frame numbers
show the location of intermediate frames. These frame marks
are not visible at lower magnifications.
1. From the Options menu, choose Preferences.
2. Click the Video tab.
3. Choose an option from the Show source frame numbers on event thumbnails as drop-down list.
4. Click OK.
Changing the ruler format
You can customize the ruler to display a number of different standard formats. The format that you select
affects how the ruler and time display window display time units. For more information, see Timecode in Vegas
software on page 325.
To change the ruler’s format, right-click the ruler and choose the desired time format from the shortcut
menu or, from the Options menu, choose Ruler Format and choose the desired time unit. You can also
change ruler settings on the Project Properties dialog’s Ruler tab. For more information, see Ruler tab on page
290.
CHP. 17
CUSTOMIZING VEGAS SOFTWARE
286
The following are the different time units available (hh=hours, mm=minutes, ss=seconds, and ff=frames):
Time format name
Units
Samples
Time
Seconds
Time & Frames
Absolute Frames
Measures & Beats
Feet & Frames 16mm (40 fpf)
Feet & Frames 35mm (16 fpf)
SMPTE Film Sync (24 fps)
SMPTE EBU (25 fps, Video)
SMPTE Non-Drop (29.97 fps, Video)
SMPTE Drop (29.97 fps, Video)
SMPTE 30 (30 fps, Audio)
Audio CD Time
numbered (starting with zero)
hh:mm.ss.sss
sssss.sss (to three decimal places)
hh:mm:ss.ff
frames are numbered starting with 0
measures.beats.ticks, where 64 ticks = 1 beat
feet+frames, where 40 frames = 1 foot
feet+frames, where 16 frames = 1 foot
hh:mm:ss:ff
hh:mm:ss:ff
hh:mm:ss:ff
hh:mm:ss:ff
hh:mm:ss:ff
hh:mm:ss or hh:mm:ss:ff when zoomed in tightly
Editing the ruler offset
The ruler doesn’t necessarily need to start with zero at the far left side. You can enter an offset to change the
orientation of the ruler in a project. One use of this is to create a lead-in into a project. A five-second offset
would mean that the ruler would start at -5 seconds and would be at 0 five seconds into the project.
Note: You cannot create a ruler offset in an audio CD
layout project.
1. Position the cursor at the desired location along the timeline.
2. Right-click the ruler and choose Set Time at Cursor from the shortcut menu. The
current ruler value is highlighted.
3. Enter a time value.
4. Press
Enter
to set the ruler’s time. The value that you enter at the cursor’s position affects the entire ruler.
CUSTOMIZING VEGAS SOFTWARE
CHP. 17
287
Changing grid spacing
Grid spacing is different from the ruler and provides an alternate method of subdividing a project’s time.
This can be useful if you want the ruler to display SMPTE video timecode, but you need to create your music
in terms of beats and measures. You can display the grid spacing in time, frame, measure, or note units. The
grid can also be set to match the ruler’s time format. The grid appears across all tracks in your project and the
grid’s lines can be used as snap points.
Ruler and grid increments can be different.
This new project is set with Ruler = SMPTE non-drop and Grid = Quarter notes.
To change grid spacing, choose Grid Spacing from the Options menu, and choose the desired time unit from
the submenu. The grid spacing changes to reflect your selection.
Note: In some cases, the grid lines and the ruler do not
match. This is because they are two independent functions.
Using the Time Display window
The Time Display window reflects the cursor’s position on the timeline and the end point of a time selection.
You can customize the time display’s settings, including what time the window displays and what colors it
uses.
You can move the Time Display window from its docked position above the track list to float on the
workspace. In addition, you can dock the time display in the window docking area. For more information, see
Window docking area and floating window docks on page 21.
Changing the time display settings
The time display always reflects the ruler settings that are selected. You can change the ruler settings via the
time display or vice versa. For more information, see Changing the ruler format on page 285.
1. Right-click the time display. A shortcut menu appears.
2. From the shortcut menu, choose Time Format, and choose the desired time format from the submenu.
Both the time display and ruler display the chosen time format.
CHP. 17
CUSTOMIZING VEGAS SOFTWARE
288
Changing the time display colors
You can change the background color and text color used in the time display.
1. Right-click the time display to display the shortcut menu.
2. From the shortcut menu, choose Text Color or Background Color and then choose Custom. The Time
Display Color dialog appears.
3. Choose the color setting that you want.
4. Click OK to set the text or background color or click Cancel to keep the existing color settings and close
the dialog.
Tip: To return the time display’s text or background color to
its default settings, choose either Text Color or Background
from the shortcut menu, and choose Default from the
submenu.
Color
Setting the time display to monitor MIDI timecode
You can use the time display to monitor the status of incoming or outgoing MIDI timecode. Vegas software
can monitor MIDI timecode being generated from an external device or monitor MIDI timecode and MIDI
clock information generated by Vegas software. From within Vegas software, the time display settings work
in conjunction with your project’s properties and MIDI setup options. For more information, see Sync tab on
page 299.
1. Right-click the time display.
2. From the shortcut menu, choose the type of MIDI monitoring to be displayed.
Monitors incoming MIDI timecode
Monitors MIDI timecode generated by Vegas softw
Monitors MIDI clock generated by Vegas software
Once you have made your selection, the time display displays both the MIDI timecode being input or output
and a status message.
CUSTOMIZING VEGAS SOFTWARE
CHP. 17
289
Working with project properties
A large range of formats and various types of media files are
supported. Some settings in a project’s properties are simply
informational details about the project, while others
control how your project is handled and its output. If you
have multiple projects, the settings used for each project are
stored. These settings can be saved as templates for future
use.
To view and modify project properties, choose Properties
from the File menu. The Project Properties dialog has five
tabs: Video, Audio, Ruler, Summary, and Audio CD. An
overview of each tab and its settings follows.
Video tab
This tab allows you to set different characteristics the
project uses to handle the video. Also, this tab displays
information about the video contained in your project. For
more information, see Modifying project video properties on page
203.
Audio tab
This tab allows you to set different characteristics the project uses to handle the audio. This page also
displays the available drive space where recorded audio is stored.
Item
Description
Master bus mode
Choose Stereo to create a two-channel stereo project. Choose 5.1 Surround if you want to perform advanced
5.1-channel mixing (available only in the full version of Vegas software).
Enter the number of stereo busses that you want in your project. You may add up to 25 additional busses. The
busses appear in the Mixer.
Choose a sample rate from the drop-down list or enter your own rate. The sample rate range is 2,000 Hz to
96,000 Hz. Higher sample rates result in better quality sound, but also mean larger audio files.
Choose a bit depth from the drop-down list. A higher bit depth results in better quality sound, but also means
larger audio files.
Choose Preview, Good, or Best resample quality.
Applies a low-pass filter to each track in a 5.1 surround project that is assigned to the LFE channel.
Number of stereo busses
Sample rate
Bit depth
Resample quality
Enable low-pass filter on LFE
(surround projects only)
Cutoff frequency for low-pass Choose a frequency to set the frequency above which audio will be ignored by the LFE channel.
filter (Hz)
Low-pass filter quality
Choose Preview, Good, or Best to determine the sharpness of the filter’s rolloff curve. Best produces the
sharpest curve.
Recorded files folder
Displays the path where recorded audio is stored. The Browse button allows you to select a new location to
store recordings.
Free storage space in selected Displays the available disk space where recorded audio is stored.
folder
Start all new projects with
Use the project properties that you have specified whenever a new project is created.
these settings
CHP. 17
CUSTOMIZING VEGAS SOFTWARE
290
Ruler tab
This tab allows you to change ruler settings used in your project. You can also change ruler settings in track
view. For more information, see Changing the ruler format on page 285.
Item
Description
Ruler time format
Ruler start time
Choose a ruler time format from the drop-down list.
Enter a value that the ruler will use at the beginning of your project. This feature is useful for synchronization
purposes.
Enter the desired number of beats per minute for the project.
Enter the desired number of beats to occur per measure for the project.
The value entered will determine the time signature used by the ruler when its format is set to Measures and
Beats. For example, if the entered value is 4, then a quarter note gets one beat.
Use the project properties that you have specified whenever a new project is created.
Beats per minute (tempo)
Beats per measure
Note that gets one beat
Start all new projects with
these settings
Summary tab
This tab allows you to enter information about the project. You can leave the boxes on this tab blank or, if
information exists, you can change it at any time.
Property
Description
Title
Artist
Engineer
Copyright
Comments
Start all new projects with
these settings
Enter the name or title of the open project.
Enter the name of the narrator, band, or artist(s) being recorded into the project.
Enter the name(s) of the people who mixed and edited the project.
Enter the date and ownership rights of the project.
Enter information that identifies and describes the project.
Use the project properties that you have specified whenever a new project is
created.
Audio CD tab
This tab allows you to enter information used when burning audio CDs.
CD burning is only available in the full version of Vegas software.
Property
Description
Universal Product Code/Media If your CD-R device supports writing UPC/MCN codes, you may specify the value in this field. If you leave the
Catalog Number
field blank, no UPC/MCN value will be written to the CD. Otherwise, the value consists of 13 digits.
First track number on disc
This sets the number for the first track on the disc.
Using the toolbar
The main toolbar is automatically displayed below the menu bar. However, you may hide and customize the
toolbar to suit your preferences. The settings that you apply to the toolbar remain set until you change them
again.
Hiding and displaying the toolbar
If you prefer to use shortcut keys when working with your project, you may hide the toolbar to create more
workspace. Choose Toolbar from the View menu to hide it. The check mark next to the command is
removed and the toolbar disappears. The toolbar remains hidden until you choose Toolbar from the View
menu to display it again.
CUSTOMIZING VEGAS SOFTWARE
CHP. 17
291
Reordering toolbar buttons
You can change the main toolbar’s button order to suit your preferences. The Customize Toolbar dialog
allows you to control the order and functionality available on the main toolbar. You may return the toolbar
to its default settings by clicking the Reset button.
1. From the Options menu, choose Customize Toolbar. The Customize Toolbar dialog appears.
2. In the Current toolbar buttons list, select the button that you want to move and click Move Up or Move Down.
3. Click Close to save the toolbar changes and close the dialog.
Adding buttons to the toolbar
A series of buttons are included that you may add to the main toolbar. These buttons are listed in the
Customize Toolbar dialog. You may also add separators on the toolbar to organize the buttons to suit your
preferences.
You may return the toolbar to its default settings by clicking the Reset button on the dialog.
1. From the Options menu, choose Customize Toolbar. The Customize Toolbar dialog appears.
2. In the Available toolbar buttons list, use the scroll bars to locate the button that you want to add, and then
select it.
3. On the Current toolbar buttons pane, select the button that you want the newly added button to proceed in
order.
4. Click Add. The new button is added above the selected button in the Current toolbar buttons list.
Note: You may also double-click a button to
add it to the toolbar.
5. Click Close to save the toolbar settings and close the dialog.
Removing buttons from the toolbar
You may remove buttons and separators from the main toolbar. If you have added buttons to the toolbar,
removing unused or unwanted buttons allows you to maximize the toolbar’s space.
1. From the Options menu, choose Customize Toolbar. The Customize Toolbar dialog appears.
2. On the Current toolbar buttons pane, select the button that you want to remove.
3. Click Remove. The button is removed from the Current toolbar buttons pane and will not appear on the
toolbar.
4. Click Close to save the toolbar settings and exit the dialog.
CHP. 17
CUSTOMIZING VEGAS SOFTWARE
292
Setting preferences
The preferences options are different from project properties. Project properties are unique to each project,
while preferences affect how Vegas software functions. Any changes that you make to the preferences remain
set until you change them again or reset Vegas software to use the default presets.
You can access the Preferences dialog by choosing Preferences from the Options menu. This dialog contains
tabbed pages. The following sections explain the settings on each tab.
General tab
The General tab includes a variety of settings. The following is a list of these preferences and their meaning.
Preference
Description
Automatically open last project
on startup
Show logo splash screen on
startup
Show active take information in
events
When Vegas software is run, the last project saved automatically opens.
Briefly shows the Vegas software logo while the program is loading. The logo does not increase loading time.
When this check box is selected, the current take information will be displayed on events in the timeline.
Pitch shifted audio events will display the amount of pitch shift in the bottom-left corner of the event. If the
media has a known root note, the new root is displayed in parentheses.
Stretched audio events will display a percentage in the lower-right corner of the event to indicate the
stretched playback rate. If the media has a known tempo, the effective playback tempo (after stretching) is
listed in parentheses after the stretch amount.
Draws a graphical representation of an audio file’s waveform and thumbnail images of a video file’s frames.
Draw waveforms and frames in
events
Show video event buttons
Shows/hides the Event FX, Pan/Crop, and Generated Media buttons on video events.
Animate video frames in Trimmer Animates the thumbnail representations of frames in a media file opened in the Trimmer. This can visually aid
trimming.
Prompt to keep files after
Opens a dialog where you can enter a name and select a location where audio will be saved after recording
recording
into a track.
Create undos for FX parameter Allows you to undo changes made in the FX, Transition, Event Pan/Crop and Track Motion windows.
changes
Confirm media file deletion when When deleting media in the Explorer or Media Pool, Vegas software warns you if any events in the project are
still in use
using these files.
Double-click on media file loads The default Explorer double-click behavior is to insert an event at the cursor position on the timeline. Select
into Trimmer instead of tracks
this option to open the media file in the Trimmer instead.
Show Trimmer history with file The Trimmer history drop-down list displays the media file’s name first, followed by the folder it is in. Select
name first, then folder
this to reverse the names.
Automatically save Trimmer
Markers and regions created at the media file level in the Trimmer can be saved to the file.
markers and regions with media
file
Show progress in Video Preview Frames can be displayed in the Video Preview during a render. This will slow a render somewhat.
window while rendering
Save active prerenders on project Full quality preview renders are cleaned up and deleted when a project is closed, Select this if you want these
close
prerendered files to be available later.
Close media files when not the
This allows media files to be edited in external editors (audio, image, etc.) while they are contained in events.
active application
Close audio and MIDI ports when Select this check box if you want Vegas software to close audio and MIDI ports when you switch to another
Vegas is not the active application application.
Enable multimedia keyboard
This allows you to use a multimedia keyboard to control playback of a project.
support
Render large Wave files as
The WAV format is limited by a maximum file size of ~2GB. You can choose to render larger files as
Wave64
Wave64™ files.
Automatically name regions and When regions and markers are added, this option automatically prompts you for a name. This does not
markers if not playing
happen when adding markers on-the-fly during playback.
Ignore third party DV codecs
Clear this check box to enable third-party DV codecs.
Use Microsoft DV codec
Vegas software uses the Sony Pictures Digital DV codec (which offers improved DV video quality over the
Microsoft codec) as a default. Select this option to have Vegas software use the Microsoft codec to read DV
files instead.
CUSTOMIZING VEGAS SOFTWARE
CHP. 17
293
Preference
Description
Strictly conform to AVI2
specification
Disable multi-processor AVI
rendering
Allow pulldown removal when
opening 24p DV
Create project file backups (.vegbak)
Use Net Notify to stay informed
about Sony products
Enable autosave
Select this option to create 100% AVI2 compliant files. While these files conform to the standards, not all
applications follow these specifications and some programs may not be able to read them.
Suspends dual processor rendering for AVI files. Selecting this option does not affect other dual processor
operations.
Select this option to have Vegas software remove pulldown on DV video files in 24 fps progressive-scan (24p)
format. When this check box is cleared, Vegas software will open 24p files as 29.97 fps interlaced video (60i).
Automatically create backups of your project files.
Use linear scrub range
Allow Ctrl+drag cursor style
scrub over events
Make spacebar and F12 Play/
Pause instead of Play/Stop
Always draw marker lines
Select this option to have Vegas software periodically display information from Sony Pictures DIgital at
startup.
Creates a temporary project file that can aid in crash recovery. When enabled, autosave occurs every five
minutes. The autosave process does not overwrite the original project file.
When this check box is selected, the scrub control uses a linear range. When this check box is cleared, the
scrub control uses a logarithmic range.
Vegas software allows scrubbing on empty sections of the timeline using Ctrl+drag on the cursor. Select this
option to enable timeline scrubbing over events as well.
Changes the spacebar and F12 keys to start and pause playback rather than start and stop.
Select this check box if you want Vegas software to extend marker and region lines across tracks in the
timeline. When the check box is cleared, marker lines are drawn only when Enable Snapping is turned on.
Build 8-bit peak files
Vegas sofware builds 16-bit peak files as a default. Select this option to build 8-bit peak files instead.
Disable pop-up animations
Turns off the animation applied to windows such as Video FX, Event Pan/Crop, and Track Motion when these
windows are opened.
Automatically hide docking area Select this check box if you want the window docking area to hide automatically. Hover over the bottom of
the Vegas software window to show the window docking area.
Show video event edge frames in Select this check box if you want Vegas software to show the frame at the edge of a video event when you
Video Preview window during
perform edge trimming. For example, when you drag the edge of a video event with this check box selected,
edits
the Video Preview window will update to draw the last frame in the event as you drag.
Build peaks for visible events
only
Keep bypassed FX running (to
avoid pause on bypass/enable)
Enable joystick support
Enable Windows XP theme
support
Allow edit cursor to be dragged
Recently used project list
Temporary files folder
Free storage space in selected
folder
Default All
CHP. 17
When the check box is cleared, Vegas software will display a static frame.
Select this check box if you want Vegas software to build peak files as needed. Vegas software will not build a
peak file until a file is visible in the timeline. You can open your projects more quickly, but there may be
occasional pauses as Vegas software builds peaks.
Clear the check box if you want Vegas software to build all necessary peak files when you open your project.
Opening a project can take longer, but after peak files are built, you can scroll through and view your project.
Select this check box if you want effects to remain open so you can bypass/enable effects with no pause for A/
B testing. When the check box is cleared, effects are fully bypassed, conserving processing power.
Select this checkbox if you want to have joystick control for editing in Vegas software.
When this check box is selected, the Vegas window will inherit the appearance of the current theme when
using Microsoft® Windows® XP. When the check box is cleared, user interface elements will maintain the
classic Windows operating system appearance.
Select this check box if you want to be able to drag the cursor to change its position on the timeline and in the
Trimmer window. When this check box is selected, you can position the cursor without losing your loop region
To create a time selection without moving the cursor, hold the Shift key.
Select the number of files to be listed at the bottom of the File menu.
Select a location for all temporary files.
Displays the available disk space in the folder specified in the Temporary files folder box.
Restores all general preferences to the default settings.
CUSTOMIZING VEGAS SOFTWARE
294
Video tab
The Video tab in the Preferences dialog controls the display of video media, video events and video tracks.
Preference
Description
Dynamic RAM Preview max
Determines the size of the RAM cache for building dynamic RAM previews in the Video Preview window.
Dynamic RAM previews are only available in the full version of Vegas software. For more information, see
Building dynamic RAM previews on page 256.
Show source frame numbers on Display frame, time, or timecode numbering on video event thumbnails.
event thumbnails as
Preferred video capture
Browse for the application to be launched when you click the Open Video Capture button (
).
application
Action safe area and Title safe
Sets the reference overlay safe areas in the Video Preview window. For more information, see Identifying safe
area
areas on page 258.
Horizontal Grid Divisions and
Sets the spacing of the grid overlay in the Video Preview window used in aligning visual elements in a project.
Vertical Grid Divisions
For more information, see Changing grid spacing on page 287.
Display at project size
Sets the Video Preview window to always display the video at full project size.
Simulate device aspect ratio
Determines how the video is displayed in the Video Preview window. In short, televisions display rectangular
pixels and computer monitors display square pixels. This can result in a distorted preview, although the source
media and rendered video is unaffected.
Background color
Sets the background color of the Video Preview window (black by default) that shows either when there is no
visual content or when using a transparent overlay with no background visual content.
Default track fade colors
Sets the default top and bottom colors when adding a Fade to Color envelope to a video track. For more
information, see Working with track envelopes on page 126.
Default All
Restores all video preferences to the default settings.
Video device tab
This tab allows you to identify an external video device for Vegas software to communicate with. The
selected video device is used to display previews on an external monitor or to print directly from the timeline
to DV tape. For more information, see Printing to DV tape on page 283.
The connection between Vegas software and the video device works with OHCI compliant IEEE-1394 DV
capture cards and some MJPEG capture cards. There are two cases where Vegas software can play back to an
external monitor. One is when you have special hardware that has both computer and television monitor
outputs. The other is for (OHCI compliant) DV capture cards where DV data can be previewed out through
your DV camcorder to an external monitor. For more information, see Using an external monitor on page 266.
Preference
Description
Device
Details
If project is invalid for DV output,
conform to the following
Sync offset (frames)
Choose a device from the drop-down list.
Displays information regarding the capture card specified in the Device drop-down list.
If your source media does not conform to DV standards, choose a setting from the drop-down list to adjust the
video to display properly on your external monitor.
If audio and video do not play back in synchronization on your external monitor, drag this slider to specify a
frame offset to restore synchronization.
Record engage delay (frames)
Recompress edited frames
Default All
CUSTOMIZING VEGAS SOFTWARE
Note: This setting affects synchronization on an external monitor only. Audio and video synchronization in your
Vegas project is unaffected.
Drag the slider to specify the number of frames it takes your camcorder or deck to switch from Record Pause
to Record mode. If you're missing frames from the beginning of your file after printing to tape, increase the
setting. If you see duplicated frames at the beginning of your video, decrease the setting.
When this check box is selected, Vegas software will recompress any edited frames in your project before
previewing.
Restores all video device preferences to the default settings.
CHP. 17
295
Audio tab
The Audio tab allows you to set preferences to optimize how your computer’s components are used to handle
resource-intensive audio. This tab also allows you to configure Vegas software to the equipment that is
connected to your computer.
Multiple audio busses are only available in the full version of Vegas software.
Preference
Description
Waveform display while
recording
Normalize peak level (dB)
Preferred audio editor
Allows you to display or hide waveforms when recording into an audio track.
Metronome
Default All
Sets the maximum level that is used when normalizing an event.
Displays the path of the audio editor that you can start directly from Vegas software to perform destructive
edits to audio.
Allows you to use a default metronome sound or to select custom sound files to be used as the metronome
beats.
Restores all audio preferences to the default settings.
Audio Device tab
Preference
Description
Audio device type
Choose a driver type from the drop-down list. The Microsoft Sound Mapper is the default setting. If you want
to activate specific sound cards, choose Windows Classic Wave Driver or ASIO and choose a device from the
Default Stereo and Front playback device drop-down list. ASIO audio drivers are only supported in the full
version of Vegas software. For more information, see Routing busses to hardware on page 147.
Choose the device that you want to use for playing stereo sound data and the front-left and -right channels of a
5.1 surround project.
Default Stereo and Front
playback device
Selecting the Microsoft Sound Mapper allows Windows to select an appropriate device to use for the current
sound data.
Default audio recording device
Automatically detect and offset
for hardware recording latency
Note: If you have selected Microsoft Sound Mapper, you will not be able to assign busses to different devices.
Choose the device that you want to use for playing the rear channels of a 5.1 surround project.
Choose the device that you want to use for playing the center and low-frequency effect channels of a 5.1
surround project.
Sets the amount of memory used during project playback. For more information, see Adjusting the playback
buffering slider on page 296.
Sets the default device for recording into a track.
Select the check box to automatically compensate for offset between the time you initiate recording and when
your sound card starts recording.
Default All
Clear the check box and drag the User recording latency offset (ms) slider to specify an offset value.
Restores all audio device preferences to the default settings.
Default Rear playback device
Default Center and LFE playback
device
Playback buffering (seconds)
CHP. 17
CUSTOMIZING VEGAS SOFTWARE
296
Advanced audio preferences
You can access advanced settings by clicking the Advanced button on the Audio Device tab. The Advanced
Audio Configuration dialog displays all of the audio devices that are installed on your computer and allows
you to set the controls for each device.
Preference
Description
Audio devices
This list contains all of the audio devices that are installed in your computer. Selecting one from the list allows
you to set the options below for that device.
During project playback, you may notice that the cursor position is different than what you are hearing. This
problem stems from inaccuracies in some audio devices. Select this control’s check box to have Vegas software
attempt to compensate for the inaccuracies by interpolating the cursor’s correct position during playback or
recording.
The position bias control gives you additional cursor control when it is inaccurately displayed during project
playback and recording. If you have enabled the Interpolate position control and are still experiencing
cursor position inaccuracies, move the Position bias control forward or backward to compensate for the
inaccuracies of the audio device.
When this option is not selected, Vegas software begins storing (buffering) project audio information prior to
playback. This storing is very fast and unnoticeable in most cases. However, some audio devices stutter when
you begin playback as a result of the buffering process. If your audio stutters when you start playback, select
this check box to prevent buffering audio information prior to playback.
Drag the slider to set the number of audio buffers that will be used. Adjusting this setting can help you
synchronize the input and output for record input monitoring. Record input monitoring is only available in the
full version of Vegas software.
Choose a setting from the drop-down list to indicate the buffer size you want to use. Choose MME to use the
Playback buffering setting on the Audio Device tab in the Preferences dialog.
Choose a setting from the drop-down list to set the priority that is assigned to your audio buffers. Increasing
the buffers’ priority can help you attain smoother playback, but it can also adversely affect other processes.
Select this check box to enable the monitoring of your recording input through Vegas software while you are
recording.
Interpolate position
Position bias
Do not pre-roll buffers before
starting playback
Audio buffers
Buffer size (samples)
Priority
Enable input monitoring
Adjusting the playback buffering slider
The playback buffer controls how much memory is used when playing back your project. This preference is
useful, but must be carefully adjusted. If you set the buffer size too high, you may experience gapping during
playback. Conversely, if you set the buffer size too low, you may experience gapping as well because Vegas
software has too little memory to work with during playback.
The playback buffer slider should be set to balance RAM usage and playback buffering. The rule is to set this
slider as low as possible without introducing gapping.
1. Open a project that has multiple events.
2. On the Audio device tab, move the Playback buffering (seconds) slider to 0.25.
3. Start playing back the project.
4. If the playback still gaps, increase the Playback buffering (seconds) slightly.
You may have to experiment to find the correct settings. If you continue to experience gapping, you can try
the following to control the gapping:
• Decrease the number of events you are trying to play back. This may mean muting tracks or soloing a
couple of tracks. RAM is mostly affected by the number of unique events that are playing back
simultaneously.
• Use the Render to New Track command (on the Tools menu) to combine all the events into one event. For
more information, see Rendering to a new track on page 116.
CUSTOMIZING VEGAS SOFTWARE
CHP. 17
297
MIDI Tab
Use the MIDI tab to set options for using MIDI devices with Vegas software. To display this tab, choose
Preferences from the Options menu, then click the MIDI tab.
Preference
Description
Make these devices available for Select the check box for each MIDI device that you want to use as a MIDI output for a control surface.
MIDI output
Make these devices available for Select the check box for each MIDI device that you want to be available for a control surface.
MIDI input
Default All
Restores all MIDI preferences to the default settings.
Editing tab
Preference
Description
Enable looping on events by
default
Preserve pitch when stretching
audio events
Collapse loop region when no
time selection is present
Sets events that are trimmed longer than their source media to automatically loop. When this option is not
selected, extended events repeat the final frame of a video file.
Prevents pitch shifting when you stretch an audio event.
When selected, a loop region does not persist when there is no time selection. This means that when you click
the timeline and move the cursor (destroying the any previous time selection), the loop region is also reset to
zero. By default, this option is not selected and loop regions persist until modified or until a new time selection
is created.
JKL/shuttle speed
Choose a setting from the drop-down list to set the speed that will be used for scrubbing the timeline with the
JKL keys or with a multimedia controller.
Quick fade length for audio
Sets a fast fade on the edges of audio events (10ms by default) to soften potentially harsh beginnings and
events (ms)
endings.
New still image length (seconds) Sets the default duration of inserted still image files (e.g., BMP, PNG).
Default time between CD tracks Sets the default time created between CD tracks when using the Add Media as CD Tracks command in the
Media Pool window. For more information, see Adding media as CD tracks to a new project on page 305.
Cursor preview duration
Enter a value in the edit box to specify the length of the time Vegas software will preview when you preview the
(seconds)
cursor.
To preview the cursor, press the 0 key on the numeric keypad. Vegas software creates a temporary selection
(centered over the cursor) and begins playback automatically.
Automatically overlap multiple
selected media when added
Cut to overlap conversion
Envelope fade types
Default All
CHP. 17
Cursor preview will loop if the Loop Playback mode is enabled.
Creates automatic crossfades between events when multiple media files are added to the same track across
time. When this check box is not selected, multiple media files are added end-to-end across time with no
overlap. For more information, see Creating a slide show on page 194.
Sets the behavior of the cut-to-overlap feature. The cut-to-overlap feature allows you to transform a cut from
one event to another into a transition. The Amount field sets the duration of the extended overlap. The
Alignment value determines the direction of the extension. For more information, see Converting a cut to a
transition on page 234.
Sets the default fade curves for event, track, and bus track envelopes. You can choose separate fade types for
audio and video envelopes. For more information, see Changing an event’s fade curve on page 138.
Restores all editing preferences to the default settings.
CUSTOMIZING VEGAS SOFTWARE
298
Display tab
Preference
Description
Track colors
Use these controls to change the default colors used to display tracks in your project.
Select a track from the Track drop-down list, and then click the color swatch to display a color picker.
You can choose any color using the RGBA or HSLA controls, or click the eyedropper to sample a color from your
screen.
Envelope Colors
Icon color saturation
Icon color tint
When you click OK or Apply, all tracks that used the selected color are updated.
Choose an envelope type from the Envelope color preference for drop-down list and click the color swatch to
display a color picker, where you can choose any color using the RGBA or HSLA controls, or click the
eyedropper to sample a color from your screen.
Drag the slider to adjust the color intensity of icons in the Vegas window. Drag to the left to decrease the color
saturation, or drag to the right to increase it.
Drag the slider to adjust the amount of tinting that is applied to the icons in the Vegas window. Drag the slider
to the right to add an average of the title bar colors to the icons. Drag to the left to decrease the amount of
tinting applied.
CD Settings tab
The CD Settings tab allows you to set preferences for burning CDs and extracting audio from your own CDs.
CD burning is only available in the full version of Vegas software.
Preference
Description
Burn drive
Burn speed
Extract optimization
Sets the device where you burn CD-R discs.
Sets the speed at which the device burns the CD-R disc.
Sets the amount of buffering and restitching done to recover audio from older CD drives. Adjust this setting if
your extracted CD audio has occasional gaps or glitches.
Autoname extracted tracks
Automatically names extracted CD tracks based on the ISRC number, the track number, and the number of
times the track has been extracted.
Use strict Red Book specification Select this check box if you want to be notified prior to burning a disc-at-once CD if anything about your CD
for DAO validation
project is against strict Red Book standards.
Include wide SCSI devices when
searching for drives
These warnings are not critical, and in most cases you will not write an unreadable disc if you proceed. Clearing
this check box will not suppress critical warnings that will result in an unreadable disc.
Select this check box if you want Vegas software to scan for wide SCSI CD drives when you attempt to extract
data from or burn CDs.
Skip drive database; autodetect
drive capabilities on startup
When the check box is cleared, Vegas software will not scan for wide SCSI devices, which can increase
compatibility with some USB device drivers that incorrectly identify themselves as wide SCSI.
When the check box is cleared, Vegas software will use an internal configuration file to determine your drive's
capabilities.
Default All
If you encounter problems burning CDs, select this check box, and Vegas software will test your drive to
determine its capabilities.
Restores all CD preferences to the default settings.
CUSTOMIZING VEGAS SOFTWARE
CHP. 17
299
Sync tab
These preferences are used to set up Vegas software to generate or trigger from MIDI timecode from external
MIDI devices. For more information, see Synchronizing MIDI timecode on page 164.
Preference
Description
Generate MIDI Timecode settings Sets the output device and frame rate used when generating MIDI timecode.
Generate MIDI Clock settings
Sets the output device used when generating MIDI Clock information. You can choose the same device that you
chose for Generate MIDI Timecode settings.
Trigger from MIDI Timecode
Sets the input software or device and frame rate used when triggering from MIDI timecode.
settings
Note: When Sync is active (Vegas software is triggering
from MTC), media files are not closed (i.e., cannot be edited
outside of Vegas software) when Vegas software is not the
active application. You will also not be prompted to rename
or delete recorded takes as this may interrupt the
synchronization.
Setting advanced Sync preferences
From the Sync tab, you can access advanced settings by clicking Advanced. The Advanced Sync Preferences
dialog has three tabs: MTC Input, MTC Output, and MIDI Clock Output. The display of these tabs is dependent on
your selections in the Sync tab. See the following sections on each tab for more information.
MTC Input
This tab displays only if you choose a device in the Trigger from MIDI Timecodes settings drop-down list on the
Sync tab.
Preference
Description
Free-wheel for timecode loss
When selected, Vegas software continues to play for a specified period of time without chasing if timecode is
lost. Enabling this option can compensate for infrequent losses in timecode monitoring. If losses in timecode are
frequent, troubleshooting should be done on your hardware to find the cause of the problem.
Specifies the amount of time that timecode can be lost before the Free-wheel playback time starts. A longer
time is more tolerant of losses in the incoming timecode.
Specifies the amount of time that Vegas software plays back after the Free-wheel slack time has been exceeded.
Free-wheel slack time (seconds)
Free-wheel playback time
(seconds)
Synchronization delay time
(seconds)
Offset adjust (quarter frames)
Specifies the amount of time required for Vegas software to synchronize itself to incoming timecode. On slower
computers, this time should be set to around two seconds. On faster computers, it may be set lower.
If Vegas software is consistently behind or ahead of the MTC generator, enter a value to adjust a
synchronization offset with quarter-frame accuracy.
If Vegas software is behind the MTC generator, enter a negative number such as -4. If Vegas software is ahead
of the MTC generator, enter a positive number such as 4.
MTC Output
This tab displays only if you choose a device in the Generate MIDI Timecode settings drop-down list on the
Sync tab.
Preference
Description
Full-frame message generation
Specifies when Vegas software sends full-frame timecode messages. Full-frame messages are used by some
external audio synchronizers to seek a proper location prior to synchronization. For example, tape-based
recorders benefit from seeking to full-frame messages because of the time required to move the transport to
the proper location. However, full-frame messages are ignored by some devices and may actually cause
unexpected behavior in other devices. Check your hardware documentation to find out if it supports full-frame
messages.
CHP. 17
CUSTOMIZING VEGAS SOFTWARE
300
MIDI Clock Output
This tab displays only if you choose a device in the Generate MIDI Clock Settings drop-down list on the Sync
tab.
Preference
Description
Send Start instead of Continue
when beginning playback
When selected, Vegas software sends a Start command rather than a Continue command. Normally, Vegas
software sends a Continue command to allow the chasing device to start at a specific time. However, some
older MIDI sequencers do not support the Continue command and must start from the beginning every time.
Song Position Pointer generation Specifies when Vegas software sends Song Position Pointer messages. Song Position Pointer messages are used
by MIDI applications and devices to seek to a proper location prior to starting the synchronization process.
Keyboard tab
From the Options menu, choose Preferences and select the Keyboard tab to customize the keyboard shortcuts
available in the Vegas interface.
The Current Key Bindings box displays the currently assigned shortcut keys. Choose a setting from the Context
drop-down list to choose which shortcuts you want to see.
Editing shortcuts
1. Select a command in the Available commands box.
Choose Global from the Context drop-down list to display all commands in the Available commands box, or
choose a different command to filter the list.
You can type a word in the Show only commands containing box to filter the list of commands to display only
commands that contain the word you typed.
2. Click the Press new shortcut keys box and press the key combination you want to assign to the selected
command.
3. Click the Assign button to assign the key combination in the Press new shortcut keys box to the command
selected in the Available commands box.
Importing a keyboard map
Click the Import button and browse to a Vegas Keyboard Map File (.ini) file to load an existing keyboard
map.
Exporting a keyboard map
Click the Export button and specify a file name and location to save your current keyboard shortcuts to a file
that you can use as a backup or to share your keyboard shortcuts with other Vegas users.
Resetting the default keyboard map
Click the Default All button to restore the default configuration.
CUSTOMIZING VEGAS SOFTWARE
CHP. 17
301
External Control & Automation tab
Use the External Control and Automation tab to set up and customize control surfaces. To display this tab,
choose Preferences from the Options menu, then click the External Control & Automation tab.
Preference
Description
Smooth and thin automation
data after recording
When recording automation, Vegas software creates as many envelope points or keyframes as possible to
represent your control movements.
Select this check box if you want to reduce the number of envelope points/keyframes after recording is finished.
Set controls to default values
when automation is turned off
Available devices
Active control devices
Default all
For more information, see Recording automation settings on page 130.
Select this check box if you want controls to return to their default values when set the track's automation
recording mode to Automation Off. Automated effect parameters do not have default settings and will retain
their last-set values when you turn automation off.
When the check box is cleared, controls will retain their last-set values when you turn automation off.
Choose a device from the drop-down list and click Add to choose the control surfaces that will be available to
Vegas software. Adding a device loads its default profile.
Lists the control devices that you’ve added. Double-click a device name to customize its behavior.
Restores all control surface preferences to the default settings.
Connecting a control surface
You can use one Mackie® Control Universal or up to five generic control surfaces with Vegas software.
Perform the following steps for each device.
1. Connect the MIDI Out port on your MIDI interface to the MIDI In port on your control surface.
2. Connect the MIDI In port on your MIDI interface to the MIDI Out port on your control surface.
3. Configure Vegas software to use your control surface
4. Use the MIDI tab in the Preferences dialog to select the device to which your control surface is
connected. For more information, see MIDI Tab on page 297.
5. Add your device on the External Control & Automation tab.
Note: For information about your specific device, please
refer to the manufacturer's documentation.
Configuring a Mackie Control Universal
The Mackie Control Universal is fully supported by Vegas software. An overlay is available from Mackie
that you can use to label the buttons and controls with their mapped functions in Vegas software.
The overlay identifies the default control mapping. You can also customize the buttons and controls on the
Mackie Control Universal. When you use the default mapping, the Mackie Control is divided into several
functional areas.
1. From the Options menu, choose Preferences to display the Preferences dialog.
2. Select the External Control & Automation tab.
3. Double-click your Mackie Control Unversal in the Active devices list to display the Configure Mackie
Control dialog.
4. To add or change a function do the following:
a. Select an item in the User defined surface control mappings list.
b. Select an item in the Available host functions list.
c. Click the Assign button.
CHP. 17
CUSTOMIZING VEGAS SOFTWARE
302
5. To remove a function, select an item in the User defined surface control mappings list and click the Clear
button.
6. To remove all functions, click the Clear All button.
7. To replace all custom functions with the default settings, click the Default All button.
Configuring a generic MIDI controller
If you have a MIDI control surface, you can configure it to work with the Vegas interface.
1. From the Options menu, choose Preferences to display the Preferences dialog.
2. Select the External Control & Automation tab.
3. Double-click the Generic Control entry in the Active control devices list to display the Configure Generic
Control dialog.
4. To load a configuration from a file, click the Open button and browse to the mapping file you want to use.
5. To add or change a function do the following:
a. Choose a setting from the View function group drop-down list.
b. Select the Learn check box.
c. Select an command in the Host Command list and activate the control on your control surface.
d. You can click the Edit button to fine-tune the MIDI message settings.
6. Repeat steps 3 and 4 for each command you want to make available on your control surface.
7. To remove a function, select an item in the Host Command list and click the Reset button.
8. To remove all functions, click the Reset All button.
9. Click the Save As button to save your updated configuration file.
CUSTOMIZING VEGAS SOFTWARE
CHP. 17
303
CHAPTER
Burning CDs
18
You created your project in Vegas® software, and now you are ready to write the project to a CD. With the
CD-burning capabilities of Vegas software, you can place and arrange audio files to produce professional
audio CDs. You can burn CDs for multiple- or single-track projects and build audio CD layouts
automatically or manually. You can also create video CDs that can be played in many home DVD players
and on computers with a CD-ROM drive and VCD player software, and multimedia CDs that can be played
in any computer with the appropriate player.
CD burning is only available in the full version of Vegas software.
Understanding track-at-once and disc-at-once
Two ways are provided for recording audio to a CD-R disc: track-at-once and disc-at-once.
Track-at-once
Track-at-once writing records individual tracks to the disc and results in a partially recorded disc. However,
the CD-R disc remains unplayable on most systems until you close the disc. The advantage of track-at-once
writing is that you can record tracks onto the disc as you finish them versus waiting until you have finished
your whole album. Track-at-once writing burns the entire project as a single track.
Disc-at-once (Single Session or Red Book)
Disc-at-once writing is the most common burning method in the music industry. This writing mode is used
when creating a master disc to be sent to a disc manufacturer for mass replication. Disc-at-once works just as
it sounds. Multiple tracks of audio are written to the CD in one recording session.
Understanding tracks and indices
You are ready to burn a CD. If you plan to use track-at-once to record a single track, you can proceed right
on to writing the entire project to a CD. However, you are more likely to set up tracks—and perhaps
indices—within your project and burn several tracks at once.
Tracks distinguish songs in the project and have a starting and ending point. Tracks are used to indicate to
the CD-R device where to mark the beginning and ending of a track during the writing process.
Indices are single markers that subdivide a track. Indices are useful for navigating to specific areas within a
track. For example, a sound effects CD may have one track of breaking glass. The track is then indexed to
allow navigation to a specific glass-breaking effect within the track. However, be aware that not all CD
players allow navigation to indices.
Tracks and indices are identified in a track list, which is a chronological text list of all tracks and indices
defined in the audio CD project.
CHP. 18
BURNING CDS
304
Setting up to burn audio CDs
CD burning is only available in the full version of Vegas software.
You can set the project properties and adjust preferences to better accommodate writing audio CDs. The
ruler and time display are set up for you automatically.
Viewing the ruler and time display
The ruler and time display are automatically changed to audio CD time for you when you mark CD tracks in
a project.
Audio CD time formats are as follows:
Display
Format
Ruler
hh:mm:ss (hours:minutes:seconds) or
Time display
tt+mm:ss:ff (track number +/- minutes:seconds:frames, with fps=75)
hh:mm:ss:ff (hours:minutes:seconds:frames, with fps=75) when zoomed in tightly
Setting project properties
Click the Properties button ( ) to access project properties. On the Audio CD tab, you can set the Universal
Product Code/Media Catalog Number (UPC/MCN) or set the number for the first track on the CD. For
more information, see Audio CD tab on page 290.
Setting preferences
From the Options menu, choose Preferences to access the Preferences dialog. On the CD Settings tab, you can
select the CD drive or set the speed at which you will burn the CD. For more information, see CD Settings tab
on page 298.
You can also enter the number of seconds added between tracks when adding Media Pool files as CD tracks.
In the same Preferences dialog, click the Editing tab, and enter a value in the Default time between CD tracks
box.
Finally, you may want to turn off the Quantize to Frames command in the Options menu. When quantizing
to frames is active, your edits are limited to the starting edge of frame boundaries. In a CD layout project, you
can turn this feature off to allow greater precision in editing and track placement. For more information, see
Quantizing to frames on page 89.
Importing CD Architect files
You can use Vegas software to open projects created in CD Architect™ version 4.0 software.
1. From the File menu, choose Open. The Open dialog appears.
2. Browse to the location of the project file.
3. In the Files of type drop-down list, select CD Architect Project Files (.cdp).
4. Select the file.
5. Click Open.
BURNING CDS
CHP. 18
305
Creating audio CD layout projects
Several ways are provided to create an audio CD layout project. If you have a set of audio files you wish to
burn to a CD, you can add the files as tracks to a new audio CD layout project. Or, if you want to burn an
audio CD from an existing project, you can mark the tracks in your project either automatically or manually.
CD layout bar
Track markers
Adding media as CD tracks to a new project
You have a collection of completed audio files that you want to write to a CD. An audio CD layout project
can quickly be assembled from sound files in the Media Pool. You can add the tracks one at a time, or use the
Media Pool to sort them into track order and add them all at once.
1. Create a new project.
2. Add all the media to be included in the project to the Media Pool. For more information, see Adding media
to the Media Pool on page 41.
3. To add all tracks at once, use the following steps to sort the files into track order:
• In the Media Pool, click the arrow on the Views button (
) and choose Details from the menu. The
Media Pool changes to Details view.
• In the Comments column, enter the track number for each media file (01, 02, etc.).
• Click the Comments column header to sort the list into track order.
• Select the sorted files in the Media Pool.
4. Right-click a media file (or the selected media files) and choose Add as CD Track from the shortcut menu.
The files are added to a new track and the audio CD tracks are marked on the CD layout bar. The name of
the media file is used to name each track. If necessary, you can edit the information for the new audio CD
tracks using the markers on the CD layout bar or using the Edit Details window. For more information, see
Working with tracks and indices on page 307.
Right-click files in the Media Pool to add them as CD tracks to a audio CD layout project.
CHP. 18
BURNING CDS
306
Marking tracks in an existing project
Once you have laid out your audio project with the appropriate pauses, you can mark tracks and indices
either automatically or manually.
Note: In DAO CD burning, Vegas software burns from the
beginning of the timeline to the last track marker, regardless of
the location of the first track marker. Material before the first
marker is included as a hidden track on the disc (if your drive
supports burning this material).
Adding pauses
Each audio CD track in your project should have a two-second pause following it. This default setting is
based on the Red Book specification for audio CDs. The exception to this standard is a continuous
recording, such as a live concert CD. For a continuous recording, you can omit the pauses after tracks for
continuous playback. For more information, see Red Book specification on page 335.
Note: The Red Book specification also requires a two-second
pause at the beginning of an audio CD. If the first track in
your project begins before the two-second mark, a ruler is
added offset to ensure the project begins with the required
two-second pause.
If you use the Add as CD Track command to add tracks from the Media Pool, the appropriate pauses are added
automatically. However, if you are laying out your project manually, you must create these pauses between
audio CD tracks.
Two-second pauses
1. Position the cursor where you want to insert the pause.
2. From the Insert menu, choose Time. The Insert Time dialog appears.
3. Enter two seconds in the Amount of time to insert box.
4. Click OK. Two seconds are inserted in the timeline at the cursor position.
Marking tracks automatically
Vegas software can examine the events in your project and mark the audio CD tracks for you. Once the
tracks are marked, you can adjust them manually if necessary. For more information, see Moving track and index
markers on page 307.
1. Lay out your project with two-second pauses between tracks.
2. From the Tools menu, choose Lay Out Audio CD from Events.
The new audio CD track markers appear on the CD layout bar above the timeline. The name of the media
file for each event is used to name the tracks.
BURNING CDS
CHP. 18
307
Marking tracks manually
You can make a time selection and then mark that selection as an audio CD track.
1. Make a time selection that includes the audio for the new track.
2. From the Insert menu, choose Audio CD Track Region. The markers for the new audio CD track appear on
the CD layout bar.
Marking indices
You can create an index marker in much the same way as you create track markers.
1. Position the cursor where you want the index mark to appear.
2. From the Insert menu, choose Audio CD Track Index. The new index marker
appears on the CD layout bar.
Working with tracks and indices
Once you have marked your tracks and indices, you can edit, move, rename, or delete them as needed.
Navigating to and selecting tracks and indices
Several shortcuts are provided for navigating to and selecting audio CD tracks on the CD layout bar.
•
•
•
•
•
•
Double-click a track marker to select the track.
Press . (period) to jump the cursor to the next track or index marker.
Press , (comma) to jump the cursor to the previous track or index marker.
Press Ctrl + . (period) to jump the cursor to the next track marker (index markers are skipped).
Press Ctrl + , (comma) to jump the cursor to the previous track marker (index markers are skipped).
Add Shift to any of these keystrokes to select rather than jump. For example, press Ctrl + Shift + .
(period) to select from the cursor position to the next track marker.
The shortcut keystrokes can be used to jump the cursor while working on a project or during playback.
Moving track and index markers
Track and index markers function just like markers and regions in Vegas software (pg. 78). You can drag a
track or index marker to move it along the CD layout bar. Alternately, you can use the Edit Details window
to make precise adjustments.
Tip: Move both the starting and ending markers for a track
by pressing
Alt
and dragging either of the markers.
Renaming track and index markers
1. Right-click a marker and choose Rename from the shortcut menu that appears.
2. Type a new name for the marker and press
Enter
.
Deleting track and index markers
You can delete a single track or index marker by right-clicking it and choosing Delete from the shortcut
menu. To delete all markers at once, right-click the CD layout bar and choose Delete All from the shortcut
menu.
CHP. 18
BURNING CDS
308
Editing markers using the Edit Details window
The Edit Details window provides a way to adjust the settings for a track or index.
1. From the View menu, choose Edit Details. The Edit Details window displays.
2. From the Show drop-down list, choose Audio CD Track List. The track settings display.
3. Double-click a setting to edit it:
• In the Position column, adjust the track starting position or index position.
• In the End column, adjust the track ending position.
• In the Length column, adjust the track length.
• in the Name column, enter the name of the track or index.
• In the Prot column, select the check box to apply copy protection to the track.
• In the Emph column, select the check box to enable a simple noise reduction process that is
implemented by a CD player. For more information, see Emphasis on page 330.
• In the ISRC column, enter the ISRC number for the track (if used).
Copying a track list from the Edit Details window
You can use the Edit Details window to copy your track list and paste it into another application.
1. Click the gray box in the upper-left corner of the Edit
Details window to select all the cells.
2. Press
Ctrl + C
to copy the cells.
3. Switch to another application and paste the information
into a document or spreadsheet.
Burning audio CDs
CD burning is only available in the full version of Vegas software.
You can burn either single tracks (track-at-once) or the entire disc (disc-at-once).
Burning single tracks (track-at-once)
You can burn your Vegas project as a single track (track-at-once). Once you have burned all your tracks to
the CD, you must close the disc before it can be played.
Burning a track-at-once CD
1. From the Tools menu, choose Burn CD, and choose Track-at-Once Audio CD from the submenu. The Burn
Track-at-Once Audio CD dialog displays the length of the current file and the amount of time remaining
on the disc in your CD recorder.
2. Choose a setting from the Action drop-down list:
• Burn audio begins recording audio to your CD when you click the Start button. You will need to close the
disc before it can be played in an audio CD player.
• Test, then burn audio performs a test to determine whether your files can be written to the CD recorder
without encountering buffer underruns. Recording begins after the test if it is successful.
• Test only performs a test to determine whether your files can be written to the CD without encountering
buffer underruns. No audio is recorded to the CD.
• Close disc closes your disc without adding any audio when you click the Start button. Closing a disc
allows your files to be played on an audio CD player.
• Erase RW disc erases your rewritable CD when you click the Start button.
BURNING CDS
CHP. 18
309
3. Select your burning options:
• Erase RW disc before burning: If you’re using a rewritable CD, select this check box to erase the CD before
you begin burning.
• Close disc when done burning: Select this check box to close the CD after burning. Closing a disc allows
your files to be played on an audio CD player.
• Eject disc when done: Select this check box to eject the CD automatically when burning has completed.
• Burn loop region only: Select this check box to burn only the audio within the loop region.
4. From the Drive drop-down list, choose the CD drive that you want to use to burn your CD.
5. From the Speed drop-down list, choose the speed at which you want to burn. Max will use your drive’s
fastest possible speed; decrease the setting if you have difficulty burning.
6. Click the Start button.
Warning: Clicking the Cancel button after the disc-writing
process has begun will render your disc unusable.
7. When the writing process is complete, a confirmation message displays. Click OK to clear the message.
Closing a track-at-once CD
1. From the Tools menu, choose Burn CD, and choose Track-at-Once Audio CD from the submenu. The Create
CD dialog appears.
2. Click the Close Disc button.
3. When the disc is closed, a confirmation message displays. Click OK to clear the message.
Burning a disc (disc-at-once)
1. From the Tools menu, choose Burn CD, and choose Disc-at-Once Audio CD from the submenu. The Burn
Disc-at-Once Audio CD dialog appears
2. From the Drive drop-down list, use the CD drive that you want to use to burn your CD.
3. From the Speed drop-down list, choose the speed at which you want to burn. Max will use your drive’s
fastest possible speed; decrease the setting to prevent the possibility of buffer underruns.
4. Select the Buffer underrun protection check box if your CD recorder supports buffer underrun protection.
Buffer underrun protection allows a CD recorder to stop and resume burning.
Note: Buffer underrun protection can create a disc that can
be played in CD players, but may contain a bit error where
burning stopped and restarted. Consider clearing this check
box when creating a premaster disc.
5. Choose a radio button in the Burn mode box:
• Burn CDs begins recording audio to your CD immediately.
• Test first, then burn CDs performs a test to determine whether your files can be written to the CD recorder
without encountering buffer underruns. No audio is recorded to the CD during the test, and recording
begins after the test if it is successful.
• Test only (do not burn CDs) performs a test to determine whether your files can be written to the CD
recorder without encountering buffer underruns. No audio is recorded to the CD.
CHP. 18
BURNING CDS
310
6. Select the Render temporary image before burning check box if you want to render your CD project to a
temporary file before recording. Prerendering can prevent buffer underruns if you have a complex project
that cannot be rendered and burned in real time.
Note: The rendered temporary file will remain until you
modify your project or exit. If an image file exists when you
Open the Burn Disc-at-Once Audio CD dialog, the check
box is displayed as Use existing rendered temporary image.
7. Select the Automatically erase rewritable discs check box if you’re burning to rewritable media and want to
erase the disc before burning.
8. Select the Eject when done check box if you want the CD to eject automatically when burning has
completed.
9. Click OK to start burning.
Burning video CDs
CD burning is only available in the full version of Vegas software.
Video CDs can be played in many home DVD players and on computers with a CD-ROM drive and VCD
player software.
1. From the Tools menu, choose Burn CD and choose Video CD from the submenu. The Burn Video CD
dialog is displayed.
2. Choose the movie file you want to use:
• If you want to render the current project, select the Render format radio button.
a.Edit the contents of the File path box to specify the name and location of your rendered file.
b.Choose a template from the Template drop-down list to specify the parameters that should be used
for rendering your file, or click the Custom button to create a new template.
c.Select the Render loop region only check box if you want to use only a portion of your project. If the
check box is cleared, the entire project will be rendered and saved to the Video CD.
BURNING CDS
CHP. 18
311
d.Select the Stretch video to fill output frame check box if you want your video to be reformatted so it
fills the output frame size listed in the Description box. When the check box is cleared, the current
aspect ratio is maintained and black borders are added to fill the extra frame area (letterbox). This
option is useful when the desired output format does not match the frame aspect ratio of you
project.
Note: Clear the Fast video resizing check box if you see unacceptable artifacts in the rendered video.
Turning off this option can correct the artifacts, but your rendering times will increase
significantly.
• If you want to use an already-rendered MPEG file, select the Use an existing file radio button, and enter
the path to the file in the File path box (or click the Browse button to locate the file).
3. Select recording options for your CD-recordable drive:
a. Choose a burn mode:
•Burn CDs begins recording audio to your CD immediately.
•Test first, then burn CDs performs a test to determine whether your files can be written to the CD
recorder without encountering buffer underruns. No audio is recorded to the CD during the test, and
recording begins after the test if it is successful.
•Test only (do not burn CDs) performs a test to determine whether your files can be written to the CD
recorder without encountering buffer underruns. No audio is recorded to the CD.
b. From the Burn speed drop-down list, choose the speed at which you want to record. Max will record
using the fastest speed possible with your drive; decrease the speed if you have difficulty recording.
4. Your movie is recorded to the CD. When recording is finished, you can select the Save movie file check
box to keep the MPEG file that was rendered, or you can clear the check box to delete the file.
5. Click Finish.
CHP. 18
BURNING CDS
312
Creating a multimedia CD
CD burning is only available in the full version of Vegas software.
From the Tools menu, choose Burn CD and choose Multimedia CD from the submenu to render your project
and burn it to a data CD. The rendered project can be played in any computer with the appropriate player.
1. From the Tools menu, choose Burn CD, and choose Multimedia CD from the submenu. The Burn
Multimedia CD dialog appears.
2. Select the options for burning the multimedia CD:
• Choose the appropriate format and template for rendering the project from the Format and Template
drop-down lists.
• Select the Render loop region only check box to burn only a portion of your project.
• Select the Stretch video to fill output frame check box to have your video reformatted so that it fills the
output frame size listed in the Description box. When the check box is cleared, the current aspect ratio is
maintained and black borders are added to fill the extra frame area (letterboxing).
• Clear the Fast video resizing check box if you see unacceptable artifacts in the rendered video. Turning
off this option can correct the artifacts, but it increases rendering time significantly.
• Select the Play movie inside web page check box to create an HTML page and embed the finished video
in it.
• Select the Include movie player installer check box to include a media player installer on the CD. Click the
Browse button to locate the installer file.
• From the Speed drop-down list, choose the speed at which you want to record. The Max option records
using the fastest speed possible with your drive. Decrease the speed if you have difficulty recording.
3. Click OK.
BURNING CDS
CHP. 18
313
CHAPTER
Using Scripting
19
Using the scripting features, Vegas® software becomes an even more powerful and flexible tool. You can use
scripting to streamline repetitive tasks, integrate with external applications, and implement customized
features.
To use scripting, you'll need to install the Microsoft® .NET Framework. This component is available from
the Microsoft Windows® Update site. (Choose Windows Update from the
menu.)
Note: To use scripts that were created for Vegas 4.0
software, you'll need to revise the script's namespace from
SonicFoundry.Vegas to Sony.Vegas. For example, the line
that includes "import SonicFoundry.Vegas;" should be
changed to "import Sony.Vegas;" before running the script.
Scripting is only available in the full version of Vegas software.
Running a script
1. From the Tools menu, choose Scripting, and then choose Run Script from the submenu. The Run Script
dialog is displayed.
2. Browse to the script file (.vb or .js) you want to run.
3. Select the file and click the Open button. The script runs.
CHP. 19
USING SCRIPTING
314
Adding scripts to the Scripting menu
When you start the program, Vegas software looks at the Script Menu folder in the Vegas program folder to
determine which scripts appear in the Scripting submenu. This folder is c:\Program Files\Sony\Vegas 5.0\Script
Menu by default.
1. Add or delete scripts in the Script Menu folder to change the contents of the submenu.
Note: To prevent duplication of script files, you can use
shortcuts in the Script Menu folder.
2. From the Tools menu, choose Scripting, and then choose Rescan Script Menu Folder to update the menu.
Creating a script
The Microsoft .NET framework is used for scripting. You can write scripts in JScript or Visual Basic .NET.
For more information on JScript®, see http://msdn.microsoft.com/library/en-us/jscript7/html/
jsoriJScript.asp.
For more information on Visual Basic® .NET, see http://msdn.microsoft.com/library/en-us/vbcn7/html/
vaconProgrammingWithVB.asp.
Editing an existing script
All you need to edit a script is a simple text editor (and a working knowledge of JScript or Visual Basic .NET
scripting). The scripts that are included are fully commented to help you find and edit the parameters you
need.
1. Create a copy of the script (.vb or .js) file you want to edit, assigning a descriptive name to the copy.
2. Open the new copy of the script in your text editor.
3. Edit the script as needed. The comments in the script will help you find the parameters you need to edit.
Comments are indicated with double forward slashes: //.
For example, the AddEffectToAllMedia.js script includes the following lines:
// This is the full name of the effect plug-in you want to add.
var plugInName = "Sony Timecode";
// This is the name of the preset you want. Set this to null if you
// want the default preset.
var presetName = "SMPTE Drop (29.97 fps)";
The default script applies the Sony Timecode plug-in to all video media in your project using the SMPTE
Drop (29.97 fps) preset. If you wanted to apply the Broadcast Colors plug-in's Extremely Conservative 7.5 Setup preset to all audio media, you could edit the script as follows (changes appear in red):
// This is the full name of the effect plug-in you want to add.
var plugInName = "Sony Broadcast Colors";
USING SCRIPTING
CHP. 19
315
// This is the name of the preset you want. Set this to null if you
// want the default preset.
var presetName = "Extremely Conservative - 7.5 Setup";
The plugInName variable should use the plug-in name that is displayed in the Plug-In Chooser. The
presetName variable should use the preset name that is displayed in the Preset box in the FX window.
4. Save the script.
CHP. 19
USING SCRIPTING
316
USING SCRIPTING
CHP. 19
317
APPENDIX
Troubleshooting
A
Troubleshooting resources
Visit the Sony Pictures Digital Web site to access product updates, look for answers in the knowledge base,
contact customer support, or participate in an online forum:
http://www.sony.com/mediasoftware
Common questions
Why are some of my DirectX plug-ins not working correctly?
Vegas® software is a nondestructive time-based editor. As a result, there are certain types of DirectX® plugins that perform poorly in Vegas software. These types of plug-ins are roughly classified as any plug-ins that
output a different amount of time than what goes in. This includes all plug-ins such as time compress/
expand, gapper/snipper and pitch shift without preserving duration. However, these types of effects plug-ins
may perform suitably as bus effects, but only if just one bus is used in the project. Plug-ins that require a lot of
pre-buffering (such as Sony Pictures Digital Acoustic Mirror™ when using long impulse files) may also
perform poorly.
Also, make certain that the plug-ins you use in Vegas software are DirectX plug-ins and not DXi plug-ins.
DXi plug-ins are not supported in the application and do not perform properly.
Why do I hear gaps in my audio playback?
Check to see if any Vegas software updates have been posted on the Sony Pictures Digital Media Software
and Services Web site:
http://mediasoftware.sonypictures.com/download
Click Updates to access the Updates page. Any updates to the application are posted at this location.
If software updates do not address the playback problem, check these other reasons that your audio playback
can gap:
• Playing back too many tracks simultaneously can overload your hard drives.
• Not enough physical RAM can cause the Windows® operating system to use virtual memory, which is
slower.
• Your CPU may not be able to process a complex mix of plug-ins.
• Problematic video card settings. For more information, see Trouble-free video: hardware solutions on page 320.
The following are some things you can check and do to make sure your system is optimized to prevent
gapping.
APPENDIX A
TROUBLESHOOTING
318
RAM usage
You could be gapping because virtual memory is being used. Virtual memory is a method used by Microsoft
Windows to write information to your hard drive to make room in physical RAM. This process uses a lot of
your computer’s resources. Try the following to optimize RAM usage:
• Exit all background applications not in use.
• Adjust the playback buffering slider on the Audio tab in the Preferences dialog. Adjust this slider as low as
possible. However, be aware that setting it too low may cause gaps as well. For more information, see
Adjusting the playback buffering slider on page 296.
• Mute/solo some of the events or tracks in the mix.
• Add more RAM to your computer.
Disk usage
You may experience gapping when data is not being read off the hard drive fast enough. Try the following to
optimize disk usage:
• Fully defragment your audio hard drives regularly.
• Split audio usage between different physical hard drives, not just different partitions of the same drive.
• Run fewer events simultaneously. It is not how many tracks you have in the project, but how many
different events are playing simultaneously that matters.
• Make sure that you trim out any silent sections of events to minimize the wasted disk access.
• Use hard drives with fast seek times and spindle speeds of 7200 RPM or greater. SCSI drives usually have
better prolonged data transfer performance than IDE drives. Under Microsoft Windows XP and Windows
2000 operating systems, Vegas software can take advantage of SCSI asynchronous reads, which can be a
big performance advantage.
CPU usage
If you have checked your RAM usage and disk usage and you are still experiencing gapping, you can try to
adjust how Vegas software utilizes the central processing unit (CPU). Try the following to optimize CPU
usage:
• Zoom out ( Ctrl + ) fully on the track view while playing so that the screen does not have to scroll to
keep the cursor on it.
• Run fewer DirectX plug-ins.
• Make sure that the peak files are built for all of the audio data in the project before playing. Peaks are only
built for those files on screen. If all peak files are not build, you can encounter gapping when the screen
scrolls as it plays and the application must build peaks on the fly. Press F5 before playback to rebuild peaks
for all of the events, on or off of the screen.
Why do mono events increase 6 dB when panning a track hard?
In Vegas software, all audio events are treated as stereo. A mono audio event is interpreted as a stereo event
with the same data in both channels. If you’re using the add channels panning mode, this duplication
doubles the amplitude and results in a 6 dB increase in volume when you pan a track hard left or right. Try
using the constant power panning mode instead. Right-click the multipurpose slider and choose Constant
Power from the shortcut menu. For more information, see Adjusting stereo panning on page 110.
Why do buffer underruns occur during a test or real write to a CD?
Buffer underruns occur when data transferred to the CD-R is too slow. This may be caused by a variety of
factors relating to optimizing your system. Try writing the CD at a slower speed or prerendering the audio.
For more information, see Burning a disc (disc-at-once) on page 309.
TROUBLESHOOTING
APPENDIX A
319
Why can’t I work with footage captured using an MJPEG card?
Vegas software requires that you have the MJPEG codec (for the MJPEG card used to capture the video)
installed locally on your workstation. Check to make sure that the appropriate MJPEG codec is installed on
your PC.
APPENDIX A
TROUBLESHOOTING
320
Trouble-free video: software solutions
There are literally dozens of possible configurations of hardware for editing video on a PC. While it is
impossible to go into detail for each and every system, the following explains some of the concepts behind
the various settings in Vegas software. Editing and playing back full-frame, 30 fps video is one of the most
demanding activities for any computer. The hardware you use is an important part of the equation, but there
are a number of things you can do to optimize your PC for video. The following list is arranged from the most
to the least important.
• Close all other applications. When capturing video or playing it back, it is critical that no other
applications interrupt this process. Close any applications that are not vital. This includes screen savers,
task schedulers, and even virus-detection software. You can ensure that you have closed all unnecessary
applications by pressing Ctrl + Alt + Delete , selecting the individual applications, and clicking the End Task
button to close them. Certain processes are required and should not (cannot) be terminated (for example,
Explorer).
• Check your virtual memory. Windows operating system uses virtual memory when RAM is low. This is a
method for Windows to use the hard disk to create more memory and is sometimes called a paging file. If
Windows tries to write to the paging file during playback or capture, this can interrupt the video software
and cause problems. Make sure that a different disk drive is being used for virtual memory other than the
one from which you are capturing or playing your video. If you have enough space, use C:\ for virtual
memory and use a physically distinct drive for capturing and playing back video.
• Make sure you have the latest drivers for your video card and capture card and the latest updates and
patches to all relevant software. One caveat to this is that you shouldn’t try to fix a program that is
working correctly. Many times patches and updates fix relatively minor bugs that only affect a small
number of users. If you are not experiencing any problems, it is probably best not to upgrade unless the
manufacturer recommends it.
• Uncompressed video may be high quality, but it results in very large files with very high data rates.
Selecting a more appropriate compression scheme (codec) will definitely improve the situation. If you are
creating movies that need maximum quality, however, this may not be an option.
Trouble-free video: hardware solutions
Even with a fast computer, video is still a hardware challenge. On the other hand, it is definitely possible to
properly configure a 400 MHz Pentium to work with large video files. There are three parts of your PC that
are important and the speed of your CPU is not necessarily the most critical. The following list is arranged
from the most to the least important.
Video subsystem
Many graphics cards (video boards, primary display cards) on a PC cannot handle full-screen, full-frame rate
video. While this leads to jerky, hesitating playback, it may not actually be a serious problem. A common
video configuration is to have a separate video capture card and a primary display card. In this case, the
playback using the primary display on the computer may be jerky, but when you finally output the video to
tape and view it on your television monitor there may not be any problems. If you are not creating movies to
go back to the television or VCR and you are experiencing stuttering playback, you should consider using a
smaller frame size (320X240) and frame rate (15 fps).
TROUBLESHOOTING
APPENDIX A
321
Hard disk
The second most common problem is slow hard disks. Until recently, fast, expensive SCSI AV hard disks
were required to properly capture and play back video on a PC. Slow hard disk problems also manifest
themselves with jerky video playback, although the stutters are less frequent and of longer duration than if
the video subsystem is the problem. Slower hard disks (e.g., 5400 RPM IDE) can cause an occasional
dropped frame. DV enthusiasts have fewer problems due to the low data rate (~3.6 MB/sec.) of that format.
The following section outlines some recommendations arranged in order of importance.
• Buy a dedicated video drive. This is easily the most important piece of hardware advice. A dedicated,
physically distinct hard drive is almost a requirement for any type of serious video work. This means that
you have one primary C:\ drive (or wherever your operating system is installed) and a separate drive for
video. You can use your dedicated drive for other purposes, especially storage, but it is a good idea not to
run any applications from it and to keep Windows virtual memory off of it. It is very important that the
drive only be used for video when playing and capturing, and that other programs (including Windows)
are not trying to access it. Since video files are so large, a dedicated drive is not an unreasonable item even
if digital video is just a hobby. You can never have too much hard disk space.
• Buy a faster hard drive. Older 5400 RPM hard drives may not be fast enough for capturing and playing
back video for any length of time, while newer 7200 RPM drives are almost always adequate. Be careful:
manufacturers are usually talking about burst transfer rates when they talk about the speed of a drive. A
drive that can transfer data at 80MB/sec is worthless for video if it cannot sustain a much slower rate of
8MB/sec for thirty minutes (or more) without dropping a frame. Look to other computer video enthusiasts
for additional advice. Again, the RPMs are a very good indicator, because 7200 RPM IDE drives are
usually newer (c.1998) and older 7200 RPM drives are usually SCSI, which are already higher quality
drives to begin with.
• IDE vs. SCSI. While this was a big issue just a few years ago, it has fortunately faded in importance. Hard
drives can be hooked up to your computer in a number of ways, with the two largest divisions being IDE
and SCSI. This interface simply determines how much data can be transferred to and from the drive in a
second. The interface almost always far outstrips the performance of even the best hard disks and even the
slower interfaces exceed the transfer requirements of video data. SCSI hard disks are usually more
expensive and require a special controller, and while SCSI-2 promises 80MB/sec transfer rates, this is
overkill for most people. Newer IDE hard disks with designations of EIDE, DMA, Ultra-DMA, ATA-33,
and ATA-66 (and newer drives that came out after this writing) can all handle most sustained video
requirements.
CPU and RAM (memory)
While the CPU and the RAM are probably the most important overall aspects of a PC’s speed and
performance, these factors are only third on the list for video. For the most part, these critical components do
not affect the capture or playback of video. This does not mean that a faster CPU or more RAM will not
help, because bigger and faster is always better: CPU and RAM definitely impact rendering speeds. Creating
a final AVI file, especially in a movie project that uses a lot of effects and transitions, can take a long time. A
thirty-minute movie could easily take six or more hours to render, depending on the format and effects used.
CPU speed is also important for more advanced compression codecs, such as MPEG and newer streaming
formats.
APPENDIX A
TROUBLESHOOTING
322
Audio proxy files (.sfap0)
Working with certain types of media files with particular audio compression schemes can be inefficient and
slow. To compensate for this, Vegas software creates audio proxy files for formats that are known to
dramatically impact performance. There are two cases where this occurs.
Multimedia video files often contain both video and audio information. In certain formats, these two streams
can be packed together in such a way as to make editing slow and inefficient. Vegas software therefore takes
the audio stream from these files (e.g., type-1 DV, QuickTime™ 4) and saves it to a separate and more
manageable audio proxy file.
QuickTime 4 audio-only files can also be compressed in a way that makes editing slower. Vegas software also
uses audio proxy files in this situation as well. While audio proxy files may be large (because they are
uncompressed), the performance increase is significant.
The file is saved as a proprietary .sfap0 file, with the same name as the original media file and has the same
characteristics as the original audio stream. So movie.avi yields a movie.avi.sfap0 audio proxy. Additional
audio streams in the same file are saved as movie.avi.sfap1, movie.avi.sfap2, etc. This is a one-time process
that greatly speeds up editing. The conversion happens automatically and does not result in a loss of quality
or synchronization. The original source file remains unchanged (the entire process is nondestructive). Audio
proxy files can be safely deleted at any time since the application recreates these files as needed.
Note: Vegas software saves audio proxy files to the same
folder as the source media. If the source media folder is readonly (e.g., CD-ROM), the files are saved to a temporary
directory.
Interlacing and field order
Field order in interlaced video is an important parameter that can severely impact the quality of video on a
television monitor. While the concept is easy enough to understand, the lack of standards in both
technology and terminology clouds the issue.
The path of the electron gun across the screen is fundamentally different between television monitors and
computer monitors. Computer monitors scan every line in order, from left to right and top to bottom. This is
known as progressive scanning. On a standard television monitor, the electron gun scans every other line
from top to bottom, twice for every picture or frame. For example, the first scan from top to bottom might
scan all of the odd numbered lines first, then jump back to the top of the screen and, in the second scan,
draw all of the remaining even numbered lines, completing the frame. The two fields are said to be interlaced
together to form a single frame.
The illustration that follows shows how two frames in a video are actually composed of two fields each, for a
total of four fields. These fields can be referred to as field one (F1) and field two (F2). Obviously, it is critical
that these two fields are paired together to create a whole frame. What may not be so obvious is that the
actual order of these two fields is not particularly important. In other words, F1 could be scanned first and
then F2, or F2 could be scanned first and then F1. Both situations would create a perfectly valid, error-free
frame of video. While that may sound like good news, in reality this is the source of all of the problems
associated with field order. Since both methods are technically correct, both methods have been used. It is
important to use the correct order when rendering video files for your particular hardware (capture card).
TROUBLESHOOTING
APPENDIX A
323
F1
frame 1
F2
frame 1
F1
frame 2
F2
frame 2
The next illustration shows the effects of incorrectly interlacing a frame of video. In this case, F2 from frame
one is combined with F1 from frame two. Remember that there is nothing inherently right or wrong with a
field order of F2/F1; it just happens to be wrong in this case. At a minimum, this can create slightly blurry or
hazy video. In most situations, the video is jumpy or jittery and is unwatchable. Interlacing problems can be
especially noticeable when two adjacent frames are significantly different; for example, at a cut or in video
with fast moving action. It can also manifest itself in certain computer-generated special effects; for example,
in slow-motion sequences.
F2
frame 1
F1
frame 2
frame on television
The basic problem is that there is no standard correct field order. Some capture cards use F1/F2 and some use
F2/F1. If this were the extent of our troubles, we could check out our hardware manual, look up the correct
field order and that would be that. Unfortunately (if this information is even available) the terminology used
can be equally baffling. F1 may be called the odd, upper, or A field, or (more rarely) it may be called the
even, lower, or B field. Add into the mix the fact that the first scan line might be numbered 0 or 1 (which
changes whether the field is considered odd or even), and that cropping may change which line is ultimately
scanned first, and you can see that this is not a very clear-cut problem. The remainder of this section deals
with how to sort this out in Vegas software. Fortunately, you only have to determine the correct settings
once for any particular hardware setup.
Identifying problems
Vegas software refers to the two fields as upper field first and lower field first. These are probably the most
common terms used to distinguish the two fields, and you may find a page in your hardware's manual that
says something like “Use a field order of lower first.” In many cases (but not all or even most),
Upper=Odd=A and Lower=Even=B.
APPENDIX A
TROUBLESHOOTING
324
In the application, you can select the field order of a project by choosing Properties from the File menu and
clicking the Video tab. The pre-configured templates should work for almost everyone (e.g., if you are editing
and outputting DV video in the US, select the NTSC DV template). If you have problems, you can
manually select a different field order on the Video tab. You can also override the project settings and set the
field order when you render a video file. From the File menu, choose Render As. Then, click the Custom
button and choose an option from the Field order drop-down list on the Video tab. You can also set field order
at the level of the media file or event. Right-click a media file in the Media Pool or an event on the timeline
and choose Properties. The Field order drop-down list appears on the Media tab.
Interlacing problems only manifest themselves on television monitors. Video that is going to be played back
on a computer does not need to be interlaced, and you can select None (progressive scan) for the field order.
Rendered video must be displayed on a television monitor to identify any problems. The only way to see
interlacing problems is to record (print) a rendered video file out to tape and play back the tape on a
television. Problems are most apparent in video that has a lot of motion or that has been modified in some
way; for example, a slow-motion effect. (Some codecs force the correct field order during a render, making it
difficult or impossible to create video with the wrong field order.)
Solving interlacing problems in Vegas software
If your hardware’s documentation does not contain any information about the proper field order, you must
determine this information for yourself. It is not a difficult process, and involves rendering one video file
with an upper first field order and another with a lower first field order. Source material that dramatically
and clearly demonstrates the improperly interlaced video is important: use a media file with a lot of motion
in it and then slow the event down with a velocity envelope or by time-stretching the event.
Timecode
Timecode is a method of labelling frames with a unique and searchable identifier. It is primarily important
for synchronizing video (in frames per second) with time in the real world and, in the case of Vegas software,
with other media in a project.
Changing the timecode used to measure a video file does not alter the contents of the file. For example, no
frames are ever dropped or removed when using SMPTE 29.97 drop frame timecode. Instead, specific frame
numbers are periodically dropped to compensate for differences between timecode and time in the real
world. Confusion between using drop versus non-drop timecode can cause synchronization problems
between video and audio. For very short periods of time, the error would be unnoticeable. After about a half
an hour, you might notice that mouths and words do not quite match in shots of people speaking. Longer
stretches of time show larger discrepancies in synchronization.
Changing the timecode displayed on an event is not equivalent to converting a video to another format. You
cannot convert NTSC video at 29.97 fps to PAL video at 25 fps by simply changing the timecode. To
convert NTSC video to PAL video in Vegas software, you need to re-render the video in the new format. In
this situation, the conversion process necessarily results in some frames of video actually being removed from
the original sequence.
SMPTE timecode types
The following are descriptions of each of the Society of Motion Picture and Television Engineers (SMPTE)
timecode types.
SMPTE 25 EBU (25 fps, Video)
SMPTE 25 EBU timecode runs at 25 fps, and matches the frame rate used by European Broadcasting Union
(EBU) television systems.
Use SMPTE 25 EBU format for PAL DV/D1 projects.
TROUBLESHOOTING
APPENDIX A
325
SMPTE Drop Frame (29.97 fps, Video)
SMPTE Drop Frame timecode runs at 29.97 fps, and matches the frame rate used by NTSC television
systems (North America, Japan).
Use SMPTE Drop Frame format for NTSC DV/D1 projects.
Both SMPTE Drop and SMPTE Non-Drop run at 29.97 fps. In both formats, the actual frames are not
discarded, but they are numbered differently. SMPTE Drop removes certain frame numbers from the
counting system to keep the SMPTE clock from drifting from real time. The time is adjusted forward by two
frames on every minute boundary except 0, 10, 20, 30, 40, and 50. For example, when SMPTE Drop time
increments from 00:00:59.29, the next value is 00:01:00.02.
SMPTE Non-Drop Frame (29.97 fps, Video)
SMPTE Non-Drop Frame timecode runs at a rate of 29.97 fps. This leads to a discrepancy between real time
and the SMPTE time, because there is no compensation in the counting system as there is in SMPTE Drop
Frame.
Use SMPTE Non-Drop format for NTSC D1 projects that are recorded on master tapes striped with NonDrop timecode.
SMPTE 30 (30 fps, Audio)
SMPTE 30 is an audio-only format and runs at exactly 30 fps. SMPTE 30 is commonly used when
synchronizing audio applications such as multitrack recorders or MIDI sequencers. This format should not be
used when working with video.
SMPTE Film Sync (24 fps)
The SMPTE Film Sync time format runs at 24 fps (frames per second). This frame rate matches the standard
crystal-sync 16/33 mm film rate of 24 fps.
Timecode in Vegas software
Video timecode crops up fairly frequently in Vegas software. Being a multimedia production tool, time in the
application can be measured in real-world time (hours, minutes, seconds), in video timecode (involving
frames of video), or in musical time (measures and beats).
Ruler format and timecode
The ruler in Vegas software can be set to measure time in any way that is convenient. This setting does not
change how the final file is rendered, but controls the grid lines and how snapping behaves. Right-click the
ruler and choose a time format from the shortcut list. For more information, see Changing the ruler format on
page 285.
Preferences dialog timecode settings
From the Options menu, choose Preferences and click the Video tab to adjust the Show source frame numbers
on event thumbnails as drop-down list. These settings take precedence over those found in the source media
Properties dialog (see the next topic) and are displayed on events inserted into the timeline. None means that
no numbers are displayed on events, Frame Numbers marks frames in the media file starting with 0, Time
displays the time in seconds, and Timecode allows the source media’s timecode to be detected or selected.
APPENDIX A
TROUBLESHOOTING
326
Source media timecode format
Right-click an event, choose Properties, and click the Media tab to view these properties. By default, Use
selected.
timecode in file is
Note: You can override these settings by choosing different
settings on the Video tab of the Preferences dialog. Select
Timecode from the Source frame numbering list to allow
event-level specification.
Render media file format
The timecode of a final rendered media file is determined by the specified format. The frame rate of the
project ultimately determines the timecode and is often constrained by the type of media file being rendered
or the codec being used for compression. For example, NTSC DV is typically limited to a frame rate of
29.97 fps and uses SMPTE drop frame timecode.
Time formats in Vegas software
A variety of time formats are provided in the application. For more information, see Changing the ruler format
on page 285.
Troubleshooting DV hardware issues
Vegas software is designed to integrate seamlessly with OHCI compliant IEEE-1394 DV video capture
hardware and DV camcorders. While most people never have any problems, the vast number of hardware
configuration possibilities makes this a potentially complex issue. There are a number of resources at the
Sony Pictures Digital Media Software and Services Web site that may be able to assist you.
More detailed information is available at:
http://mediasoftware.sonypictures.com/Support/Productinfo/OHCI.asp
You can also visit the Vegas Updates Web page to access a troubleshooting document for OHCI-compliant
devices. From the Sony Pictures Digital Media Software home page, go to the Download page and click
Updates. Click the Vegas Update link to access the update page.
TROUBLESHOOTING
APPENDIX A
327
APPENDIX
Glossary
B
A-Law
A companded compression algorithm for voice signals defined by the Geneva Recommendations (G.711).
The G.711 recommendation defines A-Law as a method of encoding 16-bit PCM signals into a nonlinear
8-bit format. The algorithm is commonly used in United States telecommunications. A-Law is very similar
to µ-Law, however, each uses a slightly different coder and decoder.
Adaptive Delta Pulse Code Modulation (ADPCM)
A method of compressing audio data. Although the theory for compression using ADPCM is standard, there
are many different algorithms employed. For example, the ADPCM algorithm from Microsoft® is not
compatible with the International Multimedia Association’s (IMA) approved ADPCM.
Aliasing
A type of distortion that occurs when digitally recording high frequencies with a low sample rate. For
example, in a motion picture, when a car’s wheels appear to slowly spin backward while the car is quickly
moving forward, you are seeing the effects of aliasing. Similarly, when you try to record a frequency greater
than one-half of the sampling rate (the Nyquist Frequency), instead of hearing a high pitch, you may hear
alias frequencies in the low end of the spectrum.
To prevent aliasing, an anti-aliasing filter is used to remove high-frequencies before recording. Once the
sound has been recorded, aliasing distortion is impossible to remove without also removing other frequencies
from the sound. This same anti-aliasing filter must be applied when resampling to a lower sample rate.
Amplitude Modulation (AM)
A process whereby the amplitude (loudness) of a sound is varied over time. When varied slowly, a tremolo
effect occurs. If the frequency of modulation is high, many side frequencies are created which can strongly
alter the timbre of a sound.
Analog
When discussing audio, this term refers to a method of reproducing a sound wave with voltage fluctuations
that are analogous to the pressure fluctuations of the sound wave. This is different from digital recording in
that these fluctuations are infinitely varying rather than discrete changes at sample time (see Quantization).
ASIO
ASIO (Audio Stream In/Out)™ is a low-latency driver model developed by Steinberg Media
Technologies AG.
ASIO audio drivers are only supported in the full version of Vegas® software.
Attack
The attack of a sound is the initial portion of the sound. Percussive sounds (drums, piano, guitar plucks) are
said to have a fast attack. This means that the sound reaches its maximum amplitude in a very short time.
Sounds that slowly swell up in volume (soft strings and wind sounds) are said to have a slow attack.
APPENDIX B
GLOSSARY
328
Attenuation
A decrease in the level of an audio signal.
Audio Compression Manager (ACM)
The Audio Compression Manager from Microsoft® is a standard interface for audio compression and signal
processing for Windows. The ACM can be used by Microsoft® Windows® programs to compress and
decompress WAV files.
AVI
A file format of digital video. Vegas software allows you to open, edit and create new AVI files.
Bandwidth
Refers to the EQ plug-in that is built in. Each frequency band has a width associated with it that determines
the range of frequencies that are affected by the EQ. An EQ band with a wide bandwidth affects a wider
range of frequencies than one with a narrow bandwidth.
Bandwidth can also refers to the amount of data that can be transferred via a connection, such as a network
or modem. For example, streaming media must be compressed due to the limited bandwidth of most Internet
connections.
Beats Per Measure
In music theory, the time signature of a piece of music contains two pieces of information: the number of
beats in each measure of music, and which note value gets one beat. This notion is used to determine the
number of ticks to put on the ruler above the track view, and to determine the spacing when the ruler
displays in measures and beats format.
Beats Per Minute (BPM)
In music theory, the tempo of a piece of music can be written as a number of beats in one minute. If the
tempo is 60 BPM, a single beat occurs once every second. Lower BPM’s equal slower tempo, and vice versa.
Bit
A bit is the most elementary unit in digital systems. Its value can only be 1 or 0, corresponding to a voltage
in an electronic circuit. Bits are used to represent values in the binary numbering system. As an example, the
8-bit binary number 10011010 represents the unsigned value of 154 in the decimal system. In digital
sampling (specifically the PCM format), a binary number is used to store individual sound levels, called
samples.
Bit Depth
The number of bits used to represent a single sample. Vegas software uses either 8, 16, or 24-bit samples.
Higher values increase the quality of the playback and any recordings that you make. While 8-bit samples
take up less memory (and hard disk space), they are inherently noisier than 16 or 24-bit samples.
Bus
A virtual pathway where signals from tracks and effects are mixed. A bus’s output can be a physical audio
device in the computer from which the signal is heard.
Byte
Refers to a set of 8 bits. An 8-bit sample requires one byte of memory to store, while a 16-bit sample takes
two bytes of memory to store.
GLOSSARY
APPENDIX B
329
Clipboard
The Clipboard is where data that you have cut or copied in Vegas software is stored. You can then paste the
data back into Vegas software at a different location, or paste it into other applications. Some data, such as
audio, cannot be pasted into applications such as Microsoft Word or Notepad, but the text data from the
Edit Details window can be pasted. This allows you to then print or format the data. The Video Preview
window also lets you capture still frames to the Clipboard for use in any image editing program. For more
information, see Understanding the Video Preview window on page 253.
Clipping
Clipping is what occurs when the amplitude of a sound is above the maximum allowed recording level. In
digital systems, clipping is seen as a clamping of the data to a maximum value, such as 32,767 in 16-bit data.
Clipping causes sound to distort.
Codec
An acronym for COmpressor/DECompressor. A codec is an computer algorithm that is used to compress
video and audio data, shrinking file sizes and data rates.
Compositing
Compositing is the term used to describe the way separate video sources are mixed together. Overlay titles
are composited onto a background video sequence.
Crossfade
Mixing two pieces of overlapping audio or video by fading one out as the other fades in.
Cutoff frequency
The cutoff frequency of a filter is the frequency at which the filter changes its response. For example, in a
low-pass filter, frequencies greater than the cutoff frequency are attenuated while frequencies less than the
cutoff frequency are not affected.
DC Offset
DC Offset occurs when hardware, such as a sound card, adds DC current to a recorded audio signal. This
current causes the audio signal to alternate around a point above or below the normal -infinity dB (center)
line in the sound file. To see if you have a DC offset present, you can zoom all the way into a sound file and
see if it appears to be floating over the center line.
Decibel (dB)
A unit used to represent a ratio between two numbers using a logarithmic scale. For example, when
comparing the numbers 14 and 7, you could say 14 is two times greater than the number 7; or you could say
14 is 6 dB greater than the number 7. Where did we pull that 6 dB from? Engineers use the equation dB = 20
x log (V1/V2) when comparing two instantaneous values. Decibels are commonly used when dealing with
sound because the ear perceives loudness in a logarithmic scale.
In Vegas software, most measurements are given in decibels. For example, if you want to double the
amplitude of a sound, you apply a 6 dB gain. A sample value of 32,767 (maximum positive sample value for
16-bit sound) can be referred to as having a value of 0 dB. Likewise, a sample value of 16,384 can be referred
to having a value of -6 dB.
Device Driver
A program that enables Microsoft Windows to connect different hardware and software. For example, a
sound card device driver is used by Microsoft Windows software to control sound card recording and
playback.
APPENDIX B
GLOSSARY
330
Digital Signal Processing (DSP)
A general term describing anything that alters digital data. Signal processors have existed for a very long
time (tone controls, distortion boxes, wah-wah pedals) in the analog (electrical) domain. Digital Signal
Processors alter the data after it has been digitized by using a combination of programming and mathematical
techniques. DSP techniques are used to perform many effects such as equalization and reverb simulation.
Since most DSP is performed with simple arithmetic operations (additions and multiplications), both your
computer’s processor and specialized DSP chips can be used to perform any DSP operation. The difference is
that DSP chips are optimized specifically for mathematical functions while your computer’s microprocessor is
not. This results in a difference in processing speed.
DirectX Application Programming Interface
A set of interfaces designed by Microsoft for multimedia development. A DirectX® plug-in, such as the Sony
Pictures Digital Noise Reduction™ DirectX plug-in, uses the DirectX Media Streaming Services (DMSS)
API. Because DMSS is a standard API, a DirectX plug-in can be used in any application that supports
DMSS.
Dithering
The practice of adding noise to a signal to mask quantization noise (see also Noise Shaping).
Drag and Drop
A quick way to perform certain operations using the mouse. To drag and drop, you click and hold a
highlighted selection, drag it (hold the left-mouse button down and move the mouse) and drop it (let go of
the mouse button) at another position on the screen.
Dynamic Range
The difference between the maximum and minimum signal levels. It can refer to a musical performance
(high volume vs. low volume signals) or to electrical equipment (peak level before distortion vs. noise floor).
For example, orchestral music has a wide dynamic range, while thrash metal has a very small (always loud)
range.
Emphasis
A rudimentary noise reduction process that involves a boost in the high frequencies during the recording of
the CD and a complimentary cut in the same frequencies during the playback of the CD. The result reduces
high frequency noise without disrupting the natural frequency response of the source material. If the
emphasis flag is set for a track, any CD player that has a de-emphasis circuit will impart the high frequency
cut on the track. Be aware that Vegas software cannot impart the pre-emphasis boost on a track; it can only
set the emphasis flag.
Endian (Little and Big)
Little and Big Endian describe the ordering of multi-byte data that is used by a computer’s microprocessor.
Little Endian specifies that data is stored in a low to high-byte format; this ordering is used by the Intel®
microprocessors. Big Endian specifies that data is stored in a high to low-byte format; this ordering is used by
the Motorola® microprocessors.
Envelopes (Audio and Video)
Envelopes, as used by Vegas software, are a way of automating the change of a certain parameter over time.
In the case of volume, you can create a fade out (which requires a change over time) by adding an envelope
and creating an extra point to the line that indicates where the fade starts. Next, you pull the end point of
the envelope down to -inf. For more information, see Working with track envelopes on page 126.
GLOSSARY
APPENDIX B
331
Equalization (EQ)
The process by which certain frequency bands are raised or lowered in level. EQ has various uses. The most
common use in Vegas software is to simply adjust the subjective timbrel qualities of a sound.
Event
Media files that have been dragged onto the timeline in Vegas software are referred to as events. An event is
actually a window into a media file and is a reference, or pointer, to the file. It can display all or part of a
media file and can be edited without altering the source media (nondestructive).
Field Order
Video that is displayed on a television is interlaced. This means that every frame of video is actually
composed of two fields, each of which is made up of half of the lines that make the final frame. These two
fields are woven together in alternate lines, but which of the two fields is displayed first (the field order) can
be important. You can set the field order for video in the Project Properties dialog or, when rendering a
project, in the Custom Template dialog. For more information, see Interlacing and field order on page 322.
File Format
A file format specifies the way in which data is stored on your floppy disks or hard drive. In Windows for
example, the most common audio file format is the Microsoft WAV format. However, Vegas software can
read and write to many other file formats so you can maintain compatibility with other software and
hardware configurations.
Frame Rate (Audio)
Audio uses frame rates only for the purposes of synching to video or other audio.
Frame Rate (Video)
The speed at which individual images in the video are displayed on the screen. A faster frame rate results in
smoother motion in the video. However, more times than not, frame rate is associated with SMPTE standard
frame rates for video: 29.97 for NTSC (used in US, North and Central America, parts of South America,
and Japan), 25 for PAL (used in many parts of the world, including Europe and much of Asia), or 24 for film.
Frequency Spectrum
The frequency spectrum of a signal refers to its range of frequencies. In audio, the frequency range is basically
20 Hz to 20,000 Hz. The frequency spectrum sometimes refers to the distribution of these frequencies. For
example, bass-heavy sounds have a large frequency content in the low end (20 Hz - 200 Hz) of the spectrum.
Hertz (Hz)
The unit of measurement for frequency or cycles per second (CPS).
Insertion Point
The insertion point (also referred to as the cursor position) is analogous to the cursor in a word processor. It
is where pasted data is placed or other data is inserted, depending on the operation. The insertion point
appears as a vertical flashing black line and can be moved by clicking the left mouse button anywhere in the
timeline.
Inverse telecine
Telecine is the process of converting 24 fps (cinema) source to 30 fps video (television) by adding pulldown
fields. Inverse telecine, then, is the process of converting 30 fps (television) video to 24 fps (cinema) by
removing pulldown.
APPENDIX B
GLOSSARY
332
Markers
Saved locations in the sound file. Markers can be displayed in the Trimmer window for sound files that
contain them, but more often, markers and regions are used at the project level to mark locations or sections
in the project.
Media Control Interface (MCI)
A standard way for Microsoft Windows programs t o communicate with multimedia devices like sound cards
and CD players. If a device has a MCI device driver, it can easily be controlled by most multimedia Microsoft
Windows software.
Media File
A media file, or multimedia file, is any image, audio or video file on a computer. In Vegas software, you can
browse for these files in the Explorer window. You can drag media files to the timeline or insert them into
the Media Pool. Media files that have been dragged to the timeline are referred to as events.
MIDI Clock
A MIDI device specific timing reference. It is not absolute time like MIDI timecode (MTC); instead, it is a
tempo-dependent number of ticks per quarter note. MIDI clock is convenient for synchronizing devices that
need to do tempo changes mid-song.
MIDI Port
A MIDI Port is the physical MIDI connection on a piece of MIDI gear. This port can be a MIDI in, out or
through. Your computer must have a MIDI port to output MIDI timecode to an external device or to receive
MIDI timecode from an external device.
MIDI Timecode (MTC)
MTC is an addendum to the MIDI 1.0 Specification and provides a way to specify absolute time for
synchronizing MIDI-capable applications. Basically, it is a MIDI representation of SMPTE timecode.
Mix
The process of combining multiple audio events and effects into a final output. The analogous process of
combining video events together is called compositing.
Musical Instrument Digital Interface (MIDI)
A standard language of control messages that provides for communication between any MIDI compliant
devices. Anything from synthesizers to lights to stage equipment can be controlled via MIDI. Vegas software
utilizes MIDI for synchronization purposes.
Noise-shaping
Noise-shaping is a technique that can minimize the audibility of quantization noise by shifting its frequency
spectrum. For example, in 44,100 Hz audio, quantization noise is shifted towards the Nyquist Frequency of
22,050 Hz. See also Dithering.
Nondestructive Editing
A type of editing used by Vegas software that involves a pointer-based system of keeping track of edits.
When you delete a section of audio in a nondestructive system, the audio on disk is not actually deleted.
Instead, a set of pointers is established to tell the program to play the active sections during playback.
Nonlinear Editing (NLE)
A method of editing video non-sequentially or in random order. Editing video in Vegas software is nonlinear
as opposed to editing video tape, which is linear.
GLOSSARY
APPENDIX B
333
Normalize
Refers to raising the volume so that the highest level sample in the file reaches a user-defined level. Use this
function to make sure you are fully utilizing the dynamic range available to you.
Nyquist Frequency
The Nyquist Frequency (or Nyquist Rate) is one-half of the sample rate and represents the highest frequency
that can be recorded using the sample rate without aliasing. For example, the Nyquist Frequency of 44,100
Hz is 22,050 Hz. Any frequencies higher than 22,050 Hz produce aliasing distortion in the sample if an antialiasing filter is not used while recording.
OPT Plug-In
A plug-in that uses Open Plug-in Technology (OPT) standard from Yamaha™. OPT plug-ins provide tools
for working with MIDI such as edit views, effect processors and filters, arpeggiators, and real-time panel
automation.
Pan
To place a mono or stereo sound source perceptually between two or more speakers.
Peak File (.sfk)
Vegas software displays the waveform of audio files graphically on a computer monitor. This visual
information must be generated by Vegas software when the audio file is opened and can take a few seconds.
Vegas software then saves this information as a peak file (.sfk). This file stores the information for displaying
waveform information so that opening a file is almost instantaneous. The peak file is stored in the directory
in which the file resides and has an .sfk extension. If the peak file is not in the same directory as the file, or is
deleted, Vegas software regenerates it the next time you open the file.
Pixel Aspect Ratio
Computers display pixels as squares: 1.0. Televisions display individual pixels as rectangles: 0.9091
(NTSC DV, D1), 1.0926 (PAL DV, D1), or other rectangular variations. Using the wrong pixel aspect ratio
can result in distortions or stretching of the video. You can set the pixel aspect ratio in the Project Properties
dialog or, when rendering, in the Custom Template dialog. You should choose the aspect ratio based on the
final movie’s destination. Consult your hardware manual if you are in doubt about the appropriate ratio. The
pixel aspect ratio is unrelated to the frame’s aspect ratio.
Plug-In
An effect that can be added to the product to enhance the feature set. Vegas software supports DirectX
compatible plug-ins. The built-in EQ, Compression and Dithering effects are also considered plug-ins
because they work in other DirectX-compatible applications.
Plug-In Chain
Plug-ins can be strung together into a chain so that the output of one effect feeds into the input of another.
This allows for complex effects that couldn’t otherwise be created.
Pre-roll/Post-roll
Pre-roll is the amount of time elapsed before an event occurs. Post-roll is the amount of time after the event.
The time selection defines the pre- and post-roll when recording into a selected event.
Preset
A snapshot of the current settings in a plug-in. Presets are created and named so that you can easily get back
to a sound or look that you have previously created.
APPENDIX B
GLOSSARY
334
A preset calls up a bulk setting of a function in Vegas software. If you like the way you tweaked that EQ, but
do not want to have to spend the time getting it back for later use, save it as a preset. Presets appear in the
top of plug-in windows in Vegas software.
Pulldown
In telecine conversion, fields are added to convert 24 fps film to 30 fps video.
In 2-3 pulldown, for example, the first frame is scanned into two fields, the second frame is scanned into
three fields, and so on for the duration of the film. 2-3 pulldown is the standard for NTSC broadcasts of 24p
material. Use 2-3 pulldown when printing to tape, but not when you intend to use the rendered video in
Vegas software. Removing 2-3 pulldown is inefficient because the pulldown fields that are created for frame
3 span two frames:
24 fps film (top) and resulting NTSC video with 2-3 pulldown fields (bottom)
Use 2-3-3-2 pulldown when you plan to use your rendered video in Vegas software as source media. When
removing 2-3-3-2 pulldown, Vegas software simply discards frame three and merges the pulldown fields in
the remaining frames:
24 fps film (top) and resulting NTSC video with 2-3-2-2 pulldown fields (bottom)
Pulse Code Modulation (PCM)
PCM is the most common direct binary representation of a level of an uncompressed audio signal. This
method of coding yields the highest fidelity possible when using digital storage.
Punch-In
Punching-in during recording means automatically starting and stopping recording at user-specified times. In
Vegas software, shorter events can be punched into longer ones.
Quadraphonic
A mixing implementation that allows for four discrete audio channels. These are usually routed to two front
speakers and two back speakers to create immersive audio mixes.
Quantization (Audio)
The process by which measurements are rounded to discrete values. Specifically with respect to audio,
quantization is a function of the analog-to-digital conversion process. The continuous variation of the
voltages of a analog audio signal are quantized to discrete amplitude values represented by digital, binary
numbers. The number of bits available to describe these values determines the resolution or accuracy of
quantization. For example, if you have 8-bit analog-to-digital converters, the varying analog voltage must be
quantized to 1 of 256 discrete values; a 16-bit converter has 65,536 values. Quantization is to level as
sampling rate is to time.
GLOSSARY
APPENDIX B
335
Quantization Noise
A result of describing an analog signal in discrete digital terms (see Quantization). This noise is most easily
heard in low resolution digital sounds that have low bit depths and is similar to a hiss while the audio is
playing. It becomes more apparent when the signal is at low levels, such as when doing a fade out. See also
Dithering.
Quantizing (MIDI)
The correction of rhythms to align with selected note lengths or beats in a MIDI sequence.
Quantizing (Video)
Limiting all editing to frame boundaries. For more information, see Quantizing to frames on page 89.
Red Book specification
The Red Book defines the specifications of every audio compact disc in every music store throughout the
world. Red Book specifications define not only the information within the disc (digital audio recorded at
44.1 kHz), but also the disc size itself and the way in which the audio is arranged.
Region
A subsection of a sound file denoted by a start and end point. You can define any number of regions in a
sound file.
Rendering
The process by which Vegas software saves the project to a specific file format like AVI or WMA.
Resample
The act of recalculating samples in a sound file at a different rate than the file was originally recorded. If an
audio file is resampled at a lower rate, Vegas software decreases sample points. As a result, the file size and
the frequency range are reduced. When resampling to a higher sample rate, Vegas software interpolates extra
sample points in the sound file. This increases the size of the sound file but does not increase the quality.
When down-sampling, one must be aware of aliasing (see Aliasing). Vegas software automatically resamples
all audio to the project’s sample rate.
Ripple; Ripple Editing
A type of editing where events are moved out of the way to make room for newly inserted events as opposed
to simply being overwritten. When a one minute event is ripple inserted into a project, the duration of a
project lengthens by one minute. If ripple editing is turned off, the same operation would not affect the
overall duration of the project.
Roll
Originally, a conventional studio typically had two source decks that were used to play back video to a final
destination or output deck. These two source decks were commonly referred to as the A and B rolls. In Vegas
software, a video track can be configured to display an A and a B roll, which appear as sub-tracks. The
concept is extended further in Vegas software to include a transition roll between the A and B rolls. For more
information, see Understanding track layers on page 234.
Ruler
The ruler is the area above the tracks that shows the horizontal axis units.
Sample
The word sample is used in many different (and often confusing) ways when talking about digital sound.
Here are some of the different meanings:
APPENDIX B
GLOSSARY
336
• A discrete point in time which a sound signal is divided into when digitizing. For example, an audio CDROM contains 44,100 samples per second. Each sample is really only a number that contains the
amplitude value of a waveform measured over time.
• A sound that has been recorded in a digital format; used by musicians who make short recordings of
musical instruments to be used for composition and performance of music or sound effects. These
recordings are called samples. In this manual, we try to use sound file instead of sample whenever referring
to a digital recording.
• The act of recording sound digitally (i.e., to sample an instrument) means to digitize and store it.
Sample Rate
The sample rate (also referred to as the sampling rate or sampling frequency) is the number of samples per
second used to store a sound. High sample rates, such as 44,100 Hz provide higher fidelity than lower sample
rates, such as 11,025 Hz. However, more storage space is required when using higher sample rates. Sampling
rate is to time as quantization is to level.
Sample Size
See Bit Depth.
Sample Value
The sample value (also referred to as sample amplitude) is the number stored by a single sample. In 16-bit
audio, these values range from -32768 to 32767. In 8-bit audio, they range from -128 to 127. The maximum
allowed sample value is often referred to as 100% or 0 dB.
.sfap0
Sony Pictures Digital audio proxy file. For more information, see Audio proxy files (.sfap0) on page 322.
.sfk
See Peak File.
Shortcut Menu
A context-sensitive menu that appears when you right-click certain areas of the screen. The functions
available in the shortcut menu depend on the object being clicked on as well as the state of the program. As
with any menu, you can select an item from the shortcut menu to perform an operation. Shortcut menus are
used frequently in Vegas software for quick access to many commands. An example of a shortcut menu can
be found by right-clicking any event along the timeline.
Signal-to-Noise Ratio
The signal-to-noise ratio (SNR) is a measurement of the difference between a recorded signal and noise
levels. A high SNR is always the goal.
The maximum signal-to-noise ratio of digital audio is determined by the number of bits per sample. In 16-bit
audio, the signal to noise ratio is 96 dB, while in 8-bit audio, the ratio is 48 dB. However, in practice, this
SNR is never achieved, especially when using low-end electronics.
Small Computer Systems Interface (SCSI)
A standard interface protocol for connecting devices to your computer. The SCSI bus can accept up to seven
devices at a time including CD-ROM drives, hard drives and samplers.
GLOSSARY
APPENDIX B
337
SMPTE
SMPTE is the acronym for the Society of Motion Picture and Television Engineers (SMPTE). SMPTE
timecode is used to synchronize time between devices. The timecode is calculated in
Hours:Minutes:Seconds:Frames, where Frames are fractions of a second based on the frame rate. Typical
frame rates for SMPTE timecode can be 24, 25, 29.97 or 30 frames per second, depending on your local
standards.
SMPTE Drop Frame Timecode
A method of measuring time in video. Drop frame involves skipping two frame numbers (no frames are
actually dropped) every ten minutes to compensate for the difference between NTSC 29.97 fps video and 30
frame counts per second.
Telecine
The process of creating 30 fps video (television) from 24 fps film (cinema). See inverse telecine and pulldown.
Tempo
Tempo is the rhythmic rate of a musical composition, usually specified in beats per minute (BPM).
Time Format
The format in which Vegas software displays the ruler and selection times. These include: time, seconds,
frames and all standard SMPTE frame rates.
Time Signature
See Beats Per Measure.
Timecode
For more information, see Timecode on page 324.
Track
A discrete timeline for audio or video data. Events are placed on tracks and determine when sound or images
start and stop. Multiple audio tracks are mixed together to give you a composite sound that you hear.
Multiple video tracks are composited on top of each other to create the final video output.
Track List
The track list appears at the left side of the Vegas workspace and contains the master controls for each track.
From here you can adjust track volume or transparency, add track effects, mute or solo tracks, and reorder
tracks.
Track View
The track view, or timeline, is the space events appear on tracks.
µ-Law
µ-Law (mu-Law) is a companded compression algorithm for voice signals defined by the Geneva
Recommendations (G.711). The G.711 recommendation defines µ-Law as a method of encoding 16-bit
PCM signals into a nonlinear 8-bit format. The algorithm is commonly used in European and Asian
telecommunications. µ-Law is very similar to A-Law, however, each uses a slightly different coder and
decoder.
APPENDIX B
GLOSSARY
338
Undo Buffer
This is the temporary file created before you do any processing to a project. This undo buffer allows the
ability to revert to previous versions of the project if you decide you don’t like changes you’ve made to the
project. This undo buffer is erased when the file is closed or when you choose Clear Edit History from the Edit
menu.
Undo/Redo
These commands allow you to change a project back to a previous state when you don’t like the changes you
have made, or reapply the changes after you have undone them. The ability to undo/redo is only limited by
the size of your hard drive. See Undo Buffer.
Undo/Redo History
A list of all of the functions that have been performed to a file that are available to be undone or redone.
The undo/redo history gives you the ability to undo or redo multiple functions. To display the history list,
click the down-arrow on the Undo (
) or Redo (
) button.
Video for Windows (AVI)
See AVI.
Virtual MIDI Router (VMR)
A software-only router for MIDI data between programs. Vegas software uses the VMR to receive MIDI
timecode and send MIDI clock. No MIDI hardware or cables are required for a VMR, so routing can only be
performed between programs running on the same PC.
WAV
A digital audio file format developed by Microsoft and IBM. One minute of uncompressed audio requires
10 MB of storage.
Waveform
A waveform is the visual representation of wave-like phenomena, such as sound or light. For example, when
the amplitude of sound pressure is graphed over time, pressure variations usually form a smooth waveform.
Waveform Display
A section inside of the Trimmer window or on an audio event that shows a graph of the sound data
waveform. The vertical axis corresponds to the amplitude of the wave. For 16-bit sounds, the amplitude
range is -32,768 to +32,767. For 24-bit sounds, the range is -8,388,607 to +8,388,607. The horizontal axis
corresponds to time, with the left-most point being the start of the waveform. In memory, the horizontal axis
corresponds to the number of samples from the start of the sound file.
Zero-crossing
A zero-crossing is the point where a fluctuating signal crosses the zero amplitude axis. By making edits at
zero-crossings with the same slope, the chance of creating glitches is minimized. Vegas software simulates
zero crossings by applying short (10 mS default) fades to trimmed audio.
Zipper noise
Zipper noise occurs when you apply a changing gain to a signal, such as when fading out. If the gain does not
change in small enough increments, zipper noise can become very noticeable. Vegas software fades are
accomplished using 64-bit arithmetic, thereby creating no zipper noise.
GLOSSARY
APPENDIX B
i
Index
Removing plug-ins from chain, 157
Numerics
Audio preferences, 295
Advanced control settings, 296
Playback buffering slider, 296
5.1 Surround Plug-In Pack, 186
5.1 Surround, See Surround
Audio property settings, 289
A
Audio proxy files, 322
A/B roll, See Tracks, Track layers
Audio tab, 289
Add channels panning model, 110, 181
Auto-crossfades, converting to transitions, 232
Adding empty tracks, 105
Automating
Mixer controls, 152
Surround panning, 182–185
Adding media to a bin, 44
Alpha channel, 227
In images, 192, 195
Selecting type for media file, 192
Automation
Assignable effects automation, 121
Bus automation, 122
Composite level automation, 124
Editing envelopes, 126
Hiding envelopes, 127
Latch mode, 130
Modes, 129
Motion blur automation, 125
Mute automation, 119
Recording, 130
Removing envelopes, 128
Showing or hiding controls, 119
Touch mode, 130
Track automation, 119
Track effect automation, 122
Volume and panning automation, 120
Animation, 212
Arming tracks to record, 53, 165
ASR, See Envelopes
Assignable effects, 150–152, 153
Assigning tracks to, 111, 151
Automation, 121
Routing to busses, 152
Volume adjustment, 111, 151
Volume envelope, 126
Attributes
Copying from one event to another, 137
Audio CD tab, 290
Audio channels, 136
Autosaving, 271
Audio Device preferences, 295
AVI
Bit depth, 278
Channels, 278
Creating a movie, 57
Format, 272, 278
Frame rate, 277
Frame size, 276
Sample rate, 278
Template, 276
Video compression, 277
Audio Display preferences, 298
Audio editor program, 85–87
Opening from Trimmer, 100
Opening from Vegas, 87
Setting up, 85
Audio effects, 153–160
Adding via Plug-in Chooser dialog, 154
Adding via Plug-Ins window, 155
Assignable effects, 150–152
Automation, 122
Bypassing plug-ins, 157
Creating a plug-in chain, 154
Plug-Ins window, 25
Rearranging chain order, 156
B
Balance panning model, 110, 181
Bins, media, 44
adding media, 44
INDEX
ii
adding recorded files automatically, 45
creating, 44
deleting media, 45
searching, 45
Blue screening, 228
Burning 5.1-channel audio to DVD, 186
Burning audio CDs, 303
Adding pauses between tracks, 306
Creating a CD layout, 305
Disc-at-once burning, 303, 309
Exporting a track list, 308
Importing CD Architect files, 304
Marking tracks and indices, 306
Settings and preferences, 304
Track-at-once burning, 303, 308
Burning CDs
proper use of software, 312
Burning video CDs, 310
Bus automation, 122
Bus tracks, 152
Busses, 111, 112, 145–149
Adding to project, 145
Adjusting for clipping, 148
Adjusting volume, 148
Assigning plug-ins to, 153
Assigning tracks to, 53, 111, 149
Automating parameters, 122
Automation, 122
Bus send volume envelopes, 126
Controls, 145
Deleting from project, 147
Meter resolution, 148
Muting, 148
Naming/renaming, 149
Panning, 179
Routing to hardware, 147
Soloing, 149
Bypassing
Audio plug-ins, 157
Video plug-ins, 210
C
Capturing images
From a scanner, 42
From the Video Preview window, 193
Capturing Video
Recapturing offline clips, 42
CD Settings tab, 298
CDs
video, 310
Channels, audio, 136
Checkerboard, 213
Child tracks (compositing), 214, 222
Chromakeying, 228
Multiple keys, 229
Chrominance
monitoring, 260
Clean up prerendered video, 256
Clearing the edit history, 78
Closed captioning, 196–198
Adding from a script, 196–198
Adding line-by-line, 196
Displaying, 198
Color
Time Display window, 288
Track, 107
Color channels, 259
Color gradient event, 213
Color key, 228
Color levels
monitoring, 262
Command markers, 82
Closed captioning, 196–198
Command bar, 19
Editing, 84
Inserting, 84
Scott Studios, 83
Composite level automation, 124
Composite level envelope, 126
Composite level slider, 52, 112, 124, 217
Composite mode
Setting default, 114
Compositing, 214–217
Compositing modes, 52, 215–217
parent/child tracks, 214, 222
Constant power panning model, 110, 181
Contrast
monitoring, 262
Control surface setup, 301
Capturing video, 42
Converting format, See Rendering
CD
Burning audio CDs, 303
multimedia, 312
CD Architect files, 304
Copying events, 63
Event attributes, 137
Time and events, 64
Time selections, 64
CD layout bar, 20
Creating a movie, 57, 271–278
INDEX
iii
Creating a multimedia CD, 312
Disc-at-once CD burning, 303, 309
Creating bins, 44
Duplicating
Events, 67
Generated media events, 214
Keyframes, 238
Tracks, 106
Creating DVD with DVD Architect, 186
Credit roll event, 213
Credits, 194
DV capture cards, 294, 326
Cropping video, 187–189
Copying and pasting cropping settings, 137
Plug-in processing order, 211
DV format, 200
Out-of-range colors, 202
Selecting source media for, 201
Setting project properties for, 201
Templates for, 201
Crossfades, 75–77, 231
Automatic, 75
Curve types, 76
Manually setting, 76
Overlapping files added to timeline, 194
Sliding, 76
Video, 231
DVD
burning 5.1-channel audio, 186
creating with DVD Architect, 186
DVD Architect, 186
Cursor indications, 32
Customizing DVD Architect
toolbar, 290
Dynamic RAM video previews, 256
E
Customizing keyboard shortcuts, 300
Edge trimming, 67
Customizing Vegas, 285–294
Frame number display, 285
Grid spacing, 287
Preferences, 292–300
Project properties, 289
Rendering settings, 275
Ruler, 285
Time Display window, 287–288
Toolbar, 18
Video Preview window, 253
Edit Decision Lists (EDL), 200
Cuts, 231
Converting to transitions, 234
Cutting events, 64–65
Ripple mode, 64
Time and events, 65
Time selections, 65
Edit Details window, 24, 101
Audio CD track list category, 102
Closed captioning, 196–198
Commands category, 102
Customizing, 104
Displaying, 102
Edit functions, 101
Editing a CD layout, 308
Events category, 103
Markers category, 103
Regions category, 103
Selected events category, 103
Edit history, clearing, 78
Editing audio in external editor, 87
Editing events, 63
D
Deleting
Busses, 147
CD layout bar markers, 307
Command markers, 85
Envelope points, 126
Events, 72
Keyframes, 238
Markers, 80
Regions, 81
Takes, 95
Tracks, 106
Deleting media from a bin, 45
Digital multitrack setup, 164
DirectX plug-ins, 153, 207
Disable resample, 135
Editing tools
Envelope, 140
Selection, 60
Zoom, 50
Effects
fine-tuning with split-screen previews, 257
Effects, See Plug-Ins
Empty events, 67
Envelope Edit Tool, 128, 140
Envelopes, 126–129, 137–141
Adding points, 126
ASR, 137
Changing fade curves, 127
Deleting from track(s), 128
Deleting points, 126
Event envelopes, 137–141
INDEX
iv
Fade in and out, 138, 139
Fade types, 138, 139
Hiding on track(s), 127
Mixer controls, 152
Moving points, 127
Opacity, 139
Ripple editing, 74
Track envelopes, 126–129
Velocity, 139
Video, 138
Volume (event), 137
Volume (track), 126
Grouping, 141–142
Moving by small increments, 49
Moving in time, 48
Moving multiple, 49
Moving single, 48
Name, changing, 95
Pasting, 65, 66
Pitch shifting, 91
Placing, 46, 47
Playback rate, 136
Recording into, 168
Reversing, 100
Selecting multiple, 60
Selecting with time, 62
Shifting the contents of, 71
Shuffling, 75
Sliding, 72
Slipping, 71
Slip-trimming, 71
Snapping, 89–90
Splitting, 69–71
Switches, 133–135
Trimming, 67
Undersample rate, 136
viewing media markers, 100
Equipment setup for recording, 163–164
Basic, 163
mixer, 164
With digital multitrack, 164
With MIDI option, 164
Event editing, 63
Event properties
Copying and pasting, 137
Displaying names, 95
Name, changing, 95
Pitch shifting, 91
Event switches, 133–135
Copying and pasting, 137
Invert phase, 134
Lock, 133
Loop, 133
Maintain aspect ratio, 135
Mute, 133
Normalize, 134
Reduce interlace flicker, 135
Resample, 135
Event takes, 94
Adding files as, 94
Changing active, 94
Deleting, 95
Displaying names of, 95
Previewing, 95
Recording audio as new, 167
Renaming, 95
Selecting, 94
Events, 48
adding transitions, 233
Channels, 136
Copying, 63
Copying and pasting attributes, 137
Crossfading, 75–77, 194, 231
Cutting, 64
Defined, 39
Deleting, 72
Duplicating, 67
edge trimming with keyboard, 69
Editing, 63
Empty, 67
Envelopes, 137–141
Fade in and out, 138
INDEX
Expand track keyframes, 52
Expand track layers, 234
Explorer window, 22
Transport bar, 40
External Control & Automation Preferences, 301
External monitor, 266–267, 294
F
Fade in and out, 138
Fade to color, 126
Fader
Assignable effects, 112
Bus send, 112, 149
Pan, 110
track, 109
Fading in/out
Mixer controls, 152
Field order, 203, 322
Filters, See Video effects
Focus, 59
Force resample, 135
Frame
freeze, 68, 134, 140
Frame numbers, 285
Frame-by-frame cursor movement, 59
Freeze frame, 68, 134, 140
v
Scanned images, 42
Still image sequences, 44
G
General editing, 59–87
Event vs. file, 48
Inserting
Command markers, 84
Empty events, 67
Markers, 79
Media, 46
Regions, 80
Time, 67
Video files with associated audio, 47
General preferences, 292
Generator
Adding, 213
Duplicating, 214
window, 25
Generic control surface setup, 302
Inserting empty tracks, 105
Glossary, 327–338
Glow, 248
Installation, 16
System requirements, 15
Grid lines
Safe areas, 258
Snapping events to, 89
Spacing, 287
Interlace, 322
Deinterlacing, 203
Field order, 203, 277, 322
Reduce interlace flicker, 135
Grouping events, 141–142
Adding to groups, 142
Clearing groups, 142
Creating new groups, 141
Moving grouped events, 49
Removing events from a group, 142
Selecting events in groups, 142
Suspending grouping, 142
Inverting
Audio event, 134
Audio track, 113
Invert track phase, 53
Isolate channels, 225
Isolating color channels, 259
K
H
Hardware
Routing surround to, 175
Setting up for surround, 174
Hiding/showing
Bus tracks, 152
Toolbar, 290
Histogram, 262
Hold keyframe, 239
I
Keyboard commands, 26–31
Cursor placement, 27, 59, 62
Edit, 27
Event, 28
Miscellaneous, 31
Playback, 26
Project file, 26
Selection, 28
Track view, 30
Trimmer window, 30
View, 28
Window view, 26
IEEE-1394 DV capture cards, 15, 42, 201, 266, 283, 294, 326
Keyboard preferences, 300
Ignore event grouping, 142
Keyboard shortcuts, customizing, 300
Image masks, 222
Keyframe animation, 212, 237
Event panning and cropping, 241
Generated text, 244
Track motion, 247
Video effects, 243
Images
Automatically crossfading, 194
Capturing in Vegas, 193, 254
Correcting for DV pixel aspect ratios, 193
Creating for use in Vegas, 192
Creating masks from, 222
Creating titles from, 195
Default length, 194
Working with, 192
Zooming in on, 241
Importing
Audio CD tracks, 43
CD Architect files, 304
Media, 41
Keyframe controller, 237
Navigating, 238
Keyframes, 182–185
Adding, 238
Changing relative spacing, 239
Deleting, 238
In track view, 52, 240
Interpolation curves, 239
Modifying, 238
Ripple editing, 74
INDEX
vi
Keying, 228
L
Labeling busses, See Naming busses
Labeling tracks, See Naming tracks
Level slider, See Composite level slider
LFE channel, 173, 176
Locking events, 133
To track envelopes, 129
To track keyframes, 240
Loop playback, 62
Looping events, 133
Luminance, 227
monitoring, 261
Properties, 204
Media generator
Adding, 213
Duplicating, 214
window, 25
Media generators, 213–214
Media markers
adding, 99
viewing in event, 100
Media Pool, 23, 41
Adding media, 41
Adding still image sequences, 44
Capturing video, 42
Extracting CD audio, 43
Getting images, 42
Replacing media in events, 41
Media region
viewing in event, 100
M
Mackie Control Universal, 301
Main window, 18
Media regions
adding, 99
Make compositing child, 52, 215, 222, 224
Metronome, 167, 295
Marker bar, 19
MIDI clock output, 300
Markers
CD layout markers, 85
Command markers, 82
Deleting, 80
Inserting, 79
media, adding, 99
media, viewing, 100
Moving, 79
Navigating, 79
Renaming, 79
Ripple editing, 74
Snapping, 89
MIDI control surface setup, 302
Markers and regions, 78–85
Snapping events to, 89
Masks, 222–229
Fine tuning, 225
Image, 222
Mask generator, 226
Video, 224
Match media settings, 38, 203
Media bin
adding recorded files automatically, 45
Media bins, 44
adding media, 44
creating, 44
deleting media, 45
searching, 45
Media files
Auto preview setting, 40
Inserting, 46
Previewing, 40
INDEX
MIDI timecode
Input devices, 299
Output devices, 299
Time Display window, 288
Triggering from, 170
Mixer, 22, 143
Busses, 112, 145–149
Preview fader, 144
Toolbar, 144
Viewing/hiding, 143
Mixer setup (external), 164
Mixer window
Automating controls, 152
Routing surround through, 175
Mixing
Multiple tracks to a new track, 116
Video tracks, 214–217
Monitoring
chrominance, 260
color content, 260
color levels and contrast, 262
luminance, 261
RGB components, 263
Monitoring video with scopes, 259
Motion blur automation, 125
Mouse scroll-wheel shortcuts, 32, 50, 59
MTC, See MIDI timecode
Multimedia CD
vii
burning, 312
Pan types, 181
Surround, 178
Multimedia controller
scrubbing, 55
Panning automation, 120
Multiple takes
Previewing, 95
Recording, 170
Selecting among, 94
Panning, audio
Envelope, 126
Multipurpose slider, 110
Panning models, 110
Multipurpose slider, 53, 110
Assignable effects send level, 111, 112, 151
Bus send level, 112, 149
Panning, 110, 318
Panning, video, 241
Pan-and-scan effect, 242
Plug-in processing order, 211
Mute automation, 119
Muting
All audio or video tracks, 113
Busses, 148
Events, 133
Mute button, 52, 53
Tracks, 113
Parent media for subclips, 101
Parent/child tracks, 214, 222
Pasting
Event attributes, 137
paste insert, 66
paste repeat, 66
Pasting events, 66
Pasting events, 65
N
Perfect Clarity (.pca) audio format, 273
Naming
Busses, 149
CD layout markers, 307
Markers, 79
Regions, 81
Takes, 95
Tracks, 106
Noise texture, 213
Non-real-time event effects, 160
Normalize audio event, 134
O
OHCI 1394-IEEE cards, 15, 42, 201, 267, 283, 294, 326
Online help, 16
Via the web, 17
What’sThis? help, 17
Optimizing previews, 255–265
Ordering of effects, 156, 210
Organizing tracks, 107–108
Overlays
Animating, 250
Compositing modes, 215–217
Masks, 222–229
Position, 247
Safe areas, 258
Shadow, 247
Transparency, 228
P
Pan type
Setting track default, 114
Phase inverting
Events, 134
tracks, 113
Picture-in-picture effect, 250
Pitch shifting, 91
Copying and pasting between events, 137
Pixel aspect ratio, 203
Custom stream properties, 205
Render settings, 277
Still images, 193
Placing media
As takes, 46
Dragging/dropping, 46
Multiple files, 46
Same track, 46
Playback
Buffer control, 296
Event playback rate, 136
Interpolate cursor position control, 296
Keyboard shortcuts, 26
Position bias control, 296
Pre-roll buffer control, 296
Scrubbing, 55
Transport bar controls, 20
Plug-in chain
Audio hierarchy, 34
Changing order, 156, 157, 210
Creating, 154, 208
Saving presets, 156, 212
Plug-ins
Animating, 212
Audio, 153
Bypassing, 157, 210
Panning
INDEX
viii
Copying and pasting event plug-ins, 137
Events with panning/cropping, 211
Generators, 213–214
Keyframes, 212
Masks, 222–229
Media generators, 213–214
Modifying, 212
Ordering, 156, 210
Removing, 157, 211
Transitioning into, 243
Transitions, 231
Video, 207
Window, 25
In media players, 56
Optimizing, 255
Prerendering, 255
Resolution, 255
Transitions, 235
Printing to tape
from the timeline, 284
Printing video
From the timeline, 283
From Video Capture, 283
Project playback
Entire, 54
Media player, 56
Time selection, 54
Post-edit rippling, 74
Post-roll, 169
Project property settings, 289–290
Audio CD tab, 290
Audio tab, 289
Matching video settings of existing file, 38, 203
Ruler tab, 290
Summary tab, 290
Video tab, 289
PQ list, See Track list
Preference settings, 292–300
Audio tab, 295
Audio tab, advanced settings, 296
CD Settings tab, 298
Editing tab, 297
General tab, 292
Sync tab, 299
Sync tab, advanced settings, 299
Video device tab, 294
Video tab, 294
Projects
Creating, 37
Renaming, 39
Rendering, 271–278
Saving, 38, 269–271
Saving as EDLs, 200
Preferences
Audio Device tab, 295
Display tab, 298
External Control & Automation tab, 301
Keyboard tab, 300
Proper use of software, 312
Properties
Events, 136
Media file, 204
Project, 37, 289–290
Track defaults, 114
Preparing video for broadcast
Safe areas, 258
Preparing video for television
DV format guidelines, 200
Proxy files, audio, 322
Prerendering video, 255
Pulldown removal, 39, 293
Configuring, 45
Pre-roll, 169
Preset chains, 159–160
Editing, 159
Organizing, 160
Saving from existing chains, 159
Punch-in, 66, 169
Q
Quantizing to frames, 89
Quick start, 37–57
Presets, saving, 156, 212, 236
Preview
split screen, 257
Preview fader
Adjusting for clipping, 148
Adjusting volume, 144
Hiding/viewing, 144
Meter resolution, 144
Previewing
split-screen view, 257
Previews, 54
Full-quality, 255
INDEX
R
RAM cache for previews, 256
RealMedia (.rm)
commands, 83
File format, 272
file format, 57
Recapturing offline video clips, 42
Recording, 163–171
Arming tracks, 165
Into a time selection, 168
ix
Into an event, 168
Into an event with time selection, 169
Multiple takes, 170
Previewing takes, 95
Selecting track input devices, 166
Specifying storage folder, 170–171
Starting and stopping, 167
Stereo, left, right channel options, 166
Manually, 74
Pasting, 65
Post-edit rippling, 74
Shuffling events, 75
Ruler, 19
Offset, setting, 286
Project property settings, 290
Time formats, 286, 326
Red book CD burning, 303, 309
Redo/Undo commands, 77–78
Clearing history, 78
Multiple, 78
Region, 80
Regions
Adding as takes, 99
Deleting, 81
Inserting, 80
media, adding, 99
media, viewing, 100
Moving, 80
Naming, 81
Navigating to, 81
Ripple editing, 74
Selecting, 81
Registering Vegas, 16
Removing
Events from a group, 142
Plug-ins, 211
plug-ins, 157
Track envelopes, 128
Velocity envelopes, 141
Renaming
Busses, 149
CD layout markers, 307
Markers, 79
Projects, 39, 270
Tracks, 106
Rendering, 57, 271–278
controls and templates, 275
Custom settings, 275
File formats, 57, 272
Surround projects, 185
To a new track, 116
Reordering tracks, 107
Resampling, 199–200
At final render, 199
Event, 135, 140, 199
Reversing a video event, 140
Reversing events, 100
RGB components, 263
Ripple editing, 66
Automatically, 74
Cutting, 64
Deleting, 72
Ruler tab, 290
S
Safe areas, 258
Saving a project, 38, 269–271
Autosaving, 271
Using Save As, 39, 270
With media files, 270
Scopes
histogram, 262
RGB parade, 263
vectorscope, 260
video, 259
waveform, 261
Scott Studio
Commands, 78, 83
File format, 40, 272
Scribble strip, 52, 53, 106
Scrolling, 50
Scrubbing, 55–56
Keyboard, 56
Scrub control, 21, 55
Timeline, 56
with multimedia controllers, 55
Searching media bins, 45
Selecting
all members of a group, 142
Audio CD tracks, 307
Envelope points, 128
Events and a time range, 62
Events to the end of the track, 61
grouped events, 142
Media files, 40
Multiple events, 60
Range of events, 60
Regions, 81
Takes, 94
time range, 61
Tracks, 62
SFAP files, 322
Shadow, 247
Shuffling events, 75
Signal flow, 34–35
Single session CD burning, 303
INDEX
x
Slide show, creating, 194
Mute, 133
Normalize, 134
Reduce interlace flicker, 135
Resample, 135
Slider
Multipurpose, 110
Sliding
Crossfades, 76
Events, 72
Sync tab, 299
Advanced control settings, 299
Synchronizing MIDI timecode, 164, 170
Slipping events, 71
System requirements, 15
Slip-trimming events, 71
Smart resample, 135
SMPTE timecode, 324
Changing, 286
Snap offset, 90
Snapping events, 89–90
Quantizing to frames, 89
Snap offset, 90
To a selection, 90
To grid lines, 89
To marker lines, 89
To the cursor, 90
Solid color event, 213
Soloing
Assignable effects chains, 150
Busses, 149
Solo button, 52, 53
Tracks, 113
Sorting media with bins, 44
Split-screen previews, 257
Splitting, 69–71
All events at cursor, 70
Selected events, 70
Time selection, 70
Status bar, 20, 117
Streaming media commands, 83
RealPlayer, 83
Windows Media, 83, 196
Stretching events, 93
Subclips, 100
Summary tab, 290
Surround, 173–186
Automating panning, 182–185
Hardware setup, 174
Keyframes, 182–185
LFE channel, 173, 176
Panning, 178
Rendering, 185
Surround Panner window, 180
Switches, 133–135
Invert phase, 134
Lock, 133
Loop, 133
Maintain aspect ratio, 135
INDEX
T
Takes, 94
Adding files as, 94
Deleting, 95
Displaying names of, 95
Placing media as, 46
Previewing, 95
Recording audio as new, 167
Renaming, 95
Selecting, 94
Technical support, 15
Test pattern
Creating when printing to DV tape, 284
Event, 213
Text
Credit roll event, 213
Keyframing, 244
Media Generators window, 25
Text event, 213
Titles, 194
Time compressing events, 93
Time Display window, 19, 287–288
Changing color, 288
Changing time format, 287
MIDI timecode settings, 288
Time selection, 61
Copying, 64
Cutting, 65
Recording into, 168
With events, 62
Timecode
MIDI, 164, 170, 299–300
Video, 324
Timeline
Adding media to, 46
Moving events along, 48
Playback on external monitor, 266–267
Print to DV tape from, 283
Titles
Creating, 194
Fading, 196
Safe areas, 258
Text generator, 213–214
Toolbar, 18
adding buttons, 291
xi
customizing, 290
hiding/showing, 290
removing buttons, 291
reordering buttons, 291
Naming/renaming, 106
Number, 52, 53
Organizing, 107–108
Panning, 178
Phase inverting, 53, 113
Reordering, 107
Resizing, 108
Scribble strip, 52, 53, 106
Selecting, 62
Soloing, 52, 53, 113
Track effects, 52, 153–160, 207–212
Track FX button, 53
Track keyframes, 52, 240
Track layers, 234
Track motion, 52, 245–251
View buttons, 52, 53
View options, 108
Volume fader, 53, 109
Track automation, 119–121
Track automation envelopes, 126
Track effects
Setting default, 114
Track envelopes, 126–129
Adding points, 126
Changing fade curves, 127
Colors, 126
Deleting points, 126
Envelope Edit Tool, 128
Hiding on track(s), 127
Locking to events, 129
Moving points, 127
Removing from track(s), 128
Types, 126
Transition
adding to all selected events, 233
Transitions, 231
Adding, 232
Animating, 237
From auto-crossfades, 232
From cuts, 234
Modifying, 236
Using, 231
Window, 24
Track FX button, 52, 53
Track list, 20, 52–53
Track list (audio CD)
Creating from events, 306
Editing in Edit Details window, 308
Exporting, 308
Track motion, 245–251
Button, 52
Glow, 248
Keyframes, 247
Picture-in-picture effect, 250
Position, 247
Shadow, 247
Shortcut menu, 246
Transparency, 139
And overlays, 228
Transport bar, 20, 54, 55
Keyboard shortcuts, 26
Triggering recording from MIDI timecode, 170
Trimmer window, 22, 96–101
Audio editor, opening from, 100
Events, placing on track, 97
Opening a file in, 96
Overview, 96
Regions and markers, adding, 99
Subclips, 100
Three-point editing, 98
Working with, 97
Track name, 52, 53
Changing, 106
Track view, 20
Track-at-once CD burning, 303, 308
Tracks, 50, 105–117
Adding empty, 105
Arming for recording, 53
Assigning plug-ins to, 153, 208
Assigning to a bus, 53, 111, 149
Automating parameters, 119–121
Color, changing, 107
Compositing modes, 52, 215–217
Default properties, 114
Deleting, 106
Duplicating, 106
Height, changing, 108
Height, setting default, 114
inserting empty, 105
Making compositing child, 52, 222
Mixing to a single track, 116
Multipurpose slider, 53
Muting, 52, 53, 113
Trimming, 67–68
Adjacent events, 68
Beyond event edges, 68
events with keyboard, 69
selected events, 67
Time and event selection, 68
Time selection, 68
Troubleshooting
Audio, 317–318
Video, 317–326
U
Undersample rate, 136
INDEX
xii
Undo/Redo commands, 77–78
Clearing history, 78
Setting track default, 114
Track envelopes, 126
Track fader, 53, 109
V
Volume automation, 120
Vectorscope, 260
Vegas
Installing, 16
Overview, 18–32
Registering, 16
W
Wave64 (.w64) audio format, 273
Web site
Accessing help, 17
Metadata examples, 78
Technical support, 15
Troubleshooting resources, 267, 317, 326
Velocity envelope, 139
Video
monitoring with scopes, 259
What’sThis? help, using, 17
Video Capture
Capturing video with, 42
Printing to tape with, 283
Recapturing offline clips with, 42
Window docking area, 21
Windows
Surround Panner, 180
Video CDs
burning, 310
Video effects, 207–212
Animating, 212
Keyframes, 212
Modifying, 212
Ordering, 210
Removing, 211
Window, 24
Video masks, 224
Video motion, See Track motion
Video preview
split-screen, 257
Video previews
Capturing images from, 193, 254
Dynamic RAM previews, 256
External monitor, 266–267
Optimizing, 255–265
Prerendering, 255
Previewing in a player, 265
Resolution, 255
Shortcut menu, 254
Window, 23
Video property settings, 289
Video scopes, 259
histogram, 262
RGB parade, 263
vectorscope, 260
waveform, 261
View buttons, 52, 53
Viewing
media markers, 100
media regions, 100
Volume
Assignable effects fader, 111, 151
Bus send fader, 149
Event envelopes, 137
INDEX
Windows Media streaming commands, 83
Z
Zoom Edit Tool, 50
Zooming, 50