1
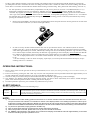
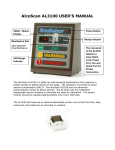
User Manual for Ex201i Alcohol Analyzer
update: 26 April 07
Congratulations on your purchase of the Ex201i Alcohol Analyzer. This mini-sized product will give you a clear and graphic indication of your breath alcohol on the LCD
display.
GETTING START:
Remove the battery compartment cover and put in 3 x AAA size 1.5V alkaline batteries and close the cover. Automatic Sensor
Cleaning function (ASC) will start automatically. For skipping the ASC, simply press “ON/OFF” once to turn off.
AUTOMATIC SENSOR CLEANING FUNCTION (ASC):
TO ENSURE HIGH PRECISION READINGS, ESPECIALLY FOR INITIAL USE OR THE UNIT HAS BEEN LEFT
UNUSED FOR 1 WEEK OR LONGER, we recommend you to run ASC function as follows.
Preparation of Automatic Sensor Cleaning (ASC) procedure:
Purpose: To achieve an accurate reading, please ensure the unit is normal performance before each alcohol test.
Recommend: User need to perform Self-test procedure to check the unit is normal performance before starting a
new alcohol test. User can then pre-check the unit by “HI” or other reading indication shown on display before
testing is performed.
1.
Put few drops of wine (~10% concentration) into the CLEANING CAP accessory and insert into the blowing tube. (As shown in the
figure below).
1) Power on the unit by pressing the “ON/OFF key once, the unit will perform a self test procedure which takes approximately 12 – 18
seconds, indicated by counting down from 12 / 18 to 0 with flashing “READY” sign.
2) The unit is ready to test when 2 beeps are heard and followed by the “BLOW” sign appearing on the LCD display.
3) The “BLOW” sign displays during the blowing detection period. Place the cleaning cap on the top of the gas hole. Then press the
BLOW key for 5 seconds until a beep sound is heard.
-
If “LO” show on display, (remains the cleaning cap on the gas hole), the unit should be perform ASC function. It is because the
“.LO” sign in this case means that the sensor may not be preheated in normal preference. After finishing the ASC operation (refer 4)
and do self-cleaning (refer 5 & 6, remove the alcohol residue in the unit), then user can do a normal blowing test.
-
If “HI” or other reading on display, remove the cleaning cap and blow fresh air into the blowing tube & chamber by pressing the
provided plastic blower. It is because the sensor is working well and no ASC is needed. To achieve an accurate reading, user should
ensure there is no alcohol residue inside the chamber before starting a normal testing. Thus, perform the self-cleaning ( refer 5 & 6 )
4.
For ASC operation, (i) remove the battery compartment cover & put in 3 pieces of AAA size 1.5V alkaline batteries or (ii)
With battery installed previously, turn off unit by ‘ON/OFF’ key once. Press and hold both the ‘BLOW’ key and the
‘ON/OFF’ key together for 2 seconds. Two beep sound will be heard which indicates the cleaning process has started and the
‘ASC’ sign will be flashing. The ASC function runs for 10 minutes , accompanied by displaying a number of 10 ~ 0 to indicate
the remaining time, and then automatically turning off. (remark: The cleaning process can be easily terminated at any time by
pressing the ‘ON/OFF’ key once.)
5
Remove the CLEANING CAP. Then use the provided plastic blower and press fresh air into the gas hole for several times
to let the alcohol residue out. (As shown in the figure below).
6
In order to test any alcohol residue inside the unit, user can pre-check the unit for “LO” indication (mean: no alcohol
residue in the unit). Power on the unit by pressing the ‘ON / OFF’ key once, the unit will perform a self-test procedure
which takes approximately 18 seconds, indicated by counting from 18 to 0 and flashing “READY” sign. The unit is ready
to test when 2 beeps are heard, followed by the “BLOW” sign appearing on the LCD display. Press and hold the ‘BLOW”
key without any blowing for at least 5 seconds until a beep sound is heard. A test reading will then be displayed.
** If “LO” is displayed, then there is no alcohol residue remained. The ASC procedure is completed and the unit is ready
to use.
** If other readings or “HI” are shown on display, repeat steps (5) to clean up the alcohol residue and step (6) for prechecking until “LO” is obtained .
OPERATING INSTRUCTIONS:
1) Insert a plastic straw into the gas hole on the top of the machine.(Remark: Refrain from drinking and smoking for at least 20 minutes and rinse your
mouth with water)
2) Power on the unit by pressing the ‘ON / OFF’ key once, the unit will perform a self-test procedure which takes approximately 12~18
seconds, indicated by counting down from 12 /18 to 0 with flashing “READY” sign.
3) The unit is ready to test when 2 beeps are heard and followed by the “BLOW” sign appearing on the LCD display.
4) The “BLOW” sign displays during the blowing detection period. You have to blow continuously for at least 5 seconds through a
plastic straw until a beep sound is heard. A reading will then be displayed.
5) In order to perform a repeat test, press ‘START’ key and follows step 3 above.
ALERT SIGNALS:
The unit is designed to alert the user in the following ways:
Low Level
Alert level
0.2 ‰ BAC
Alert Level
-For measurement below 0.2‰ BAC the ‘LO’ indicator will appear on the LCD
-For measurements equal to or above the alert concentration level limit (0.2‰ BAC), the unit beeps and a ‘No Driving’
sign will be shown, accompanied by 3 times of “Car Crashing” sound. Test result and ‘No Driving’ will remain on the
LCD until next test starts or power off.
NOTE:
1) To achieve an accurate reading, please ensure there is no alcohol residue inside the chamber before each test. You
can pre-check the unit until the ‘LO’ indication is shown in the display before a new testing is performed. This may be
achieved by pressing and holding the ‘BLOW’ key allow fresh air into the gas hole for at least 5 seconds. Alternatively
shake the unit forwards and backwards several times to let the alcohol residue out before starting a new alcohol test.
2) To perform a repeat test, simply press the ‘START’ key.
3) After 5 consecutive tests we recommend a 5 minute wait before continuing.
4) When the product is unused, please store in a dry and non-humid environment.
5) An ‘ERROR’ sign will flash in the display and a continuous beeping sound will be heard for approximately 10 seconds
when the following improper operations occur: -
i.
ii.
When the user does not keep pressing the ‘BLOW’ key for at least 5 seconds during blowing, i.e. until a beep
sound is heard.
When the user fails to proceed after the second flashing ‘BLOW’ prompt appears on the LCD display.
6) If backlight turns off (for power saving reason), you can press ‘LIGHT’ key once to turn it on again.
7) Direct mouth contact with fascia is prohibited
Specification:
1.
2.
3.
4.
5.
6.
7.
8.
9.
10.
Range:
Power Input:
Display:
Auto power off:
Breath sampling:
Recycle time:
Dimensions:
Weight:
Alert level calibrated:
Agency Approval:
0.2 ~ 1.5 ‰ BAC – Accuracy: ± 0.2‰ BAC at alert level
3 X 1.5V AAA batteries
Multi-colour LCD display
1 minutes
=> 5 seconds continuous breath sample
~30 seconds
105 X 45 X 23 mm approx.
50g (without batteries)
0.2 ‰ BAC / 0.5 ‰ BAC / 0.8 ‰ BAC setting at Mfg.
EMC DIRECTIVE 89/336 EEC (CE MARKING)