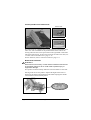
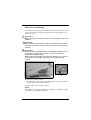
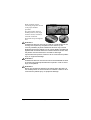
1
PROPRIETARY AND CONFIDENTIAL DRAFT: avril 21, 2005
User Manual
AvantGuard®
Electric Bed
LI158Bx/1200
QD2300
Rev.005
PROPRIETARY AND CONFIDENTIAL DRAFT: avril 21, 2005
Manufacturer:
Hill-Rom S.A.S
B.P. 14 - Z.I. du Talhouët
56330 PLUVIGNER - FRANCE
Tel: + 33 (0)2 97 50 92 12
Fax: + 33 (0)2 97 50 92 03
www.hill-rom.com
Fifth edition
First printing 2003
Printed in Europe
QD2300 Rev.005 / April 2005
The information in this manual is confidential and may not be disclosed
to third parties without the prior written consent of Hill-Rom.
Hill-Rom®, AvantGuard®, Cliniplot® III, Duo® 2, EasyChair® and
MobiBar® are registered trademarks of Hill-Rom Services, Inc.
Clinisert™ 2, Medic’hotel™, Medispace™, Primo™ and TotalGuard™
are registered trademarks of Hill-Rom Services, Inc.
Hill-Rom reserves the right to make changes without notice in design,
specifications, and models. The only warranty Hill-Rom makes is the
express written warranty extended on the sale or rental of its products.
Some of the photographs in this manual are not contractual.
To order additional copies of this manual, refer to the last page of this
manual for your national Hill-Rom representative, and place a parts
order for part number QD2300.
© 2003-2005 by Hill-Rom Services, Inc. ALL RIGHTS RESERVED
QD2300(5) - AvantGuard® Electric Bed User Manual
Table of Contents
Chapter 1: Symbols / destination
STORAGE
AND
HANDLING
WARRANTY
Page i
CLEANING
TROUBLESHOOTING
MAINTENANCE
REPLACEMENT PARTS
AvantGuard® Electric Bed User Manual - QD2300(5)
INSTRUCTIONS
FOR USE
Use . . . . . . . . . . . . . . . . . . . . . . . . . . . . . . . . . . . . . . . . . . . . . . . . . .4 - 1
Siderails . . . . . . . . . . . . . . . . . . . . . . . . . . . . . . . . . . . . . . . . . . .4 - 1
Electrical Functions . . . . . . . . . . . . . . . . . . . . . . . . . . . . . . . . .4 - 11
Electrical function management . . . . . . . . . . . . . . . . . . . . . . .4 - 13
Sleep Surface . . . . . . . . . . . . . . . . . . . . . . . . . . . . . . . . . . . . . .4 - 16
Reference mark for positioning the patient . . . . . . . . . . . . . . .4 - 20
Head section . . . . . . . . . . . . . . . . . . . . . . . . . . . . . . . . . . . . . .4 - 21
Thigh Section . . . . . . . . . . . . . . . . . . . . . . . . . . . . . . . . . . . . .4 - 22
Foot section . . . . . . . . . . . . . . . . . . . . . . . . . . . . . . . . . . . . . . .4 - 23
Automatic EasyChair®* . . . . . . . . . . . . . . . . . . . . . . . . . . . . .4 - 25
Emergency functions . . . . . . . . . . . . . . . . . . . . . . . . . . . . . . . .4 - 26
Brake and steer system . . . . . . . . . . . . . . . . . . . . . . . . . . . . . .4 - 28
Securing the power cable . . . . . . . . . . . . . . . . . . . . . . . . . . . . 4 - 32
Equipotential terminal . . . . . . . . . . . . . . . . . . . . . . . . . . . . . . .4 - 33
Handling the headboard and footboard . . . . . . . . . . . . . . . . . .4 - 33
Sleep surface . . . . . . . . . . . . . . . . . . . . . . . . . . . . . . . . . . . . . .4 - 37
INSTALLATION
ASSEMBLY
Installing the Bed. . . . . . . . . . . . . . . . . . . . . . . . . . . . . . . . . . . . . . . .3 - 1
First Steps . . . . . . . . . . . . . . . . . . . . . . . . . . . . . . . . . . . . . . . . .3 - 1
Connection to the Mains Power Supply . . . . . . . . . . . . . . . . . .3 - 2
Chapter 4: Instructions for use
PRECAUTIONS
SAFETY TIPS
Introduction . . . . . . . . . . . . . . . . . . . . . . . . . . . . . . . . . . . . . . . . . . . 2 - 1
Function Symbols . . . . . . . . . . . . . . . . . . . . . . . . . . . . . . . . . . .2 - 1
Overview . . . . . . . . . . . . . . . . . . . . . . . . . . . . . . . . . . . . . . . . . . . . .2 - 8
Standard Features . . . . . . . . . . . . . . . . . . . . . . . . . . . . . . . . . . .2 - 9
Equipment varies depending on bed model* . . . . . . . . . . . . . .2 - 9
Accessories . . . . . . . . . . . . . . . . . . . . . . . . . . . . . . . . . . . . . . .2 - 10
Chapter 3: Installing the bed
INTRODUCTION
FEATURES
SPECIFICATIONS
Symbol Definition . . . . . . . . . . . . . . . . . . . . . . . . . . . . . . . . . . . . . .1 - 1
General Symbols . . . . . . . . . . . . . . . . . . . . . . . . . . . . . . . . . . . . . . .1 - 2
Intended Use . . . . . . . . . . . . . . . . . . . . . . . . . . . . . . . . . . . . . . . . . . .1 - 3
Before placing the patient on the bed . . . . . . . . . . . . . . . . . . . .1 - 3
Bed model and country of use . . . . . . . . . . . . . . . . . . . . . . . . . .1 - 3
Chapter 2: Introduction, overview
SYMBOL DEFINITION
INTENDED USE
PROPRIETARY AND CONFIDENTIAL DRAFT April 21, 2005
PROPRIETARY AND CONFIDENTIAL DRAFT April 21, 2005
Restraining strap handles . . . . . . . . . . . . . . . . . . . . . . . . . . . . 4 - 37
Foot End Bed Extension* . . . . . . . . . . . . . . . . . . . . . . . . . . . . 4 - 39
Linen holder* . . . . . . . . . . . . . . . . . . . . . . . . . . . . . . . . . . . . . 4 - 40
Battery backup* . . . . . . . . . . . . . . . . . . . . . . . . . . . . . . . . . . . 4 - 41
MobiBar® egress handle* . . . . . . . . . . . . . . . . . . . . . . . . . . . . 4 - 42
Control unit on a flexible arm* . . . . . . . . . . . . . . . . . . . . . . . 4 - 43
Control Pendant* . . . . . . . . . . . . . . . . . . . . . . . . . . . . . . . . . . 4 - 44
Accessory support bar* . . . . . . . . . . . . . . . . . . . . . . . . . . . . . 4 - 46
Medical device support rail* . . . . . . . . . . . . . . . . . . . . . . . . . 4 - 47
Chapter 5: Cleaning, maintenance, and spare parts
Cleaning . . . . . . . . . . . . . . . . . . . . . . . . . . . . . . . . . . . . . . . . . . . . . . 5 - 1
General Cleaning . . . . . . . . . . . . . . . . . . . . . . . . . . . . . . . . . . . 5 - 1
Safety Recommendations . . . . . . . . . . . . . . . . . . . . . . . . . . . . . 5 - 1
General Advice . . . . . . . . . . . . . . . . . . . . . . . . . . . . . . . . . . . . . 5 - 2
Steam Cleaning . . . . . . . . . . . . . . . . . . . . . . . . . . . . . . . . . . . . . 5 - 3
Cleaning tough stains . . . . . . . . . . . . . . . . . . . . . . . . . . . . . . . . 5 - 3
Disinfecting . . . . . . . . . . . . . . . . . . . . . . . . . . . . . . . . . . . . . . . 5 - 3
Maintenance . . . . . . . . . . . . . . . . . . . . . . . . . . . . . . . . . . . . . . . 5 - 8
Safety Recommendations . . . . . . . . . . . . . . . . . . . . . . . . . . . . . 5 - 8
Preventive Maintenance . . . . . . . . . . . . . . . . . . . . . . . . . . . . . . 5 - 8
Chapter 6: Accessories
Accessories . . . . . . . . . . . . . . . . . . . . . . . . . . . . . . . . . . . . . . . . . . . . 6 - 1
Patient Helpers . . . . . . . . . . . . . . . . . . . . . . . . . . . . . . . . . . . . . 6 - 2
Telescopic I.V. pole . . . . . . . . . . . . . . . . . . . . . . . . . . . . . . . . . 6 - 5
Monitor Stand (AD128A) . . . . . . . . . . . . . . . . . . . . . . . . . . . . 6 - 6
Oxygen Cylinder Holder (AC959A-AD101A-AD102A) . . . . 6 - 7
Equipotential cable (AD968A) . . . . . . . . . . . . . . . . . . . . . . . . . 6 - 8
Syringe-driver holder (AC963A) . . . . . . . . . . . . . . . . . . . . . . . 6 - 9
MobiBar® egress handle (AD177A) . . . . . . . . . . . . . . . . . . . 6 - 10
Control unit on a flexible arm . . . . . . . . . . . . . . . . . . . . . . . . 6 - 10
Self-steering 5th wheel (AD135A) . . . . . . . . . . . . . . . . . . . . . 6 - 11
Controlled 5th wheel (AD180A) . . . . . . . . . . . . . . . . . . . . . . 6 - 11
Accessory support bar (AD126A) . . . . . . . . . . . . . . . . . . . . . 6 - 12
Medical device support rail (AD127A) . . . . . . . . . . . . . . . . . 6 - 12
Bilateral HiLow pedal (AD171A) . . . . . . . . . . . . . . . . . . . . . 6 - 13
Enable control pedal (AD179A) . . . . . . . . . . . . . . . . . . . . . . . 6 - 13
Page ii
AvantGuard® Electric Bed User Manual - QD2300(5)
INSTALLATION
ASSEMBLY
INSTRUCTIONS
FOR USE
CLEANING
TROUBLESHOOTING
MAINTENANCE
REPLACEMENT PARTS
STORAGE
AND
HANDLING
Specifications . . . . . . . . . . . . . . . . . . . . . . . . . . . . . . . . . . . . . . . . . .9 - 1
Technical specifications . . . . . . . . . . . . . . . . . . . . . . . . . . . . . .9 - 1
Dimensions . . . . . . . . . . . . . . . . . . . . . . . . . . . . . . . . . . . . . . . .9 - 2
Specifications . . . . . . . . . . . . . . . . . . . . . . . . . . . . . . . . . . . . . .9 - 3
Warranty and after sales service conditions . . . . . . . . . . . . . . . . . . .9 - 4
Compliance . . . . . . . . . . . . . . . . . . . . . . . . . . . . . . . . . . . . . . . . . . . .9 - 4
PRECAUTIONS
SAFETY TIPS
Safety Tips. . . . . . . . . . . . . . . . . . . . . . . . . . . . . . . . . . . . . . . . . . . . 8 - 1
Brake and steer . . . . . . . . . . . . . . . . . . . . . . . . . . . . . . . . . . . . .8 - 1
Bed Position . . . . . . . . . . . . . . . . . . . . . . . . . . . . . . . . . . . . . . .8 - 1
Trendelenburg/Reverse Trendelenburg and
Emergency Trendelenburg . . . . . . . . . . . . . . . . . . . . . . . . . . . . 8 - 1
Integral Siderails . . . . . . . . . . . . . . . . . . . . . . . . . . . . . . . . . . . .8 - 2
Mattress . . . . . . . . . . . . . . . . . . . . . . . . . . . . . . . . . . . . . . . . . . .8 - 4
Headboard . . . . . . . . . . . . . . . . . . . . . . . . . . . . . . . . . . . . . . . . .8 - 4
Cleaning and recommended cleaning fluids . . . . . . . . . . . . . . .8 - 4
Electrical function management . . . . . . . . . . . . . . . . . . . . . . . .8 - 5
Parts and accessories . . . . . . . . . . . . . . . . . . . . . . . . . . . . . . . . .8 - 5
Patient helpers . . . . . . . . . . . . . . . . . . . . . . . . . . . . . . . . . . . . . .8 - 5
Electrical safety precautions . . . . . . . . . . . . . . . . . . . . . . . . . . .8 - 5
Abnormal use . . . . . . . . . . . . . . . . . . . . . . . . . . . . . . . . . . . . . .8 - 7
De-commissioning . . . . . . . . . . . . . . . . . . . . . . . . . . . . . . . . . .8 - 8
Life expectancy of components . . . . . . . . . . . . . . . . . . . . . . . . .8 - 8
Chapter 9: Specifications and warranty
INTRODUCTION
FEATURES
SPECIFICATIONS
Transport, Storage . . . . . . . . . . . . . . . . . . . . . . . . . . . . . . . . . . . . . .7 - 1
Use . . . . . . . . . . . . . . . . . . . . . . . . . . . . . . . . . . . . . . . . . . . . . . . . . .7 - 2
Chapter 8: Safety tips and precautions
SYMBOL DEFINITION
INTENDED USE
PROPRIETARY AND CONFIDENTIAL DRAFT April 21, 2005
Long metal siderails (AD178A) . . . . . . . . . . . . . . . . . . . . . . .6 - 14
Mattress . . . . . . . . . . . . . . . . . . . . . . . . . . . . . . . . . . . . . . . . . .6 - 14
Accessory holder . . . . . . . . . . . . . . . . . . . . . . . . . . . . . . . . . . .6 - 15
Chapter 7: Shipment, storage and usage
WARRANTY
AvantGuard® Electric Bed User Manual - QD2300(5)
Page iii
PROPRIETARY AND CONFIDENTIAL DRAFT April 21, 2005
NOTES:
Page iv
AvantGuard® Electric Bed User Manual - QD2300(5)
Chapter 1
Symbols / destination
Warning / caution
–
A WARNING identifies situations or actions that may affect
patient or user safety. Disregarding a warning could result in
patient or user injury.
A CAUTION points out special procedures or precautions that
personnel must follow to avoid equipment damage.
Caught Hazard Warning
Chemical Hazard Warning
PRECAUTIONS
AND
SAFETY TIPS
• The symbol below highlights a:
ELECTRIC SHOCK HAZARD:
TROUBLESHOOTING
STORAGE
HANDLING
• The symbol below highlights a CHEMICAL HAZARD WARNING:
ACCESSORIES
• The symbol below highlights a CAUGHT HAZARD WARNING:
CLEANING
MAINTENANCE
REPLACEMENT PARTS
–
INSTRUCTIONS
FOR USE
This manual contains different typefaces and icons designed to improve
readability and increase understanding of its content. Note the following
examples:
• Standard text - used for regular information.
• Boldface text- emphasizes a word or phrase.
• NOTE - sets apart special information or important instruction
clarification.
• The symbol below highlights a paragraph:
WARNING or CAUTION!
INTRODUCTION
FEATURES
Symbol Definition
SYMBOLS
DESTINATION
PROPRIETARY AND CONFIDENTIAL DRAFT: 21 avril 2005
Electric Shock Hazard
SPECIFICATIONS
AND
WARRANTY
QD2300(5) - AvantGuard® Electric Bed User Manual
Page 1 - 1
PROPRIETARY AND CONFIDENTIAL DRAFT: 21 avril 2005
General Symbols
Attention, read the safety instructions carefully
and refer to the user manual.
DO NOT BIN, follow the local recycling regulations.
Recyclable Material
Safety Earth
Equipotential terminal
Class II Device
Type B Equipment
Direct Current
Alternating Current
Page 1 - 2
QD2300(5) - AvantGuard® Electric Bed User Manual
Intended Use
INTRODUCTION
FEATURES
The AvantGuard® line of hospital beds includes acute care beds
(Trendelenburg with battery backup is a mandatory requirement for
acute care beds) and general-purpose variable height hospital beds for
general care, for use in post-operative care, and general medicine wards.
They are designed with the needs of the whole medical team in mind
and facilitate the use of monitoring equipment and the transfer of
patients to examination wards.
SYMBOLS
DESTINATION
PROPRIETARY AND CONFIDENTIAL DRAFT: 21 avril 2005
Before placing the patient on the bed
Carry out individual risk assessments including but not limited to:
INSTRUCTIONS
FOR USE
• Caught Hazard
• Potential falls from the bed
• Confused patients
• Small children
• Persons without the mental capacity to recognize unsafe actions
• Unauthorized persons
Bed model and country of use
PRECAUTIONS
AND
SAFETY TIPS
To identify your bed model and serial number (HRP000000), refer to the
identification label (See “Overview” page 2-8). Your bed LI158Bx is
composed of a chassis/bed frame identified CS158Bx and two
endboards.
TROUBLESHOOTING
STORAGE
HANDLING
Certain bed features may be available or not, depending on the
destination country. These features are identified with an asterisk (*).
ACCESSORIES
All persons authorized to use the bed’s functions must be capable of
doing so in a safe and controlled manner. In case of doubt, the bed’s
functions must be locked.
CLEANING
MAINTENANCE
REPLACEMENT PARTS
• Patients with learning difficulties
SPECIFICATIONS
AND
WARRANTY
QD2300(5) - AvantGuard® Electric Bed User Manual
Page 1 - 3
PROPRIETARY AND CONFIDENTIAL DRAFT: 21 avril 2005
NOTES:
Page 1 - 4
QD2300(5) - AvantGuard® Electric Bed User Manual
Chapter 2
Introduction, overview
SYMBOL DEFINITION
INTENDED USE
PROPRIETARY AND CONFIDENTIAL DRAFT: avril 21, 2005
INTRODUCTION
OVERVIEW
Introduction
Function Symbols
The following labels located next to the relevant control identify manual
operations.
Head section “CPR”
INSTALLATION
ASSEMBLY
Manual Controls
INSTRUCTIONS
FOR USE
Adjustable foot section
CLEANING
MAINTENANCE
REPLACEMENT PARTS
Angle Indicators
Trendelenburg/Reverse Trendelenburg*
ACCESSORIES
TROUBLESHOOTING
STORAGE
HANDLING
Head section*
PRECAUTIONS
AND
SAFETY TIPS
SPECIFICATIONS
AND
WARRANTY
NOTE:
These indicators are not measuring devices.
QD2300(5) - AvantGuard® Electric Bed User Manual
Page 2 - 1
PROPRIETARY AND CONFIDENTIAL DRAFT: avril 21, 2005
Warning and Caution Labels
Locking Mechanism on the Foot TotalGuard™* Siderail Support Label*
This label shows how to verify the locking mechanism on the foot
TotalGuard™* siderail support.
Do Not Store label
This label indicates that nothing should be left on the frame.
No Hand Placement Label*
This label shows where hands should not be placed.
Headboard Positioning and Equipotential Terminal Label
This label shows how the position of the polypropylene headboard can
be checked and where the equipotential terminal is located.
Page 2 - 2
QD2300(5) - AvantGuard® Electric Bed User Manual
Egress handle Usage Label*
SYMBOL DEFINITION
INTENDED USE
PROPRIETARY AND CONFIDENTIAL DRAFT: avril 21, 2005
INTRODUCTION
OVERVIEW
Interference label MobiBar® and TotalGuard™*
INSTALLATION
ASSEMBLY
This label indicates the storage of the MobiBar® Egress handle.
INSTRUCTIONS
FOR USE
Locking mechanism on the long metal siderail*
ACCESSORIES
Unlock long metal siderail label*
TROUBLESHOOTING
STORAGE
HANDLING
This label shows how to verify the locking mechanism on the long metal
siderail.
CLEANING
MAINTENANCE
REPLACEMENT PARTS
Never deploy the foot section of the TotalGuard™* integral siderail
when the MobiBar® egress handle in position.
PRECAUTIONS
AND
SAFETY TIPS
SPECIFICATIONS
AND
WARRANTY
This label indicates how to unlock the long metal siderail.
QD2300(5) - AvantGuard® Electric Bed User Manual
Page 2 - 3
PROPRIETARY AND CONFIDENTIAL DRAFT: avril 21, 2005
Locking mechanism installation metal siderail label*
This label shows how to verify the locking mechanism during the
installation of the long metal siderail.
Linen holder label*
Never use the linen holder as a seat or as a foot step and never exceed
the maximum load that can be placed on the linen holder.
Headboard and metal sierails identification label*
This label indicates to place the headboard on the head end on the bed.
This type of headboard must be only used on beds with long metal
siderails or beds without siderails.
TotalGuard™* headboard* and metal siderails identification label
This label indicates to place the headboard on the head end on the bed.
This type of headboard must be only used on beds fitted with
TotalGuard™* siderails.
Page 2 - 4
QD2300(5) - AvantGuard® Electric Bed User Manual
Plastic footboard identification label
INTRODUCTION
OVERVIEW
This label indicates to place the footboard at the foot end of the bed.
SYMBOL DEFINITION
INTENDED USE
PROPRIETARY AND CONFIDENTIAL DRAFT: avril 21, 2005
INSTALLATION
ASSEMBLY
INSTRUCTIONS
FOR USE
CLEANING
MAINTENANCE
REPLACEMENT PARTS
ACCESSORIES
TROUBLESHOOTING
STORAGE
HANDLING
PRECAUTIONS
AND
SAFETY TIPS
SPECIFICATIONS
AND
WARRANTY
QD2300(5) - AvantGuard® Electric Bed User Manual
Page 2 - 5
PROPRIETARY AND CONFIDENTIAL DRAFT: avril 21, 2005
Electrical controls
Control pendant without EasyChair®*
I
G
A
C
M
L
B
H
D
K
O
N
P
Control pendant with EasyChair®*
I
G
E
A
C
M
L
B
H
F
D
K
O
N
P
J
Functions available to the patient and caregiver:
A Head section raise
F Foot section lower
B Head section lower
G Hilow raise
C Thigh section raise
H Hilow lower
D Thigh section lower
I Bed non-low position indicator
E Foot section raise
Functions available only to the caregiver:
J EasyChair® position
N Trendelenburg
K Return to flat sleep surface
O Reverse Trendelenburg
L Battery switch activation
P Function management indicator
M Power indicator
Page 2 - 6
QD2300(5) - AvantGuard® Electric Bed User Manual
Bilateral HiLow Pedal*
Raise
Lower
SYMBOL DEFINITION
INTENDED USE
PROPRIETARY AND CONFIDENTIAL DRAFT: avril 21, 2005
INTRODUCTION
OVERVIEW
Enable control under the pedal*
(reserved for nursing staff)
Enable control pedal*
INSTALLATION
ASSEMBLY
Lateral caregiver unit (without emergency Trendelenburg*)l
Battery indicator
Electrical function lockout indicator
Head
section
Hilow
Lateral caregiver unit (with emergency Trendelenburg*)
Shock position
Battery indicator
Electrical function lockout indicator
Head
section
Hilow
Battery
No battery
QD2300(5) - AvantGuard® Electric Bed User Manual
Page 2 - 7
SPECIFICATIONS
AND
WARRANTY
This label confirms that the bed’s operational
functions remain available in the event of a power
outage.
PRECAUTIONS
AND
SAFETY TIPS
Power supply
TROUBLESHOOTING
STORAGE
HANDLING
Thigh
Section
Enable control (reserved for nursing
staff)
ACCESSORIES
Thigh
Section
CLEANING
MAINTENANCE
REPLACEMENT PARTS
Enable control (reserved for nursing
staff)
INSTRUCTIONS
FOR USE
Enable control under the pedal*
(reserved for nursing staff)
PROPRIETARY AND CONFIDENTIAL DRAFT: avril 21, 2005
Overview
Head section
angle indicator*
Control Unit on a
Flexible Arm*
Reference mark for
positioning the
patient*
Control
Pendant*
Egress handle*
Vertical removable
plastic footboard*
Removable
plastic
headboard*
TotalGuard™**
integral siderail
controls
Integral bed
extension*
150 mm diameter
single band casters
Accessory
support bar
Head section “CPR”
Identification
label
Lateral caregiver unit
(on each side)
Hilow pedal*
(on each side)
Removable
metal siderails*
Retractable siderail
support with lock and bed
frame incline angle
indicator*
Fixing points for
straps*
2 I.V. pole and
patient helper
sockets*
2 I.V. pole
sockets*
150 mm diameter
double band casters*
Electrical
function
management
Bumper (4)
Shock position*
Hilow
pedal*
Enable control self-steering 5th wheel
pedal*
or controlled 5th wheel*
Central brake and steer
bar control
Integrated linen
holder*
*Equipment
varies depending
on bed model
Page 2 - 8
QD2300(5) - AvantGuard® Electric Bed User Manual
Standard Features
Sleep surface dimensions
Polypropylene hard surface
Selective electrical function lockout
Yes
Yes
Electrical adjustable Trendelenburg/Reverse Trendelenburg Yes
Adjustable head section
Yes
Comfort adjustment
Yes
Power-driven with autocontourYes
Central brake and steer system
Yes
INSTALLATION
ASSEMBLY
Adjustable thigh section
Damped CPR release
INTRODUCTION
OVERVIEW
Frame
90 x 200 cm
SYMBOL DEFINITION
INTENDED USE
PROPRIETARY AND CONFIDENTIAL DRAFT: avril 21, 2005
Equipment varies depending on bed model*
INSTRUCTIONS
FOR USE
Adjustable foot section
Mechanical
Electrical
Automatic EasyChair®
Adjustable HiLow
From 40 to 80 cm
From 45 to 85 cm
Without siderails
ACCESSORIES
Integrated siderails TotalGuard™*
Long metal siderails
Battery backup
TROUBLESHOOTING
STORAGE
HANDLING
Control pendant (patient)
Control pendant (nursing staff)
Control unit on flexible arm
Bilateral HiLow pedal
Enable control pedal
PRECAUTIONS
AND
SAFETY TIPS
Casters
CLEANING
MAINTENANCE
REPLACEMENT PARTS
Emergency Trendelenbug (mandatory requirement for acute care
beds)
125 mm diameter single band
150 mm diameter single band
150 mm diameter double band
150 mm diameter antistatic double band
Directional caster at foot end of bed
QD2300(5) - AvantGuard® Electric Bed User Manual
Page 2 - 9
SPECIFICATIONS
AND
WARRANTY
150 mm diameter antistatic single band
PROPRIETARY AND CONFIDENTIAL DRAFT: avril 21, 2005
Bed connected to AC power, brake not applied detection
Self-steering 5th wheel
Controlled 5th wheel
MobiBar® egress handle
Integral bed extension at foot end of bed
Integrated linen holder
Accessory support bar, 2 hooks
Accessory support bar, 6 hooks
Multiple bag support
Headboard and footboard
Standard polypropylene headboard and
footboard
Standard polypropylene headboard and
lockable footboard
Medispace™ headboard and footboard
Sequoia headboard and footboard
Medic’hotel™ headboard and footboard
Accessories
AC908A
AC932A
AC938A
AC961A
AD016A
AC991A
AC959A
AC962A
AD101A
AD102A
AC963A
AC968A
AD080B
AD081C
AD082A*
AD165A*
AC953A
Page 2 - 10
2-receptacle bottle holder
3P 1l pivoting stainless steel bottle holder
3P 2l pivoting stainless steel bottle holder
3-litre bottle holder for frame
Semi-spherical drainage holder
Triangular section drainage holder
Oxygen cylinder holder
3-litre bottle holder for foot end
Oxygen cylinder holder
Oxygen cylinder holder
Syringe-driver holder
Equipotential cable
Chrome-plated patient helper
Chrome-plated adjustable patient helper
Stainless steel I.V. pole
I.V. pole
Chrome-plated I.V. hooks on patient helper
QD2300(5) - AvantGuard® Electric Bed User Manual
(High resilience insert/sewn and taped cover)
INSTALLATION
ASSEMBLY
Monitor stand
Label holder
Accessory support bar
Medical device support rail
Bultex® comfort mattress
Extension cushion for Bultex® comfort mattress
Cliniplot® III mattress
Extension cushion for Cliniplot ® III mattress
Primo™ dynamic low pressure mattress system
Mattress Clinisert® 2
INTRODUCTION
OVERVIEW
AD128A
AC923A
AD126A
AD127A
AD069A
AD162A
AD066A
AD076A
AD085A
AD117A01
SYMBOL DEFINITION
INTENDED USE
PROPRIETARY AND CONFIDENTIAL DRAFT: avril 21, 2005
AD118A01 Mattress Clinisert® 2
(Visco-elastic insert/sewn and taped cover)
AD120A01 Mattress Clinisert® 2
ACCESSORIES
TROUBLESHOOTING
STORAGE
HANDLING
PRECAUTIONS
AND
SAFETY TIPS
(Visco-elastic insert/welded cover)
Extension cushion for Clinisert® 2
Duo® 2 Multi Mode Mattress System
MobiBar® egress handle
Self-steering 5th wheel
Controlled 5th wheel
Bilateral HiLow pedal
Linen holder
Monitor stand
Removable frame
Control unit on flexible arm without EasyChair®
Control unit on flexible arm with EasyChair®
Control pendant for patient without EasyChair®
Control pendant for nursing staff without EasyChair®
Control pendant for patient with EasyChair®
Control pendant for nursing staff with EasyChair®
Long metal siderails
Enable control pedal
CLEANING
MAINTENANCE
REPLACEMENT PARTS
AD164A
AD140A
AD177A*
AD135A
AD180A
AD171A
AD139A
AD128A
AD142A
AD166A
AD174A
AD167A
AD168A
AD175A
AD176A
AD178A
AD179A
INSTRUCTIONS
FOR USE
(High resilience insert/welded cover)
AD119A01 Mattress Clinisert® 2
SPECIFICATIONS
AND
WARRANTY
QD2300(5) - AvantGuard® Electric Bed User Manual
Page 2 - 11
PROPRIETARY AND CONFIDENTIAL DRAFT: avril 21, 2005
NOTES:
Page 2 - 12
QD2300(5) - AvantGuard® Electric Bed User Manual
Chapter 3
Installing the bed
SYMBOL DEFINITION
INTENDED USE
PROPRIETARY AND CONFIDENTIAL DRAFT: 21 avril 2005
INTRODUCTION
FEATURES
Installing the Bed
First Steps
Before installing the bed for the first time or after bringing the bed and
its accessories out of storage:
• ensure that the bed and its various parts are at room temperature.
• make sure that all the moving parts are in good working order,
TROUBLESHOOTING
STORAGE
HANDLING
• make sure that the bed has been cleaned and disinfected (See
“Cleaning” page 5-1).
ACCESSORIES
• connect the bed to the mains power supply (See “Connection to the
Mains Power Supply” page 3-2),
CLEANING
MAINTENANCE
REPLACEMENT PARTS
The many sources and types of accessories, hardware, or medical
devices that may be used together with this bed do not enable Hill-Rom
to guarantee both the safety and conformity of all the combinations thus
created. The operator who creates these device combinations must
therefore ensure that security and conformity requirements are met.
INSTRUCTIONS
FOR USE
Caregivers must be informed of the risks that may be encountered in the
use of electric beds.
INSTALLING
THE BED
Before using the bed, it is essential to have a thorough understanding of
this manual. This manual contains instructions for general use and
maintenance and guarantees improved safety. Caregivers must have
access to this manual.
PRECAUTIONS
AND
SAFETY TIPS
SPECIFICATIONS
AND
WARRANTY
QD2300(5) - AvantGuard® Electric Bed User Manual
Page 3 - 1
PROPRIETARY AND CONFIDENTIAL DRAFT: 21 avril 2005
Connection to the Mains Power Supply
The mains power supply for the bed must comply with relevant
standards:
NF C 15-100 and NF C 15-211 (France).
International Electrotechnical Commission (IEC) 364 for other
locations.
Check that the bed’s power requirements on the identification label (See
“Overview” page 2-8) correspond to the power supply voltage of the
hospital.
The power supply should be equipped with a maximum 30 mA earth
leakage circuit breaker, in compliance with IEC 364-5-53.
Page 3 - 2
QD2300(5) - AvantGuard® Electric Bed User Manual
Chapter 4
Instructions for use
SYMBOL DEFINITION
INTENDED USE
PROPRIETARY AND CONFIDENTIAL DRAFT: 21 April 2005
INTRODUCTION
FEATURES
Use
Siderails
The Electric bed AvantGuard® can be fitted with two types of siderail:
INSTALLATION
ASSEMBLY
• Integrated siderails TotalGuard™*
• Long, detachable metal siderails
WARNING:
Evaluate patients for entrapment risk according to protocol, and
monitor patients appropriately. Ensure that all siderails are fully
latched when in the raised position. Failure to do either of these
could result in serious injury or death.
ACCESSORIES
TROUBLESHOOTING
STORAGE
HANDLING
NOTE:
Siderails are intended to be a reminder to the patient of the unit's edges,
not a patient-restraining device. When appropriate, Hill-Rom
recommends that medical personnel determine the proper methods
necessary to ensure a patient remains safely in bed without being
constantly observed.
CLEANING
INSTRUCTIONS FOR
MAINTENANCE
USE
REPLACEMENT PARTS
WARNING:
Always ensure that there are no obstacles before raising or
lowering a siderail (e.g., person’s limb, objects, accessories).
They are not designed to restrain or immobilize the patient. No
containment devices must be fastened to the siderails (e.g.
straps). Failure to do so could result in patient injury or equipment
damage.
PRECAUTIONS
AND
SAFETY TIPS
SPECIFICATIONS
AND
WARRANTY
QD2300(5) - AvantGuard® Electric bed User Manual
Page 4 - 1
PROPRIETARY AND CONFIDENTIAL DRAFT: 21 April 2005
TotalGuard™* integrated siderails
The Electric bed AvantGuard® fitted with TotalGuard™* siderails is
able to receive a wide range of mattress widths (See “Mattress” page 84).
In order to achieve mattress/siderail combinations offering optimal
comfort and safety, the bed can be configured with siderails in two
retained and secure positions.
WARNING:
Do not place accessories (respiratory or other medical devices)
on the siderail in a manner that could interfere with the complete
storage of the foot siderail and thus block access to the release
mechanism for lowering the siderail when emergency access to
the patient could be required. The siderails must be handled
according to the instructions in the user manual. Failure to do so
could result in injury.
The TotalGuard™* integrated siderails are part of the frame. The
siderails lift into the locked position and rotate from the head to the foot.
The width of the bed is reduced when the siderails are in the low
position.
When fully raised and locked, the siderails ensure patient protection and
help to reduce the risk of falls.
Position 1: Siderail folded and in low position.
Position 2: Siderail folded and in high position.
Position 3: Siderail unfolded in high position.
2
3
1
Page 4 - 2
QD2300(5) - AvantGuard® Electric bed User Manual
The siderails are located under the bed when not in use.
To raise a siderail:
INTRODUCTION
FEATURES
• Pull the folded siderail outwards and upwards until it latches into the
locked position as close to the edge of the mattress as possible
without forcing.
• Verify the siderail is locked by pulling on the siderail.
SYMBOL DEFINITION
INTENDED USE
PROPRIETARY AND CONFIDENTIAL DRAFT: 21 April 2005
Raising the TotalGuard™* integrated siderails (position 2)
INSTALLATION
ASSEMBLY
Rotate the siderail downwards into the required low position (3), and
release the unlocking button.
1
2
3
TROUBLESHOOTING
STORAGE
HANDLING
To lower a siderail:
• Make sure that the foot siderail is folded.
• Gripping the siderail by the handles, push it slightly inwards (1).
• Activate the unlocking button on the siderail (2).
ACCESSORIES
Lowering the TotalGuard™* siderails (position 1)
CLEANING
INSTRUCTIONS FOR
MAINTENANCE
USE
REPLACEMENT PARTS
CLICK
PRECAUTIONS
AND
SAFETY TIPS
SPECIFICATIONS
AND
WARRANTY
QD2300(5) - AvantGuard® Electric bed User Manual
Page 4 - 3
PROPRIETARY AND CONFIDENTIAL DRAFT: 21 April 2005
Unfolding the foot siderails (position 3)
CAUTION:
The foot section of the siderail must only be unfolded when the
head section of the siderail is locked in the raised position.
Failure to do so could result in equipment damage.
To unfold the foot section of the siderail:
• Grip the outer foot section of the siderail and rotate it to the foot end.
• Position the siderail in the support. The siderail is secure when it
clicks into place.
• Verify the siderail is locked by trying to lift the foot section.
CLICK
Page 4 - 4
QD2300(5) - AvantGuard® Electric bed User Manual
To store the foot section of the siderail:
• With one hand (A), grip the foot siderail by the handles.
• Raise the siderail and rotate it towards the head end.
• Position the foot siderail in the support (C) provided for storage at the
head end.
INSTALLATION
ASSEMBLY
• With the other hand, press the release button (B).
INTRODUCTION
FEATURES
WARNING:
When storing the foot siderail, make sure that no objects or limbs
are in the way. Failure to do so could result in patient injury or
equipment damage.
SYMBOL DEFINITION
INTENDED USE
PROPRIETARY AND CONFIDENTIAL DRAFT: 21 April 2005
Storing the foot siderails (Position 2)
CLEANING
INSTRUCTIONS FOR
MAINTENANCE
USE
REPLACEMENT PARTS
A
B
C
ACCESSORIES
TROUBLESHOOTING
STORAGE
HANDLING
PRECAUTIONS
AND
SAFETY TIPS
SPECIFICATIONS
AND
WARRANTY
QD2300(5) - AvantGuard® Electric bed User Manual
Page 4 - 5
PROPRIETARY AND CONFIDENTIAL DRAFT: 21 April 2005
Foot Siderail Support
The foot siderail supports on both sides of the bed can be folded away,
thus enabling the caregivers to move freely when transferring the patient
to another platform.
A
B
To fold away a siderail support:
• Make sure that the foot siderail is folded.
• Hold the foot siderail support (A) with one hand.
• With the other hand, pull the release pin (B).
• Release the handle and swing the support beneath the sleep surface.
To raise a siderail support:
• Raise the foot siderail support until you hear a “click.”
• Verify the siderail support is locked by pulling on the siderail
support.
Page 4 - 6
QD2300(5) - AvantGuard® Electric bed User Manual
When fully raised and locked, the siderails ensure patient protection and
help to reduce the risk of falls.
INSTALLATION
ASSEMBLY
The metal siderails can be integrated in the frame and detached. Refer to
the assembly instructions enclosed with the accessory for installation.
The siderails are unfolded by raising them on the side of the bed. They
are equipped with a double lockout system performing two functions.
INTRODUCTION
FEATURES
WARNING:
Do not place accessories (respiratory or other medical devices)
on the siderail in a manner that could interfere with the siderail
when emergency access to the patient could be required. The
siderails must be handled according to the instructions in the user
manual. Failure to do so could result in injury.
SYMBOL DEFINITION
INTENDED USE
PROPRIETARY AND CONFIDENTIAL DRAFT: 21 April 2005
Long metal siderails*
CLEANING
INSTRUCTIONS FOR
MAINTENANCE
USE
REPLACEMENT PARTS
Position 1: Siderail in low position.
Position 2: Siderail in high position.
ACCESSORIES
TROUBLESHOOTING
STORAGE
HANDLING
PRECAUTIONS
AND
SAFETY TIPS
SPECIFICATIONS
AND
WARRANTY
QD2300(5) - AvantGuard® Electric bed User Manual
Page 4 - 7
PROPRIETARY AND CONFIDENTIAL DRAFT: 21 April 2005
Raising the long metal siderails (position 2)
To raise a long metal siderail:
• Grip the upper bar and pull upwards until a double “click” is heard.
• Ensure the siderail is locked by pulling and pushing it.
CLICK
CLICK
Page 4 - 8
QD2300(5) - AvantGuard® Electric bed User Manual
• Press the second unlocking button (2).
• Only release the two buttons after starting to lower the siderail.
INSTALLATION
ASSEMBLY
To lower a long metal siderail:
• Gripping the siderail by the upper bar.
• Push slightly (A) the siderail to the head end, then press and hold (1)
the first unlocking button.
INTRODUCTION
FEATURES
WARNING:
If control pendant is present on the siderail, then remove it (See
“Unclipping” page 4-46).
SYMBOL DEFINITION
INTENDED USE
PROPRIETARY AND CONFIDENTIAL DRAFT: 21 April 2005
Lowering the long metal siderails (position 1)
• Rotate and push (B) the siderail downwards into the low position.
CLEANING
INSTRUCTIONS FOR
MAINTENANCE
USE
REPLACEMENT PARTS
A
B
1
2
B
A
ACCESSORIES
TROUBLESHOOTING
STORAGE
HANDLING
PRECAUTIONS
AND
SAFETY TIPS
SPECIFICATIONS
AND
WARRANTY
QD2300(5) - AvantGuard® Electric bed User Manual
Page 4 - 9
PROPRIETARY AND CONFIDENTIAL DRAFT: 21 April 2005
Removing a long metal siderail
To lower a long metal siderail:
• Lower the siderail (See “Lowering the long metal siderails (position 1)”
page 4-9).
• On the head side: pull (1) the release pin, then pull (2) out the
siderail, without removing it completely from its support.
• On the foot side: pull (3) the release pin, then pull (4) out the siderail,
without removing it completely from its support.
1
4
3
2
• Grip the siderail and remove it.
Raising a long metal siderail
To raise a long metal siderail:
• Grip the siderail and position it in the head and foot supports.
• Push on both pins until a “click” is heard.
• Check that the siderail is locked by pulling it.
CLICK
• Check the correct operation of the siderail by lowering and raising it.
Page 4 - 10
QD2300(5) - AvantGuard® Electric bed User Manual
Electrical Functions
Control Pendant
For the functions, refer to "Electrical controls” page 2 - 6.
Control pendant for patients*
Control pendant for nursing staff*
CLEANING
INSTRUCTIONS FOR
MAINTENANCE
USE
REPLACEMENT PARTS
The bed can be equipped with a control pendant for the patient and a
control pendant for the nursing staff. The control pendant provides
access to the various power-driven features of the bed. The pendant can
be secured in the housings provided in the siderails (See “Positioning”
page 4-45). This mechanism allows the control pendant to be positioned
as ergonomically as possible for the patient and the nursing staff.
INSTALLATION
ASSEMBLY
WARNING:
Nursing staff need to assess whether the patient can be left
unattended with the control pendant. Failure to do so could result
in patient injury or equipment damage.
INTRODUCTION
FEATURES
The bed’s power-driven features are accessed by a control pendant, a
bilateral HiLow foot pedal or a control unit on a flexible arm. Certain
emergency functions are available on the lateral caregiver unit.
SYMBOL DEFINITION
INTENDED USE
PROPRIETARY AND CONFIDENTIAL DRAFT: 21 April 2005
ACCESSORIES
See the position in "Control Pendant*” page 4 - 44.
TROUBLESHOOTING
STORAGE
HANDLING
The control pendant can be placed on the right-hand or left-hand side of
the bed.
PRECAUTIONS
AND
SAFETY TIPS
SPECIFICATIONS
AND
WARRANTY
QD2300(5) - AvantGuard® Electric bed User Manual
Page 4 - 11
PROPRIETARY AND CONFIDENTIAL DRAFT: 21 April 2005
Control pendant on a flexible arm*
Patient side
Nursing staff side
The control unit on a flexible arm is equipped with a touchpad on both
sides. One side is intended for the patient and the other side for the
nursing staff. The arm can be positioned on the right-hand or left-hand
side of the head section. To move the arm from one side to the other, see
“Control unit on a flexible arm*” page 4 - 43.
For the functions, refer to “Electrical controls” page 2 - 6.
Bilateral HiLow Pedal*
WARNING:
Ensure that no accessory or other device interferes with the use
of the pedal. Failure to do so could result in patient injury or
equipment damage.
This pedal is located centrally under the lower bed frame on each side.
Nursing staff can use this pedal to adjust bed height and activate or
deactivate the function management mode while keeping their hands
clean and free to deal with the patient.
Page 4 - 12
QD2300(5) - AvantGuard® Electric bed User Manual
This pedal is located centrally under the lower bed frame on each side.
WARNING:
See “Safety Tips” page 8-1.
ACCESSORIES
TROUBLESHOOTING
STORAGE
HANDLING
The electrical function management (nursing mode) selectively locks
out or releases the power-driven functions of the bed according to the
nurse’s patient management needs.
The functions to be locked out or released are selected on the control
pendant or the control unit on the flexible arm after activation of the
function management.
CLEANING
INSTRUCTIONS FOR
MAINTENANCE
USE
REPLACEMENT PARTS
Electrical function management
INSTALLATION
ASSEMBLY
Nursing staff can use this pedal to activate or deactivate the function
management mode while keeping their hands clean and free.
INTRODUCTION
FEATURES
WARNING:
Ensure that no accessory or other device interferes with the use
of the pedal. Failure to do so could result in patient injury or
equipment damage.
SYMBOL DEFINITION
INTENDED USE
PROPRIETARY AND CONFIDENTIAL DRAFT: 21 April 2005
Enable key pedal*
PRECAUTIONS
AND
SAFETY TIPS
SPECIFICATIONS
AND
WARRANTY
QD2300(5) - AvantGuard® Electric bed User Manual
Page 4 - 13
PROPRIETARY AND CONFIDENTIAL DRAFT: 21 April 2005
Activating/deactivating function management
• Press manually the
enable control (1) on the
lateral caregiver unit or,
with the top of the foot,
actuate control (2*), or
(3*).
1
• The control pendant or
control unit on a flexible
arm indicator (A) is
alight, the electrical
function management is
active.
• Press control (1), or (2*),
2
or (3*) to deactivate the
function management
when the functions have been selected.
A
3
NOTE:
The Trendelenburg/Reverse Trendelenburg is not an emergency
function and is only available for the nursing staff via the electrical
function management.
NOTE:
If the electrical function management is not manually deactivated, it
locks itself after about one minute.
NOTE:
Do not fix a strap on the pedal or leave an object below it which could
activate the management key, because if the management function
remains activated permanently, the HiLow function is no longer
available.
WARNING:
It is the responsibility of the nursing staff to authorize the patient
to use certain bed functions, including the HiLow. Failure to do so
could result in patient injury or equipment damage.
Page 4 - 14
QD2300(5) - AvantGuard® Electric bed User Manual
• Activate function
management.
4
INTRODUCTION
FEATURES
• Press the symbol
representing the
function to be locked
out on the caregiver’s
side control panel.
3
INSTALLATION
ASSEMBLY
CLEANING
INSTRUCTIONS FOR
MAINTENANCE
USE
REPLACEMENT PARTS
• The indicator of the
corresponding function
will then be lit to indicate
that the function is locked
out (4).
• Deactivating function management.
Authorizing electrical functions
• Activating function
management.
4
3
ACCESSORIES
• Press the symbol
representing the function
to be authorized (3) on the
caregiver’s side control
panel.
• Deactivating function
management.
NOTE:
Locking out the head section does not lock out the thigh section
adjustment of the automatic contour function.
When the patient is restrained by the straps*, the electric functions must
be locked out. Failure to do so could result in patient injury or equipment
damage.
Page 4 - 15
SPECIFICATIONS
AND
WARRANTY
WARNING:
PRECAUTIONS
AND
SAFETY TIPS
NOTE:
Locking out the thigh section adjustment control will also lock out the
automatic contour feature (See “Automatic Contour” page 4-22).
TROUBLESHOOTING
STORAGE
HANDLING
• The indicator of the
relevant function will then
switch off to indicate that
the function is enabled (4).
QD2300(5) - AvantGuard® Electric bed User Manual
SYMBOL DEFINITION
INTENDED USE
PROPRIETARY AND CONFIDENTIAL DRAFT: 21 April 2005
Locking out electrical functions
PROPRIETARY AND CONFIDENTIAL DRAFT: 21 April 2005
Sleep Surface
Power-driven HiLow
Sleep surface height can be
adjusted using the control pendant,
the bilateral HiLow pedal, or the
control unit on a flexible arm.
WARNING:
Before using this function,
check that no obstacles (e.g.,
objects, accessories, power cables) or persons (especially
children) are under the sleep surface.
Check that patient’s limbs are within the sleep surface. Failure to
do so could result in patient injury or equipment damage.
CAUTION:
Ensure that the bed and accessories (patient helper, I.V. pole,
etc.) cannot strike any fittings (light fittings, headwalls, etc.) or
hospital furniture (chair, bedside cabinet, etc.). Failure to do so
could result in equipment damage.
NOTE:
Before using the HiLow function, check that it is enabled (See
“Electrical function management” page 4-13).
Control pendant*
Raise
Lower
To adjust the height of the sleep surface:
• Press the arrow of the symbol for the movement you require.
• Release when the required height is reached.
Page 4 - 16
QD2300(5) - AvantGuard® Electric bed User Manual
Raise
SYMBOL DEFINITION
INTENDED USE
PROPRIETARY AND CONFIDENTIAL DRAFT: 21 April 2005
Control unit on a flexible arm*
INTRODUCTION
FEATURES
To adjust the height of the sleep surface:
• Press the arrow of the symbol for the movement you require.
Bilateral HiLow pedal*
This pedal is located centrally under the lower bed frame on each side.
By default, the pedal is locked to avoid accidental movement. It is
necessary to unlock the HiLow pedal before each use.
NOTE:
The HiLow lock out (1) on the side caregiver unit does not control the
availability of the HiLow pedal.
To adjust the height of the sleep surface:
ACCESSORIES
• Activate function management
(See “Activating/deactivating
function management” page 4-14).
CLEANING
INSTRUCTIONS FOR
MAINTENANCE
USE
REPLACEMENT PARTS
• Release when the required height is reached.
INSTALLATION
ASSEMBLY
Lower
• Press your foot on the
corresponding control arrow for
the movement you require.
1
TROUBLESHOOTING
STORAGE
HANDLING
• Release when the required height is reached.
• Deactivate function management to lock the HiLow pedal.
PRECAUTIONS
AND
SAFETY TIPS
QD2300(5) - AvantGuard® Electric bed User Manual
Raise
Page 4 - 17
SPECIFICATIONS
AND
WARRANTY
Lower
PROPRIETARY AND CONFIDENTIAL DRAFT: 21 April 2005
Low bed position indicator
An indicator located on the control pendant and on the control unit on
the flexible arm switches off to indicate that the bed is in low position.
This position is recommended when the patient is left unattended.
WARNING:
When raising the bed, make sure that there is enough room
above the IV pole, if necessary. Failure to do so could result in
patient injury or equipment damage.
Page 4 - 18
QD2300(5) - AvantGuard® Electric bed User Manual
The sleep surface may be inclined in two ways: in Trendelenburg (head
end in low position) or Reverse Trendelenburg (foot end in low
position).
To tilt the sleep surface :
• Press the button corresponding to the function required on the control
pendant or control unit on a flexible arm.
• Release the button when the required angle is attained.
PRECAUTIONS
AND
SAFETY TIPS
• Deactivate the function management (See “Activating/deactivating
function management” page 4-14).
TROUBLESHOOTING
STORAGE
HANDLING
• Activate the function management (See “Activating/deactivating
function management” page 4-14).
ACCESSORIES
The maximum angle for the Trendelenburg/Reverse Trendelenburg is
available at all heights of the sleep surface. The angle is shown on the
indicator located on the foot siderail support.
CLEANING
INSTRUCTIONS FOR
MAINTENANCE
USE
REPLACEMENT PARTS
NOTE:
The Trendelenburg/Reverse Trendelenburg is not an emergency
function and is only available for the nursing staff via the electrical
function management(See “Electrical function management” page 413).
INSTALLATION
ASSEMBLY
WARNING:
Never leave the patient unattended in the Trendelenburg/Reverse
Trendelenburg position (See “Trendelenburg/Reverse
Trendelenburg and Emergency Trendelenburg” page 8-1).
INTRODUCTION
FEATURES
WARNING:
Before enabling this function, check that the frame extension is
securely locked in one of the notches and that no obstacles (e.g.,
(e.g. objects, accessories, power cables, tubes) or persons
(especially children) are under the sleep surface.
Check that patient’s limbs are within the sleep surface. Failure to
do so could result in patient injury or equipment damage.
SYMBOL DEFINITION
INTENDED USE
PROPRIETARY AND CONFIDENTIAL DRAFT: 21 April 2005
Trendelenburg/Reverse Trendelenburg
SPECIFICATIONS
AND
WARRANTY
QD2300(5) - AvantGuard® Electric bed User Manual
Page 4 - 19
PROPRIETARY AND CONFIDENTIAL DRAFT: 21 April 2005
NOTE:
After one minute, the management function is deactivated
automatically.
Trendelenbug
Reverse
Trendelenbug
Reference mark for positioning the patient
Position the patient’s hip opposite the mark on the inner surface of the
TotalGuard™* siderail to make sure that the patient is in an optimal and
comfortable position on the bed.
Page 4 - 20
QD2300(5) - AvantGuard® Electric bed User Manual
Head section
INTRODUCTION
FEATURES
WARNING:
Ensure that there are no obstacles (patient's limb, power cable,
objects, and accessories) before using the head section features.
Failure to do so could result in patient injury or material damage.
SYMBOL DEFINITION
INTENDED USE
PROPRIETARY AND CONFIDENTIAL DRAFT: 21 April 2005
INSTALLATION
ASSEMBLY
Head section adjustment can be activated from the control pendant or
the control unit on a flexible arm.
• Press the head section raise button (A) to raise the head section with
the automatic contour feature (if enabled).
• Release the button when the required angle is attained.
The angle between the head section and the horizontal can be seen on
the indicator (C) located on the head siderail.
A
PRECAUTIONS
AND
SAFETY TIPS
C
TROUBLESHOOTING
STORAGE
HANDLING
B
ACCESSORIES
The head section is lowered using button (B).
CLEANING
INSTRUCTIONS FOR
MAINTENANCE
USE
REPLACEMENT PARTS
Head section control
SPECIFICATIONS
AND
WARRANTY
QD2300(5) - AvantGuard® Electric bed User Manual
Page 4 - 21
PROPRIETARY AND CONFIDENTIAL DRAFT: 21 April 2005
Automatic Contour
The automatic contour feature
(automatic comfort level
positioning) can be activated
using the control pendant or
the control unit on a flexible
arm.
The automatic contour feature
raises the head section and the
adjustable thigh section
simultaneously and helps to
prevent the patient from sliding down in the bed.
The automatic contour feature is only available when both the head
section and thigh section functions are enabled.
NOTE:
When the head section is locked out, the adjustable thigh section can
still be activated by the control pendant or the control unit on a flexible
arm.
Thigh Section
Electric thigh section control
Thigh section elevation can be adjusted by using the control pendant or
the control unit on a flexible arm.
Raise thigh
section
Lower thigh
section
When the thigh section is raised, the foot section is inclined at an angle
of approximately 14° from the sleep surface (See “Foot section” page 423).
Page 4 - 22
QD2300(5) - AvantGuard® Electric bed User Manual
Foot section
SYMBOL DEFINITION
INTENDED USE
PROPRIETARY AND CONFIDENTIAL DRAFT: 21 April 2005
INTRODUCTION
FEATURES
INSTALLATION
ASSEMBLY
The foot section of the bed can be electrically raised by using the control
pendant or the control unit on a flexible arm.
NOTE:
The angular range that the foot section can be adjusted to depends on the
angle to which the thigh section is adjusted.
To raise the foot section:
A
ACCESSORIES
• Press the raise foot section button (A)
until the required angle is reached, then
release.
CLEANING
INSTRUCTIONS FOR
MAINTENANCE
USE
REPLACEMENT PARTS
Electric foot section*
To lower the foot section:
B
TROUBLESHOOTING
STORAGE
HANDLING
• Press the lower foot section button (B)
until the required angle is reached, then
release.
PRECAUTIONS
AND
SAFETY TIPS
SPECIFICATIONS
AND
WARRANTY
QD2300(5) - AvantGuard® Electric bed User Manual
Page 4 - 23
PROPRIETARY AND CONFIDENTIAL DRAFT: 21 April 2005
Manual foot section adjustment*
The foot section has a gas-assisted locking system that can be manually
adjusted.
NOTE:
The angular range that the foot section can be adjusted to depends on
the angle to which the thigh section is adjusted.
To incline the foot section:
• Use the pull-out handle on the end of the foot section to raise it to the
required position (1).
• Raise or lower the foot section to the required position (2).
• Release the handle.
2
1
Page 4 - 24
QD2300(5) - AvantGuard® Electric bed User Manual
Automatic EasyChair®*
INTRODUCTION
FEATURES
The EasyChair® automatic chair position allows the patient to be
progressively mobilized, without the need for transfer from the bed.
This function is only available to the caregiver.
SYMBOL DEFINITION
INTENDED USE
PROPRIETARY AND CONFIDENTIAL DRAFT: 21 April 2005
INSTALLATION
ASSEMBLY
B
Adjusting to the chair position:
• Activate the function management (See “Activating/deactivating
function management” page 4-14).
• Press the EasyChair® automatic chair position button (A) until the
chair position is reached. The movement stops automatically.
• Press the return to flat sleep surface button (B) until the normal
position is reached. The movement stops automatically.
NOTE:
The bed can be adjusted to the chair position from any sleep surface
height.
NOTE:
If the EasyChair® Automatic Chair Position is enabled, all the electric
movement functions are then automatically enabled.
PRECAUTIONS
AND
SAFETY TIPS
NOTE:
The locking out of one sleep surface function will automatically disable
the EasyChair® Automatic Chair Position function.
TROUBLESHOOTING
STORAGE
HANDLING
• Deactivating function management.
ACCESSORIES
To return to the normal position:
CLEANING
INSTRUCTIONS FOR
MAINTENANCE
USE
REPLACEMENT PARTS
A
SPECIFICATIONS
AND
WARRANTY
QD2300(5) - AvantGuard® Electric bed User Manual
Page 4 - 25
PROPRIETARY AND CONFIDENTIAL DRAFT: 21 April 2005
Emergency functions
Emergency Trendelenburg*
This feature automatically and simultaneously lowers all the articulated
sections until they are horizontal, then inclines the sleep surface to an
angle of 0° to 16°.
WARNING:
Before setting in the “Shock” position, it is imperative to lower the
siderails.
CAUTION:
Ensure that any accessories or devices cannot fall as a result of
the frame movement. Failure to do so could result in equipment
damage.
WARNING:
Never allow an unqualified person or unattended patients to use
this function in this position. Failure to do so could result in
equipment damage or injury.
Before using this function, check that no obstacles (e.g., objects,
accessories, power cables) or persons are under the sleep
surface.
A
To enable the “Shock” feature:
• On the lateral caregiver unit, push and hold the symbol (A) until the
desired angle is achieved then release.
The bed is then in the “Shock” position.
NOTE:
When there is no mains power supply, this feature is available through
an emergency Trendelenburg battery.
Page 4 - 26
QD2300(5) - AvantGuard® Electric bed User Manual
It is operated by a handle located centrally and bilaterally under the
sleep surface.
INSTALLATION
ASSEMBLY
When activated, the CPR release (resuscitation, heart massage, etc.)
uncouples the head section actuator to allow the head section to lower to
horizontal from any position. The CPR release function is gas-assisted
to cushion the movement and can be used when electric power is not
available.
INTRODUCTION
FEATURES
WARNING:
Never allow a non-qualified person to operate this function and
check that no obstacles (e.g., objects, accessories, power cables)
or persons are under the head section.
SYMBOL DEFINITION
INTENDED USE
PROPRIETARY AND CONFIDENTIAL DRAFT: 21 April 2005
CPR
CLEANING
INSTRUCTIONS FOR
MAINTENANCE
USE
REPLACEMENT PARTS
• Pull the yellow CPR handle out, hold and push the head section down
with the other hand.
• Release the handle when the head section is flat.
PRECAUTIONS
AND
SAFETY TIPS
The head section actuator is automatically re-enabled after the yellow
CPR handle is released.
TROUBLESHOOTING
STORAGE
HANDLING
• Let the head section come to rest or steady and assist the head section
to the flat position.
ACCESSORIES
Returning the head section to the flat position:
SPECIFICATIONS
AND
WARRANTY
QD2300(5) - AvantGuard® Electric bed User Manual
Page 4 - 27
PROPRIETARY AND CONFIDENTIAL DRAFT: 21 April 2005
Brake and steer system
Using the brake and steer bar
WARNING:
Always put on the brakes when the bed is
occupied, except during patient transport.
To make sure the bed will not move, push
and pull on the bed to check it after the
brakes are engaged.
The brake and steer bar, located at the foot of
the bed on the chassis cover, controls all four
casters.
“BRAKE” position (bar down):
the bed cannot be moved.
“NEUTRAL” position (bar horizontal):
all four casters can turn and swivel.
The bed can be turned in any direction.
“STEER” position (bar up):
Page 4 - 28
QD2300(5) - AvantGuard® Electric bed User Manual
th
A
INSTALLATION
ASSEMBLY
Head
INTRODUCTION
FEATURES
• without 5 wheel (basic version):
The casters turn and only the caster A or B (foot end steering caster)
can be steered and does not swivel.
The bed can be moved in a straight line.
SYMBOL DEFINITION
INTENDED USE
PROPRIETARY AND CONFIDENTIAL DRAFT: 21 April 2005
Using the bar in the steering position
Foot
• with self-steering 5th wheel (*):
NOTE:
When the bed is fitted with a self-steering 5 wheel, the steer position on
the brake and steer bar is not available.
The 5 wheel automatically changes to the steering position when the
bed is moving in a straight line, forwards or backwards, or sideways
(90° to the left or right) and is released the next time the bed is
moved.Incompatible with 125 mm diameter casters
th
th
CLEANING
INSTRUCTIONS FOR
MAINTENANCE
USE
REPLACEMENT PARTS
B
ACCESSORIES
TROUBLESHOOTING
STORAGE
HANDLING
Foot
PRECAUTIONS
AND
SAFETY TIPS
Head
QD2300(5) - AvantGuard® Electric bed User Manual
SPECIFICATIONS
AND
WARRANTY
NOTE:
Incompatible with 125 mm diameter casters
Page 4 - 29
PROPRIETARY AND CONFIDENTIAL DRAFT: 21 April 2005
• with controlled 5th wheel *:
When the bed is fitted with a controlled 5th wheel, the steer position on
the brake and steer bar remains available.
When the brake and steer bar is in the steering position, the 5 wheel
automatically switches to the steering position as soon as the bed moves
forwards or backwards.
The wheel is released when the brake and steer bar is returned to the
“NEUTRAL” position.
th
Head
Foot
NOTE:
Incompatible with 125 mm diameter casters
Before moving the bed sideways, check that the brake and
steer bar is in the “NEUTRAL” position.
Bed Connected to AC Power, Brake not Applied Detection*
When the bed is plugged into AC power and the brakes are not set, an
alarm sounds until the brakes are set or AC power is removed.
Page 4 - 30
QD2300(5) - AvantGuard® Electric bed User Manual
PRECAUTIONS
AND
SAFETY TIPS
WARNING:
The bed must be moved while in transport position by 2 people
(one at each end in order to have always one person to action the
brake bar) when moving the bed on a slope, with a foot end steer
caster or when moving the bed with a heavy load (heavy patient,
accessories fitted, etc.).
TROUBLESHOOTING
STORAGE
HANDLING
WARNING:
Applicable for beds manufactured with variable width siderails
and headboard bars.
ACCESSORIES
SHOCK HAZARD:
A damaged power cable is an electric shock hazard.
CLEANING
INSTRUCTIONS FOR
MAINTENANCE
USE
REPLACEMENT PARTS
CAUTION:
Never try to move the bed by pulling on the power cable or you
may damage it.
INSTALLATION
ASSEMBLY
• If there is a patient in the bed, ensure that the siderails are raised and
locked to help prevent the patient from falling.
• Position the sleep surface so the footboard handles are at the most
suitable height for transporting the bed (approximately ½ Hi-Low)
and with the foot section horizontal.
• Disconnect the general power cable and the power cable of the
electric accessories (e.g., air mattress, etc.) and hook them to the bed
as described in paragraph “Securing the power cable” page 4 - 32.
• Ensure that the bed or accessories (patient helper, etc.) will not catch
on doorways or other obstacles (e.g. lights).
• Place the control pendant on the inside of the head siderail to prevent
any damage to the control pendant or cable (e.g., catching on
doorways, etc.).
• Place the patient in a stable and comfortable position (do not put the
bed in the chair position or with a fully raised head section).
INTRODUCTION
FEATURES
WARNING:
Failure to perform any of the checks below could result in injury or
equipment damage. Before moving the bed, perform the following
checks:
SYMBOL DEFINITION
INTENDED USE
PROPRIETARY AND CONFIDENTIAL DRAFT: 21 April 2005
Moving the bed
SPECIFICATIONS
AND
WARRANTY
QD2300(5) - AvantGuard® Electric bed User Manual
Page 4 - 31
PROPRIETARY AND CONFIDENTIAL DRAFT: 21 April 2005
Moving the bed:
• Grip the headboard or
frame with both hands.
• Raise the brake and steer
bar to the “NEUTRAL”
position to unlock the
brakes.
• Push the bed, steering
with the headboard.
For easy transportation in a straight line:
• Push the bed using the end board opposite the steering wheel (See
“Using the brake and steer bar” page 4-28).
• After having moved the bed for a short distance to align the casters,
raise the brake and steer bar to the “STEER” position.
Securing the power cable
CAUTION:
Do not store the power cable in the
holes in the headboard. Doing so
may result in entanglement
problems with the headboard while
removing the headboard during
emergency CPR.
SHOCK HAZARD:
A damaged power cable is an
electric shock hazard.
Prior to transport, properly stow the
power cord to prevent tripping. Take
care to prevent damage to the power cable. An electric shock hazard
exists.
Page 4 - 32
QD2300(5) - AvantGuard® Electric bed User Manual
Equipotential terminal
The bed must be connected to the electrical installation.
To equalize potentials if a grounded power connection is unavailable,
connect the equipotential cable (AC968A) to the connection terminal on
the bed and the device.
INSTALLATION
ASSEMBLY
When direct intravascular or intracardiac connections are in use, the
electric potentials of all the unprotected metal parts need to be
equalized.
INTRODUCTION
FEATURES
SHOCK HAZARD:
Failure to connect the equipotential cable may result in corporal
injury.
SYMBOL DEFINITION
INTENDED USE
PROPRIETARY AND CONFIDENTIAL DRAFT: 21 April 2005
CLEANING
INSTRUCTIONS FOR
MAINTENANCE
USE
REPLACEMENT PARTS
Polypropylene headboards and footboards*
The headboard and footboard are provided with a label which helps to
differentiate the headboard from the footboard see photos on next page).
PRECAUTIONS
AND
SAFETY TIPS
WARNING:
Do not invert the headboard and footboard. Failure to do so could
result in patient injury or equipment damage.
TROUBLESHOOTING
STORAGE
HANDLING
WARNING:
The headboard bars are not intended to receive accessories,
accessory support device or any means of immobilizing the
patient (e.g.: straps). Failure to do so could result in patient injury
or equipment damage.
ACCESSORIES
Handling the headboard and footboard
SPECIFICATIONS
AND
WARRANTY
QD2300(5) - AvantGuard® Electric bed User Manual
Page 4 - 33
PROPRIETARY AND CONFIDENTIAL DRAFT: 21 April 2005
.
Polypropylene headboard
Polypropylene footboard
WARNING:
Incorrectly installing the headboard in the bed frame may
increase the risk of becoming trapped. Failure to follow these
recommendations may lead to material damage or injury.
NOTE:
Position the headboard as shown on the label on the head end cross bar
of the bed and the illustration above.
Page 4 - 34
QD2300(5) - AvantGuard® Electric bed User Manual
INTRODUCTION
FEATURES
No special tools or devices are required to
remove and replace the standard
headboard or footboard.
SYMBOL DEFINITION
INTENDED USE
PROPRIETARY AND CONFIDENTIAL DRAFT: 21 April 2005
Standard headboard and footboard*
To position a standard endboard:
• Hold the endboard by both handles.
INSTALLATION
ASSEMBLY
• Place the studs in the holes in the head
or foot of the bed.
To remove a standard endboard:
Lockable Footboard*
The footboard can be fixed to the bed frame with a manual locking
system and can be dismount for cleaning.
WARNING:
Regularly check that the footboard is correctly fixed.
To fix the footboard:
• Hold the endboard by the handles and place the studs in the holes in
foot of the bed.
• Ensure that the footboard is correctly fixed by lifting, pulling or
pushing it.
ACCESSORIES
• Tighten and lock the two knobs.
CLEANING
INSTRUCTIONS FOR
MAINTENANCE
USE
REPLACEMENT PARTS
• Hold the footboard by the handles on
either side and pull upwards.
TROUBLESHOOTING
STORAGE
HANDLING
PRECAUTIONS
AND
SAFETY TIPS
To remove an endboard:
• Loosen and unscrew the two knobs.
QD2300(5) - AvantGuard® Electric bed User Manual
Page 4 - 35
SPECIFICATIONS
AND
WARRANTY
• Hold the footboard by the handles on either side and pull upwards.
PROPRIETARY AND CONFIDENTIAL DRAFT: 21 April 2005
Wooden endboards*
No special tools or devices are required to remove and replace the
wooden headboard or footboard.
The headboard is equipped with bars.
Wooden headboard
To position the endboard:
Wooden footboard
A
• Hold the headboard or the
footboard by the handle and
orientate it as shown on the
pictures above.
• Place the studs (B) in the holes in
the head or foot of the bed.
To remove an endboard:
B
• Hold the headboard by the handle
(A) with both hands and pull upwards.
Page 4 - 36
QD2300(5) - AvantGuard® Electric bed User Manual
Sleep surface
To remove the thigh and foot hard surfaces, simply lift them up.
Sections are positioned using the handles. Ensure that the smooth part is
placed downwards and the raised lip (A) upwards. Ensure that there are
spaces (B) as indicated below.
A
CLEANING
INSTRUCTIONS FOR
MAINTENANCE
USE
REPLACEMENT PARTS
To raise the central hard surface, first fully raise the head section (See
“Head section control” page 4-21). Then raise the central hard surface
by pulling on the bars and turning. Then slide towards the rear.
INSTALLATION
ASSEMBLY
The sleep surface is composed of 4 sections with hard surfaces. Three of
them can be removed for easy cleaning. The head section hard surface is
fixed.
INTRODUCTION
FEATURES
WARNING:
Ensure that hard surfaces are properly positioned and secured
after fitting. Failure to do so could result in patient injury or
equipment damage.
SYMBOL DEFINITION
INTENDED USE
PROPRIETARY AND CONFIDENTIAL DRAFT: 21 April 2005
ACCESSORIES
1
Restraining strap handles
QD2300(5) - AvantGuard® Electric bed User Manual
Page 4 - 37
SPECIFICATIONS
AND
WARRANTY
1. Only to be used in compliance with local regulations
PRECAUTIONS
AND
SAFETY TIPS
WARNING:
Do not attach the restraining straps to any part of the bed
(particularly the siderails) other than those provided for this
purpose.
When the patient is restrained by straps, all electric functions
should be locked out. When the patient is restrained with an
abdominal strap, a system used to restrict the ankles must also
be used. Failure to do so could result in patient injury or
equipment damage.
TROUBLESHOOTING
STORAGE
HANDLING
B
PROPRIETARY AND CONFIDENTIAL DRAFT: 21 April 2005
When required, patientrestraining straps must be tied
to the proper handles
provided.
The sleep surface has four
handle positions (seat, thigh
and foot section) located on
each side of the bed.
Thread the straps through the
bars.
WARNING:
Containment devices must not be used as a replacement for the
nursing care required by the patient. Even when they are
correctly installed, physical containment devices may become
tangled and injure the patient or even cause death if the patient is
agitated and confused. Whenever containment devices are used,
the patient must be observed in accordance with legal
requirements and protocol. Failure to do so could result in patient
injury or equipment damage.
WARNING:
Containment devices must be secured to the articulated sections
of the bed using appropriate attachment points in order to avoid
injury to the patient.
WARNING:
Never use containment straps for the ankles when the bed is in
the seated position or the foot section is lowered. Failure to do so
could result in patient injury or equipment damage.
Page 4 - 38
QD2300(5) - AvantGuard® Electric bed User Manual
Foot End Bed Extension*
Foot end bed extension with polypropylene endboard*
INTRODUCTION
FEATURES
CAUTION:
Ensure that the bed extension is correctly secured when storing
or extending it by pulling or pushing. Failure to do so could result
in equipment damage.
SYMBOL DEFINITION
INTENDED USE
PROPRIETARY AND CONFIDENTIAL DRAFT: 21 April 2005
To pull out the extension:
INSTALLATION
ASSEMBLY
• Lift the handle located under
the footboard.
• Pull out the extension.
CLEANING
INSTRUCTIONS FOR
MAINTENANCE
USE
REPLACEMENT PARTS
Two positions are provided:
• Stored and extended. The
extension is securely held in
position by notches.
To store the extension, follow the
same process but push the extension in.
Extension with wooden endboard*
To pull out the extension:
ACCESSORIES
• Lift the handle located at the foot
end of the sleep surface on the
inside of the footboard.
Two positions are provided:
• Stored or extended. Each
position is secured in a notch.
PRECAUTIONS
AND
SAFETY TIPS
To store the extension, follow the same process but push the extension
in.
TROUBLESHOOTING
STORAGE
HANDLING
• Pull out the extension.
SPECIFICATIONS
AND
WARRANTY
QD2300(5) - AvantGuard® Electric bed User Manual
Page 4 - 39
PROPRIETARY AND CONFIDENTIAL DRAFT: 21 April 2005
Linen holder*
WARNING:
Do not sit on the linen holder or use it as a step. Failure to do so
could result in patient injury or equipment damage.
The bed features a linen holder that is built into the foot end.
(1)
Safe working load: 33.07 lb
Linen holder with plastic endboard*
To use the linen holder:
• Lift and pull on the board located under the footboard.
• Tip the wire guard backwards.
To store, reverse the steps above.
Linen holder with wooden endboard*
To use the linen holder:
• Pull on the board located under the footboard.
• Tip the wire guard backwards.
To store, reverse the steps above.
1. Safe working load specification allowing for a substantial safety margin.
Page 4 - 40
QD2300(5) - AvantGuard® Electric bed User Manual
Battery backup*
Power indicator
INTRODUCTION
FEATURES
A power indicator (A), on the control pendant or the
control unit on a flexible arm, indicates when it is
ON that the bed is under power (battery or main). It
switches OFF when the bed is unplugged or in sleep
mode.
A
INSTALLATION
ASSEMBLY
Battery power activation
B
NOTE:
Battery power automatically cuts out about one minute after the last
movement.
When the battery charge level is low and an electrical function is
activated, an alarm will sound indicating that the battery needs recharging. The ongoing movement will be completed.
The bed must then be connected to a mains power supply to re-charge
the battery. The electric functions can then be used normally.
C
PRECAUTIONS
AND
SAFETY TIPS
If the indicator (C) is flashing, it indicates a
low battery, and is charging. If the charge
indicator (B) is on and not flashing, then the
battery is fully charged. When the bed is
disconnected from the mains power supply or
when the battery is completely dead, this
indicator light goes off.
TROUBLESHOOTING
STORAGE
HANDLING
WARNING:
The bed must be connected to the mains power supply until the
charge indicator goes out. Charging time is approximately 10
hours. Failure to do so could result in the inability to operate the
bed when power is unavailable.
ACCESSORIES
Battery recharge
CLEANING
INSTRUCTIONS FOR
MAINTENANCE
USE
REPLACEMENT PARTS
Before using the battery, the switch (B) must be
enabled on the control pendant or the control unit on
a flexible arm. All electrical functions are then
available in their initial locked state.
SYMBOL DEFINITION
INTENDED USE
PROPRIETARY AND CONFIDENTIAL DRAFT: 21 April 2005
SPECIFICATIONS
AND
WARRANTY
QD2300(5) - AvantGuard® Electric bed User Manual
Page 4 - 41
PROPRIETARY AND CONFIDENTIAL DRAFT: 21 April 2005
MobiBar® egress handle*
A MobiBar® egress handle is
located on each side of the bed. It
enables mobile patients to get in and
out of the bed with greater ease and
in safety.
WARNING:
Before use, it is necessary to store the
TotalGuard™* foot siderail support under the sleep
surface (See “Storing the foot siderails (Position 2)”
page 4-5).
Never put or leave the MobiBar® egress handle in
the raised position when the TotalGuard™* foot
siderail is unfolded and/or locked. Fingers or body
members may become trapped.
Usage
• Grip the egress bar by the handle (A).
• Rotate the egress bar toward the head of bed until a click is heard.
• Ensure the locking mechanism is secure by pulling on the handle.
CLICK
A
Page 4 - 42
QD2300(5) - AvantGuard® Electric bed User Manual
• Grip the egress bar by handle (A) with one hand.
• While continuing to pull, rotate the egress handle (2) toward the foot
of the bed and under the sleep surface, then release.
INSTALLATION
ASSEMBLY
A
B
Control unit on a flexible arm*
TROUBLESHOOTING
STORAGE
HANDLING
This unit can be placed to the left or right of the head section, as
required.
ACCESSORIES
WARNING:
When the bed features an I.V. pole, the flexible arm must be fitted
on the opposite side of the bed to prevent any risk of catching it
when the head section is raised. Failure to do so could result in
patient injury or equipment damage.
CLEANING
INSTRUCTIONS FOR
MAINTENANCE
USE
REPLACEMENT PARTS
2
1
INTRODUCTION
FEATURES
• Pull, by the low part (B), the egress handle (1) outwards with the
other hand.
SYMBOL DEFINITION
INTENDED USE
PROPRIETARY AND CONFIDENTIAL DRAFT: 21 April 2005
Storage
PRECAUTIONS
AND
SAFETY TIPS
SPECIFICATIONS
AND
WARRANTY
QD2300(5) - AvantGuard® Electric bed User Manual
Page 4 - 43
PROPRIETARY AND CONFIDENTIAL DRAFT: 21 April 2005
Change of position
WARNING:
Two people are required for this operation and the bed must not
be occupied. Failure to do so could result in patient injury or
equipment damage.
To change the position of the
flexible arm:
• Raise the head section to
its maximum height.
• As one person holds the
arm, the other person turns
the beige knob with one
hand, while holding the
captive nut with the other
hand.
• Set the arm in the other
position.
• Insert the screw in the
oblong orifice and fully
tighten the beige knob.
• Check the positioning by
pulling on the arm.
Control Pendant*
Installation
Fit the control pendant in the open part of the TotalGuard™* siderail or
between the two upper bars of the metal siderail by inserting the top
edge first (1).
Turn (2) the control pendant until you hear a click.
1
2
Page 4 - 44
CLICK
QD2300(5) - AvantGuard® Electric bed User Manual
CLEANING
INSTRUCTIONS FOR
MAINTENANCE
USE
REPLACEMENT PARTS
The control pendant can be fitted to the siderails in several places and
facing the inside or outside of the bed for greater comfort for the patient
and the caregivers.
INSTALLATION
ASSEMBLY
WARNING:
Do not clip the control pendant on the side opposite to its
connection.
INTRODUCTION
FEATURES
CAUTION:
Make sure that the control pendant is inside the head section
when folding away the TotalGuard™* siderail (See “Storing the
foot siderails (Position 2)” page 4-5) or is removed when folding
away the metal bar (See “Lowering the long metal siderails
(position 1)” page 4-9). If it is on the outside, it may damage the
control wire of the siderail.
SYMBOL DEFINITION
INTENDED USE
PROPRIETARY AND CONFIDENTIAL DRAFT: 21 April 2005
Positioning
ACCESSORIES
TROUBLESHOOTING
STORAGE
HANDLING
PRECAUTIONS
AND
SAFETY TIPS
SPECIFICATIONS
AND
WARRANTY
QD2300(5) - AvantGuard® Electric bed User Manual
Page 4 - 45
PROPRIETARY AND CONFIDENTIAL DRAFT: 21 April 2005
Unclipping
To unclip the control pendant, reverse the installation procedure
described in the section "Installation” page 4 - 44.
Connecting the control pendant
The control pendant can be connected to the right or left of the patient,
except if an accessory control unit a flexible arm is fitted on the bed.
Accessory support bar*
WARNING:
Ensure that any accessories fixed to the accessory support bar
will not obstruct the base frame and the HiLow pedal.
This accessory is mounted on the side of the bed and can be adjusted
laterally (A) by pushing or pulling the accessory support bar.
A
A
This bar allows various devices (drainage bag, etc.) as well as some other
Hill-Rom accessories to be supported Hill-Rom, (See “Accessory
holder” page 6-15).
Page 4 - 46
QD2300(5) - AvantGuard® Electric bed User Manual
Medical device support rail*
INSTALLATION
ASSEMBLY
This accessory is mounted on the side of the bed and can be adjusted
laterally (A) by pushing or pulling the accessory support bar.
INTRODUCTION
FEATURES
WARNING:
Ensure that there can be no obstruction with the base frame and
HiLow pedal.
As a reminder, any user who attaches a medical device to the
support must ensure that the resulting combination and/or system
is compatible.
For any powered medical device, compliance with electrical
safety regulations must be checked by qualified personnel.
SYMBOL DEFINITION
INTENDED USE
PROPRIETARY AND CONFIDENTIAL DRAFT: 21 April 2005
CLEANING
INSTRUCTIONS FOR
MAINTENANCE
USE
REPLACEMENT PARTS
A
A
ACCESSORIES
The rail is used to carry various medical appliances and other
accessories Hill-Rom, (See “Accessory holder” page 6-15).
TROUBLESHOOTING
STORAGE
HANDLING
PRECAUTIONS
AND
SAFETY TIPS
SPECIFICATIONS
AND
WARRANTY
QD2300(5) - AvantGuard® Electric bed User Manual
Page 4 - 47
PROPRIETARY AND CONFIDENTIAL DRAFT: 21 April 2005
NOTES:
Page 4 - 48
QD2300(5) - AvantGuard® Electric bed User Manual
Chapter 5
Cleaning, maintenance, and spare parts
WARNING:
Follow the cleaning product manufacturer’s instructions. Failure
to do so could result in patient injury or equipment damage.
INTRODUCTION
FEATURES
Cleaning
SYMBOL DEFINITION
INTENDED USE
PROPRIETARY AND CONFIDENTIAL DRAFT: 21 avril 2005
SHOCK HAZARD:
Unplug the bed from the mains power supply. Patient injury or
equipment damage could result.
General Cleaning
The bed has been designed for easy cleaning and optimized disinfecting.
Safety Recommendations
Ensure that the bed cannot move.
2.
Set the bed to the high position.
3.
Lock out all electrical functions.
4.
Disconnect the bed and stow the power cable (see “Securing the
power cable” page 4-32).
PRECAUTIONS
AND
SAFETY TIPS
1.
TROUBLESHOOTING
STORAGE
HANDLING
Clean the bed with a lightly dampened cloth and ordinary disinfectant.
Do not use excessive liquid.
ACCESSORIES
Do not use harsh cleaners or detergents such as scouring pads
and heavy duty grease removers or solvents such as toluene,
xylene or acetone. Equipment damage could occur with an
impact on user safety.
CLEANING,
MAINTENANCE AND
REPLACEMENT PARTS
CAUTION:
INSTRUCTIONS
FOR USE
SHOCK HAZARD:
Do not expose the bed to excessive moisture that would allow for
liquid pooling. Patient injury or equipment damage could result.
SPECIFICATIONS
AND
WARRANTY
QD2300(5) - AvantGuard® Electric Bed User Manual
Page 5 - 1
PROPRIETARY AND CONFIDENTIAL DRAFT: 21 avril 2005
5. Ensure that all connections on the control units are firmly in place
(control pendant and control unit on a flexible arm on the lateral
caregiver unit).
6.
Never pour water on the bed, use a high-pressure hose, or wash in a
tunnel wash.
7.
Never use water at a temperature of over 60°C (140°F).
8.
Avoid getting excess water on connecting plugs, lateral caregiver
units, control units, on the siderail supports and on the mattress.
9.
Thoroughly dry the bed before reusing it.
Failure to implement one or more of these recommendations may lead
to damage or deterioration, preventing use of the bed and rendering the
warranty void.
General Advice
NOTE:
Staining disinfectant products such as methylene blue or eosine must be
removed rapidly to avoid permanent staining.
NOTE:
A list of recommended cleaning products for all types of cleaning
requirements is available on your request along with a special
maintenance advice leaflet.
Avoid excessive temperature differences between the water and the
actuators.
• Bed and accessories: See “Recommended Cleaning and Disinfection
Method” page 5-3.
• Polypropylene parts: See “Recommended Cleaning and Disinfection
Method” page 5-3.
• After removing the hard surfaces and moving them away from the
bed, they can be washed in running hot water.
• Endboards and siderails: See “Recommended Cleaning and
Disinfection Method” page 5-3.
The following products should not be used: chlorine, formaldehyde, or
phenol-based products and solvents of any kind. Never use abrasives,
cleaning powder or cleaning pads that may damage components.
Page 5 - 2
QD2300(5) - AvantGuard® Electric Bed User Manual
Steam Cleaning
CAUTION:
Cleaning tough stains
INTRODUCTION
FEATURES
Do not use any steam cleaning device on the bed. Excessive
moisture can damage mechanisms in this bed.
SYMBOL DEFINITION
INTENDED USE
PROPRIETARY AND CONFIDENTIAL DRAFT: 21 avril 2005
To remove tough stains, use standard household cleaners and a soft
bristle brush. To loosen heavy, dried-on soil or excreta, you may first
need to saturate the spot.
Disinfecting
The disinfecting method described below applies specifically to the bed
and its accessories and is designed to save time and to help combat
nosocomial infection more effectively.
Recommended Materials and Products
• One pair of household gloves.
• Use a standard product that complies with AFNOR standards.
NF T 72-101 (bactericide including TB, fungi and viruses, including
HIV-1 and HBV-).
• Always wipe downward, working from the cleanest to the dirtiest
areas.
QD2300(5) - AvantGuard® Electric Bed User Manual
Page 5 - 3
SPECIFICATIONS
AND
WARRANTY
• Do not scrape surfaces. Keep wipes damp (wet as many times as
needed and do not wring out too much water).
PRECAUTIONS
AND
SAFETY TIPS
Recommended Cleaning and Disinfection Method
TROUBLESHOOTING
STORAGE
HANDLING
• Detergent-disinfectant solution diluted according to hospital
guidelines (and taking into account the recommendations given
above) or a disinfecting spray.
ACCESSORIES
• Several single-use tissues or recyclable textile wipers.
CLEANING,
MAINTENANCE AND
REPLACEMENT PARTS
The following recommendations are not designed to replace existing
cleaning protocols drawn up by the hygiene officer or by other bodies
for your hospital.
INSTRUCTIONS
FOR USE
Dilute disinfectants and germicides as specified on the manufacturer’s
label.
PROPRIETARY AND CONFIDENTIAL DRAFT: 21 avril 2005
• Let product dry according to disinfectant manufacturer's
recommendations to ensure maximum efficiency.
• Rinse if necessary: follow the recommendations of the disinfectant
supplier.
• Change wipes when cleaning the least contaminated areas to areas of
medium or to highly contaminated areas.
• Change wipes when cleaning another bed.
• Always dry the bed thoroughly after it has been cleaned.
Recommended Cleaning and Disinfection
Clean and disinfect every day
Clean and disinfect after patient departure
Clean and disinfect thoroughly (after the
departure of the infected patient or according to
the facility’s disinfection protocol)
Page 5 - 4
QD2300(5) - AvantGuard® Electric Bed User Manual
A disinfection record should be kept for each bed, mentioning:
• Cleaning frequency, materials and products used.
Removal of the Foot TotalGuard™ Siderail
NOTE:
The foot part of the siderail is removable in order to permit thorough
disinfection.
INTRODUCTION
FEATURES
• Date (month, year), ward and room number, bed reference number.
SYMBOL DEFINITION
INTENDED USE
PROPRIETARY AND CONFIDENTIAL DRAFT: 21 avril 2005
Disinfection Record
NOTE:
The foot siderail should only be dismantled when the siderail is in the
folded position (see “Storing the foot siderails (Position 2)” page 4-5).
• Push on the unlocking button and pull the foot siderail.
INSTRUCTIONS
FOR USE
• Grip the foot siderail as follows. With one hand on the positioning
lug at the head end (A) and the other near the button (B) as shown on
the photo below.
CLEANING,
MAINTENANCE AND
REPLACEMENT PARTS
A
ACCESSORIES
B
TROUBLESHOOTING
STORAGE
HANDLING
You can then proceed to clean all surfaces of the head and foot siderails.
PRECAUTIONS
AND
SAFETY TIPS
SPECIFICATIONS
AND
WARRANTY
QD2300(5) - AvantGuard® Electric Bed User Manual
Page 5 - 5
PROPRIETARY AND CONFIDENTIAL DRAFT: 21 avril 2005
Foot Siderail Assembly
• Place the foot end of the foot siderail on the positioning lug of the
head siderail (A).
• Align the foot siderail in front of the head siderail socket (B) and
push until an audible click is heard.
• Verify that the foot siderail is well seated by testing its operation (see
“Unfolding the foot siderails (position 3)” page 4-4).
A
CLICK
B
Removal of the interior siderail cover
• Pull (1) outwards on the siderail cover and rotate it.
• Pull (2) the siderail cover upwards.
1
2
• The siderail and siderail cover can now be cleaned.
Page 5 - 6
QD2300(5) - AvantGuard® Electric Bed User Manual
• Place the small wings of the cover in the spaces (A).
SYMBOL DEFINITION
INTENDED USE
PROPRIETARY AND CONFIDENTIAL DRAFT: 21 avril 2005
Installation of the cover
• Rotate (1) the cover around the pivot.
A
INTRODUCTION
FEATURES
• Place the clips on the pivot (B) and push (2) to bottom until it locks in
place.
1
INSTRUCTIONS
FOR USE
CLEANING,
MAINTENANCE AND
REPLACEMENT PARTS
2
ACCESSORIES
B
TROUBLESHOOTING
STORAGE
HANDLING
PRECAUTIONS
AND
SAFETY TIPS
SPECIFICATIONS
AND
WARRANTY
QD2300(5) - AvantGuard® Electric Bed User Manual
Page 5 - 7
PROPRIETARY AND CONFIDENTIAL DRAFT: 21 avril 2005
Maintenance
Safety Recommendations
WARNING:
Only facility-authorized personnel should perform maintenance.
Failure to observe this precaution could result in patient injury or
equipment damage.
Before any maintenance or repair work, carry out the following
operations in the order presented:
• Lock out all electric functions (see “Locking out electrical functions”
page 4-15).
• Unplug the bed from the mains power supply.
• Ensure that the bed cannot move.
• Secure the frame and ensure that all movements are locked.
Never open, heat, or pierce an electrical actuator or gas actuator (highpressure cylinder).
Contact our after sales service for any specific maintenance problem
(leaks, blockages, etc.).
If the bed is fitted with a battery:
• Never open, burn, or immerse a worn out battery. See “Decommissioning” page 8-8.
• A new battery should only be installed by facility-authorized
personnel.
• Never leave the covers open.
Preventive Maintenance
NOTE:
Maintenance visit frequency should be determined according to the
condition of the bed and specific usage, as some components may need
changing after a given period of use (see Service Manual).
The bed should be inspected at least once a year to keep it in good
condition and working properly. More frequent inspections may be
necessary, depending on the use made of the bed.
If the bed is in storage, and it is equipped with a battery, it must be
charged every 3 months to prevent failure of the battery.
Page 5 - 8
QD2300(5) - AvantGuard® Electric Bed User Manual
• braking system and wheels
• Siderail locking mechanisms and foot siderail supports
• CPR release and emergency functions (cables and handles)
INTRODUCTION
FEATURES
• Drive systems (especially actuators, etc.), electrical function
management and lockouts (head and thigh sections,
Trendelenburg/ReverseTrendelenburg), and their accessories
SYMBOL DEFINITION
INTENDED USE
PROPRIETARY AND CONFIDENTIAL DRAFT: 21 avril 2005
The following points should be given particular attention:
• bed movement and ancillary part bearings
• brake/steer bar operation (in particular, return to neutral)
• the condition of cables and electrical components (in particular,
power cable)
• waterproofing of electrical connections (tears, damage)
• cable ways
• The locking system of the siderail
• The locking system of the TotalGuard™ foot siderail support bracket
• The locking system of the TotalGuard™ foot siderail support
YES
YES
NO
NO
NO
ACCESSORIES
YES
CLEANING,
MAINTENANCE AND
REPLACEMENT PARTS
• good condition of the frame and welded assemblies (corrosion and
shocks)
INSTRUCTIONS
FOR USE
• correct earthing of the bed’s metal parts and equipotential connectors
TROUBLESHOOTING
STORAGE
HANDLING
PRECAUTIONS
AND
SAFETY TIPS
The entire electrical system should be inspected by an approved after
sales service person on an average of once every three years in order to
ensure continuing operation in optimal condition.
SPECIFICATIONS
AND
WARRANTY
QD2300(5) - AvantGuard® Electric Bed User Manual
Page 5 - 9
PROPRIETARY AND CONFIDENTIAL DRAFT: 21 avril 2005
NOTES:
Page 5 - 10
QD2300(5) - AvantGuard® Electric Bed User Manual
Chapter 6
Accessories
B
C
D
ACCESSORIES
A
B
C
CLEANING
MAINTENANCE
REPLACEMENT PARTS
A
INSTRUCTIONS
FOR USE
WARNING:
Personnel should take care that the weight and the loads on the
accessories do not exceed 20kg. Patient injury, personal injury, or
equipment damage could result (the patient helpers are not
affected by this limit).
INSTALLATION
ASSEMBLY
CAUTION:
The accessories shown are not designed to be used all at the
same time. Some combinations can interfere with certain
functions. Combining accessories could result in equipment
damage. Some accessories are specific to certain versions and
must not be installed on other versions.
It is advisable to ensure that the accessories/features are
mutually compatible.
INTRODUCTION
FEATURES
Accessories
SYMBOL DEFINITION
INTENDED USE
PROPRIETARY AND CONFIDENTIAL DRAFT: 21 avril 2005
TROUBLESHOOTING
STORAGE
HANDLING
A
D
PRECAUTIONS
AND
SAFETY TIPS
A
B: Patient helper*
C: Oxygen cylinder holder*
D: Accessory support
QD2300(5) - AvantGuard® Electric Bed User Manual
SPECIFICATIONS
AND
WARRANTY
A: I.V. pole*
Page 6 - 1
PROPRIETARY AND CONFIDENTIAL DRAFT: 21 avril 2005
Patient Helpers
This accessory must only be fitted at the head of the bed.
Fixed patient helper (AD080B)
Safe Working Load: 75 kg (165.35 lb)
(1)
WARNING:
Do not position the patient helper at the outside of the bed. See
incorrect position shown below. Patient injury or equipment damage
could result.
The patient helper can be fitted into either of the two square sockets at
the head of the bed.
Place the patient helper in the socket so that the patient handle is over
the bed.
Incorrect position
Correct position
Adjustable Patient Helper (AD081C)
1
Safe Working Load: 75 kg .
The adjustable patient helper (three positions)
can be fitted into either of the square sockets at
the head end of the bed.
Place the patient helper in the socket so that
the patient handle is over the bed and so that
the patient helper arm is in the normal egress
position (see photo opposite).
1. Safe Working Load specification allowing for a substantial safety margin.
Page 6 - 2
QD2300(5) - AvantGuard® Electric Bed User Manual
INTRODUCTION
FEATURES
WARNING:
The patient helper in the patient transfer position is designed to
help the patient lift some of his/her weight so as to assist the
nursing staff with their work. This position is not designed to allow
patients to transfer themselves alone.
SYMBOL DEFINITION
INTENDED USE
PROPRIETARY AND CONFIDENTIAL DRAFT: 21 avril 2005
Patient Helper Positioning
INSTALLATION
ASSEMBLY
Patient aid transfer
position
Use the blue knob marked "TURN" to adjust patient helper position.
To adjust patient helper position:
ACCESSORIES
• Turn the blue knob a quarter turn
clockwise to unlock the patient
helper.
CLEANING
MAINTENANCE
REPLACEMENT PARTS
Normal (egress)
position
INSTRUCTIONS
FOR USE
Tuck-away position
• Place the patient helper in the
required position.
TROUBLESHOOTING
STORAGE
HANDLING
• Turn the knob anticlockwise to
lock in position.
• Turn the patient helper slightly
until it locks into place.
PRECAUTIONS
AND
SAFETY TIPS
• Pull the patient helper to ensure
that the position is secure.
SPECIFICATIONS
AND
WARRANTY
QD2300(5) - AvantGuard® Electric Bed User Manual
Page 6 - 3
PROPRIETARY AND CONFIDENTIAL DRAFT: 21 avril 2005
Patient helper handle
WARNING:
The patient helper handle must
be positioned between lugs A
and B to avoid any danger of
slippage. Failure to do so could
result in patient injury or
equipment damage.
A
B
The patient handle on the patient
helper can be adjusted according to the patient’s preference.
To adjust the height of the handle, push on the locking mechanism
button, adjust the height and release the button.
Check the locking mechanism by pulling on the patient handle.
Place the patient handle on the patient helper arm when not in use, in
order eliminate any obstruction.
If the bed is equipped with both an
adjustable patient helper (AD081C) and an
I.V. Pole (AD082A), do not use the patient
helper “tuck-away” position as this may
interfere with the I.V. pole.
Page 6 - 4
QD2300(5) - AvantGuard® Electric Bed User Manual
Telescopic I.V. pole
INTRODUCTION
FEATURES
CAUTION:
Ensure that the I.V. pole is positioned facing towards the bed and
not outwards as shown in the following illustrations.
SYMBOL DEFINITION
INTENDED USE
PROPRIETARY AND CONFIDENTIAL DRAFT: 21 avril 2005
INSTALLATION
ASSEMBLY
INSTRUCTIONS
FOR USE
CLEANING
MAINTENANCE
REPLACEMENT PARTS
Safe working load:
Refer to the value indicated on the I.V. pole
(1)
Using the I.V. pole (AD082A)
To raise the I.V. pole:
ACCESSORIES
• Hold the square part of the pole with one
hand and raise the upper part to the desired
height.
To lower the I.V. pole:
TROUBLESHOOTING
STORAGE
HANDLING
• Hold the upper part of the pole firmly and
lift slightly while pressing downward on
the plastic sleeve with two fingers of the
same hand.
• Lower the pole to the required height.
PRECAUTIONS
AND
SAFETY TIPS
• Release the sleeve.
SPECIFICATIONS
AND
WARRANTY
1. The safe working load specifications allow for a substantial safety margin.
QD2300(5) - AvantGuard® Electric Bed User Manual
Page 6 - 5
PROPRIETARY AND CONFIDENTIAL DRAFT: 21 avril 2005
Using the I.V. pole (AD165A)
To raise or lower the I.V. pole:
• Loosen the threaded knob (A),
while holding the lower pole to
prevent it from lifting out of the
accessory socket.
A
B
• Firmly grip the upper pole with
the other hand just below the
plastic collar (B).
• Push the plastic collar up with
the thumb.
• Lower the pole to the required
height.
• Tighten the threaded knob (A).
To swivel the I.V. pole:
• Loosen the threaded knob (A).
• Adjust the upper pole to the desired angle while respecting the safety
recommendations.
• Tighten the threaded knob (A).
Monitor Stand (AD128A)
Safe working load: 15 kg
(1)
The monitor stand fits into the sockets at the foot of the bed.
WARNING:
When fitting the monitor, ensure that the folded table is located on
the outer edge of the bed.
The table must be folded away when moving the bed.
If the bed is in Trendelenburg or Reverse Trendelenburg, any
device that is used must be secured to the monitor stand. Failure
to do so could result in patient injury or equipment damage.
NOTE:
Introduce both ends simultaneously to avoid the frame getting jammed
in the sockets.
1. The safe working load specifications allow for a substantial safety margin.
Page 6 - 6
QD2300(5) - AvantGuard® Electric Bed User Manual
• Unscrew the two knobs from the frame.
• Fit the knobs through the under side of the socket and tighten.
• Pivot the stand as shown in the photo below, so that it is
above the sleep surface.
INSTALLATION
ASSEMBLY
Oxygen Cylinder Holder (AC959A-AD101AAD102A)
INTRODUCTION
FEATURES
• Fit both ends of the frame into the sockets at the same time.
SYMBOL DEFINITION
INTENDED USE
PROPRIETARY AND CONFIDENTIAL DRAFT: 21 avril 2005
To fit a monitor stand:
(1
Safe working load: 15 kg
INSTRUCTIONS
FOR USE
The oxygen cylinder holder is designed to accept an oxygen cylinder
and must only be fitted on the patient helper supports at the head end of
the bed outside the sleep surface. It can be rotated through 90°. Each
type of holder corresponds to a cylinder model and must never be used
with a different cylinder. See below.
CLEANING
MAINTENANCE
REPLACEMENT PARTS
ACCESSORIES
AD101A for
cylinder model D
(Ø100)
AD102A for
cylinder model E
(Ø100)
TROUBLESHOOTING
STORAGE
HANDLING
AC959A for
cylinder model
B5 (Ø140)
PRECAUTIONS
AND
SAFETY TIPS
SPECIFICATIONS
AND
WARRANTY
1. The safe working load specifications allow for a substantial safety margin.
QD2300(5) - AvantGuard® Electric Bed User Manual
Page 6 - 7
PROPRIETARY AND CONFIDENTIAL DRAFT: 21 avril 2005
WARNING:
The following recommendations are designed to prevent any
possible incidents so that this accessory can be used in optimum
safety conditions for both the patient and nursing staff.
• Check that the cylinder is correctly
positioned at the base of the cylinder
holder.
• Never use a different oxygen cylinder
model from the model that is specified
above (danger of dropping the cylinder
or interfering with various operations
could occur).
• Pay close attention to the position of
the cylinder holder (particularly if it is
under the head section or the siderail)
when setting the Reverse
Trendelenburg position or when
lowering the sleep surface.
• Prevent any impact when moving a bed equipped with a cylinder
holder to another room (especially doorways).
• If the cylinder holder does not allow the bed to go through a
doorway, position the holder in front of the bed, otherwise place it
and the cylinder on the mattress (remember to put the holder in its
normal position after moving the bed).
Equipotential cable (AD968A)
This cable is designed to connect a metallic accessible part of some
medical intravascular or intracardiac equipment to the bed.
It consists of two POAG-WB 6 DIN type connectors and a 2m long
yellow and green cable.
Page 6 - 8
QD2300(5) - AvantGuard® Electric Bed User Manual
Syringe-driver holder (AC963A)
(1)
Safe working load: 15 kg
SYMBOL DEFINITION
INTENDED USE
PROPRIETARY AND CONFIDENTIAL DRAFT: 21 avril 2005
WARNING:
Do not position the accessory facing inwards, particularly under
the head section when it is raised, so as to prevent any risk of the
accessory obstructing the head section or siderail when being
handled.
INTRODUCTION
FEATURES
This accessory is designed to accept a syringe-driver and is fitted at the
head end of the bed in the sockets provided.
INSTALLATION
ASSEMBLY
INSTRUCTIONS
FOR USE
CLEANING
MAINTENANCE
REPLACEMENT PARTS
ACCESSORIES
TROUBLESHOOTING
STORAGE
HANDLING
PRECAUTIONS
AND
SAFETY TIPS
SPECIFICATIONS
AND
WARRANTY
1. The safe working load specifications allow for a substantial safety margin.
QD2300(5) - AvantGuard® Electric Bed User Manual
Page 6 - 9
PROPRIETARY AND CONFIDENTIAL DRAFT: 21 avril 2005
MobiBar® egress handle (AD177A)
WARNING:
This accessory must be fitted by an authorized technician. Failure
to do so could result in patient injury or equipment damage.
Please refer to the fitting instructions provided with the accessory when
fitting the accessory.
For usage, refer to “MobiBar® egress handle*” page 4-42.
Control unit on a flexible arm
WARNING:
This accessory must be fitted by an authorized technician. Failure
to do so could result in patient injury or material damage.
Please refer to the fitting instructions provided with the accessory when
fitting the accessory.
Please refer to “Control unit on a flexible arm*” page 4-43 for usage
instructions.
Page 6 - 10
QD2300(5) - AvantGuard® Electric Bed User Manual
Self-steering 5th Wheel (AD135A)
Please refer to the fitting instructions provided with the accessory when
fitting the accessory.
INTRODUCTION
FEATURES
WARNING:
This accessory must be fitted by an authorized technician. Failure
to do so could result in patient injury or equipment damage.
SYMBOL DEFINITION
INTENDED USE
PROPRIETARY AND CONFIDENTIAL DRAFT: 21 avril 2005
Please refer to “with self-steering 5th wheel (*):” page 4-29 for usage
INSTALLATION
ASSEMBLY
INSTRUCTIONS
FOR USE
CLEANING
MAINTENANCE
REPLACEMENT PARTS
instructions.
WARNING:
This accessory must be fitted by an authorized technician. Failure
to do so could result in patient injury or equipment damage.
Please refer to “with controlled 5th wheel *:” page 4-30 for usage
instructions.
PRECAUTIONS
AND
SAFETY TIPS
+
TROUBLESHOOTING
STORAGE
HANDLING
Please refer to the fitting instructions provided with the accessory when
fitting the accessory.
ACCESSORIES
Controlled 5th wheel (AD180A)
or
SPECIFICATIONS
AND
WARRANTY
QD2300(5) - AvantGuard® Electric Bed User Manual
Page 6 - 11
PROPRIETARY AND CONFIDENTIAL DRAFT: 21 avril 2005
Accessory support bar (AD126A)
WARNING:
The accessory must be fitted by an authorized technician. Failure
to do so could result in patient injury or equipment damage.
Please refer to the fitting instructions provided with the accessory when
fitting the accessory.
For usage, refer to “Accessory support bar*” page 4-46.
Medical device support rail (AD127A)
WARNING:
The accessory must be fitted by an authorized technician. Failure
to do so could result in patient injury or equipment damage.
Please refer to the fitting instructions provided with the accessory when
fitting the accessory.
For usage, refer to “Medical device support rail*” page 4-47.
Page 6 - 12
QD2300(5) - AvantGuard® Electric Bed User Manual
Bilateral HiLow pedal (AD171A)
Please refer to the fitting instructions provided with the accessory when
fitting the accessory.
INTRODUCTION
FEATURES
WARNING:
The accessory must be fitted by an authorized technician. Failure
to do so could result in patient injury or equipment damage.
SYMBOL DEFINITION
INTENDED USE
PROPRIETARY AND CONFIDENTIAL DRAFT: 21 avril 2005
INSTALLATION
ASSEMBLY
INSTRUCTIONS
FOR USE
Enable control pedal (AD179A)
Please refer to the fitting instructions provided with the accessory when
fitting the accessory.
TROUBLESHOOTING
STORAGE
HANDLING
For usage, refer to “Activating/deactivating function management” page
4-14.
ACCESSORIES
WARNING:
The accessory must be fitted by an authorized technician. Failure
to do so could result in patient injury or equipment damage.
CLEANING
MAINTENANCE
REPLACEMENT PARTS
For usage, refer to “Bilateral HiLow pedal*” page 4-17.
PRECAUTIONS
AND
SAFETY TIPS
SPECIFICATIONS
AND
WARRANTY
QD2300(5) - AvantGuard® Electric Bed User Manual
Page 6 - 13
PROPRIETARY AND CONFIDENTIAL DRAFT: 21 avril 2005
Long metal siderails (AD178A)
WARNING:
The accessory must be fitted by an authorized technician. Failure
to do so could result in patient injury or equipment damage.
Please refer to the fitting instructions provided with the accessory when
fitting the accessory.
For usage, refer to “Long metal siderails*” page 4-7.
Mattress
For more effective and safer use of this bed, Hill-Rom, recommends
mattresses that follow the safety recommendations in “Mattress” page
8-4.
The AvantGuard® bed can be used optimal conditions of comfort and
safety by choosing one of the mattresses described in paragraph
“Accessories” page 2-10.
Other mattresses that meet the conditions can also be used. Make sure
that the bed/mattress combination obeys the safety instructions shown in
paragraph “Mattress” page 8-4.
Page 6 - 14
QD2300(5) - AvantGuard® Electric Bed User Manual
Accessory holder
AD126A
AD127A
INTRODUCTION
FEATURES
INSTALLATION
ASSEMBLY
INSTRUCTIONS
FOR USE
AD016A
AC991A
AC961A
AC938A
ACCESSORIES
TROUBLESHOOTING
STORAGE
HANDLING
PRECAUTIONS
AND
SAFETY TIPS
SPECIFICATIONS
AND
WARRANTY
Page 6 - 15
QD2300(5) - AvantGuard® Electric Bed User Manual
CLEANING
MAINTENANCE
REPLACEMENT PARTS
AC932A
AC908A
SYMBOL DEFINITION
INTENDED USE
PROPRIETARY AND CONFIDENTIAL DRAFT: 21 avril 2005
PROPRIETARY AND CONFIDENTIAL DRAFT: 21 avril 2005
NOTES:
Page 6 - 16
QD2300(5) - AvantGuard® Electric Bed User Manual
Chapter 7
Shipment, storage and usage
All the necessary precautions must be taken to ensure that the bed and
its accessories are shipped and stored in complete safety under optimal
conditions.
a
When stored, the bed must be:
in the “low” position,
all electrical functions locked out,
covered, brakes applied,
During shipment or storage, beds should not be stacked one on top the
other.
ACCESSORIES
a. Shipment means the moving of the bed between facilities, not patient transfer
within the facility.
CLEANING
MAINTENANCE
REPLACEMENT PARTS
protected from fluid ingress,
temperature between -10° and
+50°C (+32° and +104°F)
Humidity: 20% to 80% at 30°C (86°F)
pressure: 500hPa to 1060hPa
(0 to 2000m)
INSTRUCTIONS
FOR USE
During shipment , the bed must be:
in the “low” position,
all electrical functions locked out,
covered, brakes applied and all
moving parts secured,
protected from fluid ingress,
at a temperature of between -10°
and +50°C (+14° and +122°F)
Humidity: 20% to 80% at 30°C (86°F)
pressure: 500hPa to 1060hPa
(0 to 2000m)
INSTALLATION
ASSEMBLY
The following conditions must be met.
INTRODUCTION
FEATURES
Transport, Storage
SYMBOL DEFINITION
INTENDED USE
PROPRIETARY AND CONFIDENTIAL DRAFT: 21 avril 2005
TRANSPORT
STORAGE
AND USE
PRECAUTIONS
AND
SAFETY TIPS
SPECIFICATIONS
AND
WARRANTY
QD2300(5) - AvantGuard® Electric Bed User Manual
Page 7 - 1
PROPRIETARY AND CONFIDENTIAL DRAFT: 21 avril 2005
Use
The bed must be used in the following conditions:
temperature between 0° and +104.00°F (+32° and +104°F)
Humidity: 20% to 80% at 30°C (86°F)
pressure: 700hPa to 1060hPa (0 to 2000m)
WARNING:
If the bed is equipped with a battery, and the bed is stored for
long periods of time, the battery must be charged every 3
months. Ignoring this recommendation risks damaging the
battery and the unavailability of functions without AC power.
NOTE:
Before use, refer to “First Steps” page 3-1.
Page 7 - 2
QD2300(5) - AvantGuard® Electric Bed User Manual
Chapter 8
Safety tips and precautions
INTRODUCTION
FEATURES
Safety Tips
Brake and steer
Try moving the bed to ensure that the wheels are locked.
Ensure that the accessories (patient helper, I.V. Pole, etc.) will not
interfere with progress through doorways, other passages, or overhead
lights.
Ensure that the power cable is disconnected and correctly secured (See
“Securing the power cable” page 4-32).
The bed should be kept in the lowest hilow position to help to reduce the
risk of patient falls, especially when left unattended.
Trendelenburg/Reverse Trendelenburg and Emergency
Trendelenburg
SPECIFICATIONS
AND
WARRANTY
Page 8 - 1
SAFETY
/
PRECAUTIONS
CAUTION:
The patient's safety may be jeopardised in the absence of a
Reverse Trendelenburg feature in cases of haemodynamic shock
or severe breathing difficulties.
The patient must never be left unattended while the bed is in
Trendelenburg. Failure to observe this precaution could result in
patient injury or equipment damage.
TROUBLESHOOTING
STORAGE
HANDLING
Use the HiLow feature of the sleep surface to adjust the bed to the
required height when the patient is undergoing treatment.
ACCESSORIES
Bed Position
CLEANING
MAINTENANCE
REPLACEMENT PARTS
Patients should be moved with the bed in mid hilow position by two
people.
INSTRUCTIONS
FOR USE
Ensure that the brakes are applied if the bed is not to be moved or if the
patient is to be left unattended (See “Brake and steer system” page 428).
INSTALLATION
ASSEMBLY
CAUTION:
Risk if not locked:
The patient may fall if he leans on the bed to get in or out of the
bed.
QD2300(5) - AvantGuard® Electric Bed User Manual
SYMBOL DEFINITION
INTENDED USE
PROPRIETARY AND CONFIDENTIAL DRAFT: 21 avril 2005
PROPRIETARY AND CONFIDENTIAL DRAFT: 21 avril 2005
Trendelenburg/Reverse Trendelenburg and emergency Trendelenburg
(required in intensive care units) must only be operated under the
supervision of or by trained nursing staff.
CAUTION:
Sufficiently qualified nursing staff determine the usage condition
suitable for this function and degree of supervision to ensure that
the patient uses the bed safely.
WARNING:
Before setting in the “Shock” position, it is imperative to lower the
siderails.
Integral Siderails
The siderails should be raised and locked when a patient is left
unattended. The siderails are designed to help reduce the risk of patients
falling out of bed accidentally. They are not designed to restrain or
immobilize the patient. Restraining straps or other devices must not be
fastened to the half-length siderails (e.g., straps).
In the case of patients suffering from particular behavioral difficulties
(agitation, mental confusion, loss of sense of direction, weakness, etc.),
properly trained medical staff should ascertain how the siderails should
be used and whether the patient should be monitored closely to ensure
patient safety.
Medical staff should note the risks involved in the use of siderails of any
model or type with particularly old, frail, restless, disorientated or
confused, and obsessive patients.
Certain national health authorities have issued guidelines on how to
reduce these hazards, as indicated below.
It is recommended that patients with health or behavioural problems of
this type be identified in each establishment or ward so that the safety
measures most appropriate to their particular needs can be implemented
(see above).
Page 8 - 2
QD2300(5) - AvantGuard® Electric Bed User Manual
ACCESSORIES
Implementing the recommendations listed above should help to reduce
accident hazards.
CLEANING
MAINTENANCE
REPLACEMENT PARTS
• Mattresses are not all interchangeable. Hill-Rom, shall in no way be
held liable for problems arising from the use of siderails or mattresses
produced by other manufacturers, which do not comply with the
recommendations set out in this manual.
INSTRUCTIONS
FOR USE
• It is not possible to ensure the compliance of all mattresses with our
recommendations, given the many different types of mattresses
available. For safety reasons, we recommend that users pay particular
attention to mattress dimensions with regard to siderail height.
INSTALLATION
ASSEMBLY
• Always keep the bed in its lowest Hi-Low position when the patient
is left unattended.
INTRODUCTION
FEATURES
Use of a mattress thicker than the recommended 175 mm may reduce
the effectiveness of the siderails in preventing falls. In such cases, the
patient must be monitored closely. The recommendations below may
contribute to patient safety.
SYMBOL DEFINITION
INTENDED USE
PROPRIETARY AND CONFIDENTIAL DRAFT: 21 avril 2005
One measure which has already proved effective is to draw up a
protocol (if such a protocol is not already in place) specifying:
1. Situations and conditions for siderail use and authorised mattress
type.
2. Situations and conditions for patient immobilization.
3. Patient monitoring procedures, both for restrained and unrestrained
patients, and procedures for the monitoring of straps, etc.
4. Should it be necessary to restrain a patient using special equipment,
follow the manufacturer's instructions carefully.
TROUBLESHOOTING
STORAGE
HANDLING
SAFETY
/
PRECAUTIONS
SPECIFICATIONS
AND
WARRANTY
QD2300(5) - AvantGuard® Electric Bed User Manual
Page 8 - 3
PROPRIETARY AND CONFIDENTIAL DRAFT: 21 avril 2005
Mattress
Only mattresses recommended by Hill-Rom, should be used.
In order to reduce the risk of the mattress sliding, it is recommended that
the mattress be placed between the raised edges and that it is laid
correctly on the sleep surface.
Should you wish to use a mattress other than those recommended,
please ensure that it is compatible with the Hill-Rom, bed model and
that it will not have any adverse effect on performance, quality, or
safety.
The beds are designed for use with standard size mattresses (length:
195-200 cm, width: 83-90 cm and thickness: 175 mm) suitable for the
sleep surface dimensions.
CAUTION:
If the bed is fitted with an electrically powered air mattress, the
power cord must be routed so as to prevent it from being cut by
the moving parts of the bed. Failure to observe this precaution
could result in patient injury or equipment damage.
If the mattress power cord is unplugged, it is advisable to store it on one
of the headboard supports (see “Securing the power cable page 4 - 32 or
on the support provided by the mattress supplier).
Headboard
WARNING:
The headboard bars are not intended to receive accessories,
accessory support device or any means of immobilization of the
patient (e.g.: straps).
WARNING:
The headboard bars are not intended to be used as handles
during transfer of the bed.
Cleaning and recommended cleaning fluids
Always disconnect the bed from the mains power supply before
cleaning (see “General Advice” page 5-2).
Only use recommended cleaning fluids and products (see
“Recommended Materials and Products” page 5-3).
Page 8 - 4
QD2300(5) - AvantGuard® Electric Bed User Manual
Electrical function management
INTRODUCTION
FEATURES
INSTALLATION
ASSEMBLY
The electrical function management controls prevent any unintended
bed movements that might cause injury to the patient (for instance
when under traction, etc.). It is highly recommended that functional lock
out should be used whenever a patient is undergoing examination or
treatment or when the bed is being serviced or moved. Functions should
also be locked out when the patient is left unattended and if the nursing
staff believe that the patient is not capable of operating the controls
independently with safety.
It is thus the responsibility of the nursing staff to authorize the patient to
use certain bed functions, including the HiLow.
SYMBOL DEFINITION
INTENDED USE
PROPRIETARY AND CONFIDENTIAL DRAFT: 21 avril 2005
Parts and accessories
Patient helpers
SAFETY
/
PRECAUTIONS
SHOCK HAZARD:
When direct intravascular or intracardiac connections are in use,
the electric potentials of all the unprotected metal parts need to
be equalized.
The bed must be connected to the mains power supply.
TROUBLESHOOTING
STORAGE
HANDLING
Electrical safety precautions
ACCESSORIES
Suitably qualified medical personnel must determine if the patient
helper can be left at disposal or not of patients suffering from particular
behavioral conditions (e.g.: not limited to but including agitation,
mental confusion or loss of sense of direction, behavioral disorders, or
weakness) and that in order to use the bed in best safety conditions.
CLEANING
MAINTENANCE
REPLACEMENT PARTS
Only use manufacturer's parts and accessories.
INSTRUCTIONS
FOR USE
CAUTION:
Never modify the bed without the manufacturer's prior consent.
Alterations could result in injury to the patient or damage to the
bed.
SPECIFICATIONS
AND
WARRANTY
QD2300(5) - AvantGuard® Electric Bed User Manual
Page 8 - 5
PROPRIETARY AND CONFIDENTIAL DRAFT: 21 avril 2005
SHOCK HAZARD:
In an environment where the electrostatic discharges are
prevalent we recommend using our antistatic casters.
All power connections must comply with standards as defined in (See
“Connection to the Mains Power Supply” page 3-2).
In compliance with standards relating to electromagnetic interference
for medical equipment, this product does not interfere with other
medical devices or is not susceptible to interference when combined
with other medical devices that also comply with the electromagnetic
standards in force.
Some devices, particularly older ones that do not comply with the
electromagnetic compatibility standards, may however undergo
interference or may themselves interfere with the working of this
product.
The users of such devices are responsible for ensuring that any
malfunctions will not endanger the patient or any other person.
Ensure that the power cord is unplugged and hooked to the bed before
moving the bed (See “Securing the power cable” page 4-32).
Only duly qualified and authorized staff should carry out electrical
maintenance.
Never clean or service the bed without unplugging it from the mains
power supply and disconnecting the battery.
The battery backup must never be left in direct contact with fire, placed
in liquid, or discarded in a refuse bin. In the event of the battery being
damaged, see “De-commissioning page 8 - 8.
Use only nasal tubes and oxygen masks.
For reasons of safety, masks and tubes should always be kept at a higher
level than the sleep surface.
Always lock out the Hi-Low function before any operations other than
cleaning or maintenance.
Page 8 - 6
QD2300(5) - AvantGuard® Electric Bed User Manual
Abnormal use
Examples of abnormal use:
• Use of the bed in a hyperbaric chamber.
• Use of bed, functions, accessories or bed movement by persons who
do not have the ability to operate the bed safely
INSTALLATION
ASSEMBLY
• Use of the bed for any purpose other than for general or intensive
care.
INTRODUCTION
FEATURES
CAUTION:
Abnormal use may result in damage to the bed and injury to
patients or staff.
SYMBOL DEFINITION
INTENDED USE
PROPRIETARY AND CONFIDENTIAL DRAFT: 21 avril 2005
• Operation of electrical functions by several persons at the same time.
• Use of the bed with a loads over 185 Kg (Safe Working Load).
• Connection of other electrical appliances to the bed.
• Use of accessories and equipment other than those specified by the
manufacturer.
• Pulling on the power cord to move the bed.
• Washing with excessive water or high pressure jet or in a tunnel
wash.
• Climatic constraints (operation/storage) other than those specified by
the manufacturer.
• Use of the bed in an atmosphere presenting a risk of explosion.
• Moving the bed over soft ground or over inappropriate surfaces.
• Actuator or column overload (see intermittent operation in paragraph
“Technical specifications” page 9-1).
SAFETY
/
PRECAUTIONS
• Moving the bed along slopes of over 10° (with or without a patient).
TROUBLESHOOTING
STORAGE
HANDLING
• Use outdoors or in a vehicle.
ACCESSORIES
th
• Moving the bed when the 5 steering wheel with controlled operation
is active.
CLEANING
MAINTENANCE
REPLACEMENT PARTS
• Connection to a non standard power supply.
INSTRUCTIONS
FOR USE
• Placing objects or equipment on the chassis or using it to support a
person.
SPECIFICATIONS
AND
WARRANTY
QD2300(5) - AvantGuard® Electric Bed User Manual
Page 8 - 7
PROPRIETARY AND CONFIDENTIAL DRAFT: 21 avril 2005
• Use of oxygen tent type respiration devices or devices that extend
below the sleep surface.
• Use of the bed in the presence of flammable gas or vapours.
• Use at unauthorized temperatures (not between 0°C and 40°C).
• Any use not complying with the instructions for use described in this
manual.
• Any other use which does not comply with normal use of a hospital
bed or its stated purpose.
De-commissioning
The bed and its accessories should be cleaned and disinfected before decommissioning.
De-commissioned equipment materials (plastics, electrical
components, etc.) must be recycled in accordance with local
recycling regulations. Please, previously check and comply
with the local environmental policy (Directive 2002/95/CEE).
As regards the battery:
•Never dispose of the lead-acid dry fit battery which contains
substances and dangerous metals for the environment and the
health.
Life expectancy of components
The bed and its listed elements below were designed to be used, under
normal conditions according to the instructions for use and
maintenance, with an expected life of approximately:
Element
Electric actuators
Gas springs
Power supply
Frame
Expected life
5 years
5 years
10 years
10 years
NOTE:
It is the responsibility of the facility to implement a preventive
maintenance program for the bed's functions under its conditions of use.
Page 8 - 8
QD2300(5) - AvantGuard® Electric Bed User Manual
Chapter 9
Specifications and warranty
Hill-Rom has an ongoing continuous improvement policy. Therefore
specifications are liable to be altered without notice.
a
AvantGuard®
LI158Bx/Model 1200
Type B
IPX4
b
c
100V AC*
50-60 Hz
360 VA
2.5 A T
2.5 A T
TROUBLESHOOTING
STORAGE
HANDLING
PRECAUTIONS
AND
SAFETY TIPS
a. See “Bed model and country of use” page 1-3.
b. If the total load (patient, mattress, and accessories) reaches between 185 kg
and 210 kg, the overload protection of the bed electronics may be activated
depending on the weight distribution on the bed. When a function is selected
that is overloaded, an alarm will sound and stop the selected movement. This
overload protection will not interfere with the emergency CPR function.
c. Do not operate electrical functions continuously for more than 3 minutes in
any 30 minute period when the bed is loaded at the safe working load value
as this may damage electrical components.
ACCESSORIES
Class I
120V AC*
50-60 Hz
360 VA
CLEANING
MAINTENANCE
REPLACEMENT PARTS
185 kg - 210 kg
10% (3min/30min)
551.16 lb
330.69 lb
INSTRUCTIONS
FOR USE
Type
Reference
Class according to IEC 60601-1
Protection against harmful ingress of
water (according to IEC 60529)
Safe working load:
Intermittent operation
Maximum lifting load
Bed weight (no mattress or
accessories)
Electric shock protection
Voltage
230V AC*
Frequency
50-60 Hz
Power supply unit
360 VA
maximum power load
Power supply unit
2AT
fuse rating
INSTALLATION
ASSEMBLY
Technical specifications
INTRODUCTION
FEATURES
Specifications
SYMBOL DEFINITION
INTENDED USE
PROPRIETARY AND CONFIDENTIAL DRAFT: 21 avril 2005
SPECIFICATIONS
AND
WARRANTIES
QD2300(5) - AvantGuard® Electric Bed User Manual
Page 9 - 1
PROPRIETARY AND CONFIDENTIAL DRAFT: 21 avril 2005
Dimensions
Min. TotalGuard™ siderail width (with siderails up) (e)
1000 mm
a
1060 mm
a
Max. TotalGuard™ siderails width (with siderails up) (e)
TotalGuard™ siderails width (with siderails down) (e)
Long metal Siderails width (e)
Bed width (with polypropylene endboards) (E)
Bed width (with Medispace™ endboards) (E)
Bed width (with Séquoia endboards) (E)
Bed width (with Medic’hotel™ endboards) (E)
Bed length with extension and polypropylene endboards (L)
Bed length without extension and polypropylene
endboards (L)
b c
970 mm
996 mm
990 mm
1045 mm
1045 mm
1000 mm
2405 mm
2225 mm
c
Bed length with extension and wooden endboards (L)
2400 mm
bc
Bed length without extension and wooden endboards (L) 2220 mm
Minimum height (single band 150mm diameter casters) (h) 415 mm
Minimum height (single band 125 mm diameter casters) (h) 393 mmd
c
d
Maximum height (single band 150 mm diameter casters) (H) 815 mmd
Maximum height (single band 125 mm diameter casters) (H) 793 mmd
a. All bed versions can pass through doorways with a clearance greater than
1050 mm when the siderails are down.
b. According to features chosen
c. Extension fully extended
d. Add 5 cm for a bed equipped with the “Hi-Low 45 to 85 cm” function.
E/e
H/h
L
Page 9 - 2
QD2300(5) - AvantGuard® Electric Bed User Manual
Specifications
Head
section
Thigh
section
Foot
section
Reverse
Trendelenburg
/
Trendelenburg
+ 65 °
+ 36 °
- 23 °
+16 °/-16 °
INSTALLATION
ASSEMBLY
NOTE :
These are average values, which may vary according to manufacturing
tolerances.
INTRODUCTION
FEATURES
Maximum
inclination with
respect to
horizontal
SYMBOL DEFINITION
INTENDED USE
PROPRIETARY AND CONFIDENTIAL DRAFT: 21 avril 2005
INSTRUCTIONS
FOR USE
CLEANING
MAINTENANCE
REPLACEMENT PARTS
ACCESSORIES
TROUBLESHOOTING
STORAGE
HANDLING
PRECAUTIONS
AND
SAFETY TIPS
SPECIFICATIONS
AND
WARRANTIES
QD2300(5) - AvantGuard® Electric Bed User Manual
Page 9 - 3
PROPRIETARY AND CONFIDENTIAL DRAFT: 21 avril 2005
Warranty and after sales service conditions
The warranty for our beds will be rendered null and void, in part or in
total, in the event of:
• Unauthorized interference with or incorrect maintenance of:
•
actuators,
•
electrical drives and components,
•
mechanical systems,
• any abnormal use,
• use of parts and accessories not authorized by the manufacturer,
• use of unauthorized cleaning procedures,
• any use, including cleaning and servicing, that does not comply with
the instructions in this manual.
The details of after sales service contacts in your country are shown on
the back of this manual.
Compliance
–
NF MEDICAL “Hospital beds” compliant
authorization N°: NF178-01/01-33
–
Complies with standards:
• NF-S-90-312 (1984),
• EN-60601-1 (1996),
• EN-60601-1-2 (2001),
• EN-60601-2-38 (1999),
• IEC-60601-2-38 Amendment 1 (1999).
–
Page 9 - 4
Complies with essential requirements of EC directive
93/42/EEC applicable to class I medical equipment.
QD2300(5) - AvantGuard® Electric Bed User Manual