1
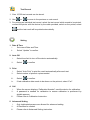
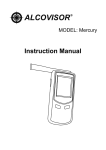
 Mark X
User Manual
Please read this manual carefully before using Alcovisor® Mark X.
Alcovisor® Mark X uses an electrochemical fuel cell to detect and measure the
concentration of alcohol vapor in expired breath.
Although the Alcovisor® Mark X is extremely simple to operate, it is important that the
following procedure is used each time a breath is given. Deviation from the proper
procedure will not generally affect the result of a test. However, the integrity and
capability of an operator, and even the legality of any resulting action, could be questioned
and brought into doubt if it is found later that the operator did not follow the proper testing
procedure.
PRETEST QUESTIONING
Some foods and even “non-alcoholic” drinks may contain traces of alcohol, which will
affect the test result through a “mouth alcohol” effect. To prevent this, wherever possible,
insure that a delay of about 20 minutes has elapsed since taking anything by mouth –
even medicines which may contain alcohol. Even a glass of water prior to the test will
cool the mouth and dilute the saliva, temporarily reducing the amount of alcohol in the
breath, and, consequently, the instrument reading. A delay of at least two minutes
should take place between the time of last smoked and the test. STRUCTURE ICON DESCRIPTION
1
Weekday Indicator
2
Time Indicator
3
Battery Indicator
4
Screening Test
5
Standard Test
6
Test Records
7
Setting
8
Date Indicator
Previous Screen/Cancel
Next Screen/Confirm
Screen
Print
Repeat Test
Main
DETAILED PROCEDURE
4.
5.
Screening Test
Attach a sampling cup onto the sample port.
Select the “Screening Test” icon by “Function Button A & B” and “Enter Button”.
When displays “Please Blow”, take a deep breath and blow to the sampling cup until
BEEP tone stops.
“Alcohol Detected” or “No Alcohol” displays on the display.
A passive test can be performed by select “Manual” during the testee is blowing.
6.
Select
7.
If “Alcohol Present”, use mouthpiece to perform a standard test to obtain an accurate
test result with reading.
1.
2.
3.
to start another test.
NOTE: Screening Test is only used for screening tests, it is to check whether alcohol is
found in the breath sample. An accurate test result can only be obtained by
standard test.
NOTE: Test records of the screen tests cannot be printed nor stored.
Standard Test
1.
2.
3.
4.
5.
Attach a disposable mouthpiece onto the sample port.
Select the “Standard Test” icon by “Function Button A & B” and “Enter Button”.
When displays “Please Blow”, take a deep breath and blow until BEEP tone stops.
Test result displays on the display.
If printer is using, connect the printer with the device by the cable provided, switch on
the printer. After test result displays, select
and the test result will be printed
automatically.
6.
Select
7.
If testee did not blow within 30 seconds, tester can select “Refuse” to confirm the
testee refused to do the test; or select “Test Again” to allow testee to do the test
again.
If testee failed to give a valid breath sample, tester can select “Discontinue” to
confirm; or select “Test Again” to allow testee to do the test again.
A passive test can be performed by select “Manual” during the testee is blowing.
8.
9.
to start another test.
Test Record
1. Over 10,000 test records can be stored.
2. Use
or
to move to the previous or next record.
3. For printing an individual test record, select the test record which needs to be printed,
connect the printer with the device by the cable provided, switch on the printer, select
and the test result will be printed automatically.
Setting
1. Date & Time
i.
Set correct Date and Time.
ii.
Select “Update” to confirm.
2. Auto Off
i.
Select time limit to turn off the device automatically.
ii.
Select
to confirm
3. Print
i.
Select “Auto Print” to print the result automatically after each test.
ii.
Select number of printout copies needed.
iii.
Select
to confirm.
iv.
If last calibration date needs to be shown on the printout, select “Cal.”.
4. Cali
i.
When the screen displays “Calibration Needed”, send the device for calibration.
ii.
A password is needed for calibration to ensure calibration is performed by
eligible persons.
iii.
Please refer to Calibration Instruction.
5. Advanced Setting
i.
Only legitimated persons are allowed for advanced setting.
ii.
A Password is needed.
iii.
Please refer to Advanced Setting Instruction.