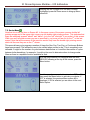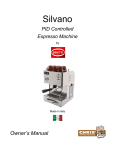
1
Espresso Machine Made In Italy by Owner’s Manual User Interface Details Addendum Covers Firmware Version 1.19 Only Version Date: April 5, 2014 S1 Dream Espresso Machine – GUI Addendum Table of Contents 1. 2 3 4 5 6 S1 Dream Graphical User Interface Addendum Scope ...................................................... 3 Dream Front Panel Description ......................................................................................... 3 The Dream’s Machine Off and Turning On Screens .......................................................... 4 Steam Boiler Water Level Sensor Threshold Settings ....................................................... 4 The Home Screen ............................................................................................................. 5 Quick Access to Information and Profile Selection Screens ............................................... 7 6.1 Serial Number and Firmware Version Information ...................................................... 7 6.2 Multiple Screens of Additional Status Information ....................................................... 8 6.3 Down Arrow Profile Selection ..................................................................................... 9 7 Menu System Documentation ............................................................................................ 9 7.1 Set Calendar ....................................................................................................... 10 7.2 Set Time of Day .................................................................................................. 11 7.3 Enable Disable Button Beep ................................................................................ 12 7.4 Select Language .................................................................................................. 12 7.5 Set Backlight LCD Time-Out ................................................................................ 13 7.6 Set Programmable On/Off Timers ........................................................................ 13 7.7 Show / Reset Shot Counters ................................................................................ 15 7.8 Program (Set / Modify Profiles) ............................................................................ 15 7.9 Profile Sub-menus .................................................................................................... 16 7.9.1 Set Coffee Water Temperature .................................................................... 17 7.9.2 Set Steam Boiler Temperature/Pressure ...................................................... 17 7.9.3 Set Coffee Doses (Water Volume) ................................................................ 18 7.9.4 Set Hot Water Options / Volume ................................................................... 18 7.9.5 Set Preinfusion – Plumbed Models Only ....................................................... 19 7.9.6 Set MAT (Milk Adjustable Temperature) ....................................................... 20 7.9.7 Name Profile ................................................................................................. 21 7.10 Exiting Back to the Main Screen ............................................................................... 21 7.11 Menu Screen 2 ......................................................................................................... 21 7.12 Service Menu ....................................................................................................... 22 7.13 Filter Replacement Notification ............................................................................ 23 7.14 Alarm History ....................................................................................................... 24 7.15 Read “Backup” Function (Machine Writes Data to SD Card) ............................... 26 7.16 Write “Restore” Function (Machine Reads Data from SD Card) ........................... 27 7.17 LED Settings (Lamps Adjacent to Group) ........................................................... 28 7.18 Espresso Grinds Warning System ....................................................................... 28 7.19 Electronic Grinds System (EGS) .......................................................................... 29 7.20 Menu Screen #3 ....................................................................................................... 30 7.21 Auto-Shutdown Enable ........................................................................................ 30 7.22 Group Cleaning .................................................................................................... 30 7.23 Screen Saver ...................................................................................................... 31 7.24 Time Update i.e. Daylight Savings Time Enable ................................................. 32 Dream GUI Addendum Page 1 S1 Dream Espresso Machine – GUI Addendum 7.25 Screen Contrast ................................................................................................... 33 7.26 Deactivate Group Pressure Front ePanel Display (Plumbed Version Only) .......... 33 7.27 Set / Change Password ...................................................................................... 34 7.28 Software Update aka Firmware Update ............................................................... 35 7.29 Menu Screen #4 (Last Menu Screen ........................................................................ 36 7.30 Default Setting ..................................................................................................... 36 7.31 Set Calibration Temperature of Steam Boiler Sensor (Don’t Use) ........................ 36 7.32 Full Power (15A/20A Setting) ............................................................................... 37 7.33 Group Temperature Offset .................................................................................. 37 7.34 View / Change PID Settings ................................................................................. 38 7.35 Returning to the HOME Screen ................................................................................ 39 8 Read / Write (Backup/Restore) Function Details ......................................................... 40 8.1 Example of converted DREAM_R.CSV file ............................................................... 42 8.2 Raw Dream_R.csv file .............................................................................................. 43 Dream GUI Addendum Page 2 S1 Dream Espresso Machine – GUI Addendum 1. S1 Dream Graphical User Interface Addendum Scope The LaSpaziale Dream Owner’s Manual is more of an extended “Quick Start” Guide. It does not cover the extensive Menu system in much detail. It is the goal of this addendum to document the complete Graphical User Interface (GUI) system in detail with photos and text in order to help the user gain the best possible espresso experience with this new machine. Since each version of firmware can have significant impacts on the User Interface, this document solely covers the operation of the Dream Espresso Machine with firmware version 1.19 installed. Any current Dream user whose machine is on an earlier version is strongly encouraged to update to this version. How to do that is covered later in this document. When future firmware versions are released this document will need to be amended or replaced depending on how extensive the changes are. Most of the settings documented below are completely safe. You can set them to any allowed value and, while you may not like the result, the settings should cause no harm to you, others, or the machine. These settings are denoted with this symbol: In the cases where an improper setting could result in dangerous operation, this symbol is used: If these cautions are ignored, you do so at your own risk. This document is to help you to better understand how this espresso machine works. You are ultimately responsible for its safe operation and for the safety of all those nearby. The Dream does have a variety of over pressure relief systems, which when working as designed, should prevent boiler ruptures and/or explosions. However, when they do so they are still capable of releasing high pressure, superheated steam. 2 Dream Front Panel Description Below is a labelled photo of the Dream’s front panel. Screenshots of the LCD display will be shown and described throughout this document. Refer to this photo, as required, when pressing of various buttons is referenced. Dream GUI Addendum Page 3 S1 Dream Espresso Machine – GUI Addendum 3 The Dream’s Machine Off and Turning On Screens When the machine is Off and the Programmable On/Off Timer is Disabled, you just see a blank, unlit screen When the machine is OFF and the Programmable On/Off Timer is Enabled and On/Off times have been set, the screen shows the next ON time. When the machine is Off, you press and hold the Power button until you see this screen for several seconds, then you will see the Home Screen as depicted in paragraph 3. 4 Steam Boiler Water Level Sensor Threshold Settings If this is improperly set and you have very soft water, you could get a hot water overflow out of the steam boiler. The water level sensor on the first production run of Dreams was connected to the control board with the leads reversed. This caused the signal to control board to be slightly off from what was expected by the software resulting in overfilling the steam boiler. Rather than recall the first batch of machines to swap the sensor leads, LaSpaziale put in a software work around. It is now possible to select one of two thresholds depending on whether you have one of those original machines or a later machine. These are referred to as Threshold A and Threshold B where Threshold A is what the setting is supposed to be and Threshold B was added as the fix for the first batch of machines. Your machine should already be set to the correct value which is Threshold B for the following ranges of serial numbers and Threshold A for anything else: Dream machine serial # 259451-259547 Dream T machine serial # 259487-259496 Dream GUI Addendum Page 4 S1 Dream Espresso Machine – GUI Addendum In order to confirm whether your machine is correct after checking your serial number as noted below in paragraph 5, check the Threshold setting as noted below. Start with the machine OFF and then press and hold the Menu button. The screen will indicate the currently set value. If it is correct you can press Menu to relock that value and exit back to the OFF state. Note the serial number of this machine is 259535 so it is correctly set as Threshold B. If you need to change to the other threshold value use the Up or Down Arrow keys to display it and then press the Menu button to return to the OFF state. In addition to being able to use the arrow keys to display Threshold A or Threshold B you can also scroll until BACK is displayed, pressing Menu with BACK display returned the machine to the OFF state without changing the original threshold value. 5 The Home Screen The Home Screen is what you normally see when you are not accessing the Menu System. The Owner’s Manual contains a single photo of this screen. However, the same physical screen space is used to display different things at different times making it impossible to capture everything with a single photo. This section includes additional photos so that the reader can see these additional items. Most of the values shown on the home screen are configurable through a multiplicity of menu screens documented later. Some of the values shown on the home screen (and other menu screens) depend on the Language set in the Menu system: American English – Time AM/PM, Date MM/DD/YY, Temp = Fahrenheit, Liquid = Gallons British English – Time AM/PM, Date DD/MM/YY, Temp = Celsius, Liquid = Liters Italian – Time 24 Hr, Date DD/MM/YY, Temp = Celsius, Liquid = Liters Dream GUI Addendum Page 5 S1 Dream Espresso Machine – GUI Addendum The “E” in the upper left corner stands for Economy mode; i.e. 15A mode. If you have the Dream plugged into a 15A outlet this needs to be showing. The Menu to set this is covered later and is referred to as Full Power - ON (20A) or OFF (15A). S1Cafe is the name of one of the four User Selectable profiles that will be covered later. The Temperature under the User Profile Name is the current group boiler temperature. The machine can be set to use and display Celsius rather than Fahrenheit if British English rather than American English is selected as the Language. The tea cup looking icon near the lower right indicates that the steam/hot water boiler is ON. When this icon is showing the area below the icon scrolls back and forth between “TBOILER” and the steam boiler temperature. This is programmable so that you can achieve your desired steam pressure shown on the pressure gauge on the front panel. The original S1 modes had this preset to 1.2-1.3 bars. However, you can easily pick a temp that makes the pressure lower or higher than this to control the quality and quantity of your steam 3.1 bar is the group pressure which equals the incoming street pressure when the pump is not running during an espresso shot. Tank models do not support this feature. Their espresso shot pressure shows on the mechanical pressure meter. This display shows what the screen looks like during a shot. The two cup icon on the left indicates that the 2 cup button was pushed. Alternately, the one cup icon would display. The bar shows the shot time relative to the total programmed shot time and the “6s” indicates that we are 6 seconds into the shot. The final time value at the end of the shot remains for 10 seconds or until the next shot is started, whichever comes first. Note that the normal water drop icon between the time and the group pressure changes from the water pressure OK to the pump on icon during a shot. In this screenshot, note that the machine has now been set to Full Power ON (20A mode) and the “E” icon is no longer displayed in the upper left corner. Also, the squiggle line under the group temperature indicates that the group boiler is on. When the steam boiler is on, its blue indicator lamp to the left of the Home screen panel blinks; i.e. there is no indication on this screen. In the lower left corner ,the display alternates between the current time and the next programmed Off time if this feature has been enabled. When the machine is Off, the next programmed ON time alternates with the clock. Dream GUI Addendum Page 6 S1 Dream Espresso Machine – GUI Addendum Note that the word OFF in the lower left corner of the display is followed by +1 in this photo. This means that the time listed below OFF+1 is for tomorrow. If the display only showed OFF the time below would be for today. (This is the same as OFF+0!) OFF+2 indicates the day after tomorrow and so on. There are two ways to interpret this timer status display which require that the user know how the machine was last turned on. 1. Dream is currently in a programmed ON cycle. In this case the time displayed is the next programmed OFF time 2) Dream is currently in a programmed OFF cycle but was manually turned on. In this case the time displayed is the next programmed ON time. In both cases the number after OFF indicates which day the time is referring to. If the programmable timer is disabled, the lower left corner will just display the current time of day. If the programmable timer is enabled but no times are programmed the timer status will be displayed but the values are meaningless. Therefore, the timer should also be set to disabled if all the times are deleted. This photo shows a thermometer like icon the upper right corner which indicates that the steam boiler is refilling. (Perhaps this icon is actually supposed to be a vertical boiler!) The pump icon between the group pressure and the time is also on as it is when pulling a shot. This is how you can tell the difference between the pump being on for a shot and the pump engaging to refill the steam boiler. For about one minute after an alarm occurs you will see a large description of the alarm on screen. After an alarm has been active for one minute the descriptive text goes away and is replaced by the alarm icon in the middle of the screen. If you weren’t looking at the screen when the above message was displayed and you only see the icon in this photo, you can go to a screen (see paragraph 6.2) and redisplay the text for this alarm as well as for any other alarms that are currently active. 6 Quick Access to Information and Profile Selection Screens 6.1 Serial Number and Firmware Version Information Dream GUI Addendum Page 7 S1 Dream Espresso Machine – GUI Addendum With the Home Screen showing, press and hold the Blue Up Arrow button to the right of the display panel until the screen below is shown. You will see the serial number on the top line. This should agree with the serial number label on your machine but it is easier to access this way. Below that is the firmware version number. As of January 2014 the latest version is 1.19. If you are on an earlier version, how to obtain and install the latest version is covered later. 6.2 Multiple Screens of Additional Status Information With the Serial Number and Firmware Version screen showing, press the Blue Down Arrow key to the Right of the Display panel. You can navigate back and forth through these screens using the Blue Up and Down Arrow Keys. When done, press the Blue Menu button to return to the Home screen. It takes at least two and sometimes 3 status screens to view your available information depending on which features are enabled. Status of disabled features is not displayed. This screen shows that the next Timer Off time is at 6:30PM. These lines automatically scroll back and forth to show the entire line of text. The Group Boiler offset is +1F and Preinfusion is set to 4 sec. This preinfusion time applies when either the one cup or two cup buttons are pressed. They aren’t independently programmable. Press down arrow for the next screen. This screen shows the number of gallons left before the filter alarm occurs. (It is set for 250 gallons and 1 gallon has been used since it was last reset.) The Time Update American setting applies to when Daylight Savings Time is changed. The Backlight LED is set to 60 minutes This means that the backlight on the GUI display remains lit for an hour after the last button press. There is a separate setting that determines when the LED lights illuminate the area under the Group. The status of that setting is not shown on these screens. On this machine the “GRINDING” option is disabled. This is an example of another setting that would be displayed if it were enabled. More on that later. Explanation above. Compare this screen with the previous one to see how the data scrolls left to right. Press the down arrow for the next screen. Up arrow for the previous screen. Dream GUI Addendum Page 8 S1 Dream Espresso Machine – GUI Addendum If there were active alarms, i.e. ongoing, unresolved error conditions a text explanation of each one – if more than one – displays here. Later in the menu documentation section you will see how to scroll through a history of all alarms that have occurred on this machine. The symbol at the bottom of the screen indicates there are no more screens below this one. Note the similar icon on the serial number screen in paragraph 3.1 which indicates there are no more screens above that one. Press the Blue Menu button to return to the Home screen. If you have a triangular alarm icon in the middle of the Home Screen and you navigate to this page, you will see the text of the alarm. If there are more than one active alarm you can use the Up and Down Arrows to scroll back and forth through the active alarm list. There is no manual way to clear alarms. They automatically clear when the alarm condition is corrected. Later in the document you will see how to get a chronological history list of all alarms. 6.3 Down Arrow Profile Selection With the Home Screen displayed, press and hold the Blue Down Arrow until the Profile Menu is displayed as shown at left. Then you can use the up and down arrows to select a different profile, if you have more than one configured. With the desired Profile highlighted press the Menu button to select it, the display then jumps back to the Home Screen. This saves you from having to navigate through the Menu system in order to select a different active profile. 7 Menu System Documentation Unless otherwise specified you will use only the Blue Up Arrow or the Blue Down Arrow to navigate to the desired menu item. The Blue Menu button will select the currently highlighted menu item. Some combination of these three keys is also used within each menu selection to pick values, to navigate, and/or to select values. When you are navigating to a main menu item, each press of the down arrow will advance you to the next menu item and that item’s icon will enlarge in size to highlight that fact. If you need to navigate to a menu item that is some distance from the currently selected menu item, press and hold the down arrow and you will advance quickly through the menu items. If you pass the menu item you wish, press the Up Arrow to reverse navigation direction. In the case you can also hold down the Up Arrow key to move quickly up the menu list. Within a few of the menus there is a lengthy list of numbers or characters to choose from. Pressing and holding the arrow keys will help you scroll quickly to the desired value. You can also scroll through the list by placing your finger between the Up and Down Arrow keys and then swipe up toward the Up Arrow button or down toward the Down Arrow button. Thus you have three different ways to navigate through the menus. Just pick the one that best suits you. Dream GUI Addendum Page 9 S1 Dream Espresso Machine – GUI Addendum Note: There are a few quirks in the menu system that will be pointed out when we get to each one. This document will just navigate from one menu to the next in sequence until all have been covered. In actual use the operator can scroll directly to whichever menu item is of interest. Starting from the Home Screen, press and hold the Blue Menu button appears. This is screen #1 of the menu system. until the screen below Password Caveat: If you have previously set and enabled password protection, this password entry screen appears first. Once you have successfully entered your password, you are shown the next screen and you can access all the other menu screens and settings. Only after you exit and then enter the menu system the next time are you asked again for your password. Use the Up and Down Arrows to select each number followed by the Menu button to enter that number and advance to the next character position If you forget the password then, when prompted to enter the password, press and hold the Menu button for 5 seconds. The password will be changed back to default (1234) and disabled. WRONG PASSWORD If you enter an incorrect Password, the screen displays the message WRONG PASSWORD for a few seconds and then bounces you back to the Home screen. You must then press and hold the MENU button to display the Password screen and try again. Note that the Home row at the top of the screen is reverse videoed indicating that it is selected rather than any of the icons below. If you press the Menu Button now you return to the Home screen. This is the main way to return to the Home screen. Wherever you are in the Menu system, press the Up arrow until the screen looks just like this one and then press the Menu button. There is one alternative way to return to the Home screen from most submenus, just do nothing for about 2 minutes and the Home screen is displayed. Of course, if you have made changes in any of the sub-menus and gotten sidetracked before pressing the Menu button to save your changes, you will return to the Home Screen without the changes being made. 7.1 Set Calendar The second screen below shows calendar settings in the form MM/DD/YY. This is because the machine is set to American English. If it is set to either of the other options – British English or Italian – the order is DD/MM/YY. Paragraph 5.4 shows how to set the desired Language. Dream GUI Addendum Page 10 S1 Dream Espresso Machine – GUI Addendum Press the down arrow once to highlight the Calendar icon. Note the calendar icon change. The top display line also changes to “Calendar” as a further indication. Press the Menu button once to enter the Calendar set function. Initially, the month is highlighted. Use the Up and Down arrows to select the desired month. Then press the Menu button to lock in this value and move to the day field. Once again use the arrow keys to select the desired value and lock it in with the Menu button. Then repeat again for the Year field. When the Menu button is pressed after setting the Year, Menu screen as shown in paragraph 5 is redisplayed. Note that even though the day of the week is displayed on this screen, it is calculated based on the date entered and is not user settable. Also, if the currently highlighted date field is already correct, just press the Menu button to skip to the next field. 7.2 Set Time of Day Wherever you currently are in the menu system be sure you are seeing Menu screen #1. Use the Arrow keys to get there and then highlight the Time icon. The top title line also display the word “Time”. Next press the Menu button in order to enter the Time set function. If your language is set for American or British English the display will be as shown. Use the Up or Down arrow to cycle through the hours being sure to pay attention that the am/pm indicator is correct. Then press the Menu key to lock in the Hours and also highlights the Minutes field. Again use the arrow keys to select the desired time and then press Menu to lock in the value and move back to the Main Menu screen. If you have selected Italian as your language this screen will display 24 hour time and there will be no AM/PM indicator. Dream GUI Addendum Page 11 S1 Dream Espresso Machine – GUI Addendum 7.3 Enable Disable Button Beep Wherever you currently are in the menu system be sure you are seeing Menu screen #1. Use the Arrow keys to get there and then highlight the Beep icon, then press the Menu button. Use the Up/Down Arrows to select Beep ON or Beep OFF, then press the Menu button to lock in the value and return to the main menu screen. You have probably noted that, by default, each time you press a button the machine Beeps, this is where you can turn that off if you desire to rig for silent running. 7.4 Select Language Wherever you currently are in the menu system be sure you are seeing Menu screen #1. Use the Arrow keys to get there and then highlight the Language icon which looks like a flag. Then press the Menu button. Rather than showing the three options on a single screen, the options for British English (B.English), American English (A. English), or Italian are shown one to a screen. The one you will initially see when you enter these screens is the option currently selected. Internally these three screens are ordered as: B. English, A. English, and Italian. Based on the one you see when you initially enter these screens, you may have to use the Up Arrow or the Down Arrow to get to the option you want. Once you press the Menu button, the displayed option is locked in and you return to the Main Menu screen #1. Dream GUI Addendum Page 12 S1 Dream Espresso Machine – GUI Addendum These are they system impacts of your choice: American English – Time AM/PM, Date MM/DD/YY, Temp = Fahrenheit, Liquid = Gallons British English – Time AM/PM, Date DD/MM/YY, Temp = Celsius, Liquid = Liters Italian – Time 24 Hr, Date DD/MM/YY, Temp = Celsius, Liquid = Liters 7.5 Set Backlight LCD Time-Out Wherever you currently are in the menu system be sure you are seeing Menu screen #1. Use the Arrow keys to get there and then highlight the Backlight LCD Time-out icon which looks like a flashlight bulb. Then press the Menu button to get into the backlight set up screen. This setting adjusts the amount of time the display stays backlit after that last front panel button press. The maximum is 60min which is shown on the display. The options are 5, 10, 30, or 60 minutes. Use the Up and Down Arrows to select your desired option, then press the Menu button to lock in the value and return to Menu screen #1. 7.6 Set Programmable On/Off Timers Wherever you currently are in the menu system be sure you are seeing Menu screen #1. Use the Arrow keys to get there and to then highlight the Black Timer icon and press the Menu button. If you do not want the Programmable On/Off Timer function to be active, use the arrow key to move the dot to the Off position, then press the Menu button to return to main Menu screen #1. However, if you want to use and/or program the On/Off timers move the dot next to On and press the Menu button. Note that if you have already set up programmable On/Off times and change this setting to Off, the programmed values are not lost and will become active again when this switch is Dream GUI Addendum Page 13 S1 Dream Espresso Machine – GUI Addendum later turned back On. If you are starting a new programming session Monday is where you want to start. However, if you want to change a day other than Monday, you can press the Up Arrow to scroll through the days of the week. When you get to the desired day, press the Menu button to start programming for that day. If you get to this screen inadvertently, keep pressing the Up Arrow button. The option after Sunday is “Back”. Pressing the Menu button with Back selected takes you to the main Menu screen #1 For this exercise we will press the Menu button with Monday selected. You can set from 1-3 different ON/OFF times per day. Note the encircled 1 above am, this indicates you are on the 1st time setting screen for Monday. Using this screen is just like setting the Time. Scroll to select the On Hour, press the Menu button to move to the On minutes, scroll to select minutes, press the Menu button to select Off Hour, scroll to select the desired hour, press Menu again to select Off minutes, then press the Menu button again. Then you are moved to the next screen. This is the Monday ON/Off time #2 screen. The dashes indicate that the 2nd ON/Off time for Monday is not currently in use. If you want to leave it this way press only the Menu button 4x to leave all values alone. Since you did not enter anything on this screen you are not taken to the Monday #3 screen. However, if you did enter any times on this screen you are taken to the 3 rd screen which looks just like this one but a circled 3 above pm. Note that if you do have times previously programmed for the 2nd (or 3rd times for Monday or any other day) and you now want to remove them, there is no direct way to select dashes for these fields. What you do is set both the On and Off times the same as the Off time on the previous screen (6:30pm in this example). When you press Menu after entering the Off minutes, the times are erased. If you then navigate back to this screen you will see that it shows all dashes where times used to be, Starting from Monday,after the last Menu button press, you are presented with this screen. Pressing the Menu button with Copy highlighted will copy all the Monday settings to the other six days of the week. The only other option is to press the Down Arrow followed by the Menu key and go into Tuesday programming mode. Tuesday as well as any other days are programmed just the same as Monday, the currently active day of the week shows in the top bar. If you don’t really want to change Tuesday, just press the Menu button until you get to another screen similar to this that only displays “ Wednesday” with no Copy option. On that screen you can use the arrow keys to skip Wednesday and select any other day of the week. The Monday to Tuesday transition is the different one due to the Copy option that is only available here. REMINDER: THE COPY OPTION IS ONLY AVAILABLE ON THE MONDAY TO TUESDAY TRANSITION. Dream GUI Addendum Page 14 S1 Dream Espresso Machine – GUI Addendum If the Copy option was selected on the last screen “Copying” will blink several times and then you are back on main Menu screen #1. Hint: If you have some days that are programmed the same and others that are different, use the above technique starting with Monday to make all days the same and then manually change the days that are different. 7.7 Show / Reset Shot Counters Wherever you currently are in the menu system be sure you are seeing Menu screen #1. Use the Arrow keys to get there and then highlight the Counters icon. Then press the Menu button. With the word COUNTERS in reverse video, as shown, you can view the current counter, then press the Menu button to return to the main menu without Resetting the counters. To Reset the counters, press the Down Arrow key in order to reverse video (highlight) the word RESET, then press the Menu button. The screen will then flash RESETTING several times before returning to the Main screen. If you return to this Counters display again you will see that the par line values are all zeroed out. The tot line is never cleared. The value under the Cup icon in the par line shows the number of times the one cup and two cup buttons have been pressed since the last time the Counters were reset. The tot line shows the total times the one and two cup buttons have been pressed since the machine was born. The values under the tea cup icon represent the similar values for presses of the hot water button. The MAT values are always zero at this time since that function is not yet implemented. How this feature is used and interpreted is up to the user. For example it could be used to count shots to know when to backflush. 7.8 Program (Set / Modify Profiles) The Dream allows the user to configure up to four profiles. The example below shows you what the profile system looks like on first use when the only profile is the default “New User” Profile. The examples below show accessing the New User profile, making changes to it, and then saving it as a new name. The name saved at the end of this example is then displayed at the top of the Home Screen. Dream GUI Addendum Page 15 S1 Dream Espresso Machine – GUI Addendum Wherever you currently are in the menu system, be sure you are seeing Menu screen #1. Use the Arrow keys to get there and then highlight the Program icon. Next press the Menu button to start the profile programming mode. You will see this screen with “New User” highlighted. To start programming this profile, press the Menu button. Note that if you have previously programmed one profile the name of that profile will appear here. You then use the arrow keys to scroll until you are on the screen that displays the “NEW USER” option and then you press the Menu button to enter that profile. This can be repeated until there are four named profiles. At that point you can just pick any one of them to modify or you can delete one or more. How this is done is shown later. The first profile can never be deleted. It can only be modified. One might think any profile could deleted except one since at least one profile is required for proper machine operation. However, the Dream is not designed that way. Profile #1 must remain in place at all times. If you have inadvertently entered the Profile PROGRAM menu, press the arrow keys until BACK is displayed and then you will return to main Menu screen #1. When you have completed setting up the profile you will exit back to this main programming screen, scroll until BACK is display, then press Menu to return to the main Menu screen #1 Unfortunately, this picture was retroactively taken after completing the profile and shows the name the profile was given at the end of the process. For the purposes of this example, it would actually display “NEW USER” Next we will work sequentially through the seven profile icons on this screen. 7.9 Profile Sub-menus The sub-menus described in this section are all under the currently selected profile. As each setting is completed and locked in with the Menu button, it will become a saved part of this profile. Note that if you walk off in the middle of setting a Profile, after a couple minutes the display reverts to the Main screen. All profile settings that you have completed will be saved. The remaining items maintain their default values. If you do not explicitly enter a new profile name, the machine will self-name the profiles as USER1, USER2, USER3, or USER4 depending on which profile you were working on. You can navigate back to where you left off and complete the profile at any later time. Dream GUI Addendum Page 16 S1 Dream Espresso Machine – GUI Addendum 7.9.1 Set Coffee Water Temperature See also the Offset setting which is one of the last menu settings described later in this document. Since Offset works in conjunction with this setting, you could have the coffee temperature below boiling but have the offset incorrectly set to a positive value that causes the water temperature to be too high. Starting from the last menu in the previous section, press the Down arrow to highlight the Coffee Temperature icon and display COFFEE TEMPERAT on the top of the screen. Then press the Menu button to enter the Coffee temperature (group boiler) programming screen. Use the up or down arrows to increase or decrease the indicated temperature until the desired espresso temperature is showing. Then press the Menu button to lock in this value and return to the main Profile menu. If B.English or Italian are selected as the language this value is show in Celsius. Range: 185-257F or 85C-125C In spite of upper range please keep actual value below boiling. Not that the higher you altitude the lower the boiling point of water. 7.9.2 Set Steam Boiler Temperature/Pressure Depending on where you are in the profile menus, press the Up or Down arrow to highlight the Boiler Temperature icon and display BOILER TEMPEARAT on the top of the screen. Then press the Menu button to enter the boiler temperature (steam boiler) programming screen. Use the up or down arrows to increase or decrease the indicated temperature until the desired steam temperature is showing. Note that unlike the coffee temperature, you are aiming for a temperature here that produces the desired steam boiler pressure as indicated by the manometer on the front panel behind the group. The normal usage range is 1.0-1.5 bar. The 254F value shown produces about 1.3bar which is what the earlier generations of S1 are permanently set to. The range of available values is 239-262F or 115123C. The lower values prevents you from select too weak a steam value and the upper value prevents boiler overpressure. Then press the Menu button to lock in this value and return to the main Profile menu. Dream GUI Addendum Page 17 S1 Dream Espresso Machine – GUI Addendum If B.English or Italian are selected as the language this value is show in Celsius. 7.9.3 Set Coffee Doses (Water Volume) Depending on where you are in the profile menus, press the Up or Down arrow to highlight the Coffee Doses icon and display that text on the top of the screen. Then press the Menu button to enter the coffee doses (water volume) programming screen. You set both the single cup and double cup buttons from this screen. Fill and pack a portafilter as usual and place a graduated shot glass under the spout(s). Press whichever of the two cup buttons you which to program. When the desired amount is dispensed, press the same button again. While on this screen you can program either or both buttons as many times as you like. Only the final values when you exit this screen are saved. After you have programmed a button, the display shows you how many seconds the machine ran and how many turns of the impeller blades occurred inside the volumetric dosimeter. When you press either cup button during a shot, the shot will run until the same number of impeller turns has occurred. The shot time is only used if the GRINDING function is enabled. See the description of that function later in this document. 7.9.4 Set Hot Water Options / Volume Depending on where you are in the profile menus, press the Up or Down arrow to highlight the HOT WATER icon and display that text on the top of the screen. Then press the Menu button to enter the hot water (hot water volume) programming screen. This screen will display the current setting. Use the up or down arrows to select the MANUAL or AUTOMATIC setting, then press the Menu button. If you selected Manual, you go back to the main profile menu. Manual means that you press the Hot Water button to turn it on and press it again to turn it off; i.e. manual operation. If you select Automatic, then you see the next menu. Dream GUI Addendum Page 18 S1 Dream Espresso Machine – GUI Addendum The Dream provides automatic timed flow as an option for the hot water spigot. The displayed value shows the current number of seconds that the hot water is programmed to run. Put a measuring cup under the hot water spigot, then press the hot water button, press it again when the desired amount has been dispensed. The display counts up as the water is flowing and shows the number of seconds at the time you shut off the water. You can reprogram the water volume as many times as you like. Only the final value when you press the Menu button is saved Warning: Depending on your machine and how it is plumbed, the Dream might pump water out of the boiler faster than cold water can flow in to replace it. If the heating element is not constantly immersed it might be damaged. Therefore, it is recommended to limit the amount of water drawn to 8oz at a time. Due to the smaller boiler size on the Tank versions those models should limit the water drawn at one time to 4-6oz. 7.9.5 Set Preinfusion – Plumbed Models Only This programmable preinfusion mode is not available on the Dream Tank but there is a nonprogrammable mechanical option for that model. Depending on where you are in the profile menus, press the Up or Down arrow to highlight the Preinfusion icon and display that text on the top of the screen. Then press the Menu button to enter the programmable preinfusion programming screen. Use the Up or Down arrow to select whether preinfusion is on ON or OFF, then press the Menu button. If OFF was selected you immediately return to the main Profile menu and you have no preinfusion on either the One Cup or the Two Cup button. If ON is selected you are shown the next screen. On this screen you select the number of seconds you desire for preinfusion. The value selected here indicates the number of seconds during the shot that the water is turned on running into the PF at street pressure before the pump is turned on. The amount of water programmed when you set the coffee doses is not impacted by the value used here since the total shot volume is measure by impeller turns any time the water is flowing. Use the Up or Down arrows to select the desired number of seconds for preinfusion, then press the Menu key to return to the main Profile menu. The value range is 1-10 seconds. Dream GUI Addendum Page 19 S1 Dream Espresso Machine – GUI Addendum 7.9.6 Set MAT (Milk Adjustable Temperature) This future feature is for a replacement steam arm that has a temperature sensor in the tip. When the programmed milk temperature is reached, the steam automatically shuts off. The firmware apparently has the support for this feature, but the replacement arm with this support is not yet available nor is any timetable for its availability known. The menus described below will let you enable the feature and set a temperature. However, if you do enable it, since there is no sensor installed, the control board sees an erroneous value and throws an alarm. Bottom line, set MAT to OFF and leave it there unless you get one of these steam arms installed sometime in the future. Depending on where you are in the profile menus, press the Up or Down arrow to highlight the MAT icon and display that text on the top of the screen. Then press the Menu button to enter the MAT programming screen. Use the up or down arrows to highlight whether you want the MAT feature ON or OFF. (For now be sure to pick OFF), then press the Menu key to exit back to the main Profile menu. Since MAT is not yet available, if you set MAT to ON the Dream will warn you with a single long Beep. When you return to the Home Screen you will see an active Alarm. If you just couldn’t help yourself on the previous screen and selected ON before pressing the Menu key, you will see this screen. You can use the up or down arrows to select a desired milk temperature, then press Menu to lock it in and exit to the main Profile menu. At the moment the only impact of this setting is to cause an alarm Range of Values: 45-85C 113-185F If B.English or Italian are selected as the language this value is show in Celsius. Dream GUI Addendum Page 20 S1 Dream Espresso Machine – GUI Addendum 7.9.7 Name Profile Depending on where you are in the profile menus, press the Up or Down arrow to highlight the Multiprofiles icon and display that text on the top of the screen. Then press the Menu button to enter the MULTIPROFILES programming screen. The name of this function is a bit misleading. Even though the profile system WILL let you set up multiple profiles, the next screen just lets you set the name for this current profile. A more appropriate name for this screen might be “Name Profile”. Use the Up and Down arrows to scroll through the alphabet and numbers. Use a period where you want a space. These are the only characters available. After you have the selected character in the left most position, press menu to advance to the next character. Repeat through all eight characters. When you press the Menu button after the eighth character the string is locked in and you return to the main Profile menu. Any periods you entered are converted to spaces. The name you gave this profile is now shown at the top of the Profile screen. 7.10 Exiting Back to the Main Screen Use the Up arrow key and scroll back until the Profile name is highlighted, then press Menu. You will now see the next screen, indicating that you have gone up one level in the menu hierarchy. Use the Down arrow key until you see the BACK option on this screen. Press the Menu button. You are now up another menu level and back at Main Menu screen #1. 7.11 Menu Screen 2 There are four setup screens in the menu system. (Five if you count the Profile setting menu option which contains its own sub-menu.) There are still three screens remaining. The 2nd and 3rd screens have a full set of eight icons and the 4th has five. Dream GUI Addendum Page 21 S1 Dream Espresso Machine – GUI Addendum Starting with the Program icon on menu Screen 1 highlighted, press the Down arrow to bring up Menu screen #2. 7.12 Service Menu Note that this is the top item on Screen #2. In the upper corner of the screen you see double left pointing arrows and in the upper right corner you see double right pointing arrows. This indicates that there are additional screens “above” and “below” (or to the “left” and right” if you prefer) of this screen. While you can’t tell which screen you are on specifically, you know you are not on the 1st or the last screen. Note that all the screens in the previous section only have the double right pointing arrows which tell the user they are on the 1st screen. This menu allows you to program a number of times the One-Cup, Two-Cup, or Continuous Buttons have been pressed. This allows the user to be notified when service is due. This is completely user definable. It might be the number of cycles between backflushes or it could be the number of cycles between boiler descalings, for example. It would not be used to determine when to change water filters as there is a separate function available for that. With the large wrench icon displayed and the word SERVICE showing at the top of the screen, press the Menu button. Use the up or down arrow buttons to select OFF or ON, then press the Menu button to activate your choice. If OFF is selected, the previous Menu screen #2 is displayed. If ON is selected you are taken to the next Menu Option. Dream GUI Addendum Page 22 S1 Dream Espresso Machine – GUI Addendum When this screen is first displayed, it shows the current Service cycle count. The current count is also shown in the status screens documented in paragraph 6. Unfortunately, that fact is not shown in those screens since the feature was disabled when those screenshots were taken. If you enter this screen and do NOT want to reset to a new value (and lose the current value), you have two options 1) Wait for a couple of minutes for the operation to time out. This will completely exit the setup function and put you back at the HOME screen. In order to reset to a new value or 2) get an option not to change the value, press the Menu button. Use the Up and Down Arrow buttons to select the desired number of service cycles. The press the Menu button to lock in this value and return to Menu screen #2. The options are: 5000, 2000, 1000, 500, and BACK. If you elect BACK and then press Menu you return to Menu screen #2 without changing the value and losing you current count. If you pick any other value the service cycles is reset to this value when Menu is pressed. 7.13 Filter Replacement Notification This setting allows you to pick a number of gallons of water for your water filter so that you get an alarm when it almost time to change the filters. This is a difficult option to test since even the smallest programmable value takes a long time to hit. When this was last tested on an older ROM it actually provided its notification when the value was down to ~20% of the total value rather than when it hit zero. This is probably OK in a commercial environment where water volume is high and that last 20% might go fast. In a home environment this is less useful. It is probably better to periodically check your water hardness using test strips. With the large filter icon is displayed and the word FILTER showing at the top of the screen, press the Menu button. Dream GUI Addendum Page 23 S1 Dream Espresso Machine – GUI Addendum Use the up or down arrow buttons to select OFF or ON, then press the Menu button to activate your choice. If OFF is selected, the previous Menu screen #2 is displayed. In this case you will received on Filter replacement notification. If ON is selected you are taken to the next Menu Option. As with the Service option described previously, the initial display shows the current gallons remaining based on the last programmed count. The current filter count is also available on the status screens shown in paragraph 6. You normally only enter this menu option when you want to reset the value. If you don’t want to reset the current value, one option is to step away until the screen times out and returns you to the Home screen. For the other option see the last screen in this paragraph. Use the Up and Down Arrow buttons to select the desired number of gallons of water that you can run through your filter. The press the Menu button to lock in this value and return to Menu screen #2. Note that since the Tank model only supports a small in-tank filter the range for this setting is much smaller than on the plumbed models. Screen values for the Plumbed version are: 1250, 500, 250, 125, and BACK. If you press BACK no new value is selected and the current value is not reset. If the current value and the selected value are the same the menu does not show the BACK option. If, for example, you reset the value to 125 Gal, exit the filter menu, then come right back in, you will not see a BACK option since the set value and the current value are still the same. 7.14 Alarm History With the large Alarm icon displayed and the word ALARMS showing at the top of the screen, press the Menu button. For a complete list of your machine’s alarms what they mean and how to clear them - consult your User’s Manual. If your version does not include this information, download the latest version from http://chriscoffee.com. Dream GUI Addendum Page 24 S1 Dream Espresso Machine – GUI Addendum This and the next three screens show an examples of four alarm history screens from this Dream machine. Note that this is alarm 6 of 11. You use the Up and Down arrow keys to scroll back and forth through the list. Note that details of the alarm as well as the date and time it occurred are displayed. Press the Menu button when done to return to Menu screen #2. Dream GUI Addendum Page 25 S1 Dream Espresso Machine – GUI Addendum 7.15 Read “Backup” Function (Machine Writes Data to SD Card) Most everyone uses SD Cards these days and is familiar with the standard notation that a Read operation will read a file from the card and put it on your computer. LaSpaziale is using the opposite frame of reference. A Read operation reads the data from the espresso machine and writes it to a file on the SDCard. Therefore, this operation is actually a backup of the entire machine configuration. The file name created on the SD Card is: DREAM_R.CSV. With the large Read icon displayed and the word READ showing at the top of the screen, press the Menu button. With the SD card that came with your machine inserted into the reader, plug the ribbon cable connector in to the port to the right of the pressure gauge. Then press the Menu (OK) button to start the backup of your machine This screen will display for a few seconds while the SD Card is being written with the Dream backup data. Then Menu screen #2 is redisplayed. If you have not plugged in the SD Card reader or the SD card is not inserted into the Reader, this message is displayed and then Menu screen #2 is redisplayed. Dream GUI Addendum Page 26 S1 Dream Espresso Machine – GUI Addendum 7.16 Write “Restore” Function (Machine Reads Data from SD Card) With the large Write icon displayed and the word Write showing at the top of the screen, press the Menu button. With the SD card that came with your machine inserted into the reader, plug the ribbon cable connector in to the port to the right of the pressure gauge. Then press the Menu (OK) button to start the restoration of your previously backed up machine settings. There MUST be a properly formatted file called DREAM_W.CSV on the SD Card for this feature to work. If you just want to restore a previous backup you need to take your Dream’s SD card to a computer and rename or copy the DREAM_R.CSV file to a file named DREAM_W.CSV. The Backup (Read) operation from the previous section backs up everything including the current time and date. Unfortunately, this Restore (Write) operation also restores that originally saved time and date. Therefore, after this operation you will need to reset your machine’s time and date information. This screen indicates that the DREAM_W.CSV file is being read from the card and written to Dream memory. When complete the screen displays Menu screen #2 indicating that the function completed successfully. This error message can be caused by any of the following: SD Card Read not attached SD Card not inserted DREAM_W.CSV file is not on the card DREAM_W.CSV file is contains bad data This message displays for a few seconds, then Menu screen #3 is redisplayed. Dream GUI Addendum Page 27 S1 Dream Espresso Machine – GUI Addendum 7.17 LED Settings (Lamps Adjacent to Group) This setting controls the two LED lamps on either side of the group that light up the area so you can see what it happening while pulling a shot or drawing hot water. With the large LED icon displayed and the word LED showing at the top of the screen, press the Menu button. Use the Up and Down Arrows to select OFF, ON, or AUTO, then press the Menu button to lock in the value and return to Menu screen #2. OFF = Lamps Never Turn On ON = Lamps are Always On Auto = Lamps come on when the One-Cup, Two-Cup, or Continuous shot buttons are pressed and automatically turn off when the shot is complete. NOTE: Pressing the Hot Water button does NOT light the LEDs. 7.18 Espresso Grinds Warning System This can be programmed to give a warning on the Home Screen if your shot runs too short or too long indicating that your coffee is ground too fine or too coarse. This is sort of a training wheels feature. Experienced home baristas will probably find this to be an unnecessary distraction. With the large Coffee Bean icon displayed and the word Grinding showing at the top of the screen, press the Menu button. Use the Up arrow or Down Arrow to select whether to use this function. If you place the Dot next to OFF and press the Menu button the feature is disabled and you return to Menu screen #2. If you place the Dot next to ON, the feature is enabled and you are taken to the next screen to select a value. Dream GUI Addendum Page 28 S1 Dream Espresso Machine – GUI Addendum Use the Up or Down arrows to scroll to the desired value. As you can see from this and the next two screens the options are 5, 10, or 15 seconds. The value initially displayed is this last value that was set for this feature. This feature works with the Set Coffee Doses feature set on Menu screen #1. On that screen when you set the volumetric dosing for the One-Cup and Two-Cup buttons, two values are shown. One is the number of impeller turns and the other is the time that the shot actually took when the coffee dose was programmed. The shot will automatically turn off when the programmed impeller turns value is reached. However, if the actual shot time differs from the programmed time by more than the value programmed in this function, a warning will be displayed on the Home Screen. Assume that the programmed dose time is 25 seconds and that the GRINDING value is set to 5 seconds. Example #1: A shot is pulled and the shot time is 40sec. You will get a Home Screen warning that your coffee is ground too fine since 4025 > 5. Example #2: A shot is pulled and the shot time is 14 seconds, You will get a Home Screen warning that your grind is too coarse since 25-14 > 5 The numbers at the bottom of the screen next to the One-Cup and Two-Cup icons are the currently programmed run-time values that were set for volumetric dosing; i.e. this machine needs reprogramming! 7.19 Electronic Grinds System (EGS) This function might be better named as “Espresso Grounds Spritzer”. When enabled, every 20 minutes water flows into the group for 1-2 seconds. It is common in some countries for Baristas to leave the grinds in the portafilter between shots. This function prevents the puck from drying out and sticking to the shower screen in that situation. If you have this bad habit and desire to perpetuate it, enable this function, but it’s recommended NOT to leave the grinds in the PF after a shot. With the large EGS icon displayed and the word EGS showing at the top of the screen, press the Menu button. Dream GUI Addendum Page 29 S1 Dream Espresso Machine – GUI Addendum Use the Up arrow or the Down arrow buttons, move the Dot to ON or OFF, then press the Menu button to lock in that option and return to Menu screen #2. 7.20 Menu Screen #3 Starting with the EGS Screen highlighted as shown in the previous paragraph, press the Down Arrow to display the Menu screen #3 Configuration Options. As with Menu screen #2 you see the double left arrows in the upper left corner of the screen and double right arrows in the upper right corner of the screen indicating that there are additional screens both to the left and to the right of this screen. 7.21 Auto-Shutdown Enable With the large On/Off button icon displayed and the word AUTO SH.DOWN showing at the top of the screen, press the Menu button. Use the Up or Down Arrows to select the desired value and then press the Menu button to lock it in. When enabled, if no operations have been performed; i.e. no front panel buttons pressed for a specific period of time, the machine will turn off independently of any automated turn off time you have programmed. If you use this function and decide to have an espresso at some later point in time, you may arrive to find your machine is cold. 7.22 Group Cleaning This function is intended to help automate backflushing. When turned on the pump is cycled on and off multiple times to push water into the portafilter then release the 3-way valve so that cleaning detergent or rinse water is flushed back into the group and out the 3-way valve. With the large Group icon displayed and the word Group Cleaning showing at the top of the screen, press the Menu button. Dream GUI Addendum Page 30 S1 Dream Espresso Machine – GUI Addendum Press the Continuous Flow button (the one between the One-Cup and Two-Cup buttons) to begin the cleaning operation. It continuously cycles 5sec On / 5sec Off. If you get to this screen and don’t want to perform a group cleaning now, press either the Up or Down Arrow to immediately return to Menu screen #3. You have to use the next step to stop the group cleaning function, don’t walk off after this step and leave the cleaning function running. There is NO time-out that will automatically stop operation after a set number of cycles. While the cleaning operation is occurring this screen is displayed. When you are satisfied that enough cleaning cycles have been run, press the Continuous Flow button (the one between the One-Cup and Two-Cup buttons) to stop the cleaning operation. Menu screen #3 is then displayed. A typical use might be ~10 group cleaning cycles with Cafiza or equivalent detergent in a blind basket, then rinse the basket, and run another 10 cycles not detergent to rinse out the system. 7.23 Screen Saver A screen saver is supposed to literally save your screen from a “burn in” effect where a static image has remained on the screen so long that it stays visible even when the machine is turned off. However, for a screen saver to actually prevent that from occurring it needs to be in nearly constant motion. The two “screen saver” options provided are just static images. There is actually more screen motion in the normal Home screen display. It is not clear whether the LCD screen on the Dream is susceptible to the burn-in effect. If it is, these “screen savers” are more likely to cause burn-in than they are to prevent it. You should consider this a feature for your amusement only and not for use as an actual screen saver. When enabled, the selected “screen saver” image replaces your Home Screen after no front panel button has been pressed for at least two minutes. As soon as a button is pressed the Home Screen reappears. This feature is independent of the LCD backlight time-out setting. If for example, the LCD Backlight is enabled for 5 minutes and the screensaver is also enabled, after two minutes of inactivity the screensaver appears, then three minutes later the backlight turns off. If while the screensaver is active you want to enter the Menu system by pressing and holding the Menu button, this will only cause the Home screen to pop up and exit screensaver mode. You must stop pressing the Menu button, then press and hold it again to enter the Menu system. With the large Screen icon displayed and the word SCREENSAVER showing at the top of the screen, press the Menu button. Dream GUI Addendum Page 31 S1 Dream Espresso Machine – GUI Addendum Use the Up or Down arrow to select your desired setting, then press the Menu button to lock it in. If you selected OFF the screensaver is disabled and you return to Menu screen #3. If you select ON you are taken to the following screens to pick your desired screen saver. Use the Up or Down Arrows to select either the Roman Colosseum or the Statue of Liberty as your screensaver, then press Menu to lock in your choice and return to Menu screen #3. Which of these two screens is shown first depends on the most recent one previously selected. 7.24 Time Update i.e. Daylight Savings Time Enable With the large Globe??? icon displayed and the word TIME UPDATE showing at the top of the screen, press the Menu button. Use the Up or Down arrows to select either OFF or ON and then press the Menu key to lock in the selected value. If OFF is selected there will be no automatic Daylight Savings time adjustment. If On is selected you are taken to the next screen to pick your desired option. Dream GUI Addendum Page 32 S1 Dream Espresso Machine – GUI Addendum Use the Up or Down arrows to select either the European or the American Daylight Savings time Start/Stop dates. Then press the Menu button to lock in the value and return to Menu screen #3. Note that this setting is independent of the Language setting. 7.25 Screen Contrast With the large ½ clear/ ½ dark circle icon displayed and the word CONTRAST showing at the top of the screen, press the Menu button. Use the Up and Down Arrows to cycle through the values on screen. Observer the contrast changes on the LCD panel. Once you have the value you prefer, press the Menu button to return to Menu screen #3. 7.26 Deactivate Group Pressure Front ePanel Display (Plumbed Version Only) With the large “Drop with and X through it “ icon displayed and the word DEACT PRES SENS showing at the top of the screen, press the Menu button. Use the Up or Down arrow keys to select either OFF or ON, then press the Menu key to lock in the selected value. ON means that the group pressure will appear on the front panel display. OFF means that the group pressure does NOT show on the front panel display. 1) It is not obvious why this function would ever be turned off. 2) Tank models do not support on screen group pressure display so this setting is always OFF on those models. Dream GUI Addendum Page 33 S1 Dream Espresso Machine – GUI Addendum 7.27 Set / Change Password With the large Padlock icon displayed and the word PASSWORD showing at the top of the screen, press the Menu button. Use the Up or Down Arrows to select the desired password mode. If you do not want the configuration menu to be password protected set this to OFF. If you want the password protection feature, turn this setting ON to use the current password. If either of these options is selected, pressing the Menu key locks in that value and returns you to Menu screen #3. Selecting Modify and then pressing Menu takes you to the next screen. First you have to enter the existing password before you can change it to a new value. The default password if you have never set one is 1234. If you forget your password use this method to recover. - Go back to the previous screen and turn the password on, even though you don’t know what it is. - Return to the Home screen and re-enter the Menu system - You will be presented with a password entry screen. - Press and hold the Menu button for 5 sec. This will reset the password to 1234 and disable the feature. Then return here to change and re-enable the password, if desired. Next use the Up and Down arrow keys to scroll through the choices for the 1st character. Only the numbers 0-9 are available and only four characters are used so this is really a PIN number more so than a password. Press Menu to lock in the 1st character and advance to the next character. Repeat until you have entered four numbers. After entering the final character and pressing the Menu button the new password is fully saved and you are returned to Menu screen #3. Note that the current state of the password is still the same as when the password function was initially entered. From the first screen in this paragraph, the password function was OFF and it still is. Only the password itself has been changed. To enable the password feature, you must re-enter the Password menu and enable the password. Dream GUI Addendum Page 34 S1 Dream Espresso Machine – GUI Addendum 7.28 Software Update aka Firmware Update Earlier in this document you were shown how to determine your Firmware version number. To find out if there is a newer version and download it, check here: https://www.chriscoffee.com/La-SpazialeS1-Dream-p/s1-dream.htm You should download both the zipped firmware file and the installation instruction manual. Not that the file needs to be unzipped and the S1D_xxxx.bin file placed on the Dream’s SD Card. Even though this link is under the Plumbed version of the Dream and there is also a link to the latest firmware update under the Tank model, the firmware for both machines is identical. Both machines use the same controller board and the same firmware. There is a jumper on the controller board so that the firmware knows which model it is running on. With the large Down Arrow icon displayed and the word SW UPDATE showing at the top of the screen, press the Menu button. On an previously shown screen, the Dream referred to Firmware version 1.19 and this Menu is called the Software Update function. Even though there is a slight difference in the definition of the two terms, LaSpaziale is using them interchangeably. Plug in the SD Card reader with the SD Card containing the firmware update file inserted. Since files with an extension of .bin are usually blocked from FTP downloads or e-mail attachments, new firmware versions are usually zipped. You will need to unzip the file and use a PC connected card reader (this one can’t be used) so that you can unzip the .bin file and copy it to this SD Card. When ready press the Menu/OK button. Next the Dream display lists all .bin files it has found on the card. Use the Up and Down arrows if you have multiple .bin files in order to highlight the correct one, then press the Menu button. A progress bar is then displayed as the new file is copied to the Dream’s flash memory. It was not possible to capture a screen shot of this bar since to process happens so quickly. When the new firmware is successfully loaded, this screen us displayed. Do NOT remove the SD Card or the SD Card Reader until you see this screen. There is NO actual reboot mechanism on the Dream. Reboot = remove the AC plug from the wall, then plug it back in! Dream GUI Addendum Page 35 S1 Dream Espresso Machine – GUI Addendum 7.29 Menu Screen #4 (Last Menu Screen Starting from the first SW Update screen above, press the Down Arrow key. This will take you to the first item on Menu screen #4. Note in the first photo of the next paragraph that there are double left pointing arrows in the upper left corner and no double right pointing arrows in the upper right corner. This indicates screens to the left of this one but no more Menu screens to the right; i.e. this is the last menu of configuration icons. 7.30 Default Setting This screen allows you to reset most machine configurations to their factory defaults. You probably want to do a Backup (Read) operation first to save all your current settings just in case. Performing this operation does NOT impact the serial number, the profile names, or the total shot counts. With the “Large Square with a line in the middle” icon displayed and the word DEFAULT SETTINGS showing at the top of the screen, press the Menu button. The screen asks you to press the Menu/OK button to reset configuration values to their default. If you get to this screen and do NOT want to reset your machine, press either the Up or Down arrows to exit this screen and return to Menu screen #4 7.31 Set Calibration Temperature of Steam Boiler Sensor (Don’t Use) With the large Triangle T icon displayed and the word SET CALIBRAT T showing at the top of the screen, press the Menu button. Dream GUI Addendum Page 36 S1 Dream Espresso Machine – GUI Addendum The Owner’s Manual instructs that this value should only be changed by a trained technician. Apparently this can correct for inaccuracies of the steam boiler temperature sensor. However, the steam boiler temperature is only selected in order to adjust for the desired steam pressure. Therefore, knowledge of the absolute temperature of the boiler is not really required. Only the lower number is adjustable. The top number is the current steam boiler temperature. The lower number acts as an offset to the upper number. The range is:-8F to +8F or -5C-+5C Use the Up or Down Arrow to select the desired correction value, then press Menu to lock it in and return to Menu screen #4 7.32 Full Power (15A/20A Setting) NOTE: If you change this to Full Power be sure you are first connected to a 20A outlet. With the large Double Square icon displayed and the word FULL POWER showing at the top of the screen, press the Menu button. Use the Up or Down arrows to select the desired value, then press the Menu button to lock in the value and return to Menu screen #4. Off = 15A mode. In this mode the steam boiler and the group boiler heater elements will never be switched on simultaneously. On = 20A mode. In this mode the steam boiler and the group boiler heater elements will be switched on simultaneously as required. 7.33 Group Temperature Offset When you pick your desired group boiler temperature in the profile section, the actual water temperature in your portafilter may be slightly different. This feature allows you to enter a negative or positive offset value so that the water in the portafilter matches exactly with the value set. This should be checked and adjusted properly before shipment to you. It takes a fairly expensive Scace device with an accurate digital thermometer to set it properly. Therefore, you should leave this alone unless you know what you are doing. SW version 1.19 is designed so that an Offset of 0F/0C should be about right. Using a Scace the author determined that at value of +1F works best in his machine which is why you see that value in the screenshot below. This works in conjunction with the group temperature setting; i.e. the two settings are additive. You must ensure that this Offset is properly calibrated and that, when combined with the group temperature setting, the water exiting the group always remains well below boiling. Dream GUI Addendum Page 37 S1 Dream Espresso Machine – GUI Addendum With the large Square and Diagonal Arrow icon displayed and the word Offset showing at the top of the screen, press the Menu button. Use the Up and Down arrows to scroll to your desired value, then press the Menu button to lock in the value and return to Menu screen #4. Range of Values: ±10F or ±6C The normal value for 1.19 software is 0. A significant deviation could mean you have a problem with your machine. 7.34 View / Change PID Settings It is NOT recommended that these values be changed from the default shipped values. Note that the values shown in the example below are NOT the default values. The actual default values are: P=300, I=1000, D=10000. When you press and hold the Up or Down arrow keys to change the PID settings, values initially change quickly by ones. After a few seconds they start to change by 10s. Unfortunately, there seems to be an issue in the current 1.19 software so that after several seconds of advancing by 10s all advancement stops. It is then necessary to stop pressing the button for a couple of seconds, then start again. This drastically increases the time it takes to make large changes in values such as D. With the large PID icon displayed and the word PID showing at the top of the screen, press the Menu button. When this screen is initially entered the P value is highlighted. Use the Up or Down Arrows to select the desired value, then press Menu to lock in the value. Then the I value is highlighted. Adjust this to the desired value using the Up or Down Arrow keys, then lock in the value by pressing the Menu button. The D value is now highlighted. Use the Arrow keys to select the desired value, then press the Menu button to lock in that value and return to Menu screen #4. Dream GUI Addendum Page 38 S1 Dream Espresso Machine – GUI Addendum 7.35 Returning to the HOME Screen 1) Using the Up Arrow key either continually press it or else press and hold it down until this screen appears. This is the top level of Menu screen #1. Then press the Menu button to return to the Home Screen. 2) Step back and don’t touch anything for two minutes. The Home Screen will reappear. Dream GUI Addendum Page 39 S1 Dream Espresso Machine – GUI Addendum 8 Read / Write (Backup/Restore) Function Details Chris Coffee Service intended for the Read and Write function to only backup the four machine profiles in order to allowing sharing them on-line with other Dream users. This is why CCS does not currently advertise that this function works nor do they support its use. In reality, it does work but this function backs up the complete machine configuration, not just the profile data. So if you share the backup file with another Dream owner they will completely wipe out their machine’s configuration and replace it with yours. This even includes 15/20A mode setting. This makes this function acceptable for personal backup and/or if you want to make a lot of set up changes and prefer to edit, then upload the file rather than using the menu system. However, sharing the file with other users is strongly discouraged and could be dangerous. Before selecting the Read or Write options plug the SD card reader into the port on the front of the machine with a card installed. 1) Dream Read Both read and write are defined backwards from the way PC/Macs normally define them. In the case of the Dream they are from the vantage point of the Dream. So if you want to write a backup file to the SD card, you use the Read function; i.e. you read the data out of the Dream and write it to the SD card. This creates a file on the SD Card called DREAM_R.csv. Unfortunately, this is a semi-colon delimited file instead of a comma delimited file. Apparently, it’s a European thing. Since they use a comma instead of a decimal point in their numbers, they can’t really use a comma as a delimiter so they opted for a semi-colon rather than the more common alternative of tab as a delimiter. If you want to make this file much easier to read, edit, and resave, you will need to transfer the file on the SD card to a PC/Mac and then use a program such as Microsoft Excel which has an Import Text File option that allows you to specify that semi-colon is the delimiter rather than comma. Here are some things you will notice when you look at the contents of the DREAM_R.csv file: a) If you have entered custom profile names, they don’t show up in this file. Apparently, the profile names are stored on the DREAM in an area of non-erasable flash. This also applies to the password, if set, as well as total shot count values. b) The four lines under User Active are the user four profiles listed in the same order they were entered on the Dream. If the UserActive field = 1 then that row shows the values for a currently defined and active profile. If the UserActive field = 0 then that row shows default values and that profile is inactive. This is the only way to tell which profile’s data aligns with which name other than being able to recognize them from the actual profile contents. c) The serial number of the machine is listed in the file. However, if you change this number it does NOT overwrite the actual machine serial number when reloaded onto the machine. d) You will see that LaSpaziale has an error in the file format in the row that contains the days of the week for the programmable On/Off times. There is an extra semicolon between each Dream GUI Addendum Page 40 S1 Dream Espresso Machine – GUI Addendum day so that the days don’t line up properly in the file. DO NOT FIX THIS. Apparently, LaSpaziale has the same error in the code when it is read back into the Dream so this error needs to remain in the file. e) The machine date and time are entered in the DREAM_R.csv file at the instant it is created. If you later upload this file back to the Dream, the original date and time WILL overwrite the current date and time so that you will need to correct them. f) If you want to reload the edited contents of the file to your machine or just reload it to get to a known previous state after making changes via the GUI, you have to resave the file in semi-colon delimited format. It is not easy to do this in Excel 2010. You mileage may vary if you are using a different program. The easiest method is to save it to a csv file in Excel which creates a comma delimited file. Then open the file in a text editor (Notepad or Wordpad in Windows work fine). Next do a “find and replace all” function to change all commas to semi-colons. LASTLY, SAVE THE FILE AS DREAM_W.CSV. This is the only file name the DREAM Write function will recognize. 2) DREAM Write The Write menu option on the Dream reads the DREAM_W.CSV file from the SD card and writes it to DREAM memory. As noted above, after this file is loaded, you will need to update the time and date. The Write function will only restore the file named DREAM_W.CSV so make sure this file exists on your SD Card. You cannot just edit, save, and restore the DREAM_R.CSV file without renaming it to DREAM_W.CSV first. On the next page is an example of the DREAM_R.CSV file that has been successfully imported to Excel. Note that there are two separate column entries for C and F for steam and group boiler temperatures as well as for the Offset. The Dream does really keep two sets of books. So if you change from American (F mode) to British or Italian (C) modes you will get the last saved value from that mode. For example 94C=201F. On a LaMarzocco GS/3, if set to 94C and you switch to F mode, you always get 201F. This is not necessarily the case on the Dream. If set to 94C and you switch to F mode you get whatever the saved value was from the last time you were in F mode which may or may not be 201F. Note that this example file does list 94C and 201F in both columns so in this case you will get the same reading if you switch back and forth but only because they are set to the same values. They could just as well be different values. There is a similar situation for the setting that provides an alarm after a preset amount of water passes through the machine signaling time to change filters. There is a column entry for gallons and one for liters. Dream GUI Addendum Page 41 S1 Dream Espresso Machine – GUI Addendum 8.1 Example of converted DREAM_R.CSV file Dream GUI Addendum Page 42 S1 Dream Espresso Machine – GUI Addendum 8.2 Raw Dream_R.csv file Dream GUI Addendum Page 43