1
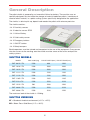
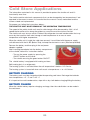
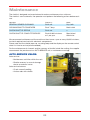
Issue No.1 January 2013
Pallet Shuttle
USER GUIDE
Workspace Creation
Call: 0800 975 4933
Contents
Introduction
3
General Description
4
Datasheet & Rack Specification
5
Packaging & Handling
6
Pallet Structure
6
Stndard Equipment
6
Warrenty
7
Battery Detail
8
Battery Pack Quick Guide
9
Shuttle Power-on
10
Placing the Shuttle into the Channel
10
Remote Control Overview
11
Remote Control Operation
12
Remote Control Menu
Automatic Commands
Other Commands
Manual Commands
14
Safety Bumpers
16
Shuttle Functions
Standard Functions
Optional Functions
16
Cold Store Applications
20
Maintenance
22
Standards
23
Moresecure understands the information in this leaflet is correct at the date of publication. All reasonable care has been taken to make it
as complete and accurate as possible, no liability can be accepted for any inaccuracies or omissions.
Introduction
CAUTION:
Read this manual before installing and using the Pallet shuttle.
The information contained in this manual must be followed and is intended as a guide to
protect people, property and provide a safe working area when using the shuttle device.
The pallet shuttle contains components that can be damaged if used incorrectly.
For any questions regarding the functionality of the shuttle system, contact your supplier
service & support department.
The shuttle must only be used by personnel who have received training from the supplier.
The shuttle must be operated in line with the details in this manual.
RECOMMENDATIONS:
a) Before using the shuttle carefully read the operating instructions supplied.
b) While using the shuttle, the operator using the system must be the only
person in the working area.
c) The radio control unit must be charged for at least 12 hours
before initial use to avoid potentially damaging the battery.
d) Charge the shuttles lithium battery for a minimum of 5.5 hours.
e) Do not open the shuttle main body for any reason without permission from
the supplier.
f)
There are no user servicable parts inside the main body of the shuttle.
g) The standard warranty period is 12 months.
h) If the shuttles lithium battery remains unused, re-charge after one month for
a minimum of 5.5 hours.
i)
The shuttle is suitable for use in dry, dust free environments.
THE MANUFACTURER IS NOT RESPONSIBLE FOR ANY DAMAGE OR FAILURE TO
CAUSED BY IMPROPER OR INCORRECT USE OF THE EQUIPMENT.
3
General Description
The pallet shuttle is powered by an innovative lithium ion battery. The machine runs on
specially designed rails that allow the storage of material loaded on pallets / containers of
wood or other material, in a pallet racking system specifically designed for the application.
The shuttle, is able to pick up, deposit and reorder the pallets with extreme precision.
The shuttle contains:
- Nr. 2 Proximity sensors
- Nr. 2 Inductive sensor STOP
- Nr. 1 Lithium Battery
- Nr. 2 Pallet safety sensor
- Nr. 2 Emergency buttons
- Nr. 1 ON/OFF button
- Nr. 2 Safety bumpers
Shuttle operators must be trained and competent in the use of the equipment. Every person
who has access to the working area the shuttle must be aware of the active and passive
safety systems.
SHUTTLE MODELS
MODEL
MAX LOAD (Kg)
PALLET DEPTH(mm) PALLET FRONT(mm)
SAT. 0812. LTH
1500
800
1200
SAT. 1010. LTH
1500
1000
1000
SAT. 1012. LTH
1500
1000
1200
SAT. 1111. LTH
1500
1100
1100
SAT. 1112. LTH
1500
1100
1200
SAT. 1165. LTH
1500
1165
1165
SAT.1210. LTH
1500
1220
1016
SAT. 1212. LTH
500
1200
1200
SAT. 4840. LTH
1500
1220
1016
SAT. 4048. LTH
1500
1016
1220
The maximum load of the shuttle is 1.500kg.
SHUTTLE VERSIONS
ST = Standard: Ambient environment (+0°C a +45°C).
BZ = Below Zero: Cold Store (-1°C a -30°C).
4
Datasheet
PERFORMANCE
MOTORS
Speed with load
30-33 m/min
Running
700 W
Speed empty
63-66 m/min
Lifting
400 W
10 -16 h
REMOTE CONTROL
Working range
Kind
BATTERY
RF
Ion MNC
Display
LED
Voltage
24V
Language
Capacity
53 Ah
ENG-CN-RUDE-PLFR
Weight
14Kg
Protection
IP65
Charger
240/50 Vac/Hz
Power supply
Lithium
Charging time
80% 3 h
Charging time
100% 5,5
Batteries quantity
1
Battery life Min.
900 charges
Kind
COLOUR
Chassis: RAL 6032 Cover: RAL 7035
5
Battery
500mAh
TX consumption
55mA
RX consumption
50mA
Stand-by function
3min.
Battery duration
Continuous
10h-22h
Packaging & Handling
The shuttle is delivered packaged in a fumigated wooden crate to meet international standards.
- Take care when opening the box.
- Only move the shuttle with a forklift capable of lifting the weight.
- Maximum weight of the shuttle (including case) = approx. 350kg
- The shuttle, is delivered wrapped in a
protective film or barrier bag which can create
condensation and moisture if left in for a long
period of time.
- Upon receipt, remove the shuttle unit
from the wooden box.
- In order to avoid damage to electronics and
mechanical parts, take care when fitting the
components and charging the batteries of the
shuttle and the Remote Control.
Pallet Structure
The shuttle is designed to transport wooden pallets as standard.
Note: - The shuttle is capable of carrying different
types of loads, such as steel and plastic pallets.
The shuttle system will need to be designed
specifically for these applications prior to the
project and upon submission of engineering
drawings / sample c / o the manufacturer
Automha (for testing system functionality).
It is important that all the pallets have a central
block as shown.
Standard Equipment
Each Machine
- N° 1 LED Remote control
- N° 1 Lithium battery
- N° 2 Eyebolts
- N° 1 Lithium battery charging station
- N° 1 User’s manual
- N° 1 Wooden box
6
Warranty - 12 months
All mechanical and electronic equipment is covered by a 12 months warranty effective from
the shipping date. Labour, transport and accommodation costs are chargeable.
During the warranty period we will repair the machine free of charge.
Contact your supplier for details.
Any other indemnity is excluded, and any direct or indirect damage of any nature and type,
included temporary unavailability of the machine, cannot be claimed.
Warranty does not apply to components not used according to the instruction given by the
supplier.
Incorrect use will invalidate the warranty.
The pallet shuttle unit should be serviced after 12 months or 60.000 mission which ever
comes first. (Additional cost)
7
Battery Detail
The shuttle battery uses Lithium technology with high performance and low weight against
standard AGM batteries with the same capacity.
Capacity 53Ah shuttle battery: - weight 14kg against 40kg of AGM units.
The battery contains:
Nr. 2 warranty seals
Nr. 1 Shock sensor
Nr. 1 START button
IS STRICTLY FORBIDDEN TO OPEN THE COVER OF THE BATTERY, BREAKING THE
SEALS, INVALIDATES THE WARRANTY.
- Do not tamper with the casing
- Do not remove seals
- Do not open the cover for any reason
- Do not use as an external power supply for other purposes
- The battery pack is fitted within an impact indicator, when activated the warranty is void.
- When unused, the battery pack loses 3% of its capacity per month when less than 21V,
if more than 21V - 1% per month.
- Always charge the battery every month if unused for a minimum of 5.5 hours
- Remove the battery from the charger once charging is complete.
- Do not carry the battery inside the cab of the truck for any reason, carry the battery
by hand.
A unique feature of this battery pack is the absence of a “memory effect”, so it is possible,
in an emergency, to recharge for less than the optimum time for charging.
The battery pack can be on charge for more than 5.5 hours, the charger automatically stops
charging when the battery level reaches 100%.
Please note that correct fitting of the battery is important. Incorrect positioning of the
connectors leading to their damage will invalidate the warranty.
If the shuttle is not to be used for a prolonged period of time, remove the battery from the
shuttle unit and keep at room temperature and free of moisture.
8
Battery Pack Quick Guide
INSERTING THE BATTERY & STARTING THE SHUTTLE
- Insert the battery pack into the shuttle
- Press and hold the START button on the cover of the battery (min.7sec)
- Turn on the shuttle by pressing the button (ON / OFF) on the front of the shuttle
- Release the START button on the cover of the battery
TURNING OFF THE BATTERY & REMOVING FROM THE
SHUTTLE
- Turn off the shuttle by pressing the ON / OFF button on the front of the shuttle
- Extract the battery pack from the shuttle
BATTERY CHARGE
Charge the battery immediately as soon as the battery is low
- Insert the battery into the battery charger compartment
- Turn on the battery charger using 0-1 key.
- The CHG LED blinks
- When the CHG LED stops flashing, the battery is fully charged
TURNING OFF THE BATTERY CHARGER & REMOVING THE
BATTERY
- Turn off the charger by pressing the button 0-1
- Remove the battery from the charger compartment
CHECK THE ALARMS OF THE CHARGER
- Insert the battery into the charging station
- Wait a minimum of 7 seconds and check if any of the following alarms are displayed:
VA
VTC
Description
OFF
OFF
No alarm
ON
OFF
Battery level is low
ON
OFF
Battery temperature is too high
ON
ON
Get beyond the minimum
BATTERY PACK RECHARGING
Always turn off the charger before removing the battery.
Do not connect the charger to the mains without the battery inserted.
Use only the charger supplied by the manufacturer, DO NOT use other similar chargers.
Do not leave the battery pack in the charger without power on.
The location of the battery charging station is important, it must be at a low humidity and at
a temperature +5 ° C to +45 ° C.
9
Shuttle Power-on
Insert the battery pack into the shuttle battery compartment
Press and hold the start button on the cover of the battery for 7 seconds, continue to hold
the START button down and press the ON / OFF on the front of the shuttle.
Once the shuttle is activated (the on / off button is illuminated) you can release the START
button on the cover of the battery.
The shuttle power button ON / OFF will flash for approx. 3/4 seconds, after which the
shuttle is ready for use.
While the button is flashing, the shuttle carries out an automatic check of all electrical
controls and software and run diagnostic testing of all of the safety modules.
Placing the shuttle into a
channel
The operator must ensure that the channel
where the shuttle is located is clear.
Lift the shuttle with a suitable forklift truck,
insert the forks under the shuttle and lift the
satellite by the guides on the bottom of unit.
Lift the shuttle ensuring the ON / OFF
button is towards the operator of the forklift
and place it in the racking.
The forklift operator/controller of the shuttle
unit must always ensure the lane channel
end stop is present; the minimum size
60x70mm to prevent accidental falls from
pallet racking due to external causes and /
or abnormal situations due to incorrect
handling of the shuttle.
Care must be taken at all times when
handling the shuttle unit.
When loaded with a pallet the shuttle must
never be moved with a fork lift truck.
The shuttle unit will not accept any input for
the remote control when it is outside the
lane channel on a forklift, in automatic or in
manual mode for safety reasons.
All personnel must be clear of the area
where the forklift and shuttle are operating.
Do not enter any part of a system where the
shuttle is operating.
10
Remote Control Overview
Antenna
The screen on the Remote control
displays the status.
READY
LED Display
Pallet In
Compacting
Stop
Forward
Lower Down
Ready to be used
The remote control is now ready to
be used.
Pallet Out
Continuous
Unloading
Each remote control can command
up to 4 machines at the same time
by selecting the appropriate number
(1 to 4).
Lift Up
Backward
shuttle
Number
Management
Menu
Horn
Software
Programming
Manual Functions - See Page 13
(Only to be used in exceptional
circumstances)
WARNINGS
- Do not tamper with the casing of the remote control.
- Any evidence of tampering will invalidate the warranty.
- Do not allow the remote control to come into contact with water / liquid.
- The battery in the remote control can only be purchased from the manufacturer.
- Charge the remote control for 12 hours before its first use
- Charge the remote control at room temperature
- Recharge the transmitter for a minimum of 12 hours each charging
- In the event of any problems, contact the supplier.
THE STOP BUTTON (RED) IS ALWAYS ACTIVATE ON THE REMOTE CONTROL
BATTERY DATA
- Typical Battery use at +20C in continuous TX-RX: min 16h max 22h
- Typical Battery use at -30C in continuous TX-RX: min 10h max 14h
- Typical Battery use at +20C in stand-by: 43 days
All the tests and checks based on laboratory findings.
REMOTE CONTROL FUNCTIONALITY
The normal operating condition involves turning on the remote signal for 30" as a result of
pressing a button and the signal remains active as long as the button is pressed. After a
period of inactivity of 30" the remote signal will return to standby.
11
Remote Control Operation
AUTOMATIC COMMANDS
Commands can be sent simultaneously to multiple shuttle units.
Command Menu
Description
IN
Load.
OUT
Unload
Continuous unloading.
Compacting. Optional (not available with multi pallet applications)
STOP
Interrupt all cycles
OTHER COMMANDS
Command Menu
Description
HORN
Switch on the siren on the machine
MENU
Management menu
F
Software programming
1, 2, 3, 4
Allows the selection of a specific shuttle unit with which
you want to communicate, the command will be confirmed by the
LED next to the number.
To make a selection you must hold down the button for 5 seconds
until the LED lights.
To disconnect a selection hold again for 5 seconds until LED
button goes out.
The remote control remembers the selected shuttle ID
until it is deactivated.
12
MANUAL COMMANDS
Only to be used in exceptional circumstances
Commands can be sent only to a single shuttle in manual mode.
While in manual handling mode all the security checks are not enabled.
The supplier / manufacturer is not responsible for damage to property / persons caused
by the operator or conductor in manual handling.
While in manual handling the shuttle recognizes only the end of the aisle and does not
recognize the presence of any pallets present in the channel lane.
Command Menu
Description
UP
Lift UP.
DOWN
Lower DOWN.
FWD
Forward.
BKW
Backward.
FWD + UP
Forward FAST
BKW + UP
Backward FAST
13
Remote Control Menu
From the home screen, press the MENU key to access the administration menu.
With FORWARD and BACKWARD buttons you can scroll through the items.
In “menu management” is not possible to send commands to automatically or manually
operate the shuttle unit.
To enter and exit the various items you must press the MENU key to exit the MENU you
must select the EXIT MENU on the screen.
REMOTE CONTROL MENU
Command Menu
Description
READ STATUS
Shows the shuttle unit status
READ ALARMS
Allows visibility of and reset of the shuttle alarms
READ DATA
Allows the operator to query the machine
READ MISSION
Shows the number of missions done by the machine
WRITE DISTANCE
Allows the operator to change the gap between each pallet
READ PALLETS
Allow the operator to activate and deactivate the inventory function
(optional)
EXIT MENU
Allows the operator to exit from the menu
Until the administration menu is exited, the shuttle can not be used for manual or automatic
tasks.
14
ALARMS DESCRIPTION
Alarm
Description
RUN MOTOR TEMP
Running motor temperature more than 65°C
BATTERY TEMP ALM Battery temperature signal
BATTERY LOW VOLT
Battery empty
FUSE F1 FAULT
Fuse F1 interrupt
FUSE F2 FAULT
Fuse F2 interrupt
ACTIVE BUMPER
Safety bumper has been activate d
ENCODER FAULT
Encoder does not read correctly
OBSTACLE
Traction control system has been activated
BATTERY LOW
Battery voltage level low
BATTERY OVER
Battery voltage lever over the standard signal
MAX MOTOR TEMP
Running motor temperature over the safety range >= 75°C
CLEAN SENSORS
Please clean the sensors. Every 3.000 missions the shuttle will
advise the operator to clean the sensors.
PALLET HEAVY
The UDL weight is more than (>1.500kg)
SERVICE
Every 60.000 missions the shuttle will advise the operator to have
the unit serviced (suggested)
CHECK DT20
Please check the functionality of the DT20 sensor
When the battery voltage reaches the threshold of 23.5V the shuttle warns us with a sound
(5 seconds siren, 20 seconds silence).
When the battery voltage reaches the threshold of 22.8V the shuttle returns to H1 (Home1:
front warehouse), the unit will no longer accept missions and will automatically turn off after
1 minute. At each attempt to restart, the shuttle will remember that the battery is low and
then turn off again after 1 minute.
To restore the normal situation, the battery voltage must be greater than 25V.
HOW TO RESET AN ALARM
When an alarm has been activated, the shuttle alerts the operator through a short and
steady sound until the alarm is reset.
To reset an alarm, go into the menu item in the list of the remote control READ ALARMS.
Entering and exiting the command menu all the alarms are reset.
If entering the READ ALARMS menu item you can not reset the alarm, contact the supplier.
15
Safety Bumpers
- Once the safety bumpers have been activated, the shuttle will sound an alarm
- Once the the shuttle alarm has been activated it will wait 60 seconds, after which it will
resume the mission.
- In an emergency, the red mushroom emergency stop button on the front and rear of all
shuttle units can be used.
Shuttle Functions
STANDARD FUNCTIONS
When the shuttle unit receives a mission it automatically beeps for 1 second to alert the
operator that the mission has been accepted.
Command Menu
Description
LOAD
The load function is activated by pressing the IN button on
the remote control. At any time the STOP button on the
remote control can be pressed to stop the movement of
the shuttle during the mission immediately.
UNLOAD
Legend: Home1: front warehouse / Home2: rear warehouse
These descriptions identify the opposite ends of the
warehouse. The unload function is activated by pressing the
OUT button on the remote control. You can not change the
function of unloading pallets already set.
CONTINUOUS UNLOADING
The Continuous Unloading function is activated by pressing
the continuous unload button on the remote control.
This feature allows the entire lane of a channel to be
unloaded without having to continually press the OUT button
for each pallet in the channel.
The function of continuous unloading is programmed to work
in the following way:
- the shuttle picks up the first pallet and takes it to the
home1 location.
- The shuttle waits for the user to pick up the pallet
before proceeding with the mission.
- Remove the pallet in the home1 location, subsequently
the shuttle will start to pick up the pallet next and so on.
16
STANDARD FUNCTIONS continued
Command Menu
Description
DIST
Gap between pallets. Minimum 20mm up to maximum 150mm.
The WRITE DISTANCE function on the menu allows the
operator to adjust the distance between the pallets within the
channel.
The distance between the pallets is based on the actual pallet
distance rather than the load. This distance does not allow for
any over hang of the load over the ends of the pallet. The
supplier assumes no responsibility for damage to goods due
to improper use of the function or consequences for plant
and equipment
MIX
MANUAL COMMANDS
Missions counter.
Only use this function in exceptional cases.
Take care when operating the shuttle manually. The operator
is responsible for any damage to the goods and / or machine,
not all controls are activated during manual handling, for any
questions please contact the supplier.
OPTIONAL FUNCTIONS
Command Menu
Description
COMPACTING “PUSH”
THIS FUNCTION IS NOT AVAILABLE WITH MULTI PALLET
Condition of operation of the function:
FIFO (First in first out, channel operation from both sides)
This function rearranges the position of the pallets in the
channel storage.
Start conditions:
The last 3 positions of the channel must be free
To activate this function: press the button on the remote control.
NOTE: During the function of COMPACTING PUSH, the
distances between the pallets selected by the remote control
may vary by a few millimetres and not be complied with.
The shuttle assumes no responsibility for distances observed.
17
OPTIONAL FUNCTIONS continued
Command Menu
Description
COMPACTING “PULL”
FUNCTION IS NOT AVAILABLE WITH MULTI PALLET
Condition of operation of the function:
FIFO (First in first out, channel operation from both sides)
This function rearranges the position of the pallets in the
channel storage.
Start conditions:
The first 3 positions of the shelf must be free
To activate this function: press the button on the remote control
UNLOAD CONTINUOUS “PLUS” The function Continuous Unload "Plus" allows you to speed up
the unloading of the entire channel with multiple fork lift truck
operators.
This function will replace the standard function of continuous
unload.
The function can be interrupted at any time by pressing the red
STOP button on the remote control.
To activate this function: press the button for continuous unload of the remote control
MULTI-PALLET
FUNCTION IS NOT AVAILABLE WITH COMPACTING
Two versions available:
- MULTI-FIFO
- MULTI-LIFO
Where enabled, the Multi-pallet function allows the storage,
in the individual channels of a warehouse, different size
pallets, namely:
- 800mm x 1200mm
- 1000mm x 1200mm
- 1200mm x 1200mm
Press IN on the remote control to load
Press OUT on the remote control to unload
ANTI-COLLISION
It is possible to use 2 shuttle units in the same channel,
allowing pallets to be handled in both directions.
To insert 2 shuttle units in the same channel the anti-collision
function will be required. There are potential situations where
the two shuttle units may travel too close to each other when
used within the lane. The units will sound an alarm, warning the
operator of the risk of collision between the two devices. The
anti-collision function requires modifications to both the
hardware and software.
18
OPTIONAL FUNCTIONS continued
Command Menu
Description
INVENTORY
The inventory function allows the number of pallets stored in
the warehouse to be counted.
The feature is optional and can be activated in the menu of
the remote control, item READ PALLET. With FWD and BKW
can enable and disable this function.
Once the administration menu is exited, press the IN key to
start counting.
The number of pallets is displayed in the menu management.
IMPORTANT: Once activated, the shuttle will continue to count the pallets
in each channel until the counting function is deactivated
within the Read Menu Pallet PALLET.
The shuttle is accurate and reliable for counting pallets,
errors are due to structural conditions of pallets moved.
The margin of error is ± 1-2 pallets. (Error due to the
structure of the pallet).
The supplier is not responsible for any inaccurate counting
of pallets.
IN CONTINUOUS
The continuous load function allows the operator to speed up
the operations of loading material into the channel.
To activate this function: press the IN button on the remote control.
The shuttle will recognize in automatic mode, the presence of
the pallet in H1, in case of any pallets movements, the Automha
shuttle will wait 10 seconds after stopping the mission and will
need to be reactivated press the button on the remote control.
The continuous load function when activated it replaces the
function of normal load.
19
Cold Store Applications
The information contained in this manual is provided to protect the shuttle unit and it’s
functionality over time.
The shuttle contains electronic components that can be damaged by low temperatures if not
operated in the correct manner. It’s essential that the manual is read, understood and the
actions stated are implemented.
For proper use, follow the instructions below: THE SHUTTLE UNIT MUST REMAIN AT THE OPERATING TEMPERATURE
The speed of the pallet shuttle unit used in cold storage will be decreased by 20%, at full
speed the formation of ice along the guide may cause the machine to lose traction.
The shuttle unit must always remain inside of the refrigerator to avoid condensation that may
occur by the transition from cold storage at cold temperature to an area at room
temperature with higher temperature.
When the shuttle unit is inside the cold store unused, it must fitted with the power supply
unit delivered with the kit BZ (Below Zero), to keep the electronics warm. (Red box provided)
Remove the battery and then plug in the red power
adapter supplied:
After inserting the adapter into the battery compartment
of the shuttle, follow the instructions below:
- Turn on the power supply by pressing the
ON/OFF button on the cover.
- Turn shuttle on using the green button ON/OFF
The shuttle battery is equipped with heating resistors.
Self-heating (only in a refrigerator):
The heating system is activated when the cell temperature is below +5 C Celsius.
The heating system is turned off when cells reach a temperature> = to +10 Celsius.
BATTERY CHARGING
The battery pack must be charged outside the operating cold store. Recharge the batteries
from temperature> +5 ° C and <+45 ° C
It is important to avoid condensation, wipe with a dry cloth before charging/fitting the battery
BATTERY CHANGE
When the shuttle battery requires charging, recharge, then the substitution can be made in
the cold room.
20
SUMMARY
Inside the
freezer
Pre-cell
(> +5°C)
Temperature
(> +15°C)
Ambient
Environment
The shuttle must remain
active in work or supplied
from the external red box
Battery
charging
Remote control
charging
Battery
storage
Recharging not allowed
Maintenance
Battery charging
Remote control
storage
Battery substitution
Yes
Yes
Yes
WARNINGS
Moving the machine from the cold store to an area at room temperature and vice versa can
cause condensation due to thermal shock.
This must be avoided!
If this has to be done, pass the unit through the pre-cell refrigerator, thoroughly dry to avoid
the formation of ice on the optics of the sensor when within the cell.
21
Maintenance
The shuttle is designed and manufactured to reduce maintenance to a minimum.
The shuttle is semi-automatic, the operator must perform the following actions before each
use.
Operation
Frequency
Mode
GENERAL SENSOR CLEANING
Each use
Dry cloth
CLEANING SHUTTLE SURFACES
Each 7 days
Moist cloth
CHECK SHUTTLE STATUS
Each use
x
CHECK SHUTTLE COMPLETE SERVICE
Each 60.000 missions
or 1 per year
Specialised
technician
We recommend maintenance of the machine at least once a year or every 60,000 missions,
to check required mechanical & electronic components.
Please note that the shuttle pops up a warning beep and the display on the remote control
when it's time to service (recommended).
For the maintenance of channels and for recovery of shuttle inside the racking, the supplier
recommends the purchase of an AUTO-SERVICE unit, a maintenance carriage.
AUTO-SERVICE USAGE:
Auto-service:- Maintenance activities within the rack
- Shuttle recovery in case of damage
due to an external cause
Auto-service features:
- Crank manual handling
- Anchor rods with shuttle
22
Standards
SHUTTLE STANDARD
Number ref.
Description
2006/42
Machine Directive
2004/108
Low Voltage Directive
2006/95
Electro-Magnetic Compatibility Directive
EN ISO 12100-1:2003
Machine safety – Basic principles, main planning principles –
Part 1 : Basic terminology, method (ISO 12100-1: 2003)
EN ISO 12100-2:2003
Machine safety – Basic principles, main planning principles
Part 2: technical principles (ISO 12100-1: 2003)
EN 60204.1
Machine safety – Machines electric equipment
EN 13849-1
Machine safety – Parts of the controlling system related to
safety
EN 13850
Machine safety – Emergency stop device, functional
aspects-Planning principles
CE
CE Conformity
AUTOMHA SRL STANDARDS
Number ref.
Description
ISO 14001
Environmental management Systems
OHSAS 18001
Health and Safety
2006/95
Electro-Magnetic Compatibility Directive
UNI EN ISO 9001:2000
Machine safety – Basic principles, main planning principles –
Part 1 : Basic terminology, method (ISO 12100-1: 2003)
The Automha shuttle is manufactured in ITALY.
23
Commercial shelving
Mobile shelving
Stockroom shelving
Pallet racking
Square tube
Small parts storage
Multi Tier shelving
Personal storage
Commercial storage
Workspace Creation
Tel: 0800 975 4933
Certificate No. FM 09409
Member Company
Mezzanine Floors
Email: [email protected]
Steel Partitions
Pallet Racking
Web: www.avantauk.com
Shelving Systems
Workplace Equipment
Office Interiors
The information contained in this leaflet was accepted as correct at the date of publication. Although all reasonable care has been taken to make it
as complete and accurate as possible, no liability can be accepted for any inaccuracies or omissions. E + OE.
Avanta UK Ltd • Unit B1 • Astra Park • Parkside Lane • Leeds • West Yorkshire • LS11 5SZ
MS/AutomhaShuttle/January13
For further information on Moresecure products, please contact your local distributor: