Download Insupad English user manual
Transcript
InsuPad® User Manual
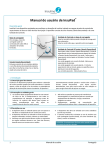
System overview
The InsuPad is designed to improve the delivery of injected insulin into the blood by controlled warming of the area
which surrounds the point of injection. The device consists of a Disposable Fenster and a Control Unit.
Charger Base
Control Unit in Charger Base
The charger base can
be connected by the
attached USB cable to
the power adapter
supplied for charging.
A red light indicates when charging is on; A green light indicates
that the device is fully charged.
Control Unit & Disposable Fenster
To inject, open the Disposable Fenster. The warming cycle will
start automatically after closing the Disposable Fenster.
Green light - Indicates warming will start after closing the
Disposable Fenster.
Green light shuts off in closed state- indicates that warming has
started.
Green light shuts off in open state – warming cycle will not
start, device was open too long (>60sec).
Blinking red light - indicates low battery.
Disposable Fenster
This part consists of a plastic cradle and
biocompatible adhesive tape, intended for
attaching the InsuPad to the body. When
opened, an injection area of 2x4 cm is
revealed.
1. Introduction
1.1 General System Description
The InsuPad device is designed to improve the delivery
of insulin injected into the subcutaneous tissue. The
system warms the insulin injection site in order to speed
up the rate of insulin absorption into the blood system
from the injection site. The device is automatically
activated by opening and closing of the Disposable
Fenster when insulin is injected by the user. This is
typically done just before a meal or to correct a high
blood
glucose
level.
1.2 General Precautions and Warnings
1. Users of the device should read this manual in its entirety
and become thoroughly familiar with all its safety
requirements and operating procedures before using the
device. The user should not make adjustments or perform
procedures other than those specified herein.
1.3 Restrictions on Usens
on Use
1. The device should be used by only one user and should
not be transferred from one user to another.
2. The device should not be used over inflamed, sensitive,
broken or wounded skin.
3. Patients with sensitive skin should check for evidence of
skin reaction during use. In case this happens please
contact your physician.
1
2. Do not operate the unit in the presence of electromagnetic
interference. Interference may be caused by electrosurgery or diathermy equipment, magnetic resonance
imaging or other equipment.
3. Portable and mobile radio frequency communications
equipment may affect operation of the device.
4. The device should not be used with drugs other than
insulin .
5. The InsuPad System is not intended for use with long acting
insulin (basal insulin), such as Ultralente (U), Lantus,
Levemir or Detemir.
CAUTION: The device should not be dropped or handled
roughly.
User Manual
English
1.4 Use of Non-Approved Components
Use Insuline authorized components only. The use of non-authorized components with the system may result
in patient injury and/or damage to the system.
1.5 Indications
The InsuPad is intended for use in type I and type II insulin
dependent diabetes mellitus patients, 12 years old and above,
on therapy with regular multiple daily injections of short-acting
mealtime insulin. This device should not be used without
consulting a physician. In particular, consult your physician in
the following cases:
1.
Excessive fibrosis, lipohypertrophy or eczema at injection
sites;
Known gastroparesis or enteroparesis;
Unstable chronic disease other than diabetes (e.g. unstable
angina pectoris, renal disease(;
Any known life-threatening disease;
Pregnant or lactating women;
Known allergies to wound dressing;
Persistence skin reaction following use of the device (e.g.
skin allergy).
2.
3.
4.
5.
6.
7.
1.6 Potential Adverse Reactions
1. Skin reaction at the injection site may include irritation,
infection and, in rare cases, a lesion appearing like a mild
burn.
2.
Skin hematoma at the injection site.
2. System Description
2.1 Disposable Fenster
The Disposable Fenster (see figure 1) includes
two parts :
1. A plastic cradle for connecting the Control Unit to the
Disposable Fenster.
2. Biocompatible adhesive tape for attaching the Disposable
Fenster to the body.
The Disposable Fenster has an opening within which the
insulin injections are carried out. The opening of 2x4 cm is
large enough to allow multiple injections to be carried out
comfortably without having to use the same injection site
twice.
The adhesive tape is medical-grade biocompatible (very skincompatible) tape.
It is strong enough to hold the pad in place for one day and
can withstand water applied to it, such as in a shower.
Figure 1: Disposable Fenster which includes plastic frame and a
biocompatible adhesive layer
2.2 Control Unit
The Control Unit controls and monitors all operational aspects
Instructions for Use - for detailed information). The Control
of the system. The Control Unit includes a warming element, a
Unit also includes a mechanism enabling the warming process
thermistor for temperature monitoring, an electronic circuit
to be switched on and off automatically. This mechanism is
and a rechargeable battery. It also includes two indicator
transparent to the user and is activated during normal
lights: a green one to indicate normal operation and a red one
operation of the device.
Figure 2: The Control
to indicate the battery status (please refer to section 3 Unit connected to the
The figure below shows the Control Unit connected to the Disposable Fenster.
Disposable Fenster
2.3 Charger Base and Power Adapter
The Charging Unit is intended for charging the rechargeable
battery inside the Control Unit. It includes a Charger Base
(Figure 3) to which the Control Unit is attached and Power
Adapter (Figure 4) connected by a USB cable extending from
the Charger Base. The device cannot be used while charging.
The shape of the Charger Base allows for a simple connection
between the Control Unit and the Charger Base.
Figure 3: The Charger
Base with the Control Unit
2
Figure 4: Power Adapter
User Manual
English
3. Instructions for Use
3.1. System signals
The Control Unit has two indicators which are used to provide information to the user. Below find all the indicators’ statuses:
Green indicator blinks for a few seconds when opening Warming cycle is “inactive”. Normal operation. If the Disposable
the Disposable Fenster
Fenster is closed during this phase NO warming cycle is triggered.
Green indicator is constantly on after opening the
Disposable Fenster.
Green indicator goes off AFTER closing the Disposable
Fenster.
Green indicator goes off BEFORE closing the Disposable
Fenster
Green indicator is constantly on while the unit is in the
Charger Base
Red indicator blinks while the unit is NOT in the Charger
Base
Red indicator is constantly on while the unit is in the
Charger Base.
Red indicator blinks while the unit is in the Charger Base.
The InsuPad is “active” and has to be closed within approximately 60
seconds in order to trigger the warming cycle.
Warming cycle has been activated. Normal operation.
If the green indicator goes off while the Disposable Fenster is opened,
NO warming cycle will be triggered after closing. In order to trigger a
new warming cycle the InsuPad has to be closed, re-opened and
closed again.
Normal operation. The unit is fully charged.
Low Battery. Charging is needed.
Normal operation up to 4 hours. The unit is being charged.
Device error. Contact support.
3.2. Description of the Procedure
1. Remove a fully charged Control Unit from the Charger Base
(the charging takes approximately 1.5 -2 hours).
2. Before use, clean the Control Unit with a wet wipe. Choose
a location for daily injections, avoiding the previous day's
locations. Change the injection site on a daily basis. Swab
the skin at the chosen InsuPad location. Wait until the skin
is dry.
3. Connect the Control Unit to the Disposable Fenster, making
sure you hear the “snap in” sound. Close the Disposable
Fenster and ensure that the Control Unit sits flat on the
Disposable Fenster.
4. Remove the protective foil covering the Disposable Fenster
adhesive by pulling at the designated end. Fix the device
onto the skin at the selected dry site.
5. Make sure that the unit is well attached to the skin. Press
against the Control Unit with one finger and wrap another
finger around the adhesive to ensure proper attachment to
the skin.
6. To open the unit before injection, press and hold the back
of the Control Unit with one finger, while pressing the front
protrusion of the Disposable Fenster with another finger.
The unit opens to reveal an area of skin. This is the injection
area (the green indicator blinks for a few seconds before it
changes to constant green light).
7. Immediately inject at one position within the area of the
Disposable Fenster, avoiding any previous injection sites.
Apply further daily injections at different locations within
the Disposable Fenster. After injection, immediately close the
Disposable Fenster in order to start the warming cycle. (The
indicators of the InsuPad should be constantly green at the
time the InsuPad is closed after injection). If the green
indicator goes off while the Disposable Fenster is still open,
the InsuPad has to be closed, re-opened after a few seconds
and re-closed again when the indicator is constantly green.
Only then the warming cycle is activated. The duration of one
warming cycle, for each activation, is 50 minutes. Warming
starts and stops automatically. The warming is gentle and
might not even be felt.
8. One hour after the last bolus injection for the day or when
the Control Unit’s red indicator light is on, detach the
Disposable Fenster from the skin by peeling the edge of the
adhesive. Release the Control Unit from the used Disposable
Fenster, using one hand to firmly hold the Disposable Fenster
and the other hand to push out the Control Unit. The Control
Unit will pop out from the Disposable Fenster and the
Disposable Fenster will break. This is in order to avoid
multiple usage of the same Disposable Fenster.
9. Dispose of the used Disposable Fenster and place the Control
Unit in the Charger Base making sure that it is properly
located.
10. The red indicator light on the Control Unit will turn on,
indicating that the Control Unit is being charged. The Control
Unit is fully charged when the green indicator light on the
Control Unit turns on.
4. Maintenance and Troubleshooting
4.1 Maintenance
WARNING: The device contains no user-serviceable parts. DO NOT open the Control Unit. In all cases of malfunction, contact Insuline
Medical.
4.2 Cleaning
The Control Unit should be cleaned with a wet wipe after each use or whenever necessary.
3
User Manual
English
4.3 Troubleshooting
Problem
Control Unit red indicator light starts blinking when opening the
Disposable Fenster
Solution
Charge the Control Unit.
Control Unit red indicator light starts blinking when opening the
Disposable Fenster during the warming phase. (Note, the indicator light
may seem orange when both indicators (red and green) are on at the
same time)
Red indicator light does not turn on when charging the Control Unit.
Charge the Control Unit after completion of the
warming cycle.
The Control Unit does not respond.
The device feels too hot or there is a sensation of pain.
Red indicator light does not turn off when charging the Control Unit for
more than 4 hours
1. Verify that the charger is plugged into the power
supply.
2. If the light still does not turn on contact Support.
1. Replace the Control Unit with a new, charged one.
Charge the non-responding unit.
2. If the device still does not respond contact Support.
1. Disconnect the Control Unit from the Disposable
Fenster
2. Contact Support.
3. Keep the Control Unit for further investigation.
1. Disconnect the Control Unit from the Charger Base
and try to charge it again
2. If the red light still does not turn off, contact
Support.
5. System Specifications
5.1. Physical Characteristics
Height
Length
Width
Weight
Storage Temp.
Operating Temp.
Control Unit
12 mm
44 mm
29 mm
11gram
-100C to 500C
0°C to 50°C
Disposable Fenster
3.8 mm
60 mm
42 mm
1.5 gram
-100C to 500C
0°C to 50°C
Output
Voltage
Weight
Operating
Temp.
Storage
Temp.
Storage Humidity
Power adapter
Input
Voltage
115VAC230VAC
at 50-60 Hz
5V
24 gm
00C ~ 350C
-200C ~ 850C
20% to 90% RH
5.2 Storage and Handling
DO NOT use the Control Unit or the Disposable Fenster if broken or otherwise damaged.
5.3 Disposal
Dispose of the InsuPad parts according to local regulations.
5.4 InsuPad Label
Symbol
Symbol
Meaning
Attention! Consult accompanying
documentation
Expiration Date
Manufacturer
4
Meaning
CE Mark
Sorted Disposal
Catalog Number
Serial Number
Type BF applied part
User Manual
English
6. Support and Contact Information
For answers to questions regarding the use of the InsuPad contact:
Manufacturer:
Insuline Medical Ltd.
70 Pinsker St., POB 10299
Petach Tikvah 4900202, Israel
Email: [email protected]
Website: www.insuline-medical.com
European Representative:
InsuLine Medical GmbH
Rahnfelsstraße 3
68163 Mannheim, Germany
Email: [email protected]
Website: www.insuline-medical.com
Disclaimer of Warranty
Insuline Medical warrants all models of the InsuPad components to be free from defects, and will, at our discretion, repair or replace
the product should it fail within two years from the first date of shipment .
This warranty is limited to defects in workmanship or materials and does not cover customer damage, abuse or unauthorized
modification. If this product fails or does not perform as warranted, users’ sole recourse shall be repair or replacement as described
above. Under no condition shall Insuline Medical be liable for any damages incurred by the use of this product .
These damages include, but are not limited to, the following: lost profits, lost savings and incidental or consequential damages
arising from the use of or inability to use this product.
Insuline Medical specifically disclaims all other warranties, expressed or implied, and the installation or use of this product shall be
deemed an acceptance of these terms by the user.
Copyright © Insuline Medical Ltd, 2014
All rights reserved.
Document Number LB-4050643(H)
No part of this publication may be reproduced in any material form, including photocopying or storing in any medium by electronic
means, whether or not temporarily or incidental to some other use of this publication, without the prior written permission of the
copyright owner, or under the terms of a license issued by the copyright owner.
The information contained in this document is subject to change without notice. Insuline is neither responsible for nor liable to
anyone in connection with the contents of document.
5
User Manual
English








![[Product Monograph Template - Standard]](http://vs1.manualzilla.com/store/data/005786637_1-bbde87d0b5b85ef8c8ff6a7fd943fd08-150x150.png)