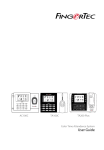
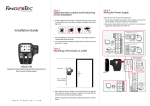
Download i-Kiosk 100 user guide
Transcript
We Make Things Easy
i-Kiosk 100
Premier Color Fingerprint Access
Control & Time Attendance System
User Guide
CONTENTS
3-4
CHAPTER 1 •
GETTING STARTED
21
Deleting Transaction Logs
Deleting All Data
Managing User Privilege
Deleting Screen Savers
Resetting to Factory Settings
Viewing the User Manual in the Internet
Included Accessories
Included Printed Materials
Activating Terminal
Registering Terminal
22
5-7
CHAPTER 2 • BASICS
Introduction to Terminal
Terminal Overview
Main Menu
Power On/Off Button
Date/Time
Voice Control
Security Features
Cleaning Terminal
Restarting and Resetting Terminal
8-11
CHAPTER 3 • USER
Enrolling User
Verifying User
Adding User Information
Deleting User
Access Level/Privilege
12-16
CHAPTER 4 •
CONNECTION – SYNCING
Installations
Communications
Mount On Wall
Descriptions of Available Connections
Checking the genuine TCMS V2
Installation and Setup of TCMS V2
Connecting Terminal to TCMS V2
Using USB to download/upload data
17-20
CHAPTER 7 • USB
Understanding the Need for USB Flash Disk
Type of USB
Downloading Data into USB
Uploading Data from USB
Uploading Pictures to the Terminal
23
CHAPTER 8 • KEYBOARD
Shortcut Keys in Short
Configuring Shortcut Keys
24
CHAPTER 9 • AUTO TEST
Who should do the Auto Test?
Audio Test
Keybord Test
Sensor Test
RTC Test
25
CHAPTER 10 • BELL
Definition of Schedule Bell
Inserting Time to Trigger Schedule Bell
Determining the Ring Type of Schedule Bell
Adjusting Volume of the Bell
Repetition
State
26
CHAPTER 11 • ACCESS
Using Terminal as Door Access
How Long It Takes Before The Door Locks Again
Delaying Door Sensor
Choosing Door Sensor Type
Delaying Alarm
CHAPTER 5 • SYSTEM
General Settings
Display Settings
Log Settings
Update
System Information
CHAPTER 6 • DATA
27
CHAPTER 13 •
TROUBLESHOOTING
29
OTHER RESOURCES
Copyright Notice & Disclaimer
1 • GETTING STARTED
Viewing the User Guide in the Internet
The User Guide is available in the package when you purchase FingerTec terminal.
The user guide is also published online at fingertec.com and user.fingertec.com.
Choose the language you prefer to view the User Guide.
Included Accessories
Back Plate
i-Kiosk 100 terminal
A Packet of Bolts
Star Screwdriver
Door Accessories
Cable
Power Connector
TCP/IP Connector
Diod
RFID Card (5 pieces)
RS232/RS485 Wiegand
Output Cable
DC 12V Power Adapter
Wiegand Input Cable
Power Supply Cable
CONTENTS
3
Included Printed Materials
5
RE
SOFTWAGS
SET TIN
4
RE
SOFTWALATION
V2
INSTAL
r to TCMS
5
4
7
80
*Refe al
Manu
ESC
3
2
1
6
9
OK
MENU
r to
*Refe V2
TCMS al
Manu
MS V2
TC
TCMS
ings
TCMS
ial Sett
V2 Init
allation
V2 Inst
6
V2
Management
TCMS
Time Control
nication
Commu ings
Sett
e
k
Quic
(Skip
Guid
Start
gertec
ser.fin
http://u
go to
re info
For mo
)
ctionsfunctions
e Fun dance
endanctime atten
e AttNOT using
are
For&Tim
if you
8 9
8
7
*Refe al.
V2 Manu
TCMS ALL if using
SET functions.
both
9
rkin
s of Wo up
Gro
Assign
•
•
•
•
•
To Wo
Users up
Gro
lled
uter insta
comp V2
nal to
termi with TCMS
RE
SOFTWA
GS
SET TIN r to
steps
rking
g Tim
System-V2
erprint
d Finges
Downloa
Templat
.com
e &
User
Fill up
tion
Informa
user inform
ation
in TCMS
V2
Setting
FingerTec Comprehensive DVD (with Product Code and Activation Key)
Quick Start Guide
Pamphlet
User Enrollment Template Form
Warranty Card
Activating Terminal
To activate the terminal, plug the DC 12V Power Adapter to the i-Kiosk 100, connect
it to a standard power outlet and turn on the on/off button. To download the data
from the i-Kiosk 100, you need to have the product key and activation code for the
TCMS. The product key and activation codes can be retrieved at the back of the FingerTec Going Green CD case. In case you lose your TCMS V2 product key and activation code, go to user.fingertec.com/retrieve_key_user.php for retrieval.
Registering Terminal
Make sure that you register your i-Kiosk 100’s warranty with us at www.fingertec.
com/ver2/english/e_main.html#
4
CONTENTS
2 • BASICS
Introduction to Terminal
We present you with the i-Kiosk 100 – FingerTec’s premium time attendance and
door access terminal. The i-Kiosk 100 takes less than 2 seconds to verify your identity, with a choice of verifying by fingerprint, card, or password.The i-Kiosk 100 works
perfectly as a standalone unit, and performs excellently in a networking environment. The USB function on the i-Kiosk 100 makes it even simpler to use, as updates,
transaction logs and other information can be uploaded or downloaded into the
terminal easily. As for security functions, the i-Kiosk 100 still has all the signature
security features of FingerTec such as door access customization, external alarm
option, and duress fingerprints. With additional features such as a full colour setting
and picture screen savers, the i-Kiosk 100 is the advanced biometric device suitable
for any workplace!
Terminal Overview
Color LCD
Navigation Keys
LED
Function
Keys
USB PORT
Keypads
Speaker
Card
Induction
Area
Fingerprint
Scanner
Item
Function
LED
Indicating status of terminal and result of verification
Green – Terminal is in standby mode, or verify users successfully.
Red – Terminal has failed to verify user.
Function Keys
Shortcut keys to enter specific command to terminal.
Keypads
To input instructions into the terminal and to allow configuration
Card induction area
Area that reads cards.
Color LCD
Screen that displays instruction and status of terminal.
Fingerprint sensor
To scan finger for confirmation of identity.
Speaker
For terminal voice emission.
USB port
To connect a USB extension for data download into a USB flash disk (pen
drive). To connect a USB Keypad to input numerical commands into the
terminal (optional).
CONTENTS
5
Main Menu
Enroll, edit, delete and insert user information from
User icon.
Setup FingerTec terminal
communication with computer through LAN, RS232
and RS485. Set communication with a computer for a
secure data transfer.
Transfer data to and from the
FingerTec the i-Kiosk 100 using a USB flash disk.
Run tests on the i-Kiosk 100
to diagnose the terminal on
various aspects.
Configure the settings of the
FingerTec terminals from
general to display setting to
fingerprint. Attendance settings and update settings
are also done here.
Check user attendance and
transaction logs that are
available in the i-Kiosk 100
and perform housekeeping
of the machine.
Adjust the date and time
settings of the terminal
Calibrate touch screen LCD
panel of the i-Kiosk 100 for
sustained performance.
Power On/Off Button
Use the power on/off button to turn the i-Kiosk 100 on or off. You can disable the
button to avoid accidental shut off of the i-Kiosk 100. Refer to page 17, Chapter 5:
System General Settings- Power Key for details.
Mini UPS 12V can also be used to provide power supply to the i-Kiosk 100. Refer to
accessory.fingertec.com for more information about accessories.
Date/Time
The i-Kiosk 100 displays the date and time at the home screen. Choose the date and
time format based on your preference. Press Menu > Date/Time > Select value >
Save.
6
CONTENTS
Voice Control
Voice Control lets you control the level of volume emitted by the i-Kiosk 100.
Turn On/Off : The system lets you to turn on/off the voice based on your preference.
Press Menu > System Icon > System > Voice Prompts > On/Off >Save.
Adjust Volume: The default volume of the i-Kiosk 100’s voice is Medium. The
volume has 3 settings: Low, Medium and High. To sustain the performance of the
speaker, it is recommended to set the volume at Medium. To adjust the volume Press
Menu > System Icon > System > Adj VOL (low/med/high) > Save.
Security Features
Security features help protect the information in the terminal from being accessed
by others.
Admin Affirm: Register an administrator to the system by enrolling a fingerprint or
password to a user ID. Press Menu > User > New User > Auth: Administrator > Choose
enrollment method > Save. After enrolling an administrator, the main menu can only
be accessed by the administrator.
Cleaning Terminal
To clean the i-Kiosk 100, you need to turn off the terminal
Clean Touch Panel: Use a dry cloth to clean the terminal. Do not use any liquids,
household cleaners, aerosol spray, solvents, alcohol, ammonia and abrasive solutions to clean the terminal because it could damage the surface of the terminalClean Fingerprint Scanner: Clean the fingerprint scanner with a microfiber cloth.
Restarting and Resetting
If something isn’t working right, try restarting or resetting i-Kiosk 100.
Restarting the Terminal: Push the On/Off button on the terminal to restart the
i-Kiosk 100. If you can’t restart the i-Kiosk 100, or if the problem persists, you might
want to reset the terminal instead.
Resetting the Terminal: Go to Menu, select System and select Reset. Press Yes to
confirm. Resetting the terminal will cause all your settings to return to the original
factory settings.
CONTENTS
7
3 • USER
Enrolling User
The i-Kiosk 100 can enroll up to 10000 fingerprint templates, 10000 passwords (1
password per user) and 10000 card information templates. This chapter covers all
possible user enrollments in the terminals.
FINGERPRINT ENROLLMENT
It is recommended to enroll two fingerprints for one user ID. One template is used
as the default and the other one as a backup. You need to check the quality of the
fingerprint before doing any fingerprint enrollment. It is important to locate the
center points of the finger because the center points have to be placed in the middle of the scanner during enrollment to get a good reading. You also have to make
sure that the fingers are not too wet or too dry for enrollment. To enroll fingerprint:
Press Menu > User icon > New User > User ID: (insert value) > Select “Enroll FP” >
Place your fingerprint 3 times following instructions given by the terminal > Select
Auth > OK to save.
CARD ENROLLMENT
The default card for the i-Kiosk 100 is RFID. MiFare and HID card systems are available upon request. To enroll card: Press Menu > User icon > New User > User ID:1 >
Insert User ID > Select “Enroll Card” > Wave the card at the scanning area until the
screen displays the Card ID > OK to save.
PASSWORD ENROLLMENT
The i-Kiosk 100 offers different enrolment methods and password verification can
be used alone or in combination with other verification methods. The maximum
length of a password is 8 digits. To enroll password: Press Menu > User icon > New
User > User ID: (insert value) > Select “Enroll Pwd” > Input password using the keypad > Reconfirm password > OK > OK to save.
Verifying User
1:1 (ONE TO ONE) / 1:N (ONE TO MANY)
8
VERIFICATION METHOD
PROCESS
1:1 (One to One)
You have to identify your User ID before inputting any biometrics feature for verification. For example, your user ID is 1008.
One to one method requires you to key in user ID followed by
your fingerprint to get verified.
1:N (One to Many)
You don’t need to identify your User ID before inputting any
biometrics feature for verification. Simply place your finger on
the scanner for verification.
CONTENTS
VOICE MESSAGE
VOICE / MESSAGE
WHAT DOES IT MEAN?
“Verified”
Identity verification is successful, the terminal stores the transaction
logs and opens the door (if connected to door access)
“Try again please”
Identity verification is failed because the finger is not properly positioned, the template is not available in the terminal or the password
is incorrect.
“Admin Affirm”
You are not an administrator of the system and you cannot access
Menu page
“Duplicate Finger”
This message only appears during registration when the finger that
you want to enroll has been enrolled before. “FP Enrolled Alrd” will
be displayed on the LCD screen.
“Invalid ID”
For 1:1 verification, User ID entered does not match with fingerprint.
FINGERPRINT VERIFICATION
1:N – 1:N verification does not require any input of your user ID. Place your finger properly
on the scanner and the terminal will take a second to verify your identity.
1:1 – 1:1 requires input of User ID before the terminal reads and verifies your identity. Press
1:1/1:N > Input ID on the screen > Press fingerprint icon > terminal will read and verify.
Some precautions have to be taken to get a good read every time.
Make sure the center point of your finger is
placed in the middle of the scanner for a good read.
Recommended to use index finger. The terminal
accepts other fingers but index is the most convenient.
Make sure the finger is not wet, too dry, injured or dirty
Do not press hard on the sensor, just place it
comfortably
Avoid direct sunlight or bright light
Center point
·
·
·
·
·
PASSWORD VERIFICATION
Password verification is an option for those who do not prefer other verification methods.
To verify using password, insert User ID and press key button > insert password and press
OK.
CARD VERIFICATION
Place the card on the card scanning area and the terminal will read and verify the card.
CONTENTS
9
Adding User Information
User information can be added into the i-Kiosk 100 through two ways. One is through
the FingerTec terminal and the other is through the TCMS V2. To add/change user
information via the terminal, press Menu > User icon > Manage > Select User ID >
Press OK > Edit/Add > Save.
M/
FIELD
WHAT CAN YOU DO?
User ID
Edit user ID based on your company’s employee numbering system. Maximum
length of user ID is 9 digit
Name
Edit/Add name of in this field. Maximum number of characters is 24
FP
Delete/Add Fingerprint
CARD
Delete/Add Card
PWD
Delete/Add Password
It is recommended that the updating of user information be done through the
TCMS V2 software. After the information is updated, sync the TCMS V2 and the
terminal to display the information.
Delete User
Only an administrator can perform user deletion at the i-Kiosk 100. To delete certain user(s), press Menu > User icon > Manage > Select User ID to delete > Press
“Menu” > Del User > Press Delete another time for confirmation > OK.
10
CONTENTS
Access Level/Privilege
FingerTec terminals offers three types of access level or privilege.
PRIVILEGE
USER ROLES
Normal User
Only use the terminal to verify your identity. You cannot access into Menu
and make changes into settings and system
Administrator
You are allowed to access into menu to enroll users and edit settings and
system
Supervisor
You are allowed to access into menu as the highest authority. You can do
what the administrator does, and you can reset the terminal to factory settings or to erase all content in it.
CONTENTS
11
4 • CONNECTION – SYNCING TERMINALS
Installations
FingerTec terminals offer several connections for power and communications. Installations of FingerTec time attendance terminals are simpler than installation for door
access functions.
Mount On Wall
Back Plate
4 feet / 1.2 meter
(recommended)
After determining the height of the terminal from the ground level and have made
the relevant marks on the wall, drill the screws into the wall to hang the back plate.
The terminal goes on top of the back plate.
12
CONTENTS
Communications
Connection points for power and communication are available at the back of the
terminals. Refer to the following diagrams.
RS485
1. RS485 Single Connection
485B
485B
485A
485A
GND
WD2
485B
Wiegand OUT
WD1
3rd party controller
with 26 bits
wiegand
input
2. RS485 Network Connection
RXD
GND
RX-
RS232/RS485
Data Converter
RS232
TXD
RS232
cable
RX+
485A
485B
485A
RX+
RX-
RS232/RS485
Data
Converter
Door Lock connector.
Refer to Appendix I
GND
+12V
DC12V 3A
Power
Supply
* Use either power input
USB Port
BEL+
BELBEEP
RLED
RJ-2
RJ-1
Wiegand IN
GLED
RJ-3
TCP / IP
TCP/IP
RJ-6
3rd party
controller with
26 bit swiegand
output
INWD0
INWD1
CONTENTS
13
Descriptions of Available Connections
USB PORT
Linking with USB flash disk for remote data transfer.
1
8
1
8
TOP
FRONT
TCP/IP PORT
Connect with a CAT 5 cable for LAN connection, one end to terminal’s port and
another end to the computer’s TCP/IP Port.
JOINT 1 PIN
TCP/IP for Single Connection
Linking the terminal to a single computer using TCP/IP
requires Ethernet 10/100Base-T Crossover Cable. The
cable can be used to cascade hubs or to connect Ethernet stations back-to-back without a hub. It works with
both 10Base-T and 100Base-TX.
JOINT 2 PIN
•
2•
3•
6•
TX+
•3
•6
•1
•2
1
TXRX+
RX-
RX+
RXTX+
TX-
TCP/IP for Network Connection
Linking the terminals to multiple computers using TCP/IP requires Ethernet 10/100Base-T Straight Thru
Cable or “whips”. The cable works with both 10Base-T and 100Base-TX, connecting a network interface
card to a hub or network outlet.
CONNECTOR PIN
TX+
TXRX+
RX-
1
2
3
4
5
6
7
8
•
•
•
•
•
•
•
•
CABLE COLOR
White/Orange
Orange
White/Green
Blue
White/Blue
Green
White/Brown
Brown
CONNECTOR
•1
•2
•3
•4
•5
•6
•7
•8
TX+
TXRX+
RX-
POWER SUPPLY PORT
Insert the Power Adapter point to this port for power.
RS485/WIEGAND INPUT CONNECTION PORT
RS485 Single Connection: Connection to a single computer using RS485 wire.
RS485 Network Connection: Connection to multiple computers using Daisy Chain connection.
Wiegand Output: Connecting with third party connector or terminal(s).
14
CONTENTS
ACCESS CONNECTION
Linking the terminal to door lock system.
BELL PORT
Linking the terminal to doorbell.
NOTE
Link all cables to the correct connection point(s) before attempting to connect the
terminals to software.
Certificate of Authenticity
Checking the Genuine TCMS V2
FingerTec TCMS v2
Product Key:
YTR1-4AWE-9899
S/N: 8203602
Activation Key: K2EWF5SZ
001010
c 2008-2009 HRM System All right reserved.
TCMS V2 is a genuine software by FingerTec. Check the genuine sticker the TCMS
V2 software on the FingerTec DVD cover to retrieve product and activation code.
The serial number of the terminal must match the serial number printed on the
sticker in order to activate the system.
Installation and Setup of TCMS V2
Install the TCMS in a PC with sufficient minimum requirements. Refer to user.fingertec.com/user-promanual.htm for TCMS V2 Manual online. Setup Wizard will
require the product key and activation code to activate the system. In case you
lose the TCMS V2 product key and activation code, go to user.fingertec.com/retrieve_key_user.php for retrieval.
CONTENTS
15
Connecting Terminal to TCMS V2
USING TCP/IP
An IP address is important, as it is the unique address of the terminal in LAN. Without
the IP address, locating the specific terminal is not possible. To input the IP address of
the i-Kiosk 100: Press Menu > Comm. Icon > Network > IP Address > Key in IP address
> Repeat settings for Subnet Mask & Gateway > Press Terminal ID > Save.
USING RS232
For connection via RS232, the baudrate is the determinant of communication speed
between the i-Kiosk 100 and the software. The higher the baudrate, the faster the
speed is. To turn on RS232 connection and set the baudrate: Press Menu > Comm. Icon
> RS232/RS485 > Change the RS232 connection to ON > Change baudrate > Press
Terminal ID button and enter the ID >Save.
USING RS485
For connection via RS485, baudrate is also the determinant of communication speed
between the terminal and the software but the speed must be according to the
speed of the converter. Check your converter for the speed. To turn on RS485 connection and set the baudrate: Press Menu > Comm. Icon > RS232/RS485 > Change the
RS482 connection to ON > Change baudrate > Save
Using USB to Download/Upload Data
The USB flash disk feature is useful in cases where the i-Kiosk 100 is installed far
from a PC or where there is a connection problem. To determine the type of USB
compatible by the i-Kiosk 100, please refer to this link at fingertec.com/newsletter/
HL_74.html. Press Menu > USB icon > Choose the operation that you would want to
be done via USB.
16
CONTENTS
5 • SYSTEM
General Settings
ADJUSTING DATE/TIME
The i-Kiosk 100 is a device to record time attendance and door access activities of
employees. Precision in time and date cannot be compromised for the system to
work efficiently. Adjust Date/Time according to your time zone. Press Menu > Date/
Time icon > Enter value using keypad > OK > OK to save.
DATE FORMAT
The date format can differ based on countries for example in Malaysia, the datemonth-year format is used while in America, month comes first. Choose your date
format according to your preference. The default format is dd-mm-yy. Press Menu >
System icon > System > Date Format > Select Format >Save
SOUND OF KEYBOARD
The i-Kiosk 100 can be set to emit a sound when you press any of its buttons. To turn
on/off the keypad sound: Press Menu > System icon > System > Keybeep > On/Off
>Save
VOICE
The i-Kiosk 100 has certain voice commands to guide users during enrolment and to
notify users during verification. Press Menu > System icon > System > Voice > On/Off
>Save
VOLUME (%)
Voice Control lets you control the level of volume emitted by the i-Kiosk 100. Turn
On/Off : The i-Kiosk 100 lets you to turn on/off the voice based on your preference.
Press Menu > System Icon > System> Voice > On/Off > Save. Adjust Volume: Default
volume of the i-Kiosk 100 is Medium. The volume has 3 settings: Low, Medium and
High. To sustain the performance of the speaker, it’s recommended to set the volume
at Medium. To adjust the volume. Press Menu > System icon > System > Volume
1:100 > Set your number > Save.
POWER KEY
You can disable or enable the power on/off button to avoid accidental shutdown of
the terminal. Disable/Enable: Press Menu > System > Misc Set > Lock Power > On/Off
>Save.
CONTENTS
17
Display Settings
Customize your i-Kiosk 100 display to your liking and requirements.
SYSTEM LANGUAGE
The i-Kiosk 100 offers various languages to match your local requirements. A maximum of 3 language packs are available in the i-Kiosk 100 and it is set according to
your request during purchase. Default language is English. Press Menu > System icon
> Misc. Set > Language > Choose your language > Save
PICTURE DELAY
Picture delay is an idle period before the screen displays your loaded advertisement. It
ranges from 1-99 seconds. Menu > System icon > Display > Picture Delay > Determine
your time > Save
SLEEP TIME
Sleep time is a period before the i-Kiosk 100 goes to sleep mode. This setting is available as power saving feature of the terminal. The time range is from 0-999 seconds.
Menu > System icon > Misc. Settings > Sleep Time > Determine your time > Save
FINGERPRINT SETTINGS
Configure settings for fingerprint enrollment and verification to achieve optimum effectiveness.
SETTING THRESHOLD
Threshold is a level of fingerprint scanner’s sensitivity. Threshold determines how
many percent of minutiae points on a fingerprint template will be read by the system.
The higher the threshold level, more points are being read, more restricted the system. Configure the threshold for 1:1 and 1:N methods.
For 1:1, the range is from 0-50 and the recommended value is 35.
For 1:N, the range is from 0-50 and the recommended value is 45.
Menu > System icon > System settings > 1:1 Threshold or 1:N Threshold > Determine
the Level > Save
NUMBER OF TRIES
You can set the limit to the number of tries for 1:1 verification. The range is from 1-9.
If a user’s number of try exceeds the limit, the terminal could trigger the alarm system
to alert security that somebody is meddling with the terminal. Menu > System icon >
Display> 1:1 Match Retry Times > Determine the Value > Save
18
CONTENTS
DISPLAY OF ALGORITHM VERSION
You can find out the Algorithm Version of your terminal. Algorithm version is important to know features that are loaded into it and having this knowledge would
prompt you to upgrade your terminal for the latest features. The Algorithm Version
also determines the firmware for the version. The version can neither be changed nor
deleted. Press Menu > System icon > System > Algorithm Version
DISPLAY OF FINGERPRINT IMAGE ONSCREEN
The terminal offers display of fingerprint image when doing scanning for user to understand how to place the finger properly. You can opt to show the fingerprint image
or otherwise. To enable/disable the fingerprint image display: Menu > System icon >
Misc Set. > FP Image > Choose Your Preference > Save
Options available include:
FINGERPRINT IMAGE DISPLAY
WHAT DOES IT MEAN?
Both show
The fingerprint image is displayed on the screen during
both enrollment and verification.
Neither show
The fingerprint image is neither displayed on the screen
during enrollment nor during verification.
Enrol show
The fingerprint image is displayed on the screen only during enrollment.
Match show
The fingerprint image is displayed on the screen only during verification.
Log Settings
Every time the terminal is used, transaction logs are kept in the memory. These settings are for the terminal to regulate housekeeping of logs.
LOG ALERT
When log storage is at a certain level, user/administrator needs to be alerted to
avoid underperformance of terminal. The recommended value is 99. Menu > System icon > System Settings> Log Alert > Input your value > Save
UPDATE INTERVAL
The i-Kiosk 100 needs to update transaction logs
of all users in a time interval to avoid duplication
of punch period. The default interval is 10 minutes. Menu > System icon > System > Rechek Min
> Input your value > Save
DEFINING WORK CODES
The i-Kiosk 100 provides a work code feature
which allows users to key in predefined numbers
after verification. The work code numbers are
predefined in the TCMS V2. The following table is
showing examples of work codes.
DESCRIPTION
Check In
Check Out
OT start
Done
Sick Leave
Half-day Leave
Emergency Leave
Meeting Client
Outstation
CODE
00
01
04
05
10
12
11
20
21
CONTENTS
19
To turn your workcode feature on or off : Press Menu > System icon > Misc Set. > Workcode > On/ Off > Save.
To add work code: through the i-Kiosk 100, Press Menu > User > Workcode > Menu
> New > Enter Code Number eg: 02 > Enter Code Name eg: Emergency Leave > OK
to save.
Update
FingerTec offers updates for i-Kiosk 100 regularly. Always consult your local reseller
before you update firmware of the i-Kiosk 100.
System Information
This option under System allows the installer to check the information of the i-Kiosk
100 including storage, firmware, algorithm, etc. To retrieve the System Information
of the terminal Press Menu > Sys Info.
SysInfo
Records
User:
RECORDS
Device
1
Admin:
0
Pwd: 0
Free
FP:
10000
Record: 100000
Free 3000
Used
Free 99687
Used 0
Used 313
SysInfo
Records
20
Device
DeviceName
i-kiosk 100
Serial Num
4100397
MAC Address
00:0a:5d:f1:86:o7
Alg Version
BioBridge VX9.0
Firmware Ver
Ver 6.1.1 510(build 30-1054-02)
Manufacturer
FingerTec
DOM
2009-03-02 20:22:43
CONTENTS
Shows free storage and used storage of the i-Kiosk 100, and details of
user count, admin count and password users. It also displays other information such as FP templates and
logs templates that have been used
and are available.
DEVICE
Selecting “Device” displays the terminal name, serial number, MAC
address, fingerprint algorithm,
firmware version, manufacturer and
manufactured date and time.
6 • DATA
Every time an enrolment is performed or a
verification is done, a transaction log is stored
inside the terminal. The data contains the terminal ID, date, time, userID and transaction
activity. For example, 0105021009000000000
010000:
DESCRIPTION
CODE
Terminal ID
01
Date (ddmmyy)
050210
Time (hhmm)
0900
User ID
000000001
Transaction Code
00
Terminal Activity
00
These logs need to be managed to maintain the effectiveness of the terminal. It is
recommended to do the housekeeping of data from the TCMS V2 software. There are
5 functions available in Data icon to enable you to manage your data in the FingerTec
terminal.
Deleting Transaction Logs
Please make sure that you are certain when you want to do this operation. The logs
that are stored inside the i-Kiosk 100 are the ones that have not been downloaded
into TCMS V2. Deleting the logs means that no backup data available. Press Menu >
System icon > Data mng > Delete Att Log > Confirmation is required (Yes/No).
Deleting All Data
This function allows you to delete all attendance data and user information in the iKiosk 100. Make sure that all user information has been backed up in TCMS V2 before
performing this task. Press Menu > System icon > Data mng > Delete All > Confirmation is required (Yes/No)
Managing User Privilege
There are three user privileges in the i-Kiosk 100, administrator, supervisor and normal user. You can delete administrator privilege but without an administrator, normal users can access the menu easily and interrupt the settings. Menu > System icon
> Data mng > Clear Auth > Confirmation is required (Yes/No)
Deleting Screen Savers
You can advertise your product and company corporate message in the i-Kiosk 100
using screen saver function. To delete all screen savers: Menu > System Icon > Data
mng > Delete Picture > Confirmation is required (Yes/No)
Resetting to Factory Settings
There are some instances, which require you to restore the i-Kiosk 100 back to its
original factory settings. Upon completion of this task, the i-Kiosk 100 no longer
keeps your settings in all functions. Please redo all the settings to suit your company’s requirements. Menu > System Icon > Reset > Reset All Default Settings > Confirmation is required (Yes/No)
CONTENTS
21
7 • USB
Understanding the Need for USB Flash Disk
Communication between the i-Kiosk 100 and a PC is very important to upload and
download transaction data for time attendance and door access reports. The terminals offer a few communication options such as LAN and serial cable connections but
sometimes there are scenarios that require USB (Universal Serial Bus) connectivity.
USB can connect terminals with a computer for download and upload of user information and transaction logs.
Types of USB
There is various type of USB available in the market. The i-Kiosk 100 can only work
with USB flash disks that support minimum Linux Kernel 2.4.x, working ideally with
Imation, Transcend and Pen Drive (minimum support Linux Kernel 2.4.x) To determine the type of USB compatible with the FingerTec terminal, please refer to this link
at fingertec.com/newsletter/HL_74.html
Downloading Data into USB
The i-Kiosk 100 is able to download data i.e. transaction logs, user information, and
short messaging system into the USB Pen Drive. To download the data: Press Menu
> USB icon > Download > Choose the information to download. After the download
process is complete, eject the USB flask disk from the terminal and connect it to your
PC that has been installed with the TCMS v2 software. Upload the data from the USB
into TCMS V2 for further processing.
Uploading Data from USB
The i-Kiosk 100 is able to upload data i.e. user information, short messaging system,
picture screensaver and themes into the USB Pen Drive. To download the data: Press
Menu > USB icon > Upload > Choose the information to upload. After the upload
process is complete, eject the USB flask disk from the terminal.
Uploading Pictures to the Terminal
The i-Kiosk 100 are able to display advertisements or pictures on the screen during an
idle period. The size of the displayed pictre must be 320 x 240 resolution. To upload
pictures using a USB Flash Disk: Menu > USB icon > Upload > Upload Picture.>Save.
PRIVIL
22
CONTENTS
8 • KEYBOARD
Shortcut Keys
Shortcut keys give you quick access to your most used functions. A total of 8 shortcut
keys are available each on the i-Kiosk 100 and the TA200 Plus for you to configure.
They are labeled as F1, F2, F3, F4, F5. F6, F7, and F8.
Configuring Shortcut Keys
Menu > System icon > Keyboard > Click on the key one at a time and select the
function you want for the specific key > SaveAmong some of the functions that can
be configured for your shortcut keys include status key, work code, viewing of sms,
setting of fingerprint, etc.
CONTENTS
23
9 • AUTO TEST
Who should do the Auto Test?
The Auto Test page is to diagnose or analyze the conditions in the i-Kiosk 100. There
are several tests available in the Auto Test page and only an administrator is allowed
to perform the test. Before running any tests, kindly contact your reseller for advice
or you could email [email protected].
Audio Test
Audio Test determines the quality of the i-Kiosk 100’s audio. Every click on the screen
will emit different voice message. If you find any distorted sound in any of the voice
messages or instructions, kindly send your terminal for checking and repair. To run
test: Press Menu > Auto Test icon > Audio Test.
Keyboard Test
The Keyboard Test is for you to check the condition of the keyboard. Press Menu >
Auto Test icon > Keyboard Test.
Sensor Test
This test is to determine the condition of the fingerprint optical scanner you need
to run fingerprint test. Once you run the sensor test, the i-Kiosk 100 will display a
white square on the screen. Place your finger on the scanner. If you can see your fingerprint on the white square, the optical scanner works fine. Otherwise, kindly send
your i-Kiosk 100 for checking and repair. To run test: Press Menu > Auto Test icon >
Sensor Test
RTC Test
Time is an essence for the i-Kiosk 100 and it should not be compromised. The RTC
Test will display date, time, 0 (s): 0 (ms)Click the screen to start the test. The 0 (s): 0
(ms) will start to run and every 10ms change the second to 1. If it doesn’t run as it
should, kindly send your i-Kiosk 100 for checking and repair. To run test: Press Menu
> Auto Test icon > RTC Test
24
CONTENTS
10 • BELL
Definition of Schedule Bell
Schedule bell is a function to alert employees or users at a certain time based on your
company’s scheduling and preference. For example, a group of employee’s lunch
time is at 10:30a.m while the other group is at 2:00p.m. The i-Kiosk 100 offers up to
56 schedules for you to define. Press Menu > System Icon > Bell > Choose the bell slot
that you want to set > Save
Inserting Time to Trigger Schedule Bell
The screen displays 00:00 as default time. Input the time for which you want the bell
to ring. The time format is displayed in 24hours format.
Determining the Ring Type of Schedule Bell
The i-Kiosk 100 offers various types of ringtones to choose from. When setting the
bell time, go to the Music option and select your preferred sound.
Adjusting Volume of the Bell
The loudness of the bell can be predetermined. The i-Kiosk 100 offers a volume range
of High, Medium and Low, and the default volume is High. Input your volume preference to determine the level of volume that you desire.
Repetition
How many times do you want the bell to ring? Input the value and the bell will ring
accordingly based on your settings.
State
You can enable or disable the schedule bell by changing the value to “on”/”off”.
CONTENTS
25
11 • ACCESS
Using The terminal as Door Access
The i-Kiosk 100 can be connected to door access accessories like electromagnetic
locks and doorbolts to control access to doors. FingerTec provides all kinds of doorlock accessories which can be viewed at accessory.fingertec.com. In Access, you can
configure 4 items which are explained below. To access to Access: Menu > User >
Access > Access Control Parameters.
How Long It Takes Before The Door Locks Again
This value is the time period for the door to lock again after unlocking for a successful
verification. The default value is 10 seconds and the range is between 1-10.
Delaying Door Sensor
This function only works if a door sensor is available. When a door is not closed for a
specified time, the sensor will trigger the alarm system. Specify the time of the delay.
The default value is 10s, and the range is from 0-99s. Choose your preferred value.
Choosing Door Sensor Type
There are two types of door sensors available for door access which are Normally
Open (NO) and Normally Close (NC). Once a door sensor is connected to the system,
you have to choose the door sensor type. Default is None.
Delaying Alarm
This function only works when there is an alarm system installed with the i-Kiosk 100.
You can define the amount of time that the door is not closed before the i-Kiosk 100
triggers the alarm system. Input the value in seconds. The default value is 30s.
26
CONTENTS
12 • TROUBLESHOOTING
“Unable to Connect” Appears
When this message appears, it means that the settings for the i-Kiosk 100 and the
computer are not properly done. Find out which method you are using to connect.
The i-Kiosk 100 offers LAN, RS232, RS485 and USB communication methods. Refer to
Chapter 4 to further understand the topic.
“Admin Affirm” Appears
You are not the administrator of this i-Kiosk 100. Only an authorized administrator of
the system is allowed to access the Menu. Any attempt of normal user to access the
Menu will prompt “Admin Affirm” message on the screen. In case the administrator
or he/she has resigned from the company, kindly contact your FingerTec authorized
reseller to access the i-Kiosk 100.
Determining the Ring Type of Schedule Bell
The i-Kiosk 100 offers various types of ringtones to choose from. When setting the
bell time, go to the Music option and select your preferred sound.
Difficult to Read Finger
There are five possible causes of this:
ENROLMENT IS NOT PROPERLY DONE
Enrolment is the most important process to ensure that the i-Kiosk 100 captures the
best quality of your fingerprints. Refer to chapter 3 for how to do a good enrolment.
THE LOCATION OF THE I-KIOSK 100 IS NOT CONDUCIVE
The scanner does not work well in bright-lighted area. Cover the scanner a bit if this is
the cause of the difficulty. Shift the location area for a better performance.
FINGER IS NOT PROPERLY PLACED
To get a good read, make sure that your finger’s center points are located at the middle of the scanner. Adjust the position of your fingerprint as you see it onscreen.
THE SCANNER IS NOT CLEANED OR IT IS SCRATCHED
Check the quality of the scanner. If the scanner is dirty, please clean it with microfiber
cloth on the scanner. If it’s scratched, contact your local reseller for a replacement.
ANYTHING HAPPEN TO YOUR FINGER LATELY?
Make sure that the finger is not injured, cut or bruised because it could cause difficulty to read. The algorithm reads the minutiae points of your fingerprint, the more
it can read, the better the result.
CONTENTS
27
The LED is Blinking All The Time
You have nothing to worry about unless the blinking light is red. The green blinking light is indicating that the terminal is under its standby mode. Red blinking
light may signal problem in the terminal. Contact your reseller for consultation.
“Duplicate Finger” Appears
FingerTec terminals are intelligent. It will not accept the same fingerprint twice
into its system. If you have registered a finger into the i-Kiosk 100, the system
would prompt “duplicate finger” when you try to enroll that finger again. Choose
a different finger to proceed.
RFID Card Doesn’t Respond
There are two possibilities for this problem:
HAVE YOU REGISTERED THE CARD TO THE TERMINAL?
The card must be registered to the i-Kiosk 100 before it can read the information
in the card. Refer to chapter 3 User for card enrolment.
HAVE YOU ASSIGNED THE USER ID TO THE VERIFICATION GROUP
THAT SUPPORTS RFID CARD?
Without setting the i-Kiosk 100 to show that you are under a group that supports
RFID card, the terminal wouldn’t read your card.
No Sound
Two possible causes for this problem:
THE TERMINAL VOICE MODE IS SILENT
Perhaps someone has turned off the voice in your i-Kiosk 100 or reduced its volume to 0%. Refer to Chapter 5 System under Voice to rectify.
SPEAKER IS DAMAGED
Once you have rectified the voice mode, if the problem persists, proceed to test
the voice. Go to Chapter 9 to do the test. If no voice is being emitted, contact your
local reseller for support.
28
CONTENTS
OTHER RESOURCES
Copyright Notice & Disclaimer
COPYRIGHT NOTICE
All rights reserved. No part of this book may be reproduced or transmitted in any
form or by any means, electronic or mechanical, including photocopying, recording, or by any information storage and retrieval system, without written permission
from FingerTec Worldwide Sdn Bhd. Every precaution has been made to supply
complete and accurate information. Information in this document is subject to
change without prior notice.
DISCLAIMER
No person should rely on the contents of this publication without first obtaining
advice from a qualified professional person. The company expressly disclaims all
and any liability and responsibility to any terminal or user of this book, in respect
of anything, and of the consequences of anything, done by any such person in
reliance, whether wholly or partially, upon the whole or any part of the contents
of this book.
FINGERTEC WORLDWIDE SDN BHD
CONTENTS
29
© 2011 FingerTec Worldwide Sdn. Bhd. All rights reserved. • 0811


