1
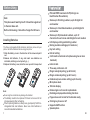
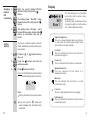
DECT Handset DCT-100
USER'S MANUAL
Contents
Before Using
Installing Batteries
Using Handset Carrying Clip
Using Headset ( optional )
Connecting Lines
Charging Handset
Display
Turning Handset On/Off
1
2
2
3
3
4
5
Basic Function
Making a Call
Receiving a Call
Last Number Redial
Using Speakerphone
Muting Microphone
Out of Range Operation
Adjusting Voice Volume
Setting External Ring Melody and Volume
Setting Internal Ring Melody and Volume
Setting Key Tone
Paging
Key Lock
6
7
8
9
9
9
10
10
11
12
12
13
Phone Book
Storing a Phone Number
Viewing Stored Entries
Character Map
Updating Your Phonebook
Erasing Numbers from Phonebook
Dialing a Number in Phonebook
14
14
15
16
16
17
Trouble Shooting
Caller ID
Symptom
Check & Remedy
No operation
Check that the telephone line cord
is properly connected.
Check that the handset batteries are
fully charged.
Check that the handset batteries are
installed properly.
No dial tone
Warning beep
occurs when
making a call
Handset seems
to have very short
battery life
Check that the telephone line cord
is properly connected.
Check that the handset batteries are
fully charged.
Check that the charge contacts.
Consistently short battery life may
indicate that replacement of the
batteries is necessary.
Viewing Caller ID Number
Erasing All Caller ID Numbers
Dialing a Caller ID Number
A Multi-handsets System
Making an Internal Call
Transferring an External call
Setting Up a Three-Way Conference Call
Registering a New Handset
De-Registering a Handset
20
20
21
21
24
Handset Setting
Setting Handset Name
Changing Handset PIN
Setting Hot Call
Setting Auto Answer Function
Setting Any Key Talk Function
Choosing Language
Resetting Handset
Feature List
Trouble shooting
31
19
19
19
26
26
27
28
28
29
29
30
31
Before Using
Note:
This phone won't work by itself. It should be registered
to the main base unit.
Before initial using, it should be charged for 24 hours.
Installing Batteries
The three rechargeable Ni-MH batteries (AAA size) come with your
phone. Install the batteries before using your phone.
1. Slide the battery cover in the direction of the arrow and pull it
out.
2. Remove old batteries, if any, and insert new batteries as
indicated, matching correct polarity (+, -).
3. Replace the battery cover, slide the cover up until it snaps shut.
Note:
Reversing the orientation may damage the handset.
The battery needs to be replaced if it does not recover its full
storage capacity after recharging.
When replacing batteries, always use good quality Ni-MH rechargeable AAA size batteries. Never use other batteries or
conventional alkaline batteries.
1
Feature List
FSK and DTMF dual mode CLIP (Calling Line
Identification Presentation)
Stores up to 50 calling numbers, up to 20 digits for
each number
Stores up to 3 last dialed numbers, up to 24 digits for
each number
Stores up to 50 phonebook numbers, up to 12
characters for each name and 24 digits for each number
LCD displays calling and dialling number
Barring numbers setting(up to 5 numbers )
Key lock setting
Hot call setting
Call transfer of external calls (when using two or more
handsets)
Internal calls
Three-way conference call
Ringer melody adjusting ( up to 9 kinds )
Ringer volume adjusting ( up to 9 levels )
Handset earpiece volume setting (up to 9 levels)
Microphone mute
Talk time display
Delete single or all records in phonebook
Redialing and preparation dialing functions
Page on base unit to look for the handset easily
Clicking key tone on or off
Supports GAP function
Speakerphone
30
Using Handset Carrying Clip
Setting
2.
Any Key
Talk
Function
(continued)
Press the or button to choose Off,
and press the
button to confirm. A
confirmation tone will be heard.
Choosing
Language
You can select a display language. Four
different languages are available. They are
English, French, Italian and Spanish.
1.
The supplied handset carrying clip allows you to conveniently carry
the handset with you. It clips easily to your belt, waist band, or shirt
pocket.
Removing the carrying clip
Insert a screw driver along the
edge of one of its arms and
release the clip. Then lift it off.
Attaching the carrying clip
Attach the carrying clip to the
back of the handset. Make
sure that the carrying clip
locks into place.
Press the
or
button to choose
button.
Language, and press the
Result: The current setting displays.
2.
Press the
or
button to select the
language , and press the
button to
confirm. A confirmation tone will be
heard.
When you reset the handset, all the userselectable features including phonebook,
incoming and outgoing calls list etc. return to
the initial setting at the time of purchase.
Resetting
Handset
1.
Press the
or
button to choose Set
button.
default, and press the
2.
The display shows " HS PIN: " , enter the
handset PIN, and press the
button.
3.
The display shows " Sure ? ", press
the
button to confirm or press the
button to cancel.
Using Headset (optional)
The headset jack is located in the
middle right side of the handset
and is 2.5mm standard plug.
Simply plug the headset into the
jack and the headset will be
activated.
Note:
When the headset is plugged
into the headset jack, the
microphone on the handset will
be deactivated.
Headset jack
Earphone
Microphone
Clip
Headset plug
29
2
Connecting Lines
Connect the modular end of the
power adapter to the power jack of
the charger, and plug the other
end into a standard AC wall outlet.
To AC wall outlet
Setting
Auto Answer
Function
When activate the Auto Answer function, you
can answer an incoming call without pressing
any key, just need to pick up the handset from
the charger.
To activate the function:
1.
Press the
or
button to choose
button.
Autoanswer , and press the
2.
Press the
or
button to choose On,
and press the
button to confirm. A
confirmation tone will be heard.
Charging Handset
To deactivate the function:
Before initial operation, YOU SHOULD FULLY
CHARGE THE HANDSET for 24 hours.
1.
Press the
or
button to choose
button.
Auto answer, and press the
To charge the handset, just place it on the
charger.
2.
Press the
or
button to choose Off,
and press the
button to confirm. A
confirmation tone will be heard.
Result: When charging, the handset is
automatically turned on and the icon
on the display will blinks.
When activate the Anykey Talk function, you
can answer an incoming call by pressing any
key ( including numeric buttons,
button and
button ).
Setting
Any Key
Talk
Function
To activate the function:
1.
Press the
or
button to choose
button.
Anykey talk , and press the
2.
Press the
or
button to choose On,
and press the
button to confirm. A
confirmation tone will be heard.
To deactivate the function:
1.
3
Press the
or
button to choose
Anykey talk, and press the
button.
28
Changing 3.
Handset
PIN
(continued)
Enter the current handset PIN (the
default is 1590), and press the
button.
4.
The display shows " New PIN: ", enter
the desired new PIN , and press the
button.
5.
The display shows " Re-type: ", enter
the new PIN once more, and press the
button. A confirmation tone will be
heard.
Display
INT
HS 1
Base 1
Lock icon
This icon indicates that the key lock function is
activated. See page 13.
1.
Press the
Hot call.
2.
Press the
button, and enter the
number you want.
In use icon
This icon indicates that the phone is in use mode.
3.
Press
Speakerphone icon
This icon indicates that the phone is in
speakerphone mode.
or
button to choose
button to confirm.
Result: A confirmation tone will be heard
and the display shows as follow:
Mute icon
This icon indicates that the phone is in mute
conversation mode.
Hot call
L1
Note:
One hot call number can be set per handset.
If you wish, press the
button twice
quickly in standby mode, this function will be
deactivated.
27
This area displays in-use information
such as the caller's number, menus,
call duration, etc.
In standby mode, the display will show
the signal strength icon, battery status
icon, handset and base number.
Signal strength icon
This icon is always displayed when your phone is
on, and shows the current signal strength. More
bars indicate more signal strength.
You can set one specific number that will be
dialled automatically no matter which key has
been pressed.
Setting
Hot Call
L1
Line icon
The icon is displayed when the line is engaged.
Intercom icon
INT This icon indicates that the phone is in the intercom
conversation mode.
4
Display (continued)
Handset Setting
Operation icon
This icon indicates that the phone is in the operation
mode.
Caller ID icon
This icon indicates that there is a new call. To view
the call, access the Caller ID menu.
Hot call
This icon indicates that the hot call function is
activated.
Using the HS setting menu, you can customize the various settings
for the handset such as the handset name, display language, hot call
etc.
In standby mode, press the
button to display the main menu. Then
press the
or
button to access HS setting , and press
button
to enter the submenu.
Then:
Setting
Handset
Name
Battery status icon
This icon is displayed at all times when your phone is
on, and shows the level of your battery charge. The
more bars, the greater the charge. During charging,
the icon will flash.
Turning Handset On/Off
When you place the handset
on the charger to charge, the
handset automatically turns on.
The handset is now ready for
use.
To turn the handset on or off in
standby mode.
1. To turn the handset on when
the display is off, press and
hold the button.
2. To turn the handset off, press
and hold the
button until "
Good-Bye"displays.Then
the display will turn off.
Note:
Nothing will appear on the
display when the battery
power is very low. You should
fully charge the handset
before using it.
5
This option allows you to set your handset
name. The handset name displays in standby
mode.
1.
Press the
User name .
2.
Press the
button to confirm and the
display shows " Name: ".
3.
Enter the name. (see p.15).
4.
Press the
button to confirm and a
confirmation tone will be heard.
or
button to choose
John 1
Base 1
A handset PIN is required to protect your
handset against unauthorized use. The default
PIN is 1590, you can change the handset PIN.
Changing
Handset
PIN
1.
Press the
PIN .
2.
Press the
button to confirm and the
display shows " HS PIN: ".
26
or
button to choose Set
De-Registering
a Handset
(continued)
The handset in setting can not be deregistered.
5.
Enter the handset number you want to
deregister, or press the
button to
exit.
6.
Press the
button to confirm and a
confirmation tone will be heard. The
display of the de-registered handset
shows " Not sub ".
Not sub
Basic Function
Standby is the initial screen that appears when you first turn on the
handset. When your phone is in standby mode, you will see the
handset and base number or the handset name, if you have one
saved.
When your phone is in standby mode, you can use the phone to make
or receive calls, or to use the menu functions.
Making a
Call
1.
Pick up the handset and press the
button.
Result: You hear a dial tone and the and
L1 icons appear on the display.
2.
Dial a phone number.
Result: The display shows the number as
you enter it.
3.
To end the call, either press the
button or replace the handset on the
charger.
Note:
To make a call to the last number you
dialed, use the Redial feature. For
details, refer to Last Number Redial on
page 8 .
You can enter the desired phone number in
standby mode, which allows you to make
corrections before dialing. Follow these
steps.
1.
Enter a phone number. Check the
number on the display.
012345
25
6
Making a
Call
(continued)
2.
Note:
If you make a mistake while entering a
number, press the
button to clear the
last digit and correct the number.
If you press and hold the
button for
more than one second, all digits you
have entered will be cleared and the
phone returns to standby mode.
You can press the
button to insert a
pause to a dialing sequence.
De-Registering
a Handset
1.
Press
button to display the main menu items.
2.
Press
or
button to choose BS
button.
setting, and press the
Result: The display shows " Waiting... "then
" MASTER PIN " .
When the number appears correctly,
press the
button.
3.
When a call is received, the phone rings
and the L1 icon on the display blinks.
If the caller can be identified, the caller's
phone number displays. If the caller name
is currently stored in your internal
phonebook, the caller's name together with
the phone number displays while the
phone rings.
Receiving
a Call
1.
7
When a call is coming, press
button
to answer it.
Or
When the handset is not on the charger,
press the
button or
button or any
numeric button to answer if the anykey
talk function is activated. (See page 28 ).
Or
When the handset is on the charger,
simply pick the handset up from the
charger(You do not need to press a
button) to answer if the auto answer
function is activated. (See page 28 ).
You can de-register a handset with the
registered handset. (All handsets must be
in standby mode.)
Enter the master pin you have set, and
press the
button.
Result: A confirmation tone is heard, and
the display shows the submenu.
4.
Press the
or
button to choose
button.
Remove HS , and press the
Result: The display shows as follow:
Remove HS: ?
M----
Note:
The current status will be shown as the
following format: "- - - - - ". Each position of
the cursor stands for the status of the
matching handset working with the base."M"
means this handset is in setting mode. "-"
means not registered yet.(For example:
"M23- -" means: There are up to 3 handsets
working with this base and the HS 1 is in
setting mode.)
24
Registering
a New
Handset
(continued)
To register a new handset with the
registered handset.
1.
2.
Result: During the conversation, the timer
is displayed in the follow sequence
hours-minutes-seconds.
Receiving
a Call
(continued)
L1
Press the
button to display the main
menu items.
00:03:05
Press
or
button to choose BS
button.
setting, and press the
2.
Result: The display shows " Waiting... "
then " MASTER PIN " .
3.
Enter the master pin you have set, and
press the
button.
Result: A confirmation tone is heard, and
display shows the submenu.
4.
Press the
or
button to choose
button.
New HS , and press the
Result: The display shows " Sub PIN: ".
5.
Enter the sub pin you want to set, and
press the
button.
Result: The indicator lamp on the base
blinks.
6.
23
To end the call, either press the
button or replace the handset on the
charger.
Your phone allows you to retrieve the last 3
numbers you have dialed.
Last
Number
Redial
To view and dial the numbers:
1.
Press the
button in standby mode.
2.
If you want to scroll through the memory,
press the
button re peatedly to view
and find the number you want to call.
3.
Press the
button to dial the number.
Note:
Each time you dial a new number, the
oldest number stored in the redial
memory is automatically erased, and the
redial memory is updated.
Pick up the new handset you want to
register, then do the same steps 2~6 as
"To register a new handset with the
base" to register it.
You can modify the displayed number
before pressing the
button by using
the
button.
Note:
In the step 5, you need to enter the Sub
PIN you have set.
If you press the
button, followed by
the
button, the phone dials the last
number immediately.
8
Using
Speaker
phone
During a call, you may turn the speakerphone on or off at any time.
1.
2.
To turn the speakerphone on, press and
hold the
button until the
icon
appears on the display.
To turn the speakerphone off, press and
hold the
button until the
icon
disappears on the display.
To register a new handset with the base:
Note:
In the speakerphone mode, the display
shows the
icon.
Press and hold the PAGE button on the
base unit for more than 10 seconds.
(The holding time depends on your base.)
2.
Press the
button to display the main
menu items.
3.
Press the
or
button to choose HS
button.
register, and press the
To mute the microphone, press the
button.
2.
To turn to the normal mode , press
button once more.
Note:
In the mute mode, the
on the display.
9
This model digital handset supports GAP.
When it is used with other manufacture
GAP-supported phones, functions except
for conversation could not always be
available.
1. PAGE
1.
Out of Range
Operation
GAP is the standard for the interworking
of handsets and base stations of different
manufacturers.
R e s u l t : Yo u c a n r e s u m e a n o r m a l
conversation using the handset.
During a call, if you want to talk with a
person next to you and not wish the party
on the line to hear, you can mute the
microphone.
Muting
Microphone
Registering
a New
Handset
(continued)
Result: The display shows the base
number.
4.
Result: The display shows the register
code it receives.
icon will appear
If the handset is too far from the base, the
handset can't access the telephone line
properly. The display shows " Searching .. " .
You should move the handset closer to the
base. Otherwise, the telephone might be
disconnected and the handset returns to
standby mode.
Press the
or
button to choose a
base number, and press the
button.
5.
Press the
button and the display
shows " PIN : ".
Enter the base pin you have set.
6.
Press the
button to confirm and a
confirmation tone will be heard.
22
Transferring
an External
Call
2.
(continued)
Result: The desired handset starts to ring,
press the
button to answer the calling.
Press the button of the calling handset, then the desired handset enters
into the external call.
Note:
If the desired handset doesn't answer,
press the button to cancel the transfer.
Then the calling handset will be
connected to the external call again.
Setting Up
a Three-Way
Conference
Call
When you have both an outside call and
an intercom call in progress ( Please refer
to "Transferring an External Call". ), you
can set up a three-way conference call,
like this:
Press and hold
button of the calling
handset for more than one second to
set up a three-way conference call.
Registering
a New
Handset
Each handset can be registered to up to 4
different base units. If there are more than
one handset registered to a other
manufacture GAP-supported phone, the
handset number will not be correctly
displayed on the LCD. The correct
number accords to the sequence of
registration.
Note:
If this is not the first base unit you are
registering to, there is a " * " in front of
the base number, you had better to
select another base number.
21
During a call, you can adjust the earpiece
volume from level 1 to 9. The higher
number, the louder the volume.
Adjusting
Voice
Volume
Press
or
volume level.
Setting
External
Ring
Melody
and
Volume
button to adjust the
You can select your own external ringing
sound and volume. There are 9 ring
melodies and 9 volume levels for choosing.
1.
Press the
button to display the main
menu items.
2.
Press the
or
button to choose
HS setting, and press the
button.
Result: The cursor is in front of Melody
Ext.
3.
Press the
4.
Press the
or
button to choose the
ring melody you want, then press the
button.
5.
Press the
or
button to choose
the volume level you want.
button to confirm.
Result: Each time you press the
or
,
the handset sounds the ring and
volume you have chosen. The
higher level you choose, the louder
the volume.
6.
Press the
button to save the setting
and a confirmation tone will be heard.
7.
To exit, press the
button.
Ering 9 1
10
Setting
Internal
Ring
Melody
and
Volume
You can select your own in ternal ringing
sound and volume. There are 9 ring
melodies and 9 volume levels for choosing.
1.
Press the
button to display the main
menu items.
2.
Press the
or
button to choose HS
setting, and press the
button.
3.
Press the
or
button to choose
button.
Melody Int, and press the
4.
Press the
or
button to choose the
ring melody you want, then press the
button.
A Multi-handset System
You can register the handset to your base unit.
With 2 or more handsets registered and your base unit supports, you can:
Make an intercom call from one handset to another
Transfer an external call from one handset to another
Set up a three-way conference call
Making an
Internal
Call
1.
Pick up the handset and press the
button.
Result: You hear a dial tone and these
icons appear on the display.
INT
Intercom
5.
Press the
or
button to choose
the volume level you want.
2.
or
,
Result: Each time you press the
the handset sounds the ring and
volume you have chosen. The
higher level you choose, the louder
the volume .
6.
Press the
button to save the setting
and a confirmation tone will be heard.
7.
To exit, press the
Iring 9 1
Result: The display shows the number as
you entered, and the desired
handset starts to ring.
3.
Press the
button of the desired
handset to answer the internal call.
4.
Press the
end the call.
button.
Transferring
an External
Call
1.
11
Enter the desired handset's number.
button when you want to
When you are making or answering an
external call, you can transfer it to another
handset.
Press the
button and enter the desired handset number.
20
Viewing
Caller ID
Numbers
Press the
menu.
2.
Press the
or
button to choose
Caller ID, and press the
button.
1.
Press the
button to display the main
menu items.
Result: The display shows the latest
caller's number (or together with
the name). If there is no Caller ID
number received, "Empty"
displays.
2.
Press the
or
button to choose
button.
HS setting, and press the
3.
Press the
or
button to choose Set
Keytone, and press the
button.
3.
Erasing
All
Caller ID
Numbers
19
button to display the main
Setting
Key Tone
Result : The display shows On or Off .
Scroll to desired number in the list by
using the
or
button.
1.
Press the
menu.
2.
Press the
or
button to choose HS
button.
setting, and press the
3.
Press the
or
button to choose
button.
Erase CID, and press the
4.
Dialing a
Caller ID
Number
Normally, whenever you press a button on
the handset, you hear a beep tone. You
can deactivate this function if you like.
1.
4.
Press the
or
button to choose
On or Off to activate or deactivate this
function.
5.
Press the
button to save the setting
and a confirmation tone will be heard.
The display shows " Click on " or " Click
off ".
button to display the main
The display shows " Sure ? ". Press the
button to erase all the Caller ID
numbers or press the button to cancel.
1.
Find the Caller ID number that you want
to dial. Refer to Viewing Caller ID
Numbers for details. (see p 19).
2.
Press the
button to dial it.
Paging
You can page the handset from the base
unit. Using this feature, you can locate a
lost handset easily.
1. PAGE Press the PAGE button on the base.
Result: The lamp on the handset blinks and
all handsets registered to the base
ring for about 20 seconds.
2. PAGE To stop paging, press the PAGE button
on the base once.
Note:
If a call comes in while the handset is
being paged, the handset stops paging
and the bell rings.
12
If you turn this feature on, in standby mode, all
buttons except for
button will be locked
and will not function.
Key Lock
You can answer incoming calls, but when you
hang up, the phone returns to the lock mode.
This feature is useful to avoid accidental key
press.
Caller ID
When you receive a call, the caller's phone number displays, if your
local telephone company provide the Caller ID service. The last 50
received calls are stored in the Caller ID list, and you can use the list
to dial the numbers.
The Caller ID icon
appears when there is a new received call
which you have missed. Once you view the number, the icon will
disappear.
To turn on the feature
1.
Press the
button to display the main
menu items.
0123456
Result: The cursor is in front of Key lock.
2.
Press the
button to confirm. A
confirmation tone will be heard.
HS 1
Locked
To turn off the feature
1.
Press the
button and the display will
show " Unlock? " .
If the caller has exercised the option to prevent his name and
number from being sent, the display will show " private ".
If the caller from an area where the telephone company is not
offering the Caller ID service or an area that is not yet providing
name and number delivery to your area via the long distance net
work, the display will show " out of area ".
If a received call number has been stored in the phonebook, when
a call is coming, the display will show the number together with the
name.
Unlock ?
private
2.
13
out of area
Press the
button to confirm or press
the
button to cancel.
18
Dialing a
Number in
Phonebook
1.
2.
Find the phonebook entry that you want
to dial. Refer to Viewing Stored Entries
for details. (see p. 14).
Press the
button to dial it.
Phone Book
The phone book allows you to store frequently used phone numbers
and their names in your personal directory so that you can easily
make a call without having to remember or enter the phone number.
You can store up to 50 numbers (up to 24 digits) with name (up to 12
characters) in the phone book.
In standby mode, press the
button to display the main menu.
Then press the
button to access Phone book , and press
button to enter the submenu.
Then:
Storing a
Phone
Number
Viewing
Stored
Entries
17
The cursor is in front of Add.
1.
Press the
button to confirm and the
LCD shows " Name: ".
2.
Enter the name. (see p.15).
3.
Press the
button to confirm and the
LCD shows " Number:" .
4.
Enter the number. (see p.15).
5.
Press the
button to confirm and a
confirmation tone will be heard and the
display shows " Stored ".
1.
The cursor is in front of Read , and press
the
button.
Or
In standby mode, press the
button.
2.
Press the
or
button to scroll
through the phonebook entries.
Note:
If the memory is empty, the display
shows " Empty " , and exit after 2
seconds.
14
Character Map
Operation method:
Press the key labeled with the required character.
Once for the first character
Twice for the second character and so on
The list of characters is shown below:
1X
2X
1
3X 4X
<
>
-
Cc
2
Ee
Ff
3
:
Gg
Hh
Ii
4
+
Jj
Kk
Ll
5
*
Mm Nn
Oo
6
#
Pp
Qq
Rr
Ss
Tt
Uu
Vv
8
7
.
Ww Xx
Yy
Zz
9
I ae Aa
Oo
Uu
I
I
II I
4.
Change the number when the desired
entry displays, and press the
button.
(see p.15). A confirmation tone will be
heard.
Erasing
Numbers 1.
from
Phonebook
Press the
or
button to find the
phonebook entry that you want to erase.
3.
Press the
button to confirm, and the
display shows " Sure ? " .
4.
Press the
button to erase or press
the
button to cancel.
1.
Press the
or
button to choose
button.
Erase all, and press the
2.
The display shows " Sure ? " , press the
button to erase or press the
button to exit.
same button), wait for a few seconds to select the next character.
To delete the entries, use the
15
Press the
or
button to choose
button.
Delete , and press the
Erasing all entries from phonebook
When entering the same character twice (or a different character on the
or vice versa.
Erasing a single entry from phonebook
2.
Note:
Press the
Press the
or
button to find the
phonebook entry that you want to
change and press the
button.
Change the name when the desired
entry displays, and press the
button.
(see p.15).
s
Bb
Dd
Press the
or
button to choose
button.
Edit, and press the
3.
5X
Aa
0
Updating 1.
Your
Phonebook 2.
button.
button to change a character from upper case to lower case
Sure ?
16