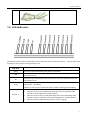
1
GoIP User Manual GoIP User Manual VoIP GSM Gateways Models: GoIP GoIP-4 GoIP-8 GoIP-16 HYBERTONE Revision: 1.2 2012/6/22 http://www.hybertone.com Sales: [email protected] Support:[email protected] GoIP User Manual Content 1 General ....................................................................................................................................................... 2 1.1 Introduction ......................................................................................................................................... 2 1.2 Protocols ............................................................................................................................................. 3 1.3 Hardware Features ............................................................................................................................ 3 1.4 Software Features .............................................................................................................................. 3 1.5 Package Content ................................................................................................................................ 4 1.6 LED Indicators ................................................................................................................................... 5 2 Installation .................................................................................................................................................. 6 3 Configuration ............................................................................................................................................. 8 3.1 HTTP WEB Server Login ................................................................................................................... 8 3.2 Status ................................................................................................................................................... 9 3.3 Configuration .................................................................................................................................... 12 3.3.1 Preference ......................................................................................................................................... 13 3.3.2 Network ............................................................................................................................................ 15 3.3.3 VoIP................................................................................................................................................... 18 3.3.3.1 SIP ..................................................................................................................................................... 18 3.3.4 Call Management .............................................................................................................................. 27 3.3.5 GSM Service Provider ...................................................................................................................... 35 3.3.6 GSM Base Station Settings ............................................................................................................... 36 3.4 Tools.................................................................................................................................................. 36 Appendix A. Special SMS Commands ................................................................................................... 42 Appendix B. SMS Modes ....................................................................................................................... 43 Appendix C. Custom Network Tones ..................................................................................................... 47 Appendix D. GSM Group Mode ............................................................................................................ 48 Appendix E. CID Call Forward.............................................................................................................. 49 Appendix F. Volume Adjustment ........................................................................................................... 50 Appendix G. Device Characteristics....................................................................................................... 51 1 GoIP User Manual 1 General 1.1 Introduction GoIP is the abbreviated from GSM over IP. It is a new type of VoIP gateway that allows call terminations from a VoIP network to a GSM network and vice versa. Call connections between IP networks and GSM networks are now bridged seamlessly to extend the voice communication coverage significantly. As the traditional PSTN lines are starting to disappear in developed countries and are not going to be built extensively in under-developed countries, GSM phones are getting more and more popular all over the world with lower and lower service charges, the emergence of GoIP bridges the gap between the traditional telephone networks and VoIP networks as shown in the diagram below. As a result, local and worldwide voice communications are more convenience, lower cost, and broader coverage. Internet / Intranet VoIP Service Provider GoIP VoIP ATA World Telephone Network GoIP4 Local GSM Network GoIP8 Local Telephone Network VoIP Phone Telephone Cellphone Telephone You can now make a call from anywhere in the world via a VoIP network and then terminate the call via a GoIP to the local telephone network (PSTN). On the other hand, you can also make a call from the local telephone network to a GoIP (the GSM phone number) and then dial another number via a VoIP network to anywhere in the world. In these two cases, a VoIP Service provider is required for one side of the call termination. For two fixed locations, it is possible to setup GoIPs at both ends for call terminations without subscribing to a VoIP Service provider. GoIP can also be used to achieve GSM roaming via VoIP. The idea is to route all your incoming GSM calls to a GoIP via call forward or simply insert your SIM card to a GoIP. You can then setup the GoIP to forward all incoming calls to another GSM number in the world via a VoIP service provider. The charge per call from a VoIP service provider is significantly lower than the roaming charge. For office environment, GoIP offers a quick way to replace the traditional PSTN lines or T1/E1 lines to your IP PBX. There is no initial installation/reallocation charge and no need to wait for installation. Depending on our usage, you can add or remove lines as per your requirement. You can even configure the system so that everybody calls the same number regardless the number of lines available. 2 GoIP User Manual 1.2 Protocols TCP/IP V4 (IP V6 automatic adaptive) Dual VoIP protocols: ITU-T H.323 V4, IETF SIP V2.0 Multiple Codecs: ITU-T G.711 Alaw/ULaw, G.729A, G.729AB, G.723.1 and GSM H.2250 V4 H.245 V7 H.235 (MD5, HMAC-SHA1) RFC1889 real-time digital transmission protocol NAT STUN Network Management Protocol (NMP) PPPoE Dial Up PPP Authentication Protocol (PAP) Internet Control Message Protocol (ICMP) TFTP Hypertext Transfer Protocol (HTTP) Dynamic Host Configuration Protocol (DHCP) Domain Name System (DNS) User Account Authentication (via MD5) Proprietary Relay Protocol (Avoiding VoIP Blockings) 1.3 Hardware Features ARM9E processor DSP for voice signal processing Two 10/100MB Ethernet ports (IEEE 802.3 standard) with status LEDs Quadband GSM module (850M 900M, 1800M and 1900M) Internal Antenna (optional) 1.4 Software Features LINUX OS Built-in Web Server for device configuration Built-in SIP Proxy (Simplified) PPPoE Dial Up Router function DHCP client & Server QoS (VLAN) VPN (PPTP) Online firmware upgrade Remote Control Mechanism for remote technical support Proprietary Auto Provisioning Mechanism Remote SIM function Short Messages (SMS) support (standalone and server based) Call Management and Routing 3 GoIP User Manual 1.5 Package Content Use care when unpacking the device package in order to avoid damage to the main unit and the packing materials. Retain the packing materials in case the unit is to be transported in the future. Please inspect the shipping container and the contents for any damages. If visible damages are present, please contact your vendor. Keep the shipping materials for the carrier inspection. The package should contain the items listed in the table below Item 1. Appearance GoIP (1-Channel) Description 1 x Main Unit GoIP-4 (4-Channel) GoIP-8 (8-Channel) GoIP-16 (16-Channel) 2. AC/DC Power Adapter: GoIP1: 12V/500mA GoIP4: 12V/2A GoIP8: 12V/3A (Adapter + external power cord) 4 GoIP User Manual 3. 1 x Ethernet CAT5 Cable (2M) 1.6 LED Indicators LED indicators (shown above for GoIP-8) are used to show the current status of the device. They are often used to determine if the GoIP is working normally or not. LED Label Power Description This LED is red and illuminates when power is connected. LAN This LED is red and illuminates when the LAN port is connected and blinks when data transmission occurs. PC This LED is red and illuminates when the PC port is connected and blinks when data transmission occurs. RUN Channel “x” This LED is green and blinks at a rate of every 100ms when VoIP is not ready for making calls. (Fast Blink) It blinks at a rate of every second when VoIP is ready for making calls (Slow Blink). Each GSM channel has its own status LED and its color is green. 1. It blinks at a rate of every 100ms (Fast blink) when the corresponding GSM channel is not yet registered to a GSM network. 2. It blinks at a rate of every second (Slow blink) when the corresponding GSM channel is ready for making or receiving calls (registered to a GSM network). 3. It illuminates when GSM call activities occurs (in use, ringing). 5 GoIP User Manual 2 Installation The installation procedures for GoIP, GoIP-4 and GoIP-8 are the same. The only different is on the number SIM cards to be installed. 1. SIM card slots are located either at the bottom (for old hardware) or at the back (for new hardware) of the main unit. For the models with the SIM card slots located at the bottom, you need to open the bottom SIM cover in order to install SIM cards. First slide the metal clip to the direction as indicated on the top of the clip. Insert a SIM card to each slot carefully and then place the metal clip back in place. For the models with the SIM card slots located at the back, just insert a SIM card to each slot as shown in the drawing on the right. Please make sure that the orientation of the SIM Card is correct before inserting the card. For GoIP (1-channel), the SIM card insertion orientation is shown in the figure on the right. The metal contacts must face down and the cut corner is inserted first. For GoIP-4 and GoIP-8, the SIM card insertion orientation is shown in the figure on the right. The metal contacts must face up and the cut corner is inserted first. 2. The LAN port is intended for intranet or internet connection. Depending on your network environment, it can be connected various type of network equipment, such as network router, network switch / Hub, xDSL/Cable modem, etc. 3. The PC port is intended for network sharing and it supports both bridge and router modes. In Bridge mode, the PC port is connected to the same network segment as the LAN port. In Router mode, the PC port is set to a different network segment. In this case, please make sure that the PC network segment IP (192.168.x.) is different from the one in the LAN port network. 4. The DC port is for power connection. Please only use the AC/DC adapter provided. Adapter with different rating or vendor may damage the device or affect its performance. 6 GoIP User Manual 5. The Reset button is recessed inside the GoIP cabinet. You need to use a sharp pointer to access the reset button. Press it momentarily to reboot the device. Press it for 15 seconds or more to reset the device settings including login password to its factory defaults. 7 GoIP User Manual 3 Configuration The device can be configured via its built-in http web server or via an Auto Provision Server. Auto Provision Server is a free utility supporting both Window and Linux OS. This utility is developed by HYBERTONE Technology for the sole purpose of automating the configuration of our products. It is available in our website for free download. This user manual only focuses on the device configuration via its built-in http web server. Please note that only window based Web browsers, such as IE, Chrome, Firefox, Mozilla, are supported. Do not use Linux based Web browsers. If you are having problems in configuring your device with your existing Web browser, please try one with lower version or a different Web browser and report the problem to us. 3.1 HTTP WEB Server Login There are two methods to access the built-in web server. 1. Method 1 is to access the built-in web server via the LAN port. The LAN port is set to DHCP mode as a factory default. When you connect it to a network with a DHCP host, it will obtain an IP address from the DHCP host automatically. Via the GoIP’s GSM channel(s), there are two ways to find out the IP address that is assigned to this port. i. Dial the SIM number of anyone of the GSM channels available. Once the call is answered, dial “*01” to hear a voice prompt reporting the LAN port IP address. ii. Send the “###INFO###” SMS command to one of the GSM channels available. The GoIP will then return back the LAN port IP address. Please refer to Appendix A Special SMS Commands for more information. Once the LAN IP address is known, you are now ready to access its built-in http web server by typing its IP address in the address field of a web browser. 2. Method 2 is to access the built-in we server via the PC port. As a factory default, the PC port IP is preset to 192.168.8.1. Connect a computer to the LAN port of the device and configure its IP to 192.168.8.x (x = 2 to 254). Type the IP address 192.168.8.1 in the address field of a web browser. Once the IP address is entered, the login window shown on the right pops up. Enter the user name and password. There are three level of access via three different user names. 1. Administrative Level -This offers a full access right to all parameters available in the built-in webpage. The user name and password for the administrative level are "admin" and "admin" respectively. 2. User Level - This level restricts user from accessing the Call Setting page. User will not be able to change any VoIP related settings. The user name and password for the user level are "user" and "1234" respectively. 3. SMS Level - This level only allows user to access the Send SMS and SMS Box functions under the Tool menu. The user name and password for 8 GoIP User Manual the SMS level is "sms" and "1234". 3.2 Status This is the default page when you first login to the built-in HTTP Web server. It consists of three columns as shown in the diagram below. All three models use the same status page design. It is important to understand the information shown in this page in order to debug or report problems encountered. 9 GoIP User Manual 1. The left hand column shows the VoIP registration and call status by line. a) SIP Number – This shows SIP number of the Line. For Single Server mode, all lines use the same SIP number. For Config. By Line mode, each line should have its own SIP number. For Config. By Group mode, lines belongs to the same group use the same SIP number. For SIP Trunk Gateway mode, this field is optional. b) Login – This parameter shows the VoIP registration status. The status "OK" means that the SIP registration for the line is successful. "FAIL" means that the SIP registration fails and no calls can be routed to and from the GSM channels. For SIP Trunk Gateway mode, the Login status is always "OK" c) Status – This shows the operating status of the SIP line. It is important to understand how call routing works between SIP and GSM in order to understand the meaning of the status. In general, the line status can be classified as follows: Calls from SIP to GSM or Calls from GSM to SIP i. IDLE - The SIP line is not engaged in any call activities. ii. IN USE - This status is active when a call connection between SIP and GSM is established. Calls from GSM to SIP iii. READY - This status only applies to 2nd dial operation. It is active when a SIP call is answered and a second dial tone is generated to prompt the SIP caller to dial a number out. iv. DIALING - This status is active when the GSM channel is dialing a number out,增加了 NUMBER 如 dialing 10086 v. RINGING - This status is active when ringback tone occurs and the call is not yet answered. vi. CONNECTED—介绍 2. The middle column shows information on the hardware and network . Hardware a) S/N – This field shows the serial number of the device. b) Firmware – This field shows the current firmware version. c) Model – This field shows the model number of the device Network LOCAL TIME 10 GoIP User Manual a) LAN Port – This field shows the IP address of the LAN Port. b) LAN MAC - This field shows the physical hardware address (MAC) of the LAN port. c) PC Port – This field shows the IP address of the PC Port. d) PPPoE – This field shows the PPPoE dial up status. It is only meaningful when PPPoE is enabled. e) Gateway – This field shows the default gateway IP for data traffics routing. f) DNS Server – This field shows the current DNS server for domain name interpretation. It is possible that some domain names are blocked by local DNS servers. Changing this to an overseas DNS server may solve the problem. g) VPN - This field shows the VPN status. If it is connected, the local IP is also shown. (Not yet available) 3. The right hand column shows the parameters and settings for each GSM channel. They are summarized as follows: 增加了 REMOTE SIM a) Channel x - This field shows the GSM module status of the channel x. "ON" means that the power to the GSM module is shut down. You can then process to check other channel information. "OFF" means that the power to the GSM module is switched off. You must first switch on the power to the GSM module via the web interface. This setting is under the GSM Channel Shut Down which is located under the Tools menu. b) SIM – This field shows "INSERTED" if the SIM card inserted in the SIM slot "x" is detected. It displays "NOT INSERTED" if no SIM card is detected. Please make sure that the SIM card is inserted properly as described in Section 2. It is also possible that SIM card is damaged or incompatible. Please test the SIM card with a cell phone to confirm if the SIM card is working properly. Please contact technical support for further assistance. c) IMEI - This field shows the IMEI number in use. d) Signal – This field shows the signal strength of Channel x. Voice call quality with a signal strength above 15 is good and below 15 is poor. For poor signal reception, it is recommended that the GoIP should be re-located or an antenna with external cable should be used for better signal reception. Signal strength of 99 means that the GSM channel is logout (not registered to any Carrier). e) Login – This fields shows whether the GSM channel "x" is registered to a Carrier or not. "OK" means the GSM channel is ready for making and receiving calls. If "Fail" is displayed, please check if corresponding SIM and Signal are showing the correct status. Please insert the SIM card to a cell phone to test if it is working properly. Contact technical support if the SIM card is valid but registration to the carrier fails. f) Details – Click on this expands the window to show additional channel information. i. ii. iii. iv. v. Module – This field shows the model number of the GSM module used. Number – This displays the phone number of the SIM card. User needs to entered this manually. Operator – This field shows the name of the GSM Service provider registered. Base Station - This field shows the reference number of the base station connected. Remain Time – When the Total Talk Time limit of the channel is set, this field displays the remaining talk time. When it is zero, the channel is disabled for all outgoing calls. Click on the [Reset] button reset the Remain Time to the Total Talk Time limit. To enable the channel, Each channel can be activated to operate for a certain period of time. The channel is then enabled for outgoing calls. Detail<< --Module: G610 11 GoIP User Manual --Service Provider: CHINA MOBILE --Number: --IMSI: 460026009838591 --ICCID: 898600 --Remain Time: NO LIMIT --Module Ver: G610_V0C.58.0D_T17 g) Call Settings – Click on this expands the window to show additional parameters. i. Call Waiting – This shows the make of the GSM module used. ii. Call Forward – This shows the name of the Carrier registered. Always - When it is "On", all incoming calls are forwarded unconditionally. Busy - When it is "On", incoming calls are forwarded when the channel is in use. No Answer - When it is "On", incoming calls are forwarded when they are not answered after x rings. No Service - When it is "On", incoming calls are forwarded when the channel fails to register to the carrier. 3.3 Configuration Click “Configuration” on the left hand column to display the Configuration page and the following submenu. 1. Preference 2. Network 3. VoIP 4. Call Management 5. GSM Service Provider 6. GSM Base Station Setting 12 GoIP User Manual 3.3.1 Preference The preference page shown above consists of the following system level parameters and options as shown in the table below. Item 1 Parameter Language 2 Time Zone 3 Time Server 4 Auto-provision Description This sets the webpage and voice prompts language. Currently, only English and Simplified Chinese (Mandarin for voice prompt) are supported. This specifies the offset of the local time zone with respect to GMT. The syntax should be “GMTx” where x is the offset. This specifies IP address or the domain name of a network time server for computer clock synchronization. The default is “pool.ntp.org”. The auto provision is optional. When this option is enabled, the device downloads its configuration from the Auto Provision Server at start up or at the time interval specified by the Provision Interval. The configuration file name is <Serial Number>.cfg which is just a text file (not encrypted). If encrypted format is required, please contact technical support for further assistance. Default Value Please note that Auto Provision Server is a free utility supporting both Linux and Window environment. Please visit our website or contact technical support for more information. Provision Server The specifies the Provision Sever address (IP or Domain name) This specifies the interval in performing an auto provisioning event. Provision 13 GoIP User Manual 5 Interval Remote Control Remote Server Remote Server Port Remote Server ID Remote Server Password This is a unique feature that allows remote access to the device's built-in Web server even when it is installed behind NAT. To achieve this function, a Remote Control Server is required to be installed. This server is a free Linux based utility and is available for download via our website. Please contact technical support for further assistance if required. Once installed, please make sure that the Remote Server Port and Password are set properly. This specifies the IP address or the domain of the Remote Control Server. Check with your Remote Server administrator for the communication port. This specifies the name to be appeared in the Remote Control Server. It is used as a reference for the device. This specifies the login password to the Remote Control Server. This is not the password to login to the built-in webpage. Please ask your Remote Server Administrator if it is not available. 6 Network Tones Network tones are the tones associated with the traditional (PSTN) telephone network, such as dial tone, ring back tone, busy tone, call waiting tones, etc. These tones will only be used when the device answers an incoming call and the call is not forwarded to a SIP server automatically. Predefined Network Tones are classified by country name. If the country desired is not found in the list, the “Custom” selection allows users to define the network tones individually. Please refer to Appendix B for more information. 7 DDNS This is a proprietary DDNS service offered by HYBERTONE. It allows HYBERTONE's products to identify each other via this DDNS service. When this service is activated, the domain name of the device is its <serial number>.com. This feature is useful to support peer-to-peer configuration. DDNS Address The default DDNS Address is “voipddns.net” which a free service offered by HYBERTONE. Please contact your vendor if you want to install your own DDNS server. The default communication port number is 39800. This specifies the interval between registrations to the DDNS. DDNS Port Update Interval 8 9 1920 Auto Reboot This option allows the device to reboot itself at the time defined by Reboot Time. Reboot Time This parameter specifies the time to reboot the device and t is defined in 24-Hour format (HH:MM). IVR The device is equipped with a simple voice prompt. When this option is enabled and a call is answered, the device plays a voice prompt instead of a dial tone to the caller. 14 GoIP User Manual 10 Remote SIM Only the GoIPs with the serial number xxxx support the Remote SIM feature. Enabling this feature allows the SIM Cards to be installed in a SIM Bank rather than in the on-board SIM slots. GoIP can either register to a SIM Bank or a SIM Server. Please refer to the SIM Bank User Manual for more information. 11 Server ID Password This specifies the IP address of the SIM Bank or the SIM Server. This specifies the name to be appeared in the SIM Bank or the SIM Server. This specifies the login password to the SIM Bank or the SIM Server. DTMF Tone Dropout (200 400) This parameter specifies the maximum dropout time for a DTMF tone. When making a call from SIP to GSM or from GSM to SIP by using the second dial method, the device needs to detect the dialing digits from the DTMF tones received via the voice data stream. Depending on the network conditions, short dropouts may occur due to packet jitter / loss. Therefore, DTMF digit may be detected more than once if these dropouts are not taken into account. Consequently, the call is dialed to an incorrect number. To avoid this problem, a dropout window is used to avoid false detection when dropouts occur. During this window, the same DTMF digit is not recognized more than once. The range of the dropout window is specified in terms of packet timestamp value. The smaller the value is, the smaller the dropout window is. This increase the chance of detecting the same digit twice or more. However, if the value is set too large, there is a possibility that the next digit is missed 3.3.2 Network Proper network environment is the key to insure the voice call performance of the device. In general, Intranet offers a more stable network environment than Internet and it is the preferred network to be used. If Internet is going to be used, please make sure that the network can offer low packet loss, small packet jitter and low packet delay. Each voice channel requires less than 90 kbps when A-law or -law voice codec is used. GoIP-8 will require 8 times this bandwidth. Therefore, it is very important to make that both upsteam and downsteam have enough bandwidth (+ 30% headroom) in order to accommodate the data traffics for the device installed when all lines are used simultaneously. In order to get external network access, the LAN port must be configured according to the network environment to be connected. LAN Port 15 GoIP User Manual There are 3 access methods available to configure the LAN port. 1. Static IP – This mode applies to both public and private IP network environment. In the LAN port configuration shown on the left, select “Static IP” and then fill in the parameters as provided by your network administrator. 2. DHCP (default setting) – When the device is installed behind NAT and a DHCP host is available, select “DHCP” to enable the device to obtain LAN IP address and other network information automatically. 3. PPPoE – ADSL and Cable modems very often use PPPoE dial up to obtan network IPs. If this is the case, select “PPPoE” and then enter the information as provided by your ISP. PC Port The PC Port allows other network devices to be attached to the device in order get network connection. It offers both Router and Bridge modes to meet your requirements. 1. Static IP (default setting) – This mode enables the device to create another network segment and it then functions as a router/gateway for this new network segment. Select “Static IP” for this new segment and then enter the PC port IP address and Subnet Mask accordingly. It also has a built-in DHCP server to assign IPs to the devices attached to this network segment. Enable it and then enter the “Starting Addrss”, “Ending Address”, and “Static DNS” as required. As a factory default, the PC port is set to “Static IP” (Router mode) with IP Address set to 192.168.8.1 and Subnet Mask to 255.255.255.0. 2. Bridge Mode – Select this mode if your network topology requires the network devices attached to the PC port to be in the same network segment as the LAN port. Advanced Features 1. VLAN – This is a type QoS service and is intended to give higher transmission priority to real time packets. However, your router switch and ISP network need to support this feature as well. 2. PPTP VPN – This option allows the device to create a VPN tunnel with the designated VPN Server. The VPN protocol supported is PPTP with no encryption or 40-bit encryption which is defined on the VPN server. In 16 GoIP User Manual general, this option is used to avoid VoIP blockings. 17 GoIP User Manual 3.3.3 VoIP This section defines all VoIP related settings. The device supports both SIP and H.323 protocols. For GoIP (1 channel) and earlier version of GoIP-4 / 8, both protocols are embedded in a single firmware version. User must select the desired protocol via the parameter “End Point Type” as shown below in the VoIP Settings section. As more features are added, SIP and H.323 VoIP protocols are supported in two different firmware versions. GoIP-4 and GoIP-8 are now shipped with the SIP protocol firmware as a factory default. If H.323 protocol is required, the firmware of the device can be changed to the one that supports H.323 protocol. Please visit our website for the latest firmware versions or contact your supplier for more information. To find out the protocol installed in the device, please check the firmware version as described below. 1. SIP firmware version is in the format GS-4.01-xx… 2. H.323 firmware version is in the format GH-4.01-xx… Please contact your vendor or visit our website for the upgrade link to the latest version. The upgrade method is discussed in Section x.x. You can always switch the firmware from SIP to H.323 or vice versa. In general, it is important to understand your VoIP application with the device before proceeding to device configuration. If the device is going to work with a IP PBX, please make sure that you know how to configure your IP PBX. It is very important that you send us your application requirements in full details when seeking for technical support in configuring the device. 3.3.3.1 SIP SIP settings are categorized into three groups of parameters in order to simplify the configuration. “VoIP” selection on the left column menu to access the SIP Settings page. Click on Depending on the models, a total of four configuration modes are supported. 18 GoIP User Manual 1. Single Server Mode (for models GoIP, GoIP-4, and GoIP-8) In this mode, only one SIP registration is used for single or multiple-line operation. Please make sure that your SIP server supports multiple-line operation and the SIP account is configured for the number of lines that matches the number of lines available in the device. When receiving a call from the SIP server (outgoing call), it picks the idle GSM channel that is used the least (in terms the number of calls dialed) to dial out the call. When a GSM channel receives an incoming call, the call can either be answered by the device or forwarded to a SIP extension or IVR. Please see more details in the Section x.x for Call Management. Parameter (Single Server Mode) Description 1. Phone Number This is the SIP number used by the device. 2. Authentication ID The name of the device used in Caller Identification is defined here. 3. Display Name The Authentication ID used for SIP registration is specified here. 4. Password The password used for SIP registration is specified here. 5. SIP Proxy The address of the SIP Proxy or Server is specified here. 6. SIP Registrar Server The address of the SIP Registrar Server is specified here. 7. Re-register Period Register to the SIP Server at an interval specified by this parameter. Default Value (s) 8. Outbound Proxy The address of the Outbound Proxy used for VoIP communication is specified here. 9. Home Domain Home Domain is used in SIP identification. 10. Backup Server Backup Server improve service reliability and is used only when the primary server It should be specified as required. fails. SIP Proxy This specifies the backup SIP Server address. SIP Registrar Server This specifies the backup SIP Registrar Server address. Home Domain This specifies the backup Home Domain address. 19 GoIP User Manual 2. Config. By Line (for models GoIP-4 and GoIP-8) This mode is only applicable for multi-line models. Each line (associated with a corresponding GSM channel) registers to a SIP server separately and operates as an independent phone line. The Gateway Prefix parameter (see the table below) is adopted for each line. It is used to specify which line (GSM channel) to be used for making an outgoing call. When the SIP server routes a call to the GoIP for making an outgoing call, the Gateway Prefix must be specified at the beginning of the phone number to be dialed. Otherwise, the attempt of making an outgoing call fails. In addition, it is necessary to remove the Gateway Prefix (P) in the Dial Plan in the Call Divert section for VoIP to PSTN. The syntax is: P:-P| When a GSM channel receives an incoming call, the call can either be answered by the device or forwarded to a SIP extension or IVR. Please see more details in the Section x.x for Call Management. Please note that the parameters defined in this mode are for each line individually. Their definitions are similar to those defined in the parameters table for Single Server mode. 3. Config. By Group (for models GoIP-4 and GoIP-8) This mode is basically a combination of Single Server mode and Config. By Line mode. It allows lines to be split up into groups. Each group only uses one SIP registration for all the lines assigned to the group. Each line can be assigned to only one group in the Grouping section as shown in the right figure. Please note the parameters listed in this figure are the same as the parameters defined in the Config. By Line mode except that there is no Backup Server option. However, these parameters are not group properties rather than line properties. 20 GoIP User Manual 4. Trunk Gateway Mode (for models GoIP, GoIP-4, and GoIP-8) This mode offers a seamless interface with the SIP Trunk configuration in a SIP server. In general, SIP registration is not required in this mode; this is an advantage for a SIP system that requires a license per registration. If SIP server and the device are not in the same network segment, it is recommended that both SIP server and the device are using public IPs for reliable operation. Installing either one or both (SIP server and the device) behind NAT may or may not work properly depending on the SIP Server and the routers (on each side) as well. In this case, SIP server must support NAT. Some routers may map an internal port to a different external port number. VoIP calls may fail to establish properly in this case. The device accepts calls from up to 3 IP addresses (SIP Trunk Gateway1, SIP Trunk Gateway2, SIP Trunk Gateway3) specified and then dial out the call via an Idle channel that is used the least (in terms of the number of calls dialed). The last part of the SIP Trunk Gateway IP addresses can be specified as "X" or "x" to represent that the whole segment IP addresses (0 - 255). Calls originated from the IP segement are accepted. Example: SIP Trunk Gateway2 = 123.124.125.x This example shows that Calls originated from 123.124.125.0 to 123.124.125.255 are accepted. Please note that selection of GSM channels for outgoing calls is done by the device automatically. Please use Config. By Line or Config. By Group mode if you would like to route a call to a specific GSM channel. For received GSM calls, they will be routed to SIP Trunk Gateway1 provided that an unique IP is used. SIP Registration is only supported for SIP Trunk Gateway1. Just fill in the SIP parameters list to enable this operation. The parameters available in this mode are listed in the table below. Parameter Description Default Value (Trunk Gateway mode) 1. SIP Trunk Gateway1 This specifies the first SIP Trunk Gateway address. Use "X' or "x" for the last part of the address to specify the entire segment (0 - 255). 2. SIP Trunk Gateway2 This specifies the second SIP Trunk Gateway address. . Use "X' or "x" for the last part of the address to specify the entire segment (0 - 255). 3. SIP Trunk Gateway3 This specifies the third SIP Trunk Gateway address. . Use "X' or "x" for the last part of the address to specify the entire segment (0 - 255). 21 GoIP User Manual SIP Registration to Trunk Some Trunk gateway connection requires a SIP registration which can Gateway 1 be defined via teh following parameters. 4. Phone Number This specifies the phone number for the SIP registration. 5. Authentication ID This specifies the authentication ID for the SIP registration. 6. Password This specifies the password for the SIP registration. 7. Re-register Period This specifies the period for sending a re-registration request. The section for Advanced Settings shown below is common for all Config. Modes. However, not all parameters are applicable in all configuration modes. In general, factory defaults have been assigned to these parameters. Users should only modify the parameters required. 22 GoIP User Manual The table below summaries all the parameters defined in this section. Parameter (Advanced Settings) Description 1. SIP Listening Port Mode SIP Local port defines the network port number that the device listens for incoming SIP messages. This port number is sent to the SIP Sever/Proxy during SIP registration. This setting defines if this port is pre-assigned to a fixed number or a randomly generated port number (5060 to 6060). Port Number This specifies the port number when the SIP Local Port Mode is set to “Fixed”. 5060 2. SIP INVITE Response One of the key function of the device is to allow call terminations from VoIP to GSM. In general, a VoIP caller dials a PSTN or GSM number (E.164) number and the SIP Server routes this call to the device by sending a SIP INVITE message. This parameter specifies the response to the INVITE message. The three possible responses are described in details below. 1. SIP 200 OK - This response inform the SIP server that the call is answered and the call duration timers starts immediately. If billing applies, the call is charged (immediately) even before the call is answered. 2. SIP 180 then 183 - The device first sends back a SIP 180 Ringing to the calling SIP device to generate a local ring. The caller hears a ringback tone immediately after the call is dialed. When a ringback tone is received from the GSM network, a SIP 183 Session In Progress message is sent to the calling party to start early media (before the call is answered). This allows to the caller to hear the ringback from the GSM network. This is done in order to avoid a long silent period before a ringback tone is returned from the GSM network. 3. SIP 183 - The device sends back a SIP 183 Session In Progress message to the calling SIP device. The calling SIP device then goes into early media mode to receive audio packets. Since it may take a few to over 10 seconds for a ringback tone is returned from the GSM network, the caller may hear a long silent period. None 3. No Answer Response This defines the response (SIP message) to be sent to the SIP Server / Softswitch when a call dialed via the GSM channel cannot be connected successfully. The device hangs up the call and then return the No Answer Response. Depending on the SIP Server / Softswitch settings, the handling of the same No Answer Response may vary from server to server. Please check out the server configuration against your application requirements in order to select the proper SIP message for No Answer Response. Two choices are available. 1. SIP 486 Busy Here 2. SIP 503 Service Unavailable This setting is intended to improve Answer Seizure Rate (ASR) if it is properly configured. 4. 5. CALL OUT PSTN Auth. Mode Bulit-in SIP Proxy This setting defines how incoming VoIP calls are authenticated when the device is configured for using SIP registration(s). This setting applies to Single Server Mode, Config. By Line and Config. by Group modes. This prevents unauthorized calls to be dialed out via the GSM Channel(s). The following authentication methods are available: 1. None - No authentication is used for calls received. This could be a simple arrangement if calls are routed from a SIP Server in the same local network. 2. IP – only calls received from the registered SIP Server(s) are accepted. 3. Password – A SIP 401 message is sent to the SIP server for password authentication of the corresponding SIP account when a call is received. 4. IP and Password – Both authentication methods are used. Default Value SIP 486 IP Note: This setting has no effect when the device is set to Trunk Gateway mode. A simple SIP Proxy is embedded in the device. Choose “Enable” to activate this SIP 23 GoIP User Manual proxy to accept any SIP registrations with the correct password which is specified in the parameter “Password”. There is no need to create a SIP account in this server. Users will have to manage the SIP numbers used on their own. This facilitates the setup of a simple SIP network for customers who do not have their own SIP servers. Password This sets the password for SIP registration to the built-in SIP server. 6. NAT Keep-Alive When enabled, NAT Keep Alive sends a NULL packet to the router regularly in order to keep the network ports used open. 7. Advanced Timings This section consists of 5 basic timers in the SIP protocol. Configure them carefully so that they are compatible with the SIP Server and your requirements. 8. No Answer Expiry (32-180s) This timer specifies the timeout for an unanswered call. A SIP 408 Request Timeout command is sent to the SIP Server when this timer expires. Note: The default value is set the maximum value so that it will not interfere with the call unanswered timeout at SIP Proxy or PBX. NICT Expiry (2-180s) NICT: Non Invite Client Transaction (RFC 3261 Section 17.1.2) ICT Expiry (5-360s) ICT : Invite Client Transaction (RFC 3261 Section 17.1.1) Retransmit T1 (200-2000ms) Round Trip Time (RTT) estimate (RFC 3261 Section 17.1.1) This timer applies to the following timeout timer. 1. INVITE request retransmission interval, for UDP only 2. Non-INVITE request retransmission interval, UDP only 3. INVITE response retransmission interval. Retransmit T2 (20000-8000ms)r The maximum retransmit interval for non-INVITE requests and INVITE responses. DTMF Signaling This setting specifies the DTMF dialing method. 1. Inband – DTMF tones are generated in the form of audio stream. 2. Outband – DTMF digits are sent in the form of digital commands (RFC2833 / SIP INFO). DTMF tones are actually generated by the terminating party. 180 200 Outband Outband DTMF Type This parameter is for outband DTMF dialing. Select the proper format (RFC2833 or SIP INFO) as required by your SIP network. RTP Payload Type This parameter specifies the payload type in RFC 2833 commands. Signaling QoS This specifies the QoS method used for SIP signaling. Both IP TOS and DiffServe format are supported. Select the proper setting that is compatible with your network environment. RFC 2833 9. 10. Signaling Encryption 11. Signaling NAT Traversal Signaling encryption is employed to offer a more secure environment for SIP communications. The following encryption methods are supported. Consult your network/VoIP administrator for more the proper selection if required. 1. RC4 2. Fast 3. VOS 4. AVS 5. N2C 6. ECM 7. ET263 8. XOR 101 None None This setting is not required if the target SIP server / PBX supports NAT traversal. However, if your ISP blocks VoIP traffics, you could try to use Relay Proxy setting. 24 GoIP User Manual Depending on how your ISP blocks VoIP traffics, the Relay Server method may or may not work in your network environment. Two NAT Traversal methods are supported: 1. Stun Server – An external Stun Server is required. This allows the device to obtain the public IP of the network used. 2. Relay Proxy – This is a proprietary method developed by HYBERTONE Technology. HYBERTONE’s Relay Proxy server must be used. A free copy of the Relay Proxy can be download from HYBERTONE’s website (www.hybertone.com). Please contact [email protected] for further assistance if needed. Medial Settings 12. RTP Port Range 13. Packet Length (ms) None This specifies the range of RTP port to be used for audio stream. This specifies the length (in time) of each packet. However, the packet length is codec dependent as well. The minimum packet length of a codec supersedes the valued specified here. The table below summarizes the possible packet length for the codec supported. 16384 - 32768 20 14. Jitter Buffer Codec Time / Frame (ms) Time / Packet (ms) G.711 a-law / -law 0.125 G.729, G.729A, G.729AB 10 10, 20, 30 G.723.1 30 30, 60 A jitter buffer is designed to remove the effects of jitter from the decoded voice stream, buffering each arriving packet for a short interval before playing it out. This substitutes additional delay and packet loss (discarded late packets) for jitter. If a jitter buffer is too small then an excessive number of packets may be discarded, which can lead to call quality degradation. If a jitter buffer is too large, then the additional delay can lead to conversational difficulty.. A fixed jitter buffer maintains a constant size whereas an adaptive jitter buffer has the capability of adjusting its size dynamically in order to optimize the delay/discard tradeoff. Three modes of jitter buffer are supported: 1. Fixed - The fixed mode, which is the default mode, is a simple first in first out mode, with a fixed jitter buffer delay. 2. Sequential - The sequential mode is also a fixed jitter buffer delay mode, but in this mode the jitter buffer function looks at the packet timestamp for dropped or out of sequence packet problems. The data packets are sorted based on the packet timestamp 3. Adaptive - The adaptive mode optimizes the size of the jitter buffer delay and depth in response to network conditions, in addition to the sequential mode functions. Delay This specifies the fixed jitter delay for both Fixed and Sequential Jitter Buffer mode. Min. Delay (ms) This specifies the minimum jitter delay for Adaptive Jitter Buffer mode. Max. Delay (ms) This specifies the maximum jitter delay for Adaptive Jitter Buffer mode. 15. Media QoS Similar to Signaling Qos, this parameter enables the QoS property for audio packets. Both IP ToS (Type of Service) and DiffServe (Differentiated Service) method are supported. 16. Media Encryption Similar to Signaling Encryption (item 6 in this table), this parameter enables the encryption for audio packets. Encryption methods supported are RC4 and ET263. 25 GoIP User Manual 17. Symmetric RTP Network environment in some enterprise may require Symmetric RTP. Please check with your network administrator for further support. 18. Media NAT Traversal This setting is not required if the target SIP server / PBX supports NAT traversal. However, if your ISP blocks VoIP traffics, you could try to use Relay Proxy setting. Depending on how your ISP blocks VoIP traffics, the Relay Server method may or may not work in your network environment. Two NAT Traversal methods are supported: 3. Stun Server – An external Stun Server is required. This allows the device to obtain the public IP of the network used. 4. Relay Proxy – This is a proprietary method developed by HYBERTONE Technology. HYBERTONE’s Relay Proxy server must be used. A free copy of the Relay Proxy can be download from HYBERTONE’s website (www.hybertone.com). Please contact [email protected] for further assistance if needed. 19. Audio Codec Preference Six types of audio codec are supported and they are summarized in the table below. Codec Raw Data Bandwidth (bps) 1. a-law 64K Ethernet 802.3 Data Bandwidth (bps) ~ 85K 2. -law 64K ~85K 3. G.729 8K ~39K 4. G.729A 8K ~39K 5. G.729AB (with Silence Compression and Voice Activity Detection (VAD) 8K ~39K 6. G.723.1 5.3K / 6.4K ~26K / 27K Note: Time per packet = 30ms is used for all bandwidth calculations. For more calculations with other conditions, please visit the VoIP Bandwidth Calculator website http://www.bandcalc.com/. Place a “tick” mark in the check box enable the corresponding codec. The codecs are listed in a descending order of priority for codec selection. This means that the top one in the table will have the highest priority to be selected when establishing a call. To change the priority, select the desired codec and the click on “UP” or “DOWN” button on the left. Note: The effective bandwidth for G.729AB is less since less data are transmitted when there is no voice activity. 26 GoIP User Manual 3.3.4 Call Management The Call Management page defines all characteristics of each GSM channel and the call routing capabilities for both VoIP and GSM calls. It is important to understand that GoIP is designed to bridge calls between VoIP and GSM. Therefore, calls originated from a VoIP network is terminated to the GSM network via the GoIP and vice versa. This means that a GoIP is handling both VoIP and GSM networks at the same time. VoIP calls are mapped to the lines available according to the configuration mode. The left hand column, as shown below, configures the parameters for each line which consists of both call routing and GSM SIM settings. The VoIP line "x" is always mapped to the GSM channel "x" and this arrangement is referred as "Line x" in the Call Management page. 27 GoIP User Manual The parameters for each line are basically divided into 4 groups. 1. Parameters for Call Out via GSM This section defines how a VoIP incoming call is routed to the corresponding GSM channel. When this call route is enabled, the following parameters are displayed for user inputs. Parameter Description Default Value 1. Call OUT via GSM This setting defines if the device is allowed to make outgoing calls via the on-board GSM channel(s). The typical application is to terminate VoIP calls via the GSM network. This setting Enabled 2. Forwarding to GSM Number If this parameter is specified, GoIP dials this phone number via the corresponding GSM channel whenever an incoming VoIP call is received for this line. This is a fixed forwarding method and has the highest priority. This means that the Dial Plan setting does not apply in this case. Please note that how this line is selected depends on the Config Mode and the Callee Number received. The Callee Number is defined as the phone number specified in the “To:” field of an INVITE message. Please refer to Section 3.3.3.1 for more information. Calling the SIP number directly routes the call to the corresponding line immediately. If this parameter is blank and the Callee Number equals to the SIP Number defined for this line, a second dial tone is generated to wait the caller to dial a phone number. Please note that this could only happen in the Single Server mode, Config by Line mode, and Config by Group mode since SIP registration is required. If this parameter is blank and the Callee Number does not equal to the SIP Number defined for this line, GoIP dials out the Caller Number according to the Dial Plan defined. 3. Dial Plan The Dial Plan specifies rules to modify the Callee Number before dialing it out. Each rule is terminated with the delimiter “|”. The rule matching begins from the left to the right. Once a match is found, rule matching terminates and the actions specified in the rule are executed. Syntax: a:-b+c| The portion on the left side (“a”) of “:” specifies the prefix for matching starting from the beginning of the Callee Number. The right portion “-b+c” is the action to be taken. Both “-b” and “+c” are optional. “-b” means that “b” is removed from the beginning of the Callee Number. If “b” is not found starting from the beginning of the Callee Number. “+c” means that “c” is added to the beginning of the Number generated from the last action. In order for this rule to be meaningful, “b” must be the same “a” or the beginning portion of “a”. Example: Callee Number = 9262124567 Dial Plan = 9:-9+852| Actual Number dialed = 85226124567 28 GoIP User Manual Syntax: a[b-c]:-d+e “b-c” specifies the range of a single digit. Together with “a”, they form a prefix for rule matching. “a” can be a single or multiple digits. “-d+e” are the actions to be taken as described in the previous syntax. Example: 913[5-9]:-9+86| In this rule, Callee Numbers starting with 9135, 9136, 9137, 9138, 9139 meet the prefix requirement. The first action is to remove the first digit “9” from the number and then append “86” to the beginning of the number. If the Callee Number is 913601234567, the actual number dialed is 8613601234567. 4. Idle Interval In Between Calls (s) This setting defines an idle interval in between calls. During this interval no outgoing calls are allowed to be made via the GSM channel. 5. Call OUT Auth This parameter defines how incoming VoIP calls are authenticated before dialing them out None via the GSM network. Five options are available: 1. None – No authentication is required. Calls are always dialed out via the GSM network. 2. Password – The caller is prompted for entering the password before the call is dialed 3. Whitelist – This is part of the Call Screen function. Only the caller numbers listed on out. the Whitelist list are allowed to dial out via the device. 4. Password or Whitelist – Either the password or the Whitelist authentication method will be used. 5. 6. Whitelist/Blacklist Biacklist – The caller numbers listed on this list are rejected. Both Whitelist and Blacklist for call screening are supported. Each list contains up to 15 entries. 1. Whitelist – This list contains a list of caller numbers that are allowed to use the device to make outgoing GSM calls when Call OUT Authentication is set to “Whitelist” or “Whitelist + Password”. Whitelist Remark: Adding a "#" digit in front of an Whitelist entry enables a special call back function. When the caller ID of an incoming call is matched, the device first drops the call and then call back the caller automatically to allow the caller to dial a phone number. 2. Blacklist – This list contains a list of caller numbers that are rejected by the device to make outgoing GSM calls when Call OUT Authentication is set to “Blacklist”. 2. Parameters for Call IN via GSM This section defines how incoming GSM calls are handled on a per channel basis. Calls can either be answered by the device or forwarded to the VoIP network connected. Please note that once the GSM Group mode of a channel is enabled, the GSM forwarding in the SIM Card settings is disabled automatically. However, GSM forwarding must be disabled before a channel is configured as “Client” in GSM Group mode. 29 GoIP User Manual The parameters related to routing GSM incoming calls to VoIP are summarized in the table below. Parameter Description Default Value 1. Call IN via GSM This setting controls the device to accept (select “Enabled”) or reject (select “Disabled”) incoming calls via the selected GSM channel. Enabled 2. Forwarding to VoIP Number This parameter defines if an incoming call to the selected GSM channel is forwarded immediately to the VoIP network or not. If this parameter is blank, the device answers an incoming GSM call. If IVR (in the Preference section) is enabled, the device generates a voice prompt to ask the caller to dial an extension number; otherwise, it generates a second dial tone. If a phone number is assigned to this parameter, a SIP INVITE to the “Forward Number” is sent to the SIP Server or the SIP trunk address. This number must be a number that can be recognized and accepted by the VoIP network registered. This means that it could be an extension number in the VoIP network or an E.164 number. For E.164 number, the VoIP network must be setup properly for dialing out via another trunking service. Since the device can be used for trunking, it is possible to set it up to route an incoming GSM call from one channel and dial out to another party with an E.164 number via another GSM channel. Special Feature Conditional forwarding is implemented to forward an incoming GSM call based on its caller ID. Syntax: a>b| “a” is a complete or portion of a number for matching with the incoming caller ID. “b” is the number to be dialed via the VoIP network. or an E.164 number. It could be an extension number Example: 98765432>108|>101| In this example, GoIP first try to match the incoming GSM caller ID with the number 98765432. If it is a match, GoIP dial the number 108. If the first rule does not match, it will continue to the second rule. There is no matching number for the second rule. It is then considered as a match and GoIP dials the number 101. The maximum length for this parameter is 140 ASCII characters. The number of rules can be adopted is limited by this length. Each rule must end with the “|” character. When there is no match, the incoming GSM call is handled as if the Forward Number is blank. 3. Dial Plan The Dial Plan specifies rules to process a number dialed after the call is answered. This number is referred as a second dial number. This enables a way to recognize second dial numbers that are in a known format and dial them out immediately. Depending on the VoIP network connected, a second number could be an extension or an E.164 number. Syntax 1: a:-b+c| The portion on the left side (“a”) of “:” specifies the prefix for matching. The right portion “-b+c” is the action to be taken and they are optional. When the beginning of the callee number matches “a”, the first action “-b” is to removed “b” from the Callee Number. The second action “+c” is to add “c” to the beginning of the number that is produced from the first action. Please note that a, b, c could be a single digit or a 30 GoIP User Manual sequence of digits and they are independent. Example 1: Dial Plan = 9:-9+852| Number received = 9262124567 Actual Number dialed = 85226124567 Syntax : XXX…XXX: | This syntax monitors the length of the number dialed when performing second dial operation. Each “X” represents a single digit. If a prefix is known, X’s can be replaced by the prefix. Example: Dial Plan: 13XXXXXXXXX: | This rule monitors the number dialed with the starting prefix of 13 and a length of 11 digits. Once this condition is met, the number will be dialed out immediately. The maximum length for the Dial Plan definition is 140 ASCII characters. There is no limit on the number of rules defined. Each rule must be ended with the “|” character. The rule matching starts from the beginning and stops once a match is found. 4. Hunt Group Mode Hunt Group operation is discuss in details in Appendix D. Please note that Hunt Group Mode is a property of each GSM channel and is required to be set individually. Disable Host - This enables the channel selected to be the Host of the Hunt Group operation. All clients registers and update the host on their channel status. The host then maintains a list of clients status and selects an idle channel to receive the next incoming GSM call via GSM call forwarding. Client- This enables the selected channel to be a client in Hunt Group mode. The Host Address field specifies the IP address of the device with the Host channel. A client registers and updates its channel status to the Host. Sharing of GSM channels between two Hunt Groups is supported. When all channels are in use in one group, Call Forward will be set to the Host channel of the other group. When a free channel is available again, Call Forward is then set to the free channel instead. Please note that the call forward mode of the Host is always set to Unconditional Call Forward to the selected Idle Client. Backup Host Address This parameter specifies the device IP that contains the Server channel in the other GSM Group. The Server channel then updates the other Server channel with the GSM number of an idle channel. Therefore, GSM call forwarding can then be set to this number when all channels are in use. 5. Call IN Authentication This parameter defines how incoming GSM calls are authenticated before routing calls to the VoIP network connected. Five options are available: 1. None – No authentication is required; all incoming GSM calls are routed to VoIP. 2. Password – The caller is prompted for entering the password before the call is routed or a second dial tone is generated. 3. Whitelist – Only calls with caller IDs that are listed on the Whitelist are accepted by the GSM channel selected. Calls with GSM numbers not on the list are not answered at all. 4. Whitelist + Password – Both Whitelist and password are used to authenticate incoming GSM calls. 5. Blacklist – Calls with caller IDs that are listed on the Blacklist are not answered by the channel selected. None 6. Whitelist/Blacklist Call screen list can be set to Whitelist or Blacklist. A maximum of 15 entries is allowed. 1. Whitelist – This list contains a list of incoming GSM caller numbers that are accepted Disabled 31 GoIP User Manual (answering calls from these numbers only) by the device when Call IN Authentication is set to “Whitelist” or “Whitelist + Password”. 2. 7. GSM Call Forward Blacklist – This list contains a list of incoming GSM caller numbers that are rejected (not answering calls from these numbers) by the device when Call Authentication is set to “Blacklist”. This setting specifies the Call Forward method when the GSM channel is configured as the server in HUNT Group mode. 1. Unconditional Call Forward – Incoming calls are always forwarded to an idle channel. This leaves the Host channel for outgoing calls. If all Client channels are in use, Call Forward mode is disabled and the Host channel will then answer incoming calls. 2. Call Forward Busy – This means that the Host channel always answers an incoming call unless it is busy. 3. SIM Card Parameters The third set of parameters are related to the SIM Card property. Each SIM card has its own set of parameters and they need to be programmed individually if required. 32 GoIP User Manual Parameter (SIM Card) 1. SIM Card Number Description 2. IMEI This specifies the International Mobile Equipment Identity number. The device comes with a factory default value. Once changed, this value cannot be restored. 3. Unlock PIN1 SIM Card unlock PIN code 1 4. Unlock PIN2 SIM Card unlock PIN code 2 5. Total Talk Time Limit (m) This sets the limit for the total talk time available for the SIM card. When this limit is reached, no more outgoing calls can be made. The SIM card must be reset via the status page or via a special SMS command (see xx). 6. Talk Time Limit (m)/call This sets the limit for the maximum talk time per call. reached, the call is dropped automatically. 7. Billing Increment (s) This is a call duration measurement unit expressed in seconds. Depending on your service provider, some services are measured and billed in sixty second increments (one minute) or the billing increment may be in durations of six or even ten seconds. 8. SMS Alert Number This specifies the GSM number to receive a SMS Alert on the Total Takl Time. If this parameter is blank, no SMS Alert will be sent. 9. SMS Alert Schedule (Remain Talk Time(m)) The Remain Time is the Total Talk Time Limit minus the total talk time used. When this Remain Time reaches the value set in the parameter, a SMS Alert is sent to the SMS Alert Number automatically. 10. Hide My GSM Number Default Value This specifies the phone number of the SIM Card that is inserted to the channel (line) selected. Factory default When this limit is This parameter determines if the caller party can receive the phone number of the caller or not. Enabling this parameter hides My GSM number from the called party. Disable This specified if the phone number of the caller is shown at the called party or not. GSM Call Forward Mode This section defines the Call Forward conditions for the selected GSM channel. This section is not applicable when the GSM Group mode is enabled. Please note that the GSM Call Forward defined here is equivalent to the same operation in a cellphone. 11. Unconditional Call Forward Forward all incoming calls unconditionally to the number specified. 12. Call Forward Busy Forward calls when the GSM Channel is in use. 13. Call Forward No Answer Forward the call when an incoming call is not answered. 14. Call Forward Unreachable Forward calls when the GSM channel cannot register to the carrier. SMS Settings 33 GoIP User Manual 15. SMS Sender This parameter enables the selected channel to register to a SMS server. The channel then becomes a SMS gateway for sending and receiving SMS. SMS Server IP SMS Server Port This specifies the domain name or ip address of the SMS server. This specifies the communication port that is used by the SMS server. This must match the value set in the SMS server. SMS Client ID This specifies the login ID for the channel. Password This specifies the login password for the SMS Client ID. 16. SMS ACK 44444 SMS ACK is the acknowledgement response to a SMS received. If this parameter is disabled, the SMS ACK is not sent and the carrier continues to send the same SMS periodically until the message is terminated. 4. Miscellaneous Parameters The parameters listed in this section are device property instead of channel property as compared to the last 3 groups. Parameter Description Default Value 1. This defines how the device handles SMS messages. Disabled SMS Mode 1. SMS Dial SMS Dial Prefix Dial – This mode is used to support Call Back function via incoming GSM messages. Appendix B describes the three different modes of operations in order to meet the different requirements from various SIP servers. Please note that the SIP server registered must be configured for this operation. This parameter specify which SMS Dial mode is used. for more information on the modes available. The parameter is applicable for SMS Dial mode. added to the phone number of the called party. 2. Please Appendix B It allows a prefix to be Relay – This mode forwards incoming GSM SMS to a SIP terminal and a GSM number. SMS Forward Number This parameter is valid in SMS Relay mode. When an incoming SMS is received via a GSM channel, it is forwarded automatically to the SMS Forward Number. SMS Forward GSM The parameter is valid in SMS Relay mode. When an incoming SMS is received, it is forwarded automatically to the SMS Forward GSM Number via the same GSM channel. Number 34 GoIP User Manual 2. CID Forward Mode This specifies the method used to transmit an incoming GSM caller ID to a SIP party. 1. Disabled – Incoming GSM caller ID is not transmitted to SIP. 2. Use Remote Party ID – This enables the Remote-Party-ID field is sent as part of the INVITE message. The incoming GSM caller ID is specified as part of this field. 3. Use CID as SIP Caller ID – This causes the CID information in an INVITE message is replaced by the incoming GSM Caller ID. CID Prefix This parameter specifies a prefix to be inserted in front of the incoming GSM caller ID received. The intension for this is to modify the caller ID so that it can be dialed back directly by the called party. Please refer to Appendix E for more information. 3.3.5 GSM Service Provider This section sets the mode of the GSM service provider selection. The factory default setting is “Auto” and this enables auto GSM Service Provider selection to the SIM card default. When a GoIP is installed in a border location where GSM roaming could occur, the "Fixed" mode could be used to manually select the preferred GSM service provider. This could avoid expensive roaming charges. Select "Fixed" mode and then press [Save Changes] to save the setting. You need to refresh the browser after a few minutes to view a list of GSM service providers as shown below. Enter the provider code 35 GoIP User Manual displayed in the Code entry and then press [Save Changes]. 3.3.6 GSM Base Station Settings This feature is currently in beta testing and it is intended for advanced users only. Don't attempt to change the default settings if you do not have a good understanding on GSM network. Please contact us for help if you have a specific requirement on GSM base station settings. Three modes for base station selection are available: 1. Auto - This mode uses the default GSM base selection mechanism. 2. Poll - This mode limits the number and the list of base stations (BTS) to be used. 3. Fixed - This mode fixes the base station (BTS) to be used. 3.4 Tools Click “Tools” on the left hand menu to access the submenu as shown below. 36 GoIP User Manual 1. Online Upgrade Click [Online Upgrade] to upgrade the device firmware. The current version is displayed as well as the last upgrade time. Contact us or local agent/supplier for the latest firmware version. Enter the firmware link (URL) and then click “Start” to begin firmware upgrade. Once the firmware upgrade is completed, the device will reboots itself automatically. Please wait patiently. Note: It is important not to disconnect the power during a firmware upgrade since the internal Flash may be corrupted. If this happens, pleases contact technical support for assistance.c Please reboot the device if an upgrade attempt fails before performing another upgrade. 2. Change Password Click “Change Password” to change the password with respect to the login level. There are three login levels: 1. 2. 3. Administrative Level – Login ID is “admin” and the default password is “admin”. User Level – Login ID is “user” and the default password is “1234”. SMS Level – Login ID is “sms” and the default password is “1234” Note: Administration Level allows changing the passwords for all 3 levels. 3. Send USSD Click [Send USSD] to access the webpage (as shown below) to send USSD commands. 37 GoIP User Manual The procedures to send an USSD command are” a) Select the Line (GSM channel) that you want to send an USSD command to the service provider. The line status and the SIM (GSM) number are displayed. b) Enter the USSD command c) Click [Send]. Example: For the service provider PCCW in Hong Kong, the USSD command to check balance is ##122#. Enter “##122#” and the click [Start]. The following screen is then displayed. A few seconds later, the service provider sends back a USSD message/response as shown below. Click [Back] to return to the Send USSD command page. For certain service requests, user responses are required. Just following USSD message and then send back a response via SEND USSD command. 4. Send SMS Click [Send SMS] to access the Send SMS webpage as shown below 38 GoIP User Manual . The procedures to send a SMS are” a) 5. Select the Line (GSM channel) that you want to send a SMS. The line status and the SIM (GSM) number are displayed. b) Enter the recipient’s phone number (GSM) c) Type the SMS message in the SMS Content box. The maximum length of a message is 140 characters for 7/8-bit ASCII code and 70 characters for 16-bit Unicode) . d) Click [Send] to send out the SMS. SMS In Box Click [SMS In Box] to view the SMS messages received as shown below. Select the desired line to view the latest 5 messages received for the corresponding GSM channel. 6. GSM Channel Shut Down This feature is implemented for two functions: 1. Removing the power to a GSM channel before removing or inserting a SIM card. This is a recommended procedure in order to prevent damages to the SIM card. 2. Disabling a GSM channel temporary. Click [GSM Channel Shut Down] to access the webpage below to shut each GSM module individually. Place a check mark () to select the desired channel and then click [Save] to activate the shut down. Remove the check mark and then click [Save] to turn on the channel again. 39 GoIP User Manual 7. Backup / Restore Configuration The device configuration can be backup or restore via this page. Click [Backup / Resotre Confguration] to access the page shown below. To backup the device configuration, just click [Save] in the Backup Configuration section. password is required when restoring a saved configuration, enter a password before the backup. If a To restore a saved configuration, choose the configuration file in the Restore Configuration section and then click [Restore]. Enter the password if required. 8. Reset Click [Reset] to reset the device configuration back to the factory default. Click [OK] in the pop up window shown below to confirm this action. Click [OK] to reset the device configuration back to the factory default! 40 GoIP User Manual 9. Reboot Click [Reboot] to restart the device. Click [OK] in the pop up window shown below to confirm this action. The reboot process will take couple of mins. 41 GoIP User Manual Appendix A. Special SMS Commands In order to manage the device, special SMS commands can be sent to anyone of the GSM channel in order to read the LAN IP, reset the device and reboot the device. The table below summarizes the SMS command syntax. “<” and “>” are not part of command text. SMS Message Content ###INFO### Function Sends an SMS response to the sender with the LAN port IP address. ###info### RESET <password>. reset <password> Reset the device configuration back to the factory defaults and then reboot the device. <password> is the password for the administration level. REBOOT <password> Reboot the device. reboot <password> <password> is the password for the administration level. 42 GoIP User Manual Appendix B. SMS Modes The device receives SMS messages from both GSM and VoIP networks and they are handled according to the modes defined below. 1. Dial Mode – In this mode, a received SMS is used to implement the “Call Back” function. The concept is to establish a phone call between the called party and the calling party. The phone number of the called party is specified in the GSM SMS message received. The phone number of the calling party is the SMS sender’s number. The device then sends a SIP INVITE message containing these phone numbers to the SIP Server registered. Three different SIP INVITE message formats are supported and are described below. a) Mode 1 SIP Message format: - The “To” field in the SIP INVITE message contains the phone number of the called party. - The “From” field contains the phone number of the calling party. Once the SIP server receives these two numbers via a SIP INVITE message, it then terminates the SIP call (SIP INVITE) and then call both parties via its own phone network. The device may or may not take part in the actual call conversation. Example: SMS content = 8675588228822 Sender’s number = 861380000000 SIP Server IP = 192.168.2.1 SIP Number = 20001 The INVITE message sent to the SIP Server is: INVITE sip:[email protected]:5060;transport=udp SIP/2.0 Via: SIP/2.0/UDP 192.168.2.237:5060;branch=z9hG4bK363969813 From: <sip:[email protected]:5060>;user=phone;tag=65248630 To: <sip:[email protected]> Call-ID: [email protected] CSeq: 2 INVITE Contact: <sip: [email protected]:5060> Max-Forwards: 30 User-Agent: HYBERTONE Allow: INVITE, ACK, BYE, CANCEL, OPTIONS, NOTIFY, REFER, REGISTER, MESSAGE, INFO, SUBSCRIBE Content-Type: application/sdp Content-Length: 226 b) Mode 2 SIP Message format: - The “To” field in the SIP INVITE message contains the phone number of the called party. - The “From” field contains the SIP number of the line that is associated with the GSM channel - Note: The VoIP configuration of the device must be set to “Config. By Line mode”. Only the phone number of the called party is passed to the SIP server via a SIP INVITE message. This mode is designed to use the GSM channel of the device to complete the Call Back function. 43 GoIP User Manual Therefore, the Call OUT via GSM parameter of the device must be enabled and the Forward Number associated with this parameter is set to the phone number of the SMS sender. To achieve the Call Back function, the SIP server calls the called party via its phone network and then calls the SIP number. Since a call to this SIP number is set to forward to the phone number of the SMS sender, both the called and calling parties can then be connected. Example: SMS content = 8675588228822 Sender’s number = 861380000000 SIP Server IP = 192.168.2.1 SIP Number = 20001 The INVITE message sent to the SIP Server is: INVITE sip:[email protected]:5060;transport=udp SIP/2.0 Via: SIP/2.0/UDP 192.168.2.237:5060;branch=z9hG4bK363969813 From: <sip:[email protected]:5060>;user=phone;tag=65248630 To: <sip:[email protected]> Call-ID: [email protected] CSeq: 2 INVITE Contact: <sip:[email protected]:5060> Max-Forwards: 30 User-Agent: HYBERTONE Allow: INVITE, ACK, BYE, CANCEL, OPTIONS, NOTIFY, REFER, REGISTER, MESSAGE, INFO, SUBSCRIBE Content-Type: application/sdp Content-Length: 226 c) Mode 3 SIP Message format: - The “To” field in the SIP INVITE message contains the phone numbers of both the called and calling parties. These two numbers are concatenated by using the asterisk (*) character with the number of the called party in the front. - The “From” field contains the SIP number of the line that is associated with the GSM channel Example: SMS content = 8675588228822 Sender’s number = 861380000000 SIP Server IP = 192.168.2.1 SIP Number = 20001 The INVITE message sent to the SIP Server is: Sending Message to 192.168.2.1:5060: INVITE sip:8675588228822*[email protected]:5060;transport=udp SIP/2.0 Via: SIP/2.0/UDP 192.168.2.237:5060;branch=z9hG4bK363969813 From: <sip:[email protected]:5060>;user=phone;tag=65248630 To: <sip:8675588228822*[email protected]> Call-ID: [email protected] CSeq: 2 INVITE Contact: <sip:[email protected]:5060> Max-Forwards: 30 44 GoIP User Manual User-Agent:HYBERTONE Allow: INVITE, ACK, BYE, CANCEL, OPTIONS, NOTIFY, REFER, REGISTER, MESSAGE, INFO, SUBSCRIBE Content-Type: application/sdp Content-Length: 226 2. Relay Mode – This mode supports SMS forwarding from GSM to SIP and from SIP to GSM. a) Received GSM SMS messages are forwarded to both SIP and GSM depending on the settings of the SMS Forward Number and SMS Forward GSM Number. t When an incoming GSM SMS is received, it can be forwarded automatically to another GSM number as specified by the SMS Forward GSM Number. The received SMS can also be forwarded automatically to a a SIP number or extension as specified by the SMS Forward Number. If this number is not set, this feature is disabled. Forwarding GSM SMS to SIP is achieved via the SIP MESSAGE command. An example of a SIP MESSAGE is shown below. Please note that the number of the GSM SMS Sender is added as part of the message (the last two lines in the SIP MESSAGE command). Example: SMS SIP Recipient = 3999 SIP Proxy = 192.168.2.1 GSM SMS Sender = 861361234567 GSM SMS Content = 075583185700 SIP MESSAGE Sent to SIP Server: MESSAGE sip:[email protected] SIP/2.0 Via: SIP/2.0/UDP 192.168.2.162:5060;branch=z9hG4bK1967685528 From: <sip:[email protected]>;tag=667435795 To: <sip:[email protected]> Call-ID: [email protected] CSeq: 4 MESSAGE Contact: <sip:[email protected]:5060> Max-Forwards: 30 User-Agent: HYBERTONE Content-Type: text/plain Content-Length: 28 8613682626865 075583185700 Please note that the SIP Server side must be programmed to process this SIP MESSAGE according to the application needed. It can forward the message to the SIP number with the Caller ID as the GSM SMS Sender. If the message content is a phone number for a called party, it is then possible to implement the Call Back function by using the content of the SIP message. If the SMS GSM Recipient is set, the received GSM SMS is forwarded to this recipient via the same GSM channel which receives the SMS. 45 GoIP User Manual b) A SMS can be sent to the device via its SIP number. The content of the SMS must be in the preset format. The first line must contain a valid GSM number and then the text message begins at the second line and must meet the restrictions imposed by a normal GSM SMS. A sample of a SIP MESSAGE sent from SIP device is shown below. Example: A SIP SMS is sent from the SIP number 3999 to the SIP number 2001 (used by the device) and then the SMS is sent out to the phone number 1368266800 via the GSM channel associated with 2001. SIP SMS Sender = 3999 SIP SMS Recipient = 2001 SIP SMS Content = 13682626800 Hello world SIP MESSAGE Sent from the SIP Server: MESSAGE sip:[email protected]:5060 SIP/2.0 From: <sip:[email protected]>;tag=5031 To: <sip:[email protected]> Call-ID: [email protected] CSeq: 3 MESSAGE Contact: <sip:[email protected]> max-forwards: 16 date: Tue, 18 Nov 2008 06:36:37 GMT user-agent: SIPPER for 3CX Phone p-hint: usrloc applied Content-Type: text/plain Content-Length: 26 13682626800 Hello world 46 GoIP User Manual Appendix C. Custom Network Tones This section describes how to define custom network tones. The “Custom” selection allows the following tones to be defined as shown on the right. 1. Dial Tone – When an incoming call is answered, this tone is generated to indicate to the caller to dial a number. 2. Ring Back Tone – When a call is dialed from the device to VoIP and the SIP 183 is not enabled, this tone is generated to indicate that the calling is in progress. 3. Busy Tone - When a call dialed from the device to VoIP is busy, this tone is generated. 4. Indication Tone – When a call waiting call is presence, this tone is generated. The syntax for a network tone script is defined as <nf, rpt, p1on, p1off, p2on, p2off, p3on, p3off, f1, f2, f3, f4, l1, l2, l3, l4> where nf is the number of single frequency tone (1-4) to be generated. rpt is the number of times for the tone to be repeated based on the on/off pattern defined (0 means infinite). p1on is the tone on duration for the first frequency tone (ms) p1off is the tone off duration for the first frequency tone (ms) p2on is the tone on duration for the second frequency tone (ms) p2off is the tone off duration for the second frequency tone (ms) p3on is the tone on duration for the third frequency tone (ms) p3off is the tone off duration for the third frequency tone (ms) f1 is the frequency of the first tone (300 to 3000Hz) f2 is the frequency of the second tone (300 to 3000Hz) f3 is the frequency of the third tone (300 to 3000Hz) f4 is the frequency of the forth tone (300 to 3000Hz l1 is the level for tone 1 (range from 0 to 31 with 0 = 3dB, -1dB for each increment) l2 is the level for tone 2 (range from 0 to 31 with 0 = 3dB, -1dB for each increment) l3 is the level for tone 3 (range from 0 to 31 with 0 = 3dB, -1dB for each increment) l4 is the level for tone 4 (range from 0 to 31 with 0 = 3dB, -1dB for each increment) Example: 1. Dial tone definition: 450Hz@-20dB, on continuously. The dial tone script is: 1,0,100,0,0,0,0,0,450,0,0,0,23,0,0,0 47 GoIP User Manual Appendix D. GSM Group Mode The GSM Group mode is designed to simulate the function of one GSM number with multiple lines. The idea is to form a GSM group with one number being the "Server". Only this GSM number is announced to the public. Calls to this number are forwarded to other GSM numbers ("Clients") in the group until all GSM channels are used up. Effectively speaking, if there are 40 GSM channels in a group, a maximum of 40 concurrent calls can be achieved by just calling the GSM number of the Server channel. The diagram below demonstrates this concept with only single channel GoIPs. In fact, GoIP with multiple channels can also be used. Only one "Server" in a group and all the other channels must be set to "Client" individually. 48 GoIP User Manual Appendix E. CID Call Forward For incoming GSM calls, the phone number of the caller can be displayed at the called party (SIP terminal). The device supports the following two methods. Unfortunately, not all SIP servers support one or both methods. Please check with the vendor of the SIP server for more information. 1. Remote Party ID - This is a parameter in a SIP INVITE message. Choose this if both SIP Server and SIP terminal support this parameter. Example: Caller ID / number = 13800000000 The Remote Party ID parameter is included in the SIP INVITE Message below. 2. USD CID as SIP Caller number - This parameter specifies the use of GSM Caller ID instead of its SIP number in the INVITE message when making a call. Please make sure that the SIP server supports this type of INVITE message since the call now is not originated from a valid SIP number defined in the server. Please note that the Remote-Party-ID is also included in the INVITE message. 49 GoIP User Manual Appendix F. Volume Adjustment The volume adjustment of the device can be accessed via the URL below. http://<device address>/en_US/gaim.html The <device address> is the IP address or domain name of the device. The volume levels of the audio streams from VoIP to GSM and GSM to VoIP are controlled by the input gain and the output gain respectively. An increase in the output gain means that the GSM / PSTN party hears a higher audio level. An increase in the input gain means that the VoIP party hears a higher audio level. Please note that changing these gain settings affects the DTMF tones in the corresponding path as well. As a result, DTMF tones for phone dialing may not be detected correctly. Please change these settings with great care and make sure that DTMF detections are not affected. 50 GoIP User Manual Appendix G. Device Characteristics Model GOIP GOIP-4 Processor DSP GoIP-8 ARM9E 133MHz 1 1 GSM Module 2 @95MHz G610 (Infineon chipset) RAM 16M 16M 32M FLASH 4M 4M 4M DC12V/500mA +-10% DC12V/2A +-10% DC12V/3A +-10% Power Remark GSM band Quad band: 850M/900M/1800M/1900M Input 100V to 240V Default: 900M/1800M Power Max. 5 W Max. 12 W Max. 20 W Consumption LED POWER, RUN, LAN, PC, GSM (one for each channel) Ethernet Port 2 2 2 100/10BASE-T 0.10 Kg 0.45 Kg 1.2 Kg Without DC Adapter Weight Operating 0-40℃ Temperature Operating 40%-90% Non-condensing Humidity Color Gray VoIP Channel 1 4 8 GSM Channel 1 4 8 51