Download Spy Clock DVR with motion detector (4GB) Model # DVR520
Transcript
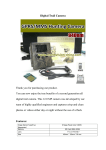
Spy Clock DVR with motion detector (4GB)
Model # DVR520
Instruction Manual
Thank you for purchasing our company’s
products! This product is a high-definition
digital camera with motion detection and photoshooting capabilities. It is also a working clock.
It has TF card memory with 4GB capacity.
Before using this product, please carefully read
this user manual. The features are presented in
Figure 1 below.
Back View
Front View
Figure 1: Appearance and buttons
1. USB Port
2. TF card slot
3. On / off button (between 1 and 2 on the
clock face) (K1)
4. Picture / Motion-detection camera button
(between 10 and 11 on the clock face) (K2)
5. Clock adjustment knob
6. Camera (above the “12”)
7. Indicator Light (under the “6”)
I. Operation instructions
A. Turning the unit on and off.
The on/off button (K1) turns the unit on
and off. To turn the unit on, press and
hold the on / off button (long press) and
release it when you see the red light
comes on. . When the red light goes out
and the green light stays on, the unit is
on and in DVR standby mode. While in
DVR standby mode and no other input,
it will shut off after 1 minute. Note: You
must wait until the unit is in DVR
standby mode before selecting any
different mode.
To save files and turn the unit off, press
and hold on/ off button until the red
light starts to flash. The indicator light
will flash the red light three times, then
power off.
B. Recording Video
Insert the TF card. Place the unit in
DVR standby mode by turning the unit
on.
Press the on/off button (K1) and release
(short press) once to enter video camera
mode. The green indicator light will
flash six times and go out. The unit is
now recording video. To save the video
file and stop recording video simply
quick press the on/ off button again and
the green LED indicator will come back
on (DVR standby mode). Files will be
saved every 5 minutes during camera
operation.
C. Recording Motion Detection Video
Insert the TF card. Place the unit in
DVR standby mode by turning the unit
on. If you want to use motion detection
long press the photo/motion-detection
button (K2), release the button when the
red indicator light will flash six times
and go out. The camera is now in
motion-detection mode. It will come on
when it detects movement, record, and
shut off when there is no more
movement detected. The unit will start
to record as soon as the red light starts
to flash and continues to record from
additional 30-45 seconds after no further
motion is detected before returning to
motion detection standby. Press and
hold the on/ off button to turn the
camera off. The red light will flash three
times and go off.
Note: Quick press the on/ off button to
return to the DVR standby mode.
D. Taking Photos
Insert the TF card and place the unit in
standby mode.
Press the picture button (K2) and release
to take photos. The green indicator light
will flash once and go out each time a
photo is taken and the photo will be
saved to the TF card. You cannot take
another picture until the green indicator
is back on
E. USB Connection
A USB cable is included for connecting
the unit to a computer for viewing files
and for charging the unit.
1. In order to view files, make sure the
unit is OFF and the TF card is installed.
Plug into the computer using the USB
cable. If it does not open automatically,
go to “My Computer” and click on the
removable disk drive, usually “E”. Open
the
“DCIM”
folder,
then
the
“100DSCIM” folder. Your pictures and
videos will be displayed for you to
double click and view.
2. The unit is equipped with a highcapacity lithium polymer battery. If the
unit needs to be charged, the green
indicator light will flash quickly. To
charge the unit, turn it off and plug it
into the computer using the USB cable.
While the unit is charging, the indicator
light will flash red, then green, until the
battery is fully charged. Full charge will
be indicated by a steady green light.
Note: When charging the battery for the
first five times, charge the battery
completely after allowing it to discharge
fully. To completely charge, let it charge
for 30 minutes to an hour longer after
the steady green light comes on. This will
ensure that maximum battery life is
achieved.
F. Setting the Time
Connect DVR to an available USB port
on your computer. If the root directory
of the DVR does not appear on the
screen, you can double click on MY
COMPUTER (located on your desktop
or in your START menu), find the drive
letter of the DVR (usually the last
removable drive letter) Once you
have the root directory open, right click
anywhere in the folder (except on the
DCIM folder). From the menu that
opens select new and then select Text
document. You will now see
in the root
directory. You will need to name the
file “Time” and press the “enter” key
on your keyboard. Hint: You can right
click on the file and select “Rename”
from the menu that appears.
You will need to double-click on the file
“Time.txt”. Enter the date and time in
the following format: YYYY.MM.DD
<SPACE>HH:MM:SS
For example, 11/10/10 2:22 PM would
be entered as 2010.11.10 14:22:00
Save and close the file. Remove the
DVR from the USB port. Turn DVR
back on and the time will be set.
G. Webcam
This DVR can also be used as a web
camera (Webcam). To use this DVR as
a webcam hold down the picture /
motion-detection camera button (K2)
while connecting the unit to the
computer using the included USB
cable. If done correctly, you will see a
window open (Image download utility)
and can see a Standard Camera icon in
My Computer.
Note: If you are using the DVR as
webcam the first time you will need to
install the driver first using the
instructions below.
To use this item as a webcam you will
need to install the webcam driver
located on the included CD. Insert the
CD into your computer’s CD drive. Go
to the MY COMPUTER folder and
double click on the icon titled
Installation CD. You should now see an
icon titled Driver. Double click on the
icon titled Driver and the driver will be
installed. When you connect the DVR
to your computer to use it as a web
camera Windows will install the driver
for a “Standard Camera”.
PARAMETERS
Item
Video format
Video encoding
Video resolution
Video
frame
rate
Media playing
software
Picture format
Picture pixels
The ratio of
image
Supporting
system
Battery capacity
Working hour
Charge pressure
Interface type
Storage support
Battery type
parameters
AVI
M-JPEG
640x480 VGA
30fps
Attached software of the
operating
system
or
mainstream audio and video
media playing software
JPG 2560x1920
5M pix
4:3
Windows ME/2000 XP/
2003/Vista/ Windows 7/Mac
/ Linux
300mAh
About 120 minutes
DC-5V
MINI 4pin USB
micro SD card
High-capacity lithium
polymer
Revised 1/14


