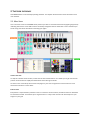
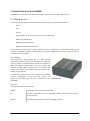
1
VisualDMX Manual Version 1.5 Written for VisualDMX 1.49 March 2009 Author: Jeroen van der Velden Translation: Maarten Engels © 2009 Visual Productions All rights reserved. No parts of this work may be reproduced in any form or by any means - graphic, electronic, or mechanical, including photocopying, recording, taping, or information storage and retrieval systems without the written permission of the publisher. While every precaution has been taken in the preparation of this document, the publisher and the author assume no responsibility for errors or omissions, or for damages resulting from the use of information contained in this document or from the use of programs and source code that may accompany it. In no event shall the publisher and the author be liable for any loss of profit or any other commercial damage caused or alleged to have been caused directly or indirectly by this document. Due to the dynamic nature of product design, the information contained in this document is subject to change without notice. Revisions of this information or new editions may be issued to incorporate such changes. Products that are referred to in this document may be either trademarks and/or registered trademarks of the respective owners. The publisher and the author make no claim to these trademarks. The Graphics Interchange Format (c) is the Copyright property of CompuServe Incorporated. GIF (sm) is a Service Mark property of CompuServe Incorporated. 1 Content 1 Introduction ......................................................................................................................................................... 3 1.1 Specifications ................................................................................................................................................ 4 1.2 Fixture Independent Architecture ................................................................................................................ 4 1.3 System Requirements ................................................................................................................................... 4 1.4 System Overview .......................................................................................................................................... 5 2 The User Interface ................................................................................................................................................ 6 2.1 Main View ..................................................................................................................................................... 6 2.2 Keyboard Shortcuts .................................................................................................................................... 15 2.3 Command-line Parameters......................................................................................................................... 16 2.4 Customize VisualDMX................................................................................................................................. 16 3 Quick Start Manual............................................................................................................................................. 21 3.1 New Configuration ..................................................................................................................................... 21 3.2 Controlling fixtures ..................................................................................................................................... 25 3.3 Learning more ............................................................................................................................................ 26 4 Working with VisualDMX ................................................................................................................................... 27 4.1 Create a Fixture Configuration ................................................................................................................... 27 4.2 Programming Sequences ............................................................................................................................ 37 4.3 Programming Actions ................................................................................................................................. 42 4.4 Using Presets .............................................................................................................................................. 49 4.5 Matrix Mania! ............................................................................................................................................. 54 4.6 Calibrating Fixtures ..................................................................................................................................... 62 4.7 Creating Tracks ........................................................................................................................................... 63 5 Connecting with VisualDMX ............................................................................................................................... 66 5.1 DMX & Art-Net ........................................................................................................................................... 66 5.2 MIDI ............................................................................................................................................................ 73 5.3 General Purpose Interface.......................................................................................................................... 74 5.4 Software Tools ............................................................................................................................................ 75 6 Index ................................................................................................................................................................... 76 7 ............................................................................................................................................................................ 76 8 Notes ...................................................................................................................... Error! Bookmark not defined. 2 1 INTRODUCTION Congratulations with your choice for the VisualDMX Lighting Control software. VisualDMX is a control system for entertainment and architectural lighting. This lighting controller is used in fixed installations in Discotheques, Clubs, Restaurants, Conference halls and other venues requiring live or preprogrammed lighting control. VisualDMX is a software based DMX-512 lighting control system that, through its advanced graphical userinterface, enables light-jockeys to quickly change lighting atmospheres and program complete lightshows. The product features more than just quality software; the VisualDMX product line comes complete with USB-toDMX hardware, standalone playback units and additional software for visualization and creation of fool-proof touch screen user interfaces. The development of VisualDMX is ongoing, we advise you to visit our website regularly for the latest software releases and the most recent version of this manual. You can find the VisualDMX website at http://www.visualdmx.com. If, after consulting this manual, you still have questions then you can obtain additional information and help through the online support forum. VisualDMX users and employees of Visual Productions share their experiences and tips on this forum. You can find the forum at http://www.visualproductions.nl/forum . We wish you lots of success in using your VisualDMX Lighting Control software. The Visual Productions Team 3 1.1 SPECIFICATIONS VisualDMX has the following specifications: 4.096 output DMX channels Advanced sequence editor Integrated shape generator Password protection DMX input MIDI in & out Audio input Joystick input Art-Net output RDM ready 1.2 FIXTURE INDEPENDENT ARCHITECTURE The Fixture Independent Architecture (FIA) forms the fundament of the intuitive VisualDMX user interface. This architecture masks the Light-jockey (LJ) from the numerous technical specification of today's complex DMX-512 equipment. The FIA translates all this technology to one uniform interface for controlling the equipment. The LJ will notice the great benefits of the FIA as soon as he starts to use the system. For instance, now it is possible to shut an arbitrary fixture simply by pressing the 'shutter button'. The FIA enables this although some fixtures lack a shutter capability, requiring the shutter to be simulated by a closed gobo or black colour. An added advantage of the FIA is that it enables sequences and cues to be applicable to every brand and type of fixture. When a sequence is programmed, this time-consuming labour is not misspent if later on it is decided to switch to another type of fixture. Also, sequences can easily be exchanged with other LJ's who might use other fixtures. 1.3 SYSTEM REQUIREMENTS The recommended system requirements are: Microsoft Windows XP Intel Core2Duo or equivalent SXGA 1280x1024 512 MB RAM Memory 40MB Disk Space To be able to operate VisualDMX, the minimum system requirements are: Microsoft Windows Vista, XP or 2000 Pentium CPU 1 GHz or equivalent XGA 1024x768 256 MB RAM Memory 40MB Disk Space 4 1.4 SYSTEM OVERVIEW The VisualDMX product family consists of several software applications and various hardware devices. A VisualDMX system is modular; its size can vary from small – consisting only of the VisualDMX control application and one DMX Output- or large – consisting of all family members and multiple hardware devices. Figure 1 illustrates an example set-up of all VisualDMX components and their interconnections. This manual discusses the VisualDMX control software and to some extents the Visual Productions hardware devices. Details on the other products can be found on the website http://www.visualproductions.nl . FIGURE 1 SYSTEM OVERVIEW 5 2 THE USER INTERFACE VisualDMX features a user-friendly operating interface. This chapter will discuss the various elements in this user interface. 2.1 MAIN VIEW This is the main screen of VisualDMX which presents you with an overview of the fixtures (lighting equipment) indicating their status. It also offers controls to directly change the fixtures’ attributes. It is this view that you will be using most of the time when controlling your lights. FIGURE 2 MAIN VIEW To help this interface to be intuitive, all the controls share fixed locations. This allows you to get used to their position and to be able to rapidly find the desired control during live shows. As shown in the screen dump of the main view (Figure 2), this view is organized in several sections. Let us discuss these sections in more detail: Fixture views Every fixture is represented by one fixture view. In contrast to all the controls, the fixture views are allowed to be moved and resized. This enables you to organize them in a way similar to their real-world layout on your stage or in your grid. 6 Selection view This window helps you to make selections of your fixtures. Almost all functions in VisualDMX depend on the current selection of fixtures. You will learn that there are many ways of making a selection: making a selection using this window is the most self-explanatory way. Sequence view This section gives you an overview of all the sequences (programmed shapes and light shows), allowing you to run them on your fixtures. Live view The Live view presents you with a collection of controls for all the typical functions a modern day fixture can have. 2.1.1 FIXTURE VIEW Every fixture is represented by a fixture view (Figure 3). The Fixture view will display the primary parameters of the fixture, simulating its real-world appearance. The displayed information depends on the view's mode. You can choose out of several modes: FIGURE 3 FIXTURE VIEW FIGURE 4 FIXTURE VIEW POPUP MENU View as scan Displays a front-view simulating the 2-dimensional movement of a scanner. View as beam Only a non-moving beam is displayed. View as dimmer A row of faders, one for each dimmer channel. View as panel Used for LED and dance floor panels. View as icon Only the icon of the fixture. Some viewing modes include showing a couple of icons representing fixture parameters. You can control these parameters directly with clicking on these icons with your mouse. The pop-up menu also contains the “Set gel” option; this feature is intended for conventional fixtures and allows you to specify a colour gel. This information is used in the 3D visualizer and in the patch window. The “Properties” option brings up a window showing various properties of the selected fixture, including the 3dimensional position of the fixture to be used in the visualizer. 7 Furthermore, you can directly control the beam position with the arrow keys in combination with <SHIFT>. Make sure the Fixture view is selected to allow this operation. It is possible to have multiple views selected for a joint move. In contrast to all the controls, the fixture views are allowed to be moved and resized. This enables you to organise them in a way similar to their real-world layout on your stage or in your grid. Adjusting the size of the Fixture view is done using the <CTRL> - and <CTRL> + keyboard shortcuts, or alternatively, by dragging the lower right corner of the fixture view. Tip: In the ‘Fixture’ menu of VisualDMX you can find the ‘Auto Lamp Strike’ function. This functions turns on all the lamps of the currently selected fixtures, however, it does so with a 1 second interval between each lamp strike to lower the power peak when enabling discharge lamps. 2.1.2 SELECTION VIEW Many functions within VisualDMX are applied on the current selection of fixtures. Selecting fixtures is therefore an often reoccurring action. You can make a selection in various ways: Selection view Use the mouse the make a selection from this view. Mouse action By clicking on the (caption bar of the) fixture views, with or without the use of the <CTRL> button to make a multiple selection. <F1> - <F8> Keyboard shortcuts for selecting the first eight teams. <CTRL> ‘A’ Keyboard shortcuts for selecting all fixtures. Actions You can program actions to perform a selection. Pop-up menu Right-click on the Selection view to bring up the popup menu. This menu offers functions like: All, Clear, Invert, Odd and Even The Selection view has 4 sections: Teams For selecting a whole team. To learn more about how to create teams refer to chapter 4.1. Fixtures For selecting individual fixtures. Subs For selecting sub-fixtures like dimmer channels. Scenery For selecting scenery fixtures. i.e. fixtures that are not DMX controllable like Par cans, truss, mirror balls, etc. 2.1.3 SEQUENCE VIEW The Sequence View (Figure 5 Sequence View) in VisualDMX is an overview containing status information on sequences and offers ways to change the behavior of the sequences. Sequences are organized in arbitrary pages like “Chasers”, “Colours” and “Movements”. Pages can freely be added, removed or renamed. 8 FIGURE 5 SEQUENCE VIEW More on sequences Besides displaying some self-explanatory information as Name and Duration, the view features several icons: Status Indicates the playing state which can be either: Playing, Paused or Stopped. Time line The time line offers you an additional impression on the sequence's progress. Coloured in green means in Playing state, and blue means Paused. Attributes A list of icons showing which attributes is programmed within the sequence. Timing source The timing source determines how the sequence will be played back. The various timing sources will be discussed in the next paragraph. Streams Displays for how many different fixtures the sequence is programmed for. This number does not limit the number of fixtures the sequence can be played upon; it merely gives the maximum number of (groups of) fixtures that are addressed uniquely by the sequences. Adding more fixtures to the sequence will end up in fixtures being paired to perform exactly the same. Duration Total duration of the sequence Loop Indicates whether the sequence will be looped infinitely or will stop as it reaches its end. 9 Timing sources A Sequence’ timing source is set to one of the following: Clock This is the standard timing source. The sequence will run on the internal software clock, taking into account the current ‘Speed’ setting. Manual This timing source behaves similar to ‘Clock’ except it will pause the sequence after each step. The operator needs to apply a ‘Go’ at this sequence for it to resume to the next step. Tempo The Tempo source will ignore the programmed durations of the steps and make all steps last as long as one beat. The tempo of the beat can be set by manual tapping or by the sound-to-light function. The speed settings of the sequences using this source are ignored. Modifying a sequence The sequence view allows you to modify several run-time characteristics of the sequence. This will not change the original programmed information in the sequence. However, you can swiftly modify things such as playback speed and apply other effects to adapt the sequence to your live situation. To summarize all modifications that are featured: Speed Playback speed Phase shift This effect causes an interdependent delay, proportionally spread between the fixtures that are controlled by the sequence. Margin (Green square) Limits the movement range of a sequence, allowing you to position a sequence on the stage or dance floor. Only works on sequences which inhibit beam movements. Timing source By right clicking on a sequence a pop-up menu will appear that allows you to change the timing source. Start and stop sequences To start, pause or stop a sequence first you have to select it and then click on one of the designated buttons. There are alternative ways to start or stop sequences, most of them provide faster ways to do this: - Double-click with the mouse on a sequence; this will toggle its playing state. Right-click with the mouse on a sequence and use the pop up-menu. Select a sequence and then press <SPACE> or <ENTER> Program an action to control a sequence. 10 Stacking sequences and Live View In addition to playing one sequence on a couple of fixtures; it is also possible to play multiple sequences on the same group of fixtures. To enable this keep the <CTRL> depressed as you start the second and following sequences. In general it is not possible to have two or more sequences controlling the same attribute; e.g. two sequences cannot move the beam position at the same time. That is why when multiple sequences with overlapping attributes are run on the same fixtures they will be stacked on top of each other. The last triggered sequences – being on top of the stack – will have priority following the LTP (Latest Takes Precedence) principle. When a sequence is stopped it is removed from the stack and the previous sequence will become priority. You can also manually overrule a sequence's operation by changing (e.g. in the live view) an attribute also present in the sequence. The Live View will then be the last triggered source and gets priority. By clicking the “Home” button the values in the Live View will be cleared. The exception is made for the dimmer and colour mix attribute; these attributes can be controlled by multiple sequences and the Live View. The joint value will be established through the HTP (Highest Takes Precedence) principle. Additional sequence operations Clicking your mouse with the right button on a sequence will bring up a menu with operations that can be performed on the sequence, see Figure 6. FIGURE 6 SEQUENCE POP-UP MENU Many of the menu options speak for themselves. Let us focus on a couple that could use some explanation. Edit This will bring up the sequence editor. For more information on editing sequences please refer to chapter 4.2. Timing source Select a Timing source for the sequence 11 The main menu ‘Sequence’ (Figure 7) offers additional functions: FIGURE 7 SEQUENCE MENU Save all Saves all sequences to disk, including the runtime parameters. Reset all Resets all runtime parameter (like Speed, Phase shift and Margin). Reload all Reloads all sequences from disk, including the runtime parameters. Caution! All unsaved modifications will be lost. 2.1.4 LIVE VIEW The Live view (Figure 8) enables you to manually and directly control the attributes of a fixture. The control in the Live view are applied on the current selection of fixtures. FIGURE 8 LIVE VIEW The Live view is organized in five sections: - Colour/Gobo/Prism Primary Secondary Smoke Custom 12 Colour/Gobo/Prism This section lets you pick a colour, gobo or prism. Colours can even be controlled in three ways: Fixed, Spectrum and Mix (RGB). Both Spectrum and Mix control the ‘colour mix’ attribute and are therefore of no use to fixtures with only fixed colours. Primary The most commonly used functions of a fixture can be controlled here. Some of which require a little more explanation: STATICS This is a simple control to create symmetrical beam positions for a group of fixtures (Figure 9). FIGURE 9 STATICS The tilt is set with the fader and there are three options for the pan position; centre, spread and cross. This control takes into account how many fixtures are selected and spreads out evenly the gaps between their beam positions. This feature is sometimes also referred to as “fanning”. Tip: To quickly reset the default value in a fader control you only have to right-click it with the mouse. HOME The ‘Home’ button removes any values from the Live View and if no other sequences are active, this will bring the selected fixtures back to their default values. If a preset with the name “home” exists, then the default values are determined by this preset (more on presets in chapter 4.4). 13 Secondary FIGURE 10 SECONDARY LIVE VIEW PAGE This section contains functions that are less often used. Most of them are self-explanatory; let us discuss those that can use additional explanation: LAD The acronym stands for Laser Aiming Device, a function found in only a few fixtures. AutoFocus AutoFocus is a function of the FIA (see chapter 1.2 for more on the FIA), it makes the focus level automatically adapt when choosing a gobo from a different gobo wheel. Prior to using, this function has to be set up in the Calibration view (chapter 4.6). CTC A Colour Temperature Correction filter is used to change colour temperature of the beam. Often these filters are implemented not as a individual control but as one of the slots in a colour wheel. Smoke The smoke section allows you to directly control smoke generators, either individually or all generators – those present in your configuration - together. It also offers you ways to setup a timer mechanism to have your smoke generator controlled automatically. Custom Some fixtures feature attributes that are uncommon in general stage lighting equipment. Those attributes are accessible through the Custom tab. 14 2.2 KEYBOARD SHORTCUTS General shortcuts <F1 tot <F9> Select teams 1 till 9 <SHIFT><ESC> Black-out <INSERT> Insert an item <DELETE> Remove an item <CTRL> S Save <CTRL> A Select all <CTRL> C Copy <CTRL> V Paste <CTRL> + Zoom in <CTRL> - Zoom out Fixture shortcuts <SHIFT> ←↑→↓ Move beam of selected fixture(s) <PAGE UP> Select previous fixture <PAGE DOWN> Select next fixture Sequence shortcuts <ENTER> Start/stop selected sequence <SPACE> Start/pause selected sequence <BACKSPACE> Stop selected sequence <ESC> Stop all running sequences and patterns ←↑→↓ Navigate through sequence pages 15 Matrix shortcuts ←↑→↓ Move the selected member <CTRL> ←↑→↓ Move the selected member to the far end <CTRL>R Rotate the selected member 2.3 COMMAND-LINE PARAMETERS -D Force demo-mode, ignoring any connected hardware. -L Load all personality files at startup -O Reset the options to factory settings 2.4 CUSTOMIZE VISUALDMX You can customize some of the features of VisualDMX by selecting ‘Options’ in the ‘Tools’ menu. A dialog box (Figure 11) appears with tabs and the following, customizable features: FIGURE 11 OPTIONS VIEW - GENERAL PAGE Startup Minimized VisualDMX will startup minimized; this is useful when VisualDMX and VisualTouch (see chapter 5.4.1) both are set to startup automatically and VisualTouch should end up on the desktop’s foreground. 16 Check for updates at startup At startup, VisualDMX can be set to automatically connect to Visual Productions’ server to check for a new software version. If a new version is available then the user will be notified through a popup dialog. Startup Automatically Sets VisualDMX to be launched automatically at the Windows start up. Please make sure that if this option is enabled that the ‘Codemeter Runtime’ software is installed on your system; if not, VisualDMX will create error messages at startup. You can obtain the ‘Codemeter Runtime’ from http://www.visualdmx.com at the ‘Downloads page’. Auto load last configuration The last used configuration file will be loaded automatically when VisualDMX starts up. Omit Save Query on Close This option will prevent the “Save changes?” dialog when VisualDMX is being closed. This function is intended for fixed installations where no new changes need to be saved and will prevent saving any accidental changes. Lock Fixture Windows Enabling this option disallows the user to move the fixture windows. This is preferable once the setup is finished and you want to prevent the operator from accidentally moving the windows while he is operating the show. ColourMix Attribute Precedence This option is set to HTP by default resulting in the ‘colour mix’ attribute to be determined by the highest value (closest to white) throughout all active sequences and live view; similar to the ‘dimmer’ attribute. When set to LTP, the ‘colour mix’ will behave like a ‘gobo’ or ‘fixed colour’ attribute; the last changed value is active. User You can fill in your details here. Snap to grid The grid option enables the user to neatly arrange the fixture windows more easily. When this option is enabled, the fixture windows snap to the grid when they are moved. The size of this grid is defined by the grid number. Grid size Size of the grid. 17 FIGURE 12 OPTIONS VIEW - MULTIMEDIA PAGE Enable audio input When enabled, the tempo timing source is derived from the beats detected in the audio signal fed through the soundcard of the computer. Enable low-pass frequency filter The beat detection algorithm requires a low-pass filter with a cross frequency of 150 Hz. The filtering is performed by the software if this option is enabled. When the audio is already filtered outside of the computer then this option can be disabled to save CPU resources. The low-pass filter is not yet implemented in version 1.49. MIDI Here you can see the available MIDI devices in your computer system. To use MIDI to trigger cues you should choose a device and enable this feature. JOYSTICK VisualDMX support the usage of joysticks as a source for triggering Actions. When this feature is enabled the software will automatically detect any USB connected joystick. 18 2.4.1 DMX HARDWARE This section shows you what hardware is detected and used by VisualDMX. FIGURE 13 OPTIONS - HARDWARE TAB Connected Devices This table indicates the following: Device Type of hardware Label Name of this unit PCB version Hardware version Firmware version Software version Via the menu you can also: Several LEDs on the selected unit will blink for a few seconds to indicate which device Blink belongs to which label. Upgrade Upgrade the firmware (device’s internal software) of the selected device. Firmware upgrade Most devices from Visual Productions contain a firmware that can be upgraded. New versions of the firmware contain bug fixes or new features and are included in the VisualDMX releases. To upgrade, select one connected device and select a corresponding firmware from the table on the right. Click ‘Upload’ and the upgrade will start. 19 Caution! During the upload process the connection between the device and the computer should not be interrupted. If this happens the device’s memory is likely to become corrupt and would need to be serviced in the factory. N.B.: The firmware for the DMX Output MKI and DMX Input MKI models cannot be upgraded via this window. Please refer to the online support forum for information on an alternative method of upgrading those models. Server The Server functionality enables VisualDMX to communicate with other programs like VisualTouch. To allow other programs to communicate with VisualDMX the ‘Enabled’ checkbox (see Figure 14) should be turned on. FIGURE 14 OPTIONS - SERVER SETTINGS This tab in the Options View further shows the list of programs currently connected to VisualDMX (Clients). The information includes the client’s version and IP address. VisualDMX itself uses port number 16945 by default. If this port is unavailable then automatically the next number is used. The port number cannot be changed manually. VisualDMX’ IP address is also shown, it is likely that you need to fill in this address and the port number in the client program’s settings. 20 3 QUICK START MANUAL This chapter has been written for those wanting to start using VisualDMX, without reading the entire manual. 3.1 NEW CONFIGURATION First of all, we start VisualDMX and make a new configuration: File-menu, New. 3.1.1 ADDING FIXTURES The next step is adding fixtures to the configuration. To do so, open the Fixture Configuration in the Fixturemenu, as shown in Figure 15: FIGURE 15 FIXTURE CONFIGURATION Select the manufacturer “Martin” in the list on the left. A list of fixtures from this manufacturer will appear in the Models-list. Scroll to the “Smartmac”, click the + to show the available modes and select “16-bit”. With a click on the “>>” button the “Add Fixture(s)” window will appear, as shown in Figure 16. Increase the number of fixtures to add to 4. FIGURE 16 ADD FIXTURE(S) Click OK, the fixtures are added now. Add 4x a “RGB 04x” from the manufacturer “Generic” in the same way. The Fixture Configuration will look similar to Figure 17. 21 FIGURE 17 FIXTURE CONFIGURATION AFTER ADDING FIXTURES Finally, add a 6-channel dimmer. It’s available from the manufacturer “Generic” (Dimmer 6x). The DMX-Configuration has been made. The next step is connecting a Duple to the Universe in the software. 3.1.2 CONNECTING A DUPLE TO THE UNIVERSE You can skip this step when there is no Visual Productions hardware-output connected Click in the bottom-left corner of the Fixture Configuration view on “Universes” to open the Universes-screen (Figure 18). 22 FIGURE 18 UNIVERSE SETTINGS Click on universe01 in the list of universes. When the text “none” is displayed in the “Output Devices” column of universe01, the universe has not yet been connected to a hardware-output. Click on CONNECT (Figure 19). FIGURE 19 SET CONNECTIONS Connected Visual Productions hardware-outputs are displayed in the “Available”-list. Move the “DMX Output 1” to the “Connected” list using the << button. Close the window with CLOSE. Now universe01 has been connected to DMX Output 1. 3.1.3 ADDING TEAMS To make fixture selection quick and easy, we’ll add a number of teams (groups). Click TEAMS to open the Teams screen. Click ADD to add an empty Team. Team01 will appear in the Teams-list. Select this team. On the right, select yoke001 till yoke004 in the fixture-list (click yoke001, press and hold <shift> and click yoke004). Click the “<<” button to add these fixtures as Team Members to the selected team. 23 The LED-fixtures we chose in this configuration, consist of 4 sub-fixtures (4 areas with individual RGB-control). In a second team we will add these sub-fixtures. Click ADD to add another Team. Open the “Subs”-page in the Fixture-list. Select panel001-[01] till panel004[04] and add these subs as Team Members to team02. The 6-channel dimmer consists of 6 sub-fixtures. Make a team for the dimmer-subs in the same way as the LED-team in the previous step. Rename the teams to “SmartMacs”, “LED” and “Dimmer” using the RENAME button on the left-side of the screen. The Team-screen will be setup like Figure 20. FIGURE 20 TEAM VIEW The configuration has now been made, the universe-settings are done and the teams have been created. Close the Fixture Configuration by pressing CLOSE. 3.1.4 SCREEN LAYOUT Select the SmartMacs: Click on the name of the team in the Selection View (bottom left) or press F1 on the keyboard to select the first team. Right-click one of the (selected) SmartMacs to open the context-menu (Figure 21) and choose ‘View as scan”. FIGURE 21 CONTEXT MENU: VIEW AS SCAN 24 Select panel001 till panel004: Click panel001, press and hold <CTRL> and click on panel002, panel003 and panel004. Right-click one of the panels and choose “View as panel”. Select dimmer001 and choose “View as dimmer” in the context-menu. By dragging the bottom-right corner of the dimmer view, you can resize the fixture view. Now move the fixtures so the screen-layout will look like Figure 22. FIGURE 22 MAIN SCREEN 3.2 CONTROLLING FIXTURES In this chapter you’ll learn how fixtures can be controlled live. 3.2.1 CONTROLLING FIXTURES USING THE LIVE VIEW Fixtures with a DMX-controlled lamp ignition, like the SmartMac, must be ignited first. VisualDMX is based on the principle that first a fixture needs to be selected before it can be controlled. Select the SmartMacs: Press <F1> or select the team “SmartMacs” in the Selection View. Move to the Secondary-page in the Live View and click Lamp On ( ) to ignite the lamp of the SmartMacs. The state of the lamp can be monitored with the first icon in the Fixture View. After igniting the lamp, the icon has been changed to . Click “Primary” in the Live View to move back to the Primary page. Move the dimmer-fader to 100%. The SmartMacs will show a white beam in the Fixture View (Figure 23). FIGURE 23 FIXTURE VIEW 25 In the Live View all available attributes of the selected fixtures are available for control. To get back to the “home”-values of the selected fixtures, press “Home”. This will clear all set Live View values. 3.2.2 CONTROLLING FIXTURES USING THE FIXTURE VIEW Some functions (depending on the type of fixture) can be controlled using the Fixture View of the fixture. For example, to change the pan/tilt position of the SmartMacs, click and drag around in the black area of the SmartMacs’ fixture views and see how the beam of the selected fixtures will follow the mouse. The individual dimmer-channels of the Dimmer-fixture can also be controlled in the corresponding Fixture View. Just move the faders of the individual channels to change their value. 3.2.3 PLAYING SEQUENCES ON FIXTURES Sequences can be played back live on selected fixtures. Select the SmartMacs team using the <F1> key or by clicking the SmartMacs team in the Selection View. Go to the “Movements” page in the Sequence View and double-click “Circle”. The SmartMacs will show a circlemovement. Using the Speed and Phaseshift faders the playback of the sequence can be changed. Together with the circle-movement another sequence can be started. Go to the “Chasers” sequence-page; whilst pressing and holding the CTRL-key on the keyboard, double-click the “Shutter Chase”. This will start the “Shutter Chase”-sequence together with the already playing sequence(s). 3.3 LEARNING MORE VisualDMX has many editors and functions to start working and programming with the current configuration. To automate the lightshow, for example by connecting functions to keys, MIDI, DMX Input and VisualTouch, you’ll need the Action Editor. More about the Action Editor can be found in chapter 4.3. To save lighting presets (“Presets”) you’ll use the Preset Editor. More about this editor can be found in chapter 4.4. 26 4 WORKING WITH VISUALDMX The previous chapter explained the basic functionality of the software. This chapter will discuss, in more depth, the most important functions of VisualDMX; like how to create a configuration, create sequences, program actions or how to control a matrix. 4.1 CREATE A FIXTURE CONFIGURATION To control fixtures in VisualDMX you need to create a ‘configuration’. This is done in the Fixture Configuration window (Figure 24) that can be accessed through the ‘Fixture’ menu. FIGURE 24 FIXTURE CONFIGURATION Configurations can be saved and loaded via the ‘File’ menu in the main view. 27 4.1.1 OVERVIEW The Fixture Configuration window is divided into four pages: Universes In the ‘Universes’ page you can add and remove universes; you need to connect them here to a DMX or Art-Net output. Fixtures This is the default page in which you can add fixtures to the universes. This is also the place to change the starting addresses of the fixtures. Teams ‘Teams’ are groups of one or more fixtures. Teams are managed in this page. Patch This page enables you to patch conventional fixtures to specific dimmer channels. U NIVERSES A DMX Universe is a single network running from the lighting controller to connected fixtures. Each universe has the capacity to control 512 DMX channels. FIGURE 25 UNIVERSES In the Universe page you can add, remove and rename universes as you can see in Figure 25. Furthermore, in this page you would need to connect each universe to at least one DMX output. This can be either a USB connected DMX device or a Art-Net sub-net. Art-Net is a protocol that like DMX is used to control lighting fixtures. The difference to DMX being that Art-Net uses a standard Ethernet for its connections. Using Ethernet has distinct advantages: Ethernet has a much 28 higher capacity (bandwith) and allows much more data to run through one cable than DMX with its limit of 512 channels. A wireless network connection is also possible. The Universe page contains the following functions: ADD Add a new universe REMOVE Delete the selected universe(s) RENAME Rename the selected universe CONNECT This will bring up a dialog to connect the selected universe to a DMX output. In the dialog you can use the <CTRL> button to select multiple outputs. DISCONNECT Disconnect all outputs from the selected universe. THROUGHPUT With ‘Throughput’ enabled, the values of all channels in the universe that are left unoccupied by any fixture are copied from the DMX Input. This allows VisualDMX to merge its data with an incoming DMX line. This feature can be control for each universe and is only available when a DMX Input is connected. F IXTURES The ‘Fixtures’ page (Figure 26) allows you to select which fixtures to control. FIGURE 26 FIXTURES Personalities A fixture is a DMX controllable device. Each fixture differs in the way it is controlled over DMX. A file describing its DMX implementation is called a ‘personality file’. VisualDMX contains a large collection with personality files 29 for over 1,500 different fixtures. If, however, you need to control a fixture which is not present in VisualDMX; then you can request its personality file to be made by sending an e-mail to [email protected]. Sub-fixtures Some fixtures are organized into multiple sub-fixtures. Examples of these include dimmer racks (consists of multiple dimmer channels), a LED panel (consisting of for example 4 individually controllable sections) and a set of 8 LED spots driven by one single dedicated controller. Each sub-fixture can be selected and controlled individually. Adding fixtures To add a fixture to the configuration you navigate through the tree structure, first selecting a manufacturer and then a model and, if available, a specific mode. Click the ‘>>’ button to add the selected fixture to your configuration. When you add a fixture the following dialog will appear (Figure 27): FIGURE 27 ADD FIXTURE DIALOG By default this dialog only asks how many of these fixtures you would like to add. More detailed settings can be made by clicking the ‘Advanced >>’ button. Default label The base of the label assigned to the new fixture(s) Start with address Set the first starting address from which the new fixtures will be addressed. Each subsequent fixture will automatically be assigned the next available address. Address gap This setting determines whether a space should be left free between the address ranges of each newly added fixture. The standard value of this setting is 0 resulting in no space between the fixtures. Lens If available, different lenses can be selected. This setting is only used in the 3D visualizer. Fixture list The fixture list presents all fixtures being controlled by VisualDMX organized in universes. Also there is a ‘Scenery’ tab that lists all non-controllable fixtures (e.g. truss, par cans, mirror balls) that can be added with the purpose of showing it in the 3D visualizer. Dipswitch If a fixture is selected, this indicates the required address setting in the case the fixture is set using a dipswitch. 30 T EAMS Teams can be used to organize your fixtures into groups. This allows you to rapidly select multiple fixtures by clicking on a team in the Selection View (Figure 2) or by using the <F1> - <F8> keyboard shortcuts. Teams are arranged in the Teams window (Figure 28). FIGURE 28 TEAMS You can add a team via the menu or the pop-up menu (right-click). Then add fixtures to the team by first selecting the team, then selecting the fixture from the Fixture List and then press the '<<' button. Once you have created a team you can use the pop-up menu (right-click) to perform actions like rename or remove members. Next to fixtures, you can also add ‘subs’ to a team. Some fixtures (like dimmers) consist of multiple sub-fixtures that are part of the main fixtures but can be controlled individually. P ATCH When using dimmers and conventional fixtures (e.g. par-cans) in the configuration, you have the option to make patches. A Patch is a connection between a conventional light and a dimmer channel controlling its intensity. Patches are organized in the Patches window (Figure 29). 31 FIGURE 29 PATCHES In order to make a patch you select a channel in the ‘Dimmer Channels’ table. Then select one or more fixtures from the ‘Unpatched Conventional Fixtures’ table and patch them to the dimmer channel by clicking the ‘<<’ button. 32 4.1.2 HOW TO... To help you create your first Fixture Configuration we will give you a walk-through guide that in several steps shows you how to do this. This example will include creating teams, patching dimmer channels and readdressing a fixture. We begin from the point that you have started up VisualDMX and your Main view is empty, not having any fixtures so far. If necessary, use menu ‘File’ and then ‘New’. Step 1 – Open the Fixture Configuration Open the Fixture Configuration view (Figure 30) by using the Fixture menu. FIGURE 30 FIXTURE CONFIGURATION Step 2 – Adding fixtures We are going to insert our first fixtures, a couple of moving heads. Select the manufacturer “Martin”, fixture “Mac 250 Krypton” and we have chosen a mode which will be “16 bit extended”. Then click on the '>>' button to copy the fixture into our list. A pop-up window will ask us how many of those fixtures we would like to add, let's say 4. We do not need any of the Advance options in our example. Next, add more fixtures in the same manner. Choose the manufacturer 'Generic' and add one 'Dimmer 4 chn. ' and 8 'PAR64' fixtures. Note that because a PAR64 is not DMX controllable it should be copied to the Scenery list. To do this you should first select the 'Scenery' tab-page and then use the '>>' button. Go back to the list of DMX controllable fixtures you have created by clicking the ‘Universes’ tab (Figure 31). 33 FIGURE 31 ADDED FIXTURES Step 3 – Creating teams For rapid selection of the fixtures later on, it is good practice to create teams. So, create two teams by operating the 'Teams' page: Select the first team and rename it into 'Yokes'. You can do this by right-clicking the team and choose for the 'Rename' option in the pop-up menu. Rename the second team 'Dimmer'. Now click on the “Yokes” team to select it. The list with Team Members will still be empty. Let’s add the four Martin Mac 250 Kryptons (‘yoke001’ till ‘yoke004’). Select all four of them (click on the first, depress <SHIFT> and click on the last one) and press the ‘<<’ button. They now have been added to the “Yokes” team as in Figure 32. 34 FIGURE 32 YOKES TEAM For the “Dimmer” team we would like to add the dimmer channels rather than the dimmer itself. In order to do this select the ‘Subs’ tab and add “dimmer001 – *01+” till “dimmer001 – *04+” to the team. Step 3 – Patching Now we would like to patch our PAR64's to our dimmer. This is done in the Patch window (Figure 33). FIGURE 33 PATCH WINDOW 35 Patching conventional fixtures is done in a way similar to arranging teams: First select a channel (e.g. “dimmer001 – *01+”) and select “spot001”; then use the ‘<<’ button to create the patch. Do this for all spots to create the following patches: Dimmer01 – [01] Spot001 Spot008 Dimmer01 – [02] Spot002 Spot007 Dimmer01 – [03] Spot003 Spot006 Dimmer01 – [04] Spot004 Spot005 Step 5 – Save our work Close the Fixture Configuration and go to the menu in the Main view. Via 'File' you can choose to save your work into a Configuration file. This concludes our exercise leaving you with a completed Fixture Configuration which you can now start controlling. 36 4.2 PROGRAMMING SEQUENCES Sequences are used to program movement shapes, chasers, theatrical plays or other small light shows for your fixtures. Sequences may contain any kind of attribute and can last from a few seconds till a couple of hours. Also, sequences are ‘transparent’ i.e. they are independent from the type of fixture they are played upon. A sequence can be used for fixtures with different brands and models. The sequences are managed in the Sequence view. It is from there where you can add new ones and start editing them. Via the pop-up menu in the Sequence view you can open the Sequence editor by clicking ‘Edit’. This chapter will describe the many features of the editor in the ‘overview’ (chapter 4.2.1), as well as provide you with some useful examples in a ‘How to...’ guide (chapter 0). 4.2.1 OVERVIEW The Sequence Editor (Figure 34) enables you to program all the characteristics of (intelligent) fixtures. It’s a powerful tool used to easily program movements, colour and gobo chasers and other complex sequences. FIGURE 34 SEQUENCE EDITOR The editor presents you with a graphical representation of the sequence which is build up of ‘Steps’, ‘Streams’ and ‘Attributes’. The tabs at the bottom of the editor contain specific settings for those elements. Let's discuss the details in this view one by one. Sequence The ‘Sequence’ tab (Figure 35) allows you to change general settings for the sequence. 37 FIGURE 35 SEQUENCE TAB The timing source determines how the sequence traverses through its steps. Refer to chapter 2.1.3 to read more about timing sources. The ‘Total Duration’ indicates the length of all steps together. The Loop option lets you control whether the sequence should stop after reaching its end, or continue looping from the beginning. No loop; stop at the end of the sequence Loop; start with step 1 again Step Indent An alternative way of using the loop is to create a non-linear loop by setting a step-indent. The use of a step indent will make the sequence initially start at the beginning of the sequence, notably step 1; then after completing the full series of steps it will loop; however, starting at the step denoted by the step indent value, repeating this smaller loop indefinitely. This feature enables you to program some initial changing of attributes, perhaps fading the current state into the beginning of the actual light show and then perform a repeating lighting pattern. Step A sequence is a series of steps, that will be played one by one. A step has a variable duration. You can give each step a label for your own convenience. When played back from the editor, the blue box representing the step will indicate which step is currently running by the play icon and the time line. At the bottom of the editor you will find the ‘Step’ tab (Figure 36) for modifying the settings of the step. When zoomed in using the ‘zoom buttons’ in the toolbar, the step's box will offer ways of directly editing these settings. FIGURE 36 STEP TAB Stream A sequence will control one or more streams. Each stream will contain its own data on how to change the attributes of the fixtures. To have a sequence that controls two fixtures making them perform two different movements will require the programming of two streams in this sequence. The more streams you program, the more fixtures can behave independent of each other. 38 There are no restrictions on how many fixtures can be mapped on a stream, resulting in them behaving identically. FIGURE 37 STREAM TAB For your convenience you can give a stream a label. Furthermore, you have to add attributes to the stream; these attributes will be the ones that are controlled by the sequence. Editing a stream can be done through the Stream tab (Figure 37) at the bottom of the editor, or by operating the (pop-up menu of the) stream's box. Attribute Adding an attribute to a stream will result in a Sub-Stream; it is the sub-stream that represents the actual data programmed for a certain attribute. The Sub-stream will be spread across all steps allowing you to create settings for this attribute in each and every step. Change The cross section of an attribute with a step is called a Change. It is the Changes that contain the actual data that the fixtures will perform when controlled by the sequence. You can modify a change by selecting it (or a few at once) and go to the Change tab (Figure 38) at the bottom of the editor. This page will automatically show the controls corresponding with the attribute of the selected change(s). FIGURE 38 CHANGE TAB 39 4.2.2 HOW TO... This topic will show you how to program your first sequences in VisualDMX, step by step. Sequence 1 We will start with making a sequence that will control the beam position of one fixture. Step 1 – New sequence Go to the Sequence view, select a page and right-click on it. This will bring up a menu from which you can select 'New'. Step 2 – Open the editor Right-click on the new sequence and select 'Edit'. This will open the editor. Step 3 – Add steps In this example we are going to program 3 steps. So, select the one and only step currently present and operate the (pop-up) menu to insert two extra. Adding new steps can also be achieved by using the <INSERT> key on your keyboard after selecting a step. Step 4 – Add streams We will only be programming for one stream; therefore, we do not need to add any extra. Step 5 – Add Attributes A newly created sequence always contains the dimmer attribute. However, in our example we only want to control the Position attribute. We need to add the Position and remove the Dimmer. You can do this by selecting the stream and go to the Stream page at the bottom of the editor. There you will find the Available and Present attribute list, you can use the '>>' and '<<' buttons to add and remove attributes to the stream. Now your screen should look like that in Figure 39. FIGURE 39 RESULTS AFTER STEP 5 Step 6 – Edit the changes Go to the Change page at the bottom of the editor and select the Position change in step 1. You will now see all the controls necessary to program the Position attribute. Leave the Shape to 'Set' and choose an arbitrary point to set the beam to (Figure 40). 40 FIGURE 40 EDITING A POSITION Select the change in step 2. Set the shape to 'Line'. Make the green starting point the same as the point in the previous step (you can make sure of this by selecting the green crosshair and clicking on the 'Previous' button) and choose a new point as the line ending point (Figure 41). FIGURE 41 CREATING A LINE MOVEMENT Select step 3. Set the shape to 'Curve'. Again, make the line start from where the previous step ended. Select a new ending point, this time the ending point should match the starting point of the first step (to do this exactly you can select the red cross-hair and click on the 'Next' button). Move the intermediate point around to create a curve. Step 7 – Modify the duration Go to the Step page and select a step, you can now change its duration. You can repeat this for every step. Step 8 – Set Timing source Go to the Sequence page and from the drop-down list, select Clock as the Timing source. This completes the example. You could now save your work and close the Sequence editor. 41 4.3 PROGRAMMING ACTIONS This chapter will cover the subject of Actions. Actions are a powerful feature that may be of more interest and use to the advanced user. Actions allow you to automate various functions within VisualDMX. e.g. you can create keyboard shortcuts and have VisualDMX’s functions respond to events from other sources like DMX Input, schedulers, timers, etc. The Action editor is accessed by the ‘Tools’ menu. The Action Editor is shown in Figure 42. FIGURE 42 ACTION EDITOR 4.3.1 ACTION LIST An Action List is a collection of Actions that share the same source. When an Action List is created by means of the ‘Add’ button, the following choice of sources is presented: S YSTEM The System source contains events produced by the VisualDMX application itself. These include application startup and close down events. DMX I NPUT Action Lists with the DMX Input source will respond to changes in the incoming DMX signal received by the Visual Productions DMX Input USB hardware. For more information on this device please refer to chapter 5.1.6. K EYBOARD 42 This source comprises of any keystroke on the computer’s keyboard. T OUCH S CREEN The Touch Screen source will handle all incoming events from the external VisualTouch software. Refer to chapter 5.4.1 for information on how to connect VisualDMX to VisualTouch. J OYSTICK Actions in a ‘Joystick’ Action List can be triggered through a USB connected joystick. Various triggers like X-axis, Y-axis and buttons can be used. M IDI Add a ‘MIDI’ Action List to program events for incoming MIDI messages. T IMER The Timer source behaves like a stopwatch that can be started, paused and stopped. Events are triggered as soon as specific times have been reached. S CHEDULER The Scheduler allows you to program actions that should be triggered on predefined moments. GPI For actions triggered by the GPI device. The ‘Enable’ checkbox in the Action Editor can be used to temporarily activate or deactivate a certain Action List. Page Labels When an Action List with source ‘Touch Screen’ is selected, the ‘Page Labels’ button will be enabled. Clicking this button will launch a dialog that allows you to set custom labels for the pages within VisualTouch. These labels will overwrite the default ‘1’, ‘2’, ‘3’, … numbers. 4.3.2 ACTION When an Action List is selected, the editor will show a list of all Actions present in that List. The editor features various Action related controls (at the right of Figure 42): ADD Insert an Action in the currently selected Action List. REMOVE Delete the selected Action(s). RENAME Change the label of the selected Action EDIT Open up the screen for editing the contents of the Action. EXECUTE Execute the selected Action(s); this is quite useful for testing the Action without having to wait for the actual event. UP/DOWN Move the selected action one position up - or down - in the list. 4.3.3 EDITING AN ACTION Select an Action and press the EDIT button, this will launch the edit screen as shown in Figure 43. 43 FIGURE 43 ACTION EDIT WINDOW T RIGGER With the exception of a Touch Screen Action List, each Action requires a Trigger to be set. The Trigger determines which specific event - created by the Source of its Action List – the Action will respond to. Select the ‘Change’ button to choose a different trigger. Setting a trigger in a Touch Screen Action List is not necessary because the VisualTouch software will automatically make sure that each touch screen button is routed to the corresponding action. T ARGET Some Actions require a Target to be specified, this depends on the type of Tasks used in the Action. E.g. if you program a fixture’s colour attribute to be set to ‘red’, then you need to specify which fixtures in the Target setting. On the other hand, if you program the Master Intensity level to 50% then the Target setting is irrelevant. Press the ‘Change’ button to launch the edit screen for the Target setting, see Figure 44. 44 FIGURE 44 SELECTING A TARGET The target can be determined in various ways: SPECIFIC Select this mode to manually specify certain fixtures SELECTION Use the current fixture selection INVERTED SELECTION All fixtures currently not selected ALL All fixtures in the system For some actions the Target setting is irrelevant. For example, if you program an action to control the Grand Master then it does not matter which – if any – fixtures you’ve set as a target. A DDITIONAL SETTINGS When editing an action from a Touch Screen action list then additional settings are offered to customize the appearance of the touch screen control: Colour Set the screen colour of the control. Label Set a specific label for the control. Image When enabled this setting allows you to place a bitmap image in the touch screen buttons. 45 4.3.4 TASKS An Action will perform one or more ‘Tasks’. A DDING T ASKS FIGURE 45 TASK TYPES Press the ‘Add’ button to insert a task into the current action. A dialog will be shown allowing you to select one of the various tasks types (see Figure 45): LAYER 1 Control one of the matrix layers in Matrix Mania! ATTRIBUTE Control an attribute of a fixture, e.g. colour, dimmer, strobe, etc. SEQUENCE Control a sequence SELECTION Control the fixture selection SPECIAL Contains special functions like the Tempo-tap. ACTION Trigger a different action; can be used to link actions ACTION LIST Control an action list; e.g. change the ‘enabled’ setting MIDI Send a MIDI message GPO Control a GPO port 4.3.5 EDITING A TASK Once added, the new task can be configured by selecting and pressing the ‘Edit’ button. This will open up the screen as shown in Figure 46. 46 FIGURE 46 EDITING A TASK This screen has the following controls: F EATURE Choose one of the items this task can change. F UNCTION Choose a way in which this item will be changed, like: SET Set to a specific value TOGGLE Alternate between two specific values CONTROL Set to the value determined by the trigger of the action. For example, if the trigger is a DMX Input channel then the value is the level of that DMX channel. INVERTED CONTROL Similar to ‘Control’ with the value inverted C HANGE P ARAM 1 First value P RESET P ARAM 1 Do not program a certain value; instead link to a preset. Refer to chapter 4.4 for more information on presets. C HANGE P ARAM 2 Second value P RESET P ARAM 2 Do not program a certain value; instead link to a preset. M ANUAL A SSIGNMENT Sequences, being transparent from the fixtures, normally have the fixtures automatically assigned to their different streams. The first selected fixture will be assigned to the first stream, the second fixture to the second stream, etc. If this automatic assignment does not suit your requirements then the ‘Manual Assignment’ function allows you to specify yourself which fixtures are being assigned to which streams. The ‘Manual Assignment’ setting will become available when a task with the type ‘Sequence’ is selected. Press the ‘Set Assignment’ button to open up the ‘Sequence Assignment’ dialog (Figure 47). 47 FIGURE 47 SEQUENCE ASSIGNMENT The ‘Streams’ table on the left shows the streams that are present in the sequence. The ‘Targets in stream’ table indicates the fixtures already assigned to the selected stream. The ‘Available targets’ shows all fixtures not assigned yet to any of the streams. The fixtures are taken from the Action’s target; i.e. you can only assign fixtures that have been placed in the target first. Use the ‘<<’ button to assign fixtures to a stream. 48 4.4 USING PRESETS While programming lighting fixtures it can prove to be very effective and time saving to save frequently used lighting scenes as ‘Presets’ that later on can simply be reused rather than reprogrammed each time they’re needed. The additional advantage is that when this lighting scene needs to be altered, only the Preset needs to be modified; any sequence or action referring to this Preset will automatically call the new scene. This chapter will discuss the ‘Preset Editor’ and cover how to make Presets. 4.4.1 PRESET EDITOR Presets can be made for any type of fixture and for almost any attribute. Only the ‘Reset’ attribute is ignored by Presets. The Preset Editor (Figure 48) is accessible via the ‘Tools’ menu. In the editor, the Presets are listed in the ‘Preset List’ table. When selected, the content of a Preset is shown in the ‘Preset Details’ table and the ‘Fixtures’ and ‘Attributes’ tabs provide ways to alter the Preset. FIGURE 48 PRESET EDITOR Furthermore, the editor has the following controls: ADD Add a new Preset. R EMOVE Remove the selected Preset(s). 49 R ENAME Change the label of the selected Preset. E XECUTE Test the selected Preset. F ETCH For each fixture in the Preset this will get the values from all the attributes present in the Preset. These values will be stored in the Preset. CUT Cut the selected Preset(s) to the clipboard COPY Copy the selected Preset(s) to the clipboard PASTE Paste the Preset(s) on the clipboard PASTE COPIED Inserts the Preset(s) on the clipboard 4.4.2 HOME PRESET When no sequence or live view setting is controlling a fixture’s attribute it will fall back to its ‘home’ value. Home values are set by VisualDMX; however, you can overrule the standard home values by programming a special ‘Home Preset’. Any preset with the label ‘home’ will override the standard home values. Fixtures or attributes not programmed in this preset will keep their default home values. 50 4.4.3 HOW TO... In this paragraph we are going to make a Preset for a couple of moving heads; setting their position and colour attribute. Step 1 – Position the moving heads and set the colours Open the ‘Demo 8 heads.cfg’ configuration. Select a couple of moving heads, apply the ‘Static’ control in the Live View (on the ‘primary’ tab) as in Figure 49 FIGURE 49 FANNING MOVING HEADS Set some moving heads to a colour, e.g. blue. Select the other moving heads and set them to a different colour, e.g. magenta. Figure 50 now shows the state of the moving heads. FIGURE 50 FANNED MOVING HEADS IN BLUE/MAGENTA Step 2 – Add a Preset In VisualDMX’s main screen, go to the ‘Tools’ menu and choose ‘Preset Editor’. Add a Preset by clicking on the ‘Add’ button. Select the new Preset, click on ‘Rename’ and label the Preset e.g. “Blue Magenta Fan”. In the ‘Fixtures’ tab you can select the moving heads we’ve set up. Add them to the Preset by using the ‘>>’ button. Now select the ‘Attributes’ tab and add the ‘Position’ and ‘Colour 1’ attributes to the Preset by using the ‘>>’ button. The Preset Editor should now look like Figure 51. 51 FIGURE 51 PRESET EDITOR 'BLUE MAGENTA FAN' Step 3 – Fetch the values The final step for this Preset is to set the values. Select the Preset in the ‘Preset List’ and click on the ‘Fetch’ button. All the attributes’ values are now fetched from the fixtures and stored in the Preset, see Figure 52. 52 FIGURE 52 PRESET WITH ITS CONTENT STORED Step 4 – Test the Preset To test the Preset first select the moving heads in the Main view of VisualDMX and set them to different values; you could use the ‘Home’ button in the Live View to do this. Now go back to the Preset Editor and select our Preset and click on the ‘Execute’ button. The moving heads will now show the position and the colour programmed in this Preset. 53 4.5 MATRIX MANIA! Matrix Mania! (Figure 53) is a powerful and fun tool to control matrix setups. By matrix we mean a two dimensional array consisting of fixtures. The fixtures together form one appearance which is usually a dance floor or a wall of panels, capable of rendering patterns or even text. The fixtures making up the matrix are typically LED panels but can also be any other kind of fixture including dimmers and moving-heads. Matrix Mania! is a light-weight version of Canvix Matrix Server and is intended to control matrixes in an easy way, allowing you to combine it with the other features of VisualDMX. For specific matrix applications that require more control functionality we advise you to download Canvix from www.canvix.com. Canvix operates with the same hardware devices as VisualDMX does. This tool inhibits patterns for the matrix using their colour or dimmer attribute, all other attributes are not affected by Matrix Mania!. One of the most powerful characteristics of Matrix Mania! is that the patterns are automatically adapted to the dimensions of the matrix. In addition to the predefined patterns you can also display general graphics on the matrix. Currently supported graphic file formats are Bitmap (BMP) and GIF. The GIF files incorporate an animation feature that is supported by Matrix Mania! FIGURE 53 MATRIX MANIA! 4.5.1 OVERVIEW The Matrix Mania! window is divided up into three views: 54 This page will be used most, offering you an overview of the appearance of the matrix and the full list of all patterns and graphics that can be applied. The setting section will have its use before and during the show, allowing you to customize the many parameters of the patterns. This page also contains an editor for the graphics like Bitmaps and GIFs. Using Matrix Mania! will start here where you will enter the dimensions of the matrix and map each fixture on the pixels of the matrix that it corresponds to. L IVE The Live view offers the means to control the matrix. Figure 54 shows the sections this view consists of. FIGURE 54 MATRIX MANIA! LIVE VIEW Patterns This table lists the pattern collection. For each pattern its label, timing source and loop function are shown. The pattern’s icon indicates the type of pattern. Preview This is a preview of the image applied to the matrix. Progress The progress bar shows the running time for the currently loaded pattern. You can also click and drag in this bar to set its position manually. Control The matrix can be control by using the following buttons: Call Load the currently selected pattern into the matrix layer. 55 0 / 90 / 180 / 270 Rotate the loaded pattern by increments of 90 degrees Clock / Manual Set the Timing Source. Speed Play back speed of the loaded pattern Attack Cross fade time of the loaded pattern Intensity Intensity of the matrix layer Stop Stop the loaded pattern Go Back Go back one step Pause Pause Go Start playing the loaded pattern, or advance one step Flash Momentarily sets the intensity of the matrix layer to 100% S ETTINGS The Settings view (Figure 55) enables you to manage and edit the patterns. FIGURE 55 MATRIX MANIA! SETTINGS VIEW Some type of Patterns are computer generated; they are calculated in real-time, e.g. the ‘Fire’ Pattern. Other types of patterns include GIF patterns; they consist of one or more images with which animations can be 56 created. There are also several Text Patterns available. These patterns render text on the matrix in various ways, e.g. horizontally, vertically, static, scrolling, etc. At the left-hand side the following controls are offered: Add Insert a Pattern Remove Remove a Pattern Rename Rename a Pattern Edit Opens the in-built graphics editor (only available for GIF and BMP patterns) Clock / Manual Change the Timing Source of the Pattern Rotate Rotate the pattern by 90 degrees Parameters Each pattern has parameters; the amount of parameters varies through the different types of Patterns. A few examples of parameters are “Speed”, “Attack”, “Background colour” and “Text”. Figure 55 shows the parameter table on the right. By clicking on a “value” you launch a pop up dialog that enables you to change the value of the parameter. GIF-P ATTERNS A GIF pattern consists of one or more images that can run one by one to create an animation. You can use the in-built GIF editor to change these patterns. To access the editor (Figure 56), select a GIF pattern and press the ‘Edit’ button. 57 FIGURE 56 GIF EDITOR The GIF patterns have some specific properties: Width Width of the pattern Height Height of the pattern Colours The Colours property determines the size of the palette; i.e. the number of colours it contains. Palette Included To further reduce file size the GIF format allows for the palette to be omitted. When no palette is included in the GIF the standard system palettes are used. Loop Repeat the playback of the pattern Images Number of images inside the GIF Total Duration Cumulative duration of all the steps in the pattern A GIF consists of multiple images which are listed in the table on the right. The individual images can be edited. The following properties can be set per image: Width Width of the image Height Height of the image 58 Duration Duration of this step in the GIF, if the attack parameter is set to full fade then this duration becomes the fade time. Transparancy The transparency can be enabled or disabled. Transparent Colour The GIF format features the option to set one of the colours in its palette as the transparent colour. When set, all pixels with that colour will be rendered transparent. Palette In order to reduce file size, GIFs use palettes to store their colour information. This means that a pixel in an image is not stored as a real colour, instead it is stored as an index number; this index refers to a position in the palette in which real colours can be found. If you change a colour within the palette all pixels throughout all images that refer to that index will change accordingly. To be able to edit a palette colour the “Palette included” property of the GIF has to be enabled. Also, in the editor you can perform the following operations: Pen Draw per pixel in the selected colour. Flood Flood-fill an area with the selected colour. Clear Clear the whole canvas with the selected colour. The selected colour can be modified by using the ‘Edit’ button at the bottom of the palette. 59 L AYOUT The Layout view is the place where you configure the matrix dimensions and position the fixtures to a specific pixel; see Figure 57. FIGURE 57 MATRIX MANIA! LAYOUT VIEW In the ‘Members’ section you can control which fixtures should be controlled by the matrix and set their position within the matrix. Add Add fixtures to the matrix Remove Remove the selected members from the matrix Clear all Remove all members from the matrix Rotate Rotate the selected fixture(s) Snap to Previ This will position the selected fixture to the same location as the previous fixture in the list. Arrange all Instead of positioning the fixtures manually one by one, you can also opt for VisualDMX to arrange the fixtures automatically. Pressing the ‘Arrange all’ button will pop up a dialog that allows you to select the arranging method that corresponds to the physical arrangement of the fixtures. Indication This function helps with positioning the fixtures. When Indication is enabled the physical fixtures will display the same colour as the pixels in the Mapping overview. By watching the real fixtures it will become instantly clear where this fixture belongs 60 st within the matrix. The 1 pixel of a fixture is indicated in orange showing its orientation. ←↑→↓ Move the selected fixture(s) Import Load the matrix layout from file. Export Save the matrix layout to a specific file. Note: the matrix settings are already saved in the configuration file. Mapping The Mapping diagram shows the positions of the fixtures inside the matrix. Using different colours, it indicates the state of each pixel: Black Contains no fixture Cyan Contains a (part of a) fixture Orange Multiple fixture overlap on this pixel Dark blue edge Selected fixture Layout view keyboard shortcuts <ENTER>: Select the next fixture <BACKSPACE> Select the previous fixture R Rotate the selected fixture(s) ←↑→↓ Move the selected fixture(s) <CTRL> ←↑→↓ Move the selected fixture(s) to the very end P Snap to Previous 61 4.6 CALIBRATING FIXTURES The Calibration view (Figure 58) allows you to modify the behaviour of the currently selected fixtures. FIGURE 58 CALIBRATION VIEW - ORIENTATION O RIENTATION Here you can invert the pan (horizontal) and the tilt (vertical) movement, or swap the pan and the tilt axes. M ARGINS The margin control enables you to limit the movement range of the moving head or scanner (see Figure 59). This limitation is taken into account throughout the whole VisualDMX application by sequences, cues and manual control of the fixture's beam. FIGURE 59 CALIBRATION VIEW - MARGINS A UTO F OCUS The AutoFocus feature is set up here (Figure 60). For each gobo wheel you'll need to set a corresponding focus level. More details on the AutoFocus function can be found in chapter 2.1.4. FIGURE 60 CALIBRATION VIEW - AUTOFOCUS 62 4.7 CREATING TRACKS A track is a VisualDMX proprietary file format that contains DMX data to control lights. The track format is used by equipment like the Elite and the Frontier. Unlike other file formats used for storage of DMX data, a track is not built up out of steps; rather, it is a continuous, fluent stream of DMX perfectly capable of containing true goniometrical circles and smooth colour changing patterns. Tracks are created and managed in the Track View (Figure 61). This view features a wizard that guides the user through specifying all the details of the track before it is generated. In general, a track is constructed out of a Fixture Configuration (indicating the type of fixtures and their starting addresses) and a sequence (telling those fixtures what to do) or even a matrix pattern. FIGURE 61 TRACK VIEW Tracks vs. Sequences The main difference between a track and sequence is that a sequence, on its own, is useless because it lacks the information on real DMX values; the sequence doesn't know yet on which and on how many fixtures it is going to played. On the contrary, with a track, at its construction, information from the Fixture Configuration as well as from the current selection was added to the data from a sequence or pattern. This makes a track file complete, ready to be played upon lights without requiring any additional information. This aspect reveals the true purpose of the tracks; that is a file format for standalone playback. Compression A consequence of the track's characteristic of containing streaming DMX rather than step-wise, is that the amount of data to be stored in the file is enormous. Without any special treatment the size of a track file would defeat its purpose; it would become too big to be held in the relatively small memories of the hardware devices. To tackle this issue, the data in the track format is compressed. The compression technique specially designed for this purpose has some similarities with the popular MP3 compression of audio files, in the sense that it has a high compression ratio that makes it very efficient and that the actual compression ratio will differ from file to file depending on its structure. Also, the rate of compression can be set by the user, which will be 63 linear with loss in signal quality at playback. This setting is the refresh rate of the DMX signal; just like the sample rate setting with MP3. This chapter will give you an overview of the Track View and an explanation of its functions, including instructions on how to construct tracks and upload them to a hardware device. 4.7.1 OVERVIEW The Track View is used for managing the track files. After selecting a track from the list you can operate the (pop-up) menu to save, rename or delete it. C REATING NEW TRACKS To create a new track you can select ‘New’ from the menu, this will launch the wizard for constructing track files. This wizard (Figure 62) will guide you through the following settings required for the track: FIGURE 62 TRACK CREATION WIZARD Type This determines the source for the track. You can choose from: Sequence, Snapshot and Pattern. A snapshot is merely an exact copy of the current status of your lights. According to your selection here, some of the following settings can be omitted. Refresh rate The refresh rate of the DMX signal will, to some extent, determine the quality of the track. The higher the refresh rate, the larger the file size will be. Large files can become too big to fit into the, fixed sized memory slots of the hardware devices; this might restrict the length of track. Often a low refresh rate will do fine for the purpose of a track; especially when the track involves slow and smooth changes; at that point raising the refresh rate would not gain any noticeable signal quality. Universe A track has the restriction of covering no more than one DMX Universe. When controlling multiple universes, you are being asked to choose one. Selection You can apply the source of the track (i.e. sequence or pattern) on all fixtures in the universe; however, it is also possible to make a sub selection. 64 Sequence/Pattern Eventually, you would need to denote the sequence or pattern you would like to be used for the track. M ERGE When selected, multiple tracks can be merged to a single new one by using the ‘Merge’ function in the ‘Tracks’ menu. This way could for instance combine sequence tracks with matrix tracks. D EVICES WITH MEMORY The ‘Devices with memory’ field will list all connected hardware that supports tracks, e.g. Elites and Frontiers. When one of these devices is selected the ‘Slots’ table will show the contents of this device. Through the ‘Device’ menu you can perform several operations on the selected device like ‘Erase all memory slots’ or ‘Blink’. Blink will identify the selected device by making its LEDs flash for a couple of seconds. The ‘Slot’ menu offers several operations specific to the device’s slots. This includes ‘Set Auto Duration’; this function is to set the duration of each slot when it is played by means of the ‘Auto’ mode featured by the Elite (showing the ‘A’ in its display). If you set this duration to zero, the slot will be skipped in the Auto mode. 65 5 CONNECTING WITH VISUALDMX VisualDMX can communicate with the outside-world in several ways; this chapter explains how. 5.1 DMX & ART-NET Communication with DMX controlled equipment is done through one of the following devices: - Duple - Elite - Frontier - Art-Net Dongle (In combination with a 3 party Art-Net Node) - DMX Input (discontinued) - DMX Output (discontinued) - DMX Output RS-232 (discontinued) rd These methods of communication can be combined. As soon as a USB device is connected and installed on the computer, VisualDMX will detect it automatically. The number of DMX Outputs and Inputs found is shown in the caption bar of VisualDMX. 5.1.1 DUPLE Visual Productions’ Duple (Figure 63) is a DMX interface connected via USB. The Duple has both a DMX-512 output port and an input port. The DMX output transmits 512 channels of DMX. The optically isolated DMX input port receives 512 channels of DMX. When connected to a third party DMX console, each channel can be used to control any function in the lighting control software. A maximum of eight Duples can be connected to VisualDMX, however, configurations of more than four universes are advised to use Art-Net. Only one input is available for use in FIGURE 63 DUPLE VisualDMX. I NTERFACE The Duple features three status LEDs: POWER Indicates the device is powered by the USB. PC Indicates communication with the VisualDMX software. This LED should be on for correct operation. DMX IN Indicates DMX signal being received on the DMX input port. 66 I NSTALLING THE DMX O UTPUT The screen dumps used in this chapter are taken from Windows 2000. If you are installing on a different Windows system the appearances of the screens might differ. S TEP 1 Connect the Duple to your PC using the USB cable. New hardware has been detected and Windows will search for the driver. S TEP 2 Select Install from a list or specific location. S TEP 3 Make sure that Search for the best drivers in these locations and Include this location in the search are checked. Click on Browse to locate the drivers: The drivers are installed together with our software release in the folder ‘Drivers’. E.g. 'C:\Program Files\Visual Productions\VisualDMX\Drivers'). Press the NEXT button. 67 S TEP 4 Windows will search for the driver in the designated folder. S TEP 5 ° If this warning appears then click ‘Continue Anyway’. S TEP 6 Click FINISH. The device is now completely installed and is ready to be used by the software. 68 You can check whether the driver is installed properly by going to Window’s ‘Control Panel’ and open ‘System’. On the ‘Hardware’ tab you find the ‘Device Manager’. The Device Manager presents you with a tree structure indicating all hardware connected to your computer. You expect to find VisualDMX’s devices in the section ‘Universal Serial Bus Controllers’. If the device is not listed here, something went wrong with installing the drivers. 5.1.2 FRONTIER Visual Productions’ Frontier (Figure 64) is also a USB connected DMX interface. The unit offers direct control of 16 tracks for standalone usage. FIGURE 64 FRONTIER I NTERFACE The Frontier features 16 illuminated buttons that allow you to select a Track. The rotary knob can be used to adjust the playback speed of the currently active track, depressing the knob will reset the speed to the level originally programmed. If no track is active then the unit behaves like a normal DMX Output and can be used for live control with VisualDMX. TEST FUNCTIONS The Frontier has a few test functions built in. To run a test function, depress the specific track button while applying power to the unit. Button Function 3 LED test, all buttons are lit 4 Button test, pressing a button will illuminate its LED 5 Encoder test, use the encoder to move a ‘cursor’ around Rotary knob Close any test function, go back to the normal mode I NSTALLING THE F RONTIER The installation of the Frontier’s driver is similar to installing the Duple as described in chapter 5.1.1. 5.1.3 ELITE The Elite (Figure 65) from Visual Productions is a DMX interface also connected via USB. The Elite features the possibility to upload “tracks” into the device and playback these sequences standalone without a computer. FIGURE 65 ELITE 69 I NTERFACE The Elite has two LEDs: PC Indicates communication with the VisualDMX software. This LED should be on when not used standalone. DMX Indicates DMX signal is being transmitted. This LED should be on continuously. Furthermore, the Elite has a display and two buttons to select the playback track. The display can show: 1-8 Tracks 1 till 8 A Auto Mode, automatically traverse through tracks 1 till 8 - When connected to VisualDMX: Live control from VisualDMX When used standalone: Blackout I NSTALLING THE E LITE The installation of the Elite’s driver is similar to installing the Duple as described in chapter 5.1.1. 5.1.4 ART-NET DONGLE The Art-Net Dongle (Figure 67) enables VisualDMX to send out its DMX values over the Art-Net protocol. The dongle is available in various sizes, i.e. the number of universes that will be unlocked for use with Art-Net. The Art-Net signal will be transmitted through the standard network port of the computer. Art-Net is compatible with a wide variety of DMX equipment and converters are offered by various third-party suppliers. C ODEMETER R UNTIME K IT FIGURE 66 ART-NET DONGLE The Art-Net Dongle does not require any driver or special software to be installed unless you are using the 'Startup Automatically' feature that will start up VisualDMX every time Windows boots up. This feature does require the Codemeter Runtime Kit to be installed on your computer. You can find the Codemeter Runtime kit on CD-ROM that accompanied your Visual Productions hardware. Alternatively, you can download it from our website http://www.visualproductions.nl. 5.1.5 DMX OUTPUT Visual Productions’ DMX Output (Figure 68) is a DMX interface connected via USB. This device is obsolete and not supplied any longer by Visual Productions, it is however still supported by this version of VisualDMX. A maximum of eight DMX Outputs can be connected to VisualDMX, however, configurations of more than four universes are advised to use Art-Net. FIGURE 67 DMX OUTPUT 70 I NTERFACE The DMX Output features three status LEDs: POWER Indicates the device is powered by the USB. PC Indicates communication with the VisualDMX software. This LED should be on for correct operation. DMX Indicates DMX signal is being transmitted. This LED should be on continuously. 5.1.6 DMX INPUT The DMX Input (Figure 68) enables VisualDMX to be controlled by an external DMX lighting desk. FIGURE 68 DMX INPUT I NTERFACE The DMX Input features three status LEDs: POWER Indicates the unit is powered via the USB. PC Indicates the unit is communicating with the VisualDMX application. DMX Indicates DMX is being received. I NSTALLLING THE DMX I NPUT The installation of the DMX Input’s driver is similar to installing the Duple as described in chapter chapter 5.1.1. 71 A CTIONS By using actions, any functionality in VisualDMX can be assigned and triggered by a DMX channel in the DMX Input. You can find out more on how to program actions in chapter 4.3.1. 5.1.7 DMX OUTPUT RS-232 The DMX Output RS-232 (Figure 69) is a DMX interface connected via the computer’s serial port. This device is obsolete and not supplied any longer by Visual Productions, it is however still supported by this version of VisualDMX. I NTERFACE FIGURE 69 DMX OUTPUT RS-232 The DMX Output RS-232 has three status LEDs: POWER Indicates the unit has power HOST COMM Flashes when the unit is communicating with the VisualDMX application DMX Indicates DMX is being sent I NSTALLING THE DMX O UTPUT RS-232 To install the DMX Output RS-232 first connect the RS-232 cable between the unit and the computer, then apply the power to the DMX Output RS-232. Have VisualDMX scan the serial ports for the unit by using the ‘Detect RS-232 Hardware’ function in the ‘Tools’ menu; this will take a few seconds. 72 5.2 MIDI VisualDMX is capable of both receiving and transmitting MIDI messages. MIDI is the acronym for Musical Instrument Digital Interface. The MIDI protocol allows electronic devices (usually synthesizers, but also computers, light show controllers, VCR's, multi-track recorders, etc.) to interact and work in synchronization with other MIDI compatible devices. Using a master controller device such as a keyboard, one can play or trigger sounds from other electronic devices remotely. This eliminates the need for one keyboardist to perform with nine or ten keyboards around him. He can play all the keyboards through one simply by connecting them using MIDI. The other keyboards can be off-stage; he never has to touch them, yet he can play them. You can find more information on MIDI at http://www.midi.com . To enable MIDI communication, select a MIDI input and output device in the Options window. 5.2.1 RECEIVING To respond to incoming MIDI messages you would need to create an ‘MIDI’ Action List. Within this list you add an Action for each individual message you would like to process. Actions allow you to trigger a great many different functions within the VisualDMX software. 5.2.2 TRANSMITTING In order to transmit a MIDI message you would need to add a ‘MIDI’ task to action. Within this task you can specify the details like MIDI channel, message type and value. 73 5.3 GENERAL PURPOSE INTERFACE VisualDMX features GPI and GPO modules to interconnect with external equipment. Some project might require VisualDMX to be triggered by an external source. When communicating this signal via DMX or MIDI is undesired or impossible, VisualDMX has the alternative to receiving signals through its GPI interface. Likewise, in some cases it might required for VisualDMX to trigger external devices with a ‘contact closure’ signal; this can easily be done with the aid of the GPO interface. 5.3.1 GPI Visual Productions’ GPI (General Purpose Input) interface allows external signals to be connected to VisualDMX and Canvix. Our lighting control programs are then able to be triggered by these signals to create a fully automated lighting control system. The GPI is intended for fixed installations where our lighting control software can be interconnected to other equipment, mechanical switches or sensors. The GPI is designed with installers and system integrators in mind; it features a DIN-Rail enclosure that allows easy mounting of the unit. All connections have detachable screw-connectors for a quick replacement of the unit. The GPI features 8 contact closure input ports and is USB powered. The function of the input ports can be freely programmed within VisualDMX and Canvix, allowing you to trigger any software function. FIGURE 70 GPI 5.3.2 GPO The GPO (General Purpose Output) device enables the VisualDMX and Canvix lighting control programs to be interfaced with external equipment. This technology will allow you to complement your VisualDMX or Canvix system with more equipment even when these do not feature protocols like DMX. The GPO is intended for fixed installations where the need for interfacing our lighting control software with other equipment regularly arises. The GPO is designed with installers and system integrators in mind; it features a DIN-Rail enclosure that allows easy mounting of the unit. All connections have detachable screw-connectors for a quick replacement of the unit. The GPO features 8 contact closure output ports and is USB connected. The function of the output ports can be freely programmed within FIGURE 71 GPO VisualDMX and Canvix, allowing it to be triggered from software function. 74 5.4 SOFTWARE TOOLS VisualDMX can communicate with other software tools, so called ‘clients’, like VisualTouch and Visual3D. It communicates via a TCP/IP connection (a standard Ethernet network) and thus can reach clients that run on the same computer as VisualDMX, and clients that run on a different computer that is connected to this network. 5.4.1 VISUALTOUCH VisualTouch (Figure 72) is a freely available software tool from Visual Productions. This tool will add a fool-proof user interface to your VisualDMX system. You can define multiple pages with many buttons that will trigger various functions and Patterns in VisualDMX. The user interface is 100% touch screen optimized and password protected; it is primarily designed for leaving VisualDMX in a fixed installation to be used by non-technical staff. Multiple VisualTouch applications can be connected to one VisualDMX system. FIGURE 72 VISUALTOUCH 5.4.2 VISUAL3D Visual3D (Figure 73) is a 3D visualizer for simulating the fixtures, controlled by VisualDMX, in a 3D world. When connected to VisualDMX, the program automatically fetches all fixture data and renders the lights in real-time. Visual3D is free to all VisualDMX users and can be downloaded from the website. Use the ‘Venue Editor’ in the ‘Tools’ menu of VisualDMX to change the dimensions of the room. FIGURE 73 VISUAL3D 5.4.3 API In order to communicate with other software programs from 3rd party suppliers, VisualDMX features an API (Application Programming Interface). This API is accessible via TCP/IP socket connections and is documented in ‘Developer Manual’ that can be downloaded from the website. 75 6 INDEX 3D visualizer ........................... 7 Action ................................... 43 Action Editor ........................ 42 Action List ............................. 42 API ........................................ 75 Arrange all ............................ 60 Art-Net ................................. 28 Art-Net Dongle ..................... 70 Attack ................................... 56 Attribute ............................... 39 Audio input........................... 18 Auto Duration ...................... 65 Auto load .............................. 17 Auto Mode ........................... 70 AutoFocus ...................... 14, 62 Blink................................ 19, 65 Calibration view ................... 62 Canvix Matrix Server ............ 54 Change ................................. 39 Check for updates at startup 17 Clients................................... 75 Clock ..................................... 10 Codemeter Runtime ............. 17 ColourMix Attribute Precedence ...................... 17 Command-line Parameters .. 16 Compression ........................ 63 Connect ................................ 29 Contact Closure .................... 74 CTC ....................................... 14 Custom ................................. 14 Devices ................................. 19 Dipswitch.............................. 30 Disconnect ............................ 29 DMX Input ...................... 42, 71 DMX Output ......................... 70 DMX Output RS-232 ............. 72 Dongle .................................. 70 Driver.................................... 67 Duple .................................... 66 Elite ...................................... 69 Enable audio input ............... 18 Execute ................................. 43 Export ................................... 61 Fanning ................................. 13 Feature ................................. 47 FIA .......................................... 4 Firmware upgrade ................ 19 Firmware version .................. 19 Fixture Configuration ........... 27 Fixture Independent Architecture ....................... 4 Fixture view ............................ 7 Fixtures ................................. 29 Frontier ................................. 69 Function................................ 47 Gap ....................................... 30 GIF .................................. 56, 57 GPI ........................................ 74 GPO ................................ 46, 74 Grid size ................................ 17 Home .................................... 13 Home preset ......................... 50 HTP ................................. 11, 17 Import................................... 61 Indication.............................. 60 Joystick ................................. 18 Keyboard .............................. 42 Keyboard Shortcuts .............. 15 LAD ....................................... 14 Layout ................................... 60 Lens ...................................... 30 Live view ............................... 12 Lock Fixture Windows .......... 17 Loop ........................................ 9 Low-pass frequency filter ..... 18 LTP .................................. 11, 17 Manual ................................. 10 Manual Assignment .............. 47 Mapping ............................... 61 Margins........................... 10, 62 Matrix Mania! ....................... 54 Merge ................................... 65 MIDI .................... 18, 43, 46, 73 Omit Save Query on Close .... 17 Options ................................. 16 Orientation ........................... 62 Palette ............................ 58, 59 Param ................................... 47 Parameters ........................... 57 Patch ..................................... 31 Pattern .................................. 55 PCB version ........................... 19 Personality File ..................... 29 76 Phase shift ........................... 10 Preset Editor ........................ 49 Presets ................................. 49 Primary ................................ 13 Refresh rate ......................... 64 Rotate .................................. 60 RS-232 .................................. 72 Scenery .................................. 8 Scheduler ............................. 43 Secondary ............................ 14 Selection view ........................ 8 Sequence Editor ................... 37 Sequence View ...................... 8 Sequences ............................ 37 Server................................... 20 Slots ..................................... 65 Smoke .................................. 14 Snap to grid.......................... 17 Snap to Previous ............ 60, 61 Snapshot .............................. 64 Specifications ......................... 4 Speed ................................... 56 Stacking sequences .............. 11 Startup Automatically .......... 17 Startup Minimized ............... 16 Statics .................................. 13 Step ...................................... 38 Stream ................................. 38 Streams .................................. 9 Sub fixtures .......................... 30 Super Fetch .......................... 50 System ................................. 42 System Requirements ............ 4 Target................................... 44 Tasks .................................... 46 Teams .................................. 31 Tempo .................................. 10 Throughput .......................... 29 Timer.................................... 43 Timing Source .............9, 10, 11 Touch Screen ................. 43, 75 Tracks ................................... 63 Transparancy ....................... 59 Trigger.................................. 44 Universe ............................... 28 Upgrade ............................... 19 User ..................................... 17 7 NOTES 77