1
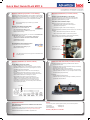
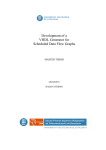
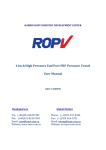
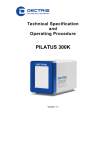
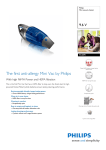
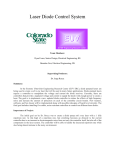
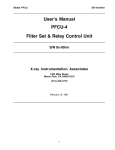
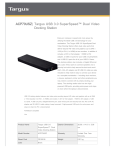
Quick Start Guide DLoG MPC 6
1
Configure the device on the desktop
!
TIP: Configure the DLoG MPC 6 before fastening it to machines or
vehicles. Software configuration for the WLAN function, for Automatic
switch-off, etc. is significantly simpler and more convenient on the
desktop.
+
Prerequisites
=
• Power supply cable
• DLoG pre-converter, to connect the DLoG MPC 6 to an AC power supply
• IMPORTANT: The output voltage of the pre-converter must be compatible
with the input voltage of the DLoG MPC 6. If it is not, the DLoG MPC 6
may become badly damaged.
PRECONVERTER
+
~
POWER
Easy configuring the DLoG MPC 6
on the Desktop
Connection to power supply
• If you want to operate the DLoG MPC 6 using an external mouse/keyboard,
connect this before switching on the DLoG MPC 6.
• Next, connect the DLoG MPC 6 to the power supply.
Connectors on the DLoG MPC 6 for power supply, accessories...
2
Switch on the device
• Press the <Power> button for 3 seconds to start the DLoG MPC 6.
• If the DLoG MPC 6 has an automatic switch-off function and this has
already been configured, the device will start as soon as the power supply
is applied.
Tips for operating the DLoG MPC 6
Brightness:
Display brighter / darker
Background lighting:
on / off
Log on as an administrator
The settings for the automatic switch-off function, WLAN, etc. can be made
only by administrators, since the relevant tools are available in Admin mode
ONLY!
Operate the touch screen using:
Fingers, gloves, touch screen pens
Do not operate the touch screen using:
Sharp tools, ball pens etc.
To log on as an administrator:
• When the initial blue Windows start screen appears, press and hold down
the right <Shift> key on the keyboard.
• Name: admin
• Password: gold
3
Open the context menu
(right click):
Press the touch screen for 2 sec.
Software settings (preparation on the desktop)
You can use the DLoG Config program to configure automatic switch-off, the
WLAN status display and the front keys on the DLoG MPC 6.
Customize the WLAN status display
Start DLoG Config
• To start DLoG Config choose the program icon on the desktop.
• Or go to Start – Programs.
• The default password is „gold“.
• In the DLoG Config program, go to the WLAN menu.
• Open the WLAN status window, which contains information about signal strengths
and the quality of the WLAN connection.
• Customize the appearance of the WLAN status window.
• Save your settings.
!
TIP: You can use the Parameter Connect Program to start any program
automatically as soon as there is an active WLAN connection.
Configure the automatic switch-off function
Optional - for DLoG MPC 6 devices on vehicles only!
• In the DLoG Config program, go to the Automatic Switchoff menu.
• Configure the switch-on and switch-off behavior of the DLoG MPC 6
in connection with the vehicle ignition.
• Save your settings.
!
CAUTION: If an incorrectly configured DLoG MPC 6 is connected to
a given vehicle‘s ignition, this can cause malfunctions to the extent
that the DLoG MPC 6 can possibly no longer be switched on or off.
Program the keys on the front of the DLoG MPC 6
In the DLoG Config program, go to the Front Panel menu.
Assign frequently used functions to the soft keys.
Start external programs using the soft keys.
Two functions can be assigned to those soft keys displayed white/gray in the menu
(use <Shift> to switch between functions).
• Save your settings.
•
•
•
•
DLoG DAN 885901E.00
Quick Start Guide DLoG MPC 6
4
Wireless networks (preparation on the desktop)
Depending on the ordered configuration, the DLoG MPC 6 contains either a
Summit WLAN card or a Proxim WLAN card. Generally, the WLAN profile
is set as default in the factory by DLoG for the integrated card. If any adjustments are required, tools for modifying the WLAN profile are available.
!
5
Mechanical installation (on vehicle, fork lift)
Position of the DLoG MPC 6 on the vehicle
The driver‘s field of vision in the vehicle must not be obstructed.
If you want to install a keyboard and scanner on the side of the
DLoG MPC 6, please allow enough space.
Overview of the installation steps:
NOTE: WLAN settings may be made only by qualified
technical staff.
Before you mount the DLoG MPC 6 onto the vehicle:
• The automatic switch-off function must be configured.
• The forklift must be prepared
(connection to ignition, observe correct voltage, etc.)
Summit Client Utility Program (SCU)
for DLoG MPC 6 with Summit WLAN card
We recommend that the installation process is carried out in the following
sequence:
• Start the Summit Client Utility program.
• Log on with the password „SUMMIT“ (all uppercase).
• Make the desired settings.
• Step 1: Secure the mounting bracket onto the vehicle
• Step 2: Attach the DLoG MPC 6 to the mounting bracket
As an alternative to the SCU program, you can also use the Windows Zero
Configuration (WZC) program:
When installing your DLoG MPC 6, please observe the assembly
instructions that come with the relevant mounting kit.
• Start the WZC program by choosing Desktop - Admin Tools Control Panel - Network Connections: Wireless Network
Connections (Properties).
• Make the desired settings.
Proxim Atheros Client Utility Program
for DLoG MPC 6 with Proxim WLAN card
• Start the Atheros Client Utility program.
• Make the desired settings.
!
6
The DLoG MPC 6 and
accessories must not
protrude beyond the vehicle.
TIP: Use the help function for this programs to read details about
the setting options.
Electrical installation (on vehicle, fork lift)
On the MPC 6 and on the vehicle
• Ensure that the ground connection is correct!
• Choose a suitable position on the forklift for the ground connection.
• Sometimes the position from which the ground signal is to come is
specified by the vehicle manufacturer.
• Position and attach the DLoG MPC 6 as close to the battery as
possible.
• Do not attach the DLoG MPC 6 directly to a connector for a highpowered consumer (e.g. an inverter for fork lift motors) as this could
lead to restarts, malfunctions or damage to the device..
• Some forklifts have a chassis that is connected to DC+.
Therefore, the DLoG MPC 6 chassis is also connected to DC+.
However, if you use peripheral devices that supply DC- to the
DLoG MPC 6 via an interconnector (such as a DC- serial port),
this will cause a short circuit. This will inevitably lead to malfunctions
or even a total system failure
7
Cable cover and strain relief (on vehicle, fork lift)
Once the DLoG MPC 6 and mounting bracket have been secured:
• Prepare the strain relief.
• Position the cables on the stress relief rail so that they will fit through
the openings in the cable cover.
• Mount the cables loosely on the strain relief rail.
• When attaching the cables observe the following: The power supply
cable is provided with a ferrite core; you must lay this cable in a loop
for space reasons (see photo below).
Final steps:
• Fix the cables to the strain relief rail.
• Close the cable cover carefully, observing the assembly instructions
provided with the DLoG MPC 6.
Ground bolt
Example for cable positioning
Further information
User manual and device driver available from the DLoG
download center
The DLoG MPC 6 user manual and the latest device drivers are available
from the DLoG download section on www.dlog.com/DownloadCenter.
Additional technical details are available for registered users.
Copyright 2010, DLoG GmbH, Industriestraße 15, D-82110 Germering, All rights reserved.
Hotline
If you have any further questions, please contact your DLoG service partner or:
DLoG GmbH
Industriestraße 15
D-82110 Germering
[email protected]
www.dlog.com
Phone: (+49) 89 / 41 11 91 999
DLoG DAN 885901E.00