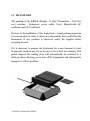
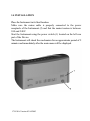
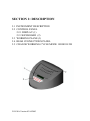
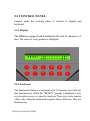
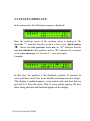
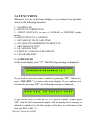
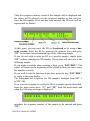
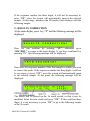
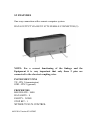
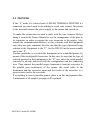
1
LINEAR CHEMICALS S.L.
Joaquim Costa 18 2ª Planta
08390 Montgat
Tel 34-93-469 49 90
Fax 34-93-469 34 35
www.linear.es
e-mail: [email protected]
LENA
USER´S MANUAL
Random Access Autoanalyzer for Determination of the
Erythrocyte Sedimentation Rate (ESR)
1 LENA Version 03 04/2003
2 LENA Version 03 04/2003
USER´S MANUAL
1- INSTALLATION
2- DESCRIPTION
3- OPERATION
4- ERROR MESSAGES
5- ON-LINE COMMUNICATIONS PROTOCOL
6- SERVICE AND MAINTENANCE
CE CERTIFICATE
3 LENA Version 03 04/2003
4 LENA Version 03 04/2003
INTRODUCTION
LENA is a random access autoanalyzer to determine the
Erythrocyte Sedimentation Rate (ESR), capable of processing up
to 16 samples simultaneously by means of an IR LED optical
system.
LENA requires a minimal handling of the sample, as the test is
performed directly on the test-tube, admitting both open and
vacuum tubes.
LENA allows the test to be made in accordance with two
different operating modes:
1 HOUR MODE
1 HOUR/2 HOURS MODE
In both cases, results are expressed in Westergren millimeters.
LENA is capable to process 40 samples per hour, with
uninterrupted sample loading, as test positions are left free.
LENA features structured software to facilitate its learning and
use, with a clear and concise display. The Instrument requires a
minimum user’s intervention, and handling is simple and userfriendly.
5 LENA Version 03 04/2003
6 LENA Version 03 04/2003
1
7 LENA Version 03 04/2003
8 LENA Version 03 04/2003
SECTION 1: INSTALLATION
This Section describes installation, applicable safety regulations
and the transport packing dimensions of the LENA. Physical
location, environmental conditions and electric power
requirements are indicated for the correct installation of the
Instrument.
1.1 SAFETY REQUIREMENTS
1.2 INSTRUMENT REQUIREMENTS
1.3 TRANSPORT
1.4 INSTALLATION
9 LENA Version 03 04/2003
10 LENA Version 03 04/2003
1.1 SAFETY REQUIREMENTS
NOTE: Under no circumstances should the user deliberately
modify the safety features of the Instrument. Any
modification of the Instrument will cancel the warranty or the
technical service agreement, if any.
In case the cable or the power supply begins to get damaged or
broken, they should immediately be replaced.
This Instrument is an electro mechanic device of which the user may
not handle the internal parts. For any technical issue, contact the
Technical Service of your Distributor, whose staff is trained and
qualified to carry out any repairs.
WARNING: The Instrument must be disconnected from the
power supply before starting any technical corrective work.
Operators should not attempt to repair faults or breakdowns.
In case of accidental spillage of the analyzed samples, the spill must
immediately be cleaned with an appropriate disinfecting solution, to
avoid the possible contamination of the laboratory personnel and
Equipment.
Note: The Instrument can be cleaned with a water and soap
solution or with 70% alcohol. Do not use a larger alcohol
concentration, as it could damage the cover of the Equipment.
11 LENA Version 03 04/2003
12 LENA Version 03 04/2003
1.2 INSTRUMENT REQUIREMENTS
The LENA must be placed on a perfectly flat and level surface not
exposed to any vibrations. It is important for the rear of the
Instrument to have sufficient clearance to allow the air to circulate
properly. Recommended clearance for a good air circulation is
approximately 15 cm.
Weight : 4 Kgs.
Width : 31 cm.
Height : 18 cm.
Depth : 31 cm.
Main voltage 100V -240V
Frequency 47-63 Hz
Frequency line variation +- 2 Hz
Current 0.5 A
Energy consumption 10 VA
The LENA has been designed to operate under certain environmental
conditions:
Room temperature
Max. relative humidity
13 LENA Version 03 04/2003
15º-32ºC
80% at 32ºC
14 LENA Version 03 04/2003
1.3 TRANSPORT
The packing of the LENA (Weight : 11 Kgs. Dimensions : 41x32x41
cm.) contains: Instrument, power cable, User’s Manual(with QC
certificate and CE Certificate).
Previous to the installation of the Equipment, a visual packing inspection
is recommended, in order to detect any abnormality that could affect the
Instrument. If any problem is observed, notify the supplier before
accepting the unit.
If it is necessary to prepare the Instrument for a new transport, it must
be operated (without any test on the move) for at least two minutes. This
period elapsed, the reading plate will automatically be switched to a
safety position, allowing you to turn off the Equipment and subsequently
transport it with no problem.
15 LENA Version 03 04/2003
16 LENA Version 03 04/2003
1.4 INSTALLATION
Place the Instrument in its final location.
Make sure the mains cable is properly connected to the power
receptacle of the Instrument (2) and that the mains tension is between
100 and 240V.
Start the Instrument using the power switch (1) located on the left rear
part of the Device.
The Instrument will check the mechanism for an approximate period of 2
minutes and immediately after the main menu will be displayed.
17 LENA Version 03 04/2003
18 LENA Version 03 04/2003
2
19 LENA Version 03 04/2003
20 LENA Version 03 04/2003
SECTION 2: DESCRIPTION
2.1 INSTRUMENT DESCRIPTION
2.2 CONTROL PANEL
2.2.1 DISPLAY (1)
2.2.2 KEYBOARD (2)
2.3 WORKING PLANE (3)
2.4 REAR CONNECTIONS PANEL
2.5 CHANGE WORKING CYCLE MODE 1H OR 1H 2H
21 LENA Version 03 04/2003
22 LENA Version 03 04/2003
2.1 INSTRUMENT DESCRIPTION
The LENA has been designed to operate, without needing an
adapter, with either open or vacuum tubes containing a sodium citrate
solution as anticoagulant.
The capacity of the working plane is 16 positions, divided into 2
rows each with 8 positions. The duration of the test cycle for every
sample depends on the selected operation mode; in 1-hour mode,
the total test time is 24 minutes, while in 1-2 hour mode the time is 48
minutes. In both cases results are expressed in Westergren
millimeters. System throughput is 40 samples per hour.
The basis of the system allows the random access of samples, so that
the analytic cycle of every one begins once each tube is inserted.
Therefore, it is not necessary to fill the 16 working positions to start
an analytic cycle. When the test time for a sample is completed, the
corresponding message will appear on the display, and we will be
able to consult it through the display or send it to a peripheral unit
(informatic system or printer) through on-line connection.
The Instrument allows the user to enter the samples I.D. codes, using
either the keyboard or a bar-code reader.
23 LENA Version 03 04/2003
2.2 CONTROL PANEL
Located under the working plane, it consists of display and
keyboard.
2.2.1 Display
The LENA is equipped with a backlight LCD with 24 characters x 2
lines. The status of every position is displayed.
2.2.2 Keyboard
The Instrument features a keyboard with 10 numeric keys that are
also function keys. When the “READY” prompt is displayed, every
key provides access to a specific function. These keys enter number
values only when the Instrument requires them; otherwise, they are
function keys.
24 LENA Version 03 04/2003
In addition, the keyboard contains the following keys:
“In”.- It confirms the access to a function or the numeric data being
entered.
“Esc/Del”.- If pressed once, it deletes any numeric data being
entered. If pressed around 2 seconds, it serves to exit any function,
when possible.
2.3 WORKING PLANE
Located in the upper part of the Instrument, it features 16 positions
for samples, divided into two numbered rows.
25 LENA Version 03 04/2003
2.4 REAR CONNECTOR PANEL
Located at the rear of the Instrument, it contains the following
elements:
1. Power connector (1), switch (2).
2. Ventilation outlet (3).
3. SUB-D9 connector (male) for bar-code reader (4).
4. SUB-D9 connector (female) for on-line connection (5).
26 LENA Version 03 04/2003
2.5 CHANGE WORKING CYCLE MODE 1H OR 1H 2H
NOTE: To switch on or switch off the Instrument do not modify
the parameters previously configurated.
To consult the configuration, press key “7” to enter the mechanical
test menu. The Instrument will display the message:
and press “IN” to enter or “ESC/DEL” during 2 seconds to exit.
If “IN” is pressed the following display will appear:
Where “B077” indicates the number of motor passes in the last cycle,
“0005” is the consumption meter, “L” indicates the type of on-line
the equipment has selected (the alternative one would be “P” or
“O”), “1H” indicates it is working with the 1 h cycle (the alternative
one would be “2H”) and if “K” appears it indic ates that the kinetics
control is activated.
27 LENA Version 03 04/2003
28 LENA Version 03 04/2003
The LENA allows tests to be conducted in two different operating
modes:
1 HOUR OPERATION MODE (24 minutes)
1 HOUR-2 HOURS OPERATION MODE (48 minutes)
The Instrument is delivered shaped with the 1H cycle.
If we change the type of analysis cycle, the working memory prior to
this modification will not be deleted. To change the cycle, switch off
the Instrument and reset it while pressing the key “1”, until one of the
two messages of the corresponding cycle change is displayed:
or
Then the change must be done.
29 LENA Version 03 04/2003
30 LENA Version 03 04/2003
3
31 LENA Version 03 04/2003
32 LENA Version 03 04/2003
SECTION 3: OPERATION
This section describes the system starting procedures.
3.1 SWITCHING ON THE UNIT
3.2 GENERAL
3.3 STATUS DISPLAYS
3.4 FUNCTIONS
3.5 “SKS” (SAFE-KEEPING SYSTEM)
3.6 KINETICS CONTROL
3.7 HOW WORK
33 LENA Version 03 04/2003
34 LENA Version 03 04/2003
3.1 SWITCHING-ON THE UNIT
Switch on the unit using the switch located on the rear left side of the
Equipment. The following message will be displayed
around 2 minutes and it will check its different electronic and
mechanical components.
To change the cycle type of the Instrument, reset the Unit while
pressing the “1” key.
If a day change has occurred, the data memory will be cleared and the
working list sequence will begin from the first position.
The checkings being completed (2 minutes approx.), the main menu
message will be displayed:
The Instrument is now ready to begin an analysis cycle.
3.2 GENERAL
Tubes must be correctly levelled with the blood sample, according to
the level marking on the tube. The tolerance of the Equipment with
regard to the level is +5mm. and –11mm. Otherwise, the Instrument
will display an “L.E.” level error message.
35 LENA Version 03 04/2003
The sample should be shaken by slowly inverting the tube
during approximately 5 minutes, before inserting it in the
Instrument.
It is not necessary, but advisable, to identify the sample to begin the
test. The test starts when the tube is inserted in the Instrument.
Work should be performed consecutively. Begin daily job at position 1
and so forth until reaching position 16.
When reaching position 16 and if there are still samples to analyse,
start again from position 1(sequentially numbered 17) and so on.
If an analytical cycle is completed and more tubes arrive, continue
from the position following the last used one. In this way, the work list
will be adequately arranged.
When every tube has been identified, the identification menu will
display the next position to be used, unless otherwise instructed.
Do not remove the tube from its position until the test is
completed. If you do so, the test will be aborted and the “S.E.”
message will appear on the results printout.
After 24 or 48 minutes have elapsed from the start of the test and
depending on the selected cycle, the end of the test is reported with
an “F”in the corresponding position on the display.
36 LENA Version 03 04/2003
3.3 STATUS DISPLAYS
In the main menu, the following message is displayed:
Here the positions status of the working panel is displayed. The
asterisk “*” indicates that this position is free; every black square
“g” shows that this position is in use; an “F” indicates that the
test has finished in this position; and an “E” indicates the existence
of an error message (see Section 4 – error messages).
Example:
In this case, the position 2 has finalized, position 12 presents an
error, positions 6 and 9 are in use and the remaining ones are empty.
This display is updated approx. every minute and each time that we
go back to it from the menu. That is, every minute approx. the new
tubes being detected and finalized appear on the display.
37 LENA Version 03 04/2003
3.4 FUNCTIONS
Whenever you are at the main display, every numeric key provides
access to the following functions:
1.- SAMPLES ID
2.- RESULTS CORRECTION
3.- PRINT RESULTS( in case of LINEAR or PRINTER online
mode)
4.- REPETITION OF A SAMPLE
5.- SET/ADJUST DATE AND TIME
6.- ON-LINE TRANSMISSION OF RESULTS
7.- MECHANICAL TEST
8.- I.R. SENSOR TEST
9.- PARTIAL AND FINAL READINGS
0.- CLEAR MEMORY
1.- SAMPLES ID
At the main display press “1”. The following message is displayed:
If you wish to enter the menu, confirm by pressing “IN”. Otherwise,
press “ESC/DEL” to return to the main display. If you confirm your
selection by pressing “IN”, the following message is displayed:
If you do not wish to enter an ID to a specific sample, simply press
“IN” and the last memorized sample will be displayed (if memory is
deleted or whether it is the first sample of the day, we will return to the
first one POS 1 SEC 1).
38 LENA Version 03 04/2003
Then the complete memory record of this sample will be displayed and
the cursor will be placed over the sequence number so that you can
enter the ID number. If no one has been entered, the ID code will be
represented by dashes.
At this point, you can enter the ID via keyboard or by using a barcode reader. Enter the ID by pressing the numeric keys and press
“IN” to confirm your selection and go to the following sample.
If you do not wish to enter an ID to a specific sample, simple press
“IN” without entering any ID number. The system will take you to the
following sample.
If you make a mistake when entering a digit, press “ESC/DEL”, The
cursor will return to the beginning of the record so that you can re-enter
the number correctly.
If you wish to exit the function at any time, press the key “ESC/DEL”
to return to the main display.
The Instrument has a capacity for 240 samples, arranged from SEC 1
to SEC 240.
If we want to recognize or rectify the ID of a sample already identified,
from the main menu press “1” and “IN” from the main menu and
when the following message is displayed
introduce the sequence number of the sample to be entered and press
“IN”.
39 LENA Version 03 04/2003
If the sequence number has three digits, it will not be necessary to
press “IN”, since the system will automatically jump to the selected
sample. At this stage, introduce the ID number and continue with the
following sample.
2.- RESULTS CORRECTION
At the main display press key “2” and the following message will be
displayed:
Here we can confirm by pressing “IN”; otherwise press
“ESC/DEL” to return to the main display. If you have confirmed by
pressing “IN”, the following message will be displayed:
Now enter the sequence number of the first sample to which you want
to correct the result. If the sequence number has three digits, it will not
be necessary to press “IN”, since the system will automatically jump
to the selected sample. At this point, the following message will be
displayed:
The cursor will be placed on the 1h result record, so that it can be
modified. Enter the new result and press “IN”. If the result has three
digits, it is not necessary to press “IN” to go to the following sample
or the 2h result.
40 LENA Version 03 04/2003
If you do not wish to enter a result to a specific sample, simply press
“IN” without entering any number to go to the next sample. If you
make a mistake when entering a digit, press “ESC/DEL” for the
cursor to return to the beginning of the record and then re-enter the
correct result. To exist this function, press “ESC/DEL” to return to
the main display.
NOTE: Any result being modified by the user will be indicated
with an asterisk before it.
3.- PRINT RESULTS only in case of LINEAR or PRINTER
online mode. Works in the same way of SEND ONLINE ( see
page 43).
4.- REPETITION OF A SAMPLE
This function is used to repeat a sample in the same position and with
the same sequence and ID numbers. In this way, the arrangement on
the working list or the sequence number is maintained. To make it
correctly, take out the tube, shake it, enter this function, select its
position and afterwards enter it in this position.
Press “4” at the main display and the display will show
If you wish to enter the menu, confirm your choice by pressing “IN”;
otherwise press “ESC/DEL” to return to the main display. If you
have confirmed by pressing “IN”, the display will show
Enter the position number of the sample you wish to repeat.
If the position number has two digits, it will not be necessary to press
“IN”, since the Instrument will automatically accept the position.
41 LENA Version 03 04/2003
If you make a mistake when entering a digit, press “ESC/DEL” and
the cursor will return to the beginning of the record, to introduce the
correct position.
If you enter a position number higher than 16, the Instrument will not
accept it. Once the position number being accepted, the Instrument will
go automatically back to the main menu. To exit the function, press
“ESC/DEL” to return to the main display.
5.- SET/ADJUST DATE AND TIME
NOTE: To have access to this function, any test should not be
going.
Press key “5”at the main display and it will appear:
If you wish to enter the menu, confirm by pressing “IN”; otherwise
press “ESC/DEL” to return to the main display. If you have
confirmed your choice by pressing “IN”, the display will show:
The cursor will wait on the underline of the display so that you may
enter the data as they appear above. Once all the data being entered,
the System will memorize them and will automatically return to the
main display. If you make a mistake when entering a digit, press
“ESC/DEL” for the cursor to return to the beginning of the record,
to re-enter the correct data.
To exit this function, press “ESC/DEL” to return to the main display.
42 LENA Version 03 04/2003
6.- ON-LINE TRANSMISSION RESULTS
Press “6” at the main display. The following message will be
displayed:
If you wish to enter the menu, confirm your choice by pressing “IN”;
otherwise press “ESC/DEL” to return to the main display. If you have
confirmed by pressing “IN”, the following message will be displayed:
The sequence number of the first sample to be sent and afterwards the
sequence number of the last one will be entered in the second row . If
the sequence number has three digits, it will not be necessary to press
“IN”, since the System will automatically jump, waiting for the number
of the last sample to be sent.
If you make a mistake when entering a digit, press “ESC/DEL” for
the cursor to return to the beginning of the record and then re-enter the
correct sequences. After entering these sequence numbers, the
Instrument will start to send data, displaying the following message:
When the transmission is completed, the System will automatically
return to the main display. To exit this function, press “ESC/DEL” to
turn back to the main display.
43 LENA Version 03 04/2003
Data can be transmitted to the computer system of the laboratory. So
it is necessary to know the communication protocol (Section 5 of this
Manual).
Data can also be transmitted to any computer with a free serial port,
only adjusting the port parameters (section 5) on the
HYPERTERMINAL program and printing from this program.
A LENA CONNECTION program is also available, with the
parameters being adjusted for its functioning and being only necessary
to check the port number through which the connection is made.
In the event of transmitting the data to a printer with serial port, we
have to configure the data transmission as “PRT” in the configuration
menu “7”, for its better functioning. In the same way make sure that
the printer port parameters and the wiring are the correct ones.
7.- MECHANICAL TEST
The functioning of menu “7” is fully detailed on Section 6.2 of this
Manual(page 79).
8.- I.R. SENSORS TEST
NOTE: To have access to this function, any test should not be
going.
This function checks the proper operation of the Instrument optical
system.
Press “8” at the main display and the following message will be
displayed:
44 LENA Version 03 04/2003
If you wish to enter this function, confirm your choice by pressing
“IN”; otherwise press “ESC/DEL” to return to the main display.
If you have confirmed by pressing “IN”, you will access the function.
The display will show:
with a dash on position 1, indicating the position being checked. If a
black square g appears, it indicates that there is a tube in this
position.
To move to the next position press any numeric key and the dash will
move to the following position.
If we press “IN” we can check all position in the same time.
If we take more than 30 seconds to press a key, the programme,
having made a previous checking, will return to the main menu.
until reaching the lower position of the reader.
The status changes of the positions are displayed at once, thus being
easy to check if any position is not operating correctly.
To exit this function, press key “ESC/DEL” to return to the main
display, having previously displayed the checking display, whereas
the read-out board goes back to its original position.
9. PARTIAL AND FINAL READINGS
This function allows you to visualize the complete record of a sample
with the 1H or 2H results, if any, and of the 6 partial readings made
by the Instrument during the analytical cycle.
45 LENA Version 03 04/2003
Access to these partial readings provides the chance to follow the test
evolution. The Instrument only displays the partial readings of the
positions, which are in use (up to a maximum of 16 samples), but it
holds in memory the remainder of the patient record up to 240
samples.
Press “9”at the main display. The following message will be displayed:
If you wish to enter the menu, confirm your choice by pressing “IN”,
otherwise press “ESC/DEL” to return to the main display. If you have
confirmed by pressing “IN”, the following message is displayed:
Enter the position number of the sample we wish to display.
If the position number has two digits, it will not be necessary to press
“IN”, as the Instrument will automatically accept the position.
If we make a mistake when entering a digit, press “ESC/DEL” for the
cursor to return to the beginning of the record and then re-enter the
correct position. The Instrument will not accept a position number
higher than 16. If we are working with the 1H cycle, every partial
reading has been made and therefore the test has finished, the
following message will be displayed:
46 LENA Version 03 04/2003
In case we are working with the 1H/2H cycle, every partial reading
has been made and therefore the analysis has finished, the following
message will be displayed:
If the tests are not completed, we only display data being obtained up
till then.
If you wish to printout de data of the sample with the partial graphic,
press key “3”.
If you wish to transmit on-line the two records, press key “6”. Press
“IN” to display the following sample records and “ESC/DEL” to
display the records of the preceding sample.
0.- CLEAR MEMORY
Up to 240 samples and 16 records of partial readings can be saved
in the Instrument memory.
When we delete memory, the default sequence number being
memorized in the Instrument starts from the first sample, that is POS
1 SEC 1.
The Instrument clears memory when it is switched on every new day.
If the Instrument is in motion when changing from one day to another,
the memory will only be deleted when the Instrument stops and
restarts again.
To delete the memory on the main display, press key “0”. The
following question will be displayed:
47 LENA Version 03 04/2003
If you wish to enter this function, confirm by pressing “IN”; otherwise
press “ESC/DEL” to return to the main display.
Warning: If you run this function, all data stored in memory will get
lost and the analytical cycle will be aborted.
While this function is being run, the following message will be
displayed:
Once completed, the System will automatically return to the main
display.
48 LENA Version 03 04/2003
3.5 “SKS” (SAFE-KEEPING SYSTEM)
The Instrument has a protection system (“SKS”) allowing finalizing
the tests which are going, in the event of a breakdown in the current
during the analytical cycle.
After any break in the current and once being repaired, the “SKS”
sytem will be activated: It will operate in a different way and according
to the following assumptions:
- If there are no tests in motion, the Unit resets normally.
- If there are tests going , the Unit begins to work in the default
analysis mode, checks that the initial level has been memorized
for every sample and that the analytical cycle of everyone has
not finished. If these conditions are fulfilled, the Instrument
will complete and print the results of the samples test. In case
that some sample does not comply with the above conditions,
the Unit and the message “S.E.” will be printed will refuse it.
- The activation of the “SKS” System will be indicated with an
Asterisk “∗ ” on the mechanical tests.
NOTE 1 : The “SKS” system is exclusively designed to finalize the
tests of a sample, thus obtaining the final result. Therefore, when the
“SKS” system is activated, the results of the partial readings must be
discarded.
49 LENA Version 03 04/2003
NOTE 2 : If the user disconnects by mistake the Unit during the
analytical cycle, the “SKS” system will be activated, thus allowing to
finalize the test under way.
NOTE 3 : If the breakdown in the current is higher than the duration
of the analysis cycle, it is necessary to repeat the test of the samples.
50 LENA Version 03 04/2003
3.6 KINETICS CONTROL
The Instrument is equipped with a kinetics control system allowing to
check the linearity of the tests being made.
When the equipment leaves the Factory , the kinetics control system is
deactivated.
If the kinetics control system is activated (Section 6.2 explains how to
activate it and how to check if it has been activated), the Instrument
checks that between two successive readings (approx. 2 minutes), the
red blood cells fallout is not higher than 10 mm.; otherwise the sample
will follow the test normally, but it will be marked with an “?” placed
on the record of the sample between the 1H and 2H results.
In this way, the Instrument indicates that the sample has an unstable
performance and it is advisable to visually check the result or repeat
the test.
51 LENA Version 03 04/2003
3.6 KINETICS CONTROL
The Instrument is equipped with a kinetics control system allowing to
check the linearity of the tests being made.
When the equipment leaves the Factory , the kinetics control system is
deactivated.
If the kinetics control system is activated (Section 6.2 explains how to
activate it and how to check if it has been activated), the Instrument
checks that between two successive readings (approx. 2 minutes), the
red blood cells fallout is not higher than 10 mm.; otherwise the sample
will follow the test normally, but it will be marked with an “?” placed
on the record of the sample between the 1H and 2H results.
In this way, the Instrument indicates that the sample has an unstable
performance and it is advisable to visually check the result or repeat
the test.
52 LENA Version 03 04/2003
3.7 HOW WORK
Switch on the unit (see section 3.1) and wait to the end of test cycle.
When a dot “*” appears in the corresponding position we can load
this position with a new tube (first mix the tube like we describe in
section 3.2). Before that, we can introduce the ID_CODE for that
sample (see section 3.4.1).
When this sample is recognized by the instrument with the black
square “g” in their position the sample starts his cycle.
If the filling level of that sample it’s not correct the instrument show us
“E” in the specific position.
At the end of analysis the instruments show us “F” in the specific
position, and at the same time the instrument send trough the serial
port this result to the printer o a computer.
It’s possible too, to see the results in Partial Menu (key “9” see section
3.4.9).
Then we can take off the finished sample. After some minute a “*”
appear in that position to show us than that position it’s empty. Then
we can reload this position with a new tube. The sequence( list
number) of that sample has the sequence of the predecessor plus 16.
Note: It’s very important to wait until the instrument shown
“*” In the corresponding position, because in that way the
instrument recognize the position empty and it’s able to accept
another sample.
Note: Don’t forget to mix properly the samples.
53 LENA Version 03 04/2003
Data can be transmitted to the computer system of the laboratory. So
it is necessary to know the communication protocol (Section 5 of this
Manual).
Data can also be transmitted to any computer with a free serial port,
only adjusting the port parameters (section 5) on the
HYPERTERMINAL program and printing from this program.
A LINEAR CONNECTION program is also available, with the
parameters being adjusted for its functioning and being only necessary
to check the port number through which the connection is made.
Note: make sure that the printer port parameters and the wiring is the
correct ones.
54 LENA Version 03 04/2003
4
55 LENA Version 03 04/2003
56 LENA Version 03 04/2003
SECTION 4 : ERROR MESSAGES
This Section describes the error messages which may be generated.
4.1 ERRORS
4.2 ANALYTICAL ERRORS
57 LENA Version 03 04/2003
58 LENA Version 03 04/2003
4.1 ERRORS
1.-“L.E” Level Error
It indicates that the blood level is not correct.
Fill to the correct level and repeat the test.
If this error message is displayed for a position with no sample tube, call
the Technical Service.
2.- “S.E” Sample Error
It indicates that a sample has been removed before completing the test.
Repeat the test.
If this error message is displayed for a position with no sample tube, call
the Technical Service.
3.- “ERROR !”
It appears in the second line of the main screen, and indicates that the
reading plate has not detected the upper or lower mechanical sensor.
If this error message is displayed, stop and then restart the Instrument. If
the error persists, call the Technical Service.
NOTE : This error may occur if a tube breaks and some parts
remain inside it or whether some object falls down or is
introduced through the opening of the tubes.
59 LENA Version 03 04/2003
4.2 ANALYTICAL ERRORS
Low results:
a) Possible blood clot in the sample.
Repeat the test with a new sample.
b) When more than 2 hours have elapsed from the taking out of the
sample until the test.
c) Insufficient sample amount, which alters the proportion between
blood and anticoagulant, affecting the test result.
High results:
a) Sample not shaken correctly.
b) If the Instrument has been installed on a surface that is not
perfectly level.
A 3% inclination can increase the ESR by 30%.
c) Excessive sample amount, which alters the proportion between
blood and anticoagulant, affecting the test result.
60 LENA Version 03 04/2003
5
61 LENA Version 03 04/2003
62 LENA Version 03 04/2003
SECTION 5 : ON-LINE COMMUNICATIONS
PROTOCOL.
This Section describes the different connection possibilities of the
Instrument: to the printer, computer or bar-code reader.
5.1 GENERAL
5.2 ON-LINE FEATURES
5.3 ON-LINE DATA PACKAGE CONTAINS
5.4 CONNECTION TO A PERSONAL COMPUTER
5.5 PRINTER
5.6 BAR-CODE
63 LENA Version 03 04/2003
64 LENA Version 03 04/2003
5.1 GENERAL
To transmit data, enter menu 6 and select the samples to be sent
through their sequence number.
Once being selected, the transmission will automatically be made,
provided that the linkage has already been established.
The Instrument has 3 standard transmission modes:
• The LINEAR PRINTER (L) mode, suitable to transmits to the
LINEAR THERMIC PRINTER the results. In that mode the results
will be automatically printout at the end of analysis and enable the
menu ”3” that works in the same way of menu “6” but only to transmit
to the printer.
• The ON-LINE (O) mode, suitable to transmits to a computer
system, either to the central computer of the laboratory or to a
personal computer.
• The PRINTER (P) mode, suitable to transmit to a Seiko M180
printer, or DPU414(without graphics). In that mode the results will be
automatically printout at the end of analysis and enable the menu ”3”
that works in the same way of menu “6” but only to transmit to the
printer.
To select or visualize the transmission mode, see Section 6.2.
To input identification codes by means of the bar-code reader, we
have to make the same operations as in the manual input, but reading
the code with the reader.
65 LENA Version 03 04/2003
5.2 FEATURES
One-way connection with a remote computer system.
DATA OUTPUT VIA RS232 9CTS FEMALE CONNECTOR (5)
NOTE: For a correct functioning of the linkage and the
Equipment it is very important that only these 2 pins are
connected to the shortest coupling wire.
INSTRUMENT PINS
TX : PIN 3 (transmission)
GND : PIN 5 (ground)
PROPERTIES
BAUD RATE : 9600
DATA BITS : 8
PARITY : NONE
STOP BIT : 1
WITHOUT FLUX CONTROL
66 LENA Version 03 04/2003
5.3 DATA PACKAGE CONTENTS ON-LINE (ONL) MODE
The following is transmitted once the connection is established:
CR
“START”
LF
CR
Then the full record of every selected sample is transmitted.
Every sample record is composed of 24 BYTES followed by LF and
CR. It is a text record and its format is as follows:
“PP_SSS_R1H_R2H_CCCCCCCCC” LF CR
where:
. “_” equals a blank space = (20h).
.”PP” equals the position on the grate (1 to 16).
. “SSS” is the sequence number of the sample (1 to 240).
. “R1H” is the 1 hour result (1 to 200).
“R2H” is the 2 hour result (1 to 200) If no results are available,
blank spaces are transmitted.
. “CCCCCCCCC” is the ID code of the sample, with a maximum of 9
digits. If no ID was entered, 9 “_” (blank spaces) are transmitted.
. LF = (0Ah) and CR = (0Dh) are transmitted at the end of every
record.
The end of the sample data transmission is indicated by ESC = (0Bh)
and LF = (0Ah).
67 LENA Version 03 04/2003
5.4 CONNECTION TO A PERSONAL COMPUTER
Connecting features are the same: The type of ON-LINE (ONL)
transmission is used. To make this connection we have serial connecting
wires for 9 and 25 pins port, as well as the LENA CONNECTION
programme.
To perform the connection we need first the correct wire with the
connector for the 9 or 25 female pins computer (this connector will
depend on the computer to which it is connected; the one that is
connected to the Instrument will always be of 9 male pins).
To install LENA CONNECTION in your computer, copy the file from
its origin (disk A?) to the Windows office. Then you will have the
program icon on the main display of the Windows (office).
Once installed, we need to know in which communications port we have
switched on the connecting wire, COM1, COM2, etc. The program has
been shaped to work in the COM2; if the wire is connected to the
COM2, nothing else has to be done. Otherwise we have to open the
program by pressing twice the icon with the mouse. Once being opened,
press the file menu with the mouse, press properties and change the
COM2 connection to COM1 or to the corresponding port.
To use the program, open it by pressing twice the icon with the mouse
and transmit the data, which will appear on the display, from the
Instrument. Then select the data with the mouse and print (file menu,
print).
Once having finished, press file and exit.
68 LENA Version 03 04/2003
5.5 PRINTER
If the “L” mode it’s selected and a LINEAR THERMAL PRINTER it’s
connected you don’t need to do nothing to work, only connect the printer
to the lena and connect the power supply to the printer and switch on.
To make the connection we need a cable with the a.m. features. Before
doing it consult the Printer Manual to see the arrangement of the pins in
its connector, in order to prepare the wire connector to the printer. Also
consult the communication features, so they coincide with the Equipment
ones (they are quite common). Be also sure that the type of protocol being
selected in the Equipment is the “P” ,for the DPU414 as the more suitable
one is the “P”.
Another possibility is to switch the Instrument on to a standard printer, by
means of the serial/parallel converter. In this case, be sure that the type of
selected protocol in the Equipment is the “P” one, since the serial/parallel
converter is already delivered with the configuration and the connecting
wire. Then connect the parallel output (centronics) from the converter to
the parallel port (centronics) of the printer, the serial cable to the
Instrument and the converter input and the feeder of the converter to a
power source and to the converter.
If everything is correct, start the printer, place it on line and transmit data.
A maximum of 60 samples per page will be printed.
69 LENA Version 03 04/2003
5.6 BAR-CODE
NOTE : Bar-code readers delivered by LINEAR CHEMICALS,
S.L. have already been adjusted in the plant to operate with the
Equipment, so the only necessary operation is to connect them to
the Equipment (in connector 4) and start the Instrument.
To enter I.D. codes by means of the bar-code reader, make the same
operations as for its manual entering, but read the bar-code with the
reader.
The DB9 male connector (4) of the Instrument has a standard connection,
to operate with any BAR-CODE reader with series RS232.
At first it will not be necessary to change the pins connection, since it is a
standard one. These configuration is:
PINS OF THE BAR-CODE READER
TX : PIN 2 (transmission)
GND : PIN 5 (grond)
VCC : PIN 9 (supply 5 Volts)
70 LENA Version 03 04/2003
It could be necessary to change the features of the reader communication
interface. To do so, the reader is delivered with a programming manual,
on the basis of reading bar-code labels. Connect the reader to the
Instrument, start it and read the corresponding labels to configurate the
reader as follows:
• Type of communication: RS 232
• Baud Rate: 9600
• Data Bits: 8 bits
• Parity: Even
• Handshaking: No
• Stop Bit: 1
• End of Record or End of Text: CR
Do not enable the transmission of any other control signal.
We usually have to read a BEGINNING label and, having read the
configuration codes, a FINAL label or to save configuration.
Once the Equipment being configurated, stop the Instrument and restart
it to test the reader.
71 LENA Version 03 04/2003
72 LENA Version 03 04/2003
6
73 LENA Version 03 04/2003
74 LENA Version 03 04/2003
SECTION 6 : SERVICE AND MAINTENANCE
6.1 GENERAL
6.2 INSTRUMENT CONFIGURATION
6.3 OPEN THE INSTRUMENT
6.4 ELECTRONIC PARTS
6.5 MECHANIC PARTS
6.6 TEST THE INSTRUMENT
6.7 HOW THE INSTRUMENT WORKS
75 LENA Version 03 04/2003
6.1 GENERAL
The Instrument has been designed to need the minimum maintenance
during several years, although there are some factors which can influence
the duration of this period.
. The Instrument has to operate in a clean ambiance and with few dust, as
it could be adhered to the reader and movable parts of the machine. So it
is adviseable to cover the Instrument when no used.
. Clean the Instrument with a humid cloth, when needed.
. Avoid to spill liquids or reagents over the Equipment, and above all the
breakdown of tubes.
.The stability of the mains in the laboratory affects the life of the electrical
components of the Equipment. So it is desirable to keep it away to the
maximum from other equipments generating electromagnetic disturbances,
such as centrifugues, autoclaves, and equipments not marked CE and,
generally, equipments using electronic power devices such as motors,
pumps, electrovalves and compressors.
76 LENA Version 03 04/2003
6.2 INSTRUMENT CONFIGURATION
NOTE: To switch on or switch off the Ins trument does not modify
the parameters previously configured.
To consult or change the configuration, press key “7” to enter the
mechanical test menu. The Instrument will display the message:
and press “IN” to enter or “ESC/DEL” during 2 seconds to exit.
If “IN” is pressed the following display will appear:
then pres 5 times “IN” and the configuration screen appears:
In the first line we can see the headers, and just below the headers we
can see the selection.
-
“IDI” means language. Then “ENG” it’s English, “FRA”
French, “POR” Portuguese, “ITA” Italian, “TUR” Turkish,
“ESP” Spanish. Every time than we press “1” key the selection
changes to the next one.
-
“P” means the type of online selection. Then “L” it’s Linear to
work with Linear Thermic Printer, “P” it’s Printer to work with
M180 Seiko printer or DPU414(without graphics), and “O” it’s
no printer disable all the printout. Every time than we press “2”
key the selection changes to the next one.
77 LENA Version 03 04/2003
-
“G” means automatic printout of the partial graph. Then “G”
enables the automatic printout of the partial graph. “ ” a space
means without automatic printout of the partial graph. Every
time than we press “3” key the selection changes to the next
one.
-
“T” means automatic temperature conversion of the results .
Then “T” means automatic temperature conversion of the
results . And “ ” a space means without automatic
temperature conversion of the results . Every time than we
press “4” key the selection changes to the next one. To setup
that parameter the motor must be stopped without any analysis
in work.
-
“C” means printout of the record sample in large mode. That
means the information of one sample it’s printed in 5 lines to
be clearer. Then “a” enables the normal printout of the record
sample. “A ” printout of the records sample in large mode.
Every time than we press “5” key the selection changes to
the next one.
-
“30” mean automatic printout of the 30 minutes result. Then
“30” enable the automatic printout of the 30 minutes result.
And “ ” a space means without automatic printout of the 30
minutes result. Every time than we press “6” key the
selection changes to the next one. To setup that parameter the
motor must be stopped without any analysis in work.
-
“K” means Kinetic control( section 3.6 page 51). Then “K”
enables Kinetic control. And “ ” disable kinetic control. Every
time than we press “7” key the selection changes to the next
one.
78 LENA Version 03 04/2003
-
“Le” it’s the number of steps how are settled the error level,
it’s a hexadecimal number. The factory setup it’s 39. If we
need more tolerance to don’t have so many errors we need to
setup a lower number. If we need less tolerance we need to
setup a greater number. To increases the number press “8”
and to decreases the number press “0” if we are pressed
before “8”. To setup that parameter the motor must be
stopped without any analysis in work.
-
“Te Fa” every time we press “Esc/Del” below “Te”
appears the temperature in the instrument. Below “Fa” we
can see the factor to adjust that temperature. To increases the
factor and the temperature press “9” and to decreases the
factor and temperature press “0” if we are pressed before
“9”. To setup that parameter the motor must be stopped
without any analysis in work.
To come back to the main screen press “Esc/Del” for some seconds.
79 LENA Version 03 04/2003
6.3 OPEN THE INSTRUMENT
To open the instrument proceed as follows:
a) Disconnect the Instrument from the power supply and pull out
the connector cable of the Instrument.
b) Remove the 5 screws on the bottom part of the instrument.
c) Place that cover in front of the instrument.
Make attention at cable position when you open and close the
instrument. I.R. cable it’s has a long ring in the front of
instrument. LCD cable must be placed out of the range of I. R.
movements.
80 LENA Version 03 04/2003
6.4 ELECTRONIC PARTS
Two boards compose the instrument. The Infrared Board, and the
main board.
The main board are placed in front of the instrument and controls all
the functions of the instrument:
Power Supply Filter.
The step motor.
The LCD display.
The I.R. Board (reader and mechanic sensors).
The serial port.
The keyboard.
Calculation functions.
81 LENA Version 03 04/2003
The performance of the power supply are:
Main voltage input 100V to 240V AC and output 5V CC
Frequency 47-63 Hz
Current 2 A
Energy consumption 10 W
Before the power supply we find the socket, and switch. It’s placed in
the backside of the instrument.
The Step motor it’s driving trough a chip in Main Board( MC3479P).
The LCD Display, and the Keyboard are driving trough the Main
Board.
The serial port it’s driving trough a chip in Main Board (ST232C).
The IR Board are driving like a matrix trough chips (374 and 4051)
and the reader signal it’s compared to a reference signal in other
chip(LM311) before input in Micro.
In Main Board it’s located the Micro(87C52) how do all calculation
and control functions and a backup memory(M48T08) to maintain the
data.
In the IR Board the blue leds are the emitters and the white leds are
the receptors. The emitters electrically are grouped in groups of four
emitters each one.
82 LENA Version 03 04/2003
6.5 MECHANIC PARTS
The Mechanical Support with their axis, the IR carriage with their
bearings, and the Tubes Support compose the mechanical parts.
The Step Motor converts electrical impulses to axial movement, and
moves the lead screw (trough the coupling). The lead screw converts
axial movement to linear movement and move up and down the IR
Board.
The mechanical support its fixed at the instrument trough 2 screws in
bottom. The I. R. Board it’s fixed at carriage trough four screws in
bottom. To dismount the I. R. Board we need to dismount the flag of
the sensor up ant take off to the up the carriage from their axis.
It’s important that the axis and the bearings are clean and lubrificated
with solid greases( for example lithium grasses).
Do not lubrificate the lead screw.
83 LENA Version 03 04/2003
The mechanical sensor up it’s placed in the backside of the IR Board
and it’s important that have a good alignment to the up flag to detect
de up position.
The mechanical sensor down it’s placed in the bottom front side of
the IR Board and it’s important that have a good alignment to the
down flag to detect de down position.
It’s important to maintain the mechanical sensor and IR leds and
receptors clean and not exposed at direct light.
84 LENA Version 03 04/2003
6.6 TEST THE INSTRUMENT
•
I.R. READER TEST. You can see how works the Infrared
Test in page 44. That test allows us to know if the couple of
Infrared Leds of every position it’s working properly. To be sure
that I. R. Leds work ok it’s recommendable to move the I.R.
cable up and down, because maybe it’s working properly in static
position but in movement not.
Note: the tube must be filled with blood o something not
Transparent
•
MECHANIC TEST. To enter in Mechanical Test, press key
“7” to enter the mechanical test menu. Then press “IN” to
confirm and enter in Mechanical Test Screen. The first four digits
at the left side of the second line for example “B9A7” indicates
the number of step motor in the last movement in hexadecimal
format. The movement can be up to down or down to up. When
we are in that screen and the first key that we press it’s “9” the
steps of the motor are updated (and send it to the printer and in
the LCD) at the end of every movement. In that way after some
minute we can see in the printer a list of the recent mechanical
test. When the instrument has made some movements you can
check if the variation between movements it’s OK. A variation
greater than 10 hexadecimal steps it’s abnormal. It’s possible
make that test during an analysis. If the repetibily of that test it’s
not good the results can be erroneous. Check the conditions of the
axis and her bearing maybe are dusty or not good lubrificate.
If after some minute of moving up or down the instrument
don’t detect the mechanical sensor it show to us “ERROR!” in
the second line of the main screen and change the direction of
the movement. It means that the instrument have some
mechanical problem.
85 LENA Version 03 04/2003
6.7 HOW THE INSTRUMENT WORKS
When we switch on the instrument the micro set-up the LCD display.
Controls if there’s some analysis in process o some tube in the
instrument, if there’s one go directly to the main screen, and continue the
analysis process if there’s in time.
If don’t have tubes in the instrument check if we would like to change
the analysis mode( 1H or 1H/2H) and send online the head report. After
those controls if there’s a change of the date and if it’s a new day clear
the memory.
Then test the mechanic going up( send the second part of the header)
and down, and when arrives down go to main screen and it’s ready to
work. Then makes a new up-down cycle and if don’t detect any tube go
to wait status and stops the motor.
Then if detects the introduction a new tube makes a movement UPDONW and then starts the analysis.
In the first reader it controls if the filling levels it’s correct. If it’s incorrect
it printout Level Error.
After 24 minutes in 1H mode and 48 minutes in 1H/2H mode it printout
the results and if don’t have any other tube in work stops the reader.
If someone takes off a tube during the working time the instrument print
out Sample Error.
The instrument detects new tubes only when it’s in low position and then
upgrades the LCD. In that way when we put a new sample in the
instrument or extract a finished sample the instrument can need some
minute to show us the new status in the LCD.
When don’t have analysis in process they stop the motor and wait for a
new sample. Maybe the instrument doesn’t detect a new tube that it’s in
one position, because his level it’s out of range of reader’s movement.
86 LENA Version 03 04/2003
If before of the finish of the analysis one sample fall this level down of
reader’s movement the instrument printout a S.E Sample Error that
mains that don’t detect the sample because it’s out of range of the
reader or some take off that sample. But that it’s produce in the second
half of the analysis the instrument don’t printout and error but the result
will be 125mm/h.
It’s important to understand that each position has his couple of sensors
and each one has her analysis time.
87 LENA Version 03 04/2003
88 LENA Version 03 04/2003
DECLARATION OF CONFORMITY
Manufacturer:
Linear Chemicals, SL
Address:
Linear Chemicals, SL
Joaquin Costa 18 2ª Planta
08390 Montgat
Spain
declares that the following product
Product:
Options:
LENA
All
conforms to the following Directives and Regulations
Directive 89/336/EEC Electromagnetic Compatibility (EMC)
Directive 73/23/EEC Low Voltage Directive (LVD)
Directive 98/79/EC In Vitro diagnostic medical devices
(IVD)
Generic
standards:
EN 61010-1 (1990)
EN 55022 (EN 50081-1)
EN 61000-4-2 (EN 50082-1)
EN 61000-4-3 (EN 50082-1)
EN 61000-4-4 (EN 50082-1)
EN 61000-4-5 (EN 50082-1)
EN 61000-4-6 (EN 50082-1)
EN 61000-4-11 (EN 50082-1)
The purpose of this instrument is the determination of Erythrocyte
Sedimentation Rate (ESR) in blood specimens.
The user himself or herself is ultimately responsible for the correct and
controlled operation of the instrument.
Mongat 2004-07-02
Linear Chemicals, SL
Technical Director
Manuel Rodríguez
Doc. 30-06-04
89 LENA Version 03 04/2003
90 LENA/01/00/01


![SERVIS Drawer 17inch [FD-1100AT] User`s Manual](http://vs1.manualzilla.com/store/data/005815433_1-e0ce1fd89f0d0c8bc9b31edbdc395367-150x150.png)