1
Operating Instructions
for advanced features
Digital Camera
Model No.
DMC-GM1
Please read these instructions carefully before using this product,
and save this manual for future use.
Message Display
P312
Troubleshooting
P325
Finding the information you need
P2
Contents
P4
Menu list
P316
VQT5D72
F1013WT0
until
2013/10/11
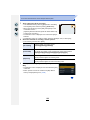
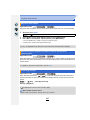
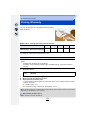
Finding the information you need
In this “Operating Instructions for advanced features”,
you can find the information you need from the following
pages.
By clicking a page number, you can jump to the linked
page and quickly find the information.
Search from “Contents”
P4 ~
Search from “Names and
Functions of Components”
P12 ~
Search from “Monitor Display”
P306 ~
Search from the list of
on-screen messages
P312 ~
“Message Display”
Search from the menu list
“Menu list”
P316 ~
[Rec] ..............................................................P316
[Motion Picture]..............................................P319
[Custom] ........................................................P320
[Setup] ...........................................................P322
[Playback] ......................................................P324
Search from
“Troubleshooting”
P325 ~
For details on how to use this
manual, see the next page.
P3
Wi-FiR function
P241 ~
2
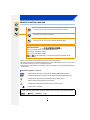
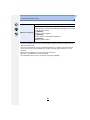
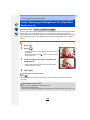
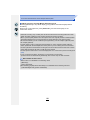
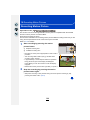
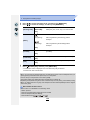
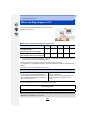
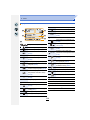
How to use this manual
Click this icon to jump to “Finding the information you need”.
Click this icon to jump to “Contents”.
Click this icon to return to the previously displayed page.
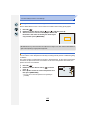
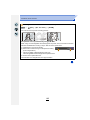
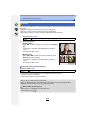
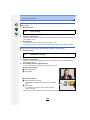
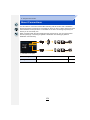
About the indication of the applicable mode
Applicable modes:
The icons indicate the modes available for a function.
• Black icons: Applicable modes
• Grey icons: Unavailable modes
and
will differ depending on the Recording Modes registered under
custom settings.
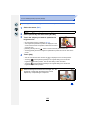
• Click a cross reference in the text to jump to the corresponding page.
• By entering keywords in the search field at the top of the Adobe Reader screen, you can run a
keyword search and jump to the corresponding page.
• Operations and other details of this manual may vary depending on the Adobe Reader version
you are using.
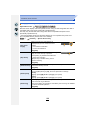
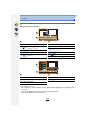
∫ About the symbols in the text
[MENU]:
Indicates that the menu can be set by pressing [MENU/SET] button.
[Wi-Fi]:
Indicates that the Wi-Fi setting can be made by pressing [Wi-Fi] button.
:
Configurations that can be performed in the [Custom] menu.
:
Tips for skilful use and points for recording.
:
Conditions in which a particular function cannot be used.
: Continued to next page.
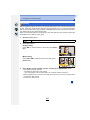
In these operating instructions, steps for setting a menu item are described as follows.
[MENU] >
[Rec] > [Quality] > [›]
3
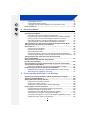
Contents
Finding the information you need.......................................................................2
How to use this manual .......................................................................................3
1.
Before Use
Care of the camera .............................................................................................10
Standard Accessories ........................................................................................11
Names and Functions of Components .............................................................12
About the Lens ...................................................................................................18
2.
Preparations before Recording
Changing the Lens .............................................................................................20
Attaching the Shoulder Strap ............................................................................22
Charging the Battery ..........................................................................................24
• Charging ......................................................................................................24
• Approximate operating time and number of recordable pictures .................26
Inserting and Removing the Card (optional)/
the Battery...........................................................................................................29
About the Card....................................................................................................31
• About cards that can be used with this unit .................................................31
• Formatting the card (initialisation)................................................................32
• Approximate number of recordable pictures and available recording
time..............................................................................................................33
Setting Date/Time (Clock Set) ...........................................................................35
• Changing the Clock Setting .........................................................................36
Setting the Menu.................................................................................................37
• Setting menu items ......................................................................................37
Calling frequently-used menus instantly
(Quick Menu).......................................................................................................40
• Change the Quick Menu to your preferred item..........................................41
Assigning frequently used functions to the buttons (function buttons) ......43
Configuring basic settings of this unit
(Setup Menu).......................................................................................................45
Entering Text.......................................................................................................54
3.
Basic Operation
Tips for taking good pictures ............................................................................55
• Detects orientation of camera (Direction Detection Function) .....................56
Taking a Still picture...........................................................................................57
• Taking pictures using the Touch Shutter function.........................................59
Recording Motion Picture..................................................................................60
Selecting the Recording Mode ..........................................................................61
Switching the Information Displayed on the recording screen .....................62
Playing Back Pictures/Motion Pictures ............................................................65
4
• Playing Back Pictures ..................................................................................65
• Playing Back Motion Pictures ......................................................................68
• Changing the information displayed on the playback screen.......................69
Deleting Pictures ................................................................................................71
4.
Recording Modes
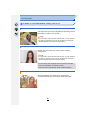
Taking Pictures using the Automatic Function
(Intelligent Auto Mode).......................................................................................73
• Recording night scenes ([iHandheld Night Shot]) ........................................76
• Combining pictures into a single picture with rich gradation ([iHDR]) ..........77
• Taking a picture with a blurred background (Defocus Control) ....................78
• Recording images by changing the brightness or colour tone .....................79
• About Intelligent Auto Plus Mode and Intelligent Auto Mode .......................81
Taking Pictures with Your Favourite Settings (Programme AE Mode)..........83
Taking Pictures by Specifying the Aperture/
Shutter Speed .....................................................................................................86
• Aperture-Priority AE Mode ...........................................................................86
• Shutter-Priority AE Mode .............................................................................87
• Manual Exposure Mode ...............................................................................88
• Confirm the Effects of Aperture and Shutter Speed (Preview Mode)...........90
• Easily set aperture/shutter speed for suitable exposure (One Push AE).....92
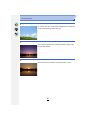
Taking Pictures that match the Scene being recorded
(Scene Guide Mode) ...........................................................................................93
Taking Pictures with different image effects
(Creative Control Mode)...................................................................................104
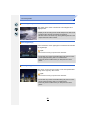
Recording motion pictures with manually set aperture value/shutter
speed (Creative Video Mode) ..........................................................................116
• Minimising operational sounds during motion picture recording ................ 117
Registering your preferred settings (Custom Mode) ....................................118
• Registering Personal Menu Settings (Registering custom settings) ..........118
• Recording using registered custom set......................................................119
5.
Picture Quality and Colour Tone Settings
Adjusting the Picture Quality by Adding an Effect ([Photo Style])..............120
Adjusting the White Balance ...........................................................................123
Setting the Picture Quality and Size ...............................................................128
• Setting the aspect ratio of pictures.............................................................128
• Setting the number of pixels ......................................................................128
• Setting the compression rate of pictures ([Quality]) ...................................129
Using Image Correction Functions.................................................................130
• Compensating the contrast and exposure ([i.Dynamic]) ............................130
• Raising the resolution ([i.Resolution]) ........................................................130
• Combining pictures with different exposures ([HDR]) ................................131
• Reducing the long shutter noise ([Long Shtr NR]) .....................................133
• Correcting the brightness on the screen periphery ([Shading Comp.])......133
• Setting the colour space ([Color Space]) ...................................................134
5
6.
Focus and Brightness (Exposure) Settings
Taking Pictures with Auto Focus ....................................................................135
• About the focus mode (AFS/AFF/AFC)......................................................136
• Type of the Auto Focus Mode ....................................................................138
• Setting the desired focus method ..............................................................144
Taking Pictures with Manual Focus................................................................147
• Making the desired changes to MF Assist settings....................................153
Fixing the Focus and the Exposure (AF/AE Lock) ........................................155
Compensating the Exposure...........................................................................157
Setting the Light Sensitivity ............................................................................158
• Setting the upper limit on ISO sensitivity ...................................................159
• Setting the step increment of ISO sensitivity .............................................160
• Extending ISO sensitivity ...........................................................................160
Selecting the Method for Measuring Brightness ([Metering Mode])............161
Easily Optimising the Brightness for a Specified Area (Touch AE).............162
7.
Shutter and Drive Settings
Setting the Shutter Type ..................................................................................165
Select a Drive Mode..........................................................................................167
Taking Pictures using Burst Mode..................................................................168
Taking Pictures using Auto Bracket ...............................................................171
Taking Pictures with the Self-timer .................................................................174
8.
Functions Customised for Various Subjects and Purposes
Taking Pictures Automatically at Set Intervals ([Time Lapse Shot]) ...........176
Creating Stop Motion Pictures ([Stop Motion Animation]) ...........................178
Making Multiple Exposures on One Picture
([Multi Exp.])......................................................................................................182
Disabling Operational Sounds and the Output of Light at once
([Silent Mode])...................................................................................................184
Taking Clear Pictures by Registering Faces
([Face Recog.])..................................................................................................185
Recording Profiles of Babies and Pets on Images........................................190
9.
Stabiliser, Zoom and Flash
Optical Image Stabiliser ...................................................................................191
Taking Pictures with the Zoom........................................................................193
• Raising the telescopic effect ......................................................................194
• Zooming using touch operations................................................................199
Taking pictures by using the flash..................................................................200
• Changing Flash Mode................................................................................203
• Setting to the 2nd Curtain Synchro ............................................................206
• Adjust the flash output ...............................................................................207
• Synchronising the output of the built-in flash to the Exposure
Compensation ...........................................................................................207
6
• Correcting red eyes....................................................................................207
10. Recording Motion Pictures
Recording Motion Picture................................................................................208
• Setting the format, size and recording frame rate...................................... 211
• How to set focus when recording a motion picture ([Continuous AF]) .......213
Recording still pictures while recording motion pictures ............................214
Using the [Motion Picture] Menu ....................................................................215
• [Rec Format] ..............................................................................................215
• [Rec Quality] ..............................................................................................215
• [Exposure Mode]........................................................................................215
• [Picture Mode]............................................................................................215
• [Continuous AF] .........................................................................................215
• [Rec Highlight]............................................................................................215
• [Ex. Tele Conv.] ..........................................................................................216
• [Flkr Decrease]...........................................................................................216
• [Silent Operation] .......................................................................................216
• [Mic Level Disp.].........................................................................................216
• [Mic Level Adj.]...........................................................................................216
• [Wind Cut] ..................................................................................................217
11. Playing Back and Editing Images
Playing Back Group Pictures ..........................................................................218
Creating Still Pictures from a Motion Picture ................................................220
Using the [Playback] Menu..............................................................................221
• [2D/3D Settings].........................................................................................221
• [Slide Show] ...............................................................................................221
• [Playback Mode] ........................................................................................223
• [Location Logging]......................................................................................224
• [Clear Retouch] ..........................................................................................225
• [Title Edit] ...................................................................................................227
• [Text Stamp] ...............................................................................................228
• [Video Divide].............................................................................................230
• [Time Lapse Video] ....................................................................................231
• [Stop Motion Video]....................................................................................232
• [Resize] ......................................................................................................233
• [Cropping] ..................................................................................................234
• [Rotate]/[Rotate Disp.]................................................................................235
• [Favorite] ....................................................................................................236
• [Print Set] ...................................................................................................237
• [Protect]......................................................................................................239
• [Face Rec Edit] ..........................................................................................240
• [Delete Confirmation] .................................................................................240
7
12. Using the Wi-Fi function
Wi-FiR function .................................................................................................241
What you can do with the Wi-Fi function .......................................................244
Controlling with a Smartphone/Tablet............................................................245
• Installing the smartphone/tablet app “Image App”.....................................245
• Connecting to a smartphone/tablet ............................................................246
• Taking pictures via a smartphone/tablet (remote recording) ......................247
• Saving images stored in the camera..........................................................247
• Sending images in the camera to an SNS .................................................248
• Sending location information to the camera from a smartphone/tablet......248
• Sending images to a smartphone/tablet by controlling the camera ...........249
Displaying pictures on a TV ............................................................................252
Printing Wirelessly ...........................................................................................253
When sending images to AV device ...............................................................254
When sending images to PC ...........................................................................257
Using Web services..........................................................................................261
• When sending images to web service .......................................................262
• When sending images to [Cloud Sync. Service] ........................................265
Registering to the “LUMIX CLUB” ..................................................................267
• About the [LUMIX CLUB] ...........................................................................267
• Configuring the external AV device settings ..............................................272
About Connections ..........................................................................................273
• Connecting from your house (via the network) ..........................................274
• Connecting from a location away from your house (direct connection) .....277
• Connecting quickly with the same settings as the previous ones ([Select
a destination from History]/[Select a destination from Favorite]) ...............278
• About settings for sending images.............................................................280
[Wi-Fi Setup] Menu ...........................................................................................283
13. Connecting to other equipment
Enjoying 3D pictures........................................................................................285
Playing Back Pictures on a TV Screen ...........................................................288
• Using VIERA Link (HDMI)..........................................................................290
Saving still pictures and motion pictures on your PC ..................................292
• About the supplied software.......................................................................293
Saving still pictures and motion pictures on a Recorder .............................298
Printing the Pictures ........................................................................................299
8
14. Others
Optional accessories .......................................................................................305
Monitor Display.................................................................................................306
Message Display...............................................................................................312
Menu list ............................................................................................................316
• [Rec]...........................................................................................................316
• [Motion Picture] ..........................................................................................319
• [Custom].....................................................................................................320
• [Setup] .......................................................................................................322
• [Playback] ..................................................................................................324
Troubleshooting ...............................................................................................325
Cautions for Use...............................................................................................341
9
1. Before Use
Care of the camera
Do not subject to strong vibration, shock, or pressure.
• The lens, monitor, or external case may be damaged if used in the
following conditions.
It may also malfunction or image may not be recorded if you:
– Drop or hit the camera.
– Press hard on the lens or the monitor.
This camera is not dust/drip/water proof.
Avoid using the camera in places with a lot of dust, water, sand,
etc.
• Liquid, sand and other foreign material may get into the space around
the lens, buttons, etc. Be particularly careful since it may not just cause
malfunctions, but it may also become irreparable.
– Places with a lot of sand or dust.
– Places where water can come into contact with this unit, such as when
using it on a rainy day or at the beach.
Do not place your hands inside the mount of the digital camera
body. Since the sensor unit is a precision apparatus, it may cause a malfunction or
damage.
∫ About Condensation (When the lens or monitor is fogged up)
• Condensation occurs when the ambient temperature or humidity
changes. Be careful of condensation since it causes lens and
monitor stains, fungus and camera malfunction.
• If condensation occurs, turn the camera off and leave it for about
2 hours. The fog will disappear naturally when the temperature of
the camera becomes close to the ambient temperature.
10
1. Before Use
Standard Accessories
Check that all the accessories are supplied before using the camera.
• The accessories and their shape will differ depending on the country or area where the camera
was purchased.
For details on the accessories, refer to “Basic Operating Instructions”.
• Battery Pack is indicated as battery pack or battery in the text.
• Battery Charger is indicated as battery charger or charger in the text.
• SD Memory Card, SDHC Memory Card and SDXC Memory Card are indicated as card in the
text.
• The card is optional.
• Description in these operating instructions is based on the interchangeable lens (H-FS12032).
• Consult the dealer or Panasonic if you lose the supplied accessories. (You can purchase the
accessories separately.)
11
1. Before Use
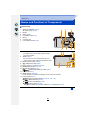
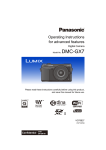
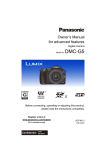
Names and Functions of Components
∫ Camera body
1
2
3
4
5
6
7
Self-timer indicator (P174)/
AF Assist Lamp (P145)
Sensor
Flash (P200)
Lens fitting mark (P21)
Mount
Lens lock pin
Lens release button (P20)
1
4
8
Flash open lever (P200)
• The flash opens, and recording with the flash
9
Speaker (P47)
• Be careful not to cover the speaker with your
8 9
2
3
5
6
7
10 11
becomes possible.
finger. Doing so may make sound difficult to hear.
10
11
12
13
14
Motion picture button (P208)
[(] (Playback) button (P65)
Touch screen (P15)/monitor (P306)
[MENU/SET] button (P17, 37)
12
[ ] (Delete) button (P71)/
[
] (Quick Menu/Return) button (P40)
15 Control dial (P17)
16 [DISP.] button (P62, 69)
• Each time this is pressed, the display on the monitor is switched.
17 Cursor buttons (P17)
3/[È] (Exposure Compensation) (P79, 88, 106, 157)
1/[
] (White Balance) (P123)
2/[
] (Auto Focus Mode) (P135)
4/[
] (Drive mode) (P167)
Single (P57)/Burst (P168)/Auto bracket (P171)/Self-timer (P174)
12
13 14 15 16 17
1. Before Use
18 Stereo microphone (P216)
• Be careful not to cover the microphone with your
18
19 20
finger. Doing so may make sound difficult to
record.
19
20
21
22
Camera ON/OFF switch (P35)
Shutter button (P57)
Focus distance reference mark (P152)
[Fn1] button (P43)
• At the time of purchase, [Wi-Fi] is set to [Fn1].
21
22 23 24 25
(P242)
23 Focus mode lever (P135, 147)
24 Status indicator (P35)/
Wi-Fi® connection lamp (P242)
• The lamp lights green when the camera is turned
on, and lights blue when it is connected to Wi-Fi.
25 Mode dial (P61)
26 Shoulder strap eyelet (P22)
• Be sure to attach the shoulder strap when using
the camera to ensure that you will not drop it.
26
27 [HDMI] socket (P288)
28 [AV OUT/DIGITAL] socket (P289, 295, 298,
299)
27
28
29 Tripod mount (P348)
• A tripod with a screw length of 5.5 mm
(0.22 inch) or more may damage this unit if
attached.
30 Card/Battery door (P29)
31 DC coupler cover
• When using an AC adaptor, ensure that the
29
30 31 32
Panasonic DC coupler (optional) and AC adaptor (optional) are used. (P305)
32 Release lever (P29)
13
1. Before Use
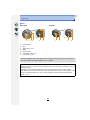
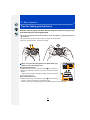
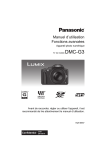
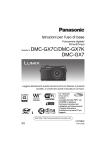
∫ Lens
H-FS12032
1 2
1
2
3
4
5
6
7
H-H020A
3 4
5
1
6
7
5
6
Lens surface
Tele
Zoom ring (P193)
Wide
Contact point
Lens fitting mark (P21)
Focus ring (P148)
• The interchangeable lens (H-FS12032) does not have a focus ring, but you can use manual
focus by operating the camera. Refer to P147 for details.
• The interchangeable lens (H-H020A) utilises a lens drive system to realize a compact and
bright F1.7 lens. As a result, sound and vibration may occur during focus operation, but this is
not a malfunction.
• Operating sounds will be recorded when auto focus is performed during motion picture
recording. (P60) It is recommended to record with [Continuous AF] (P213) set to [OFF], if the
sound of operation bothers you. Also, it is not possible to set the Focus Mode to [AFC] or
[AFF]. (P136)
14
1. Before Use
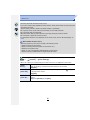
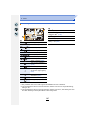
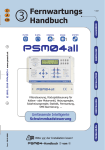
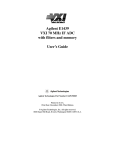
Touch screen (capacitive)
Operate the touch screen directly with your finger.
∫ Touch
To touch and release the touch screen.
• When selecting features using the touch screen, be sure to
Fn2
Fn3
Fn6
touch the centre of the desired icon.
Fn4
Fn5
Fn6
∫ Drag
A movement without releasing the touch screen.
This can also be used to move to the next image during
playback, etc.
∫ Pinch (enlarge/reduce)
Pinch the touch panel apart (enlarge) or together
(reduce) with two fingers.
15
2.0X
1. Before Use
• Touch the panel with the clean and dry finger.
• If you use a commercially available monitor protection sheet, please follow the instructions that
accompany the sheet.
(Some monitor protection sheets may impair visibility or operability.)
• Do not press on the monitor with hard pointed tips, such as ball point pens.
• Do not operate with your fingernails.
• Wipe the monitor with dry soft cloth when it gets dirty with finger prints and others.
• Do not scratch or press the monitor too hard.
• For information about the icons displayed on the touch screen, refer to “Monitor Display” on
P306.
Not available in these cases:
• The touch panel may not function normally in the following cases.
– When touched by a gloved hand
– When touched by a wet hand (water or hand cream, etc.)
– When the touch panel is wet
– When you use a commercially available monitor protect sheet
– When touched by multiple hands or fingers at the same time
Enabling/disabling the touch operation
[MENU] >
[Custom] > [Touch Settings]
• When set to [OFF], no corresponding touch tab or touch icon is displayed on the screen.
[Touch
Screen]
[Touch Tab]
All touch operations.
When set to [OFF], only button and dial operations can be used.
[ON]/[OFF]
Operation to display the touch icons by touching tabs such as [ ] displayed
on the right of the screen.
[ON]/[OFF]
[Touch AF]
Operation to optimise the focus or both the focus and brightness for a touched
subject.
[AF] (P141)/[AF+AE] (P163)/[OFF]
16
1. Before Use
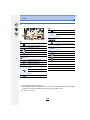
Cursor buttons/[MENU/SET] button
Pressing the cursor button:
Selection of items or setting of values etc., is performed.
Pressing [MENU/SET]:
Confirmation of setting contents, etc., is performed.
• These operating instructions expresses the up, down, left, and
right of the cursor button as 3/4/2/1.
Even when the camera is operated using the touch screen, it
is possible to operate with the cursor button and [MENU/SET]
button if a guide like the one shown on the right is displayed.
Even on menu screens etc. on which the guide is not
displayed, you can make settings and selections by operating
the buttons.
Control Dial
Rotating the control dial:
Selection of items or setting of values etc., is performed.
In these operating instructions, turning the control dial is indicated as follows.
Displaying/not displaying the operation guide
[MENU] >
[Custom] > [Dial Guide] > [ON]/[OFF]
• When [ON] is set, the operation guide for dials, buttons, etc. is
displayed on the recording screen.
3.5 60
17
0
98
1. Before Use
About the Lens
∫ Micro Four Thirds™ mount specification lens
This unit can use the dedicated lenses compatible with
the Micro Four Thirds System lens mount specification
(Micro Four Thirds mount).
∫ Four Thirds™ mount specification lens
Lens with the Four Thirds mount specification can be
used by using the mount adaptor (DMW-MA1: optional).
∫ Leica mount specification lens
When you use the M mount adaptor or R mount adaptor (DMW-MA2M, DMW-MA3R:
optional), you can use Leica M Mount or Leica R Mount interchangeable lenses.
• For certain lenses, the actual distance at which the subject is in focus may differ slightly from
the rated distance.
• When using a Leica lens mount adaptor, set [Shoot w/o Lens] (P20) to [ON].
18
1. Before Use
About the lens and functions
There are functions that cannot be used, or the operation may be different depending on
the lens used.
Auto Focus/Auto aperture setting/Defocus control function (P78)/[Shading Comp.] (P133)/
[Quick AF] (P144)/[Shutter Type] (P165)/[Stabilizer] (P191)/[Power Zoom Lens] (P198)/
Touch zoom (P199)
For details on the lens used, refer to the website.
Refer to catalogues/Web pages for most current information regarding compatible
lenses.
http://panasonic.jp/support/global/cs/dsc/
(This Site is English only.)
• The available flash range etc. differs depending on the aperture value of the lens you are using.
• The focal length noted on the lens in use is equivalent to double when converted to the 35 mm
film camera.
(It will be equivalent to 100 mm lens when a 50 mm lens is used.)
Refer to the website for details about the 3D interchangeable lens.
19
2. Preparations before Recording
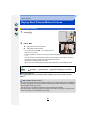
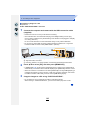
Changing the Lens
By changing the lens, you will increase your picture taking-options and further your
enjoyment of the camera. Change the lens using the following procedure.
• Check that the camera is turned off.
• When attaching or detaching the interchangeable lens (H-FS12032), retract the lens barrel.
• Change lenses where there is not a lot of dirt or dust. Refer to P342 when dirt or dust gets on
the lens.
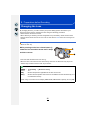
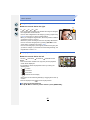
Detaching the lens
• Attach the lens cap.
While pressing on the lens release button B,
rotate the lens toward the arrow until it stops
and then remove.
• Hold and rotate the base area of the lens A.
• When the lens is removed from the camera body, make sure to attach the body cap to the
camera body and attach the lens rear cap to the lens.
To enable/disable the shutter release without lens.
[MENU] >
[Custom] > [Shoot w/o Lens]
[ON]:
Shutter will operate regardless of the lens on the unit.
[OFF]:
Shutter will not operate when a lens is not attached to the camera body or is
not attached correctly.
• When using a Leica lens mount adaptor (DMW-MA2M, DMW-MA3R: optional), set it to [ON].
20
2. Preparations before Recording
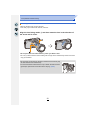
Attaching the lens
• Remove the lens rear cap from the lens.
• If the body cap is fitted to the camera, remove it.
Align the lens fitting marks A and then rotate the lens in the direction of
the arrow until it clicks.
• Do not press the lens release button B when you attach a lens.
• Do not try to attach the lens when holding it at an angle to the camera body as the lens mount
may get scratched.
• Do not insert your fingers into the mount when the lens and body cap
are removed from the camera body.
• It is recommended to attach the lens cap or attach the MC Protector
(optional) to protect the lens surface when carrying. (P305)
21
2. Preparations before Recording
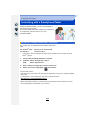
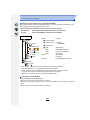
Attaching the Shoulder Strap
• We recommend attaching the shoulder strap when using the camera to prevent it from
dropping.
1
Pass the shoulder strap through the shoulder
strap eyelet on the camera body.
A: Shoulder strap eyelet
A
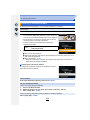
2
Pass the end of the shoulder strap through
the ring in the direction of the arrow and then
pass it through the stopper.
3
Pass the end of the shoulder strap through
the hole on the other side of the stopper.
4
Pull the other side of the
shoulder strap and then
check that it will not come
out.
• Perform steps 1 to 4 and then
attach the other side of the
shoulder strap.
22
2. Preparations before Recording
• Use the shoulder strap around your shoulder.
– Do not wrap the strap around your neck.
– It may result in injury or accident.
• Do not leave the shoulder strap where an infant can reach it.
– It may result in an accident by mistakenly wrapping around the neck.
23
2. Preparations before Recording
Charging the Battery
∫ About batteries that you can use with this unit
It has been found that counterfeit battery packs which look very similar to the
genuine product are made available for purchase in some markets. Some of
these battery packs are not adequately protected with internal protection to meet
the requirements of appropriate safety standards. There is a possibility that
these battery packs may lead to fire or explosion. Please be advised that we are
not liable for any accident or failure occurring as a result of use of a counterfeit
battery pack. To ensure that safe products are used, we recommend that a
genuine Panasonic battery pack is used.
• Use the dedicated charger and battery.
Charging
• The battery is not charged when the camera is shipped. Charge the battery before use.
• Charge the battery with the charger indoors.
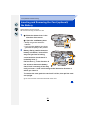
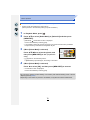
1
Attach the battery paying
attention to the direction of
the battery.
2
Connect the charger to the
electrical outlet.
plug-in type
• The [CHARGE] indicator A lights
up and charging begins.
24
inlet type
2. Preparations before Recording
∫ About the [CHARGE] indicator
On:
Charging.
Off:
Charging has completed.
(Disconnect the charger from the electrical socket and detach the
battery after charging is completed.)
• When the [CHARGE] indicator flashes
– The battery temperature is too high or too low. It is recommended to charge the battery again
in an ambient temperature of between 10 oC and 30 oC (50 oF and 86 oF).
– The terminals of the charger or the battery are dirty. In this case, wipe them with a dry cloth.
∫ Charging time
Charging time
Approx. 130 min
• The indicated charging time is for when the battery has been discharged completely.
The charging time may vary depending on how the battery has been used.
The charging time for the battery in hot/cold environments or a battery that has not been
used for a long time may be longer than normal.
∫ Battery indication
4:3
L
AFS
• The indication turns red and blinks if the remaining battery power is exhausted.
98
(The status indicator also blinks)
Recharge the battery or replace it with a fully charged battery.
• Do not leave any metal items (such as clips) near the contact areas of the power plug.
Otherwise, a fire and/or electric shocks may be caused by short-circuiting or the
resulting heat generated.
• The battery can be recharged even when it still has some charge left, but it is not
recommended that the battery charge be frequently topped up while the battery is fully
charged.
(Since characteristic swelling may occur.)
25
2. Preparations before Recording
Approximate operating time and number of recordable pictures
∫ Recording still pictures (By CIPA standard in Programme AE Mode)
When the interchangeable lens (H-FS12032) is used
Number of recordable pictures
Approx. 230 pictures
Recording time
Approx. 115 min
When the interchangeable lens (H-H020A) is used
Number of recordable pictures
Approx. 220 pictures
Recording time
Approx. 110 min
Recording conditions by CIPA standard
• CIPA is an abbreviation of [Camera & Imaging Products Association].
• Temperature: 23 oC (73.4 oF)/Humidity: 50%RH when monitor is on.
• When using a Panasonic SDHC Memory Card.
• Using the supplied battery.
• Starting recording 30 seconds after the camera is turned on.
(When attaching an interchangeable lens compatible with the Optical Image Stabiliser function,
set the Optical Image Stabiliser to [
])
• Recording once every 30 seconds using full flash every second recording.
• Turning the camera off every 10 recordings and leaving it until the temperature of the battery
decreases.
The number of recordable pictures varies depending on the recording interval time.
If the recording interval time becomes longer, the number of recordable pictures
decreases.
[For example, if you were to take one picture every two minutes, then the number of
pictures would be reduced to approximately one-quarter of the number of pictures
given above (based upon one picture taken every 30 seconds).]
26
2. Preparations before Recording
∫ Recording motion pictures
[AVCHD] (Recording with picture quality set to [FHD/50i])
When the interchangeable lens (H-FS12032) is used
Recordable time
Approx. 80 min
Actual recordable time
Approx. 40 min
When the interchangeable lens (H-H020A) is used
Recordable time
Approx. 80 min
Actual recordable time
Approx. 40 min
[MP4] (Recording with picture quality set to [FHD/25p])
When the interchangeable lens (H-FS12032) is used
Recordable time
Approx. 80 min
Actual recordable time
Approx. 40 min
When the interchangeable lens (H-H020A) is used
Recordable time
Approx. 80 min
Actual recordable time
Approx. 40 min
• These times are for an ambient temperature of 23 oC (73.4 oF) and a humidity of 50%RH.
Please be aware that these times are approximate.
• Actual recordable time is the time available for recording when repeating actions such as
turning this unit on and off, starting/stopping recording, etc.
• Maximum time to record motion pictures continuously with [AVCHD] is 29 minutes 59 seconds.
• Maximum time to record motion pictures continuously with [MP4] is 29 minutes 59 seconds or
up to 4 GB.
(For [FHD/25p] in [MP4] format, the file size is large and so the recordable time will drop below
29 minutes 59 seconds.)
27
2. Preparations before Recording
∫ Playback
When the interchangeable lens (H-FS12032) is used
Playback time
Approx. 160 min
When the interchangeable lens (H-H020A) is used
Playback time
Approx. 150 min
• The operating times and number of recordable pictures will differ according to the
environment and the operating conditions.
For example, in the following cases, the operating times shorten and the number of recordable
pictures is reduced.
– In low-temperature environments, such as on ski slopes.
– When flash is used repeatedly.
• When the operating time of the camera becomes extremely short even after properly charging
the battery, the life of the battery may have expired. Buy a new battery.
28
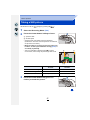
2. Preparations before Recording
Inserting and Removing the Card (optional)/
the Battery
• Check that this unit is turned off.
• We recommend using a Panasonic card.
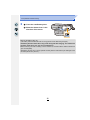
1
1: Slide the release lever in the
direction of the arrow.
2: Open the card/battery door.
• Always use genuine Panasonic
batteries.
• If you use other batteries, we cannot
guarantee the quality of this product.
2
Battery: Being careful about the
battery orientation, insert all the
way until you hear a locking
sound and then check that it is
locked by lever A.
Pull the lever A in the direction of
the arrow to remove the battery.
Card: Push it securely all the way
until you hear a “click” while being careful about the direction in
which you insert it.
To remove the card, push the card until it clicks, then pull the card
out upright.
B: Do not touch the connection terminals of the card.
29
2. Preparations before Recording
3
1: Close the card/battery door.
2: Slide the release lever in the
direction of the arrow.
• Remove the battery after use.
(The battery will be exhausted if left for a long period of time after being charged.)
• The battery becomes warm after using it and during and after charging. The camera also
becomes warm during use. This is not a malfunction.
• Before removing the card or battery, turn the camera off, and wait until the status indicator has
gone off completely.
(Otherwise, this unit may no longer operate normally and the card itself may be damaged or the
recorded pictures may be lost.)
30
2. Preparations before Recording
About the Card
About cards that can be used with this unit
The following cards which conform to the SD standard can be used with this unit.
(These cards are indicated as card in the text.)
Remarks
SD Memory Card
(8 MB to 2 GB)
SDHC Memory Card
(4 GB to 32 GB)
SDXC Memory Card
(48 GB, 64 GB)
• SDHC Memory Cards and SDXC Memory Cards can be
used only with their compatible devices.
• Check that the PC and other equipment are compatible when
using the SDXC Memory Cards.
http://panasonic.net/avc/sdcard/information/SDXC.html
• This unit is compatible with UHS-I standard SDHC/SDXC
memory cards.
• Only the cards with capacity listed left can be used.
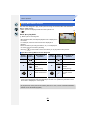
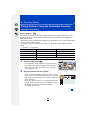
∫ About the motion picture recording and SD speed class
Confirm the SD Speed Class (the speed standard regarding continuous writing) on a card
label etc. when you record a motion picture.
Use a card with SD Speed Class with “Class 4” or more for [AVCHD]/[MP4] motion picture
recording.
e.g.:
• Please confirm the latest information on the following website.
http://panasonic.jp/support/global/cs/dsc/
(This Site is English only.)
Access to the card
The access indication displays red when pictures are being
recorded on the card.
• During access (image writing, reading and deleting,
50 i
4:3
L
formatting etc.), do not turn this unit off, remove the battery,
card or disconnect the AC adaptor (optional). Furthermore, do not subject the camera to
vibration, impact or static electricity.
The card or the data on the card may be damaged, and this unit may no longer operate
normally.
If operation fails due to vibration, impact or static electricity, perform the operation
again.
31
AFS
2. Preparations before Recording
• Write-Protect switch A provided (When this switch is set to the [LOCK] position,
no further data writing, deletion or formatting is possible. The ability to write,
delete and format data is restored when the switch is returned to its original
position.)
• The data on the card may be damaged or lost due to electromagnetic waves,
static electricity or breakdown of the camera or the card. We recommend storing
important data on a PC etc.
• Keep the Memory Card out of reach of children to prevent swallowing.
2
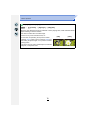
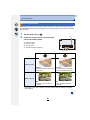
Formatting the card (initialisation)
Format the card before recording a picture with this unit.
Since data cannot be recovered after formatting, make sure to back up necessary
data in advance.
Select the menu. (P37)
[MENU] >
[Setup] > [Format]
• Confirmation screen is displayed. It is executed when [Yes] is selected.
• Use a battery with sufficient battery power or the AC adaptor (optional) (P305) when formatting.
Do not turn the camera off during formatting.
• If the card has been formatted on a PC or other equipment, format it on the camera again.
• If the card cannot be formatted, please try another card before contacting Panasonic.
32
2. Preparations before Recording
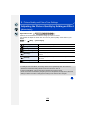
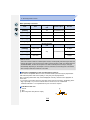
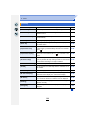
Approximate number of recordable pictures and available recording
time
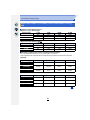
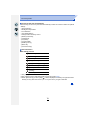
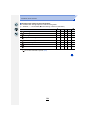
∫ Number of recordable pictures
• Aspect ratio [4:3], Quality [A]
[Picture Size]
L (16M)
M (8M)
S (4M)
2 GB
220
410
690
• Aspect ratio [4:3], Quality [
[Picture Size]
L (16M)
M (8M)
S (4M)
2 GB
68
79
86
8 GB
900
1650
2800
32 GB
3640
6690
11360
64 GB
7260
13000
21480
8 GB
270
320
340
32 GB
1110
1300
1410
64 GB
2230
2580
2800
]
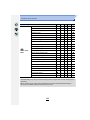
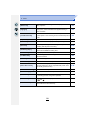
∫ Available recording time (when recording motion pictures)
• “h” is an abbreviation for hour, “m” for minute and “s” for second.
• The recordable time is the total time of all the motion pictures which have been recorded.
• [AVCHD]
[Rec Quality]
2 GB
8 GB
32 GB
64 GB
[FHD/50i]
14m00s
1h1m
4h9m
8h26m
[FHD/25p]/
[FHD/24p]
10m00s
43m00s
2h57m
5h58m
[HD/50p]
14m00s
1h1m
4h9m
8h26m
• [MP4]
[Rec Quality]
2 GB
8 GB
32 GB
64 GB
[FHD/25p]
11m00s
49m00s
3h22m
6h50m
[HD/25p]
22m00s
1h34m
6h27m
13h4m
[VGA/25p]
49m00s
3h28m
14h11m
28h45m
33
2. Preparations before Recording
• Depending on the recording conditions and the type of card, the number of recordable pictures
and available recording time vary.
• Maximum time to record motion pictures continuously with [AVCHD] is 29 minutes 59 seconds.
• Maximum time to record motion pictures continuously with [MP4] is 29 minutes 59 seconds or
up to 4 GB.
(For [FHD/25p] in [MP4] format, the file size is large and so the recordable time will drop below
29 minutes 59 seconds.)
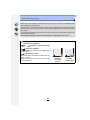
• The maximum available continuous recording time is displayed on the screen.
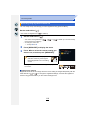
Switching the display between the number of recordable pictures and the
available recording time
[MENU] >
[Custom] > [Remaining Disp.]
[
] ([Remaining Shots]):
This will display the number of recordable pictures
for still pictures.
[
] ([Remaining Time]):
This will display the available recording time for
motion pictures.
• [9999i] is displayed if there are more than 10000
pictures remaining.
34
0
98
Number of
recordable
pictures
0
R5m04
4s
Available
recording time
2. Preparations before Recording
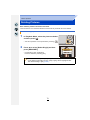
Setting Date/Time (Clock Set)
• The clock is not set when the camera is shipped.
1
Turn the camera on.
• When the camera is turned on, the status indicator 1
lights up green.
• If the language select screen is not displayed, proceed to
step 4.
2
3
Press [MENU/SET].
4
Press [MENU/SET].
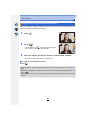
5
Press 2/1 to select the items (year, month,
day, hour, minute), and press 3/4 to set.
Press 3/4 to select the language, and press
[MENU/SET].
:
:
A: Time at the home area
B: Time at the travel destination
• You can cancel without setting the clock by pressing
[
].
To set the display order and the time display
format.
• To display the setting screen of the order/time, select
[Style] and then press [MENU/SET].
6
7
Press [MENU/SET] to set.
Press [MENU/SET] in the confirmation
screen.
• When an interchangeable lens (H-FS12032) is used and the lens barrel is retracted,
recording is not possible (a message will be displayed). Rotate the zoom ring to extend
the lens. (P55)
35
2. Preparations before Recording
Changing the Clock Setting
Select [Clock Set] in the [Setup] menu. (P37)
• The clock can be reset as shown in steps 5 and 6.
• The clock setting is maintained for 3 months using the built-in clock battery even
without the battery.
(Leave the charged battery in the unit for 24 hours to charge the built-in battery.)
• If the clock is not set, the correct date cannot be printed when you stamp the date on the
pictures with [Text Stamp] or order a photo studio to print the pictures.
36
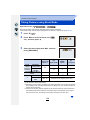
2. Preparations before Recording
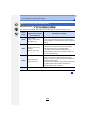
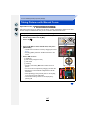
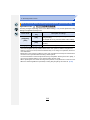
Setting the Menu
The [Setup] menu contains some important settings relating to the camera’s clock and
power.
Check the settings of this menu before proceeding to use the camera.
Setting menu items
You can set menu items in two ways: with button operation, which involves pressing the
cursor button and rotating the control dial, or with touch operation, which involves touching
the screen.
In these operating instructions, steps for setting a menu item are described as follows.
Example: In the [Rec] menu, change [Quality] from [A] to [›]
[MENU] >
1
[Rec] > [Quality] > [›]
Press [MENU/SET].
[Rec] (P316)
This menu lets you set the aspect ratio, number of pixels
and other aspects of the pictures you are recording.
[Motion Picture]
(P215)
This menu lets you set the [Rec Format], [Rec Quality], and
other aspects for motion picture recording.
[Custom] (P320)
Operation of the unit, such as displaying of the screen and
button operations, can be set up according to your
preferences. Also, it is possible to register the modified
settings.
[Setup] (P45)
This menu lets you perform the clock settings, select the
operating beep tone settings and set other settings which
make it easier for you to operate the camera.
You can also configure the settings of Wi-Fi related
functions.
[Playback] (P324)
This menu lets you set the Protection, Cropping or Print
Settings, etc. of recorded pictures.
37
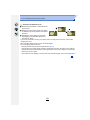
2. Preparations before Recording
∫ Switching to other menus
e.g.: Switching to the [Setup] menu from [Rec] menu.
1
2
Press 2.
Press 3/4 to select [ ] or another of the menu
toggle icons.
• The menu toggle icon can also be selected by rotating the
3
Press [MENU/SET].
• Select a menu item next and set it.
control dial.
(In touch operation)
Touch [
2
] or another of the menu toggle icons A.
Press 3/4 of the cursor button to select the
menu item and press [MENU/SET].
• The menu item can also be selected by rotating the
control dial.
• You can also move to the next screen by pressing
[DISP.].
(In touch operation)
Touch the menu item.
• The page can be changed by touching [
3
]/[
].
Press 3/4 of the cursor button to select the
setting and press [MENU/SET].
• The setting can also be selected by rotating the control
dial.
• Depending on the menu item, its setting may not appear
or it may be displayed in a different way.
(In touch operation)
Touch the Setting to set.
38
A
2. Preparations before Recording
• When [Menu Information] (P51) in the [Setup] menu is set to [ON], explanations of the
menu items and settings are displayed on the menu screen.
• If you set [Menu Resume] (P51) in the [Setup] menu to [ON], the screen shows the last
selected menu item.
It is set to [ON] at the time of purchase.
• There are functions that cannot be set or used depending on the modes or menu settings being
used on the camera due to the specifications.
∫ Close the menu
Press [
] or press the shutter button halfway.
(In touch operation)
Touch [
].
Setting the menu screen background
You can set the background for the menu screen according to your preferences.
1 Select the menu.
[MENU] >
2
[Setup] > [Menu Background]
Press 3/4 to select the background colour and then press [MENU/SET].
• Exit the menu after it is set.
39
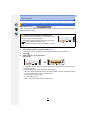
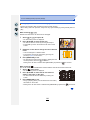
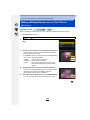
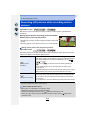
2. Preparations before Recording
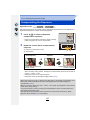
Calling frequently-used menus instantly
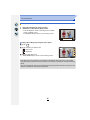
(Quick Menu)
By using the Quick Menu, some of the menu settings can be easily found.
• The features that can be adjusted using Quick Menu are determined by the mode or a display
style the camera is in.
1
Press [
2
Rotate the control dial to select the menu
item, and press 4 or 3.
] to display the Quick Menu.
50 i
4:3
L
AFS
• The menu item can also be selected by pressing 2/1.
3.5 60
3
Rotate the control dial to select the setting.
0
50 i
4:3
L
AUTO
AWB
AFS
• The setting can also be selected with 2/1.
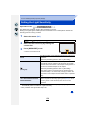
4
Press [
] to exit the menu once the
setting is complete.
• You can close the menu by pressing the shutter button
halfway.
Switching the method for setting Quick Menu items
[MENU] >
[Custom] > [Q.MENU]
[PRESET]:
The default items can be set.
[CUSTOM]:
The Quick Menu will consist of desired items. (P41)
40
3.5 60
0
AUTO
AWB
2. Preparations before Recording
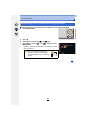
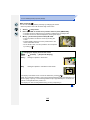
Change the Quick Menu to your preferred item
When [Q.MENU] (P40) in the [Custom] menu is set to [CUSTOM], the Quick Menu can be
changed as desired.
Up to 15 items can be set to the Quick Menu.
1
Press 4 to select [
SET].
] and then press [MENU/
4:3
L
2
3
Press 3/4/2/1 to select the menu item in the
top row and then press [MENU/SET].
Press 2/1 to select the empty space in the
bottom row and then press [MENU/SET].
A Items that can be setup as Quick Menus.
B Items that can be displayed in the Quick Menu
screen.
AUTO
A
AFS
OFF
123
ON
OFF
OFF
OFF
4:3
L
• You can also set the menu item by dragging it from the
AUTO
B
top row to the bottom row.
• If there is no empty space in the bottom row, you can replace an existing item with a new
select item by selecting the existing item.
• To cancel the setting, move to the bottom row by pressing 4 and select an item to cancel,
and then press [MENU/SET].
• Items that can be set are as follows:
[Rec] menu
– [Photo Style] (P120)
– [Picture Setting]
– [HDR] (P131)
– [Shutter Type] (P165)
– [Flash Mode] (P203)
– [Flash Adjust.] (P207)
– [Ex. Tele Conv.]
([Aspect Ratio] (P128)/[Picture Size]
(P128))
– [Quality] (P129)
– [Sensitivity] (P158)
– [Metering Mode] (P161)
– [i.Dynamic] (P130)
– [i.Resolution] (P130)
(still pictures/motion pictures) (P194)
– [Digital Zoom] (P197)
– [Stabilizer] (P191)
41
2. Preparations before Recording
[Motion Picture] menu
[Custom] menu
– [Motion Pic. Set]
– [Silent Mode] (P184)
– [AFS/AFF] (P137)
– [Peaking] (P150)
– [Histogram] (P63)
– [Guide Line] (P63)
– [Rec Area] (P209)
– [Step Zoom] (P198)
– [Zoom Speed] (P198)
([Rec Format] (P211)/[Rec Quality]
(P211))
– [Picture Mode] (P214)
4
Press [
].
• It will return to screen of step 1.
Press [MENU/SET] to switch to the recording screen.
42
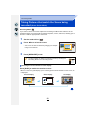
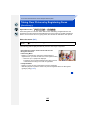
2. Preparations before Recording
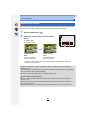
Assigning frequently used functions to the
buttons (function buttons)
You can assign recording functions, etc. to specific buttons and icons.
1
Select the menu.
[MENU] >
2
3
[Custom] > [Fn Button Set]
Press 3/4 to select the function button you want to
assign a function to and then press [MENU/SET].
Press 3/4 to select the function you want to assign
and then press [MENU/SET].
• Some functions cannot be assigned depending on the
function button.
[Rec] menu/Recording functions
¢
– [Wi-Fi] (P242): [Fn1]
– [AF/AE LOCK] (P155)
– [AF-ON] (P149, 155)
– [One Push AE] (P92)
– [Touch AE] (P162)
– [Preview] (P90): [Fn2]¢
– [Level Gauge] (P64): [Fn3]¢
– [Zoom Control] (P193)
– [Photo Style] (P120)
– [Aspect Ratio] (P128)
– [Picture Size] (P128)
– [Quality] (P129)
– [Sensitivity] (P158)
– [Metering Mode] (P161)
– [i.Dynamic] (P130)
– [i.Resolution] (P130)
– [HDR] (P131)
– [Shutter Type] (P165)
– [Flash Mode] (P203)
– [Flash Adjust.] (P207)
– [Ex. Tele Conv.]
(still pictures/motion pictures) (P194)
– [Digital Zoom] (P197)
– [Stabilizer] (P191)
– [Restore to Default] (P44)
[Motion Picture] menu
– [Motion Pic. Set]
– [Picture Mode] (P214)
([Rec Format] (P211)/[Rec Quality]
(P211))
[Custom] menu
– [Silent Mode] (P184)
– [AFS/AFF] (P137)
– [Peaking] (P150)
– [Histogram] (P63): [Fn4]¢
– [Guide Line] (P63)
– [Rec Area] (P209)
– [Step Zoom] (P198)
– [Zoom Speed] (P198)
¢ Function button settings at the time of purchase.
(At the time of purchase, function button settings are not assigned to [Fn5] and [Fn6].)
• Exit the menu after it is set.
43
2. Preparations before Recording
• Some functions cannot be used depending on the mode or displayed screen.
• When [Restore to Default] is set, function button settings return to the default configuration.
Not available in these cases:
• In the following case, [Fn1] does not work:
– [Miniature Effect]/[One Point Color]/[Sunshine] (Creative Control Mode)
– [Multi Exp.]
– When using [Time Lapse Shot]
∫ Using function buttons with touch operations
[Fn2], [Fn3], [Fn4], [Fn5] and [Fn6] are used by touching function buttons.
1
2
Touch [ ].
Touch [Fn2], [Fn3], [Fn4], [Fn5] or [Fn6].
• The assigned function will operate.
Fn2
Fn3
Fn6
Fn4
Fn5
Fn6
44
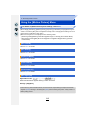
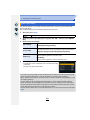
2. Preparations before Recording
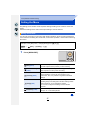
Configuring basic settings of this unit
(Setup Menu)
For details on how to select the [Setup] menu settings, refer to P37.
[Clock Set] and [Economy] are important items.
Check their settings before using them.
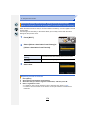
—
[Clock Set]
• Refer to P35 for details.
Set the time in your home area and travel destination.
You can display the local times at the travel destinations and
record them on the pictures you take.
• Set [Home] first thing after purchasing.
[Destination] can be set after setting up [Home].
After selecting [Destination] or [Home], press 2/1 to select
an area, and press [MENU/SET] to set.
“ [Destination]:
Travel destination area
[World Time]
A Current time of the destination
area
B Time difference from home
area
– [Home]:
Your home area
A
B
C
C Current time
D Time difference from GMT
(Greenwich Mean Time)
• Press 3 if you are using Daylight Savings [
D
]. (The time will move forward by 1 hour.)
Press 3 once more to return to the normal time.
• If you cannot find the travel destination in the areas displayed on the screen, set by the time
difference from the home area.
45
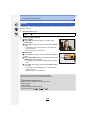
2. Preparations before Recording
Departure date and return date of the trip as well as the name of
the travel destination can be set.
You can display the number of days that have passed when
playing back the pictures and stamp it on the recorded pictures
with [Text Stamp] (P228).
[Travel Setup]:
[SET]:
Departure date and return date are set. Elapsed days
(how many days after) of the trip are recorded.
[OFF]
[Travel Date]
• The travel date is automatically cancelled if the current date is
after the return date.
If the [Travel Setup] is set to [OFF], [Location] will also be set to
[OFF].
[Location]:
[SET]:
Travel destination is recorded at the time of
recording.
[OFF]
• For details on how to enter characters, refer to “Entering Text” on
P54.
• The number of days that have passed since the departure date can be printed out using the
“PHOTOfunSTUDIO” bundled software on the CD-ROM (supplied).
• The travel date is calculated using the date in the clock setting and the departure date you set.
If you set [World Time] to the travel destination, the travel date is calculated using the date in
the clock setting and the travel destination setting.
• The [Travel Date] feature is disabled when recording [AVCHD] motion pictures.
• While recording motion pictures, the [Location] feature is disabled.
[Wi-Fi]
[Wi-Fi Function]/[Wi-Fi Setup]
• Refer to P244, 283 for details.
46
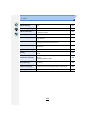
2. Preparations before Recording
This allows you to set the volume for electronic sound and the
electronic shutter sound.
[Beep Volume]:
[Beep]
[Shutter Vol.]:
[u] (High)
[
] (High)
[t] (Low)
[
] (Low)
[s] (OFF)
[
] (OFF)
[Shutter Tone]:
[ 1 ]/[ 2 ]/[ 3 ]
• When [Silent Mode] is set to [ON], [Beep Volume] and [Shutter Vol.] is set to [OFF].
[Speaker Volume]
Adjust the volume of the speaker to any of the 7 levels.
• When you connect the camera to a TV, the volume of the TV speakers does not change. Also,
when connected, no sound is output from the camera speakers.
• When [Silent Mode] is set to [ON], the volume is set to 0.
Brightness, colour, or red or blue tint of the Monitor is adjusted.
[
] ([Brightness]):
Adjust the brightness.
[
] ([Contrast · Saturation]):
Adjust the contrast or clarity of colours.
[
[Monitor Display]
] ([Red Tint]):
Adjust the red tint.
[
] ([Blue Tint]):
Adjust the blue tint.
1
2
Select the settings by pressing 3/4, and adjust with
2/1.
• Adjusting can also be performed by rotating the control dial.
Press [MENU/SET] to set.
• Some subjects may appear differently from actuality on the monitor. However, this does not
affect the recorded pictures.
47
2. Preparations before Recording
Sets the monitor brightness according to the ambient light level.
[Monitor Luminance]
„ [AUTO]:
The brightness is adjusted automatically depending on how bright
it is around the camera.
…
1 [MODE1]:
Make the monitor brighter.
…
2 [MODE2]:
Set the monitor to the standard brightness.
…
3 [MODE3]:
Make the monitor darker.
• The brightness of pictures displayed on the monitor is enhanced, so some subjects on the
monitor may appear different from the actual subjects. However, this enhancement does not
affect recorded pictures.
• The monitor automatically returns to standard brightness if no operations are performed for
30 seconds when recording in [MODE1]. It will light up brightly again with button or touch
operation.
• When [AUTO] or [MODE1] is set, the usage time is reduced.
• [AUTO] is only available in the Recording Mode.
• The initial setting when using the AC adaptor (optional) is [MODE2].
48
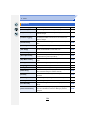
2. Preparations before Recording
The unit can be set up to prevent unnecessary battery
consumption.
[Sleep Mode]:
The camera is automatically turned off if the camera has not been
used for the time selected on the setting.
[10MIN.]/[5MIN.]/[2MIN.]/[1MIN.]/[OFF]
[Economy]
[Auto Monitor Off]:
The monitor is automatically turned off if the camera has not been
used for the time selected on the setting.
[5MIN.]/[2MIN.]/[1MIN.]
[Live View Mode]:
Sets the monitor to display in such a way that power consumption
is reduced.
[NORMAL]/[ECO]
• Press the shutter button halfway or turn the camera off and on to cancel [Sleep Mode].
• To turn the monitor on again, press any button or touch the monitor.
• When [Live View Mode] is set to [ECO] the image quality on the recording screen may be
worse than when it is set to [NORMAL], but this does not affect the recorded image.
• When [Live View Mode] is set to [NORMAL], the usage time is reduced.
• [Economy] does not work in the following cases.
– When connecting to a PC or a printer
– When recording or playing back motion pictures
– During a slide show
– [Multi Exp.]
– [Time Lapse Shot]
• When using the AC adaptor (optional), [Sleep Mode] is disabled.
• When using the AC adaptor (optional), [Auto Monitor Off] is fixed to [5MIN.].
• When using the AC adaptor (optional), [Live View Mode] is fixed to [NORMAL].
Select the USB communication system when connecting the
camera to your PC or your printer with the USB connection cable
(supplied).
[USB Mode]
y [Select on connection]:
Select either [PC] or [PictBridge(PTP)] if you connected the
camera to a PC or a printer supporting PictBridge.
{ [PictBridge(PTP)]:
Set when connecting to a printer supporting PictBridge.
z [PC]:
Set when connecting to a PC.
49
2. Preparations before Recording
This sets how the unit connects to a television etc.
[Video Out]:
Set to match the colour television system in each country.
[NTSC]:
Video output is set to NTSC system.
[PAL]:
Video output is set to PAL system.
• This will operate when the AV cable (optional) or HDMI micro cable is
connected.
[TV Aspect]:
Set to match the type of TV.
[16:9]:
When connecting to a 16:9 screen TV.
[4:3]:
When connecting to a 4:3 screen TV.
• This will work when the AV cable (optional) is connected.
[Output]
[HDMI Mode]:
Set the format for the HDMI output when playing back on the
HDMI compatible high-definition TV connected with this unit using
the HDMI micro cable.
[AUTO]:
The output resolution is automatically set based on the
information from the connected TV.
[1080i]:
The interlace method with 1080 available scan lines is used for
output.
[720p]:
The progressive method with 720 available scan lines is used
for output.
[576p]¢1/[480p]¢2:
The progressive method with 576¢1/480¢2 available scan lines
is used for output.
¢1 When [Video Out] is set to [PAL]
¢2 When [Video Out] is set to [NTSC]
• This will work when the HDMI micro cable is connected.
• If the images are not output on the TV when the setting is [AUTO],
match with the image format your TV can display, and select the
number of effective scanning lines.
(Please read the operating instructions for the TV.)
50
2. Preparations before Recording
Settings that allow this unit to be controlled by the remote control
of the VIERA equipment by automatically coupling this unit with
the VIERA Link compatible equipment using HDMI micro cable.
[ON]:
Remote control operation of the VIERA Link
compatible equipment is enabled.
(Not all operations are possible)
Button operation of the main unit will be limited.
[OFF]:
Operation is performed with the buttons on this
unit.
[VIERA Link]
• This will work when the HDMI micro cable is connected.
• Refer to P290 for details.
Set the output method for 3D pictures.
[3D Playback]
[
]:
Set when connecting to a 3D compatible
television.
[
]:
Set when connecting to a television not
compatible with 3D.
Set this when you would like to view pictures in
2D (conventional image) on a 3D compatible
television.
• This will work when the HDMI micro cable is connected.
• Refer to P286 for the method to play back 3D pictures in 3D.
Stores the location of the last-used menu item for each menu.
[Menu Resume]
[ON]/[OFF]
[Menu Background]
Set the background colour for the menu screen.
• Refer to P39 for details.
[Menu Information]
Explanations of the menu items and settings are displayed on the
menu screen.
[ON]/[OFF]
51
2. Preparations before Recording
[Language]
Set the language displayed on the screen.
• If you set a different language by mistake, select [~] from the menu icons to set the desired
language.
—
[Version Disp.]
• This enables the firmware versions of the camera and lens to be checked.
• Press [MENU/SET] on the version display screen to display information about the software on
the unit.
[Exposure Comp.
Reset]
An exposure value can be reset when the Recording Mode is
changed or the camera is turned off.
[ON]/[OFF]
Set whether to cancel the self-timer when the unit is turned off.
[Self Timer Auto Off]
[ON]/[OFF]
[No.Reset]
Reset the file number of the next recording to 0001.
• The folder number is updated and the file number starts from 0001.
• A folder number between 100 and 999 can be assigned.
The folder number should be reset before it reaches 999. We recommend formatting the card
(P32) after saving the data on a PC or elsewhere.
• To reset the folder number to 100, format the card first and then use this function to reset the
file number.
A reset screen for the folder number will then appear. Select [Yes] to reset the folder number.
[Reset]
The recording or setup/custom settings are reset to the default.
• When the recording setting is reset, the content of the following settings is also reset.
– The [Face Recog.] setting
• When the setup/custom settings are reset, the following settings are also reset.
– The [World Time] setting
– The settings of [Travel Date] (departure date, return date, location)
– The [Profile Setup] setting
– The settings of [Rotate Disp.] and [Delete Confirmation] in the [Playback] menu
• The folder number and the clock setting are not changed.
52
2. Preparations before Recording
[Reset Wi-Fi Settings]
Reset all settings in the [Wi-Fi] menu to factory default settings.
(Excluding [LUMIX CLUB] (P271))
• Always reset the camera when disposing or selling it to prevent personal information saved
within the camera from being misused.
• Always reset the camera after making a copy of personal information when sending the camera
in to be repaired.
[Pixel Refresh]
It will perform optimisation of imaging device and image
processing.
• Imaging device and image processing is optimised when the camera is purchased. Use this
function when bright spots that do not exist in the subject get recorded.
• Turn the camera off and on after the pixels are corrected.
[Sensor Cleaning]
Dust reduction to blow off the debris and dust that have affixed to
the front of the imaging device is performed.
• Dust Reduction Function will operate automatically when the camera is turned on, but you can
use this function when you see dust. (P342)
—
[Format]
• Refer to P32 for details.
53
2. Preparations before Recording
Entering Text
It is possible to enter babies’ and pets’ names and the
locations when recording.
When a screen that looks like the one on the right is
displayed, you can enter characters.
(Only alphabetical characters and symbols can be entered.)
1
Press 3/4/2/1 to select text and then press [MENU/SET] to
register.
• Move the cursor to [
•
•
•
•
2
] and then press [MENU/SET] to switch text between [A]
(capitals), [a] (lower case), [1] (numbers) and [&] (special characters).
To enter the same character again, rotate the control dial right to move the cursor.
The following operations can be performed by moving the cursor to the item and
pressing [MENU/SET]:
– []]: Enter a blank
– [Delete]: Delete a character
– [ ]: Move the entry position cursor to the left
– [ ]: Move the entry position cursor to the right
A maximum of 30 characters can be entered.
(Maximum of 9 characters when setting names in [Face Recog.])
A maximum of 15 characters can be entered for [ ], [ ], [ ], [ ] and [ ].
(Maximum of 6 characters when setting names in [Face Recog.])
Press 3/4/2/1 to move the cursor to [Set] and then press
[MENU/SET] to end text input.
• Text can be scrolled if all of the entered text does not fit on the screen.
54
3. Basic Operation
Tips for taking good pictures
Hold the camera gently with both hands, keep your arms still at your side
and stand with your feet slightly apart.
• Do not cover the flash, the AF assist lamp A or the microphone B with your fingers or
other objects.
• Be careful not to move the camera when you press the shutter button.
• Be sure to remove the lens cap when recording.
∫ When using the interchangeable lens (H-FS12032), pay
attention to the following points
Recording Preparations
• Rotate the zoom ring in the direction of arrow 1 from position A
(the lens is retracted) to position B (12 mm to 32 mm) to extend
the lens.
– When the lens barrel is retracted, images cannot be recorded.
C The lens is retracted
How to Retract the Lens
• Rotate the zoom ring in the direction of arrow 2 from position B
(12 mm to 32 mm) to position A to retract the lens.
– When you are not recording images, we recommend that you retract the lens.
55
3. Basic Operation
Detects orientation of camera (Direction Detection Function)
This function detects the vertical orientation when you record
with the camera vertically orientated.
When you play back the recording, the recording is
automatically displayed in vertical orientation.
(Only available when [Rotate Disp.] (P235) is set to [ON].)
• When recording with this unit, Direction Detection can be performed even if you are using a
lens that is not compatible with the Direction Detection Function.
• When the camera is held vertically and tilted significantly up or down to record, the Direction
Detection Function may not work correctly.
• Motion pictures taken with the camera held vertically are not displayed vertically.
56
3. Basic Operation
Taking a Still picture
• Set the drive mode to [
1
2
] (single) by pressing 4(
).
Select the Recording Mode. (P61)
Press the shutter button halfway to focus.
A Aperture value
B Shutter speed
• Aperture value and shutter speed are displayed.
(It will flash in red if the correct exposure is not achieved,
except when set to flash.)
• When the image is correctly focused, the picture will
be taken, since the [Focus/Release Priority] (P146) is
set initially to [FOCUS].
• The focus indication is displayed as [ LOW ] in a dark
environment, and focusing may take longer than usual.
D
C
3.5 60
AB
When the subject is
focused
When the subject is not
focused
Focus indication C
On
Blinks
AF area D
Green
—
Sound
Beeps 2 times
—
Focus
3
Press the shutter button fully (push it in
further), and take the picture.
57
3. Basic Operation
• If you zoom in/out after focusing on a subject, the focus may lose its accuracy. In that case,
re-adjust the focus.
• The focus range is different depending on the lens used.
When the interchangeable lens
(H-FS12032) is used
0.2 m (0.66 feet) to ¶ (from the focus distance
reference line)
(focal length 12 mm to 20 mm)
0.3 m (0.98 feet) to ¶ (from the focus distance
reference line)
(focal length 21 mm to 32 mm)
When the interchangeable lens
(H-H020A) is used
0.2 m (0.66 feet) to ¶ (from the focus distance
reference line)
Subjects and recording conditions which are difficult to focus
• Fast-moving subjects, extremely bright subjects or subjects without contrast.
• When recording subjects through windows or near shiny objects.
• When it is dark or when jitter occurs.
• When the camera is too close to the subject or when taking a picture of both distant and near
subjects.
Displaying a picture right after it is taken
[MENU] >
[Custom] > [Auto Review]
[Duration Time]
Set the length of time that the picture is displayed after taking the
still picture.
[HOLD]:
The pictures are displayed until shutter button is pressed halfway.
[5SEC]/[4SEC]/[3SEC]/[2SEC]/[1SEC]/[OFF]
[Playback Operation
Priority]
[ON]
Switching the display of the playback screen, deleting
pictures, etc. are possible during [Auto Review].
[OFF]
Button operations during [Auto Review] become the
same as those for recording.
58
3. Basic Operation
Taking pictures using the Touch Shutter function
Just by touching the subject you want as your point of focus, the camera will focus on the
subject and take the picture automatically.
1
Touch [ ].
2
Touch [
× ].
• Icon will change to [
], and taking a picture with the
Touch Shutter function becomes possible.
AE
3
Touch the subject you wish to focus on, and then take a picture.
• The picture is taken when the focus is achieved.
∫ To cancel the Touch Shutter function
Touch [
].
• If shooting with the touch shutter fails, the AF area turns red and disappears. In that case, try
again.
• Measurement of brightness is performed on the spot touched when the [Metering Mode] (P161)
is set to [ ].
At the edge of the screen, the metering may be affected by the brightness around the touched
location.
59
3. Basic Operation
Recording Motion Picture
This camera can record full high definition motion pictures compatible with the AVCHD
format or motion pictures recorded in MP4.
Audio will be recorded in stereo.
1
Start recording by pressing the motion picture
button.
A Elapsed recording time
B Available recording time
• Recording of motion picture appropriate for each mode is
A
possible.
• The recording state indicator (red) C will flash while
recording motion pictures.
3s
• If approximately 1 minute elapses without an operation
being performed, part of the display will disappear. Press
[DISP.] or touch the monitor to make the display reappear.
• Release the motion picture button right after you press it.
C
R1m37s
B
2
Stop the recording by pressing the motion
picture button again.
60
3. Basic Operation
Selecting the Recording Mode
Select the mode by rotating the mode dial.
• Rotate the mode dial slowly to select the desired mode.
Intelligent Auto Mode
(P73)
The subjects are recorded using settings automatically
selected by the camera.
Intelligent Auto Plus Mode Allows you to adjust the brightness and colour hue when
(P81)
in Intelligent Auto Mode.
Programme AE Mode
(P83)
Records at the aperture value and shutter speed set by
the camera.
Aperture-Priority AE Mode The shutter speed is automatically determined by the
(P86)
aperture value you set.
Shutter-Priority AE Mode
(P87)
The aperture value is automatically determined by the
shutter speed you set.
Manual Exposure Mode
(P88)
The exposure is adjusted by the aperture value and the
shutter speed which are manually adjusted.
Creative Video Mode
(P116)
Records motion pictures with a manually set aperture
value and shutter speed.
¢ You cannot take still pictures.
Custom Mode (P118)
Use this mode to take pictures with previously registered
settings.
Scene Guide Mode (P93)
This mode allows you to take pictures that match the
scene being recorded.
Creative Control Mode
(P104)
Record while checking the image effect.
61
3. Basic Operation
Switching the Information Displayed on the
recording screen
Press [DISP.] to change.
ュリヴヱハ
• Screen will switch as follows:
With
information¢
50 i
4:3
L
0
With information
(tilt sensor
display)¢
Without
information
AFS
50 i
98
4:3
L
0
Without
information
(tilt sensor
display)
AFS
98
¢ Histograms are displayed when the [Histogram] of the [Custom] menu is set to [ON].
It is also possible to display the Exposure meter by setting the [Expo.Meter] of the [Custom]
menu to [ON]. (P84)
• If approximately 1 minute elapses without an operation being performed, part of the display will
disappear. Press [DISP.] or touch the monitor to make the display reappear.
62
3. Basic Operation
Displaying/not displaying the histogram
[MENU] >
[Custom] > [Histogram] > [ON]/[OFF]
You can set the position by pressing 3/4/2/1.
• Direct touch operation is also possible from the recording screen.
• A histogram is a graph that displays brightness along the
horizontal axis (black to white) and the number of pixels at each
brightness level on the vertical axis.
It allows you to easily check a picture’s exposure.
A dark
B bright
• When the recorded picture and the histogram do not match each other under the
following conditions, the histogram is displayed in orange.
– When the Manual Exposure Assistance is other than [n0] during Exposure Compensation or
in the Manual Exposure Mode
– When the flash is activated
– When suitable exposure is not achieved with the flash closed
– When the brightness of the screen is not correctly displayed in dark places
• The histogram is an approximation in the Recording Mode.
• The histogram displayed in this camera does not match histograms displayed by picture editing
software used in PCs etc.
Displaying/not displaying the guide lines
[MENU] >
[Custom] > [Guide Line] > [
]/[
]/[
]/[OFF]
When [
] is set, guideline positions can be set by pressing 3/4/2/
1.
• You can also set the position directly by touching [ ] on the guideline
of the recording screen.
63
3. Basic Operation
∫ About the tilt sensor display
With the tilt sensor displayed, it is easy to correct the tilt of the camera etc.
1
2
Press [DISP.] to display the tilt sensor.
Check the tilt of the camera.
A Horizontal direction:
Correcting tilt to the left
B Vertical direction:
Correcting downward tilt
• When the tilt of the camera is little, the indicator changes to green.
• When recording with a vertical orientation, the display automatically switches to a
vertically orientated display.
• Even after correcting the tilt, there may still be an error of approximately n1°.
• When a function button is set to [Level Gauge], the tilt sensor display can be switched on/off by
pressing the function button.
Not available in these cases:
• Tilt sensor display may not be displayed correctly when this unit is in motion.
• When tilted significantly upwards or downwards to record, the tilt sensor display may not be
displayed correctly, and the Direction Detection Function (P56) may not work correctly.
64
3. Basic Operation
Playing Back Pictures/Motion Pictures
Playing Back Pictures
1
Press [(].
2
Press 2/1.
2:
Play back the previous picture
1:
Play back the next picture
1/98
• If you press and hold 2/1, you can play back the
pictures in succession.
• It is also possible to forward or rewind the image by dragging the screen horizontally
(P15).
• You can forward or rewind pictures continuously by keeping your finger on the left or
right sides of the screen after forwarding/rewinding a picture.
(Pictures are displayed reduced in size)
• Speed of picture forwarding/rewinding changes depending on the playback status.
Switching the speed for forwarding or rewinding pictures continuously
[MENU] >
[Custom] > [Touch Scroll] > [H] (High speed)/[L] (Low speed)
∫ To finish playback
Press [(] again, press the shutter button halfway or press the motion picture
button.
Not available in these cases:
• This camera complies with the DCF standard “Design rule for Camera File system” established
by JEITA “Japan Electronics and Information Technology Industries Association” and with Exif
“Exchangeable Image File Format”.
This camera can only display pictures that comply with the DCF standard.
• The camera may not play back images recorded on other devices correctly, and the functions
of the camera may not be available for the images.
65
3. Basic Operation
Using the Playback Zoom
Rotate the control dial to the right.
A
1k 2k 4k 8k 16k
• If the control dial is rotated to the left after the image is enlarged,
2.0X
the magnification will be reduced.
• You can also enlarge/reduce the image by pinching out/pinching
in (P15) on the part you want to enlarge/reduce.
• When you change the magnification, the zoom position indication
A appears for about 1 second.
• The more a picture is enlarged, the more its quality deteriorates.
• You can move the enlarged part by pressing 3/4/2/1 of the
cursor button or dragging the screen. (P15)
• You can also enlarge (2k) the image by double-touching the part
you want to enlarge. If you double-touch the enlarged image, the
magnification is reset to 1k.
Displaying multiple screens (Multi Playback)
Rotate the control dial to the left.
1/98
1 screen 12 screens 30 screens Calendar screen
display
• If the control dial is rotated to the right, the previous playback
screen will be displayed.
• It is possible to switch the playback screen by touching the
following icons.
–[
]: 1 screen
–[
]: 12 screens
–[
]: 30 screens
– [ CAL ]: Calendar screen display
• The screen can be switched gradually by dragging the screen up
or down.
• Pictures displayed using [
] cannot be played back.
∫ To return to Normal Playback
Press 3/4/2/1 to select a picture and then press [MENU/SET].
66
3. Basic Operation
Displaying Pictures by Recording Date (Calendar Playback)
1
Rotate the control dial to the left to display the calendar screen.
2
3
Press 3/4/2/1 to select the date to be played back.
4
Press [MENU/SET] to display the images that are
recorded in selected date.
Press 3/4/2/1 to select a picture and then press
[MENU/SET].
• The recording date of the picture selected in the playback screen becomes the date selected
when the Calendar screen is first displayed.
• You can display the Calendar between January 2000 and December 2099.
• If the date is not set in the camera, the recording date is set as the 1st January, 2013.
• If you take pictures after setting the travel destination in [World Time], the pictures are
displayed by the dates at the travel destination in Calendar Playback.
67
3. Basic Operation
Playing Back Motion Pictures
This unit was designed to play motion pictures using the AVCHD, MP4 and QuickTime
Motion JPEG formats.
• Motion pictures are displayed with the motion picture icon
([
A
]).
Press 3 to play back.
12s
A Motion picture recording time
• After playback starts, the elapsed playback time is displayed on
the screen.
For example, 8 minutes and 30 seconds is displayed as
[8m30s].
• Some information (recording information, etc.) is not displayed
for motion pictures recorded in [AVCHD].
• Touching [
] in the middle of the screen allows you to play back motion pictures.
∫ Operations during Motion Picture Playback
Button
Touch
operation operation
3
Description of
operation
Button
Touch
operation operation
4
Play/Pause
Fast rewind¢
2
Description of
operation
Stop
Fast forward¢
Frame-by-frame
rewind
(while pausing)
1
Frame-by-frame
forward
(while pausing)
Increase volume
level
Reduce volume level
¢ The fast forward/rewind speed increases if you press 1/2 again.
• Control panel disappears after approximately 2 seconds if no operation is performed. Touch
the screen to redisplay the control panel.
• To play back the motion pictures recorded by this unit on a PC, use the “PHOTOfunSTUDIO”
software on the CD-ROM (supplied).
68
3. Basic Operation
Changing the information displayed on the playback screen
Press [DISP.] to switch the monitor screen.
ュリヴヱハ
• Screen will switch as follows:
Detailed
information
display¢2
With
information¢1
4:3
L
1/98
98
Histogram
display¢2
Without
information
(Highlight
display)¢1, 2, 3, 4
60
F3.5
0
AWB
ISO 200
WB
F3.5 60
0
200
AWB
4:3
L
AFS
P STD.
'(&
s
100-0001
RGB
F3.5 60
0 ISO200
1/98
100-0001
Without
information¢4
¢1 If approximately 1 minute elapses without an operation being performed, part of the display
will disappear. Press [DISP.] or touch the monitor to make the display reappear.
¢2 Not displayed during playback zoom, motion picture playback, sequential playback or a slide
show.
¢3 This is displayed if [Highlight] (P70) in the [Custom] menu is set to [ON].
¢4 If no operation is performed for a number of seconds, [
] and other touch icons will
disappear.
• Histogram is displayed in R (red), G (green), B (blue), and Y (luminance) during the playback.
69
3. Basic Operation
Displaying/not displaying white saturated areas
[MENU] >
[Custom] > [Highlight] > [ON]/[OFF]
When the Auto Review function is activated or when playing back, white saturated areas
appear blinking in black and white.
This does not affect the recorded image.
• If there are any white saturated areas, we
[ON]
recommend compensating the exposure towards
negative (P157) referring to the histogram (P63) and
then taking the picture again. It may result in a better
quality picture.
• This does not work while in Multi Playback, Calendar
Playback, or Playback Zoom.
70
[OFF]
3. Basic Operation
Deleting Pictures
Once deleted, pictures cannot be recovered.
• Pictures that are not in the DCF standard or those that are protected cannot be deleted.
To delete a single picture
1
In Playback Mode, select the picture to delete
and then press [ ].
• The same operation can be performed by touching [
2
Press 3 to select [Delete Single] and then
press [MENU/SET].
].
'HOHWH6LQJOH
'HOHWH0XOWL
• Confirmation screen is displayed.
'HOHWH$OO
Picture is deleted by selecting [Yes].
[Delete Confirmation] in the [Playback] menu enables you to set which option
on the delete confirmation screen, [Yes] or [No], will be highlighted first.
The default setting is [No]. (P240)
71
3. Basic Operation
To delete multiple pictures (up to 100¢) or all the pictures
¢ Picture groups are treated as a single picture.
(All the pictures in the selected picture group will be deleted.)
1
2
In Playback Mode, press [
].
Press 3/4 to select [Delete Multi] or [Delete All] and then press
[MENU/SET].
• [Delete All] > Confirmation screen is displayed.
Pictures are deleted by selecting [Yes].
• It is possible to delete all pictures except the ones set as favourite when [All Delete
Except Favorite] is selected with the [Delete All] set.
3
(When [Delete Multi] is selected)
Press 3/4/2/1 to select the picture, and
then press [MENU/SET] to set. (Repeat this
step.)
2.
• [‚] appears on the selected pictures.
If [MENU/SET] is pressed again, the setting is cancelled.
4
(When [Delete Multi] is selected)
Press 2 to select [OK], and then press [MENU/SET] to execute.
• Confirmation screen is displayed.
Pictures are deleted by selecting [Yes].
• Do not turn the camera off while deleting. Use a battery with sufficient battery power or the AC
adaptor (optional) (P305).
• Depending on the number of pictures to be deleted, it may take some time to delete them.
72
4. Recording Modes
Taking Pictures using the Automatic Function
(Intelligent Auto Mode)
Recording Mode:
In this mode, the camera makes the optimal settings for the subject and scene, so we
recommend it when you wish to leave the settings to the camera and record without
thinking about them.
• Setting main functions automatically, Intelligent Auto Mode allows you to record images without
having to make complex settings.
If you want to adjust some settings manually to your preference, use Intelligent Auto Plus
Mode.
(±: possible, —: not possible)
Intelligent Auto Plus Mode
Intelligent Auto Mode
Setting the brightness
±
—
Setting the colour tone
±
—
Defocus Control
±
±
Menus that can be set
1
Refer to P82 for details.
Set the mode dial to [¦].
• The camera will switch to either the most recently used
of Intelligent Auto Mode or Intelligent Auto Plus Mode.
At the time of purchase, the mode is set to Intelligent
Auto Plus Mode. (P81)
2
Align the screen with the subject.
• When the camera identifies the optimum scene, the icon
of the scene concerned is displayed in blue for 2 seconds,
after which its colour changes to the usual red. (Automatic
scene detection)
• When the subject is touched, AF Tracking function works.
It is also possible by pressing the cursor button towards
2, and then pressing the shutter button halfway.
For details, refer to P139.
73
50 i
4
4. Recording Modes
∫ Functions that work automatically
• The following functions are performed automatically to allow the camera to make the optimal
settings.
– Scene Detection
– Backlight Compensation
– Face Detection
– Auto White Balance
– Intelligent ISO sensitivity control
– [Red-Eye Removal]
– [i.Resolution]
– [i.Dynamic]
– [Long Shtr NR]
– [Shading Comp.]
– [Quick AF]
– [AF Assist Lamp]
∫ Scene Detection
When taking pictures
[i-Portrait]
[i-Scenery]
[i-Macro]
[i-Night Portrait]¢1
[i-Night Scenery]
[iHandheld Night Shot]¢2
[i-Food]
[i-Baby]¢3
[i-Sunset]
¢1 Only displayed when the built-in flash is open.
¢2 Only displayed when [iHandheld Night Shot] is set to [ON]. (P76)
¢3 When [Face Recog.] is set to [ON], [ ] will be displayed for birthdays of registered faces
already set only when the face of a person 3 years old or younger is detected.
74
4. Recording Modes
When recording motion pictures
[i-Portrait]
[i-Scenery]
[i-Low Light]
[i-Macro]
• Due to conditions such as the ones below, a different scene may be identified for the same
subject.
– Subject conditions: When the face is bright or dark, the size, colour and shape of the
subject, the distance to the subject, the contrast of the subject, when the subject is moving
– Recording conditions: Sunset, sunrise, under low brightness conditions, when the camera
is shaken, when zoom is used
• [¦] is set if none of the scenes are applicable, and the standard settings are set.
• When [ ], [ ] or [ ] is selected, the camera automatically detects a person’s face, and it
will adjust the focus and exposure. (Face Detection)
• If a tripod is used, for instance, and the camera has judged that camera shake is minimal when
the scene detection has been identified as [ ], the shutter speed will be slower than normal.
Take care not to move the camera while taking pictures.
• An optimum scene for the specified subject will be chosen when set to AF tracking.
• When [Face Recog.] is set to [ON], and the face similar to the registered face is detected, [R] is
displayed in the top right of [ ], [ ] and [ ].
∫ About the flash
Flash mode is set to [Œ] when the flash is closed, and [
] (AUTO) when it is open.
When the flash is open, the camera automatically sets [
], [
] (AUTO/Red-Eye
Reduction), [
] or [ ] to match the type of subject and brightness.
• Open the flash when the flash is to be used. (P200)
• When [
] or [
] is set, Red-Eye Removal is enabled.
• Shutter speed will be slower during [
] or [
].
The Backlight Compensation
• When there is a backlight, the subject appears darker and the camera will automatically
attempt to correct it by increasing the brightness of the picture.
In Intelligent Auto Plus Mode or Intelligent Auto Mode, backlight compensation works
automatically.
75
4. Recording Modes
Recording night scenes ([iHandheld Night Shot])
Recording Mode:
When [iHandheld Night Shot] is set to [ON] and [ ] is detected while taking handheld
night shots, pictures of the night scenery will be taken at a high burst speed and composed
into a single picture.
This mode is useful if you want to take stunning night shots with minimal jitter and noise,
without using a tripod.
[MENU] >
[Rec] > [iHandheld Night Shot] > [ON]/[OFF]
• The angle of view will be slightly narrower.
• A message notifying that multiple pictures will be taken is displayed. Do not move the camera
during the continuous shooting after pressing the shutter button.
] will not be detected.
• If the camera is mounted on a tripod or other type of stand, [
• Flash is fixed to [Œ] (forced flash off).
Not available in these cases:
• [iHandheld Night Shot] does not work for the pictures taken during a motion picture recording.
• This function is not available in the following cases:
– When [Quality] is set to [
], [
] or [
]
– When [Ex. Tele Conv.] in the [Rec] menu is set
– When using [Time Lapse Shot]
– When using [Stop Motion Animation] (only when [Auto Shooting] is set)
76
4. Recording Modes
Combining pictures into a single picture with rich gradation ([iHDR])
Recording Mode:
When [iHDR] is set to [ON] and there is, for example, strong contrast between the
background and the subject, multiple still pictures are recorded with differing exposures
and combined to create a single still picture rich in gradation.
[iHDR] works automatically as needed. When it does, [
] is displayed on the screen.
[MENU] >
[Rec] > [iHDR] > [ON]/[OFF]
• The angle of view will be slightly narrower.
• A message notifying that multiple pictures will be taken is displayed. Do not move the camera
during the continuous shooting after pressing the shutter button.
• You cannot take the next picture until the combination of pictures is complete.
• A moving subject may be recorded with unnatural blurs.
Not available in these cases:
• [iHDR] does not work for the pictures taken during a motion picture recording.
• This function is not available in the following cases:
– When recording using the flash
– When recording in Burst Mode
– When recording with Auto Bracket
– When [Quality] is set to [
], [
] or [
]
– When [Ex. Tele Conv.] in the [Rec] menu is set
– When using [Time Lapse Shot]
– When using [Stop Motion Animation] (only when [Auto Shooting] is set)
77
4. Recording Modes
Taking a picture with a blurred background (Defocus Control)
Recording Mode:
You can easily set the blurriness of the background while checking the screen.
1
Press 3 to display the setting screen.
• Each time 3 is pressed in Intelligent Auto Plus Mode, the camera switches between
brightness setting operation (P79), Defocus Control operation, and normal operation.
• Each time 3 is pressed in Intelligent Auto Mode, the camera switches between Defocus
Control operation and normal operation.
2
Rotate the control dial to set the blurriness.
SS
F
Strong defocus
500
250
125
60
30
4.0
5.6
8.0
Weak defocus
∫ When operating the touch screen
1 Touch [
2 Touch [
].
] to display the setting screen.
3 Drag the exposure meter to set the blurriness.
• Press [MENU/SET] to end the Defocus Control operation.
AE
• Pressing [
] on the blurriness setting screen will cancel the setting.
• In Intelligent Auto Mode (
or
), Auto Focus Mode is set to [ Ø].
The position of the AF area can be set by touching the screen. (Its size cannot be changed)
• Depending on the lens used, you may hear a sound from the lens when the Defocus Control is
used, but this is due to operation of the aperture of the lens and it is not a malfunction.
• Depending on the lens used, operational sound of the Defocus Control may be recorded during
the recording of a motion picture when the function is used.
Not available in these cases:
• Depending on the lens used, Defocus Control function may not operate.
Refer to the website for compatible lenses.
78
4. Recording Modes
Recording images by changing the brightness or colour tone
Recording Mode:
This mode enables you to change the brightness and colour tone to your preferred
settings from the ones set by the camera.
Setting brightness
1
Press 3 to display the setting screen.
• Each press of 3 switches among brightness setting, Defocus Control (P78) and end
2
Rotate the control dial to adjust brightness.
operation.
±0
-5 -4 -3 -2 -1 0 +1 +2 +3 +4 +5
79
4. Recording Modes
Setting colour
1
2
Press 1 to display the setting screen.
Rotate the control dial to adjust colour.
• This will adjust the colour of the image from a reddish
colour to a bluish colour.
• Press [MENU/SET] to return to the recording screen.
A
B
∫ Change the settings by using the touch panel
1 Touch [
].
2 Touch the item you want to set.
[
]: Colour tone
[
]: Brightness
3 Drag the slide bar to set.
• Press [MENU/SET] to return to the recording screen.
• If the [Exposure Comp. Reset] is set to [ON], the brightness setting will return to the default
level (centre point) when this unit is turned off or the camera is switched to another Recording
Mode.
• The colour setting will return to the default level (centre point) when this unit is turned off or the
camera is switched to another Recording Mode.
80
4. Recording Modes
About Intelligent Auto Plus Mode and Intelligent Auto Mode
∫ Switching between Intelligent Auto Plus Mode and Intelligent Auto Mode
1 Press [MENU/SET].
2
3
4
Press 2.
Press 3/4 to select the [
] or [
] tab.
Press 2/1 to select [
] or [
] and then press
[MENU/SET].
• If [DISP.] is pressed, the description of the selected mode
will be displayed.
It is also possible to display the
selection screen by touching the
Recording Mode icon in recording
screen.
81
4. Recording Modes
∫ Menus that can be set
Only the following menus can be set.
Intelligent Auto Plus Mode
Menu
Item
[Rec]
[Photo Style]/[Aspect Ratio]/[Picture Size]/[Quality]/[Burst Rate]/[Auto
Bracket]/[Self Timer]/[iHandheld Night Shot]/[iHDR]/[Time Lapse Shot]/[Stop
Motion Animation]/[Shutter Type]/[Ex. Tele Conv.]/[Color Space]/[Stabilizer]/
[Face Recog.]/[Profile Setup]
[Motion
Picture]
[Photo Style]/[Rec Format]/[Rec Quality]/[Continuous AF]/[Ex. Tele Conv.]/
[Mic Level Disp.]/[Mic Level Adj.]/[Wind Cut]
[Custom]
[Silent Mode]/[Half Press Release]/[AFS/AFF]/[Pinpoint AF Time]/[Pinpoint AF
Display]/[Focus/Release Priority]/[AF+MF]/[MF Assist]/[MF Assist Display]/
[MF Guide]/[Peaking]/[Histogram]/[Guide Line]/[Highlight]/[Constant Preview]/
[Dial Guide]/[Rec Area]/[Remaining Disp.]/[Auto Review]/[Fn Button Set]/
[Q.MENU]/[Video Button]/[Power Zoom Lens]/[Lens w/o Focus Ring]/[Touch
Settings]/[Touch Scroll]/[Menu Guide]/[Shoot w/o Lens]
[Setup]
All menu items can be set. (P45)
Intelligent Auto Mode
Menu
Item
[Rec]
[Aspect Ratio]/[Picture Size]/[Burst Rate]/[Self Timer]/[iHandheld Night Shot]/
[iHDR]/[Time Lapse Shot]/[Stop Motion Animation]/[Face Recog.]
[Motion
Picture]
[Rec Format]/[Rec Quality]
[Custom]
[Silent Mode]/[AFS/AFF]/[Guide Line]/[Remaining Disp.]
[Setup]
All menu items can be set. (P45)
82
4. Recording Modes
Taking Pictures with Your Favourite Settings
(Programme AE Mode)
Recording Mode:
The camera automatically sets the shutter speed and the aperture value according to the
brightness of the subject.
You can take pictures with greater freedom by changing various settings in the [Rec]
menu.
1
2
3
Set the mode dial to [
].
Press the shutter button halfway and display
the aperture value and shutter speed value
on the screen.
SS
F
250
125
4.0 60
60
30
15
4.0
5.6
8.0
0
200
98
A
While the values are displayed (about
10 seconds), perform the Programme Shift by rotating the control
dial.
A Programme Shift indication
• During display of the numerical values, each press of the cursor button 3 switches
between Programme Shift and Exposure Compensation. (P157)
• To cancel Programme Shift, turn the camera off or rotate the control dial until the
Programme Shift indication disappears.
Programme Shift is easily cancelled by setting [Fn Button Set] on the [Custom] menu to
[One Push AE]. (P92)
83
4. Recording Modes
Displaying/not displaying the exposure meter
[MENU] >
[Custom] > [Expo.Meter] > [ON]/[OFF]
B Exposure meter
SS 250 125 60 30 15
• Set to [ON] to display the Exposure meter when correcting
4.0 5.6 8.0
F
exposure, performing Programme Shift, setting aperture, and
0 200
98
4.0 60
setting shutter speed.
• Unsuitable areas of the range are displayed in red.
B
• When the Exposure meter is not displayed, switch the display
information for screen by pressing [DISP.]. (P62)
• The Exposure meter disappears after approximately 4 seconds if no operation is performed.
• If the exposure is not adequate when the shutter button is pressed halfway, the aperture value
and shutter speed turn red and blink.
84
4. Recording Modes
Programme Shift
In Programme AE Mode, you can change the preset aperture value and shutter speed
without changing the exposure. This is called Programme Shift.
You can make the background more blurred by decreasing the aperture value or record a
moving subject more dynamically by slowing the shutter speed when taking a picture in
Programme AE Mode.
Example of Programme Shift
[When the interchangeable lens (H-FS12032) is used]
㧙1
0
1
2
3
4
5
6
7
8
9 10 11 12 13 14 15 16 㧔'X㧕
2
17
2.8
18
4
19
(A) 5.6
20
8
21
11
22
16
23
22
4
2
1
1/2 1/4 1/8 1/15 1/30 1/60 1/125 1/250 1/500 1/1000 1/2000 1/4000 1/8000 1/16000
(B)
(A): Aperture value
(B): Shutter speed
1 Programme Shift amount
2 Programme Shift line chart
3 Programme Shift limit
• “EV” is an abbreviation of “Exposure Value”.
The EV changes with the aperture value or the shutter speed.
Not available in these cases:
• Programme Shift is available in all [Sensitivity] settings except [
85
].
4. Recording Modes
Taking Pictures by Specifying the Aperture/
Shutter Speed
Recording Mode:
• The effects of the set aperture value and shutter speed will not be visible on the recording
screen. To check on the recording screen, please use [Preview]. (P90)
• The brightness of the screen and the recorded pictures may differ. Check the pictures on the
playback screen.
Aperture-Priority AE Mode
Set the aperture value to a higher number when you want a sharp focus background. Set
the aperture value to a lower number when you want a soft focus background.
1
2
Set the mode dial to [
].
Rotate the control dial to set the aperture
value.
A Aperture value
B Exposure meter
SS
F
60
4.0
30
5.6
15
8.0
8
11
4
16
8.0
A
Aperture value:
Reduces
It becomes easier to
defocus the
background.
B
Aperture value:
Increases
It becomes easier to
maintain focus as far
as the background.
• Each press of the cursor button 3 switches between Aperture Setting and Exposure
Compensation.
• Rotate the control dial to display the Exposure Meter. Unsuitable areas of the range are
displayed in red.
• If the exposure is not adequate, the aperture value and the shutter speed turn red and blink
when the shutter button is pressed halfway.
• When using a lens having an aperture ring, set the position of the aperture ring to [A] to activate
the control dial setting. At positions other than [A], the ring setting will take priority.
86
4. Recording Modes
Shutter-Priority AE Mode
When you want to take a sharp picture of a fast moving subject, set with a faster shutter
speed. When you want to create a trail effect, set to a slower shutter speed.
1
2
Set the mode dial to [
].
Rotate the control dial to set the shutter
speed.
A Shutter speed
B Exposure meter
SS
F
60
125
250
500
11
8.0
5.6
4.0
1000
250
A
Shutter speed:
Slow
It becomes easier to
express movement.
B
Shutter speed:
Fast
It becomes easier to
freeze movement.
• Each press of the cursor button 3 switches between Shutter Speed Setting and
Exposure Compensation.
• Rotate the control dial to display the Exposure Meter. Unsuitable areas of the range are
displayed in red.
• If the exposure is not adequate, the aperture value and the shutter speed turn red and blink
when the shutter button is pressed halfway.
• We recommend using a tripod when the shutter speed is slow.
Not available in these cases:
• When the flash is activated, the fastest shutter speed that can be selected is 1/50th of a
second. (P203)
• When the electronic front curtain shutter is used, shutter speeds faster than 1/500th of a
second cannot be set.
• When the electronic shutter is used, shutter speeds slower than 1 second cannot be set.
87
4. Recording Modes
Manual Exposure Mode
Determine the exposure by manually setting the aperture value and the shutter speed.
The Manual Exposure Assistance appears on the lower portion of the screen to indicate
the exposure.
1
2
Set the mode dial to [
].
A
Rotate the control dial to set the aperture
value and shutter speed.
A
B
C
D
Exposure meter
Aperture value
Shutter speed
Manual Exposure Assistance
SS
F
8
15
30
4.0
5.6
5.6 30
0
60
125
8.0
11
+3
B C D
Aperture value
Reduces
It becomes easier to defocus the
background.
Increases
It becomes easier to maintain
focus as far as the background.
Slow
It becomes easier to express
movement.
Fast
It becomes easier to freeze
movement.
Shutter speed
• Each press of the cursor button 3 switches between Aperture Setting and Shutter
Speed Setting.
88
4. Recording Modes
Manual Exposure Assistance
0
−3
0
The exposure is adequate.
+3
Set to faster shutter speed or larger aperture value.
0
Set to slower shutter speed or smaller aperture value.
• The Manual Exposure Assistance is an approximation. We recommend checking the pictures
on the playback screen.
Checking/not checking the effects of aperture and shutter speed on the
recording screen
[MENU] >
[Custom] > [Constant Preview] > [ON]/[OFF]
• Close the flash.
• It can only be used with Manual Exposure Mode.
• Rotate the control dial to display the Exposure Meter. Unsuitable areas of the range are
displayed in red.
• If the exposure is not adequate, the aperture value and the shutter speed turn red and blink
when the shutter button is pressed halfway.
• We recommend using a tripod when the shutter speed is slow.
• When you use a lens with an aperture ring, the aperture ring setting takes priority.
Not available in these cases:
• When the flash is activated, the fastest shutter speed that can be selected is 1/50th of a
second. (P203)
• When the electronic front curtain shutter is used, shutter speeds faster than 1/500th of a
second cannot be set.
• When the electronic shutter is used, shutter speeds slower than 1 second cannot be set.
89
4. Recording Modes
Confirm the Effects of Aperture and Shutter Speed (Preview Mode)
Applicable modes:
The effects of aperture and shutter speed can be checked by using the Preview Mode.
• Confirm the effects of aperture: You can check the depth of field (effective focus range)
before taking a picture by closing the leaf shutter to the aperture value you set.
• Confirm the effects of shutter speed: Movement can be confirmed by displaying the actual
picture that will be taken with that shutter speed.
When the shutter speed is set for high speed, display in the shutter speed preview will be
displayed like a time-release film. It is used in cases such as stopping the movement of running
water.
1
Set a function button to [Preview]. (P43)
• The following step is an example in which [Preview] is assigned to [Fn2].
2
3
Touch [
].
Switch the confirmation screen by touching [Fn2].
• The screen switches each time [Fn2] is touched.
Normal recording screen
Aperture effect preview
screen
Shutter speed effect
preview screen
Fn2
Fn2
Fn2
Fn3
Fn6
Fn3
Fn6
Fn3
Fn4
Fn4
Fn4
Fn5
Fn5
Fn6
Fn3
6KWU6SHHG(IIHFW2Q Fn2
90
Fn6
Fn5
6KWU6SHHG(IIHFW2II Fn2
Fn6
4. Recording Modes
Depth of field properties
¢1
Aperture value
Small
Focus length of the lens
Tele
Wide
Distance to the subject
Near
Distant
Shallow (Narrow)¢2
Deep (Wide)¢3
Depth of field (effective focus range)
Large
¢1 Recording conditions
¢2 Example: When you want to take a picture with a blurred background etc.
¢3 Example: When you want to take a picture with everything in focus including the background
etc.
• It is possible to record while in Preview Mode.
• Range for shutter speed effect check is 8 seconds to 1/1000th of a second.
91
4. Recording Modes
Easily set aperture/shutter speed for suitable exposure (One Push AE)
Applicable modes:
When the exposure setting is too bright or too dark, you can use one push AE to achieve a
suitable exposure setting.
How to tell if the exposure is not adequate
• If the aperture values and shutter speed blink red A when
the shutter button is pressed halfway.
• If the Manual Exposure Assistance is anything other than
3.5 16000
when in Manual Exposure mode.
For more details on Manual Exposure Assistance, refer to
P89.
1
2
3
-3
0
200
98
A
Set a function button to [One Push AE]. (P43)
• The following step is an example in which [One Push AE] is assigned to [Fn5].
Touch [ ].
(When exposure is not adequate)
Touch [Fn5].
SS
F
3.5 16000
-3
0
200
98
15
30
60
125
4.0
250
5.6
Fn5
AE
8.0
Fn6
3.5 60
0
200
• The exposure meter is displayed, and the aperture and shutter speed are changed to give
a suitable exposure.
• In the following cases, suitable exposure cannot be set.
– When the subject is extremely dark and it is not possible to achieve adequate exposure
by changing the aperture value or shutter speed
– When recording using the flash
– In Preview Mode (P90)
– When using a lens that includes an aperture ring
92
4. Recording Modes
Taking Pictures that match the Scene being
recorded (Scene Guide Mode)
Recording Mode:
If you select a scene to suit the subject and recording conditions with reference to the
example images, the camera will set optimal exposure, colour, and focus, allowing you to
record in a manner appropriate to the scene.
1
2
Set the mode dial to [
].
Press 2/1 to select the scene.
• The scene can also be selected by dragging an example
image or the slide bar.
3
Press [MENU/SET] to set.
• It is also possible to display the selection screen by touching the
Recording Mode icon in recording screen.
7
∫ Switching the scene selection screen display
Press [DISP.] to switch the monitor screen.
• When it is set to the guide display, tips for creating picture effects suitable for each scene, etc.
is displayed.
Normal display
Guide display
93
List display
4. Recording Modes
Displaying/not displaying the selection screen when the mode dial is
switched to
/ .
[MENU] >
[Custom] > [Menu Guide]
[ON]:
Displays the selection screen for the Scene Guide or the Creative Control Mode.
[OFF]:
Displays the recording screen of the currently selected mode of the Scene Guide or the
Creative Control Mode.
• To change the Scene Guide Mode, select the [
] tab on the menu screen, select [Scene
Switch], and then press [MENU/SET]. You can return to step 2 on P93.
• The following items cannot be set in Scene Guide Mode because the camera automatically
adjusts them to the optimal setting.
– Items other than the picture quality adjustment in [Photo Style]
– [Sensitivity]
– [Metering Mode]
– [HDR]
– [Multi Exp.]
– [Digital Zoom]
• Although White Balance is fixed to [AWB] for certain types of scene, you can fine tune the
White Balance or use White Balance bracketing by pressing the cursor button 1 on the
recording screen.
For further details, please read P126, 127.
94
4. Recording Modes
For details on “Scene Guide Mode” settings, refer to P93.
[Clear Portrait]
The brightness of the face is adjusted and the background is
defocused to create a clear portrait.
Tips
• If you are using a lens with the zoom function, you can enhance
the effect by zooming in as much as possible and closing the
distance between the camera and the subject.
[Silky Skin]
Brighter face and softer skin colour creates a healthy
younger look.
Tips
• If you are using a lens with the zoom function, you can enhance
the effect by zooming in as much as possible and closing the
distance between the camera and the subject.
• The smoothing effect is applied to the part that has a similar
tone to the complexion of a subject, as well.
• This mode may not be effective under insufficient lighting.
[Backlit Softness]
When backlighted, the overall screen brightness is
increased. Portraits are softened and infused with light.
95
4. Recording Modes
[Relaxing Tone]
The warm colour tone creates an image with a relaxing
mood.
[Sweet Child's Face]
Moderate background defocusing and skin tone highlighted
draws attention to the child’s face.
Touch the face.
• A still picture is recorded with the focus and exposure set for the
touched location.
Tips
• If you are using a lens with the zoom function, you can enhance
the effect by zooming in as much as possible and closing the
distance between the camera and the subject.
[Distinct Scenery]
Saturation of sky and trees creates more distinct scenery.
96
4. Recording Modes
[Bright Blue Sky]
On a sunny day, the overall screen brightness is increased to
create a vibrant image of the blue sky.
[Romantic Sunset Glow]
The enhanced purple tone creates a romantic image of the
sky just after sunset.
[Vivid Sunset Glow]
Red is enhanced to create a vivid image of the sunset.
97
4. Recording Modes
[Glistening Water]
The glisten of the water is enhanced to look brighter and
slightly bluish.
• Display of the recording screen will be delayed more than usual
and the screen will look as if frames are dropping.
• Star filter used in this mode may cause glistening effects on the
objects other than water surface.
[Clear Nightscape]
Colour saturation of the night light is increased to accentuate
the nightscape.
Tips
• We recommend using a tripod and the self-timer.
• The shutter may remain closed after taking the picture. This is
due to signal processing and is not a malfunction.
• Noise may become visible when you take pictures in dark
places.
[Cool Night Sky]
Blue tones are enhanced to create a cool and sophisticated
image of the night sky after sunset.
Tips
• We recommend using a tripod and the self-timer.
• The shutter may remain closed after taking the picture. This is
due to signal processing and is not a malfunction.
• Noise may become visible when you take pictures in dark
places.
98
4. Recording Modes
[Warm Glowing Nightscape]
The warm colour tone creates a warm image of the
nightscape.
Tips
• We recommend using a tripod and the self-timer.
• The shutter may remain closed after taking the picture. This is
due to signal processing and is not a malfunction.
• Noise may become visible when you take pictures in dark
places.
[Artistic Nightscape]
A slow shutter speed captures light trails that can creates an
artistic nightscape.
Tips
• We recommend using a tripod and the self-timer.
• The shutter may remain closed after taking the picture. This is
due to signal processing and is not a malfunction.
• Noise may become visible when you take pictures in dark
places.
[Glittering Illuminations]
The star filter enhances pinpoints of light.
Tips
• We recommend using a tripod and the self-timer.
• Display of the recording screen will be delayed more than usual
and the screen will look as if frames are dropping.
• The shutter may remain closed after taking the picture. This is
due to signal processing and is not a malfunction.
• Noise may become visible when you take pictures in dark
places.
99
4. Recording Modes
[Handheld Night Shot]
Capture multiple images and combine the data to minimise
blur and noise for hand-held shooting with night scenery.
Tips
• Do not move the unit during the continuous shooting after
pressing the shutter button.
• The angle of view will be slightly narrower.
[Clear Night Portrait]
Fill flash and a longer exposure capture better portraits
against the nightscape.
Tips
].)
• Open the flash. (You can set to [
• We recommend using a tripod and the self-timer.
• When [Clear Night Portrait] is selected, keep the subject still for
about 1 second after taking the picture.
• When [Silent Mode] is set to [ON], the flash is not activated.
• The shutter may remain closed after taking the picture. This is
due to signal processing and is not a malfunction.
• Noise may become visible when you take pictures in dark
places.
100
4. Recording Modes
[Soft Image of a Flower]
The soft focus creates a diffused image.
Tips
• We recommend using a tripod and the self-timer.
• For close-up recording, we recommend that you close the flash
and avoid using it.
• Display of the recording screen will be delayed more than usual
and the screen will look as if frames are dropping.
• The focus range is different depending on lens used. Refer to
“About the focus distance reference mark” on P152 for the focus
range.
• When a subject is close to the camera, the effective focus range
is significantly narrowed. Therefore, if the distance between the
camera and the subject is changed after focusing on the
subject, it may become difficult to focus on it again.
• Close-up regions are prioritised when taking pictures, and so
time is required to focus if you take a picture of a distant subject.
• When you take pictures at close range, the resolution of the
periphery of the picture may decrease slightly. This is not a
malfunction.
• If the lens becomes dirty with fingerprints or dust, the lens may
not be able to focus on the subject correctly.
[Appetizing Food]
The overall screen brightness is increased to make the food
look appealing.
Tips
• If you are using a lens with the zoom function, you can enhance
the effect by zooming in as much as possible and closing the
distance between the camera and the subject.
• We recommend using a tripod and the self-timer.
• For close-up recording, we recommend that you close the flash
and avoid using it.
101
4. Recording Modes
[Cute Dessert]
The overall screen brightness is set higher to enhance the
cuteness of the dessert.
Tips
• If you are using a lens with the zoom function, you can enhance
the effect by zooming in as much as possible and closing the
distance between the camera and the subject.
• We recommend using a tripod and the self-timer.
• For close-up recording, we recommend that you close the flash
and avoid using it.
[Freeze Animal Motion]
The faster shutter speed prevents blur and captures a clear
image of the fast moving animal.
• The initial setting for the AF assist lamp is [OFF].
102
4. Recording Modes
[Clear Sports Shot]
The faster shutter speed prevents blur, for example at
sporting events.
[Monochrome]
A monochrome image captures the mood of the moment.
103
4. Recording Modes
Taking Pictures with different image effects
(Creative Control Mode)
Recording Mode:
This mode records with additional image effects.
You can set the effects to add by selecting example images and checking them on the
screen.
1
2
Set the mode dial to [
].
Press 3/4 to select the image effects
(filters).
A
• The image effect of the selected example image will be
applied in a preview display A.
• You can also select the image effects (filters) by touching
the example images.
• It is also possible to display the
selection screen by touching the
Recording Mode icon in recording
screen.
3
EXPS
Press [MENU/SET] to set.
∫ Switching the image effect (filter) selection screen display
Press [DISP.] to switch the monitor screen.
• When the image effect selection screen display is set to the guide display, description of the
selected image effect is displayed.
Normal display
Guide display
104
List display
4. Recording Modes
• To change the Creative Control Mode, select the [
] tab on the menu screen, select [Filter
Switch], and then press [MENU/SET]. You can return to step 2 on P104.
• White Balance will be fixed to [AWB], and [Sensitivity] will be fixed to [AUTO].
• Depending on the [Menu Guide] setting in the [Custom] menu, either the selection screen or
the recording screen is displayed when the Mode Dial is switched. (P94)
Adjust the effect to fit your preferences
The strength and colours of the effects can be easily adjusted to fit your preferences.
1
2
Press 1 to display the setting screen.
Rotate the control dial to set.
• The items that can be set differ depending on which
Creative Control Mode is currently set.
For information on each image effect, refer to “Items that
can be set”.
• Press [MENU/SET] to return to the recording screen.
• When making the effect setting, [
] is displayed on the
screen.
• If you do not change the settings, select the centre (standard).
Taking a picture with a blurred background (Defocus Control)
You can easily set the blurriness of the background while checking the screen.
1
Press 3 to display the setting screen.
• Each press of 3 switches among brightness setting,
2
Rotate the control dial to set.
• Pressing [
] on the blurriness setting screen will
Defocus Control and end operation.
cancel the setting.
SS
F
Not available in these cases:
• This function is not available in the following case:
– [Miniature Effect] (Creative Control Mode)
105
500
250
125
60
30
4.0
5.6
8.0
4. Recording Modes
Setting brightness
1
Press 3 to display the setting screen.
• Each press of 3 switches among brightness setting,
2
Rotate the control dial to set.
Defocus Control and end operation.
±0
∫ Change the settings by using the touch panel
1 Touch [
-5 -4 -3 -2 -1 0 +1 +2 +3 +4 +5
].
2 Touch the item you want to set.
[
]: Image effects
[
]: Defocus level
[
]: Brightness
EXPS
3 Drag the slide bar to set.
• Press [MENU/SET] to return to the recording screen.
106
4. Recording Modes
For details on “Creative Control Mode” settings, refer to P104.
[Expressive]
This effect emphasises the colour to make a pop art picture.
Items that can be set
Freshness
Understated colours
Pop colours
[Retro]
This effect gives a faded image.
Items that can be set
Colour
Yellow emphasised
Red emphasised
[Old Days]
This effect adds a bright, soft and nostalgic feel to the overall
image.
Items that can be set
Contrast
Low contrast
107
High contrast
4. Recording Modes
[High Key]
This effect adds a bright, airy and soft feel to the overall image.
Items that can be set
Colour
Pink emphasised
Aquamarine
emphasised
[Low Key]
This effect adds a dark and relaxing feel to the overall image and
enhances bright parts.
Items that can be set
Colour
Red emphasised
Blue emphasised
[Sepia]
This effect creates a sepia image.
Items that can be set
Contrast
Low contrast
High contrast
[Monochrome]
This effect creates a black and white picture.
Items that can be set
Contrast
Yellow
emphasised
108
Blue
emphasised
4. Recording Modes
[Dynamic Monochrome]
This effect gives a higher contrast to create an impressive black
and white picture.
Items that can be set
Contrast
Low contrast
High contrast
[Rough Monochrome]
This effect creates a black and white picture with granular noise.
Items that can be set
Grittiness
Less gritty
Grittier
• Display of the recording screen will be delayed more than usual and
the screen will look as if frames are dropping.
[Silky Monochrome]
This effect blurs the overall image to add a soft feel to a black and
white picture.
Items that can be set
Extent of defocus
Weak defocus
Strong defocus
• Display of the recording screen will be delayed more than usual and
the screen will look as if frames are dropping.
109
4. Recording Modes
[Impressive Art]
This effect gives your photo a dramatic contrast look.
Items that can be set
Freshness
Black and white
Pop colours
[High Dynamic]
This effect produces the optimum brightness for both dark and
bright parts.
Items that can be set
Freshness
Black and white
Pop colours
[Cross Process]
This effect gives your photo a dramatic colour look.
Items that can be set
Colour
Green tone/Blue tone/Yellow tone/Red tone
• Select the desired colour tone by
rotating the control dial, and then
press [MENU/SET].
110
4. Recording Modes
[Toy Effect]
This effect reduces peripheral brightness to give the impression of
a toy camera.
Items that can be set
Orange
emphasised
Colour
Blue emphasised
[Toy Pop]
This effect creates a vivid and bright image with the look of a toy
camera.
Items that can be set
Area with reduced
peripheral
brightness
Small
Large
[Bleach Bypass]
This effect gives a higher contrast and a lower saturation to create
a sober and tranquil picture.
Items that can be set
Contrast
Low contrast
111
High contrast
4. Recording Modes
[Miniature Effect]
This effect blurs peripheral areas to give the impression of a
diorama.
Items that can be set
Freshness
Understated colours
Pop colours
∫ Setting the type of defocus
With [Miniature Effect] you can make the subject stand out by intentionally creating
defocused and in-focus portions.
You can set the recording orientation (defocus orientation) and the position and size of the
in-focus portion.
1
Press [Fn1] to display the setting screen.
• Setting screen can also be displayed by touching in order of [
2
] then [
].
Press 3/4 or 2/1 to move the in-focus portion.
• You can also move the in-focus portion by touching the
screen on the recording screen.
] allows you to set the recording orientation
(defocus orientation).
• Touching [
3
4
Rotate the control dial to change the size of in-focus
portion.
• It can be changed to 3 different sizes.
• The portion can also be enlarged/reduced by pinching out/pinching in (P15) the screen.
• Pressing [DISP.] will return the in-focus portion setting back to the default setting.
Press [MENU/SET] to set.
• Display of the recording screen will be delayed more than usual and the screen will look as if
frames are dropping.
• No sound is recorded in motion pictures.
• Approximately 1/8 of the time period is recorded.
(If you record for 8 minutes, the resulting motion picture recording will be approximately
1 minute long.)
The displayed available recording time is approximately 8 times. When switching to Recording
Mode, please check the available recording time.
• If you end motion picture recording after a short time, the camera may go on recording for a
certain period. Please continue to hold the camera until the recording finishes.
• When the focus mode lever is set to [MF], move the in-focus portion over a manually-focused
area.
112
4. Recording Modes
[Soft Focus]
This effect blurs the overall image to produce a soft feel.
Items that can be set
Extent of defocus
Weak defocus
Strong defocus
• Display of the recording screen will be delayed more than usual and
the screen will look as if frames are dropping.
[Fantasy]
This effect creates a fantastical image in a pale colour tone.
Items that can be set
Freshness
Understated colours
Pop colours
[Star Filter]
This effect transforms pin-points of light into a star effect.
Items that can be set
Length of shine
Short
Long
• Display of the recording screen will be delayed more than usual and
the screen will look as if frames are dropping.
113
4. Recording Modes
[One Point Color]
This effect leaves one selected colour to emphasise
impressiveness.
Items that can be set
Amount of colour
left
Small amount of
colour
Large amount of
colour
∫ Set the colour to leave in
Set the colour to leave in by selecting a location on the screen.
1
Press [Fn1] to display the setting screen.
• Setting screen can also be displayed by touching in order of [
2
Select the colour you want to leave by moving the
frame with 3/4/2/1.
• You can also select the colour you want to leave by
touching the screen.
3
• Pressing [DISP.] will return the frame back to the centre.
Press [MENU/SET] to set.
• Depending on the subject, the set colour may not be left in.
114
] then [
].
4. Recording Modes
[Sunshine]
This effect adds a cast of light to the scene.
Items that can be set
Colour
Yellow tone/Red tone/Blue tone/White tone
• Select the colour tone by rotating the
control dial, and then press [MENU/
SET].
∫ Setting the light source
You can change the position and size of the light source.
1
2
Press [Fn1] to display the setting screen.
• Setting screen can also be displayed by touching in order of [
] then [
].
Press 3/4/2/1 to move the centre position of the light source.
• The position of the light source can also be moved by touching the screen.
• The centre of the light source can be moved to the edge of the screen.
Point for when placing the centre of the light
source
A more natural appearance can be created by
placing the centre of the light source outside the
image.
3
4
Rotate the control dial to adjust the size of the light
source.
• It can be changed to 4 different sizes.
• The display can also be enlarged/reduced by pinching out/pinching in.
• Pressing [DISP.] will return the light source setting back to the default setting.
Press [MENU/SET] to set.
• Display of the recording screen will be delayed more than usual and the screen will look as if
frames are dropping.
115
4. Recording Modes
Recording motion pictures with manually set
aperture value/shutter speed (Creative Video Mode)
Recording Mode:
It is possible to manually change the aperture and shutter speed and record motion
pictures.
1
2
Set the mode dial to [
Select the menu. (P37)
[MENU] >
3
].
[Motion Picture] > [Exposure Mode]
Press 3/4 to select [P], [A], [S] or [M], and then press [MENU/SET].
• The operation for changing the aperture value or shutter speed is the same as the
operation for setting the mode dial to
,
,
or
.
It is also possible to display the selection screen by touching the
Recording Mode icon in recording screen.
4
P
Start recording.
• Press the motion picture button or the shutter button to start recording a motion picture.
(Still pictures cannot be taken.)
5
Stop recording.
• Press the motion picture button or the shutter button to stop recording a motion picture.
• Aperture value
– Set the aperture value to a higher number when you want a sharp focus background. Set the
aperture value to a lower number when you want a soft focus background.
• Shutter speed
– When you want to take a sharp picture of a fast moving subject, set with a faster shutter
speed. When you want to create a trail effect, set to a slower shutter speed.
– Manually setting a higher shutter speed may increase the noise on-screen due to the higher
sensitivity.
– When subjects are recorded in an extremely bright place or under fluorescent/LED lighting,
the colour tone or brightness of the image may change, or horizontal stripes may appear on
the screen. In that case, change the Recording Mode or manually adjust the shutter speed to
1/60 or 1/100.
116
4. Recording Modes
Minimising operational sounds during motion picture recording
The operational sound of the zoom or button operation may be recorded when it is
operated during the recording of a motion picture.
Using touch icons allows silent operation while recording motion pictures.
Select the menu. (P37)
[MENU] >
1
2
3
[Motion Picture] > [Silent Operation] > [ON]
Start recording.
Touch [
].
Touch icon.
Zoom
(When an interchangeable lens compatible with power zoom is used)
F
Aperture value
SS
Shutter speed
Exposure Compensation
ISO
ISO sensitivity
Mic level adjustment
4
Drag the slide bar to set.
• The speed of the operation varies depending on the
position you touch.
5
[
]/[
]
changes the setting slowly
[
]/[
]
changes the setting quickly
Stop recording.
117
4. Recording Modes
Registering your preferred settings (Custom Mode)
Recording Mode:
You can register the current camera settings as custom settings.
If you then record in Custom Mode, you can use the registered settings.
• Initial setting of the Programme AE Mode is registered as the custom settings initially.
Registering Personal Menu Settings (Registering custom settings)
To allow recording using the same settings, up to 4 sets of current camera settings can be
registered using [Cust.Set Mem.]. (
,
,
,
)
Preparations:
Set in advance the Recording Mode you wish to save and select the desired menu
settings on the camera.
1
Select the menu. (P37)
[MENU] >
2
[Custom] > [Cust.Set Mem.]
Press 3/4 to select the custom set to register and then press
[MENU/SET].
The settings are registered for
on the mode dial.
• You can record using by simply rotating the mode dial to the
corresponding position. If you register the custom settings you
use often, it is then convenient to use them.
The settings are registered for
on the mode dial.
• You can register up to 3 sets of custom settings and use the
different sets as condition demand.
• Confirmation screen is displayed. It is executed when [Yes] is selected.
Exit the menu after it is executed.
• The following menu items are not registered as custom settings.
[Rec] menu
– Data registered with
[Setup] menu
[Custom] menu
– All menus
– [Touch Scroll]
– [Menu Guide]
[Face Recog.]
– The [Profile Setup]
[Playback] menu
– [Rotate Disp.]
– [Delete
Confirmation]
setting
118
4. Recording Modes
Recording using registered custom set
You can easily call up the settings you have registered using [Cust.Set Mem.].
Set the mode dial to [
].
• The custom set registered for [
1
] is called up.
Set the mode dial to [
].
• The custom set registered for [
], [
] or [
] is called up. The most recently
used custom set is called up.
• To change a custom set
> To steps 2 and 3.
2
3
Press [MENU/SET] to display the menu.
Press 2/1 to select the custom setting you
want to use, and then press [MENU/SET].
It is also possible to display the
selection screen by touching the
Recording Mode icon in recording
screen.
C2-1
• Saving of the selected custom settings is displayed on
the screen.
C2-1
50 i
4:
∫ Changing the settings
Registered contents do not change when the menu setting is changed temporarily with the
mode dial set to
or
. To change the registered settings, overwrite the registered
content using [Cust.Set Mem.] on the custom settings menu.
119
5. Picture Quality and Colour Tone Settings
Adjusting the Picture Quality by Adding an Effect
([Photo Style])
Applicable modes:
6 effects can be selected to match the image you wish to record.
It is possible to adjust the items such as colour or picture quality of the effect to your
desire.
[MENU] >
[Rec] > [Photo Style]
[Standard]
This is the standard setting.
[Vivid]¢
Brilliant effect with high saturation and contrast.
[Natural]¢
Soft effect with low saturation.
[Monochrome]
Monochrome effect with no colour shades.
[Scenery]¢
An effect appropriate for sceneries with vivid blue skies and
greens.
[Portrait]¢
An effect appropriate for portraits with a healthy and beautiful
skin tone.
[Custom]¢
Use the setting registered in advance.
¢ This is disabled when Intelligent Auto Plus Mode is selected.
• In Intelligent Auto Plus Mode, the setting will be reset to [Standard] when the camera is
switched to another Recording Mode or this unit is turned on and off.
• In Scene Guide Mode, a photo style which matches each scene is fixed.
• Those menu items are shared by the [Rec] menu and the [Motion Picture] menu. When the
setting for either of the two is changed, the setting for the other is also changed.
120
5. Picture Quality and Colour Tone Settings
∫ Adjusting the picture quality
• Picture quality cannot be adjusted in the Intelligent Auto Plus Mode.
1
2
Press 2/1 to select the type of Photo Style.
Press 3/4 to select the items, and then press 2/1
to adjust.
6WDQGDUG
-5
0
+5
±0
S ±0
±0
±0
[r]
Increases the difference between the brightness and
the darkness in the picture.
[s]
Decreases the difference between the brightness
and the darkness in the picture.
[r]
The picture is sharply defined.
[s]
The picture is softly focused.
[r]
The colours in the picture become vivid.
[s]
The colours in the picture become natural.
[r]
The noise reduction effect is enhanced.
Picture resolution may deteriorate slightly.
[s]
The noise reduction effect is reduced. You can obtain
pictures with higher resolution.
[Yellow]
Enhances the contrast of an subject. (Effect: Weak)
The blue sky can be recorded clearly.
[Contrast]
S [Sharpness]
[Saturation]
[Noise Reduction]
Enhances the contrast of an subject. (Effect:
[Orange] Medium)
The blue sky can be recorded in darker blue.
[Filter Effect]¢
[Red]
Enhances the contrast of an subject. (Effect: Strong)
The blue sky can be recorded in much darker blue.
[Green]
The skin and lips of people appear in natural tones.
Green leaves appear brighter and more enhanced.
[Off]
—
¢ Displayed only when [Monochrome] is selected.
3
• If you adjust the picture quality, [_] is displayed beside the Photo Style icon on the screen.
• Colour can be changed by [Saturation] when [Monochrome] is selected.
Press [MENU/SET].
121
5. Picture Quality and Colour Tone Settings
∫ Registering settings to [Custom]
Adjust the picture quality following step 2 of “Adjusting the picture quality”, and
then press [DISP.].
• Confirmation screen is displayed. It is executed when [Yes] is selected.
122
5. Picture Quality and Colour Tone Settings
Adjusting the White Balance
Applicable modes:
In sunlight, under incandescent lights or in other such conditions where the colour of white
takes on a reddish or bluish tinge, this item adjusts to the colour of white which is closest
to what is seen by the eye in accordance with the light source.
1
Press 1 (
2
Select the White Balance by rotating the
control dial.
).
WB
3
AWB
Press [MENU/SET] to set.
Item
Recording conditions
[AWB]
When taking pictures outdoors under a clear sky
[Ð]
When taking pictures outdoors under a cloudy sky
[î]
When taking pictures outdoors in the shade
[Ñ]
When taking pictures under incandescent lights
¢
[
[
Automatic adjustment
[V]
1
[
]
]/[
2
]
When taking pictures with the flash only
]
The manually set value is used
When using the preset colour temperature setting
¢ It will operate as [AWB] during motion picture recording.
123
5. Picture Quality and Colour Tone Settings
Under fluorescent lighting, LED lighting fixture etc., the appropriate White Balance
will vary depending on the lighting type, so use [AWB] or [ 1 ], [ 2 ].
• The White Balance is only calculated for subjects within the range of the camera’s flash. (P201)
• In Scene Guide Mode, changing the scene or Recording Mode will return White Balance
settings (including the White Balance fine adjustment setting) back to [AWB].
• The setting is fixed to [AWB] in the following cases.
– [Backlit Softness]/[Relaxing Tone]/[Distinct Scenery]/[Bright Blue Sky]/[Romantic Sunset
Glow]/[Vivid Sunset Glow]/[Glistening Water]/[Clear Nightscape]/[Cool Night Sky]/[Warm
Glowing Nightscape]/[Artistic Nightscape]/[Glittering Illuminations]/[Handheld Night Shot]/
[Clear Night Portrait]/[Appetizing Food]/[Cute Dessert] (Scene Guide Mode)
∫ Auto White Balance
Depending on the conditions prevailing when pictures are taken, the pictures may take on
a reddish or bluish tinge. Furthermore, when a multiple number of light sources are being
used or there is nothing with a colour close to white, Auto White Balance may not function
properly. In a case like this, set the White Balance to a mode other than [AWB].
1 Auto White Balance will work within this range.
2 Blue sky
3 Cloudy sky (Rain)
4 Shade
5 Sunlight
6 White fluorescent light
7 Incandescent light bulb
8 Sunrise and sunset
9 Candlelight
KlKelvin Colour Temperature
124
5. Picture Quality and Colour Tone Settings
Setting the White Balance manually
Set the White Balance value. Use to match the condition when taking photographs.
1
2
3
Press 1 (
).
Rotate the control dial to select [ 1 ] or [ 2 ] and then press 3.
Aim the camera at a sheet of white paper etc. so that
the frame in the centre is filled by the white object
only and then press [MENU/SET].
• White Balance may not be set when the subject is too bright or too dark. Set the White Balance
again after adjusting to appropriate brightness.
Setting the colour temperature
You can set the colour temperature manually for taking natural pictures in different lighting
conditions.
The colour of light is measured as a number in degrees Kelvin. As the colour temperature
increases, the picture becomes more bluish. As the colour temperature decreases, the
picture becomes more reddish.
1
2
3
Press 1 (
).
Rotate the control dial to select [
], and then
press 3.
Press 3/4 to select the colour temperature and
then press [MENU/SET].
• You can set a colour temperature from [2500K] to
[10000K].
125
6500K
5. Picture Quality and Colour Tone Settings
Finely adjusting the White Balance
You can finely adjust the White Balance when you cannot acquire the desired hue by
setting the White Balance.
1
2
Select the White Balance and then press 4.
Press 3/4/2/1 to fine-adjust the White Balance.
2 : A (AMBER: ORANGE)
1 : B (BLUE: BLUISH)
3 : G (GREEN: GREENISH)
4 : M (MAGENTA: REDDISH)
• You can also make fine adjustments by touching the White
Balance graph.
• Pressing [DISP.] resets the position back to the centre.
3
G
A
B
M
Press [MENU/SET].
• If you finely adjust the White Balance to [A] (amber), the White Balance icon on the screen will
change to orange.
If you finely adjust the White Balance to [B] (blue), the White Balance icon on the screen will
change to blue.
• If you finely adjust the White Balance to [G] (green) or [M] (magenta), [_] (green) or [`]
(magenta) appears beside the White Balance icon on the screen.
• The White Balance fine adjustment setting is reflected in the picture when using the flash.
• The White Balance fine adjustment level returns to the standard setting (centre point) in the
following cases.
– When you reset the White Balance in [ 1 ] or [ 2 ]
– When you reset the colour temperature manually in [
]
126
5. Picture Quality and Colour Tone Settings
White Balance Bracket
Bracket setting is performed based on the adjustment values for the White Balance fine
adjustment, and 3 pictures with different colours are automatically recorded when the
shutter button is pressed once.
1
2
Fine-adjust the White Balance in step 2 of “Finely
adjusting the White Balance” and then perform the
bracket setting by rotating the control dial.
Rotating the control dial to the right:
Horizontal ([A] to [B])
Rotating the control dial to the left:
Vertical ([G] to [M])
• You can also set the bracket by touching [ ]/[ ].
Press [MENU/SET].
G
A
B
M
] is displayed in White Balance icon in the screen when the White Balance Bracket is set.
•[
• The White Balance Bracket setting is released when this unit has been turned off (including
Sleep Mode).
• You will only hear the shutter sound once.
Not available in these cases:
• The White Balance Bracket does not work in the following cases:
– [Glistening Water]/[Glittering Illuminations]/[Handheld Night Shot]/[Soft Image of a Flower]
(Scene Guide Mode)
– When recording motion pictures
– When [Quality] is set to [
], [
– When [HDR] is set to [ON]
– [Multi Exp.]
– When using [Time Lapse Shot]
] or [
127
]
5. Picture Quality and Colour Tone Settings
Setting the Picture Quality and Size
Setting the aspect ratio of pictures
Applicable modes:
This allows you to select the aspect ratio of the pictures to suit printing or the playback method.
[MENU] >
[Rec] > [Aspect Ratio]
[4:3]
[Aspect Ratio] of a 4:3 TV
[3:2]
[Aspect Ratio] of a 35 mm film camera
[16:9]
[Aspect Ratio] of a high-definition TV, etc.
[1:1]
Square aspect ratio
• The ends of the recorded pictures may be cut at printing so check before printing. (P338)
Setting the number of pixels
Applicable modes:
Set the number of pixels.
The higher the numbers of pixels, the finer the detail of the pictures will appear even when
they are printed onto large sheets.
[MENU] >
[Rec] > [Picture Size]
When the aspect ratio is [4:3].
When the aspect ratio is [3:2].
Settings
Image size
Settings
Image size
[L] (16M)
4592k3448
[L] (14M)
4592k3064
[
M] (8M)
3232k2424
[
S] (4M)
2272k1704
When the aspect ratio is [16:9].
Settings
Image size
[L] (12M)
[
[
M] (7M)
3232k2160
S] (3.5M)
2272k1520
When the aspect ratio is [1:1].
Settings
Image size
4592k2584
[L] (11.5M)
3424k3424
[
M] (6M)
3232k1824
[
M] (6M)
2416k2416
[
S] (2M)
1920k1080
[
S] (3M)
1712k1712
• When [Ex. Tele Conv.] (P194) is set, [
] is displayed on the picture sizes of each aspect ratio
except for [L].
• The picture size will be fixed to [S] when [Burst Rate] is set to [SH].
128
5. Picture Quality and Colour Tone Settings
Setting the compression rate of pictures ([Quality])
Applicable modes:
Set the compression rate at which the pictures are to be stored.
[MENU] >
[Rec] > [Quality]
Settings
File format
[A]
A JPEG image in which image quality was given priority.
JPEG
[›]
[
]
[
]
[
Description of settings
]
RAWiJPEG
RAW
A standard image quality JPEG image.
This is useful for increasing the number of shots without
changing the number of pixels.
You can record a RAW image and a JPEG image ([A] or
[›]) simultaneously.¢1
You can only record RAW images.¢2
[
] images are recorded with a smaller data volume than
[
] or [
].
¢1 If you delete a RAW file from the camera, the corresponding JPEG image will also be
deleted.
¢2 It is fixed to maximum recordable pixels ([L]) for each image aspect ratio.
About RAW
RAW format refers to the original format of data that is not image-processed on the
camera. Playback and Editing of RAW images require dedicated software.
Using the dedicated software, you can perform advanced editing, such as adjusting the
White Balance after taking a picture. The software also allows you to save pictures in
file formats that can display them on a PC (JPEG, TIFF, etc.). Pictures taken in RAW
format will have higher image quality than those taken in JPEG format, but the data size
will be larger.
• You can develop RAW files and edit them using the software “SILKYPIX Developer Studio”
by Ichikawa Soft Laboratory on the CD-ROM (supplied).
Not available in these cases:
• The following effects are not reflected in RAW images:
– [Photo Style]/[i.Dynamic]/[Red-Eye Removal]/[i.Resolution]/[Color Space] ([Rec] menu)
– Scene Guide Mode
– Creative Control Mode
• In the following cases, [
], [
], and [
] cannot be set.
– [Handheld Night Shot] (Scene Guide Mode)
129
5. Picture Quality and Colour Tone Settings
Using Image Correction Functions
Compensating the contrast and exposure ([i.Dynamic])
Applicable modes:
Contrast and exposure are compensated when the brightness difference between the
background and subject is great, etc.
[MENU] >
[Rec] > [i.Dynamic]
Settings: [AUTO]/[HIGH]/[STANDARD]/[LOW]/[OFF]
• [AUTO] automatically sets the intensity of the effect according to the recording conditions.
• Those menu items are shared by the [Rec] menu and the [Motion Picture] menu. When the
setting for either of the two is changed, the setting for the other is also changed.
Not available in these cases:
• This feature may be automatically disabled, depending on the recording conditions.
• In the following cases, [i.Dynamic] does not work:
– When [HDR] is set to [ON]
Raising the resolution ([i.Resolution])
Applicable modes:
Pictures with sharp profile and resolution can be taken by using the Intelligent Resolution
Technology.
[MENU] >
[Rec] > [i.Resolution]
Settings: [HIGH]/[STANDARD]/[LOW]/[EXTENDED]/[OFF]
• [EXTENDED] allows you to take natural pictures with a higher resolution.
• When recording a motion picture, [EXTENDED] changes to [LOW].
• Those menu items are shared by the [Rec] menu and the [Motion Picture] menu. When the
setting for either of the two is changed, the setting for the other is also changed.
130
5. Picture Quality and Colour Tone Settings
Combining pictures with different exposures ([HDR])
Applicable modes:
You can combine 3 pictures with different levels of exposure into a single picture with rich
gradation.
You can minimise the loss of gradations in bright areas and dark areas when, for example,
the contrast between the background and the subject is large.
An image combined by HDR is recorded in JPEG.
[MENU] >
[Rec] > [HDR]
Settings
Description of settings
[ON]
Records HDR pictures.
[OFF]
Does not record HDR pictures.
[Dynamic Range]
[AUTO]: Automatically adjusts the exposure range according to the differences
between the bright and dark areas.
[n1 EV]/[n2 EV]/[n3 EV]:
Adjusts the exposure within the selected exposure parameters.
[SET]
[Auto Align]
[ON]:
Automatically corrects camera shake (jitter) and other problems that
can cause the images to misalign.
Recommended for use during hand-held shooting.
[OFF]:
Image misalignment not adjusted.
Recommended when a tripod is used.
∫ What is HDR?
HDR stands for High Dynamic Range and refers to a technique for expressing a wide
contrast range.
131
5. Picture Quality and Colour Tone Settings
• Do not move the unit during the continuous shooting after pressing the shutter button.
• You cannot take the next picture until the combination of pictures is complete.
• A moving subject may be recorded with unnatural blurs.
• The angle of view becomes narrow slightly when [Auto Align] is set to [ON].
• Flash is fixed to [Œ] (forced flash off).
Not available in these cases:
• [HDR] does not work for the pictures taken during a motion picture recording.
• This function is not available in the following cases:
– When [Quality] is set to [
], [
] or [
]
– When using [Time Lapse Shot]
– In [Stop Motion Animation] (only when [Auto Shooting] is set)
132
5. Picture Quality and Colour Tone Settings
Reducing the long shutter noise ([Long Shtr NR])
Applicable modes:
The camera automatically removes noise that appears when the shutter speed becomes
slower to take pictures of night scenery etc. so you can take beautiful pictures.
[MENU] >
[Rec] > [Long Shtr NR]
Settings: [ON]/[OFF]
• [Long shutter noise reduction ongoing] is displayed for the same time as the shutter speed for
signal processing.
• We recommend using a tripod when the shutter speed is slowed to take pictures.
Not available in these cases:
• In the following cases, [Long Shtr NR] does not work:
– When recording motion pictures
– When [Burst Rate] is set to [SH]
Correcting the brightness on the screen periphery ([Shading Comp.])
Applicable modes:
When the screen periphery darkens as a result of the lens characteristics, you can record
pictures with the brightness of the screen periphery corrected.
[MENU] >
[Rec] > [Shading Comp.]
Settings: [ON]/[OFF]
• This feature may be automatically disabled, depending on the recording conditions.
• Noise in the periphery of the picture may stand out with higher ISO sensitivity.
Not available in these cases:
• Correction is not possible in the following cases:
– When recording motion pictures
– Recording still pictures while recording a motion picture [only when set to [
picture priorities)]
– When [Burst Rate] is set to [SH]
• Depending on the lens used, [Shading Comp.] may not operate.
Refer to the website for compatible lenses.
133
] (motion
5. Picture Quality and Colour Tone Settings
Setting the colour space ([Color Space])
Applicable modes:
Set this when you want to correct the colour reproduction of the recorded pictures on a
PC, printer etc.
[MENU] >
[sRGB]
[AdobeRGB]
[Rec] > [Color Space]
Colour space is set to sRGB colour space.
This is widely used in computer related equipment.
Colour space is set to AdobeRGB colour space.
AdobeRGB is mainly used for business purposes such as professional
printing because it has a greater range of reproducible colours than sRGB.
• Set to [sRGB] if you are not very familiar with AdobeRGB.
• The setting is fixed to [sRGB] in the following case.
– When recording motion pictures
134
6. Focus and Brightness (Exposure) Settings
Taking Pictures with Auto Focus
Applicable modes:
This allows the focusing method that suits the positions and number of the subjects to be
selected.
1
Set the focus mode lever to [AFS] or [AFC]
(P136).
2
Press 2 (
3
Press 2/1 to select AF Mode and then press
[MENU/SET].
).
• AF area selection screen is displayed when 4 is pressed
while [š], [ ], [Ø], or [
] is selected.
For operation in the AF area selection screen, refer to
P141.
• The setting is fixed to [Ø] in the following cases.
– When using the Digital Zoom
– [Miniature Effect] (Creative Control Mode)
135
6. Focus and Brightness (Exposure) Settings
About the focus mode (AFS/AFF/AFC)
Applicable modes:
The method for achieving focus when the shutter button is pressed halfway is set.
Focus
mode
[AFS]
[AFF]
[AFC]
[MF]
The movement of the
subject and the scene
(recommended)
Description of settings
Subject is still
(Scenery, anniversary
photograph, etc.)
“AFS” is an abbreviation of “Auto Focus Single”.
Focus is set automatically when the shutter button is
pressed halfway. Focus will be fixed while it is pressed
halfway.
Movement cannot be
predicted
(Children, pets, etc.)
“AFF” is an abbreviation of “Auto Focus Flexible”.
In this mode, focusing is performed automatically
when the shutter button is pressed halfway.
If the subject moves while the shutter button is
pressed halfway, the focus is corrected to match the
movement automatically.
Subject is moving
(Sport, trains, etc.)
“AFC” is an abbreviation of “Auto Focus Continuous”.
In this mode, while the shutter button is pressed
halfway, focusing is constantly performed to match the
movement of the subject.
When the subject is moving, the focusing is performed
by predicting the subject position at the time of
recording. (Movement prediction)
Set the focus manually. (P147)
136
6. Focus and Brightness (Exposure) Settings
Changing the focus mode assigned to [AFS] of the focus mode lever
[MENU] >
[Custom] > [AFS/AFF]
[AFS]:
Assigns [AFS].
[AFF]:
Assigns [AFF].
When recording using [AFF], [AFC]
• It may take time to focus on the subject when you operate the zoom from Wide to Tele or
suddenly change the subject from a distant one to a nearby one.
• Press the shutter button halfway again when it is difficult to focus on the subject.
• While the shutter button is pressed halfway, shake may be seen on the screen.
• When AF Mode is set to [ ], the first AF area at which focus is achieved may be displayed
momentarily while pressing halfway.
• A beep will be emitted when focus is first achieved during the pressing halfway.
• When the brightness is insufficient for [AFF] or [AFC], the camera will operate as if [AFS] has
been set. In this case, the display will change to the yellow [AFS].
Not available in these cases:
• Depending on the lens used, [AFF] and [AFC] may not operate. Refer to the website on P19.
• When the interchangeable lens (H-H020A) is used, [AFF] and [AFC] cannot be set.
137
6. Focus and Brightness (Exposure) Settings
Type of the Auto Focus Mode
About [
] ([Face Detection])
The camera automatically detects the person’s face. The focus
and exposure can then be adjusted to fit that face no matter
what portion of the picture it is in. (max. 15 areas)
When the camera detects a person’s face, the AF area is
displayed.
Yellow:
When the shutter button is pressed halfway, the frame turns
green when the camera is focused.
White:
Displayed when more than one face is detected. Other faces that are the same distance
away as faces within the yellow AF areas are also focused.
• Position and size of the AF area can be changed. (P141)
• When [š] is selected and [Metering Mode] is set to multiple [
], the camera will adjust the
exposure to suit the person’s face. (P161)
Not available in these cases:
• It cannot be set to [š] in the following cases.
– [Clear Nightscape]/[Cool Night Sky]/[Warm Glowing Nightscape]/[Artistic Nightscape]/
[Glittering Illuminations]/[Handheld Night Shot]/[Appetizing Food]/[Cute Dessert] (Scene
Guide Mode)
• Under certain picture-taking conditions including the following cases, the Face Detection
Function may fail to work, making it impossible to detect faces.
The AF Mode is switched to [ ].
– When the face is not facing the camera
– When the face is at an angle
– When the face is extremely bright or dark
– When the facial features are hidden behind sunglasses, etc.
– When the face appears small on the screen
– When there is little contrast on the faces
– When there is rapid movement
– When the subject is other than a human being
– When the camera is shaking
138
6. Focus and Brightness (Exposure) Settings
Setting up [
] ([AF Tracking])
Focus and exposure can be adjusted to a specified subject. Focus and exposure will keep
on following the subject even if it moves. (Dynamic tracking)
∫ When operating buttons
Place the subject in the AF tracking frame, and press the
shutter button halfway to lock the subject.
A AF tracking frame
• AF area will turn green when the camera detects the subject.
• The AF area turns yellow when the shutter button is released.
• Lock is cancelled when [MENU/SET] is pressed.
A
∫ When operating the touch screen
You can lock the subject by touching it.
• Perform the operation after cancelling the touch shutter function.
• The AF area turns yellow while the subject is locked.
• Lock is cancelled when [
] is touched.
• Exposure is adjusted in accordance with the locked subject when [Metering Mode] is set to
[
]. (P161)
• If it fails to lock, AF area will flash in red, and disappear. Try to lock again.
• When AF tracking fails, [Ø] is set.
Not available in these cases:
•[
] cannot be used with [Time Lapse Shot].
• In the following cases, [ ] operates as [Ø].
– [Glistening Water]/[Glittering Illuminations]/[Soft Image of a Flower]/[Monochrome] (Scene
Guide Mode)
– [Sepia]/[Monochrome]/[Dynamic Monochrome]/[Rough Monochrome]/[Silky Monochrome]/
[Soft Focus]/[Star Filter]/[Sunshine] (Creative Control Mode)
– [Monochrome] ([Photo Style])
• Dynamic Tracking function may not work in the following cases:
– When the subject is too small
– When the recording location is too dark or bright
– When the subject is moving too fast
– When the background has the same or similar colour to the subject
– When jitter is occurring
– When zoom is operated
139
6. Focus and Brightness (Exposure) Settings
About [
] ([23-Area])
Up to 23 AF areas can be focused.
This is effective when a subject is not in the centre of the screen.
• The 23 AF areas can be divided into 9 areas and the area to be focused can be set.
(P141)
About [
] ([1-Area])
The camera focuses on the subject in the AF area on the centre of the screen.
• Position and size of the AF area can be changed. (P141)
• When the subject is not in the centre of the composition in [Ø], you can bring the subject into
the AF area, fix the focus and exposure by pressing the shutter button halfway, move the
camera to the composition you want with the shutter button pressed halfway, and then take the
picture.
(Only when the focus mode is set to [AFS].)
About [
] ([Pinpoint])
You can achieve a more precise focus on a point that is smaller than [Ø].
• The focus position can be set on an enlarged screen. (P142)
• If the shutter button is pressed halfway, the screen for checking the focus position will be
enlarged.
• In the following case, [ ] operates as [Ø]
– When recording motion pictures
• It cannot be set to [ ] in the following cases.
– [AFF]/[AFC] (focus mode)
140
6. Focus and Brightness (Exposure) Settings
Setting up position of the AF area/changing size of the AF area
• Perform the operation after cancelling the touch shutter function.
• When setting with touch operation, set [Touch AF] in [Touch Settings] of the [Custom] menu to
[AF].
When selecting [š], [Ø]
Position and size of the AF area can be changed.
1
2
Select [š] or [Ø] and press 4.
• AF area setting screen is displayed.
Press 3/4/2/1 to move the AF area.
• AF area can also be moved by touching the subject.
• Press [DISP.] to return the AF area to the centre of the
screen.
3
Rotate the control dial to change the size of AF area
frame.
• It can be changed to 4 different sizes.
• The area size can also be changed by pinching out/
4
Press [MENU/SET] to set.
• AF area with the same function as [Ø] is displayed in the
pinching in (P15) on the screen.
touched position, when the [š] is selected.
Setting of the AF area is cleared when [MENU/SET] is pressed or [
] is touched.
When selecting [ ]
The 23 AF areas can be divided into 9 areas and the area to be focused can be set.
1 Select [ ] and press 4.
• AF area setting screen is displayed.
2 Press 3/4/2/1 to select the AF area frame as
shown in the figure on the right.
• AF area frame can also be selected by touching the
screen.
3
Press [MENU/SET] to set.
• Only [i] display (centre point of selected AF area frame)
will remain on the screen.
• Setting of the AF area frame is cleared when [MENU/SET] is pressed or [
141
] is touched.
6. Focus and Brightness (Exposure) Settings
When selecting [ ]
You can set the focus position precisely by enlarging the screen.
• The focus position cannot be set at the edge of the screen.
1
2
3
Select [ ] and press 4.
Press 3/4/2/1 to set the focus position and then press [MENU/SET].
• The assist screen for setting the focus position is displayed in an enlarged size.
• The assist screen can also be displayed by touching the subject.
Move [_] to the focus position with 3/4/2/1.
• The focus position can also be moved by touching the
screen.
• Pressing [DISP.] will bring the focus position back to the
centre of the assist screen.
• On the assist screen, it is also possible to record a picture
by touching [
].
Changing the display of the assist screen
[MENU] >
[Custom] > [Pinpoint AF Display]
[FULL]:
Enlarges a picture in full screen.
[PIP]:
Enlarges a picture in a window on the screen.
].
• The display of the assist screen can also be switched by touching [
• When the control dial is rotated, a picture can be enlarged/reduced up to approximately 3 to 6
times in [PIP]. In [FULL], it can be enlarged/reduced up to approximately 3 to 10 times. The
picture is enlarged/reduced by a factor of 1.
• The display can also be enlarged/reduced by pinching out/pinching in.
142
6. Focus and Brightness (Exposure) Settings
Setting the duration for which the screen is enlarged
[MENU] >
[Custom] > [Pinpoint AF Time] >
[LONG] (Approx. 1.5 seconds)/[MID] (Approx. 1.0 second)/[SHORT]
(Approx. 0.5 second)
• The spot metering target can also be moved to match the AF area when the [Metering Mode]
(P161) is set to [
].
At the edge of the screen, the metering may be affected by the brightness around the AF area.
• When [Touch AF] is set to [AF+AE], the brightness optimisation position follows the movement
of the AF area. (The AF area works as [Ø].) (P163)
Not available in these cases:
• When using digital zoom, the position and size of the AF area cannot be changed.
143
6. Focus and Brightness (Exposure) Settings
Setting the desired focus method
Using the [Custom] menu, you can set the focus method in detail.
Releasing/not releasing the shutter by pressing the shutter button halfway
[MENU] >
[Custom] > [Half Press Release] > [ON]/[OFF]
Focusing/Not focusing in advance
[MENU] >
[Custom] > [Quick AF] > [ON]/[OFF]
As long as the camera is held steady, the camera will automatically adjust the focus and
focus adjustment will then be quicker when the shutter is pressed. This is useful when you
do not want to miss a picture-taking opportunity.
• The battery will be consumed faster than usual.
• Press the shutter button halfway again when it is difficult to focus on the subject.
• The [Quick AF] feature is disabled in the following conditions:
– In Preview Mode
– In low light situations
– With lenses that only offer Manual Focus
– With some Four Third lenses that do not support contrast AF
144
6. Focus and Brightness (Exposure) Settings
Turning on/not turning on the AF Assist Lamp
[MENU] >
[Custom] > [AF Assist Lamp] > [ON]/[OFF]
AF assist lamp will illuminate the subject when the shutter button is pressed halfway,
making it easier for the camera to focus when recording in low light conditions.
(Larger AF area is displayed depending on the recording conditions.)
• The effective range of the AF Assist Lamp is different depending on the lens used.
– When the interchangeable lens (H-FS12032) is attached and at Wide:
Approx. 1.0 m (3.3 feet) to 3.0 m (9.8 feet)
– When the interchangeable lens (H-H020A) is attached:
Approx. 1.0 m (3.3 feet) to 5.0 m (16 feet)
• The AF Assist Lamp is valid only for the subject in the centre of the screen. Use it by
positioning the subject in the centre of the screen.
• Remove the lens hood.
• When you do not want to use the AF Assist Lamp (e.g. when taking pictures of animals in dark
places), set the [AF Assist Lamp] to [OFF]. In this case, it will become more difficult to focus on
the subject.
• The AF Assist Lamp gets slightly blocked when the interchangeable lens (H-FS12032/
H-H020A) is used, but it does not affect the performance.
• The AF Assist Lamp may be greatly blocked, and it may become harder to focus when a lens
with large diameter is used.
• The setting is fixed to [OFF] in the following cases.
– [Distinct Scenery]/[Bright Blue Sky]/[Romantic Sunset Glow]/[Vivid Sunset Glow]/[Glistening
Water]/[Clear Nightscape]/[Cool Night Sky]/[Warm Glowing Nightscape]/[Artistic Nightscape]/
[Handheld Night Shot] (Scene Guide Mode)
– When [Silent Mode] is set to [ON]
145
6. Focus and Brightness (Exposure) Settings
Recording/not recording even when focus is not achieved
[MENU] >
[Custom] > [Focus/Release Priority]
[FOCUS]:
You cannot take a picture until the subject is brought into focus.
[RELEASE]:
This gives priority to the best time to take a picture so you can take a picture when the
shutter button is pressed fully.
• When set to [RELEASE], please be aware that focus may not be achieved even with focus
mode set to [AFS], [AFF] or [AFC].
Adjusting/not adjusting the focus manually after achieving Auto Focus
[MENU] >
[Custom] > [AF+MF] > [ON]/[OFF]
When AF Lock is ON (press the shutter button halfway with the focus mode set to [AFS] or
set AF Lock using [AF/AE LOCK]), you can make fine adjustments to the focus manually.
146
6. Focus and Brightness (Exposure) Settings
Taking Pictures with Manual Focus
Applicable modes:
Use this function when you want to fix the focus or when the distance between the lens
and the subject is determined and you do not want to activate Auto Focus.
The operations to focus manually differ depending on the lens used.
When using an interchangeable lens (H-FS12032) with no focus ring
Set the focus mode lever to [MF].
Press 2 (
).
1
2
3
Press 3/4/2/1 to move the MF area, and press
[MENU/SET].
• The MF area can also be moved by dragging the screen
(P15).
• Pressing [DISP.] will return the MF area back to the
centre.
4
Press 2/1 to focus.
A
B
C
D
Slide bar
MF Assist (enlarged screen)
MF Guide
Peaking
• Pressing and holding 2/1 will increase the focus
•
•
•
•
speed.
Focus can also be adjusted by dragging the slide bar.
Rotating the control dial will enlarge/reduce the MF
Assist size.
When [Peaking] in the [Custom] menu is set to [ON],
in-focus portions are highlighted.
The MF area setting screen can be displayed by
pressing 4.
147
D
B
+
AF
C
A
6. Focus and Brightness (Exposure) Settings
When using an interchangeable lens (H-H020A) with
a focus ring
1 Set the focus mode lever to [MF].
2 Rotate the focus ring to focus.
A
Rotate to A side:
Focuses on nearby subject
B
Rotate to B side:
Focuses on faraway subject
G
E MF Assist (enlarged screen)
F MF Guide
G Peaking
• When using an interchangeable lens with a focus
lever, move the focus lever to focus.
E
+
AF
F
∫ Displaying the MF Assist
• It can be displayed by rotating the focus ring, pinching out (P15) the screen, or touching the
screen twice. (In [Miniature Effect] of Creative Control Mode, it cannot be displayed by touching
the screen)
• It can also be displayed by pressing 2 of the cursor button to display the MF area setup
screen, using the cursor button to decide the MF area position, and then pressing [MENU/
SET].
∫ Closing the MF Assist
• It will close when the shutter button is pressed halfway.
• You can also close MF Assist by pressing [MENU/SET] or touching [Exit].
• It will also close when the screen is touched twice.
• When displayed by rotating the focus ring, it is closed approximately 10 seconds after
operations are stopped.
• MF Assist or MF guide may not display depending on the lens used, but you can display MF
Assist by direct operation of the camera, using the touch screen or a button.
Not available in these cases:
• The MF Assist is disabled when using the Digital Zoom or recording motion pictures.
148
6. Focus and Brightness (Exposure) Settings
Displaying/not displaying the MF Guide
[MENU] >
[Custom] > [MF Guide] > [ON]/[OFF]
A Indicator for ¶ (infinity)
When [MF Guide] on the [Custom] menu is set to [ON] and
you focus manually, the MF guide is displayed on the screen.
You can check whether the point of focus is to the near side
or the far side.
A
Achieving focus quickly using Auto Focus
[MENU] >
[Custom] > [AF/AE Lock] > [AF-ON]
In Manual Focus, if the function button to which [AF/AE LOCK] is set is pressed (P43),
Auto Focus will work.
• [AF/AE LOCK] can only be assigned to [Fn1].
• Auto Focus works at the centre of the frame.
• If Auto Focus is used while the MF Assist screen is displayed,
the centre of the MF Assist screen will be focused.
• Auto Focus also works with the following touch operations.
– Touching [ AF ]
– Dragging the monitor and releasing your finger at the position
you want to focus on
149
AF
6. Focus and Brightness (Exposure) Settings
Highlighting/not highlighting in-focus portions
[MENU] >
[Custom]>[Peaking]
[ON]
In-focus portions are highlighted with colour.
[OFF]
In-focus portions are not highlighted.
The detection level for in-focus portions is set.
When [HIGH] is set, portions to be highlighted are
[Detect Level] reduced, allowing you to achieve a more precise focus.
[HIGH]/[LOW]
• The detection level setting does not affect the focus range.
Sets the highlighting colour used for [Peaking].
• When [Detect Level] is set to [HIGH]: [ ] (Light blue)/[
[SET]
[Display
Color]
]
(Yellow)/[ ] (Green)
• When [Detect Level] is set to [LOW]: [ ] (Blue)/[ ]
(Orange)/[ ] (White)
• Changing the [Detect Level] setting also changes the
[Display Color] setting as follows.
–[
–[
–[
] (Light blue)
] (Yellow)
[
] (Green)
[
• When [Peaking] is set, [
[ ] (Blue)
] (Orange)
] (White)
] ([Detect Level]: [HIGH]) or [
] ([Detect Level]: [LOW]) will
be displayed.
• Each time [
] in [ ] is touched, the setting is switched in order of [ON] ([Detect Level]:
[LOW]) > [ON] ([Detect Level]: [HIGH]) > [OFF].
• Each time the set function button is pressed when [Peaking] is set to [Fn Button Set] (P43) in
the [Custom] menu, the peaking setting switches in order of [ON] ([Detect Level]: [LOW]) >
[ON] ([Detect Level]: [HIGH]) > [OFF].
• This function works in Manual Focus or when focus is being adjusted manually with [AF+MF].
• Since portions with clear outlines on the screen are highlighted as in-focus portions, portions to
be highlighted vary depending on the recording conditions.
• The colour used for highlighting does not affect recorded images.
• [Peaking] does not work with [Rough Monochrome] in Creative Control Mode.
150
6. Focus and Brightness (Exposure) Settings
Technique for Manual Focus
1 Press the cursor button or rotate the focus
ring to focus.
2 Press the cursor button a few more times
or rotate the focus ring further in the same
direction.
3 Operate the cursor button or the focus
ring slightly in the opposite direction to
fine tune the focus.
• If you zoom in/out after focusing on a subject, the focus may lose its accuracy. In that case,
re-adjust the focus.
• After cancelling Sleep Mode, focus on the subject again.
• If you are taking close-up pictures:
– We recommend using a tripod and the self-timer (P174).
– The effective focus range (depth of field) is significantly narrowed. Therefore, if the distance
between the camera and the subject is changed after focusing on the subject, it may become
difficult to focus on it again.
– The resolution of the periphery of the picture may decrease slightly. This is not a malfunction.
151
6. Focus and Brightness (Exposure) Settings
∫ About the focus distance reference mark
The focus distance reference mark is a mark used to measure the focus distance.
Use this when taking pictures with Manual Focus or taking close-up pictures.
Focus range
A Focus distance reference mark
B Focus distance reference line
C 0.2 m (0.66 feet) (focal length 12 mm to 20 mm)
[When the interchangeable lens (H-FS12032) is used]
D 0.3 m (0.98 feet) (focal length 21 mm to 32 mm)
[When the interchangeable lens (H-FS12032) is used]
E 0.2 m (0.66 feet) [When the interchangeable lens (H-H020A) is used]
152
6. Focus and Brightness (Exposure) Settings
Making the desired changes to MF Assist settings
Using the [Custom] menu, you can make advanced MF Assist settings.
Setting the display method of the MF Assist (enlarged screen)
[MENU] >
[Custom] > [MF Assist]
• Available settings vary depending on the lens used.
When an interchangeable lens with no focus ring (H-FS12032) is used
[ON]
Focus can be adjusted when 2(
displayed.
) is pressed and the MF area setting screen is
[OFF]
Focus can be adjusted when 2(
be displayed.
) is pressed. The MF area setting screen will not
When an interchangeable lens having a focus ring (H-H020A) is used
MF Assist is displayed when the focus ring of the lens is rotated or 2(
]
pressed.
[
[
) is
] MF Assist is displayed when the focus ring of the lens is rotated.
[
]
[OFF]
MF Assist is displayed when 2(
) is pressed.
MF Assist is not displayed even when the focus ring of the lens is rotated.
Changing the display of the MF Assist
[MENU] >
[Custom] > [MF Assist Display]
[FULL]:
Enlarges the display in a window on the screen.
[PIP]:
Enlarges the display in full screen.
• The display of the assist screen can also be switched by touching [
] on the focus
adjustment screen.
• When the control dial is rotated, the display can be enlarged/reduced up to approximately 3 to
6 times in [PIP]. In [FULL], it can be enlarged/reduced up to approximately 3 to 10 times. The
display is enlarged/reduced by a factor of 1.
• The display can also be enlarged/reduced by pinching out/pinching in.
153
6. Focus and Brightness (Exposure) Settings
Setting the initial magnification level of MF Assist
[MENU] >
[Custom] > [Lens w/o Focus Ring] > [MF Magnification Level]
An initial MF Assist magnification level between 3 and 10 times can be set.
• When [MF Assist Display] is set to [PIP], the display can be enlarged only up to 6 times
regardless of this setting.
• The magnification level from the last MF Assist session is saved as the initial magnification
level.
• These items can be set only when an interchangeable lens with no focus ring (H-FS12032) is
used.
Changing the control dial operation in Manual Focus
[MENU] >
[Custom] > [Lens w/o Focus Ring] > [Control Dial (MF)]
[MAGLEVEL]:
Rotating the control dial allows you to change the magnification level of
the enlarged area.
[FOCUS]:
Rotating the control dial allows you to adjust the focus.
• These items can be set only when an interchangeable lens with no focus ring (H-FS12032) is
used.
154
6. Focus and Brightness (Exposure) Settings
Fixing the Focus and the Exposure (AF/AE Lock)
Applicable modes:
This is useful when you want to take a picture of a subject outside the AF area or the
contrast is too strong and you cannot achieve appropriate exposure.
1
Set a function button to [AF/AE LOCK]. (P43)
• [AF/AE LOCK] can only be assigned to [Fn1].
2
3
Align the screen with the subject.
Press [Fn1] to fix the focus or exposure.
• AF/AE Lock is cancelled by pressing [Fn1] button again.
• Only the exposure is locked in the default setting.
4
Move the camera as you compose the picture
and then press shutter button fully.
AEL
3.5 60
0
200
A
A AE Lock indication
• When [AE LOCK] is set, after pressing the shutter button halfway to focus, press the
shutter button fully.
Setting the functions of [AF/AE LOCK]
[MENU] >
[Custom] > [AF/AE Lock]
[AE LOCK]
Only the exposure is locked.
• When the exposure is set, [AEL], the aperture value, and the shutter speed
are displayed.
[AF LOCK]
Only the focus is locked.
• When the subject is focused, [AFL], the focus indication, the aperture value,
and the shutter speed are displayed.
Both focus and exposure are locked.
[AF/AE LOCK] • [AFL], [AEL], the focus indication, aperture value and shutter speed are
displayed when the focus and the exposure are optimised.
[AF-ON]
Auto Focus is performed.
155
6. Focus and Brightness (Exposure) Settings
• AF Lock only is effective when taking pictures in Manual Exposure Mode.
• AE Lock only is effective when taking pictures with Manual Focus.
• Only the AF lock is active during motion picture recording. Once you cancel the AF lock during
the recording, the AF lock cannot be reactivated.
• The subject can be focused again by pressing the shutter button halfway even when AE is
locked.
• Programme Shift can be set even when AE is locked.
156
6. Focus and Brightness (Exposure) Settings
Compensating the Exposure
Applicable modes:
Use this function when you cannot achieve appropriate exposure due to the difference in
brightness between the subject and the background.
1
Press 3 (È) to switch to Exposure
Compensation operation.
• Exposure Compensation value turns yellow, indicating
that the exposure can now be compensated.
2
Rotate the control dial to compensate the
exposure.
A Exposure Compensation value
B [Expo.Meter]
Underexposed
SS
F
250
125
60
3.5 60
0
Compensate the exposure
towards positive.
15
5.6
+5
A
Properly
exposed
30
4.0
8.0
200
98
B
Overexposed
Compensate the exposure
towards negative.
• The Exposure Compensation value can be set within a range of j5 EV to i5 EV.
When recording motion pictures, the Exposure Compensation value can be set within a
range of j3 EV to i3 EV.
• Select [0] to return to the original exposure.
• Rotate the control dial to display the [Expo.Meter]. (P84)
• When [Auto Exposure Comp.] in [Flash] in the [Rec] menu is set to [ON], the brightness of the
built-in flash will automatically be set to the level appropriate to the selected Exposure
Compensation. (P207)
• When the exposure value is out of the j3 EV to i3 EV range, the brightness of the recording
screen will no longer change.
It is recommended to record by checking the actual brightness of the recorded image in the
Auto Review or playback screen.
• The set Exposure Compensation value is stored even if the camera is turned off. (When
[Exposure Comp. Reset] (P52) is set to [OFF])
157
6. Focus and Brightness (Exposure) Settings
Setting the Light Sensitivity
Applicable modes:
This allows the sensitivity to light (ISO sensitivity) to be set.
Setting to a higher figure enables pictures to be taken even in dark places without the
resulting pictures coming out dark.
1
Select the menu. (P37)
[MENU] >
[Rec] > [Sensitivity]
2
Select the ISO sensitivity by rotating the
control dial.
3
Press [MENU/SET] to set.
AUTO
• Exit the menu after it is set.
AUTO
ISO
AUTO
200 400
The ISO sensitivity is automatically adjusted according to the
brightness.
• Maximum [ISO3200] (With the flash on [ISO1600])¢1
The camera detects movement of the subject and then
automatically sets the optimum ISO sensitivity and shutter
speed to suit the movement of the subject and brightness of
the scene to minimise the jitter of the subject.
(Intelligent)
• Maximum [ISO3200] (With the flash on [ISO1600])¢1
• The shutter speed is not fixed when the shutter button is
pressed halfway. It is continuously changing to match the
movement of the subject until the shutter button is pressed
fully.
The ISO sensitivity is fixed to various settings.
125¢2/200/400/800/1600/3200/
6400/12800/25600
• When the [ISO Increments] in [Rec] menu (P160) is set to
[1/3 EV], items of ISO sensitivity that can be set will
increase.
¢1 When the [ISO Limit Set] (P159) of [Rec] menu is set to anything except [OFF], it is set
automatically within the value set in [ISO Limit Set].
¢2 Only available when [Extended ISO] is set.
158
6. Focus and Brightness (Exposure) Settings
Characteristics of the ISO sensitivity
200
Recording location
(recommended)
When it is light (outdoors)
25600
When it is dark
Shutter speed
Slow
Fast
Noise
Less
Increased
Increased
Less
Jitter of the subject
• For the focus range of flash when [AUTO] is set, refer to P201.
• In Shutter-Priority AE Mode, [
] cannot be used; in Manual Exposure Mode, [AUTO] and
[
] cannot be used.
• When [Multi Exp.] is set, the maximum setting is [ISO3200].
• Setting items below will be selectable in Creative Video Mode.
[AUTO]/[200] to [3200]
• Those menu items are shared by the [Rec] menu and the [Motion Picture] menu. When the
setting for either of the two is changed, the setting for the other is also changed.
Setting the upper limit on ISO sensitivity
Applicable modes:
It will select optimal ISO sensitivity with set value as limit depending on the brightness of
the subject.
].
• It will work when the [Sensitivity] is set to [AUTO] or [
[MENU] >
[Rec] > [ISO Limit Set]
Settings: [400]/[800]/[1600]/[3200]/[6400]/[12800]/[25600]/[OFF]
Not available in these cases:
• [ISO Limit Set] is disabled in the following cases:
– [Clear Nightscape]/[Cool Night Sky]/[Warm Glowing Nightscape]/[Handheld Night Shot]
(Scene Guide Mode)
– When recording motion pictures
159
6. Focus and Brightness (Exposure) Settings
Setting the step increment of ISO sensitivity
Applicable modes:
You can adjust the ISO sensitivity settings for every 1/3 EV.
[MENU] >
[1/3 EV]
[1 EV]
[Rec] > [ISO Increments]
[L.125]¢/[L.160]¢/[200]/[250]/[320]/[400]/[500]/[640]/[800]/[1000]/[1250]/[1600]/
[2000]/[2500]/[3200]/[4000]/[5000]/[6400]/[8000]/[10000]/[12800]/[16000]/
[20000]/[25600]
[L.125]¢/[200]/[400]/[800]/[1600]/[3200]/[6400]/[12800]/[25600]
¢ Only available when [Extended ISO] is set.
• When the setting is changed from [1/3 EV] to [1 EV], [Sensitivity] will be set to value closest to
the value set during the [1/3 EV].
Extending ISO sensitivity
Applicable modes:
ISO sensitivity can be set up to minimum [ISO125].
[MENU] >
[Rec] > [Extended ISO]
Settings: [ON]/[OFF]
160
6. Focus and Brightness (Exposure) Settings
Selecting the Method for Measuring Brightness
([Metering Mode])
Applicable modes:
Type of optical measurement to measure brightness can be changed.
[MENU] >
[Rec] > [Metering Mode]
[
]
(Multiple)
This is the method in which the camera measures the most suitable
exposure by judging the allocation of brightness on the whole screen
automatically.
Usually, we recommend using this method.
[
]
(Centre weighted)
This is the method used to focus on the subject on the centre of the
screen and measure the whole screen evenly.
[
]
(Spot)
This is the method to measure the subject in the spot
metering target A.
• Those menu items are shared by the [Rec] menu and the [Motion Picture] menu. When the
setting for either of the two is changed, the setting for the other is also changed.
161
6. Focus and Brightness (Exposure) Settings
Easily Optimising the Brightness for a Specified
Area (Touch AE)
Applicable modes:
You can easily optimise the brightness for a touched position. When the face of the subject
appears dark, you can brighten the screen according to the brightness of the face.
You can optimise just the brightness for a touched position or by optimising the brightness
when using Touch AF, you can optimise both the focus and brightness for the touched
position.
Optimising only the brightness for a touched position
AFS
1
2
3.5 60
0
16 0
98
Touch [ ].
Touch [
AE
].
• The setting screen for the brightness optimisation position
is displayed.
• [Metering Mode] is set to [
AE
], which is used exclusively
AE
for the Touch AE.
3
Touch the subject you want to optimise the
brightness for.
• Touching [Reset] will bring the brightness optimisation
position back to the centre.
DISP.
4
5HVHW
6HW
Touch [Set].
∫ Cancelling the Touch AE function
Touch [
].
• [Metering Mode] returns to the original setting, and the brightness optimisation position is
cancelled.
Not available in these cases:
• This function is not available in the following cases:
– When using the Digital Zoom.
– When [Touch AF] in [Touch Settings] of the [Custom] menu has been set to [AF+AE]. (P163)
162
6. Focus and Brightness (Exposure) Settings
Optimising the focus and brightness for a touched position
1
Select the menu. (P37)
[MENU] >
2
3
[Custom] > [Touch Settings]
Select [Touch AF] and then touch [AF+AE].
Touch the subject you want to optimise the
brightness for.
• AF area setting screen is displayed. (P141)
• The brightness optimisation position is displayed on the
DISP. 5HVHW
centre of the AF area. The position follows the movement
6HW
of the AF area.
• [Metering Mode] is set to [ AE ], which is used exclusively for the Touch AE.
• Touching [Reset] returns the brightness optimisation position and the AF area to the
centre.
4
Touch [Set].
• The AF area with the same function as [Ø] is displayed on the touched position.
• Touching [
] returns [Metering Mode] to the original setting and cancels the
brightness optimisation position. The AF area setting is also cancelled.
• Touching [
] returns [Metering Mode] to the original setting and cancels the
brightness optimisation position.
When the background has become too bright, etc., the
brightness contrast with the background can be
adjusted by compensating the exposure.
163
6. Focus and Brightness (Exposure) Settings
• When recording with the Touch Shutter, the focus and brightness are optimised for the touched
position before recording takes place.
• At the edge of the screen, the metering may be affected by the brightness around the touched
location.
Not available in these cases:
• [AF+AE], which optimises the focus and brightness, does not work in the following cases.
– When using the Manual Focus
– When using the Digital Zoom
– When the AF area has been set by using the cursor button
164
7. Shutter and Drive Settings
Setting the Shutter Type
Applicable modes:
You can take pictures using either of the two shutter methods: the Electronic Front Curtain
method or the electronic shutter method.
Electronic Front Curtain
The camera starts an exposure
electronically, and ends it with the
mechanical shutter.
Description
Electronic Shutter
The camera starts and ends an
exposure electronically.
Flash
±
—
Shutter Speed
(Sec.)
60 to 1/500th
1¢1 to 1/16000th
Shutter sound
Mechanical shutter sound¢2+
Electronic shutter sound¢3
Electronic shutter sound¢3
¢1 Up to an ISO sensitivity of [ISO3200]. When the setting is higher than [ISO3200], the shutter
speed will be faster than 1 second.
¢2 The mechanical shutter sound cannot be muted.
¢3 Electronic shutter sound settings can be changed in [Shutter Vol.] and [Shutter Tone]. (P47)
Select the menu. (P37)
[MENU] >
[Rec] > [Shutter Type]
[AUTO]
[EFC]
[ESHTR]
Depending on the recording condition and the shutter speed, the
shutter type is switched automatically.
• The Electronic Front Curtain method takes priority. This method
places less limitations on the functions that can be used, for
example when pictures are taken with the flash.
Takes pictures using only the Electronic Front Curtain method.
Takes pictures using only the electronic shutter method.
165
7. Shutter and Drive Settings
• When [ ] is displayed on the screen, pictures will be taken with the electronic shutter.
• When [Burst Rate] is set to [SH], pictures will be taken with the electronic shutter.
• When [Silent Mode] is set to [ON], pictures will be taken with the electronic shutter.
• When a lens not based on the Micro Four Thirds System standard/Four Thirds System
standard is used, [AUTO] takes pictures with the electronic shutter except when, for example,
the flash is used for taking pictures. Also, [EFC] switches to [AUTO].
Certain lenses based on the Micro Four Thirds System standard/Four Thirds System standard
may also cause the setting to switch to [AUTO].
Refer to the website for compatible lenses.
• When a moving subject is recorded with the electronic shutter, the subject may appear
distorted on the picture.
• When the electronic shutter is used under fluorescent or LED lighting, etc., horizontal
stripes may appear on the picture. In such cases, lowering the shutter speed may
reduce the effect of the horizontal stripes.
• Be sure to pay special attention to the privacy, the likeness rights, etc. of the subject
when you use this function. Use at your own risk.
166
7. Shutter and Drive Settings
Select a Drive Mode
Applicable modes:
You can change what the camera will do when you press the shutter button.
1
Press 4 (
2
Press 2/1 to select the drive mode, and then
press [MENU/SET].
).
A Drive mode
1 2 3 4
H 31/3
A
1 [Single] (P57)
When the shutter button is pressed, only one picture is
recorded.
2 [Burst] (P168)
Recordings are made in succession while the shutter
button is pressed.
3 [Auto Bracket] (P171)
Each time the shutter button is pressed, recordings
are made with different exposure settings according to
the Exposure Compensation range.
4 [Self Timer] (P174)
When the shutter button is pressed, recording takes
place after the set time has elapsed.
• To cancel the drive mode, select [
]. The setting will switch to [Single].
• Settings for each drive mode can be changed by pressing 3.
167
7. Shutter and Drive Settings
Taking Pictures using Burst Mode
Applicable modes:
Pictures are taken continuously while the shutter button is pressed.
• Pictures taken with a burst speed of [SH] will be recorded as a single burst group (P218).
1
2
Press 4 (
3
Select the burst speed with 2/1, and then
press [MENU/SET].
).
Press 2/1 to select the burst icon ([
etc.), and then press 3.
],
[SH]
[H]
(Super high
(High speed)
¢2
speed)
Burst
speed
(pictures/
second)
Electronic
Front Curtain
Electronic
Shutter
Live View during Burst
Mode
¢1
H 31/3
SH
H
LV
M
LV
L
[M]
(Middle
speed)
[L]
(Low speed)
5
4
2
10
4
2
None
Available
Available
40
None
With RAW files
—
Without RAW
files
7
Max. 39
¢3, 4
Depends on the capacity of the card¢4
¢1 Number of recordable pictures
¢2 The electronic shutter will operate.
¢3 Depending on the recording conditions, the number of frames in a burst may be reduced.
(For example, when you set [i.Resolution] of the [Rec] menu, the number of frames in
a burst may be reduced)
¢4 Pictures can be taken until the capacity of the card becomes full. However the burst
speed will become slower halfway. The exact timing of this depends on the aspect
ratio, the picture size, the setting for the quality and the type of card used.
168
7. Shutter and Drive Settings
• The burst speed may become slower depending on the following settings.
– [Picture Size] (P128)
– [Quality] (P129)
– [Sensitivity] (P158)
– Focus mode (P136)
– [Focus/Release Priority] (P146)
• Burst speed can also be set with [Burst Rate] in the [Rec] menu.
• Refer to P129 for information about RAW files.
4
Focus on the subject and take a picture.
50 i
4:3
L
AFS
H
• Hold down the shutter button fully to activate the Burst
Mode.
∫ Cancelling the Burst Mode
Select [
] ([Single]) or [
] from among the drive modes. (P167)
Focusing in Burst Mode
The way focus is achieved varies according to the focus mode (P136) setting and the
[Focus/Release Priority] (P146) setting in the [Custom] menu.
Focus mode
[AFS]
[AFF]/[AFC]¢1
[MF]
[Focus/Release
Priority]
[FOCUS]
Focus
At the first picture
[RELEASE]
[FOCUS]
Normal focusing¢2
[RELEASE]
Predicted focusing¢3
—
Focus set with Manual Focus
¢1 When the subject is dark or the burst speed is set to [SH], the focus is fixed on the first
picture.
¢2 The burst speed may become slower because the camera is continuously focusing on the
subject.
¢3 Burst speed takes priority, and focus is estimated within possible range.
169
7. Shutter and Drive Settings
• When a high ambient temperature, continuous recording in Burst Mode or other conditions are
causing the camera to overheat, [
] flashes. If a message is displayed after [
] flashes, the
camera will turn off automatically to protect itself. When this happens, some functions will be
disabled until the camera cools down.
• When the burst speed is set to [SH] or [H] (when focus mode is [AFS] or [MF]), the exposure
and White Balance are fixed at the settings used for the first picture for the subsequent pictures
as well.
When the burst speed is set to [H] (when focus mode is [AFF] or [AFC]), [M] or [L], they are
adjusted each time you take a picture.
• Since the shutter speed becomes slower in dark places, the burst speed (pictures/second) may
become slower.
• Depending on the operating conditions, it may take time to take the next picture if you repeat
the recording of pictures.
• It may take time to save pictures taken in Burst Mode on the card. If you take pictures
continuously while saving, the maximum number of recordable pictures decreases. For
continuous shooting, use of a high speed memory card is recommended.
Not available in these cases:
• The Burst Mode is disabled in the following cases.
– [Glistening Water]/[Glittering Illuminations]/[Handheld Night Shot]/[Soft Image of a Flower]
(Scene Guide Mode)
– [Rough Monochrome]/[Silky Monochrome]/[Miniature Effect]/[Soft Focus]/[Star Filter]/
[Sunshine] (Creative Control Mode)
– When White Balance Bracket is set
– When recording motion pictures
– When recording using the flash
– When recording with [iHandheld Night Shot]
– When [HDR] is set to [ON]
– [Multi Exp.]
– When using [Time Lapse Shot]
– In [Stop Motion Animation] (only when [Auto Shooting] is set)
• In the following cases, [SH] in Burst Mode cannot be used.
– When [Quality] is set to [
], [
] or [
]
– When using [Stop Motion Animation]
170
7. Shutter and Drive Settings
Taking Pictures using Auto Bracket
Applicable modes:
Maximum of 7 pictures will be recorded with different exposure settings following the
Exposure Compensation range every time the shutter button is pressed.
With Auto Bracket
[Step]: [3•1/3], [Sequence]: [0/s/r]
1st picture
2nd picture
3rd picture
d0 EV
j1/3 EV
i1/3 EV
1
2
Press 4 (
3
Press 2/1 to select the compensation range,
and then press [MENU/SET].
).
Press to 2/1 to select the Auto Bracket icon
([ 3 1/3 ], etc.), and then press 3.
H 31/3
-3
-2
-1
0
2
1
+1
31/3 32/3 3 1 51/3 52/3 5 1
71/3 72/3 7 1
4
Focus on the subject and take a picture.
50 i
4:3
L
AFS
• If you press and hold the shutter button, the number of
pictures that you set is taken.
• The Auto Bracket indication blinks until the number of
pictures that you set is taken.
• The picture count is reset to [0] if you change the Auto Bracket setting or turn the
camera off before all the pictures that you set are taken.
171
+2
3
+3
7. Shutter and Drive Settings
∫ Cancelling the Auto Bracket
Select [
] ([Single]) or [
] from among the drive modes. (P167)
∫ Changing the settings for [Single/Burst Settings], [Step] and [Sequence] in Auto
Bracket
1 Select the menu. (P37)
[MENU] >
2
3
[Rec] > [Auto Bracket]
Press 3/4 to select [Single/Burst Settings], [Step] or [Sequence] and then
press [MENU/SET].
Press 3/4 to select the setting and then press [MENU/SET].
[Single/Burst Settings]
[
] (single)
[
] (burst)
[3•1/3] (3 pictures)
[3•2/3] (3 pictures)
[3•1] (3 pictures)
[5•1/3] (5 pictures)
[5•2/3] (5 pictures)
[Step]
[5•1] (5 pictures)
[7•1/3] (7 pictures)
[7•2/3] (7 pictures)
[7•1] (7 pictures)
[0/`/_]
[Sequence]
[`/0/_]
• You can take one picture at a time when set to [ ].
• You can continuously take pictures up to set numbers when set to [
• Exit the menu after it is set.
172
].
7. Shutter and Drive Settings
• When taking pictures using Auto Bracket after setting the Exposure Compensation value, the
pictures taken are based on the selected Exposure Compensation value.
Not available in these cases:
• Auto Bracket is disabled in the following cases.
– [Glistening Water]/[Glittering Illuminations]/[Handheld Night Shot]/[Soft Image of a Flower]
(Scene Guide Mode)
– [Rough Monochrome]/[Silky Monochrome]/[Miniature Effect]/[Soft Focus]/[Star Filter]/
[Sunshine] (Creative Control Mode)
– When White Balance Bracket is set
– When recording motion pictures
– When recording using the flash
– When recording with [iHandheld Night Shot]
– When [HDR] is set to [ON]
– [Multi Exp.]
– When using [Time Lapse Shot]
– In [Stop Motion Animation] (only when [Auto Shooting] is set)
173
7. Shutter and Drive Settings
Taking Pictures with the Self-timer
Applicable modes:
1
2
Press 4 (
3
Press 2/1 to select the time setting for the
self-timer, and then press [MENU/SET].
).
Press 2/1 to select the self-timer icon
([ 10 ], etc.), and then press 3.
H 31/3
10
10
2
Picture is taken 10 seconds after shutter is pressed.
After 10 seconds the camera takes 3 pictures at about 2 seconds intervals.
Picture is taken 2 seconds after shutter is pressed.
• When using a tripod, etc., this setting is a convenient way to avoid the jitter
caused by pressing the shutter button.
• Time setting for the self timer can also be set by [Self Timer] in the [Rec] menu.
174
7. Shutter and Drive Settings
4
Press the shutter button halfway to focus and
then press it fully to take the picture.
• Focus and exposure will be set when the shutter button
is pressed halfway.
• After the self-timer indicator flashes, recording starts.
∫ Cancelling the self-timer
Select [
] ([Single]) or [
] from among the drive modes. (P167)
• It is also possible to cancel by turning off this unit.
(When [Self Timer Auto Off] (P52) is set to [ON])
• We recommend using a tripod when recording with the self-timer.
• The flash output may vary slightly when the [
] is selected.
Not available in these cases:
] in the following cases.
• It cannot be set to [
– When White Balance Bracket is set
– [Multi Exp.]
• Self-timer is disabled in the following cases.
– When recording motion pictures
– When using [Time Lapse Shot]
– In [Stop Motion Animation] (only when [Auto Shooting] is set)
175
8. Functions Customised for Various Subjects and Purposes
Taking Pictures Automatically at Set Intervals
([Time Lapse Shot])
Applicable modes:
You can set the recording start time, the recording interval and the number of pictures, and
automatically record subjects such as animals and plants as time elapses.
Pictures are recorded as a single Picture Group (P218).
You can create motion pictures using [Time Lapse Video] in [Playback] menu. (P231)
• Set the date and time settings in advance. (P35)
1 Select the menu. (P37)
[MENU] >
2
[Rec] > [Time Lapse Shot]
Press 3/4 to select the item and then press [MENU/
SET].
[Now]
[Start Time]
Starts the recording by fully-pressing the shutter button.
You can set the time to start recording.
[Start Time Any time up to 23 hours 59 minutes ahead can be set.
Select the item (hour or minute) by pressing 2/1, set the
Set]
start time by pressing 3/4, and then press [MENU/SET].
[Shooting
Interval]/
[Image
Count]
The recording interval and the number of pictures can be set.
2/1: Select the item (minute/second/number of pictures)
3/4: Setting
[MENU/SET]: Set
• A recording interval ranging from 1 second to 99 minutes and 59 seconds can
be set at 1 second interval.
• The number of pictures ranging from 1 to 9999 can be set.
• Set the recording interval D so that it will be longer than the exposure time
(shutter speed) E. (The figure below)
Recording may be skipped when the recording interval D is shorter than the
exposure time (shutter speed) E, for example during night-time recording.
A:First
B:Second
C:Third
176
8. Functions Customised for Various Subjects and Purposes
3
4
Press 3/4 to select [Start] and then press [MENU/SET].
Press the shutter button fully.
• The recording starts automatically.
• During recording standby, the power will turn off automatically if no operation is performed
for a certain period. The Time Lapse Shot is continued even with the power turned off.
When the recording start time arrives, the power turns on automatically.
To turn on the power manually, press the shutter button halfway.
• If [Fn1] is pressed or [
] is touched while this unit is turned on, a selection screen
asking you to pause or end will be displayed. Operate in accordance with the screen.
Also, if [Fn1] is pressed or [
] is touched during the pause, a selection screen asking
you to resume or end will be displayed. Pressing the shutter button fully will also enable
you to resume from the pause.
• This function is not for use in a security camera.
• If you leave the unit somewhere to perform [Time Lapse Shot], please be careful of theft.
• Recording for long periods in cold places such as ski resorts or places at high altitude,
or in warm, wet environments may cause a malfunction, so please be careful.
• Recording may not be consistent with the set recording interval or the set number of pictures
depending on recording conditions.
• We recommend that you use a sufficiently charged battery or an AC adaptor (optional) and a
DC coupler (optional).
• [Time Lapse Shot] is paused in the following cases.
– When the charge on the battery runs out
– Turning the camera off
During [Time Lapse Shot], you can replace the battery and the card, and then restart by turning
on this unit. (Note that pictures taken after the restart will be saved as a separate set of group
pictures) Turn off this unit when replacing the battery or the card.
• Do not connect the AV cable (optional), the HDMI micro cable, or the USB connection cable
(supplied) during Time Lapse Shooting.
• When only one picture is taken, it will not be saved as a group picture.
Not available in these cases:
• This function is not available in the following cases:
– [Handheld Night Shot] (Scene Guide Mode)
– [Multi Exp.]
– When using [Stop Motion Animation]
177
8. Functions Customised for Various Subjects and Purposes
Creating Stop Motion Pictures ([Stop Motion Animation])
Applicable modes:
A stop motion picture is created by splicing pictures together.
• Set the date and time settings in advance. (P35)
• Pictures taken with [Stop Motion Animation] are displayed as a set of group pictures. (P218)
Before creating a motion picture with [Stop Motion Animation]
With [Stop Motion Animation], you can make a motion picture in which objects appear to
be moving by making a recording each time you move a doll, etc., in small increments,
and then splicing the recordings together.
• With this unit, pictures of 1 to 25 frames have to be taken per second of a motion picture.
• For smoother motion, record movement in as small increments as possible, and set the frame
rate per second (frame rate) to a large value.
1
Select the menu. (P37)
[MENU] >
[Rec] > [Stop Motion Animation]
178
8. Functions Customised for Various Subjects and Purposes
2
Press 3/4 to select the recording method, and then
press [MENU/SET].
[Auto
Shooting]
[Shooting
Interval]
3
4
5
6
[ON]
Takes pictures automatically at a set recording interval.
When the shutter button is pressed fully, recording starts.
[OFF]
This is for taking pictures manually, frame by frame.
(Only when [Auto Shooting] is set to [ON])
Sets the interval for automatic recording. A value between 1 and
60 seconds can be set in 1 second intervals.
Press 2/1 to select the recording interval (seconds), press 3/4
to set it, and press [MENU/SET].
Press 3/4 to select [Start] and then press [MENU/SET].
Press 3/4 to select [New] and then press [MENU/SET].
Press the shutter button fully.
• Up to 9999 frames can be recorded.
Move the subject to decide on the composition.
• Repeat recording in the same way.
• If this unit is turned off while recording, a message for
resuming the recording is displayed when the camera is
turned on. Selecting [Yes] allows you to continue the
recording from the interruption point.
Recording materials skilfully
• The recording screen displays up to two pictures taken previously. Use them as
reference for the amount of movement.
• Pressing [(] allows you to check recorded pictures.
Unnecessary pictures can be deleted by pressing [ ].
Pressing [(] again will return you to the recording screen.
179
8. Functions Customised for Various Subjects and Purposes
7
Touch [
] to end the recording.
• It can also be ended by selecting [Stop Motion Animation]
from the [Rec] menu and then pressing [MENU/SET].
• When [Auto Shooting] is set to [ON], select [End] on the
confirmation screen.
(If [Pause] has been selected, press the shutter button fully
to resume the recording.)
• Confirmation screen is displayed. It is ended when [Yes] is
selected.
• Confirmation screen for creating a motion picture is displayed next, so select [Yes].
8
Select the methods for creating a motion picture.
• The recording format is set to [MP4].
[Rec Quality]
Sets the quality of a motion picture.
[FHD/25p]/[HD/25p]/[VGA/25p]
[Frame Rate]
Sets the number of frames per second.
The larger the number is, the smoother the motion picture will be.
[25fps]/[12.5fps]/[8.3fps]/[6.25fps]/[5fps]/[2.5fps]/[1fps]
[NORMAL]:
Splices pictures together in recording order.
[Sequence]
[REVERSE]:
Splices pictures together in reverse recording order.
9
Press 3/4 to select [OK] and then press [MENU/
SET].
• Confirmation screen is displayed. It is executed when [Yes]
is selected.
• Motion pictures can also be created from [Stop Motion
Video] in the [Playback] menu. (P232)
180
30
8. Functions Customised for Various Subjects and Purposes
∫ Adding pictures to the Stop Motion Animation group
Selecting [Additional] in step 4 will display group pictures recorded with [Stop Motion
Animation].
Select a set of group pictures, press [MENU/SET], and then select [Yes] on the
confirmation screen.
• Automatic recording may not take place at set intervals because recording takes time under
certain recording conditions, such as when the flash is used for recording.
• When a picture quality different from the aspect ratio of the original pictures is selected, black
strips will be displayed on the top and bottom or the left and right of the motion picture.
• We recommend that you use a sufficiently charged battery or an AC adaptor (optional) and a
DC coupler (optional).
• If power supply is lost by unplugging the AC adaptor or due to a blackout while creating a
motion picture with the AC adaptor, the motion picture you are creating will not be recorded.
• A motion picture that exceeds the recording time of 29 minutes and 59 seconds and a motion
picture that exceeds the file size of 4 GB cannot be created.
• A motion picture shorter than 1 second is displayed as “0s” on the motion picture recording time
(P68).
• If only one picture was taken, the picture is not saved as a group picture.
A picture cannot be selected from [Additional] when it is the only one that was taken.
Not available in these cases:
• This function is not available in the following cases:
– [Multi Exp.]
– [Time Lapse Shot]
• [Auto Shooting] in [Stop Motion Animation] is not available for the following functions:
– [Handheld Night Shot] (Scene Guide Mode)
181
8. Functions Customised for Various Subjects and Purposes
Making Multiple Exposures on One Picture
([Multi Exp.])
Applicable modes:
Gives an effect like multi exposure. (up to 4 times equivalent per a single image)
1
Select the menu. (P37)
[MENU] >
[Rec] > [Multi Exp.]
2
Press 3/4 to select [Start] and then press [MENU/
SET].
3
Decide on the composition, and take the first picture.
• After taking the picture, press the shutter button halfway
down to take the next picture.
• Press 3/4 to select the item and then press [MENU/SET]
for one of the following operations.
– [Next]:
– [Retake]:
– [Exit]:
4
1H[W
5HWDNH
Advance to the next picture.
Return to the first picture.
Record the image of the first picture, and
finish the multiple exposure picture-taking
session.
([LW
Shooting the second, third, and fourth exposures.
• If [Fn1] is pressed while taking pictures, the photographed
images are recorded, and the multiple exposure
picture-taking session will be completed.
5
Press 4 to select [Exit] and then press [MENU/SET].
• You can also press the shutter button halfway to finish.
182
5HWDNH
([LW
8. Functions Customised for Various Subjects and Purposes
∫ About Automatic Gain Control setting
Select [Auto Gain] on the screen shown in step 2 and set it.
• [ON]:
The brightness level is adjusted according to the number of pictures taken and the
pictures are superimposed over each other.
• [OFF]: Compensate the exposure to match the subject so that all the superimposed exposure
effects will be just right.
∫ Superimposing pictures on a picture already taken
On the screen shown in step 2, set [Overlay] to [ON].
After [Start], images in the card will be displayed. Select the RAW images, press [MENU/
SET], and continue recording.
• [Overlay] is available only for RAW images taken with this unit.
• Image is not recorded until completion.
• The recording information displayed for pictures taken with multiple exposures is the recording
information for the last picture taken.
• Items shown in grey on the menu screen cannot be set during multiple exposures.
Not available in these cases:
• This function is not available in the following cases:
– When using [Time Lapse Shot]
– When using [Stop Motion Animation]
183
8. Functions Customised for Various Subjects and Purposes
Disabling Operational Sounds and the Output of
Light at once ([Silent Mode])
Applicable modes:
This function is useful for recording images in a quiet environment, public facility, etc. or
recording images of subjects such as babies or animals.
Select the menu. (P37)
[MENU] >
[Custom] > [Silent Mode]
Settings: [ON]/[OFF]
• Operational sounds are muted, and the flash and the AF Assist lamp are forced off.
The following settings are fixed.
– [Shutter Type]: [ESHTR]
– [Flash Mode]: [Œ] (forced flash off)
– [AF Assist Lamp]: [OFF]
– [Beep Volume]: [s] (OFF)
– [Shutter Vol.]: [
] (OFF)
– [Speaker Volume]: 0
• Even when [ON] is set, the following functions light up/flash.
– Status indicator
– Self-timer indicator
– Wi-Fi connection lamp
• Operational sounds of the camera, such as those made by the lens aperture or focus
operations, are not turned off.
• Be sure to pay special attention to the privacy, the likeness rights, etc. of the subject
when you use this function. Use at your own risk.
184
8. Functions Customised for Various Subjects and Purposes
Taking Clear Pictures by Registering Faces
([Face Recog.])
Applicable modes:
Face Recognition is a function which finds a face resembling a registered face and
prioritises focus and exposure automatically. Even if the person is located towards the
back or on the end of a line in a group photo, the camera can still take a clear picture.
Select the menu. (P37)
[MENU] >
[Rec] > [Face Recog.]
Settings: [ON]/[OFF]/[MEMORY]
• [Face Recog.] will turn [ON] automatically when the face image is registered.
• The following functions will also work with the Face
Recognition function.
In Recording Mode
– Display of corresponding name when camera detects a
registered face¢ (if name has been set for the registered face)
¢ Names of up to 3 people are displayed.
Precedence for the names displayed when taking pictures
is determined according to the order of registration.
In Playback Mode
– Display of name and age (if information has been registered)
– Selective playback of pictures chosen from pictures registered with Face Recognition
([Category Play] (P223))
185
8. Functions Customised for Various Subjects and Purposes
• [Face Recog.] only works when the AF Mode is set to [š].
• During the Burst Mode, [Face Recog.] picture information can be attached to only the first
picture.
• When group pictures are played back, the name of the first picture of the set is displayed.
• Face Recognition may take more time to select and recognise distinctive facial features than
regular Face Detection.
• Even when face recognition information has been registered, pictures taken with [Name] set to
[OFF] will not be categorised by face recognition in [Category Play].
• Even when Face Recognition information is changed (P189), Face Recognition
information for the pictures already taken will not be changed.
For instance, if the name is changed, pictures recorded before the change will not be
categorised by face recognition in [Category Play].
• To change the name information of the pictures taken, perform the [REPLACE] in [Face Rec
Edit] (P240).
Not available in these cases:
• This function is not available in the following cases:
– Recording Modes which do not allow setting to [š] of [AF Mode] (P138)
– [Miniature Effect] (Creative Control Mode)
– When recording motion pictures
– When using [Time Lapse Shot]
186
8. Functions Customised for Various Subjects and Purposes
Face Settings
You can register information such as names and birthdays for face images of up to 6
people.
∫ Point of recording when registering the face images
• Face front with eyes open and mouth closed, making sure the
outline of the face, the eyes, or the eyebrows are not covered
with hair when registering.
• Make sure there is no extreme shading on the face when
registering.
(Flash will not flash during registration.)
(Good example for
registering)
∫ When face is not recognised during recording
• Register the face of same person indoors and outdoors, or with different expressions or
angles. (P188)
• Additionally register at the location of recording.
• When a person who is registered is not recognised, correct by re-registering.
• Face Recognition may not be possible or may not recognise faces correctly even for
registered faces, depending on the facial expression and environment.
1
2
Press 3/4 to select [MEMORY] and then press [MENU/SET].
Press 3/4/2/1 to select the Face Recognition
frame that is not registered, and then press [MENU/
SET].
KEN
• [New] will not display if there are 6 people already
registered. Delete a person already registered to register a
new person.
3
Take the picture adjusting the face with the guide.
• Confirmation screen is displayed. It is executed when [Yes]
is selected.
• The faces of subjects other than people (pets, etc.) cannot
be registered.
• To display the description of the face registration, press 1
or touch [
].
187
1HZ
8. Functions Customised for Various Subjects and Purposes
4
Set the item.
• You can register up to 3 face images.
It is possible to register names.
[Name]
1 Press 4 to select [SET] and then press [MENU/SET].
2 Enter the name.
• For details on how to enter characters, refer to “Entering Text”
section on P54.
It is possible to register the birthday.
[Age]
1 Press 4 to select [SET] and then press [MENU/SET].
2 Press 2/1 to select the items (Year/Month/Day), and then
press 3/4 to set and then press [MENU/SET].
(Add Images)
To add additional face images.
1 Select the unregistered face recognition frame, and then press
[MENU/SET].
2 Perform step 3 in “Face Settings”.
[Add Images]
(Delete)
To delete one of the face images.
Press 2/1 to select the face image to delete, and then press
[MENU/SET].
• This feature requires that at least one facial image remain, once
registered.
• Confirmation screen is displayed. It is executed when [Yes] is selected.
188
8. Functions Customised for Various Subjects and Purposes
Change or delete the information for a registered person
You can modify the pictures or information of an already registered person. You can also
delete the information of the registered person.
1
2
3
Press 4 to select [MEMORY] and press [MENU/SET].
Press 3/4/2/1 to select the face image to edit or delete and then press
[MENU/SET].
Press 3/4 to select the item and then press [MENU/SET].
[Info Edit]
Changing the information of an already registered person.
Perform step 4 in “Face Settings”.
The focus and exposure are preferentially adjusted for
higher-priority faces.
[Priority]
Press 3/4/2/1 to select the priority and then press
[MENU/SET].
[Delete]
• Confirmation screen is displayed. It is executed when [Yes] is
Deleting information of a registered person.
selected.
189
8. Functions Customised for Various Subjects and Purposes
Recording Profiles of Babies and Pets on Images
Applicable modes:
If you set the name and birthday of your baby or pet in advance, you can record their name
and age in months and years in the images.
You can display these at playback or stamp the recorded images using [Text Stamp]
(P228).
∫ Setting [Age] or [Name]
1 Select the menu. (P37)
[MENU] >
Settings: [
2
3
4
5
[Rec] > [Profile Setup]
] ([Baby1])/[
] ([Baby2])/[
] ([Pet])/[OFF]/[SET]
Press 3/4 to select [SET] and then press [MENU/SET].
Press 3/4 to select [Baby1], [Baby2] or [Pet] and then press [MENU/SET].
Press 3/4 to select [Age] or [Name] and then press
[MENU/SET].
Press 3/4 to select [SET] and then press [MENU/
SET].
Enter [Age] (birthday)
2/1: Select the items (year/month/day)
3/4: Setting
[MENU/SET]: Set
Enter [Name]
For details on how to enter characters, refer to “Entering
Text” on P54.
6
Press 4 to select [Exit] and then press [MENU/SET] to finish.
∫ To cancel [Age] and [Name]
Select the [OFF] setting in step 1.
• The age and name can be printed out using the “PHOTOfunSTUDIO” bundled software on the
CD-ROM (supplied).
Not available in these cases:
• Still pictures recorded during motion picture recording ([
will not record age or name.
190
] (motion picture priorities)) (P214)
9. Stabiliser, Zoom and Flash
Optical Image Stabiliser
Applicable modes:
The camera detects jitter during recording and automatically corrects it, so you can record
images with reduced jitter.
A lens which supports the stabiliser function is required.
• The interchangeable lens (H-FS12032) supports the Optical Image Stabiliser function.
• The interchangeable lens (H-H020A) does not support the Optical Image Stabiliser function.
∫ Setting the Stabiliser in the [Rec] menu
1
Select the menu. (P37)
[MENU] >
2
[Rec] > [Stabilizer]
Press 3/4 to select the item and then press [MENU/SET].
[
]
([Normal])
Vertical and horizontal shake are compensated for.
[
]
([Panning])
Camera shake is corrected for up/down movements.
This mode is ideal for panning (a method of taking pictures which involves
turning the camera to track the movements of a subject which continues to
move in a fixed direction).
[OFF]
[Stabilizer] does not work.
(This can be selected only when using a lens without the [O.I.S.] switch.)
• The [Stabilizer] feature is only available if the lens you are using has an internal stabiliser.
• Exit the menu after it is set.
191
9. Stabiliser, Zoom and Flash
Preventing jitter (camera shake)
When the jitter alert [
] appears, use [Stabilizer], a tripod or the self-timer (P174).
• Shutter speed will be slower particularly in the following cases. Keep the camera still from the
moment the shutter button is pressed until the picture appears on the screen.
We recommend using a tripod.
– Slow Sync.
– Slow Sync./Red-Eye Reduction
– [Clear Nightscape]/[Cool Night Sky]/[Warm Glowing Nightscape]/[Artistic Nightscape]/
[Glittering Illuminations]/[Clear Night Portrait] (Scene Guide Mode)
– When you set to a slow shutter speed
• When using an optional interchangeable lens with an O.I.S. switch, it is possible to set to
enable the Optical Image Stabiliser by switching the O.I.S. switch on the lens to [ON].
(At the time of purchase, it is initially set to [
].)
• It is recommended to disable the Optical Image Stabiliser when using a tripod. [
] is
displayed on the screen at that time.
Not available in these cases:
• The stabiliser function may not be effective in the following cases.
Be careful of camera jitter when you press the shutter button.
– When there is a lot of jitter
– When the zoom magnification is high
– When using the Digital Zoom
– When taking pictures while following a moving subject
– When the shutter speed becomes slower to take pictures indoors or in dark places
• The panning effect in [
] is more difficult to achieve in the following cases.
– In brightly lit places such as in broad daylight on a summer’s day
– When the shutter speed is faster than 1/100th of a second
– When you move the camera too slowly because the subject is moving slowly (The
background will not become a blur)
– When the camera does not keep up with the subject satisfactorily
192
9. Stabiliser, Zoom and Flash
Taking Pictures with the Zoom
Applicable modes:
You can zoom-out to record landscapes etc. in wide angle (Wide) or zoom-in to make
people and objects appear closer (Tele).
Zoom ring of an
interchangeable lens
Interchangeable lens with a zoom
ring (H-FS12032)
Cursor buttons of this
unit¢1, 2
T
W
Cursor buttons of this unit¢1, 2
When using the interchangeable lens
(H-H020A) that does not support the
zoom
T side:
Enlarges distant subject
W side:
Widens angle of view
3/1:
Enlarges distant subject
4/2:
Widens angle of view
¢1 When operating the zoom with the cursor buttons, press the function button to which [Zoom
Control] in [Fn Button Set] (P43) of the [Custom] menu has been set.
The zoom operation is terminated when the function button is pressed again or a certain
amount of time passes.
¢2 Operation with the cursor buttons is available only when [Ex. Tele Conv.] in the [Rec] menu
is set to [ZOOM].
• When using an interchangeable lens with a zoom lever, move the zoom lever to operate the
zoom.
• When an interchangeable lens with a zoom lever is attached to the camera but the zoom is
operated with the cursor buttons, pressing 3/4 will zoom fast, and pressing 2/1 will zoom
slow.
193
9. Stabiliser, Zoom and Flash
Raising the telescopic effect
[Ex. Tele Conv.]
Applicable modes:
The Extra Tele Conversion enables you to take pictures that are further enlarged without
deteriorating the picture quality.
When taking pictures
[Ex. Tele Conv.]
1.4k: [
[1:1])
2.0k: [
[1:1])
• Set the picture size to [M]or [S] (picture sizes indicated with
M] ([4:3]/[3:2]/[16:9]/
S] ([4:3]/[3:2]/[16:9]/
), and set the quality to
[A] or [›].
When recording motion
pictures
[Ex. Tele Conv.]
194
2.4k: [FHD/50i]/[FHD/25p]/[FHD/
24p]
3.6k: [HD/50p]/[HD/25p]
4.8k: [VGA/25p]
9. Stabiliser, Zoom and Flash
Zooming in with the Extra Tele Conversion in steps
[MENU] >
[Rec] > [Ex. Tele Conv.] > [ZOOM]
• This can be used only when recording pictures.
4:3
4:3
EX1.0x
EX2.0x
The operation can be performed by using 3/4/2/1.
• When using an interchangeable lens that supports the power zoom, Extra Tele Conversion
becomes available after zooming in to the Tele end of the optical zoom.
A Optical Zoom range (Focal length)¢
B Extra Tele Conversion range for still picture recording
(Zoom magnification)
A
¢ This zoom slider is displayed when using an
interchangeable lens that supports the power zoom.
• A constant zoom speed will be set.
• The indicated zoom magnification is an approximation.
195
B
9. Stabiliser, Zoom and Flash
Simply zooming in with the Extra Tele Conversion
[MENU] >
[Rec] > [Ex. Tele Conv.] > [TELE CONV.]
[MENU] >
[Motion Picture] > [Ex. Tele Conv.] > [ON]
4:3
4:3
[OFF]
• When the Extra Tele Conversion is used, angle of view for still pictures will be different from the
angle of view for motion pictures because the zoom factor is different between them.
Angle of view for recording can be checked beforehand by matching the [Rec Area] (P209)
setting to the mode you wish to record in.
Not available in these cases:
• This function is not available in the following cases:
– [Handheld Night Shot] (Scene Guide Mode)
– [Toy Effect]/[Toy Pop] (Creative Control Mode)
– When [Quality] is set to [
], [
] or [
]
– When [Burst Rate] is set to [SH]
– When [HDR] is set to [ON]
– [Multi Exp.]
196
9. Stabiliser, Zoom and Flash
[Digital Zoom]
Applicable modes:
Although the image quality deteriorates every time you zoom in further, you can zoom in
up to four times the original zoom magnification.
(Continuous zooming is not possible.)
[MENU] >
[Rec] > [Digital Zoom] > [4t]/[2t]
• When using the Digital Zoom, we recommend using a tripod and the self-timer (P174) for taking
pictures.
• Those menu items are shared by the [Rec] menu and the [Motion Picture] menu. When the
setting for either of the two is changed, the setting for the other is also changed.
Not available in these cases:
• This function is not available in the following cases:
– [Toy Effect]/[Toy Pop]/[Miniature Effect] (Creative Control Mode)
– [Multi Exp.]
197
9. Stabiliser, Zoom and Flash
Changing the settings for a power zoom lens
Applicable modes:
Sets the screen display and lens operations when using an interchangeable lens that is
compatible with power zoom (electrically operated zoom).
This may only be selected when using a lens that is compatible with power zoom
(electrically operated zoom).
• The interchangeable lenses (H-FS12032/H-H020A) are not compatible with power zoom.
(For compatible lenses, please refer to our website.)
[MENU] >
[Custom] > [Power Zoom Lens]
[Disp Focal
Length]
When you zoom, the focal distance is
displayed and you can confirm the zoom
position.
A Focal distance indication
B Current focal distance
[ON]/[OFF]
[Step Zoom]
When you operate the zoom with this setting
[ON], the zoom will stop at positions
corresponding to predetermined distances.
C Step zoom indication
• [Step Zoom] is disabled during motion
picture recording.
[ON]/[OFF]
A
B
C
When you turn this unit on, the zoom positions when you last turned this unit
[Zoom Resume] off are automatically restored.
[ON]/[OFF]
You can set the zoom speed for zoom operations.
• If you set [Step Zoom] to [ON], the zoom speed will not change.
[Zoom Speed]
[Zoom Ring]
[Photo]:
[H] (High speed)/[M] (Middle speed)/[L] (Low speed)
[Video]:
[H] (High speed)/[M] (Middle speed)/[L] (Low speed)
This may only be selected when a power zoom-compatible lens with a zoom
lever and zoom ring is attached.
When set to [OFF], the operations controlled by the zoom ring are disabled
to prevent accidental operation.
[ON]/[OFF]
198
9. Stabiliser, Zoom and Flash
Zooming using touch operations
You can perform zoom operations by touching. (Touch zoom)
(Optical Zoom and Extra Tele Conversion for still picture recording are operable)
• If you are using an interchangeable lens not supporting power zoom (H-FS12032/H-H020A),
you can only operate the Extra Tele Conversion for pictures by setting [Ex. Tele Conv.] (P194)
to [ZOOM].
1
2
Touch [ ].
Touch [
].
• The slide bar is displayed.
AE
3
Perform zoom operations by dragging the
slide bar.
• The zoom speed varies depending on the touched
position.
[
]/[
]
Zooms slowly
[
]/[
]
Zooms quickly
• Touch [
] again to end touch zoom operations.
• When [Step Zoom] (P198) is set to [ON], the slide bar for
step zoom is displayed.
14
199
18
25
9. Stabiliser, Zoom and Flash
Taking pictures by using the flash
Applicable modes:
∫ Open/Close the built-in flash
Taking a picture using the flash becomes
possible by opening the built-in flash.
A To open the flash
Slide the flash open lever.
B To close the flash
Press the flash until it clicks.
• Check that the flash is retracted in a
horizontal position.
• Forcibly closing the flash can damage the
camera.
• Be sure to close the built-in flash when not in
use.
• The flash setting is fixed to [Œ] while the
flash is closed.
• Be careful when opening the flash as the flash will jump out.
• Be careful not to catch a finger when closing a flash bulb.
Forcing the flash off ([Œ])
When the flash is closed or pictures cannot be taken with the flash due to motion picture
recording, etc., [Œ] (forced flash off) is displayed on the recording screen and the flash
will not fire.
• Close the flash in places where its use is prohibited so that it will not fire.
200
9. Stabiliser, Zoom and Flash
∫ The available flash range (approximation)
When you use certain lenses, light from the flash may be blocked or fail to cover the
lens field of view, causing dark areas to appear in the resulting pictures.
The distance at which light from the flash is blocked by lens, and the distance to which
light from the flash is delivered vary depending on the lens used. Check the distance to the
subject when taking a picture.
When the interchangeable lens (H-FS12032) is used
Available flash range
[AUTO] in
[Sensitivity]
Wide
Tele
90 cm (3.0 feet) to 4.5 m (15 feet)
30 cm (1.0 feet) to 2.8 m (9.2 feet)
When the interchangeable lens (H-H020A) is used
Available flash range
[AUTO] in
[Sensitivity]
50 cm (1.6 feet) to 9.4 m (31 feet)
• This is the range when [ISO Limit Set] (P159) is set to [OFF].
Using the flash skilfully
• When recording with the flash, white saturation can occur if the subject is too close.
If [Highlight] of the [Custom] menu is set to [ON], regions of white saturation will blink black
and white when you play back or use Auto Review. In this case, we recommend that you
adjust [Flash Adjust.] (P207) in the minus direction and record the pictures again.
• When taking pictures with flash with the lens hood attached, the lower portion of the photo
may turn dark and the control of the flash may be disabled because the photo flash may be
obscured by the lens hood. We recommend detaching the lens hood.
201
9. Stabiliser, Zoom and Flash
• Do not bring the flash too close to objects or close the flash while it is activated. The objects
may be discoloured by its heat or lighting.
• Do not close the flash soon after the flash is activated prior to taking pictures due to Forced ON/
Red-Eye Reduction etc. It causes a malfunction.
• It may take time to charge the flash if you repeatedly take pictures. You must wait a moment to
take the next picture while the flash icon is blinking red indicating the flash is charging. Take a
picture after the access indication disappears.
• In the following cases, the flash is fixed to [Œ] (forced flash off).
– When recording motion pictures
– When using the electronic shutter
– When [HDR] is set to [ON]
– When [Silent Mode] is set to [ON]
202
9. Stabiliser, Zoom and Flash
Changing Flash Mode
Applicable modes:
Set the built-in flash to match the recording.
1
Select the menu. (P37)
[MENU] >
2
3
‰
[Rec] > [Flash]
Press 3/4 to select [Flash Mode] and then press [MENU/SET].
Press 3/4 to select the item and then press [MENU/SET].
The flash is activated every time regardless of the recording
([Forced Flash On])
conditions.
([Forced On/
• Use this when your subject is back-lit or under fluorescent
Red-Eye])
light.
When taking pictures against a dark background landscape, this
feature will slow the shutter speed when the flash is activated. Dark
([Slow Sync.])
background landscape will appear brighter.
• Use this when you take pictures of people in front of a dark
([Slow Sync./
background.
Red-Eye])
• Using a slower speed can cause motion blur. Using a tripod
can enhance your photos.
The flash is activated twice.
The interval between the first and second flash is longer when [
] or [
] is
set. The subject should not move until the second flash is activated.
• The Red-Eye Reduction effect differs between people. Also, if the subject was far away from
the camera or was not looking at the first flash, the effect may not be evident.
∫ Shutter speed for each flash setting
Flash setting
‰
Shutter speed (Sec.)
Flash setting
1/50th¢
Shutter speed (Sec.)
1 to 1/16000th
Œ
60 to 1/16000th
¢ This becomes 60 seconds to 1/50th of a second in Shutter-Priority AE Mode and Manual
Exposure Mode.
• When the flash is activated the fastest shutter speed that can be selected is 1/50th of a second.
• In Intelligent Auto (
or
) Mode, shutter speed changes depending on the identified
scene.
203
9. Stabiliser, Zoom and Flash
∫ Available flash settings by Recording Mode
The available flash settings depend on the Recording Mode.
(±: Available, —: Not available, ¥: Initial setting of Scene Guide Mode)
‰
Intelligent Auto Mode
Intelligent Auto Plus Mode
Œ
—¢
—¢
—¢
—¢
¢
¢
¢
¢
±
—
—
±
±
±
±
—
—
Programme AE Mode
±
±
Aperture-Priority AE Mode
±
±
±
±
±
Shutter-Priority AE Mode
±
±
—
—
±
Manual Exposure Mode
±
±
—
—
±
Creative Video Mode
—
—
—
—
±
Creative Control Mode
—
—
—
—
±
¢ Cannot be set using the [Rec] menu.
[
] is set when the flash is opened. (P75)
204
9. Stabiliser, Zoom and Flash
‰
Scene Guide
Mode
Œ
[Clear Portrait]
±
¥
—
—
±
[Silky Skin]
±
¥
—
—
±
[Backlit Softness]
—
—
—
—
¥
[Relaxing Tone]
—
—
—
—
¥
[Sweet Child's Face]
±
¥
—
—
±
[Distinct Scenery]
—
—
—
—
¥
[Bright Blue Sky]
—
—
—
—
¥
[Romantic Sunset Glow]
—
—
—
—
¥
[Vivid Sunset Glow]
—
—
—
—
¥
[Glistening Water]
—
—
—
—
¥
[Clear Nightscape]
—
—
—
—
¥
[Cool Night Sky]
—
—
—
—
¥
[Warm Glowing Nightscape]
—
—
—
—
¥
[Artistic Nightscape]
—
—
—
—
¥
[Glittering Illuminations]
—
—
—
—
¥
[Handheld Night Shot]
—
—
—
—
¥
[Clear Night Portrait]
—
—
—
¥
±
[Soft Image of a Flower]
¥
—
—
—
±
[Appetizing Food]
¥
—
—
—
±
[Cute Dessert]
¥
—
—
—
±
[Freeze Animal Motion]
¥
—
—
—
±
[Clear Sports Shot]
¥
—
—
—
±
[Monochrome]
¥
±
±
±
±
• The flash setting may change if the Recording Mode is changed. Set the flash setting again if
necessary.
• When changing scene using Scene Guide Mode, the Scene Guide Mode flash setting is
returned to the default value with each change of scene.
205
9. Stabiliser, Zoom and Flash
Setting to the 2nd Curtain Synchro
Applicable modes:
2nd curtain synchro activates the flash just before the shutter closes when taking pictures
of moving objects such as cars using a slow shutter speed.
1
Select the menu. (P37)
[MENU] >
2
3
[Rec] > [Flash]
Press 3/4 to select [Flash Synchro] and then press [MENU/SET].
Press 3/4 to select the item and then press [MENU/SET].
[1ST]
[2ND]
1st curtain synchro
The normal method when taking pictures with the flash.
2nd curtain synchro
The light source appears behind the subject and picture
becomes dynamic.
• Set it to [1ST] for normal use.
• [2nd] is displayed in the flash icon on the screen if you set [Flash Synchro] to [2ND].
• When a fast shutter speed is set, the effect of [Flash Synchro] may deteriorate.
• You cannot set [
] or [
] when [Flash Synchro] is set to [2ND].
206
9. Stabiliser, Zoom and Flash
Adjust the flash output
Applicable modes:
Adjust the flash brightness when pictures taken with the flash are over or underexposed.
1
Select the menu. (P37)
[MENU] >
2
3
[Rec] > [Flash]
Press 3/4 to select [Flash Adjust.] and then press [MENU/SET].
Press 2/1 to set the flash output and then press [MENU/SET].
• You can adjust from [j2 EV] to [i2 EV] in steps of 1/3 EV.
• Select [n0] to return to the original flash output.
• [i] or [j] is displayed on the flash icon in the screen when the flash level is adjusted.
Synchronising the output of the built-in flash to the Exposure
Compensation
Applicable modes:
When [Auto Exposure Comp.] in [Flash] in the [Rec] menu is set to [ON], the brightness of
the built-in flash will automatically be set to the level appropriate to the selected Exposure
Compensation.
• For details on Exposure Compensation, refer to P157.
Correcting red eyes
Applicable modes:
When Red-Eye Reduction ([
], [
]) is selected, Red-Eye Removal is performed
whenever the flash is used. The camera automatically detects red-eye and corrects the
picture.
[MENU] >
[Rec] > [Red-Eye Removal]
Settings: [ON]/[OFF]
•[
] is displayed on the icon when it is set to [ON].
Not available in these cases:
• Under certain circumstances, red-eye cannot be corrected.
207
10. Recording Motion Pictures
Recording Motion Picture
Applicable modes:
This camera can record full high definition motion pictures compatible with the AVCHD
format or motion pictures recorded in MP4.
Audio will be recorded in stereo.
The functions available when recording motion pictures differ according to the lens you are
using, and the operational sound of the lens may be recorded.
Refer to P19 for details.
1
Start recording by pressing the motion
picture button.
A Elapsed recording time
B Available recording time
• Recording of motion picture appropriate for each mode is
possible.
• The recording state indicator (red) C will flash while
recording motion pictures.
• If approximately 1 minute elapses without an operation
being performed, part of the display will disappear.
Press [DISP.] or touch the monitor to make the display
reappear.
• Release the motion picture button right after you press it.
2
A
3s
Stop the recording by pressing the motion
picture button again.
• Still picture recording is also possible during the motion picture recording by fully
pressing the shutter button. (P214)
208
C
R1m37s
B
10. Recording Motion Pictures
Enabling/disabling the motion picture button
[MENU] >
[Custom] > [Video Button] > [ON]/[OFF]
• This function is for preventing accidental operation of the button.
Switching between the angle of view for taking pictures and the one for
recording motion pictures
[MENU] >
[Custom] > [Rec Area] > [!] (Picture)/[
] (Motion picture)
• When the aspect ratio setting is different in still and motion pictures, the angle of view
changes at the start of motion picture recording.
When [Rec Area] is set to [
], angle of view during motion picture recording is displayed.
• The recording area indicated is an approximation.
209
10. Recording Motion Pictures
• When a high ambient temperature, continuous motion picture recording or other conditions are
causing the camera to overheat, [
] flashes. If a message is displayed after [
] flashes, the
camera will turn off automatically to protect itself. When this happens, some functions will be
disabled until the camera cools down.
• The operational sound of the zoom or button operation may be recorded when it is operated
during the recording of a motion picture.
• The available recording time displayed on the screen may not decrease regularly.
• Depending on the type of the card, the card access indication may appear for a while after
recording motion pictures. This is not a malfunction.
• The [Sensitivity] will be set to [AUTO] (for motion pictures) when recording motion pictures.
Also, the [ISO Limit Set] will not operate.
• When recording a motion picture, [Stabilizer] will be fixed to [
] even if it is set to [
].
• It is recommended to use a fully charged battery or AC adaptor (optional) when recording
motion pictures. (P305)
• If while recording motion pictures using the AC adaptor (optional) the power supply is cut off
due to a power cut or if the AC adaptor (optional) is disconnected etc., the motion picture will
not be recorded.
• It will be recorded in the following categories for certain Recording Modes. A motion picture
recording matching each Recording Mode will be performed for the ones not listed below.
Recording Mode while
recording motion picture
Selected Recording Mode
– Programme AE Mode
– Aperture-Priority AE Mode
Normal motion picture
– Shutter-Priority AE Mode
– Manual Exposure Mode
– [Clear Nightscape]/[Artistic Nightscape]/[Handheld Night
Shot]/[Clear Night Portrait] (Scene Guide Mode)
Low Light Mode
Not available in these cases:
• Motion pictures cannot be recorded in the following cases.
– [Glistening Water]/[Glittering Illuminations]/[Soft Image of a Flower] (Scene Guide Mode)
– [Rough Monochrome]/[Silky Monochrome]/[Soft Focus]/[Star Filter]/[Sunshine] (Creative
Control Mode)
– When using [Time Lapse Shot]
– When using [Stop Motion Animation]
210
10. Recording Motion Pictures
Setting the format, size and recording frame rate
Applicable modes:
1
Select the menu. (P37)
[MENU] >
2
Press 3/4 to select the item and then press [MENU/SET].
Item
Format
[AVCHD]
This data format is suitable for when playing back on a high-definition
TV, etc.
[MP4]
3
4
[Motion Picture] > [Rec Format]
This data format is suitable for when playing back on a PC, etc.
Press 3/4 to select [Rec Quality] and then press [MENU/SET].
Press 3/4 to select the item and then press [MENU/SET].
• Exit the menu after it is set.
211
10. Recording Motion Pictures
When [AVCHD] is selected
Item
Size
Recording frame
rate
Sensor output
Bit rate
[FHD/50i]
1920k1080
50i
50 frames/second
17 Mbps
[FHD/25p]
1920k1080
50i
25 frames/second
24 Mbps
[FHD/24p]
1920k1080
24p
24 frames/second
24 Mbps
[HD/50p]
1280k720
50p
50 frames/second
17 Mbps
Recording frame
rate
Sensor output
Bit rate
When [MP4] is selected
Item
Size
[FHD/25p]
1920k1080
[HD/25p]
1280k720
[VGA/25p]
640k480
20 Mbps
25p
25 frames/second
10 Mbps
4 Mbps
• What is bit rate
This is the volume of data for a definite period of time, and the quality becomes higher when the
number gets bigger. This unit is using the “VBR” recording method. “VBR” is an abbreviation for
“Variable Bit Rate”, and the bit rate (volume of data for definite period of time) is changed
automatically depending on the subject to record. Therefore, the recording time is shortened
when a subject with fast movement is recorded.
∫ About the compatibility of the recorded motion pictures
Even when a compatible device is used, recorded motion pictures may be played back
with reduced picture and sound quality, or they may not be played back.
Also, recording information may not be displayed correctly. Use this unit to playback in
such case.
• If you want to use another device to play back motion pictures recorded in, [FHD/25p], [FHD/
24p] of [AVCHD] or if you want to transfer them to the device, a PC installed with
“PHOTOfunSTUDIO” or a compatible Blu-ray disc recorder is required.
∫ Indication of the icon
A Format
B Size
C Recording frame rate (Sensor output)
A
B
212
AVCHD
FHD 50i
C
10. Recording Motion Pictures
How to set focus when recording a motion picture ([Continuous AF])
Applicable modes:
Focusing changes depending on the Focus Mode setting (P136) and the [Continuous AF]
setting in the [Motion Picture] menu.
Focus mode
[AFS]/[AFF]/
[AFC]
[MF]
[Continuous
AF]
Description of settings
[ON]
The camera automatically keeps focusing on subjects
during recording.
• To readjust the focus, press the shutter button halfway.
[OFF]
The camera maintains the focus position at the start of
recording.
[ON]/[OFF]
You can focus manually. (P147)
• The interchangeable lens (H-H020A) utilises a lens drive system to realize a compact and
bright F1.7 lens. As a result, sound and vibration may occur during focus operation, but this is
not a malfunction.
• Depending on the recording conditions or lens used, operational sound may be recorded when
the Auto Focus is operated while recording a motion picture.
It is recommended to record with [Continuous AF] in the [Motion Picture] menu set to [OFF], if
the sound of operation bothers you to avoid recording the lens noise.
• When operating the zoom when recording motion pictures, it may take time to come into focus.
• When the interchangeable lens (H-H020A) is used, [AFF] and [AFC] cannot be set. (P136)
213
10. Recording Motion Pictures
Recording still pictures while recording motion
pictures
Applicable modes:
Still pictures can be recorded even while recording a motion picture. (Simultaneous
recording)
During motion picture recording, press the shutter
button fully to record a still picture.
• Simultaneous recording indicator is displayed while recording still
pictures.
• Recording with the Touch Shutter function (P59) is also available.
13
∫ Setting motion picture and still picture priorities
Applicable modes:
Recording method for the still pictures taken while recording a motion picture can be set
with [Picture Mode] in the [Motion Picture] menu.
• Pictures will be recorded with a picture size of [S] (2 M).
The picture quality may be different to [S] (2 M) of standard pictures.
],
[
] or [
].
(When set to [
], still pictures will be recorded in [Quality] of
[A].)
• Up to 15 still pictures can be recorded during recording of the
motion picture.
• In [Miniature Effect] of Creative Control Mode, there may be a slight
delay between fully pressing the shutter button and recording.
• Only JPEG images are recorded when [Quality] is set to [
[
]
(Motion picture
priorities)
[
]
(Still picture priorities)
• Pictures will be recorded with the set picture size and quality.
• The screen will go dark while recording pictures. A still picture will
be recorded in the motion picture during that period, and audio is
not recorded.
• Up to 4 still pictures can be recorded during recording of the motion picture.
• The picture aspect ratio will be fixed to [16:9].
Not available in these cases:
• This function is not available in the following cases:
– When [Rec Format] is set to [VGA/25p] in [MP4]
– When the [FHD/24p] is set [only when [ ] (still picture priorities) is set]
– When using [Ex. Tele Conv.] in the [Motion Picture] menu [only when [ ] (still picture
priorities) is set]
214
10. Recording Motion Pictures
Using the [Motion Picture] Menu
For details on [Motion Picture] menu settings, refer to P37.
• [Photo Style], [Sensitivity], [Metering Mode], [i.Dynamic], [i.Resolution] and [Digital Zoom] are
common to both the [Rec] menu and [Motion Picture] menu. Changing these settings in one of
these menus is reflected in other menu.
• [Motion Picture] menu is not displayed in the following cases.
– [Glistening Water]/[Glittering Illuminations]/[Soft Image of a Flower] (Scene Guide Mode)
– [Rough Monochrome]/[Silky Monochrome]/[Soft Focus]/[Star Filter]/[Sunshine] (Creative
Control Mode)
[Rec Format]
• Refer to P211 for details.
[Rec Quality]
• Refer to P211 for details.
[Exposure Mode]
• Refer to P116 for details.
[Picture Mode]
• Refer to P214 for details.
[Continuous AF]
• Refer to P213 for details.
[Rec Highlight]
Applicable modes:
White saturated areas appear blinking in black and white.
Settings: [ON]/[OFF]
• If there are any white saturated areas, we recommend compensating the exposure towards
negative (P157) referring to the histogram (P63) and then taking the picture. It may result in a
better quality picture.
215
10. Recording Motion Pictures
[Ex. Tele Conv.]
• Refer to P194 for details.
[Flkr Decrease]
Applicable modes:
The shutter speed can be fixed to reduce the flicker or striping in the motion picture.
Settings: [1/50]/[1/60]/[1/100]/[1/120]/[OFF]
[Silent Operation]
• Refer to P117 for details.
[Mic Level Disp.]
Applicable modes:
Set whether or not the mic levels are displayed on the screen.
Settings: [ON]/[OFF]
Not available in these cases:
• This function is not available in the following case:
– [Miniature Effect] (Creative Control Mode)
[Mic Level Adj.]
Applicable modes:
Adjust the sound input level to 4 different levels.
Not available in these cases:
• This function is not available in the following case:
– [Miniature Effect] (Creative Control Mode)
216
10. Recording Motion Pictures
[Wind Cut]
Applicable modes:
Reduces the wind noise effectively if there is wind noise when recording sound.
Settings: [AUTO]/[HIGH]/[STANDARD]/[LOW]/[OFF]
• Setting [Wind Cut] may alter the usual sound quality.
Not available in these cases:
• This function is not available in the following case:
– [Miniature Effect] (Creative Control Mode)
217
11. Playing Back and Editing Images
Playing Back Group Pictures
A picture group consists of multiple pictures. You can play back pictures in a group either
continuously or one by one.
• You can edit or delete all pictures in a group at once.
(For example, if you delete a picture group, all pictures in the group are deleted.)
[
]:
A picture group consisting of pictures taken in the Burst Mode
with the burst speed [SH]. (P168)
[
]:
A picture group consisting of pictures taken in a Time Lapse
Shot. (P176)
[
]:
A picture group consisting of pictures taken in the Stop Motion
Animation. (P178)
1/98
SLF
• Pictures will not be grouped if recorded without setting the clock.
Continuously playing back Group Pictures
Select a picture with the group picture icon ([
press 3.
], [
], [
]), and then
• The same operation can be performed by touching the group picture icon ([
[
]).
• When playing back group pictures one at a time, options are displayed.
[From the first picture]:
Pictures are played back continuously from the first picture of the group.
[From the current picture]:
Pictures are played back continuously from the picture being played back.
∫ Operations during Group Pictures playback
3
Continuous playback/Pause
4
Fast rewind
2
Stop
Fast forward
1
Rewind
(while pausing)
218
Forward
(while pausing)
], [
],
11. Playing Back and Editing Images
Playing back each Group Pictures
1
Select a picture with the group display icon ([
],
[
], [
]), and then press 4.
• The same operation can be performed by touching the
group display icon ([
2
], [
], [
1/98
SLF
]).
Press 2/1 to flip through images.
] or press 4 again to return to the normal playback screen.
• Touch [
• Each picture in a group can be treated same as normal pictures when they are played
back. (Such as Multi Playback, Playback Zoom and deleting images)
219
11. Playing Back and Editing Images
Creating Still Pictures from a Motion Picture
You can create a single still picture from a recorded motion picture.
1
2
Press 3 to pause motion picture playback.
Press [MENU/SET].
• The same operation can be performed by touching
[
].
• Confirmation screen is displayed. It is executed when
[Yes] is selected.
• It will be saved with [Picture Size] set to [S] (2 M), [Aspect Ratio] set to [16:9], and [Quality] set
to [›].
• Still pictures created from a motion picture may be coarser than with normal picture quality.
•[
] is displayed during playback of still pictures created from motion pictures.
Not available in these cases:
• While recording [MP4], using [VGA/25p], the ability to create still pictures is disabled.
220
11. Playing Back and Editing Images
Using the [Playback] Menu
With this menu, you can use various playback functions such as cropping and other
editing of recorded images, protect settings, etc.
• With [Clear Retouch], [Text Stamp], [Time Lapse Video], [Stop Motion Video], [Resize] or
[Cropping], a new edited picture is created.
A new picture cannot be created if there is no free space on the card so we recommend
checking that there is free space before editing the picture.
• The camera may not play back images recorded on other devices correctly, and the functions
of the camera may not be available for the images.
[2D/3D Settings]
Playback methods for the 3D pictures can be switched.
• This is a menu that is only displayed when 3D playback is possible.
Refer to P286 for details.
[Slide Show]
You can play back the pictures you have taken in synchronisation with music, and you can
do this in sequence while leaving a fixed interval between each of the pictures.
You can also put together a slide show composed of only still pictures, only motion
pictures, only 3D pictures etc.
We recommend this feature when you view your pictures by connecting the camera to a
TV.
1
Select the menu. (P37)
[MENU] >
2
[Playback] > [Slide Show]
Select the group to play back by pressing 3/4, and
then press [MENU/SET].
• Refer to P286 for the method to play back [3D] pictures in
3D.
• When [Category Selection] is selected, press 3/4/2/1
to select a category and then press [MENU/SET].
For details on categories, refer to P223.
3
Press 3 to select [Start] and then press [MENU/SET].
221
11. Playing Back and Editing Images
∫ Operations during a slideshow
Button
Touch
operation operation
Description of
operation
Button
Touch
operation operation
Description of
operation
3
Play/Pause
4
Exit slide show
2
Back to previous
picture
1
Ahead to next picture
Reduce volume level
Increase volume
level
• Normal playback resumes after the slide show finishes.
∫ Changing the slide show settings
You can change the settings for slide show playback by selecting [Effect] or [Setup] on the
slide show menu screen.
[Effect]
This allows you to select the screen effects when switching from one picture to the next.
[AUTO]/[NATURAL]/[SLOW]/[SWING]/[URBAN]/[OFF]
• When [URBAN] has been selected, the picture may appear in black and white as a screen effect.
• [AUTO] can be used only when [Category Selection] has been selected. The pictures are
played back with the recommended effects in each category.
• [Effect] is fixed to [OFF] when in [Video Only] or during the slide show for [
], [
], [
[Category Selection].
• Even if [Effect] is set, it does not work during a slide show of Group Pictures.
• When pictures are displayed on a TV connected via an HDMI micro cable or when
vertically-displayed pictures are played back, some of the [Effect] settings will not work.
] in
[Setup]
[Duration] or [Repeat] can be set.
[Duration]
[Repeat]
[Sound]
[5SEC]/[3SEC]/[2SEC]/[1SEC]
[ON]/[OFF]
[AUTO]:
Music is played when the still pictures are played back, and
audio is played when the motion pictures are played back.
[Music]:
Music is played back.
[Audio]:
Audio (only for motion pictures) is played back.
[OFF]:
There will be no sound.
• [Duration] can be set only when [OFF] has been selected as the [Effect] setting.
• When playing back the following pictures, the [Duration] setting is disabled.
– Motion pictures
– Group Pictures
222
11. Playing Back and Editing Images
[Playback Mode]
Playback in [Normal Play], [Picture Only], [Video Only], [3D Play], [Category Play] or
[Favorite Play] can be selected.
1
Select the menu. (P37)
[MENU] >
2
[Playback] > [Playback Mode]
Select the group to play back by pressing 3/4, and then press [MENU/SET].
• Refer to P286 for the method to play back [3D Play] pictures in 3D.
When [Category Play] is selected in above step 2
Press 3/4/2/1 to select the category and then press [MENU/SET] to set.
• Pictures are sorted into the categories shown below.
3
– [Face Recog.]¢
*
– [i-Portrait]/[i-Night Portrait]/[i-Baby] (Scene Detection)
– [Clear Portrait]/[Silky Skin]/[Backlit Softness]/[Relaxing Tone]/[Sweet
Child's Face]/[Clear Night Portrait] (Scene Guide Mode)
,
– [i-Scenery]/[i-Sunset] (Scene Detection)
– [Distinct Scenery]/[Bright Blue Sky]/[Romantic Sunset Glow]/[Vivid Sunset
Glow]/[Glistening Water] (Scene Guide Mode)
.
– [i-Night Portrait]/[i-Night Scenery]/[iHandheld Night Shot] (Scene Detection)
– [Clear Nightscape]/[Cool Night Sky]/[Warm Glowing Nightscape]/[Artistic
Nightscape]/[Glittering Illuminations]/[Handheld Night Shot]/[Clear Night
Portrait] (Scene Guide Mode)
– [Clear Sports Shot] (Scene Guide Mode)
1
– [i-Food] (Scene Detection)
– [Appetizing Food]/[Cute Dessert] (Scene Guide Mode)
– [Travel Date]
– Still pictures recorded continuously with burst speed set to [SH]
– [Time Lapse Shot]/[Time Lapse Video]
– [Stop Motion Animation]/[Stop Motion Video]
¢ Press 3/4/2/1 to select the person to play back and then press [MENU/SET].
As for group pictures, the entire group is treated as a single picture with Face
Recognition information.
• Categorisation of the motion pictures differ from the still pictures depending on the
Recording Mode. Some motion pictures may not be played back.
223
11. Playing Back and Editing Images
[Location Logging]
The location information (longitude/latitude) acquired by the smartphone/tablet can be
sent to the camera and written in images.
Preparation:
Sending location information to the camera from the smartphone/tablet.
• You need to install “Panasonic Image App” on your smartphone/tablet. (P245)
• Read the [Help] in the “Image App” menu for further details on how to operate.
1
Select the menu. (P37)
[MENU] >
2
[Playback] > [Location Logging] > [Add Location Data]
Press 3/4 to select the period you intend to record location information on
images, then press [MENU/SET].
• Confirmation screen is displayed. It is executed when [Yes] is selected.
• Images with location information are indicated with [
].
∫ To pause the recording of location information
Press [MENU/SET] while recording of the location information onto images is taking
place.
• During a suspended period, [±] is displayed.
Select the period with [±] to restart the recording process from the picture you left off.
∫ To delete the received location information
1 Select the menu. (P37)
[MENU] >
2
[Playback] > [Location Logging] > [Delete Location Data]
Press 3/4 to select the period you want to delete, then press [MENU/SET].
• Confirmation screen is displayed. It is executed when [Yes] is selected.
• Location information can be written only to images taken on this camera.
Not available in these cases:
• Location information will not be written on pictures taken after the location information had been
sent (P248).
• Location information is not written onto the images recorded when [Rec Format] is set to
[AVCHD].
• When there is insufficient free space on the card, location information might not be able to be
written.
224
11. Playing Back and Editing Images
[Clear Retouch]
You can erase unnecessary parts recorded
on the pictures taken.
• The erasure operation can only be
performed by touching. [Clear Retouch]
automatically enables the touch operation.
1
Select the menu. (P37)
[MENU] >
2
3
[Playback] > [Clear Retouch]
Press 2/1 to select a picture, and then press [MENU/SET].
Drag your finger over the part you want to delete.
• The parts to be erased are coloured.
• Touching [Undo] will return the coloured part back to its
previous state.
5(029(
6&$/,1*
8QGR
6HW
Erasing details (enlarging the display)
1 Touch [SCALING].
• Pinching out/pinching in (P15) the screen allows you
to enlarge/reduce it.
• You can also enlarge/reduce the picture by rotating
the control dial.
• Dragging the screen allows you to move the
enlarged part.
5(029(
6&$/,1*
8QGR
2 Touch [REMOVE].
• This will bring you back to the operation of dragging
your finger over the part you want to delete. The part
you want to delete can be dragged even while the
picture is enlarged.
4
5
Touch [Set].
• Preview screen is displayed.
Touch [Save] or press [MENU/SET].
• Confirmation screen is displayed. It is executed when [Yes] is selected.
Exit the menu after it is executed.
225
6HW
11. Playing Back and Editing Images
• Pictures may appear unnatural because the background of deleted parts is artificially created.
• For group pictures, perform [Clear Retouch] on each picture.
(They cannot be edited at once.)
• When [Clear Retouch] is performed on group pictures, they are saved as new pictures separate
from the original ones.
Not available in these cases:
• This function is not available in the following cases:
– Motion pictures
– Pictures taken with [
], [
] or [
]
226
11. Playing Back and Editing Images
[Title Edit]
You can add text (comments) to pictures. After text has been registered, it can be stamped
in prints using [Text Stamp] (P228).
1
Select the menu. (P37)
[MENU] >
2
[Playback] > [Title Edit] > [Single]/[Multi]
Select the picture.
• [’] is displayed for pictures with titles already registered.
[Single] setting
1 Press 2/1 to select the picture.
2 Press [MENU/SET].
6HW
[Multi] setting
1 Press 3/4/2/1 to select the picture and then press
[MENU/SET] (repeat).
• The setting is cancelled when [MENU/SET] is pressed
2.
again.
2 Press 2 to select [OK], and then press [MENU/SET]
to execute.
3
Enter the text. (P54)
• Exit the menu after it is set.
• To delete the title, erase all the text in the text input screen.
• You can print out texts (comments) using the “PHOTOfunSTUDIO” bundled software on the
CD-ROM (supplied).
• You can set up to 100 pictures at one time with [Multi].
Not available in these cases:
• This function is not available in the following cases:
– Motion pictures
– Pictures taken with [
], [
] or [
]
227
11. Playing Back and Editing Images
[Text Stamp]
You can stamp the recording date/time, name, location, travel date or title onto the
recorded pictures.
1
Select the menu. (P37)
[MENU] >
2
[Playback] > [Text Stamp] > [Single]/[Multi]
Select the picture.
• [‘] appears on screen if the picture is stamped with text.
[Single] setting
1 Press 2/1 to select the picture.
2 Press [MENU/SET].
6HW
[Multi] setting
1 Press 3/4/2/1 to select the picture and then press
[MENU/SET] (repeat).
• The setting is cancelled when [MENU/SET] is pressed
again.
2 Press 2 to select [OK], and then press [MENU/SET]
to execute.
3
Press 3/4 to select [Set], and then press [MENU/SET].
228
2.
11. Playing Back and Editing Images
4
5
Press 3/4 to select text stamp items, and then press [MENU/SET].
Press 3/4 to select the settings, and then press [MENU/SET].
[Shooting Date]
[W/O TIME]:
Stamp the year, month and date.
[WITH TIME]:
Stamp the year, month, day, hour and minutes.
[OFF]
[
]
([Face
Recognition]):
[Name]
[
Name registered in [Face Recog.] will be
stamped.
]
([Baby/Pet]):
Name registered in [Profile Setup] will be
stamped.
[OFF]
[ON]:
[Location]
Stamps the travel destination name set under
[Location].
[OFF]
[Travel Date]
[Title]
6
7
[ON]:
Stamps the travel date set under [Travel Date].
[OFF]
[ON]:
Title input in the [Title Edit] will be stamped.
[OFF]
Press [
].
Press 3 to select [OK], and then press [MENU/SET].
• Confirmation screen is displayed. It is executed when [Yes] is selected.
Exit the menu after it is executed.
• When you print pictures stamped with text, the date will be printed over the stamped text if you
specify printing of the date at the photo shop or on the printer.
• You can set up to 100 pictures at one time in [Multi].
• The picture quality may deteriorate when text stamping is carried out.
• Depending on the printer being used, some characters may be cut at printing. Check before printing.
• When you stamp pictures in a group, the stamped ones are saved separately from the original
ones in the group.
Not available in these cases:
• This function is not available in the following cases:
– Motion pictures
– Pictures recorded without setting the clock and title
– Pictures stamped with [Text Stamp]
– Pictures taken with [
], [
] or [
]
229
11. Playing Back and Editing Images
[Video Divide]
Recorded motion picture can be divided in two. It is recommended for when you want to
divide a part you need with a part you do not need.
Dividing a motion picture is permanent. Decide before you divide!
1
Select the menu. (P37)
[MENU] >
2
3
[Playback] > [Video Divide]
Press 2/1 to select the motion picture to divide, and then press [MENU/SET].
Press 3 at the location to divide.
• You can finely adjust the location for division by pressing 2/
1 while the motion picture is paused.
4
Press 4.
• Confirmation screen is displayed. It is executed when [Yes] is selected.
Exit the menu after it is executed.
• Motion picture may be lost if the card or battery is removed while processing the dividing.
• With [MP4] motion pictures, the order of pictures will change if divided.
It is recommended to search these motion pictures by using Calendar Playback (P67) or [Video
Only] in the [Playback Mode].
Not available in these cases:
• Avoid trying to divide motion picture near the very beginning or end of the motion picture.
• This function is not available in the following case:
– Motion pictures with a short recording time
230
11. Playing Back and Editing Images
[Time Lapse Video]
This function allows you to create a motion picture from a picture group recorded with
[Time Lapse Shot].
The created motion picture is saved in MP4 recording format.
1
Select the menu. (P37)
[MENU] >
2
3
[Playback] > [Time Lapse Video]
Select the [Time Lapse Shot] picture group with 2/1, and then press [MENU/
SET].
Select items and settings.
[Rec Quality]
Sets the quality of a motion picture.
[FHD/25p]/[HD/25p]/[VGA/25p]
[Frame Rate]
Sets the number of frames per second.
The larger the number is, the smoother the motion picture will be.
[25fps]/[12.5fps]/[8.3fps]/[6.25fps]/[5fps]/[2.5fps]/[1fps]
[Sequence]
4
[NORMAL]:
Splices pictures together in recording order.
[REVERSE]:
Splices pictures together in reverse recording order.
Select [OK] with 3/4, and then press [MENU/SET].
• Confirmation screen is displayed. It is executed when [Yes]
is selected.
Exit the menu after it is executed.
• If you select an image quality in which the aspect ratio is different from the one for the picture
group, black strips will appear on the top and bottom or left and right of the image.
• When creating motion pictures, we recommend you use the sufficiently-charged battery or the
AC adaptor (optional).
• If power supply is lost by unplugging the AC adaptor or due to a blackout while creating a
motion picture with the AC adaptor, the motion picture you are creating will not be recorded.
• A motion picture that exceeds the recording time of 29 minutes and 59 seconds and a motion
picture that exceeds the file size of 4 GB cannot be created.
• A motion picture shorter than 1 second is displayed as “0s” on the motion picture recording time
(P68).
231
11. Playing Back and Editing Images
[Stop Motion Video]
A Motion picture is created from group pictures taken with [Stop Motion Animation].
Created motion pictures are saved in MP4 recording format.
1
Select the menu. (P37)
[MENU] >
2
3
[Playback] > [Stop Motion Video]
Select the Stop Motion Animation group with 2/1, and then press [MENU/SET].
Create a motion picture by selecting the methods for creating it.
• The steps are the same as those for creating a motion picture following the recording of
[Stop Motion Animation].
Refer to step 8 onwards on P180 for details.
Also refer to the notes on P181 for created motion pictures.
232
11. Playing Back and Editing Images
[Resize]
To allow easy posting to web pages, attachment to e-mail etc., picture size (number of
pixels) is reduced.
1
Select the menu. (P37)
[MENU] >
2
[Playback] > [Resize] > [Single]/[Multi]
Select the picture and size.
[Single] setting
1 Press 2/1 to select the picture, and then press
[MENU/SET].
2 Press 3/4 to select the size, and then press [MENU/
SET].
• Confirmation screen is displayed. It is executed when
4:3
L 16
4:3
M 8
4:3
S 4
6HW
[Yes] is selected.
Exit the menu after it is executed.
[Multi] setting
1 Press 3/4 to select the size, and then press [MENU/
SET].
2 Press 3/4/2/1 to select the picture, and then press
[MENU/SET] to set (repeat).
• The setting is cancelled when [MENU/SET] is pressed
again.
3 Press 2 to select [OK], and then press [MENU/SET]
to execute.
• Confirmation screen is displayed. It is executed when
[Yes] is selected.
Exit the menu after it is executed.
• You can set up to 100 pictures at one time in [Multi].
• The picture quality of the resized picture will deteriorate.
Not available in these cases:
• This function is not available in the following cases:
– Motion pictures
– Group Pictures
– Pictures stamped with [Text Stamp]
– Pictures taken with [
], [
] or [
]
233
2.
11. Playing Back and Editing Images
[Cropping]
You can enlarge and then clip the important part of the recorded picture.
1
Select the menu. (P37)
[MENU] >
2
3
[Playback] > [Cropping]
Press 2/1 to select the picture, and then press [MENU/SET].
Use the control dial and press 3/4/2/1 to select the parts to be cropped.
Control dial (right): Enlargement
Control dial (left): Reduction
3/4/2/1: Move
• You can also touch [
4
]/[
] to enlarge/reduce.
• You can also move by dragging on the screen.
Press [MENU/SET].
• Confirmation screen is displayed. It is executed when [Yes] is selected.
Exit the menu after it is executed.
• The picture quality of the cropped picture will deteriorate.
• Crop one picture at a time when you want to crop the pictures in a picture group.
(You cannot edit all pictures in a group at once.)
• When you crop pictures in a group, the cropped ones are saved separately from the original
ones in the group.
• Information regarding the Face Recognition in the original picture will not be copied to images
having undergone [Cropping].
Not available in these cases:
• This function is not available in the following cases:
– Motion pictures
– Pictures stamped with [Text Stamp]
– Pictures taken with [
], [
] or [
]
234
11. Playing Back and Editing Images
[Rotate]/[Rotate Disp.]
This mode allows you to automatically display pictures vertically if they were recorded
holding the camera vertically or rotate pictures manually in 90o steps.
[Rotate] (The picture is rotated manually)
• The [Rotate] function is disabled when [Rotate Disp.] is set to [OFF].
1
Select the menu. (P37)
[MENU] >
2
3
[Playback] > [Rotate]
Press 2/1 to select the picture and then press [MENU/SET].
• The [Rotate] function is disabled for Group Pictures.
Select the rotation direction.
:
The picture rotates clockwise in steps of 90o.
:
The picture rotates counter-clockwise in steps of 90o.
• Exit the menu after it is set.
[Rotate Disp.] (The picture is automatically rotated and displayed)
Select the menu. (P37)
[MENU] >
[Playback] > [Rotate Disp.] > [ON]
• The pictures are displayed without being rotated when you select [OFF].
• Exit the menu after it is set.
Not available in these cases:
• When you play back pictures on a PC, they cannot be displayed in the rotated direction unless
the OS or software is compatible with Exif.
Exif is a file format for still pictures which allows recording information etc. to be added. It was
established by “JEITA (Japan Electronics and Information Technology Industries Association)”.
• [Rotate Disp.] may not work on a screen that plays back multiple pictures, such as the one
displayed after [Delete Multi] is selected.
235
11. Playing Back and Editing Images
[Favorite]
You can do the following if a mark has been added to pictures and they have been set as
favourites.
• Play back the pictures set as favourites only as a slide show.
• Play back only the pictures set as favourites. ([Favorite Play])
• Delete all the pictures not set as favourites. ([All Delete Except Favorite])
1
Select the menu. (P37)
[MENU] >
2
[Playback] > [Favorite] > [Single]/[Multi]
Select the picture.
[Single] setting
Press 2/1 to select the picture, and then press [MENU/
SET].
• The setting is cancelled when [MENU/SET] is pressed
again.
• Exit the menu after it is set.
6HW&DQFHO
[Multi] setting
Press 3/4/2/1 to select the picture, and then press
[MENU/SET] to set (repeat).
• The setting is cancelled when [MENU/SET] is pressed
again.
• Exit the menu after it is set.
1
2
3
4
5
6
6HW&DQFHO
∫ Cancelling all the [Favorite] settings
Select the menu. (P37)
[MENU] >
[Playback] > [Favorite] > [Cancel]
• Confirmation screen is displayed. It is executed when [Yes] is selected.
Exit the menu after it is executed.
• In [Playback Mode], the [Cancel] is disabled.
• You can set up to 999 pictures as favourites.
• When you set pictures in a group as [Favorite], the number of your [Favorite] pictures is
displayed on the [Favorite] icon of the group’s top picture.
Not available in these cases:
• This function is not available in the following case:
– Pictures taken with [
]
236
11. Playing Back and Editing Images
[Print Set]
DPOF “Digital Print Order Format” is a system that allows the user to select which pictures
to print, how many copies of each picture to print and whether or not to print the recording
date on the pictures when using a DPOF compatible photo printer or photo printing store.
For details, ask at your photo printing store.
When you set [Print Set] for a group pictures, the print setting for the number of prints will
be applied to every picture in the group.
1
Select the menu. (P37)
[MENU] >
2
[Playback] > [Print Set] > [Single]/[Multi]
Select the picture.
[Single] setting
Press 2/1 to select the picture, and then press [MENU/
SET].
1
1
'DWH
&RXQW
[Multi] setting
Press 3/4/2/1 to select the picture and then press
[MENU/SET].
1
1
4
&RXQW
3
6HW
2
3
5
6
1
'DWH
6HW
Press 3/4 to set the number of prints, and then press [MENU/SET] to set.
• When [Multi] has been selected
– Repeat steps 2 and 3 for each picture.
(It is not possible to use the same setting for a multiple number of pictures.)
• [999+] is displayed on the screen, if the total number of prints you set for a group pictures
is more than 1000 pictures.
• Exit the menu after it is set.
237
11. Playing Back and Editing Images
∫ Cancelling all the [Print Set] settings
Select the menu. (P37)
[MENU] >
[Playback] > [Print Set] > [Cancel]
• Confirmation screen is displayed. It is executed when [Yes] is selected.
Exit the menu after it is executed.
∫ To print the date
After setting the number of prints, set/cancel printing with the recording date by pressing
1.
• Depending on the photo printing store or the printer, the date may not be printed even if you set
to print the date. For further information, ask at your photo printing store or refer to the
operating instructions for the printer.
• The date print feature is disabled for pictures that are stamped with text.
• The number of prints can be set from 0 to 999.
• Depending on the printer, the date print settings of the printer may take precedence so check if
this is the case.
• It may not be possible to use the print settings with other equipment. In this case, cancel all the
settings, and reset the settings.
• When you set pictures in a group to [Print Set], the number of pictures added to [Print Set] and
the total number of pictures to be printed are displayed on the [Print Set] icon of the group’s top
picture.
Not available in these cases:
• This function is not available in the following cases:
– Motion pictures
– Pictures taken with [
]
– File that does not comply with the DCF standard
238
11. Playing Back and Editing Images
[Protect]
You can set protection for pictures you do not want to delete by mistake.
1
Select the menu. (P37)
[MENU] >
2
[Playback] > [Protect] > [Single]/[Multi]
Select the picture.
[Single] setting
Press 2/1 to select the picture, and then press [MENU/
SET].
• The setting is cancelled when [MENU/SET] is pressed
again.
• Exit the menu after it is set.
6HW&DQFHO
[Multi] setting
Press 3/4/2/1 to select the pictures and then press
[MENU/SET] (repeat).
• The setting is cancelled when [MENU/SET] is pressed
again.
• Exit the menu after it is set.
1
2
3
4
5
6
6HW&DQFHO
∫ Cancelling all the [Protect] settings
Select the menu. (P37)
[MENU] >
[Playback] > [Protect] > [Cancel]
• Confirmation screen is displayed. It is executed when [Yes] is selected.
Exit the menu after it is executed.
Even if you do not protect pictures on a card, they cannot be deleted when the
card’s Write-Protect switch is set to [LOCK].
• The [Protect] feature is only designed to work with this camera.
• Even if you protect pictures on a card, they will be deleted if the card is formatted.
• When you set pictures in a group to [Protect], the number of pictures with the [Protect] setting is
displayed on the [Protect] icon of the group’s top picture.
239
11. Playing Back and Editing Images
[Face Rec Edit]
You can clear and replace all information relating to face recognition in selected images.
1
Select the menu. (P37)
[MENU] >
2
3
4
[Playback] > [Face Rec Edit] > [REPLACE]/[DELETE]
Press 2/1 to select the picture and then press [MENU/SET].
Press 2/1 to select the person and then press [MENU/SET].
(When [REPLACE] is selected)
Press 3/4/2/1 to select the person to replace and then press [MENU/SET].
• Confirmation screen is displayed. It is executed when [Yes] is selected.
Exit the menu after it is executed.
• Cleared information regarding the [Face Recog.] cannot be restored.
• When all Face Recognition information in a picture has been cancelled, the picture will not be
categorised using Face Recognition in [Category Play].
• The Face Recognition information of pictures in a group has to be edited at once.
(You cannot edit one picture at a time.)
• Editing of group pictures can be performed only on the first picture of each set.
[Delete Confirmation]
This sets which option, [Yes] or [No], will be highlighted first
when the confirmation screen for deleting a picture is
displayed.
Yes
1
Select the menu. (P37)
[MENU] >
2
No
[Playback] > [Delete Confirmation]
Press 3/4 to select an item and then press [MENU/SET].
[“Yes” first]
[Yes] is highlighted first, so deletion can be done quickly.
[“No” first]
[No] is highlighted first. Accidental deletion of pictures is avoided.
• Exit the menu after it is set.
240
12. Using the Wi-Fi function
Wi-FiR function
∫ Use the camera as a wireless LAN device
When using equipment or computer systems that require more reliable security than
wireless LAN devices, ensure that the appropriate measures are taken for safety designs
and defects for the systems used. Panasonic will not take any responsibility for any
damage that arises when using the camera for any purpose other than as a wireless LAN
device.
∫ Use of the Wi-Fi function of this camera is presumed to be in countries where this
camera is sold
There is the risk that the camera violates the radiowave regulations if used in countries
other than those where this camera is sold, and Panasonic takes no responsibility for any
violations.
∫ There is the risk that data sent and received via radio waves may be intercepted
Please note that there is the risk that data sent and received via radio waves may be
intercepted by a third party.
∫ Do not use the camera in areas with magnetic fields, static electricity or
interference
• Do not use the camera in areas with magnetic fields, static electricity or interference, such as
near microwave ovens. These may cause the interruption of the radio waves.
• Using the camera near devices such as microwave ovens or cordless telephones that use the
2.4 GHz radio wave band may cause a decrease in performance in both devices.
∫ Do not connect to the wireless network you are not authorised to use
When the camera utilises its Wi-Fi function, wireless networks will be searched
automatically. When this happens, wireless networks that you are not authorised to use
(SSID¢) may be displayed, however do not attempt to connect to the network as it may be
considered as unauthorised access.
¢ SSID refers to the name that is used to identify a network over a wireless LAN connection. If
the SSID matches for both devices, transmission is possible.
∫ Before Use
To use the Wi-Fi function on this unit, a wireless access point or a destination device
equipped with the wireless LAN function is required.
241
12. Using the Wi-Fi function
∫ About the Wi-Fi connection lamp
Lit blue:
The Wi-Fi connection is on standby
Blinking blue:
Sending/receiving data through the Wi-Fi
connection
∫ About the [Wi-Fi] button
At the time of purchase, [Wi-Fi] is set to [Fn1].
In the chapter for “Using the Wi-Fi function”, [Fn1] is written
as [Wi-Fi] .
• Refer to P43 for details about the function button.
∫ What you can do with the [Wi-Fi] button when connected to Wi-Fi
If [Wi-Fi] button is pressed when connected to Wi-Fi, the following operations can be
performed.
[Terminate the Connection]
Terminates the Wi-Fi connection.
[Change the Destination]
Terminates the Wi-Fi connection, and allows you to
select a different Wi-Fi connection.
[Change Settings for Sending
Images]¢
Refer to P282 for details.
Registering the current connection destination or the
[Register the Current Destination
connection method, you can easily connect with the
to Favorite]
same connection method next time.
[Network Address]
Displays the MAC address and IP address of this unit.
¢ This is not displayed when the destination of [Remote Shooting & View], [Playback on TV] or
[Send Images Stored in the Camera] is set to [Printer].
242
12. Using the Wi-Fi function
∫ Describing method
When “select [Select a destination from History]”, etc. is
described in a step, perform any of the following operations.
Button operation:
Touch operation:
Select [Select a destination from
History] with the cursor button, and
then press [MENU/SET].
Touch [Select a destination from
History].
• The camera cannot be used to connect to a public wireless LAN connection.
• Use a IEEE802.11b, IEEE802.11g or IEEE802.11n compatible device when using a wireless
access point.
• We strongly recommend that you set an encryption to maintain information security.
• It is recommended to use a fully charged battery when sending images.
• When the battery indicator is flashing red, the connection with other equipment may not start or
the connection may be disrupted.
(A message such as [Communication error] is displayed.)
• When sending images on a mobile network, high packet communication fees may be incurred
depending on the details of your contract.
• Pictures may not be completely sent depending on radio wave conditions. If the connection is
terminated while sending pictures, pictures with missing sections may be sent.
• Do not remove the memory card or battery or move to an area without any reception
while sending images.
• The monitor display may become distorted for an instant while connected to the service,
however this will not affect the image being sent.
243
12. Using the Wi-Fi function
What you can do with the Wi-Fi function
Controlling with a Smartphone/Tablet
Recording with a
smartphone.
Saving images stored in the
camera.
Sending images to an SNS.
P245
Easy connection
By pressing and holding [Wi-Fi], you
can easily connect the camera to a
smartphone or tablet.
Displaying pictures on a TV
P252
Printing Wirelessly
P253
When sending images to AV device
You can send pictures and motion pictures to AV devices in your
house (home AV devices). You can also send them to the devices
(external AV devices) of your family or friends living away from you
via “LUMIX CLUB”.
When sending images to PC
P254
P257
Using Web services
You can send pictures and motion pictures to an SNS, etc. via
“LUMIX CLUB”.
By using [Cloud Sync. Service], you can receive pictures and
motion pictures on a PC or smartphone.
244
P261
12. Using the Wi-Fi function
Controlling with a Smartphone/Tablet
Using a smartphone/tablet, you can record images on
the camera and save them.
You need to install “Panasonic Image App” (referred to
as “Image App” from this point on) on your
smartphone/tablet.
Installing the smartphone/tablet app “Image App”
The “Image App” is an application provided by Panasonic.
• OS
For AndroidTM apps:
Android 2.2 to Android 4.3¢
For iOS apps:
iOS 5.0 to iOS 7.0
¢ Connecting to this unit with [Wi-Fi Direct] requires Android OS 4.0 or higher and Wi-Fi
DirectTM support.
1
2
3
4
Connect the smartphone/tablet to a network.
(Android)
Select “Google PlayTM Store”.
(iOS)
Select “App StoreSM”.
Enter “Panasonic Image App” into the search box.
Select “Panasonic Image App”
and install it.
• Use the latest version.
• The service may not be able to be used properly depending on the type of smartphone/tablet
being used.
For information on the “Image App”, refer to the support site below.
http://panasonic.jp/support/global/cs/dsc/
(This Site is English only.)
• When downloading the app on a mobile network, high packet communication fees may be
incurred depending on the details of your contract.
245
12. Using the Wi-Fi function
Connecting to a smartphone/tablet
By pressing and holding [Wi-Fi], you can easily establish a connection.
Preparations:
• Install the “Image App” in advance. (P245)
1
Press and hold [Wi-Fi].
• The information (SSID and password) required for directly
connecting your smartphone/tablet to this unit is displayed.
• Except for when connecting for the first time, the screen
from the previous connection is displayed.
• The same screen can be displayed by selecting the
following menu items.
[Wi-Fi] >
2
[New Connection] > [Remote
Shooting & View]
Operate the smartphone/tablet.
1 Turn on the Wi-Fi function.
2 Select the SSID that matches the one displayed on the screen of this unit, and
then enter the password.
3 Start “Image App”. (P245)
• When the connection is complete, live images being captured by the camera are
displayed on the smartphone/tablet.
∫ Changing the connection method
To change the connection method, press [DISP.], and then
select the connection method.
On the camera
Select [Via Network] or [Direct], and connect. (P273)
On your smartphone/tablet
When connecting with [Via Network]:
1
2
3
Turn on the Wi-Fi function.
Select the wireless access point you want to connect to, and set.
Start “Image App ”. (P245)
When connecting with [Wi-Fi Direct] or [WPS Connection] in [Direct]:
Start “Image App ”. (P245)
246
12. Using the Wi-Fi function
Taking pictures via a smartphone/tablet (remote recording)
1
2
Connect to a smartphone/tablet. (P246)
Select [
] on the smartphone/tablet.
• The recorded images are saved in the camera.
• Some settings are not available.
• The screen differs depending on the OS.
• When a high ambient temperature, continuous motion picture
recording or other conditions are causing the camera to
overheat, [
] flashes. If a message is displayed after [
]
flashes, the camera will turn off automatically to protect itself.
When this happens, some functions will be disabled until the
camera cools down.
Saving images stored in the camera
1
2
3
Connect to a smartphone/tablet. (P246)
Select [
] on a smartphone/tablet.
Drag an image to save it.
• If an image is touched, the picture will be played back in an
enlarged size.
• The function can be assigned to the top, bottom, left or
right according to your preference.
247
12. Using the Wi-Fi function
Sending images in the camera to an SNS
1
2
3
Connect to a smartphone/tablet. (P246)
Select [
] on a smartphone/tablet.
Drag an image to send it to an SNS, etc.
• The image is sent to a web service such as an SNS.
• The function can be assigned to the top, bottom, left or
right according to your preference.
Sending location information to the camera from a smartphone/tablet
You can acquire location information from a smartphone/tablet, and write it on images
afterwards.
Refer to P224 for how to write the location information on the images recorded by this unit.
• Read the [Help] in the “Image App” menu for further details on how to operate.
• To change the setting or disconnect, press [Wi-Fi]. (P242)
• Cautions for Use:
Be sure to pay special attention to the privacy, the likeness rights, etc. of the subject
when you use this function. Use at your own risk.
• If you have changed the clock setting of this unit or the smartphone/tablet after [Time sync],
perform [Time sync] again.
• On the smartphone/tablet, you can set the acquisition interval of location information and check
the transfer status of location information.
Refer to [Help] in the “Image App” menu for details.
• (When using “Image App” for iOS)
If you press the Home or On/Off button of a smartphone/tablet while [Rec. loc. Info] is working,
location information recording is stopped.
Not available in these cases:
• The smartphone/tablet may fail to acquire location information in China and the border area in
the neighbouring countries of China.
(As of October 2013)
248
12. Using the Wi-Fi function
Sending images to a smartphone/tablet by controlling the camera
∫ Methods for sending and images that can be sent
JPEG
RAW
MP4
AVCHD
3D
Sending an image each time a
recording is made
([Send Images While Recording])
±
—
—
—
—
Select and send the images
([Send Images Stored in the Camera])
±
—
±
—
—
• Some images may not be played back or sent depending on the device.
• For information on the playback of images, check the operating instructions of the destination
device.
• For details on how to send images, refer to P280.
Preparations:
• Install the “Image App” in advance. (P245)
Click the followings to jump to the beginning of each menu.
Sending an image each time a recording is made ([Send Images While
Recording]) P250
Select and send the images ([Send Images Stored in the Camera]) P251
• When sending images on a mobile network, high packet communication fees may be incurred
depending on the details of your contract.
249
12. Using the Wi-Fi function
Sending an image each time a recording is made ([Send Images While
Recording])
1
Select the menu.
[Wi-Fi] >
2
[New Connection] > [Send Images While Recording] >
[Smartphone]
Select [Via Network] or [Direct], and connect. (P273)
On your smartphone/tablet
When connecting with [Via Network]:
1 Turn on the Wi-Fi function.
2 Select the wireless access point you want to connect to, and set.
3 Start “Image App”. (P245)
When connecting with [Wi-Fi Direct] or [WPS Connection] in [Direct]:
1 Start “Image App”. (P245)
When connecting with [Manual Connection] in [Direct]:
1 Turn on the Wi-Fi function.
2 Select the SSID that matches the one displayed on the screen of this unit, and
then enter the password.
3 Start “Image App”. (P245)
3
Select a device you want to connect.
• When the connection is complete, the screen is displayed. To change the send setting,
4
Take pictures.
• The pictures are sent automatically after taking them.
• To change the setting or disconnect, press [Wi-Fi]. (P242)
press [DISP.]. (P282)
You cannot change the settings while sending pictures. Wait until sending is complete.
250
12. Using the Wi-Fi function
Select and send the images ([Send Images Stored in the Camera])
1
Select the menu.
[Wi-Fi] >
2
[New Connection] > [Send Images Stored in the Camera] >
[Smartphone]
Select [Via Network] or [Direct], and connect. (P273)
On your smartphone/tablet
When connecting with [Via Network]:
1 Turn on the Wi-Fi function.
2 Select the wireless access point you want to connect to, and set.
3 Start “Image App”. (P245)
When connecting with [Wi-Fi Direct] or [WPS Connection] in [Direct]:
1 Start “Image App”. (P245)
When connecting with [Manual Connection] in [Direct]:
1 Turn on the Wi-Fi function.
2 Select the SSID that matches the one displayed on the screen of this unit, and
then enter the password.
3 Start “Image App”. (P245)
3
Select a device you want to connect.
• When the connection is complete, the screen is displayed. To change the send setting,
4
Select [Single Select] or [Multi Select].
• To change the setting or disconnect, press [Wi-Fi]. (P242)
press [DISP.]. (P282)
[Single Select] setting
1 Select the picture.
2 Select [Set].
6HW
[Multi Select] setting
1 Select the picture. (repeat)
• The setting is cancelled when the picture is selected
again.
2.
2 Select [OK].
• The number of pictures that can be sent by [Multi
Select] is limited.
• Confirmation screen is displayed. It is executed when [Yes] is selected.
251
12. Using the Wi-Fi function
Displaying pictures on a TV
You can display pictures on a TV that supports the
Digital Media Renderer (DMR) function of the DLNA
standard.
Preparations:
Set the TV to DLNA waiting mode.
• Read the operating instructions for your TV.
• For details on compatible devices, refer to the support sites below.
http://panasonic.jp/support/global/cs/dsc/
(This Site is English only.)
1
Select the menu.
[Wi-Fi] >
2
3
4
[New Connection] > [Playback on TV]
Select [Via Network] or [Direct], and connect. (P273)
Select a device you want to connect.
• When the connection is established, the screen is displayed.
Take or play back pictures on this unit.
• To change the setting or disconnect, press [Wi-Fi]. (P242)
• When a TV is connected to this unit, the TV screen may temporarily return to the status before
the connection. Pictures are displayed again when you take or play back pictures.
• [Effect] and [Sound] of the Slide Show are disabled.
Not available in these cases:
• Motion pictures cannot be played back.
• During the multi/calendar playback, pictures displayed on the screen of this unit are not
displayed on TV.
252
12. Using the Wi-Fi function
Printing Wirelessly
You can send images to a compatible printer, and print
them wirelessly.
∫ Methods for sending and images that can be sent
Select and send the images
([Send Images Stored in the Camera])
JPEG
RAW
MP4
AVCHD
3D
±
—
—
—
—
• Some images may not be sent depending on the device.
• For details on how to send images, refer to P280.
Preparations:
• You can print out recorded pictures wirelessly from a PictBridge (wireless LAN-compatible)¢
printer.
¢ Compliant with the DPS over IP standards.
For details on the PictBridge (wireless LAN-compatible) printer, contact the respective
company.
1
Select the menu.
[Wi-Fi] >
2
3
4
[New Connection] > [Send Images Stored in the Camera] >
[Printer]
Select [Via Network] or [Direct], and connect. (P273)
Select a printer you want to connect.
Select pictures, and then print.
• The procedure for selecting pictures is the same as the one for when the USB connection
cable is connected.
For details, refer to P301.
• To change the setting or disconnect, press [Wi-Fi]. (P242)
• When sending images on a mobile network, high packet communication fees may be incurred
depending on the details of your contract.
Not available in these cases:
• Motion pictures cannot be printed out.
253
12. Using the Wi-Fi function
When sending images to AV device
You can send pictures and motion pictures to AV devices in your house (home AV
devices). You can also send them to the devices (external AV devices) of your family or
friends living away from you via “LUMIX CLUB”.
LUMIX CLUB
A Wireless access point
B AV device ([Home])
C AV device ([External])
∫ Methods for sending and images that can be sent
JPEG
RAW
MP4
AVCHD
3D
Sending an image each time a
recording is made
([Send Images While Recording])
±
—
—
—
±
Select and send the images
([Send Images Stored in the Camera])
±
—
—
—
±
• Some images may not be played back or sent depending on the device.
• For information on the playback of images, check the operating instructions of the destination
device.
• For details on how to send images, refer to P280.
254
12. Using the Wi-Fi function
Preparations:
When sending a picture to [Home], set your device to DLNA waiting mode.
• Read the operating instructions of your device for details.
When sending images to [External], the following are required:
• Registration to “LUMIX CLUB” (P267)
• Address number and access number acquired by the destination External AV device. (P272)
Click the followings to jump to the beginning of each menu.
Sending an image each time a recording is made ([Send Images While
Recording]) P255
Select and send the images ([Send Images Stored in the Camera]) P256
• When sending images on a mobile network, high packet communication fees may be incurred
depending on the details of your contract.
Sending an image each time a recording is made ([Send Images While
Recording])
1
Select the menu.
[Wi-Fi] >
2
3
4
[New Connection] > [Send Images While Recording] > [AV
device]
Select [Home] or [External].
Select [Via Network] or [Direct], and connect. (P273)
• When [External] is selected, [Direct] cannot be selected.
Select a device you want to connect.
• When the connection is complete, the screen is displayed. To change the send setting,
press [DISP.]. (P282)
5
Take pictures.
• To change the setting or disconnect, press [Wi-Fi]. (P242)
You cannot change the settings while sending pictures. Wait until sending is complete.
255
12. Using the Wi-Fi function
Select and send the images ([Send Images Stored in the Camera])
1
Select the menu.
[Wi-Fi] >
2
3
4
[New Connection] > [Send Images Stored in the Camera] > [AV
device]
Select [Home] or [External].
Select [Via Network] or [Direct], and connect. (P273)
• When [External] is selected, [Direct] cannot be selected.
Select a device you want to connect.
• When the connection is complete, the screen is displayed. To change the send setting,
press [DISP.]. (P282)
5
Select [Single Select] or [Multi Select].
• To change the setting or disconnect, press [Wi-Fi]. (P242)
[Single Select] setting
1 Select the picture.
2 Select [Set].
6HW
[Multi Select] setting
1 Select the picture. (repeat)
• The setting is cancelled when the picture is selected
again.
2.
2 Select [OK].
• The number of pictures that can be sent by [Multi
Select] is limited.
• Confirmation screen is displayed. It is executed when [Yes] is selected.
256
12. Using the Wi-Fi function
When sending images to PC
You can send pictures and motion pictures recorded
with this unit to a PC.
∫ Methods for sending and images that can be sent
JPEG
RAW
MP4
AVCHD¢
3D
Sending an image each time a
recording is made
([Send Images While Recording])
±
±
—
—
±
Select and send the images
([Send Images Stored in the Camera])
±
±
±
±
±
¢ A motion picture recorded in [AVCHD] can be sent to [PC] if the file size is 4 GB or smaller. It
cannot be sent if the size is greater than 4 GB.
• Some images may not be played back or sent depending on the device.
• For information on the playback of images, check the operating instructions of the destination
device.
• For details on how to send images, refer to P280.
Preparations:
(On the camera)
• If the workgroup of the destination PC has
(On your PC)
• Turn the computer on.
been changed from the standard setting, you • Prepare folders for receiving images on the
also need to change the setting of this unit in
[PC Connection]. (P283)
PC before sending a picture to the PC.
(P258)
Click the followings to jump to the beginning of each menu.
Sending an image each time a recording is made ([Send Images While
Recording]) P259
Select and send the images ([Send Images Stored in the Camera]) P260
• When sending images on a mobile network, high packet communication fees may be incurred
depending on the details of your contract.
257
12. Using the Wi-Fi function
To create a folder that receives images
• Create a PC user account [account name (up to 254 characters) and password (up to
32 characters)] consisting of alphanumeric characters. An attempt to create a receive folder
may fail if the account includes non-alphanumeric characters.
∫ When using “PHOTOfunSTUDIO”
1 Install “PHOTOfunSTUDIO” to the PC.
• For details on hardware requirements and installation, read “About the supplied software”
(P293).
2
Create a folder that receives images with “PHOTOfunSTUDIO”.
• To create the folder automatically, select [Auto-create]. To specify a folder, create a new
folder, or set a password to the folder, select [Create manually].
• For details, refer to the operating instructions of “PHOTOfunSTUDIO” (PDF).
∫ When not using “PHOTOfunSTUDIO”
(For Windows)
Supported OS: Windows XP/Windows Vista/Windows 7/Windows 8
Example: Windows 7
1 Select a folder you intend to use for receiving, then right-click.
2 Select [Properties], then enable sharing of the folder.
• For details, refer to the operating instructions of your PC or Help on the OS.
(For Mac)
Supported OS: OS X v10.4 to v10.8
Example: OS X v10.8
1 Select a folder you intend to use for receiving, then click on the items in the
following order.
[File]
[Get Info]
2 Enable sharing of the folder.
• For details, refer to the operating instructions of your PC or Help on the OS.
258
12. Using the Wi-Fi function
Sending an image each time a recording is made ([Send Images While
Recording])
1
Select the menu.
[Wi-Fi] >
[New Connection] > [Send Images While Recording] > [PC]
2
3
Select [Via Network] or [Direct], and connect. (P273)
Select the PC you want to connect to.
• When the PC you want to connect to is not displayed, select [Manual Input], and enter the
4
Select the folder you want to send.
• When the connection is complete, the screen is displayed. To change the send setting,
5
Take pictures.
• To change the setting or disconnect, press [Wi-Fi]. (P242)
computer name of the PC (NetBIOS name for Apple Mac computers).
press [DISP.]. (P282)
You cannot change the settings while sending pictures. Wait until sending is complete.
259
12. Using the Wi-Fi function
Select and send the images ([Send Images Stored in the Camera])
1
Select the menu.
[Wi-Fi] >
[New Connection] > [Send Images Stored in the Camera] > [PC]
2
3
Select [Via Network] or [Direct], and connect. (P273)
Select the PC you want to connect to.
• When the PC you want to connect to is not displayed, select [Manual Input], and enter the
4
Select the folder you want to send.
• When the connection is complete, the screen is displayed. To change the send setting,
5
Select [Single Select] or [Multi Select].
computer name of the PC (NetBIOS name for Apple Mac computers).
press [DISP.]. (P282)
6
• To change the setting or disconnect, press [Wi-Fi]. (P242)
[Single Select] setting
1 Select the picture.
2 Select [Set].
6HW
[Multi Select] setting
1 Select the picture. (repeat)
• The setting is cancelled when the picture is selected
again.
2.
2 Select [OK].
• The number of pictures that can be sent by [Multi
Select] is limited.
• Confirmation screen is displayed. It is executed when [Yes] is selected.
• Folders sorted by the sent date are created in the specified folder, and pictures are saved in
those folders.
• If the screen for a user account and password entry appears, enter the one you set on your PC.
• When the computer name (NetBIOS name for Apple Mac computers) contains a space (blank
character), etc., it may not be recognised correctly.
If a connection attempt fails, we recommend that you change the computer name (or NetBIOS
name) to the one consisting of only alphanumeric characters, with a maximum of
15 characters.
260
12. Using the Wi-Fi function
Using Web services
You can send pictures and motion pictures to an SNS, etc. via “LUMIX CLUB”.
By setting up automatic transfers of pictures and motion pictures to the Cloud Sync
Service, you can receive the transferred pictures or motion pictures on a PC or
smartphone.
LUMIX CLUB
A Wireless access point
B Web service
C Cloud Sync Service
Preparations:
To send images to a web service or a cloud folder, you need to register to “LUMIX
CLUB” (P267).
To send images to a web service, you need to register the web service. (P263)
Click the followings to jump to the beginning of each menu.
When sending images to web service P262
When sending images to [Cloud Sync. Service] P265
• When sending images on a mobile network, high packet communication fees may be incurred
depending on the details of your contract.
261
12. Using the Wi-Fi function
When sending images to web service
∫ Methods for sending and images that can be sent
JPEG
RAW
MP4
AVCHD
3D
Sending an image each time a
recording is made
([Send Images While Recording])
±
—
—
—
±
Select and send the images
([Send Images Stored in the Camera])
±
—
±
—
±
• Some images may not be played back or sent depending on the device.
• For information on the playback of images, check the web service.
• For details on how to send images, refer to P280.
Click the followings to jump to the beginning of each menu.
Sending an image each time a recording is made ([Send Images While
Recording]) P263
Select and send the images ([Send Images Stored in the Camera]) P264
• Images uploaded to the web service cannot be displayed or deleted with this camera. Check
images by accessing the web service with your smartphone/tablet or computer.
• If sending images fails, a report email outlining the failure will be sent to the email address
registered with “LUMIX CLUB”.
• Images may contain personal information that can be used to identify the user, such as a
title, the time and date when the images was taken, and the location where the image
was taken. Check this information before uploading images to web services.
• Panasonic assumes no responsibility for the damages resulting from the leakage, loss, etc.
of images uploaded on web services.
• When uploading images to the web service, do not delete images from this camera, even
after they have finished sending, until you have checked that they have been properly
uploaded to the web service. Panasonic assumes no responsibility for the damages
resulting from the deletion of images stored in this unit.
262
12. Using the Wi-Fi function
Registering web services
When sending images to web services, the web service being used must be registered
with the “LUMIX CLUB”. (P267)
• Check the “FAQ/Contact us” on the following site for compatible web services.
http://lumixclub.panasonic.net/eng/c/lumix_faqs/
Preparation:
Make sure that you have created an account on the web service you want to use, and
have the login information available.
1
2
3
4
Connect to the “LUMIX CLUB” site using a smartphone/tablet or computer.
http://lumixclub.panasonic.net/eng/c/
Enter your “LUMIX CLUB” login ID and password and log in to the service.
(P267)
Register your email address.
Select the web service to be used and register it.
• Follow the instructions on the screen to register the service.
Sending an image each time a recording is made ([Send Images While
Recording])
1
Select the menu.
[Wi-Fi] >
[New Connection] > [Send Images While Recording] > [Web
service]
2
3
Select [Via Network], and connect. (P274)
Select a web service you want to connect.
• When the connection is complete, the screen is displayed. To change the send setting,
4
Take pictures.
• To change the setting or disconnect, press [Wi-Fi]. (P242)
press [DISP.]. (P282)
You cannot change the settings while sending pictures. Wait until sending is complete.
263
12. Using the Wi-Fi function
Select and send the images ([Send Images Stored in the Camera])
1
Select the menu.
[Wi-Fi] >
[New Connection] > [Send Images Stored in the Camera] > [Web
service]
2
3
Select [Via Network], and connect. (P274)
Select a web service you want to connect.
• When the connection is complete, the screen is displayed. To change the send setting,
4
Select [Single Select] or [Multi Select].
• To change the setting or disconnect, press [Wi-Fi]. (P242)
press [DISP.]. (P282)
[Single Select] setting
1 Select the picture.
2 Select [Set].
6HW
[Multi Select] setting
1 Select the picture. (repeat)
• The setting is cancelled when the picture is selected
again.
2.
2 Select [OK].
• The number of pictures that can be sent by [Multi
Select] is limited.
• Confirmation screen is displayed. It is executed when [Yes] is selected.
264
12. Using the Wi-Fi function
When sending images to [Cloud Sync. Service]
∫ Using [Cloud Sync. Service] (as of October 2013)
Preparations:
You need to register to “LUMIX CLUB” (P267) and configure the Cloud Sync. setting to
send a picture to a Cloud Folder.
For a PC, use “PHOTOfunSTUDIO” to set up Cloud Sync settings. For a smartphone/
tablet, use “Image App” to set them up.
• If you set the picture destination to [Cloud Sync. Service], sent pictures are temporarily saved
in the cloud folder, and they can be synchronised with the device in use, such as the PC or
smartphone/tablet.
• A Cloud Folder stores transferred images for 30 days (up to 1000 pictures). Transferred images
are deleted automatically 30 days after the transfer. Furthermore, when the number of stored
images exceeds 1000, some images may be deleted depending on the [Cloud Limit] (P282)
setting even within 30 days after the transfer.
• When the download of images from a Cloud Folder to all specified devices is complete, images
may be deleted from the Cloud Folder even within 30 days after the transfer.
∫ Methods for sending and images that can be sent
JPEG
RAW
MP4
AVCHD
3D
Sending an image each time a
recording is made
([Send Images While Recording])
±
—
—
—
±
Select and send the images
([Send Images Stored in the Camera])
±
—
±
—
±
• Some images may not be played back or sent depending on the device.
• For information on the playback of images, check the operating instructions of the destination
device.
• For details on how to send images, refer to P280.
Click the followings to jump to the beginning of each menu.
Sending an image each time a recording is made ([Send Images While
Recording]) P266
Select and send the images ([Send Images Stored in the Camera]) P266
265
12. Using the Wi-Fi function
Sending an image each time a recording is made ([Send Images While
Recording])
1
Select the menu.
[Wi-Fi] >
[New Connection] > [Send Images While Recording] > [Cloud
Sync. Service]
2
3
Select [Via Network], and connect. (P274)
Check the send setting.
• When the connection is complete, the screen is displayed. To change the send setting,
4
Take pictures.
• To change the setting or disconnect, press [Wi-Fi]. (P242)
press [DISP.]. (P282)
You cannot change the settings while sending pictures. Wait until sending is complete.
Select and send the images ([Send Images Stored in the Camera])
1
Select the menu.
[Wi-Fi] >
[New Connection] > [Send Images Stored in the Camera] >
[Cloud Sync. Service]
2
3
Select [Via Network], and connect. (P274)
Check the send setting.
• When the connection is complete, the screen is displayed. To change the send setting,
4
Select [Single Select] or [Multi Select].
• To change the setting or disconnect, press [Wi-Fi]. (P242)
press [DISP.]. (P282)
[Single Select] setting
1 Select the picture.
2 Select [Set].
6HW
[Multi Select] setting
1 Select the picture. (repeat)
• The setting is cancelled when the picture is selected
again.
2.
2 Select [OK].
• The number of pictures that can be sent by [Multi
Select] is limited.
• Confirmation screen is displayed. It is executed when [Yes] is selected.
266
12. Using the Wi-Fi function
Registering to the “LUMIX CLUB”
About the [LUMIX CLUB]
Acquire a “LUMIX CLUB” login ID (free).
If you register this unit to the “LUMIX CLUB”, you can synchronise images between the
devices you are using, or transfer these images to web services.
Use the “LUMIX CLUB” when uploading pictures to web services or external AV device.
• You can set the same “LUMIX CLUB” login ID for this unit and a smartphone/tablet. (P270)
Refer to the “LUMIX CLUB” site for details.
http://lumixclub.panasonic.net/eng/c/
Please note:
• The service may be suspended due to regular maintenance or unexpected troubles, and
the service contents may be changed or added, without prior notice to the users.
• The service may be stopped in whole or in part with a reasonable period of advance notice.
Acquiring a new login ID ([New account])
1
Select the menu. (P37)
[MENU] >
[Setup] > [Wi-Fi] > [Wi-Fi Setup] > [LUMIX CLUB]
2
Select [Set/Add Account].
3
Select [New account].
• Connect to the network.
Proceed to the next page by selecting [Next].
• A confirmation screen will be displayed if a login ID has
already been acquired for the camera. Select [Yes] to
acquire a new login ID, or [No] if you do not need to acquire
a new login ID.
4
Select the method for connecting to a wireless access point, and set.
• Refer to P274 for details.
• A setting screen will be displayed only when connecting for the first time.
Once you set the connection method, it will be saved on this unit and used when
connecting the next time. To change the wireless access point you want to connect to,
press [DISP.], and change the connection destination.
• Proceed to the next page by selecting [Next].
267
12. Using the Wi-Fi function
5
Read through the “LUMIX CLUB” terms of use and select [Agree].
• You can switch pages by 3/4.
• The display can be enlarged (2k) by rotating the control dial to the right.
• The enlarged display can be reset to its original size (1k) by rotating the control dial to the
left.
6
7
• You can move the position of the enlarged display with 3/4/2/1.
• Press [
] to cancel the process without acquiring a login ID.
Enter a password.
• Enter any combination of 8 to 16 characters and numbers for the password.
• For details on how to enter characters, refer to “Entering Text” section on P54.
Check the login ID and select [OK].
• The login ID (12-digit number) will be displayed
automatically.
When logging in to the “LUMIX CLUB” with a computer,
you only need to enter the numbers.
• A message is displayed when the connection is complete.
Select [OK].
• Be sure to make a note of the login ID and password.
• Exit the menu after it is set.
268
12. Using the Wi-Fi function
Using the acquired login ID/Checking or changing the login ID or password ([Set
Login ID])
Preparation:
When using the acquired login ID, check the ID and password.
To change the “LUMIX CLUB” password on the camera, access the “LUMIX CLUB”
website from your smartphone/tablet or PC and change the “LUMIX CLUB” password in
advance.
• The login ID and password registered to the “LUMIX CLUB” cannot be changed on this unit.
1
Select the menu. (P37)
[MENU] >
2
3
4
5
[Setup] > [Wi-Fi] > [Wi-Fi Setup] > [LUMIX CLUB]
Select [Set/Add Account].
Select [Set Login ID].
• The login ID and password are displayed.
• The password is displayed as “ ”.
• Close the menu if only checking the login ID.
Select the item to change.
Enter the login ID or password.
• Refer to “Entering Text” (P54) for information on how to
enter text.
• Enter the new password you have created on your
smartphone/tablet or PC into the camera. If the password
differs from the one you created on your smartphone/tablet
or PC, you will not be able to upload images.
• Exit the menu after it is set.
269
12. Using the Wi-Fi function
To set the same login ID for the camera and the smartphone/tablet
• Setting the same login ID on this unit and your smartphone/tablet is convenient for sending
images on this unit to other devices or web services.
When either this unit or the smartphone/tablet has acquired the login ID:
1
2
Connect this unit to the smartphone/tablet. (P246)
From the “Image App” menu, set the common login ID.
• The login IDs for this unit and the smartphone/tablet become the same.
• After connecting this unit to the smartphone/tablet, the setup screen for a common login ID
may appear when you display the playback screen. You can also set a common login ID by
following the on-screen instructions.
• This operation is not available for [Wi-Fi Direct] connection.
When this unit and the smartphone/tablet have acquired different login IDs:
(When you want to use the smartphone’s/tablet’s login ID for this unit)
Change the login ID and password for this unit to those acquired by the
smartphone/tablet.
(When you want to use this unit’s login ID for the smartphone/tablet)
Change the login ID and password for the smartphone/tablet to those acquired by
this unit.
Check the “LUMIX CLUB” terms of use
Check the details if the terms of use have been updated.
1
Select the menu. (P37)
[MENU] >
2
[Setup] > [Wi-Fi] > [Wi-Fi Setup] > [LUMIX CLUB]
Select [Terms of use].
• The camera will connect to the network and the terms of use will be displayed.
Close the menu after checking the terms of use.
270
12. Using the Wi-Fi function
Delete your login ID and account from the “LUMIX CLUB”
Delete the login ID from the camera when transferring it to another party or disposing of it.
You can also delete your “LUMIX CLUB” account.
1
Select the menu. (P37)
[MENU] >
2
3
4
[Setup] > [Wi-Fi] > [Wi-Fi Setup] > [LUMIX CLUB]
Select [Delete account].
• The message is displayed. Select [Next].
Select [Yes] in the login ID delete confirmation screen.
• The message is displayed. Select [Next].
Select [Yes] on the confirmation screen for deleting the “LUMIX CLUB”
account.
• If you want to continue using the service, selecting [No] will only delete the login ID.
Exit the menu after it is executed.
5
Select [Next].
• The login ID is deleted, and then the message notifying the deletion of your account is
displayed. Select [OK].
• Exit the menu after it is executed.
• Changes and other actions to login IDs can only be made to the login ID acquired with the
camera.
271
12. Using the Wi-Fi function
Configuring the external AV device settings
Images can be sent to the AV device of relatives and acquaintances via “LUMIX CLUB”.
Preparations:
Check the address number (16-digit number) and access number (4-digit number) of the
destination AV device issued by “LUMIX CLUB”.
(Refer to the AV device instruction manual for details)
1
Select the menu. (P37)
[MENU] >
2
3
4
5
[Setup] > [Wi-Fi] > [Wi-Fi Setup] > [External AV device]
Select [Add new device].
Enter the address number.
Enter the access code.
Enter any name.
• A maximum of 28 characters can be entered. A two-byte character is treated as two
characters.
• Exit the menu after it is set.
• Refer to “Entering Text” (P54) for information on how to enter text.
Change or delete information on registered AV device
Information on AV device that has already been saved can be changed or deleted.
1
Select the menu. (P37)
[MENU] >
2
3
[Setup] > [Wi-Fi] > [Wi-Fi Setup] > [External AV device]
Select the AV device you want to change or delete.
Select [Edit] or [Delete].
Change information on AV device that has already been registered.
[Edit]
[Delete]
Perform steps 3 through 5 of “Configuring the external AV
device settings”.
Delete information on AV device that has already been registered.
• Confirmation screen is displayed. It is executed when [Yes] is
selected.
• Exit the menu after it is set.
272
12. Using the Wi-Fi function
About Connections
You can select a connection method after selecting a Wi-Fi function and a destination.
Performing a direct connection is convenient for when you are in a place away from home
where wireless access points are not available or for when connecting temporarily to a
device you do not usually use.
When connecting with the same settings as the previous ones, you can use the Wi-Fi
function quickly by connecting via [Select a destination from History]or [Select a
destination from Favorite].
A
A Wireless access point
[Via Network]
Connects via a wireless access point.
P274
[Direct]
Your device connects directly to this unit.
P277
273
12. Using the Wi-Fi function
Connecting from your house (via the network)
You can select the method for connecting to a wireless
access point.
¢ WPS refers to a function that allows you to easily configure
the settings related to the connection and security of wireless
LAN devices.
To check if the wireless access point you are using is
compatible with WPS, refer to the manual of the wireless
access point.
Save push button type wireless access point that is compatible with
Wi-Fi Protected SetupTM with a WPS mark.
[WPS (Push-Button)]
e.g.:
Press the wireless access point
WPS button until it switches to WPS
mode.
• Refer to the wireless access point
instruction manual for details.
Save PIN code type wireless access point that is compatible with
Wi-Fi Protected Setup with a WPS mark.
1
[WPS (PIN code)]
2
3
Select the wireless access point you are connecting
to.
Enter the PIN code displayed on the camera screen
into the wireless access point.
Press [MENU/SET].
• Refer to the wireless access point instruction manual for
details.
[Manual Connection]
Select this option when you are not sure about the WPS
compatibility, or when you want to search for and connect to a
wireless access point.
• Refer to P275 for details.
274
12. Using the Wi-Fi function
If you are not sure about the WPS compatibility (connecting by [Manual
Connection])
Search for available wireless access points.
• Confirm encryption key of the selected wireless access point if the network authentication is
encrypted.
• When connecting by [Manual Input], confirm SSID, encryption type, encryption key of the
wireless access point you are using.
1
Select the wireless access point you are connecting
to.
• Pressing [DISP.] will search for a wireless access point
again.
2
• If no wireless access point is found, refer to “When
connecting with [Manual Input]” on P275.
(If network authentication is encrypted)
Enter the encryption key.
• For details on how to enter characters, refer to “Entering Text” section on P54.
∫ When connecting with [Manual Input]
1 On the screen displayed in step 1 of “If you are not sure about the WPS
compatibility (connecting by [Manual Connection])”, select [Manual Input].
2 Enter the SSID of the wireless access point you are connecting to, then select
[Set].
• For details on how to enter characters, refer to “Entering Text” section on P54.
3 Select the network authentication type.
• For information on network authentication, see the manual of the wireless access point.
4 Select the encryption type.
• The type of settings that can be changed may vary depending on the details of network
authentication settings.
Network authentication type
5
Encryption types that can be set
[WPA2-PSK]
[TKIP]/[AES]
[WPA-PSK]
[TKIP]/[AES]
[Common Key]
[WEP]
[Open]
[No Encryption]/[WEP]
(When an option other than [No Encryption] is selected)
Enter the encryption key.
275
12. Using the Wi-Fi function
• Check the wireless access points instruction manual and settings when saving a wireless
access point.
• If no connection can be established, the wireless access point’s radio waves may be too weak.
Refer to “Message Display” (P312) and “Troubleshooting” (P325) for details.
• Transmission speed may decrease, or may not be usable depending on the environment it is
used in.
276
12. Using the Wi-Fi function
Connecting from a location away from your house (direct connection)
You can select the method for connecting to the device you
are using.
Select the connection method supported by your device.
[Wi-Fi Direct]
1
2
3
Set the device to Wi-Fi DirectTM mode.
Select [Wi-Fi Direct].
Select the device to connect to.
• Read the operating instructions of your device for details.
[WPS (Push-Button)]
1
2
[WPS Connection]
Select [WPS (Push-Button)].
Set the device to WPS mode.
• You can wait longer for a connection by pressing the [DISP.]
button on this unit.
[WPS (PIN code)]
1
2
[Manual Connection]
Select [WPS (PIN code)].
Enter the PIN code of the device into this unit.
Enter the SSID and password into
the device. The SSID and
password are displayed on the
connection waiting screen of this
unit.
277
12. Using the Wi-Fi function
Connecting quickly with the same settings as the previous ones
([Select a destination from History]/[Select a destination from Favorite])
When the Wi-Fi function is used, a record is saved in the history. You can register records
as favourites.
Connecting from the history or favourites allows you to easily connect with the same
settings as the previous ones.
1
Press [Wi-Fi].
2
Select [Select a destination from History] or
[Select a destination from Favorite].
3
[Select a destination from
History]
Connects with the same settings as the previous ones.
[Select a destination from
Favorite]
Connects with settings registered as favourites.
Select item.
Registering records as favourites
1
2
3
4
Press [Wi-Fi].
Select [Select a destination from History].
Select the item you want to register to favourites, and then press 1.
Enter a registration name.
• For details on how to enter characters, refer to “Entering Text” section on P54.
• A maximum of 30 characters can be entered. A two-byte character is treated as two
characters.
278
12. Using the Wi-Fi function
Editing the items registered to favourites
1
2
3
4
Press [Wi-Fi].
Select [Select a destination from Favorite].
Select the favourite item you want to edit, and then press 1.
Select the item.
[Remove from Favorite]
[Change the Order in
Favorite]
[Change the Registered
Name]
—
Select the destination.
• For details on how to enter characters, refer to “Entering
Text” section on P54.
• A maximum of 30 characters can be entered. A two-byte
character is treated as two characters.
Save frequently-used Wi-Fi connection settings as favourites
The number that can be saved in the history is limited.
We recommend that you save frequently-used Wi-Fi connection settings by registering
them as favourites. (P278)
Checking the connection detail of a record or favourite
If [DISP.] is pressed when selecting an item in the history or favourites, the detail of the
connection can be displayed.
• Performing [Reset Wi-Fi Settings] clears the history and the contents saved in [Select a
destination from Favorite].
• When connecting to a network to which many PCs are connected by using [Select a destination
from History] or [Select a destination from Favorite], a connection attempt may fail because the
previously-connected device will be identified from among many devices.
If a connection attempt fails, reconnect by using [New Connection].
279
12. Using the Wi-Fi function
About settings for sending images
When sending images, select the method for sending them after selecting [New
Connection].
After the connection has been completed, settings for sending, such as the image size for
sending, can also be changed.
• When sending images on a mobile network, high packet communication fees may be incurred
depending on the details of your contract.
∫ Images that can be sent
Destination
JPEG
RAW
MP4¢1
AVCHD¢1, 2
3D
[Smartphone]
±
—
±
—
—
[PC]
±
±
±
±
±
[Cloud Sync.
Service]
±
—
±
—
±
[Web service]
±
—
±
—
±
[AV device]
±
—
—
—
±
[Printer]¢1
±
—
—
—
—
¢1 Sending by [Send Images While Recording] is not available.
¢2 A motion picture recorded in [AVCHD] can be sent to [PC] if the file size is 4 GB or smaller. It
cannot be sent if the size is greater than 4 GB.
• Some images may not be played back or sent depending on the device.
• Refer to the manual of the destination equipment or the web service for more information on
how to playback pictures.
280
12. Using the Wi-Fi function
Send Images While Recording
A picture can be automatically sent to a specified device every time you take it.
• Since the camera gives priority to recording, sending may take longer during the recording.
• When connected with [Send Images While Recording], [
] is
displayed on the recording screen, and [ ] is displayed while
sending a file.
• If you turn off this unit or the Wi-Fi connection before sending is
complete, unsent pictures will not be resent.
• You may not be able to delete files or use the playback menu
while sending.
55
Not available in these cases:
• Motion pictures cannot be sent.
Send Images Stored in the Camera
Images can be selected and sent after recording.
• Details of the playback menu [Favorite] or [Print Set] settings will not be sent.
Not available in these cases:
• Some images taken with a different camera may not be able to be sent.
• Images that have been modified or edited with a computer may not be able to be sent.
281
12. Using the Wi-Fi function
Changing the settings for sending images
Pressing [DISP.] after completing a connection allows you to change the settings for
sending such as the image size for sending.
[Size]
Resize the image to send.
[Original]/[Auto]¢1/[Change]
• If you select [Auto], the image size is determined by the
circumstances at the destination.
• You can select the image size for [Change] from [M], [S] or [VGA].
The aspect ratio does not change.
[File Format]¢2
[JPG]/[RAWiJPG]/[RAW]
Select whether to delete the location information from images before
sending them.
[Delete Location
Data]¢3
[ON]:
Delete the location information, then send.
[OFF]:
Keep the location information and send.
• This operation only deletes the location information from the images
that are set to be sent.
(The location information will not be deleted from the original images
stored in this unit.)
¢4
[Cloud Limit]
You can select whether to send images when the Cloud Folder runs
out of free space.
[ON]:
Do not send images.
[OFF]:
Delete images from the oldest ones, then send new images.
¢1 Only available when the destination is set to [Web service].
¢2 Only available when the destination is set to [PC].
¢3 Only available when [Send Images Stored in the Camera] is selected and the destination is
set to [Cloud Sync. Service], [Web service] or [External] of [AV device].
¢4 Only available when the destination is set to [Cloud Sync. Service].
282
12. Using the Wi-Fi function
[Wi-Fi Setup] Menu
Configure the settings required for the Wi-Fi function.
The settings cannot be changed when connected to Wi-Fi.
Select the menu. (P37)
[MENU] >
[Setup] > [Wi-Fi] > [Wi-Fi Setup] > Desired item to be set
[LUMIX CLUB]
Acquires or changes the “LUMIX CLUB” login ID.
• Refer to P267 for details.
You can set the workgroup.
To send images to a PC, a connection to the same workgroup as
the destination PC is required.
(The default setting is “WORKGROUP”.)
[PC Connection]
[Change Workgroup Name]:
Enter the workgroup of the connecting PC.
[Restore to Default]:
Restores the default state.
• For details on how to enter characters, refer to “Entering Text” section on P54.
• If you are using the PC with standard settings, you do not need to change the workgroup.
You can change the name of this unit.
[Device Name]
1
2
Press [DISP.].
Enter the desired device name.
• For details on how to enter characters, refer to “Entering Text”
section on P54.
• A maximum of 32 characters can be entered.
[External AV device]
Images can be sent to the AV device of relatives and
acquaintances via “LUMIX CLUB”.
• Refer to P272 for details.
283
12. Using the Wi-Fi function
[Wi-Fi Password]
To prevent incorrect operation or use of the Wi-Fi function by a
third party and to protect saved personal information, it is
recommended that you protect the Wi-Fi function with a
password.
Setting a password will automatically display the password input
screen when the Wi-Fi function is used.
[Setup]:
Enter any 4-digit numbers as the password.
[Delete]
• For details on how to enter characters, refer to “Entering Text” section on P54.
• Make a copy of password.
If you forget the password, you can reset it with [Reset Wi-Fi Settings] in the [Setup] menu,
however other settings will also be reset. (excluding [LUMIX CLUB])
[Network Address]
Displays the MAC address and IP address of this unit.
• A “MAC Address” is a unique address that is used to identify network equipment.
• “IP address” refers to a number that identifies a PC connected to a network such as the
Internet. Usually, the addresses for homes are automatically assigned by the DHCP function
such as a wireless access point. (Example: 192.168.0.87)
284
13. Connecting to other equipment
Enjoying 3D pictures
Taking 3D pictures
Attaching the 3D interchangeable lens (H-FT012: optional) to the camera allows you to
take 3D pictures for extra impact.
To view 3D pictures, a television that supports 3D is required.
1
2
Attach the 3D interchangeable lens to the camera.
Bring the subject into the frame and record by pressing the shutter
button fully.
• Focusing is not required when recording 3D pictures.
• Still pictures recorded with the 3D interchangeable lens attached are saved in MPO
format (3D).
To ensure that the 3D pictures can be safely viewed, pay attention to the
following points when recording.
• Where possible, record with the unit in a horizontal state.
• The suggested minimum subject distance is 0.6 m (2.0 feet).
• Be careful not to shake the camera while in a vehicle or walking.
It is recommended to use a tripod or a flash to record steady pictures.
• Up to approx. 490 3D pictures can be recorded on a 2 GB card.
(When the aspect ratio is set to [4:3], and the quality is set to [
].)
• Read the operating instructions of the 3D interchangeable lens for details.
Not available in these cases:
• You cannot record 3D pictures in vertical orientation.
• When a distance to the subject is 0.6 m (2.0 feet) to approximately 1 m (3.3 feet), horizontal
disparity becomes too great, and you may not see the 3D effect at the edges of the image.
285
13. Connecting to other equipment
Playing back 3D pictures
Connecting the camera to a 3D compatible television and playing back pictures taken in
3D allows you to enjoy 3D pictures for extra impact.
It is also possible to play back the recorded 3D pictures by inserting an SD card into the
3D compatible television with an SD card slot.
Preparations:
Set the [HDMI Mode] to [AUTO] or [1080i]. (P50)
Set the [3D Playback] to [
]. (P51)
Connect the unit to a 3D compatible television using the HDMI micro cable
and display the playback screen. (P288)
• When [VIERA Link] is set to [ON] and the camera is connected to a TV supporting VIERA Link,
input of the TV will be switched automatically and playback screen will be displayed.
Refer to P290 for details.
• For the pictures recorded in 3D, [
] will appear on the thumbnail display at playback.
∫ Playback in 3D by selecting only the still pictures recorded in 3D
Select [3D Play] in [Playback Mode] in the [Playback] menu. (P223)
∫ Playback as a 3D slide show by selecting only the still pictures recorded in 3D
Select [3D] in [Slide Show] in the [Playback] menu. (P221)
∫ Switch the playback method for the still pictures recorded in 3D
1 Select the picture recorded in 3D.
2 Select [2D/3D Settings] on the [Playback] menu. (P37)
• Playback method will switch to 3D if it is playing back in 2D (conventional image), or it will
switch to 2D if it is playing back in 3D.
• If you feel tired, uncomfortable or otherwise strange when playing back pictures recorded
in 3D, set to 2D.
• A black screen is displayed for a few seconds when switching playback back and forth from 3D
to 2D pictures.
• When you select a 3D picture thumbnail, it may take a few seconds for playback to start. After
playback, the thumbnail display may take a few seconds to reappear.
• When viewing 3D pictures, your eyes may become tired if you are too close to the television
screen.
• If your television does not switch to a 3D picture, make the necessary settings on the TV.
(For details, refer to the operating instructions of the TV.)
• 3D pictures can be saved to your computer or Panasonic devices. (P292, 298)
286
13. Connecting to other equipment
Functions that cannot be used on 3D pictures
∫ Functions that cannot be used during 3D recording
When recording with the 3D interchangeable lens (H-FT012: optional), the following
feature will be disabled:
(Recording functions)
• Auto Focus/Manual Focus operation
• Aperture setting
• Zoom operation
• Recording motion pictures¢1
• [Glistening Water]/[Glittering Illuminations]/[Handheld Night Shot] (Scene Guide Mode)
• [Rough Monochrome]/[Impressive Art]/[High Dynamic]/[Toy Effect]/[Toy Pop]/[Star Filter]/[One
Point Color]/[Sunshine] (Creative Control Mode)
• Defocus control function
¢1 The motion picture button, Creative Video Mode and the [Motion Picture] menu will be
unavailable or unusable.
([Rec] menu)
• [Picture Size]¢2/[Quality]¢3/[SH] of [Burst Rate]/[i.Dynamic]/[i.Resolution]/
[iHandheld Night Shot]/[iHDR]/[HDR]/[Multi Exp.]/[EFC] ([Shutter Type])/[Red-Eye Removal]/
[Shading Comp.]/[Ex. Tele Conv.]/[Digital Zoom]/[Stabilizer]
¢2 The setting is fixed as shown below.
Aspect ratio
[4:3]
[3:2]
[16:9]
[1:1]
Picture size
1824k1368
1824k1216
1824k1024
1712k1712
¢3 When attaching 3D interchangeable lens, the following icons are displayed.
[
] ([3D+Fine]):
[
] ([3D+Standard]):
Both MPO images and fine JPEG images are recorded
simultaneously.
Both MPO images and standard JPEG images are recorded
simultaneously.
([Custom] menu)
• [AF/AE Lock]/[Quick AF]/[Pinpoint AF Time]/[Pinpoint AF Display]/[AF Assist Lamp]/[Focus/
Release Priority]/[AF+MF]/[MF Assist]/[MF Assist Display]/[MF Guide]/[Rec Area]/[Remaining
Disp.]/[Video Button]/[Power Zoom Lens]/[Lens w/o Focus Ring]/[Touch AF] in [Touch Settings]
∫ Functions that cannot be used during 3D picture playback
During the 3D playback of 3D pictures on a 3D-compatible TV, the following functions are
disabled.
• [Highlight] ([Custom] menu)
• Playback Zoom
([Playback] menu)
• [Location Logging]/[Clear Retouch]/[Title Edit]/[Text Stamp]/[Video Divide]/[Time Lapse Video]/
[Stop Motion Video]/[Resize]/[Cropping]/[Rotate]/[Rotate Disp.]/[Favorite]/[Print Set]/[Protect]/
[Face Rec Edit]/[Delete Confirmation]
287
13. Connecting to other equipment
Playing Back Pictures on a TV Screen
Pictures recorded with this unit can be played back on a TV screen.
Preparations:
Turn this unit and the TV off.
• Confirm the terminals on your TV and
use a cable compatible with the
terminals.
Image quality may vary with the
connected terminals.
1
HDMI
socket
Video
socket
High quality
Connect the camera and a TV.
• Check the direction of the terminals and plug in/out straight holding onto the plug.
(It may result in malfunction by the deforming of the terminal if it is plugged in obliquely
or in wrong direction.)
Do not connect devices to incorrect terminals. Doing so may cause malfunction.
To connect with an HDMI micro cable
• Check the [HDMI Mode]. (P50)
• During 24p motion picture playback, please set [HDMI Mode] to [AUTO].
For settings other than [AUTO], it cannot output at 24 frames/second.
• Audio will be played back as stereo.
• No picture is displayed on the screen of this unit.
• Use a “High Speed HDMI micro cable” with the HDMI logo.
Cables that do not comply with the HDMI standards will not work.
“High Speed HDMI micro cable” (Type D–Type A plug, up to 2 m (6.6 feet) long)
288
13. Connecting to other equipment
To connect with an AV cable (optional)
• Always use a genuine Panasonic AV cable (DMW-AVC1: optional).
• Check the [TV Aspect]. (P50)
• Audio will be played back in monaural.
A
B
C
D
2
3
E White: to the audio input socket
F Align the marks, and insert.
G Place the camera in an upright position,
and find the gold terminal at the bottom.
HDMI micro cable
HDMI socket
AV cable (optional)
Yellow: to the video input socket
Turn on the TV and select the input to match the connector in use.
Turn the camera on and then press [(].
• Input of the TV will switch automatically and playback screen is displayed when
connected to a VIERA Link compatible TV using an HDMI micro cable with the [VIERA
Link] set to [ON]. (P290)
• Depending on the [Aspect Ratio], black bands may be displayed on the top and bottom or the
left and right of the pictures.
• Change the screen mode on your TV if the picture is displayed with the top or bottom cut off.
• Output from the HDMI micro cable has priority when both AV cable (optional) and HDMI micro
cable are connected.
• The connection with the USB connection cable (supplied) will take priority when you connect
the USB connection cable (supplied) simultaneously with the HDMI micro cable.
• When you play back a picture vertically, it may be blurry.
• Proper playback will be dependent on the TV used for viewing.
• You can view pictures on TVs in other countries (regions) which use the NTSC or PAL system
when you set [Video Out] in the [Setup] menu.
• No sound is output from the camera speakers.
• Read the operating instructions for the TV.
The recorded pictures can be played back on a TV with an SD Memory Card
slot
• Depending on the TV model, pictures may not be displayed on the full screen.
• The file format of the motion pictures that can be played back differs depending on the TV
model.
• For cards compatible with playback, refer to the operating instructions of the TV.
289
13. Connecting to other equipment
Using VIERA Link (HDMI)
What is the VIERA Link (HDMI) (HDAVI Control™)?
• This function allows you to use your remote control for the Panasonic TV for easy
operations when this unit has been connected to a VIERA Link compatible device using a
HDMI micro cable for automatic linked operations.
(Not all operations are possible.)
• VIERA Link is a unique Panasonic function built on a HDMI control function using the
standard HDMI CEC (Consumer Electronics Control) specification.
Linked operations with HDMI CEC compatible devices made by other companies are not
guaranteed. When using devices made by other companies that are compatible with
VIERA Link, refer to the operating instructions for the respective devices.
• This unit supports “VIERA Link Ver.5” function. “VIERA Link Ver.5” is the standard for
Panasonic’s VIERA Link compatible equipment. This standard is compatible with
Panasonic’s conventional VIERA Link equipment.
Preparations:
Set the [VIERA Link] to [ON]. (P51)
1
Connect this unit to a Panasonic TV compatible with VIERA Link with
an HDMI micro cable (P288).
2
3
Turn the camera on and then press [(].
Operate with the remote control for the TV.
• Operate with reference to the operation icons displayed on the screen.
• To play back the sound of a film during a slide show, set [Sound] to [AUTO] or [Audio] on the
Slide Show setting screen.
• It is recommended to connect this unit to an HDMI terminal other than the HDMI1 if there are 2
or more HDMI input terminals on the TV.
• Operation using the buttons on this unit will be limited.
290
13. Connecting to other equipment
∫ Other linked operations
Turning this unit off:
If you use the remote control for the TV to turn the TV off, this unit is also turned off.
Automatic input switching:
• If you connect with an HDMI micro cable and then turn this unit on, and then press [(], the
input channel on the TV automatically switches to this unit’s screen. If the TV’s power is in
standby status, it will turn on automatically (if [Set] has been selected for the TV’s [Power on
link] setting).
• Depending on your TV’s HDMI connection, on some TV’s it may be necessary to manually
select the HDMI connection you are using. In this case, use the remote control for the TV to
switch the input channel.
(For details on how to switch input, please read the operating instructions for the TV.)
• If VIERA Link does not work properly, refer to P337.
• If you are unsure whether or not the TV you are using is compatible with VIERA Link, read the
operating instructions for the TV.
• Available linked operations between this unit and a Panasonic TV are different depending on
the types of Panasonic TVs even if they are compatible with VIERA Link. Refer to the operating
instructions of the TV for the operations are supported on the TV.
• Be sure to use a cable that is HDMI certified.
• [HDMI Mode] for this unit is determined automatically when the VIERA Link is operating.
• Use a “High Speed HDMI micro cable” with the HDMI logo.
Cables that do not comply with the HDMI standards will not work.
“High Speed HDMI micro cable” (Type D–Type A plug, up to 2 m (6.6 feet) long)
291
13. Connecting to other equipment
Saving still pictures and motion pictures on your
PC
You can acquire recorded pictures to a PC by connecting the camera and the PC.
• Some PCs can read directly from the card removed from the camera. For details, refer to the
operating instructions of your PC.
• If the computer being used does not support SDXC Memory Cards, a message
prompting you to format may appear.
(Doing so will cause recorded images to be erased so do not choose to format.)
If the card is not recognised, please refer to the below support site.
http://panasonic.net/avc/sdcard/information/SDXC.html
∫ PC that can be used
The unit can be connected to any PC capable of recognising a mass storage device.
• Windows support:
Windows XP/Vista/7/8
• Mac support:
OS X v10.1 to v10.8
AVCHD motion pictures may not be imported correctly when copied as files or
folder
• With Windows, always import AVCHD motion pictures using “PHOTOfunSTUDIO”, one of the
programmes on the CD-ROM (supplied).
• With a Mac, AVCHD motion pictures can be imported using “iMovie’11”.
(For details about iMovie’11, please contact Apple Inc.)
292
13. Connecting to other equipment
About the supplied software
The supplied CD-ROM includes the following software.
Install the software on to your computer before use.
• PHOTOfunSTUDIO 9.2 AE (Windows XP/Vista/7/8)
This software allows you to manage images. For example, you can send pictures and motion
pictures to a PC and sort them by recording date or model name. You can also perform
operations such as writing images to a DVD, processing and correcting images, and editing
motion pictures.
• SILKYPIX Developer Studio
(Windows XP/Vista/7/8, Mac OS X v10.5/v10.6/v10.7/v10.8)
This is software to edit RAW format images.
Edited images can be saved in a format (JPEG, TIFF, etc.) that can be displayed on a personal
computer.
For details on how to use the SILKYPIX Developer Studio, refer to the “Help” or the
Ichikawa Soft Laboratory’s support website:
http://www.isl.co.jp/SILKYPIX/english/p/support/
• LoiLoScope 30 day full trial version (Windows XP/Vista/7/8)
LoiLoScope is a video editing software where that draws out the full power of your PC. Creating
videos is as easy as organizing cards on top of a desk. Use your music, picture and video files
to create videos to share with your friends and family by burning it to a DVD, uploading it to
websites, or simply share your videos with your friends via e-mail.
– This will only install a shortcut to the trial version download site.
For more information on how to use LoiLoScope, read the LoiLoScope manual
available for download at the link below.
Manual URL: http://loilo.tv/product/20
293
13. Connecting to other equipment
∫ Installing supplied software
• Before inserting the CD-ROM, close all running applications.
1
Check the environment of your PC.
• Operating environment of “PHOTOfunSTUDIO 9.2 AE”
– OS:
WindowsR XP (32bit) SP3,
Windows VistaR (32bit) SP2,
WindowsR 7 (32bit/64bit) or SP1,
WindowsR 8 (32bit/64bit)
– CPU:
PentiumR III 500 MHz or higher (WindowsR XP),
PentiumR III 800 MHz or higher (Windows VistaR),
PentiumR III 1 GHz or higher (WindowsR 7/WindowsR 8)
– Display:
1024k768 pixels or more (1920k1080 pixels or more recommended)
– RAM:
512 MB or more (WindowsR XP/Windows VistaR),
1 GB or more (WindowsR 7 32bit/WindowsR 8 32bit),
2 GB or more (WindowsR 7 64bit/WindowsR 8 64bit)
– Free hard disk space:
450 MB or more for installing software
• Refer to the operating instructions of “PHOTOfunSTUDIO” (PDF file) for further operating
environment.
• For details on “SILKYPIX Developer Studio 4.1 SE”, please read the support site given on P293.
2
3
Insert the CD-ROM with the supplied software.
Click on the [Recommended Installation] on the install menu to install.
• If the automatic playback screen is displayed, you can display the menu by selecting and
executing [InstMenu.exe].
• In Windows 8, you can display the menu by clicking a message that is displayed after
inserting the CD-ROM and then selecting and executing [InstMenu.exe].
• You can also display the menu by double-clicking [VFFXXXX] in [Computer] (XXXX differs
depending on the model).
• Proceed with installation according to messages appearing on the screen.
• The software compatible with your PC will be installed.
• On the Mac, SILKYPIX can be installed manually.
1 Insert the CD-ROM with the supplied software.
2 Double-click on the automatically displayed folder.
3 Double-click the icon in the application folder.
Not available in these cases:
• “PHOTOfunSTUDIO” and “LoiLoScope” are not compatible with Mac.
294
13. Connecting to other equipment
∫ Transferring images to a PC
Preparations:
Install “PHOTOfunSTUDIO” to the PC.
1
Connect the computer and camera with the USB connection cable
(supplied).
• Please turn this unit on and your PC before connecting.
• Check the direction of the terminals and plug in/out straight holding onto the plug.
(It may result in malfunction by the deforming of the terminal if it is plugged in obliquely
or in wrong direction.)
Do not connect devices to incorrect terminals. Doing so may cause malfunction.
• Do not use any other USB connection cables except the supplied one or a genuine
Panasonic USB connection cable (DMW-USBC1: optional).
A USB connection cable (supplied)
B Align the marks, and insert.
C Place the camera in an upright position, and find the gold terminal at the bottom.
2
Press 3/4 to select [PC], and then press [MENU/SET].
• If [USB Mode] (P49) is set to [PC] in the [Setup] menu in advance, the camera will be
automatically connected to the PC without displaying the [USB Mode] selection screen.
• When the camera is connected to a PC while [USB Mode] is set to [PictBridge(PTP)], a
message may appear on the PC screen. In that case, close the message, and remove
the USB connection cable safely, and then set the [USB Mode] to [PC].
3
Copy the images to a PC using “PHOTOfunSTUDIO”.
• Do not delete or move copied files or folders in Windows Explorer.
When viewing in “PHOTOfunSTUDIO”, you will not be able to play back or edit.
295
13. Connecting to other equipment
• Use a battery with sufficient battery power or the AC adaptor (optional). If the remaining battery
power becomes low while the camera and the PC are communicating, the status indicator
blinks and the alarm beeps.
Disconnect the USB connection cable safely.
• Before connecting or disconnecting the AC adaptor (optional), turn the camera off.
• Before inserting or removing a card, turn the camera off and disconnect the USB connection
cable. Otherwise, data may be destroyed.
296
13. Connecting to other equipment
∫ Copying to a PC without using “PHOTOfunSTUDIO ”
If you are not able to install “PHOTOfunSTUDIO”, you can copy files and folders to your
PC by dragging and dropping files from this unit.
• The content (folder structure) on the card of this unit is as follows.
For Windows:
A drive ([Removable Disk]) is displayed in [Computer]
For Mac:
A drive ([NO NAME]) is displayed on the desktop
• Card
DCIM
100_PANA
P1000001.JPG
P1000002.JPG
P1000999.JPG
101_PANA
999_PANA
MISC
DCIM:
Images
1 Folder number
2 Colour space
P: sRGB
_: AdobeRGB
3 File number
4 JPG:
Still pictures
MP4:
[MP4] Motion pictures
RW2:
Pictures in RAW files
MPO:
3D pictures
MISC:
DPOF print
Favourite
AVCHD:
[AVCHD] Motion pictures
PRIVATE
AVCHD
• A new folder is created when pictures are taken in the following situations.
– After [No.Reset] (P52) in the [Setup] menu has been executed
– When a card containing a folder with the same folder number has been inserted
(such as when pictures were taken using another maker of camera)
– When there is a picture with file number 999 inside the folder
∫ Connection in the PTP Mode
Set [USB Mode] to [PictBridge(PTP)].
• Data can now be read only from the card in the PC.
• When there are 1000 or more pictures on a card, the pictures may not be imported in the PTP
Mode.
• Motion picture cannot be played back in PTP Mode.
297
13. Connecting to other equipment
Saving still pictures and motion pictures on a
Recorder
If you insert card holding content recorded with this unit into a
Panasonic recorder, you can dub the content to a Blu-ray Disc or
DVD etc.
Methods to export still pictures and motion pictures to other
devices will vary depending on the file format. (JPEG, RAW,
MPO, AVCHD, or MP4).
• See the operating instructions for the recorder about the details about copying and playing
back.
∫ Dubbing with non-compatible equipment
You can dub the content played back using this unit to non-compatible equipment such as
recorders and video players by connecting this unit to the non-compatible equipment using
an AV cable (optional).
Non-compatible equipment will be able to play back the content. This is convenient if you
wish to pass around dubbed content. In this case, the content will be played back in
standard rather than high-definition picture quality.
1
2
3
Connect this unit with the recording
equipment with an AV cable
(optional).
Start the playback of this unit.
Start the recording on the recording
equipment.
• When ending the recording (copying),
stop the playback on this unit after
stopping the recording on recording
equipment.
1
2
A
B
Yellow: to the video input socket
White: to the audio input socket
AV cable (optional)
Place the camera in an upright position,
and find the gold terminal at the bottom.
• When you play back motion pictures on 4:3 aspect ratio TV, you must set [TV Aspect] (P50) on
this unit to [4:3] before starting a copy.
The image will be vertically long if you play back motion pictures copied with [16:9] setting on a
[4:3] aspect TV.
• Always use a genuine Panasonic AV cable (DMW-AVC1: optional).
• See the operating instructions for the recording equipment for details about copying and
playing back.
298
13. Connecting to other equipment
Printing the Pictures
If you connect the camera to a printer supporting PictBridge, you can select the pictures to
be printed out and instruct that printing be started on the camera’s monitor.
• Group pictures will not be displayed as group pictures but as single pictures.
• Some printers can print directly from the card removed from the camera. For details, refer to
the operating instructions of your printer.
Preparations:
Turn on the camera and the printer.
Perform the print quality and other settings at the printer before printing the pictures.
1
Connect the printer and camera with the USB connection cable
(supplied).
• Check the direction of the terminals and plug in/out straight holding onto the plug.
(It may result in malfunction by the deforming of the terminal if it is plugged in obliquely
or in wrong direction.)
Do not connect devices to incorrect terminals. Doing so may cause malfunction.
• Do not use any other USB connection cables except the supplied one or a genuine
Panasonic USB connection cable (DMW-USBC1: optional).
A USB connection cable (supplied)
B Align the marks, and insert.
C Place the camera in an upright position, and find the gold terminal at the bottom.
2
Press 3/4 to select [PictBridge(PTP)], and then press [MENU/SET].
299
13. Connecting to other equipment
• Use a battery with sufficient battery power or the AC adaptor (optional). If the remaining battery
power becomes low while the camera and the printer are connected, the status indicator blinks
and the alarm beeps. If this happens during printing, stop printing at once. If not printing,
disconnect the USB connection cable.
• Do not disconnect the USB connection cable while [å] (Cable disconnect prohibit icon) is
displayed.
(May not be displayed depending on the type of printer used.)
• Before connecting or disconnecting the AC adaptor (optional), turn the camera off.
• Before inserting or removing a card, turn the camera off, and disconnect the USB connection
cable.
Not available in these cases:
• Motion pictures recorded cannot be printed out.
300
13. Connecting to other equipment
Selecting a single picture and printing it
1
Press 2/1 to select the picture and then press
[MENU/SET].
PictBridge
Pi
0XOWL3ULQW
3ULQW
2
Press 3 to select [Print start] and then press [MENU/SET].
• Refer to P302 for the items that can be set before starting to print the pictures.
• Disconnect the USB connection cable after printing.
Selecting multiple pictures and printing them
1
2
Press 3.
Press 3/4 to select an item and then press [MENU/SET].
[Multi Select]
Multiple pictures are printed at one time.
• Press 3/4/2/1 to select the pictures and then press [MENU/
SET].
(When [MENU/SET] is pressed again, the setting is cancelled.)
• After the pictures have been selected, press 2 to select [OK], and
then press [MENU/SET].
[Select All]
Prints all the stored pictures.
[Print Set (DPOF)] Prints the pictures set in [Print Set] only. (P237)
[Favorite]
3
Prints the pictures set as favourites only. (P236)
Press 3 to select [Print start] and then press [MENU/SET].
• If the print check screen has appeared, select [Yes], and print the pictures.
• Refer to P302 for the items which can be set before starting to print the pictures.
• Disconnect the USB connection cable after printing.
301
13. Connecting to other equipment
Print Settings
Select and set the items both on the screen in step 2 of the “Selecting a single
picture and printing it” and in step 3 of the “Selecting multiple pictures and printing
them” procedures.
• When you want to print pictures on a paper size or a layout which is not supported by the
camera, set [Paper Size] or [Page Layout] to [{] and then set the paper size or the layout on
the printer.
(For details, refer to the operating instructions of the printer.)
• When [Print Set (DPOF)] has been selected, the [Print with Date] and [Num.of prints] items are
not displayed.
∫ [Print with Date]
[ON]
Date is printed.
[OFF]
Date is not printed.
• If the printer does not support date printing, the date cannot be printed on the picture.
• Depending on the printer, the date print settings of the printer may take precedence so check if
this is the case.
• When printing images with a text stamp, please remember to set print with date to [OFF] or the
date will print on top.
• In some printers, the picture date for pictures taken with the aspect ratio set to [1:1] will be
printed vertically.
When asking the photo shop to print the pictures
• By stamping the date using [Text Stamp] (P228) or setting date printing at the time of the [Print
Set] (P237) setting before going to a photo shop, the dates can be printed on the pictures at the
photo shop.
∫ [Num.of prints]
You can set the number of prints up to 999.
• You can also use the control dial to set.
302
13. Connecting to other equipment
∫ [Paper Size]
{
Settings on the printer are prioritised.
[L/3.5qk5q]
89 mmk127 mm
[2L/5qk7q]
127 mmk178 mm
[POSTCARD]
100 mmk148 mm
[16:9]
101.6 mmk180.6 mm
[A4]
210 mmk297 mm
[A3]
297 mmk420 mm
[10k15cm]
100 mmk150 mm
[4qk6q]
101.6 mmk152.4 mm
[8qk10q]
203.2 mmk254 mm
[LETTER]
[CARD SIZE]
216 mmk279.4 mm
54 mmk85.6 mm
• Paper sizes not supported by the printer will not be displayed.
∫ [Page Layout] (Layouts for printing that can be set with this unit)
{
Settings on the printer are prioritised.
á
1 picture with no frame on 1 page
â
1 picture with a frame on 1 page
ã
2 pictures on 1 page
ä
4 pictures on 1 page
• An item cannot be selected if the printer does not support the page layout.
∫ Layout printing
When printing a picture several times on 1 sheet of paper.
For example, if you want to print the same picture 4 times on 1 sheet of paper, set [Page
Layout] to [ä] and then set [Num.of prints] to 4 for the picture that you want to print.
When printing different pictures on 1 sheet of paper.
For example, if you want to print 4 different pictures on 1 sheet of paper, set [Page Layout]
to [ä] and then set [Num.of prints] to 1 for each of the 4 pictures.
303
13. Connecting to other equipment
• The camera is receiving an error message from the printer when the [¥] indication lights
orange during printing. After finishing printing, make sure there are no problems with the
printer.
• If the number of prints is high, the pictures may be printed several times. In this case, the
remaining number of prints indicated may differ from the number set.
• Only pictures taken in JPEG format can be printed. Those taken in RAW will use the JPEG
pictures that were simultaneously created. If an equivalent JPEG picture is not available, no
print will take place.
304
14. Others
Optional accessories
Hand grip (optional)
Attaching a hand grip (optional: DMW-HGR1) will improve your grip on the camera.
• For details, refer to the operating instructions of the hand grip.
AC adaptor (optional)/DC coupler (optional)
By connecting the AC adaptor (optional), and then plugging them into an electrical socket,
you can connect this unit to a PC or printer and use without worrying about the capacity of
the battery.
To use the AC adaptor, a DC coupler (optional) is required.
• Always use a genuine Panasonic AC adaptor (optional).
• When using an AC adaptor, use the AC cable supplied with the AC adaptor.
• Also read the operating instructions for the AC adaptor and DC coupler.
Filters (optional)
The MC protector is a transparent filter which affects neither the colours nor the amount of
light, so it can always be used to protect the camera’s lens.
The ND filter reduces the amount of light to approximately 1/8th (equal to adjusting the
aperture value 3 increments) without affecting the colour balance.
PL filter will suppress the reflected light from a metal or non spherical surfaces (flat
non-metallic surfaces, water vapour or invisible particles in the air), making it possible to
take a picture with enhanced contrast.
• Do not attach multiple filters at the same time.
• You can attach the lens cap or the lens hood when the filter is attached.
• If you have difficulty attaching or removing the PL filter on the interchangeable lens (H-H020A),
we recommend that you attach or remove the filter with the camera power turned on and the
Focus Mode set to [MF].
• Refer to the instructions for each filter for details.
305
14. Others
Monitor Display
In recording
4:3
L
4:3
AFS
M
EX
H
Extra Tele Conversion
(when taking still pictures)
(P194)
Card (displayed only during
recording) (P31)
AEL
3.5 60
BKT
0 200 AWB
8m30s
98
Elapsed recording time¢
(P208)
Simultaneous recording
indicator (P214)
1
Peaking (P150)
C2-1
P
1
Recording Mode (P61)
ラュン
EXPS
HDR (P131)/iHDR (P77)
Multi exposure (P182)
Custom settings (P118)
Digital Zoom (P197)
Electronic shutter (P165)
Photo Style (P120)
Creative control adjustment
display (P105)
‰
Œ
Flash Mode (P203)
Flash (P206)
Extra Tele Conversion
(when recording motion
pictures) (P194)
Recording format/
Recording quality (P211)
4:3
L
Picture size/Aspect Ratio
(P128)
¢ m: minute, s: second
306
Picture Mode (Still picture
priorities) (P214)
Overheat indicator (P313,
326)
14. Others
In recording
4:3
L
AFS
H
3
Name¢2 (P190)
Number of days that have passed since the
departure date¢3 (P46)
Age¢2 (P190)
AEL
3.5 60
BKT
0 200 AWB
98
2
A›
Quality (P129)
AFS AFF AFC
š
Ø
Location¢3 (P46)
Current date and time/Travel destination
setting¢3: “ (P45)
Focus Mode (P136)
AF Mode (P135)
Face Recognition (P185)
AFL
AF Lock (P155)
Burst (P168)
Auto Bracket (P171)
Self-timer (P174)
Battery indication (P25)
Optical Image Stabiliser¢1
(P191)
Jitter alert (P192)
Recording state (Flashes
red.)/Focus (Lights green.)
(P57)
LOW
Focus (Under low
illumination) (P57)
Connected to Wi-Fi (P280)
Histogram (P63)
¢1 Only available when a lens that supports the Stabiliser function is attached.
¢2 This is displayed for about 5 seconds when the camera is turned on if the [Profile Setup]
setting is set.
¢3 This is displayed for about 5 seconds when the camera is turned on, after setting the clock
and after switching from Playback Mode to Recording Mode.
307
14. Others
In recording
4:3
L
5
AFS
H
Dial operation guide (P17)
White Balance Bracket (P127)
BKT
AWB
AEL
3.5 60
BKT
0 200 AWB
98
VÐîÑ
1
4
White Balance Fine Adjustment
(P126)
White Balance (P123)
Colour (P80)
AF area (P57, 141)
98
Spot metering target (P161)
Self-timer¢1 (P174)
R8 m30s
Mic level display (P216)
Available recording time¢2, 3
(P33)
Touch tab (P16)
Silent Mode (P184)
AEL
Number of recordable pictures¢2
(P33)
Touch tab (P16, 44)
AE Lock (P155)
Touch tab (P16, 80)
Metering Mode (P161, 162)
Touch tab (P16, 106)
Programme Shift (P85)
Touch tab (P16, 117)
AE
3.5
Aperture value (P57)
6
60
Shutter speed (P57)
Exposure meter (P84)
Exposure compensation value
(P157)
Focal distance display (P198)
Step zoom (P198)
Brightness (P79, 106)
Manual Exposure Assistance
(P89)
ISO sensitivity (P158)
¢1 This is displayed during countdown.
¢2 It is possible to switch the display between the number of recordable pictures and available
recording time with the [Remaining Disp.] setting in the [Custom] menu.
¢3 m: minute, s: second
308
14. Others
In recording
Fn2
Fn3
F
Fn4
SS
Fn5
Fn6
ISO
Touch zoom (P199)
Brightness (P79, 106)
×
Touch Shutter (P59)
Type of defocus ([Miniature Effect])
(P112)
AE
Touch AE (P162)
One point colour (P114)
Peaking (P150)
Position of the light source (P115)
Fn2
Fn2 (Function button) (P44)
Fn3
Fn3 (Function button) (P44)
Fn4
Fn4 (Function button) (P44)
F
Aperture value (P57)
Fn5
Fn5 (Function button) (P44)
SS
Shutter speed (P57)
Fn6
Fn6 (Function button) (P44)
ISO ISO sensitivity (P158)
Creative control adjustment (P106)
Microphone level adjustment (P216)
Colour (P80)
Defocus control function (P78, 105)
309
14. Others
In playback
1/98
4:3
1
L
Connected to Wi-Fi (P280)
1/98
SLF
67'$<
PRQWK GD\V
F3.5 60
0
200
SLF
Number of pictures in burst
8m30s
Motion picture recording time¢1
(P68)
3
$:%
Clear Retouch completed icon
(P225)
1
3D
Playback Mode (P223)
Currently retrieving information
icon (P314)
Protected picture (P239)
Playback (Motion Pictures)
(P68)
Number of prints (P237)
Location Information display
(P224)
Ü
Favourites (P236)
å
Cable disconnect prohibit icon
(P300)
67'$<
8m30s
Number of days that have
passed since the departure date
(P46)
Burst Picture Group Display
(P219)
Motion picture playback (P68)
[Time Lapse Shot] Picture
Group Display (P219)
Continuous Burst Picture Group
Playback (P218)
Display for the Stop Motion
Animation Group (P219)
Continuous [Time Lapse Shot]
Picture Group Playback (P218)
Silent Mode (P184)
PRQWKGD\V
Continuous playback of the
Stop Motion Animation Group
(P218)
‘
Picture number/Total pictures
Stamped with text indication
(P228)
¢1
Elapsed playback time
(P68)
Age (P188, 190)
Multi Playback (P66)
Delete (P71)
4
Name¢2 (P188, 190)
Location¢2 (P46)
2
4:3
L
AVCHD
FHD 50i
A›
Picture size/Aspect Ratio
(P128)
Recording format/Recording
quality (P211)
Title¢2 (P227)
5
Recording information¢3
Quality (P129)
Battery indication (P25)
310
14. Others
In playback
Detailed information display
60
F3.5
0
WB
ISO
AWB
200
AFS
P
STD.
'(&
4:3
L
s
RGB
100-0001
1
2
Recording information
Recorded date and time/World Time (P45)
Intelligent Dynamic Range
Control¢3 (P130)
3
4:3
HDR¢4 (P131)/iHDR¢4 (P77)
Intelligent Resolution (P130)
L
A›
Shading Compensation¢4
(P133)
Picture size/Aspect Ratio
(P128)
Quality (P129)
Colour space¢4 (P134)
100-0001 Folder/File number¢3 (P297)
Histogram display
F3.5 60
0 ISO200
1
1/98
100-0001
3
1/98
Histogram (P69)
2
Picture number/Total pictures
100-0001 Folder/File number¢3 (P297)
Recording information¢3
¢1 m: minute, s: second
¢2 It is displayed in order of [Title], [Location], [Name] ([Baby1]/[Baby2], [Pet]), [Name] ([Face
Recog.]).
¢3 This is not displayed for motion pictures recorded in [AVCHD].
¢4 This is not displayed for motion pictures.
311
14. Others
Message Display
Confirmation messages or error messages will be displayed on the screen in some cases.
The major messages are described below as examples.
[This picture is protected]
• Delete the picture after cancelling the protect setting. (P239)
[Some pictures cannot be deleted]/[This picture cannot be deleted]
• This feature can only be used with pictures that comply with the DCF standard.
Perform formatting (P32) on this unit after saving necessary data on a PC, etc.
[Cannot be set on this picture]
• [Title Edit], [Text Stamp], [Print Set], etc. cannot be set for pictures not based on the DCF
standard.
[Memory Card Error
Format this card?]
• It is a format that cannot be used with this unit.
– Insert a different card.
– Format the card again with the camera after saving necessary data on a PC etc. (P32)
Data will be deleted.
[Lens not found, or shoot w/o lens in Custom menu is set to off.]
• When using a Leica lens mount adaptor (DMW-MA2M, DMW-MA3R: optional), set [Shoot w/o
Lens] (P20) to [ON] in the custom menu.
[The lens is not attached properly. Do not push lens release button while lens is
attached.]
• Detach the lens once, and then attach it again without pressing the lens release button. (P20)
Turn this unit on again, and if it is still displaying, contact the dealer.
[Lens attachment failed. Please make sure the lens is attached correctly.]
• Detach the lens from the camera body and gently wipe the contacts on the lens and the
camera body using a dry cotton swab.
Attach the lens, turn this unit on again, and if it is still displaying, contact the dealer.
[Lens not detected. Please turn camera on again.]
• This is displayed when the lens has stopped operating normally due to being pressed on by a
hand etc.
Turn the camera off and on. If the message persists, contact the dealer or Panasonic.
312
14. Others
[Memory Card Error]/[Memory card parameter error]/[This memory card cannot be
used]
• Use a card compatible with this unit. (P31)
[Insert SD card again]/[Try another card]
• An error has occurred accessing the card.
Insert the card again.
• Insert a different card.
[Read Error/Write Error
Please check the card]
• It has failed to read or write data.
Remove the card after turning this unit off. Insert the card again, turn this unit on, and try to
read or write the data again.
• The card may be broken.
• Insert a different card.
[Cannot record due to incompatible format(NTSC/PAL) data on this card.]
• Perform formatting (P32) on this unit after saving necessary data on a PC, etc.
• Insert a different card.
[Motion recording was cancelled due to the limitation of the writing speed of the
card]
• Use a card with SD Speed Class with “Class 4” or higher when recording motion pictures.
• In the event that it stops even after using a “Class 4” card or higher, the data writing speed has
deteriorated so it is recommended to make a backup and then format (P32).
Depending on the type of the card, motion picture recording may stop in the middle.
[A folder cannot be created]
• A folder cannot be created because there are no remaining folder numbers that can be used.
Format the card on this unit after saving necessary data on a PC etc. (P32)
If you execute [No.Reset] in the [Setup] menu after formatting, the folder number is reset to
100. (P52)
[Recording stopped due to overheating. Please wait for the camera to cool down.]/
[The Wi-Fi connection will be terminated due to overheating. Please wait for the
camera to cool down.]/[Temporarily disabled. Please wait for the camera to cool
down.]
• When a high ambient temperature, continuous recording in Burst Mode or of a motion picture,
continuous use of a Wi-Fi connection or other conditions are causing the camera to overheat,
[
] flashes. If a message is displayed after [
] flashes, the camera will turn off
automatically to protect itself. When this happens, some functions will be disabled until the
camera cools down.
313
14. Others
[Picture is displayed for 16:9 TV]/[Picture is displayed for 4:3 TV]
• Select [TV Aspect] in the [Setup] menu if you want to change the TV aspect. (P50)
• This message also appears when the USB connection cable is connected to the camera only.
In this case, connect the other end of the USB connection cable to a PC or a printer. (P295,
299)
[Editing operation cannot proceed as information processing is ongoing.]
• When there are too many image files, the currently retrieving information icon ([
] or
[
]) may be displayed on the playback screen for a long period of time. During this time,
deletion and use of the [Playback] menu are not possible.
– If this unit is turned off while acquiring information, only the pictures that have already
acquired the information are saved as a group.
When you switch on again, the information retrieval will restart from the same point.
[This battery cannot be used]
• Use a genuine Panasonic battery. If this message is displayed even when a genuine
Panasonic battery is used, contact the dealer or Panasonic.
• If the battery terminal is dirty, clean it and remove any objects.
[Failed to connect wireless access point]/[Connection failed]/[No destination
found]
• Check following regarding the wireless access point.
– The wireless access point information set on this unit is wrong.
Check the authentication type, encryption type, and encryption key. (P275)
– Power of the wireless access point is not turned on.
– Setting of the wireless access point is not supported by this unit.
• Check the network setting of the destination.
• Radio waves from other devices may block the connection to a wireless access point.
Check other devices that are connected to the wireless access point and devices that use the
2.4 GHz band.
[No picture to send]
• This is displayed when there is no image to transmit due to the restriction of the destination.
Check the file format of the image to send. (P280)
[Connection failed. Please retry in a few minutes.]/[Network disconnected. Transfer
stopped.]
• Radio waves from the wireless access point are getting weak.
Perform the connection closer to the wireless access point.
• There is no reply from the server or it has exceeded the communication processing time.
Try again after a while.
• Depending on the wireless access point, connection may be automatically disconnected after
specific time has passed.
Reconnect the connection again.
314
14. Others
[Upload to the Cloud Folder is available after Cloud Sync settings have been set up
on downloadable devices such as PCs or smartphones.]
• Devices that download images from a cloud folder are not registered.
• Perform Cloud Sync setting. Configure the settings on a PC with “PHOTOfunSTUDIO” or on a
smartphone/tablet with “Image App”.
Refer to P265 for details on [Cloud Sync. Service].
[Connection failed]
• Check following regarding the smartphones/tablet you intend to connect.
– The smartphone/tablet does not operate.
– Change the access point to connect to in the smartphone/tablet Wi-Fi settings to this
camera.
– There is no free storage space on the smartphone/tablet.
[Login failed. Please check Login ID and Password.]
• Login ID or password for the “LUMIX CLUB” is not correct.
Please enter it again.
If you have forgotten the login ID or the password, there is information in the login screen of
the “LUMIX CLUB” website.
[Some files cannot be sent because of destination limit]/[Transfer completed.
Some files are left because of destination limit.]
• Check the file format of the image to send. (P280)
• Sending motion pictures may fail if the file size is too large.
Split the motion picture using [Video Divide]. (P230)
[Unavailable. Please set Login settings on LUMIX CLUB web site.]
• Login to the “LUMIX CLUB” from your smartphone/tablet or PC, and set the login details of the
destination web service.
[Both picture and video sharing service cannot be selected together]
• Web services designed only for pictures, and web services designed only for motion pictures
cannot be selected at the same time.
Deselect one of the services.
[Cannot get IP address. Please set wireless AP’s IP address setting to DHCP.]
• Turn on DHCP settings of the IP address of the connected wireless access points.
[Cannot connect to server]
• If a message is displaying asking to update the root certificate, agree to update the root
certificate.
315
14. Others
Menu list
Click the followings to jump to the beginning of each menu.
[Rec]
P316
[Custom]
[Playback]
[Motion Picture]
P320
[Setup]
P319
P322
P324
[Rec]
• If any of the settings common to both the [Rec] and [Motion Picture] menus have been
changed, the corresponding setting in the other menu will also be changed.
[Photo Style]
You can select effects to match the type of image you wish
to record.
You can adjust the colour and image quality of the effects.
P120
[Aspect Ratio]
Sets the aspect ratio of the image.
P128
[Picture Size]
Set the number of pixels.
P128
[Quality]
Set the compression rate at which the pictures are to be
stored.
P129
[Sensitivity]
This allows the sensitivity to light (ISO sensitivity) to be set. P158
[Metering Mode]
Sets the light metering method for measuring brightness.
P161
[Burst Rate]
Sets the burst speed for burst recording.
P168
[Auto Bracket]
Sets single/burst recording, compensation range and
recording sequence for Auto Bracket recording.
P171
[Self Timer]
Sets the manner in which the self-timer works.
P174
[i.Dynamic] (Intelligent
dynamic range control)
Adjusts the contrast and exposure.
P130
[i.Resolution]
Records pictures with more defined outlines and sense of
clarity.
P130
[iHandheld Night Shot]
Pictures of the night scenery will be taken at a high burst
speed and composed into a single picture.
P76
[iHDR]
There is, for example, strong contrast between the
background and the subject, multiple still pictures are
recorded with differing exposures and combined to create
a single still picture rich in gradation.
P77
316
14. Others
[HDR]
You can combine 3 pictures with different levels of
exposure into a single picture with rich gradation.
P131
[Multi Exp.]
Gives an effect like multi exposure. (up to 4 times
equivalent per a single image)
P182
[Time Lapse Shot]
You can set the recording start time, the recording interval
and the number of pictures, and automatically record
subjects such as animals and plants as time elapses.
P176
[Stop Motion Animation]
A stop motion picture is created by splicing pictures
together.
P178
[Shutter Type]
This enables you to choose whether pictures will be taken
with the Electronic Front Curtain or the electronic shutter.
P165
[Flash]
Sets the manner in which the flash works.
P203
[Red-Eye Removal]
Automatically detects red-eye caused by the flash and
corrects the image data accordingly.
P207
[ISO Limit Set]
When the ISO sensitivity is set to [AUTO] or [
], an
optimal ISO sensitivity is set with the selected value as an
upper limit.
P159
[ISO Increments]
The ISO sensitivity settings values changes in steps of
1/3 EV or 1 EV.
P160
[Extended ISO]
ISO sensitivity can be set up to minimum [ISO125].
P160
[Long Shtr NR]
You can eliminate the noise caused by recording with a
slower shutter speed.
P133
[Shading Comp.]
If the screen periphery darkens as a result of lens
characteristics, the brightness in this region will be
corrected.
P133
[Ex. Tele Conv.]
When the number of pixels is set to anything other than [L],
the Tele effect is increased without degradation in image
quality.
P194
[Digital Zoom]
Increases the Tele effect.
The higher the level of magnification, the greater the
degradation in image quality.
P197
317
14. Others
[Color Space]
Set this when you want to correct the colour reproduction
of the recorded pictures on a PC, printer etc.
P134
[Stabilizer]
When camera shake is sensed during recording, the
camera corrects it automatically.
P191
[Face Recog.]
Sets the focus and exposure automatically prioritising
registered faces.
P185
[Profile Setup]
If you set the name and birthday of your baby or pet in
advance, you can record their name and age in months
and years in the images.
P190
318
14. Others
[Motion Picture]
• [Photo Style], [Sensitivity], [Metering Mode], [i.Dynamic], [i.Resolution] and [Digital Zoom] are
common to both the [Rec] menu and [Motion Picture] menu. Changing these settings in one of
these menus is reflected in other menu.
For details, refer to the explanation for the corresponding setting in the [Rec] menu.
[Rec Format]
Sets the file format for the motion pictures you record.
P211
[Rec Quality]
This sets up the picture quality of motion pictures.
P211
[Exposure Mode]
Select the method for setting the aperture value and
shutter speed in Creative Video Mode.
P116
[Picture Mode]
Sets the recording method for still pictures during motion
picture recording.
P214
[Continuous AF]
Continues to focus on the subject for which focus has been
achieved.
P213
[Rec Highlight]
White saturated areas appear blinking in black and white.
P215
[Ex. Tele Conv.]
Increases the Tele effect.
P194
[Flkr Decrease]
The shutter speed can be fixed to reduce the flicker or
striping in the motion picture.
P216
[Silent Operation]
Enables touch operations to allow silent use while
recording motion pictures.
P117
[Mic Level Disp.]
Set whether or not the mic levels are displayed on the
screen.
P216
[Mic Level Adj.]
Adjust the sound input level to 4 different levels.
P216
[Wind Cut]
Reduces the wind noise effectively if there is wind noise
when recording sound.
P217
319
14. Others
[Custom]
[Cust.Set Mem.]
Registers the current camera settings as custom set.
P118
[Silent Mode]
Disables operational sounds and output of light at once.
P184
[AF/AE Lock]
Sets the fixed content for focusing and exposure when the
AF/AE lock is on.
P155
[Half Press Release]
The shutter will immediately fire when the shutter button is
pressed halfway.
P144
[AFS/AFF]
Assigns [AFS] or [AFF] to [AFS] of the focus mode lever.
P137
[Quick AF]
Speeds up the focusing that takes place when you press
the shutter button.
P144
[Pinpoint AF Time]
Sets the time for which the screen is enlarged when the
shutter button is pressed halfway with Auto Focus Mode
set to [
].
P143
[Pinpoint AF Display]
Sets whether to display the assist screen that appears
when Auto Focus Mode is set to [
] in a window or full
screen.
P142
[AF Assist Lamp]
AF assist lamp will illuminate the subject when the shutter
button is pressed half-way making it easier for the camera
to focus when recording in low light conditions.
P145
[Focus/Release Priority] It will set so no picture can be taken when it is out of focus.
P146
[AF+MF]
You can set the focus manually after the automatic focus
has finished.
P146
[MF Assist]
Sets the display method of MF Assist (enlarged screen).
P153
[MF Assist Display]
Sets whether MF Assist (enlarged screen) will appear in a
windowed screen display or in a full screen display.
P153
[MF Guide]
When you set the focus manually, an MF guide that allows
you to check the direction to achieve focus is displayed.
P149
[Peaking]
In-focus portions are highlighted when focus is being
adjusted manually.
P150
[Histogram]
This allows you to set either to display or not display the
histogram.
P63
320
14. Others
[Guide Line]
This will set the pattern of guide lines displayed when
taking a picture.
P63
[Highlight]
When the Auto Review function is activated or when
playing back, white saturated areas appear blinking in
black and white.
P70
[Constant Preview]
You can check the effects of the chosen aperture and
shutter speed on the recording screen in Manual Exposure
Mode.
P89
[Expo.Meter]
Set whether or not to display the exposure meter.
P84
[Dial Guide]
Set whether or not to display the dial operation guide.
P17
[Rec Area]
This changes the angle of view during motion picture
recording and still picture recording.
P209
[Remaining Disp.]
This will switch display between the number of recordable
pictures and available recording time.
P34
[Auto Review]
Displays a picture immediately after it is taken.
P58
[Fn Button Set]
You can assign various recording and other functions to
the function button.
P43
[Q.MENU]
Switch the setting method of Quick Menu.
P40
[Video Button]
Enables/disables the motion picture button.
P209
[Power Zoom Lens]
Sets the screen display and lens operations when using an
interchangeable lens that is compatible with power zoom
(electrically operated zoom).
P198
[Lens w/o Focus Ring]
Sets the control dial operation for MF Assist.
P154
[Touch Settings]
Enables/disables the Touch operation.
P16
[Touch Scroll]
This allows you to set the speed of continuously forwarding
or rewinding pictures using touch operation.
P65
[Menu Guide]
Set the screen that is displayed when the mode dial is set
to
and
.
P94
[Shoot w/o Lens]
Sets whether or not the shutter can be released when no
lens is attached to the main body.
P20
321
14. Others
[Setup]
[Clock Set]
Setting Date/Time.
P35
[World Time]
Sets the times for the region where you live and your
holiday destination.
P45
[Travel Date]
Departure date and return date of the trip as well as the
name of the travel destination can be set.
P46
[Wi-Fi]
Configure the each setting for Wi-Fi functions.
P283
[Beep]
This allows you to set the volume for electronic sound and
the electronic shutter sound.
P47
[Speaker Volume]
Adjust the volume of the speaker to any of 7 levels.
P47
[Monitor Display]
Brightness, colour, or red or blue tint of the Monitor is
adjusted.
P47
[Monitor Luminance]
Set the monitor brightness to suit the amount of
surrounding light.
P48
[Economy]
Suppresses the unit’s power consumption to prevent the
battery from being run down.
P49
[USB Mode]
Sets the communication method when connecting using
the USB connection cable (supplied).
P49
[Output]
This sets how the unit connects to a television etc.
P50
[VIERA Link]
Equipment that supports the VIERA Link will connect
automatically.
P51
[3D Playback]
Set the output method for 3D pictures.
P51
322
14. Others
[Menu Resume]
Stores the location of the last-used menu item for each
menu.
P51
[Menu Background]
Set the background colour for the menu screen.
P39
[Menu Information]
Descriptions of menu items or their settings are displayed
on the menu screen.
P51
[Language]
Set the language displayed on the screen.
P52
[Version Disp.]
This enables the firmware versions of the camera and lens
to be checked.
P52
[Exposure Comp. Reset]
An exposure value can be reset when the Recording Mode
is changed or the camera is turned off.
P52
[Self Timer Auto Off]
Sets whether or not to cancel the self-timer when this unit
is turned off.
P52
[No.Reset]
Returns the image file number to 0001.
P52
[Reset]
The recording or setup/custom settings are reset to the
default.
P52
[Reset Wi-Fi Settings]
Reset all settings in the [Wi-Fi] menu to factory default
settings.
(Excluding [LUMIX CLUB])
P53
[Pixel Refresh]
It will perform optimisation of imaging device and image
processing.
P53
[Sensor Cleaning]
Dust reduction to blow off the debris and dust that have
affixed to the front of the imaging device is performed.
P53
[Format]
The card is formatted.
P32
323
14. Others
[Playback]
[2D/3D Settings]
Switches the playback method for 3D images.
[Slide Show]
Selects the type etc. of the images and plays back in order. P221
[Playback Mode]
Selects the type etc. of the images and plays back only
particular images.
P223
[Location Logging]
The location information (longitude/latitude) acquired by
the smartphone/tablet can be sent to the camera and
written in images.
P224
[Clear Retouch]
You can erase unnecessary parts recorded on the pictures
taken.
P225
[Title Edit]
Input texts (comments) on the recorded pictures.
P227
[Text Stamp]
Stamps the recorded pictures with recording date and time,
names, travel destination, travel date, etc.
P228
[Video Divide]
Splits the recorded motion picture in two.
P230
[Time Lapse Video]
Creates a motion picture from a set of group pictures
recorded with the [Time Lapse Shot].
P231
[Stop Motion Video]
Creates a motion picture from the Stop Motion Animation
group.
P232
[Resize]
Reduces the image size (number of pixels).
P233
[Cropping]
Crops the recorded image.
P234
[Rotate]
Rotate pictures manually in 90o steps.
P235
[Rotate Disp.]
This mode allows you to display pictures vertically if they
were recorded holding the camera vertically.
P235
[Favorite]
Marks can be added to images, and images can be set as
favourites.
P236
[Print Set]
Sets the images for printing and the number of prints.
P237
[Protect]
Protects images to prevent deletion by mistake.
P239
[Face Rec Edit]
Removes or changes information relating to personal
identity.
P240
[Delete Confirmation]
This sets which option, [Yes] or [No], will be highlighted first
when the confirmation screen for deleting a picture is
displayed.
P240
324
P221
14. Others
Troubleshooting
First, try out the following procedures (P325–P340).
If the problem is not resolved, it may be improved by selecting [Reset] (P52) on the
[Setup] menu.
Battery and power source
The camera cannot be operated even when it is turned on.
The camera turns off immediately after it is turned on.
• The battery is exhausted.
> Charge the battery.
• If you leave the camera on, the battery will be exhausted.
> Turn the camera off frequently by using the [Economy] etc. (P49)
This unit is turned off automatically.
• Is the linked operation of VIERA Link enabled?
> If you are not using VIERA Link, set [VIERA Link] to [OFF]. (P51)
Card/battery door does not close.
• Insert the battery securely all the way in. (P29)
The battery becomes flat too quickly.
• Is a Wi-Fi connection being used for a long period of time?
The battery can become flat quickly when connected to Wi-Fi.
> Turn the camera off frequently by using the [Economy] etc. (P49)
325
14. Others
Recording
This unit suddenly turns off during recording.
• When a high ambient temperature, continuous recording in Burst Mode or of a motion picture,
continuous use of a Wi-Fi connection or other conditions are causing the camera to overheat,
[
] flashes. If a message is displayed after [
] flashes, the camera will turn off
automatically to protect itself. When this happens, some functions will be disabled until the
camera cools down.
Taking pictures is not possible.
The shutter will not operate immediately when the shutter button is pressed.
• Is the subject focused?
> [Focus/Release Priority] is set to [FOCUS] at the time of purchase, and so you cannot take
pictures until the subject is in focus. (P146)
The recorded picture is whitish.
• Picture might look whitish when lens or image sensor gets dirty with fingerprints or similar.
> If the lens is dirty turn the camera off and then gently wipe the lens surface with a soft, dry
cloth.
> Refer to P342 when the image sensor gets dirty.
The recorded picture is too bright or dark.
• Check that the exposure is correctly compensated. (P157)
• Is the AE Lock (P155) applied incorrectly?
Multiple pictures are taken at one time.
• Cancel the following settings:
– Burst/Auto Bracket/[
] of the self-timer (P167)
– White Balance Bracket (P127)
326
14. Others
The subject is not focused properly.
• The subject is beyond the focus range of the camera. (P58)
• There is camera shake (jitter) or the subject is moving slightly. (P192)
• Is [Focus/Release Priority] in the [Custom] menu set to [RELEASE]? (P146)
• Is the AF Lock (P155) applied incorrectly?
The recorded picture is blurred.
The Optical Image Stabiliser is not effective.
• The shutter speed will become slower and the Optical Image Stabiliser function may not work
properly when taking pictures especially in dark places.
> We recommend holding the camera firmly with both hands when taking pictures. (P55)
> We recommend using a tripod and the self-timer (P174) when taking pictures with a slow
shutter speed.
• Are you using a lens which supports the Stabiliser function? (P19)
• When a moving subject is recorded with the electronic shutter, the subject may appear
distorted on the picture. (P165)
Taking pictures using White Balance Bracket is not possible.
• Is there any memory remaining on the card?
The recorded picture looks rough.
Noise appears on the picture.
• Try the following:
> Take pictures in bright places.
> Decrease the ISO sensitivity. (P158)
> Increase the setting for [Noise Reduction] in [Photo Style] or lower the setting for each of the
items other than [Noise Reduction]. (P121)
> Set the [Long Shtr NR] to [ON]. (P133)
• Is the [Picture Size] (P128) or the [Quality] (P129) set low?
• Is the [Digital Zoom] set? (P197)
327
14. Others
Striping or flicker may appear under lighting such as fluorescent lighting and
LED lighting fixture.
• This is characteristic of MOS sensors which serve as the
camera’s pickup sensors.
This is not a malfunction.
• Are you taking pictures with the electronic shutter? (P165)
> When using the electronic shutter, lowering the shutter speed
may reduce the effect of the horizontal stripes.
The brightness or the hue of the recorded picture is different from the actual
scene.
• When recording under fluorescent or LED lighting fixture, etc., increasing the shutter speed
may introduce slight changes to brightness and colour. These are a result of the characteristics
of the light source and do not indicate a malfunction.
• When recording subjects in extremely bright locations or recording under fluorescent lighting,
LED lighting fixture, mercury lamp, sodium lighting, etc., the colours and screen brightness may
change or horizontal striping may appear on the screen.
Bright spot not in subject is recorded.
• There may be defective pixels in the image sensor.
> Perform [Pixel Refresh] (P53).
Subject cannot be locked.
(AF tracking not possible)
• Set the AF area to the distinctive colour of the subject if there is a part that is different from the
surrounding colour. (P139)
Operation sound is small.
• Is your finger covering up the speaker? (P12)
328
14. Others
Motion pictures
Recording motion pictures is not possible.
• You may not be able to record for a short while after turning this unit on when using a large
capacity card.
Motion picture recording stops in the middle.
• Use a card with SD Speed Class with “Class 4” or higher when recording motion pictures.
• When a card with a slow data writing speed is used, motion picture recording may stop midway.
> If a card on which recording and deleting have been repeated many times or a card that has
been formatted on a PC or other equipment is being used, we recommend that you make a
backup of the data and format (P32) the card on the unit.
When recording a motion picture, the screen may go dark.
• When recording a motion picture, the screen may go dark after a certain period to reduce
battery consumption, but this will not affect the recorded motion picture.
The screen may be blacked out momentarily, or the unit may record noise.
• The screen may be blacked out momentarily, or the unit may record noise due to static
electricity or electromagnetic waves etc. depending on the environment of the motion picture
recording.
Striping or flicker appears under lighting such as a fluorescent or LED lighting
fixture.
The subject appears distorted.
• This is characteristic of MOS sensors which serve as the camera’s pickup sensors.
This is not a malfunction.
When a subject moves across the image very fast, the subject may appear slightly distorted.
• When noticeable flicker or striping is seen under lighting such as a fluorescent or LED lighting
fixture, you can reduce the flicker or striping by setting up [Flkr Decrease] (P216) and fixing the
shutter speed. It is possible to select a shutter speed from [1/50], [1/60], [1/100], or [1/120].
You can set the shutter speed manually in the Creative Video Mode. (P116)
329
14. Others
In motion pictures, abnormal clicking and buzzing sounds are recorded.
The recorded sound is very quiet.
• With recording in a quiet environment, depending on the lenses used, the sound of aperture
and focus actions may be recorded in motion pictures.
Focus operation can be set to [OFF] in [Continuous AF] (P213).
• Use of [Silent Operation] is recommended if you are concerned about operational sounds.
(P117)
• While recording motion pictures, plugging the aperture of the microphone with a finger may
reduce the level of audio recording or audio may not record at all. Also be careful because the
operation sound of lenses can easily be recorded at this time.
Lens
Recorded image may be warped, or nonexistent colour is surrounding the
subject.
• Depending on the lens used, picture may be warped slightly or you may see colours along the
edge depending on the zoom factor, due to the characteristics of the lens. Also, the peripherals
of the image might look warped because the perspective is enhanced when the wide angle is
used. This is not a malfunction.
When the lens is attached to another digital camera, stabiliser function cannot be
turned off or stabiliser function does not work.
• The Optical Image Stabiliser function of the interchangeable lens (H-FS12032) only works
correctly with supported cameras.
> When older Panasonic digital cameras (DMC-GF1/DMC-GH1/DMC-G1) are used,
[Stabilizer] in the [Rec] menu (P191) cannot be set to [OFF].
It is recommended to update the firmware of the digital camera at the following website.
http://panasonic.jp/support/global/cs/dsc/download/
> When using this lens with another make of digital cameras, the Optical Image Stabiliser
function will not work.
(As of October 2013)
For details, contact the respective company.
When the lens is attached to another digital camera, manual focus operation
cannot be performed.
• Manual Focus with the lens is possible only with the interchangeable lens (H-FS12032).
Refer to the support website below for details:
http://panasonic.jp/support/global/cs/dsc/
330
14. Others
Flash
The flash is not activated.
• Is the flash closed?
> Open the flash. (P200)
• When the electronic shutter is used, the flash is not activated. (P165)
> Set [Shutter Type] to [AUTO] or [EFC].
• When [Silent Mode] is set to [ON], the flash is not activated. (P184)
> Set [Silent Mode] to [OFF].
The flash is activated 2 times.
• The flash is activated 2 times.
The interval between the first and second flash is longer when Red-Eye Reduction (P203) is
set so the subject should not move until the second flash is activated.
Monitor
The Monitor is too bright or dark.
• Check [Monitor Luminance] setting. (P48)
• Perform [Monitor Display]. (P47)
It may flicker for an instant or the brightness of the screen may change
significantly for an instant.
• This occurs due to the aperture of the lens changing when the shutter button is pressed
halfway, or when the brightness of the subject changes. This is not a malfunction.
• This may occur more often when a bright lens, such as the interchangeable lens (H-H020A), is
used for recording in brightly lit outdoor environments.
Black, red, blue and green dots appear on the Monitor.
• This is not a malfunction.
These pixels do not affect the recorded pictures.
Noise appears on the monitor.
• In dark places, noise may appear to maintain the brightness of the monitor.
331
14. Others
Playback
The picture being played back is not rotated, or is rotated in an unexpected
direction, when displayed.
• You can display the pictures without being rotated when [Rotate Disp.] (P235) is set to [OFF].
• You can rotate pictures with the [Rotate] function. (P235)
The picture is not played back.
There are no recorded pictures.
• Is the card inserted?
• Is there a picture on the card?
• Is this a folder or picture which was processed in the PC?
If it is, it cannot be played back by this unit.
> It is recommended to use the “PHOTOfunSTUDIO” software in the CD-ROM (supplied) to
write pictures from PC to card.
• Has [Playback Mode] been set for playback?
> Change to [Normal Play]. (P223)
The folder number and the file number are displayed as [—] and the screen turns
black.
• Is this a non-standard picture, a picture which has been edited using a PC or a picture which
was taken by another make of digital camera?
• Did you remove the battery immediately after picture-taking or did you take the picture using a
battery with a low remaining charge?
> To delete such pictures, make a backup of the data and format the card (P32).
Playback sound or operation sound is too low.
• Is something covering up the speaker? (P12)
Images with different date as recorded date are played back in the Calendar
Playback.
• Is the clock in the camera set properly? (P35)
• Images edited on a PC or images recorded on other cameras might display a different date to
the recorded date during the Calendar Playback.
332
14. Others
White round spots like soap bubbles appear on the recorded picture.
• If you take a picture with the flash in a dark place or indoors, white
round spots may appear on the picture caused by the flash
reflecting of particles of dust in the air. This is not a malfunction.
[Thumbnail is displayed] appears on the screen.
• Is it a picture that has been recorded with other equipment?
In such cases, these pictures may be displayed with a deteriorated picture quality.
Red part of the recorded image has changed colour to black.
• When Red-Eye Removal ([
]) or [
]) is performed, red parts may be corrected to black.
> It is recommended to take a pictures with the flash closed, Flash Mode set to [‰], or
[Red-Eye Removal] set to [OFF]. (P207)
Motion pictures recorded with this model cannot be played back on other
equipment.
• Motion pictures recorded in [AVCHD] or [MP4] may be played back with poor picture or sound
quality or playback may not be possible even when played back with equipment compatible
with these formats. Also, the recording information may not be displayed properly.
333
14. Others
Wi-Fi function
A Wi-Fi connection cannot be established.
Radio waves get disconnected.
Wireless access point is not displayed.
∫ General tips for using a Wi-Fi connection
• Use within the communication range of the device to be connected.
• Is any device, such as microwave oven, cordless phone, etc., that uses 2.4 GHz frequency
operated nearby?
> Radio waves may get interrupted when used simultaneously. Use them sufficiently away
from the device.
• When the battery indicator is flashing red, the connection with other equipment may not start or
the connection may be disrupted.
(A message such as [Communication error] is displayed.)
∫ About a wireless access point
• Check if the wireless access point to connect is in operating state.
• The camera may not display or connect to a wireless access point depending on the radio
wave condition.
> Move this unit closer to the wireless access point.
> Remove the obstacles between this unit and the wireless access point.
> Change the direction of this unit.
> Change the location and orientation of the wireless access point.
> Perform the [Manual Connection]. (P275)
• It may not display even if the radio waves exist depending on the setting of the wireless access
point.
> Check the settings of the wireless access point.
> When the network SSID of the wireless access point is set not to broadcast, the wireless
access point may not be detected. Enter the network SSID to start the connection (P275) or
enable the SSID broadcast of the wireless access point.
• Connection types and security setting methods are different depending on the wireless access
point. (Refer to the operating instructions of the wireless access point.)
• Is the 5 GHz/2.4 GHz switchable wireless access point connected to other equipment using the
5 GHz band?
> The use of a wireless access point that can use 5 GHz/2.4 GHz simultaneously is
recommended. It cannot be used simultaneously with this camera if it is not compatible.
334
14. Others
It takes long time every time to connect to a smartphone/tablet.
• It may take longer time to connect depending on the Wi-Fi connection setting of the
smartphone/tablet, but it is not a malfunction.
This unit is not displayed in the Wi-Fi setting screen of the smartphone/tablet.
• From the Wi-Fi setting menu on the smartphone/tablet, turn off and then on the Wi-Fi function.
I have forgotten the login ID or password for the “LUMIX CLUB”.
• Check the information in the login screen of “LUMIX CLUB”.
http://lumixclub.panasonic.net/eng/c/
I do not have a wireless access point at my home, but I would like to perform
service user registration of the “LUMIX CLUB”.
• Service user registration for the “LUMIX CLUB” is not possible in the environment without a
wireless access point.
I cannot send images to an AV device.
• Sending may fail depending on the operational status of the AV device. Also, sending may take
a while.
Images cannot be transmitted to a PC.
• When the firewall of the OS, security software, etc. is enabled, connecting to the PC may not
be possible.
Images cannot be transmitted to the web service.
• Confirm that the login information (login ID/user name/email address/password) is correct.
• Web service server or the network may be busy.
> Try again after a while.
> Check the site of the web service you are sending the image to.
It takes time to transmit an image to the web service.
• Is the size of the image too large?
> Reduce the image size at [Size] (P282), and then send.
> Transmit after dividing the motion picture with [Video Divide] (P230).
• It may take longer time to transmit when distance to the wireless access point is far.
> Transmit closer to the wireless access point.
335
14. Others
The image that was supposed to have uploaded to the web service is not there.
• Upload may not complete when it is disconnected while transmitting the image.
• It may take some time after uploading the image to be reflected in the web service depending
on the status of the server.
> Wait for a while and try again.
• You can check the transmission status on the web service link settings by logging into “LUMIX
CLUB”.
I would like to return the image in the web service to the camera.
• The images in the web service cannot be saved (downloaded) to this unit.
> Do not delete the uploaded images, and make a backup of them.
I cannot display or delete the images uploaded to the web service by this unit.
• The images uploaded to the web service cannot be displayed or deleted by this unit.
> Perform the task using a smartphone/tablet or a PC.
Transmission of the image fails midway. Some images cannot be transmitted.
• Image cannot be transmitted when the battery indicator is flashing red.
• Is the size of the image too large?
> Reduce the image size at [Size] (P282), and then send.
> Transmit after dividing the motion picture with [Video Divide] (P230).
• File format of the motion picture that can be sent differs depending on the destination. (P280)
• Capacity or number of images in the web service is full.
> Login to “LUMIX CLUB”, and check the status of the destination on the web service link
settings.
Your “LUMIX CLUB” login ID and password were deleted after sending the
camera in to be repaired.
• The settings stored in the camera may be deleted depending on the type of repair.
> Always make a copy of important settings.
I have forgotten the password for the Wi-Fi.
• Execute the [Reset Wi-Fi Settings] in the [Setup] menu. (P53)
However, all the information you have set on the [Wi-Fi Setup] menu will be reset. (excluding
[LUMIX CLUB])
336
14. Others
TV, PC and printer
The picture does not appear on the television.
• Is the camera connected to the TV correctly? (P288)
> Set the TV input to external input mode.
The picture is not displayed fully on the TV.
The display areas on the TV screen and the camera’s monitor are different.
• Check [TV Aspect] setting. (P50)
• Depending on the TV model, the pictures may be extended horizontally or vertically or they
may be displayed with their edges cut off.
The motion pictures cannot be played back on a TV.
• Are you trying to play back the motion pictures by directly inserting the card in the card slot of
the TV?
> Connect the camera to the TV with the AV cable (optional), or with the HDMI micro cable,
and then play back the motion pictures on the camera. (P288)
Sound is not output from the speaker of the camera.
• When an AV cable (optional) or an HDMI micro cable is connected, sound is not output from the
camera.
VIERA Link does not work.
• Is it connected properly with the HDMI micro cable? (P288)
• Is the [VIERA Link] on this unit set to [ON]? (P51)
> If the input channel does not switch automatically, use the remote control for the TV to
switch it.
> Check the VIERA Link setting on the connected device.
> Turn this unit off and on.
> Set [HDAVI Control] to [Off] on the TV and then turn it back to [On].
(Refer to the operating instructions of the TV for details.)
> Check [Video Out] setting. (P50)
Cannot communicate with the PC.
• Is the camera recognised by the PC correctly?
> Set to [PC] in [USB Mode]. (P49, 295)
> Turn this unit off and on.
337
14. Others
The card is not recognised by the PC.
• Disconnect the USB connection cable. Connect it again while the card is inserted in the
camera.
• If there are two or more USB terminal on a single PC, try connecting the USB connection cable
to another USB terminal.
The card is not recognised by the PC.
(SDXC memory card is used.)
• Check if your PC is compatible with SDXC memory cards.
http://panasonic.net/avc/sdcard/information/SDXC.html
• A message prompting to format the card may be displayed when connecting, but do not format.
• If the [Access] displayed on the monitor does not disappear, disconnect the USB connection
cable after turning this unit off.
The picture cannot be printed when the camera is connected to a printer.
• Pictures cannot be printed using a printer that does not support PictBridge.
> Set to [PictBridge(PTP)] in [USB Mode]. (P49, 299)
The ends of the pictures are cut at printing.
• When using a printer with a Cropping or borderless printing function, cancel this function before
printing.
(For details, refer to the operating instructions for the printer.)
• When you order photo studios to print pictures, ask the photo studio if the 16:9 pictures can be
printed.
338
14. Others
Others
The shutter remains closed when the camera is turned off (including Sleep
Mode).
• If the camera is shaken, it may cause the shutter to close. This is not a malfunction. Do not put
your finger in the mount. Turning on the camera will re-open the shutter.
The camera makes a noise when this unit is turned on.
• This is the noise of the Dust Reduction Function working (P342); it is not a malfunction.
There is a sound from lens unit.
• It is a sound of lens movement or aperture operation when this unit is turned on or off, and it is
not a malfunction.
• The sound, which is caused by the automatic adjustment of the aperture, is heard when the
brightness has changed due to, for example, zooming or the movement of the camera. This is
not a malfunction.
An unreadable language was selected by mistake.
• Press [MENU/SET], select the [Setup] menu icon [
] and then select the [~] icon to set the
desired language. (P52)
Part of the picture is flashing in black and white.
• This is a highlight function showing the white saturated area. (P70)
A red lamp sometimes turns on when the shutter button is pressed halfway.
• In dark places, the AF Assist Lamp (P145) lights red to make it easier to focus on a subject.
The AF Assist Lamp does not turn on.
• Is [AF Assist Lamp] set to [ON]? (P145)
• The AF Assist Lamp does not turn on in bright places.
339
14. Others
The camera becomes warm.
• The surface of the camera may become warm during use. This does not affect the performance
or quality of the camera.
The clock is reset.
• If you do not use the camera for a long time, the clock may be reset.
> [Please set the clock] message will be displayed; please reset the clock. (P35)
The file numbers are not recorded consecutively.
• When you perform an operation after taking a certain action, the pictures may be recorded in
folders with different numbers from the ones used prior to the operation.
The file numbers are recorded with previously used numbers.
• If you insert or remove the battery before turning off this unit, the folder and file numbers for the
pictures taken will not be stored in the memory. When this unit is turned on again and pictures
are taken, they may be stored under file numbers which should have been assigned to
previous pictures.
340
14. Others
Cautions for Use
Optimal use of the camera
Keep this unit as far away as possible from electromagnetic equipment (such as
microwave ovens, TVs, video games etc.).
• If you use this unit on top of or near a TV, the pictures and/or sound on this unit may be
disrupted by electromagnetic wave radiation.
• Do not use this unit near cell phones because doing so may result in noise adversely affecting
the pictures and/or sound.
• Recorded data may be damaged, or pictures may be distorted, by strong magnetic fields
created by speakers or large motors.
• Electromagnetic wave radiation may adversely affect this unit, disturbing the pictures and/or
sound.
• If this unit is adversely affected by electromagnetic equipment and stops functioning properly,
turn this unit off and remove the battery or disconnect AC adaptor (optional). Then reinsert the
battery or reconnect AC adaptor and turn this unit on.
Do not use this unit near radio transmitters or high-voltage lines.
• If you record near radio transmitters or high-voltage lines, the recorded pictures and/or sound
may be adversely affected.
Always use the supplied cords and cables.
If you use optional accessories, use the cords and the cables supplied with them.
Do not extend the cords or the cables.
Do not spray the camera with insecticides or volatile chemicals.
• If the camera is sprayed with such chemicals, the body of the camera may be damaged and the
surface finish may peel off.
• Do not keep rubber or plastic products in contact with the camera for a long period of time.
341
14. Others
Cleaning
Before cleaning the camera, remove the battery or the DC coupler (optional), or
disconnect the power plug from the outlet. Then wipe the camera with a dry, soft
cloth.
• When the camera is soiled badly, it can be cleaned by wiping the dirt off with a wrung wet cloth,
and then with a dry cloth.
• Wipe off any dirt or dust on the zoom ring and the focus ring with a dry, dustless cloth.
• Do not use solvents such as benzine, thinner, alcohol, kitchen detergents, etc., to clean the
camera, since it may deteriorate the external case or the coating may peel off.
• When using a chemical cloth, be sure to follow the accompanying instructions.
∫ About dirt on the image sensor
This camera features an interchangeable lens system so dirt may get inside the camera
body when changing lenses. Depending on the recording conditions, dirt on the image
sensor may appear on the recorded picture.
To prevent debris or dust adhering to internal parts of the body, avoid changing the lens in
a dusty environment and always fit the body cap or a lens when storing the camera.
Remove any dirt on the body cap before attaching it.
Dust reduction function
This unit has a dust reduction function that will blow off the debris and dust that have
affixed to the front of the imaging device.
This function will function automatically when the camera is turned on, but if you see
dust, perform the [Sensor Cleaning] (P53) in the [Setup] menu.
Removing dirt on the image sensor
The image sensor is very precise and delicate, so be sure to observe the following when
you do have to clean it yourself.
• Blow off the dust on the surface of the image sensor with a commercially available blower
brush. Be careful not to blow too strongly.
• Do not put the blower brush further inside than the lens mount.
• Do not let the blower brush touch the image sensor as the image sensor may get scratched.
• Do not use any objects except a blower brush to clean the image sensor.
• If you cannot remove the dirt or dust with the blower, consult the dealer or Panasonic.
342
14. Others
About the Monitor
• Do not press the monitor with excessive force. Uneven colours may appear on the monitor and
it may malfunction.
• If the camera is cold when you turn it on, the picture on the Monitor will be slightly darker than
usual at first. However, the picture will return to normal brightness when the internal
temperature of the camera increases.
Extremely high precision technology is employed to produce the Monitor
screen. However there may be some dark or bright spots (red, blue or green) on
the screen. This is not a malfunction. Though the Monitor screen parts are
produced with highly controlled precision technology, some pixels may be
inactive or always lit. The spots will not be recorded on pictures on a card.
About the Lens
• Do not press the lens with excessive force.
• Do not leave the camera with the lens facing the sun as rays of light from the sun may cause it
to malfunction. Also, be careful when placing the camera outside or near a window.
• When there is dirt (water, oil, and fingerprints, etc.) on the surface of the lens, the picture may
be affected. Lightly wipe the surface of the lens with a soft, dry cloth before and after taking
pictures.
• Do not place the lens mount facing downwards. Do not allow the lens
mount contacts A to become dirty.
343
14. Others
Battery
The battery is a rechargeable lithium ion battery. Its ability to generate power comes
from the chemical reaction that takes place inside it. This reaction is susceptible to
the surrounding temperature and humidity. If the temperature is too high or too low,
the operating time of the battery will become shorter.
Always remove the battery after use.
• Place the removed battery in a plastic bag, and store or keep away from metallic objects (clips,
etc.).
If you drop the battery accidentally, check to see if the body of the battery and the
terminals are damaged.
• Inserting a damaged battery in the camera will damage the camera.
Bring charged spare batteries when going out.
• Be aware that the operating time of the battery becomes shorter in low temperature conditions
such as at a ski resort.
• When you travel, do not forget to bring the battery charger (supplied) so that you can charge
the battery in the country that you are travelling in.
Dispose of unusable battery.
• The battery has a limited life.
• Do not throw the battery into fire because it may cause an explosion.
Do not allow battery terminals to come into contact with metal objects (such as
necklaces, hairpins, etc.).
• This can cause short-circuiting or heat generation and you may be badly burned if you touch a
battery.
Charger
• The [CHARGE] indicator may blink under the influence of static electricity or electromagnetic
wave. This phenomenon has no effects on charging.
• If you use the battery charger near a radio, the radio reception may be disturbed.
Keep the charger 1 m (3.3 feet) or more away from radio.
• The charger may generate whirring sounds when it is being used. This is not a malfunction.
• After use, be sure to disconnect the power supply device from the electrical outlet.
(A very small amount of current is consumed if it is left connected.)
• Keep the terminals of the charger and battery clean.
344
14. Others
About 3D
∫ About 3D recording
With the 3D interchangeable lens attached, do not record a subject at less than the
minimum focus distance.
• The 3D effects may be more pronounced, and therefore cause tiredness or discomfort.
• When the 3D interchangeable lens (H-FT012: optional) is used, the minimum focus distance is
0.6 m (2.0 feet).
When recording with the 3D interchangeable lens attached, be careful not to shake
the unit.
• Tiredness or discomfort may result if the shake is pronounced, due to riding in a vehicle or
walking etc.
• We recommend using a tripod.
∫ About 3D viewing
Anyone who is hyper sensitive to light, suffers from heart disease or is otherwise
unwell should avoid viewing 3D contents.
• Viewing 3D contents may have an adverse effect to the individual.
If you feel tired, uncomfortable or otherwise strange when viewing 3D contents,
stop viewing at once.
• Continuing to view may cause illness.
• After stopping viewing, please rest appropriately.
When viewing 3D contents, we recommend taking a break every 30 to 60 minutes.
• Viewing for extended periods may cause eye-fatigue.
Short-sighted or long-sighted persons, those with differences in the sight of their
right and left eyes, and those with astigmatism are advised to correct their vision by
wearing glasses etc.
Stop viewing if you can clearly see a double image while viewing 3D contents.
• There are differences in the way that different people experience 3D contents. Please correct
your sight appropriately before viewing 3D contents.
• You can change the 3D setting of your television or 3D output setting of the unit to 2D.
345
14. Others
Card
Do not leave the card where the temperature is high, where electromagnetic waves
or static electricity are easily generated or exposed to direct sunlight.
Do not bend or drop the card.
• The card may be damaged or the recorded content may be damaged or deleted.
• Put the card in the card case or the storage bag after use and when storing or carrying the
card.
• Do not allow dirt, dust, or water to get into the terminals on the back of the card and do not
touch the terminals with your fingers.
Notice for when transferring to another party, or disposing of the memory card
“Format” or “delete” using the camera or a PC will only modify the file management
information, it will not erase the data in the memory card completely.
It is recommended to physically destroy the memory card or use the commercially
available computer data deletion software to completely erase the data in the
memory card before transferring to another party or disposing.
Management of data in the memory card is the responsibility of the user.
About the personal information
If a name or birthday is set for [Profile Setup]/Face Recognition function, this personal
information is kept in the camera and recorded in the image.
Setting a Wi-Fi password is recommended to protect personal information. (P284)
Disclaimer
• Information including personal information may be altered or vanish due to erroneous
operation, effect of static electricity, accident, malfunction, repair, or other handlings.
Please note in advance that Panasonic is not liable in any way for any direct or indirect damage
from the alteration or vanishing of information or personal information.
346
14. Others
When requesting a repair, transferring to another party, or disposing.
• After making a copy of personal information, always delete information such as personal
information and wireless LAN connection settings that you have saved within the camera with
[Reset Wi-Fi Settings]/[Delete account] (P53, 271).
• Reset the settings to protect the personal information. (P52)
• Remove the memory card from the camera when requesting a repair.
• Settings may return to factory default when camera is repaired.
• Please contact the dealer where you purchased the camera or Panasonic if above operations
are not possible due to malfunction.
When transferring to another party, or disposing of the memory card, please refer to
“Notice for when transferring to another party, or disposing of the memory card”.
(P346)
When uploading images on web services
• Images may contain information that can be used for identifying individuals such as titles,
recording dates, and location information. When uploading images on web services, check
carefully, and then upload.
When not using the camera for a long period of time
• Store the battery in a cool and dry place with a relatively stable temperature: (Recommended
temperature: 15 oC to 25 oC (59 oF to 77 oF), Recommended humidity: 40%RH to 60%RH)
• Always remove the battery and the card from the camera.
• If the battery is left inserted in the camera, it will discharge even if the camera is turned off. If
the battery continues to be left in the camera, it will discharge excessively and may become
unusable even if charged.
• When storing the battery for a long period of time, we recommend charging it once a year.
Remove the battery from the camera and store it again after it has completely discharged.
• We recommend storing the camera with a desiccant (silica gel) when you keep it in a closet or
a cabinet.
• Check all the parts before taking pictures when you have not used the camera for a long period
of time.
347
14. Others
About the picture data
• Recorded data may be damaged or lost if the camera breaks down due to inappropriate
handling. Panasonic will not be liable for any damage caused due to loss of recorded data.
About tripods or unipods
• When you use a tripod, make sure the tripod is stable when this unit is attached to it.
• You may not be able to remove the card or the battery when using a tripod or unipod.
• Make sure that the screw on the tripod or unipod is not at an angle when attaching or detaching
the camera. You may damage the screw on the camera if you use excessive force when
turning it. Also, the camera body and the rating label may be damaged or scratched if the
camera is attached too tightly to the tripod or unipod.
• When using this unit with a large-diameter lens, the lens may come into contact with the
pedestal depending on the tripod/unipod. Tightening the screw with the lens and pedestal in
contact with each other may damage this unit or the lens. Therefore it is recommended to
attach the tripod adaptor (DMW-TA1: optional) before mounting on the tripod/unipod.
• Read the operating instructions for the tripod or unipod carefully.
About the shoulder strap
• If you attach a heavy interchangeable lens (more than about 1 kg/35.3 oz) to the camera body,
do not carry the camera by the shoulder strap.
Hold the camera and the lens when carrying them.
348
• G MICRO SYSTEM is a lens exchange type digital camera
system of LUMIX based on a Micro Four Thirds System
standard.
• Micro Four Thirds™ and Micro Four Thirds Logo marks are
trademarks or registered trademarks of Olympus Imaging
Corporation, in Japan, the United States, the European Union
and other countries.
• Four Thirds™ and Four Thirds Logo marks are trademarks or
registered trademarks of Olympus Imaging Corporation, in
Japan, the United States, the European Union and other
countries.
• SDXC Logo is a trademark of SD-3C, LLC.
• HDMI, the HDMI Logo, and High-Definition Multimedia
Interface are trademarks or registered trademarks of HDMI
Licensing LLC in the United States and other countries.
• “AVCHD” and the “AVCHD” logo are trademarks of Panasonic
Corporation and Sony Corporation.
• Manufactured under license from Dolby Laboratories.
Dolby and the double-D symbol are trademarks of Dolby
Laboratories.
• HDAVI Control™ is a trademark of Panasonic Corporation.
• Adobe is a trademark or registered trademark of Adobe
Systems Incorporated in the United States and/or other
countries.
• Windows and Windows Vista are either registered trademarks or trademarks of Microsoft
Corporation in the United States and/or other countries.
• iMovie, Mac and Mac OS are trademarks of Apple Inc., registered in the U.S. and other
countries.
• App Store is a service mark of Apple Inc.
349
• QuickTime and the QuickTime logo are trademarks or
registered trademarks of Apple Inc., used under license
therefrom.
• Android and Google Play are trademarks or registered
trademarks of Google Inc.
• The Wi-Fi CERTIFIED Logo is a certification mark of the Wi-Fi
Alliance.
• The Wi-Fi Protected Setup Mark is a mark of the Wi-Fi Alliance.
• “Wi-Fi”, “Wi-Fi Protected Setup”, “Wi-Fi Direct”, “WPA” and
“WPA2” are marks or registered marks of the Wi-Fi Alliance.
• DLNA, the DLNA Logo and DLNA CERTIFIED are trademarks,
service marks, or certification marks of the Digital Living
Network Alliance.
• This product uses “DynaFont” from DynaComware
Corporation. DynaFont is a registered trademark of
DynaComware Taiwan Inc.
• Other names of systems and products mentioned in these
instructions are usually the registered trademarks or
trademarks of the manufacturers who developed the system or
product concerned.
This product is licensed under the AVC patent portfolio license for the personal and
non-commercial use of a consumer to (i) encode video in compliance with the AVC Standard
(“AVC Video”) and/or (ii) decode AVC Video that was encoded by a consumer engaged in a
personal and non-commercial activity and/or was obtained from a video provider licensed to
provide AVC Video. No license is granted or shall be implied for any other use. Additional
information may be obtained from MPEG LA, LLC. See http://www.mpegla.com .
Disposal of Old Equipment and Batteries
Only for European Union and countries with recycling systems
These symbols on the products, packaging, and/or accompanying
documents mean that used electrical and electronic products and
batteries must not be mixed with general household waste.
For proper treatment, recovery and recycling of old products and used
batteries, please take them to applicable collection points in accordance
with your national legislation.
By disposing of them correctly, you will help to save valuable resources
and prevent any potential negative effects on human health and the
environment.
For more information about collection and recycling, please contact your
local municipality.
Penalties may be applicable for incorrect disposal of this waste, in
accordance with national legislation.
Note for the battery symbol (bottom symbol):
This symbol might be used in combination with a chemical symbol. In
this case it complies with the requirement set by the Directive for the
chemical involved.