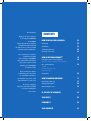
1
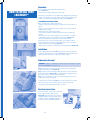
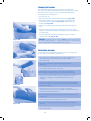
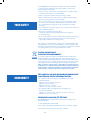
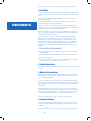
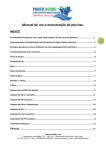
Dear Customer, CONTENTS Thank you for your confidence in choosing the LAZERNAUT from ZODIAC. This product has been designed, manufactured and tested with the utmost care in order to provide you with complete satisfaction. HOW TO INSTALL YOUR LAZERNAUTTM 13 Unpacking 13 Installation 13 Submerging the robot 13 Electrical connections 13 HOW TO USE YOUR LAZERNAUTTM 14 Description of the control keyboard Functions of the 8 buttons and 5 indicators 14 The control keyboard To start Programming the robot During the cycle 15 Programmes 16 HOW TO MAINTAIN YOUR ROBOT 17 Cleaning the filter bag 17 Changing the brushes 18 Maintaining the robot 18 IN THE EVENT OF A PROBLEM 19 YOUR SAFETY 20 CONFORMITY 20 YOUR GUARANTEE 21 We recommend you read these instructions carefully, before using your LAZERNAUT. They contain all the information you need in order to benefit fully from your LAZERNAUT, in complete safety. Please contact your retailer, a swimming pool professional, for any further information. He will advise you on the usage and maintenance of your robot. He can also supply you with spare parts and is qualified to provide you with after sales service. Unpacking HOW TO INSTALL YOUR LAZERNAUTTM The packaging should contain the following items: > the LAZERNAUT™, > the transport trolley including the control unit. Check that your appliance has not suffered any damage during transport (bumps, broken parts, etc.) If you detect the slightest problem, please contact your retailer immediately before using your LAZERNAUT™. > Assembling the transport trolley: Before removing the appliance from its box - Pull the upper section of the trolley containing the control unit out of the box, - Remove the robot from the box being careful not to let the cable get caught up in the trolley, - Remove the lower section of the trolley, - Loosen the lock-wheels completely and remove the screw from the axle-pin, - Fit the upper section of the trolley into the lower section so that the control unit's keyboard is facing the front of the trolley Diagram 1. - Fix the screws in place to hold the 2 sections of the trolley together. Be sure to position a plastic washer on both sides of these screws. Tighten the lock-wheels as far as they will go (the 'lock-wheels' must face the back of the trolley) Diagram 2. - Make sure the cable wrap-around hooks are facing backwards Diagram 3. Diagram 1 Installation Diagram 2 For your safety and for the LAZERNAUT™ to function correctly, place the control unit at a distance of at least 3.5 metres from the edge of the pool making sure that the unit is not exposed to direct sunlight. Submerging the robot Important : Under no circumstances should anyone be allowed to swim when the LAZERNAUT™ is in your pool. Diagram 3 Stage 1 : Submerge the robot in the water and evacuate any air that it contains by turning it over Diagram 4. Stage 2 : Squeeze the foam brushes with your hands to push out the air and to allow water in Diagram 5. It is essential that the appliance sinks to the bottom of the pool and stays there without aid. Stage 3 : Lay out the cable on the pool leaving the float closest to the control unit on the pool’s edging. To get the best out of your LAZERNAUT, run in the foam pads. To do this, carry out four 11/2 - hour cleaning cycles in “bottom only” mode (see paragraph “Programming the Robot”, page 15). Electrical connections Diagram 4 Connect the robot’s cable to the control unit and lock the connector under the unit Diagram 6 ; Only connect the control unit to a plug fitted with a security residual current protection system of 30 mA maximum (if in doubt, contact an electrician/installer). Diagram 6 Diagram 5 13 You can choose to run your LAZERNAUT™ in either automatic or manual mode. To select the operation mode, use the control keyboard located on the transport trolley Diagram 7. Description of the control keyboard HOW TO USE YOUR LAZERNAUTTM The keyboard consists of 8 buttons (micro-contact) and a screen with 4 figures and 5 indicators. 5 buttons control usage in manual mode (4 directions and a stop button) and the programming of the robot. 3 buttons provide access to the function modes of the robot ( ; ; ) Diagram 8. Functions of the 8 buttons and 5 indicators Buttons The Start / Stop button for the robot. Selection of automatic or manual mode. Selection of Bottom + Sides mode or Bottom only. Diagram 7 In automatic mode, this button selects the Programme or Time menus. During programming, it (C: CANCEL) cancels the choice that has been made for the Programme or the Time. In manual mode, this button turns the robot to the left while it is still underwater. In automatic mode, this button selects the Programme or Time menus. During programming, it validates the Programme or the Time choice. In manual mode, this button turns the robot to the right while it is still underwater. In manual mode, this button stops the movement of the robot. Diagram 9. (NB: the pump is still functioning). In automatic mode, this button increases the programme numbers or the length of the cleaning process. In manual mode, pressing this button makes the robot go forward. Diagram 8 I n automatic mode, this button reduces the programme numbers or the length of the cleaning process. In manual mode, pressing this button makes the robot go backwards. Indicators: These are logos in front of which small triangles that they represent is active. appear when the mode Automatic mode. Manual mode. Cleaning of the bottom and of the sides of the swimming pool. Cleaning of the bottom only. Diagram 9 Start / Stop button for the robot. 14 The control keyboard When switched on, the robot is in sleep mode and the display is blank. The robot is now waiting for a start or programming command. To start When the button is pressed, the robot starts in automatic mode. Diagram 10. A small triangle appears opposite the indicator on the top right-hand side of the screen and the and or mode indicators. The programme, the length of operation time and the ‘bottom only’ or ‘bottom + sides’ parameters are those memorised during the previous cleaning cycle. The amount of time remaining before the system is due to stop appears on the screen Diagram 11. Diagram 10 Programming of the robot When the robot is in sleep mode, pressing any button except takes one into the programming mode. The screen displays the length of the cycle. By pressing or , one moves alternatively b etween the Time and the Programme menu. The active menu is shown on the display (t: time; P: Programme). The possible values are increased or decreased using the or buttons. Diagram 11 Example for the programmes P : 01 P : 24 P : 02 P : 03 …. P : 01 (See chapter Programmes, page 16 for P : 00 selecting programmes). The modified value flashes and is then validated by by or cancelled (Cancel). The length of the cycle can be set for 30 min. to 6 hours, in 30 minute intervals, using the or buttons. You can also use a programming clock (not supplied): the robot starts and stops automatically according to the time and programming parameters that you have defined using this clock. In this case, the cycle time must be set to t0:00. During the cycle While the robot is operating, the display screen shows the time remaining before the cleaning process is programmed to stop. In automatic mode one can, at any given time, increase or reduce the amount of time remaining before the system stops by using the or , buttons (in 30 minute intervals). However, the Programme menu cannot be changed during the cycle. You can also adjust the robot’s operating mode. When you press the button, the If the or , indicator is activated on the screen. indicator is active, the robot cleans the bottom and the sides of the pool. If the indicator is active, the robot only cleans the bottom of the pool. When you press the button, you move from automatic mode to manual mode and vice versa. 15 The or indicator shows the current mode (auto or manual). In manual mode, pressing the or buttons causes the robot to advance or reverse until the central button, or the opposite direction’s button, is pressed. When you press or button, the robot turns in the corresponding direction. As soon as you release the button, the robot continues in a straight line. Programmes These 24 programmes are designed for the optimal performance of your robot. They enable you to choose the parameters that are best suited to the dimensions and the shape of your pool. You should choose one of these programmes according to the width and the shape of your pool. To activate one of these programmes, refer to chapter. Programming the robot, on page 15. The programmes in the robot’s memory are: Program numero Maximum width of the pool 0 Shape of the pool Test program 1 2 3 4 5 6 3 4 5 6 7 8 Rectangular pool with flat bottom or complex slope 7 8 9 10 11 12 3 4 5 6 7 8 Rectangular pool with pyramid shaped diving area 13 14 15 16 17 18 3 4 5 6 7 8 A circular shaped pool 19 20 21 22 23 24 3 4 5 6 7 8 An oval shaped pool Microprocesssor The Lazernaut™ is controlled by a microprocessor to ensure optimal cleaning in all pool configurations. This microprocessor also offers the following functions. Poolside system: In the event that your Lazernaut™ comes out of the pool onto a poolside surface, the microprocessor is able to detect the lack of water. The robot turns around and goes back into the pool to continue cleaning. Out-of-water security system: If the Lazernaut™ does not succeed in going back into the water, or if the robot is started out of the water, the microprocessor shuts off the robot’s power supply after approximately 20 seconds to avoid damage to the waterproof joints. 16 Cleaning the filter bag We recommend that you clean the filter bag at the end of each cycle. > Bring the robot in by pulling on the cable Diagam 12 or using the manual mode (see page 14 for manual mode utilisation). > Switch the robot off and unplug the control unit from the mains. > As soon as the robot is out of the water, pick it up by the handle and lay it upside down on the poolside, so that you have access to the filter-holder plate located beneath the robot HOW TO MAINTAIN YOUR ROBOT Diagram 13 to 19 > Push down on the outside of the 2 clips that hold the filter-holder plate in position and free it from the robot, still holding it upside down, so that the debris stays in the bag. The filter is attached to the plate. > Remove the filter from the plate (There is slight resistance behind the clips). > Empty the bag and clean it with running water or if necessary with slightly soapy water. If you use soap, rinse it thoroughly whilst turning it over. Do not wring it out. You can also machine wash it, following the instructions given on the label inside the bag. > Also rinse the filter-holder plate and remove any debris caught under the valves. Diagram 12 open shut > Replace the bag in the filter-holder plate by pressing down on the filter’s frame in the corners and behind the clips, so that the frame is firmly in position on the plate. Important: the bag must be facing the right way. When the bag is in position on the filter-holder plate, the Zodiac label must be visible. > Fit the filter-holder plate back onto the robot when the filter-bag is dry and click it into place. Make sure that the clip attachments are properly in place by pushing them outwards. Diagram 13 Diagram 14 Diagram 15 Diagram 16 Diagram 17 Diagram 18 Diagram 19 17 Changing the brushes Your robot is fitted with foam brushes mounted on a brush-holder that consists of a male and a female roller. We recommend that you change the brushes at the end of each season. It is imperative that they are changed if they are noticeably worn. > Turn the robot over > Lift up the clip that is located between the 2 rollers Diagram 20. Bring them together so that you can free their extremity from the 4 pins attached to the drive unit Diagram 21 and then remove the brush-holder Diagram 22. > Remove the used brushes from the rollers and replace them with new ones. > Join the 2 rollers, reposition them, and then move them apart again making sure that their extremity is properly fitted to the 4 pins attached to the drive unit. > Lock the central clip (the "clip" shows that the rollers are properly attached to the unit) Diagram 23. Diagram 20 Important : To get the best out of your LAZERNAUT, run in the foam pads. To do this, carry out four 11/2 - hour cleaning cycles in “bottom only” mode (see paragraph “Programming the Robot”, page 15). Maintaining the robot In order that your robot retains its original appearance, we suggest that you follow the recommendations given below. Diagram 21 > The robot must be cleaned regularly in tap water or slightly soapy water, without using any solvents such as trichlorethylene. Rinse thoroughly. > Do not leave your robot to dry in direct sunlight by the side of the pool. > Clean the filter bag at the end of each cycle. > If the robot is to be put away for an extended period (holidays or winter storage for example), rinse it in tap water and leave it to dry. > Use your robot vacuum cleaner as often as possible: your pool will always be wonderfully clean and the filter bag will not clog up so quickly. Diagram 22 > The robot is designed to work in a swimming pool whose water quality is as follows: chlorine < 2 mg/ l, pH between 6.8 and 7.6, temperature between 10°C and 35 °C. > If part of the pool is not as clean as it should be when using your robot’s automatic programme, it only takes a minute to finish off the cleaning using the manual mode. > Do not use your robot when carrying out any "shock treatment" process in your pool. > Do not leave your robot permanently in the water. Diagram 23 > You should not oil any external mechanical part that is accessible by the user. > Disconnect the cable from the control box and wind it round the hooks on the trolley. 18 Your robot is fitted with a protection system for the motors in the event of a blockage. A message appears on the screen: EE01 or EE02 or……EE06. > If a message numbered between EE04 and EE06 appears on the screen, check that nothing is blocking the movement of the propeller or the brushes and re-initialise the control unit by pressing both the IN THE EVENT OF A PROBLEM and buttons at the same time. > If a message between EE01 and EE03 appears on the screen, the problem is more serious and you should take the robot and the control unit in to your retailer. 1. The robot is not functioning, the screen remains blank and the buttons are not responding: the power supply is not functioning. Check the plug by plugging in a different electrical appliance. Re-connect the control unit’s cable if the plug functions correctly. 2. The robot is not staying on the bottom of the pool as it should do or is regularly coming up towards the pool’s surface. There is still some air inside the system’s shell. Go back through the steps for submerging the robot, respecting the recommendations given earlier in this document point by point. Turn the robot right over and hold it underwater so that all the air trapped in the shell can escape. Squeeze the foam pads to evacuate the air. Leave the robot for a while operating in bottom only mode. 3. The robot does not or has stopped climbing the sides There are 2 reasons for this: > the filter bag is full or has become clogged up: it just needs cleaning, > although the water seems clear, there are microscopic algae in your pool, invisible to the naked eye, that make the sides slippery and prevent the robot from climbing them. Carry out ‘shock treatment’ and lower the pH a little. Do not leave the robot in the water during the shock treatment process. 4. The robot is not moving and the screen is switched on Check that the robot’s power cable is properly connected underneath the control unit. Check that the indicator is lit up. If not, press . 5. The result of the cleaning process does not seem to be as good > Clean the filter bag. > Check that the foam brushes have not deteriorated. We recommend that you change the foam brushes at the end of each season. 19 YOUR SAFETY Your LAZERNAUT™ is manufactured according to the strictest standards. To ensure complete safety when using your appliance, please respect the following recommendations: >O nly connect the control unit to a plug fitted with a security residual current protection system of 30 mA maximum. > Make sure the socket outlet is always and easily accessible. > Make sure that the control unit is at least 3.5 metres from the edge of the pool, and avoid exposure to direct sunlight. > On no account should you ever allow anyone to swim while the robot is in the pool. If by "accident", the trolley were to fall into the water, it is essential that you unplug the electric supply before recovering the trolley. > To avoid any risk of an electric shock, never open the electric control unit. Call a qualified technician. > Never try to repair the mains power cable. Contact the Customer Services Department to have it replaced, to avoid any danger. > Do not use the appliance in your pool if the water temperature is above 35ºC. > Always disconnect the mains power lead after use and before doing any cleaning, maintenance or servicing work. This appliance is not intended for use by persons (including children) with reduced physical, sensory or mental capabilities, or lack of experience and knowledge, unless they have been given supervision or instruction concerning use of the appliance by a person responsible for their safety. Product waste disposal Protection of the environment: In accordance with the provisions of the Waste Electrical and Electronic Equipment (WEEE - 2002/96/EC) Directive, used electric and electronic products must be destroyed separately from normal household waste in order both to promote re-use, recycling and other forms of recovery and to reduce the quantity of waste to be destroyed and hence the disposal operations. When you dispose of this product, comply with the local waste disposal instructions. Do not throw it away in the middle of nowhere : take it to a waste collection centre that specialises in used electrical and electronic products and/or consult your dealer when buying a new product. CONFORMITY This appliance has been designed and manufactured in accordance with the following standards: > In compliance with Electromagnetic compatibility 2004/108/EC and the standards: EN 55014-1: 2000 +A1:2001 +A2:2002 EN 55014-2: 1997 +A1:2002 EN 61000-3-2: 2000 + A2:2005 EN 61000-3-3: 1995 + A1:2001 +A2:2005 > In compliance with Low Voltage Directive 2006/95/EC and the following standards: EN 60335-1 : 2002 + A1:2004 + A2:2006 +A11:2004 + A12:2006 EN 60335-2-41 : 2003 + A1:2004. Extra details concerning ‘CE’ (EC) label: The LAZERNAUT™ pool cleaning robot is labelled ‘CE’ according to the following directives: > C.E.M. 89/336/CEE and 92/31/CEE. > Low voltage 73/23/CEE 73/23/CEE vis-à-vis those to which it complies. The product has been tested in normal usage conditions. 20 These terms are in accordance with French law at the time of printing. 1. Conditions All our technical experience and concern for quality has been used in the construction of our equipment. It has all been subjected to quality control tests. Our models are regularly updated and improved to make the most of technological advances. YOUR GUARANTEE It is understood that these improvements cannot be added to previous models within the context of our guarantee. If, in spite of all the care and know-how used in the manufacture of our products, you were to have need of the guarantee, please be aware that it only applies to the free replacement of faulty parts. Transport and labour costs remain your responsibility. The guarantee does not cover accidents, breakage or deterioration due to causes unrelated to, or independent of the recorded fault. We are fully within our rights to cancel the guarantee if the appliance has been seen to by a third party, not known to our workshops, or by a technician who has not been approved by us, or if modifications have been carried out without our written agreement. We are also fully within our rights to cancel the guarantee in the event of usage that does not comply with the instructions provided with the appliance at the time of purchase. > Not covered by the guarantee > Normal wear and tear of the operational parts such as the foam brushes or the filter bags. > Electrical damage caused by lightning or a bad electrical connection. > Breakage due to impact. > Under no circumstances can repairs or replacements made as part of the guarantee prolong the appliance’s guarantee period. 2. Period of guarantee The period of guarantee is fixed at three years from the date of invoicing the first user. 3. Object of the guarantee During the guarantee period defined above, any part recognised as faulty will be mended or exchanged by the manufacturer with a new part or in correct operating condition. In all cases, travel and labour costs will be the responsibility of the user. In the event of a return to the workshop, return transport costs will be the responsibility of the user, but labour costs remain the responsibility of the manufacturer. The immobilisation and the prevention of possession of an appliance in the event of any necessary repairs cannot give rise to compensation. In all circumstances, the legal guarantee of the seller continues to be applied in accordance with article 4 of decree n° 78-464 of 24 March 1978. The legal guarantee of article 1641 of the civil code is applied. 4. Transport damage Appliances always travel at the risk and peril of the user. It is up to the user, before taking delivery of the appliance, to check that it is in perfect condition. Under no circumstances can we be held responsible for transport damage. 21