1
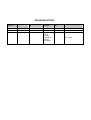
User Manual Version 3.0 REVISION HISTORY Document Version Revision Date Created/Changed by 3.0 3.0 3.0 Jan 31, 2010 Feb 26, 2010 June 25,2010 Sreehari, Raj Giribabu Giribabu Summary of Change Updated Device Security; Updated the settings information Reviewed By Raj Raj Raj Section/Page Changed Sec 4/P8 Sec 5.9/23 CONTENTS 1. 1.1 1.2 Introduction to RemoMail.................................................................................................... 1 Purchasing RemoMail ........................................................................................................ 1 RemoMail Features .......................................................................................................... 2 2. 2.1 2.2 2.3 Handset Requirements ....................................................................................................... 3 Handset Memory Requirements ............................................................................................ 3 BREW and ARM versions supported ........................................................................................ 3 Handset keys used ........................................................................................................... 3 2.3.1 Power/End Key (usually red) ................................................................................... 3 2.3.2 Numbers 0-9 ...................................................................................................... 3 2.3.3 Up, Down, Left, Right Keys (Arrow keys) ..................................................................... 3 2.3.4 Clear Key (CLR) ................................................................................................... 3 2.3.5 Back Key ........................................................................................................... 3 2.3.6 Select/OK Key .................................................................................................... 4 2.3.7 Asterisk (*) Key ................................................................................................... 4 2.3.8 Pound (#) Key ..................................................................................................... 4 2.3.9 Option icon........................................................................................................ 4 2.3.10 Hide icon .......................................................................................................... 4 3. 3.1 3.2 Application Setup ............................................................................................................. 5 Setting up RemoMail on your mobile phone.............................................................................. 5 Selecting from Providers List............................................................................................... 6 4. 4.1 4.2 Device Security ............................................................................................................... 8 PIN settings ................................................................................................................... 8 Poison Pill ..................................................................................................................... 8 5. Home Page..................................................................................................................... 9 5.1 Inbox......................................................................................................................... 10 5.2 Drafts ........................................................................................................................ 13 5.3 Outbox ...................................................................................................................... 14 5.4 Search ....................................................................................................................... 15 5.5 Server Folders .............................................................................................................. 15 5.6 Groups....................................................................................................................... 16 5.7 Quick Messages............................................................................................................. 17 5.8 Manage Accounts........................................................................................................... 18 5.9 Settings...................................................................................................................... 22 5.10 Turn Sync On/Off .......................................................................................................... 24 5.11 Help.......................................................................................................................... 25 6. 6.1 Appendix ..................................................................................................................... 26 Poison Pill .................................................................................................................... 26 RemoMail User Guide 3.0 R e m o M a i l 1. Introduction to RemoMail Mobile Access to Your Emails RemoMail is a BREW® based application for CDMA phones that allows users to access email. RemoMail securely accesses email stored on most Internet-accessible IMAP4/POP3 mail servers. Email addresses from native phonebook can be accessed directly from RemoMail. The different features of RemoMail are described in detail in the sections below. RemoMail uses the following Protocols for Fetching Mails from Mail Server. IMAP4 POP3 To get started, launch RemoMail from BREW menu on your mobile. If you are using RemoMail for the first time, you will be taken to the Introduction screen. On selecting ‘OK’, you can configure your email account by providing your username, password and the email address in full. RemoMail will attempt to retrieve the account settings automatically from a designated server. On success, your account will be configured and ready to use. In case the required account settings cannot be found, then you will be prompted to enter the incoming server address information before an attempt is made to login using the incoming server address failing which the user will be displayed with a message “Enter the correct details”. 1.1 Purchasing RemoMail 1. Navigate to the BREW Apps. 2. Select RemoMail from the list to download and install the application. If you cannot find RemoMail on the menu, logon to www.remoba.com. Check for the application availability for your phone model. 1 6/25/2010 RemoMail User Guide 3.0 1.2 RemoMail Features Access to existing corporate and personal email accounts. Supports IMAP4 & POP3 mail services - for e.g. Hotmail , Yahoo , Gmail , and others. Supports SSL for secure access. Push Mail for IMAP accounts Supports Predictive Text Entry quick-entry feature on most handsets. Create and store custom Quick Messages for faster mail composing. View the text portion of an email (up to 2048 characters on most handsets). View the complete mail header information when required (subject, sender, date). Reply, Reply All and Forward mails. Create and attach a custom signature to the mails being sent. Mark To Delete, Restore and Purge Mails. Compose and send new emails (up to 510 characters on most handsets), with features to add ® ® ® a Cc and Bcc. Ability to input email address from the native phonebook directly when composing mails Group feature to quickly add recipients from predefined groups Store emails on phone in the Drafts or Outbox folder for later viewing Folder level view for IMAP accounts A powerful search feature to search for mails by sender, by date or subject for IMAP accounts Search across all folders or only the Inbox folder Help Section to offer quick reference and workarounds. Note: Access to Yahoo and other email services from a Mobile Phone may require subscription to premium services. Please check with your service provider for details. 2 6/25/2010 RemoMail User Guide 3.0 2. Handset Requirements 2.1 Handset Memory Requirements Free shared memory (also called application memory): at least 1MB Heap memory: at least 500 KB 2.2 BREW and ARM versions supported BREW version: 3.1.2, 3.1.4, 3.1.5 ARM version: 1.2 2.3 Handset keys used This manual makes references to function keys such as the Back and CLR key. While mobile phone manufacturers have attempted to standardize on key definition and location, there remains some variation between handsets. RemoMail uses the following keys to perform the functions: 2.3.1 Power/End Key (usually red) This may be used to exit RemoMail, although it is not the recommended method. Shutting the cover on a clamshell style mobile phone has the same effect. 2.3.2 Numbers 0-9 These are generally used to enter numbers and letters though in some cases they are defined as function keys. The number ‘1’ key is also used to enter frequently used special characters e.g. ’@’, ’.’ etc. The number keys also act as short cut keys on some screens that will be displayed on the relevant screen. 2.3.3 Up, Down, Left, Right Keys (Arrow keys) These keys are used to move the cursor or to scroll through options/ menu items. These keys are usually clearly marked with arrowheads on the handset. 2.3.4 Clear Key (CLR) CLR key is usually a hard key (a labeled key on the phone pad). Used for deletion in text entry mode. CLR key may also be used to cancel action initiated by the user during “RemoMail is working” animation. CLR Key on each of the submenu items like Email will navigate back to RemoMail Main menu. 2.3.5 Back Key Back key is usually a soft key (definition on screen) indicated by the previous . This is used to navigate to the screen. On touch screen handsets this is available on the top left corner of the screen 3 6/25/2010 RemoMail User Guide 3.0 2.3.6 Select/OK Key This is useful on touch-screen phones. This m ay be a hard key (a labeled key on the phone pad) or a soft key (definition on screen). A hard key is usually located in the middle of the arrow keys and identified with unique color and/or symbol. 2.3.7 Asterisk (*) Key This is used to toggle between cases in text entry mode (on most handsets). The three cases used in text entry modes are: Lower case Title case Upper case 2.3.8 Pound (#) Key Used for spacing words in text entry mode. 2.3.9 Option icon Indicated by the . This displays additional menu options for user 2.3.10 Hide icon Indicated by the . Hides the additional menu options in the current view 4 6/25/2010 RemoMail User Guide 3.0 3. Application Setup 3.1 Setting up RemoMail on your mobile phone 1. In the BREW Catalog, find and launch RemoMail. At the Welcome screen, press Ok, to continue. 2. RemoMail will automatically be installed on the Phone 3. Next, you must enter the account credentials to create IMAP or POP email accounts. You will be prompted for the following account information: Username: Enter the user name of your POP/IMAP account Password: Enter the password for your POP/IMAP account Email address: Enter the email address of the POP/IMAP account that you wish to configure Figure 1 Clicking ‘Next’ will initiate the auto-discover feature with the server where RemoMail will attempt to retrieve the account settings automatically from a designated server. On success, your account will be configured and ready to use. In case the required account settings cannot be found, then you will prompted to enter all the required configuration information then you will be prompted to enter the incoming server address information before an attempt is made to login using the incoming server address failing which the user will be displayed with a message “Enter the correct details”. Note: Ensure that you provide the correct credentials when setting up your account. You can verify if the information you provided is correct, by logging into your web account and then checking under the Settings page. Ensure that you have enabled “POP/IMAP forwarding” under the server settings. On a successful login, you will be navigated to the PIN entry page where you will be prompted for a PIN. Enter a 4-digit PIN of your choice after which you will be navigated to the Home screen. The screenshots below indicate the settings for Security PIN. A 4-digit numeric PIN must be entered and then confirmed. You must then choose how often you wish to be prompted for the PIN from the following choices: 5 6/25/2010 RemoMail User Guide 3.0 Ask PIN every time: prompt each time RemoMail is launched Ask PIN once a day: prompt only once a day Don’t ask PIN: never prompt for a PIN Figure 2 3.2 Selecting from Providers List This option allows user to choose and configure an account for a specific email service. This option is available under ‘Options’ menu on the Configure Email screen as shown below. Figure 3 Choosing the Select provider option on the above screen displays a list of all the available email service providers as shown in the screens below 6 6/25/2010 RemoMail User Guide 3.0 Figure 4 Select a provider and proceed to enter all the required information for the account. You must enter all the required fields or else an alert is displayed indicating there are missing fields. Complete them to proceed further. Figure 5 If the account that you configured is the first account, then you will navigated to the PIN entry page, or else you will be directed to the Home page for that account. 7 6/25/2010 RemoMail User Guide 3.0 4. Device Security 4.1 PIN settings Once your account has been set up, you will be asked with the PIN settings to enter before connecting to the server and downloading the mails. This is to ensure that there is no unauthorized access to all your email accounts information or unauthorized use of your Phone, it is recommended that changing the PIN every 15days on your Phone. To do this, click on ‘Manage Accounts’ option on the Main Menu of the application, which will navigate you to the Accounts page. Click on options and select ‘Security’ which will open up the PIN settings screen. Enter a PIN of your choice and confirmation of the PIN. Enter the PIN again and if both entries match, then the PIN that you entered is saved on the Phone and will be used for subsequent access to the application. The navigation screens are shown below. Figure 6 User must enter the PIN in the specified format for access to the application. If the PIN is incorrectly entered for the 3 times and 3 times wrong password for default account then the application will initiate a local data wipe and proceeds to wipe off all Email information from the Phone. In case the application is left unused or idle for a 15min, then the application will automatically close and exit after the specified timeout period. 4.2 Poison Pill Poison Pill is a security feature that can be used to delete all private information stored on your phone like the email account information, contact information. This prevents unauthorized use of RemoMail. User can remotely issue a Poison Pill command that will issue a data wipe command to the application thereby wiping all the contact information as well as email information that is stored on the device. All you have to do is enter your phone number and click on ‘Send’ from the web page. To issue a Poison Pill, access your account at www.remoba.com. Note: See Appendix for details on how to issue a poison pill command from the web account 8 6/25/2010 RemoMail User Guide 3.0 5. Home Page The Home page views for POP and IMAP account are slightly different from each other. IMAP account Home screen carries some additional options that are not available for POP accounts. Below is a listing of the available options. Grid view of IMAP account The Home Page for the IMAP account provides you with the options to access 1. 2. 3. 4. 5. 6. 7. 8. 9. 10. 11. Inbox Drafts Outbox Search Server Folders Groups Quick Messages Manage Accounts Settings Sync Turn On/Off Help Figure 7 Grid view of POP account The Home Page for the POP3 account provides you with the following options 1. 2. 3. 4. 5. 6. 7. 8. 9. 10. Inbox Compose Drafts Outbox Groups Quick Messages Manage Accounts Settings Sync Turn On/Off Help Figure 8 9 6/25/2010 RemoMail User Guide 3.0 5.1 Inbox Clicking on the Inbox icon on the grid view allows you to navigate to your Inbox view that contains the email headers of the account on your handset. RemoMail will synchronize and store up to 50 latest emails for IMAP account and, for other POP accounts it is the most recent 10 mails that will be synchronized. The Reply and Mark to Delete/Restore options are displayed as buttons at the bottom of the page. Reply: to Reply to an incoming mail Mark to Delete: to mark the current mail for deletion Restore: this button is displayed when mail selected for Mark to Delete. This unmarks the current mail selected for deletion Clicking on the ‘Option’ button will bring up the following options menu: Reply all: send replies to all recipients of the received mail Forward: forward mail to recipients of your choice Compose: Compose a new mail Mark as Read/Unread: This option toggles based on the current status of the mail. The ’Mark as Read’ option will be displayed for an unread mail and the ‘Mark as unread’ option for Read mails. Email header: View the full header details of the incoming mail that contains the recipient email addresses, full subject line etc Purge: Deletes all the marked mails for deletion on Phone and on the server Main Menu: Navigates you back to the main menu of your account Refresh: Refresh the current view and display new email if any. . Figure 9 Clicking on the email header will open up the mail and display the mail body. 10 6/25/2010 RemoMail User Guide 3.0 Figure 10 Pressing the ‘Option’ button will bring up the following menu options: Send Email/Call: Allows you to call or send an email to the highlighted Phone number or email address. Reply all: to send replies to all recipients of the mail Forward: to forward a mail. This will open up the Compose mail screen where you have to enter the recipient addresses in the To, Cc and Bcc fields and the body content. Pressing Send will send the mail via SMTP server of the respective service provider. For other accounts, RemoMail sends emails using the default SMTP server. List attachments: On User selection the application fetches the Attachments for that mail. The user can first view a list of all attachments that are present in the mail. Selecting LSK will bring up the following options. Zoom in: This option allows the user to zoom into the attachment page currently being displayed. Supports up to 5x zooming capability Zoom Out: This option allow the user to zoom out of the attachment page currently being displayed. . Supports up to 5x zoom out capability Next page: This option allows the user to fetch the next page of the attachment. Previous page: This allows the user to view the previous page of the attachment. Go To Page: This option allows user to jump to a specific page of the attachment where the attachment spans several pages. This is particularly helpful if the user wishes to view only particular sections of the attachment. Read Text: This option allows the user to read the text content of the attachment page wherein the image and other graphic content on the page is removed while leaving the text content alone. 11 6/25/2010 RemoMail User Guide 3.0 Figure 11 The following options will be available only for IMAP accounts and visible only if the incoming mail is a Meeting Invite: Accept: Use this option to accept a Meeting Request Tentative: Use this option if your attendance is tentative or not sure Decline: Use this option to decline the meeting invitation. Reply All: Reply to all recipients in the incoming mail Forward: Forward mail to a destination email address Add to Contacts: This option allows you to save email addresses from incoming mails directly to the application PIM. This will save you the trouble of reentering mail ids that you may require later. Email Header: to view all details of the incoming mail like all email addresses in the ‘To’ and ‘Cc’ fields, time sent etc. , Figure 12 Compose mail: Clicking on this option will bring up the compose mail screen that allows you to compose a new mail and add recipient addresses to it before sending it. Pressing the ‘Option’ button will bring up the following options as shown in Figure below: 12 6/25/2010 RemoMail User Guide 3.0 Figure 13 Show Cc: Displays the Cc field that was not displayed in the original view. Allows you to add recipient addresses to the Cc field Show Bcc: Displays the Bcc field that was not displayed in the original view. Allows you to add recipient addresses to the Bcc field Contacts: Clicking on Contacts will bring up the contacts list from the Phone’s address book. You may then choose from the listed contacts to add to the To, Cc or the Bcc fields Groups: You can use the group option to send mail to all email addresses listed under a group. Clicking on Groups will display a list of available groups from which you can select and add. If no predefined groups are present, then ‘Empty’ will be displayed. Pressing the Back button from this screen will take you back to the previous screen. 5.2 Drafts The Drafts folder can be used to temporarily save the drafted mails that can be sent later. The current view displays the Drafts folder items and clicking the ‘Option’ button brings up the following items: Delete: Deletes the current mail from the Drafts folder Delete All: Deletes all mails from the Drafts folder. Choose a mail to open the mail in the edit mode. Pressing the ‘Option’ button will bring up the following options: Show Cc: Displays the Cc field that was not displayed in the original view. Allows you to add recipient addresses to the Cc field Show Bcc: Displays the Bcc field that was not displayed in the original view. Allows you to add recipient addresses to the Bcc field Contacts: Clicking on Contacts will bring up the contacts list from the Phone’s address book. You may then choose from the listed contacts to add to the To, Cc or the Bcc fields Groups: You can use the group option to send mail to all email addresses listed under a group. Clicking on Groups will display a list of available groups from which you can select and add. If no predefined groups are present, then ‘Empty’ will be displayed. Delete: Deletes the current mail from the Drafts folder 13 6/25/2010 RemoMail User Guide 3.0 Figure 14 5.3 Outbox Outbox contains the mails that were not sent successfully when performing a Send operation. You can edit the mails present in the Outbox. The initial views display a list of items in the Outbox and pressing the ‘Option’ button will bring up the following options: Delete: Deletes a particular mail from the Outbox Delete All: Deletes all mails from the Outbox. The following options are available for mails in the Outbox: Resend: Use this option to retry sending the mail. Choose a mail to open the mail in the edit mode. Pressing the ‘Option’ button will bring up the following options: Show Cc: Displays the Cc field that was not displayed in the original view. Allows you to add recipient addresses to the Cc field Show Bcc: Displays the Bcc field that was not displayed in the original view. Allows you to add recipient addresses to the Bcc field Contacts: Clicking on Contacts will bring up the contacts list from the Phone’s address book. You may then choose from the listed contacts to add to the To, Cc or the Bcc fields Groups: You can use the group option to send mail to all email addresses listed under a group. Clicking on Groups will display a list of available groups from which you can select and add. If no predefined groups are present, then ‘Empty’ will be displayed. Delete: Deletes the current mail from the Outbox folder Delete all: Deletes all mails in the Outbox Figure 15 14 6/25/2010 RemoMail User Guide 3.0 5.4 Search This feature is available as a grid item only for IMAP accounts. This enables you to search for particular mails in the INBOX or through all folders. You may enter your search criteria in the following manner: From: Specify the mail address of the sender Since Date: Specify the since date from which the mails have to be retrieved. Subject: Specify the search text. Search Inbox: Specify the search in inbox folder. Search all folders: Specify the search in all folders. Reset: This will clear the previously entered search parameters while allowing you to enter new search parameters. Figure 16 The matching search results will be displayed with an option to navigate to the Next/Previous pages. Below are the options for search results: Reply: Use this option to reply to the sender of the mail from the ‘Search Results page’ Reply All: Use this option to reply to all recipients Pressing the ‘Option’ button will bring up the following options: Forward: Use this option to forward the mail to the desired recipients. Home: This will navigate you to the Main Menu of the application. 5.5 Server Folders This option is available for IMAP accounts. Once user clicks on server folders, app fetches the folders list from server and displays to the user. By selecting the each folder, it fetches the subfolders along with the emails in that folder. RemoMail application is not storing folders list and mails with the server folders local to application. Once the user selects any folder to view, all the previous data is wiped off from the device. Get Mail: Gets the mails from that folder. Help: Shows the help for server folders. Reply: Use this option to reply to the sender of the mail from the ‘Server Folders page’ Reply All: Use this option to reply to all recipients. Forward: Use this option to forward the mail to the desired recipients. 15 6/25/2010 RemoMail User Guide 3.0 Figure 17 5.6 Groups Allow you to pre-configure and store email ids that you frequently use by grouping them under an Alias. This is particularly helpful during sending a mail, where you can quickly pick up and add one or more groups from the stored groups to the To, Cc and Bcc fields before sending the mail. To create a new group, click on ‘Add Group’, and then enter a name for the group. Proceed to add contacts (Maximum of 10 mail ids) from the Phone’s address book. Once done, the Groups page will display the list of available Groups. Selecting a group and Pressing the ‘Option’ button will bring up the following options: Add Member: Allows you to add a contact to the Group. Remove Member: Allows you to remove a contact from the Group. 16 6/25/2010 RemoMail User Guide 3.0 Figure 18 5.7 Quick Messages Up to 50 custom messages can be configured for Quick and Easy Replies. This will help you to quickly add messages from a predefined list without having to type in the message. Below options are displayed in default quick messages screen: New: Allows you to add a quick message. Edit: Allows you to edit a quick message from the available templates. Pressing the ‘Option’ button will bring up the following options: Delete: Allows you to delete a quick message from the available templates. Figure 19 17 6/25/2010 RemoMail User Guide 3.0 5.8 Manage Accounts Manage Accounts will show all the account details with Add, Edit buttons and delete option for the accounts. User can create, edit and delete the accounts. User can create maximum of 5 accounts with RemoMail application. Add Account: You may use Add button option to create an account. It shows the screen to configure the IMAP or POP account. User can enter account details and clicks next button. Figure 20 Clicking the ‘Option’ button will provide you the following options: 1. Sync Schedule 2. Security 3. Delete 4. Help The options are explained below: Sync Schedule: Allows you to select from the following Synchronization options: Direct Push: This will enable ‘Direct Push’ for the selected IMAP account. By enabling direct push you will be able to receive real time notifications of new Email data on your phone as soon as they arrive on the IMAP server. Choosing Direct Push will navigate you to the Schedule page that contains a list of your existing schedules along with an option ‘Add Schedule’ to add a new schedule Scheduled sync: You can set up the application for a scheduled synchronization. You may choose from frequencies of 15 min, 30 min, 1 hour, 2 hour or 4 hour intervals. You will then be navigated to the Start time – to choose the start time; End time – to choose the end time (say between 8 a.m. and 8 p.m. on the scheduled days). Then you will be navigated to select the Day of week, and the schedule will be set to the selected day of the week at the specified time. The application will automatically check for updates at the defined time and synchronize them to the phone. The navigation for setting up Direct Push is shown in the application screenshots below: 18 6/25/2010 RemoMail User Guide 3.0 Figure 21 Choosing Custom on the Sync Days page will allow you to enable synchronization on select days by providing you with an option to select the days from a list as shown below. The remaining setting options are as shown in the screenshots above. The screenshots below in Figure 22 indicate the Scheduled Sync options for RemoMail 19 6/25/2010 RemoMail User Guide 3.0 Figure 22 Security: The screenshots below indicate the settings for Security PIN. User should enter a PIN in the required format as prompted on the screen 20 6/25/2010 RemoMail User Guide 3.0 Figure 23 Delete: Allows you to delete the selected account information. This will remove all account information related to that account. Help: The Help section provides you with brief help topics to enable you to use the email client more efficiently. Figure 24 21 6/25/2010 RemoMail User Guide 3.0 5.9 Settings Settings menu options will show the following details. Settings: On choosing Settings option from IMAP account grid view will navigate you to the Settings Sub menu that contains the following 5 primary settings options that you can use to control the behavior of RemoMail on your Mobile Phone. 1. 2. 3. 4. 5. New mail alert a. Vibrate b. Audible Alert Alert Display [toggle ON/OFF] Alert Display time Attachment Server Email alert filters a. Email b. Domain Figure 25 The Menu and submenu items under settings are organized in the following manner: New Mail Alert: Allows you to set up alerts on new mail arrival. You may choose to alerted by Vibrate: Allows you to turn on the Phone’s vibrate alert for the selected event Audible Alert: Allows you to turn on the Phone’s ringer alert for the selected event. On phones that may not support a ringer tone, a beep will be used instead. Alert Display [ON/OFF]: Allows you to toggle the Alert Display. Alert Display Time: This option allows you configure the alert display time settings. Whenever an alert is popped up on a new mail (e.g. when Direct Push is ON), some form of user action is expected (user must dismiss the alert) to ensure that the alert has been noticed. But if there is no user feedback, then the alerts will continue till the time specified by the ‘Alert Display Time’. For e.g. An alert is displayed on a new mail arrival and the Alert Display time is set to 15 minutes which means that this alert will be alive for 15 minutes of the initial notification after which it will automatically be dismissed. Figure 26 22 6/25/2010 RemoMail User Guide 3.0 Attachment Server [available for IMAP accounts only]: RemoMail provides you with an ability to view attachments of some selected types. The client application connects to a server that converts the attachments to image formats that can be viewed on your Phone. To be able to view attachments, you must enter the server name and save it, otherwise attachments are fetched from default server. Email Alert Filters: This option allows you to set up alerts on new mail from a specific email address (es) or from a specific domain. User can enter the specified email address or domain names and save them. If no domain name or email address is entered, then user will be notified on all new email arrival. Figure 27 23 6/25/2010 RemoMail User Guide 3.0 5.10 Turn Sync On/Off This option helps to turn the sync on/off from main menu itself. You may choose to turn off direct push, Schedule sync. User will be prompted with a confirmation message when this option selected for off. Figure 28 24 6/25/2010 RemoMail User Guide 3.0 5.11 Help The Help section provides you with brief usage instructions for RemoMail. You must refer this User Manual for detailed instructions on the features and functions of RemoMail. Figure 29 25 6/25/2010 RemoMail User Guide 3.0 6. Appendix 6.1 Poison Pill Poison Pill is a security feature that can be used to delete all private information stored on your phone - email account information and contact information. This prevents unauthorized use of RemoMail. User can remotely issue a Poison Pill command that will issue a data wipe command to the application thereby wiping all the contact information as well as email information that is stored on the device. All you have to do is enter your phone number and click on ‘Send’ from the web page. To issue a Poison Pill, access your account at www.remoba.com. Poison Pill Registration: Registration of the client with the server for the Poison pill service is performed at the time of initial account configuration. When the PIN is entered at the first time, the registration information containing the Phone number, PIN, Country and Operator name is automatically sent to the server. On successful registration, the application proceeds with the Inbox sync. If the registration fails for some reason, the application will reattempt to register at the next launch till it is successful. If Registration fails even after 3 attempts, then the user is displayed with a warning message and prompted for the correct registration information. Issuing Poison Pill from Web page: The screenshot below indicates the steps to be followed for issuing the poison pill command from the web account. You must first log in to your web account before issuing the poison pill command. Select Login as shown below Figure A-1 26 6/25/2010 RemoMail User Guide 3.0 Click on the Issue Remote Data Wipe link as shown below: Figure A-2 Enter your Phone Number and the 4-digit PIN, select RemoMail for Product and click on Login. Note: Use the same 4-digit PIN that you used on the Mobile at the time of configuring a new account. Figure A-3 27 6/25/2010 RemoMail User Guide 3.0 After you enter the required information and on a successful login, you will be navigated to the screen indicated below: Figure A-4 Choose the Product as RemoMail and then hit the send which will send a Data wipe command to the application thereby deleting all account, email and contact information on the phone. 28 6/25/2010