1
USER MANUAL SMART Media Player (GX-SM530CF) The purpose of Safety Concerns is to ensure users’ safety and to prevent property losses. Please read this document carefully for proper use. © 2013 SAMSUNG ELECTRONICS Co., Ltd. All rights reserved. Part No: GL68-00568A(Ed.01) Notice: This product is for one way cable only, not interactive cable. Dispose unwanted electronics through an approved recycler. To find the nearest recycling location, go to our website: www.samsung.com/recyclingdirect or call, (877) 278 - 0799 Contact SAMSUNG USA If you have any questions or comments relating to Samsung products, please contact the SAMSUNG customer care center. CALL: 1-800-SAMSUNG (726-7864) OR VISIT US ONLINE AT: http://www.samsung.com safety Information Warning IMPORTANT NOTE TO REDUCE THE RISK OF ELECTRIC SHOCK, DO NOT REMOVE THE COVER (OR BACK). NO USER-SERVICEABLE PARTS ARE INSIDE. REFER SERVICING TO QUALIFIED SERVICE PERSONNEL. If the power plug on this unit does not fit the wall outlets in your house, have the wall outlets replaced with outlets that fit by a licensed electrician. If the power cord is not long enough, obtain a suitable, safety-approved extension cord. If you have questions about the power cord or plug, or need additional help, consult your dealer for assistance. To turn off this unit completely, you must disconnect it from the wall outlet. Consequently, the unit's power plug must be readily accessible at all times. This product is manufactured under license in accordance with certain intellectual property rights of certain third parties. CAUTION RISK OF ELECTRIC SHOCK DO NOT OPEN This symbol indicates "dangerous voltage" inside the product that presents a risk of electric shock or personal injury. CAUTION: TO REDUCE THE RISK OF ELECTRIC SHOCK, DO NOT REMOVE COVER (OR BACK) NO USER SERVICEABLE PARTS INSIDE. REFER SERVICING TO QUALIFIED SERVICE PERSONNEL. This symbol indicates important instructions accompanying the product. Do not install this equipment in a confined space such as a bookcase or similar unit. WARNING To prevent damage which may result in fire or electric shock hazard, do not expose this appliance to rain or moisture. CAUTION USE OF CONTROLS OR ADJUSTMENTS OR PERFORMANCE OF PROCEDURES OTHER THAN THOSE SPECIFIED HEREIN MAY RESULT IN HAZARDOUS RADIATION EXPOSURE. DO NOT OPEN COVERS AND DO NsOT REPAIR YOURSELF. REFER SERVICING TO QUALIFIED PERSONNEL. This product satisfies CE regulations when shielded cables and connectors are used to connect the unit to other equipment. To prevent electromagnetic interference with electric appliances, such as radios and televisions, use shielded cables and connectors for connections. FCC NOTES (for U.S.A) This equipment has been tested and found to comply with the limits for a Class B digital device, pursuant to Part 15 of the FCC rules. These limits are designed to provide reasonable protection against harmful interference in a residential installation. This equipment generates, uses and can radiate radio frequency energy and, if not installed and used in accordance with the instructions, may cause harmful interference to radio or television reception, which can be determined by turning the equipment off and on. If interference is present, the user is encouraged to try to correct the interference by one or more of the following measures: • Reorient or relocate the receiving antenna. • Increase the separation between the equipment and receiver. • Connect this equipment into an outlet on a circuit different from that to which the receiver is connected. • Consult the dealer or an experienced radio/TV technician for help. • This class B digital product meets all requirements of the Canadian Interference - Causing Equipment Regulations. e safety Information FCC NOTES (for U.S.A) Precautions Important Safety Instructions Read these operating instructions carefully before using the unit. Follow all the safety instructions listed below. Keep these operating instructions handy for future reference. Read these instructions. Keep these instructions. Heed all warnings. Follow all instructions. Do not use this apparatus near water. Clean only with a dry cloth. Do not block any ventilation openings. Install in accordance with the manufacturer’s instructions. 8. Do not install near any heat sources such as radiators, heat registers, stoves, or other apparatus (including AV receivers) that produce heat. 9. Do not defeat the safety purpose of the polarized or grounding-type plug. A polarized plug has two blades with one wider than the other. A grounding type plug has two blades and a third grounding prong. The wide blade or the third prong are provided for your safety. If the provided plug does not fit into your outlet, consult an electrician for replacement of the obsolete outlet. 10. Protect the power cord from being walked on or pinched particularly at plugs, convenience receptacles, and the point where it exits the apparatus. 11. Only use attachments/accessories specified by the manufacturer. 12. Use only with the cart, stand, tripod, bracket, or table specified by the manufacturer, or sold with the apparatus. When a cart is used, use caution when moving the cart/apparatus combination to avoid injury from tip-over. 13. Unplug this apparatus during lightning storms or when unused for long periods of time. 1. 2. 3. 4. 5. 6. 7. 14. Refer all servicing to qualified service personnel. Servicing is required when the apparatus has been damaged in any way, such as when the powersupply cord or plug is damaged, liquid has been spilled or objects have fallen into the apparatus, the apparatus has been exposed to rain or moisture, does not operate normally, or has been dropped. Handling Cautions WARNING • If you position this product near a wireless device, noise may appear on the TV you have connected the unit to when the TV is on. • Never remove the top cover of this product. There are no user-serviceable parts inside it. • Make sure all electrical connections are properly made. • Connect all equipment to the unit first, and then plug in their power cords. • Disconnect the Smart Media Player’s power plug from the wall outlet before you disconnect any equipment from the product’s rear panel. • Never push anything into the holes, slots or other openings in the case. • If the supplied power plug does not fit your wall outlets DO NOT plug it in. Have the wall outlets replaced with appropriate wall outlets by a qualified electrician. • To turn off this product completely, you must disconnect it from the wall outlet. Consequently, the unit's power plug must be readily accessible at all times. safety Information Handling Cautions CAUTION • Do not move the Smart Media Player when it is on. • Do not use or store the Smart Media Player in hot, cold, damp or dusty places. • Do not block the ventilation holes of the Smart Media Player. Leave a space of at least 2 inches (5cm) around all sides. • Never place the Smart Media Player on soft furnishings or carpets. • Do not put anything on the Smart Media Player which might spill liquid into it or place it in an environment where it may be subject to moisture or rain. • Do not place the Smart Media Player on top of other powered electrical equipment such as an amplifier or DVD player. • Do not operate in an enclosed space such as a Hi-Fi cabinet. • Do not allow the power cable or DC wire from the power supply to become trapped under any object, crushed or jammed in a cabinet door. • Do not clean with spray polish. • Only dust with a dry cloth. • Do not place the Smart Media Player in front of a heat source such as a radiator or fire. Copyright © 2013 SAMSUNG ELECTRONICS AMERICA All rights reserved. No part of this user’s manual may be reproduced or copied without the prior written permission of SAMSUNG ELECTRONICS AMERICA. Contents Getting Started . . . . . . . . . . . . . . . . . . . . . . . . 06 Media File Format Compatibility . . . . . . . . . . . . . . . . . . . . 06 Accessories . . . . . . . . . . . . . . . . . . . . . . . . . . . . . . . . . . . . . 11 Front Panel AND Rear Panel . . . . . . . . . . . . . . . . . . . . . . . . 11 Remote Control . . . . . . . . . . . . . . . . . . . . . . . . . . . . . . . . . . 12 Connections. . . . . . . . . . . . . . . . . . . . . . . . . . . 15 Installing a CableCARD . . . . . . . . . . . . . . . . . . . . . . . . . . . . 15 Tuning Adapter . . . . . . . . . . . . . . . . . . . . . . . . . . . . . . . . . . 15 Connecting to a TV . . . . . . . . . . . . . . . . . . . . . . . . . . . . . . . 16 Connecting to an Audio System . . . . . . . . . . . . . . . . . . . . . 17 Connecting to a Network Router . . . . . . . . . . . . . . . . . . . . 18 Connecting the Power . . . . . . . . . . . . . . . . . . . . . . . . . . . . 20 Settings . . . . . . . . . . . . . . . . . . . . . . . . . . . . . . 21 The Setup Procedure . . . . . . . . . . . . . . . . . . . . . . . . . . . . . 21 The Home Screen . . . . . . . . . . . . . . . . . . . . . . . . . . . . . . . . 25 Accessing the Settings Screen . . . . . . . . . . . . . . . . . . . . . . 26 Display . . . . . . . . . . . . . . . . . . . . . . . . . . . . . . . . . . . . . . . . . 27 Audio . . . . . . . . . . . . . . . . . . . . . . . . . . . . . . . . . . . . . . . . . . 31 Broadcasting . . . . . . . . . . . . . . . . . . . . . . . . . . . . . . . . . . . . 33 Network . . . . . . . . . . . . . . . . . . . . . . . . . . . . . . . . . . . . . . . . 37 Smart Features . . . . . . . . . . . . . . . . . . . . . . . . . . . . . . . . . . 44 System . . . . . . . . . . . . . . . . . . . . . . . . . . . . . . . . . . . . . . . . . 45 Support . . . . . . . . . . . . . . . . . . . . . . . . . . . . . . . . . . . . . . . . 50 DTV Functions . . . . . . . . . . . . . . . . . . . . . . . . . 54 Watching TV Channels . . . . . . . . . . . . . . . . . . . . . . . . . . . . 54 Editing Channels . . . . . . . . . . . . . . . . . . . . . . . . . . . . . . . . . 55 Viewing the Guide Screen . . . . . . . . . . . . . . . . . . . . . . . . . 61 Media Play. . . . . . . . . . . . . . . . . . . . . . . . . . . . 62 The Samsung Link Screen . . . . . . . . . . . . . . . . . . . . . . . . . . 62 Playing Files on a USB Device . . . . . . . . . . . . . . . . . . . . . . . 62 Using the Samsung Link Network Function . . . . . . . . . . . 64 Controlling Video Playback . . . . . . . . . . . . . . . . . . . . . . . . 66 Controlling Music Playback . . . . . . . . . . . . . . . . . . . . . . . . 69 Playing Photo Contents . . . . . . . . . . . . . . . . . . . . . . . . . . . 72 Network Services. . . . . . . . . . . . . . . . . . . . . . . 74 Logging In to Your Samsung Account . . . . . . . . . . . . . . . . 74 Before Using Apps . . . . . . . . . . . . . . . . . . . . . . . . . . . . . . . . 75 Using Apps . . . . . . . . . . . . . . . . . . . . . . . . . . . . . . . . . . . . . . 76 Screen Mirroring . . . . . . . . . . . . . . . . . . . . . . . . . . . . . . . . . 84 Using the Web Browser . . . . . . . . . . . . . . . . . . . . . . . . . . . 85 Linking Your Internet Service Accounts to the Smart Media Player . . . . . . . . . . . . . . . . . . . . . . . . . . . 90 Appendix. . . . . . . . . . . . . . . . . . . . . . . . . . . . . 91 Additional Information . . . . . . . . . . . . . . . . . . . . . . . . . . . . 91 Troubleshooting . . . . . . . . . . . . . . . . . . . . . . . . . . . . . . . . . 92 Specifications . . . . . . . . . . . . . . . . . . . . . . . . . . . . . . . . . . . 94 Network Service Disclaimer . . . . . . . . . . . . . . . . . . . . . . . . 95 Licence . . . . . . . . . . . . . . . . . . . . . . . . . . . . . . . . . . . . . . . . . 95 Samsung Brand Products. . . . . . . . . . . . . . . . . 98 LIMITED WARRANTY TO ORIGINAL PURCHASER . . . . . . . . . . . . . . . . . . . . . . . . 98 Getting Started The GX-SM530CF is an Hybrid Type digital HD Smart Media Player that supports MSO Cable TV and OTT Service, Multi-Media File Playback, Samsung Apps, and Samsung Link. Media File Format Compatibility Contents your product can play Contents Media Details VIDEO / MUSIC / PHOTO USB Video, music and photos stored in USB drive. * For more information on the file format, refer to pages 7~10. 06 Getting Started Media File Format Compatibility Supported Formats Video File Support • Limitations -- Normal playback is not guaranteed if the file’s container information is wrong or the file itself is corrupted. -- Files having a higher Bit rate/frame rate than indicated in the table on page 8 may stutter when played back. -- The Seek (Jump) function is not available if the file’s index table is damaged. -- When you playback a file remotely through a network connection, video playback may stutter depending on the network speed. -- Some USB/Digital camera devices may not be compatible with the product. • Video decoder -- Supports up to H.264 Level 4.1. (Does not support FMO/ASO/RS) -- Does not support VC1/AP/L4. -- CODECs except for WMVv7, v8, MSMPEG4 v3, MVC, VP6 -- Below 1280 x 720 : 60 frames max. -- Above 1280 x 720 : 30 frames max. -- Does not support GMC 2 or higher. -- Supports SVAF (Top/Bottom, Side by Side). -- Supports MVC (Frame Packing). • Audio decoder -- Supports WMA 10 PRO (Up to 5.1). -- Does not support WMA lossless audio. -- Supports ADPCM IMA, MS. -- Does not support ADPCM (A-Law, μ-Law). -- Does not support QCELP/AMR NB/WB. -- Supports vorbis (Up to 2ch). -- Supports Dolby Digital, Dolby Digital Plus (2ch). 07 Getting Started Media File Format Compatibility • Supported DivX subtitle file formats -- *.ttxt, *.smi, *.srt, *.sub, *.txt \\ Some DivX, MKV and MP4 format files may not play, depending on their video resolution and frame rate. File Extension Container *.avi *.mkv *.asf *.wmv *.mp4 *.3gp *.vro *.mpg *.mpeg *.ts *.tp *.trp *.mov *.flv *.vob *.svi *.m2ts *.mts *.divx AVI MKV ASF MP4 3GP MOV FLV VRO VOB PS TS SVAF *.webm WebM 08 Video Codec Resolution Frame rate (fps) Bit rate (Mbps) Audio Codec DivX 3.11 / 4 / 5 / 6 MPEG4 SP/ASP H.264 BP/MP/HP Motion JPEG Microsoft MPEG-4 v3 1920x1080 (WMV v7, v8, MSMPEG4 v3 : 1280x720) 6~30 30 Window Media Video v7, v8, v9 MPEG2 Dolby Digital LPCM ADPCM(IMA, MS) AAC HE-AAC WMA Dolby Digital Plus MPEG(MP3) MPEG1 VP6 MVC VP8 4 640x480 1920x1080 24/25/30 60 6~30 20 Vorbis Getting Started Media File Format Compatibility Supported Subtitle File Formats Name File Extension Name File Extension MPEG-4 Timed text .ttxt Xsub AVI SAMI .smi SubStation Alpha MKV SubRip .srt Advanced SubStation Alpha MKV SubViewer .sub SubRip MKV Micro DVD .sub or.txt MPEG-4 Timed text MP4 SubStation Alpha .ssa Advanced SubStation Alpha .ass Powerdivx .psb External Internal Music File Support File Extension Type Codec Support Range *.mp3 MPEG MPEG1 Audio Layer 3 - File Extension Type Codec Support Range *.wma WMA WMA Supports WMA 10 Pro (Up to 5.1). Does not support WMA lossless audio. Supports up to M2 profile. Does not support LBR mode. Supports up to 2ch *.mid *.midi midi midi type 0 and type 1 - *.ape ape ape *.m4a *.mpa *.aac MPEG4 AAC - *.flac FLAC FLAC Supports up to 2ch *.ogg OGG Vorbis *.wav wav wav 09 Getting Started Media File Format Compatibility Picture File Support • Certain USB HDD Devices, multi-card readers and thumb drives may not be compatible with this product. File Extension Type Resolution *.jpg *.jpeg JPEG 15360x8640 4096x4096 *.png PNG *.bmp BMP 4096x4096 *.mpo MPO 15360x8640 Notes on the USB connection • Your product supports USB storage media, MP3 products, digital cameras, and USB card readers. • If some USB devices require excessive power, they may be limited by the circuit safety device. • If playback from a USB HDD is unstable, provide additional power by plugging the HDD into a wall socket. If the problem continues, contact the USB HDD manufacturer. • During the playback or copying, do not disconnect a USB device. • SAMSUNG is not responsible for any data file damage or data loss. • Your product does not support NTFS file compression, NTFS sparse file, or NTFS file encryption. • You can repair or format a USB device on your Desktop PC. (MS-Windows OS only) • Some USB/digital camera devices may not be compatible with the product. • Your product supports the FAT16, FAT32, and NTFS files systems (read only). • Connect USB devices directly to the product’s USB port. Connecting through a USB cable may cause compatibility problems. • Inserting more than one memory device into a multi-card reader may cause the reader to operate improperly. • The product supports the PTP protocol. • Do not disconnect a USB device during a "loading" process. • The bigger the image resolution, the longer the image takes to display. • This product cannot play MP3 files with DRM (Digital Rights Management) downloaded from commercial sites. • The USB port on your product does not support videos with frame rates over 30 fps. • Your product only supports USB Mass Storage Class (MSC) devices such as thumb drives, flash card readers and USB HDD. (HUB is not supported.) 10 R Getting Started Accessories Accessories Check for the supplied accessories below. Remote Control Batteries for Remote Control (AAA Size) Power Adapter User Manual Quick Start Guide \\ You can obtain cable accessories that are not supplied from your local Samsung dealer. Front Panel AND Rear Panel PWR N/W POWER LED POWER USB 0.5A CABLE IN REMOTE CONTROL SENSOR NETWORK LED CableCARDTM SLOT HDMI OUT OPTICAL OUT \\ Power LED : Glows blue when the Smart Media Player is on. \\ Network LED : Glows when the network connection is on and working correctly. Blinks if the network connection is faulty. LAN DC POWER USB 0.5A 11 Getting Started Remote Control Remote Control Tour of the Remote Control Turn the product on and off. Turn the TV on and off. Press numeric buttons to operate options or to access channels directly. Tune to the previously viewed channel. Used to toggle between normal & muted audio. Volume adjustment. Press to move to the home screen. Displays the Live TV screen. Press to search contents. Displays the EPG (Electronic Program Guide.) Press to use Tools menu. Press to display channel information or to display playback information while playing content from a USB device. Use to select menu items and change menu value./ Press to skip backwards or forwards. Return to the previous menu. Displays the Movies & TV Show Screen. Displays the Screen Mirroring screen. Press to search backwards. Press this to play a media file. 12 Press to change channels. Press to exit the menu. These buttons are used both for menus on the Smart Media Player and also several functions. Press to stop playback. Press to enable or disable captions. Press to search forwards. Press to pause a media file. Getting Started Remote Control Installing batteries \\ If the remote does not operate properly: -- Check the polarity +/– of the batteries. -- Check if the batteries are drained. -- Check if the remote sensor is blocked by obstacles. -- Check if there is any fluorescent lighting nearby. \\ Dispose of batteries according to local environmental regulations. Do not put them in the household trash. Setting the Remote Control to Operate Your TV • To determine whether your television is compatible, follow the instructions below. 1. Turn your television on. 2. Point the remote control towards the television. 3. Press the TV button to set the remote to TV mode. 4. Press and hold the TV button, and then enter the two-figure code in the table to the right that corresponds to the brand of your television by pressing the appropriate number buttons. If your television is compatible with the remote control, it will turn off. The remote is now programed to operate the TV. \\ If several codes are listed for your television brand, try each one in turn until you find one that works. \\ If you replace the remote control’s batteries, you must set the brand code again. You can control the TV function below with this remote control. Button Function TV Use to turn the television on and off. \\ The function above will not necessarily work on all televisions. If you encounter problems, use the TV remote control. 13 Getting Started Remote Control TV Control Codes Brand Code Brand SAMSUNG TV+01, +02, +03, +04, +05, +06, +07, +08, +09 FORMENTI TV+57 NOBLEX TV+66 SHARP FUJITSU TV+84 NOKIA TV+74 SIEMENS TV+71 GRADIENTE TV+70 NORDMENDE SINGER TV+57 TV+57 AIWA TV+82 ANAM TV+10, +11, +12, +13, +14, +15, +16, +17, +18 BANG & OLUFSEN TV+57 BLAUPUNKT BRANDT TV+71 TV+73 BRIONVEGA TV+57 CGE TV+52 CONTINENTAL EDISON DAEWOO TV+75 TV+19, +20, +23, +24, +25, +26, +27, +28, +29, +30, +31, +32, +33, +34 EMERSON TV+64 FERGUSON TV+73 FINLUX 14 TV+06, +49, +57 GRUNDIG HITACHI IMPERIAL Code TV+49, +52, +71 TV+60, +72, +73, +75 Brand Code TV+72, +73, +75 PANASONIC TV+53, +54, +74, +75 SINUDYNE PHILIPS TV+06, +55, +56, +57 SONY TV+52 PHONOLA TV+06, +56, +57 JVC TV+61, +79 PIONEER TV+58, +59, +73, +74 LG TV+06, +19, +20, +21, +22, +78 RADIOLA TV+06, +56 LOEWE TV+06, +69 RADIOMARELLI LOEWE OPTA TV+06, +57 RCA TV+45, +46 MAGNAVOX TV+40 REX TV+74 METZ TV+57 SABA TV+57, +72, +73, +74, +75 MITSUBISHI MIVAR TV+06, +48, +62, +65 TV+52, +77 Brand TV+57 SALORA TV+74 SANYO TV+41, +42, +43, +44, +48 NEC TV+83 SCHNEIDER TV+06 NEWSAN TV+68 SELECO TV+74 TELEAVA TELEFUNKEN THOMSON THOMSON ASIA TOSHIBA Code TV+36, +37, +38, +39, +48 TV+35, +48 TV+73 TV+67, +73, +75, +76 TV+72, +73, +75 TV+80, +81 TV+47, +48, +49, +50, +51, +52 WEGA TV+57 YOKO TV+06 ZENITH TV+63 Connections Installing a CableCARD Before inserting the CableCARD supplied by your Cable Service Provider, write down the CableCARD Serial Number (SN) and “MAC” address. When you contact your Cable Service provider to activate your cable service, they will ask for the CableCARD Serial number and possibly the MAC Address. To prevent the possibility of electrical damage, insert the CableCARD before you connect the power cord to the product. POWER Tuning Adapter To receive all of the digital channels your Cable Service Provider has to offer, you may need to install a Switched Digital Video Tuning Adapter, which will be supplied by your Cable Service Provider. Switched Digital Video (SDV) is an advanced technology that allows Cable Service Providers to better utilize existing cable capacity. The Tuning adapter must be installed correctly and connected to your Smart Media Player to receive channels delivered using SDV Technology. If your Cable Service Provider does not utilize Switched Digital Video Technology, a Tuning Adapter is not required. Refer to the Tuning Adapter manual provided by your Cable Service provider. Tuning Adapter POWER 15 Connections Connecting to a TV Connecting to a TV TV POWER Audio Video POWER 1. Connect the product to your TV using an HDMI cable. 2. Turn on the product and TV. 3. Press the input selector on your TV remote control until the signal from the product appears on the TV screen. \\ Do not connect the power cord until you have made all the other connections. \\ When you change connections, turn off all devices before you start. \\ If you use an HDMI-to-DVI cable to connect to your display device, you must also connect the Digital Audio Out on the product to an audio system to hear audio. \\ An HDMI cable outputs digital video/audio, so you don’t need to connect an audio cable. \\ Depending on your TV, certain HDMI output resolutions may not work. Please refer to the user manual of your TV. \\ When you connect the product to your TV for the first time using an HDMI cable or connect it to a new TV using an HDMI cable, it will automatically set the HDMI output resolution to the highest supported by the TV. \\ A long HDMI cable may cause screen noise. If this occurs, set Deep Color to Off in the menu. \\ If the product is connected to your TV in the HDMI 720p, 1080i, or 1080p output mode, you must use a High speed (category 2) HDMI cable. 16 \\ HDMI outputs only a pure digital signal to the TV. If your TV does not support HDCP (High-bandwidth Digital Content Protection), random noise appears on the screen. Connections Connecting to an Audio System Connecting to an Audio System HIMI OUT POWER Audio Method 2 HIMI IN HIMI IN TV POWER Method 1 Audio / Video 1. Connect the product to an audio system using one of the two methods illustrated above. 2. Turn on the product, audio system, and TV. -- Do not connect the power cord until you have made all the other connections. -- When you change the connections, turn off all devices before you start. 3. Press the input selectors of the connected audio system and TV until the video signal from the product appears on your TV and you hear the audio signal through your audio system. Method 1) Connecting to an HDMI supported AV receiver • Use an HDMI cable (not included) Method 2) Connecting to an AV receiver with Optical input • Use an Optical Cable (not included) • You will hear sound only through the front two speakers with Digital Output set to PCM. \\ Please refer to page 31 for detailed information. 17 Connections Connecting to a Network Router Connecting to a Network Router You can connect your product to your network router using one of the methods illustrated on page 18 or 19. Wired Network Broadband modem (with integrated router) POWER Broadband service Or Router Broadband modem Broadband service \\ Internet access to Samsung’s software update server may not be allowed, depending on the router you use or your ISP’s policy. For more information, contact your ISP (Internet Service Provider). \\ DSL users, please use a router to make a network connection. \\ To use the Samsung Link function with your PC, you must connect your PC to your network. 18 Connections Connecting to a Network Router Wireless Network POWER Wireless Router Broadband service \\ If the wireless router supports DHCP, your product can use a DHCP or static IP address to connect to the wireless network. \\ Set your wireless router to Infrastructure mode. Ad-hoc mode is not supported. \\ The product supports only the following wireless security key protocols: -- WEP (OPEN/SHARED), WPA-PSK (TKIP/AES), WPA2-PSK (TKIP/AES) \\ Select a channel on the wireless router that is not currently being used. If the channel set for the wireless router is currently being used by another device nearby, it will result in interference and communication failure. \\ In compliance with the newest Wi-Fi certification specifications, this product does not support WEP, TKIP, or TKIP-AES (WPS2 Mixed) security encryption in networks running in the 802.11n mode. \\ If your router supports WPS (Wi-Fi Protected Setup), you can connect to the network via PBC (Push Button Configuration) or PIN (Personal Identification Number). WPS will automatically configure the SSID and WPA key in either mode. \\ Wireless LAN, by its nature, may cause interference, depending on the operating conditions (router performance, distance, obstacles, interference by other radio devices, etc). \\ To use the Samsung Link function with your PC, you must connect your PC to your network. \\ Web Authentication based Internet services, such as Hotel on Office networks, are not supported during the Initial Installation. 19 Connections Connecting the Power Connecting the Power After connecting your Smart Media Player to your TV and audio system, connect the included power adaptor to the Smart Media Player, and then plug the power adaptor into a wall socket. When you plug in the power adapter for the first time, the Smart Media Player will turn on automatically and display the Initial Settings screen. To turn off the product, press the Power button on your remote control. To turn it on, press the Power button again. If you turn off the product by pressing the Power button on your remote control, the product can be in one of two states: • Active Standby mode: If the Quick Start option is set to On. The POWER LED is turned off, but the NETWORK LED will flash on and off, depending on the network status. • Deep Sleep mode: If the Quick Start option is set to Off. Both the POWER LED and the NETWORK LED are turned off. See page 45 for more information about the Quick Start option. (The setting you choose impacts the power consumption of the product when it is off.) POWER Power Adapter \\ If power is disconnected from the Smart Media Player while it is operating normally, the product will turn on automatically when power is reconnected. \\ If the Smart Media Player has been turned off or left unplugged for more than 1 week, the device may lose authorization for cable TV services. To restore cable TV services, please contact your cable service provider. 20 T t Settings The Setup Procedure • The Home screen will not appear if you do not configure the initial settings. • The OSD (On Screen Display) of this product may change after you upgrade the software version. • The access steps may differ depending on the menu you selected. Turn on your TV after connecting the Smart Media Player. When you connect the Smart Media Player to a TV for the first time, the product turns on automatically and the Initial Settings screen appears. See the Initial Settings Procedure below. \\ When you connect the power to the Smart Media Player for the first time, the product turns on automatically. This is normal operation. \\ PIN : The default security PIN is 0000. You can enter the PIN using the number buttons on your remote. To change the PIN, go to System Security Change PIN in the system menu. Run the Initial Settings procedure 1. Plug in the Smart Media Player, and then turn on your TV. When you connect the Smart Media Player to a TV for the first time, the product turns on automatically and the Initial Settings language screen appears. If the Language screen does not appear, change the TV’s source setting to the source you’ve connected the product to (for example, HDMI 1, HDMI 2). For instructions, see your TV’s user’s manual. 2. Use the ▲▼ buttons to choose a language, and then press the v button. 3. Press the v button. Use the ▲▼ buttons to set Daylight Savings on or off, and then press the v button. Setting it on sets the time one hour ahead. Press the ▼ button and then press the v button. Select your Time Zone and then press the v button. Press the ▶ button, and then press the v button. 21 Settings The Setup Procedure 4. On the Essential Details screen, Select Network type, and then press the v button. Select your Network type from the list, and then press the v button. If you have no network, select No Network. \\ If you have connected a cable to the product’s LAN port, Network type defaults to Wired. 5. If you selected Wired, go to Step 6. If you selected Wireless, go to Step 10. If you selected No Network, go to Step 16. \\ To use a CableCARD, you must connect your product to your network and the Internet. 6. Press the ▶ button, and then press the v button. The Network Checking screen appears and the Smart Media Player automatically verifies your wired network. 7. When verification is complete, the Network Setting screen appears displaying a confirmation message. 8. Select Close, and then press the v button. The Connect RF Cable screen appears. 22 9. If you have not installed a CableCARD and not connected a Tuning Adaptor, go to Step 16. If you have installed a CableCARD, but have not connected a Tuning Adaptor, go to Step 18. If you have installed a CableCARD and connected a Tuning Adapter, go to Step 19. 10. If you selected Wireless, the Smart Media Player automatically searches for and then lists all the wireless networks within range. Use the ▲▼ buttons to select your wireless network from the list, and then press the v button. The keyboard appears. 11. If your network has a security key, use the keyboard to enter the key. Press the number buttons on your remote to enter numbers. Use the keyboard to enter letters. If you want to display the key as you enter it, select Show Password on the right. When done, use the ▲▼◀▶ buttons to select Done, and then press the v button. If you have no key, go to Step 13. 12. The Network Checking screen appears and the Smart Media Player automatically verifies your wireless network. 13. When verification is complete, the Network Setting screen appears displaying a confirmation message. Settings The Setup Procedure 14. Select Close, and then press the v button. The Connect RF Cable screen appears. 15. If you have not installed a CableCARD and not connected a Tuning Adaptor, go to Step 16. If you have installed a CableCARD, but have not connected a Tuning Adaptor, go to Step 18. If you have installed a CableCARD and connected a Tuning Adapter, go to Step 19. 16. If you have not connected the RF cable from your cable outlet to your product, do it now. Once you have connected the cable, press the ▶ button, and then press the v button. If you have already connected the RF cable, press the ▶ button, and then press the v button. 18. If your cable company provided a Tuning Adapter (SDV), and you have not connected it, connect it to the Smart Media Player now. When done, press the ▶ button, and then press the v button. The Zip Code screen appears. For additional information about the the Tuning Adapter, refer to the users manual provided by your Cable Service Provider. \\ Do not connect the USB cable to the Tuning Adapter and the Smart Media Player until after the Tuning Adapter LED light is solid. \\ The RF cable connects your product to the video transmissions from your cable company. If you don’t use an RF cable, select “I don’t use an RF cable” 19. Enter your Zip Code into the Zip Code field using the number at the bottom of the screen, and then go to Step 26. Note that without an buttons on the remote. If you RF cable connection, you won’t be able to watch TV broadcasts. make a mistake, press the ◀ If you have no network or have not connected the product to your network, button to delete the mistake. go to Step 23. When done, press the v button. 17. If your cable company provided 20. In the list that appears, select your a CableCARD, insert the card into cable provider, and then press the slot on the back of the Smart the v button. The Confirmation Media Player. The “CableCARD window appears. is inserted” message appears. 21. Press the v button to confirm Press the v button, and then the information is correct. go to Step 18. If your CableCARD is already installed, press the v button, and then go to Step 18. If you did not get a CableCARD or want to use your product without a CableCARD, select "I don't use a CableCARD". Then, press the v button, and go to Step 23. 23 Settings The Setup Procedure 22. The Smart Media Player downloads your provider’s information. When it is done, the Provider Setup complete window appears. Press the v button. The Smart Hub Terms and Conditions screen appears. Go to Step 26. 23. If you did not insert a CableCARD or have no network, the Auto Program screen appears. Press the ▼ button to select the Digital Cable field, and then press the v button. 24. Select the kind of digital cable 26. Review and then agree to the Terms and Conditions by pressing the v button. Press the v button again to continue. 27. Review and then agree to the Supplemental Terms and Conditions and the Privacy Notices by pressing the v button. Press the v button again to continue. 28. Updating your product software ensures you can enjoy the latest features and services. Press the ▶ button to select Update now or Update later, and then press the v button. system you have, and then press the v button. In most cases, you would select STD. When done, 29. Setup is complete! Press the v select Scan at the bottom of the button to exit. screen, and then press the v button. 25. Scanning can take between 30 minutes and an hour, depending on the number of channels your cable system has. When scanning is complete, a screen appears on the right displaying a live channel. Press the v button. If you have connected the Smart Media Player to your network, the Smart Hub Terms and Conditions screen appears. Go to Step 26. \\ If you have no network or have not connected the Smart Media Player to your network, skip Steps 26, 27 and 28, and go to Step 29. 24 Settings The Home Screen The Home Screen 1 6 2 3 5 4 1 Guide : View the program schedule, select programs to watch, and view information about future programs. 2 Movies & TV Shows : Access and watch video on demand (VOD) provided by Samsung. 3 Apps : Access various for pay or free-of-charge applications. 4 Photos, Video & Music : Play videos, photos, or music content from USB devices, PCs, or mobile devices. 5 Netflix : Watch TV shows and movies online provided by Netflix. 6 Settings : Set various functions to suit your personal preferences. \\ When the Home Screen is displayed, the Smart Media Player will switch to DTV Channel mode if there is no user activity for 3 minutes. When the Settings menu is dislayed, the product will activate the Screen Saver if there is no user activity for 60 minutes. If there is no user operation for 4 hours, the product will turn off to save power. However, if "Auto Power Off" is set to Off, the power will not turn off automatically . 25 FUNCTION TV SOURCE Settings Accessing the Settings Screen Accessing the Settings Screen 1. Select Settings on the Home screen, and then press v button. The Settings menu screen appears. Settings menus, sub-menus, and options, please refer to the remote control illustration and the Settings Control Button table below. 2. To access theMUTE Remote Control LIVE Settings Control Button Table 1 1 MENU Button : Press to move to the Home screen. 2 RETURN Button : Return to the previous menu. 3 v (Enter) / DIRECTION Buttons : Press ▲▼◀▶ to move the cursor or select an item. Press the v button to activate the currently selected item or confirm a setting. 4 EXIT Button : Press to exit the current menu. 3 2 26 4 Settings Display Display You can configure various display options such as the TV Aspect Ratio, Resolution, etc. TV Aspect Ratio Lets you adjust the output of the Smart Media Player to the screen size of your TV. • 16:9 Original : Select when you connect the product to a 16:9 TV screen. The product will display all content in its original aspect ratio. Content formatted in 4:3 will be displayed with black bars on the left and right. • 16:9 Full : Select when you connect the product to a 16:9 TV screen. All content will fill the full screen. Content formatted in 4:3 will be stretched. • 4:3 Letter Box : Select when you connect the product to a 4:3 TV screen. The product will display all content in its original aspect ratio. Content formatted in 16:9 will be displayed with black bars on the top and bottom. • 4:3 Pan-Scan : Select when you connect the product to a 4:3 TV screen. 16:9 content will have the extreme left and right portions cut off. \\ Depending on the video format, some aspect ratios may not be available. \\ If you select an aspect ratio and option which is different from the aspect ratio of your TV screen, picture might appear to be distorted. \\ If you select 16:9 Original, your TV may display 4:3 Pillarbox (black bars on sides of picture). BD Wise (Samsung Products only) When you connect a Samsung product and a Samsung TV with BD Wise to each other via HDMI, and BD Wise is on in both the Smart Media Player and TV, the product outputs video at the video resolution and frame rate of the video content. • Off : The output resolution stays fixed at the resolution you set previously in the Resolution menu, regardless of the resolution of the video content. See Resolution on the next page. • On : The product outputs video at the original resolution and frame rate of the video content. \\ When BD Wise is on, the Resolution setting automatically defaults to BD Wise and BD Wise appears in the Resolution menu. \\ If the Smart Media Player is connected to a device that does not support BD Wise, you cannot use the BD Wise function. \\ For proper operation of BD Wise, set the BD Wise menu of both the Smart Media Player and the TV to On. 27 Settings Display Resolution Set the output resolution of the HDMI video signal. The number indicates the number of lines of video per frame. The i and p indicate interlaced and progressive scan, respectively. The more lines, the higher quality. • BD Wise : Automatically sets the resolution to the resolution of the video content if you have connected the Smart Media Player via HDMI to a TV with the BD Wise feature. (The BD Wise menu item appears only if BD Wise is set to On. See BD Wise on the previous page.) • Auto : Automatically sets the output resolution to the connected TV’s maximum resolution. • 1080p : Outputs 1080 lines of progressive video. • 1080i : Outputs 1080 lines of interlaced video. • 720p : Outputs 720 lines of progressive video. • 480p : Outputs 480 lines of progressive video. \\ Depending on the video format, some aspect ratios may not be available. \\ If you select an aspect ratio and option which is different from the aspect ratio of your TV screen, the picture might appear to be distorted. \\ If you select the 16:9 Original in TV Aspect Ratio, your TV may display 4:3 Pillarbox (black bars on sides of picture). Resolution according to the output mode Resolution E-contents/Digital contents/DTV Resolution E-contents/Digital contents/DTV BD Wise 1080p 1080i 1080i Auto Max. Resolution of TV input 720p 720p 1080p 1080p 480p 480p 28 Settings Display DTV Smart Resolution Use this function if you are using a TV/Projector/AV Receiver which incorporates a high-quality video processor and you want the Smart Media Player to transmit video in its original resolution to the processor. • Auto : The Smart Media Player outputs unprocessed video in its original resolution. • Off : The Smart Media Player outputs at the resolution you have selected in the Resolution option. (See page 28.) \\ If you set this function to auto and the video resolution the Smart Media Player is outputting changes because the video resolution of the TV program you are now watching differs from the previous program, you may experience these effects: -- When you change channel, it take longer for theTV display the picture. -- The picture on your TV blinks once when the resolution changes. If you do not want these effects to occur, set DTV Smart Resolution to Off. (This is the default.) \\ The DTV Smart Resolution function is active only if the Resolution option is set to Auto. \\ If your TV does not support the original video resolution of a TV program, the video output is changed to a resolution your TV supports. Movie Frame (24Fs) If the Smart Media Player is connected to a 24Fs compatible TV, setting the Movie Frame (24Fs) feature to Auto lets the product adjust its HDMI output to 24 frames per second automatically for improved picture quality. You can enjoy the Movie Frame (24Fs) feature only on a TV supporting this frame rate. Movie Frame is only available when the product is in the 1080p output resolution mode and the content you are watching is encoded in the 24 frame per second format. • Auto : The Movie Frame (24Fs) function is on. • Off : The Movie Frame (24Fs) function is off. Smart Hub Screen Size Sets the Smart Hub Screen to the optimal size. 29 Settings Display HDMI Color Format Lets you set the color space format for the HDMI output so that it matches the capabilities of the connected device. • Auto : Automatically set the optimum format supported by the connected display device. • YCbCr (4:4:4) : Recommended when connected to a display that supports YCbCr (4:4:4). • RGB (Standard) : Recommended when connected to a display that does not support the YCbCr format. Outputs the normal range of RGB Colors. • RGB (Enhanced) : Select this for output of an enhanced range of RGB Colors. Not recommended for general use because it will increase the contrast between black and white. HDMI Deep Color Lets you set the Smart Media Player to output HDMI video with Deep Color. Deep Color provides more accurate color reproduction with greater color depth. • Auto : The product outputs video with Deep Color to a connected TV which supports HDMI Deep Color. • Off : The picture is output without Deep Color. Progressive Mode Optimize picture quality for video or film-based programs. • Auto : Select to have the product automatically select the best Progressive Mode. • Video : Select for the best picture quality for Video based programs. 30 Settings Audio Audio Digital Output Lets you select the digital audio output format that is suitable for your TV or AV Receiver. • PCM : PCM is the default setting and offers the best compatibility with most TV and AV Receivers. The Smart Media Player always outputs sound in the PCM format. Select PCM if you want to use the product's Volume Control function. • Bitstream (Unprocessed) : Select Bitstream if you have connected the Smart Media Player to an AV receiver or home theater and want to hear Multi-channel Dolby Digital or Dolby Digital plus sound. If you select Bitstream, you must use the volume control on the receiver or home theater to control the volume. \\ Be sure to select the correct Digital Output or you will hear no sound or a loud noise. \\ If the HDMI device (AV receiver, TV) is not compatible with compressed formats (Dolby Digital), the audio signal outputs as PCM. Digital Output Selection Condition PCM Bitstream (Unprocessed) HDMI Out Optical Out HDMI Out Optical Out Dolby Digital PCM 2ch PCM 2ch Dolby Digital Dolby Digital Plus PCM 2ch PCM 2ch Dolby Digital Plus HE AAC PCM up to 5.1ch(2) PCM 2ch PCM up to 5.1ch(2) PCM 2ch MPEG Layer 2 and etc. PCM 2ch PCM 2ch PCM 2ch PCM 2ch Dolby Digital (1) Dolby Digital (1) If your AV Receiver does not support Dolby Digital Plus, the Bitstream Output via HDMI converts to Dolby Digital. (2) If the Smart Media Player is connected to a TV only, the output is always PCM stereo. 31 Settings Audio Dynamic Range Control Lets you adjust the volume so that the difference between very loud and very quiet sound is reduced. This function works only when the Smart Media Player outputs Dolby Digital or Dolby Digital Plus sound in PCM format. • RF Mode : Compresses the dynamic range of the sound so that it is optimized for TV speakers. • Standard : Reduces the difference between very loud and very quiet sound for a more comfortable listening. • Maximum : Lets you can experience the original dynamic range of the sound. \\ If the Smart Media Player outputs Dolby Digital or Dolby Digital Plus Audio in Bitstream format, the AV Receiver connected to this product controls the dynamic range of the sound. Downmixing Mode Select the Downmix method for stereo output. • Normal Stereo : Downmixes the multi-channel audio into two channel stereo. Choose when the Smart Media Player is connected to equipment that does not support virtual surround functions such as Dolby Pro Logic. • Surround Compatible : Downmixes multi-channel audio into surround compatible stereo. Choose when the Smart Media Player is connected to equipment that supports virtual surround functions such as Dolby Pro Logic. Audio Sync In some cases, when the Smart Media Player is connected to a digital TV, the audio signal may not synchronize with the video signal. If this occurs, adjust the audio delay time to match the video signal. • You can set the audio delay time between 0 msec and 200 msec. Adjust it to the optimal setting. \\ The audio delay time you specify may not be exact depending on the played content. 32 Settings Broadcasting Broadcasting Configure, manage, and access channels, create and edit favorites, block channels inappropriate for children. Auto Tuning Automatically scans and indexes all channels received through the Smart Media Player's cable input connector. The channels in the index of channels then appear when you press the CH button on your remote. \\ If there is an existing index of channels, it will be overwritten. To run the Auto Tuning function, follow these steps: 1. Navigate to Broadcasting and select Auto Program. 2. Select Start when prompted, and then press v button. 3. Select the Digital Cable System field, and then press v button. In the drop down, select your Cable System type, and then press v button. In most cases, you would select STD (Standard). 4. Select the Scan button on the bottom of the screen, and then press v button. -- Depending on the number of channels that are available in your cable system, the scanning process can take up to 1 hour. 5. When scanning is complete, you should see a live TV channel displayed in a window on the right. 6. Select the Close button on the bottom right side of the screen, and then press v button. Channel List The Channel List displays the list of channels memorized and indexed during the Auto Scanning process. On the Channel List screen you can select and change channels, view indexed channels by various categories (Added Ch, etc.), and view and access Favorites. See page 55 for additional details. The Channel List screen icons indicate the following: • : An analog channel • : A Schedule Viewing reserved channel • : A favorite channel • : A locked channel 33 Settings Broadcasting Change Channels Select a channel to jump to it right away. To scroll through the list of channels one at a time, use the ▲▼ buttons. To quickly scroll through the list a page at a time, use the channel up/down buttons. Press the v button to jump to the selected channel. Change the Channel List Press the ▶ button to display the Channel list by category (Added Ch., Favorites, etc.). However, you can select the Favorites list only if it contains at least one favorite channel. If no favorite channel have been added, you can select Edit Favorites and add channels to a Favorite List on the Edit Favorites screen. Edit Channel You can remove channels from the index and from channel categories such as Recently Viewed, restore removed channels, lock and unlock channels, access and edit favorites. See page 55 for additional details. The Edit Channel displays the following icons: • : An analog channel • : A favorite channel • : A locked channel With the Edit Channel screen displayed, press the TOOLS button on your remote to access the following options: Category: The TV's channel index is divided into different categories such as Added Ch., Recently Viewed, and Mostly Viewed. Choose a category. Edit Favorites: You can designate frequently watched channels as favorites. For details, see "Edit Favorites". Information: View detailed information about the current program. Edit Favorites You can designate frequently watched channels as favorites. Favorite channels are identified in Edit Channel and the channel list screens with the create up to 5 favorite channel lists. You can also rename and edit favorite channel lists. See page 58 for additional details. Preferred Language Lets you listen to a broadcast in a language other than your preferred language. You can select English, Spanish or French. \\ Digital broadcasts are capable of simultaneous transmission of many audio tracks (for example, simultaneous translations of a program into foreign languages). 34 symbol. You can Settings Broadcasting Program Rating Lock The Program Rating Lock feature lets you block programs based on their ratings. This is useful for controlling what children watch on TV. Program Rating Lock does not block programs originating from external sources, such as DVD players or USB files. Every time you access the Program Rating Lock feature, you must enter a PIN. You must also enter this PIN to watch a blocked program. The default PIN is 0000. To change the PIN, go to System Security Change PIN. The Program Rating Lock is available only when you are watching broadcast, cable TV. Blocking Programs Using the TV Rating Locks and ratings are displayed in a table. To block content, select a rating entry to lock. All programs at that level and higher are blocked and require that you enter the PIN to watch. To unblock a category, click the lock icon. To unblock all the categories in a row, click the lock under ALL. Categories on the left: • TV-Y: Young children • TV-Y7: Children 7 and over • TV-G: General audience • TV-PG: Parental guidance • TV-14: Viewers 14 and over • TV-MA: Mature audience Categories on the top: • ALL: Lock all TV ratings. • FV: Fantasy violence • V: Violence • S: Sexual situations • L: Adult Language • D: Sexually Suggestive Dialog 35 Settings Broadcasting Blocking Based on Movie Rating (MPAA) Block movies based on their MPAA rating. This applies to all material with supplied ratings in the USA. From the MPAA: “The Motion Picture Association of America (MPAA) has implemented a rating system that provides parents or guardians with advanced information on which films are appropriate for children.” Click a lock beside one of the rating categories to block that category and all higher categories. To unblock a category, select the lock icon. • G: General audience (no restrictions). • PG: Parental guidance suggested. • PG-13: Parents strongly cautioned. • R: Restricted. Children under 17 should be accompanied by an adult. • NC-17: No children under age 17. • X: Adults only. • NR: Not rated. CableCARD Info The Cable Card Info screen displays information about your cable card such as vendor, serial number, etc. Tuning Adapter Info If you have connected an SDV adapter to your product, the SDV Diagnostic screen displays diagnostic information about the SDV adapter. 36 Settings Network Network When you connect this product to a network, you can use network based applications and functions, and upgrade the Smart Media Player's software through the network connection. For more information about accessing and using Internet services, see the Network Services chapter of this manual on pages 74~90. Instructions for configuring the network connection start below. Network Status Lets you check the current network and Internet status. Network Settings Before you begin, contact your ISP to find out if your IP address is static or dynamic. If it is dynamic, and you have a wired or wireless network, we recommend using the Automatic configuration procedures described below. If you are connecting to a wired network, connect the Smart Media Player to your router using a LAN cable before you start the configuration procedure. If you are connecting to a wireless network, disconnect any wired network connection before you begin, and confirm that your router is on. To begin configuring your network connection, follow these steps: Wired Network ◈◈ Wired - Automatic 1. In the Home screen, select Settings, and then press the v button. 2. Select Network, and then press the v button. 3. Select Network Settings, and then press the v button. 4. Select Wired in the Network Settings screen, and then press the v button. 5. Select the Connect button, and then press the v button. The Smart Media Player detects the wired connection, verifies the network connection and then connects to the network. 37 Settings Network ◈◈ Wired - Manual If you have a static IP address or the Automatic procedure does not work, you'll need to set the Network Settings parameters manually. Follow Steps 1 and 2 in Wired Network, and then follow these steps: 1. Select Network Status. The Smart Media Player searches for a network, and then displays the connection failed message. 2. On the bottom of the screen, select IP Settings, and then press the v button. The IP Settings screen appears. 3. Select the IP Setting field, and then press the v button. 4. Select Enter manually in the IP Setting field, and then press the v button. 5. Select a parameter to enter (IP Address, for example), and then press the v button. Use the number keypad on your remote control to enter the numbers for the parameter. You can also enter numbers using the ▲▼ buttons. Use the ◀▶ buttons on the remote control to move from entry field to entry field within a parameter. When done with one parameter, press the v button. 6. Press the ▲ or ▼ button to move to another parameter, and then enter the numbers for that parameter following the instructions in Step 5. 7. Repeat Steps 5 and 6 until you have filled in all parameters. \\ You can get the Network parameters from your Internet provider. 8. When finished entering all the parameters, select OK, and then press the v button. The Smart Media Player verifies the network connection and then connects to the network. Wireless Network You can setup a wireless network connection in four ways: • Wireless Automatic • Wireless Manual • WPS(PBC) • WPS(PIN) When you configure the wireless network connection, any wireless network devices currently connected through the Smart Media Player or, if applicable, the product's current wired connection, will be disconnected. 38 Settings Network ◈◈ Wireless - Automatic 1. In the Home screen, select Settings, and then press the v button. 2. Select Network, and then press the v button. 3. Select Network Settings, and then press the v button. 4. Select Wireless in the Network Settings screen, and then press the v button. The Smart Media Player searches for and then displays a list of the available networks. 5. Select the desired network, and then press the v button. 6. On the Security screen, enter your network's Security Code or Pass Phrase. Enter numbers directly using the number buttons on your remote control. Enter letters by selecting a letter with an arrow button, and then pressing v button. \\ To view the password as you enter it, use the arrow buttons to select Show Password on the right side, and then press v button. 7. When done, select Done and then press the v button. The Smart Media Player verifies the network connection and then connects to the network. 8. When verification is complete, select OK, and then press the v button. \\ You should be able to find the Security Code or Pass Phrase on one of the set up screens you used to set up your router or modem. 39 Settings Network ◈◈ Wireless - Manual If you have a static IP address or the Automatic procedure does not work, you'll need to set the Network Settings parameters manually. 1. Follow the directions in Wireless - Automatic through Step 5. 2. The Smart Media Player searches for a network, and then displays the connection failed message. 3. On the bottom of the screen, select IP Settings, and then press the v button. The IP Settings screen appears. 4. Select the IP Setting field, and then press the v button. 5. Select Enter manually in the IP Setting field, and then press the v button. 6. Select a parameter to enter (IP Address, for example), and then press v button. Use the number keypad on your remote control to enter the numbers for the parameter. You can also enter numbers using the ▲▼ buttons. Use the ◀▶ buttons on the remote control to move from entry field to entry field within a parameter. When done with one parameter, press the v button. 7. Press the ▲ or ▼ button to move to another parameter, and then enter the numbers for that parameter following the instructions in Step 6. 8. Repeat Steps 6 and 7 until you have filled in all parameters. \\ You can get the Network parameters from your Internet provider. 9. When finished, select OK, and then press the v button. The Security Screen appears. 10. On the Security screen, enter your network's Security Code or Pass Phrase. Enter numbers directly using the number buttons on your remote control. Enter letters by selecting a letter with the ▲▼◀▶ buttons, and then pressing the v button. 11. When finished, select Done at the right of the screen, and then press the v button. The Smart Media Player verifies the network connection and then connects to the network. 12. After the Smart Media Player verifies the network, select OK, and then press the v button. 40 Settings Network ◈◈ WPS(PBC) 1. In the Home screen, select Settings, and then press the v button. 2. Select Network, and then press the v button. 3. Select Network Settings, and then press the v button. 4. Select Wireless in the Network Settings screen, and then press the v button. 5. Use the ▼▶ button on your remote control to select the WPS(PBC). 6. Press the v button on your remote. The "Press the PBC button" message appears. 7. Press the WPS(PBC) button on your router within two minutes. Your product automatically acquires all the network settings values it needs and connects to your network. The Network Status screen appears. The Smart Media Player connects to the network after the network connection is verified. ◈◈ WPS(PIN) Before you begin, open the router's setup menu on your PC and access the screen with the WPS PIN entry field. 1. In the Home screen, select Settings, and then press the v button. 2. Select Network, and then press the v button. 3. Select Network Settings, and then press the v button. 4. Select Wireless in the Network Settings screen, and then press the v button. The Smart Media Player searches for and then displays a list of the available networks. 5. Select the desired network, and then press the v button. 6. Select the WPS(PIN), and then press the v button. The PIN pop-up appears. 7. Enter the PIN into the WPS PIN entry field in the router's Set Up screen and then save the the screen. \\ Contact the manufacturer of the router for instructions explaining how to access the route's Set Up screens or refer to the router's user's manual. \\ For a WPS connection, set your wireless router’s security encryption to AES. WPS does not support WEP security encryption. 41 Settings Network Wi-Fi Direct The Wi-Fi Direct function allows you to connect Wi-Fi Direct devices to the Smart Media Player and each other using a peer-to-peer network, without a wireless router. \\ Some Wi-Fi Direct devices may not support the Samsung Link function if connected via Wi-Fi Direct. If this is the case, we recommend changing the network connection method between the devices. \\ Bluetooth transmissions can interfere with the Wi-Fi Direct signal. Before you use the Wi-Fi Direct function, we strongly recommend that you turn off the Bluetooth function of any active mobile device. 1. Turn on the Wi-Fi direct device and activate its Wi-Fi Direct function. 2. In the Home screen, select Settings, and then press the v button. 3. Select Network, and then press the v button. 4. Select Wi-Fi Direct, and then press the v button. The Wi-Fi Direct devices that your product can connect to appear. 5. You have three ways to complete the Wi-Fi connection: -- Through the Wi-Fi device. -- Through the Smart Media Player using PBC. -- Through the Smart Media Player using a PIN. Each is covered below. Through the Wi-Fi Device 1. On the Wi-Fi device, follow the procedure on the device for connecting to another Wi-Fi Direct device. See the device's user manual for instructions. 2. When you have completed the procedure, you should see a pop-up on your TV screen saying that a device that supports Wi-Fi Direct has requested to connect. Select OK, and then press the v button to accept. 3. The Connecting pop-up appears, followed by the Connected pop-up. When it closes, you should see the device listed on the Wi-Fi Direct screen as connected. 42 Settings Network Through the Smart Media Player Using PBC 1. Select the Wi-Fi Direct device you want to connect to this product, and then press the v button. The PBC/PIN pop up appears. 2. Select PBC, and then press the v button. The PBC pop-up appears. 3. Press the PBC button on the Wi-Fi Direct device within 2 minutes. 4. The Connecting pop-up appears, followed by the Connected pop-up. When it closes, you should see the device listed on the Wi-Fi Direct screen as connected. Through the Smart Media Player Using a PIN 1. Select the Wi-Fi Direct device you want to connect to this product, and then press the v button. The PBC/PIN pop up appears. 2. Select PIN, and then press the v button. The PIN pop-up appears. 3. Note the PIN code in the pop-up, and then enter it into the appropriate field in the Wi-Fi Direct device you want to connect. 4. The Connecting pop-up appears, followed by the Connected pop-up. When it closes, you should see the device listed on the Wi-Fi Direct screen as connected. \\ The current wired or wireless network connection will be disconnected when you use the Wi-Fi Direct function. \\ Text files, such as files with a .TXT or .DOC extension, will not display when you are using the Wi-Fi Direct function. Device Name Assign a unique name to your product that will identify it in your network. When you select Device Name, the on-screen keyboard appears. Select letters, numbers, or symbols by pressing the arrow buttons on your remote until the focus highlight reaches the letter, number, or symbol you want. Press the v button to select. Repeat this procedure to select additional characters. When finished, select Done on the keyboard in the same way. For additional instructions on using the keyboard, see 'Entering Text using the On-Screen Keypad'. 43 Settings Smart Features Smart Features Set your preferences for using Apps. Apps Settings Lets you configure App notification settings and view basic info about your Apps. Auto Ticker Configure selected tickers to display automatically when the TV is turned on. A ticker is a service that displays stock values, news, and weather updates on the screen in real-time. Enabling the Ticker service brings you up-to-the-minute information while you watch TV. From the Auto Ticker list, select the applications to run. If a selected application has not been installed on your TV, you will need to download and install it first through Smart Hub using Samsung Apps. Push Notification Settings Enable/disable push notifications from the publishers of applications you have downloaded to your TV. Push notifications are displayed on the screen as you watch TV. You can select notifications to open them and view their content. Channel-Bound Apps Channel-Bound Apps are available on certain channels. These apps provide additional services for or information about the program you are watching currently. You can set this function on or off. Properties View the Samsung Apps version, your TV’s memory usage status, and the TV’s serial number. Terms & Conditions, Privacy Policy Displays the Smart Hub Terms and Conditions and Privacy Policy. You must review and agree to the Terms & Conditions and the privacy policy to enjoy App services. Reset Smart Hub Reset the App services and Samsung account settings stored on your device. Smart Hub Reset removes all Samsung accounts and everything linked to them, including apps, from your device. You must enter your password (PIN) to access this option. 44 Settings System System Setup Lets you re-run the Initial Settings procedure. See the Quick Start Guide for details. Quick Start Lets you set the Smart Media Player to turn on quickly by decreasing the boot time. • With Quick Start On: W hen you turn off the Smart Media Player, it will go into Active Standby mode. In this state, the product starts up faster. However, Active Standby mode consumes more electricity than Deep sleep mode. • With Quick Start Off: W hen you turn off the Smart Media Player, it will go into Deep Sleep mode, Deep Sleep mode consumes less electricity than Active Standby mode. However, the product's boot time is longer. \\ Even if you have set Quick Start to On, the product will go into Deep Sleep mode after being in Active Standby mode for 8 hours. \\ If the Smart Media Player has been turned off or left unplugged for more than 1 week, the device may lose authorization for cable TV services. To restore cable TV services, please contact your cable service provider. Language You can select the language you prefer for the On-screen menu, etc. The selected language will only appear if it is supported. Device Manager Setup input devices such as a keyboard, mouse, or smartphone to use with this product. You can view lists of input devices to select from and adjust the settings of connected devices. 45 Settings System Samsung Link Settings - Content Sharing Lets you control which devices on your network, such as smart phones and tablets, can share content with your product. Keyboard Settings Lets you select a wireless USB keyboard connected to the Smart Media Player, and then configure it for use. \\ You can use the Keyboard only when a QWERTY keyboard screen or window appears in the Web Browser or in an Apps screen. Mouse Settings Lets you select a wireless USB mouse connected to the Smart Media Player, and then configure it for use. \\ You can use the mouse only in the Web Browser or in an Apps screen. 1. Connect a wireless USB mouse to the Smart Media Player. 2. On the Mouse Settings screen, select the Primary Button and Pointer Speed options that suite your needs. \\ Depending on the model, some USB HID keyboards and mice may not be compatible with your product. \\ Some HID keyboard keys may not work. \\ Wired USB keyboards are not supported. \\ Some applications may not be supported. \\ If a wireless HID Keyboard does not operate because of interference, move the keyboard closer to the Smart Media Player. 46 Settings System Clock Sets the current date and time. Auto When you set Clock Mode to Auto, your unit automatically downloads the correct time from a digital channel. To enable this option, the Smart Media Player must be connected to a cable system through its Cable In jack and must receive digital broadcasts. • Time Zone: Choose your time zone. To ensure the clock runs correctly, you must select your time zone from the drop down list in the Time Zone field. • DST: Set the DST (Daylight Savings Time). -- Off: No adjustment for DST. -- On: Sets the clock an hour ahead. Manual To enter the time and date manually, follow these steps. 1. Set Clock Mode to Manual, select Clock Set, and then press v button. 2. Select Date, and then press v button. The date entry pop-up appears. 3. Change the numbers displayed using the up and down arrow buttons on the remote. Move from field to field using the left and right arrow buttons on your remote. When done, press the RETURN button on your remote. 4. Select the Time field, and then press v button. 5. Set the hour and minutes in the same fashion you set the date. When done, press the RETURN button on your remote. 47 Settings System Auto Power Off Setting Auto Power Off option to On saves energy by turning off the Smart Media Player automatically if no user operation is detected for 4 hours. \\ If the Quick Start option is Off, the product go into Deep Sleep mode when it is turned off by this function. \\ If the Quick Start option is On, the product will go into Active Standby mode when it is turned off by this function. If the product is in Active Standby mode for 8 hours without being turned on, it will automatically go into Deep Sleep mode. \\ If the Smart Media Player has been turned off or left unplugged for more than 1 week, the device may lose authorization for cable TV services. To restore cable TV services, please contact your cable service provider. Caption Configure CC (Closed Caption) options. Caption Set Caption to ON to view captions. The broadcast must be transmitted with captions for the captions to appear. Caption Mode Select a caption mode from the drop down list. • Default / CC1 ~ CC4 / Text1 ~ Text4: (analog channels only) The analog caption function operates in either analog TV channel mode or when a signal is supplied from an external device to the TV. (Depending on the broadcasting signal, the analog caption function may or may not work with digital channels.) • Default / Service1 ~ Service6 / CC1 ~ CC4 / Text1 ~ Text4: (Digital channels only) The digital caption function works with digital channels. Service1 – Service6 may not be available in digital caption mode depending on the broadcast. Security This function works in conjunction with the Program Rating Lock function which requires you to enter a PIN before it allows access. When you access the Security function, the Security screen appears. The first time you access this function, enter the default Security PIN: 0000. Change the PIN using the Change PIN function. See below. \\ The default password is set to 0000. 48 m Settings System Change PIN Change the 4-digit PIN used to access security functions. To change the PIN, follow these steps: 1. Select Change PIN, and then press v button. 2. Enter the old PIN into the change PIN screen using the number buttons on your remote. 3. Under Enter new PIN, enter the new PIN using the number buttons. 4. Under Confirm new PIN, enter the new PIN again. The PIN is changed successfully message appears. 5. Press the v button on your remote. General You can change the options listed below to match your preferences. Menu Transparency Adjust the transparency of the menu box. You can select Low, Medium, or High. Anynet+ (HDMI-CEC) Anynet+ is a convenient function that offers linked operations with other Samsung products that have the Anynet+ feature. To operate this function, connect this product to an Anynet+ Samsung TV using an HDMI cable. DivX® Video On Demand View your DivX® VOD Registration Code. You need this code to purchase and play DivX® VOD contents. 49 Settings Support Support Remote Management Remote management lets our Call Center access your Samsung product remotely to troubleshoot a problem. To use Remote Management, follow these steps: 1. Call the Samsung Contact Center, and then ask for remote support. 2. Open the menu on your product, and then go to the Support section. 3. Select Remote Management, and then read and agree to the service agreements. When the PIN screen appears, provide the PIN code to the agent. 4. The agent will then access your TV. That's it! Software Update The Software Update menu allows you to upgrade the Smart Media Player's software for performance improvements or additional services. \\ Never turn the Smart Media Player off or back on manually during the update process. 1. In the Home screen, select Settings, and then press the v button. 2. Select Support, and then press the v button. 3. Select Software Update, and then press the v button. 4. To download update software and update now, select Update now, and then press the v button. See "Update now" on the next page for details. 5. To let the Smart Media Player download update software automatically when available, select Auto Update, and then press the v button. See "Auto Update" on next page for details. \\ The update is complete when the Smart Media Player turns off, and then turns on again by itself. \\ SAMSUNG ELECTRONICS takes no legal responsibility for Smart Media Player malfunction caused by an unstable Internet connection or consumer negligence during a software Update. 50 \\ During Software update, Both Power LED / Network LED will glow. Settings Support Update now You can use Update Now to update the software through your network connection or by using a USB flash drive. The network instructions are below. Instructions for using a USB flash drive to update the software are on the next page. 1. Select Update now, and then press the v button. The Update now pop-up appears. 2. The Smart Media Player searches on line for the latest software version. 3. If it does not find an update, the "No new updates" pop-up appears. Press the v button to exit. 4. If it finds a new version, the Update Request pop-up appears. 5. Select OK. The Smart Media Player upgrades the software, turns off, and then turns on automatically. 6. If you do not select OK or Cancel in one minute, the Smart Media Player stores the new update software. You can update the software later using Auto Update. 7. If you select Cancel, the Smart Media Player cancels the update. \\ When the system update is done, check the software details in the Product Information section of the Contact Samsung screen. \\ Do not turn off the Smart Media Player during the Software Update. It may cause the product to malfunction. Auto Update You can set the Auto Update function so that the Smart Media Player downloads new update software when it is in Auto Update mode. In Auto Update mode, the product is off, but its Internet connection is active. This allows the product to download update software automatically, when you are not using it. 1. Press the ▲▼ buttons to select Auto Update, and then press the v button. 2. Select the desired time. The Smart Media Player will be updated automatically at the time you have set or after power off. If it downloads new update software, the product will ask you if you want to install it when you turn the product on. \\ To use the Auto Update function, your product must be connected to the Internet. 51 Settings Support ◈◈ By USB 1. Visit www.samsung.com. 2. Click SUPPORT on the top right of the page. 3. Enter the product's model number into the search field. As you enter the model number, a drop down will display products that match the model number. 4. Left click your product's model number in the drop down list. 5. On the page that appears, scroll down to and then click Firmware Manuals & Downloads. 6. Click Firmware in the center of the page. 7. Click the ZIP button in the File column on the right side of the page. 8. Click Send in the first pop-up that appears. Click OK in the second pop-up to download and save the firmware file to your PC. 9. Unzip the zip archive to your computer. You should have a single folder with the same name as the zip file. 10. Copy the folder to a USB flash drive. 11. Insert the USB flash drive into the USB port of the Smart Media Player. 12. In the Smart Media Player’s menu, go to Settings > Support > Software Update. 13. Select Update Now. 14. The Smart Media Player searches for the software on the USB drive. When it finds the software, the Update Request pop-up appears. 15. Select OK. The Smart Media Player upgrades the software, turns off, and then turns on automatically. \\ When the system update is done, check the software details in the Product Information section of the Contact Samsung screen. \\ Do not turn off the Smart Media Player during the software Update. It may cause the product to malfunction. \\ Software Updates using the USB jack must be performed with a USB flash memory stick only. 52 Settings Support Contact Samsung Displays support contact information and important product information such as model number, serial number, software version, and MAC address. Reset Resets all settings to their default settings except for the network and App service settings. The default PIN is 0000. \\ You must enter your 4 digit PIN using the number buttons on the remote to access the Reset function. If you have not set a PIN, use the default PIN: 0000. 53 DTV Functions Watching TV Channels After Auto Programming is completed, you can watch your TV channels. Using the channel option Using the remote control buttons To use these buttons, see the table on the right. 1 1 NUMBER buttons : To move to a TV channel directly, press the number buttons that correspond to the desired TV channel. 2 CH button : Press this button to change TV channels. 3 INFO button : Press this button to display detailed channel information. Using the Tools Button Press the TOOLS button while you are viewing a channel. Press RETURN or EXIT to close. Picture Mode Select to set the picture mode. -- Dynamic : Choose this setting to increase sharpness. -- Standard : Choose this setting for most viewing applications. -- Movie : This is the best setting for watching movies. -- User : Lets you adjust the sharpness and noise reduction function respectively. Signal Information Select to view the signal information Audio Language Lets you select another audio track in a different language if the TV program provides multi track sound. Edit Favorite Lets you save the channel displaying the current program as a Favorite channel. You can save the channel into any of 5 Favorite Channel Groups. Caption Turn captions on or off. 2 3 54 DTV Functions Editing Channels Editing Channels Channel List Press the MENU button to bring up the Home screen. 1. In the Home screen, select Settings, and then press the v button. 2. Select Broadcasting, and then press the v button. 3. Select Channel List, and then press the v button. 4. Press the ◀ button to sort channels. You can order the list by name or number. 5. Press the ▶ button to display the channel list by category (Added Ch.). 6. Select the desired channel, and then press the v button. The selected channel appears. Edit Channel Manage the stored channels. Press the MENU button to bring up the Home screen. 1. In the Home screen, select Settings, and then press the v button. 2. Select Broadcasting, and then press the v button. 3. Select Edit Channel, and then press the v button. The Edit Channel Screen appears. 4. To scroll through the channels one at a time, press the ▲▼ buttons on your remote. 5. To scroll the list one page at a time, press the Channel Up/Down buttons (ƒ) on your remote. 55 DTV Functions Editing Channels Remove Channels On the Edit Channels screen, remove registered channels from the channel index or remove channels from a channel category list. Removing channels from the Recently Viewed or Mostly Viewed categories clears the channels from that category only and does not remove them from the index. When you remove a channel from the channel index, it will no longer appear when you scroll through the channels using the CH button on your remote. It does remain in the ALL category list. To remove channels on the Edit Channels screen, follow these steps: 1. With the Edit Channel screen displayed, select a channel or select a category using the Category function in the TOOLS menu, and then select a channel. A check appears next to the channel you selected. \\ To access the Category function, press the TOOLS button on your remote, select Category from the Tools menu, and then press the v button. 2. If you want, select additional channels. You can select more than one channel at a time. \\ Deselect channels by selecting them again. When you deselect a channel, the check mark disappears. 3. Select the Delete button on the left of the screen, and then press the v button. The selected channel(s) are deleted. \\ You can also press the c button on your remote. Restore Removed Channels Restore channels removed from the channel index. Removed channels are displayed in gray on the All list. In addition, the Add option is only available for removed channels. 1. With the Edit Channel screen displayed, open the TOOLS menu, select Category, select ALL, and then press the v button. 2. In the ALL list, select the channels you want to restore. Unselect channels by choosing them again. 3. Select the Add button on the left of the screen, and then press the v button. The selected channel(s) are added to the channel index. 56 DTV Functions Editing Channels Using the Go To Function The Go To function lets you scroll the Edit Channel list to the channel you want by entering the channel number. To use the Go To function, follow these steps: 1. Using the number pad on your remote, enter the channel number of the channel you want to go to, and then press the v button. 2. The Smart Media Player scrolls the list, and then highlights the channel you want. Other Button Functions Depending on the screens or menus you are displaying, these other button functions are sometimes available: Buttons or Icons Operations or Functions c Delete all selected channels. d Select all channels on a list. A check appears by each channel on the list. 57 DTV Functions Editing Channels Edit Favorites You can designate frequently watched channels as favorites. Favorite channels are identified in Edit Channel and the channel list screens with the symbol. You can create up to 5 favorite channel lists. You can also rename and edit favorite channel lists. To display the Edit Favorites screen, press the MENU button on your remote. On the Home screen, select Settings. In the menu that appears, select Broadcasting Edit Favorites. Add Favorite Channels Add a channel to a favorite channels list. 1. In the Edit Favorites screen, select the Category button on the left of the screen, and then press the v button to display the channel list containing the channels you want to add. This list appears in the left center of the screen. To select a channel, highlight the channel, and then press the v button. A check appears next to the channel. Repeat for each channel you want to add. -- You can also press the Red (A) button on your remote to display different category lists. 2. Select the Change Fav. button on the left of the screen, and then press the v button to display a favorite channels list. The list appears on the right of the screen. Each time you select the Change Fav. button, a different Favorites List appears. You can select Favorites list 1 through 5. -- You can also press the Blue (B) button on your remote to change Favorites Lists. 3. Select the Add button, and then press the v button to add the selected channels to the Favorites List you chose. 58 DTV Functions Editing Channels Remove Favorite Channels Remove channels from a favorite channels list. 1. In the Edit Favorites screen, select the Change Fav. button on the left of the screen, and then press the v button. A favorite channels list appears on the right side of the screen. 2. Select the Change Fav. button repeatedly until the Favorites List you want appears. 3. In the Favorites List, select each channel you want to delete by highlighting the channel, and then pressing the v button. A check appears beside each channel. -- You can deselect a channel by highlighting it, and then pressing the v button again. 4. Select the Delete button on the left side of the screen, and then press the v button to delete the channels from the list. Rearrange a Favorite Channels List Rearrange the order of the channels in a Favorite Channels List. 1. In the Edit Favorites screen, select the Change Fav. button on the left of the screen, and then press the v button. A favorite channels list appears on the right side of the screen. 2. Select the Change Fav. button repeatedly until the Favorites List you want appears. 3. Select a channel, and then press the v button. 4. Select the Change Order button on the left side of the screen, and then press the v button. 5. Press the ▲▼ buttons on the remote to move the channel you selected. Press the v button when done. 59 DTV Functions Editing Channels Rename a Favorite Channel List Rename an existing favorite channels list. 1. On the Favorites screen, move the highlight to a favorite in a Favorite list on the right of the screen. 2. Select the TOOLS button on your remote, and then press the v button. 3. In the TOOLS menu, select Rename Favorites, and then press the v button. A list of Favorite lists appears. 4. Select the list whose name you want to change, and then press the v button. The pop-up keyboard appears. 5. Rename the list using the popup keyboard. The new name can be up to 20 characters long. 6. When finished, select Done on the keyboard, and then press the v button. \\ To rename Favorite Channel Lists, there must be one favorite listed in at least one Favorite Channel List. \\ For instructions on using the keyboard, see Entering Text Using the Onscreen Keypad. Copy a Favorite Channel from One Favorites List to Another Copy channels from one favorite channels list to another. 1. In the Edit Favorites screen, select the Change Fav. button on the left of the screen, and then press the v button. A favorite channels list appears on the right side of the screen. 2. Select the Change Fav. button repeatedly until the Favorites List you want appears. 3. Select the channel you want to copy, and then press the v button. 4. Press the TOOLS button on your remote, select Copy to Favorites from the TOOLS list, and then press the v button. 5. Select each Favorite Channels List you want to copy to by highlighting it, and then pressing the v button. 6. When finished, select OK, and then press the v button. The channels are copied to the Favorite Channels List(s) you selected. 60 DTV Functions Viewing the Guide Screen Viewing the Guide Screen On the Guide screen, you can view each digital channel's programming schedule. The Guide screen will be available to you if you have inserted a CableCARD into your product and have connected the Smart Media Player to your network so that it has access to the Internet. The EPG (Electronic Program Guide) information is provided by broadcasters. Using the Guide Screen option Press the GUIDE button on the remote control. 1. Press the GUIDE button. The guide screen will be displayed. Change Channels Select a channel in the Guide, and then press the e button to jump to that program right away if the program is on now. If the program will be on in the future, the program's detail info will appear in the banner on the screen. Quick Navi Press the Red (A) button on your remote. With Quick Navi activated, -- Pressing the ◀▶ buttons on your remote control moves the focus two hours backwards or forwards, enabling faster browsing of the programming schedule. You cannot move the focus to a time prior to the current time. -- Pressing the $% buttons on your remote control moves the list 6 channels at once. 61 Media Play Your Smart Media Player can play content located on USB devices and PCs. To play content located on your PC, you must connect your PC and this product to your network and download and install the Samsung Link software on your PC. The Samsung Link Screen For all media, the Samsung Link Main screen or one of its sub screens is your primary means of accessing and playing contents saved on a variety of devices, either connected directly or using your network. Accessing the Samsung Link Screen To access the Samsung Link Main screen, select Photos, Videos & Music on the Home screen, and then press the v button. Playing Files on a USB Device There are two methods you can use to play or view multimedia files located on a USB device through your product. Method 1 1. Turn the Smart Media Player on. 2. Connect the USB device to the USB port on the front panel of the Smart Media Player. The New Device Connected pop-up appears. \\ If the pop-up does not appear, go to Method 2. 3. Use the ▲▼ buttons to select Photos, Videos, Music or All Content, and then press the v button. The Samsung Link screen appears listing the contents of the device. Depending on how the contents are arranged, you will see either folders, individual files, or both. 4. If necessary, use the the ▲▼◀▶ buttons to select a folder, and then press the v button. 5. Select a file to view or play, and then press the v button. 6. Press the RETURN button to exit a folder or the EXIT button to return to the Home screen. 62 \\ Even though the Smart Media Player will display folders for all content types, it will only display files of the Content Type you selected in Step 3. For example, if you selected music, you will only be able to see music files. You can change this selection by returning to the Photos, Videos and Music screen and repeating Step 3. Media Play Playing Files on a USB Device Method 2 1. Turn the Smart Media Player on. 2. Connect the USB device to the USB port on the front panel of the Smart Media Player. 3. Press the MENU button to go to Home screen. 4. Select Photos, Videos & Music on the Home screen, and then press the v button. 5. Select Photos, Videos, Music or All content, and then press the v button. 6. Use the ◀▶ buttons to select the desired device and then press the v button. Depending on how the contents are arranged, you will see either folders, individual files, or both. 7. If necessary, use the ▲▼◀▶ buttons to select a folder, and then press the v button. 8. Use the ▲▼◀▶ buttons to select a file to view or play, and then press the v button. 9. Press the RETURN button to exit a folder or the EXIT button to return to Home screen. \\ Even though the Smart Media Player will display folders for all content types, it will only display files of the Content Type you selected in Step 5. For example, if you selected music, you will only be able to see music files. You can change this selection by returning to the Photos, Videos and Music screen and repeating Step 5. 63 Media Play Using the Samsung Link Network Function Using the Samsung Link Network Function Samsung Link lets you play Videos, Photos, or Music located on your PC or your Samsung Link compatible device through the Smart Media Player using a wireless or wired network connection. \\ You can connect a Samsung smartphone device that has the Samsung Link app installed to your product if the smartphone and player are connected to the same network. \\ You cannot connect a Samsung smartphone or a PC that has the Samsung Link app installed to this product through a remote network. To Download the Samsung Link Software Samsung Link makes it easy to retrieve and enjoy media files from computers and DLNA-enabled devices. However, for Samsung Link to work, computers need to have Samsung Link PC software installed and mobile devices need to support Samsung Link. For more information, visit the Samsung Content & Service portal (http://link. samsung.com). You may experience compatibility issues when attempting to play media files via a third-party DLNA server. 64 Media Play Using the Samsung Link Network Function Playing Content Located on Your PC or Samsung Link Device (DMS) through this product (DMP). PC SMART Media Player PWR N/W Play back PC's files Samsung Link Connection Samsung Link makes it easy to retrieve and enjoy media files from computers and DLNA-enabled devices. However, computers need to have Samsung Link PC installed. 1. Connect the Smart Media Player, your PC, and/or your Samsung Link compatible device to the same wireless or wired network. 2. Follow the directions in the Samsung Link software Installation/Instruction manual to set up devices and files for playing or viewing. 3. Select Photos, Videos & Music on the product's Home screen, and then press the v button. The Samsung Link screen appears. 4. Select the type of content you want to play - Photos, Videos, Music, or All Content - and then press the v button. 5. In the list of Samsung Link connected devices that appears, select your PC or other Samsung Link compatible device, and then press the v button. A screen listing the available files appears. 6. Select the file you want to play or view, and then press the v button. 65 Media Play Controlling Video Playback Controlling Video Playback You can control the playback of video content located on a USB drive, mobile device or PC. Depending on the contents, some of the functions described in this manual may not be available. Buttons on the Remote Control used for Video Playback Playback related buttons The Smart Media Player does not play sound in Search, Slow or Step mode. • To return to normal speed playback, press the p button. p button Pause or resume playback. @ button Stops playback. Fast Motion During playback, press the ( or ) button. Play Each time you press the ( or ) button, the playback speed will change. Slow Motion In pause mode, press the ) button. Play Each time you press the ) button, the playback speed will change. Step Motion In pause mode, press the @ button. Play Each time you press the @ button, a new frame appears. Skip Motion During playback, press the _ or + button. Play Each time you press _ or + button, the Smart Media Player skips to the previous file or the next file. 66 Media Play Controlling Video Playback Using the Tools Menu During playback or in pause mode, press the TOOLS button. Play from the Beginning Select to return to the beginning of the movie, and then press the v button. Subtitle Settings Select to set the desired subtitle options. This option may not be available depending on your region. Information Select to view video file information. Picture Mode Select to set the picture mode. -- Dynamic : Choose this setting to increase Sharpness. -- Standard : Choose this setting for most viewing applications. -- Movie : This is the best setting for watching movies. -- User : Lets you adjust the sharpness and noise reduction function respectively. Search Title Search Time Bar If there is more than one movie on the device, select to play a different title. \\ You can enable or disable the subtitles by pressing the CC button on the remote control. \\ Depending on the storage device, the Tools menu may differ. \\ Video files with high bitrates of 20Mbps or more strain the product's capabilities and may stop playing during playback. Select to play the movie from a selected time point. Select Search Time Bar, and then press the v button. Using the number buttons, enter the time point you want to go to, and then press the v button. \\ You can also use the ◀▶ buttons to advance or rewind the movie. The movie advances or rewinds one minute each tme you press the ◀▶ buttons. Repeat mode Select to repeat a specific section. Off : Plays all files in the current folder in order one time. Repeat One : Plays the current file repeatedly. Repeat All : Plays all the files in the current folder repeatedly. Full Screen Select to set the size of the video image. Audio Sync Select to adjust the audio so that it syncs with the video. 67 Media Play Controlling Video Playback Using the View & Options Menus Using the View Menu On a file screen containing video files, select View, and then press the v button. Date Displays all the folders with videos by date. If you select a folder, and then press the E button, displays all the videos in the folder by date. Title Displays all the video files on the media or storage device by title. Folder Displays all the folders on the media or storage device. \\ Depending on the storage device, the View menu may differ or not be shown. Using the Options Menu On a file screen containing video files, select Options, and then press the v button. Play Selected Play Selected lets you create a playlist by selecting specific files to play. It works essentially the same way for all media. See 'Creating a Playlist' on page 71. Send Select Send to upload selected files to an on-line site (Picasa, Facebook, etc.) or to a device. To use Send, you need to establish an account with the on-line site, and then log in using the Log In function. \\ Depending on the storage device, the Options menu may differ or not be shown. 68 Media Play Controlling Music Playback Controlling Music Playback You can control the playback of music content located on a USB drive, mobile device or PC. Depending on the contents, some of the functions described in this manual may not be available. Buttons on the screen used for Music Playback Pause or resume playback. Search backward or forward in a file. You can also use the ( ) buttons on the remote control to advance or rewind the music. Skip to the previous file or the next file. Selects the repeat playback mode. Plays the files in the current folder at random. Using the View & Options Menus Using the View Menu A file screen containing music files, select the View, and then press the v button. Track Displays all the music tracks on the media or storage device. Album Displays all music on the media or storage device by album. Artist Displays all the the music files on the media or storage device by artist. Genre Displays all the music on the media or storage device by genre. Folder Displays all the folders on the media or storage device. \\ Depending on the storage device, the View menu may differ or not be shown. 69 Media Play Controlling Music Playback Using the Options Menu A file screen containing music files, select Options, and then press the v button. Play Selected Play Selected lets you create a playlist by selecting specific files to play. It works essentially the same way for all media. See the 'Creating a Playlist' on page 71. Send Select Send to upload selected files an on-line site (Picasa, Facebook, etc.) or to a device. To use Send, you need to establish an account with the on-line site, and then log in using the Log In function. Encoding Select to manage the text encoding options. \\ Depending on the storage device, the Options menu may differ or not be shown. Repeating Tracks You can set the Smart Media Player to repeat tracks. 1. On the Playback screen, use the ▲▼◀▶ buttons to select in the lower left corner of the screen, and then press the v button. 2. Use the ▲▼ to select the repeat mode you want - Off, One Song, or All - and then press the v button. Shuffling Tracks You can set the Smart Media Player to play tracks at random. 1. On the Playback screen, use the ▲▼◀▶ buttons to select in the lower left corner of the screen, and then press the v button. 2. Use the ▲▼ to set the Shuffle mode On or Off, and then press the v button. 70 Media Play Controlling Music Playback Creating a Playlist 1. With the Playback screen displayed, select Options, and then press the v button. The Options menu appears. 2. Use the ▲▼ buttons to select Play Selected, and then press the v button. The Selection Play screen appears. 3. Use the ▲▼_+ buttons to select a track, and then press the v button. A check appears to the left of the track. 4. Repeat Step 3 to select and check additional tracks. 5. To remove a track from the list, move to the track, and then press the v button again. The check on the track is removed. 6. When done, press the ▲▼ button to select Play, and then press the v button. The Music Playback screen reappears listing only the tracks you checked. The selected tracks play automatically. \\ On the Selection Play screen, you can also choose Select All, Deselect All, and Cancel. -- Use Select All to select all tracks. This cancels your individual track selections. When you press the RETURN button on your remote control or select the Play button, and then press the v button, all tracks will appear on the Music Playback screen. The Smart Media Player will begin to play all tracks from the first track. -- Use Deselect All to deselect all selected tracks at once. Then, select individual tracks or use Select All to select all the tracks, and then press the RETURN button on your remote control. If you do not use Select All or select individual tracks, the Playlist will not change. -- Cancel cancels any changes you made on the Play Select screen. When you return to the Playback screen, the Playlist will be unchanged. 71 Media Play Playing Photo Contents Playing Photo Contents You can play photo contents located on a USB, mobile device or PC. Using the Tools Menu During playback, press the TOOLS button. Previous Select to move to the previous picture. Next Select to move to the next picture. Start / Stop Slide Show Select to play/pause the slide show. Slideshow Settings Select the Slide Show settings. -- Speed : Select to set the slide speed. -- Effects : Select to set the slide effect. Zoom Select to enlarge the current picture. (Enlarge up to 4 times) Rotate Select to rotate the picture. (This will rotate the picture either clockwise or counter clockwise.) Background Music Select to listen to music while viewing a slide show. Settings Select the picture mode and information. \\ Depending on the storage device, the Tools menu may differ. All options may not be displayed. \\ To enable the background music function, the photo file must be in the same storage media as the music file. However, the sound quality can be affected by the bitrate of the MP3 file, the size of the photo, and the encoding method. \\ You can't enlarge the subtitle and PG graphic in the full screen mode. 72 Media Play Playing Photo Contents Using the View & Options Menus Using the View Menu On a file screen containing photo files, select View, and then press the v button. Title Displays all the the photo files on the media or storage device by title. Date Groups all the the photo files on the media or storage device by Date. Click a group to see the photos in that group. Folder Displays all the folders on the media or storage device. \\ Depending on the storage device, the View menu may differ or not be shown. Using the Options Menu On a file screen containing photo files, select Options, and then press the v button. Slide show Starts the slide show. Shows all the files in the current folder, one after another. If you want to create a slide show with a selected group of photos, see Play Selected below. Play Selected Play Selected lets you create a playlist by selecting specific photos to view. It works essentially the same for all media. See 'Creating a Playlist' on page 71. Send Select Send to upload selected files to an on-line site (Picasa, Facebook, etc.) or a device. To use Send, you need to establish an account with the on-line site, and then log in using the Log In function \\ Depending on the storage device, the Options menu may differ or not be shown. 73 Network Services You can enjoy various network services such as streaming video or on-line apps by connecting the Smart Media Player to your network. \\ To use network services, you must first: -- Connect the Smart Media Player to your network. (See page 18) -- Configure the network settings. (See pages 37~43) Logging In to Your Samsung Account Before you access Movies & TV Shows or Apps, we suggest you log in to your Samsung account. To log in to your Samsung account, follow these steps: 1. With the Samsung Apps displayed, press the RED (A) button. The Log In screen appears. 2. Select the Email field, and then press the v button. The keyboard pop-up appears. 3. Using the keyboard, enter your e-mail address. When finished, select the Done button, and then press the v button. The Log In screen re-appears. 4. Select the Password field, and then press the v button. The keyboard pop-up appears. 5. Using the keyboard, enter your password. When finished, select the Done button, and then press the v button. The Log In screen re-appears. 6. To make the log in process easier next time, select Sign me in automatically, and then press the v button. 7. Select Log In, and then press the v button. The Smart Media Player logs you in to your account. Your account e-mail is displayed on the bottom left of the screen. \\ If you selected Sign me in automatically, the next time you log in, the Smart Media Player will automatically enter your e-mail and password. All you need to do is select Log In. \\ If your e-mail address and password are not displayed when the Log In screen appears, select the button with the down pointing arrow head next to the Email field, and then press the v button. A drop down list of all your registered accounts will appear. Select your account, and then press the v button. The Smart Media Player will fill in the e-mail and password fields. \\ If you press the RED (A) button after you have logged in, the My Account pop-up appears. On the pop-up, you can select Logout, Change Account Information, Link Service Accounts, Remove Accounts from the Device, and Deactivate Account. \\ To rent films and purchase for-pay apps, you must have a credit card registered in your account. If you haven’t registered a card, select Change Account Information. On the Change Account information page, select Register Card, press the v button, and then follow the directions on the screen. 74 Network Services Before Using Apps Before Using Apps If you haven’t set up Smart Hub, when you use Apps for the first time, the Smart Media Player will ask you to perform the Smart Hub set up procedure. 1. On the Home screen, select Apps, and then press the v button. 2. On the Smart Hub Terms & Conditions, Privacy Policy screen, you must review and agree to both the Smart Hub Terms and Conditions and the Privacy Policy to use Smart Hub. 3. Scroll down, and then click the View Details buttons to review the full documents. 4. When done reading, scroll up to the first entry field, and press the v button to agree to the Terms and Conditions and consent to the Privacy Policy. 5. Press the ▶ button to go to the Supplemental Privacy Notices screen. 6. Click the View Details button to view the entire notice. 7. When done reading, scroll up to the top entry field, and then press the v button. \\ You do not need to consent to the Supplemental Privacy Notice, but one or more Smart TV features or functionalities may not be available if you do not. 8. Press the ▶ button twice. The Setup Complete screen appears. Press the v button. 75 Network Services Using Apps Using Apps You can download applications various for pay or free-of-charge application from the Internet and view them on your TV. To access some applications, you need to have a Samsung account. The Apps Screen at a Glance 1 4 1 Recommended : Displays recommended contents managed by Samsung. 2 My Apps : Displays your personal gallery of applications modifiable on the More Apps screen. 3 More Apps : Select to access the More Apps screen where you can add, modify, and delete applications and see all downloaded applications. 4 Featured Applications : Use the ▲▼◀▶ buttons to highlight the displayed Feature Application, and then press the v button. Information about the featured application appears. 2 3 Downloading Applications You can download for pay or free-of-charge applications through Samsung Apps. 1. On the Apps screen, select Samsung Apps, and then press the v button. The Samsung Apps screen appears. 2. Across the top of the screen, under What’s New, you'll see a series of new apps. Use the ◀▶ buttons to scroll the list right or left, and then select an app. Press the v button to see more information about the app. If the app is free, select Download, and then press the v button to download the app. If it is a for pay app, select Buy, press the v button, and then follow the instructions on the screen. \\ To buy an app, you must be logged into your Samsung account and have a credit card registered to the account. Press the RED (A) button on your remote to log in. \\ If you haven’t registered a card, after you log in, press the RED (A) button again, and then select Change Account Information in the pop-up that appears. On the Change Account information page, select Register Card, press the v button, and then follow the directions on the screen. 76 \\ You can also access and download apps from the categories listed on the left of the screen. For instructions, see Step 4. Network Services Using Apps 3. After the app has downloaded, select Run, and then press the v button to run the app now. To run the app later, press the RETURN button. In either case, the icon for the app will appear on the Apps screen. 4. To see additional apps, use the ▲▼◀▶ buttons to move to the category list on the left side of the screen. 5. Use the ▲▼ buttons to select a category. Each time you move the highlight to another category, a different set of applications appears on the right. 6. Use the ▶ button to move to the applications and the ▲▼◀▶ buttons to move from app to app. 7. To see more information about an app, select it, and then press the v button. 8. To download the app, follow the directions in Steps 2 and 3. Starting an Application 1. Select Apps on the Home screen, and then press the v button. 2. On the Apps screen, use the ▲▼◀▶ buttons to select an app, and then press the v button. The app starts. Using the More Apps Screen The More Apps Screen lists all the apps you have downloaded and lets you: • Sort the apps on the More Apps screen by Date downloaded, Recently opened, and Title. • Apply a number of Options Menu functions to the apps listed in the My Apps section of the Apps screen including updating apps, moving apps into a folder, deleting the apps from My Apps, and locking the apps. • Start apps. 77 Network Services Using Apps Sorting the Apps To sort the apps on the More Apps screen, follow these steps: 1. On the Home screen, select Apps, and then press the v button. 2. On the Apps screen, use the ▼ button to move to the More Apps hotspot at the bottom of the page, and then press the v button. 3. On the More Apps screen, use the ▲▶ buttons to move to View at the top of the screen, and then press the v button. 4. In the drop down that appears, select Date Downloaded, Recently Opened, or Title, and then press the v button. The apps on the More Apps screen are sorted by the criteria you have chosen. Using the Options Menu Lock/Unlock Using the Lock/Unlock function and the Security PIN, you can lock applications so they cannot be started on either the Apps screen or the More Apps screen. The default PIN is 0000. 1. On the More Apps screen, use the ▲▶ buttons to go to Options at the top of the screen, and then press the v button. 2. Select Lock/Unlock, and then press the v button. 3. When the Lock Service appears, enter the PIN using the number buttons on your remote control. 4. Select the application you want to lock, and then press the v button. A check appears in the upper left corner of the app. \\ To select all the apps, select Select All at the top right of the screen, and then press the v button. To deselect all the apps, select Deselect All at the top right of the screen, and then press the v button. 5. After you have made all your selections, select Lock at the top of the screen, and then press the v button. 6. Press the RETURN button to return to the Apps screen. Locked apps will display a lock on the upper right side. 78 Network Services Using Apps Edit My Apps Edit My Apps lets you add apps to and delete apps from My Apps. It also lets you change the position of an app in My Apps. ◈◈ Add an App to My Apps 1. On the More Apps screen, use the ▲▶ buttons to go to Options at the top of the screen, and then press the v button. 2. Select Edit My Apps, and then press the v button. The Edit My Apps screen appears. 3. Select a full Color app from the top row of apps, and then press the v button. The full Color app icon appears in the My Apps area below and the app icon in the top row is grayed out. \\ Grayed out apps are already in My Apps. 4. When you return to the Apps screen, the app will appear in the My Apps area. ◈◈ Delete an App from My Apps 1. On the More Apps screen, use the ▲▶ buttons to go to Options at the top of the screen, and then press the v button. 2. Select Edit My Apps, and then press the v button. The Edit My Apps screen appears. 3. Select the app you want to delete from My Apps, press the v button, and then press the v button in the direction of the X. The Remove from My Apps popup appears. \\ If the X does not appear immediately, move the app to the top or bottom row. See Move an App in My Apps on page 80. 4. Select Yes, and then press the v button. 5. When you return to the Apps screen, the app will have been removed from the My Apps area. 79 Network Services Using Apps ◈◈ Move an App in My Apps 1. On the More Apps screen, use the ▲▶ buttons to go to Options at the top of the screen, and then press the v button. 2. Select Edit My Apps, and then press the v button. The Edit My Apps screen appears. 3. Select the app you want to move in My Apps, press the v button, and then press the ▲▼◀▶ button to move the app icon in the direction of one of the arrows (<, >, , ) that appears around the app icon. The app icon moves in the direction you have chosen. \\ Do not move an app in the direction of an X. Moving it in that direction removes the app from My Apps. 4. After you have placed the app icon where you want, press the v button. 5. When you return to the Apps screen, the app will be positioned in the location you had selected. Create Folder Create Folder lets you create a folder on the More Apps screen into which you can put apps. 1. On the More Apps screen, use the ▲▶ buttons to go to Options at the top of the screen, and then press the v button. 2. Select Create Folder, and then press the v button. The Set Folder Name pop-up appears. 3. Press the v button. The keyboard appears. 4. Select the Clear button on the right side, and then press the v button to remove Folder 1 from the entry field. Then, using the keyboard, enter the name you want to apply to the folder. 5. When finished, select the Done button on the right side, and then press the v button. The pop-up reappears. 6. Select OK, and then press the v button. The new folder appears in the list of apps on the left side of the screen. 80 Network Services Using Apps Move to Folder Move to Folder lets you move apps to the folder of your choice. 1. On the More Apps screen, use the ▲▶ buttons to go to Options at the top of the screen, and then press the v button. 2. Select Move to Folder, and then press the v button. The Move to Folder screen appears. 3. Use the ▲▼◀▶ buttons to move to an app, and then press the v button to select the app. A check appears in the upper left corner of the app. 4. To deselect an app, press the v button. The check disappears. 5. Repeat Step 3 to select additional apps. \\ To select all the downloaded apps, select Select All at the top right of the screen, and then press the v button. To deselect all the apps, select Deselect All at the top right of the screen, and then press the v button. 6. When done, select Select folder at the top of the screen, and then press the v button. The Select folder pop-up appears. 7. In the Select folder pop-up, use the ▲▼ buttons to select the folder you want to move the apps you selected to and then press the v button. 8. The Apps Moved pop up appears. Press the v button. 9. To open a folder, use the ▲▼◀▶ buttons to highlight the folder, and then press the v button. Rename Folder Rename Folder lets you rename an existing folder. 1. On the More Apps screen, use the ▲▶ buttons to go to Options at the top of the screen, and then press the v button. 2. Select Rename Folder, and then press the v button. The Rename Folder screen appears, and a folder is highlighted. 3. User the ▲▼◀▶ buttons to highlight a folder of your choice, and then press the v button. The Rename pop-up appears. 4. Press the v button. The keyboard appears. 5. Enter the new name for the folder. When finished, select Done on the right side, and then press the v button. The Rename pop-up reappears displaying the new name. 6. Select OK, and then press the v button. The folder is renamed. 7. Select Close on the right side of the screen, and then press the v button. 81 Network Services Using Apps Delete Delete lets you delete apps and folders from the My Apps screen. If there are apps in a folder, both the folder and the apps are deleted together. Delete removes apps permanently. If you decide you want to use an app you deleted, you will need to download it again. 1. On the More Apps screen, use the ▲▶ buttons to go to Options at the top of the screen, and then press the v button. 2. Select Delete, and then press the v button. The Delete screen appears. 3. Use the ▲▼◀▶ buttons to move to an app, or folder and then press the v button to select. A check appears in the upper left corner of the app or folder you selected. 4. To deselect an app, press the v button. The check disappears. 5. Repeat Step 3 to select additional apps or folders. \\ To select all the downloaded apps, select Select All at the top right of the screen, and then press the v button. To deselect all the apps, select Deselect All at the top right of the screen, and then press the v button. 6. After you have made all your selections, select Delete at the top of the screen, and then press the v button. The Delete pop-up appears. 7. Select Yes, and then press the v button. All the apps you selected are deleted. \\ You cannot immediately delete a locked app or folder. If you select a locked app or folder to delete, when you perform Step 7, the Lock Service popup appears. Enter the Security PIN into the pop-up, and then press the v button. The lock will be released and the app or folder will be deleted. 82 Network Services Using Apps Update Apps Update Apps automatically searches the Internet for updated versions of the apps you have downloaded and updates them if it finds newer versions. 1. On the More Apps screen, use the ▲▶ buttons to go to Options at the top of the screen, and then press the v button. 2. Select Update Apps, and then press the v button. 3. The unit searches the Internet for newer versions of your apps. If there are new apps, the Update Apps pop-up appears. 4. To download the update for a particular app, highlight the app, and then press the v button. A check appears to the left of the app. 5. To deselect the app, highlight it, and then press the v button. \\ To select all the updates, select Select All on the right of the pop-up, and then press the v button. To deselect all the updates, select Deselect All, and then press the v button. 6. After you have selected the updates you want to download, select Update on the right side of the pop-up, and then press the v button. 7. The unit downloads the updates you have chosen. A download bar appears in each app icon as the update for that app is downloaded. The download is complete when the download bars disappear. 83 Network Services Screen Mirroring Screen Mirroring The Screen Mirroring function lets you view the screen of your smart phone or android tablet on the TV you have connected to the Smart Media Player. 1. Press the MIRROR button on the remote. The Screen Mirroring pop-up appears. 2. Launch AllShare Cast or the Screen Mirroring app on your device. 3. On your device, find the name of the Smart Media Player in the list of available devices and then select it. 4. The TV will display a PIN. Enter the PIN into your device. 5. The TV displays a connecting message (for example, Connecting to Android_92gb...) and then displays the connected message. 6. In a few moments, the screen of your device appears on the TV screen. 7. To stop Screen Mirroring, press the EXIT or RETURN button on the remote control, or disable the Screen Mirroring function of your smart phone. \\ You can connect to a device that supports AllShare Cast. Note that connecting to such a device may not be fully supported depending on the manufacturer. For further information on mobile connection support, refer to the manufacturer’s web site. \\ When you are using the Screen Mirroring function, video stuttering or audio dropouts may occur, depending on your environment. \\ Bluetooth transmissions can interfere with the Screen Mirroring signal. Before using the Screen Mirroring function, we strongly recommend that you turn off the Bluetooth function on your smart phone or smart device (tablet, etc.). \\ Screen Mirroring is only available with mobile devices that support AllShare Cast or Wireless Mirroring. For more information, visit the mobile device manufacturer's website. 84 Network Services Using the Web Browser Using the Web Browser You can access the Internet using the Web Browser application. Select Web Browser on the Apps screen, and then press the v button. \\ The Web Browser is not compatible with Java applications. \\ If you attempt to download a file, and the file cannot be saved, an error message will appear. \\ E-commerce (purchasing products online) is not supported. \\ ActiveX is not supported. \\ Access may be blocked to some websites or to web browsers operated by certain businesses. Link Browsing and Pointer Browsing The Web Browser provides two types of browsing, Pointer Browsing and Link Browsing. When you launch the browser for the first time, Pointer Browsing is active. If you are using a mouse to navigate in the Web Browser, we recommend leaving Pointer Browsing active. If you are using your remote to navigate in the Web Browser, we recommend that you replace Pointer Browsing with Link Browsing. Link Browsing moves a highlight from one link to the next in the Web Browser and is much faster than Pointer Browsing if you are using your remote. To activate Link Browsing, follow these steps: 1. Use the ▲▼◀▶ buttons on your remote to move the pointer to the Link Browser icon on the top right of the screen. The Link Browser icon is the third icon from the right. The pointer will be in the correct position if the icon turns blue and the words “Link Browsing” appear on the screen. 2. Press the v button. Link Browsing is activated and will remain active whenever you bring up the Web Browser. 85 Network Services Using the Web Browser The Control Panel at a Glance The Control Panel, which runs across the top of the screen, has a series of icons which start a number of useful functions. The icons are described below, starting with the icon on the far left of the screen. http://www.samsung.com 100% • : Moves to the previous page. • : Moves to the next web page. • : Displays the Bookmarks and History screen. You can bookmark the current page, select an existing bookmark, and edit and delete bookmarks. You can also view your browsing history and select a page to revisit. • • : Lets you enter a page address manually using the keyboard pop-up. • : Reloads the current page so that it is refreshed on the screen. • : Adds the current page to your bookmarks. • • 86 : Moves to the Home screen of the Web Browser. http://www.samsung.com : Lets you search for information by entering words or characters using the keyboard pop-up. See 'Using the Keyboard Pop-up' on page 87. : Lets you enlarge or shrink the screen by various percentages. • : Turns on the PIP (Picture-in-Picture) function. • : Lets you switch between Pointer Browsing and Link Browsing. • : Lets you configure the Browser’s settings. See 'Using the Setting Menu' on page 88. • : Closes the Web Browser. Network Services Using the Web Browser Using the Keyboard Pop-up When you click the http://www.samsung.com , the or access a data or text entry field, and then press the v button, the keyboard pop-up appears. To use the keyboard pop-up with your remote, follow these steps: 1. Use the ▲▼◀▶ buttons on your remote to move the highlight to a letter or number of your choice. 2. Press the v button to enter the letter or number into the entry field. 3. To access capital letters, move the highlight to the Caps key on the top left, and then press the v button. Press the v button again with the Caps key highlighted to access small letters again. 4. To access symbols and additional punctuation marks, highlight the 123#& button on the left, and then press the v button. 5. To delete a character you entered, move the highlight to the button, and then press the v button. 6. To delete all the characters you entered, move the highlight to the Clear button, and then press the v button. 7. When finished entering, move the highlight to the Done button, and then press the v button. \\ If you have a wireless keyboard connected to your product, you can use the wireless keyboard to enter letters, numbers, symbols, and punctuation. Note that the wireless keyboard will work only when the keyboard popup appears and can only be used to enter letters, numbers, symbols, and punctuation. Options on the Keyboard Pop-Up To access the keyboard pop-up options, highlight the button on the bottom left of the keyboard, and then press the v button. Language Select the language for the keyboard. You can select English, French, Russian, etc. Recommended Text The keyboard will suggest recommended words as you enter text. You can turn this function On or Off. Reset recommended text data All the keyword data that has been inputted will be reset. Predict Next Letter The keyboard will predict the next letter as you enter letters. The predictions appear in a ring around the letter you have just entered. You can select a predicted letter or move to another letter. You can turn this function On or Off. 87 Network Services Using the Web Browser Using the Setting Menu The Setting menu contains functions that control how the Browser operates and Browser security functions. To open the Setting menu, highlight the Control Panel, and then press the v button. To select an option in the setting menu, highlight the option, and then press the v button. http://www.samsung.com icon in the 100% Enable Grabbing Approved Sites Private browsing on PIP Settings Web Browser Settings Help Close Enable/Disable Grabbing Approved Sites Turns the Grabber function on and off. When the Grabber function is on, you can move a web page up and down without dragging the scroll bar. The Grabber function is only available in Pointer Browsing. Lets you restrict your children’s access to inappropriate web pages by allowing access only to the web sites you have registered. Every time you access this function, the PIN screen appears. The first time you access this function, enter the default PIN, 0000 using the number buttons on your remote. You can change the PIN using Reset password for the Approved Sites function. See below. Approved Sites Feature : Turns the Approved Sites function on or off. Reset password for Approved Sites : Change the Approved Sites' passwords. Add current site : Lets you add the currently displayed web site to the Approved Sites list. Manage Approved Sites : Lets you key in URLs to add to the Approved Sites List and delete sites from the Approved Sites list. \\ If you turn this function on and have not added any sites to the Approved Sites list, you will not be able to access any Internet sites. 88 Network Services Using the Web Browser Enable or disable the Privacy mode. When the Privacy mode is enabled, the browser does not retain the URLs of sites you visit. If you want to enable Privacy mode, select Private Browsing On/Off OK. If the Privacy mode is running, the “Stop” icon appears in front of the URL at the top of the screen. To disable Privacy mode, select it again when Privacy mode is enabled. Position : You can set the desired PIP position. PIP Settings \\ In case "PIP Settings" item was not activated, if you clicks activated. icon at the upper right side of the web browser, it is Web Browser Setting Set as homepage : You can set the Browser's home page. Pop-up Block : Turns the Popup Block on and off. Page Block : You can block the current web page and manage the blocked sites. General : You can delete personal information such as website history and browsing data (cookies, etc.), and reset all web browser settings to their factory defaults. Encoding : You can set the Encoding setting for web pages to Automatic or select the encoding format manually from a list. Pointer : You can set the speed of the cursor when the cursor is set to Pointer and turn Smart Cursor On and Off. Browser Information : Displays the version number and copyright information for the Web Browser. Help Provides basic information about the operation of the Web Browser. \\ Depending on the web site, some of the Web Browser Setting functions may not be activated. Functions that are not activated are greyed out and cannot be used. 89 Network Services Linking Your Internet Service Accounts to the Smart Media Player Linking Your Internet Service Accounts to the Smart Media Player The Link Service Accounts function lets you link your product to your accounts with Internet services such as Pandora so that the Smart Media Player can log you in to the service automatically when you start the app for that service. To create a service account link, follow these steps: 1. On the Samsugn Apps screen, press the RED (A) button on your remote to log in to your Samsung Account. 2. After you have logged in, press the RED (A) button on your remote again. 3. Select Link Service Accounts in the My Account pop-up, and then press the v button. 4. On the Link Service Accounts screen, select the service you want to link to the Smart Media Player, and then press the v button. 5. Select Register, and then press the v button. 6. In the ID and Password screen, enter the ID you use to log in to the service you selected using the pop-up keyboard. When finished, select Done, and then press the v button. 7. Repeat the same process for the password. When finished select Done, and then press the v button. 8. Select OK, and then press the v button. 90 Appendix Additional Information TV Aspect Ratio yyDepending on the video format type, some aspect ratios may not be available. yyIf you select an aspect ratio and option which is different than the aspect ratio of your TV screen, then the picture might appear to be distorted. yyIf you select the 16:9 Original, your TV may display 4:3 Pillarbox (black bars on sides of picture). BD Wise (Samsung Products only) yyWhen BD Wise is on, the Resolution setting automatically defaults to BD Wise and BD Wise appears in the Resolution menu. yyIf the Smart Media Player is connected to a device that does not support BD Wise, you can not use the BD Wise function. yyFor proper operation of BD Wise, set the BD Wise menu of both the Smart Media Player and the TV to On. Settings Digital Output yyBe sure to select the correct Digital Output or you will hear no sound or just loud noise. yyIf the HDMI device (AV receiver, TV) is not compatible with compressed formats (Dolby Digital), the audio signal outputs as PCM. Anynet+ (HDMI-CEC) yyDepending on your TV, certain HDMI output resolutions may not work. Please refer to the user manual of your TV. yyThis function is not available if the HDMI cable does not support CEC. yyIf your Samsung TV has an Anynet+ logo, then it supports the Anynet+ function. Turning on/off the Closed Caption yyIf you press the CC (Closed Caption) button on the remote control, the caption bar appears. Press the RETURN button to remove the caption bar. 91 Troubleshooting No operation can be performed with the remote control. Forgot password ▪▪Check the batteries in the remote control. They may need replacing. ▪▪Operate the remote control at a distance of no more than 20 ft. (6.1 m). ▪▪Remove the batteries and hold down one or more buttons for several minutes to drain the microprocessor inside the remote control to reset it. Reinstall the batteries and try to operate the remote control again. ▪▪Select Settings Support Reset on the Home screen. All settings including the PIN will revert to the factory settings. When the factory default settings are restored, all stored user data is deleted. Play mode differs from the Setup Menu selection. If you experience other problems. ▪▪Some of the functions selected in the Setup Menu may not work properly if the content file is not encoded with the corresponding function. ▪▪This is not a problem with the Smart Media Player. ▪▪Go to the table of contents and find the section of the user manual that contains the explanations regarding the current problem, and follow the procedure once again. ▪▪If the problem still cannot be solved, please contact your nearest Samsung authorized service center. No audio. No HDMI output. ▪▪Make sure you have selected the correct Digital Output in the Audio Options Menu. ▪▪Check the connection between the TV and the HDMI jack of the Smart Media Player. ▪▪Check if your TV supports 480p, 720p, 1080i, 1080p HDMI input resolution. The screen ratio cannot be changed. The screen is blank. ▪▪If the HDMI output is set to a resolution your TV cannot support (for example, 1080p), you may not see a picture on your TV. ▪▪Select Settings Support Reset on the Home screen in other TV. When the factory default settings are restored, all stored user data is deleted. 92 Abnormal HDMI output screen. ▪▪If random noise appears on the screen, it means that TV does not support HDCP (High-bandwidth Digital Content Protection). Samsung Link function I can see folders shared through Samsung Link, but I cannot see the files. Repairs ▪▪Samsung Link only shows Video, Photo, and Music files. Other types of files are not displayed. 1. An engineer is called out to your home at your request and there is no Video plays intermittently. 2. You bring the unit to a repair center and there is no defect in the Smart ▪▪Check if the network is stable. ▪▪Check if the network cable is properly connected and if the network is not overloaded. ▪▪The wireless connection between the DLNA compatible device and the Smart Media Player is unstable. Check the connection. The Samsung Link connection between the Smart Media Player and PC is unstable. If you contact us to repair your product, an administration fee may be charged if either: defect in the Smart Media Player. Media Player. We will provide you with the amount of the administration fee before we make a home visit or begin any work on your product. We recommend you read this manually thoroughly, search for a solution on line at www.samsung.com, or contact Samsung Customer Care before seeking to repair your product. ▪▪IP addresses within the same subnetwork should be unique. If they are not, IP interference can cause this phenomenon. ▪▪Check if you have a firewall enabled. If so, disable the firewall function. \\ When the factory default settings are restored, all stored user data is deleted. 93 Appendix Specifications Specifications General USB ▪▪Net Weight: 1.5 lbs. (0.7 Kg) ▪▪Dimensions: 9.17 (W) x .98 (H) x 6.8 (D) in. (233 (W) x 25 (H) x 173 (D) mm) ▪▪Operating Temperature Range: +41 °F to +95 °F (+5 °C to +35 °C) ▪▪Operating Humidity Range: 10 % to 75 % ▪▪USB 2.0 Host x2 (0.5A) HDMI ▪▪Video Output Resolution: 1080p, 1080i, 720p, 480p ▪▪Audio Output Format: PCM, Dolby Digital, Dolby Digital Plus Optical Digital Audio ▪▪Terminal: TOS-Link Optical ▪▪Audio Output Format: PCM, Dolby Digital Network ▪▪Wired LAN: RJ-45 Ethernet Port x 1, 100M BASE-TX ▪▪Wireless LAN: Built-in EP(OPEN/SHARED) ▪▪Security: W WPA-PSK(TKIP/AES) WPA2-PSK(TKIP/AES) ▪▪WPS(PBC): Supported Power ▪▪Power Consumption Power On: Max. 25 W Power Off (when "Quick Start" Setting is "Off"): 0.5 W / 1.786 A ▪▪Power Rating: DC 14 V CableCARD Slot ▪▪Single Stream CableCARD Interface (S-MODE of M-CARD) FDC (Forward Data Channel) ▪▪RF Input Tunning Range: 70 to 130 MHz ▪▪RF Input Level Range: -15 to + 15 dBmV (QPSK) ▪▪Format: SCTE 55-1, 55-2 Cable ▪▪Channel Input Frequency: 54 to 1002 MHz 4 QAM -15 to +15 dBmV ▪▪Cable Input Signal Level Range: 6 256 QAM -12 to +15 dBmV ▪▪Cable Input Signal Modulation: 64/256 QAM \\ Network speeds equal to or below 10 Mbps are not supported. \\ Design and specifications are subject to change without prior notice. \\ For the power supply and power consumption, refer to the label attached to the Smart Media Player. \\ Weight and dimensions are approximate. 94 Appendix Network Service Disclaimer Network Service Disclaimer All content and services accessible through this device belong to third parties and are protected by copyright, patent, trademark and/or other intellectual property laws. Such content and services are provided solely for your personal noncommercial use. You may not use any content or services in a manner that has not been authorized by the content owner or service provider. Without limiting the foregoing, unless expressly authorized by the applicable content owner or service provider, you may not modify, copy, republish, upload, post, transmit, translate, sell, create derivative works, exploit, or distribute in any manner or medium any content or services displayed through this device. THIRD PARTY CONTENT AND SERVICES ARE PROVIDED "AS IS." SAMSUNG DOES NOT WARRANT CONTENT OR SERVICES SO PROVIDED, EITHER EXPRESSLY OR IMPLIEDLY, FOR ANY PURPOSE. SAMSUNG EXPRESSLY DISCLAIMS ANY IMPLIED WARRANTIES, INCLUDING BUT NOT LIMITED TO, WARRANTIES OF MERCHANTABILITY OR FITNESS FOR A PARTICULAR PURPOSE. SAMSUNG DOES NOT GUARANTEE THE ACCURACY, VALIDITY, TIMELINESS, LEGALITY, OR COMPLETENESS OF ANY CONTENT OR SERVICE MADE AVAILABLE THROUGH THIS DEVICE AND UNDER NO CIRCUMSTANCES, INCLUDING NEGLIGENCE, SHALL SAMSUNG BE LIABLE, WHETHER IN CONTRACT OR TORT, FOR ANY DIRECT, INDIRECT, INCIDENTAL, SPECIAL OR CONSEQUENTIAL DAMAGES, ATTORNEY FEES, EXPENSES, OR ANY OTHER DAMAGES ARISING OUT OF, OR IN CONNECTION WITH, ANY INFORMATION CONTAINED IN, OR AS A RESULT OF THE USE OF ANY CONTENT OR SERVICE BY YOU OR ANY THIRD PARTY, EVEN IF ADVISED OF THE POSSIBILITY OF SUCH DAMAGES. Third party services may be terminated or interrupted at any time, and Samsung makes no representation or warranty that any content or service will remain available for any period of time. Content and services are transmitted by third parties by means of networks and transmission facilities over which Samsung has no control. Without limiting the generality of this disclaimer, Samsung expressly disclaims any responsibility or liability for any interruption or suspension of any content or service made available through this device. Samsung is neither responsible nor liable for customer service related to the content and services. Any question or request for service relating to the content or services should be made directly to the respective content and service providers. Licence • Manufactured under license from Dolby Laboratories. Dolby and the double-D symbol are trademarks of Dolby Laboratories. • The terms HDMI and HDMI High-Definition Multimedia Interface, and the HDMI Logo are trademarks or registered trademarks of HDMI Licensing LLC in the United States and other countries. 95 Appendix Licence • DivX -- ABOUT DIVX VIDEO: DivX® is a digital video format created by DivX, LLC, a subsidiary of Rovi Corporation. This is an official DivX Certified® device that has passed rigorous testing to verify that it plays DivX video. Visit divx.com for more information and software tools to convert your files into DivX videos. -- ABOUT DIVX VIDEO-ON-DEMAND: This DivX Certified® device must be registered in order to play purchased DivX Video-on-Demand (VOD) movies. To obtain your registration code, locate the DivX VOD section in your device setup menu. Go to vod.divx.com for more information on how to complete your registration. -- DivX Certified® to play DivX® video up to HD 1080p, including premium content. DivX®, DivX Certified® and associated logos are trademarks of Rovi Corporation or its subsidiaries and are used under license. Covered by one or more of the following U.S. patents : 7,295,673; 7,460,668; 7,515,710; 7,519,274 • Oracle and Java are registered trademarks of Oracle and/or its affiliates. Other names may be trademarks of their respective owners • Rovi Product Notice -- This item incorporates copy protection technology that is protected by U.S. patents and other intellectual property rights of Rovi Corporation. Reverse engineering and disassembly are prohibited. • Open Source Licence Notice -- In the case of using open source software, Open Source Licences are available on the Smart Media Player menu. To access the Open Source Licence, select Settings Support Contact Samsung on the Home screen. When the message, 'Press Red Key to see Open Source Licence' appears, press the Red (A) button. • ENERGY STAR qualified model only -- As an ENERGY STAR Partner, Samsung has determined that this product or product models meets the ENERGY STAR guidelines for energy efficiency. 96 Memo 97 Samsung Brand Products LIMITED WARRANTY TO ORIGINAL PURCHASER This SAMSUNG brand product, as supplied and distributed by SAMSUNG and delivered new, in the original carton to the original consumer purchaser, is warranted by SAMSUNG against manufacturing defects in materials and workmanship for a limited warranty period of 1 (one) year. This limited warranty begins on the original date of purchase, and is valid only on products purchased and used in the United States. To receive warranty service, the purchaser must contact SAMSUNG for problem determination and service procedures. Warranty service can only be performed by a SAMSUNG authorized service center. The original dated bill of sale must be presented upon request as proof of purchase to SAMSUNG or SAMSUNG's authorized service center. SAMSUNG will repair or replace this product, at our option and at no charge as stipulated herein, with new or reconditioned parts or products if found to be defective during the limited warranty period. All replaced parts and products become the property of SAMSUNG and must be returned to SAMSUNG. Replacement parts and products assume the remaining original warranty, or ninety (90) days, whichever is longer. This limited warranty covers manufacturing defects in materials and workmanship encountered in normal, and except to the extent otherwise expressly provided for in this statement, noncommercial use of this product, and shall not apply to the following, including, but not limited to: damage which occurs in shipment; delivery and installation; applications and uses for which this product was not intended; altered product or serial numbers; cosmetic damage or exterior finishes; accidents, abuse, neglect, fire, water, lightning or other acts of nature; use of products, equipment, systems, utilities, services, parts, supplies, accessories, applications, installations, repairs, external wiring or connectors not supplied or authorized by SAMSUNG which damage this product or result in service problems; incorrect electrical line voltage, fluctuations and surges; customer adjustments and failure to follow operating instructions, cleaning, maintenance and environmental instructions that are covered and prescribed in the instruction book; reception problems and distortion related to noise, echo, interference or other signal transmission and delivery problems. SAMSUNG does not warrant Remote Control related return due to customer's fault, such as Remote Control damage or breakage due to customer's fault, or dead battery of remote control; Viewing Card related problems, such as defective card used; or Antenna or Signal related external problems, such as broadcasting signal not available due to low signal power (not a problem of the Samsung box) and noise added signal from exterior. SAMSUNG does not warrant uninterrupted or error-free operation of the product. THERE ARE NO EXPRESS WARRANTIES OTHER THAN THOSE LISTED AND DESCRIBED ABOVE, AND NO WARRANTIES WHETHER EXPRESS OR IMPLIED, INCLUDING, BUT NOT LIMITED TO, ANY IMPLIED WARRANTIES OF MERCHANTABILITY OR FITNESS FOR A PARTICULAR PURPOSE, SHALL APPLY AFTER THE EXPRESS WARRANTY PERIODS STATED ABOVE, AND NO OTHER EXPRESS WARRANTY OR GUARANTY GIVEN BY ANY PERSON, FIRM OR CORPORATION WITH RESPECT TO THIS PRODUCT SHALL BE BINDING ON SAMSUNG. SAMSUNG SHALL NOT BE LIABLE FOR LOSS OF REVENUE OR PROFITS, FAILURE TO REALIZE SAVINGS OR OTHER BENEFITS, OR ANY OTHER SPECIAL, INCIDENTAL OR CONSEQUENTIAL DAMAGES CAUSED BY THE USE, MISUSE OR INABILITY TO USE THIS PRODUCT, REGARDLESS OF THE LEGAL THEORY ON WHICH THE CLAIM IS BASED, AND EVEN IF SAMSUNG HAS BEEN ADVISED OF THE POSSIBILITY OF SUCH DAMAGES. NOR SHALL RECOVERY OF ANY KIND AGAINST SAMSUNG BE GREATER IN AMOUNT THAN THE PURCHASE PRICE OF THE PRODUCT SOLD BY SAMSUNG AND CAUSING THE ALLEGED DAMAGE. WITHOUT LIMITING THE FOREGOING, PURCHASER ASSUMES ALL RISK AND LIABILITY FOR LOSS, DAMAGE OR INJURY TO PURCHASER AND PURCHASER’S PROPERTY AND TO OTHERS AND THEIR PROPERTY ARISING OUT OF THE USE, MISUSE OR INABILITY TO USE THIS PRODUCT SOLD BY SAMSUNG NOT CAUSED DIRECTLY BY THE NEGLIGENCE OF SAMSUNG. THIS LIMITED WARRANTY SHALL NOT EXTEND TO ANYONE OTHER THAN THE ORIGINAL PURCHASER OF THIS PRODUCT, IS NONTRANSFERABLE AND STATES YOUR EXCLUSIVE REMEDY. Some states do not allow limitations on how long an implied warranty lasts, or the exclusion or limitation of incidental or consequential damages, so the above limitations or exclusions may not apply to you. This warranty gives you specific legal rights, and you may also have other rights which vary from state to state. To obtain warranty service, please contact SAMSUNG at: Samsung Electronics America, Inc. 85 Challenger Road Ridgefield Park, NJ 07660-2112 1-800-SAMSUNG (726-7864) – www.samsung.com


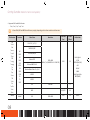


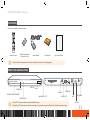

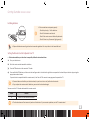
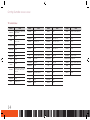

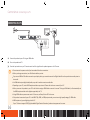


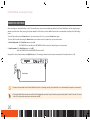

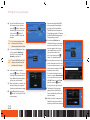

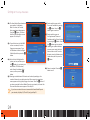


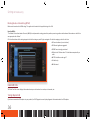


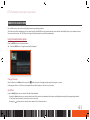

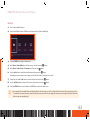


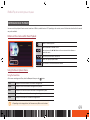


![PLAS A O ]-OR](http://vs1.manualzilla.com/store/data/005852706_1-5db0b7ed584537f0e62af161fb124638-150x150.png)