1
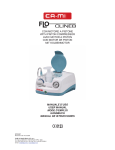
STANDARD OPERATION PROCEDURES (SOP) FOR 7-STAGE MERCER
CASCADE IMPACTOR
Preparing Mercer Impactor for Sampling
1. Lay the 7 stainless steel collection disks onto a clean work surface in a ventilated
chemical hood and carefully with a q-tip apply a thin, even layer of grease
solution supplied by the manufacturer on each disk
2. Let the disks dry for about 10 minutes
!
ATTENTION! Do not overgrease the disks. Overgreasing may results in
reduced accuracy of measurements. On the other hand, make sure that
disks get enough grease in order to avoid particle loss due to bounce.
3. Weigh the stainless steel collection disks and a 25 mm filter. Log in the weights.
4. Inspect the impactor jet plates and make sure that their rubber O-rings are placed
properly and do not show signs of damage.
1. Place the jet plate labeled with the number 7 on the working surface and, with the
help of a pair of tweezers, carefully center on it one of the stainless steel
collection disks. Note in you laboratory book the weight of the collection disk
corresponding to Stage 7.
2. On top of Stage 7, stack up the jet plate labeled with the number 6. Place another
collection disk on it and mark down the weight of the collection disk.
3. Repeat this procedure until all the stages from 7 (bottom) to 1 (top) are loaded
with their collection disks and stacked up on top of each other. Make sure the
weights of the collection disks are properly identified for each stage. For the data
use a table like the following:
Stage
Weight before
exposure
Weight after
exposure
Collected
Mass
1
2
3
4
5
6
7
Filter
4. Align the impactor barrel with the stack of stages and slowly but firmly push it
down until the whole stack, starting from Stage 1, is fully inserted
5. Place a weighted 25 mm filter in the filter holder inside the impactor’s tail piece
1
6. Hold the tail piece with one hand and screw in the loaded impactor barrel with the
other while keeping it upright (stage 7 at the bottom). Do not overtighten!
7. Attach the nose piece on the other side of the barrel. Do not overtighten!
8. Slide the impactor inlet into the impactor sampling adaptor
9. Connect the sampling line to the push-to-connect fitting
10. Using an appropriate flow measuring device (primary standard or standardtraceable) check the impactor’s flow rate. Note the flow rate on your laboratory
book.
Sampling with the Mercer Impactor
1. Unplug an exposure port designated for sampling and connect the impactor
sampling adaptor to it
2. Connect the sampling line to the impactor
3. Start sampling and, at the same time, start measuring the sampling time with a
laboratory timer
4. When the pre-determined sampling time is up, stop sampling. Write down the
sampling time.
!
ATTENTION! Length of sampling time will depend on the expected
concentration in the chamber. The higher the concentration, the shorter
time needed to collect on the discs the necessary amount of material.
Oversampling may results in reduced accuracy of measurements of the
larger fractions as a result of particles bouncing on the collected material.
On the other hand, undersampling may result in collection of negligible
amounts of material in the lower stages.
5. Disconnect the impactor from the sampling exposure port and plug the port
immediately
6. Disconnect the sampling line from the impactor outlet
7. Move the impactor to a clean, ventilated working area.
8. Unscrew and remove both nose and tail pieces
9. Pick up with a pair of tweezers the filter from the tail piece and weigh it. Log in
the weight in the data table
10. Hold the barrel upright (Stage 7 at the bottom) and, using the pusher provided
with the impactor kit, remove the stages one by one by pushing them from
beneath. As each stage comes out of the barrel, pick up their collection disks with
tweezers and weigh them. Log in all their weights in the data table.
11. Continue the analysis procedure according to the analysis SOP
Analyzing Data Collected with Mercer Impactor
To calculate the MMAD and GSD values for the sampled aerosol, use either the
manual method (log-prob graph paper) as described on the User’s Manual, or enter
2
the data (collected mass on discs, sampling time and sampling flow rate) on the
provided Excel spreadsheet. The latter one is faster, easier and more accurate.
3