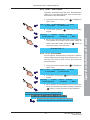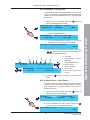
1
ID50/60 997-264-000-11, Issue 11 October 2010 operating manual ID50 Series Panel - Operating Manual Contents Introduction 1 1.1 Associated Documents 1 1.2 The ID50 / ID60 Series Panel 1 1.2.1 Device Type Abbreviations 2 Cleaning 2 1.3 2 Panel Controls and Indicators 3 2.1 Controls 3 2.2 Indicators 4 3 Automatic Alarms - What to do 3.1 5 Fire 5 3.1.1 Fire in Delayed Mode 7 3.2 Pre-alarm 8 3.3 Fault 9 3.3 4 3.2.1 Power Fail 10 Plant Alarm 11 Operator Actions at Panel 4.1 12 Introduction 12 4.1.1 Liquid Crystal Display 12 4.1.2 Internal Buzzer 13 4.1.3 Access Codes 13 4.1.4 Keyswitch 14 4.2 MUTE BUZZER Pushbutton 14 4.3 EXTEND DELAY Pushbutton 14 4.4 END DELAYS/EVACUATE Pushbutton 15 4.5 SILENCE/RESOUND Pushbutton 16 4.6 RESET Pushbutton 17 4.7 Numeric Keys 18 4.7.1 Cancellation/Termination Button 18 4.7.2 Level 2 Options Menu Button 18 4.8 Level 2 Option Menus 19 4.9 TEST - User Option 20 4.9.1 LEDs - User Option 21 4.9.2 LCD - User Option 21 4.9.3 Zones - User Option 22 4.9.4 Auto High Test - User Option 24 4.9.5 Outputs - User Option 24 i 997-264-000-11, Issue 11 October 2010 Contents 1 ID50 Series Panel - Operating Manual 4.9.6 Buzzer - User Option 27 4.9.7 Keyboard - User Option 27 4.10 DISABLE / ENABLE - User Option 28 4.10.1 Zones - User Option 28 4.10.2 Outputs - User Option 31 4.10.3 Day Mode - User Option 32 4.10.4 Delays - User Option 33 4.11 CLOCK - User Option 4.11.1 Time - User Option 35 4.11.2 Date - User Option 36 Contents 4.12 VIEW MODE - User Option 997-264-000-11, Issue 11 October 2010 34 37 4.12.1 Log - User Option 38 4.12.2 Devices - User Option 39 4.12.3 Faults - User Option 41 4.12.4 Input Events - User Option 42 4.12.5 Disabled - User Option 43 4.12.6 Alarm Count - User Option 43 4.12.7 Voltages - User Option 44 4.12.8 Version - User Option 45 4.13 Commissioning 45 4.14 Print 45 Appendix 1 - Log Book A1-1 Appendix 2 - Maintenance A2-1 Appendix 3 - ID60 Single Loop Panel Differences A3-1 ii ID50 Series Panel - Operating Manual ZONE FIRE ZONE FAULT/ DISABLE/TEST 1 2 3 4 5 6 7 8 9 10 11 12 13 14 15 16 FIRE 7 8 9 4 5 [ 6 1 2 3 0..9 0 4 MUTE BUZZER DISABLEMENT FAULT TEST POWER SUPPLY FAULT DELAYS ACTIVE EARTH FAULT FIRE OUTPUT: FAULT/ DISABLED SYSTEM FAULT FIRE OUTPUT ACTIVE SOUNDER: FAULT/ DISABLED PLANT ALARM PRE-ALARM POWER FIRE CONTROL O/P: FAULT/ DISABLED iii EXTEND DELAY END DELAY/ EVACUATE SILENCE/ RESOUND RESET 997-264-000-11, Issue 11 October 2010 Series Panel ID50Contents ID50 Series Panel ID50 Series Panel - Operating Manual 1 Introduction This manual contains operating instructions for the ID50 and ID60 Series Fire Detection Panels. Differences between the ID50 and ID60 panels are given in Appendix 3. Users of this manual are assumed to be working with a panel that has already been installed and configured appropriately for the area under its supervision. 1.1 Associated Documents This manual does not describe the installation or configuration procedures of the panel. For information on these topics, refer to the ID50 Series Panel - Installation, Commissioning and Configuration Manual (Ref. 997-263-000-X). The panel, as supplied by NOTIFIER, is a 1-loop, 16-zone Analogue Addressable Panel. The single loop has the capacity for up to 99 analogue sensors plus up to 99 modules and, in some installations, panels may also be connected to repeaters using the RS485 Communications Link. All the control and operation functions described in this manual can be carried out using the pushbuttons on the front of the panel. A keyswitch is provided which, when set to the right, has the same effect as entering an access 2 passcode. Set it to the centre to cancel out of all menus and return to the Status: NORMAL display. This indicates access level 2 is de-selected. 1 997-264-000-11, Issue 11 October 2010 Introduction 1.2 The ID50/ ID60 Series Panel ID50 Series Panel - Operating Manual 1.2.1 Device Type Abbreviations Throughout this manual the panel may refer to devices by an abbreviated name. The following table lists the device type abbreviation and its description. Abbreviation Introduction AUX AVR AVS CTE CTL ESE ESM ESO EST ION IRL LBM MCP MLT MNS MON MRL M-CZ OPT OPX RLE RLY SDR SDH SM2/SMT2 SM3/SMT3 SM4/SMT4 STRB TMP TxD ZMX Type Description Plant Warning Input Advanced VIEW™ Reference* Advanced VIEW™ Sensor* Monitored (Relay Type) Output (VdS) Monitored (Relay Type) Output Extinguishant System Output (VdS) Extinguishant System Monitored Extinguishing System Output Extinguishant Monitor System Trigger Ionisation Smoke Detector Immediate Release Input Loop Booster Module Manual Call Point† Advanced Multi Sensor Monitor module (no short-circuit) Fire Alarm Monitor Input Manual Release Input Conventional Interface input (OPAL) Optical/Photo-electric Smoke Detector Optiplex Multi-sensor Unmonitored(RelayType)orO/COutputs(VdS) Unmonitored (Relay Type) or O/C Outputs Monitored (Sounder Type) Output Monitored (Sounder Type) Output - high load SMART 2 Multi-criteria Sensor SMART 3 Multi-criteria Sensor SMART 4 Multi-criteria Sensor* Strobe (OPAL) Temperature Detector Monitored Transmission Routing Output Conventional Detector Input (CLIP) Note: Devices marked ‘*’ are supported by the ID60 Panel only. The Device marked ‘ † ’ is also available as ‘DKM’ - not used in this application (provided to be compatible with VdS requirements). 1.3 Cleaning The panel case may be cleaned periodically by wiping with a soft, damp lint-free cloth. Do not use solvents. 997-264-000-11, Issue 11 October 2010 2 ID50 Series Panel - Operating Manual 2 Panel Controls and Indicators The panel’s controls and indicators are used to operate the overall system and display the panel status. The panel has five function pushbuttons, twelve numeric/cursor keys and thirty-two zonal LED indicators, two ‘FIRE’ indicators and fourteen system status LED indicators. Status: NORMAL SAT 12/10/2002 00:00:00 ZONE FIRE ZONE FAULT DISABLE/TEST 1 2 3 4 5 6 7 8 9 10 11 12 13 14 15 16 FIRE FAULT TEST POWER SUPPLY FAULT DELAYS ACTIVE EARTH FAULT SYSTEM FAULT FIRE OUTPUT ACTIVE PLANT ALARM POWER 8 9 4 5 6 1 2 3 0..9 0 MUTE BUZZER DISABLEMENT FIRE OUTPUT: FAULT/ DISABLED 7 EXTEND DELAY END DELAY/ EVACUATE SOUNDER: FAULT/ DISABLED SILENCE/ RESOUND PRE-ALARM FIRE CONTROL O/P: FAULT/ DISABLED RESET 2.1 Controls The pushbuttons are listed below, together with references to the relevant sections of the manual: + + Function Pushbuttons MUTE BUZZER EXTEND DELAY + + END DELAY/ EVACUATE SILENCE/ RESOUND RESET • • • • • MUTE BUZZER - (Section 4.2). 1 Also configurable as Transmission Device (TD) Enable/Disable. EXTEND DELAY - (Section 4.3). END DELAY/EVACUATE1 - (Section 4.4) SILENCE/RESOUND - (Section 4.5). RESET - (Section 4.6). Numeric/Cursor Keys • Numeric/Cursor keys - (Section 4.7). Keyswitch Turn the keyswitch to enable level 2 access. The keyswitch provides an alternative to entering the level 2 access code via the numeric keys. See Section 4.1.3 and Section 4.1.4. 3 997-264-000-11, Issue 11 October 2010 Panel Controls & Indicators An access level 2 keyswitch is provided to enable the operation of panel controls and access to user menus without entering a passcode via the numeric keypad. ID50 Series Panel - Operating Manual 2.2 Indicators The panel status indicators comprise three groups: a. Zone Status LED indicators. b. Panel/System LED indicators. c. Visible/Audible indicators. Zone Status LED Indicators • ZONE FIRE - these LEDs indicate affected zone(s). • ZONE FAULT/DISABLE/TEST - these LEDs indicate affected zone(s). Panel Controls & Indicators Panel/System LED Indicators FIRE • FIRE - these LEDs indicate a fire condition. • Other System Status LEDs: + + FAULT + indicates a fault has been detected by the panel. DISABLEMENT indicates the presence of a manually-configured disablement. TEST indicates a test is in progress. DELAY ACTIVE indicates delays are active. FIRE OUTPUT ACTIVE indicates fire outputs have been operated. PRE-ALARM1 indicates a pre-alarm condition exists. POWER indicates status of power supply. SYSTEM FAULT indicates the CPU has reset or a system fault has occurred. EARTH FAULT indicates an earth fault has occurred. PLANT ALARM2 indicates a fault or warning from a plant-monitoring device. FIRE CONTROL O/P: FAULT/DISABLED indicates a fire control output fault or disablement. FIRE OUTPUT: FAULT/DISABLED indicates a fire output fault or disablement SOUNDER: FAULT/DISABLED indicates a sounder circuit fault or disablement POWER SUPPLY FAULT indicates an unsatisfactory power supply to the panel. + DISABLEMENT FAULT TEST POWER SUPPLY FAULT DELAYS ACTIVE EARTH FAULT SYSTEM FAULT FIRE OUTPUT: FAULT/ DISABLED FIRE OUTPUT ACTIVE PLANT ALARM POWER SOUNDER: FAULT/ DISABLED PRE-ALARM FIRE CONTROL O/P: FAULT/ DISABLED 1 This LED is also configurable as SOUNDERS SILENCED. This LED can be configured as: FAULT O/P: FAULT/ DISABLED. 2 Visible/Audible Indicators • Liquid Crystal Display (LCD) - (Section 4.1.1). • Internal Buzzer - (Section 4.1.2). 997-264-000-11, Issue 11 October 2010 4 ID50 Series Panel - Operating Manual 3 Automatic Alarms - What to do Before any automatic alarms have been sounded the panel only operates in display mode (quiescent state). The user must then turn the keyswitch to the right or enter a Level 2 access code to enable the panel’s pushbuttons. Only one alarm condition can be displayed at a time on the LCD. If fire alarms, faults and/or warning conditions (Plant Alarm) are present on the panel at the same time, they are displayed in the following priority order: a. Fire Alarms. c. Faults. d. Warnings. The alarm condition is registered in a log. The user must then enter a Level 2 access code, or turn the keyswitch to the right, to enable the panel’s pushbuttons. When the Level 2 access code is active, the ‘ 2 / 8 ’ buttons can be used to scroll through the alarms and the ‘ 4 ’ button will display the first alarm. 3.1 Fire Automatic panel actions: If the system detects a fire alarm, the panel always does the following automatically: a. Operates the internal (high-pitched) buzzer. b. Illuminates the red FIRE LEDs, and the numbered red ZONE FIRE LED. c. Displays information on the LCD regarding the fire condition. The information includes device address and device location (see example below). DISPLAYED ALARM CONDITION ALARM CONDITION LOGGED ALARM CONDITIONS FIRE 02 / 05 Z01 MAIN BUILDING ZONE TEXT TEST DELAYS ACTIVE FIRE OUTPUT: FAULT/ DISABLED TEST DELAYS ACTIVE FIRE OUTPUT: FAULT/ DISABLED ZONE NUMBER DEVICE TYPE TIME OF LOGGED ALARM CONDITION M12 MCP 11:59 BASEMENT ROOM 23 DEVICE ADDRESS DEVICE TEXT Note: If a delay is configured DELAYED is displayed on the top line of the LCD. When a delay is active the DELAY ACTIVE LED illuminates and the remaining time before the first day mode delay expires is displayed every 5 secs. The LED only extinguishes when the delay period has expired. d. Operates the sounders and output modules according to the panel’s Control-by-Event (CBE) Rules (configured during the Commissioning stage). 5 997-264-000-11, Issue 11 October 2010 Automatic Alarms - What to do b. Pre-alarms ID50 Series Panel - Operating Manual Recommended operator actions: EN54-2: 7.6.1, 7.8, 8.7.1, 9.1.2 Ensure EN54 compliance for access to controls. 1 Note: In the recommended operator actions described below only MUTE BUZZER and END DELAY are selectable at Access Level 1. The operation of EXTEND DELAY, EVACUATE, SILENCE, RESOUND and RESET must only be possible at access Level 2, in accordance with the requirements of EN54:Part 2. 1 Operate the MUTE BUZZER pushbutton to silence the panel’s internal buzzer. Automatic Alarms - What to do 2 Follow prescribed instructions for evacuation of premises, notification of Fire Brigade and investigation of source of fire. 3 3 If additional sounder operations are required to achieve a complete and immediate evacuation of the premises, press the END DELAY /EVACUATE pushbutton (needs access level 2). This will cause the internal buzzer to resound, so press the MUTE BUZZER pushbutton to silence. 4 4 When more than one fire Alarm condition is present, it is possible to manually scroll through all logged Fire Alarm conditions using the ‘ 2 / 8 ’ arrows. Note: With multiple alarms, the LCD displays the first alarm event. 5 5 When evacuation of the premises is achieved, or at the direction of an authorised person, the Alarm Sounders may be silenced by pressing the SILENCE / RESOUND pushbutton. Note: The SOUNDERS SILENCED LED illuminates if this option was configured during panel commissioning. The default function for this LED is PRE-ALARM. 6 6 To re-start the sounders, press the SILENCE / RESOUND pushbutton. You must wait at least 10 seconds after having originally silenced the sounders before resounding them. If the SOUNDERS SILENCED LED option was configured during commissioning to illuminate, this will now extinguish. 7 7 When the cause of the alarm has been removed and call points and input devices have been locally reset, the system may be returned to ‘Status: NORMAL’* by pressing the RESET pushbutton. Status: NORMAL Sat 01/12/2001 00:00:00 * Unless the Site name menu was edited during commissioning - refer to Section 4.1.1 Liquid crystal Display. 997-264-000-11, Issue 11 October 2010 6 ID50 Series Panel - Operating Manual 3.1.1 Fire in Delayed Mode EN54-2: 7.11 (c) Total time for configured delays MUST NOT exceed 600 seconds. Note: For any configured delays, pressing EXTEND DELAY cancels the initial response time and initiates the fire investigation period. Activation of an MCP will also cancel any configured delay period. The maximum time for the primary initial response time is 300 secs; the TOTAL time for both periods is 600 secs. The delay period can only be configured at Level 3 by the Commissioning Engineer. The delayed mode status is indicated on the LCD as below: Status: DELAYED Sat 01/12/2001 1a When the panel enters a fire condition the delay countdown is started and the internal buzzer sounds. The buzzer can be silenced by pressing the MUTE BUZZER pushbutton. The LCD displays the alarm information on the top line; this alternates for 1 sec every 5 secs with the time remaining before the shortest day mode delay expires. 1a 1b 00:00:00 EXTEND DELAY FIRE DISABLEMENT TEST FIRE 02 / 05 MAIN BUILDING FIRE 02 / 05 MAIN BUILDING Z01 S16 ION 11:59 FIRST FLOOR ROOM 36 DELAYED: 050 FIRST FLOOR ROOM 36 1b If the 2-stage delay is configured, pressing the EXTEND DELAY pushbutton during the primary delay initiates the fire investigation period. Note: If configured to do so, the DISABLEMENT LED is illuminated (not default) from the initiation of the primary delay and extinguishes at the end of the primary delay period or fire investigation period. 2 2 If the delay time elapses, a full alarm condition is entered (the configured fire outputs are activated). To cancel the delay, operate the END DELAY/EVACUATE pushbutton; the full alarm condition is entered and the internal buzzer sounds (it can be silenced by pressing the MUTE BUZZER pushbutton). Note: A Fire alarm in a different zone to the first alarm will also cancel the delay. 3 3 When the cause of the alarm has been cleared, press the RESET pushbutton to return to the ‘Status: NORMAL’ message. Status: NORMAL Sat 01/12/2001 7 00:00:00 997-264-000-11, Issue 11 October 2010 Automatic Alarms - What to do The DeIayed Mode introduces a delay between an alarm being detected and the sounders and output modules activating. Depending upon the panel configuration, this may be a single delay or a 2-stage delay (an initial brief delay which may be extended by pressing EXTEND DELAY to allow an investigation). The delay is initiated if the panel enters an alarm condition during Delayed Mode. ID50 Series Panel - Operating Manual 3.2 Pre-alarm When one or more input devices signal to the panel a reading higher than normal but not yet at the FIRE level, this is a PRE-ALARM condition. Automatic panel actions a. Intermittent operation of the internal buzzer (one second ON, one second OFF). ZONE FIRE ZONE FAULT DISABLE/TEST 1 2 3 4 FAULT FIRE POWER SUPPLY FAULT DISABLEMENT EARTH FAULT SYSTEM FAULT TEST SOUNDER: FAULT/ DISABLED Automatic Alarms - What to do PRE-ALARM b. Operation of the appropriate ZONE FAULT/DISABLE/ TEST LED and yellow PRE-ALARM LED. c. Displays information on the LCD regarding the prealarm condition. FIRE CONTROL O/P: FAULT/ DISABLED Status: FAULT PRE-ALARM 01/02 14:55 d. Operation of any assigned outputs in response to a general pre-alarm condition at the panel (refer to Section 5.7 Control-by-Event Rules). Recommended operator actions: 1 Operate the MUTE buzzer pushbutton to silence the panel’s internal buzzer. 2 Check condition of sensor indicated and check area for possible fire. If the cause cannot be determined notify authorised servicing company. 997-264-000-11, Issue 11 October 2010 8 ID50 Series Panel - Operating Manual 3.3 Fault Automatic panel actions: If a fault occurs, the panel automatically does the following: ZONE FIRE 2 3 4 a. Operates the internal buzzer (2 sec. on, 1 sec. off). FIRE b. Flashes the appropriate FAULT LEDs, including numbered ZONE FAULT/ DISABLE / TEST LED(s) if appropriate. FAULT POWER SUPPLY FAULT DISABLEMENT TEST EARTH FAULT SYSTEM FAULT SOUNDER: FAULT/DISABLED c. Operates any control outputs which are associated in the Control-by-Event Rules with fault events. PRE-ALARM FIRE CONTROL O/P: FAULT/DISABLED Recommended operator actions: 1 A fault message typically displays information as follows (not all items apply to all types of fault): a. Fault condition. b. Fault number currently displayed. c. Total number of faults logged. d. A text message describing the fault. e. Zone Number. f. Device Address. g. Device Type. h. Time fault was logged. Depending upon the fault message, either: A B C D E F FAULT 01 / 03 Z01 M12 NO REPLY FROM DEVICE G i H MCP 6 If the fault message relates to a specific loop device, investigate whether the cause of the fault is immediately apparent and can be corrected. 14:55 > FAULT 01 / 03 Z01 : M12 MCP 14:55 < - - - Zone Text - - - > < - - - Device Text - - - > Note: Press the ‘ 6 ’ button to view additional zone text information. To return to the fault message press any numeric/cursor key (if no key is pressed within ten [10] seconds the display automatically returns to the fault message). ii. If the fault message relates to a system fault condition, as displayed below, note the full description of the fault and notify the authorised servicing company. Note: Items e, f, and g are not applicable. A D B FAULT EARTH FAULT 9 01 / 03 C H 14:55 997-264-000-11, Issue 11 October 2010 Automatic Alarms - What to do 1 ZONE FAULT DISABLE/TEST ID50 Series Panel - Operating Manual 2 If a service contact number has been entered during panel commissioning, the LCD alternates between the fault message(s) and the following: A B C D FAULT 01 / 03 For Service Contact ***** ****** E 14:55 Note: Press the MUTE BUZZER pushbutton to silence the panel’s internal buzzer. Automatic Alarms - What to do 3 When the cause of the fault has been cleared, press the RESET pushbutton. Status: NORMAL Sat 01/12/2001 00:00:00 3.3.1 Power Fail 1 The loss of a power supply causes the panel to enter a Power Fail condition. The POWER SUPPLY FAULT and general FAULT LEDs illuminate and the internal buzzer operates. The LCD displays: If both the AC and Battery power fail, the indicators and LCD are non-operational. a. Fault condition. b. Fault number currently displayed. DISABLEMENT FAULT TEST POWER SUPPLY FAULT DELAYS ACTIVE EARTH FAULT FIRE OUTPUT: FAULT / DISABLED SYSTEM FAULT FIRE OUTPUT ACTIVE SOUNDER: FAULT / DISABLED PLANT ALARM PRE- ALARM POWER FIRE CONTROL O/P: FAULT / DISABLED c. Total number of faults logged. d. Time fault was logged. e. A text message describing the fault. A E B C D FAULT 01 / 02 NO MAINS SUPPLY 14:55 A battery fault is shown on the LCD as follows: FAULT 01 / 02 BATTERIES MISSING 14:55 2 If a service contact number has been configured, the LCD alternates between the power fault message and the service contact number. Note: Press the MUTE BUZZER pushbutton to silence the panel’s internal buzzer. 3 When the cause of the fault has been cleared, press the RESET pushbutton. Status: NORMAL Sat 01/12/2001 997-264-000-11, Issue 11 October 2010 10 00:00:00 ID50 Series Panel - Operating Manual 3.4 Plant Alarm A Plant Alarm indication is the default configuration setting for ID50 Series fire control panels. In this configuration, the panel operates as follows: A Plant Alarm message is displayed if the panel detects a non-fire input (AUX) configured in zones 17 to 32. When a non-fire event occurs the Plant Alarm LED is illuminated (except for Hold Switch and Abort Switch AUX inputs) and the LCD displays the following information: a. Plant Alarm condition. c. Number of alarms. d. Zone number. e. Device address. f. Device type. g. Time of logged message. h. Zonal and device text (if any). A FIRE OUTPUT ACTIVE PLANT ALARM POWER B C D E F PLANT 01 / 01 Z21 M12 MCP 14:55 < - - - Zone Text - - - > < - - - Device Text - - - > H G When the cause of the alarm has been cleared, the message will automatically be removed from the LCD and the LED extinguished. The panel returns to quiescent mode. Status: NORMAL Sat 01/12/2001 00:00:00 FIRE OUTPUT ACTIVE PLANT ALARM POWER 3.5 Fault Output: Fault /Disabled (Optional) If the panel has been configured to indicate the status of the Fault Output relay circuit, a message is displayed if a Fault Output relay circuit fault condition is detected or if it has been disabled. FIRE OUTPUT: FAULT / DISABLED FIRE OUTPUT ACTIVE FAULT OUTPUT: FAULT/DISABLED Note: An output device configured to a Fault CBE rule remains active if disabled from a source other than the panel Fault Output relay disable function. 11 997-264-000-11, Issue 11 October 2010 Automatic Alarms - What to do b. Alarm number currently displayed. ID50 Series Panel - Operating Manual 4 Operator Actions at Panel 4.1 Introduction Operator actions at the panel require the correct pushbutton and access code entry. The LCD and the user pushbuttons located on the panel allow the following actions to be carried out: a. Mute the panel buzzer. b. Extend Delays. c. Panel reset. d. End Delays / Evacuate (terminate delays to outputs, if delay is active and activate sounders). e. Silence and resound the alarms. Operator Actions at Panel f. Menu navigation and alphanumeric key entry. g. Operator-controlled tests. h. Disable and enable of zones, outputs or delays. i. Set the clock and date. j. View: log, devices, faults, input events, disablements, voltages and versions. Note: Maintenance alarm count is also available but this is an ID60 feature available at access level 3 only. All actions are access-controlled either through turning the panel keyswitch to the right, or by entering a Level 2 access code (see Section 4.1.3 Access Codes). 4.1.1 Liquid Crystal Display The Liquid Crystal Display (LCD) provides 80 characters of alphanumeric information on a 2 line display. The LCD is backlit to assist viewing under dim ambient light conditions. System Normal Display When in a quiescent state the LCD shows the ‘Status: NORMAL’ message on line 1 and the day, date and time on line 2. The message will be different if the Site Name menu was edited during commissioning. Status: NORMAL Sat 01/12/2001 SYSTEM NORMAL 1 : TEST 2 : DISABLE/ENABLE 00:00:00 The user options are accessed via a menu structure, which in turn is accessed from the ‘Status: NORMAL’ message (see opposite). If the ‘Status: NORMAL’ message is not present, press the 3 : CLOCK 4 : VIEW MODE 5 : COMMISSIONING 6 : PRINT * The Commissioning Menu is ONLY available with a Level 3 passcode 997-264-000-11, Issue 11 October 2010 ‘ 4 ’ button repeatedly until it is displayed (this terminates access Level 2). Alternatively, turn the keyswitch to the right and and then back to normal to exit all user menus. Menus will revert to the panel status display automatically five minutes after the last key press. Press the ‘ ’ button to toggle between the menus and top level display. Note: To exit the Level 3 Commissioning menu press the numeric ‘ 12 7 ’ button. ID50 Series Panel - Operating Manual 4.1.2 Internal Buzzer FIRE DISABLEMENT FAULT TEST POWER SUPPLY FAULT DELAYS ACTIVE EARTH FAULT FIRE OUTPUT: FAULT / DISABLED SYSTEM FAULT FIRE OUTPUT ACTIVE SOUNDER: FAULT / DISABLED PLANT ALARM PRE- ALARM POWER FIRE CONTROL O/P: FAULT / DISABLED The panel has an internal buzzer which gives a local warning when any of the following is detected: a. Fire condition. b. Pre-alarm condition. c. Fault condition. Operations within this manual require Level 2 access (code or keyswitch), although a Level 3 access code may be entered. Throughout this manual a U accompanied by a number represents a Level 2 access code. With the exception of the Loop Booster Output Test option, the actions described in this manual require access Level 2, which is invoked either by turning the keyswitch or by entry of an access code. The access code is a sequence of numbers configured in the panel during commissioning. The panel has two levels of access codes:7 Level 2 and Level 3. Level 3 is required for testing the loop booster output and for panel configuration and commissioning procedures. The panel has a maximum of ten (10) Level 2 access codes, each defined by the user identification number [U0 - U9] in the top left-hand corner. Entering a Level 2 access code allows access to all functional controls and some system operation parameters. (Operating the keyswitch to enter Level 2 always displays ‘[U9]’). Note: When the panel is at Level 3, [S1] is displayed in place of the user identification number. 1 1 Press the ‘ ’ button at the ‘Status: NORMAL’ message to prompt for a Level 2/3 access code, as shown below: 2,3 ACCESS TO MENUS RESTRICTED Enter Level 2/3 Passcode: . . . . 5 < : BackSp 2 Press and hold the ‘ 0..9 ’ button while pressing the appropriate 4 digit Level 2 access code. ‘*’ will appear on the LCD as the numbers are entered. ACCESS TO MENUS RESTRICTED Enter Level 2/3 Passcode: * * * * < : BackSp 3 Press the ‘ 5 ’ button to confirm the entered code. The Level 2 Options are then displayed. [U0] 1:Test 2:Disable/Enable 3:Clock 4:View Mode 5:Commission 4 The procedure to cancel Level 2 (and thus prevent any other person accessing Level 2 options) is given in Section 4.1.1). Note: If an incorrect access code is entered, the following is displayed: ERROR - INCORRECT PASSCODE ! ! ! Press the ‘ 4 ’ button or wait for approximately one minute to return to the ‘Status: NORMAL’ message. 13 997-264-000-11, Issue 11 October 2010 Operator Actions at Panel 4.1.3 Access Codes ID50 Series Panel - Operating Manual 4.1.4 Keyswitch The panel is fitted with a keyswitch which provides an alternative to the Level 2 access code. If the keyswitch is in the enabled position, it overrides the requirement for a Level 2 access code. Therefore, if an alarm condition occurs the keyswitch enables the immediate operation of the control keys. With the keyswitch in the enabled position the Level 2 menus are accessible by pressing the ‘ ’ button. [U0] 1:Test 2:Disable/Enable 3:Clock 4:View Mode 5:Commission Operator Actions at Panel 4.2 MUTE BUZZER Pushbutton Operating the MUTE BUZZER pushbutton when an alarm or fault has occurred, silences the internal buzzer. If the Primary Delay is active during an alarm condition this pushbutton will also terminate this delay and start the Extend Delay time. The internal buzzer remains silent until the system is RESET or the panel detects another alarm condition. 4.3 EXTEND DELAY Pushbutton EXTEND DELAY TEST DELAYS ACTIVE With the occurrence of an alarm and with the Primary Delay active, pressing the EXTEND DELAY pushbutton cancels the initial response time and initiates the fire investigation period (refer to Section 3.1.1 Fire in Delayed Mode). The DELAY ACTIVE LED remains illuminated until the delay timer expires. FIRE OUTPUT: FAULT / DISABLED 997-264-000-11, Issue 11 October 2010 14 ID50 Series Panel - Operating Manual 4.4 END DELAY / EVACUATE Pushbutton The END DELAY/EVACUATE pushbutton is used to initiate the Evacuate procedure. If this pushbutton is operated while a delay is active, all delays are cancelled and all sounders designated in the pre-configured Evacuate rule are activated. Fire Alarm Condition Providing the pushbuttons have been enabled for Level 1 operation and delays are active the following occurs: 1 Press the END DELAY/EVACUATE pushbutton. The following is typically displayed: 01 / 05 14:55 2 No further action is needed until it is required to silence the sounders, in which case the SILENCE/RESOUND pushbutton should be pressed, see Section 4.5, Silence / Resound pushbutton. Note: If the pushbuttons are enabled to operate at Level 2, enter the Level 2 passcode in the manner described in the RESET pushbutton procedure (Section 4.6). No Alarm Condition In quiescent mode, pressing the END DELAY/EVACUATE pushbutton immediately sounds the internal buzzer, operates all outputs configured in accordance with the CBE rules (configured at time system was commissioned) and the LCD displays the ‘EVACUATE’ message. OPERATOR EVACUATE 15 01 / 01 14:55 997-264-000-11, Issue 11 October 2010 Operator Actions at Panel OPERATOR EVACUATE ID50 Series Panel - Operating Manual 4.5 SILENCE / RESOUND Pushbutton The term ‘silence’ as used throughout this manual, describes a temporary state the panel enters whenever the SILENCE / RESOUND pushbutton is pressed to stop the sounders operating. While the panel is in this state, a new fire alarm, operating the SILENCE / RESOUND pushbutton again or operation of the END DELAY/ EVACUATE pushbutton, will re-sound all previously silenced sounders. Operator Actions at Panel You can suspend all sounder output delays and silence all sounder outputs which are operating as a result of a FIRE alarm or an EVACUATE operation. Provided that the pushbuttons have been enabled for Level 1 operation and delays are active, proceed as follows: 1 1 Press the SILENCE / RESOUND pushbutton. The following are not switched off by this operation: a. The internal FIRE buzzer. b. Any output modules configured in the CBE Rules during commissioning NOT to be silenced by the SILENCE / RESOUND pushbutton. 2 2 To start the sounders again in the same pattern as they were previously operating and reactivate any programmed delays, press the SILENCE / RESOUND pushbutton. 3 SILENCE/ RESOUND SOUNDER: FAULT / DISABLED SOUNDERS SILENCED 3 The panel may have been configured, during commissioning, to illuminate the SOUNDERS SILENCED LED when the SILENCE/RESOUND pushbutton is pressed (non-default selection). Pressing the SILENCE / RESOUND pushbutton again to operate the sounders, the SOUNDERS SILENCED LED extinguishes. Note: If the pushbuttons are enabled to operate at Level 2, enter the Level 2 passcode in the manner described in the RESET pushbutton procedure (Section 4.6). 997-264-000-11, Issue 11 October 2010 16 ID50 Series Panel - Operating Manual 4.6 RESET Pushbutton The RESET pushbutton is used to clear all non-quiescent conditions and return the panel to a normal quiescent condition. Provided that the control keys have been enabled for Level 1 operation, the following occurs: a. All FIRE and FAULT lamps are switched off. b. All sounders cease to operate. c. The system status returns to NORMAL provided that no operator actions are being carried out. If the pushbuttons are enabled to operate at Level 2, follow the procedure below: CONTROL KEY LOCKED - ACCESS REQUIRED Enter Level 2/3 Passcode: . . . . < : BackSp 2 Either turn the keyswitch, or enter an appropriate Level 5 2 access code and confirm using the ‘ 5 ’ button. CONTROL KEY LOCKED - ACCESS REQUIRED Enter Level 2/3 Passcode: * * * * < : BackSp If Alarm(s), and/or Fault(s) conditions are still present when RESET is operated, the condition will be reported as if it were a completely new event with appropriate annunciation. 17 997-264-000-11, Issue 11 October 2010 Operator Actions at Panel 1 Press the RESET pushbutton. The LCD displays the following: ID50 Series Panel - Operating Manual 4.7 Numeric Keys When using any numeric key, each operation is confirmed by a sharp audible bleep. At Access Level 1, the numeric buttons have NO function until an alarm condition occurs. The alarm condition enables the ‘ 2 ’ and ‘ 8 ’ buttons, allowing the user to view each alarm in turn. At Access Level 2 the ‘ / 8 to the Level 1 function. The ‘ 0..9 ‘ Operator Actions at Panel 2 6 ’ function remains identical 4 ’ (cancel), ‘ 5 ’ (confirm), ’ (go to next option) buttons are enabled. Numeric entry (used in conjunction with the ‘ 0..9 ’ [shift] button) is also enabled. a. Use the ‘ 2 ’ and ‘ 8 ’ buttons to scroll through fire alarms, fault conditions, and warning conditions or to view the ‘More’ menu list when available. b. Press the ‘ Press and hold the ‘ 0..9 ’ (Shift) pushbutton while entering numbers. 5 ’ button to confirm an option. c. Press the ‘ 0..9 ’ (Shift) button to enable number entry. Following the input of a number (approx. 1 sec later) a second audible bleep indicates that number entry is no longer enabled. 4.7.1 Cancellation/Termination Button To cancel or terminate configuration data entry, press the ‘ 4 ’ button. The LCD returns to the previous menu. 4 To cancel access rights, press the ‘ 4 ’ button until the ‘Status: NORMAL’ message is displayed. 4.7.2 Level 2 Options Menu Button Operating the ‘ ’ button enables the Level 2 menu and prompts for the entry of an appropriate access code, as described in Section 4.1.3 Access Codes. Pressing the menu button toggles between the panel status and user menus. 997-264-000-11, Issue 11 October 2010 18 ID50 Series Panel - Operating Manual 4.8 Level 2 Option Menus The following Level 2 Option Menus are available after a correct Level 2 access code has been input or the keyswitch has been operated. Operator Actions at Panel The menu map at left shows an overview of the Level 2 menus. The Commissioning menu is shown inverted to indicate that a Level 3 access is required. Notes: 1. Level 3 Configuration Menus are described in 997-263-000-X, ID50 Series Panel Installation, Commissioning & Configuration Manual, Section 5 Configuration. 2. With a fire alarm active the panel status display will override the user menu 5 secs after the last key press. 19 997-264-000-11, Issue 11 October 2010 ID50 Series Panel - Operating Manual 4.9 TEST - User Option The following tests are available at Access Level 2 from the Test - User Option menu: a. LEDs. b. LCD. c. Zones. d. Auto High Test. e. Outputs. f. Buzzer. g. Keyboard. Operator Actions at Panel To start the TEST - User Option: ’ 1 At the ‘Status:NORMAL’ message, press the ‘ button. The LCD prompts for a Level 2/3 access code. (To cancel, press ‘ 4 ’). ACCESS TO MENUS RESTRICTED Enter Level 2/3 Passcode: . . . . < : BackSp Note: Entering an incorrect access code causes the LCD to display the ‘ERROR - INCORRECT PASSCODE ! ! !’ message, then an automatic return to the access code prompt. 2 Either turn the keyswitch or, using the numeric keypad, enter the correct Level 2 access code and confirm using the ‘ 5 ’ button. The User Option menu is displayed with the user number ([U0] to [U9]) in the top left-hand corner. [U0] 1 : Test 2 : Disable/Enable 3 : Clock 4 : View Mode 5 : Commission Extinguishing System - Testing SLC device outputs. To prevent inadvertant operation of the direction and release valves during testing, zones containing the associated SLC devices MUST FIRST be put into TEST mode. Also, where a zone test is manually activated using an input module, extinguishant bottles MUST FIRST be disconnected to prevent unauthorized extinguishant discharge. Note: A manual release reset will not stop the extinguishant discharge because of a physical link between the direction valve inputs and outputs. 997-264-000-11, Issue 11 October 2010 20 ID50 Series Panel - Operating Manual 4.9.1 LEDs - User Option This option, selected from the Test menu, illuminates each LED in turn. To test the panel LEDs, enter access Level 2 and follow the procedure below: 1 Using the numeric keypad, press ‘ TEST menu. 1 1 ’ to display the [U0] 1 : Test 2 : Disable/Enable 3 : Clock 4 : View Mode 5 : Commission 2 To test LEDs, press the ‘ keypad. [U0 Test] 1:LEDs 4:Auto High Test ’ button on the numeric 1 2:LCD 3:Zones 5:Outputs : More 3 Each of the panel LEDs illuminates in turn while the LCD flashes the message shown below. When all LEDs have been tested, press the ‘ cancel and return to the Test menu. 4 ’ button to TESTING LEDs ! ! ! 4.9.2 LCD - User Option The LCD Option, selected from the Test menu, tests the LCD by displaying each upper case character in turn. To test the LCD, enter access Level 2 and follow the procedure below. 1 Using the numeric keypad, press ‘ TEST menu. 1 ’ to display the 1 [U0] 1 : Test 2 : Disable/Enable 3 : Clock 4 : View Mode 5 : Commission 2 To test the LCD, press the ‘ keypad. 2 [U0 Test] 1:LEDs 4:Auto High Test 2 ’ button on the numeric 2:LCD 3:Zones 5:Outputs : More 3 Each character is then displayed in turn on the LCD. When all characters have been displayed, press the ‘ 4 ’ button to cancel and return to the Test Menu. AAAAAAAAAAAAAAAAAAAAAAAAAAAAAAAAAAAAAAAA AAAAAAAAAAAAAAAAAAAAAAAAAAAAAAAAAAAAAAAA BBBBBBBBBBBBBBBBBBBBBBBBBBBBBBBBBBBBBBBB BBBBBBBBBBBBBBBBBBBBBBBBBBBBBBBBBBBBBBBB ZZZZZZZZZZZZZZZZZZZZZZZZZZZZZZZZZZZZZZZZ ZZZZZZZZZZZZZZZZZZZZZZZZZZZZZZZZZZZZZZZZ 21 997-264-000-11, Issue 11 October 2010 Operator Actions at Panel 1 ID50 Series Panel - Operating Manual 4.9.3 Zones - User Option The Test Zones option, selected from the Test Menu, allows the user to perform a walk test on one zone at a time. During the walk test the TEST and relevant ZONE FAULT/DISABLE/TEST LEDs are illuminated, indicating that the system and zone is in TEST mode. To perform a walk test, at the TEST menu: 1 1 Press the ‘ 3 ’ button on the numeric keypad to select the walk test procedure. 3 [U0 Test] 1:LEDs 4:Auto High Test 2 The LCD displays the Test Zones menu. Select either the Ring Sounders or No Sounders walk test: 2 Operator Actions at Panel 2:LCD 3:Zones 5:Outputs : More [U0 Zones] 1: Ring Sounders 2:No Sounders 3:View/Stop Test ZONE FIRE ZONE FAULT DISABLE/TEST 1 2 3 4 FIRE DISABLEMENT TEST DELAYS ACTIVE 2 or 8 5 : More a. Using the numeric keypad press ‘ 1 ’ to display the Ring Sounders menu as below. In this mode the sounders will ring for a few seconds when a device is tested, then reset automatically. [WALK TEST (Sounders)] Select Zone:01 : Start : Change <:Exit i Use the ‘ 2 / 8 ’ buttons to select the zone to be tested. Press the ‘ 5 ’ button to confirm the zone number. [WALK TEST (Sounders)] Press to Confirm Select Zone: 01 <:Cancel ii The LCD prompts for confirmation. Press the ‘ 5 ’ button to start the walk test for this zone. Repeat steps i and ii for any further zones to be tested. Test the devices (see Checking the Devices overleaf). [WALK TEST (Sounders)] Select Zone: 01 : Start : Change <:Exit OPAL Protocol Devices in Walk Test When a zone with OPAL protocol enabled is put into Walk Test, the OPAL device LEDs flash green with a longer* ON duration to indicate that the device is ready for testing. When a device is tested the green LED will show red momentarily, with an end to the green prolonged flash to indicate that testing is now finished for that device. * Approximately 1 sec. ON/1 sec OFF. iii Press the ‘ 4 ’ button to exit the Ring Sounders menu and return to the Zones menu. b. To walk test devices on a specific zone without activating the sounders, press ‘ 2 ’ on the numeric keypad to select the ‘No Sounders’ option. The walk test procedure is otherwise the same as given above for ‘Ring Sounders’. 3 To end the walk test: a. For a specified zone: at the Test Zones menu, press the ‘ 3 ’ button on the numeric keypad to select the View/Stop Test menu: [STOP WALK TEST] Select Zone: 01 : Stop : Change 997-264-000-11, Issue 11 October 2010 22 <:Exit ID50 Series Panel - Operating Manual or 8 i 5 Use the ‘ the ‘ 5 2 / 8 ’ buttons to select the zone, then press ’ button to confirm the zone number. [STOP WALK TEST] Select Zone: 01 Press to Confirm <:Cancel ii Press the ‘ 5 ’ button to stop the walk test for the selected zone. If no other walk tests are active, the following is displayed: 5 The system has no walk test zones active <:Exit iii Press the ‘ 4 ’ button to exit the Walk Test menu and return to the Test Zones menu. b. For all zones: from the ‘ : More’ option (‘ 2 / 8 ’) press the ‘ 4 ’ button on the numeric keypad to select the Stop All menu: 8 [U0 Zones] 1: Ring Sounders 2:No Sounders 3:View/Stop Test [U0 Zones] : More 4: Stop All 2 : More 4 Stop all Zones in Walk Test ? Press to Confirm <:Cancel 4 To exit the Test Zones menu, press the ‘ 4 ’ button. Continue pressing this button until the required menu or the ‘Status: NORMAL’ message is displayed. Checking the Devices Use the following methods to check devices during a walk test: i. Test sensors by applying smoke or heat as appropriate, or by operating the device’s internal test switch by means of a magnet. ii. Test Manual Call Points by using a test key. For each device, the panel will record the event in the log, sound its internal buzzer, illuminate the appropriate ZONE FIRE LED and, if a CLIP protocol device, turn on the LED at the device that initiated the alarm. For OPAL protocol devices the longer green LED flash duration is replaced, after testing, by the normal poll flash. Note: A maximum of ten devices’ LEDs can be illuminated during the test. Further device testing functions normally in all other respects. LEDs will not light again until after the removal of the walk test condition and manually resetting the panel. After a few seconds, the panel will automatically return to Test Mode and the device LED will be turned off. The panel is then ready to test the next device. Note: Up to one minute must be allowed for smoke sensors to clear. 23 997-264-000-11, Issue 11 October 2010 Operator Actions at Panel 2 ID50 Series Panel - Operating Manual If a fire alarm signal is received from a zone other than those being tested, all sounder output and relay output circuits will activate as configured for a zone in alarm. The sounders will continue to ring until silenced from the panel. 4.9.4 Auto High Test - User Option The Auto High Test, if configured during commissioning, automatically polls and tests all devices on the loop at a specified time of day. This test takes about 70-80 seconds to complete. To run the test manually: 1 From the Test Menu, using the numeric keypad press the ‘ Operator Actions at Panel 4 4 ’ button to select the Auto High Test. [U0 Test] 1:LEDs 4:Auto High Test 2:LCD 3:Zones 5:Outputs : More 2 When the LCD displays the start Auto High Test message, press the ‘ 5 ’ button to start the test. Manually start automatic high test ? Press to confirm 5 <:Cancel 3 Each sensor is tested individually. The device under test is displayed on line 2 of the LCD in the format shown below, then re-displays the Test Menu. Test started ! ! [Sensor nn in test] <:Cancel 4 After each device test the pass or fail message is displayed, as in the examples below: Sensor nn passed [Sensor nn in test] Sensor nn failed [Sensor nn in test] Total failed:nn <:Cancel Total failed:nn <:Cancel 5 If a fault occurs while the Auto High Test is active the LCD displays a fault message (example given below): 6 or 4 FAULT 01 / 03 Z01 M12 DEVICE FAILED AUTO HIGH TEST 6 Press the ‘ 6 MCP 14:55 > ’ button to display additional zonal and device text information. Press the ‘ 4 ’ button to return to the Test menu. Clear the fault and repeat the test. 4.9.5 Outputs - User Option The Test Outputs option, accessed from the Test Menu, tests the panel’s internal sounder and relay circuits and the Signalling Line Circuit (SLC) loop outputs. To perform this test: Test Internal Outputs 5 [U0 Test] 1:LEDs 4:Auto High Test 2:LCD 3:Zones 5:Outputs : More 1 From the Test Menu, press the ‘ 5 ’ button on the numeric keypad to select the Outputs option. 997-264-000-11, Issue 11 October 2010 24 ID50 Series Panel - Operating Manual [U0 Outputs] 1:Internal 3: Loop Power 1 2:SLC 2 Press the ‘ 1 ’ button on the numeric keypad to display the Internal Test menu. [Internal Test] : Start 2 or 8 B:01 SDR : Change Output 3 Use the ‘ / 2 <:Exit ’ buttons to select the internal output 8 required for testing and press the ‘ 5 ’ button to start the test. The LCD then displays the following: [Internal Test] : Start B:02 SDR : Change Output <:Exit the ‘ 5 ’ button again. Press the ‘ 4 ’ button again to exit and return to the Test Outputs menu. Test SLC Outputs [U0 Outputs] 2 1:Internal 3: Loop Power 2:SLC 1 From the Outputs menu, press the ‘ 2 ’ button on the numeric keypad to display the SLC Output Test menu: [SLC Test] : Start M:nn 2 Use the ‘ 2 SDR : Change Output / 8 ’ buttons to select the first output required for testing and press the ‘ 2 or 8 <:Exit 5 ’ button to start 5 the test. Use the ‘ 2 / 8 ’ buttons to select other outputs for testing, as required. For modules, the LCD then displays the following: [SLC Test] : Stop M:nn TESTING : Change Output <:Exit 3 For OPAL sensors configured with a Remote Output set to CBE mode, the LCD displays the following: [SLC Test] : Stop 5 S:nn TESTING : Change Output <:Exit 4 Check that the output operates. To stop the test of the currently displayed device, press the ‘ again. 2 or 8 5 5 ’ button 5 If other outputs were also put into test mode, use the ‘ 2 / 8 ’ buttons to select these to stop testing, as required. Press the ‘ 4 ’ button again to exit and return to the Test Outputs menu. 25 997-264-000-11, Issue 11 October 2010 Operator Actions at Panel 4 Check that the output operates. To stop the test, press ID50 Series Panel - Operating Manual Test Loop Booster Outputs To perform a Loop Booster output test an access level 3 passcode ( is required. A number of tests are available to satisfactorily test the operation of the Loop Booster Modules (LBMs) during alarm conditions. The tests are designed so that the power delivered to the loop by the panel can be switched off from either end, or each LBM in turn can be prevented from being turned on. The tests are designed, when combined with a walk-test, to check that: a. The panel operates all loop-powered devices correctly with the LBM(s) with one source of loop power isolated. b. All loop-powered outputs operate correctly with any individual LBM disabled or with the loop only powered from one end. Operator Actions at Panel [U0 Outputs] 1:Internal 3:Loop Power 2:SLC 1 Press the ‘ 3 ’ button on the numeric keypad to select the Loop Booster test procedure. With the panel currently at access level 2, the following warning is displayed prompting for entry of access level 3 passcode: COMMISSION MODE ACCESS Enter Level 3 passcode - < BackSp 2 Having entered the access level 3 passcode, press the ‘ 5 ’ button to start the test. [LBM Test] : Start Select ‘Both Sides’ to test looppowered sounders only (LBMs are not turned on). Select ‘In Only’ to perform test with loop powered only from the ‘Loop Out’ end. Select ‘Out Only’ to perform test with loop powered only from the ‘Loop In’ end. Loop : Both Sides : Change<:Exit 0% 3 Before the test starts a 0% percentage indication of the equipment under test is displayed on the top line. As the test progresses, the percentage value increases to 100% as to indicate that all loop-powered devices under test are operating correctly. This percentage value may go down if a device starts reporting incorrectly or becomes de-activated. [LBM Test] : Start Loop : Both Sides : Change<:Exit 0% 4 Press the ‘ 2 / 8 ’ pushbuttons to select the other Loop Booster options: ‘In Only’ or ‘Out Only’ [LBM Test] : Start Loop : In Only : Change<:Exit [LBM Test] : Start 0% Loop : Out Only : Change<:Exit 0% 5 To perform a loop test without loop booster support you can turn off individual LBMs while testing that looppowered sounders are still able to operate correctly. [LBM Test] : Start M nn : Inactive : Change<:Exit 0% 6 Press the 4 ’ button to cancel the test and return to the Test Menu. Note: If the test is not cancelled manually, it is cancelled automatically 4 hours after the last panel keystroke. 997-264-000-11, Issue 11 October 2010 26 ID50 Series Panel - Operating Manual 4.9.6 Buzzer - User Option The Buzzer User Option, selected from the Test Menu, tests the internal buzzer. Proceed as follows: 1 [U0] 1 : Test 2 : Disable/Enable 3 : Clock 4 : View Mode 5 : Commission 1 Using the numeric keypad, press ’ TEST menu. [U0 Test] 1 ’ to display the 6:Buzzer 7:Keyboard : More 2 / 8 ’ pushbuttons to display the next screen options. To test the buzzer, press the ‘ button on the numeric keypad. 6 ’ TESTING BUZZER ! ! ! 3 The buzzer sounds with a 2:1 mark:space ratio and the LCD flashes the message below. Press the ‘ 4 ’ button to cancel the test and return to the Test Menu. 4.9.7 Keyboard - User Option The standard function of the control keys is suppressed while this test is active. Normal function resumes upon test completion. 1 This option allows the panel keyboard to be functionally tested. 1 Using the numeric keypad, press ’ TEST menu. ’ to display the [U0] 1 : Test 2 : Disable/Enable 3 : Clock 4 : View Mode 5 : Commission 6:Print 2 Press the ‘ 7 1 2 / 8 ’ pushbuttons to display the next screen options. To test the keyboard, press the ‘ button on the numeric keypad. [U0 Test] 7 ’ 6:Buzzer 7:Keyboard : More 3 The following screen is displayed. Press each panel pushbutton in turn. When a pushbutton is pressed, the corresponding display entry is replaced by an equivalent number of asterisk (*) characters. The five pushbuttons are represented by A to E, where A is the top button. Once all pushbuttons have been pressed the display will return to the test menu. The keyboard test will automatically abort after one minute if no key is pressed. Press ALL keys to exit . . . 0 . . 9 0 MENU 1 2 3 4 5 6 7 8 9 A B C D E 27 997-264-000-11, Issue 11 October 2010 Operator Actions at Panel 2 Press the ‘ 6 ID50 Series Panel - Operating Manual 4.10 DISABLE / ENABLE - User Option This option allows the user to disable or enable (depending on their current state) the following parts of the system: a. Zone (Device or Full Zone). b. Outputs. c. Day Mode. d. Delays. To display the DISABLE/ENABLE menu: ’ 1 At the ‘Status: NORMAL’ message, press the ‘ button. The LCD prompts for a Level 2/3 access code. Operator Actions at Panel ACCESS TO MENUS RESTRICTED Enter Level 2/3 Passcode: . . . . < : BackSp 2 Either turn the keyswitch or, using the numeric keypad, enter the correct Level 2 access code and confirm using the ‘ 5 ’ button to display the menu. The LCD displays the user number ([U0] to [U9]) in the top lefthand corner. Note: An incorrect access code causes the LCD to display the ‘ERROR - INCORRECT PASSCODE’ message. After one minute the LCD returns to the ‘Status: NORMAL’ message. 2 [U0] 1 : Test 2 : Disable/Enable 3 : Clock 4 : View Mode 5 : Commission 3 Using the numeric keypad, press the ‘ display the DISABLE / ENABLE menu. 2 ’ button to [U0 Disable/Enable] 1:Zone 2:Outputs 3:Day Mode 4:Delays 4.10.1 Zone - User Option This option allows the user to disable/enable a full zone or part of a zone (selected devices). To perform this operation: 1 Using the numeric keypad, press the ‘ select the Disable/Enable Zone option. 1 1 ’ button to [U0 Disable/Enable] 1:Zone 2:Outputs 3:Day Mode 4:Delays 2 The LCD displays the Zone option and prompts for a zone number. Enter the zone number (one or two digits entered via the numeric keypad). Press the ‘ confirm the zone number. [Disable/Enable] Enter Zone Number 997-264-000-11, Issue 11 October 2010 28 Zone _ _ < : Cancel 5 ’ to ID50 Series Panel - Operating Manual 3 The LCD then displays the current state of the zone (Fully enabled, Fully disabled or Part disabled) and prompts for selection of Full Zone or Devices in zone: 5 Note: Press the ‘ 2 / 8 ’ buttons to step to the previous/ next zone and confirm using the ‘ [Disable/Enable] Zone 0 1 1:Full Zone 2:Device in Zone ’ button. 5 (Fully enabled) : More 4 To disable: 1 ZONE FIRE ZONE FAULT DISABLE/TEST 1 keypad to select the Full Zone option, and the ‘ button to confirm. 5 3 4 2 ’ button on the numeric 1 [Disable/Enable] Zone 0 1 Press to Confirm Disable fully ? <:Cancel [Disable/Enable] Zone 0 1 1:Full Zone 2:Device in Zone Fully disabled : More 5 ’ FIRE DISABLEMENT TEST DELAYS ACTIVE The DISABLEMENT and relevant ZONE FAULT/ DISABLE/TEST LEDs illuminate, indicating that the selected zone(s) are now disabled. The LCD returns to the Disable/Enable menu. To enable a Full Zone: 1 5 ZONE FIRE ZONE FAULT DISABLE/TEST 1 3 4 2 FIRE DISABLEMENT TEST DELAYS ACTIVE [Disable/Enable] Zone 0 1 Press to Confirm Enable fully ? <:Cancel [Disable/Enable] Zone 0 1 1:Full Zone 2:Device in Zone Fully enabled : More The DISABLEMENT and relevant ZONE FAULT/ DISABLE/TEST LEDs extinguish. 2 b. A Partial Zone - Press the ‘ 2 ’ button on the numeric keypad to select the Device in Zone option: [Disable/Enable] Zone 0 1 1:Full Zone 2:Device in Zone Part disabled : More 5 To select individual devices use the ‘ 2 / 8 ’ buttons to display the required device(s). Confirm selection of each by pressing the ‘ 8 [Enable] Zone 0 1 - Enable S02 ? Press to confirm [Disable] Zone 0 1 - Disable S01 ? Press to confirm <:Cancel 5 ’ button. ZONE FIRE ZONE FAULT DISABLE/TEST <:Cancel 1 2 3 4 5 FIRE DISABLEMENT 2 [Disable] Zone 0 1 - Disable M99 ? Press to confirm 29 <:Cancel TEST DELAYS ACTIVE 997-264-000-11, Issue 11 October 2010 Operator Actions at Panel a. A Full Zone - Press the ‘ ID50 Series Panel - Operating Manual Repeat until all devices are in the required state (either disabled or enabled). The DISABLEMENT LED remains illuminated if one or more devices are disabled. It is extinguished when all devices have been enabled. The relevant ZONE FAULT/DISABLE/TEST LED is illuminated when all devices in that zone have been disabled. Disablement of ALL devices is confirmed by the ‘Fully Disabled’ LCD message. Operator Actions at Panel 6 Press the ‘ menu. 997-264-000-11, Issue 11 October 2010 30 4 ’ button to return to the Disable/Enable ID50 Series Panel - Operating Manual 4.10.2 Outputs - User Option The Outputs option allows the user to disable or enable all sounders, the extinguishant system (if fitted), and relay and control outputs. To Disable/Enable these outputs, proceed as follows: [U0 Disable/Enable] 1:Zone 2:Outputs 3:Day Mode 4:Delays 2 [U0 Disable/Enable] 1:Sounders 2:Transmission Device Outputs :More [U0 Disable/Enable] 3:Ext. Systems 4:Fault Relays 5:Others :More 2 Press the appropriate numbered button on the numeric keypad to display one of the following: a. Press the ‘ sounders. 1 1 ’ button to disable/enable all Disable ALL Sounder Outputs Press to confirm <:Cancel b. Press the ‘ 2 ’ button to disable/enable all transmission device outputs. 2 Disable ALL Transmission Device Outputs Press to confirm <:Cancel c. Press the ‘ 2 ’ button to disable/enable all Extinguishant System outputs. 3 Disable ALL Extinguishant System Outputs Press to confirm <:Cancel d. Press the ‘ 3 ’ button to disable/enable all Fault relay outputs. 4 Disable ALL Fault Relay Outputs Press to confirm 5 5 <:Cancel e. Press the ‘ 5 ’ button to disable/enable ‘other’ (relays and control) outputs. Disable ALL Relay and CTL Outputs Press to confirm <:Cancel 3 Press the ‘ 5 ’ button to confirm the selected operation. The LCD automatically returns to the Disable/Enable menu. FIRE DISABLEMENT FAULT TEST POWER SUPPLY FAULT DELAYS ACTIVE EARTH FAULT FIRE OUTPUT: FAULT / DISABLED SYSTEM FAULT FIRE OUTPUT ACTIVE SOUNDER: FAULT / DISABLED PLANT ALARM PRE- ALARM POWER FIRE CONTROL O/P: FAULT / DISABLED When outputs are disabled, the general DISABLEMENT LED and, if applicable, the FIRE CONTROL O/P: FAULT/ DISABLED, FIRE OUTPUT: FAULT/DISABLED and/or SOUNDERS: FAULT/DISABLED LEDs illuminate. If the Extinguishant System is disabled, only the DISABLEMENT LED will illuminate. 31 997-264-000-11, Issue 11 October 2010 Operator Actions at Panel 1 Using the numeric keypad, press the ‘ 2 ’ pushbutton to display the Disable/Enable Outputs menu: ID50 Series Panel - Operating Manual 5 [U0 Disable/Enable] 1:Zone 2:Outputs 3:Day Mode 4:Delays The FIRE CONTROL O/P: FAULT/DISABLED, FIRE OUTPUT: FAULT/DISABLED and the SOUNDERS DISABLED LEDs extinguish when the corresponding outputs have been enabled. The DISABLEMENT LED will only extinguish when ALL disablements have been enabled. Operator Actions at Panel 4.10.3 Day Mode - User Option If Day Mode is enabled during panel commissioning, this option allows the user to activate/deactivate Day Mode delays during the set Day Mode time period. This has no effect on any sensor sensitivity changes that may have been configured during commissioning. Any sensor sensitivity changes will automatically occur at the set Day Mode period start and end times. To Disable / Enable Day Mode, proceed as follows: 3 [U0 Disable/Enable] 1:Zone 2:Outputs 3:Day Mode 4:Delays 1 From the Disable / Enable menu, press the ‘ to display the following: Start Day Mode Press to confirm 5 3 ’ button <:Cancel 2 Press the ‘ 5 ’ button to confirm the requested operation. The LCD automatically returns to the Disable / Enable menu. If Delays have been configured the DELAY ACTIVE LED illuminates when Day Mode is started. FIRE DISABLEMENT TEST DELAYS ACTIVE [U0 Disable/Enable] 1:Zone 2:Outputs 3:Day Mode 4:Delays FIRE OUTPUT: FAULT / DISABLED FIRE OUTPUT ACTIVE PLANT ALARM POWER 3 To end Day Mode, repeat steps 1 and 2 (the display is as shown below): End Day Mode Press to confirm <:Cancel The DELAY ACTIVE LED will extinguish when the Day Mode operation has been ended, either when day mode is turned off or when the timer has timed out. No delays are active. Note: If Day Mode is NOT cancelled manually, Day Mode delays are automatically deactivated at the end of the set time period. 997-264-000-11, Issue 11 October 2010 32 ID50 Series Panel - Operating Manual 4.10.4 Delays - User Option The Disable / Enable Delays option allows the user to cancel or initiate the Delays function of the panel, which is configured during commissioning (refer to 997-263 ID50 Series Panel Installation, Commissioning and Configuration Manual, Sections 5.5.5.4 Primary/ Extend Delay Timers and 5.7.8 CBE Zones). To Disable / Enable Delays: 1 Using the numeric keypad, press the ‘ 4 ’ button to select the Disable/Enable Delays option: 2 At the prompt, press the ‘ 5 ’ button to confirm the Delays operation. If delays are disabled, the LCD prompts to enable delays, and vice versa. Disable Delays Press to confirm 5 <:Cancel When the delays are disabled, the DELAY ACTIVE LED is extinguished. When the delays are enabled, the LED is illuminated. FIRE [U0 Disable/Enable] 1:Zone 2:Outputs 3:Day Mode 4:Delays DISABLEMENT TEST DELAYS ACTIVE FIRE OUTPUT: FAULT / DISABLED FIRE OUTPUT ACTIVE PLANT ALARM POWER If a Day Mode time period is configured, the CBE Rule delays will activate when Day Mode is started either: a. Using the Disable / Enable menu, or b. When Digital / ÜE Input 1 is operated (if this input is configured during commissioning for Day Mode Start). These delays will be deactivated when Day Mode is ended, either automatically at the end of the configured Day Mode period, or by one of the following: a. Using the Disable / Enable menu, b. When the Digital / ÜE Input 1 is operated, c. Delays are disabled using the Disable / Enable menu. 33 997-264-000-11, Issue 11 October 2010 Operator Actions at Panel [U0 Disable/Enable] 1:Zone 2:Outputs 3:Day Mode 4:Delays 4 ID50 Series Panel - Operating Manual 4.11 Clock - User Option The CLOCK User Option allows the user to enter or edit the following: a. Time. b. Date. To edit the CLOCK - User Option: 1 At the ‘Status: NORMAL’ message, press the ‘ ’ button. The LCD prompts for a Level 2/3 access code. Operator Actions at Panel ACCESS TO MENUS RESTRICTED Enter Level 2/3 Passcode: . . . . < : BackSp Note: If an incorrect access code is entered, the LCD displays an ‘ERROR - INCORRECT PASSCODE ! ! !’. After one minute the LCD returns to the ‘Status: NORMAL’ message. 5 2 Either turn the keyswitch or, using the numeric keypad, enter the correct Level 2 access code and confirm using the ‘ 5 ’ button. The Level 2 menu is displayed with the user number ([U0] to [U9]) in the top left-hand corner. [U0] 1 : Test 2 : Disable/Enable 3 : Clock 4 : View Mode 5 : Commission 3 3 Press the ‘ 3 ’ button on the numeric keypad to select the Clock menu. [U0 Clock] 997-264-000-11, Issue 11 October 2010 34 1 : Time 2 : Date ID50 Series Panel - Operating Manual 4.11.1 Time - User Option The Time User Option allows the user to enter or edit the current time displayed on the LCD. To edit the time, proceed as follows: 1 Press the ‘ 1 ’ pushbutton on the numeric keypad to select the Time option. [U0 Clock] 1 : Time 2 : Date 1 ENTER NEW TIME (format hh : mm) --:-- <:Cancel After entering the last digit, press the ‘ and return to the CLOCK menu. 1 9 1 1 5 ENTER NEW TIME (format hh : mm) 19 : 11 [U0 Clock] 9 1 1 1 5 5 ’ to confirm <:Cancel 1 : Time 2 : Date Note: The entered time must be in the 24-hour clock format (e.g. for 07:11 pm, enter 1911). If an invalid time is entered, the LCD displays an error message and then re-displays the Clock menu. ENTER NEW TIME (format hh : mm) 91 : 11 <:Cancel Invalid Value Entered ! [U0 Clock] 35 1 : Time 2 : Date 997-264-000-11, Issue 11 October 2010 Operator Actions at Panel 2 The LCD displays the Enter New Time prompt. Using the numeric keypad, enter the numbers directly. All digits are automatically entered into position from left to right on the display. ID50 Series Panel - Operating Manual 4.11.2 Date - User Option The Date User Option allows the user to enter or edit the current date displayed on the LCD. To enter or edit the date, proceed as follows: 1 Using the numeric keypad, press the ‘ select the Date option. [U0 Clock] Operator Actions at Panel 2 1 : Time 2 : Date 2 The LCD prompts for entry of a new date. Using the numeric keypad, enter the numbers directly. All digits are automatically entered into position from left to right on the display. ENTER NEW DATE (format dd/mm/yy) - -/- -/- - <:Cancel After entering the last digit press the ‘ and return to the Clock menu. 1 2 1 2 0 0 5 ENTER NEW DATE (format dd/mm/yy) 12/12/00 [U0 Clock] 2 2 2 2 2 2 ’ button to 2 5 5 ’ to confirm <:Cancel 1 : Time 2 : Date Note: The date MUST be entered in the same format as indicated on the LCD. Only date entries between 2000 and 2063 are valid. If an invalid date is entered, for example 222222 - 22/22/22, the LCD displays an error message and then re-displays the Clock menu. ENTER NEW DATE (format dd/mm/yy) 22/22/22 <:Cancel Invalid Value Entered ! [U0 Clock] 997-264-000-11, Issue 11 October 2010 36 1 : Time 2 : Date ID50 Series Panel - Operating Manual 4.12 View Mode - User Option The VIEW MODE User Option allows the user to view the following system parameters: a. Log b. Devices on the loop c. Faults d. Input Events e. Disablements on the loop f. Maintenance Log (ID60 only - requires access level 3) g. Alarm Count h. Voltages To display the View Mode menu: ’ 1 From the ‘Status: NORMAL’ message, press the ‘ button. The LCD prompts for a Level 2/3 access code. ACCESS TO MENUS RESTRICTED Enter Level 2/3 Passcode: . . . . < : BackSp Note: If an incorrect access code is entered, the LCD displays ‘ERROR - INCORRECT PASSCODE ! ! !’. After one minute the LCD returns to the ‘Status: NORMAL’ message. 5 2 Either turn the keyswitch or, using the numeric keypad, enter the correct Level 2 access code and confirm using the ‘ 5 ’ button. The Level 2 menu is displayed with the user number ([U0] to [U9]) in the top left-hand corner. [U0] 1 : Test 2 : Disable/Enable 3 : Clock 4 : View Mode 5 : Commission 4 3 Using the numeric keypad, press the ‘ select the View Mode menu: 4 ’ button to [U0 View] 1: Log 2: Devices 3: Faults 4: Input Events 5: Disabled : More 2 or 8 4 Press the ‘ options: 2 / 8 ’ buttons to display further menu [U0 View] 6: Maint.* 7: Alarm Count 8: Voltages 9: Version : More * ID60 panels only 37 997-264-000-11, Issue 11 October 2010 Operator Actions at Panel i. Version (system and loop software). ID50 Series Panel - Operating Manual 4.12.1 Log - User Option The Log User Option allows the user to view all logged events, one at a time. To display the Log, from the VIEW Mode menu: 1 On the numeric keypad, press the ‘ select the Log option. [U0 View] 1:Log 4:Input Events 1 2:Devices 5:Disabled 1 ’ pushbutton to 3:Faults : More 2 The LCD automatically displays the last recorded event. Viewing commences from this point; press the Operator Actions at Panel ‘ 2 / 8 ’ buttons to scroll through the Log entries. Example Log entries are given below: [LOG 001/512] CPU FAULT 2 12/12/00 [LOG 002/512] DEVICE ADDED M12 6 MCP 11:48 > 8 12/12/00 14:55 > [LOG 002/512] ZONE10 M12 MCP 12/12/00 14:55 > Note: Press the ‘ 6 ’ button to view additional zone text information. To return to the previous display press any numeric/cursor key. Alternatively, if no key is pressed within ten (10) seconds the LCD returns to the View Log display automatically. 3 Press the ‘ menu. 4 ’ pushbutton to return to the View Mode 4.12.2 Devices - User Option The Devices User Option allows the user to observe all loop devices in turn. Device data is displayed on the bottom line of the display and the format depends on the configured protocol (CLIP or OPAL) of the selected device. To view Devices, from the View Mode menu: [U0 View] 1:Log 4:Input Events 2 2:Devices 5:Disabled 1 On the numeric keypad, press the ‘ 2 ’ button to select the Devices display. The LCD displays the last-viewed sensor address: [U0 Sensor nn - AAA] PW1:286 2:283 3:285 2 997-264-000-11, Issue 11 October 2010 3:Faults : More >: Next : More 4:1003 5:0292 <:Exit Press the ‘ 2 / 8 ’ buttons to scroll through device address entries until the desired sensor is displayed. If the loop has mixed protocol devices the display will show the approriate device information. 38 ID50 Series Panel - Operating Manual CLIP protocol: Device Address Device Type [U0 Sensor 02 - OPT] PW1:286 2:283 3:285 >: Next : More 4:1003 5:0292 <:Exit 8 2 [U0 Sensor 03 - OPT] PW1:286 2:283 3:285 >: Next : More 4:1003 5:0292 <:Exit Pulse Width Time Periods OPAL protocol - Sensors & Non-Multi-modules: Device Type [U0 Sensor 04 - OPT] >: Next : More Value: 049, 026, 000, 000, 000, 000; 224 Sub-address values Isolator state value OPAL protocol - Multi-Modules: Module Address (Channel A) Multi-module Types: ‘MON/MON’ (M720) or ‘MON/MON/RLY’ (M721) [U0 M04 - MON/MON/RLY] >: Next : More Value: 050, 073, 074, 000, 000, 000; 224 Isolator state value (sub-address 127) Values for Sub-addresses 0, 1, 2 & 3 (see below) Notes: Multi-modules consist of a number of channels: channel A, or ‘core’ channel, corresponds to the rotary address switch setting; channels B and C (if it exists) are ‘reserved memory’ allocations and use the next consecutive addresses. The first three values are: sub-address 0 (System), sub-address 1 (Channel A) and sub-address 2 (Channel B). The fourth value is sub-address 3 (Channel C) and corresponds to the output (RLY) of an M721 module. Press the ‘ 2 / 8 ’ buttons to display details of each sub-address. For the example above, module type M721 with its core address M04, the sub-addresses for this module are as follows: Module Address (Channel B) [U0 - M05 = M04/2] >: Next : More - M05 = M04/3] >: Next : More Module Address (Channel C) [U0 Sub-address Values Explained Sensors: the first value indicates the sensor status, i.e fire, pre-alarm, etc. used by the panel. The next values (before the semi-colon) are internal to the sensor and, therefore, are of no concern to the user. Modules: the first value is interpreted by the panel as an indication of the module’s health status. The next values represent the status, where appropriate, of the sub-addresses (inputs and/or output circuits). In either case, the last value (after the semi-colon) shows the status of the internal isolator, if fitted: 224 = isolator closed, 96 = isolator open. For devices without an internal isolator this value = 0. 39 997-264-000-11, Issue 11 October 2010 Operator Actions at Panel Device Address ID50 Series Panel - Operating Manual 3 Press the 6 ’ button to view additional device information. For CLIP protocol devices: [U0 Sensor nn - OPT] >: Next : More Level 050% -〉〉 050% -〉〉 050% Note: Three percentage values are displayed [this is the device’s alarm level status, e.g. 100% (default) is equivalent to alarm]. The value on the left is the current alarm status level. The other percentage values are historical; the previous two alarm status percentages are displayed, the one on the left being the more recent. For OPAL protocol devices, the device data displayed is for reference purposes only: Operator Actions at Panel [U0 Sensor 04 - OPT] >: Next : More SN.: DA1BFCCB Imp: 31 Rev: 026 Avg: 025, 027 4 Press the ‘ 4 ’ button to return to the View Mode menu. AWACSTM Devices (ID60 only) The ID60 panel allows the configuration of all sensor types, except HEAT sensors, to use the AWACSTM multisensing algorithm. For these devices an additional screen is available which displays the current percentage values for alarm and pre-alarm. [U0 Sensor nn - AVS] AWACS Alarm: 000%, 997-264-000-11, Issue 11 October 2010 40 >: Next : More Prealarm: 000% ID50 Series Panel - Operating Manual 4.12.3 Faults - User Option This menu option allows the user to view active faults while the normal active fault display has been overridden by a higher priority display (alarms). To view Faults, from the View Mode menu: 1 On the numeric keypad, press the ‘ the Faults display. [U0 View] 1:Log 4:Input Events 3 ’ button to select 2:Devices 3:Faults 5:Disabled : More 2 The LCD automatically displays the last recorded event first. Viewing commences from this point. Press the ‘ 2 / 8 ’ buttons to scroll through the faults. Note: Press the ‘ 6 ’ button to view additional zone text information. To return to the fault message press any numeric/cursor key. Alternatively, if no key is pressed within ten (10) seconds the display reverts to the fault message. Example fault displays are given below: A B C D E F FAULT 01 / 03 Z01 M12 NO REPLY FROM DEVICE 2 G H MCP 14:55 > FAULT 01 / 03 Z01 NO REPLY FROM DEVICE S23 TMP 8 14:55 > 6 FAULT 01 / 03 < - - - Zone Text - - - > a. Fault condition b. Fault currently displayed. c. Total number of faults logged. d. Text description of fault. e. Zone Number. f. Device Address. g. Device Type. h. Time fault was logged. Z01 M12 MCP 14:55 < - - - Device Text - - - > Note: If no faults are recorded on the system, the following message is displayed: The system has NO faults present <:Exit 3 Press the ‘ menu. 41 4 ’ button to return to the View Mode 997-264-000-11, Issue 11 October 2010 Operator Actions at Panel 3 ID50 Series Panel - Operating Manual 4.12.4 Input Events - User Option The Input Events menu option allows the user to view active input events/plant alarms while the normal active input events/plant alarms display has been overridden by a higher priority display (alarms). To view Plant Alarms, from the VIEW Mode menu: 1 Using the numeric keypad, press the ‘ select the Input Events display. [U0 View] 1:Log 4:Input Events 4 2:Devices 5:Disabled 4 ’ button to 3:Faults : More 2 The LCD automatically displays either: Operator Actions at Panel a. The first input event, or PLANT 01 / 10 < - - - Zone Text - - - > Z21 M12 AUX 14:55 < - - - Device Text - - - > b. The ‘No Warnings message’, if there are no current input events recorded on the system. The system has NO warnings present <:Exit 3 If a number of input events are present, press the ‘ A H B PLANT 01 / 10 < - - - Zone Text - - - > 2 C D E 2 / F 8 ’ buttons to scroll through the entries: G Z21 M12 AUX 14:55 < - - - Device Text - - - > PLANT 02 / 10 < - - - Zone Text - - - > 8 Z17 M05 MON 15:05 < - - - Device Text - - - > a. b. c. d. e. f. g. h. Plant Alarm condition Alarm currently displayed. Number of alarms. Zone Number. Device Address. Device Type. Time alarm was logged. Zonal and Device text (if any). Note: Plant alarms for Hold Switch and Abort Switch inputs are entered as AUX events in the Fault list. These input events are not processed by any CBE rules. 4 Press the ‘ menu. 997-264-000-11, Issue 11 October 2010 42 4 ’ button to return to the View Mode ID50 Series Panel - Operating Manual 4.12.5 Disabled - User Option The Disablement User Option allows the user to view all current loop-based input disablements recorded on the system. To view each disablement in turn, from the VIEW Mode menu: 1 Using the numeric keypad, press the ‘ select the Disablements display. [U0 View] 1:Log 4:Input Events 5 2:Devices 5:Disabled 5 ’ button to 3:Faults : More 2 The LCD automatically displays either: a. The zone disablements, or b. The NO disablements message, if no current Disablements are present on the system. There are no loop devices disabled <:Exit 3 If more than one disablement is present, press the ‘ 2 / 8 ’ buttons to scroll through the Disablement entries (see examples below): A B C D E F DISABLEMENT 01 / 09 Z01 S02 TMP < - - - Zone Text - - - > < - - - Device Text - - - > 2 a. Condition, b. Disablement currently displayed, c. Active disablements, d. Zone number, e. Device address, f. Device type, g. Zonal and device text (if any). G 8 DISABLEMENT 01 / 09 Z01 S03 TMP < - - - Zone Text - - - > < - - - Device Text - - - > 4 Press the ‘ menu. 4 ’ button to return to the View Mode 4.12.6 Alarm Count - User Option The Alarm Count User Option allows the user to view the number of times the panel has entered alarm condition since manufacture. To view the Alarm Count, from the VIEW Mode menu: 1 Using the numeric keypad, press the ‘ select the Alarm Count display. 6 6 ’ button to [U0 View] 6: Maint.* 7: Alarm Count 8: Voltages 9: Version : More * ID60 panels only 2 The LCD displays the Alarm Count. Press the ‘ button to return to the View Mode menu. Current Alarm Count is 4 ’ 12 <:Exit 43 997-264-000-11, Issue 11 October 2010 Operator Actions at Panel DISABLEMENT 01 / 01 Z01 S02 TMP < - - - Zone Text - - - > < - - - Device Text - - - > ID50 Series Panel - Operating Manual 4.12.7 Voltages - User Option With sounder circuits configured as transmission device (TxD) the Voltages User option is used to set the transmission circuit reference impedance. With the TxD circuit selected, use The Voltages User Option allows the user to view the Voltages (mV) of various parts of the system. For sounder circuits configured as a transmission device (TxD) a resistance value (Ω) is displayed (see note at left). the numeric keypad and press the ‘ 1 ’ pushbutton. This sets the impedance reference value for the TxD circuit which is used to determine if a fault condition exists. Ideally, this value should be between 250 and 800Ω. To view these Voltage/resistance values, from the View Mode menu: 1 Using the numeric keypad, press the ‘ 8 ’ button to select the Voltages menu. [U0 View] 6: Maint.* 7: Alarm Count 8: Voltages 9: Version : More 8 * ID60 Panels only. Operator Actions at Panel 2 The Battery Volts window is automatically displayed. Press the ‘ 2 / 8 ’ buttons to display the previous/next system voltage. BATTERY WIRING TEST [U0 VOLTS] BATTERY VOLTS = 27.0 : Select <:Cancel [U0 ANALOGUE] 8 EARTH = 271 : Select <:Cancel 2 [U0 ANALOGUE] [U0 ANALOGUE] [U0 ANALOGUE] [U0 ANALOGUE] SOUNDER 1 = 21092 : Select <:Cancel SOUNDER 2 = 21088 : Select <:Cancel SOUNDER 3 = 21091 The last battery load test result is displayed (in mΩ). If the value displayed is ‘9999’, either the battery load test has not been run yet or the test has been suspended. The range is 220 to 570. Any value outside this range will generate a fault. : Select <:Cancel SOUNDER 4 = 21090 BATTERY : Select WIRING <:Cancel = 350 : Select <:Cancel AC POWER = 237 [U0 VOLTS] [U0 VOLTS] [U0 VOLTS] : SelectCHARGER <:Cancel = 27.2 : Select <:Cancel Note: The voltage displayed for each system should be within a given range. a. Mains supply present: a battery voltage value greater than 15V means that batteries are connected; battery voltage is low if greater than 15V but less than 18.9V. No mains supply present: a value of less than 22V means an imminent deep discharge; a value less than 21V indicates deep discharge of the batteries. b. An Earth Fault is indicated when the displayed value is less than 175 or greater than 450. c. A fault is generated if the panel detects either: a series resistance is too high or parallel resistance is too low. The values are for service engineer use only. d. A mains failure is detected when the AC voltage drops below 193Vac. This fault will remain until the AC voltage rises above 205Vac. e. The Charger is faulty if a value less than 24V is displayed. 3 Press the ‘ 4 ’ button to cancel and return to the View Mode menu. 997-264-000-11, Issue 11 October 2010 44 ID50 Series Panel - Operating Manual 4.12.8 Version - User Option The Version User Option allows the user to view the System and Loop part numbers and revision levels used in the system. To view the Versions, from the View Mode menu: 1 Using the numeric keypad, press the ‘ select the Versions display. 8 ’ button to [U0 View] 6: Maint.* 7: Alarm Count 8: Voltages 9: Version : More 8 * ID60 panel only 2 The LCD automatically displays the following. Press [U0 VERSION] System Loop : nnn-nnn-nnn : nnn-nnn n.nn n.nn Revision Level Part Number 4.13 Commissioning The Commissioning User Option is available to Level 3 users only (i.e. the Level 3 access code must be entered). The Commissioning menu allows the engineer to configure the system in preparation for handover. For details concerning commissioning and configuring the system, refer to 997-263, ID50 Series Panel Installation, Commissioning & Configuration Manual, Sections 4 and 5. 4.14 Print The RS232 Protocol option has to be set to ‘Printer’ for this option to become available. If available, the panel’s event log and disablements can be printed using an external printer or displayed on a terminal or saved as a file on a PC connected to the RS232 port. To print the event log: 6 [U0] 1 : Test 2 : Disable/Enable 3 : Clock 4 : View Mode 5 : Commission 6: Print 1 From the top level menu, press the ‘ 6 ’ button to select the Print option. The following options are displayed: [U0 PRINT] 1 1 1 : Log 2 : Disablements 3 : Maintenance1 ID60 option only. 2 Press the ‘ option. 1 ’ pushbutton to select the Print Log [U0 PRINT LOG] 1 : All 2 : Fire 3 : Fault 4 : Pre-Alarm 5 : Test 6: Disablement 45 997-264-000-11, Issue 11 October 2010 Operator Actions at Panel the ‘ 4 ’ button to cancel and return to the View Mode menu. ID50 Series Panel - Operating Manual Where no history exists for a selected print option, the option will not be selectable. 3 Select the appropriate print option from the Log menu using the appropriate numeric key. You are prompted to enter the dates of the event log period you wish to print. Use the numeric keypad to enter the dates, press the ‘ 5 ’ to confirm the date entered. If you make a mistake, edit the date using the ‘ press the ‘ 5 4 ’ button and then ’ button. Enter date rang,e (dd/mm/yy) -- /-- / -- to -- /-- /-: All <: Cancel 4 The display now changes to indicate that printing is taking place as follows: Operator Actions at Panel Printing Event Log < : Stop 5 If the event log is being printed to a PC, the data can be saved as a .csv (comma separated values Excel) file for archiving purposes. Note: The ID5x/6x Series offline configuration tool has an option (under the Tools menu) to allow event or device data to be retrieved from the panel and saved on the PC. 6 To print the disablements, press the ‘ the Print screen: 2 2 ’ button at [U0 PRINT DISABLEMENTS] 1 : Device 2 : Zone 3 : Outputs 7 Select the appropriate option using the numeric keypad. If disabled device data is available the print screen changes to advise that printing is taking place. For example, if option 2 Zone is selected the following information is displayed: Printing Zone Disablements < : Stop 8 To print the maintenance log (ID60 only), press the ‘ 3 ’ button. The display changes to indicate that printing is in progress, as below: Printing Maintenance Log Note: The Maintenance log can hold up to 100 log entries. Newer entries replace the oldest in the log. 9 Press the 4 ’ button to cancel printing and return to the Print menu. 997-264-000-11, Issue 11 October 2010 46 ID50 Series Panel - Operating Manual Appendix 1 - Log Book In accordance with EN54 part 14, it is the user’s responsibility to maintain a log book and to record all events resulting from or affecting the system. The log book should be kept in a place accessible to authorised persons (preferably near the control panel). One or more identifiable individuals should be appointed to oversee or carry out all entries in the log book. The names of these persons (and any changes of responsible person) should be recorded. Sample pages of the log book are provided here and can be photocopied to produce a log book that conforms to EN54-14. The sample below is for the reference data (eg the name of the responsible person), while the sample on the next page is for the entry of event data. REFERENCE DATA Name and address -----------------------------------------------------------------------------------------------Responsible person -------------------------------------------------------------------------------------------------------------------------------------------------------------------- Date -------------------------------------- ---------------------------------------------------------------------- Date -------------------------------------- ---------------------------------------------------------------------- Date -------------------------------------- ---------------------------------------------------------------------- Date -------------------------------------- ---------------------------------------------------------------------- Date -------------------------------------- ---------------------------------------------------------------------- Date -------------------------------------- ---------------------------------------------------------------------- Date -------------------------------------- ---------------------------------------------------------------------- Date -------------------------------------- ---------------------------------------------------------------------- Date -------------------------------------- ---------------------------------------------------------------------- Date -------------------------------------- This system was installed by ----------------------------------------------------------------------------------and is maintained under contract by ---------------------------------------------------------------------- until --------------------------------------- Telephone number --------------------------------------------should be contacted if service is required A1 - 1 997-264-000-11, Issue 11 October 2010 Appendix 1 - Log Book All events should be properly recorded (events include real and false fire alarms, faults, pre-alarm warnings, tests, temporary disconnections and service visits). A brief note of any work carried out or outstanding should be made. ID50 Series Panel - Operating Manual Event Data Time Event Action Required Appendix 1 - Log Book Date 997-264-000-11, Issue 11 October 2010 A1 - 2 Date Completed Initials ID50 Series Panel - Operating Manual Event Data Time Event Action Required Date Completed Initials Appendix 1 - Log Book Date A1 - 3 997-264-000-11, Issue 11 October 2010 ID50 Series Panel - Operating Manual Event Data Time Event Action Required Appendix 1 - Log Book Date 997-264-000-11, Issue 11 October 2010 A1 - 4 Date Completed Initials ID50 Series Panel - Operating Manual Appendix 2 - Maintenance Create a log book (see Appendix 1) in accordance with the recommendations of EN54 Part 14. This log book should be used and maintained for recording events as described below. A2.1 Routine Testing Daily - Check the panel to ascertain that it indicates normal operation. If any fault is indicated check that it has been recorded in the log book and that the appropriate actions have been taken, e.g. informing the maintaining company. Weekly - Test at least one sensor or call point to confirm the operation of the panel and the audible alarms. Test a different zone each week and, if possible, a different device. Keep a record of the device and zone tested each week. Record and report any malfunction. Quarterly - The responsible person should ensure that every three months the system is checked by a competent person who shall: Check the log book entries and any action taken. Check the standby batteries and the charger voltage. Test at least one device in each zone to check the panel functions. Check the operation of the audible alarm and any link to a remote manned centre, Central Station, etc. Carry out a visual inspection of the installation to check for alterations or obstructions and issue a certificate of testing. Annually - The responsible person should ensure that, in addition to the quarterly checks, each device on the system is tested and that a visual inspection is made of the cable fittings and equipment. A2.2 Batteries As a minimum, replace the batteries every four years. The battery units should always be disposed of in accordance with the battery manufacturer ’s recommendations and local regulations. A2.3 Cleaning The panel may be cleaned periodically by wiping with a soft, damp lint-free cloth. Do not use any solvents. A2 - 1 997-264-000-11, Issue 11 October 2010 Appendix 2 - Maintenance In order to ensure that the system is fully operational, and to comply with the requirements of EN54 Part 14 and BS 5839 Part 1: 1988, the following routine attention is recommended: ID50 Series Panel - Operating Manual Appendix 3 ID60 Single Loop Panel Differences The ID60 Panel differs from the ID50 Panel in that it supports Very Intelligent Early Warning (VIEWTM) and SMART 4 multi-criteria sensors. This appendix describes differences to the user operations required by the ID60 Panel. Each VIEW TM sensor has to be calibrated on first operation with the panel. If a VIEWTM sensor is removed and cleaned, or replaced with a new one, wait at least 30 secs after removal before replacing it. Following replacement, VIEWTM sensors remain inoperable for 60 seconds while calibrating. Calibration is carried out automatically for each sensor approximately 60 secs after the sensor is installed on a panel which is already operating normally. During this initial period (which is required to allow the VIEWTM sensor to stabilise) the sensor must not be exposed to smoke or any other abnormal conditions, otherwise the panel may report a sensor fault. SMART 4 Sensor No user procedures are required with this sensor. However, a new advisory message is logged whenever a SMART 4 device approaches the end of the useful life of the CO sensor element (approximately 6 months before the sensor needs a complete replacement). A new print option is available with the ID60 that allows printing of the maintenance log. It is still possible to print the maintenance log even if it contains no entries. The print out will confirm that the maintenance log is empty. Service Due Indication If configured, the advisory message ‘Status: SYSTEM SERVICE DUE’ will replace the ‘Status Normal’ screen when the service due date has been reached. Contact the authorised servicing company. This service due message can only be reset or disabled by the authorised servicing company. A3 - 1 997-264-000-11, Issue 11 October 2010 Appendix 3 - ID60 Differences VIEWTM Sensor Charles Avenue Burgess Hill W. Sussex RH15 9UF T: +44 (0) 1444 230 300 F: +44 (0) 1444 230 888 E: [email protected] www.notifierfiresystems.co.uk PREVENT SS RD LO local distributor N TIO BOA CA R N CE TIFI IO 007 Quality Systems Certificate No. 154 Assessed to ISO9001 Every care has been taken in the preparation of this document but no liability can be accepted for the use of the information therein. Design features may be changed or amended without prior notice.