1
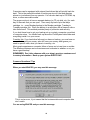
WinPOS - Windows Point-Of-Sale WinBPS - Windows Bridal Profit System WinTPS - Windows Tuxedo Profit System BBL Systems, Inc. 6021 Sandy Springs Circle Atlanta, GA 30328 VOICE: (800) 587-7277 FAX: (770) 234-4223 E-MAIL: [email protected] WEB SITE: WWW.BBLSYSTEMS.COM Copyright Notice: Copyright 2000-2013 BBL Systems, Inc. BBL Systems, Inc. makes no representations or warranties with respect to the merchantability or fitness of the Windows Point-Of-Sale (WinPOS) for any particular purpose. Further, BBL Systems, Inc. reserves the right to revise this publication and accompanying software without obligation to notify any person or organization of such revision. Trademarks: Tuxedo Profit System, TPS, Bridal Profit System and BPS are trademarks of BBL Systems, Inc. This Quick start is for version 8 and beyond. 1 Welcome Welcome to WinPOS®, the premiere Windows-based POS system for bridal shops, formalwear retailers and formalwear rental stores from BBL Systems Inc., the makers of The Bridal Profit System. WinPOS® hardware system requirements: Pentium processor at 500Mhz or faster (recommended) 128 MB RAM or more depending on operating system 32 or 64 bit operating system such as Microsoft Windows 95, 98, Me, NT 4, or 2000/XP (Windows 2000/XP/7/8 is the preferred operating system) At least 500 MB free disk space before installing WinPOS®. Multi user installations require wired 100mb networking and/or Windows 2000/2003/2008/20012 Terminal Services (NOTE: For performance and reliability reasons, BBL Systems does NOT support Wi-Fi (wireless) network systems) Copyright ©2000-2013 BBL Systems, Inc. All rights reserved. Contacting BBL Systems BBL Systems, Inc. 6021 Sandy Springs Circle, NE Atlanta GA 30328 Phone: 800-587-7277 Fax: 770-234-4223 Office Hours: Monday to Friday 9:00 A.M. to 6:00 P.M. Eastern Standard Time World Wide Web: www.bblsystems.com Sales email: [email protected] Support email: [email protected] At BBL Systems, we work hard to provide you with intuitive technical products. Additionally, we try to provide superior online and print documentation to enable you to work independently in running your store with WinPOS®. If you have a technical question that you can’t answer with the provided tools, please contact our Technical Support department. All of our Technical Support representatives are eager to answer your questions. Note: You should have a current support contract or be under warranty to access BBL Systems support services. BBL Systems support services are subject to BBL Systems prices, terms, and conditions in place at the time the service is used. 2 Installing/Upgrading WinPOS A note before you install WinPOS®… Please, read all these instructions before proceeding. If you are not entirely clear on any of these instructions, contact BBL Systems Tech Support at (800) 587-7277, ext 2 BEFORE installing any of this software. You should view our training / tutorial videos on our YouTube channel. The videos may viewed online from: Training Video Play Lists http://bit.ly/13LsVdG Installation Videos Play Lists http://www.youtube.com/playlist?list=PLdd9YgjhIKMfycH6FYQWCp5Rc3G8tFjz If you accidentally lock the workstation (the entire screen will be blue, and it will be prompting you to “enter the password below to unlock” the password is UNLOCK. The built-in username and password are MANAGER and PASSWORD. You must enter PASSWORD in uppercase! You are a single user/PC installation? If so follow these steps-- You are a new user and will use WinPOS on one computer. a. Open your computer’s Web Browser and type the following address into your web browser’s address field: www.bblsystems.com/downloads/server11/ssetup.exe b. When prompted, choose to save the file to your Desktop. c. When the download is complete, type the following address into your web browser’s address field: www.bblsystems.com/downloads/workstation11/wsetup.exe d. When prompted, choose to save the file to your Desktop. Close your Web Browser when the download is complete. e. Double-click on the ssetup.exe icon on your Desktop. Accept the default location for the installation and click the Install button. 3 f. Once the server install finishes, double-click on the wserver.exe icon on your Desktop. Accept the default location for the installation and click the Install button. When the installation is complete, go to step 2. You are a multi-user user/PC installation? If so follow these steps-- You are new user and will use WinPOS on MORE than one computer in a PC to PC peer network a. Insure all the computers are installed properly and can read/write to the Server/Primary computer’s hard drive. If you do not know how to share the file server’s hard drive please ask your hardware consultant. Also printers should be installed and working,i.e. ability to print a test sheet.. Please write down the name of this server computer. A name was given to it by whomever installed the Windows Operating System. You may need the name when you install the ProfitSystem on each workstation. b. Open your server computer’s Web Browser and type the following address into your web browser’s address field. Perform this on your primary computer, the one you will use to store all the data and where youhave shared the hard drive so other computer may read/write data to it. This should be the newest/fastest computer www.bblsystems.com/downloads/server11/ssetup.exe c. When prompted, choose to save the file to your Desktop. d. Close your Web Browser when the download is complete. e. Double-click on the sserver.exe icon on your Desktop. Accept the default location for the installation and click the Install button. f. If you DON’T want to use your server computer as a workstation, go to step 2. g. If you DO want to use your server computer as a workstation, re-open your computer’s Web Browser and type the following address into your web browser’s address field: www.bblsystems.com/downloads/workstation11/wsetup.exe h. When prompted, choose to save the file to your Desktop. Close your Web Browser when the download is complete. i. Double-click on the wsetup.exe icon on your Desktop. Accept the default location for the installation and click the Install button. 4 j. If you have any additional computers in the shop that you wish to use as WinPOS workstations, repeat steps f, g and h above for each of those computers. When the installations are complete, go to step 2. Note: The data files and workstation specific configuration files are located in the default folder of: In Windows XP: C:\Documents and Settings\All Users\Application Data\ProfitSystem In Windows Vista, or Windows 7/8: C:\ProgramData\ProfitSystem Setup files like the TPSWIN.INI are located there even if the default folders are not accepted during the installation. The program files are located in the default folder of: C:\Program Files\ProfitSystem Running the software for the first time Step 2 – Starting the application for the first time for NEW USERS with single or multiple computer installations a. When you start WinPOS for the first time on each server/workstation this message will appear: This is the first time you've run The Profit System. b. If the data files are installed on this computer, go to step c. If the data files are installed on another computer (a server), enter the name of that computer. WinBPS will check if the data files are installed on the computer and available as a data share called ProfitSystem. If WinBPS can locate the data files, go to step c. If WinBPS cannot locate the data files it will tell you. You should go to the computer that contains the shared data files and create a data share called ProfitSystem on the data directory, and make sure all users have full permissions to access it. This may require the help of your computer technician. The share location will be different depending upon the windows operating system being used. In Windows 2000/XP the data directory is located at: C:\Documents and Settings\All Users\Application Data\ProfitSystem\ 5 In Windows Vista & newer the data directory is located at: C:\ProgramData\ProfitSystem\ In either case create a share called ProfitSystem on the data location for your windows operating system, and make sure all users have full read-write access to it, both through the data share and through the Windows permissions on the folder. If this procedure is not clear, please consult a local computer expert who can assist you. c. The installation program will provide a workstation Name and number prompt for each workstation the first time WinPOS is ran on each, enter a name for this register (for example, POS1). The register name is used to identify the computer to WinPOS® (within WinPOS the term used for PCs/Terminals is REGISTER). All sales transactions are stamped with the register name that processed them. The register name is also printed on the sales receipt. We recommend you use descriptive workstation names (such as POS1, RECEIVING, SERVER, etc.) so they will have meaning to you. If you are setting up your computers and network from scratch, use the same descriptive names for your computer names in Windows when installed. At the Number prompt, either type in a station number or use the up and down arrow buttons to the right of the entry field to increase or decrease the number. The station number is used to identify the computer for the Credit Card Processing integration when used and should be unique. We recommend that you number the computers sequentially. Start the numbering at the Point of Sale stations, starting with 1. Click the SAVE button when you are done and WinPOS will automatically create the necessary entries for this workstation. Activation / Authorization of software d. Next when WinPOS starts properly a message will display: “How are you updating your license?” Choose Via the internet using a update/license key, included in the email you received from us. This method will download your license file from our servers and authorize the computer to run WinPOS When successful, WinPOS will display a message stating that the license file has been updated. Next, a window will appear stating that your computer has not been authorized. This is normal. Click on OK. 6 The Set Business Date form will appear. This form is displaying the current date and asking you to confirm that it is correct. Normally, your computer keeps track of the current date. Make sure the date shown after “Set WinPOS business date to” is correct. Enter MANAGER for the Sales Associate (a user/SA we have set up for you). Click OPEN STORE. Step 3 - After WinPOS is installed & authorized The installation will create a BBL Program Group with seven shortcut Icons. These icons will be: The Profit System This icon starts the WinPOS® software. Training The Profit System This icon starts the WinPOS® software with training data where users can practice with the software and not be concerned about entering mistakes, bad data, etc. The Profit System Manual This icon will display the User Manual in Adobe Acrobat (PDF) format. Acrobat is a format proprietary to Adobe Systems which as become a standard for displaying and printing documentation. This requires the computer to have the Adobe Acrobat file reader installed. It is installed as part of the WinPOS Workstation. The Adobe Reader may be also be downloaded FREE from the Adobe Web site www.adobe.com if your computer fails to automatically open the file. The Adobe reader is excellent for printing the manual. The Profit System Help This icon displays the manual in the Help file format. This is great for online viewing and is available also from within WinPOS®. Query Maker Manual WinPOS® includes the capability to create Report, Labels and output to spreadsheet programs on demand via a utility called Query. This manual explains how to use Query. 7 Data Manager This Icon short cut will start a special data file maintenance utility. BBL or the shop may use it from time to time when necessary. Reset training data This icon will restore the training data back to its initial state. You would use this if you’ve used the training mode of WinPOS for a while and want to reset the data back to how it was when you started. Copy license to training This icon will copy your license file from your live data to your training. You would use this if you purchase new features in your program and want them enabled for your training. Copy live data to training This icon will copy your shops live data into the training data. You would use this once you are up and running with WinPOS so that when you train new users they will be training with your inventory, rather than the default training inventory. Remote Helpdesk This icon download and run the Remote Helpdesk program from BBL Systems. This is used by technical support to troubleshoot problems with your computer. The URL for the program is http://bblsystems.com/downloads/remhelp.exe We strongly suggest that you print out a copy of the manual and review it before trying to use WinPOS. Below are directions to print the manual. Click Start->Programs->BBL Systems->WinPOS Manual. Once it displays on-screen, click the File menu, then choose Print. The manual is about 500 pages. Please review the manual for detailed operating instructions. If you are a DOS BPS user and are upgrading. Once you have WinBPS installed and authorized you can import your DOS BPS data. Before converting, you must read the special instructions document included with this Quickstart Guide for “How to 8 Convert DOS BPS data to WinPOS.” . Remember to import your DOS BPS data, WinBPS will need access to it. Consult your computer tech for the best method to gain access to the DOS BPS data. Review the manual From within WinPOS you may click on the Help menu and then Contents. This is a fast way to look up answers. Start with the online help Chapter Help-> Contents-> Getting Started-> Getting Started with WinPOS. Also the manual may be printed from the Start->Programs->The Profit System program group. Please review the manual for detailed operating instructions. At the minimum, you’ll have to perform the following steps before using WinPOS: Configure basic settings in System/Store Setup, at Main->Housekeeping>General Setup->System/Store Setup. Required. Select your Accounting method in System/Store Setup, at Main>Housekeeping->General Setup->System/Store Setup. Required. Add all your employees using the Sales Associates form, at Main>Housekeeping->General Setup->Sales Associates. Optional. Create Inventory Categories, at Main->Inventory->Inventory Categories. Required. Add Vendors, at Main->Inventory->Vendors. Required. Add Color/Size/Width charts for matrixes, at Main->Inventory. Required if you want to use stock purchase orders. Add Markdown codes (optional) at Main->Inventory->Mark down codes. Optional. Enter your tax rate(s) on the Taxes form, at Main->Housekeeping>Accounting Setup->Taxes. Required. Add Retail Inventory, Sizes, and Receive History, at Main->Inventory>Inventory. Required. Setup Security, at Main->Housekeeping->General Setup->Security Groups Permissions. Optional. Enter your sales contract to print on receipts in Document Terms, located at Main->Housekeeping->General Setup->Document Terms. Required. Select your printers at Main->Housekeeping->General Setup->Printers. Required. Customize Letters, Tag, Mailing Labels at Main->Housekeeping->Letters, Tags, Mailing Labels. Optional. Add Customers via Main->View/Change Customers. Required. 9 Things to consider BEFORE entering your Retail Inventory: Decide on the inventory categories and sub-categories you will use. You’ll need a list of all your vendors. Assign an alphanumeric code for each one to identify them within WINPOS (they can be up to 9 characters long but we recommend keeping them short). Determine the method your store will use to assign the style codes to inventory items. Decide if you will put in all size and color charts or use standard charts. Write a short description for each item (this will appear on the list tab as well as on reports, receipts and Purchase Orders). Which items do the vendors give discounts on and what is the percentage? Does your store carry this item in stock? How low should the quantity on hand go before re-ordering? Make a list of reasons you would markdown inventory items and assign a code to each reason (can be up to 9 characters but we recommend keeping them short). Which items will employees receive a spiff on, how much and when (Special order item, from stock or either)? Any special notes you would like displayed on the screen at the time of sale? Does this item require a season code? Is this item discontinued, if so when? (WINPOS will display this information on the ticket screen at the time of sale). Is this an item that has been advertised? How many do you have in stock, what sizes and colors? Will you have more than one price for this item? (WINPOS can display two retail prices at time of sale and you choose between the two). Go over the accounting classes in WINPOS: which will allow price changes, which will be taxable, and which will pay commissions. Finally you must gather the information WINPOS needs to compute the retail price. They are the retail factor %, cost factor, sample cost, reorder cost, and the plus fields on the details screen of the inventory item. Things to consider BEFORE entering your Customers: 10 Create a list of all the different ways customers may hear about your store. These are your customer sources. Decide if you will use the customer type field and make a list of the types you will use for your store if desired. (Not required by WINPOS) Decide what types of ID you will ask your customers for (WINPOS supports four different forms of identification). Does your store have any group accounts? You will need to have these entered before entering your customers. It is important to understand the order of customer entry before entering any customer information. First there is an event file for each event and then customer files (member files) are created within the event files. Finally the tickets are created within the customer files. The order of entry would be: Event->Add Members->Go to Customer->Fill in customer info->New Sale-> Create Transactions on the ticket. The information you will need to have to begin entering your current customers is as follows: the event type (wedding, Prom, Social), event name (usually the bride’s name/ the grooms name), event date, (WinPOS can also track the event time and location) Bride’s name, address, phone numbers, ID information, measurements and similar information for all members of the event. Next it is necessary to decide how the customer balances will be entered into WinPOS. We recommend using the Balance Forward and Tax Forward method. This takes the customers balance due and breaks it down into two numbers, a taxes portion and non-taxes portion allowing balances to be entered quickly using only two transactions per customer. The other method is to enter all transactions for each customer individually. This method will give you more detailed information on the ticket screen but is much more time consuming than the balance forward method. You can be entering Events-> Add Members (customers), and your inventory at the same time. If you choose the balance forward method you can also enter the customer tickets if the system setup is done properly before your customers are entered. If you choose to enter all ticket transactions for your customers then all inventory must be entered before entering the customer tickets. Finally - Back Up Your Data! The most important job of working with a computer is to back-up it's data on a daily basis. Computers are mechanical and thus can break ANYTIME! This is usually not a problem because they can be repaired quickly and easily. However, a breakdown can cause data loss. Data CANNOT be replaced quickly and easily. For this reason you must BACKUP the data on the computer every day. 11 Computers can be equipped with external hard drives that will quickly back the data. This is the preferred method of backing up since it's fast and requires almost no involvement from an operator. You can also back up to CD-ROM, zip drive, or other removable media. The proper routine is to have a separate backup (or CD, zip disk, etc.) for each day of the week that you are open. Then every day back-up to that day’s cartridge, i.e.: every Monday backup to the Monday cartridge, Tuesday to Tuesday cartridge, etc. Place the backup in a safe place like a fireproof safe or take them home. This method provides plenty of protection and security. If you don’t know how to get your backup set up, contact a computer consultant or computer store. You should back up the entire \ProfitSystem data folder and everything inside it on your server. Consider this: If you hard drive fails and you have no backup, you now have no record of who paid you money, who still owes you money, what gowns you need to special order, what you have in inventory, etc. Most people experience a computer failure of some sort at one time or another. The difference between an inconvenience and a disaster is whether or not you have a good backup! REMEMBER: Don’t take chances with your shop’s precious customer and inventory information. Back up your system EVERY DAY! Common Questions / Tips When you start WinPOS, you may see this message This is not an error, it just means that the business date and computer date don’t match. You are using WinPOS and you see this message 12 This means you have accidentally locked WinPOS. The password is UNLOCK. You can lock WinPOS by pressing the F12 key, or selecting Lock Workstation menu option. You cannot get the MANGER username and PASSWORD to work PASSWORD must be entered in all capitals. Manager can be entered in lowercase or uppercase. You are trying to print a receipt and nothing comes out You must tell WinPOS which printer to use for receipts, and how many copies to print. 1. Go to Main->Housekeeping->General Setup->Printers. Select the correct printer for each document type. Click Done when done. 2. Go to Main->Housekeeping->General Setup->System/Store Setup. Go to the Other Settings Tab. Make sure the Receipt Copies is set to a number greater than zero. Click Save, then Done. 3. Go to Main->Housekeeping->General Setup->System/Store Setup. Go to the Other Settings Tab. Make sure the Receipt Copies is set to a number greater than zero. Click Save, then Done. 4. Go to Main->Housekeeping->General Setup->Register Setup. Select the first register in the list and go to the Details Tab. Make sure the Receipt Copies is set to –1, which will tell WinPOS to use the System/Store Setting. If you want a different number of copies for the selected workstation, enter it instead. Click Save. Go back to the List tab and repeat for each workstation. When you have updated all the registers, click Done. 5. Exit from WinPOS and restart it and try printing a receipt again. Help Us Help You 13 When contacting Technical Support via phone, email, web site form or fax, please provide the following information for the fastest possible service: Product serial number (registration number) Your name, company name, and phone number Exact product name and version number Type of operating system (e.g., Windows 95) Complete description of the issue, including steps to reproduce it Exact wording of any messages displayed when you encountered the problem Steps taken to resolve the problem All previous email messages with BBL Systems about the issue, if any Submit online support request Log in to our new Customer portal at: https://bblsystems.com/store/clientarea.php email: (the email address on file with us) password: Reset your password if you do not know your current password Email Ask questions and receive detailed answers from Technical Support by addressing your email message to: [email protected] Please make sure to include the information listed above. You will receive a response via email. Fax Ask questions and receive detailed answers from Technical Support by sending a fax message to: 1-770-234-4223 Please make sure to include the information listed above. You will receive a response via fax. 14 Frequently Asked Questions and Manual The current WinPOS Manual is located on our web site. http://bblsystems.com/support-2/ Telephone You can reach BBL Systems Technical Support by phone Monday through Friday (excluding holidays) at: 404-978-0137 or 800-587-7277 Please make sure to include the information listed above. Calls are returned on a first come, first served basis. Order supplies http://bblsystems.com/products/ 15