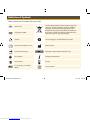
1
Abbott Diabetes Care 666 Doncaster Road Doncaster 3108 Victoria, Australia ABN 95000 180 389 1800-801-478 Abbott Laboratories (M) Sdn Bhd Abbott Diabetes Care No.22,Jalan Pemaju U1/15, HICOM-Glenmarie Ind.Park 40150 Shah Alam, Selangor Malaysia 03-5569-1919 Abbott Laboratories (N. Z.) Ltd, Ground Floor Bldg. D, 4 Pacific Rise, Mount Wellington, P.O. Box 22-801 Otahuhu, Auckland, New Zealand 0800 106 100 National Phytopharma Joint-Stock Company 24 Nguyen Thi Nghia, District 1 Ho Chi Minh City Vietnam 08-910-6640 ext 849 Abbott Laboratories Pakistan Ltd. Abbott Diabetes Care Opposite Radio Pakistan Transmission, Hyderabad Road, Landhi Karachi, Pakistan 021-35100321 Abbott Laboratories Abbott Diabetes Care 102 E.De Los Santos Ave. Madison Street 1554 Mandaluyong, Metro Manila Philippines 02-7028577 02-7028578 Abbott Laboratories (Singapore) Pte Ltd Abbott Diabetes Care 1 Maritime Square #12-09 Harbour Front Centre Singapore 099253 1800-272-2881 User’s Manual Blood Glucose Monitoring System FreeStyle and other brand marks are trademarks of Abbott Diabetes Care Inc. in various jurisdictions. ©2010 Abbott ART20287 Rev. A 11/10 ART20287_Rev-A-Cvr.indd 1-2 Downloaded from www.Manualslib.com manuals search engine 11/17/10 2:40 PM Definition of Symbols These symbols are associated with your meter. Batch code Catalogue number The European Battery Directive requires separate collection of spent batteries, aiming to facilitate recycling and to protect the environment. The batteries in this product should be removed and disposed in accordance with local regulations for separate collection of spent batteries. Caution This packaging is capable of being recycled Consult instructions for use Manufacturer Date of manufacture Sterilised using irradiation (lancets only) Do not drink Temperature limitation Do not reuse Use by In vitro diagnostic medical device Serial number ART20287_Rev-A-Man.indd 1 Downloaded from www.Manualslib.com manuals search engine 11/17/10 3:01 PM Table of Contents Intended Use . . . . . . . . . . . . . . . . . . . . . . . . . . . . . . . . . . . . . . . . . . . . . . . . . . . . . . . . . . . . . . . . . 1 Language Monitoring System Kit Contents . . . . . . . . . . . . . . . . . . . . . . . . . . . . . . . . . . . . . . . . . . . . . 3 Language Setting Up the Meter . . . . . . . . . . . . . . . . . . . . . . . . . . . . . . . . . . . . . . . . . . . . . . . . . . . . . . . . . 4 Enter Setup Mode . . . . . . . . . . . . . . . . . . . . . . . . . . . . . . . . . . . . . . . . . . . . . . . . . . . . . . . . . . . . .4 Beeper . . . . . . . . . . . . . . . . . . . . . . . . . . . . . . . . . . . . . . . . . . . . . . . . . . . . . . . . . . . . . . . . . . . . . . . .4 Time . . . . . . . . . . . . . . . . . . . . . . . . . . . . . . . . . . . . . . . . . . . . . . . . . . . . . . . . . . . . . . . . . . . . . . . . . .5 Date . . . . . . . . . . . . . . . . . . . . . . . . . . . . . . . . . . . . . . . . . . . . . . . . . . . . . . . . . . . . . . . . . . . . . . . . . .5 Time Format . . . . . . . . . . . . . . . . . . . . . . . . . . . . . . . . . . . . . . . . . . . . . . . . . . . . . . . . . . . . . . . . . . 5 Date Format . . . . . . . . . . . . . . . . . . . . . . . . . . . . . . . . . . . . . . . . . . . . . . . . . . . . . . . . . . . . . . . . . . 6 Measurement Units . . . . . . . . . . . . . . . . . . . . . . . . . . . . . . . . . . . . . . . . . . . . . . . . . . . . . . . . . . . 6 Language Testing Your Blood Glucose . . . . . . . . . . . . . . . . . . . . . . . . . . . . . . . . . . . . . . . . . . . . . . . . . . 7 Important Testing Notes . . . . . . . . . . . . . . . . . . . . . . . . . . . . . . . . . . . . . . . . . . . . . . . . . . . . . . .7 Test Site . . . . . . . . . . . . . . . . . . . . . . . . . . . . . . . . . . . . . . . . . . . . . . . . . . . . . . . . . . . . . . . . . . . . . . 8 Alternative Sites . . . . . . . . . . . . . . . . . . . . . . . . . . . . . . . . . . . . . . . . . . . . . . . . . . . . . . . . . . . . . . 9 Performing a Blood Glucose Test . . . . . . . . . . . . . . . . . . . . . . . . . . . . . . . . . . . . . . . . . . . . . 10 Language Understanding Blood Glucose Test Results . . . . . . . . . . . . . . . . . . . . . . . . . . . . . . . . . 13 Low and High Blood Glucose Results . . . . . . . . . . . . . . . . . . . . . . . . . . . . . . . . . . . . . . . . . 13 MediSense or Optium Glucose and Ketone Control Solutions. . . . . . . . . . . . . . 23 Important Control Solution Testing Notes . . . . . . . . . . . . . . . . . . . . . . . . . . . . . . . . . . . . 24 Performing a Control Solution Test . . . . . . . . . . . . . . . . . . . . . . . . . . . . . . . . . . . . . . . . . . . 25 Managing Your Results . . . . . . . . . . . . . . . . . . . . . . . . . . . . . . . . . . . . . . . . . . . . . . . . . . . . . 29 Viewing Test Results in Memory . . . . . . . . . . . . . . . . . . . . . . . . . . . . . . . . . . . . . . . . . . . . . . 29 Viewing Blood Glucose Averages . . . . . . . . . . . . . . . . . . . . . . . . . . . . . . . . . . . . . . . . . . . . . 31 Transferring Results to a Computer . . . . . . . . . . . . . . . . . . . . . . . . . . . . . . . . . . . . . . . . . . . 33 Error Messages . . . . . . . . . . . . . . . . . . . . . . . . . . . . . . . . . . . . . . . . . . . . . . . . . . . . . . . . . . . . . 33 E-1 to E-9, What It Means, What To Do . . . . . . . . . . . . . . . . . . . . . . . . . . . . . . . . . . . . . . . . 33 Troubleshooting . . . . . . . . . . . . . . . . . . . . . . . . . . . . . . . . . . . . . . . . . . . . . . . . . . . . . . . . . . . . 36 Maintaining the Meter. . . . . . . . . . . . . . . . . . . . . . . . . . . . . . . . . . . . . . . . . . . . . . . . . . . . . . 39 Replacing the Battery . . . . . . . . . . . . . . . . . . . . . . . . . . . . . . . . . . . . . . . . . . . . . . . . . . . . . . . . 39 Cleaning the Meter . . . . . . . . . . . . . . . . . . . . . . . . . . . . . . . . . . . . . . . . . . . . . . . . . . . . . . . . . . 41 Storing the Meter . . . . . . . . . . . . . . . . . . . . . . . . . . . . . . . . . . . . . . . . . . . . . . . . . . . . . . . . . . . . 42 Specifications. . . . . . . . . . . . . . . . . . . . . . . . . . . . . . . . . . . . . . . . . . . . . . . . . . . . . . . . . . . . . . . 42 References. . . . . . . . . . . . . . . . . . . . . . . . . . . . . . . . . . . . . . . . . . . . . . . . . . . . . . . . . . . . . . . . . . 45 Testing Your Blood β-Ketone. . . . . . . . . . . . . . . . . . . . . . . . . . . . . . . . . . . . . . . . . . . . . . . . 16 Important Testing Notes . . . . . . . . . . . . . . . . . . . . . . . . . . . . . . . . . . . . . . . . . . . . . . . . . . . . . 16 Test Site . . . . . . . . . . . . . . . . . . . . . . . . . . . . . . . . . . . . . . . . . . . . . . . . . . . . . . . . . . . . . . . . . . . . . 17 Performing a Blood β-Ketone Test . . . . . . . . . . . . . . . . . . . . . . . . . . . . . . . . . . . . . . . . . . . . 17 Understanding Blood β-Ketone Test Results. . . . . . . . . . . . . . . . . . . . . . . . . . . . . . . . 21 High Blood β-Ketone Results . . . . . . . . . . . . . . . . . . . . . . . . . . . . . . . . . . . . . . . . . . . . . . . . . 21 ART20287_Rev-A-Man.indd 2-3 Downloaded from www.Manualslib.com manuals search engine 11/17/10 3:01 PM Language Language ART20287_Rev-A-Man.indd 1-2 Downloaded from www.Manualslib.com manuals search engine Observe caution when using around children. Small parts may constitute a choking hazard. How Your FreeStyle Optium Blood Glucose Monitoring System Works When you insert a test strip into your meter, the Apply Sample message shows on your meter’s display window. When a blood sample or control solution sample is applied to the test strip, the glucose or β-Ketone reacts with the chemicals on the test strip. This reaction produces a small electrical current that is measured. The result shows on your meter’s display window. IMPORTANT: Avoid getting dust, dirt, blood, control solution, water or any other substance in the meter’s test strip port. Language Read the instructions in this user’s manual. Failure to follow instructions will cause incorrect results. Practise the testing procedures before using the meter. Follow your healthcare professional’s advice when testing blood glucose levels and blood β-Ketone levels. Language Language 1 Potential infection risk: Healthcare professionals performing blood tests with this system on multiple patients must always wear gloves and should follow the infection control policies and procedures approved by their facility. Language Language IMPORTANT: Use only FreeStyle Optium blood glucose test strips and FreeStyle Optium blood β-Ketone test strips. Other test strips may produce inaccurate results. IMPORTANT: See test strip instructions for use for more information about sample types. Language Intended Use Use outside the body only (in vitro diagnostic use) for self testing or professional use in the management of diabetes. Use for measuring blood glucose from samples taken from the forearm, upper arm, base of the thumb, or fingers. •Test blood glucose in fresh whole blood samples •Test blood β-Ketone (β-hydroxybutyrate) in fresh whole blood samples from fingers only 2 11/17/10 3:01 PM •Logbook •Warranty Card Start with the meter off (no test strip inserted). Commands •Press to move between setup displays •Press to move forward •Press to go back •Press to turn display light On and Off •Blood Glucose Test Strips •Lancing Device •Lancets Language Items not included: •Blood β-Ketone Test Strips •Control Solutions •Data Management System Language 3 ART20287_Rev-A-Man.indd 3-4 Downloaded from www.Manualslib.com manuals search engine Press and hold and until and appear. This indicates the beeper is turned on. indicate the beeper is turned off. Beeper Press or to change the beeper setting. Press to save the beeper setting and move to set time. The beeper sounds when: •The test countdown starts •The test countdown ends Language Language Your Kit may also contain: Language Language •Meter •User’s Manual •Carrying Case Enter Setup Mode Language Monitoring System Kit contains: Setting Up the Meter Language Monitoring System Kit Contents 4 11/17/10 3:01 PM Time Date Format Language IMPORTANT: Please check that the correct time and date is set before you use the meter for the first time. This will help you keep records of when you monitor and will help you and your healthcare professional make informed decisions about your care. You must set the time and date to review averages. Language The unit of measurement set by the factory appears. You cannot change this setting. Contact Customer Service for more information. Press to return to set beeper, or press and hold to turn off the meter. Time Format Note: If using the 12-hour time format, AM and PM appear. The time format flashes. Press or to change the time format. Press save the time format and to move to set date format. 5 ART20287_Rev-A-Man.indd 5-6 Downloaded from www.Manualslib.com manuals search engine to Language The year flashes. Press or until the correct year appears. Press to save the year and to move to set month. The month flashes. Press or until the correct month appears. Press to save the month and to move to set day. The day flashes. Press or until the correct day appears. Press to save the day and to move to set time format. Measurement Units 24 Hour Format Language to Language Language Month – Day The date format flashes. Press or to change the date format. Press save the date format and to move to the measurement units. Day.Month Date Year Month – Day Language Language The hour flashes. Press or until the correct hour appears. Press to save the hour and to move to set minutes. The minutes flash. Press or until the correct minutes appear. Press to save the minutes and to move to set date. 6 11/17/10 3:01 PM Language This display always appears when the meter is turned on. You should check that your meter matches the example you see here exactly every time your meter turns on. Note: See test strip instructions for use for operating range and more information on limitations of use. Language Do not use the meter if the display check screen does not exactly match the example. If the screen does not match, the meter may show an incorrect result. Please contact Customer Service. Test Site Language Language D5 45001 A138 2012/03 E.g. Expiry date: March 31, 2012 •Use the meter within the test strip operating range •Use the test strip immediately after removing it from its foil packet •Use each test strip only once 7 ART20287_Rev-A-Man.indd 7-8 Downloaded from www.Manualslib.com manuals search engine Do not use expired test strips; they may produce inaccurate results. The expiry date is the last day of the month if only the month and year are shown. Do not use a wet, bent, scratched or damaged test strip. Do not use the test strip if its foil packet has a puncture or tear in it. Fingertips IMPORTANT: Wash your hands and the test site with warm soapy water to ensure accurate results. Thoroughly dry your hands and the test site. To warm the site, apply a warm dry pad or rub vigorously for a few seconds. Note: Avoid areas near bones, areas with lots of hair, and squeezing the puncture site. Bruising may occur at alternate sites, but will disappear quickly. If bruising occurs, consider selecting another site. Finger tip testing is different to alternative site testing. (Adjust the lancing device accordingly for testing site. See lancing device instructions for use for more information.) Language A138 E.g. Expiry date: March 31, 2012 Language 45001 2012/03 Important Testing Notes Language D5 Language Testing Your Blood Glucose 8 11/17/10 3:01 PM Alternative Sites Language 2 Forearm Language 9 ART20287_Rev-A-Man.indd 9-10 Downloaded from www.Manualslib.com manuals search engine Abbott Diabetes Care Ltd. Range Road Witney, Oxon, OX29 0YL Made in UK. 4˚C This display always appears when the meter is turned on. Do not use the meter if the display check screen does not exactly match the example. Contact Customer Service. See “Testing Your Blood Glucose” section for more information. Time and date (if set) appear next. Language Do not use blood samples from alternative sites when: •You think your blood glucose is low or changing rapidly •You have been diagnosed with hypoglycaemic unawareness •Alternative site results do not match the way you feel •You are within two hours of eating a meal, taking insulin, or exercising Insert the Test Strip With the contact bars (3 black lines) facing up, insert the test strip into the meter until it stops. This turns on the meter. Note: The meter turns off after 3 minutes of inactivity. Remove and reinsert the unused test strip to restart the meter. Language Upper arm Language Language levels change rapidly (e.g. after eating a meal or taking insulin, or during or after exercise) •Use alternative sites before, or more than two hours after, you eat a meal, take insulin, or exercise Open the foil test strip packet at the notch and tear down to remove the test strip. Blood Glucose Sensor Electrode Abbott Diabetes Care Ltd. Range Road Witney, Oxon, OX29 0YL Made in UK. •Alternative site results may differ from fingertip results when blood glucose Base of thumb 2 Language 2 Language Performing a Blood Glucose Test Obtaining a blood sample from alternative sites – forearm, upper arm, and base of the thumb – is subject to limitation. Contact your healthcare professional before beginning alternative site testing. 10 11/17/10 3:01 PM Language Apply Blood to the Test Strip Bring the blood drop to the white area at the end of the test strip. The blood is drawn into the test strip. Language IMPORTANT: If the countdown does not start, you may not have applied enough blood to the test strip. See test strip instructions for use for re-application instructions. If the countdown still does not start, remove the used strip and discard it correctly. Start a new test with a new test strip. 11 ART20287_Rev-A-Man.indd 11-12 Downloaded from www.Manualslib.com manuals search engine View the Result The meter beeps (if sound is on) when the result appears on the display. The test is complete (example shown). The result is stored in memory or you can write it in a logbook. Turn Off the Meter Use the opened foil packet to remove the used test strip. This turns off the meter. Discard the used test strip correctly. Note: You can also press and hold for at least 2 seconds to turn off the meter. The meter also turns off after 60 seconds of inactivity. Language Language 2 Language The countdown appears on the display as the meter checks your glucose level. Note: Do not remove the test strip from the meter or disturb the test strip during the countdown. Language Language Obtain a Blood Sample Select a test site. Use the lancing device to obtain a blood sample. (See lancing device instructions for use for more information.) Hold the blood drop to the white area until the meter beeps (if sound is on) and the status bar appears on the display. This indicates the test strip has obtained enough blood. Language The Apply Sample symbols and appear next, indicating the meter is ready for you to apply a sample to the test strip. 12 11/17/10 3:01 PM Understanding Blood Glucose Test Results Meter: Language Check blood β-Ketone, if checking ketones is part of your diabetes management programme. Language Blood glucose level is high General: Result What It Means What To Do Language Lower than 2.8 mmol/L (Lower than 50 mg/dL) Low (hypoglycaemic) Repeat the test with a new test strip, even if you do not feel that you have low blood glucose. Higher than 16.7 mmol/L (Higher than 300 mg/dL) High (hyperglycaemic) Repeat the test with a new test strip, even if you do not feel that you have high blood glucose. 13 ART20287_Rev-A-Man.indd 13-14 Downloaded from www.Manualslib.com manuals search engine Appears with result which is: Higher than or equal to 16.7 mmol/L (Higher than or equal to 300 mg/dL) Language Language IMPORTANT: The meter displays results from 1.1–27.8 mmol/L (20–500 mg/dL). Low or high blood glucose results can indicate a potentially serious medical condition. Appears when result is: Lower than 1.1 mmol/L (Lower than 20 mg/dL)) What To Do Repeat the test with a new test strip. If the result is LO, contact your healthcare professional immediately. Language Language The meter displays results in mmol/L or mg/dL. The unit of measurement is preset. You cannot change this setting. What It Means Severe low blood glucose or There may be a problem with the test strip Language Display Low and High Blood Glucose Results 14 11/17/10 3:01 PM Testing Your Blood β-Ketone Repeat the test with a new test strip. If the result is HI, contact your healthcare professional immediately. Check blood β-Ketone, if checking ketones is part of your diabetes management programme. Language Note: If you see the error messages E-3 or E-4, consult the Error Messages section in this user’s manual. Language IMPORTANT: Contact your healthcare professional if you have symptoms that do not match your test result, and you have followed the instructions in this user’s manual. Language 15 ART20287_Rev-A-Man.indd 15-16 Downloaded from www.Manualslib.com manuals search engine Important Testing Notes D5 75001 A17 2012/ 03 E.g. Expiry date: March 31, 2012 Language Language Appears when result is: Higher than 27.8 mmol/L (Higher than 500 mg/dL) Severe high blood glucose or There may be a problem with the test strip What To Do •Use the meter within the test strip operating range •Use the test strip immediately after removing it from the foil packet •Use each test strip only once Do not use expired test strips; they may produce inaccurate results. The expiry date is the last day of the month if only the month and year are shown. Do not put urine on the test strip. Do not use a wet, bent, scratched or damaged test strip. Do not use the test strip if its foil packet has a puncture or tear in it. Note: See test strip instructions for use for operating range and more information on limitations of use. Check your ketones: • When you have an illness • When your blood glucose is above 16.7 mmol/L (300 mg/dL) • When you are experiencing unusual blood glucose results • When you and your healthcare professional feel it is necessary Language What It Means Language Display Language Meter: 16 11/17/10 3:01 PM This display always appears when the meter is turned on. IMPORTANT: Wash your hands with warm soapy water to ensure accurate results. Thoroughly dry your hands. To warm the site, apply a warm dry pad or rub vigorously for a few seconds. See “Testing Your Blood Glucose” section for more information. Note: Avoid squeezing the puncture site. Time and date (if set) appear next. Use only fingertip blood samples for blood β-Ketone testing. Fingertips Open the foil test strip packet at the notch and tear down to remove the test strip. Obtain a Blood Sample Select a test site. Use the lancing device to obtain a blood sample. (See lancing device instructions for use for more information.) 17 ART20287_Rev-A-Man.indd 17-18 Downloaded from www.Manualslib.com manuals search engine 2 Language Insert the Test Strip With the contact bars (3 black lines) facing up, insert the test strip into the meter until it stops. This turns on the meter. Note: The meter turns off after 3 minutes of inactivity. Remove and reinsert the unused test strip to restart the meter. Language Language 4˚C Abbott Diabetes Care Ltd. Range Road Witney, Oxon, OX29 0YL Made in UK. and the Apply Sample symbols appear, indicating the meter is ready for you to apply a sample to the test strip. Blood Glucose Sensor Electrode Abbott Diabetes Care Ltd. Range Road Witney, Oxon, OX29 0YL Made in UK. Language Performing a Blood β-Ketone Test Language Language Language Do not use the meter if the display check screen does not exactly match the example. Contact Customer Service. Language Test Site 18 11/17/10 3:01 PM Language Language The countdown appears on the display as the meter checks your β-Ketone level. Note: Do not remove the test strip from the meter or disturb the test strip during the countdown. 19 ART20287_Rev-A-Man.indd 19-20 Downloaded from www.Manualslib.com manuals search engine Language Language Language Hold the blood drop to the white area until the meter beeps (if sound is on) and the status bar appears on the display. This indicates the test strip obtained enough blood. Language Language IMPORTANT: If the countdown does not start, you may not have applied enough blood to the test strip. See test strip instructions for use for re-application instructions. If the countdown still does not start, remove the used strip and discard it correctly. Start a new test with a new test strip. View the Result The meter beeps (if sound is on) when the result and appears on the display. The test is complete (example shown). The result is stored in memory or you can write it in a logbook. Turn Off the Meter Use the opened foil packet to remove the used test strip. This turns off the meter. Discard the used test strip correctly. Note: You can also press and hold for at least 2 seconds to turn off the meter. The meter also turns off after 60 seconds of inactivity. Language Apply Blood to the Test Strip Bring the blood drop to the white area at the end of the test strip. The blood is drawn into the test strip. 20 11/17/10 3:01 PM Language Language Blood β-Ketone is expected to be below 0.6 mmol/L.2 High blood β-Ketone may be caused by illness, fasting, vigorous exercise, or uncontrolled blood glucose levels.1-3 Language Repeat a blood β-Ketone test using a new blood β-Ketone test strip when: •HI appears on the display •Your result is unusually high •You question your result •Your blood β-Ketone result is 0.0 mmol/L, but your blood glucose is higher than 16.7 mmol/L (300 mg/dL) 21 ART20287_Rev-A-Man.indd 21-22 Downloaded from www.Manualslib.com manuals search engine What To Do Result remains: 0.6 – 1.5 mmol/L or becomes: Higher than 1.5 mmol/L You may be at risk of developing diabetic ketoacidosis (DKA)2-6 Contact your healthcare professional immediately. Very high blood β-Ketone or There may be a problem with the test strip Repeat the test with a new test strip. If the result is HI, contact your healthcare professional immediately. Appears when result is: Higher than 8.0 mmol/L A problem requiring medical assistance may be occurring Contact your healthcare professional for sick-day management instructions. Language IMPORTANT: The meter displays results from 0.0 - 8.0 mmol/L. Consult your healthcare professional before changing your diabetes medication programme. What It Means High blood β-Ketone Language Language The meter displays results in mmol/L. The unit of measurement is preset. You cannot change this setting. Display Result is between: 0.6 – 1.5 mmol/L and your blood glucose result is: Higher than 16.7 mmol/L (Higher than 300 mg/dL) Language High Blood β-Ketone Results Meter: Language Understanding Blood β-Ketone Test Results 22 11/17/10 3:01 PM Language Contact Customer Service for information on how to obtain control solutions. Language 23 ART20287_Rev-A-Man.indd 23-24 Downloaded from www.Manualslib.com manuals search engine Language Do not use control solution past the expiry date. Do not add water or other liquid to control solution. Do not swallow or inject the control solution. Do not use the control solution as eye drops. IMPORTANT: Control solution results should fall within the control solution range printed on the test strip instructions for use. Check that the lot number printed on the test strip packet and instructions for use match. •Repeat the test if control solution results are outside this range •Stop using the meter if control solution results are continually outside the range printed on the test strip instructions for use. Contact Customer Service IMPORTANT: Control solution results do not reflect your blood glucose or blood β-Ketone level. Language Language Control solutions may be used with either glucose or β-Ketone test strips. Use control solution: •To practise testing without using your own blood •To confirm that the meter and test strips work together correctly •When you are unsure of your blood glucose or blood β-Ketone test results •Use only MediSense or Optium Glucose and Ketone control solutions with the meter •Replace the cap securely on the bottle immediately after use Language Language IMPORTANT: When you open a control solution bottle for the first time, count forward 90 days and write this date on the control solution bottle using a pen that won’t smear or wipe off. Throw away any remaining solution after this date. Important Control Solution Testing Notes Language MediSense or Optium Glucose and Ketone Control Solutions 24 11/17/10 3:01 PM The Apply Sample symbols and also appear. Language Insert the Test Strip With the contact bars (3 black lines) facing up, insert the test strip into the meter until it stops. This turns on the meter. Language Note: The meter turns off after 3 minutes of inactivity. Remove and reinsert the unused test strip to restart the meter. This display always appears when the meter is turned on. Language Do not use the meter if the display check screen does not exactly match the example. Contact Customer Service. Press to mark the test as a control solution test. The appears. The meter is now ready for you to apply control solution to the test strip. IMPORTANT: The test result will be saved to memory as a blood glucose or blood β-Ketone result if not marked as a control solution test. This may affect your blood glucose averages. Apply Control Solution to the Test Strip Shake the control solution bottle to mix the solution. Apply a drop of control solution to the white area at the end of the test strip in the area shown. The control solution is drawn into the test strip. See “Testing Your Blood Glucose” section for more information. Hold the control solution drop to the white area until the meter beeps (if sound is on) and the status bar appears on the display. This indicates the test strip has obtained enough control solution. Language will appear if performing a β-Ketone control solution Language and Language Note: test. Language Blood Glucose Sensor Electrode Abbott Diabetes Care Ltd. Range Road Witney, Oxon, OX29 0YL Made in UK. Language Open the foil test strip packet at the notch and tear down to remove the test strip. 4˚C Abbott Diabetes Care Ltd. Range Road Witney, Oxon, OX29 0YL Made in UK. Performing a Control Solution Test Time and date (if set) appear next. 25 ART20287_Rev-A-Man.indd 25-26 Downloaded from www.Manualslib.com manuals search engine 26 11/17/10 3:01 PM Repeat the test with a new test strip. Follow the testing instructions carefully. Contact Customer Service if the result is still outside the printed range. Language appears with the result if performing a β-Ketone control solution Language 27 ART20287_Rev-A-Man.indd 27-28 Downloaded from www.Manualslib.com manuals search engine Language Language Note: test. Language Language View the Result The meter beeps (if sound is on) when the result appears on the display. The test is complete (examples shown). The result is stored in memory as a control solution result or you can write it in a logbook as a control result. Turn Off the Meter Use the opened foil packet to remove the used test strip. This turns off the meter. Discard the used test strip correctly. Note: You can also press and hold for at least 2 seconds to turn off the meter. The meter also turns off after 60 seconds of inactivity. Language If the countdown does not start, remove and discard the used test strip, turn off the meter and try again with a new strip. Language Note: Do not remove the test strip from the meter or disturb the test strip during the countdown. Compare the control solution result to the range printed on the blood glucose or blood β-Ketone test strip instructions for use. The result should fall within the range. Causes of out-of-range results include: •The meter and test strips may not be working correctly The countdown appears on the display as the meter checks the glucose or β-Ketone level. 28 11/17/10 3:01 PM Managing Your Results Language Press to turn the meter on. Language This display always appears when the meter is turned on. Do not use the meter if the display check screen does not exactly match the example. Contact Customer Service. See “Testing Your Blood Glucose” section for more information. = Blood β-Ketone result = Glucose control solution result = Ketone control solution result Press to review the previous result. Repeat this for each result you wish to review. Note: To exit meter memory at any time, press and hold Language ART20287_Rev-A-Man.indd 29-30 Downloaded from www.Manualslib.com manuals search engine . Appear on the display when there are no previous results to view. Press to return to a previously reviewed result. Repeat this for each result you wish to review. Note: To exit meter memory at any time, press and hold 29 Language = Blood glucose result Language Start with the meter off (no test strip inserted). Language Viewing Test Results in Memory Language Language Meter memory stores up to 450 events – control solution, blood glucose, and blood β-Ketone results, and other meter information. The most recent events appear first. Your most recent result, with time and date (if set) it was obtained, appears next. The following symbols indicate the type of result: . 30 11/17/10 3:01 PM Language Language ART20287_Rev-A-Man.indd 31-32 Downloaded from www.Manualslib.com manuals search engine Language Press to view the 14-day average. Press to view the 30-day average. Press to return to the 7-day average, or Press to return to the memory screen. Language Language 31 . Your 7-day average appears. Press and hold of inactivity. to turn off the meter. The meter turns off after 30 seconds Language Language IMPORTANT: •Set the date and time before testing to be able to review averages •Averages do not include glucose and β-Ketone control solution results, blood β-Ketone results, and results that do not show time and date •Control solution results not marked as control solution tests may cause averages to be inaccurate • appear on the display when there are no current averages to view • blood glucose test results appear in averages as 1.1 mmol/L (20 mg/dL) • blood glucose test results appear in averages as 27.8 mmol/L (500 mg/dL) While in memory, press Note: n = number of results included in your 7-, 14-, or 30-day average. Language Viewing Blood Glucose Averages 32 11/17/10 3:01 PM Message What It Means What To Do Language 1. Move the meter and test strips to a location where the temperature is within the test strip operating range. (See test strip instructions for use for the appropriate range.) 2. Wait for the meter and test strips to adjust to the new temperature. 3. Repeat the test using a new test strip. 4. If the error reappears, contact Customer Service. Meter error 1. Turn off the meter. 2. Repeat the previous testing steps. 3. If the error reappears, contact Customer Service. Language The temperature is too hot or too cold for the meter to work correctly Language 33 ART20287_Rev-A-Man.indd 33-34 Downloaded from www.Manualslib.com manuals search engine The blood glucose level may be too high to be read by the system or There may be a problem with the test strip 1. Repeat the test using a new test strip. 2. If the error reappears, contact your healthcare professional immediately. Blood was applied to the test strip too soon 1. Review the testing instructions. 2. Repeat the test using a new test strip. 3. If the error reappears, contact Customer Service. Language What To Do 1. Review the testing instructions. 2. Repeat the test using a new test strip. 3. If the error reappears, contact your healthcare professional immediately. Language Language Error Messages What It Means The blood glucose level may be too low to be read by the system or There may be a problem with the test strip Language Message Language Transferring Results to a Computer Transferring test results to a computer requires a compatible data management system. For more information, please go to our website or contact Customer Service. 34 11/17/10 3:01 PM Language Language Language 1. Check that you are using the correct test strip for this meter. (See test strip instructions for use to verify your strip is compatible with this meter.) 2. Repeat the test using a test strip for use with your meter. 3. If the error reappears, contact Customer Service. Meter error 1. Turn off the meter. 2. Repeat the previous testing steps. 3. If the error reappears, contact Customer Service. or 35 ART20287_Rev-A-Man.indd 35-36 Downloaded from www.Manualslib.com manuals search engine What It Means The meter Test strip is not inserted does not enter correctly or fully into the test mode meter after inserting a test strip. What To Do 1. With the contact bars (3 black lines) facing up, insert the test strip into the meter until it stops. This turns on the meter. 2. If the meter still does not enter test mode, contact Customer Service. No battery is installed Battery is installed incorrectly 1. Install battery with (+) facing up. Dead battery 1. Replace battery. Reset date and time, if necessary. Language Language No coding required or Test strip may be damaged, used, or the meter does not recognise it Troubleshooting Language What To Do 1. Check that you are using the correct strip for this meter. (See test strip instructions for use to verify your strip is compatible with this meter.) 2. Repeat the test using a test strip for use with your meter. 3. If the error reappears, contact Customer Service. Language What It Means Meter error Language Message 36 11/17/10 3:01 PM Language Language 37 ART20287_Rev-A-Man.indd 37-38 Downloaded from www.Manualslib.com manuals search engine Defective meter or test strip What To Do 1. Remove the used strip and discard it correctly. 2. Repeat the test using a new test strip. 3. If the test still does not start, contact Customer Service. Language 1. Remove the used strip and discard it correctly. 2. Review the testing instructions. 3. Repeat the test using a new test strip. 4. If the test still does not start, contact Customer Service. Language Sample applied after meter turns off What It Means The test does not start after applying the blood sample. Language Language 1. See test strip instructions for use for re-application instructions. 2. If the countdown still does not start, remove the used strip and discard it correctly. 3. Repeat the test using a new test strip. 4. If the test still does not start, contact Customer Service. Language What To Do Blood sample is too small Language What It Means The test does not start after applying the blood sample. 38 11/17/10 3:01 PM Language If the meter does not include a plastic tab, push the battery upward to remove it. 3. Insert a new CR 2032, lithium (coin cell) battery: (+) facing up. Language •Appears on the display when the battery is low. •Causes the display light to fail to turn on. When appears, you may still use the meter and the results will be accurate. The display light will not work. Replace the battery immediately. Language Language The meter comes with a CR 2032 lithium (coin cell) battery installed. It provides power for about 1,000 tests. 2. If the meter includes a plastic tab, pull on the tab to remove the battery. 4. Slide the battery cover into place until it clicks. Language When appears alone, the meter is not usable. The meter turns off automatically. Replace the battery immediately. Language Note: Dispose of used batteries correctly. 1. Gently push the battery cover in and up to remove it. 39 ART20287_Rev-A-Man.indd 39-40 Downloaded from www.Manualslib.com manuals search engine 5. Press and hold to turn the meter on. If the meter does not turn on, check to see that the battery was installed correctly. If meter turns on, the meter may prompt you to reset the time and date. (See ‘Setting Up the Meter’ in this user’s manual.) Note: Test results will be not be lost even if the meter loses its time and date settings. Language Replacing the Battery Language Maintaining the Meter 40 11/17/10 3:01 PM Language Specifications Size Length 7.47 cm Width Top 5.33 cm Language Language Language IMPORTANT: Do not try to clean the test strip port. Do not pour liquid into the test strip port or onto the buttons. Do not immerse the meter in water or other liquid. Storing the Meter Store the meter in the carrying case provided. Bottom 4.32 cm Depth 1.63 cm Language Language Avoid getting dirt, dust, blood, control solution, or liquid in the meter test strip port. Clean the outside of the meter using a damp cloth and mild soap. Healthcare Professionals: Acceptable cleaning solutions include: •70% isopropyl alcohol, or •A mixture of 1 part ammonia, 9 parts water, or •A mixture of 1 part household bleach, 9 parts water Language Weight 40 to 46 grams Power Source 1 CR 2032 Lithium (coin cell) battery Battery Life Approximately 1,000 tests Memory Up to 450 events, including control solution, blood glucose and blood β-Ketone results, and other meter information. Language Cleaning the Meter Storage Temperature 41 ART20287_Rev-A-Man.indd 41-42 Downloaded from www.Manualslib.com manuals search engine Meter -25 ° to 55 °C (–13 ° to 131 °F) 42 11/17/10 3:01 PM See blood β-Ketone test strip instructions for use. Control Solution Range Blood glucose See blood glucose test strip instructions for use. Language Blood β-Ketone See blood β-Ketone test strip instructions for use. Language Blood β-Ketone testing 43 Functions Blood glucose testing Memory 450 events Glucose averaging 7-, 14-, and 30-day Control solution marking and testing ART20287_Rev-A-Man.indd 43-44 Downloaded from www.Manualslib.com manuals search engine On: Stays on during countdown; turns off 30 seconds after results appear. Stays on while transferring results to a computer. Data Port Yes Operating Range Meter temperature 10 ° to 50 °C (50 ° to 122 °F) System temperature See operating range of the test strip you are using. See test strip instructions for use. Meter relative humidity 10% to 90%, non-condensing System relative humidity 10% to 90%, non-condensing System altitude Clinical testing demonstrates that altitudes up to 2,195 metres (7,200 feet) above sea level do not affect results Language See blood glucose test strip instructions for use. Blood β-Ketone Display Light Language Blood glucose Assay Range On: When countdown starts and ends. Language Amperometric electrochemistry Assay Method Beeper Language See control solution instructions for use. Language See test strip instructions for use. Control solution Language Test strips 44 11/17/10 3:01 PM References Language Language Language Language 1. S chade DS, Eaton RP. Metabolic and clinical significance of ketosis. Special Topics in Endocrinology and Metabolism 1982; 4:1–27. 2. iggam MI, O’Kane MJ, Harper R, Atkinson AB, Hadden DR, Trimble ER, Bell PM. Treatment of W diabetic ketoacidosis using normalization of blood 3-hydroxybutyrate concentration as the endpoint of emergency management. Diabetes Care 1997; 20:1347–1352. 3. Harano Y, Kosugi K, Hyosu T, Suzuki M, Hidaka H, Kashiwagi A, Uno S, Shigeta Y. Ketone bodies as markers for Type 1 (insulin-dependent) diabetes and their value in the monitoring of diabetes control. Diabetologia 1984; 26:343-348. 4. Ubukata E. Diurnal variation of blood ketone bodies in insulin-dependent diabetes mellitus and non-insulin-dependent diabetes mellitus patients: The relationship to serum C-peptide immunoreactivity and free insulin. Ann Nutr Metab 1990; 34:333–342. 5. Luzi L, Barrett EJ, Groop LC, Ferrannini E, DeFronzo RA. Metabolic effects of low-dose insulin therapy on glucose metabolism in diabetic ketoacidosis. Diabetes 1988; 37:1470–1477. 6. ale PJ, Crase J, Nattrass M. Metabolic effects of bicarbonate in the treatment of diabetic H ketoacidosis. Br Med J 1984; 289; 1035–1038. 7. Directive 1999/45/EC of the European Parliament and of the Council of 31 May 1999 concerning the approximation of the laws, regulations and administrative provisions of the Member States relating to the classification, packaging and labelling of dangerous preparations. 45 ART20287_Rev-A-Man.indd 45 Downloaded from www.Manualslib.com manuals search engine 11/17/10 3:01 PM