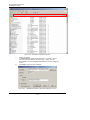
1
RiT Enterprise Solutions Installation Guide PV4E V6.0 Updated September 2009 Copyright © 2009 RiT Technologies. All rights reserved. No part of this book shall be reproduced, stored in a retrieval system, or transmitted by any means, electronic, mechanical, photocopying, recording or otherwise, without written permission from RiT Technologies. No patent liability is assumed with respect to the use of the information contained herein. Although every precaution has been taken in the preparation of this book, RiT Technologies assume no responsibility for errors or omissions. Neither is any liability assumed for damages resulting from the use of the information contained herein. RiT Technologies Ltd. i RiT Enterprise Solutions Installation Guide Trademarks All terms mentioned in this book that are known to be trademarks or service marks have been appropriately capitalized. RiT Technologies cannot attest to the accuracy of this information. Use of a term in this book should not be regarded as affecting the validity of any trademark or service mark. The following are propriety trademarks of RiT Technologies and may not be used or reproduced without the permission of RiT Technologies: CenterMind™ PVMax Security Controller Control Pad PVMax Splitter Device Locator PVMax™ LAN Mapper RiT’s Dashboard™ LAN Server SDK PatchView for the Enterprise™ Secure Link PatchView™ SiteBuilder™ P-LET™ SitePro™ Provisioning SiteWiz™ PV4E™ SMART Cabling System™ PV PowerMax SMART CLASSix™ PVMax Expander SMART Giga™ PVMax Indicator Controller SMART Patch Panels PVMax Local Scanner SMARTen™ PVMax Master The PVMax Scanner System PVMax Master Expander Work Order (WO) PVMax Scanner Exclusive Remedies The remedies provided herein are the Buyer's sole and exclusive remedies. RiT Technologies shall not be liable for any direct, indirect, special, incidental or consequential damages, including but not limited to, lost profits. In no event shall RiT's liability exceed the purchase price of the RiT product. RiT Technologies Ltd. ii RiT Enterprise Solutions Installation Guide Assistance For any assistance contact your nearest RiT Sales and Service Office, or your local dealer. For further information on technical support and seminars please visit out web site or email us. Web Site: http://www.rittech.com/ RiT Technologies Ltd. iii RiT Enterprise Solutions Installation Guide Contents Section Page CHAPTER 1: INTRODUCTION ................................................................................... 1 How to use this Document.................................................................................................................................... 1 CHAPTER 2 – PV4E INSTALLATION ........................................................................ 2 System Requirements ........................................................................................................................................... 2 Minimum Requirements ..................................................................................................................................... 2 Deployment Server Requirements ...................................................................................................................... 3 Client Requirements ........................................................................................................................................... 4 License Registration ............................................................................................................................................. 4 Pre-requisites ........................................................................................................................................................ 5 SQL Server ......................................................................................................................................................... 5 Install SQL Server 2005 Enterprise Edition ....................................................................................................... 5 Service Packs for SQL........................................................................................................................................ 5 Install SQL Server 2008 ..................................................................................................................................... 5 SQL Configuration ............................................................................................................................................. 5 Changing the Web Security Settings .................................................................................................................. 6 Checking Services Required for Installation ...................................................................................................... 6 Windows 2008 Server..................................................................................................................................... 7 Remote SQL Installation...................................................................................................................................... 9 Configuring for Remote SQL Server.................................................................................................................. 9 Remote Connection using Active Directory ..................................................................................................... 10 Security Configuration Screens for Win 2003 Server SP1 and Win 2003 Server SP2................................ 12 Remote Connection when Active Directory is Unavailable ............................................................................. 13 HOW TO CONFIGURE DTC ON WINDOWS 2008 ..................................................14 Installing PV4E ................................................................................................................................................... 15 PV4E Installation.............................................................................................................................................. 16 Upgrading PV4E Software................................................................................................................................. 28 Installing PV4E Upgrades ................................................................................................................................ 28 Software Upgrade for Windows Vista .............................................................................................................. 36 Additional Software............................................................................................................................................ 36 Installation Verification ..................................................................................................................................... 36 Sanity Analyzer ................................................................................................................................................ 36 Troubleshooting .................................................................................................................................................. 37 Symptoms ......................................................................................................................................................... 37 Solution............................................................................................................................................................. 38 Symptoms ......................................................................................................................................................... 38 Cause ............................................................................................................................................................ 38 Workaround .................................................................................................................................................. 38 Running PV4E.................................................................................................................................................. 39 RiT Technologies Ltd. iv RiT Enterprise Solutions Installation Guide PV4E Settings...................................................................................................................................................... 39 Uninstalling PV4E .............................................................................................................................................. 41 CHAPTER 3 – EXTENDED DRIVER PACK .............................................................43 Installing Extended Driver Pack ....................................................................................................................... 43 CHAPTER 4 – CAD MODULE ..................................................................................46 License Registration ........................................................................................................................................... 46 System Requirements ......................................................................................................................................... 46 MapGuide Server Version ................................................................................................................................. 46 Uninstalling Previous MapGuide Components................................................................................................ 46 Uninstalling the MapGuide Toolkit.................................................................................................................. 47 Uninstalling the MapGuide Server ................................................................................................................... 49 Uninstalling a Previous Version of PV4E CAD Module.................................................................................. 51 Installing the MapGuide Components .............................................................................................................. 52 Installing the MapGuide Server.................................................................................................................... 52 Installing the MapGuide SDF ........................................................................................................................... 60 Installing the PV4E CAD Module ..................................................................................................................... 63 MapGuide Configuration................................................................................................................................... 65 Activating the Active X Component ................................................................................................................ 67 Changing DCOM User Privileges ..................................................................................................................... 70 CHAPTER 5 – PV360 DASHBOARD INSTALLATION............................................72 Client Side ........................................................................................................................................................... 72 Changing the Web Security Settings ................................................................................................................ 72 PV360 Dashboard Configuration Instructions ................................................................................................ 72 Dashboard Installation and Server Impact Information ................................................................................ 76 For WinXP........................................................................................................................................................ 76 .asmx files..................................................................................................................................................... 76 Installation........................................................................................................................................................... 77 Uninstalling Dashboard ..................................................................................................................................... 79 CHAPTER 6 – SITEPRO INSTALLATION ...............................................................80 Requirements ...................................................................................................................................................... 80 SitePro Installation and Configuration............................................................................................................. 80 APPENDIX. ................................................................................................................81 Install Microsoft .NET 3.5.................................................................................................................................. 81 RiT Technologies Ltd. v RiT Enterprise Solutions Installation Guide Install SQL Server 2005 Enterprise Edition .................................................................................................... 83 Installation of SQL Server 2008 ....................................................................................................................... 93 PV4E Issues.................................................................................................................................................... 104 Configuring MSDTC ...................................................................................................................................... 107 SQL Server 2005 Service Pack 1 Installation................................................................................................. 108 TABLE OF FIGURES ..............................................................................................112 INSTALLATION CHECKLIST .................................................................................114 RiT Technologies Ltd. vi RiT Enterprise Solutions Installation Guide Chapter 1: Introduction This user guide provides you with complete instructions on how to install the following modules: PV4E Ð Extended Driver Pack Ð The CAD Module enables visual representation of the PV4E locations and inventory items on 2-D maps PV360 Dashboard Ð This section is relevent only if you have purchased the extended Driver Pack. The Extended Switch Driver Pack provides expanded switch information support for switches CAD Ð A comprehensive and efficient intelligent infrastructure management solution that can automate and simplify both the planning and day-today management of networks and their associated passive and active equipment PV360 Dashboard provides a centralized depot for defining real-time alerts and centrally monitoring events across a company’s physical network infrastructure SitePro Ð SitePro is a hand held device that gives the technician detailed information about tasks that need to be performed in the communication room or datacenter in real time. Using SitePro, the technician is able to perform the patch process guided by the details sent from the PV4E or SiteWiz applications Also contained in this user guide are the pre-requisites and requirements together with all other essential information you will require to install these modules efficiently. For full and detailed information about PV4E, please refer to the PV4E User Manual. How to use this Document This document is based on machines using Windows 2003 / 2008 server and SQL 2005 / 2008 editions. It is recommended that you check off each step of the installation using the installation check list, found at the end of this Installation Guide. The checklist contains a complete list of installation items required to perform a successful and complete installation of the PV4E system. RiT Technologies Ltd. 1 1 RiT Enterprise Solutions Installation Guide Chapter 2 – PV4E Installation This chapter explains how to install the PV4E software. To install PV4E, the user must have administrator privileges to run the PV4E installation. SQL users must have DBO privileges. System Requirements PV4E software must be installed on the computer that serves as a dedicated server (Deployment Server). Depending on the function of the workstation, there are different hardware and software requirements, as well as different installation procedures. Minimum Requirements The minimal software requirements have been modified to allow running the PV4E on a Windows 2003 server or Windows 2008 server. Following are the minimum Hardware and Software requirements for the PV4E Server and Client Stations. Included in this section are the requirements for: Deployment Server Requirements Client Requirements RiT Technologies Ltd. 2 RiT Enterprise Solutions Installation Guide Deployment Server Requirements Note: The PV4E CAD application does not support SQL 2005 SP1 Express Edition. (should be recheck) The requirements for the deployment server are: Group Component Minimum Requirement Hardware Pentium IV Running at 2.4GHz or greater (for large installations, the computer configuration should be determined separately RAM 2GB Hard Disk space 2 GB (additional 30GB is recommended for logging purposes) Operating System Windows 2003 Server R2 SP2, Windows 2003 server SP2 and Windows 2008 Software Microsoft Internet 6.0 SP1, IE 7, IE8 Explorer DB MS SQL 2005 Standard/Enterprise (basic, SP2 and SP3) MS SQL 2008 – all versions (SP1) IIS 5 or 6 Prerequisites: FTP Server, SMTP Services MSMQ Version 2.0 or 3.0 or higher RiT Technologies Ltd. 3 RiT Enterprise Solutions Installation Guide Note: If MSMQ and IIS are not installed on your computer, please do it now. Installation can be done through the “Windows Components” option in the Computer Settings/ Control Panel/ Add or Remove Programs. Client Requirements The requirements for a client are: Group Component Minimum Requirements Hardware P–III 900 MHz Running at 900MHz (P-IV recommended). RAM 512MB Operating System Microsoft Windows 2003 , Windows XP or Windows Vista Internet Explorer 6.0 SP1 , IE 7 or IE8 with ActiveX, Cookie and Java Script support Software License Registration After you have purchased the PV4E system, you will receive a software certificate for the software from RiT Technologies. You must then go to our website: http://www.rittech.com and register. You will find registration in the support section of the website. After registration you will receive a License File via email. Open the file and save on your computer. This file is needed during the installation setup. RiT Technologies Ltd. 4 RiT Enterprise Solutions Installation Guide Pre-requisites SQL Server Note :Starting from PV4E 6.0, , SQL 2000 will no longer be supported. You must install MSSQL Server 2005 Standard Edition or MSSQL Server 2008 to run PV4E. The following explains the procedure for installing SQL. The system requirement for installing MSSQL Server 2005 editions or MSSQL Server 2008 editions can be read at the Microsoft website: http://www.microsoft.com/sql/prodinfo/sysreqs/default.mspx Install SQL Server 2005 Enterprise Edition See the installion process description in the Appendix. Service Packs for SQL Installing SP2 and SP3 for SQL 2005. Install SQL Server 2008 See the installion process description in the Appendix. SQL Configuration From the computer where the SQL Sever 2005 is installed, do the following: 1. Open the SQL Server Surface Area Configuration. 2. From the Start menu: Start > Programs > Configuration Tools > SQL Server Surface Area Configuration 3. Click Surface Area Configuration for Services and Connections 4. Select View by Instance tab 5. Expand the relevant SQL Server instance 6. Expand the Database Engine branch 7. Select the Remote Connections branch 8. Select Local and remote connections on the right-hand side pane 9. Select Using both TCP/IP and named pipes 10. Click OK 11. Stop and Start the SQL Server service RiT Technologies Ltd. 5 RiT Enterprise Solutions Installation Guide Changing the Web Security Settings 1. Open the Internet Explorer 2. Select > Tools/Internet Options/Security/Internet/Custom level 3. Check the radio buttons for ActiveX controls and plug-ins to enable 4. Click OK 5. Select > Local Internet/Custom levels - Check the radio buttons for ActiveX controls and plug-ins to enable 6. Click OK 7. Click Apply Checking Services Required for Installation During the installation process, you will be required to add the following Window components. See next section for Server installation instructions. Indexing Service Message Queuing Services Internet information Services (IIS) File Transfer Protocol (FTP) Server SMTP Service RiT Technologies Ltd. 6 RiT Enterprise Solutions Installation Guide Windows 2008 Server Installing IIS 7 (with IIS 6 Management Compatibility + FTP server) Open the "Server Manager" window (right click on Computer – >Manage) Choose "Roles" and click on "Add Roles" hyper link. Make sure that all the required features are checked as in the following images: Figure 1: Select Role services RiT Technologies Ltd. 7 RiT Enterprise Solutions Installation Guide Figure 2: Select Role services - continue If some of the features are not checked, checked them and click next to install them. Installing MSMQ and SMTP Open the "Server Manager" window (right click on Computer – >Manage) Choose "Features" and click on "Add Features" hyper link. Make sure that all the required features are checked as in the following image: RiT Technologies Ltd. 8 RiT Enterprise Solutions Installation Guide Figure 3: Select Features If the features "Message Queuing Server" and/or "SMTP Server" are not checked, checked them and click next to install them. Make sure FTP server is running After installation of IIS, we need to make sure that the FTP service "Startup Type" is set to "Automatic" and that the server is running. At "Server Manager" window click on "Configuration" to expand, then click on "Services". Search for the service "FTP Publishing Services". Make sure that its Startup type is set to "Automatic" and its status is "Started". Remote SQL Installation Configuring for Remote SQL Server You need to make configuration changes if the PV4E and SQL servers are located on separate machines. The instructions in this section relate specifically to Windows Server 2003. The instructions may vary for other Windows versions. The instructions depend on whether an Active Directory is available in the network. Both the PV4E and SQL servers require registration for working as part of the Active Directory configured on the network. Refer to your IT Manager for details on the Active Directory. RiT Technologies Ltd. 9 RiT Enterprise Solutions Installation Guide If no Active Directory is available, see Remote Connection when Active Directory is Unavailable. Note: It is highly recommended that you perform the respective tasks in close coordination with the IT Manager. Remote Connection using Active Directory The instructions are the same for the two machines that contain the PV4E application and the SQL Server. This section assumes that there is an active directory available on the network. To set up the remote connection when the active directory is available 1. From the Windows Start menu, select Administrative Tools > Component Services. The Component Services window appears. Figure 1 - Component Services Window 2. Right-click My Computer and select Properties. My Computer Properties dialog appears. RiT Technologies Ltd. 10 RiT Enterprise Solutions Installation Guide Figure 2 - My Computer Properties Dialog 3. Click the MSDTC tab. 4. Click the Security Configuration button. The Security Configuration dialog appears: (Please note that the Security Configuration screens for Win 2003 Server SP1 and Win 2003 Server SP2 are different. Please see Figures 3 and 4 on page 20. Figure 3 - Security Configuration dialog RiT Technologies Ltd. 11 RiT Enterprise Solutions Installation Guide 5. Check all the options in the Security Settings area. 6. Click OK in both dialogs and close the Component Services window. Security Configuration Screens for Win 2003 Server SP1 and Win 2003 Server SP2. Figure 4 - Security Configuration dialog for Win 2003 Server SP1 Figure 5 - Security Configuration dialog for Win 2003 Server SP2 RiT Technologies Ltd. 12 RiT Enterprise Solutions Installation Guide Remote Connection when Active Directory is Unavailable If an Active Directory is not available in the network, perform the following configuration change only on the machine containing the SQL Server. Note: You are highly recommended to perform this in close coordination with the IT Manager. To enable remote connection to the SQL Server when Active Directory is Unavailable 1. Open the Registry Editor. 2. Disable the security for MSDTC by adding a DWORD registry value. This value is called TurnOffRpcSecurity at HKEY_LOCAL_MACHINE\SOFTWARE\Microsoft\MSDTC 3. Set the value of TurnOffRpcSecurity = 1. 4. Restart the MSDTC service restart for the change to take effect. RiT Technologies Ltd. 13 RiT Enterprise Solutions Installation Guide How to configure DTC on Windows 2008 If you click the plus sign next to Roles in the right hand menu you can navigate down to Roles > Application Server > Component Services > Distributed Transaction Coordinator > Local DTC. Check which ever boxes you need to in order to get the DTC setup to match the other servers in your environment. Be sure to enable “Allow Remote Clients” or client machines won’t be able to access the DTC on this machine. If remotely enabling the DTC from another machine is required you’ll need to check the “Allow Remote Administration”. Note : Once DTC is setup the remote administration isn’t probably that important so it can be left unchecked and simply RDP into the server if it needs to be worked on. The screen will look something like this. RiT Technologies Ltd. 14 RiT Enterprise Solutions Installation Guide In Account field enter local computer user with administrator rights with a correct password. When you click OK DTC will prompt you to restart it. Click yes (unless you want to schedule the restart for another time) and DTC will restart. You can see the DTC events in the log by selecting the “Application Server” option from the menu on the left. You are going to want the most recent event to look something like this. Installing PV4E To install upgrades, please go to: Installing PV4E Upgrades The following instructions refer to the installation of PV4E as a first time installation. If you have a previous version of PV4E installed, refer to the section Upgrading PV4E Software in this document. You only need to install PV4E on the server. PV4E is installed onto the server by running the setup program on the installation CD received from RiT. The setup program prompts you to enter the required fields and automatically installs the application. Note: RiT Technologies Ltd. 15 RiT Enterprise Solutions Installation Guide You need to enter your License number that you should already have obtained from RiT. Please have it available. PV4E Installation To install PV4E 1. Insert the PV4E Installation CD into the CD Rom disk drive. The following PatchView for the Enterprise Installation Window opens. The screen is divided into two parts. The first is Installation the second Documentation. At this point, you can install PV4E only or PV4E and accompanying documentation. Figure 6 - PatchView for the Enterprise Installation window To install PV4E only: Click OK on the left-hand side of the screen, under Installation. To install the documentation: Under Documentation on the right-hand side, click OK next to User Manual PVMax. The manual is in PDF format, therefore you will need a PDF reader installed on your computer. Release Notes are not available with this installation. The system prepares the InstallShield Wizard. RiT Technologies Ltd. 16 RiT Enterprise Solutions Installation Guide Figure 7 - InstallShield Wizard The PatchView for the Enterprise 6.0 Setup box opens. Figure 8 - InstallShield Wizard window 2. If .NET elements are not installed on the server, a window opens warning that .NET elements must be installed. RiT Technologies Ltd. 17 RiT Enterprise Solutions Installation Guide 3. Click OK. 4. Install .NET 3.5 as described in Appendix 5. Start the PV4E installing process from the beginning. If the Active Server Pages on your machine is set to 'prohibited' the following message is received. 6. To allow the PV4E installation to continue click Yes. This allows the required parameters to be set. Click No to abort installation. The PatchView for the Enterprise Setup - License Agreement dialog box opens. RiT Technologies Ltd. 18 RiT Enterprise Solutions Installation Guide Figure 9 - PatchView for the Enterprise Setup - License Agreement dialog box 7. Please read the agreement carefully. 8. Click Yes to continue. RiT Technologies Ltd. 19 RiT Enterprise Solutions Installation Guide The User Information dialog box opens. Figure 10 - User Information dialog box 9. Enter the Name and Company details. The License Key file is supplied with to locate the License the software. To locate, click the ellipsis button Key file. The following Select License Key file screen opens. Select file and click Open. The License Key file appears in the License Key file field. Click Next. RiT Technologies Ltd. 20 RiT Enterprise Solutions Installation Guide Note: The Next button is enabled after a License Key file is entered. RiT Technologies Ltd. 21 RiT Enterprise Solutions Installation Guide The Select Features dialog box opens. Figure 11 - Select Features dialog box The PV4E CD includes the following components: PV4E Application PV4E Help These checkboxes are selected by default. If SQL is installed at a different location (remote server) then the database can be installed on the remote server. The database is automatically installed. There is no checkbox for the database. 10. Click Next to continue. The PV4E Edit Data dialog box opens. RiT Technologies Ltd. 22 RiT Enterprise Solutions Installation Guide Figure 12 – Edit Datan dialog box 11. Enter the connection path to the SQL server in the above fields and press the “Connect” button. RiT Technologies Ltd. 23 RiT Enterprise Solutions Installation Guide 12. Click Next to continue. The Application Account dialog box opens. 13. Check the radio button to select either Interactive User or This user (current user) RiT Technologies Ltd. 24 RiT Enterprise Solutions Installation Guide Figure 13 – Application Account dialog 14. Click Next to continue. The Choose Destination dialog box opens. Figure 14 – Choose Destination Location dialog box 15. If you want to install PV4E in another location, click Browse and select the location, click OK. Click Next to continue. The following box appears. This is to temporarily stop the Internet Information Services (IIS) while this part of the PV4E installation takes place. The following box appears The following Setup Status dialog box appears RiT Technologies Ltd. 25 RiT Enterprise Solutions Installation Guide PV4E starts the installation. A series of indicator status screens opens. The Setup Status dialog box opens giving the current status of the installation. The InstallShield Wizard Complete dialog box opens: RiT Technologies Ltd. 26 RiT Enterprise Solutions Installation Guide Figure 15 - PV4E InstallShield Wizard Complete dialog box 16. It is recommended to select Reboot. Click Finish to complete the installation. You should reboot the system immediately after installation. 17. The Verifying PV4E installation dialog box appears: Finally, the PV4E Sanity Analyzer dialog box opens: The Sanity Analyzer process checks that all components were installed properly. Leave the CD in the CD Rom disk drive. Sometimes after the reboot, further installation tasks are performed automatically after the Windows login. The RiT icon for PV4E Server appears in the Status Bar of your desktop. RiT Technologies Ltd. 27 RiT Enterprise Solutions Installation Guide Upgrading PV4E Software You must have a previous version of PV4E to perform the upgrade procedure. Install PV4E upgrades only on the PV4E Server. The upgrade procedure uninstalls the existing version before installing the new version. Note: There is no license number for PV4E V6.0 upgrade. A license file is used instead and is supplied with the software. Installing PV4E Upgrades Note: While the contents of the database are not modified during the upgrade process, you should backup the PV4E database before running the upgrade. In addition, you should also backup any non-PatchView data in this directory before upgrade. 1. Insert the PV4E Installation CD into the CD Rom disk drive. The PatchView for the Enterprise Installation Window opens. The following PatchView for the Enterprise Installation Window opens. The screen is divided into two parts. The first is Installation the second Documentation. At this point, you can install PV4E only or PV4E and accompanying documentation. Figure 16 - PatchView for the Enterprise Installation window To install PV4E only: Click OK on the Installation side of the screen. To install the documentation: Under Documentation on the right-hand side Click OK next to the documents you want to install. RiT Technologies Ltd. 28 RiT Enterprise Solutions Installation Guide The system prepares the InstallShield Wizard. The Upgrade InstallShield Wizard dialog box opens. Figure 17 – InstallShield Wizard window 2. Click Next to continue. 3. If .NET elements are not installed on the server, a window opens warning that .NET elements must be installed. 4. Click OK. 5. Install .NET 3.5 as described in Appendix 6. The License Agreement dialog box opens. RiT Technologies Ltd. 29 RiT Enterprise Solutions Installation Guide Figure 18 – License Agreement dialog box 7. Please read the agreement carefully. Click Yes to continue. The User Information dialog box opens. Figure 19 - User Information dialog box RiT Technologies Ltd. 30 RiT Enterprise Solutions Installation Guide 8. Enter the Name and Company. The License Key file is supplied with the to locate the License Key software. To locate, click the ellipsis button file. The following Select License Key file screen opens. Select file and click Open. The License Key file appears in the License Key file field. Click Next. Note: The Next button is enabled after a License Key file is entered. 9. Click Next to continue. The Application Account dialog box opens. 10. Check the radio button to select either Interactive User or This user (current user). The following screen shows that the Interactive User has been selected. RiT Technologies Ltd. 31 RiT Enterprise Solutions Installation Guide Figure 20 – Application Account dialog – Interactive User The following screen shows that This user has been selected. Figure 21 – Application Account dialog – This user 11. Click Next to continue. The Setup Information dialog box opens. RiT Technologies Ltd. 32 RiT Enterprise Solutions Installation Guide Figure 22 - PV4E Upgrade dialog box 12. Click Next to continue. Several setup bars appear in succession, see the following:. 13. Once completed, and immediately after, the following Setup Status dialog box opens. RiT Technologies Ltd. 33 RiT Enterprise Solutions Installation Guide Figure 23 - Setup Status dialog box 14. The Registering components progress window appears. Figure 24 - Registering components dialog box 15. Once completed, and immediately after, a Registering MTS components progress window appears. 16. When completed the InstallShield Wizard opens. Click Yes, I want to restart my computer now. This step is recommended. Click Finish. RiT Technologies Ltd. 34 RiT Enterprise Solutions Installation Guide Figure 25 - InstallShield Wizard dialog box 17. After you have restarted your computer, the following dialog box appears: The following PV4E Sanity Analyzer dialog box appears. This checks that the service is up and the PV4E installation completed successfully. Figure 26 - PV4E Sanity Analyzer dialog box The following PV4E Sanity Analyzer dialog box appears. This checks that the service is up and the PV4E installation completed successfully. Finally the following PV4E Installation completed successfully dialog box appears: RiT Technologies Ltd. 35 RiT Enterprise Solutions Installation Guide Note: In case the PV4E version 5 has an installed driver pack, the upgrade process will require to uninstall the driver pack. There will be necessary to install this driver pack again after the PV4E ugrading. Software Upgrade for Windows Vista The following section explains what action to take should you encounter any problems when peforming the software upgrade for Windows Vista. Problem When pressing the Download button in the Software Download window, the progress bar turns red indicating that the operation has failed. Cause The cause can be attributed to either of the following reasons: FTP Service is not running No sufficient permissions on the BootLoader folder Fix > Run the FTP Service: 1. In Windows Vista, open the Computer Management window. 2. Open the IIS 6.0 Manager and click FTP Sites. 3. Check that the FTP Service is running, if not, start it. > Add Permission to BootLoader: 1. Go to the RiT Technologies\PatchView for the Enterprise folder, located under the Programs Files folder. 2. Right click the BootLoader folder and select Properties. 3. Choose the Security tab. 4. Click Add and select the Internet User Account (IUSR_<ComputerName>) with Full Control permission. Try the Software Download operation again to make sure the problem has been solved. Additional Software Online help files are supplied together with the PV4E application. You can also refer to the lastest Service Pack released by RiT Technologies Ltd. (need to confirem if the online help are within the PV4E Installation Verification Sanity Analyzer To activate the sanity analyzer run the following file: C:\Program Files\RiT Technologies\PatchView for the Enterprise\Server\Tools\PV4ESanityAnalyzer.exe RiT Technologies Ltd. 36 RiT Enterprise Solutions Installation Guide Once activated, the sanity analyzer performs several tests. On completion, you are prompted to view the report results. Select Yes to continue. Verify that all is OK. If you encounter any problems that you cannot solve, please contact RiT customer support. When you have completed the sanity analyzer report, please email the sanity analyzer report to RiT customer suport. The PV4E Sanity Analyzer is used to validate the PV4E installation by performing simple checks. Level Check Category Warning Regional Settings Error Checks that the Regional Settings are correct Checks that the PV4E registry is valid Checks that the database exists Error Checks that the MSMQs are created MSMQ Error Checks that all COM+ components COM+ are installed Checks if the ASP is allowed on the IIS ASP Web Extension machine Checks if the ASP.NET is allowed on IIS ASP.NET Web the machine Extension Checks if the machine can run ASP.NET ASP.NET Checks the binaries were copied CRC correctly Checks that all PV4E’s processes Processes are running Validates the license file License Error Error Warning Warning Error Error Error Registry Database Troubleshooting Symptoms When you try to login you receive an error message that the page cannot be displayed, with the following technical information: Error Type: Active Server Pages, ASP 0115 (0x80004005) A trappable error (E06D7363) occurred in an external object. The script cannot continue running. /pv4e/main/pv4e.asp Page: GET /pv4e/main/pv4e.asp Cause The COM+ (MTS) components of PV4E run, by default, in the context of the interactive user. The interactive user is the user which is currently logged on to Windows directly. A user that is logged on through Terminal Services is not an interactive user. A user that uses NetMeeting, PCAnywhere, etc. is an RiT Technologies Ltd. 37 RiT Enterprise Solutions Installation Guide interactive user. If Windows is in a state of log off then there is no interactive user and the PV4E will fail to work from a remote Internet Explorer. Solution The following workaround can be applied by any user: 1. On the PV4E Server machine, Open the Control Panel 2. Open the Administrative Tools 3. Open Component Services 4. Go to Computers\My Computer\COM+ Applications\PV4E 5. Right click and select Properties 6. Go to the Identity tab 7. Select This user 8. Fill in a username and password of a valid Windows' user that has administrator privileges. 9. Apply the same to Computers\My Computer\COM+ Applications\PV4E.Server if it exists Symptoms The installation of PV4E runs smoothly, but when you try to login into the PV4E application an Invalid Password message is received. Another symptom, which happens only if part of this solution is applied, is that you login and view items, but cannot add/edit them. Each time you try to add/edit an item the PV4E generates a message box that the system is busy. Cause The windows built-in anonymous user is not allowed to access the cmsserv.exe. And/or the BL user is not allowed to access the cmsserv.exe. Workaround The workaround can be applied by any user and applies to Windows XP professional edition only. Windows XP home edition is not supported. Do the following steps on the PV4E Server machine after the PV4E installation. (The instructions applies to Windows 2003 Server with SP1 and to Windows XP with SP2) 1. Open the Control Panel 2. Open the Administrative Tools 3. Open Component Services 4. Go to Computers\My Computer\DCOM Config\CmsServ 5. Right click Properties 6. Go to the Security tab 7. On the Launch and Activation Permissions click Edit... 8. Click Add... RiT Technologies Ltd. 38 RiT Enterprise Solutions Installation Guide 9. Click Advanced... 10. Click Locations... 11. Select the local computer name (not a domain name) and click OK 12. Click Find Now 13. After the search completes select the user whosename begins with IUSR_ and ends with the machine name. For example if the machine name is MyMachine then the user name is IUSR_MYMACHINE 14. Click OK 15. Click OK 16. A new entry will appear in the Group or user names list: Internet Guest Account. Select. 17. In the Permission list below check all of the actions to enable the user local and remote launch and activation. 18. Repeat on steps 8 to 12 19. Find your user name and select 20. Repeat steps 14 to 18 for your user name 21. Click OK 22. Click OK 23. Repeat steps 8 to 12 24. Find the Network Service and select 25. Repeat steps 14 to 18 on Network Service account 26. Click OK 27. Click OK 28. There is no need to restart the machine Running PV4E When PV4E has been successfully installed you can log into the application via your browser. PV4E Settings To login/open PV4E 1. Open the Internet Browser and type the path into the Address window. If you are working on the computer where PV4E server is installed, type: http://local computer name/pv4e If you are working from a client, type: http://host name/pv4e. 2. Press Enter, the PV4E login window opens. RiT Technologies Ltd. 39 RiT Enterprise Solutions Installation Guide Figure 27 - PV4E Login window 3. Type in your User Name and Password. The default settings are below and are case-sensitive. We strongly recommend that you change these settings as soon as possible: User Name = Administrator Password = [blank] 4. Click Login. When launching PV4E for the first time, a RiT Security Warning message appears. Figure 28 - RiT Security Warning message 5. Click Yes to continue. PatchView for the Enterprise opens. RiT Technologies Ltd. 40 RiT Enterprise Solutions Installation Guide Figure 29 - PV4E Opening Screen The default is set to open in the Maintenance window as it is here that most of the activity in PV4E occurs. When this window opens for the first time after installation, there is no information pane, as this only appears after an item is added or defined within the database. Uninstalling PV4E 1. From the Start menu, select > Settings > Control Panel. 2. Select Add/Remove Programs. 3. Locate PV4E from the list of programs and click Remove. The following Uninstall sequence is activated: RiT Technologies Ltd. 41 RiT Enterprise Solutions Installation Guide After the above InstallShield Wizard, closes, the following InstallShield Wizard Complete box opens: Click Finish to uninstall PV4E. Figure 30 –InstallShield Wizard Complete dialog box RiT Technologies Ltd. 42 RiT Enterprise Solutions Installation Guide Chapter 3 – Extended Driver Pack Installing Extended Driver Pack This section is relevent only if you have purchased the extended Driver Pack. Note: Before Installation stop the PV4E server. The Extended Switch DriverPack provides expanded switch information support for switches. A list of supported switches can be found at our website: http://www.rittech.com/content.asp?id=403&mode=1 This section describes how to install the Extended Switch DriverPack. 1. Go to: Insert the Extended Switch DriverPack Installation CD into the CD Rom disk drive. 2. Open the CD Rom drive on your computer. 3. Run .exe file to install driver pack. 4. The system prepares the InstallShield Wizard. Figure 31 - Preparing the InstallShield Wizard 5. The InstallShield Wizard dialog box opens. Click Next to continue. RiT Technologies Ltd. 43 43 RiT Enterprise Solutions Installation Guide C Figure 32 - InstallShield Wizard window 6. The Setup status dialog box opens. A series of indicator status screens show the current status of the installation. Figure 33 - Setup Status dialog RiT Technologies Ltd. 44 Comment: This image will not be relevant in released version RiT Enterprise Solutions Installation Guide 7. The InstallShield Wizard Complete dialog box opens. Click Finish to complete installation. Figure 34 - PV4E InstallShield Wizard Complete dialog RiT Technologies Ltd. 45 RiT Enterprise Solutions Installation Guide Chapter 4 – CAD Module Note: The CAD module is not supported in windows server 2008 and windows Vista This chapter includes the following sections: License Registration System Requirements MapGuide Server Version Installing the PV4E CAD Module MapGuide Configuration Activating the Active X Component Note: For all procedures contained in this chapter, you must be logged into the PV4E Server with administrative privileges. License Registration Prior to installation of the PV4E CAD Module, please register your software copy and obtain a valid license key. Please refer to the License Registration document that is included in this package. System Requirements Note: The PV4E CAD application does not support SQL 2005 SP1 Express Edition. The System Requirements for the installation of CAD are identical to the requirements for the installation of PV4E. CAD must be installed on the PV4E Server. MapGuide Server Version The MapGuide Server versions that support this PV4E module are AutoCAD 2000, 2000i, and 2002. Uninstalling Previous MapGuide Components If you presently have MapGuide 6.0 or lower installed on your machine, you must follow the uninstall procedure before installing the new version. You need to uninstall the toolkit and the Server. RiT Technologies Ltd. 46 RiT Enterprise Solutions Installation Guide Uninstalling the MapGuide Toolkit You need to uninstall a previous version of the MapGuide Toolkit before installing the latest version. To uninstall a previous version of the MapGuide Toolkit 1. From the Windows Start menu, select Control Panel > Add/Remove Programs. The Add/Remove Programs window appears. 2. Click Autodesk MapGuide(R) SDF Component Toolkit 6. The title may be different for previous versions. 3. Click Change/Modify. The Autodesk MapGuide(R) SDF Component Toolkit Release 6 Setup – Welcome dialog appears. Figure 35- Setup – Welcome Dialog Box 4. Select Remove SDF Component Toolkit and click Next. The Confirm Removal dialog appears. RiT Technologies Ltd. 47 RiT Enterprise Solutions Installation Guide Figure 36- Setup – Confirm Removal Dialog Box 5. Click Next. The Removal Complete dialog appears. Figure 37 - Setup – Removal Complete Dialog Box 6. Click Finish. RiT Technologies Ltd. 48 RiT Enterprise Solutions Installation Guide Uninstalling the MapGuide Server You need to uninstall a previous version of the MapGuide Server before installing the latest version. To uninstall a previous version of the MapGuide Server 1. From the Windows Start menu, select Control Panel > Add/Remove Programs. The Add/Remove Programs window appears. 2. Click Autodesk MapGuide(R) Server Release 6. The title may be different for previous versions. 3. Click Change/Modify. The Autodesk MapGuide(R) Server Release 6 Setup - Welcome dialog appears. Figure 38- Autodesk MapGuide(R) Server Release Dialog Box 4. Select Remove Autodesk MapGuide Server and click Next. RiT Technologies Ltd. 49 RiT Enterprise Solutions Installation Guide Figure 39- Remove Autodesk MapGuide Server Dialog Box 5. Click Next. The Confirm Removal dialog appears. Figure 40- Confirm Removal Dialog Box 6. Click Next. RiT Technologies Ltd. 50 RiT Enterprise Solutions Installation Guide The Removal Complete dialog appears. Figure 41- Removal Complete Dialog Box 7. Click Finish. A message appears informing that you should restart your machine. 8. Click Yes. The machine restarts. Uninstalling a Previous Version of PV4E CAD Module You need to uninstall the previous version of the PV4E CAD Module before installing the latest version. To uninstall a previous version of the MapGuide Server 1. From the Windows Start menu, select Control Panel > Add/Remove Programs. The Add/Remove Programs window appears. 2. Click PV4E CAD Integration Module. 3. Click Change/Modify. RiT Technologies Ltd. 51 RiT Enterprise Solutions Installation Guide A dialog box appears and prompts you to proceed with the installation procedure. 4. Click Yes. The uninstall process begins. The PatchView for the Enterprise - CAD Module Setup dialog appears requesting that you restart the computer. 5. Click the Yes option and click Finish. Installing the MapGuide Components You must install the MapGuide Components - Server and SDF Components Toolkit before installing the PV4E CAD Module. Installing the MapGuide Server There are two procedures when installing the MapGuide Server: Install MDAC 2.8 if it is not already installed. These are the Microsoft Data Access Components Install the MapGuide Server Install the SDF Toolkit To install MDAC 2.8 1. Insert the Autodesk MapGuide CD into your CD-ROM drive. The Installation Utility screen appears. You can ignore this window for now. 2. Using File Explorer, go to the root directory on the CD. 3. Open the MDAC 2.8 directory. 4. Double click MDAC_TYP.exe. The installation wizard opens. 5. Continue with wizard until the Microsoft Data Access Components 2.8 Setup – End User License Agreement dialog appears. RiT Technologies Ltd. 52 RiT Enterprise Solutions Installation Guide Figure 42- End User License Agreement Dialog Box 6. Select the I Accept checkbox and click Next. 7. Continue with the wizard while it checks for disk space until the Microsoft Data Access Components 2.8 Setup - Installing the Software dialog appears. Figure 43- Installing the Software Dialog Box RiT Technologies Ltd. 53 RiT Enterprise Solutions Installation Guide 8. Click Finish. The installation starts. On completion of the installation process, the Microsoft Data Access Components 2.8 Setup - Restarting the System dialog appears. 9. Ensure Let setup restart the system now is selected. 10. Click Finish. The system reboots. To install the MapGuide Server 1. Insert the Autodesk MapGuide CD into your CD-ROM drive (if you did not do so for the previous section). The Installation Utility screen appears. Figure 44- Installation Utility Dialog Box 2. Click Autodesk MapGuide Server. The Autodesk MapGuide(R) Server Release 6.5 Setup - Welcome dialog appears. RiT Technologies Ltd. 54 RiT Enterprise Solutions Installation Guide Figure 45- Autodesk MapGuide(R) Server Release Setup Dialog Box 3. Click Next. The End User License Agreement dialog appears. 4. Select I Accept checkbox and click Next. The Register Autodesk MapGuide Server dialog appears. Figure 46- Register Autodesk MapGuide(R) Dialog Box RiT Technologies Ltd. 55 RiT Enterprise Solutions Installation Guide 5. In the dialog box: Enter the serial number. Ensure the Registered Installation option is selected. Enter the Authorization Code. 6. Click Next. The Select Installation Type dialog appears. Figure 47- Installation Type Dialog Box 7. Ensure Standard installation is selected and click Next. The Select Installation Directory dialog appears. RiT Technologies Ltd. 56 RiT Enterprise Solutions Installation Guide Figure 48- Select Installation Dialog Box 8. Click Next. The Configure Autodesk MapGuide Server Settings dialog appears. Figure 49- Autodesk MapGuide Server Dialog Box 9. Click Next. RiT Technologies Ltd. 57 RiT Enterprise Solutions Installation Guide The Notes for Configuring Autodesk MapGuide Server Service dialog appears. 10. Click Next. The Oracle Client Not Detected dialog appears. Figure 50- Oracle Client Not Detected Dialog Box 11. Click Next. The Confirm Installation dialog appears. RiT Technologies Ltd. 58 RiT Enterprise Solutions Installation Guide Figure 51- Confirm Installation Dialog Box 12. Click Next. The installation process starts. A progress dialog appears. Figure 52- Installation Process Dialog Box RiT Technologies Ltd. 59 RiT Enterprise Solutions Installation Guide On completion of the installation process, the Setup Complete dialog appears. 13. Click Finish. The restart message appears. 14. Click Yes. The computer reboots. Installing the MapGuide SDF 1. Using the Installation Utility, select Utilities. The Installation Utility screen appears. Figure 53-Installation Utility Screen Dialog Box 2. Click SDF Component Toolkit. The Autodesk MapGuide(R) SDF Component Toolkit Release 6.5 Setup – Welcome dialog appears. RiT Technologies Ltd. 60 RiT Enterprise Solutions Installation Guide Figure 54- Autodesk MapGuide(R) SDF Component Toolkit Release Dialog Box 3. Click Next. The Select Installation Directory dialog appears. Figure 55- Select Installation Dialog Box 4. Click Next. The CSMap Files Detected dialog appears. RiT Technologies Ltd. 61 RiT Enterprise Solutions Installation Guide Figure 56- CSMap Files Detected Dialog Box 5. Ensure Yes is selected and click Next. The Setup Complete dialog appears. Figure 57-Setup Complete Dialog Box 6. Click Finish. RiT Technologies Ltd. 62 RiT Enterprise Solutions Installation Guide After the installation process completes, the Installation Utility main screen reappears. 7. Click Exit. Installing the PV4E CAD Module The PV4E CAD Module installation is a simple process when all hardware and software requirements are met. The intuitive Setup Wizard guides the system administrator through the steps necessary to install the software product. Tip: The Serial Number, CD Key and Authorization Code are required during the installation process. Please refer to the Registration Document included in this package. This tip only refers to when you are installing the CAD Module on MapGuide 6.0. To start the installation 1. Log into the server with Administrator privileges. 2. Insert the PV4E CAD Module CD-ROM into your CD-ROM drive. Click on Setup.exe file to initiate the installation. 3. .The Preparing to Install InstallShield Wizard dialog box opens. When the InstallShield Wizard is installed, the CAD Module Setup – Welcome dialog opens. Figure 58- PV4E CAD Module Setup Dialog Box 4. Click Next. The License Agreement dialog opens. RiT Technologies Ltd. 63 Comment: CAD 6.0 missing autorun. For installation requiren to execute Setup.exe file from installation CD RiT Enterprise Solutions Installation Guide 5. Click Yes to continue. The Select Components dialog opens. 6. Click Next. The Check Setup Information dialog appears. RiT Technologies Ltd. 64 RiT Enterprise Solutions Installation Guide 7. Click Next. The setup process continues. A progress window opens showing the progress of the installation. On completion of the installation, the Installation Wizard Complete dialog appears. 8. Click Finish and the computer restarts. Leave the CD-ROM in the computer until the reboot process has completed after logging into Windows. Note: For CAD to work, the Active X Components must have the correct settings. MapGuide Configuration After completing the PV4E CAD Module installation you need to configure the MapGuide application. To configure MapGuide 1. From the Windows Start menu, select Programs > MapGuide Release 6.5 > Autodesk MapGuide Server Admin. The Autodesk MapGuide Server Admin window opens. RiT Technologies Ltd. 65 RiT Enterprise Solutions Installation Guide Figure 59- Autodesk MapGuide Server Admin Dialog Box 2. From the Edit menu, select Properties. The Properties dialog opens. RiT Technologies Ltd. 66 RiT Enterprise Solutions Installation Guide Figure 60- Properties Dialog Box 3. Enter the value 32 into the Maximum number of simultaneous requests field. 4. Enter the value 50 into the Maximum number of cached DWG file connections field. 5. Click Apply. 6. Click OK. Activating the Active X Component To activate the Active X Component 1. Right-click on the Internet Explorer icon on the computer desktop. 2. Select and click Properties from the drop-down menu. The Internet Properties dialog opens. 3. Click the Security tab. The Security Tab Window opens. RiT Technologies Ltd. 67 RiT Enterprise Solutions Installation Guide Figure 61- Security Tab Dialog Box 4. Select the Internet icon. 5. Click the Custom Level button. The Security Settings dialog opens. RiT Technologies Ltd. 68 RiT Enterprise Solutions Installation Guide Figure 62- Security Settings Dialog Box 6. In the ActiveX controls and plug-ins section click the Prompt radio buttons. 7. Click the OK button. The Security Settings dialog closes. RiT Technologies Ltd. 69 RiT Enterprise Solutions Installation Guide 8. In the Internet Properties dialog, select Local Intranet. 9. Click Custom Level. The Security Settings dialog opens. 10. In the ActiveX controls and plug-ins section click Prompt radio buttons. 11. Click OK. The Security Settings dialog closes. 12. Click OK to close the Internet Properties dialog to complete the process. 13. Reboot the system. Changing DCOM User Privileges 1. Open the Control Panel 2. Open the Administrative Tools 3. Open Component Services 4. Go to Computers\My Computer\DCOM Config\autodesk_mapguide_server 5. Right-click and select Properties 6. Go to the Security tab 7. On the Launch and Activation Permissions click Edit... 8. Click Add... 9. Click Advanced... RiT Technologies Ltd. 70 RiT Enterprise Solutions Installation Guide 10. Click Locations... 11. Choose the local computer name (not a domain name) and click OK 12. Click Find Now 13. After the search completes choose the user that its name begins with IUSR_ and ends with the machine name. For example if the machine name is MyMachine then the user name is IUSR_MYMACHINE 14 Click OK 15 Click OK 16. A new entry will appear in the Group or user names list: Internet Guest Account - select 18. In the Permission list below check all of the actions to enable the user local and remote launch and activation. 19. Repeat steps 8 to 12 20. But find your user name and choose it 21. Repeat on steps 14 to 18 on your user name 22. Click OK 23. Click OK 24. Repeat steps 8 to 12 25. This time find the Network Service account and choose it 26. Repeat steps 14 to 18 on Network Service account 27. Click OK 28. Click OK 29. You do not have to reboot your machine RiT Technologies Ltd. 71 RiT Enterprise Solutions Installation Guide Chapter 5 – PV360 Dashboard Installation Installation of PV4E V6.0 includes installation of Dashborad on the server side. Client Side Changing the Web Security Settings Please see Changing the Web Security Settings (To View ActiveX Controls) page 17. PV360 Dashboard Configuration Instructions Note: The following configuration is for the client side Before you can begin configuring the Dashboard functionality you must take several preliminary steps, as follows: Select the Internet Information Services (IIS). This can be found under: Start > Settings > Control Panel > Administrative Tools. The following IIS screens opens: Perform the following steps: 1. Select >local computer > Web Sites > PV4E. 1 > Local computer 2 > Web Sites 3 > PV4E Figure 63 - IIS Manager 2. Stand on PV4E and right-click. RiT Technologies Ltd. 72 RiT Enterprise Solutions Installation Guide Figure 64 - IIS Manager 3. From the context menu, right-click > Properties. The following PV4E Properties dialog box opens: Figure 65 - PV4E Properties Window RiT Technologies Ltd. 73 RiT Enterprise Solutions Installation Guide 4. Click Configuration. The following Application Configuration box opens: Figure 66 - Application Configuration Screen 5. Look for a file with an '.asmx' extension from the Application extensions field box and double click. The following Add/Edit Application Extension Mapping screen opens: Figure 67 - Add/Edit Application Extension Mapping 6. If in the Executable field, the version is V1.1.4322, Click OK. If the version is not V1.1.4322, click Browse. The following screen opens: RiT Technologies Ltd. 74 RiT Enterprise Solutions Installation Guide Figure 68 - Windows Framework Screen 7. Search for folder: c:\WINDOWS\Microsoft.Net\Framework\v1.1.4322. Select the text from the address line and copy. Paste into the Executable line of the Add/Edit Application Extension Mapping screen. 8. Click OK to close all open windows. Figure 69 - Add/Edit Application Extension Mapping screen RiT Technologies Ltd. 75 RiT Enterprise Solutions Installation Guide Dashboard Installation and Server Impact Information 1. The Dashboard installation modifies the ConfigFile.config file and installs in the GAC version 4.0 of the following files: Microsoft.ApplicationBlocks.Cache.dll Microsoft.ApplicationBlocks.ExceptionManagement.dll Microsoft.ApplicationBlocks.ExceptionManagement.Interfaces.dll 2. SQL database - the installation adds the new Service Pack, tables, and a view to the database 3. The Dashboard server communicates with the client using Web Services 4. Server impact - beyond the installation on the server and client no additional impact is expected, not on the devices nor on the network. For WinXP ASP.Net will work for computers loaded with Win XP and will not require any change in configuration/setting. .asmx files If after selecting .asmx, from c:\WINDOWS\Microsoft.Net\Framework\v1.1.4322\aspnet_isapi.dll the OK button is disabled, you will need to configure the extension by clicking the ‘Executable’ command field. This step will enable the OK button. RiT Technologies Ltd. 76 RiT Enterprise Solutions Installation Guide Installation 1. Insert the Dashboard installation CD into the CD Rom disk drive. The PV360 Dashboard Client Components Setup Wizard Window opens. Figure 70 – Dashboard Client Components Setup Wizard dialog box 2. Click Next. The Select Installation Folder Window opens. Figure 71 – Select Installation Folder dialog box RiT Technologies Ltd. 77 RiT Enterprise Solutions Installation Guide 3. If you want to install Dashboard in another location, click Browse and select the location. click OK. Select the relevant radio button to install Dashboard to everyone who uses the machine, or just you. Click Next to continue. The Confirm Installation dialog box opens Figure 72 – Confirm Installation dialog box 4. Click Back to go back to the previous step or click Next to start the installation. The Installing PV360 Dashboard Client Components dialog box opens. Figure 73 – Installing PV360 Dashboard Client Components dialog box Once completed, and immediately after, the Installation Complete dialog box appears. RiT Technologies Ltd. 78 RiT Enterprise Solutions Installation Guide Figure 74 – Installing Complete dialog box Uninstalling Dashboard 1. From the Start menu, select > Settings > Control Panel. 2. Select Add/Remove Programs. 3. Locate PV360 Dashboard from the list of programs and click Remove. The following Uninstall sequence is activated: 4. Click Yes to remove PV360 Dashboard or No to cancel. Dashboard has been removed from your computer. RiT Technologies Ltd. 79 RiT Enterprise Solutions Installation Guide Chapter 6 – SitePro Installation The SitePro application is installed on your PDA via your computer using the .cab file supplied by RiT Technologies. Once SitePro is loaded on to your PDA you will be able to receive a list of tasks that are assigned to you. One Work Order can be made up of several tasks, and each one can be assigned to a different technician. SitePro requires PV4E version 5.0 and up. Requirements Operating System: Windows Mobile 2005 for PocketPC Screen: QVGA Portrait (240X320) Add-ons: Microsoft .NET Compact Framework 2.0 sp1 SitePro Installation and Configuration To install SitePro on your PDA you must synchronize your PDA with your PC. You will need the Microsoft .NET Compact Framework 2.0 application. This application is available as a freeware application and can be downloaded from the Microsoft site. Once you have installed the .NET Compact Framework application, do the following: 1. Search for the .cab file on your PC (SitePro_X_X_X.cab). 2. When you have located the .cab file, copy it from your PC to the PDA. The .cab location is dependent on the PDA type. The .cab file is activated from the PDA after it has been copied. To enter the SitePro application you must enter a valid name and password set by your administrator. RiT Technologies Ltd. 80 RiT Enterprise Solutions Installation Guide Appendix. The following Appendix explains how to Install .Net 3.5, SQL Server 2005 Enterprise Edition, SQL Server 2008, and Remote SQL Server. Install Microsoft .NET 3.5 1. To install .NET 3.5 open the PV4E installation disk and go to the folder dotnetfx. 2. Open this folder and run file dontenfx.exe. 3. The process of installing is started. 4. License Agreement dialog box opens. RiT Technologies Ltd. 81 RiT Enterprise Solutions Installation Guide 5. Check the ACCEPT radio button and click Install. The installing process will start and may take a few minutes. 6. After the installation process is completed click Exit. RiT Technologies Ltd. 82 RiT Enterprise Solutions Installation Guide Restart computer dialog window is opened. 7. Click Restart Now. Install SQL Server 2005 Enterprise Edition 1. Install MDAC 2.8 (for Windows 2000 Editions only). 2. Install latest windows updates. 3. Start the SQL Standard installation. 4. Select the Server components… link in the Install Section RiT Technologies Ltd. 83 RiT Enterprise Solutions Installation Guide 5. Select the License Agreement checkbox and click Next. 6. Click Install. RiT Technologies Ltd. 84 RiT Enterprise Solutions Installation Guide 7. Click Next. 8. Click Next. RiT Technologies Ltd. 85 RiT Enterprise Solutions Installation Guide RiT Technologies Ltd. 86 RiT Enterprise Solutions Installation Guide 9. Verify there are no errors and click Next. 10. Insert Name and Company information and click Next RiT Technologies Ltd. 87 RiT Enterprise Solutions Installation Guide 11. Click Advanced 12. Select the Entire Database Services and Client Components features and click Next. RiT Technologies Ltd. 88 RiT Enterprise Solutions Installation Guide 13. Select Default Instance radio button and click Next. 14. Select the use the built-in system account option and select Local System for the account and click Next. RiT Technologies Ltd. 89 RiT Enterprise Solutions Installation Guide 15. Select the Mixed Mode authentication option, enter a password to the database and click Next. 16. Leave the default collation selection as is and click Next. RiT Technologies Ltd. 90 RiT Enterprise Solutions Installation Guide 17. Select the Enable User Interface and click Next. 18. Remove the selection from both check boxes (if selected) and click Next. RiT Technologies Ltd. 91 RiT Enterprise Solutions Installation Guide 19. Click Install. 20. Verify that all products were installed and click Next. RiT Technologies Ltd. 92 RiT Enterprise Solutions Installation Guide 21. Click Finish and reboot the machine. 22. After the machine reboots install the relevant Service Pack as describe in the Service Pack section. 23. After installing the Service Pack you can configure the SQL Server. Installation of SQL Server 2008 1. SP2 for the Windows 2003 must be installed. 2. Start the SQL Standard installation SQL Server Installation Center window will open RiT Technologies Ltd. 93 RiT Enterprise Solutions Installation Guide 3. Select Installation on the left part of the window 4. Click on “New SQL server stand-alone installation…” SQL Server 2008 Setup dialog opens RiT Technologies Ltd. 94 RiT Enterprise Solutions Installation Guide It checks all the supported rules 5. Click OK. 6. Enter the product key to the appropriate field. 7. Click Next. RiT Technologies Ltd. 95 RiT Enterprise Solutions Installation Guide 8. Accept the agreement and click Next. 9. Click Install. RiT Technologies Ltd. 96 RiT Enterprise Solutions Installation Guide 10. Click Next. 11. In Feature Selection dialog select the checkboxes as appears on the following screenshot 12. Click Next. 13. Click Next. RiT Technologies Ltd. 97 RiT Enterprise Solutions Installation Guide 14. Click Next. 15. Click “Use the same account…” RiT Technologies Ltd. 98 RiT Enterprise Solutions Installation Guide 16. In the open dialog window enter the name and the password of the user account. 17. Click Next. 18. In the opened dialog window - Database Engine Configuration select the Mixed Mode option and enter the password 19. Click Add Current User RiT Technologies Ltd. 99 RiT Enterprise Solutions Installation Guide 19. Click Next. 20. Click Next. RiT Technologies Ltd. 100 RiT Enterprise Solutions Installation Guide 21. Click Next. 22. Click Install. 23. Wait for several minutes until the installing process is finished. RiT Technologies Ltd. 101 RiT Enterprise Solutions Installation Guide 24. Click Next. RiT Technologies Ltd. 102 RiT Enterprise Solutions Installation Guide 25. Click Close. 26. After the installation of the SQL Server 2008 enable the Named Pipes and TCP/IP protocols via SQL Server Configuration Manager. RiT Technologies Ltd. 103 RiT Enterprise Solutions Installation Guide PV4E Issues During a remote installation of PV4E Server (PV4E Server on machine A and SQL Server on Machine B), the SQL Server will install a client application in the PV4E server: 1. Click Next. RiT Technologies Ltd. 104 RiT Enterprise Solutions Installation Guide 2. Accept the license aggrement and click Next. 3. Insert Name & Company info and click Next. 4. Select the entire Client Components features and click Next. RiT Technologies Ltd. 105 RiT Enterprise Solutions Installation Guide 5. Click Install. 6. Click Finish. RiT Technologies Ltd. 106 RiT Enterprise Solutions Installation Guide 7. After installing the SQL Client Components, the PV4E installation will continue as normal. Configuring MSDTC After the PV4E installation is completed, the MSDTC (only for windows XP, 2003 and above) setting must be configured in order to work in remote configuration. The MSDTC Settings should be set in the PV4E Server and the SQL as follow: 1. Go to Start Æ Run and insert the following C:\WINDOWS\system32\Com\comexp.msc 2. After the Component Services window is displayed go to Component Services Æ Computers Æ My Computer 3. Right click My Computer and select Properties. 4. Select the MSDTC tab 5. Press the Security Configuration 6. Set the Security as follows: RiT Technologies Ltd. 107 RiT Enterprise Solutions Installation Guide 7. Click OK to save your settings and reboot the server 8. After applying the settings for both servers (PV4E & SQL) you are ready to work in remote configuration. SQL Server 2005 Service Pack 1 Installation 1. Run the installation package to start the installation 2. Click Next. 3. Accept the License Agreement by selecting the check box and click Next. RiT Technologies Ltd. 108 RiT Enterprise Solutions Installation Guide 4. Leave all default selections and click Next. 5. Insert valid authentication info and click Next. RiT Technologies Ltd. 109 RiT Enterprise Solutions Installation Guide 6. Click Install. 7. Leave all default selections and click Next. RiT Technologies Ltd. 110 RiT Enterprise Solutions Installation Guide 8. Verify that all products were installed and click Finish. RiT Technologies Ltd. 111 RiT Enterprise Solutions Installation Guide Table of Figures Figure Figure Figure Figure Figure Figure Figure Figure Figure Figure Figure Figure Figure Figure Figure Figure Figure Figure Figure Figure Figure Figure Figure Figure Figure Figure Figure Figure Figure Figure Figure Figure Figure Figure Figure Figure Figure Figure Figure Figure Figure Figure Figure Figure Figure Figure Figure Figure Figure Figure Figure Figure Figure Figure 1 - Component Services Window ................................................................ 10 2 - My Computer Properties Dialog.............................................................. 11 3 - Security Configuration dialog................................................................. 11 4 - Security Configuration dialog for Win 2003 Server SP1.............................. 12 5 - Security Configuration dialog for Win 2003 Server SP2.............................. 12 6 - PatchView for the Enterprise Installation window...................................... 16 7 - InstallShield Wizard ............................................................................. 17 8 - InstallShield Wizard window .................................................................. 17 9 - PatchView for the Enterprise Setup - License Agreement dialog box ............ 19 10 - User Information dialog box ................................................................ 20 11 - Select Features dialog box .................................................................. 22 12 – Edit Datan dialog box......................................................................... 23 13 – Application Account dialog .................................................................. 25 14 – Choose Destination Location dialog box ................................................ 25 15 - PV4E InstallShield Wizard Complete dialog box ...................................... 27 16 - PatchView for the Enterprise Installation window .................................... 28 17 – InstallShield Wizard window................................................................ 29 18 – License Agreement dialog box ............................................................. 30 19 - User Information dialog box ................................................................ 30 20 – Application Account dialog – Interactive User ........................................ 32 21 – Application Account dialog – This user .................................................. 32 22 - PV4E Upgrade dialog box .................................................................... 33 23 - Setup Status dialog box ...................................................................... 34 24 - Registering components dialog box...................................................... 34 25 - InstallShield Wizard dialog box ........................................................... 35 26 - PV4E Sanity Analyzer dialog box .......................................................... 35 27 - PV4E Login window ............................................................................ 40 28 - RiT Security Warning message............................................................. 40 29 - PV4E Opening Screen ......................................................................... 41 33 –InstallShield Wizard Complete dialog box............................................... 42 34 - Preparing the InstallShield Wizard ........................................................ 43 35 - InstallShield Wizard window ................................................................ 44 36 - Setup Status dialog............................................................................ 44 37 - PV4E InstallShield Wizard Complete dialog ............................................ 45 38- Setup – Welcome Dialog Box ................................................................ 47 39- Setup – Confirm Removal Dialog Box..................................................... 48 40 - Setup – Removal Complete Dialog Box.................................................. 48 41- Autodesk MapGuide(R) Server Release Dialog Box................................... 49 42- Remove Autodesk MapGuide Server Dialog Box..................................... 50 43- Confirm Removal Dialog Box ................................................................ 50 44- Removal Complete Dialog Box .............................................................. 51 45- End User License Agreement Dialog Box................................................. 53 46- Installing the Software Dialog Box......................................................... 53 47- Installation Utility Dialog Box................................................................ 54 48- Autodesk MapGuide(R) Server Release Setup Dialog Box.......................... 55 49- Register Autodesk MapGuide(R) Dialog Box ............................................ 55 50- Installation Type Dialog Box ................................................................. 56 51- Select Installation Dialog Box ............................................................... 57 52- Autodesk MapGuide Server Dialog Box................................................... 57 53- Oracle Client Not Detected Dialog Box ................................................... 58 54- Confirm Installation Dialog Box ............................................................. 59 55- Installation Process Dialog Box ............................................................. 59 56-Installation Utility Screen Dialog Box ...................................................... 60 57- Autodesk MapGuide(R) SDF Component Toolkit Release Dialog Box ........... 61 RiT Technologies Ltd. 112 RiT Enterprise Solutions Installation Guide Figure Figure Figure Figure Figure Figure Figure Figure Figure Figure Figure Figure Figure Figure Figure Figure Figure Figure Figure Figure 58- Select Installation Dialog Box .............................................................. 61 59- CSMap Files Detected Dialog Box .......................................................... 62 60-Setup Complete Dialog Box ................................................................... 62 62- PV4E CAD Module Setup Dialog Box ...................................................... 63 63- Autodesk MapGuide Server Admin Dialog Box ......................................... 66 64- Properties Dialog Box .......................................................................... 67 65- Security Tab Dialog Box....................................................................... 68 66- Security Settings Dialog Box................................................................. 69 67 - IIS Manager..................................................................................... 72 68 - IIS Manager..................................................................................... 73 69 - PV4E Properties Window .................................................................... 73 70 - Application Configuration Screen ......................................................... 74 71 - Add/Edit Application Extension Mapping ............................................... 74 72 - Windows Framework Screen ............................................................... 75 73 - Add/Edit Application Extension Mapping screen ..................................... 75 74 – Dashboard Client Components Setup Wizard dialog box .......................... 77 75 – Select Installation Folder dialog box ..................................................... 77 76 – Confirm Installation dialog box ............................................................ 78 77 – Installing PV360 Dashboard Client Components dialog box ...................... 78 78 – Installing Complete dialog box ............................................................ 79 RiT Technologies Ltd. 113 RiT Enterprise Solutions Installation Guide Installation Checklist Item Completed (9) Pre-requisites SQL Server 2005 Standard Edition Service Pack for SQL SQL Configuration Change Web Security Settings Check Services required for Installation PV4E License Registration number PV4E Installation SP or Hotfix as needed Installation verification Sanity Analyzer Running PV4E RiT Technologies Ltd. 114