1
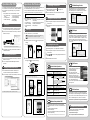
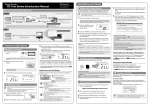
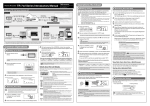
Thermo Recorder
TR-7wf Series Introductory Manual
© Copyright T&D Corporation. All rights reserved.
2015. 03 16504930012 3rd Edition
http://www.tandd.com/
Making Settings
What can TR-7wf Series devices do?
• In the auto-upload, the maximum number of readings which can be stored in
"T&D WebStorage Service" is 80,000. When this limit is exceeded, the oldest data will be
overwritten and deleted.
• Wireless LAN settings via operation of buttons on the logger can be made only when using
a wireless LAN access point supporting WPS.
• If your access point does not support WPS, use the T&D application
"TR-7wf/nw for Windows" or "T&D Thermo" to make wireless LAN settings. For details,
printed on the back of this paper.
see
• The time difference setting can be changed via "T&D WebStorage Service",
"TR-7wf/nw for Windows", or "T&D Thermo". The default time difference is as follows:
Serial number "No.4XXXXXXX" : GMT +1:00
Serial number "No.3XXXXXXX" : GMT -8:00
Graph Display
Download Data
Auto-upload of Recorded Data*1
Wireless LAN
Communication
Setup
Apply Settings
View with a Web Browser
Via USB
Checking Recorded Data
By making settings for auto-upload, it is possible to automatically
upload recorded data to the online "T&D WebStorage Service".
Via Cloud
TR-7wf Series
Operations Via Cloud
Setup and Data Download
Via Wireless
Setup and Data Download
TR-7wf Series
PC
Graph Display
TR-7wf Series
Smartphone
Tablet device
Graph Display
Setting up the Device
11 Connect sensor(s) to the device.
Image of TR-71wf
To ensure a proper connection, make sure that the sensor connector is completely
inserted.
21 Remove the battery cover and insert
batteries.
Within a few seconds, the display will return to measurement
mode to indicate the recording interval is set.
41 Start recording by pressing
Below are some examples of recording intervals and maximum recording times1
1 sec.
30 sec.
5 min.
15 min.
60 min.
About 2 hours
About 2 days
About 27 days
About 83 days
About 333 days
In order to stop a recording session, press and hold the <REC/STOP> button until the
mark disappears from the display.
Other than the measurement display, the following is displayed on
the LCD monitor.
31 The measurement will be displayed on the LCD screen.
Under Normal Conditions:
During Sensor Error (no sensor connected /
improper connection / damaged):
Wireless LAN Connection Status
ON : Connected to the wireless network. (Signal strength: 1
to 3 bars)
BLINKING : Unable to connect to the wireless network.
OFF : Wireless LAN settings not made.
Internet Connection Status
ON : Connected to the Internet.
BLINKING : Unable to connect to the Internet.
OFF : Auto-upload is set to "OFF".
Displayed Measurement Channel
Mobile Device Communication Possible
Starting Recording
• Upon the start of a new recording session all stored data will be deleted from the device.
• Recording Interval settings cannot be changed while a recording session is in progress.
Stop recording first and then change settings.
• During recording, the power cannot be turned off.
11 Click the <INTERVAL> button
to display the current
recording interval.
21 Press-and-hold the <INTERVAL> button until the display flashes.
31 With each pressing of the <INTERVAL> button the recording
interval time will change. When the desired interval appears, stop
pressing the button.
If you already have your User ID, go to 3 below.
31 Login by entering the registered User ID and Password.
41 Clicking the [Account] button will take you to the Account
Management page.
The registration code can be found on the supplied Registration
Code Label.
61 After data is sent to the "T&D WebStorage Service", either by
31 If the setup is successfully completed, the
mark on the LCD
display will turn ON.
auto-upload or by pressing the <REC/STOP> button on the
device, the added TR-7wf Series device and its measurements
will appear in the [Current Readings] tab page.
41 Click the <INTERVAL> button
twice to display the current
upload interval.
51 Press-and-hold the <INTERVAL> button until the display flashes.
61 With each pressing of the <INTERVAL> button the upload interval
and holding the <REC/STOP>
button until the
mark
appears in the display.
Details about the LCD Display
* Make sure not to mistake + / -.
* Always use new batteries.
21 Follow the directions as they appear to get a User ID.
If
keeps blinking:
It means the device is unable to connect to the wireless network. After adjusting the
distance between the device and the access point, start from step 1 again.
*1: To auto upload recorded data to the "T&D WebStorage Service", it is necessary to have Internet access via wireless LAN and a T&D WebStorage Service User ID.
The "T&D Data Server" application can be used to auto upload data to your own PC rather than to "T&D WebStorage Service". (See
printed on the back of this paper.)
*2: A mobile device with wireless LAN capability is required for direct communication with the TR-7wf series device.
Common Operations
http://www1webstorage-service1com/
registration code for the target TR-7wf Series and then click the
[Register this device] button.
<POWER> and <DISPLAY>
buttons together until
appears on the LCD screen.
For details on the wireless LAN access point, contact the manufacturer of your access point.
Wireless
Communication*2
(Wireless LAN)
your PC or mobile device.
51 Select [Device Registration], and enter the serial number and
11 Press-and-hold the
21 Set your wireless LAN access point to "WPS" mode.
USB
Communication
11 Access "T&D WebStorage Service" from the web browser on
Wireless LAN Setup using WPS Possible
time will change. When the desired interval appears, stop
pressing the button.
If you wish NOT to use the auto-upload feature, select "OFF".
Within a few seconds, the display will return to measurement
mode to indicate the upload interval is set.
Below are some examples of upload intervals and the corresponding
estimated battery life1
In general, the shorter the upload interval, the shorter the battery life.
Upload Interval
1 min.
10 min.
1 hr.
12 hrs.
Battery Life
About 10 days
About 2 months
About 1 year
About 1.5 years
* All estimates are based on operations carried out with a new battery and are in no way a
guarantee of actual battery life.
* The auto-upload interval can also be changed during a recording session.
Installing the Device
Install the device to the actual place it will be used.
To perform auto-upload, make sure to install the device at a place
that has wireless LAN Internet access.
Recording Status
ON : Recording in progress BLINKING : Waiting for programmed start
OFF : Recording stopped
Amount of Recorded Data in Device
Low Battery Level
* Please change the batteries as soon as you see this mark. If not, the device enters
sleep mode ([SLP] appears on LCD) and stops all operations. If the batteries are further
left unchanged, all previously recorded data will be lost.
Indicates Auto-upload Interval when using <INTERVAL> button.
Indicates Recording Interval when using <INTERVAL> button.
* Check the device screen to make sure
is ON. Recorded data will not be uploaded
when recording is not in progress.
* Try sending data to "T&D WebStorage Service" again by pressing the <REC/STOP> button
on the device.
* See "Checking Connection Status" in , and check if the device has a wireless LAN connection.
If the display of measurements is not refreshed:
We recommend making the recording interval shorter than the auto-upload interval. If the
recording interval is set to longer than the upload interval, the same measurement is displayed
until the next recording occurs and the new data is uploaded.
If you cannot find the registration code:
The registration code can also be found by using the software "TR-7wf/nw for Windows" via a
USB cable connected to a PC.
See Operations Via USB on the back of this paper.
View Data from other than a Web Browser
Recorded data which was sent to the "T&D WebStorage Service"
can also be viewed from "T&D Thermo" and/or "T&D Graph".
Saving Auto-Uploaded Data
Recorded data which has been uploaded to the
"T&D WebStorage Service" can be saved to a PC by using
"T&D Graph" and accessing "T&D WebStorage Service".
For details, please see
printed on the back of this paper.
Changing the Settings
Wireless LAN or USB Communication in Progress
Recording Mode
ENDLESS : Upon reaching the logging capacity of 8,000 readings, the oldest data is
overwritten and recording continues.
ONETIME : Upon reaching the logging capacity of 8,000 readings, [FULL] appears on the
LCD display and recording automatically stops.
* Use "TR-7wf/nw for Windows" or "T&D Thermo" to change the recording mode.
(Cannot be changed by buttons on TR-7wf.)
If measurements are not displayed:
By using the "T&D WebStorage Service", it is possible to change all
the settings except Wireless LAN settings.:
Internet
Wireless LAN
Access Point
Check Wireless LAN Connection Status
Checking Connection Status
By pressing the <REC/STOP> button, recorded data will be sent to "T&D WebStorage Service".
If the transmission is successful,
will still be ON even after communication is complete
and
turns OFF.
is blinking : Wireless LAN connection failed. Try adjusting the position of the device or its
distance from the access point.
is blinking : Internet connection failed. Confirm whether your access point can connect
to the Internet.
Distributed by MicroDAQ.com, Ltd.
The changes in settings will be applied when the device communicates with the
"T&D WebStorage Service". To apply the changes immediately, press the <REC/STOP>
button on the device after settings are completed.
www.MicroDAQ.com
(603) 746-5524
Operations Via USB
Operations Via Wireless
It is possible to make device settings and download recorded data
via our software "TR-7wf/nw for Windows". Data downloaded can
then be viewed in a graph for analysis by using our software
"T&D Graph".
It is possible to make device settings, download recorded data, and
view recorded data directly from your mobile device.
Primary features of "TR-7wf/nw for Windows" include :
• Start / Stop Recording
Settings
• Auto-upload Interval
• Wireless LAN Settings
• Device Name, Group Name, and
Channel Name Settings
• Downloading and Saving
Recorded Data
• Warning Settings
Setting Up
11 Download and install the software "TR-7wf/nw for Windows"
from http://www.tandd.com/support/download/software/
21 Open "TR-7wf/nw for Windows" and connect your device via
USB to the computer.
To carry out direct communication with a TR-7wf series device, it is
necessary to download and use our application "T&D Thermo".
Direct communication may not work properly with some Android devices.
Primary features of "T&D Thermo" include :
• Start / Stop Recording
Settings
• Auto-upload Interval
• Wireless LAN Settings
• Recorded Data Graph
Display
• Device Name, Group Name, and Channel
Name Settings
• Downloading and Saving Recorded Data
• Uploading Downloaded Data
• Warning Settings
Downloading Recorded Data
11 Open the application, and click the
icon and go into
[Download Recorded Data].
21 Follow the directions to communicate with the TR-7wf series
Viewing Recorded Data in Graph
11 Open the application, and place a check mark next to the data
you wish to view.
21 Select [Graph] from the menu being displayed at the bottom of
Setting Up
T&D Graph
11 Install "T&D Thermo" to your mobile device.
"T&D Graph" is a software program which enables the viewing of
recorded data in graph form, no matter whether the data is stored on
a local computer or at "T&D WebStorage Service". Even if the data
you wish to view is divided into multiple files, it is possible to merge
them into one graph by specifying the device name and/or time
period. It is also possible to save the graph and data info as displayed
in "T&D Graph".
21 Open the application, and click the
icon and go into [Device
Settings].
Uploading Recorded Data
* All screenshots shown are from iPhone.
For details about operations please see the "Help" menu in the software.
It is possible to send downloaded data to the
“T&D WebStorage Service” or to a designated e-mail address.
31 After the setup is complete, place the device to the desired
11 Open the application, and place a check mark next to the data
measurement location.
you wish to send.
21 Select
Downloading Recorded Data
USB to the computer.
21
Click on the [Download Recorded Data] tab to start the
download.
or
the screen.
31 Press and hold the <DISPLAY> and <INTERVAL> buttons on the
data logger until
from the menu being displayed at the bottom of
31 Select the destination for the data.
T&D Thermo
Device Button Operations
Viewing Recorded Data in Graph
ON
11 Download and install the software "T&D Graph" from
21 Open "T&D Graph" and then access the data you wish to view.
Download from : http://www1tandd1com/support/download/software/
turns on (without blinking).
BLINKING
http://www.tandd.com/support/download/software/
T&D WebStorage Service : http://www1webstorage-service1com/
the screen.
For Android devices: Search for "T&D Thermo" in the Google Play Store
For iOS devices: Search for "T&D Thermo" in the App Store
11 Open "TR-7wf/nw for Windows" and connect your device via
"T&D WebStorage Service" is a free web-based storage service
provided by T&D Corporation. By uploading recorded data to
"T&D WebStorage Service", it is possible to access your important
data from anyplace in the world at any time you wish.
device and download data.
Check
USB Communication Cable
T&D WebStorage Service
"Press-and-hold" means to hold the button down for about two seconds.
Power ON/OFF
Press-and-hold the <POWER> button. (Cannot power
OFF when a recording is in progress.)
Start/Stop Recording
Press-and-hold the <REC/STOP> button.
Press-and-hold
For iOS Users:
Return to the Home screen and go to Settings > Wi-Fi.
From the list shown, choose your data logger and establish a Wi-Fi network connection.
Recording Interval (
Upload Interval (
) / Pressing the <INTERVAL> button will cycle the interval
) selection between the recording interval (
) and the
upload interval (
). To change the interval time,
press-and-hold the <INTERVAL> button for two seconds
or more while the selected interval (
or
) is
displayed. Note, however, that it is not possible to make
any changes to the recording interval settings during
recording (while
appears).
"T&D Thermo" enables the use of mobile
devices for making device settings to and
viewing data recorded from
TR-7wf Series data loggers.
When used in conjunction with
"T&D WebStorage Service", convenient
functions can be carried out via the
Internet such as changing settings in the
TR-7wf Series and viewing data uploaded
to the "T&D WebStorage Service".
The "T&D Thermo" app is available for download from the Google Play
Store or App Store.
Communication with
Press the <REC/STOP> button to send data to or apply
"T&D WebStorage Service" settings in "T&D WebStorage Service".
For details about operations please see the "Help" menu in the software.
Channel on Display
Press the <DISPLAY> button to switch the display.
Wireless LAN Settings
using WPS
Press-and-hold the <POWER> button and the
<DISPLAY> button together.
Direct Communication
with Mobile Devices
Press-and-hold the <INTERVAL> button and the
<DISPLAY> button together.
"T&D Data Server" is a program for your PC, which receives and stores
data recorded by TR-7wf/nw Series data loggers to user-specified folders.
When you wish to have recorded data automatically uploaded to your server
rather than "T&D WebStorage Service", please use "T&D Data Server".
41 Return to the application and make desired settings.
For Android Users:
Click your data logger on the application screen
and establish a Wi-Fi network connection.
T&D Data Server
Download from : http://www1tandd1com/support/download/software/
Wireless Setup without WPS
For wireless setup without using WPS, use the T&D application
"TR-7wf/nw for Windows" or "T&D Thermo" and make wireless LAN
settings.
You will need the following information.
• Network Name (SSID)
• Security (WEP 64bit/128bit, WPA-PSK (TKIP), WPA2-PSK (AES))
• Password (Network Key)
* If you are unsure of the above information,
please see
access point user’sLtd.
manual.
Distributed
by your
MicroDAQ.com,
Troubleshooting and Detailed Info
Support information is available on the T&D Website.
Please access the following URL:
http://www1tandd1com/support/
FAQs: http://www1tandd1com/m/smartdevice/faq/7wf/
www.MicroDAQ.com
(603) 746-5524