1
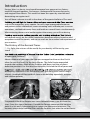
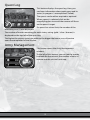
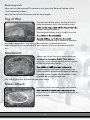
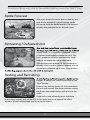
MANUAL
Contents
System Requirements......................................2
Installation ...........................................................2
Segmented Movement & Control
Zones............................................................... 18
Introduction ........................................................3
Impetuous Temper ..................................... 19
Starting the Game.............................................8
Magic............................................................... 19
Main Menu .......................................................8
Army Management ................................... 20
Campaign .........................................................8
Artifacts .......................................................... 20
...........................................9
Leveling Up ................................................... 21
Game Interface...................................................9
Heroes ............................................................. 21
Message Windows .........................................9
Results Screen .............................................. 22
End Turn ......................................................... 10
Intermission Interface................................... 22
Army Panel .................................................... 10
Selecting a Mission..................................... 22
Reserve Panel ............................................... 10
Army Control ................................................ 23
“Forward”, “Backward”, and “Skip”
Arrows............................................................. 11
Unit Improvement...................................... 23
For Experienced Players ............................... 24
Selected Unit Panel .................................... 11
Terrain Bonuses ........................................... 26
Hex Grid.......................................................... 12
Movement Mechanics............................... 27
Banner Mode ................................................ 12
Options............................................................... 28
Camera Position .......................................... 12
Hot Keys ............................................................ 30
Mission Map.................................................. 12
Multiplayer........................................................ 31
Quest Log....................................................... 13
LAN or Direct Connect .............................. 31
Army Management ................................... 13
Hotseat ........................................................... 32
Controls.............................................................. 14
Credits ................................................................ 33
Troop Deployment .................................... 14
Technical Support ..........................................36
Fog of War...................................................... 15
Movement ..................................................... 15
Melee Attack................................................. 15
Ranged Attack.............................................. 16
Covered Attack............................................. 16
Aviation .......................................................... 16
Battle Forecast.............................................. 17
Retreating / Defeated Unit ...................... 17
Resting and Recruiting.............................. 17
Capturing Towns ......................................... 18
1
System Requirements
Operating System
Windows® XP
Processor
1.5 GHz Intel® Pentium® 4 or 1.5 GHz AMD Athlon™ 2000+
(2.4 GHz Intel Pentium 4 or 2.2 GHz AMD Athlon 3500+
recommended)
Memory:
512 MB (1 GB recommended)
Hard Disk Space:
3 GB available
DVD-ROM drive:
8X Speed or faster
Graphics:
128 MB NVIDIA GeForce® FX 5700 or ATI® Radeon 9600
(256 MB NVIDIA GeForce® FX 6800 or ATI Radeon 850XT
recommended)
Sound:
DirectX® 9.0c-compatible sound card
DirectX:
DirectX 9.0c (included) or higher
We recommend that you update your graphics card driver.
Installation
1. Start Windows. Exit all other applications.
2. Insert the Fantasy Wars disc into yourDVD drive.
3. If AutoPlay is not enabled, click on the Start button on your Windows taskbar.
If you are using Windows XP: click on Run and type D:\Setup and click on OK.
If you are using Windows Vista: type D:\Setup in the “Search” box and click on
“Enter.” Note: If your DVD drive is assigned to a letter other than D, substitute
that letter.
4.
Fantasy
Wars.
Uninstalling Fantasy Wars
To uninstall the game, use the “Add/Remove Programs” option in your Windows
Control Panel.
2
Introduction
Fantasy Wars is a classic, turn-based hexagonal war game set in a fantasy
world of Human kingdoms, Orc barrens, underground Dwarven fortresses,
and magical Elven forests. This world has been torn apart by a terrible and
devastating war against evil.
You will have a chance to walk in the shoes of the great chieftain of Orcs and
such as the mercenary army captain. You will siege impregnable fortresses
and protect civilian settlements, cover retreating units and take part in rescue
operations, raid behind enemy lines and battle on several fronts simultaneously.
When entering these crucial battles against the enemy, you will use daring
will depend mostly on the skillful interactions between military branches and
competent use of the terrain, and not so much on the number and experience of
your warriors.
The History of the Ancient Times
“…Cry, Eolia, the mistress of the world, for your beauty will be cut by your
sword …”
of apocrypha, volume 2.
About a thousand years ago, the Humans managed to drive out the Orcish
tribes far into the South, to the Verks Wastes. The Eolia Empire expanded
towards the northern lands of the Dwarves and down into the southern
defensive positions. For the next four centuries, Eolia led the life of peace and
developing. Numerous cults worshiping gods got along with various magic
schools. Hundreds of thousands of slaves were building aqueducts, temples,
and sublime palaces.
The peaceful life of the Empire was soon shattered when a star fell from the
skies. From this sign of darkness, Farrakh the Demon came into the world to
claim it as his own. A devastating war swept over the central provinces. The
Humans sought help from the Elves and the Dwarves, but even the united forces
3
of three races could not defeat this threat. At a critical juncture, General Marcus,
who commanded the Human army, personally led an attack against the enemy
and managed to slay Farrakh but at the cost of his own life.
Eolia withstood, but it cost them dearly. After the victory, constant rebellions
of slaves started to take place in the distant provinces as well as the
establishment of protectorates. The main resources of the Empire were spent
on the restoration of the capital, giving no thought towards the small towns
provinces that led to the decline of the greatest kingdom.
The priests of the Solitarius cult, which was attracting more and more believers,
proclaimed General Marcus a saint. Marcus’s sword, stained with the saint’s
blood, became the symbol of a new religion.
The History of Kingdom’s Creation
“…And from the North they came, proud and brave knights. And they founded
kingdoms of their own on the ruins of the old world, and their people came with
them. And they started to cultivate the soil, and breed the cattle. Towers rose
over the fortresses, and the holy land began to shine in its glory …”
– Court-chronicler of King Sigismund II.
The kingdoms were founded on the territory of the former Eolia Empire circa
internal wars, exorbitant luxury, and lack of supplies. New Lords came down
from the northern boundaries – squads of Tirolingians, lead by brilliant and
noble knights (Eolians referred to them as savages and barbarians).
Having easily defeated the “invincible” legions, Tirolingians captured the capital
and declared all the provinces to be under the control of a new religion. The
religion with them. Almost 200 years of murderous religious wars passed since
that time, and the Saint Marcus Church became the one true church, and the
boundaries of the kingdoms became what they are now.
Derenhalle
The kingdom of Derenhalle lies to the South of the former Empire territories. The
scenery and the climate of this land are incredible. Derenhalle could have been
the best place on earth if it were not for the constant threat of the Orcish raids.
from the Verks Wastes, but the green-skins still manage to get deep into the
country, annihilating everything in their way. This is why every adult male in
Derenhalle undergoes military training and every village resembles a fort.
4
Freiburg
“Me, a miserable monk, I am bowing my head to this stone warrior, whose glory,
although have risen up high, will never fall.”
– Advitius, monk of the Talimian order -.
High walls with even taller pinions seem to grow from the very rocks they stand
the distance. The leaf bridge made of the blackened wood is always elevated by
an ancient ritual. Freiburg is ready to counter enemy attacks any day or night– the
fortress keeps ward for the lands of the King and the Holy Church as in the elder
Leranse
To the North of Derenhalle lies Leranse, the former central province of the Empire
and the most powerful of all the new kingdoms. It is the center of high and
be the best army in the world. The main Inquisition fortress is also located here.
The residences of the King and the Pope are located in its capital Verson.
Verson – the city of kings
“Truly great and glorious is the city of Verson, the capital of Leranse. So many
wise kings ruled in it, so many genuine knights feasted in its halls, so many saints
preached in its churches, that its walls and its stones became the stronghold of
holiness, knighthood and monarchy.”
Oh, Verson! This city is rightfully considered to be one of the world wonders!
Where the Versa and Saine rivers merge, a town of kings towers over the hills
– the ancient capital of the Gillangian dynasty. This town was built upon the ruins
of four centuries, and now its beauty is legend. The town starts from the outer
wall, which was built during the recent calm years, and that is why it is not that
high, but it is beautiful – bleached white, it encircles the town like a bride’s belt.
Merchant with red-brown tile roofs, multicolored signboards and shops start their
rows right behind the wall.
used to be white, but now the plaster has faded. However, their beauty is not
most precious thing of Verson – the Saint Marcus Cathedral.
The Cathedral is the most beautiful building ever built by the Humans (It is
prohibited to compare the Cathedral with the academy of heretic mages in
Sylent– Priest’s note). Its white walls made of pure marble, its silver stained-glass
to Marcus: let us talk about the Cathedral as a man-made wonder created ad
5
Gloriam. The residence of the Leranse Kings, the Lariv castle, is located near the
Cathedral. This castle is by far the most powerful and it has the greatest walls
and towers. For ten generations now, the Gillangians have ruled the country
from this castle. Long live their family!
Mirralia
Plains change into woods on the northwestern frontier of Leranse. The lands
of the Great Dukes of Mirralia start here. Ralin, the capital of the dukedom, is
renown as the town of arts and sciences. The best artists, poets, and scientists
work in this town. Just beyond its city limits, in the woods and on the coast,
gangs, pirate conclaves, and mercenary armies are doing very well with their
‘businesses’.
The Free City of Sylent
On the coast between Mirralia and Leranse, like between the beetle and the
block, lies the free town of Sylent. Gold is the most precious thing. It is the town
where one can buy and sell anything. This is the town whose treasures have
been attracting close attention of the neighboring countries for a long time.
Most importantly, the walls of Sylent are guarded by the best mercenary army.
Secondly, the Magic Academy is located here. It is the last remaining school of
magic where the most powerful and the bravest magicians, those who survived
the Priest’s hunt, study and teach. These two reasons are serious obstacles for
the Leranse Kings who are eager to seize this free town.
Sylent
“If you had visited Sylent, then you saw all towns of the world!”
– Haigred Silver-Tooth
Everyone who climbs the highest tower of the Academy will witness a fabulous
view over Sylent.
From the tower, one will see the ever-busy port; where masts and heaps of
goods are competing with each other in height, where the bubble of the sea
place for the night. One can also see the main square, always full of various
people, half of them being pro-pickpockets; the trade council building, where
the proceedings always take place and the speeches can always be heard;
endless rows of shopping stalls, where one can buy something vital for almost
nothing or pay a fortune for something trivial; and the guilds and workshops,
manufacturing anything one can imagine – from candies to gelatin capsules
Only in Sylent one can see everything at once, and only here things are buzzong
day and night, regardless of what is going on.
6
Larid, Tersh and Parsa
Larid, Tersh, and Parsa lands spread over the North and West. These kingdoms
can only boast that their way of life has not been changed for over two centuries
here. Hunts are followed by feasts, feasts are followed by tournaments, and
tournaments are followed by peasant rebellions. As for the rest, the politics of
these countries depends on their elderly neighbors.
Church and Magic
“A mage ( magician, conjurer, witch doctor) is a Human, either dowered or
pursuant to prolonged restraint and meditations, that has mastered the forbidden
animated and non-animated, and can change them with his inner power.”
Practical instruction of Father Antonius how to battle
the embodied and non-embodied Enemy.
Times of the Empire
The magic was developing back in the days of the pagan empire. Already back
mages were pagan priests who practiced this knowledge within their rituals.
However, the Priests of the Solitarius cult considered that practicing magic
was something undeserving and unnatural. The deed of Saint Marcus, who
professed the faith in Solitarius, brought about the church consolidation.
Moreover, many accused mages of the fact that it was them who released
Farrakh into the world. Since that time, the magic was divided into holy
(healing, blessing, and protection) and elemental spells. Practicing any unholy
magic was becoming more and more dangerous.
Times of Kingdoms
of the clergy, those who considered the new version of the religion brought by
powerful; although not quite as powerful as the authority of the Holy Throne.
The other priests accepted this new canon, which also included a postulate that
there is God magic and there is Demon magic.
purity of faith, but also hunted down and eliminating witches, mages and
the Pope himself! Hundreds of years of manhunt did not do magic justice.
Although you can still encounter a witch or a mage away from the capitals,
School in Sylent.
7
Starting the Game
Main Menu
Campaign – Start a new campaign or load a
saved campaign game.
Single Mission – Start a new single mission or
load a saved game.
Multi-Player – Create an online game, join an
online game, or start a “Hotseat” game (several
players on one computer).
Tutorial – Here you will be taught the basics of
the game.
Options
For a detailed description of the options, see page 28.
Credits – Here you will see everyone who helped create Fantasy Wars.
Exit – Quit the game.
Campaign
Click the “Campaign” button, and then choose one of the following options:
•
Continue the campaign game
•
Start a new campaign
•
Load a saved game.
If you have no saved games, “Continue” and “Load Game” are not available.
To launch a new campaign, click on” New
Campaign” and then select an available
campaign. Two campaigns are initially available:
Humans and Orcs. If you complete these two
campaigns, you unlock a third – the Alliance
Campaign.
The campaign description is displayed at the
bottom of the screen. Click “Start” to launch the
selected campaign.
Complete the Humans and Orcs campaigns
to unlock the third campaign.
8
Select a mission by clicking on any crossed
swords icon on the map.
the mission and its objectives.
level enemy troops.
Game Interface
hexes.
Only one ground-based unit can occupy a hex at a time
(or one ground-based and one flying unit).
Message Windows
Messages, which contain tips and important
information about your progress in the mission,
appear in the upper part of the screen. .
9
End Turn
The “End Turn” button is in the top-right corner.
After your units have completed all of their
orders, click on this button to end your turn.
Army Panel
This panel displays the list of your army units.
orders that have been accomplished by a unit.
markers on the unit’s icon: the green one means
the ability to move, while the red one means the
ability to attack. Dimmed markers mean that the
action is not available during the current turn.
There are additional control buttons under the Army Panel.
Reserve Panel
This panel contains the units that have not yet
During the mission, you can deploy reserve
units near friendly towns (if allowed by the
mission restrictions).
You can return to the game by switching to the Army
Panel or by clicking on the “End Deployment“ button.
10
“Forward”, “Backward”, and “Skip”
Arrows
You can toggle through the units on the map
with these arrows. The arrows allow you to go
to the next unit, go to the previous unit, or skip
the current unit.
Selected Unit Panel
The selected unit is displayed on the bottom left
panel. Here you can see:
•
Unit’s name and class
•
Current experience level
•
Unit’s hit points
•
Type of terrain the unit is currently on
•
“Level Up” button
•
“Halt” button
•
“Recruit” button
Panel of the Unit under the Cursor
Similar information is displayed on the bottomright panel for the unit under the cursor. It is
worth checking this panel before attacking an
enemy.
11
Hex Grid
This button allows you to toggle the hex grid on
The grid will help you in planning your next
movement.
Banner Mode
This button allows you to switch between
banner modes. The color of the unit’s banner
indicates which side it is on. The banner also
shows whether the unit is able to move, attack
or cover its neighbor.
You can display banners for all the units, for
the units under the cursor, or you can switch
Camera Position
This button allows you to switch between the
camera modes without using the scroll wheel.
Click it once to completely zoom-in the camera
using the current focus point. Click it a second
time to set it to the medium zoom. Click it a
third time to zoom out completely.
Mission Map
This button toggles an map overview of your
mission.
The map displays all the cities and villages,
quest locations, visible units, and the Fog of
War.
12
Quest Log
This button displays the quest log. Here, you
can learn information about each quest and its
status (in progress / accomplished / failed).
The quests can be either required or optional.
When a quest is selected, click on the
magnifying glass icon and the camera will focus
on the quest’s target.
If a quest has a time limit, the number of the
remaining turns is also displayed.
The number of moves remaining for each victory rating (gold / silver / bronze) is
displayed on the top-left of the quest log.
The higher the victory rating you achieve, the bigger the bonus you will receive
upon the completion of the mission.
Army Management
This button opens the Army Management
window.
To the left of this button, you can see the money
available for the mission, the number of units in
reserve and the mission’s unit cap.
13
Controls
Troop Deployment
•
To place the selected unit on the map, left-click
a hex highlighted in yellow. If you change your
mind or put the unit in a wrong location, you
can return it to the reserve by clicking on it
again.
as a ground-based unit, hold down the “SHIFT”
key and left-click.
The hexes available for deplying troops are highlighted in yellow.
After deploying the troops, click on the “End Deployment” button to launch a
mission.
All the order are given by left-clicking. Right-clicking
an object reveals its relevant information.
Unit Properties
Right-clicking a unit (or its icon) will open the properties screen, which contains
the following information:
•
Current experience level
•
Hit points
•
Artifacts (or their absence)
•
Protection
•
Type of movement and speed
•
Range of sight
•
All available types of attacks
•
Perks (special abilities)
•
Tips about the unit’s purpose
Clicking the “Description” button reveals information not only about the unit but
also about the world of Illis.
14
Renaming units
Most units can be renamed. To rename a unit, press the “Rename” button in the
“Unit Properties” window.
Note: Names of main characters cannot be changed.
Fog of War
The dark part of the map is the “fog of war.” It
hides the enemy’s units. Each of your army’s
certain distance around it.
The distance in hexes that is “visible” to a unit
“visibility” distance and its chance of spotting
any hidden opponents. Any hex on the map that is “uncovered” at the
beginning of the turn or during that turn, remains that way until the end of the
turn.
Movement
Select a unit (click the unit’s icon in the list of
walk, the surrounding area where it can move
will be highlighted in green.
markers on the unit’s icon: Green means the
ability to move; red means the ability to attack.
Dimmed markers mean that the action is not
available during the current turn.
Left-click a green hex to make the unit move there.
Melee Attack
In order to attack an enemy, your unit should
enemy (into the adjacent hex) and then give an
order to attack.
15
Left-click to issue orders to move and to attack.
Ranged Attack
Archers and other units capable of ranged
attacks can strike enemies from a distance.
will not be able to retaliate against the attacker.
The enemies that the selected unit can attack are highlighted in red.
Covered Attack
Aarchers standing on a hex adjacent to a friendly unit can provide cover to that
unit. If the covered unit is attacked, the archers will shoot at the attacker.
Flying hunters are also able to support friendly units.
A unit can support another friendly unit only once per turn.
banner.
Aviation
Flying units can move considerably faster than
ground-based ones. However, they are not
strong enough at the initial levels to destroy the
enemy on their own.
targets BELOW them (occupying the same hex).
Flying units can only be attacked by archers,
16
To select a flying unit, click its hex while holding down the“SHIFT“ key.
Battle Forecast
When you hover the cursor over an enemy unit
that can be attacked, a tip will appear under
the cursor with the battle forecast. The forecast
displays the potential losses for both sides.
Retreating / Defeated Unit
severe losses, it is assigned a “defeated” status
(a broken shield appears above the unit). The
unit’s properties become considerably lower
and the unit becomes more vulnerable.
The unit becomes broken if it has nowhere to
retreat. If the unit that is broken already tries to
retreat but is blocked on all sides, it surrenders.
Resting and Recruiting
healed. To heal a unit, select it and click on the
“Rest” button.
If there is no enemy nearby, all the wounded in
the unit will recover. The more enemies nearby,
the fewer wounded warriors will return to the
ranks.
If the unit is near a friendly town and there
is no enemy nearby, you will be able to hire new recruits to replace the killed
warriors. (If you have enough money to pay for them.)
17
Recruits will decrease the total experience level of the unit.
Capturing Towns
However, you should remember that all
settlements provide a defense bonus. Even
weak Goblins can be a serious theat when
defending from behind walls.
If you have managed to kill an enemy unit or
make it retreat, you can capture the town. To do
so, just let any ground-based unit enter the
town.
In a war, an army often collects bountiful loot
from the fortresses it captures.
Also (if mission restrictions allow it), you can
deploy troops from the reserve near a captured
town.
Flying units cannot capture towns.
Segmented Movement & Control Zones
Each unit controls a zone around it. Therefore,
it is normally impossible to pass an enemy
without stopping near him.
Scouts using the “segmented movement”
special ability are able to pass by an enemy.
Such units can also spend their movement
points gradually rather than all at once. This
means that a unit can approach an enemy,
18
Impetuous Temper
Certain units (including Human knights) are
characterized as impetuous. This means that
after completed its movement, the unit will rush
to attack any enemy within its reach, without
waiting for an order.
Magic
When selecting a wizard, a list of available
spells will appear on the left above the
“Selected Unit Panel.”
The wizard can cast his spells at any distance.
It is essential, however, that the target is not
covered by the “fog of war.”
The wizard can attack or cast only one spell per
turn. Each spell can be used a limited number of
times (indicatd by a number on the icon).
After a mission, used spells are automatically
replenished.
You can use the following spells:
•
Attack spells
•
Heal spells (healing a unit without spending a turn to take a rest
•
Spells improving friendly units’ properties
•
Spells impairing enemies’ properties
•
Summon spells (summoning various creatures)
•
Area spells (those covering a 7-hex area)
Right-click a spell icon to show detailed spell properties.
19
Army Management
During a mission, you can acquire new troops
and transfer artifacts (see details on artifacts
below). Here you can see:
•
Filter Panel
•
Artifacts Panel
•
Army Units and Reserve Units
•
Selected Unit Information
panel will help you to sort them by their branch.
If you get more troops than allowed by the
mission’s unit cap, you must leave some in
reserve.
Switch to the army management window and
select the unit you would like to purchase. If
you have enough money to purchase it, click
the “Buy” button. The unit will appear in your
reserve list.
To put units from the reserve onto the map, close the management screen,
switch to the reserve list panel, select a unit, and place the unit by clicking a
yellow hex.
Your troops can only be deployed near a town belonging to your army.
Artifacts
In the course of the mission, your troops can
properties and make certain spells available.
A unit can only carry one artifact. A hero can carry three.
20
Unused artifacts are placed on the left part of
the army management screen.
During a mission, you can transfer artifacts
between units for a fee. Between missions, you
can transfer artifacts free of charge.
Right-click an artifact to display its properties
and description.
Leveling Up
experience. This experience is used to raise their level.
A normal unit can be upgraded to level 5.
experience. The unit’s combat characteristics increases automatically and the
“Choose a New Perk” button becomes available.
Click on the “Select Ability” button (which appears on the selected unit panel in
the unit properties or army management screen) to switch to the “Select New
Abilities” screen.
The properties of the chosen ability or spell will appear on the left side of the
screen while the right side will contain its description.
The unit properties screen will provide the detailed description and
properties of the abilities. Right-click the ability icon to view them.
Heroes
In addition to common units, your army has heroes, who are much stronger
than regular warriors.
Heroes can be upgraded up to level 10.
21
A hero is always alone, but his abilities allow
A hero lost in a battle is considered to be
severely wounded. He will not be able to take
part in combat until the end of the mission, but
he can still participate in dialogs.
Losing your army’s commander (key hero) will
cause you to fail the mission.
Death of your army's commander (key hero) causes mission failure.
Results Screen
After a successfully accomplished mission, you
will see a results screen featuring your statistics.
Your victory rating (gold, silver, or bronze)
awarded.
If you are not happy with the result, you can
replay the mission.
Intermission Interface
Selecting a Mission
Here, you can select a new mission and see the
statistics of previously accomplished missions.
22
Army Control
After selecting a new mission, you will be able
to learn about its quests and prepare the army
for the upcoming battles.
If you have too many unnecessary units, you
can disband them and recove half of their cost.
All those wounded and killer will automatically be recovered between the missions without any loss of experience.
new perks during the mission, you can do this now in the army management
window. Once prepared for the mission, click the “Continue” button to launch it.
Unit Improvement
When preparing for the new mission, you can
improve your units by changing their class
(if you have enough money, of course). For
example, you can turn peasants into militia, or
militia into pikemen.
A unit will retain all the previously selected abilities after changing its class.
23
For Experienced Players
Only for those who want to know the details of the game mechanics
Unit Features
Mobility
•
•
Move Points – the number of move points
Movement Type – a discrete feature that determines how well a unit
Movement Types:
•
Wheeled – moves slowly everywhere except on roads and open
terrain
•
Mounted – moves slowly everywhere except on roads and open
terrain
•
Foot – acceptable rate of movement through the woods, hills, and
rocks
•
•
•
All Terrain
Big Foot –
Flight
•
•
Defense Skill – the numerical value of protection
Attack
— any unit usually has 1 or 2 attack types available
Attack Characteristics:
•
•
Attack Skill – the numerical value of the attack force
Attack Type – a discrete feature of the attack that determines the
application conditions
Attack Types:
•
Melee and Air Melee – a melee attack, the basic attack type at a
distance of 1
•
Skirmish – an attack at a distance of 1, against which melee units do
not retaliate
•
Missile
retaliate against it
•
Charge – an additional attack at a distance of 1 available for cavalry; it
is only applied during the attack
•
Stone Shell, Bolt Shell – an attack at a distance of 3, which cannot,
24
attack; melee units do not retaliate against it
•
Bombardment – a bomber’s attack against a ground-based unit below
it at a distance of 0; melee units do not retaliate against it
General Features
•
Experience / Level – Experience is accumulated during the course of
combat actions. Level increases with every 100 points of experience,
and with each new level, a unit gets a +1 bonus to such characteristics
as Attack Skill and Defense Skill. Also, with each new level, you can
select a perk (ability) for the unit.
•
HP (Hit points)
subdivided into “killed” and “wounded.” This subdivision is important
when “healing” the units.
•
Unit Class
terrain bonuses.
Unit Classes:
•
•
•
•
•
•
•
•
•
HC (heavy cavalry) – melee units capable of a charge attack.
HI (heavy infantry) and HR (ranger heroes) – use a melee attack
LI (light infantry) – use a melee attack
LC (light cavalry) – mounted scouts; melee units do not retaliate
against their attacks, but other scouts can retaliate
AR (archers) and HM (mage heroes) – use a ranged attack but
do not get involved into melee attacks, thus, melee units do not
retaliate against them
SK (skirmishers) – all-terrain foot scouts; they avoid melee attacks,
but other scouts can retaliate against them
WM (war machines) – they are capable of a long-ranged attack,
which nobody can retaliate against; they have a bonus against
defense units
AF
AB (air bombers)
25
Terrain Bonuses
calculated based on the hex where the defender is situated.
Terrain Bonuses in Defense
This bonus is applied to a unit’s attack and defense value when it stands on a
given terrain type.
Hill
River
Village
Town
Castle
HI
Plains Forest Swamp Desert Rough
0
0
-8
-2
0
+2
-8
+2
+4
+6
LI
0
+4
-4
0
+4
+4
-4
+2
+4
+6
Ar
0
0
-8
0
0
+2
-8
+2
+4
+6
HC
0
-4
-10
-2
-4
+2
-8
0
+2
+4
LC
0
-4
-10
0
-4
+2
-8
0
+2
+4
AF
0
0
0
0
0
0
0
0
0
0
AB
0
0
0
0
0
0
0
0
0
0
Sk
0
+4
-4
0
+4
+4
-4
+2
+4
+6
WM
0
-4
-10
0
-4
+2
-8
+2
+4
+6
HR
0
0
-8
0
0
+2
-8
+2
+4
+6
HM
0
0
-8
0
0
+2
-8
+2
+4
+6
Terrain Bonuses in Attack
This bonus is applied to a unit’s attack and defense features value when it
attacks an enemy standing on a given terrain type.
Plains Forest Swamp Desert Rough
HI
0
0
Hill
River
Village
Town
Castle
-4
-2
0
0
-4
0
0
0
LI
0
+4
0
0
+4
+2
0
0
0
0
Ar
0
0
-4
0
0
0
-4
0
0
0
HC
0
-4
-6
-2
-4
-2
-4
-2
-2
-2
LC
0
-4
-6
0
-4
-2
-4
-2
-2
-2
AF
0
0
0
0
0
0
0
0
0
0
AB
0
0
0
0
0
0
0
0
0
0
Sk
0
+4
0
0
+4
+2
0
0
0
0
WM
0
-4
-6
0
-4
0
-4
0
0
0
HR
0
0
-4
0
0
0
-4
0
0
0
HM
0
0
-4
0
0
0
-4
0
0
0
26
Movement Mechanics
A unit’s mobility is determined by two factors: the number of Move Points and
the Movement Type (i.e. the number of points required to cross one hex
with a given type of terrain).
Important Rules of Movement
•
Having moved once, a unit loses its ability to move any further during
the turn regardless of the distance covered.
•
If a unit lacks Move Points to move to the next hex, it can still make
this move spending all its remaining Move Points.
•
Control Zones – if a ground-based unit gets on a hex adjacent to that
of the enemy ground-based unit, the movement stops. E.g. a unit
The Movement Cost Table
•
Plains
Forest
Swamp
Desert
Rough
Hill
Wheeled
100%
20%
20%
50%
25%
50%
–
20%
140%
Mounted
100%
25%
20%
67%
50%
67%
–
25%
140%
Foot
100%
67%
25%
67%
67%
67%
–
25%
140%
Big Foot
100%
100%
50%
100%
100%
100%
–
50%
140%
All Terrain 100%
100%
50%
100%
100%
100%
–
33%
140%
100%
100%
100%
100%
100%
100%
100%
–
Flight
100%
Mountain River
Armor and Armor Piercing
•
A unit can have a perk called Armor. It means that the enemy’s attack
•
A unit can have a perk called Armor Piercing. It means that this unit
ignores the enemy’s Armor-related bonus.
•
Armor Piercing can only relate to one of the unit’s attack types, e.g.
the charge.
Willpower
•
the general Willpower
special abilities. For example:
•
Cause Fear – a unit attacked by an enemy that has this ability must
retreat.
•
Fearless – such units ignore the enemy’s ability to Cause Fear.
27
Road
Options
Graphics
Resoution – set screen resolution.
Gamma Correction – allows for adjusting the
gamma correction parameter.
Shaders Quality – this parameter greatly
values make it possible to get better
performance on weaker computers but impairs
the games appearance.
Graphics Quality Presets – clicking on the “Low,” “Medium,” or “High” buttons
sets the relevant graphics quality.
View Distance – sets the maximum distance from which the game terrain is
visible.
Model Detail – adjusts the quality of details of the game models.
Grass Quality – changes the grass image quality and distance. The higher the
value, the better the terrain looks.
Shadowmap Size – adjusts the shadow image quality. The higher the value, the
clearer and the more accurate the shadow will be.
Texture Quality – the higher the value, the clearer the texture on the game
items will be.
Default – clicking the “Default” button will reset all the settings to their standard
values.
Sound
Voice volume – sets the volume of speech in
dialogues.
SoundFX volume – sets the volume of terrain
Music volume – sets the volume of the
background music.
Default – clicking the “Default” button will reset
all the settings to their standard values.
28
Game
Common Settings
•
Show Quest Marks – when toggled on, the
quest items are marked with special symbols
shaped as arrows and displayed above them.
Golden arrows show obligatory quests,
whereas green ones show additional quests.
This option is toggled on by default.
•
Use Battle Camera – toggle battle camera
•
Show Fog of War
•
Show Numbers on the Health Bars – toggle
Invert Vertical Mouse Movement – inverts the mouse movement along the X
axis (when the mouse is moved down, the cursor will move up). This option is
Invert Horizontal Mouse Movement – inverts the mouse movement along the
by default.
Figure Scale
camera zooms out. The “Changing” option is selected by default.
Player’s Units Speed – adjusts the animation speed for your units’ movement.
Enemy Units Speed – adjusts the animation speed for the enemy units’
default.
Fight Animation Speed – adjusts the combat animation speed. It does not
Default – clicking the “Default” button will reset all the settings to their standard
values.
Graphics options cannot be changed during a mission.
29
Hot Keys
Enter
Accept and apply / next message in a dialog / end of turn
Esc
F5
Back / cancel / skip movie or dialog / Pause menu
Skip a movie / close "OK" message box / next message in a
dialog
Quicksave
F6
Save Game menu
F9
Quickload
F10
Load Game menu
Tab
Switch between units
“ .“
Next unit
“ ,“
Previous unit
“ /“
Skip a unit
Space
Shift + Click
Q
Quest log
Backspace
Cancel the last unit movement (if possible)
X
Rest
C
Recruit
M
Mission map
I
Unit info
B
Army Shop
H
Enable hex grid
N
Switch banner modes
R
Switch between “army” / “reserve” tabs
F
Focus camera on the selected unit
V
Switch standard cameras
“Ctrl + ~”
Open the Multiplayer Chat window
Cursor arrows, WASD
Move camera
“ +“
Move in camera
“ –“
Move out camera
PgUp
Raise camera angle
PgDn
Lower camera angle
Ins
Turn camera to the left
Del
Turn the camera to the right
PrtScn
Take screenshot
30
Multiplayer
To begin a multiplayer game, press the “Multiplayer” button on the Main menu.
Then you can choose between two multiplayer modes: LAN or Hotseat.
LAN or Direct Connect
•
Local network or internet multiplayer game (up to four players).
Create Host
The player who hosts the game chooses the mission. By default, the name
Missions have a max number of players, indicated by the dice icons next to the
mission names.
by clicking on the faction’s icon.
The host can also set the turn’s time limit. By default it is unlimited.
Any faction in a multiplayer game can be managed by AI. To assign an AI player
to the faction, press the small button named “Computer” next to the faction’s
icon.
When all factions are set, players must apply their choices by pressing “Ready”.
During each player’s turn, the others will receive the message about it, and then
it is possible to see the movement of enemy units on the map (if they aren’t
covered by the fog of war).
Join
Click on this button to join a LAN game.
The “Server List” displays the names of all available servers.
To join a non-listed server, enter its IP-address in the host address line and click
on the “Next” button.
31
Multiplayer chat
During a LAN game, you can send messages to other players using the
multiplayer chat window. All messages are shown in the upper-left corner.
To write a message, open the chat window by pressing “Ctrl + ~” and then
choose to send it to all players or to the selected player. Press “Enter” or click
“OK” to send the message.
Saving a multiplayer game
During a multiplayer game, only the host can save the game.
Loading a multiplayer game
A host server will be automatically created during the loading of a saved
multiplayer game. All players (the one who loaded the game and all connected
to it) must choose a faction. Note: Players may choose any faction, and set AI
players for any faction.
If one player leaves the game, other players will receive a message about it. The
game might be continued after that – the AI will manage the army of the player
who quit.
If the host leaves the game, it will end.
Hotseat
•
Several players on one computer.
First, choose the mission for the game. This is done in the same way as in a LAN
game. Players can then choose the factions they will play.
After all players chose their factions, click on “Start” to begin. In Hotseat, as in
LAN, any faction(s) can be managed by the computer.
32
CREDITS
Ino-Co Game
Development
Project Leader / Director
Alexey “Skelos” Kozyrev
Animation Programming
Alexander “Tigra” Ivolgin
Alexey “bers” Bersenev
Sound Programming
Stanislav “Tomat” Klinov
Leading Game Designer
Dmitry “Elm” Gulin
Multiplayer
Alexey “bers” Bersenev
Eugeny “alphard” Kaptsov
Sergey Semenov
Game Designer
Max “Nutcracker” Bodrikov
Pavel “PEK” Kondrashov
Map Editor
Alexander “Tigra” Ivolgin
Alexey “bers” Bersenev
Senior Developer /
Project Architect
Sergey Semyonov
2D Artist / Concept Designer
Sergey “SerJJ”
Kondratovich
Lead Programmer
Alexander “Tigra” Ivolgin
Leading 2D Designer
Marina “Katarina” Gulina
AI
Alexey “bers” Bersenev
Sergey Semenov
2D Designer
Andrey “Black Rider”
Shershnev
Game Mechanics
Alexey “bers” Bersenev
Eugeny “alphard” Kaptsov
Eugeny “Rever” Rudnev
Nikolai “Cool Ace”
Voronecky
Michail “Miha” Pizic
Sergey “Hyps” Galustyan
Sergey Semenov
3D Artists / Animators
Ruslan Kokarev
Alexey “Letin” Shumeykin
User Interface
Alexander “Tigra” Ivolgin
Eugeny “alphard” Kaptsov
Nikolai “Cool Ace”
Voronecky
Tools
Alexander “Tigra” Ivolgin
Eugeny “alphard” Kaptsov
Nikolai “Cool Ace”
Voronecky
Svyatoslav Deineko
Stanislav “Tomat” Klinov
Landscape Generator
Eugeny “Rever” Rudnev
Graphics and FX
programming
Alexander “Tigra” Ivolgin
Nikolai “Cool Ace”
Voronecky
Roman “xT_RoMeO” Gipsle
Stanislav “Tomat” Klinov
3D Artists
Andrey “Black Rider”
Shershnev
Alexey “Fireball” Yastrebov
Vladimir “Gash” Gorshkov
Kirill “Apostle” Dunenkov
Cutscenes
Alexey “Letin” Shumeykin
Max “Nutcracker” Bodrikov
Motion Capture
Mocap.ru Studio
Motion Capture Actors
Vladislav “Mechanik”
Migalev
Alexander Stepchenko
Timur Artykov
Lubov Gurkina
Alexey “Letin” Shumeikin
Max “Nutcracker” Bodrikov
Andrey “Black Rider”
Shershnev
Alexey “Fireball” Yastrebov
33
Texture Artists
Alexander “Novik” Novik
Anna “Ann” Gorelova
Ivan “Baho” Andreev
Inga Paukshtite
Story and texts
Aleksey “Skelos” Kozyrev
Dmitry “Elm” Gulin
Max “Nutcracker” Bodrikov
Paul “PEK” Kondrashov
Music
TriHorn Productions (www.
trihorn.ru)
MuzaGames / Artyom
Kolpakov
Evgeny Ukraintsev (End
Titles Theme)
Sound Producer
Roman “Krom” Kaverga
Elena “Skyla” Kozyreva
Gaijin Sound
Translator
Pavel “PEK” Kondrashov
Level Designers
Elena “Skyla” Kozyreva
Dmitry “Elm” Gulin
Max “Nutcracker” Bodrikov
Pavel “PEK” Kondrashov
PR
Kirill “Apostle” Dunenkov
Testing
Ivan “Odin” Lubkov
Evgeny “Sokol” Sokolov
User Manual
Max “Nutcracker” Bodrikov
1C
Producer
Alexey “Tool” Patsiorkovsky
Localization
Oleg Mironov
Translators
Dmitry Blyudov
Dmitry Venyavkin
Roman Patrashov
Maria Yakovleva
Marketing and PR
Alexey Artyomenko
Svetlana Gorobets
Alexey Pastushenko
Alexander Baryshnikov
Ilya Chernyh
Design and Cover
Sergey Konovalov
Olga Krutova
Art
Ilya Fofanov
Michail Ryapolov
Andrew Maximov
Vladimir Kuchar
Senior Tester
Alexander Shishov
Testers
Dmitry Savin
Alexander Shelaputov
Sergey Kiyatkin
Michail Korolev
Nikolai Nikolaev
Ann Trusova
Dmitry Fedotov
Dmitry Chernetsky
Maxim Shaternik
Aleksey Yurchenko
Thanks for help in the game
creation
To Nikolay Baryshnikov for
all he did for the project,
To Pavel Krutov for his help
and support,
To Alexandra Smirnova for
her kindness and care,
To all our relatives and
friends
for their understanding and
patience.
Beta Testing
Konstantin “Hoaxer”
Simonov
Aleksey “Chem” Gordeev
Vasily Ryabov
Maxim “heleo” Kurchushkin
Igor Rusov
Vladimir Pavlov
Lev Lidin
Alexander Alekseev
Alexander Maximov
Vladimir Somoilo
Anton Fokin
Anvar Starkov
Yury Sinitsin
Dmitry Tarasov
Peter Artamonov
Alexander Artemov
Aleksey Bormotov
Aleksey Gorlychev
Boris “Woodcat” Grigoriev
Anton Grachevnikov
Aleksey Zavaruhin
Vitaly Kamnev
Maxim Kuzmik
Aleksey Kushnir
Alexander Lavrienko
Yury Lapshin
Vladimir Markelov
Aleksey Miroshkin
Evgeny Nesterovsky
Vladimir Novosilov
Vladimir Samylin
Dmitry Timchenko
Dmitry “Demon” Tuchnin
34
Technical Support
If you encounter problems while installing or playing the game, do the following before you
contact us:
- Choose “Run” in the “Start” menu.
- Type «dxdiag» in the dialog window and press “Enter” to run Microsoft DirectX Diagnostic Tool.
- Pass all tests.
- Having passed the tests, press “Save All Information”.
- Send the text file obtained and a description of your problem to our technical support.
Information Required:
- Game version (installed updates)
- Operating system
- Processor brand, type and clock speed
- RAM volume
- Sound card type
- Video adapter model and parameters
- CD/DVD-ROM drive type
- Mouse type and driver version
- DirectX version
- Detailed description of the problem that you faced
Contact:
Via e-mail at: [email protected]
Please use the e-mail address provided. All support enquires to the company address or phone
number(s) cannot be answered by our staff.
For more information and updates please visit:
www.1cpublishing.com
© 2007 Developed by 1C:Ino-Co. All rights reserved.
35