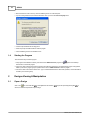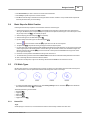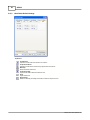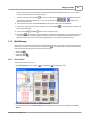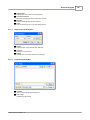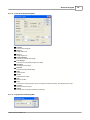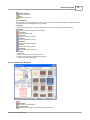
1
SEDS II Achiever User Manual
2005-06, Sew Good Software, Inc
Copyright Notice
Information in this document is subject to change without notice. Companies, names, and data used in
examples are fictitious unless otherwise noted. No part of this document may be reproduced or
transmitted in any form by any means, electronic or mechanical, for any purpose, without the express
written consent of Sew Good Software, Inc.
(c) 2005-06 Sew Good Software, Inc. All rights reserved.
TrueType is a registered trademark of Apple Computer, Inc.
Other product and company names mentioned herein may be the trademarksof their respective owners.
NOTE: Complying with all applicable copyright laws is the responsibility of the user. The user should
review the accuracy of any summary because a summary is by its nature not the entirety of the work.
Please remember: You must accept the End-User License Agreement before you can use this product.
The product is licensed as a single product. Its component may not be set up for use on more than one
computer. If you do not accept terms of the License Agreement, you should promptly return the product
for a refund. Do not make illegal copies. for further details, please refer to the End-User License
Agreement.
Sew Good Software Inc. claims no responsibility for errors resulting from display
or output from the demonstration versions of its software.
Contents
I
Table of Contents
Foreword
0
9
Part I Introduction
1 Overview ................................................................................................................................... 9
2 System Requirements
................................................................................................................................... 9
3 Installation ................................................................................................................................... 9
Things Required
.......................................................................................................................................................... 9
Installing the Program
.......................................................................................................................................................... 9
4 Starting the
Program
...................................................................................................................................
10
Part II Designs Viewing & Manipulation
10
1 Open a Design
................................................................................................................................... 10
Design Browser
.......................................................................................................................................................... 12
Import from Tape .......................................................................................................................................................... 13
2 Selection ................................................................................................................................... 14
Select Object(s)
.......................................................................................................................................................... 14
Select Stitch Block(s)
.......................................................................................................................................................... 14
3 Select View
Options
...................................................................................................................................
14
Show Stitch Points.......................................................................................................................................................... 14
Show Jump Stitches
.......................................................................................................................................................... 15
Show In/Out Points.......................................................................................................................................................... 15
Show Machine Codes
.......................................................................................................................................................... 15
Show Underlay Stitches
.......................................................................................................................................................... 15
Show Underlay Stitches
..........................................................................................................................................................
Only
15
Show Particular Stitch
..........................................................................................................................................................
Blocks
15
Show Grid
.......................................................................................................................................................... 15
Show Ruler
.......................................................................................................................................................... 16
4 Zoom and...................................................................................................................................
Pan
16
How to Zoom
.......................................................................................................................................................... 16
How to Pan
.......................................................................................................................................................... 16
Using Aerial View .......................................................................................................................................................... 16
5 Slow Redraw
................................................................................................................................... 17
Normal Slow Redraw
.......................................................................................................................................................... 17
3D Simulation Slow..........................................................................................................................................................
Redraw
17
6 Align and ...................................................................................................................................
Distribute
17
7 3D Simulation
View
...................................................................................................................................
18
Choose Simulation..........................................................................................................................................................
Background
18
Import Simulation Background
..........................................................................................................................................................
Image
18
8 Stitch Blocks
Navigation
...................................................................................................................................
19
9 Change Color
................................................................................................................................... 19
10 Measurement
................................................................................................................................... 19
11 Printout ................................................................................................................................... 19
12 Using Stitch
Browser
...................................................................................................................................
20
2005-06, Sew Good Software, Inc
I
II
SEDS II
Part III Designs Output and Conversion
20
1 Using Save
As
...................................................................................................................................
20
2 Using Punch
Floppy Export
...................................................................................................................................
21
3 Using Punch
Tape Export
...................................................................................................................................
22
4 Using Punch
Direct Export
...................................................................................................................................
23
5 Floppy Disk
Format
...................................................................................................................................
23
6 Machine Code
Filter
...................................................................................................................................
24
Part IV Designs Management using Album
25
1 Manage an...................................................................................................................................
Album
25
Create a New Album
.......................................................................................................................................................... 25
Delete an Album
.......................................................................................................................................................... 26
Select an Album
.......................................................................................................................................................... 26
Lock/Unlock an Album
.......................................................................................................................................................... 26
2 View Designs
in Album
...................................................................................................................................
26
View all Designs
.......................................................................................................................................................... 26
View Search Result.......................................................................................................................................................... 26
View the Selected Design
.......................................................................................................................................................... 26
View Design Information
.......................................................................................................................................................... 27
3 Manage Designs
Using Album
...................................................................................................................................
27
Add a Design to Album
.......................................................................................................................................................... 27
Open a Design from
..........................................................................................................................................................
Album
28
Delete a Design from
..........................................................................................................................................................
Album
28
Search Designs in Album
.......................................................................................................................................................... 28
Print Designs in Album
.......................................................................................................................................................... 29
Part V Designs Creation
30
1 About Images
................................................................................................................................... 31
Import an Image
.......................................................................................................................................................... 31
Image Browser ......................................................................................................................................................... 32
Acquire Image
.......................................................................................................................................................... 32
Export Image
.......................................................................................................................................................... 33
Adjust Brightness .......................................................................................................................................................... 33
Reduce Image Color
.......................................................................................................................................................... 33
Image Mirror and Rotate
.......................................................................................................................................................... 34
Image Editing
.......................................................................................................................................................... 34
2 About Objects
................................................................................................................................... 35
Create an Object .......................................................................................................................................................... 36
Line & Curve
......................................................................................................................................................... 36
Circle & Ellipse ......................................................................................................................................................... 36
Square & Rectangle
......................................................................................................................................................... 37
Polygon/Star
Circular Arc
Object Editing
......................................................................................................................................................... 37
......................................................................................................................................................... 38
.......................................................................................................................................................... 38
Move/Resize Object(s)
......................................................................................................................................................... 38
Rotate Object(s)......................................................................................................................................................... 39
Mirror Object(s)......................................................................................................................................................... 40
Copy Object(s) ......................................................................................................................................................... 40
2005-06, Sew Good Software, Inc
Contents
III
Delete Object(s)......................................................................................................................................................... 40
Add/Delete Anchor
.........................................................................................................................................................
Points
40
Geometric Transform
......................................................................................................................................................... 41
Cut Object
......................................................................................................................................................... 41
Join Object
......................................................................................................................................................... 42
Cut Closed Object
......................................................................................................................................................... 42
Import Vector File .......................................................................................................................................................... 42
Vector File Browser
......................................................................................................................................................... 43
Export Objects
.......................................................................................................................................................... 43
Auto Trace
.......................................................................................................................................................... 44
3 Create a New
Design
...................................................................................................................................
44
4 Basic Steps
for Stitch Creation
...................................................................................................................................
45
5 Fill Stitch ...................................................................................................................................
Types
45
Normal Fill
.......................................................................................................................................................... 45
Jagged Fill
.......................................................................................................................................................... 46
Pattern Fill
.......................................................................................................................................................... 46
Column Fill
.......................................................................................................................................................... 47
Jagged Column Fill.......................................................................................................................................................... 48
6 Satin Stitch
Types
...................................................................................................................................
48
About Auto-Span .......................................................................................................................................................... 48
About Cornering .......................................................................................................................................................... 49
About Guide Lines.......................................................................................................................................................... 52
One Line Satin
.......................................................................................................................................................... 52
Two Line Satin
.......................................................................................................................................................... 53
Pattern Fill Satin
.......................................................................................................................................................... 53
Jagged Satin
.......................................................................................................................................................... 54
7 Line Stitch...................................................................................................................................
Types
55
Single Line
.......................................................................................................................................................... 55
Double Line
.......................................................................................................................................................... 55
E-Stitch
.......................................................................................................................................................... 56
Bean Stitch
.......................................................................................................................................................... 56
8 Special Stitch
Types
...................................................................................................................................
57
Line Motif
.......................................................................................................................................................... 57
Fill Motif
.......................................................................................................................................................... 57
Cross Stitch
.......................................................................................................................................................... 58
Photo Stitch
.......................................................................................................................................................... 59
9 Lettering ................................................................................................................................... 61
Create Lettering on..........................................................................................................................................................
Screen
61
Create Lettering with
..........................................................................................................................................................
Lettering Input Wizard
61
Lettering Editing .......................................................................................................................................................... 63
Within Box (Box)
......................................................................................................................................................... 65
On One Line (Line,
.........................................................................................................................................................
Vertical Line)
65
Between Two Lines
.........................................................................................................................................................
(2 Lines)
66
Within Diamond.........................................................................................................................................................
Shape (Diamond)
66
On One Object .........................................................................................................................................................
(Arc, Ellipse, Free Line)
67
Between Two Objects
.........................................................................................................................................................
(2 Free Lines)
67
Using Lettering.........................................................................................................................................................
Input Wizard
68
Lettering Stitch Types
.......................................................................................................................................................... 68
Satin Lettering ......................................................................................................................................................... 68
Normal Fill Lettering
......................................................................................................................................................... 69
Line Stitch Lettering
......................................................................................................................................................... 70
Column Fill Lettering
......................................................................................................................................................... 71
2005-06, Sew Good Software, Inc
III
IV
SEDS II
10 Insert Manual/Jump
Stitches
...................................................................................................................................
72
11 Freehand Satin
................................................................................................................................... 72
12 OneTouch...................................................................................................................................
Auto-Digitizing
72
Import an Image for..........................................................................................................................................................
Auto-Digitizing
72
Auto-Digitize a Region
.......................................................................................................................................................... 73
Auto-Digitize the Whole
..........................................................................................................................................................
Image
73
Change Default Settings
.......................................................................................................................................................... 73
Using the OneTouch
..........................................................................................................................................................
Wizard
74
13 Settings Manager
................................................................................................................................... 76
General Default Settings
.......................................................................................................................................................... 77
Fill Stitch Default Settings
.......................................................................................................................................................... 78
Satin Stitch Default..........................................................................................................................................................
Settings
79
Line Stitch Default ..........................................................................................................................................................
Settings
81
Motif Stitch Default..........................................................................................................................................................
Settings
82
Cross Stitch Default
..........................................................................................................................................................
Settings
83
Photo Stitch Default
..........................................................................................................................................................
Settings
84
Satin Lettering Default
..........................................................................................................................................................
Settings
85
Fill Lettering Default
..........................................................................................................................................................
Settings
86
Line Lettering Default
..........................................................................................................................................................
Settings
87
14 Pattern Manager
................................................................................................................................... 88
Select a Pattern
.......................................................................................................................................................... 88
Delete a Pattern
.......................................................................................................................................................... 88
Create a New Pattern
.......................................................................................................................................................... 89
Edit Existing Patterns
.......................................................................................................................................................... 90
15 Motif Manager
................................................................................................................................... 91
Select a Motif
.......................................................................................................................................................... 91
Delete a Motif
.......................................................................................................................................................... 92
Create a New Motif.......................................................................................................................................................... 92
Edit Existing Motifs.......................................................................................................................................................... 93
16 Font Management
................................................................................................................................... 95
Activate Font(s)
.......................................................................................................................................................... 95
Part VI Designs Editing
95
1 Change Canvas
of a Design
...................................................................................................................................
95
2 Merge Designs
................................................................................................................................... 95
3 Stitch Block(s)
Editing
...................................................................................................................................
96
Move/Resize Stitch..........................................................................................................................................................
Block(s)
96
Rotate Stitch Block(s)
.......................................................................................................................................................... 97
Mirror Stitch Block(s)
.......................................................................................................................................................... 98
Copy Stitch Block(s)
.......................................................................................................................................................... 98
Delete Stitch Block(s)
.......................................................................................................................................................... 98
Change Stitching Sequence
.......................................................................................................................................................... 98
Change Stitch Block(s)
..........................................................................................................................................................
Color
99
Insert/Remove Trim..........................................................................................................................................................
Code
99
Edit Stitch Block(s).......................................................................................................................................................... 99
Stitch Browser
.......................................................................................................................................................... 99
4 Stitch Block(s)
Processing
...................................................................................................................................
100
Change Size
.......................................................................................................................................................... 101
Change Number of
..........................................................................................................................................................
Stitches
102
Change Density (Span)
.......................................................................................................................................................... 102
2005-06, Sew Good Software, Inc
Contents
V
Convert Manual Stitch
..........................................................................................................................................................
Block
103
5 Stitch Point(s)
Editing
...................................................................................................................................
103
Select Stitch Point(s)
.......................................................................................................................................................... 103
Move Stitch Point(s)
.......................................................................................................................................................... 104
Insert Stitch Point(s)
.......................................................................................................................................................... 104
Remove Stitch Point(s)
.......................................................................................................................................................... 104
Split a Stitch Block
.......................................................................................................................................................... 104
Change Machine Code
.......................................................................................................................................................... 104
6 Remove Short
Stitches
...................................................................................................................................
105
7 Frame Move
................................................................................................................................... 105
8 Change Design
Properties
...................................................................................................................................
105
Part VII System Functions
106
1 Settings ...................................................................................................................................
Preview
106
2 Freeze Cursor
................................................................................................................................... 106
3 Search Machine
Code
...................................................................................................................................
106
4 Statistics................................................................................................................................... 106
Part VIII About the Program
108
1 Interface................................................................................................................................... 108
The Program Window
.......................................................................................................................................................... 108
Menu Bar
.......................................................................................................................................................... 108
File Menu
......................................................................................................................................................... 108
Edit Menu
......................................................................................................................................................... 110
View Menu
......................................................................................................................................................... 111
Tools Menu
......................................................................................................................................................... 113
Window Menu......................................................................................................................................................... 113
Help Menu
ToolBars
......................................................................................................................................................... 113
.......................................................................................................................................................... 113
Main Bar
......................................................................................................................................................... 113
Primary Bar ......................................................................................................................................................... 114
Color Bar
......................................................................................................................................................... 115
Options Bar ......................................................................................................................................................... 115
Lettering Options Bar......................................................................................................................................... 115
Lettering Input Options
...................................................................................................................................
Bar
115
Lettering in Box/Diamond
...................................................................................................................................
Options Bar
115
Lettering on 1 Line Options
...................................................................................................................................
Bar
116
Lettering between 2...................................................................................................................................
Lines Options Bar
116
Lettering on 1 Object
...................................................................................................................................
Options Bar
116
Lettering between 2...................................................................................................................................
Objects Options Bar
117
Fill Type Options Bar......................................................................................................................................... 117
Normal Fill Options...................................................................................................................................
Bar
117
Jagged Fill Options...................................................................................................................................
Bar
117
Pattern Fill Options...................................................................................................................................
Bar
117
Column Fill Options...................................................................................................................................
Bar
118
Jagged Column Fill...................................................................................................................................
Options Bar
118
Satin Type Options Bar
......................................................................................................................................... 118
One Line Satin Options
...................................................................................................................................
Bar
118
Two Line Satin Options
...................................................................................................................................
Bar
118
Pattern Fill Satin Options
...................................................................................................................................
Bar
119
2005-06, Sew Good Software, Inc
V
VI
SEDS II
Jagged Satin Options
...................................................................................................................................
Bar
119
Line Type Options Bar
......................................................................................................................................... 119
Single Line Options...................................................................................................................................
Bar
119
Double Line Options...................................................................................................................................
Bar
120
E-Stitch Options Bar
................................................................................................................................... 120
Bean Stitch Options...................................................................................................................................
Bar
120
Lettering Type Options
.........................................................................................................................................
Bar
120
Satin Lettering Options
...................................................................................................................................
Bar
121
Normal Fill Lettering...................................................................................................................................
Options Bar
121
Line Stitch Lettering...................................................................................................................................
Options Bar
121
Column Fill Lettering
...................................................................................................................................
Options Bar
122
Special Type Options
.........................................................................................................................................
Bar
122
Line Motif Options Bar
................................................................................................................................... 122
Fill Motif Options Bar
................................................................................................................................... 122
Cross Stitch Options
...................................................................................................................................
Bar
122
Photo Stitch Options
...................................................................................................................................
Bar
123
Miscellaneous Options
.........................................................................................................................................
Bar
123
Selection Options Bar
................................................................................................................................... 123
Zoom Options Bar ................................................................................................................................... 123
Ellipse/Rectangle Options
...................................................................................................................................
Bar
124
Polygon/Star Options
...................................................................................................................................
Bar
124
Manual Stitch Options
...................................................................................................................................
Bar
124
Slow Redraw Options
...................................................................................................................................
Bar
124
Search Machine Code
...................................................................................................................................
Options Bar
125
Pop-up Options
......................................................................................................................................... 125
Orientation Options................................................................................................................................... 125
Control Nodes Options
................................................................................................................................... 126
Alignment Options ................................................................................................................................... 126
Position Options
................................................................................................................................... 126
Lock Stitch Options................................................................................................................................... 127
Fill Stitch Boundary...................................................................................................................................
Options
127
Jag Direction Options
................................................................................................................................... 127
Column Fill Mode Options
................................................................................................................................... 127
Cornering Options ................................................................................................................................... 128
Satin Pattern Options
................................................................................................................................... 128
E-Stitch Direction Options
................................................................................................................................... 129
Fill Motif Alignment ...................................................................................................................................
Options
129
Photo Stitch Type Options
................................................................................................................................... 129
Photo Stitch Orientation
...................................................................................................................................
Options
130
Stitch Creation.........................................................................................................................................................
Bar
130
Stitch Settings.........................................................................................................................................................
Bar
131
Lettering Settings Bar
......................................................................................................................................... 131
Lettering Transformation
...................................................................................................................................
Options
131
Fill Type Settings Bar
......................................................................................................................................... 132
Normal Fill Settings...................................................................................................................................
Bar
132
Jagged Fill Settings...................................................................................................................................
Bar
133
Pattern Fill Settings...................................................................................................................................
Bar
133
Column Fill Settings...................................................................................................................................
Bar
134
Jagged Column Fill...................................................................................................................................
Settings Bar
134
Satin Type Settings Bar
......................................................................................................................................... 134
One Line Satin Settings
...................................................................................................................................
Bar
135
Two Line Satin Settings
...................................................................................................................................
Bar
135
Pattern Fill Satin Settings
...................................................................................................................................
Bar
136
Jagged Satin Settings
...................................................................................................................................
Bar
136
2005-06, Sew Good Software, Inc
Contents
VII
Line Type Settings Bar
......................................................................................................................................... 137
Single Line Settings...................................................................................................................................
Bar
137
Double Line Settings
...................................................................................................................................
Bar
137
E-Stitch Settings Bar
................................................................................................................................... 138
Bean Stitch Settings...................................................................................................................................
Bar
138
Lettering Type Settings
.........................................................................................................................................
Bar
138
Satin Lettering Settings
...................................................................................................................................
Bar
138
Normal Fill Lettering...................................................................................................................................
Settings Bar
139
Line Stitch Lettering...................................................................................................................................
Settings Bar
140
Column Fill Lettering
...................................................................................................................................
Settings Bar
140
Special Type Settings
.........................................................................................................................................
Bar
141
Line Motif Settings Bar
................................................................................................................................... 141
Fill Motif Settings Bar
................................................................................................................................... 141
Cross Stitch Settings
...................................................................................................................................
Bar
141
Photo Stitch Settings
...................................................................................................................................
Bar
142
Miscellaneous Settings
......................................................................................................................................... 142
Satin Underlay Pattern
................................................................................................................................... 142
Fill Underlay Pattern................................................................................................................................... 143
External Compensation
...................................................................................................................................
Mode
143
Border Type
................................................................................................................................... 143
Line Stitch Type
................................................................................................................................... 143
Stitch View Control
.........................................................................................................................................................
Bar
143
Pop-up Toolbars
......................................................................................................................................................... 144
Zoom Toolbar
......................................................................................................................................... 144
Line Toolbar
......................................................................................................................................... 144
Ellipse Toolbar
......................................................................................................................................... 144
Rectangle Toolbar ......................................................................................................................................... 145
Polygon/Star Toolbar......................................................................................................................................... 145
Object Manipulation .........................................................................................................................................
Toolbar
145
Stitch Point Edit Toolbar
......................................................................................................................................... 145
Stitch Block Edit Toolbar
......................................................................................................................................... 146
Manual Stitch Toolbar
......................................................................................................................................... 146
Machine Control Toolbar
......................................................................................................................................... 146
OneTouch Toolbar ......................................................................................................................................... 146
Slow Redraw Toolbar
......................................................................................................................................... 146
Miscellaneous.........................................................................................................................................................
Toolbars
147
Short Stitch Removal.........................................................................................................................................
Bar
147
OneTouch Bar
......................................................................................................................................... 147
Reduce Image Color.........................................................................................................................................
Bar
147
Status Bar
.......................................................................................................................................................... 148
Dialog Boxes
.......................................................................................................................................................... 148
New Design Dialog
.........................................................................................................................................................
Box
148
Open Design Dialog
.........................................................................................................................................................
Box
149
Save As Dialog.........................................................................................................................................................
Box
150
Import Image Dialog
.........................................................................................................................................................
Box
151
Import Simulation
.........................................................................................................................................................
Background Image Dialog Box
152
Import Vector File
.........................................................................................................................................................
Dialog Box
152
Import from Tape
.........................................................................................................................................................
Dialog Box
153
Export Image Dialog
.........................................................................................................................................................
Box
153
Export Objects.........................................................................................................................................................
Dialog Box
154
Export Motif Dialog
.........................................................................................................................................................
Box
154
Punch Floppy .........................................................................................................................................................
Export Dialog Box
155
Punch Tape Export
.........................................................................................................................................................
Dialog Box
156
Punch Direct Export
.........................................................................................................................................................
Dialog Box
157
2005-06, Sew Good Software, Inc
VII
VIII
SEDS II
Floppy Disk Format
.........................................................................................................................................................
Dialog Box
157
Normal Print Dialog
.........................................................................................................................................................
Box
158
Design Information ......................................................................................................................................... 158
Thread Information ......................................................................................................................................... 159
Color Sequence
......................................................................................................................................... 160
Design Properties
.........................................................................................................................................................
Dialog Box
160
General
......................................................................................................................................... 161
Design Information ......................................................................................................................................... 162
Production Information
......................................................................................................................................... 163
Lettering Input.........................................................................................................................................................
Wizard Dialog Box
164
Pattern Browser
.........................................................................................................................................................
Dialog Box
165
Pattern Editor .........................................................................................................................................................
Dialog Box
166
Motif Browser .........................................................................................................................................................
Dialog Box
167
Motif Editor Dialog
.........................................................................................................................................................
Box
169
Design Browser
.........................................................................................................................................................
Dialog Box
171
Image Browser.........................................................................................................................................................
Dialog Box
172
Vector File Browser
.........................................................................................................................................................
Dialog Box
173
Edit Machine Code
.........................................................................................................................................................
Filter Dialog Box
174
Album Dialog Box
......................................................................................................................................................... 174
Object Properties
.........................................................................................................................................................
Dialog Box
176
Stitch Processing
.........................................................................................................................................................
Dialog Box
177
2 Program ...................................................................................................................................
Options
177
Appearance
.......................................................................................................................................................... 179
Advanced
.......................................................................................................................................................... 180
Folders
.......................................................................................................................................................... 181
Part IX Appendix
181
1 End User...................................................................................................................................
License Agreement
181
2 Working ...................................................................................................................................
with Melco Condensed Format
182
Objects
.......................................................................................................................................................... 183
Stitch Types
.......................................................................................................................................................... 183
Creating Fill Stitches
.......................................................................................................................................................... 183
Satin and Line Stitches
.......................................................................................................................................................... 183
Editing Fill Stitches
.......................................................................................................................................................... 184
3 Trouble Shooting
Guide
...................................................................................................................................
184
Problems during Installation
.......................................................................................................................................................... 184
Problems Starting..........................................................................................................................................................
the Program
184
Problems during Program
..........................................................................................................................................................
Operation
185
4 Hotkey List
................................................................................................................................... 186
5 Glossary...................................................................................................................................
of Embroidery Terms
187
General
.......................................................................................................................................................... 187
Object-Based Digitizing
.......................................................................................................................................................... 187
Punching
Index
.......................................................................................................................................................... 188
189
2005-06, Sew Good Software, Inc
Introduction
1
Introduction
1.1
Overview
9
Thank you for using our SEDS II Achiever digitizing software.
To start using the software, first please refer to the System Requirements 9 section to check if your hardware is compatible for use
with the software. Then follow the instructions in the Installation 9 section to install the program.
Please note that SEDS II is divided into 2 levels, Anchor and Achiever, and make sure that you are installing the correct level that
you purchased.
We have work hard to make the contents in this user guide as accurate as possible and they are subject to change without prior
notice. The functions in the software prevails over those described in this guide, in case there are any discrepancies, and under no
circumstance would the software be treated as incomplete or incorrect.
1.2
System Requirements
· Intel Pentium 266MHz or higher (Compatible processors: AMD K6 or higher, Cyrix 6x86 or higher)
· 128Mb of RAM (256Mb or more strongly recommended)
· 1.44Mb Floppy Drive
· 2x or faster CD-ROM Drive
· Graphics card with 2Mb of memory capable of display 1024x768 with at least 64k colors (VGA with 4Mb of memory capable of
display 1280x1024 or higher with at least 16.8 million of color or higher strongly recommended)
· Keyboard and mouse or other pointing device
· One available USB port
· Windows 98/ME/2000/XP
· Color Printer (Optional)
1.3
Installation
1.3.1
Things Required
Before installing the program, make sure you have the following items at hand:
· Security Device: An USB Dongle to be inserted into one of your USB ports. This device should be labeled with a serial number
that starts with 'SU', followed by 4 digits. This number should be quoted when corresponding with the Technical Support
Department.
· Program and Dataset Installation CD ROM. (CD ROM is optional. Program Files can also be downloaded from our website and
stored in a hard drive or other storage device.)
· Cap File Diskette: It contains a 'cap' file that is essential in identifying the security device.
1.3.2
Installing the Program
· Close all programs.
· Insert the SEDS II Achiever program installation CD ROM into the CD ROM drive, or click on the setup.exe file in your hard drive.
· When the Installation screen comes up, click on the Install SEDS II Achiever button.
· If this is the first time you install the program into this computer, a Driver Installation window will appear. Click OK to install the
device drivers.
· After installing the drivers, an Install window appears. Click OK to restart.
· Your computer should resume the installation process automatically by showing you the Welcome screen. If not, open and close
the CD drive door and click on the Install SEDS II Achiever button again.
2005-06, Sew Good Software, Inc
10
SEDS II
· When the Welcome screen comes up, insert the USB Dongle into one of the USB ports.
· If you are running Windows XP, the window below MAY come up. Click on the Continue Anyway button.
· Insert the Cap File Diskette into the floppy drive.
· Follow the prompts to install the SEDS II Achiever program.
· Click on Finish to go back to the Installation menu.
1.4
Starting the Program
There are several ways to start the program:
1. If the program was installed successfully, there should be an SEDS II Achiever program icon
Double click on it to start the program.
placed on the Desktop.
2. Click on the "Start" button and then select "Programs" and locate the program group you selected during program setup (default
SEDS II). Click on the program group to expand it and then click on SEDS II Achiever to start the program.
3. Click on the "Start" button and then select "Run". Type in "install folder\bin\seds.exe" without the quotations, where install folder is
the folder you chose during setup.
2
Designs Viewing & Manipulation
2.1
Open a Design
Click on the
icon on the Main Bar 113 or select Open from the File Menu 108 will open the Open Design Dialog Box
shown, then follow the steps below to open a design:
149
as
2005-06, Sew Good Software, Inc
Designs Viewing & Manipulation
11
1. Select the folder where the design is located from Look in.
2. Select the design file type in Files of type. The program currently supports EDS, EDF, EDP, DST, FMC, FDR, ZSK, CND, EXP,
TAP, PEC, PES, PCS, PCM, KSM, HUS and SEW formats. Note that if you choose a NON-DOS format, such as FMC, FDR,
ZSK, NORMAL EXP and NORMAL CND, the program will access the floppy drive automatically and you need to insert a diskette
of the selected format into the drive beforehand. If you forget to insert the diskette or you've selected a wrong type, insert the
correct diskette and click the Refresh button to display the contents in the diskette (see 3 below).
3. Clicking on the Advanced button will toggle the display of advanced features on/off, depending on what design file type you are
working on:
·
For EDS, EDF and EDP types, the dialog box will be expanded to include the following:
2005-06, Sew Good Software, Inc
12
SEDS II
Design X
Design Width in mm.
Design Y
Design Height in mm.
Number of Stitches
Total number of stitches in the design.
Number of Colors
Total number of colors (needles) of the design.
Color Changes
Total number of color (needle) changes in the design.
Date Created
Date the design was created.
Last Edited
Date the design was last edited.
Description
Description about the design.
Keywords
Keywords associated with the design.
Browse
Invoke the Designs Browser.
Refer to Designs Browser 12 for more details.
·
For other DOS types, such as DST, CND, EXP, TAP, PEC, PES, PCS, PCM, KSM, HUS and SEW, the dialog box will be
expanded to include the following:
Convert
If checked, the program will use the internal import filter to convert some of the machine codes to its internal
representation. Otherwise no conversion will be performed and machine codes are imported as they are.
Preview
If checked a thumbnail of the design will be display in the preview window when you click on a file in the file
list window. Turning this on will slow down response when navigating between files.
Browse
Invoke the Designs Browser.
Refer to Designs Browser 12 for more details.
·
For NON-DOS types, such as FMC, FDR, ZSK, NORMAL CND and NORMAL EXP, the dialog box will be expanded to
include the following:
Convert
If checked, the program will use the internal import filter to convert some of the machine codes to its internal
representation. Otherwise no conversion will be performed and machine codes are imported as they are.
Preview
If checked a thumbnail of the design will be display in the preview window when you click on a file in the file
list window. Turning this on will slow down response when navigating between files.
Refresh
Cause the program to read the contents in the NON-DOS diskette again.
4. Select the file from the file list window or if you know the name type it in File name.
5. When you click on a design file in the file list window, a thumbnail of the design will be shown in the preview window if the design
is one of the EDS, EDF and EDP type, or if Preview is checked.
6. Click on the Open button after you've select the desired design file to open it.
See also Designs Browser
2.1.1
12
for how to open a design using the Designs Browser.
Design Browser
The Design Browser Dialog Box 171 , as shown, will be displayed when you click on Browse in the Open Design Dialog Box 149
(refer to Open a Design 10 for more details). This gives you thumbnail views of all the designs of a particular type, or of all available
types, in a folder.
2005-06, Sew Good Software, Inc
Designs Viewing & Manipulation
· To open a design select it from the Thumbnail Window by clicking on the thumbnail and then click the
double click on a thumbnail.
13
icon in the Toolbar, or
· You can follow the step above to open many designs without exiting the dialog box.
2.1.2
· Click on the
icon, however, will open the selected design and close the dialog box afterwards.
· Click on the
icon to check the properties of the design before open.
Import from Tape
The Import from Tape Dialog Box 153 , as shown, will be displayed when you select Import From Tape from the Import submenu in
the File Menu 108 . This allows you to read designs stored on paper tapes through a tape reader.
· The program support serial port tape reader only. Note the number of the serial port (COM1, COM2,...) connecting to the tape
reader and check the settings of it in the Program Options 177 before proceeding.
· Make sure that the tape reader is connect to the serial port and power on.
· Select the design format (Tajima, Barudan, ZSK or MELCO EXP)
· Select the serial (COM) port number and click on the Settings button if you need to change the default settings.
· Click Import to start.
· The design will be opened in a Design Window automatically if finished successfully.
2005-06, Sew Good Software, Inc
14
SEDS II
2.2
Selection
2.2.1
Select Object(s)
Follow the steps below to select object(s):
1. Click on the
icon on the Primary Bar 114 .
2. To select a single object, click on the object, with Additive Select in the Edit Menu
110
unchecked.
3. To select multiple objects:
· Draw a box in the Design Window, all objects inside the box will be selected.
· Hold down the Ctrl key on the keyboard and with the mouse button down, draw an arbitrary region in the Design Window. All
objects inside the region will be selected.
· Hold down the Shift key on the keyboard and select objects one by one by clicking on each of them.
· Check Additive Select from the Edit Menu 110 and select objects one by one by clicking on each of them.
4. To select all objects, first uncheck Display Stitches from the Design View submenu in the View Menu 111 , then press Ctrl-A on
the keyboard or select Select All from the Edit Menu 110 .
5. To select all objects of a certain color, select that color from the Color Bar 115 first and then click on the
Options Bar 123 .
icon on the Selection
6. To de-select an already selected object, hold down the Ctrl key and click on it.
7. To de-select all objects:
· Click on an empty area in the Design Window, with Additive Select in the Edit Menu
· Select De-select All from the Edit Menu 110 .
2.2.2
110
unchecked.
Select Stitch Block(s)
Most operations on stitch block(s) require you to select the block(s) first and here we show you how to accomplish this in different
ways:
1. Click on the
icon on the Primary Bar 114 .
2. To select a single stitch block, click on the area inside it, with Additive Select in the Edit Menu
110
unchecked.
3. To select a stitch block that is covered by other stitch blocks, click on the area inside it continuously until that block is selected.
4. To select multiple stitch blocks:
· Draw a box in the Design Window, all stitch blocks inside the box will be selected.
· Hold down the Ctrl key on the keyboard and with the mouse button down, draw an arbitrary region in the Design Window. All
stitch blocks inside the region will be selected.
· Hold down the Shift key on the keyboard and select stitch blocks one by one by clicking on each of them.
· Check Additive Select from the Edit Menu 110 and select stitch blocks one by one by clicking on each of them.
5. To select all stitch blocks, press Ctrl-A on the keyboard or select Select All from the Edit Menu
110
.
6. To select all stitch blocks of a certain color, select that color from the Color Bar 115 first and then click on the
Selection Options Bar 123 .
icon on the
7. To de-select an already selected stitch block, hold down the Ctrl key and click on it.
8. To de-select all stitch blocks:
· Click on an empty area in the Design Window, with Additive Select in the Edit Menu
· Select De-select All from the Edit Menu 110 .
110
unchecked.
Note that each selected stitch block is highlighted by 4 pink small squares locate at the 4 corners of the block.
2.3
Select View Options
2.3.1
Show Stitch Points
You can choose whether to show stitch points in a design by checking/un-checking Display Stitches with Needle Points from the
Design submenu of the View Menu 111 . If checked, a single dot will be drawn at the position of each stitch point in the color specified
in Program Options 177 .
2005-06, Sew Good Software, Inc
Designs Viewing & Manipulation
2.3.2
15
Show Jump Stitches
You can choose whether to show jump stitch lines in a design by checking/un-checking Display Stitches with Jump Lines from the
Design submenu of the View Menu 111 . If checked, jump stitch lines will be drawn as green dotted lines in the design.
2.3.3
Show In/Out Points
You can choose whether to show in/out points of stitch blocks in a design by checking/un-checking Display Stitch In/Out Points
from the Design submenu of the View Menu 111 . If checked, green dots will be drawn at the in points of stitch blocks and red dots at
the out points.
2.3.4
Show Machine Codes
You can choose whether to show machine codes in a design by checking/un-checking Display Stitches with Machine Codes from
the Design submenu of the View Menu 111 . If checked, machine codes will be drawn in green rectangles in the design. Note that Hit
stitches will not be drawn.
2.3.5
Show Underlay Stitches
You can choose whether to show underlay stitches in a design by checking/un-checking Display Stitches with Underlay from the
Design submenu of the View Menu 111 . The program will uncheck Display Underlay Stitches Only automatically when Display
Stitches with Underlay is checked. See Show Underlay Stitches Only 15 for more details.
2.3.6
Show Underlay Stitches Only
You can choose to show underlay stitches only in a design by checking Display Underlay Stitches Only from the Design submenu
of the View Menu 111 . The program will uncheck Display Stitches with Underlay automatically when Display Underlay Stitches
Only is checked. See Show Underlay Stitches 15 for more details.
2.3.7
Show Particular Stitch Blocks
You can choose to show particular stitch blocks only in a design according to the following options by checking the corresponding
menu item from the Design submenu of the View Menu 111 . Note that these options are mutually exclusive, meaning that selecting
one will de-select the others.
· Display All Stitches - show all stitch blocks
· Display Manual/Jump Stitches Only - show Manual/Jump Stitch type only
· Display Fill Stitches Only - show Fill Stitch type only
· Display Satin Stitches Only - show Satin Stitch type only
· Display Line Stitches Only - show Line Stitch type only
· Display Last 2 Stitch Blocks - show last 2 stitch blocks only
· Display Selected Stitches Only - show selected stitch blocks only
· Display Selected Stitches With Background - selected stitch blocks are show as normal and other stitch blocks are 'grayed
out' using the Disable color defined in the Program Options 177 .
2.3.8
Show Grid
Grid is an array of horizontal and vertical lines to help you to locate and measure objects and stitch blocks in a design. There are 3
ways to toggle grid display on/off:
· Click Show Grid from the View Menu 111 .
· Press ALT-G on the keyboard.
· Click Show Grid in the Program Options 177 dialog box.
2005-06, Sew Good Software, Inc
16
SEDS II
The distance between the grid lines is user-definable and is independent in the horizontal and vertical directions. See the Program
Options 177 section for how to set the distances and other properties.
2.3.9
Show Ruler
You can choose whether to display horizontal and vertical rulers by checking/un-checking Show Ruler from the View Menu 111 . The
rulers will be drawn at the left and top side of the Design Window in the unit specified in Program Options 177 .
2.4
Zoom and Pan
2.4.1
How to Zoom
There are several ways to zoom in/out a design:
1. Select a zoom level directly from the Zoom Level pull down box on the Main Bar
113
.
2. Pressing the '+' key on the keyboard to zoom in to the next level or the '-' key to zoom out to the next level.
3. Click on the
icon on the Primary Bar 114 . This will invoke the zoom function with which you can perform various zoom
operations:
· On the Zoom Options Bar 123 , you can choose to Zoom In, Zoom Out, Zoom to Fit Window, Zoom to Selection and Zoom to
Actual Size.
· In the Design Window, draw a box and the design will be zoomed to a size closely match the size of the box.
4. Draw a box in the Aerial View Window to zoom (refer to Using Aerial View
16
for more details).
Also there are 2 special zoom functions under the View Menu 111 :
1. Zoom to Selection will zoom the current select objects and stitches to the size of the Design Window.
2. Last Zoom will change back to the last zoom level.
2.4.2
How to Pan
There are several ways to pan through a design:
1. If the design is zoomed to be larger than the Design Window, horizontal and/or vertical scroll bars will appear automatically. You
can pan through the design using the scroll bars the same way you use them in common Windows programs.
2. Press down the Alt key and one of the arrow keys together to pan in the direction of the arrow key.
3. Click on the
icon on the Zoom Toolbar 144 in the Primary Bar 114 to invoke the Real-time Pan function. The cursor will be
changed to a hand shape and you can click and drag in the Design Window to pan. You can also pan Real-time by pressing down
the Space key on the keyboard and at the same time click and drag in the Design Window.
4. Click on a point in the Aerial View Window to pan (refer to Using Aerial View
2.4.3
16
for more details).
Using Aerial View
There are chances that you get lose where you are at a design after several zoom and pan operations and the Aerial View Window
will be useful under such circumstances. Click on the Aerial View from the View Menu 111 or press Ctrl-W on the keyboard to open
the Aerial View Window. The whole design is scaled and displayed in the window. A red rectangle is drawn inside the Aerial View
Window, which indicates the current viewing area. You can perform zoom and pan function within the Aerial View Window by:
· To pan, click in the Aerial View Window and drag the red rectangle to the area you want to pan to.
· To zoom, click in the Aerial View Window to draw the first point of a box. Release the mouse button and move the cursor to the
second point of the box you want to zoom to. A blinking rectangle will be shown as you move the cursor. Click again at the second
point of the box and the design will be zoomed to a size closely matched the size of the box you have drawn.
2005-06, Sew Good Software, Inc
Designs Viewing & Manipulation
2.5
Slow Redraw
2.5.1
Normal Slow Redraw
17
To start Normal Slow Redraw, click on the
icon on the Slow Redraw Toolbar 146 on the Stitch View Control Bar 143 , or select
Slow Redraw from the View Menu 111 . The Play Stitching button on the Slow Redraw Options Bar 124 , as shown below, will be
turned on automatically and the program will start redrawing the current design starting from the beginning. Also the Slow Redraw
Options Bar 124 will be displayed, allowing you to:
· Control the speed of redrawing by adjusting the slider bar towards the right for increasing speeds and left for decreasing speeds.
· Pause redrawing by clicking on Pause and resume redrawing by clicking on Play Stitching.
· Redraw from the start by clicking on Replay.
· Step forward or backward by 1, 10 stitches or 100 stitches increments.
· Move forward or backward by a stitch block.
· Move forward of backward by a needle.
· Hotkeys
Forward 1 stitch
2.5.2
Right arrow key
Backward 1 stitch
Left arrow key
Forward 10 stitches
Shift-Right arrow key
Backward 10 stitches
Shift-Left arrow key
Forward 100 stitches
Ctrl-Right arrow key
Backward 100 stitches
Ctrl-Left arrow key
Forward 1 stitch block
Down key
Backwad 1 stitch block
Up key
Forward 1 needle
Shift-Down key
Backward 1 needle
Shift-Up key
3D Simulation Slow Redraw
To start 3D Simulation Slow Redraw, click on the
icon on the Slow Redraw Toolbar 146 on the Stitch View Control Bar 143 , or
select Simulation Slow Redraw from the View Menu 111 . The operations of 3D Simulation Slow Redraw is exactly the same as
Normal Slow Redraw 17 . The difference between the two is that when using this redraw function the program will redraw stitch lines
in a 3D simulation way, giving you a better visual effect of how the design will be like after sewed out.
2.6
Align and Distribute
You can align stitch blocks to Top, Bottom, Left, Right, Vertical Center or Horizontal Center as follows:
1. Select the stitch block(s) that you want to align (refer to Select Stitch Block(s)
14
for more details).
2. Select the corresponding Align function from the Align & Distribute submenu under the Edit Menu
110
.
Similarly, you can distribute stitch blocks to space evenly in the horizontal or vertical direction as follows:
1. Select the stitch block(s) that you want to align (refer to Select Stitch Block(s)
14
for more details).
2. Select the corresponding Distribute function from the Align & Distribute submenu under the Edit Menu
2005-06, Sew Good Software, Inc
110
.
18
2.7
SEDS II
3D Simulation View
To turn on/off 3D Simulation View mode, click on the
icon on the Stitch View Control Bar 143 , or select Simulation Display
from the View Menu 111 . If on, stitches on the current design will be display in a 3D simulation way, giving you a better visual effect
of how the design will be like after sewed out. Below is an example to show the effect will 3D simulation on and off:
3D simulation off
3D simulation on
See Choose Simulation Background 18 for more details for how to change the background for simulation view. (The example above
use Default Pattern as background)
2.7.1
Choose Simulation Background
You can choose the display the background for simulation view in 3 different ways by selecting the corresponding menu item from the
Simulation Background submenu of the View Menu 111 :
· Single Color - Background is displayed as single solid color using the color defined in Background in the Program Options 177 .
· Default Pattern - Background is displayed using the default fabric-like pattern generated automatically by the program.
· Background Image - Background is displayed using the user-defined image, which will be tiled in the Design Window if its size is
smaller than the Design Window. See Import Simulation Background Image 18 for more details.
2.7.2
Import Simulation Background Image
To open or change the background image, follow the steps below:
1. Select Import Simulation Background Image from the Import submenu of the File Menu
Background Image Dialog Box 152 , as shown below, will be opened.
108
. The Import Simulation
2. Select the folder where the image is located from Look in.
3. Select the image type, or use All Image Files. The program currently supports BMP, JPEG, TIFF, PCX, GIF, MSP, RAS, PCT,
2005-06, Sew Good Software, Inc
Designs Viewing & Manipulation
19
WMF, PSD and AWD formats.
4. Click Import to import the image. Note that importing a new image will replace the original one if exists.
5. Click Browse will invoke the Image Browser
2.8
32
, allowing you to select a background image there.
Stitch Blocks Navigation
After selecting a certain stitch block, you can jump to the previous or the next stitch block easily by:
· Click on the
icon on the Stitch View Control Bar 143 to jump to the previous block or the
to jump to the next block.
· Press the Page Up key on the keyboard to jump to the previous block or the Page Down key to jump to the next block.
2.9
Change Color
Follow the steps below to change the color of stitch block(s):
1. Select the stitch block(s) that you want to change color (refer to Select Stitch Block(s)
blocks with different colors and change them all to the same color.
14
for more details). You can select stitch
2. Select the destination color from the Color Bar 115 .
3. Right-click in the Design Window and select Change Color in the context menu.
Note that the sequence of the stitch blocks may be altered if you change the colors.
2.10
Measurement
You can use the measurement tool to measure lengths and angles in the Design Window. To use:
1. Click on the
icon on the Primary Bar 114 .
2. Click on a point in the Design Window. This is the anchor point.
3. With the mouse button released move the cursor around in the Design Window and a blue dotted line will be drawn from the
anchor point to wherever the cursor is moved.
4. The length between the current cursor position and the anchor point will be shown on the Status Bar
dotted line and the horizontal axis will be shown also in anti-clockwise direction.
2.11
148
. The angle between the
Printout
Follow the steps below to print out a design:
1. Open the design file (refer to Open a Design
2. Click on the
icon on the Main Bar
3. The Print Dialog Box
2005-06, Sew Good Software, Inc
158
113
10
for more details on how to open a design).
, or select Print from the File Menu
will be displayed as shown below:
108
, or press CTRL-P on the keyboard.
20
SEDS II
4. Click Print Setup to change printer related properties, like which printer, printing direction etc.
5. Select All to print the whole design or Selected to print just the selected stitch blocks, in which case you need to select stitch
blocks first before printing.
6. Select a magnification scale from the Scale list.
7. Mark the check box for each information tab to be printed.
8. Select Preview to display a preview of the final output.
9. Select Print to start printing.
2.12
Using Stitch Browser
You can use the Stitch Browser to perform functions like selection, navigation, editing of stitch blocks. See Stitch Browser
more details.
3
Designs Output and Conversion
3.1
Using Save As
99
for
The Save As function can be used to:
· Save the current design file to a new name.
· Save the current design file to another folder.
· Convert the current design file to another DOS format design file, such as EDS, EDF, EDP, DST, CND, EXP, TAP, PEC, PES,
PCS, PCM, KSM, HUS and SEW.
To use, follow the steps below:
1. Select Save As from the File Menu
2. The Save As Dialog Box
150
108
.
will be displayed, as shown below:
2005-06, Sew Good Software, Inc
Designs Output and Conversion
21
3. Select the folder you want to save the design to from Save in.
4. The original name of the design file will be shown in File name. Change it to a new name if desired.
5. Select the format you want to save the design to from Save as type.
6. If the design file includes a background image (applicable to EDS, EDF and EDP files only), check Save background image if
you want to save the background image also. Note that the image will be embedded in the design file and thus increase its size.
7. Click Save to finish. Note that if there is a design file with the same name as you entered, a warning dialog box will be displayed
asking you if you want to overwrite the file. Click Yes to overwrite or No to go back and enter a new file name.
3.2
Using Punch Floppy Export
The Punch Floppy Export function is primarily used to save design files directly to a floppy diskette, which is the only option for NONDOS formats, such as FMC, FDR, ZSK, NORMAL CND, NORMAL EXP. These NON-DOS floppy diskettes needed to be specially
formatted before used (refer to Floppy Disk Format 23 for more details).
To use, follow the steps below:
1. Insert a formatted floppy diskette in the floppy drive.
2. Select Punch Floppy Export from the Export submenu of the File Menu
3. The Punch Floppy Export Dialog Box
2005-06, Sew Good Software, Inc
155
108
will be displayed, as shown below:
.
22
SEDS II
4. The original design file name will be shown in Name and you can change it to another name. Click Browse to check the list of files
already in the floppy diskette.
5. Select the destination output format from the Format list. Note that the default filter will be selected automatically in Filter when
you select a format. You can select your own defined filter is desired (See Machine Code Filter 24 for how to create your own
filters).
6. Check Trace if you want to add a series of jump stitches to the beginning of the output, which run along the border of the design.
This may help you to check if the design is out of bound.
7. Click Punch to start.
3.3
Using Punch Tape Export
The Punch Tape Export function is primarily used to output design files to paper tapes using a tape puncher, in Tajima, Barudan,
ZSK or MELCO EXP format.
To use, follow the steps below:
1. Connect the tape puncher to one of the available serial(COM) ports and power on.
2. Select Punch Tape Export from the Export submenu of the File Menu
108
.
3. The Punch Tape Export Dialog Box 156 will be displayed, as shown below:
4. The original design file name will be shown in Name and you can change it to another name.
2005-06, Sew Good Software, Inc
Designs Output and Conversion
23
5. Select the destination output format from the Format list. Note that the default filter will be selected automatically in Filter when
you select a format. You can select your own defined filter is desired (See Machine Code Filter 24 for how to create your own
filters).
6. Check Trace if you want to add a series of jump stitches to the beginning of the output, which run along the border of the design.
This may help you to check if the design is out of bound.
7. Select the serial(COM) port which is connected to the tape puncher in COM Port and click Settings to change the settings of the
serial(COM) port if necessary.
8. Click Punch to start.
3.4
Using Punch Direct Export
The Punch Direct Export function is primarily used to output design files directly to embroidery machines.
To use, follow the steps below:
1. Connect the embroidery machine to one of the available serial(COM) ports and power on.
2. Select Punch Direct Export from the Export submenu of the File Menu
108
.
3. The Punch Direct Export Dialog Box 157 will be displayed, as shown below:
4. The original design file name will be shown in Name and you can change it to another name.
5. Select the destination output format from the Format list. Note that the default filter will be selected automatically in Filter when
you select a format. You can select your own defined filter is desired (See Machine Code Filter 24 for how to create your own
filters).
6. Check Trace if you want to add a series of jump stitches to the beginning of the output, which run along the border of the design.
This may help you to check if the design is out of bound.
7. Select the serial(COM) port which is connected to the embroidery machine in COM Port and click Settings to change the settings
of the serial(COM) port if necessary.
8. Click Punch to start.
3.5
Floppy Disk Format
The Floppy Disk Format function is used to format floppy diskette, especially for NON-DOS formats, such as FMC, FDR, ZSK,
NORMAL CND and NORMAL EXP.
To use, follow the steps below:
1. Insert a blank floppy diskette into the floppy drive. For NON-DOS formats, you need a DD diskette. IF YOU USE A NON-BLANK
DISKETTE, ALL CONTENTS WILL BE ERASED.
2005-06, Sew Good Software, Inc
24
SEDS II
2. Select Floppy Disk Format from the File Menu
3. The Floppy Disk Format Dialog Box
157
108
.
will be displayed, as shown below:
4. Select a format from the Disk Format Select list. Note that DST, CND, EXP, TAP, PEC, PES, PCS, PCM, KSM, HUS and SEW
are DOS compatible and you can use the Windows Explorer to perform formatting for them.
5. Click Format to start formatting.
3.6
Machine Code Filter
Not every machine is built the same, and, likewise, not every user's requirements are the same. Have you ever wished you could add
three hit stitches right before you do a color change? The Edit Machine Code Filter in SEDS II Achiever does this kind of thing well.
Users are allowed to edit each of the machine code functions individually and save as their own machine code filter, and use them to
output designs. This makes possible extra features that the machine does not support originally.
To use, follow the steps below:
1. Select Edit Machine Code Filter from the Tools Menu 113 .
2. The Edit Machine Code Filter Dialog Box
174
will be displayed, as shown below:
3. Select an existing filter from the Filter list, or click New to create a new filter.
4. Select a machine code from the From list that you want to change.
5. Input the sequence of codes, separated by ";" in To. The values enclosed in the bracket are horizontal displacement and vertical
displacement in units of 0.1mm. Use (0, 0) for no displacement codes and (X, Y) for codes with original displacement. Available
codes are:
· HIT - needle down
· JUMP - needle up
· TRIM - trim
· STOP - stop
· NEEDLE_CHG - needle change
· NEEDLE_xx - needle number xx
· SLOW - slow speed
· FAST - fast speed
· FRAME_IN - move frame in
· FRAME_OUT - move frame out
· SEQ_ON - cutter needle
· TAPE_END - end of file
· NEEDLE_UP - needle up
2005-06, Sew Good Software, Inc
Designs Management using Album
4
25
Designs Management using Album
The Album function is used for designs management. You can categorize designs by grouping them in an album and performs
advance searching and sorting functions within the album. To use, select Album from the File Menu 108 and the Album Dialog
Box 174 will be opened, as shown below:
· Manage an Album 25
· View Designs in Album 26
· Manage Designs Using Album
4.1
Manage an Album
·
·
·
·
4.1.1
27
Create a New Album 25
Delete an Album 26
Select an Album 26
Lock/Unlock an Album 26
Create a New Album
Follow the steps below to create a new album:
1. Type a name for the new album in the Album List box.
2. Click on the
icon on the toolbar.
3. An empty album will be created.
2005-06, Sew Good Software, Inc
26
4.1.2
SEDS II
Delete an Album
Follow the steps below to delete an album:
1. Select the album you want to delete (refer to Select an Album
2. Click on the
26
for more details).
icon on the toolbar.
3. A delete confirmation dialog box will be displayed and click Yes to delete and No to cancel.
4.1.3
Select an Album
You need to select an album first before you can view its contents or manipulate it. This is done by selecting from the Album List
box. (Click on the button with a down arrow to open the list of albums and click on one to select.)
4.1.4
Lock/Unlock an Album
Click on the
icon to lock an album and the
icon to unlock it. These two icons will be shown alternatively depending on
whether an album is locked or not. When locked you cannot add items to or remove items from the album.
4.2
View Designs in Album
·
·
·
·
4.2.1
View all Designs 26
View Search Result 26
View the Selected Design 26
View Design Information 27
View all Designs
To view all designs in the current album, click on Archive List. There all designs are shown as thumbnails and you can perform the
following operations:
· Click on a thumbnail will select the design and the frame of the thumbnail will change to blue color when selected.
· Double click on a thumbnail will open the design to a Design Window.
· Right-click anywhere in Content Window and select Sort Items from the context menu will display a submenu for sort options:
· By Name - Sort by name in ascending order.
· By Size - Sort by height and then by width in ascending order.
· By Stitches - Sort by the total number of stitches in ascending order.
· By Last Edit Time - Sort by the last edited date in ascending order.
4.2.2
View Search Result
To view the result from the Search function (refer to Search Designs in Album 28 for more details), click on Search Result. Only
thumbnails of the designs that match the search criteria will be shown. You can perform similar operations as in Archive List (refer
to View all Designs 26 for more details).
4.2.3
View the Selected Design
To view a design in a large view, select a design in Archive List or in Search Result and then click on View Selected. Right-click
anywhere in Content Window will open a context menu with the following functions:
·
·
·
·
·
Zoom In
Zoom Out
Zoom 1:X - Zoom to pre-defined scale
Zoom to Window
Hide/Show Ruler - Turn On/Off the display of the ruler
2005-06, Sew Good Software, Inc
Designs Management using Album
4.2.4
27
View Design Information
You can obtain useful information, such as size, total number of stitches, total number of color changes etc, of designs in an album in
the following ways:
· Information of the selected design shown on the Message Bar (refer to Designs Management using Album
25
for more details).
· By default, thumbnails are shown in Compact View mode, in which just the file name of the designs are displayed. However you
can switch to Normal View mode by clicking on the
icon on the Toolbar. In this mode, the size in mm, total number stitches
and number of color changes will be displayed as well under each thumbnail. Note that the Normal View icon
Compact View icon
·
and the
will be shown alternatively depending on the current view mode.
Right-click on a thumbnail and select Properties from the context menu will open the design properties dialog box as shown
below:
Note that the Thread Length property will be shown only for EDS files.
4.3
Manage Designs Using Album
·
·
·
·
·
4.3.1
Add a Design to Album 27
Open a Design from Album 28
Delete a Design from Album 28
Search Designs in Album 28
Print Designs in Album 29
Add a Design to Album
Follow the steps below to add design files to an album:
1. Select an album into which you want to add designs (refer to Select an Album
2. Click the
26
for more details).
icon on the toolbar to unlock the album if it is locked.
3. Select Archive List.
4. Click on the
icon on the toolbar, or right-click in the Content Window and select Add Items from the context menu. The
dialog box below will be shown:
2005-06, Sew Good Software, Inc
28
SEDS II
5 Select the folder where the designs are located in Look in.
6 Select multiple files from the file list window or type in the name of a design in File name.
7 Click Open to add the files to the album.
Note that when you add designs to an album, only the paths and thumbnails are saved in the album but not the designs themselves.
4.3.2
Open a Design from Album
The Album Window is designed to be able to co-function with the main program, meaning that you can continue to work in the main
program window with the Album Window opened. The ability the open a design file directly from an album make it very easy for you to
manipulate your designs. Follow the steps below to open a design from an album:
1. Select the album which contain the designs you want to open (refer to Select an Album
26
for more details).
2. Choose to open designs from Archive List or Search Result.
3. Select the thumbnail of the design you want to open and the click on the
and select Open from the context menu, or double click on the thumbnail.
icon on the toolbar, or right-click on the thumbnail
4. The design will be opened in a new Design Window.
Note that sometimes the
4.3.3
icon will be disabled. This happens when the design file no longer exists in the path saved in the album.
Delete a Design from Album
Follow the steps below to delete design files from an album:
1. Select an album from which you want to delete designs (refer to Select an Album
2. Click the
26
for more details).
icon on the toolbar to unlock the album if it is locked.
3. Choose to delete designs from Archive List or Search Result.
4. Select the thumbnail of the design you want to delete and the click on the
and select Delete from the context menu.
icon on the toolbar, or right-click on the thumbnail
5. A deletion confirmation dialog box will be shown and click Yes to delete and No to cancel.
4.3.4
Search Designs in Album
The search function is very useful if you have a lot of designs in an album and need to display some of them with particular
properties. To use, click on the
icon on the toolbar and the Search dialog box will be displayed as shown below:
2005-06, Sew Good Software, Inc
Designs Management using Album
29
A number of search criteria are available and check the box on the left of it to enable it. Search will be performed for designs that
match all the enabled criteria.
·
·
·
·
·
·
·
·
·
File Name - Name of the designs. You can use wildcard characters here, e.g. a*.* means all designs with names start with 'a'.
File Type - Design file format, including EDS, EDF, EDP, DST, CND, EXP, TAP, PEC, PES, HUS, SEW, PCS, PCM, KSM.
No. of Stitches - Total number of stitches of the design.
Design X - Width of design in mm.
Design Y - Height of design in mm.
No. of Colors - Total number of colors in the design.
Color Changes - Total number of color changes (needles) in the design.
Date Created - The date the design was created (applicable to EDS, EDF, EDP files only).
Last Edited - The date the design was last edited (applicable to EDS, EDF, EDP files only).
Note that the Design Info and Product Info tabs are for advanced search options for EDS files ONLY.
4.3.5
Print Designs in Album
You can print thumbnail of designs in an album using the Print function. To use, follow the steps below:
1. Select the album with the designs you want to print (refer to Select an Album
26
for more details).
2. Choose to print designs from Archive List or Search Result.
3. Click on the
icon on the toolbar. The Print dialog box will be displayed as shown below:
2005-06, Sew Good Software, Inc
30
SEDS II
4. Select the design information you would like to print under each thumbnail in Output Information by checking the appropriate
boxes.
5. Select the number of rows and columns you want the thumbnails printed on a page in Rows and Columns.
6. Select Fixed to print thumbnails in a size pre-defined by the program according to Rows and Columns. Select Alterable to print
thumbnails at a size that fit the page as much as possible. You can notice the effect of Fixed and Alterable in the Page Preview
window in real time.
7. Click Preview to check if you are satisfy with the layout if necessary.
8. Click Print to start printing.
9. You can select to print the thumbnails to a html file. Click HTML Output and the dialog box below will be shown:
Input the name of the html file you want to create in Destination File and select an image for the Banner File, if any. The banner
image will be shown at the top of the html file. Click Output to create the file.
5
Designs Creation
SEDS II Achiever is an object-base digitizing program, meaning that all stitch blocks, except manual stitch types blocks, rely on one
or more objects. An object is a geometric shape created by the user to define an area or a path in/along which a stitch block is to be
created. You can create any desired shape objects from scratch, or trace from virtually any type of artwork imported into the program.
Each stitch type has its own specific requirement on objects. For example, Normal Fill Stitch type requires one or more closed objects
(objects that do not have open ends). Objects and their properties can be shared by more than one stitch block. When the shape or
size of an object changed, all the stitch blocks attached to it change too. This is what we call object inheritance.
The objects creation process and the stitches creation process are completely separated, so that you can create all or part of the
objects first and then create stitches on them.
2005-06, Sew Good Software, Inc
Designs Creation
5.1
31
About Images
Background images are used to trace objects as well as used in OneTouch auto-digitizing and Photo Stitches. You can choose to
turn on/off the background image by checking/un-checking Displaying Background Image from the Design View submenu of the
View Menu 111 .
Refer to the following for more details on how to work with images:
· Import an Image 31
· Acquire Image 32
· Export Image 33
· Reduce Image Color 33
· Mirror and Rotate 34
· Image Editing 34
5.1.1
Import an Image
To import an image in the current Design Window, follow the steps below:
1. Select Import Image from Import submenu of the File Menu
below:
108
. The Import Image Dialog Box 151 will be opened, as shown
2. Select the folder where the image is located from Look in.
3. Select the image type, or use All Image Files. The program currently supports BMP, JPEG, TIFF, PCX, GIF, MSP, RAS, PCT,
WMF, PSD and AWD formats.
4. Select the file from the file list window or if you know the name type it in File name.
5. Enter a value, in mm or inch, in Margin to add margins around the image when import.
6. Check Import As New if you want to import the image to a new Design Window. The new Design Window thus created will be of
same size as the image plus margins.
7. If Import As New is not checked, choose between Fit Design size and Keep Size. Fit Design Size will scale the image to fit
the size of the Design Window minus margins. Keep Size will import the image at its original size. It will be truncated if bigger
than the size of the Design Window minus margins.
8. Check Constrain Proportions to keep the original aspect ratio if scaling is required. (Enabled only when Fit Design Size is
selected.)
9. Check Center to put the image at the center of the Design Window. (Enabled only when Keep Size is selected.)
2005-06, Sew Good Software, Inc
32
SEDS II
10. Click Import to import the image.
You can also click Browse to invoke the Image Browser
5.1.1.1
32
to import an image from there.
Image Browser
The Image Browser Dialog Box 172 , as shown below, will be displayed when you click on Browse in the Import Image Dialog
Box 151 . This gives you thumbnail views of all images the in a folder.
· Select a folder from the Folder List Window.
· To open an image, select it from the Thumbnail Window by clicking on the thumbnail and then click the
double click on the thumbnail.
5.1.2
icon in the Toolbar, or
Acquire Image
You can import an image from a TWAIN device, like a scanner, directly into the current Design Window. To use, follow the steps
below:
1. Select Select Source from the File Menu
108
, the Select Source Dialog Box will be displayed, as shown below:
You can skip this and the next step if you are using the last used device.
2. Select a device from the Sources list and click Select.
3. Select Acquire Image from the File Menu
user manual to acquire the image.
108
, a device specific dialog box will be opened and follow the steps in your device's
4. The image will be placed in the current Design Window when finished.
2005-06, Sew Good Software, Inc
Designs Creation
5.1.3
33
Export Image
You can choose to save the background image only (e.g. after acquiring the image from a scanner) for later use. To Use:
1. Select Export Image from the Export submenu of the File Menu
108
.
2. The Export Image Dialog Box 153 will be displayed, as shown below:
3. Select the folder you want to save the image to from Save in.
4. Input a file name in File name.
5. Currently, only BMP format is supported.
6. Click Save to save.
5.1.4
Adjust Brightness
You can adjust the brightness of the background image as follows:
5.1.5
·
To lighten the background image, click the
icon on the Stitch View Control Bar 143 , or press F11 on the keyboard.
·
To darken the background image, click the
icon on the Stitch View Control Bar 143 , or press F12 on the keyboard.
Reduce Image Color
Sometimes it is necessary to reduce the number of colors in an image in order to use some features, like OneTouch auto-digitizing,
or to obtain better results in certain features.
The function can be started by clicking on the
icon in the OneTouch Toolbar 146 , or by selecting Reduce Image Color from the
Edit Menu 110 . The Reduce Image Color Bar 147 will be displayed on top of the program window, as shown:
This function works by first selecting a number of reference colors, either:
(i) automatically by the program as below:
1. Check Auto Select Color.
2. Input the Number of Colors you want to reduce to.
Or
2005-06, Sew Good Software, Inc
34
SEDS II
(ii) manually as below:
1. Uncheck Auto Select Color.
2. Click on any area that contains a color you wish to be a reference color. Notice that the color you selected will be added in the
Reduce Image Color Bar 147 and the Number of Colors will be increased by one each time a color is added.
3. If you make a mistake or for some reasons you want to remove a selected color, just click on the color on the Reduce Image
Color Bar 147 .
Usually the automatic method will have the job done satisfactorily but in some cases if the result is not undesirable you may try the
manual method.
Note that if you are preparing the image for OneTouch auto-digitizing, Number of Colors MUST be below 14.
After the reference colors are selected, click Do to start processing.
When finished, examine the quality of the image and if you think it is not good enough click Undo on the Reduce Image Color
Bar 147 to undo the changes. You may try to change the value in Number of Colors or use the manual method describe above to
obtain a better result.
5.1.6
Image Mirror and Rotate
The image mirror and rotate functions are located on the Edit Menu 110 :
Image X-Mirror
Mirror the background image of the active Design Window in the horizontal direction.
Image Y-Mirror
Mirror the background image of the active Design Window in the vertical direction.
Image Rotate
Rotate the image of the active Design Window by a arbitrary angle.
When select, the Rotate Image dialog box will be show as below:
Rotate Angle
Angle of rotation, positive values rotate clockwise and negative values counter clockwise.
Preview
Preview the rotated image in the Design Window before confirmation.
5.1.7
Image Editing
You can invoke an external graphic editor to edit the image in the Design Window as follows:
1. Choose the graphic editor program by selecting Select Image Editor from the Edit Menu
will be shown as below:
110
. The Select Image Editor dialog box
2005-06, Sew Good Software, Inc
Designs Creation
35
2. Change to the folder when the graphic editor program is located from Look in.
3. Enter the name of the graphic editor program (usually with an "exe" extension) in File name.
4. Click Select and this program will be selected as the default graphic editor (you don't need to select it each time if you are using
the same program to edit).
5. Select Image Edit from the Edit Menu 110 . This will invoke the default graphic editor and the current image will be opened
automatically. Use the editor to do whatever modifications necessary. Upon finish, save the image and exit the graphic editor
program. The modified image will appear in the current Design Window automatically.
5.2
About Objects
There are two types of object (also commonly known as vector): closed and open objects. A closed object is a continuous, circular
path, as in an ellipse or a polygon. An open object, on the other hand, is a shape that does not form a complete loop, such as a line or
an arc. While this may seem obvious, note that it is possible to create an object that appears to be closed (the ends of a curve appear
to touch) but actually isn't. In SEDS II Achiever, objects are used to:
· As a base for stitches creation.
· Define the area of operation in the Photo Stitch function.
· Define the path (refer to On One Object
lettering.
67
for more details) or envelope (refer to Between Two Objects
67
for more details) of
The shape of objects is defined by points called Anchor Points, which are points drawn by the user that determine its ends, degree
of curvature or angle for any given area on that object. There are two types of anchor points: a corner point, and a curved point.
Corner points are shown as small black filled-in squares while curved points are represented as open squares, shown in the figure
below:
Refer to the following topics for more information on objects:
·
·
·
·
·
Create an Object 36
Object Editing 38
Import Vector File 42
Export Objects 43
Auto Trace 44
2005-06, Sew Good Software, Inc
36
5.2.1
SEDS II
Create an Object
The object creation tools are located on the Primary Bar 114 . With the line/curve tool you can create arbitrary shape objects and with
other tools like ellipse or rectangle, you can create regular shape objects. Refer to the followings for more details:
·
·
·
·
·
5.2.1.1
Line & Curve 36
Circle & Ellipse 36
Square & Rectangle
Polygon/Star 37
Circular Arc 38
37
Line & Curve
You can create a open or closed shape with combination of polylines and curves as show below:
1. Select the line
icon or the curve
'curve' mode respectively.
icon from Line Toolbar 144 on the Primary Bar 114 . This will start the shape in 'line' or
2. If 'line' mode is selected, click once in the Design Window will add a 'line' point to the shape, otherwise a 'curve' point will be
added.
3. You can press the Backspace key on the keyboard to delete the last added point in case you make a mistake.
4. In the course of drawing a shape you can switch 'line' and 'curve' mode but selecting the
on the keyboard.
or the
icon, or by pressing F4
5. Double click on the last point of the shape to end.
6. To create a closed shape, move the cursor near the first point and when a small square appear on the first point double click to
end.
5.2.1.2
Circle & Ellipse
Follow the steps below to create a circle or ellipse:
1. Select the ellipse
icon from Ellipse Toolbar 144 on the Primary Bar 114 .
2. For circle, push down the
button on the Ellipse/Rectangle Options Bar 124 while for ellipse have it up.
3. With the
button up, if the
button is up, each click in the Design Window will define a diagonal point of the circle/ellipse.
Otherwise the first point will be the center and the second point a circumference point.
4. Or, wth the
height.
button down, the first two points will define a center line of the circle/ellipse and the third point will control the
Follow the steps below to create concentric circles or ellipses:
1. Select the concentric ellipse
icon from Ellipse Toolbar 144 on the Primary Bar 114 .
2. For concentric circles, push down the
up.
button on the Ellipse/Rectangle Options Bar 124 while for concentric ellipses have it
3. With the
button up, if the
button is up, each click in the Design Window will define a diagonal point of the circle/ellipse.
Otherwise the first point will be the center and the second point a circumference point.
4. Click 2 points in the Design Window to create the first circle/ellipse.
5. Continue to click in the Design Window will create circle/ellipse with the same center as the first one. Each point click will be
circumference point.
6. Or, wth the
height.
button down, the first two points will define a center line of the circle/ellipse and the third point will control the
7. Click 3 points in the Design Window to create the first circle/ellipse.
8. A rubberband line with one end at the center of the first circle/ellipse will be shown. The first point clicked will define a 'radial'
2005-06, Sew Good Software, Inc
Designs Creation
37
center line and the second point will control the height. Continue to click pair of points to create concentric circle/ellipse as desired.
5.2.1.3
Square & Rectangle
Follow the steps below to create a square or rectangle:
1. Select the rectangle
icon from Rectangle Toolbar
2. For square, push down the
145
on the Primary Bar 114 .
button on the Ellipse/Rectangle Options Bar 124 while for rectangle have it up.
3. With the
button up, if the
button is up, each click in the Design Window will define a diagonal point of the
square/rectangle. Otherwise the first point will be the center and the second point a circumference point.
4. Or, wth the
height.
button down, the first two points will define an edge of the square/rectangle and the third point will control the
Follow the steps below to create concentric squares or rectangles:
1. Select the concentric rectangle
icon from Rectangle Toolbar
2. For concentric squares, push down the
it up.
145
on the Primary Bar 114 .
button on the Ellipse/Rectangle Options Bar 124 while for concentric rectangles have
3. With the
button up, if the
button is up, each click in the Design Window will define a diagonal point of the
square/rectangle. Otherwise the first point will be the center and the second point a circumference point.
4. Click 2 points in the Design Window to create the first square/rectangle.
5. Continue to click in the Design Window will create square/rectangle with the same center as the first one. Each point click will be
circumference point.
6. Or, wth the
height.
button down, the first two points will define an edge of the square/rectangle and the third point will control the
7. Click 3 points in the Design Window to create the first square/rectangle.
8. A rubberband line with one end at the center of the first square/rectangle will be shown. The first point clicked will define a 'radial'
center line and the second point will control the height. Continue to click pair of points to create concentric square/rectangle as
desired.
5.2.1.4
Polygon/Star
Follow the steps below to create a polygon or star shape:
1. For polygon, select the
icons from Polygon/Star Toolbar
145
on the Primary Bar 114 . For star shape, select the
2. For regular polygons or star shapes (sides of same length), push down the
icon.
button on the Polygon/Star Options Bar 124 .
3. With the
button up, if the
button is up, each click in the Design Window will define a diagonal point of the polygon/star
shape. Otherwise the first point will be the center and the second point a circumference point.
4. Input the number of sides in
.
5. Click 2 points in the Design Window to create the polygon/star shape.
6. Or, wth the
height.
button down, the first two points will define an edge of the polygon/star shape and the third point will control the
7. Input the number of sides in
.
8. Click 3 points in the Design Window to create the polygon/star shape.
2005-06, Sew Good Software, Inc
38
SEDS II
5.2.1.5
Circular Arc
Follow the steps below to create a circular arc:
1. Select the circular arc
icon from Ellipse Toolbar 144 on the Primary Bar 114 .
2. Move the cursor to one of the end points of the arc and click in the Design Window.
3. Move the cursor to any point of the arc and again click in the Design Window.
4. Move the cursor to the other end point of the arc and click in the Design Window to end.
5.2.2
Object Editing
Operations on objects, like move, resize, rotate, copy, delete, mirror etc are very similar to the corresponding operations for stitch
blocks except you need to select the objects (refer to Select Object(s) 14 for more details) first instead of stitch blocks. Refer to the
following for more details:
·
·
·
·
·
·
·
·
·
·
5.2.2.1
Move/Resize Object(s) 38
Rotate Object(s) 39
Mirror Object(s) 40
Copy Object(s) 40
Delete Object(s) 40
Add/Delete Anchor Points
Geometric Transform 41
Cut Object 41
Join Object 42
Cut Closed Object 42
40
Move/Resize Object(s)
Follow the steps below to move or resize object(s):
1. Select the object(s) you want to move/resize (refer to Selecting Object(s)
14
for more details).
2. The 9 move/resize control nodes shown below will be displayed at the boundary rectangle of the object(s).
3. To resize the object(s), hold down the mouse button on one of the 'square' control node. Drag the mouse and the object(s) will be
re-sized in the direction corresponding to the position of the control node, e.g. if the bottom-right control node is used, the object(s)
will be re-sized in the bottom-right direction. Release the mouse button to end.
4. To move the object(s), hold down the mouse button on the 'cross' control node at the center and drag the mouse to move the
block(s). Release the mouse button to end.
5. You can also enter the exact size or position from the Object Properties Dialog Box 176 , which can be opened by pressing F7 on
the keyboard, or selecting Object Properties from the Edit Menu 110 , as shown:
2005-06, Sew Good Software, Inc
Designs Creation
39
· To change position, select Position and input the values in X Position for horizontal displacement and Y Position for vertical
displacement. The values entered will be relative to the original position if Offset is selected, or to the lower left corner of the
file if From File Origin is selected.
· To change size, select Stretch and input the Width and/or Height in mm or as a percentage of the original values. Check
Proportionate to maintain the original aspect ratio. You can also specify the Anchor Point of re-size (the point that doesn't
move) in At Object.
5.2.2.2
Rotate Object(s)
Follow the steps below to rotate object(s):
1. Select the object(s) you want to rotate (refer to Selecting Object(s)
14
for more details).
2. Click on the 'cross' control node at the center (refer to Move/Resize Objects(s)
38
for more details).
3. The 9 move/resize control nodes will be change to the 5 rotate control nodes, as shown below:
4. The 'circle' control node at the center denotes the center of rotation. Hold down the mouse button on it and drag the mouse to
change its position. Release the mouse button to end.
5. To rotate the object(s), hold down the mouse button on one of the 'arc' control node at the corners and drag the mouse to rotate
the block(s). Release the mouse button to end.
6. You can also enter the exact angle and/or the center of rotation from the Object Properties Dialog Box 176 , which can be opened
by pressing F7 on the keyboard, or selecting Object Properties from the Edit Menu 110 , as shown:
2005-06, Sew Good Software, Inc
40
SEDS II
· Select Rotate and input value in Angle for the rotation angle, and select the center of rotation from At Object. Note
coordinates of the center of rotation relative to the lower left corner of the file will be shown in X Position and Y Position. If
"User defined" is selected in At Object, you can input values in X Position and Y Position manually.
5.2.2.3
Mirror Object(s)
Follow the steps below to mirror object(s):
1. Select the object(s) you want to mirror (refer to Selecting Object(s)
5.2.2.4
14
for more details).
2. Select X-Mirror from the Edit Menu
110
to mirror the object(s) in the horizontal direction.
3. Select Y-Mirror from the Edit Menu
110
to mirror the object(s) in the vertical direction.
Copy Object(s)
Follow the steps below to copy object(s):
1. Select the stitch object(s) you want to copy (refer to Selecting Object(s)
2. Select Copy from the Edit Menu
110
, or press Ctrl-C on the keyboard.
3. Select Paste from the Edit Menu
110
, or press Ctrl-V on the keyboard.
14
for more details).
4. Move the cursor to the position you want to place the copied object(s) and click in the Design Window to end.
5.2.2.5
Delete Object(s)
Follow the steps below to delete object(s):
1. Select the object(s) you want to delete (refer to Selecting Object(s)
2. Select Delete from the Edit Menu
110
14
for more details).
, or press the DEL on the keyboard will delete the object(s).
3. Alternatively, select Cut from the Edit Menu 110 , or press Ctrl-X on the keyboard will also delete the object(s) but in addition a
copy of the object(s) will be placed in the clipboard.
5.2.2.6
Add/Delete Anchor Points
Follow the steps below to add/delete anchor points of an object:
1. Select the object you want to add/delete anchor points (refer to Selecting Object(s)
14
for more details).
2005-06, Sew Good Software, Inc
Designs Creation
41
2. Select the
icon from the Object Manipulation Toolbar 145 on the Primary Bar 114 . Anchor points of the object will be shown
as black filled or blank rectangles according to their type.
3. Select the anchor points for operation. For single point selection just click on the point. For multiple points selection, draw a box in
the Design Window, which includes the points, or use CTRL/SHIFT clicks on points. CTRL clicks will toggle select/de-select of
points and SHIFT click will select all points in the range between the first and second point.
4. To delete point(s), select Delete from the right-click context menu.
5. To add point(s), select Insert Point from the right-click context menu. Then click on the Design Window to add points where
desired. Use the F4 key to toggle between line and curve points. Use the Backspace key to delete the last added point. Double
click will add the last point and end the operation.
6. To auto delete points, select Auto Delete Points from the right-click context menu. The program will delete points that are closed
to each other automatically.
7. To change the point(s) type from curve to line, select Change to Line Point from the right-click context menu.
8. To change the point(s) type from line to curve, select Change To Pass-Point Curve Point or Change To Not-Pass-Point
Curve Point from the right-click context menu. Curve will lie on the Pass-Point anchor points but not on the Not-Pass-Point
points.
9. You can also move the anchor points here if desired by dragging on one of the selected points.
5.2.2.7
Geometric Transform
Follow the steps below to perform geometric transform, like slanting, on object(s):
1. Select the object(s) you want to perform transformation (refer to Selecting Object(s)
14
for more details).
2. Select the
icon from the Object Manipulation Toolbar 145 on the Primary Bar 114 . A box envelope will be shown around the
object(s) with control nodes drawn as blank rectangles.
3. Drag the control nodes to adjust the shape of the envelope, nodes on the 4 corners are line nodes while the others are curve
nodes.
Tips:
· By moving either both upper or both lower corner nodes to the left or right, lettering may be uniformly slanted in italicized
fashion, as shown below:
· By moving a single upper corner node, perspective effects can be achieved, as shown below:
· By adjusting the center nodes on the upper and lower side to produce a dome shape lettering, as show below:
4. Select Enter from the right-click context menu or press the Enter key to confirm changes, or Exit from the right-click menu or the
ESC key to discard changes and exit the function.
5.2.2.8
Cut Object
Follow the steps below to cut an single object into 2 objects:
1. Select the object you want to cut (refer to Selecting Object(s)
2005-06, Sew Good Software, Inc
14
for more details).
42
SEDS II
2. Select the
icon from the Object Manipulation Toolbar 145 on the Primary Bar 114 .
3. Draw a line in the Design Window, the object will be cut at the intersection of the object and the line.
5.2.2.9
Join Object
Follow the steps below to join 2 objects or close a single object:
1. Select one or two object(s) you want to join (refer to Selecting Object(s)
2. Click the
14
for more details).
icon from the Object Manipulation Toolbar 145 on the Primary Bar 114 .
3. If 2 objects are selected, they will be combined to become a single object by adding a line at the nearest end points. If 1 opened
object is selected, it will be closed by adding a line joining the start and the end points.
5.2.2.10
Cut Closed Object
Follow the steps below to cut a closed object into 2 closed objects:
1. Select an closed object you want to cut (refer to Selecting Object(s)
2. Select the
14
for more details).
icon from the Object Manipulation Toolbar 145 on the Primary Bar 114 .
3. Draw a line in the Design Window which must cross 2 points on the object.
4. The object will be cut into 2 objects at the 2 cross points with lines added joining the points.
5.2.3
Import Vector File
You can import a vector file created by other graphics programs as objects in SEDS II Achiever. To use, follow the steps below:
1. Select Import Vector File from Import submenu of the File Menu
shown:
108
. The Import Vector File Dialog Box
42
will be opened, as
2. Select the folder where the vector file is located from Look in.
3. Select the vector file type, or use All Vector Files. The program now support WMF, EMF, PS and EPS formats.
4. Select the file from the file list window or if you know the name type it in File name.
2005-06, Sew Good Software, Inc
Designs Creation
43
5. Check Import As New if you want to import the vector file to a new design. The new design thus created will be of same size as
the vector file.
6. If Import As New is not checked, choose between Fit Design size and Keep Size. Fit Design Size will scale the vectors to fit
the size of the Design Window. Keep Size will import the vectors at their original size.
7. Check Constrain Proportions to keep the original aspect ratio if scaling is required. (Enabled only when Fit Design Size is
selected.)
8. Check Center to put the vectors at the center of the Design Window. (Enabled only when Keep Size is selected.)
9. Click Import to import the vector file.
You can also click Browse to invoke the Vector File Browser
5.2.3.1
43
to import a vector file from there.
Vector File Browser
The Vector File Browser Dialog Box 173 , as shown, will be displayed when you click on Browse in the Import Vector File Dialog
Box 152 . This gives you thumbnail views of all the vector files in a folder.
· Select a folder from the Folder List Window.
· To open a vector file, select it from the Thumbnail Window by clicking on the thumbnail and then click the
or double click on the thumbnail.
5.2.4
icon in the Toolbar,
Export Objects
You can export the objects you created in SEDS II Achiever for use in other graphics programs, or to create new emblems. To use,
follow the steps below:
1. Select Export Objects from the Export submenu of the File Menu
2. The Export Objects Dialog Box 154 will be displayed, as shown:
2005-06, Sew Good Software, Inc
108
.
44
SEDS II
3. Select the folder you want to save the image to from Save in.
4. Input a file name in File name.
5. Select a file format in Save as type, WMF and DXF formats are supported. Note that if saving objects for use as emblems, you
MUST WMF format.
6. Check Selected Only to save the selected objects only, otherwise all the objects in the Design Window will be saved.
7. Click Save to save.
5.2.5
Auto Trace
With this function, outline objects can be automatically created from the background image. This function work best if the background
image is clear with distinguished colors. Use the Reduce Image Color 33 function to reduce the colors in the image if necessary. To
use, follow the steps below:
1. Import an background image (Refer to Import an Image
2. Select the Auto Trace
31
for more details).
icon from the OneTouch Toolbar 146 on the Stitch Creation Bar
130
.
3. Select a color from the Color Bar 115 .
4. Click at a point in the Design Window. An outline object will be created for the connected area (same color) at that point.
5. You can continue to click on other areas to create the outline objects as desired.
5.3
Create a New Design
To create a new design, follow the steps below:
1. Select the
icon from the Main Bar
displayed, as shown:
113
, or select New from the File Menu
108
, the New Design Dialog Box
148
will be
2. Input the design width and height in either mm or inch. Note that the values in mm or inch will be calculated automatically if one of
them is changed.
2005-06, Sew Good Software, Inc
Designs Creation
45
3. Click Set as Default if you want to save the current sizes as the default sizes.
4. Click Lookup for preset hoop sizes for common machines.
5. Click OK to create the design. Note that the new design file will be named as "untitled??" and you will be asked to input the file
name and path the first time you save the design.
5.4
Basic Steps for Stitch Creation
Following are the basic steps required for successful stitch creation for most stitch types:
1. Create the object(s) (see Create an Object 36 for more details) that are required for a particular stitch type. Note that some
stitch types, like fill stitch types, accept closed objects only while some accepts both, like line types. You can also import a vector
file (see Import Vector File 42 for more details) as objects.
2. Select the object(s) (see Select Object(s)
14
for more details).
3. Select the stitch type from the Stitch Settings Bar 131 .
4. Input the settings for the stitch type in the Stitch Settings Bar 131 .
5. Select the
icon from the Stitch Creation Bar
130
, or press Enter or CTRL+G on the keyboard.
6. The Options Bar 115 for the particular stitch type will appear. Select the required options.
7. For most stitch types, the objects selected will be highlighted and default In/Out points will appear, In point in green and Out point
in Red. Drag the points to the desired positions. For some stitch types, like the satin, however, there are additional stages and
follow the prompts on the Status Bar 148 to proceed. Press Enter on the keyboard or select Enter from the right-click context
menu to go to the next stage.
8. Press Enter on the keyboard or select Enter from the right-click context menu.
9. The selected stitch type will be created and the Manual Stitch function will be invoked automatically after stitches are created.
10. Click on the Design Window to add manual stitches if desired.
11. Press ESC on the keyboard, or right-click in the Design Window and select EXIT from the context menu to end.
5.5
Fill Stitch Types
Fill stitch types require one or more closed objects. If more than one objects, one of them MUST enclose the others and they must
NOT cross each other. The inner objects will be treated as holes during stitch creation. For example:
Correct
Correct
Incorrect
Incorrect
· To change the default settings for Fill Stitch Types, select Settings Manager from the Tools Menu
See Fill Stitch Default Settings 78 for more details.
113
then select the Fill tab.
The following Fill Stitch Types are available:
· Normal Fill 45
· Jagged Fill 46
· Pattern Fill 46
· Column Fill 47
· Jagged Column Fill 48
5.5.1
Normal Fill
Target
Closed object(s). If more than one, one of them MUST enclose the others and they must NOT cross each other.
2005-06, Sew Good Software, Inc
46
SEDS II
Settings
Options
Procedures
See Basic Steps for Stitch Creation
45
for details.
Examples
Without Boundary Stitches
See Also
Jagged Fill
5.5.2
46
With Boundary Stitches
, Gradual Fill, Pattern Fill
46
, Column Fill
47
, Jagged Column Fill
With Holes
48
Jagged Fill
Target
Closed object(s). If more than one, one of them MUST enclose the others and they must NOT cross each other.
Settings
Options
Procedures
See Basic Steps for Stitch Creation
45
for details.
Examples
Left
See Also
Normal Fill
5.5.3
45
, Gradual Fill, Pattern Fill
Center
46
, Column Fill
47
Right
, Jagged Column Fill
48
Pattern Fill
Target
Closed object(s). If more than one, one of them MUST enclose the others and they must NOT cross each other.
Settings
2005-06, Sew Good Software, Inc
Designs Creation
Options
Procedures
1. Select a pattern using the Pattern Browser
2. See Basic Steps for Stitch Creation
45
165
, see Select a Pattern
88
for more details.
for details.
Examples
Without Boundary Stitches
See Also
Pattern Manager
5.5.4
88
, Normal Fill
45
With Boundary Stitches
, Jagged Fill
46
, Gradual Fill, Column Fill
47
, Jagged Column Fill
48
Column Fill
Target
Closed object(s). If more than one, one of them MUST enclose the others and they must NOT cross each other.
Settings
Options
Procedures
See Basic Steps for Stitch Creation
45
for details.
Examples
Classic
See Also
Normal Fill
45
, Jagged Fill
2005-06, Sew Good Software, Inc
Modern
46
, Gradual Fill, Pattern Fill
46
, Jagged Column Fill
48
47
48
5.5.5
SEDS II
Jagged Column Fill
Target
Closed object(s). If more than one, one of them MUST enclose the others and they must NOT cross each other.
Settings
Options
Procedures
See Basic Steps for Stitch Creation
45
for details.
Examples
Left
See Also
Normal Fill
5.6
45
, Jagged Fill
Center
46
, Gradual Fill, Pattern Fill
46
Right
, Column Fill
47
Satin Stitch Types
Read the following topics about Auto-Span, Cornering and Guide Lines for better results when creating Satin Stitches.
· About Auto-Span 48
· About Cornering 49
· About Guide Lines 52
To change the default settings for Satin Stitch Types, select Settings Manager from the Tools Menu 113 then select the Satin tab.
See Satin Stitch Default Settings 79 for more details.
The following Satin Stitch Types are available:
· One Line Satin 52
· Two Line Satin 53
· Pattern Fill Satin 53
· Jagged Satin 54
5.6.1
About Auto-Span
In a satin stitch block, when the width of the column changes drastically, it may require the Span to change accordingly. Auto-Span is
designed to deal with such situation.
When Auto-Span is on, density of stitches is monitored by 'Minimum Span', 'Maximum Span' and 'Highest Density Width'.
2005-06, Sew Good Software, Inc
Designs Creation
Maximum Span
This value controls the span when column width is at its narrowest, normally 0.1 mm. That means density of
stitches is the lowest.
Minimum Span
This value controls the span when column width reaches the widest value preset by 'Highest Density Width'.
Highest Density Width
When column width is at the Highest Density Width, it will also be at its Minimum Span (Highest Density). Even
when the stitch length goes beyond this value, density won't go any higher.
Example of Auto-Span: Density varies as column width changes.
5.6.2
About Cornering
Four cornering options are devised, giving users more choices in dealing with cornering in satin stitches.
For examples:
· Two Line Satin
· Cornering Type 1
This is most commonly used type of cornering. The guide lines are applied the usual way.
· Cornering Type 2
2005-06, Sew Good Software, Inc
49
50
SEDS II
(A)
(B)
Stitching is from left to right. (A) and (B) show different ways of applying guide lines to achieve different effects.
For this corner type ONLY, the amount of overlap from the side that sews first is controlled by the
setting, which is in mm.
'Corner Compensation'
· Cornering Type 3
(A)
(B)
In this corner type, overlapping occurs fully on both sides, creating a more solid corner. (A) and (B) show different ways of
applying guide lines to achieve different effects.
· Cornering Type 4
In this type, the system automatically put a 'capped' block connecting the stitches going into the corner and the stitches coming
out of the corner. It's better to have 'Auto-Span' turned on to accommodate the stitch length variation.
· One Line Satin
For One Line Satin, there's no guide line to apply.
· Cornering Type 1
2005-06, Sew Good Software, Inc
Designs Creation
51
· Cornering Type 2
For this type, the amount of overlap can be controlled by the
'Corner Compensation' setting.
· Cornering Type 3
· Cornering Type 4
In Type 4, the system automatically put a 'capped' block connecting the stitches going into the corner and the stitches coming
out of the corner. It's better to have 'Auto-Span' turned on to accommodate the stitch length variation.
2005-06, Sew Good Software, Inc
52
5.6.3
SEDS II
About Guide Lines
Except for One Line Satin 52 , which uses one object, other satin stitch types use two objects and require user to draw guide lines in
addition to the objects. Guide lines are lines which have the two end points on each of the two objects. Guide lines MUST NOT cross
each other, or unpredictable results may occur. For example: (guide lines shown in black color)
Correct
Incorrect
· To add a guide line, draw a line in the Design Window. The program will automatically truncate the line at the intersections of the 2
objects.
· To delete a guide line, click on it to select it first (it will be highlighted as a blue dotted line). Then select Delete Guide Line in the
right-click context menu, or press the DEL key.
· To move a guide line, drag on one of the end points along the object.
You can think of the 2 objects being cut into blocks at the positions of the guide lines and stitches will be created for each block. If the
Force Stitch on Guide Line
button is on, the program will treat each block independently, otherwise stitches will be smooth out
between blocks to produce a more even result. For example:
Force Stitch on Guide Line Off
Force Stitch on Guide Line On
5.6.4
One Line Satin
Target
One object, can be opened or closed.
Settings
Options
Procedures
1. Follow the steps described in Basic Steps for Stitch Creation
45
up to step 7.
2005-06, Sew Good Software, Inc
Designs Creation
53
2. Two offset lines will appear according to the Offset and Width settings. You can click and drag in the Design Window to adjust
the offset lines.
3. Follow the remaining steps in Basic Steps for Stitch Creation
45
to create the stitches.
Examples
Needle Up
See Also
About Auto-Span
5.6.5
48
Needle Down, Random Inner Needle Down, Random Inner
Stitches Off
Stitches On
, About Cornering
49
, Two Line Satin
53
, Pattern Fill Satin
53
, Jagged Satin
54
Two Line Satin
Target
Two object, can be opened or closed.
Settings
Options
Procedures
1. Follow the steps described in Basic Steps for Stitch Creation
45
up to step 7.
2. Two guide lines will be added at the ends of the objects automatically. Add or change the guide lines as desired.
3. Follow the remaining steps in Basic Steps for Stitch Creation
45
to create the stitches.
Examples
Needle Up
Needle Down, Random Inner Stitches Off Needle Down, Random Inner Stitches On
Fill
See Also
About Auto-Span
5.6.6
48
, About Cornering
Pattern Fill Satin
Target
Two object, can be opened or closed.
Settings
2005-06, Sew Good Software, Inc
49
, About Guide Lines
52
, One Line Satin
52
, Pattern Fill Satin
53
, Jagged Satin
54
54
SEDS II
Options
Procedures
1. Select a pattern using the Pattern Browser
165
, see Select a Pattern
2. Follow the steps described in Basic Steps for Stitch Creation
45
88
for more details.
up to step 7.
3. Two guide lines will be added at the ends of the objects automatically. Add or change the guide lines as desired.
4. Follow the remaining steps in Basic Steps for Stitch Creation
45
to create the stitches.
Examples
See Also
About Guide Lines
5.6.7
52
, Pattern Manager
88
, One Line Satin
, Two Line Satin
52
53
, Jagged Satin
54
Jagged Satin
Target
Two object, can be opened or closed.
Settings
Options
Procedures
1. Follow the steps described in Basic Steps for Stitch Creation
45
up to step 7.
2. Two guide lines will be added at the ends of the objects automatically. Add or change the guide lines as desired.
3. Follow the remaining steps in Basic Steps for Stitch Creation
45
to create the stitches.
Examples
Left
Center
Right
Needle Down
Needle Down, Random Inner Stitches
On
Fill
See Also
About Auto-Span
48
, About Guide Lines
52
, One Line Satin
52
, Two Line Satin
53
, Pattern Fill Satin
53
2005-06, Sew Good Software, Inc
Designs Creation
5.7
55
Line Stitch Types
To change the default settings for Line Stitch Types, select Settings Manager from the Tools Menu 113 then select the Line tab.
See Line Stitch Default Settings 81 for more details.
The following Line Stitch Types are available:
· Single Line 55
· Double Line 55
· E-Stitch 56
· Bean Stitch 56
5.7.1
Single Line
Target
One object, can be opened or closed.
Settings
Options
Procedures
See Basic Steps for Stitch Creation
45
for details.
Examples
Adjust to Path On
See Also
Double Line
5.7.2
55
, E-Stitch
56
Adjust to Path Off
, Bean Stitch
56
, Chain Stitch
Double Line
Target
One object, can be opened or closed.
Settings
Options
Procedures
See Basic Steps for Stitch Creation
Examples
2005-06, Sew Good Software, Inc
45
for details.
56
SEDS II
Adjust to Path On
See Also
Single Line
5.7.3
55
, E-Stitch
56
Adjust to Path Off
, Bean Stitch
56
, Chain Stitch
E-Stitch
Target
One object, can be opened or closed.
Settings
Options
Procedures
See Basic Steps for Stitch Creation
45
for details.
Examples
Inside
See Also
Single Line
5.7.4
55
, Double Line
Outside
55
, Bean Stitch
56
Scale Off
, Chain Stitch
Bean Stitch
Target
One object, can be opened or closed.
Settings
Options
Procedures
See Basic Steps for Stitch Creation
45
for details.
Examples
2005-06, Sew Good Software, Inc
Designs Creation
Adjust to Path On
See Also
Single Line
5.8
55
, Double Line
57
Adjust to Path Off
55
, E-Stitch
56
, Chain Stitch
Special Stitch Types
SEDS II Achiever supports many special stitch types, see the following topics for more details.
·
·
·
·
5.8.1
Line Motif 57
Fill Motif 57
Cross Stitch 58
Photo Stitch 59
Line Motif
Target
One object, can be opened or closed.
Settings
Options
Procedures
1. Select a motif using the Motif Browser
2. See Basic Steps for Stitch Creation
45
167
, see Select a Motif
91
for more details.
for details.
Notes
· To change the default settings for Line Motif, select Settings Manager from the Tools Menu
Motif Stitch Default Settings 82 for more details.
113
then select the Motif tab. See
Examples
Scale On
See Also
Motif Manager
5.8.2
91
, Fill Motif
Scale Off
57
Fill Motif
Target
Closed object(s). If more than one, one of them MUST enclose the others and they must NOT cross each other.
Settings
2005-06, Sew Good Software, Inc
58
SEDS II
Options
Procedures
1. Select a motif using the Motif Browser
2. See Basic Steps for Stitch Creation
45
167
, see Select a Motif
91
for more details.
for details.
Notes
· To change the default settings for Fill Motif, select Settings Manager from the Tools Menu
Motif Stitch Default Settings 82 for more details.
113
then select the Motif tab. See
Examples
Align Normal
See Also
Motif Manager
5.8.3
91
, Line Motif
Align Interlace
Align Overlap
Align Free at 10%
57
Cross Stitch
Target
Closed object(s). If more than one, one of them MUST enclose the others and they must NOT cross each other.
Settings
Options
Procedures
See Basic Steps for Stitch Creation
45
for details.
Notes
· To change the default settings for Cross Stitch, select Settings Manager from the Tools Menu
See Cross Stitch Default Settings 83 for more details.
113
then select the Cross tab.
Examples
2005-06, Sew Good Software, Inc
Designs Creation
0 degree
59
45 degree
See Also
Fill Motif 57
5.8.4
Photo Stitch
Target
Background Image. Closed object(s). If more than one, one of them MUST enclose the others and they must NOT cross each other.
Settings
Options
Procedures
1. Import an image (Refer to Import an Image
Photo Stitch.
31
for more details). You can use both black & white or color photographic images for
2. If the partial processing is desired, create closed objects that define the processing area and select them all afterwards. The
outmost object will defines the outside boundary of the area and the inner objects, if presents, will be holes.
3. Select the
4. Select the
and
from the Stitch Settings Bar
icon from the Stitch Creation Bar
5. Input the settings in the Stitch Settings Bar
131
130
131
.
, or press Enter or CTRL+G on the keyboard.
.
6. Select the required options. Type 1 to Type 4 are for black & white photos, while Color Type 1 and Color Type 2 are for color
photos. Note that selecting the 'on black' modes will produce a 'negative' effect which is useful for sewing on dark color fabrics
using light color threads. For the color types, stitches will be created in the 4 basic colors CMYK. When sewing you have to use
threads in these 4 colors for good results. Press the Partial
button down if partial processing is desired.
7. Press Enter on the keyboard or select Enter from the right-click context menu to start processing.
Notes
· To change the default settings for Photo Stitch, select Settings Manager from the Tools Menu
See Photo Stitch Default Settings 84 for more details.
Examples
2005-06, Sew Good Software, Inc
113
then select the Photo tab.
60
SEDS II
Original image in black & white
Type 1 on White
Type 2 on White
Type 3 on white
Type 4 on white
Original image in color
2005-06, Sew Good Software, Inc
Designs Creation
See Also
Import an Image
61
31
5.9
Lettering
5.9.1
Create Lettering on Screen
To create lettering on screen, follow the steps below:
1. Select the Lettering
be shown.
icon from the Primary Bar 114 , the Lettering Settings Bar 131 and Lettering Input Options Bar 115 will
2. Select a font type from the Font Type pull-down box on the Lettering Input Options Bar 115 . There are 4 options, TTF Fill, TTF
Satin, SEDS Fill and SEDS Satin. The SEDS types are our proprietary pre-digitized fonts.
4. Select a font from the Font Name pull-down box on the Lettering Input Options Bar 115 . Note that a small preview window will be
displayed on the left side of the pull-down box showing how the selected font look likes.
5. Push the
button on the Lettering Input Options Bar 115 down will to turn on 'bold' effect if desired.
6. Push the
button on the Lettering Input Options Bar 115 down will to turn on 'italic' effect if desired.
7. Input the Character Height, Character Width, Character Space and Line Space values on the Lettering Settings Bar 131 if
desired. Note that The Character Width is expressed as a percentage of the normal width of the characters relative to the
Character Height.
8. Select one of the transform options from the Lettering Transformation Options 131 on the Lettering Settings Bar 131 . For the One
Object option you need to select an object in advance and for Between Two Lines, you need to select 2 objects in advance. See
Lettering Editing 63 for more details about transform options.
8. Click on the Design Window at where you want to put the lettering. A rectangular shape cursor in the selected transform options
will be displayed.
9. Type in the characters. They will be shown real time in the Design Window as you type.
10. Right-click in the Design Window and select Enter from the context menu when finish inputting.
11. The program will jump to the editing mode automatically (see Lettering Editing
and right-click in the Design Window and select Enter when finished.
5.9.2
63
for more details). Edit the lettering as desired
Create Lettering with Lettering Input Wizard
To create lettering with Lettering Input Wizard, follow the steps below:
1. Select Lettering Input Wizard from the Tools Menu 113 , the Lettering Input Wizard
2005-06, Sew Good Software, Inc
164
will be shown as below:
62
SEDS II
2. Select a font type from Font Type. There are 4 options, TTF Fill, TTF Satin, SEDS Fill and SEDS Satin. The SEDS types are
our proprietary pre-digitized fonts. For TTF, the same font can be used for Fill and Satin.
3. Select a font from Font Name. Note that a small preview window will be displayed on the left side of the pull-down box showing
how the selected font look likes.
4. Input the Height, Width, Char Spacing and Line Spacing values if desired. The Width is expressed as a percentage of the
normal width of the characters relative to the height.
5. Check Bold to turn on 'bold' effect for TTF fonts if desired.
6. Check Italic to turn on 'italic' effect for TTF fonts if desired.
7. Check Auto Space to allow the program to even the spacing between characters automatically.
8. You can set the orientation of the characters in 2 ways, Baseline or Absolute. If lettering is arranged on a baseline object, such
as Line, Vertical Line, Arc, Ellipse and Free Line, if Baseline is selected, the orientation angle is always relative to the baseline.
Otherwise if Absolute is selected, the orientation angle is always relative to the horizontal line. For arrange in Box, select
Absolute will change the angle of the box instead.
9. Click
to have letterings in the normal orientation or click
to have them inverted (flipped and mirrored).
10. Select from Arrange how the lettering is to be placed, None (free on the design), Box (within a box), Line (on a straight line),
Vertical Line (on a vertical line), 2 Lines (between 2 straight lines), Diamond (within a diamond shape), Arc (on an arc), Ellipse
(on an ellipse), Free Line (on a user drawn curve/line) or 2 Free Lines (between 2 user drawn curves/lines).
11. Select from Position where the lettering will be placed when arranged on Line, Vertical Line, Arc, Ellipse and Free Line. Choose
to place the lettering above the object,
to place at center the object or
12. Select from Alignment the alignment option between,
width of object).
(align left),
to place below the object.
(align center),
(align right) or
(span the
13. For TTF Satin fonts, check Cap Corner to use Cap Cornering options when generating stitches. Check Cut Serif to have serifs
generated as separated stitch blocks.
14. Check Preview to display "Sample Text" in the preview window according to the options used.
15. Click OK will close the Text Input Wizard. Follow the instructions on the Status Bar 148 to finish the function. If text in entered in
the Text Input Window, the text will be used, otherwise the program will prompt you to input the text on screen. Note that if you
select Arc, Ellipse, Free Line or 2 Free Line, the program will prompt you to draw the particular object first before placing the
2005-06, Sew Good Software, Inc
Designs Creation
63
lettering on it. After drawing an object, you can modify it by click and drag on the control points. Press the Enter key on the
keyboard or select Enter from the right-click menu to advance to the next step. The program will jump to the editing step before
the lettering is finally created. Refer to Lettering Editing 63 for more details.
5.9.3
Lettering Editing
Lettering Editing will be invoked automatically as the last stage when using the Lettering Input Wizard, or when you click on the
icon from the Primary Bar 114 when a lettering is selected.
In Lettering Editing mode, you can reshape, resize, align, re-position lettering in different ways. The Lettering Settings Bar
shown together with one of the following accompanying Options Bar:
·
·
·
·
·
131
will be
Lettering in Box/Diamond Options Bar 115 (if Box or Diamond is selected)
Lettering on 1 Line Options Bar 116 (if Line or Vertical Line is selected)
Lettering between 2 Lines Options Bar 116 (if 2 Lines is selected)
Lettering on 1 Object Options Bar 116 (if Arc, Ellipse, or Free Line is selected)
Lettering between 2 Objects Options Bar 117 (if 2 Free Lines is selected)
Below list the functions you can perform in the Lettering Editing mode :
· Change Font Type to Another Font
Select the desire Font Type and Font from the Lettering Input Options Bar
for TTF fonts only.
115
. Note that the
and
icons are enabled
· Character(s) Editing
Select a character to edit by clicking on one of the edges. You can select multiple characters by pressing the CTRL key on the
keyboard and click on the characters. 4 character control nodes will be displayed as show below when a character is selected.
1. Drag the 'circle' control node will move the character along the base path.
2. Drag the 'square' control node will resize the character.
3. Drag the 'arc' control node will rotate the character, centered at the 'circle' control node.
4. Drag the 'cross' control node to freely move the character.
· Alignment
You can set alignment of the lettering from the Alignment Options
below:
126
on the accompanying Options Bar. An example is shown
Align Left
Align Right
Align Center
Align Free
· Auto-Spacing
By default, auto-spacing is turned on (the
2005-06, Sew Good Software, Inc
button on the accompanying Options Bar is down). When this is on, the spacing
64
SEDS II
between characters will be adjusted automatically so that they look more even. An example is shown below:
Auto-spacing on
Auto-spacing off
· Absolute Angle (available in Line, Vertical Line, Arc, Ellipse and Free Line only)
If the
button is down, the angle of the characters are relative to the horizontal line, otherwise it is relative to the base object.
An example is shown below, with Angle = 30 degree :
Absolute Angle on
Absolute Angle off
· Positioning (available in Line, Vertical Line, Arc, Ellipse and Free Line only)
You can set the position of the lettering relative to the base object from the Position Options 126 . An example is shown below:
Above Object
Center Object
Below Object
· Orientation
You can change the orientation of the lettering from the Orientation Options
Normal
125
. An example is shown below:
Inverted
· Control Nodes (available in Box, Diamond, Line and 2 Lines only)
You can change the number and function of the control nodes from the Control Nodes Options
below:
3 Curve Nodes
1 Curve Node
3 Line Node
1 Line Node
126
. An example is shown
2005-06, Sew Good Software, Inc
Designs Creation
5.9.3.1
65
Within Box (Box)
This function is mainly used to reshape or resize lettering. To use, follow the steps below:
1. Select a lettering and click on the
icon from the Primary Bar 114 .
2. Click on the
icon from the Lettering Transformation Options 131 on the Lettering Settings Bar 131 . The lettering will appear in
a box surrounded by control nodes as shown below:
3. The number of control nodes on each side and their attributes (line or curve) can be selected from the Control Nodes Options
or from the right-click context menu.
126
,
4. Drag on the control nodes to reshape the lettering.
Tips:
· By moving either both upper or both lower corner nodes to the left or right, lettering may be uniformly slanted in italicized
fashion, as shown below:
· By moving a single upper corner node, perspective effects can be achieved, as shown below:
· Using 1 curve control node and adjust the center nodes on the upper and lower side to produce a dome shape lettering, as
show below:
5. You can adjust the size, angle, location of each character as described in Lettering Editing
63
.
6. Right-click in the Design Window and select Enter from the context menu to end.
5.9.3.2
On One Line (Line, Vertical Line)
This function is mainly used to change the base path or rotate lettering. To use, follow the steps below:
1. Select a lettering click on the
icon from the Primary Bar 114 .
2. Click on the
icon from the Lettering Transformation Options 131 on the Lettering Settings Bar 131 . The lettering will appear
on a line with control nodes as shown below:
3. The number of control nodes on each side and their attributes (line or curve) can be selected from the Control Nodes Options
or from the right-click context menu.
4. Drag on the control nodes to change the base path or rotate the lettering.
Tips:
· Move one of the end nodes to will rotate the lettering as a whole, as shown below:
2005-06, Sew Good Software, Inc
126
,
66
SEDS II
· Using 1 curve control node and adjust the center node to place the lettering on an arc, as show below:
5. You can adjust the size, angle, location of each character as described in Lettering Editing
63
.
6. Right-click in the Design Window and select Enter from the context menu to end.
5.9.3.3
Between Two Lines (2 Lines)
This function is mainly used to place lettering in the envelope between 2 lines. To use, follow the steps below:
1. Select a lettering click on the
icon from the Primary Bar 114 .
2. Click on the
icon from the Lettering Transformation Options 131 on the Lettering Settings Bar 131 . The lettering will appear
between 2 lines with control nodes as shown below:
3. The number of control nodes on each side and their attributes (line or curve) can be selected from the Control Nodes Options
or from the right-click context menu.
126
,
4. Drag on the control nodes to change shape of the envelope.
Tips:
· By moving a single upper corner node, perspective effects can be achieved (unlike in the Within Box 65 function, the
transformation is linear here which means that characters are scaled in the vertical direction only), as shown below:
· Using 1 curve control node and adjust the center nodes of the upper and lower lines to an uneven dome shape envelope, as
show below:
5. You can adjust the size, angle, location of each character as described in Lettering Editing
63
.
6. Right-click in the Design Window and select Enter from the context menu to end.
5.9.3.4
Within Diamond Shape (Diamond)
This function is mainly used to reshape lettering to a diamond shape. To use, follow the steps below:
1. Select a lettering click on the
icon from the Primary Bar 114 .
2. Click on the
icon from the Lettering Transformation Options 131 on the Lettering Settings Bar 131 . The lettering will appear in
a diamond shape surrounded by control nodes as shown below:
2005-06, Sew Good Software, Inc
Designs Creation
67
3. The number of control nodes on each side and their attributes (line or curve) can be selected from the Control Nodes Options
or from the right-click context menu.
126
4. Drag on the control nodes to change the diamond shape.
5. You can adjust the size, angle, location of each character as described in Lettering Editing
63
.
6. Right-click in the Design Window and select Enter from the context menu to end.
5.9.3.5
On One Object (Arc, Ellipse, Free Line)
This function is mainly used to change the baseline object of a lettering. To use, follow the steps below:
1. Select a lettering and click on the
2. Click on the
icon from the Primary Bar 114 .
icon from the Lettering Transformation Options 131 on the Lettering Settings Bar 131 . The lettering with its
baseline object will be shown as below: (Note that if the lettering is not created using one of Arc, Ellipse or Free Line, the
be disabled.)
3. You can adjust the baseline object by click and drag the control points shown as gray small squares.
4. You can split the baseline object into 2 parts and place the lettering on either by:
· Draw a line in the Design Window to cut the baseline object into 2 parts.
· Click on either part to select it, the lettering will be automatically placed on the selected part.
5. You can adjust the size, angle, location of each character as described in Lettering Editing
63
.
6. Right-click in the Design Window and select Enter from the context menu to end.
5.9.3.6
Between Two Objects (2 Free Lines)
This function is mainly used to change the 2 envelope objects of a lettering. To use, follow the steps below:
1. Select a lettering click on the
2. Click on the
icon from the Primary Bar 114 .
icon in the Lettering Transformation Options 131 on the Lettering Settings Bar 131 . The lettering with its
2005-06, Sew Good Software, Inc
will
,
68
SEDS II
envelope objects will be shown as below:
3. You can adjust the envelope objects by click and drag the control points shown as gray small squares.
4. You can split the baseline object (the one where the lettering sits on) into 2 parts and place the lettering on either by:
· Draw a line in the Design Window to cut the baseline object into 2 parts.
· Click on either part to select it, the lettering will be automatically placed on the selected part.
5. You can adjust the size, angle, location of each character as described in Lettering Editing
63
.
6. Right-click in the Design Window and select Enter from the context menu to end.
5.9.3.7
Using Lettering Input Wizard
After creating a lettering, you can use the Text Input Wizard to change the text and any other properties available. This can be done
by:
1. Select a lettering.
2. Press F8 on the keyboard, or select Lettering Properties from the Edit Menu 110 . This will invoke the Text Input Wizard, with the
text and all relating properties of the lettering set. Follow the descriptions found in Create Lettering with Text Input Wizard 61 to
change the properties and/or text.
5.9.4
Lettering Stitch Types
The following Lettering Stitch Types are available:
·
·
·
·
5.9.4.1
Satin Lettering 68
Normal Fill Lettering 69
Line Stitch Lettering 70
Column Fill Lettering 71
Satin Lettering
Target
Satin Type Lettering.
Settings
Options
2005-06, Sew Good Software, Inc
Designs Creation
Procedures
See Basic Steps for Stitch Creation
45
69
for details.
Notes
To change the default settings for Satin Lettering, select Settings Manager from the Tools Menu
Lettering tab. See Satin Lettering Default Settings 85 for more details.
113
then select the Satin
Examples
Cap Corner off, Cut Serif off
Cap Corner on, Cut Serif off
Cap Corner off, Cut Serif on
Cap Corner on, Cut Serif on
See Also
About Auto-Span
5.9.4.2
48
, About Cornering
49
, About Guide Lines
52
Normal Fill Lettering
Target
Fill Type Lettering.
Settings
Options
Procedures
See Basic Steps for Stitch Creation
45
for details.
Notes
To change the default settings for Normal Fill Lettering, select Settings Manager from the Tools Menu
Lettering tab. See Fill Lettering Default Settings 86 for more details.
Examples
2005-06, Sew Good Software, Inc
113
then select the Fill
70
SEDS II
Without Border
With Satin Border
With Bean Stitch Border
See Also
Normal Fill
5.9.4.3
45
Line Stitch Lettering
Target
Fill Type Lettering.
Settings
Options
Procedures
See Basic Steps for Stitch Creation
45
for details.
Notes
To change the default settings for Line Stitch Lettering, select Settings Manager from the Tools Menu
Lettering tab. See Line Lettering Default Settings 87 for more details.
113
then select the Line
Examples
2005-06, Sew Good Software, Inc
Designs Creation
Satin
71
Double Line
E-Stitch
See Also
Single Line
5.9.4.4
55
, Double Line
55
, E-Stitch
56
, Bean Stitch
56
Column Fill Lettering
Target
Fill Type Lettering.
Settings
Options
Procedures
See Basic Steps for Stitch Creation
45
for details.
Notes
To change the default settings for Column Fill Lettering, select Settings Manager from the Tools Menu
Lettering tab. See Fill Lettering Default Settings 86 for more details.
Examples
Classic
See Also
Column Fill
47
2005-06, Sew Good Software, Inc
Modern
113
then select the Fill
72
5.10
SEDS II
Insert Manual/Jump Stitches
To insert manual (running)/jump stitches in a design, follow the procedures below:
· Select a stitch block. Manual/jump stitch will be added starting at the end of this stitch block. If no stitch block is selected, the
manual/jump stitches will be add to the end of the design, following the last stitch block.
· Click on the Manual Stitch
icon for manual stitches or the Jump Stitch
icon for jump stitches from the Manual Stitch
Toolbar 146 on the Stitch Creation Bar 130 . If a stitch block is selected, a stitch/jump line will be attached to the end of the block.
· Click on the Design Window one at a time to add stitch by stitch.
· Double click when finish.
5.11
Freehand Satin
This function is similar to Two Line Satin 53 except that you don't have to draw the 2 objects in advance. Instead, you draw the
object as alternate "point pairs" in the Design Window within the function and satin stitch will be created at the end. To use this
function, follow the steps below:
1. Select the Freehand Satin
from the Stitch Creation Bar 130 .
2. Draw alternate "point pairs" in the Design Window. Each point in a "point pair" should be on the opposite side of the satin. A
guideline will be created automatically connecting the "point pair" when it is drawn.
3. Double click in the Design Window, or select Enter from the right-click context menu to end drawing the "point pairs". Notice that
2 objects along the "point pairs" are created.
4. Input the In/Out points at the desired locations.
5. select Enter from the right-click context menu to generate the satin stitches.
Example
After drawing the "point pairs"
5.12
Satin output
OneTouch Auto-Digitizing
Refer to the following topics for details on how to use the OneTouch auto-digitizing feature:
·
·
·
·
5.12.1
Import an Image for Auto-Digitizing 72
Auto-Digitize a Region 73
Auto-Digitize the Whole Image 73
Adjust Auto-Digitizing Default Settings
73
Import an Image for Auto-Digitizing
The Import Image dialog box will be opened automatically when you click the OneTouch
icon if there is no image loaded already.
Refer to Import an Image 31 for details on how to import an image. If the image you are importing has too many colors than what
OneTouch can handle, the program will invoke the Reduce Image Color function automatically (refer to Reduce Image Color 33 for
more details).
2005-06, Sew Good Software, Inc
Designs Creation
5.12.2
73
Auto-Digitize a Region
Follow the steps below to auto-digitize a region:
1. Import an image (refer to Import an Image for Auto-Digitizing
2. Click on the OneTouch
3. The OneTouch Bar
147
72
for more details).
icon from the OneTouch Toolbar 146 on the Stitch Creation Bar
130
.
will appear on the top of the program window, as shown below:
4. Fill stitches will be generate by default on large regions, check Force Satin if you want to produce satin stitches for the region
instead.
5. Check Auto Angle if you want to generate fill stitches at an angle closely match the shape of the region. If this is not checked, fill
stitches will be generated in the horizontal direction. (Auto Angle is neglected if Force Satin is checked.)
6. Click on a region where you want to put stitches on, the program will generate stitches automatically over the region. A region is
defined as a 'connected' area of the same color. Note that the program treats colors on the OneTouch Bar 147 with the same
number as the same color, which essentially allows you to merge similar colors as a single color during auto-digitizing. Right-click
on a color to change its color number. Also note that the program will change a system color to the color of the region
automatically.
7. Repeat step 6 to digitize other regions.
5.12.3
Auto-Digitize the Whole Image
Follow the steps below to auto-digitize a region:
1. Import an image (refer to Import an Image for Auto-Digitizing
2. Click on the OneTouch icon
3. The OneTouch Bar
147
72
for more details).
located on the Stitch Creation Bar
130
.
will appear on the top of the program window.
4. Select a prefer stitching direction in Direction. For example, if you choose 'Top to Bottom', the first stitching color will be the first
effective color from the top and so on for other colors.
5. Fill stitches will be generate by default on large regions, check Force Satin if you want to produce satin stitches instead.
6. Check Auto Angle if you want to generate fill stitches at an angle closely match the shapes of different regions. If this is not
checked, fill stitches will be generated in the horizontal direction. (Auto Angle is neglected if Force Satin is checked.)
7. Click Do All to start generating stitches. The program will generate stitches automatically on all effective color regions. A region is
defined as a 'connected' area of the same color. Note that the program treats colors on the OneTouch Bar 147 with the same
number as the same color, which essentially allows you to merge similar colors as a single color during auto-digitizing. Right-click
on a color to change its color number or ignore the color for processing. Also note that the program will change system colors to
the color of the regions automatically.
8. Right-click on a color on the image and select Do One Color will generate stitches on all regions in that color only. Note that Do
One Color will be disable if you right-click on an ignored color.
5.12.4
Change Default Settings
To change the default settings for OneTouch auto-digitizing, select Settings Manager from the Tools Menu 113 . Default settings for
OneTouch are found in the Fill and Satin tabs.
· Fill Stitch Default Settings
78
· Satin Stitch Default Settings
2005-06, Sew Good Software, Inc
79
74
5.12.5
SEDS II
Using the OneTouch Wizard
The OneTouch Wizard will guide you step by step to use the OneTouch auto-digitizing function. To use, follow the steps below:
1. Select OneTouch Wizard from the Tools Menu 113 .
2. Step 1 of the OneTouch Wizard will be shown as below:
Input the full path name of the image for OneTouch in Image File. Click Browse to locate the file if necessary. Check
Custom Size and input the desired design size if different from the original image. Check Scale Image to Fit Size to scale the
image to fit the new design size if necessary. If leave unchecked, borders will be added if new design size if larger than original
size or the image will be truncated if smaller. Select a location to place the image in Alignment, effective only when new design
size is larger than original size. Click Next to continue.
3. If the number of colors in the image file is more than 16, Step 2 of the OneTouch Wizard will be shown as below, allowing you to
reduce the number of colors:
Check Auto Select Color to allow the program to select the colors automatically for you and the desire number of colors in
Number of Color. Alternatively you can select the colors manually by click on the image. A new color box will be displayed on the
2005-06, Sew Good Software, Inc
Designs Creation
75
right each time a color is added. To de-select a color, click on the selected point on the image, or select De-select Color from the
right-click menu on the color boxes. Click Next to continue.
4. Step 3 of the OneTouch Wizard will be shown as below:
The program will automatically assigned a sewing needle to each color and select the 'Background Color' also (background color
will not be assigned a needle). To select you own sewing sequence, uncheck System Defined and drag and drop each color
from the Color Bar at the lower right to a Sewing Order (Needle) row. Colors in the same row will be sewn using the same needle.
Color(s) left behind in the Color Bar will be treated as 'Background Color(s)' and will not be sewn.
· Select a prefer stitching direction in Direction. For example, if you choose 'Top to Bottom', the first stitching color will be the
first effective color from the top and so on for other colors.
· Fill stitches will be generate by default on large regions, check Force Satin if you want to produce satin stitches instead.
· Check Auto Angle if you want to generate fill stitches at an angle closely match the shapes of different regions. If this is not
checked, fill stitches will be generated in the horizontal direction. (Auto Angle is neglected if Force Satin is checked.)
· Click View Image to if you need to examine the image, the following dialog box will be shown:
Select the zoom level from the right-click menu on the image. Show/Hide a color by checking/unchecking the box besides it.
Click All On to show all colors and All Off to hide all colors.
Click Start to start processing.
2005-06, Sew Good Software, Inc
76
5.13
SEDS II
Settings Manager
Select Settings Manager from the Tools Menu 113 to open the Default Settings dialog box, as shown below:
· The Preview Stitch Type pull down menu will be enabled if stitch types are available for preview. To use, select the stitch type
you want to preview from the pull down menu and then click Show Preview. The Setting Preview window will be opened.
· To open existing settings files, select from the pull down menu on the lower left corner. The 'Default' settings file is created by the
program. You can modify any settings and click Save to save the file. Note that clicking OK will NOT save the settings to the file, it
will just allow you to use the settings at the current instance of the program. If you exit and restart the program the settings will be
returned to the values saved in the file.
· You can add as many settings files as you like. To do so, input a new name in the pull down menu and then click Save. The
current default settings will be saved in a settings file with the new name.
· Click Reset to restore the system defined default settings into the current settings file.
2005-06, Sew Good Software, Inc
Designs Creation
5.13.1
General Default Settings
General
Maximum Stitch Length
Maximum stitch length in mm. Stitches will be cut automatically with jump stitches if longer than this
length during punch output.
Minimum Stitch Length
Minimum stitch length in mm. Stitches will be removed automatically if shorter than this length during
punch output.
Manual Stitch
Manual Stitch Length
Distance between manual stitch points in mm.
Jump Stitch Length
Distance between jump stitch points in mm.
Fill Font Character
Character Width
Width of character in percentage of the width proportional to the character height.
Character Height
Height of characters in mm. Typically this gives the height of the capital letter 'A'.
Character Space
Space between characters in mm.
Line Space
Space between lines in mm.
Satin Font Character
Character Width
Width of character in percentage of the width proportional to the character height.
Character Height
Height of characters in mm. Typically this gives the height of the capital letter 'A'.
2005-06, Sew Good Software, Inc
77
78
SEDS II
Character Space
Space between characters in mm.
Line Space
Space between lines in mm.
5.13.2
Fill Stitch Default Settings
Top Stitches
Length
Distance between top stitch points in mm.
Span
Defines the density of the top stitches, measured by the space between threads in mm.
Angle
Angle of stitch lines.
Cycle
Number of thread passes (1 pass = 1 back and forth loop) between a given stitch point and the next time
it occurs in the same horizontal location, but further along in the fill.
Fill Offset
Distance between 1 stitch point and the closest stitch point on the thread adjacent to it, in mm.
External Compensation Mode 143
External Compensation Value by Percentage
External compensation value in percentage.
External Compensation Value by (mm)
External compensation value in mm.
Internal Compensation
Reserved for future.
Maximum Span
Fill density will vary from Span to Maximum Span, in mm.
Minimum Jag Percentage
Defines the minimum percentage of the width of the stitch block to which the program will randomly bring
edge stitches.
2005-06, Sew Good Software, Inc
Designs Creation
Maximum Jag Percentage
Defines the maximum percentage of the width of the stitch block to which the program will randomly bring
edge stitches.
Underlay
Fill Underlay Pattern 143
Underlay Length
Space between underlay stitch points in mm.
Underlay Span
Defines the density of underlay stitches, measured by the space between threads in mm.
Underlay Gap
Amount of space that the underlay can be set to recede from the edge of the top stitches to prevent it from
showing. Gap only appears along the direction of the stitches. Units = percentage of the width of the stitch
block.
5.13.3
Satin Stitch Default Settings
Top Stitches
Length
Distance between top stitch points in mm.
Span
Defines the density of the top stitches, measured by the space between threads in mm.
Cycle
Number of thread passes (1 pass = 1 back and forth loop) between a given stitch point and the next time
it occurs in the same horizontal location, but further along in the fill.
Fill Offset
Distance between 1 stitch point and the closest stitch point on the thread adjacent to it, in mm.
External Compensation Mode 143
External Compensation Value by Percentage
External compensation value in percentage.
2005-06, Sew Good Software, Inc
79
80
SEDS II
External Compensation Value by (mm)
External compensation value in mm.
Internal Compensation
Reserved for future.
Width
Width of single line satin stitch in mm.
Satin Offset
Offset of the satin column from the center in percentage of total width.
Minimum Jag Percentage
Defines the minimum percentage of the width of the stitch block to which the program will randomly bring
edge stitches.
Maximum Jag Percentage
Defines the maximum percentage of the width of the stitch block to which the program will randomly bring
edge stitches.
Corner Compensation
Use with Corner Type 2 to set the amount of overlapping at corners.
Highest Density Width
When auto-span is turned on, the program will automatically adjust stitch density between the Minimum
Span and Maximum Span value as a function of the width across the satin column, for which the width is
less than the Highest Density Width value. The narrower the column, the lighter the density (higher span).
Maximum Span
Maximum (lightest) density. When auto-span is turned on, the program will automatically varies stitch
density between the Span and Maximum Span value as a function of the width across the satin column at
any given point. The narrower the column, the lighter the density.
Minimum Span
When auto-span is turned on, the program will automatically adjust stitch density between the Minimum
Span and Maximum Span value as a function of the width across the satin column, for which the width is
less than the Highest Density Width value. The narrower the column, the lighter the density (higher span).
Underlay
Satin Underlay Pattern 142
Underlay Length
Space between underlay stitch points in mm.
Underlay Span
Defines the density of underlay stitches, measured by the space between threads in mm.
Underlay Gap
Amount of space that the underlay can be set to recede from the edge of the top stitches to prevent it from
showing. Gap only appears along the direction of the stitches. Units = percentage of the width of the stitch
block.
2005-06, Sew Good Software, Inc
Designs Creation
5.13.4
Line Stitch Default Settings
Top Stitches
Length
Distance between top stitch points in mm.
Span
Defines the density of the top stitches, measured by the space between threads in mm.
Width
Width of single line satin stitch in mm.
Satin Offset
Offset of the satin column from the center in percentage of total width.
2005-06, Sew Good Software, Inc
81
82
5.13.5
SEDS II
Motif Stitch Default Settings
Top Stitches
Parallel Offset
Adjust this to shift motifs in the direction of a motif line.
Perpendicular Offset
Adjust this to shift motifs in the direction perpendicular to the motif line.
Motif Gap
Distance between motifs in mm.
Perpendicular Gap
Perpendicular distance between motif lines in mm.
Angle
Angle of stitch lines.
Displacement
Motifs are shifted by percentage of the width of a motif from the previous row.
2005-06, Sew Good Software, Inc
Designs Creation
5.13.6
Cross Stitch Default Settings
Top Stitches
Cross Stitch Length
The distance in mm of the cross stitch pattern shown in blue below:
Cross Stitch Span
The distance in mm of the cross stitch pattern shown in blue below:
Cross Stitch Angle
Angle of the cross stitch pattern, as show below:
0 degree
2005-06, Sew Good Software, Inc
45 degree
83
84
5.13.7
SEDS II
Photo Stitch Default Settings
Top Stitches
Maximum Stitch Length
Maximum stitch length in mm.
Minimum Stitch Length
Minimum stitch length in mm.
Span
Defines the density of the top stitches, measured by the space between threads in mm.
X-Gap
Space between columns in mm.
Y-Gap
Space between rows in mm.
2005-06, Sew Good Software, Inc
Designs Creation
5.13.8
Satin Lettering Default Settings
Top Stitches Settings:
Length
Distance between top stitch points in mm.
Span
Defines the density of the top stitches, measured by the space between threads in mm.
External Compensation Mode 143
External Compensation Value by Percentage
External compensation value in percentage.
External Compensation Value by (mm)
External compensation value in mm.
Corner Compensation
Use with Corner Type 2 to set the amount of overlapping at corners.
Highest Density Width
When auto-span is turned on, the program will automatically adjust stitch density between the Minimum
Span and Maximum Span value as a function of the width across the satin column, for which the width is
less than the Highest Density Width value. The narrower the column, the lighter the density (higher span).
Maximum Span
Maximum (lightest) density. When auto-span is turned on, the program will automatically varies stitch
density between the Span and Maximum Span value as a function of the width across the satin column at
any given point. The narrower the column, the lighter the density.
Minimum Span
When auto-span is turned on, the program will automatically adjust stitch density between the Minimum
Span and Maximum Span value as a function of the width across the satin column, for which the width is
less than the Highest Density Width value. The narrower the column, the lighter the density (higher span).
Underlay Settings:
Satin Underlay Pattern 142
Underlay Length
Space between underlay stitch points in mm.
2005-06, Sew Good Software, Inc
85
86
SEDS II
Underlay Span
Defines the density of underlay stitches, measured by the space between threads in mm.
Underlay Gap
Amount of space that the underlay can be set to recede from the edge of the top stitches to prevent it from
showing. Gap only appears along the direction of the stitches. Units = percentage of the width of the stitch
block.
5.13.9
Fill Lettering Default Settings
Top Stitches Settings:
Length
Distance between top stitch points in mm.
Span
Defines the density of the top stitches, measured by the space between threads in mm.
Angle
Angle of stitch lines.
Cycle
Number of thread passes (1 pass = 1 back and forth loop) between a given stitch point and the next time
it occurs in the same horizontal location, but further along in the fill.
Fill Offset
Distance between 1 stitch point and the closest stitch point on the thread adjacent to it, in mm.
External Compensation Mode 143
External Compensation Value by Percentage
External compensation value in percentage.
External Compensation Value by (mm)
External compensation value in mm.
Internal Compensation
Reserved for future.
Underlay Settings:
Fill Underlay Pattern 143
2005-06, Sew Good Software, Inc
Designs Creation
Underlay Length
Space between underlay stitch points in mm.
Underlay Span
Defines the density of underlay stitches, measured by the space between threads in mm.
Underlay Gap
Amount of space that the underlay can be set to recede from the edge of the top stitches to prevent it from
showing. Gap only appears along the direction of the stitches. Units = percentage of the width of the stitch
block.
Border Settings:
Border Type
143
Satin Offset
Offset of the satin column from the center in percentage of total width.
Border Length
Length of border stitches in mm.
Border Width
Width of the border stitches in mm.
Border Span
Span (density) of border stitches in mm.
5.13.10 Line Lettering Default Settings
Top Stitches
Length
Distance between top stitch points in mm.
Span
Defines the density of the top stitches, measured by the space between threads in mm.
Width
Width of single line satin stitch in mm.
Satin Offset
Offset of the satin column from the center in percentage of total width.
2005-06, Sew Good Software, Inc
87
88
5.14
SEDS II
Pattern Manager
Patterns are used in various stitch types like, Pattern Fill, Pattern Fill Satin and Pattern Fill Lettering. The program comes with a predefined set of patterns and you can add your own patterns easily (see Create a New Pattern 89 for more details). Once a pattern is
selected as the default pattern, it will remain be selected throughout even after the program is closed.
·
·
·
·
5.14.1
Select a Pattern 88
Delete a Pattern 88
Create a New Pattern
Edit Existing Patterns
89
90
Select a Pattern
Follow the steps below to select a pattern:
1. Select Pattern Manager from the Tools Menu 113 . The Pattern Browser
165
will be displayed as below:
2. Select the folder containing the pattern from the Folder List Window.
3. Click on the desired pattern in the Thumbnail Window, it will be highlighted and a scaled view will be displayed in the Preview
Window.
4. Click the Apply button or select Apply from the right-click context menu to select the pattern as the default pattern.
5. You can choose to close the Pattern Browser
5.14.2
165
or leave it opened and continue to work in the Program Window.
Delete a Pattern
Follow the steps below to delete a pattern:
1. Select Pattern Manager from the Tools Menu 113 . The Pattern Browser
165
will be displayed as below:
2005-06, Sew Good Software, Inc
Designs Creation
89
2. Select the folder containing the pattern from the Folder List Window.
3. Click on the desired pattern in the Thumbnail Window, it will be highlighted and a scaled view will be displayed in the Preview
Window.
4. Click the
icon on the Toolbar, or select Delete from the right-click context menu to delete the pattern.
5. You can choose to close the Pattern Browser
5.14.3
165
or leave it opened and continue to work in the Program Window.
Create a New Pattern
Follow the steps below to create a pattern:
1. Select Pattern Manager from the Tools Menu 113 . The Pattern Browser
2. Click the
will close the Pattern Browser
2005-06, Sew Good Software, Inc
165
165
and open the Pattern Editor
will be displayed.
166
, as shown below:
90
SEDS II
3. Click the New
icon to create a new pattern. The New Pattern dialog box will be shown as below:
Input the desired Width, Height and Span of the pattern and then click OK. A blank pattern will be created.
4. Follow the steps in Edit Existing Patterns
5.14.4
90
to edit and save the new pattern.
Edit Existing Patterns
Follow the steps below to edit an existing pattern:
1. Select Pattern Manager from the Tools Menu 113 . The Pattern Browser
2. Click the
will close the Pattern Browser
3. Click the Open
165
165
and open the Pattern Editor
will be displayed.
166
, as shown below:
icon to select the folder when the pattern is located.
4. Select the pattern from the List Window by clicking on the thumbnail. The pattern will be opened and displayed in the Edit
Window.
5. To zoom in/out, draw a rectangle in the Aerial View Window for the area to zoom, or select the appropriate function from the rightclick context menu in the Edit Window.
6. To manually add/delete stitch points to/from the pattern, select the Add/Delete Point
will add a point at that location, otherwise the point will be delete.
icon. Click on a line with no point there
7. You can also generate points from objects. To do so, first create the relevant objects using the object drawing tools. This process
is similar to the object creations in the Design Window (see Create an Object 36 for more details). Click the Select
icon
and select the objects desired. The process is similar to the objects selection in the Design Window (see Select Object(s) 14 for
more details). Click the Generate Points
lines.
8. To move points, select the
icon. Points will be created at the intersections of the objects and the horizontal
icon. Select a single point by clicking on it or multiple points by drawing a rectangle in the Edit
2005-06, Sew Good Software, Inc
Designs Creation
91
Window. The points within the rectangle will be all selected. Selected points will be highlighted in blue color. To move, drag on
one of the selected points and move to the desired location.
9. To shift the whole pattern, select the Shift
icon. Click on a location in the Edit Window and the whole pattern will be shifted
with that location moved to the lower left corner. You can also click the shift icons,
pattern in the desired direction.
,
,
or
to shift the whole
10. To clear all points in the pattern, select Clear All Points from the right-click context menu in the Edit Window.
11. To get a feel of how the pattern will look like in a fill stitch, click on the Tile Display
be tiled to fit the Edit Window.
12. You can use the Undo
and Redo
icon in the Edit Window. The pattern will
button to undo or redo changes made.
13. Click the Save
to save the pattern. The Save As dialog box will be opened. Select the folder you want the pattern to be saved
in and input the name for it. Note that the pattern file will have a ".pat" extension. Click Save to save the pattern. Note that you
MUST have at least one point on each horizontal line (highlighted in gray color), otherwise the pattern will not work.
5.15
Motif Manager
Motifs are used in various stitch types like, Line Motif, Fill Motif and Fill Motif Lettering. The program comes with a pre-defined set of
motifs and you can add your own motifs easily (see Create a New Motif 92 for more details). Once a motif is selected as the default
motif, it will remain be selected throughout even after the program is closed.
·
·
·
·
5.15.1
Select a Motif 91
Delete a Motif 92
Create a New Motif
Edit Existing Motifs
92
93
Select a Motif
Follow the steps below to select a motif:
1. Select Motif Manager from the Tools Menu 113 . The Motif Browser
167
will be displayed as below:
2. Select the folder containing the motif from the Folder List Window.
3. Click on the desired motif in the Thumbnail Window, it will be highlighted and a scaled view will be displayed in the Preview
Window.
2005-06, Sew Good Software, Inc
92
SEDS II
4. Click the Apply button or select Apply from the right-click context menu to select the motif as the default motif.
5. You can choose to close the Motif Browser
5.15.2
167
or leave it opened and continue to work in the Program Window.
Delete a Motif
Follow the steps below to delete a motif:
1. Select Motif Manager from the Tools Menu 113 . The Motif Browser
167
will be displayed as below:
2. Select the folder containing the motif from the Folder List Window.
3. Click on the desired motif in the Thumbnail Window, it will be highlighted and a scaled view will be displayed in the Preview
Window.
4. Click the
icon on the Toolbar, or select Delete from the right-click context menu to delete the motif.
5. You can choose to close the Motif Browser
5.15.3
167
or leave it opened and continue to work in the Program Window.
Create a New Motif
Follow the steps below to create a motif:
1. Select Motif Manager from the Tools Menu 113 . The Motif Browser
2. Click the
will close the Motif Browser
167
167
and open the Motif Editor
will be displayed.
169
, as shown below:
2005-06, Sew Good Software, Inc
Designs Creation
3. Click the New
icon to create a new motif. The New Motif dialog box will be shown as below:
Input the desired Width and Height of the new motif and then click OK. A blank motif will be created.
4. Follow the steps in Edit Existing Motifs
5.15.4
93
to edit and save the new motif.
Edit Existing Motifs
Follow the steps below to edit an existing motif:
1. Select Motif Manager from the Tools Menu 113 . The Motif Browser
2. Click the
will close the Motif Browser
2005-06, Sew Good Software, Inc
167
167
and open the Motif Editor
will be displayed.
169
, as shown below:
93
94
SEDS II
3. Click the Open
icon to select the folder when the motif is located.
4. Select the motif from the List Window by clicking on the thumbnail. The motif will be opened and displayed in the Edit Window.
5. To zoom in/out, draw a rectangle in the Aerial View Window for the area to zoom, or select the appropriate function from the rightclick context menu in the Edit Window.
6. To add stitch blocks to the motif, select the Add Stitch Blocks
Create the stitch block in the Edit Window using manual stitches.
icon. Select a color for stitch block from the Color List.
7. To edit stitch blocks, click the Select
icon and select the stitch blocks desired (this process is similar to selecting stitch
blocks in the Design Window, see Select Stitch Block(s) 14 for more details).
· To change size, input the new values in Width and Height. Push the
down if you want to maintain the original aspect
ratio when changing the values of width or height. Click Unit to switch between absolute (mm) or relative (%) mode. In
absolute mode the values in Width and Height will be defined in mm, while in relative mode, the values will be defined in
percentage of the original value.
· To change color, select the desired color in the Color List and the select Change Color from the right-click context menu in
the Edit Window.
· To mirror, select X Mirror or Y Mirror from the right-click context menu in the Edit Window. X Mirror will mirror the blocks in
the horizontal direction while Y Mirror will mirror them in the vertical direction.
8. To edit points in a stitch block, click the Select
icon and select the stitch block. Then click the Edit Points
icon will
highlight the selected block. Select the points you want to edit (this process is similar to selecting points in Stitch Point(s) Editing
and see Select Stitch Point(s) 103 for more details). Selected points will be highlighted in purple color.
· To move, drag on one of the selected points and move to the desired location.
· To insert points, select a single point and then select Insert Stitches from the right-click context menu in the Edit Window
and draw the points as needed.
· To remove, select Remove from the right-click context menu in the Edit Window.
· To split, select a single point and then select Separate Stitches from the right-click context menu in the Edit Window. The
stitch block will be spilt into 2 at the position of the selected point.
9. The Preview Window shows how it will look to have the motif filled in a rectangle. Click Change Preview Size
icon and
input the desired width of height of the filled rectangle. Adjust other settings for different results (see Fill Motif 57 for more
details).
10. You can use the Undo
and Redo
button to undo or redo changes made.
2005-06, Sew Good Software, Inc
Designs Creation
95
11. Click the Save
to save the motif. The Save As dialog box will be opened. Select the folder you want the motif to be saved in
and input the name for it. Note that the motif file will have a ".mtf" extension. Click Save to save the motif.
5.16
Font Management
5.16.1
Activate Font(s)
You can use a limited number of pre-digitized fonts and you can purchase additional fonts when needed. To order fonts, visit our
website or email us. After an order is completed, we will send you activation code(s) through email and following the steps below to
activate fonts:
1. Select Activate Font from the Help Menu
113
and the Activate Font dialog box will be displayed as shown below:
2. Input the activation code you received from us into the blank space.
3. Click Register when finished. A confirm message will be shown if successful.
4. Repeat 2 & 3 for all the codes.
6
Designs Editing
6.1
Change Canvas of a Design
Sometimes you may require to add more empty space in a design, e.g. when you are merging designs. To do so, follow the steps
below:
1. Open a design file (refer to Open a Design
2. Select Properties from the Edit Menu
for more details).
110
10
for more details).
and the Design Properties dialog box will be displayed (refer to Design Properties 161
3. Check Proportionate if you want to maintain the original aspect ratio for the new file size.
4. Input a new file width in X-(mm) or X-(inch) if desired. Note that you just need to input one of the them only, the value of the other
will be calculated automatically.
5. Input a new file height in Y-(mm) or Y-(inch) if desired. Note that you just need to input one of the them only, the value of the other
will be calculated automatically.
6. Check Canvas.
7. Click OK and the file size of the design will be changed accordingly with the original contents placed at the center of the new file
area.
6.2
Merge Designs
The steps below shows how to merge 2 designs and can be applied to merging multiple designs:
1. Open one of the design files (refer to Open a Design
10
for more details), usually the larger of the 2 if not same size.
2. Change the canvas of the opened file if necessary to accommodate the size of the second design file (refer to Change Canvas of a
Design 95 for more details).
3. Select Merge from the File Menu
2005-06, Sew Good Software, Inc
108
and the Merge Design dialog box will be shown as below:
96
SEDS II
4. Select the file to be merged and click Open to starting merging.
5. Note that the new design will be placed at the center of the original design.
6.3
Stitch Block(s) Editing
Operations on stitch blocks, like move, resize, rotate, copy, delete, mirror etc are very similar to the corresponding operations for
objects except you need to select the stitch blocks (refer to Select Stitch Block(s) 14 for more details) first instead of stitch blocks.
Refer to the following for more details:
·
·
·
·
·
·
·
·
·
6.3.1
Move/Resize Stitch Block(s) 96
Rotate Stitch Block(s) 97
Mirror Stitch Block(s) 98
Copy Stitch Block(s) 98
Delete Stitch Block(s) 98
Change Stitching Sequence 98
Change Stitch Block(s) Color 99
Edit Stitch Block(s) 99
Stitch Editor
Move/Resize Stitch Block(s)
Follow the steps below to move or resize stitch block(s):
1. Select the stitch block(s) you want to move/resize (refer to Select Stitch Block(s)
14
for more details).
2. The 9 move/resize control nodes shown below will be displayed at the boundary rectangle of the stitch block(s).
3. To resize the stitch block(s), hold down the mouse button on one of the 'square' control node. Drag the mouse and the stitch
block(s) will be re-sized in the direction corresponding to the position of the control node, e.g. if the bottom-right control node is
used, the block(s) will be re-sized in the bottom-right direction. Release the mouse button to end.
4. To move the stitch block(s), hold down the mouse button on the 'cross' control node at the center and drag the mouse to move the
block(s). Release the mouse button to end.
5. Because of object-inheritance (see Object-Based Digitizing 187 for more details), you can also enter the exact size or position for
the stitch blocks from the Object Properties dialog box, which can be opened by pressing F7 on the keyboard, or selecting Object
Properties from the Edit Menu 110 , as shown:
2005-06, Sew Good Software, Inc
Designs Editing
97
· To change position, select Position and input the values in X Position for horizontal displacement and Y Position for vertical
displacement. The values entered will be relative to the original position if Offset is selected, or to the lower left corner of the file
if From File Origin is selected.
· To change size, select Stretch and input the Width and/or Height in mm or as a percentage of the original values. Check
Proportionate to maintain the original aspect ratio. You can also specify the Anchor Point of re-size (the point that doesn't
move) in At Object.
6.3.2
Rotate Stitch Block(s)
Follow the steps below to rotate stitch block(s):
1. Select the stitch block(s) you want to rotate (refer to Select Stitch Block(s)
14
for more details).
2. Click on the 'cross' control node at the center (refer to Move/Resize Stitch Block(s)
96
for more details).
3. The 9 move/resize control nodes will be change to the 5 rotate control nodes, as shown below:
4. The 'circle' control node at the center denotes the center of rotation. Hold down the mouse button on it and drag the mouse to
change its position. Release the mouse button to end.
5. To rotate the stitch block(s), hold down the mouse button on one of the 'arc' control node at the corners and drag the mouse to
rotate the block(s). Release the mouse button to end.
6. Because of object-inheritance (see Object-Based Digitizing 187 for more details), you can also enter the exact angle and/or the
center of rotation from the Object Properties Dialog Box 176 , which can be opened by pressing F7 on the keyboard, or selecting
Object Properties from the Edit Menu 110 , as shown:
2005-06, Sew Good Software, Inc
98
SEDS II
· Select Rotate and input value in Angle for the rotation angle, and select the center of rotation from At Object. Note
coordinates of the center of rotation relative to the lower left corner of the file will be shown in X Position and Y Position. If
"User defined" is selected in At Object, you can input values in X Position and Y Position manually.
6.3.3
Mirror Stitch Block(s)
Follow the steps below to mirror stitch block(s):
1. Select the stitch block(s) you want to mirror (refer to Select Stitch Block(s)
6.3.4
14
for more details).
2. Select X-Mirror from the Edit Menu
110
to mirror the block(s) in the horizontal direction.
3. Select Y-Mirror from the Edit Menu
110
to mirror the block(s) in the vertical direction.
Copy Stitch Block(s)
Follow the steps below to copy stitch block(s):
1. Select the stitch block(s) you want to copy (refer to Select Stitch Block(s)
2. Select Copy from the Edit Menu
110
, or press Ctrl-C on the keyboard.
3. Select Paste from the Edit Menu
110
, or press Ctrl-V on the keyboard.
14
for more details).
4. Move the cursor to the position you want to place the copied block(s) and click in the Design Window to end.
6.3.5
Delete Stitch Block(s)
Follow the steps below to delete stitch block(s):
1. Select the stitch block(s) you want to delete (refer to Select Stitch Block(s)
2. Select Delete from the Edit Menu
110
14
for more details).
, or press the DEL on the keyboard will delete the block(s).
3. Alternatively, select Cut from the Edit Menu 110 , or press Ctrl-X on the keyboard will also delete the block(s) but in addition a copy
of the block(s) will be placed in the clipboard.
6.3.6
Change Stitching Sequence
Refer to the topic Stitch Browser
99
on how to change stitch blocks sequence using the Stitch Browser.
2005-06, Sew Good Software, Inc
Designs Editing
6.3.7
99
Change Stitch Block(s) Color
Refer to the topic Change Color 19 on how to change stitch block(s) color in the Design Window or the topic Stitch Browser
how to change stitch block(s) color in the Stitch Browser.
6.3.8
99
on
Insert/Remove Trim Code
Trim code will be added automatically during punch output if Auto Lock Stitch with Trim
can also insert/remove trim codes at the end of stitch block as follows:
1. Select the Insert/Remove Trim Code
is selected during stitch creation. You
icon from the Machine Control Toolbar 146 on the Stitch Creation Bar
130
.
2. Click on the stitch block you want to insert/remove trim code. If the stitch block already have a trim code it will be removed,
otherwise it will be added.
3. You can check if a trim code exist in a stitch block from the Stitch Browser 99 , or select Display Stitches with Jump Lines
from the Design View submenu of the View Menu 111 . Jump lines will be shown in red color if there is a trim code, if not it will be
shown in green.
6.3.9
Edit Stitch Block(s)
After a stitch block is created, you can change many of its properties, like settings, options, In/Out points and even stitch type, at
ease using the Edit Stitch Block(s) function as described below:
1. Select the Edit Stitch Block(s)
icon from the Stitch Block Edit Toolbar 146 on the Primary Bar 114 .
2. Click on a stitch block that you want to edit. The corresponding stitch type, settings, options and In/Out points of the block will be
shown.
3. To change the In/Out points, click and drag on the points and move them to the desired location.
4. Change the settings and options on the corresponding settings bar and options bar as necessary.
5. You can change to another "compatible" stitch type by selecting the type on the setting bar. Stitch types that requires the same
object type combination are compatible.
6. Select Enter from the right-click context menu to make the changes in effect.
6.3.10
Stitch Browser
You can use the Stitch Browser to perform many stitch block related functions, such as:
Select Stitch Block(s) 99
Hide/Show Stitch Block(s) 99
Re-sequence Stitch Blocks 99
Change Color of Stitch Block(s) 99
Insert/Remove Trim Codes of Stitch Block(s)
Edit Stitch Point(s) 99
Edit Stitch Block(s) 99
99
· To turn on/off the Stitch Browser Docking Pane, select Stitch Browser from the Toolbars submenu of the View Menu 111 .
· Click on the Stitch Browser Docking Pane to open it. To have it stayed open push the
resume auto hide click the
icon.
icon on the upper right corner. To
· Stitch blocks will be shown as thumbnails according to the display mode selected on the tabs on the top and right side. There are
3 numbers beneath each thumbnail. The one on the left is the ordinal number of the thumbnails. The one on the right is the ordinal
number of the stitch block(s) in the design. The one in bracket is the total number of stitches in the stitch block(s).
· All Layers
Display stitch blocks from all layers.
· Current Layer
Display stitch blocks in current layer only.
· All
Each stitch block is display in a separate thumbnail.
· Color Change
Successive stitch blocks of the same color (needle) are displayed in a thumbnail.
2005-06, Sew Good Software, Inc
100
SEDS II
· Selected
Display only selected stitch blocks, one in a separate thumbnail.
· Manual
Display only manual stitch blocks, one in a separate thumbnail.
· Fill
Display only fill stitch blocks, one in a separate thumbnail.
· Satin
Display only satin stitch blocks, one in a separate thumbnail.
· Line
Display only line stitch blocks, one in a separate thumbnail.
· To select a single thumbnail, just click on it. Thumbnails that are originally selected will be de-selected. By selecting a thumbnail all
stitch blocks in it will be selected. The selected thumbnail will be highlighted with a blue rectangle around it.
· To select a group of adjacent thumbnails,
· Click on the first thumbnail.
· Hold down the SHIFT key.
· With the SHIFT key still depressed, click on the last thumbnail in sequence you wish to select. All thumbnails between the two
thumbnails you've clicked will be selected.
· To toggle selection/de-selection a thumbnail, hold down the CTRL key and click on a thumbnail. You can use this to select multiple
thumbnails.
· To hide/show stitch blocks in a thumbnail, select Show/Hide
it cannot be selected.
/
icon beneath the thumbnail. Note that if a thumbnail is hide
· To hide multiple thumbnails at the same time, select the thumbnails and select Hide Selected from the right-click context menu.
· To show all thumbnails, select Show All from the right-click context menu.
· To re-sequence thumbnails, thus the stitch block(s) they contain,
· Select the thumbnails you want to re-sequence.
· Click on one of the selected thumbnails and with the mouse button hold down.
· Drag and move to a thumbnail that is not selected and release the button.
· The selected thumbnails will be moved before that thumbnail.
· To change the color of all stitch blocks in a thumbnail,
· Select the thumbnail.
· Select Change Color from the right-click context menu.
· Select the desired color from the submenu.
· To insert/remove trim code at the end of stitch blocks in a thumbnail, press the
trim codes and push it up to remove trim codes.
button beneath the thumbnail down to insert
· To edit stitch points in the stitch blocks of a thumbnail, click the
icon beneath the thumbnail. The thumbnail will be selected
automatically and the program will jump to the Stitch Point(s) Editing 103 function. If there are more than 1 stitch block in the
thumbnail, the first block will be selected for operation.
· To edit the stitch blocks of a thumbnail, click the
icon beneath the thumbnail. The thumbnail will be selected automatically and
the program will jump to the Edit Stitch Block(s) 99 function. If there are more than 1 stitch block in the thumbnail, the first block
will be selected for operation.
6.4
Stitch Block(s) Processing
Follow the steps below to process stitch block(s):
1. Select the stitch block(s) you want to process (refer to Select Stitch Block(s)
select all stitch blocks.
2. Click on the
14
for more details). To process the whole design,
in the Primary Bar 114 .
3. The Stitch Processing Dialog Box
177
will be shown below:
2005-06, Sew Good Software, Inc
Designs Editing
101
4. To change the size of the stitch block(s), select Change Size of Stitch Block(s) and input the desired width and/or height in mm
or by percentage. Check Proportionate to maintain the aspect ratio of the stitch block(s).
5. To change the number of stitches of the stitch block(s), select Change Number of Stitches and input the desire stitch number in
Total Stitches, or a percentage of the current number of stitches in Percentage.
6. To change the span(density) of the stitch block(s), select Change Span of Stitch Block(s) and input the desire span or density
for fill and satin stitch blocks.
7. Click OK to start processing.
6.4.1
Change Size
To change the size of stitch block(s):
1. Select the stitch block(s) you want to resize (refer to Select Stitch Block(s)
select all stitch blocks.
2. Select the Stitch Processing
3. The Stitch Processing Dialog Box
14
for more details). To resize the whole design,
icon from the Stitch Block Edit Toolbar 146 on the Primary Bar 114 .
177
will be shown below:
4. Select Change Size of Stitch Block(s) and input the desired width and/or height in mm or by percentage. Check Proportionate
to maintain the aspect ratio of the stitch block(s).
5. Click OK to start processing.
6. Note that the program will automatically adjust add or remove stitches during re-sizing to preserve the original density.
2005-06, Sew Good Software, Inc
102
6.4.2
SEDS II
Change Number of Stitches
To change the number of stitches in stitch block(s):
1. Select the stitch block(s) you want to process (refer to Select Stitch Block(s)
select all stitch blocks.
2. Select the Stitch Processing
3. The Stitch Processing Dialog Box
14
for more details). To process the whole design,
icon from the Stitch Block Edit Toolbar 146 on the Primary Bar 114 .
177
will be shown below:
4. Select Change Number of Stitches and input the desire stitch number in Total Stitches, or a percentage of the current number
of stitches in Percentage.
5. Click OK to start processing.
6. Note that the program will adjust the density of the stitch blocks during the process.
6.4.3
Change Density (Span)
To change the density(span) of stitch block(s):
1. Select the stitch block(s) you want to process (refer to Select Stitch Block(s)
select all stitch blocks.
2. Select the Stitch Processing
3. The Stitch Processing Dialog Box
14
for more details). To process the whole design,
icon from the Stitch Block Edit Toolbar 146 on the Primary Bar 114 .
177
will be shown below:
2005-06, Sew Good Software, Inc
Designs Editing
103
4. Select Change Span of Stitch Block(s) and input the desire percentage of the original span or density for fill and satin stitch
blocks.
5. Click OK to start processing.
6. Note that the program will adjust the number of stitches during the process.
6.4.4
Convert Manual Stitch Block
When design files, like DST, MELCO EXP, are imported to the program, all stitch blocks are stored as Manual Stitch Type. To
convert the manual stitch blocks to the program's internal stitch type, like Fill and Satin, do the following:
1. Split the stitch block(s) at locations where stitches running from one area to another area, as described in Split a Stitch Block 104 .
Note that this function work good on one connected area of stitches only so this splitting step is important to get a good result.
2. Select the Convert Manual Stitch Block
icon from the Stitch Block Edit Toolbar 146 on the Primary Bar 114 .
3. Click on the stitch block you want to process, the outline of the area enclosing the block will be created and the appropriate stitch
type will be shown on the settings bar. If the stitch type is wrong change it to the correct one. Change the settings and options for
the stitch type if needed.
4. Click Enter from the right-click context menu to start processing.
5. If successful, the Manual Stitch block will be changed to the new stitch type selected with all the accompanying properties. Outline
objects will also be created.
6.5
Stitch Point(s) Editing
This function is used to edit stitch points within a stitch block. To use,
1. Select a stitch block which contains the stitch points you want to select (refer to Select Stitch Block(s)
2. Click on the Stitch Edit
·
·
·
·
·
·
6.5.1
icon of the Stitch Point Edit Toolbar
145
14
for more details).
on the Primary Bar 114 .
Select Stitch Point(s) 103
Move Stitch Point(s) 104
Insert Stitch Point(s) 104
Remove Stitch Point(s) 104
Split a Stitch Block 104
Change Machine Code 104
Select Stitch Point(s)
Follow the steps below to select stitch point(s) in a stitch block:
1. To select a single stitch point, just click on it. Note that selected points will be highlighted by small squares over them.
2005-06, Sew Good Software, Inc
104
SEDS II
2. To select consecutive stitch points, click on a point and with the Shift key down click on another point. The points between these 2
points, including themselves, will be selected.
3. Alternatively, you can select consecutive stitch points by first click on a point and then with the Shift key down, press the left, right
arrow keys to select points before or after it.
4. To select points that are not consecutive, hold down the CTRL key and then click on the points. Note that if you click on an already
selected points with the CTRL key down the point will be de-selected.
5. To de-select all points, just click on an empty area.
6.5.2
Move Stitch Point(s)
Follow the steps below to move stitch point(s) in a stitch block:
1. Select the stitch point(s) you want to move (refer to Select Stitch Point(s) 103 for more details).
2. Hold down the mouse button on one of the select points and drag the points to where you want.
3. Release the button to end.
6.5.3
Insert Stitch Point(s)
Follow the steps below to insert stitch point(s) to a stitch block:
1. Select a stitch point where you want to insert points (refer to Select Stitch Point(s) 103 for more details).
2. Right-click in the Design Window and select Insert Stitches from the context menu.
3. Click in the Design Window once will insert a stitch point at the position of the cursor.
4. Double click in the Design Window to end.
5. Alternatively, you can right-click in the Design Window and select Add from the context menu. This will insert a single stitch point
at the middle of the selected point and the point immediately before it.
6.5.4
Remove Stitch Point(s)
Follow the steps below to remove stitch point(s) from a stitch block:
1. Select the stitch point(s) you want to remove (refer to Select Stitch Point(s) 103 for more details).
2. Right-click in the Design Window and select Remove from the context menu.
3. The selected stitch point(s) will be removed.
6.5.5
Split a Stitch Block
Follow the steps below to split a stitch block:
1. Select the stitch point at where you want the stitch block split (refer to Select Stitch Point(s) 103 for more details).
2. Right-click in the Design Window and select Separate Stitches from the context menu.
6.5.6
Change Machine Code
Follow the steps below to change the machine code of a stitch point in a stitch block:
1. Select the stitch point you want to change (refer to Select Stitch Point(s) 103 for more details).
2. Right-click in the Design Window and select Machine Code from the context menu.
3. Select the desired machine code from the submenu.
2005-06, Sew Good Software, Inc
Designs Editing
6.6
105
Remove Short Stitches
This function is useful in "cleaning up" a design before sending it to a machine by automatically removing stitches in a design shorter
than a certain length, determined by the user. To use, follow the steps below:
1. Select the Short Stitch Removal
icon from the Stitch Point Edit Toolbar
Removal Bar 147 will appear, as shown below
145
on the Primary Bar 114 . The Short Stitch
2. Enter a length in mm in Shortest.
3. Check Retain edge stitches if you want to exclude edge turning stitch points from removal.
4. Click Do. The program will automatically remove stitches shorter than the length you've entered in Shortest.
6.7
Frame Move
Frame move is useful if you need to add accessory, like appliqué , to the sewing. Essentially, what this operation does is to move the
frame to a user specified location and the stop the machine. User will perform whatever is needed and then restart the machine. The
frame will be moved to the next sewing position before moving. To use, follow the steps below:
1. Select the stitch block at the end of which you want to add a frame move code (refer to Select Stitch Block(s)
details).
2. Select the Insert Move Frame Code
14
icon from the Machine Control Toolbar 146 on the Stitch Creation Bar
for more
130
.
3. Click in the Design Window to insert the move frame code at the location you want. The move frame code will be highlighted by a
blue triangle. The frame will be moved to this location after the stitch block finished sewing and the machine will be stopped. After
resume sewing, the frame will be moved to the beginning of the next stitch block.
6.8
Change Design Properties
Design Properties can be found in Properties under the Edit Menu
Here you can change the following design properties:
· Canvas
See Change Canvas of a Design
95
110
(refer to Design Properties Dialog Box 160 for more details).
for more details.
· Design In/Out points
You can choose to place the design In/Out at Design Center (center of all stitches), File Center (center of the canvas), First and
Last Stitch or Manually. If choose Manually, select the Design In/Out Points
the Primary Bar 114 and draw the In/Out Points in the Design Window directly.
· Design Information
Design Number
Customer Number
Customer Name
Job Number
Digitizer
Description
Keywords
· Production Information
Marker Number
Hoop Number
Appliqué Number
Backing
Topping
2005-06, Sew Good Software, Inc
icon from the Stitch Block Edit Toolbar 146 on
106
SEDS II
7
System Functions
7.1
Settings Preview
You can preview the result of the current settings of the current stitch type using the Setting Preview Window. To turn it on/off, select
Settings Preview from the View Menu 111 . The window will be automatically updated when you change a setting or to another stitch
type.
7.2
Freeze Cursor
Sometimes it is useful to freeze the cursor to the horizontal (X) or vertical (Y) directions, e.g. when drawing horizontal lines, it will be
easy to do so with the cursor froze in the horizontal (X) direction.
To freeze the cursor in the horizontal direction, select X Freeze from the View Menu 111 . To freeze the cursor in the vertical
direction, select Y Freeze from the View Menu 111 . Select Free to unfreeze.
You may also press the F2 key on the keyboard to toggle between the Free, X Freeze and Y Freeze modes.
7.3
Search Machine Code
Machine codes are codes that are used to control the behaviour of the embroidery machine, like hit, jump and trim etc. With SEDS II
Achiever it is possible to view and/or edit the machine codes giving you even more control of the final output file. To use,
1. Click on the
icon on the Stitch View Control Bar 143 .
2. All the machine codes will be displayed in the Design Window.
3. Use the Search Machine Code Options Bar
right-click context menu.
125
to navigate through the machine code, or select the appropriate action from the
4. To change a machine code, right-click on it and select the new code from the Machine Code submenu.
7.4
Statistics
The Statistics function provides useful information about a design. Click on the
from the Tools Menu 113 will open the Statistics dialog box, as shown below:
icon on the Main Bar
113
, or select Statistics
2005-06, Sew Good Software, Inc
System Functions
·
·
·
·
·
·
·
·
·
·
·
107
File Name - Name of the design.
File Size - File size of the design in mm, X denotes the width and Y the height.
Design Size - Actual size of the design in mm, X denotes the width and Y the height.
Start Point - Distance from the file origin (lower-left corner) in mm, X in the horizontal direction and Y in the vertical direction.
Offset From Start Point - Shows how far the design goes in the left, right, up and down directions from the start point.
Color(s) - Show all the colors in the design. The first number in the color box denotes the color number used in the program and
the number in bracket denotes the needle number.
Stitches - Show the total number of stitches in a given color.
Trim(s) - Show the total number of trim codes in a given color.
Jump(s) - Show the total number of jump codes in a given color.
Thread(m) - Show the total thread length required for a given color in meter.
Length - Display more detail stitch lengths statistics. The Stitch Length Analysis dialog box will be opened when click on Length,
as shown below:
Each row shows the total number of stitches with lengths between From(>=) and To(<). You can customize the values in 2nd to
7th row of From(>=) to suit your needs. Click Recalculate to recalculate lengths after changing values.
2005-06, Sew Good Software, Inc
108
SEDS II
8
About the Program
8.1
Interface
8.1.1
The Program Window
Below is the SEDS II Achiever Program Window.
8.1.2
Menu Bar
·
·
·
·
·
·
8.1.2.1
File Menu 108
Edit Menu 110
View Menu 111
Tools Menu 113
Window Menu 113
Help Menu 113
File Menu
New
Create a new, blank design file.
Open
Open an existing design file in one of the supported format (eds, edf, edp, tap, dst, fmc, fdr, zsk, cnd, exp, pec,
pes, pcs, pcm, ksm, hus, sew).
2005-06, Sew Good Software, Inc
About the Program
Reopen
Select from the submenu a list of recent opened files to reopen.
Merge
Open an existing design file into the active Design Window.
Close
Close the active Design Window but does not exit the program.
Save
Save the current design to its current file name and location.
Save As
Save the current design under a different name or to a different location or as a different format (eds, tap, dst,
cnd, exp, pes, pec, pcs, pcm, ksm, hus, sew).
Import
Import Image
Import an image into the active Design Window or as a new Design Window.
Import Simulation Background Image
Import an image to use as the background for simulation display.
Import Vector File
Import a vector file (wmf) into the active file or as a new file.
Import From Tape
Import data from a paper tape through a tape reader into the active file or as a new file.
Export
Export Image
Export the image in the active file to a different name and location. If there is no image in the active file, this
function is disabled.
Export Objects
Export the selected objects in the active file to a vector file in a different name or location (dxf, wmf). If there is
no selected objects, this function is disabled.
Export Motif
Export the selected stitch blocks in the active file as a motif file. If there is no selected stitch blocks, this
function is disabled.
Punch Floppy Export
Export the active file to a machine readable format in a different name or location, usually a floppy disk (dst,
fmc, fdr, zsk, cnd, exp).
Punch Tape Export
Export the active file to a paper tape in different formats through a tape puncher. (Tajima, Barudan, ZSK)
Punch Direct Export
Export the active file directly to an embroidery machine through dedicated connections.
Floppy Disk Format
Format a floppy diskette in various formats (DOS, FDR, FMC, ZSK, MELCO).
Acquire Image
Acquire an image through a TWAIN compatible input device, usually a scanner.
Select Source
Select a TWAIN compatible input device, usually a scanner, from a list of available devices.
Album Manager
Invokes the Album Manager dialog box for designs management.
Print Setup
Select a printer and its properties.
Print
Print the contents in the active Design Window.
Publish HTML File
Convert the active file into a HTML file.
Send Mail
Send the active file as an attachment by the default e-mail program.
Exit
Terminate the program.
2005-06, Sew Good Software, Inc
109
110
8.1.2.2
SEDS II
Edit Menu
Undo
Reverse the changes of the last operation.
Redo
Reverse the changes of the last Undo.
Cut
Delete the selected objects and stitch blocks from the active Design Window and place them into the clipboard.
Copy
Make a copy of the selected objects and stitch blocks from the active Design Window and place them into the
clipboard.
Paste
Copy the contents of the clipboard into the active Design Window.
Paste Image
As New Design
Create a new file and import the image in the clipboard into it.
Into Current Design
Import the image in the clipboard into the active file.
Delete
Delete the selected objects and stitch blocks from the active Design Window.
Select All
Select all objects and stitch blocks in the active Design Window.
De-select All
De-select all objects and stitch blocks in the active Design Window.
Additive Select
On/Off. When an object is created, turning this on will have the object selected with original selected objects.
Otherwise only the newly created object is selected.
Reduce Image Color
Automatically reduce the colors of the image in the active Design Window. If there is no image, this function is
disabled.
Image X-Mirror
Mirror the background image of the active Design Window in the horizontal direction.
Image Y-Mirror
Mirror the background image of the active Design Window in the vertical direction.
Image Rotate
Rotate the image of the active Design Window by a arbitrary angle.
Image Edit
Invoke the default image editor to edit the background image.
Select Image Editor
Select and change the default image editor.
Align & Distribute
Align Top
Align all the currently selected objects and stitches to the top of the bounding rectangle.
Align Bottom
Align all the currently selected objects and stitches to the bottom of the bounding rectangle.
Align Left
Align all the currently selected objects and stitches to the left of the bounding rectangle.
Align Right
Align all the currently selected objects and stitches to the right of the bounding rectangle.
Align Vertical Center
Align all the currently selected objects and stitches to the vertical center of the bounding rectangle.
Align Horizontal Center
Align all the currently selected objects and stitches to the horizontal center of the bounding rectangle.
Vertical Even Spacing
Rearrange the currently selected objects and stitches to even vertical spacing.
Horizontal Even Spacing
Rearrange the currently selected objects and stitches to even horizontal spacing.
Compact Design Colors
Find all colors used in the active file and re-arrange them as color 1,2,3... in the Color Bar.
2005-06, Sew Good Software, Inc
About the Program
X-Mirror
Flip the selected objects and stitch blocks of the active Design Window horizontally.
Y-Mirror
Flip the selected objects and stitch blocks of the active Design Window vertically.
Object Properties
Open the Object Properties dialog box to change location, size, rotation etc of the current selected objects.
Lettering Properties
Open the Lettering Properties dialog box to change font, alignment, text etc of the current selected lettering.
Search Machine Code
Search for special machine code in the active Design Window.
Design Properties
Open the Properties dialog box for the current design.
8.1.2.3
View Menu
Design View
Display Stitches With Needle Points
On/Off. If on, a dot is shown at each stitch point.
Display Stitch In/Out Points
On/Off. If on, a green dot is shown at each In point and a red dot is shown at each Out point.
Display Stitches With Machine Code
On/Off. If on, machine codes are shown in green rectangles. Hit stitches are not shown.
Display Stitches With Jump Lines
On/Off. If on, jump lines are shown as green dotted lines.
Display Underlay Stitches Only
On/Off. If on, only underlay stitches are shown.
Display Stitches With Underlay
On/Off. If on, both top and underlay stitches are shown. Otherwise only top stitches shown.
Display All Stitches
On/Off. If on, display all stitch blocks no matter what types. Turn off automatically if turn on other display mode
in the group.
Display Last 2 Stitch Blocks
On/Off. If on, display the last 2 stitch blocks only. Turn off automatically if turn on other display mode in the
group.
Display Manual/Jump Stitches Only
On/Off. If on, display manual and jump stitch blocks only. Turn off automatically if turn on other display mode
in the group.
Display Fill Stitches Only
On/Off. If on, display fill stitch blocks only. Turn off automatically if turn on other display mode in the group.
Display Satin Stitches Only
On/Off. If on, display satin stitch blocks only. Turn off automatically if turn on other display mode in the group.
Display Line Stitches Only
On/Off. If on, display line stitch blocks only. Turn off automatically if turn on other display mode in the group.
Display Selected Stitches Only
On/Off. If on, display selected stitch blocks only no matter what types. Turn off automatically if turn on other
display mode in the group.
Display Selected Stitches With Background
On/Off. If on, the selected stitch blocks, no matter what types, will be displayed as usual. All other stitch
blocks will be "grey-out". Turn off automatically if turn on other display mode in the group.
Display Stitches
On/Off. If on, stitch blocks will be displayed.
Display Objects
On/Off. If on, objects will be displayed.
Display Background Image
On/Off. If on, the background image will be displayed. This function will be disable if there is no background
image.
Aerial View
On/Off. Turn on/off the aerial view window.
Settings Preview
Turn on/off the Settings Preview Window.
2005-06, Sew Good Software, Inc
111
112
SEDS II
Show Grid
On/Off. Turn on/off grid lines display.
Show Ruler
On/Off. Turn on/off ruler display.
Zoom In
Zoom in to the next level.
Zoom Out
Zoom out to the next level.
Zoom to Selection
Zoom the current selected objects and stitch blocks to the size of the Design Window.
Last Zoom
Zoom to the last zoom level.
Simulation Background
Single Color
Use the background color as the background during simulation display.
Default Pattern
Use the default pattern as the background during simulation display.
Background Image
Use the selected background image as the background during simulation display.
Simulation Display
On/Off. Turn on/off 3D simulation display of stitches.
Slow Redraw
Redraw stitches from the start in various speeds.
Simulation Slow Redraw
Redraw stitches from the start in various speeds in 3-D simulation display.
Toolbars
Status Bar
On/Off. Turn on/off display of the status bar.
Main Bar
On/Off. Turn on/off display of the main bar.
Color Bar
On/Off. Turn on/off display of the color bar.
Primary Bar
On/Off. Turn on/off display of the primary bar.
Stitch Creation Bar
On/Off. Turn on/off display of the stitch creation bar.
Stitch Settings Bar
On/Off. Turn on/off display of the stitch settings bar.
Stitch View Control Bar
On/Off. Turn on/off display of the stitch view control bar.
Layer Manager
Turn on/off the Layer Manager docking pane.
Stitch Browser
Turn on/off the Stitch Browser docking pane.
Reset Position
Return all toolbars to their default positions.
Free
On/Off. If on, the cursor is not confined. Turn off automatically if X Freeze or Y Freeze is on.
X Freeze
On/Off. If on, the cursor is confined in the horizontal direction. Turn off automatically if Free or Y Freeze is on.
Y Freeze
On/Off. If on, the cursor is confined in the vertical direction. Turn off automatically if Free or X Freeze is on.
Theme
Office 2000
Use Office 2000 style theme for menubar and toolbars.
Office XP
Use Office XP style theme for menubar and toolbars.
Windows XP
Use Windows XP style theme for menubar and toolbars.
2005-06, Sew Good Software, Inc
About the Program
Office 2003
Use Office 2003 style theme for menubar and toolbars.
8.1.2.4
Tools Menu
Options
Open the Program Options dialog box.
Edit Machine Code Filter
Open the Edit Machine Code Filter dialog box.
Settings Manager
Open the Settings Manager dialog box.
Statistics
Open the Statistics dialog box.
Pattern Manager
Invoke the Pattern Manager dialog box to select and edit patterns.
Motif Manager
Invoke the Motif Manager dialog box to select and edit motifs.
Lettering Input Wizard
Open the 'Lettering Input Wizard' for input lettering.
OneTouch Wizard
Invoke the OneTouch Wizard for OneTouch auto-digitizing.
8.1.2.5
Window Menu
Cascade
Cascade all opened design windows.
Tile
Tile all opened Design Windows.
8.1.2.6
Help Menu
User's Guide
Open the online user's guide.
Website Online
Open an Internet browser and jump to our web site.
Activate Font
Enter the registration code to activate font(s).
About
Open the About dialog box.
8.1.3
ToolBars
8.1.3.1
Main Bar
New
Create a new, blank design file.
Open
Open an existing design file in one of the supported format (eds, edf, edp, tap, dst, fmc, fdr, zsk, cnd, exp,
pec, pes, pcs, pcm, ksm, hus, sew).
Click the arrow on the right to display a list of recent opened files and select from the list to reopen the file.
Save
Save the current design to its current file name and location.
Print
Print the contents in the active Design Window.
2005-06, Sew Good Software, Inc
113
114
SEDS II
Cut
Delete the selected objects and stitch blocks from the active Design Window and place them into the
clipboard.
Copy
Make a copy of the selected objects and stitch blocks from the active Design Window and place them into the
clipboard.
Paste
Copy the contents of the clipboard into the active Design Window.
Undo
Reverse the changes of the last operation.
Click the arrow on the right to display a list of previous operations and select from the list to undo operations
up to that point.
Redo
Reverse the changes of the last Undo.
Click the arrow on the right to display a list of next operations and select from the list to redo operations up to
that point.
Statistics
Open the Statistics dialog box.
Zoom Level
Shows the current zoom level and allow you to select from the pull down list of pre-defined zoom levels or input
your own.
Current Settings
Display and select the current setting file.
About
Open the About dialog box.
What's this?
Click to enter the context-sensitive help mode. In this help mode you can left click another object to display a
context-sensitive help window for that object. The help window provides a brief explanation about the object
and how to use it.
Note
Press ESC to cancel the context-sensitive help mode.
8.1.3.2
Primary Bar
Selection
Objects and Stitch Blocks selection tool.
Zoom Toolbar 144
Line Toolbar 144
Ellipse Toolbar 144
Rectangle Toolbar
145
Polygon/Star Toolbar
145
Lettering
If no lettering is selected, open the 'Lettering Input Wizard'. Otherwise, change certain properties of the
currently selected lettering.
Object Manipulation Toolbar 145
Stitch Point Edit Toolbar
145
Stitch Block Edit Toolbar 146
Measure
Measure length and angle.
2005-06, Sew Good Software, Inc
About the Program
8.1.3.3
115
Color Bar
Color Palette
Display the Color dialog box for reviewing or adjusting color palette.
Thread Charts
Display the thread charts dialog box.
Scroll Colors Left
Scroll colors by one to the left.
Scroll Colors Right
Scroll colors by one to the right.
8.1.3.4
Options Bar
For different functions there are different options and its corresponding options bar will be shown when the function is invoked.
·
·
·
·
·
·
·
·
Lettering Options Bar 115
Fill Type Options Bar 117
Satin Type Options Bar 118
Line Type Options Bar 119
Lettering Type Options Bar 120
Special Type Options Bar 122
Miscellaneous Options Bar 123
Pop-up Options 125
8.1.3.4.1 Lettering Options Bar
These options bar are used during Lettering input:
·
·
·
·
·
·
Lettering Input Options Bar 115
Lettering in Box/Diamond Options Bar 115
Lettering on 1 Line Options Bar 116
Lettering between 2 Lines Options Bar 116
Lettering on 1 Object Options Bar 116
Lettering between 2 Objects Options Bar 117
8.1.3.4.1.1 Lettering Input Options Bar
Font Type
Four types, TTF Fill, TTF Satin, SEDS Fill and SEDS Satin are available. The SEDS types are pre-digitized
font types.
Font Name
The name of the font.
Bold
Create text in bold mode, supported in TTF fonts only.
Italic
Create text in italic mode, supported in TTF fonts only.
8.1.3.4.1.2 Lettering in Box/Diamond Options Bar
2005-06, Sew Good Software, Inc
116
SEDS II
Control Nodes Options
126
Orientation Options 125
Alignment Options
126
Auto Spacing
If button is down, turn on adjust spacing between characters automatically, off otherwise.
8.1.3.4.1.3 Lettering on 1 Line Options Bar
Control Nodes Options
126
Orientation Options 125
Alignment Options
126
Position Options 126
Absolute Angle
If button is down, the rotation angle is relative to the horizontal direction, otherwise it is relative to the base
object.
Auto Spacing
If button is down, turn on adjust spacing between characters automatically, off otherwise.
8.1.3.4.1.4 Lettering between 2 Lines Options Bar
Control Nodes Options
126
Orientation Options 125
Alignment Options
126
Absolute Angle
If button is down, the rotation angle is relative to the horizontal direction, otherwise it is relative to the base
object.
Auto Spacing
If button is down, turn on adjust spacing between characters automatically, off otherwise.
8.1.3.4.1.5 Lettering on 1 Object Options Bar
Orientation Options 125
Alignment Options
126
Position Options 126
Absolute Angle
If button is down, the rotation angle is relative to the horizontal direction, otherwise it is relative to the base
object.
2005-06, Sew Good Software, Inc
About the Program
Auto Spacing
If button is down, turn on adjust spacing between characters automatically, off otherwise.
8.1.3.4.1.6 Lettering between 2 Objects Options Bar
Orientation Options 125
Alignment Options
126
Absolute Angle
If button is down, the rotation angle is relative to the horizontal direction, otherwise it is relative to the base
object.
Auto Spacing
If button is down, turn on adjust spacing between characters automatically, off otherwise.
8.1.3.4.2 Fill Type Options Bar
These options bar are used in Fill Stitch Type:
·
·
·
·
·
Normal Fill Options Bar 117
Jagged Fill Options Bar 117
Pattern Fill Options Bar 117
Column Fill Options Bar 118
Jagged Column Fill Options Bar
118
8.1.3.4.2.1 Normal Fill Options Bar
Lock Stitch Options 127
Fill Stitch Boundary Options 127
8.1.3.4.2.2 Jagged Fill Options Bar
Lock Stitch Options 127
Jag Direction Options 127
8.1.3.4.2.3 Pattern Fill Options Bar
Lock Stitch Options 127
Fill Stitch Boundary Options 127
2005-06, Sew Good Software, Inc
117
118
SEDS II
8.1.3.4.2.4 Column Fill Options Bar
Lock Stitch Options 127
Column Fill Mode Options
127
8.1.3.4.2.5 Jagged Column Fill Options Bar
Lock Stitch Options 127
Jag Direction Options 127
8.1.3.4.3 Satin Type Options Bar
These options bar are used in Satin Stitch Type:
·
·
·
·
One Line Satin Options Bar 118
Two Line Satin Options Bar 118
Pattern Fill Satin Options Bar 119
Jagged Satin Options Bar 119
8.1.3.4.3.1 One Line Satin Options Bar
Needle Down
If button down, add split stitches across the middle for large width satin stitches, otherwise no split stitch will
be added.
Lock Stitch Options 127
Auto Span
If button is down, adjust density automatically according to stitch widths. Even density otherwise.
Cornering Options
128
Random Inner Stitches
If button is down, inner stitches, if added, will be created in a random way.
8.1.3.4.3.2 Two Line Satin Options Bar
Needle Down
If button down, add split stitches across the middle for large width satin stitches, otherwise no split stitch will
be added.
Lock Stitch Options 127
Satin Pattern Options
128
2005-06, Sew Good Software, Inc
About the Program
Auto Span
If button is down, adjust density automatically according to stitch widths. Even density otherwise.
Force Stitch on Guide Line
If button is down, the program will force the generation of stitches exactly at the location of the guide lines
created. Otherwise the program will smooth stitches out to give a better result.
Cornering Options
128
Random Inner Stitches
If button is down, inner stitches, if added, will be created in a random way.
8.1.3.4.3.3 Pattern Fill Satin Options Bar
Needle Down
If button down, add split stitches across the middle for large width satin stitches, otherwise no split stitch will
be added.
Lock Stitch Options 127
Force Stitch on Guide Line
If button is down, the program will force the generation of stitches exactly at the location of the guide lines
created. Otherwise the program will smooth stitches out to give a better result.
8.1.3.4.3.4 Jagged Satin Options Bar
Needle Down
If button down, add split stitches across the middle for large width satin stitches, otherwise no split stitch will
be added.
Lock Stitch Options 127
Satin Pattern Options
128
Jag Direction Options 127
Force Stitch on Guide Line
If button is down, the program will force the generation of stitches exactly at the location of the guide lines
created. Otherwise the program will smooth stitches out to give a better result.
Auto Span
If button is down, adjust density automatically according to stitch widths. Even density otherwise.
Random Inner Stitches
If button is down, inner stitches, if added, will be created in a random way.
8.1.3.4.4 Line Type Options Bar
These options bar are used in Line Stitch Type:
·
·
·
·
Single Line Options Bar 119
Double Line Options Bar 120
E-Stitch Options Bar 120
Bean Stitch Options Bar 120
8.1.3.4.4.1 Single Line Options Bar
2005-06, Sew Good Software, Inc
119
120
SEDS II
Needle Down
If button down, add split stitches across the middle for large width satin stitches, otherwise no split stitch will
be added.
Lock Stitch Options 127
Adjust to Path
If button is down, stitch length will be adjusted to fit the path of the object where possible. Otherwise fixed
stitch length will be used.
8.1.3.4.4.2 Double Line Options Bar
Needle Down
If button down, add split stitches across the middle for large width satin stitches, otherwise no split stitch will
be added.
Lock Stitch Options 127
Adjust to Path
If button is down, stitch length will be adjusted to fit the path of the object where possible. Otherwise fixed
stitch length will be used.
8.1.3.4.4.3 E-Stitch Options Bar
Needle Down
If button down, add split stitches across the middle for large width satin stitches, otherwise no split stitch will
be added.
Lock Stitch Options 127
E-Stitch Direction Options
129
Scale
If button is down, stitch entities (e.g. motif, e-stitch, chain) will be scaled to fit object.
8.1.3.4.4.4 Bean Stitch Options Bar
Needle Down
If button down, add split stitches across the middle for large width satin stitches, otherwise no split stitch will
be added.
Lock Stitch Options 127
Adjust to Path
If button is down, stitch length will be adjusted to fit the path of the object where possible. Otherwise fixed
stitch length will be used.
8.1.3.4.5 Lettering Type Options Bar
These options bar are used in Lettering Stitch Type:
·
·
·
·
Satin Lettering Options Bar 121
Normal Fill Lettering Options Bar 121
Line Stitch Lettering Options Bar 121
Column Fill Lettering Options Bar 122
2005-06, Sew Good Software, Inc
About the Program
8.1.3.4.5.1 Satin Lettering Options Bar
Needle Down
If button down, add split stitches across the middle for large width satin stitches, otherwise no split stitch will
be added.
Lock Stitch Options 127
Trim
If button is down, a trim code will be inserted automatically at the end of a stitch block when it is created,
otherwise no trim code will be added.
Auto Span
If button is down, adjust density automatically according to stitch widths. Even density otherwise.
Force Stitch on Guide Line
If button is down, the program will force the generation of stitches exactly at the location of the guide lines
created. Otherwise the program will smooth stitches out to give a better result.
Cornering Options
128
8.1.3.4.5.2 Normal Fill Lettering Options Bar
Lock Stitch Options 127
Trim
If button is down, a trim code will be inserted automatically at the end of a stitch block when it is created,
otherwise no trim code will be added.
Fill Stitch Boundary Options 127
8.1.3.4.5.3 Line Stitch Lettering Options Bar
Needle Down
If button down, add split stitches across the middle for large width satin stitches, otherwise no split stitch will
be added.
Lock Stitch Options 127
Trim
If button is down, a trim code will be inserted automatically at the end of a stitch block when it is created,
otherwise no trim code will be added.
Adjust to Path
If button is down, stitch length will be adjusted to fit the path of the object where possible. Otherwise fixed
stitch length will be used.
E-Stitch Direction Options
129
Scale
If button is down, stitch entities (e.g. motif, e-stitch, chain) will be scaled to fit object.
2005-06, Sew Good Software, Inc
121
122
SEDS II
8.1.3.4.5.4 Column Fill Lettering Options Bar
Lock Stitch Options 127
Trim
If button is down, a trim code will be inserted automatically at the end of a stitch block when it is created,
otherwise no trim code will be added.
Column Fill Mode Options
127
8.1.3.4.6 Special Type Options Bar
These options bar are used in Special Stitch Type:
·
·
·
·
Line Motif Options Bar 122
Fill Motif Options Bar 122
Cross Stitch Options Bar 122
Photo Stitch Options Bar 123
8.1.3.4.6.1 Line Motif Options Bar
Needle Down
If button down, add split stitches across the middle for large width satin stitches, otherwise no split stitch will
be added.
Lock Stitch Options 127
Scale
If button is down, stitch entities (e.g. motif, e-stitch, chain) will be scaled to fit object.
8.1.3.4.6.2 Fill Motif Options Bar
Needle Down
If button down, add split stitches across the middle for large width satin stitches, otherwise no split stitch will
be added.
Lock Stitch Options 127
Fill Motif Alignment Options
129
8.1.3.4.6.3 Cross Stitch Options Bar
Lock Stitch Options 127
2005-06, Sew Good Software, Inc
About the Program
8.1.3.4.6.4 Photo Stitch Options Bar
Needle Down
If button down, add split stitches across the middle for large width satin stitches, otherwise no split stitch will
be added.
Lock Stitch Options 127
Photo Stitch Type Options 129
Photo Stitch Orientation Options 130
Within Object
If button down, stitches will be created inside the area bounded by the selected object only. Otherwise stitches
will be created on the whole image.
8.1.3.4.7 Miscellaneous Options Bar
These options bar are used in various system functions:
·
·
·
·
·
·
·
Selection Options Bar 123
Zoom Options Bar 123
Ellipse/Rectangle Options Bar 124
Polygon/Star Options Bar 124
Manual Stitch Options Bar 124
Slow Redraw Options Bar 124
Search Machine Code Options Bar
125
8.1.3.4.7.1 Selection Options Bar
Select By Color
Select all objects and stitch blocks in current color.
8.1.3.4.7.2 Zoom Options Bar
Zoom In
Zoom in to the next level.
Zoom Out
Zoom out to the next level.
Zoom to Window
Zoom all objects and stitch blocks to fit the size of the Design Window.
Zoom to Selection
Zoom the current selected objects and stitch blocks to the size of the Design Window.
Actual Size
Zoom to actual size of the design.
Zoom to Pre-defined Scale
Zoom to the scale pre-defined in Options.
2005-06, Sew Good Software, Inc
123
124
SEDS II
8.1.3.4.7.3 Ellipse/Rectangle Options Bar
First Point from Center
If button is down, the first point clicked will define the center of the object.
Regular Object
If button is down, the width will be forced to be the same as the height of the object. Use for drawing circles,
squares and equilateral polygons.
Edge Points Draw
Press this button down to draw objects with an angle. The first 2 points define the edge or center line of the
object. The 3rd point defines a vertex of the bounding rectangle.
8.1.3.4.7.4 Polygon/Star Options Bar
First Point from Center
If button is down, the first point clicked will define the center of the object.
Regular Object
If button is down, the width will be forced to be the same as the height of the object. Use for drawing circles,
squares and equilateral polygons.
Edge Points Draw
Press this button down to draw objects with an angle. The first 2 points define the edge or center line of the
object. The 3rd point defines a vertex of the bounding rectangle.
Number of Corners
Select from the pull down box the number of corners (edges) for polygon and star objects.
8.1.3.4.7.5 Manual Stitch Options Bar
Needle Down
If button down, add split stitches across the middle for large width satin stitches, otherwise no split stitch will
be added.
Lock Stitch Options 127
8.1.3.4.7.6 Slow Redraw Options Bar
Replay
Redraw the design stitch by stitch starting from where it is last stopped or if not from the start of the design.
You can control the speed during redraw.
Start/Pause Playing
Start/Pause the redraw of the stitches.
Speed Control Bar
Control the speed of redraw, move the handle to the right side will increase the speed, whereas to the left will
decrease the speed.
Forward 10 Stitches
Redraw forward by 10 stitches at one time.
Forward 100 Stitches
Redraw forward by 100 stitches at one time.
2005-06, Sew Good Software, Inc
About the Program
125
Backward 10 Stitches
Redraw backward by 10 stitches at one time.
Backward 100 Stitches
Redraw backward by 100 stitches at one time.
Backward One Stitch
Redraw backward one stitch.
Forward One Stitch
Redraw forward one stitch.
Previous Block
Jump to the beginning of the previous stitch block.
Next Block
Jump to the beginning of the next stitch block.
Previous Needle
Jump to beginning of the previous needle.
Next Needle
Jump to the beginning of the next needle.
8.1.3.4.7.7 Search Machine Code Options Bar
Previous Machine Code
Move to the location of the previous machine code.
Next Machine Code
Move to the location of the next machine code.
Previous Stitch
Move to previous stitch.
Next Stitch
Move to next stitch.
8.1.3.4.8 Pop-up Options
Some icons have a small black triangle at the right side. For those icons, click on the small triangle will pop-up a list for more available
options.
·
·
·
·
·
·
·
·
·
·
·
·
·
·
Orientation Options 125
Control Nodes Options 126
Alignment Options 126
Position Options 126
Lock Stitch Options 127
Fill Stitch Boundary Options 127
Jag Direction Options 127
Column Fill Mode Options 127
Cornering Options 128
Satin Pattern Options 128
E-Stitch Direction Options 129
Fill Motif Alignment Options 129
Photo Stitch Type Options 129
Photo Stitch Orientation Options 130
8.1.3.4.8.1 Orientation Options
2005-06, Sew Good Software, Inc
126
SEDS II
Normal
Lettering is in the normal upright direction.
Inverted
Lettering is inverted.
8.1.3.4.8.2 Control Nodes Options
3 Curve Nodes
Place 3 curve control nodes on each side.
1 Curve Node
Place 1 curve control node on each side.
3 Line Nodes
Place 3 line control nodes on each side.
1 Line Node
Place 1 line control node on each side.
8.1.3.4.8.3 Alignment Options
Align Left
Align text to the left.
Align Center
Align text to the center.
Align Right
Align text to the right.
Align Free
Characters are spaced evenly to fill the extent of the bounding object.
8.1.3.4.8.4 Position Options
Above Object
Place lettering above the object.
Object at Middle
Place the middle of the lettering along the object.
Below Object
Place lettering below the object.
2005-06, Sew Good Software, Inc
About the Program
8.1.3.4.8.5 Lock Stitch Options
Auto Lock Stitch with Trim
Automatically insert a lock stitch at the end of a stitch block if a trim code is added.
Lock Stitch On
Automatically insert a lock stitch each time a stitch block is created.
Lock Stitch Off
No lock stitch is added to a stitch block when it is created.
8.1.3.4.8.6 Fill Stitch Boundary Options
Without Boundary Stitches
End stitches are added along the outline of the object on alternate stitch lines.
With Boundary Stitches
End stitches are added along the outline of the object on each stitch line.
8.1.3.4.8.7 Jag Direction Options
Jag Left
Create jagged stitches on the left side of the object only.
Jag Both
Create jagged stitches on both sides of the object.
Jag Right
Create jagged stitches on the right side of the object only.
8.1.3.4.8.8 Column Fill Mode Options
Classic
With this mode, stitches are created at an ordered manner.
Modern
With this mode, stitches are created at a more random manner.
2005-06, Sew Good Software, Inc
127
128
SEDS II
8.1.3.4.8.9 Cornering Options
Cornering Type 1
Use the cornering pattern as shown below:
Cornering Type 2
Use the cornering pattern as shown below:
Cornering Type 3
Use the cornering pattern as shown below:
Cornering Type 3
Use the cornering pattern as shown below:
8.1.3.4.8.10 Satin Pattern Options
Satin Pattern : Regular
Create regular Satin stitch.
Satin Pattern : Normal Fill
Create Satin stitch with normal fill pattern.
2005-06, Sew Good Software, Inc
About the Program
8.1.3.4.8.11 E-Stitch Direction Options
E-Stitch Inside
Create E-stitch on the inside of the object.
E-Stitch Outside
Create E-stitch on the outside of the object.
8.1.3.4.8.12 Fill Motif Alignment Options
Align Normal
Motifs are aligned at the same position on each row.
Align Interlace
Motifs are shifted by half the width of the motif each row.
Align Overlap
Motifs are shifted by half the width of the motif each row and the distance between rows is decreased by half
the height of the motif.
Align Free
Motifs are shifted by a percentage of the width of the motif each row.
8.1.3.4.8.13 Photo Stitch Type Options
Type 1 on White
The image is divided into rows or columns and fill with fix span, variable length satin stitches. For sewing on
light color fabric.
Type 1 on Black
The image is divided into rows or columns and fill with fix span, variable length satin stitches. For sewing on
dark color fabric.
Type 2 on White
The image is divided into rows or columns and fill with variable span, multi-length satin stitches. For sewing on
light color fabric.
2005-06, Sew Good Software, Inc
129
130
SEDS II
Type 2 on Black
The image is divided into rows or columns and fill with variable span, multi-length satin stitches. For sewing on
dark color fabric.
Type 3 on White
The image is divided into rows or columns and fill with fix length pattern satin stitches. For sewing on light
color fabric.
Type 3 on Black
The image is divided into rows or columns and fill with fix length pattern satin stitches. For sewing on dark
color fabric.
Type 4 on White
The image is divided into rows or columns and fill with variable span, variable length satin stitches. For sewing
on light color fabric.
Type 4 on Black
The image is divided into rows or columns and fill with variable span, variable length satin stitches. For sewing
on dark color fabric.
Color Type 1
The image is divided into rows and columns and fill with variable span, variable length satin stitches in 4
colors.
Color Type 2
The image is divided into rows and columns and fill with fix length pattern satin stitches in 4 colors.
8.1.3.4.8.14 Photo Stitch Orientation Options
Horizontal
For mode 1-4, satin stitches running in the horizontal direction.
Vertical
For mode 1-4, satin stitches running in the vertical direction.
45 Degree Right
For mode 1-4, satin stitches running at an angle of 45 degree to the right.
45 Degree Left
For mode 1-4, satin stitches running at an angle of 45 degree to the left.
8.1.3.5
Stitch Creation Bar
Punching
Start to create stitches on the selected objects using the current stitch mode.
Manual Stitch Toolbar 146
Freehand Satin
Create freehand satin stitches.
Machine Control Toolbar 146
OneTouch Toolbar 146
2005-06, Sew Good Software, Inc
About the Program
8.1.3.6
131
Stitch Settings Bar
The Stitch Settings Bar is used for both selecting stitch types and change settings. The first large icon on the Stitch Setting Bar
allows you to select the major stitch type while the second one allows you to select a particular type from the major list. Depending on
what level of the software you have, the stitch types available may vary. To select a different type, click on the small arrow on the right
of the large icon and select the appropriate one from the pop-up bar.
·
·
·
·
·
·
·
Lettering Settings Bar 131
Fill Type Settings Bar 132
Satin Type Settings Bar 134
Line Type Settings Bar 137
Lettering Type Settings Bar 138
Special Type Settings Bar 141
Miscellaneous Settings 142
8.1.3.6.1 Lettering Settings Bar
Character Height
Height of characters in mm. Typically this gives the height of the capital letter 'A'.
Character Width
Width of character in percentage of the width proportional to the character height.
Character Space
Space between characters in mm.
Line Space
Space between lines in mm.
Character Angle
Defines the angle of each character relative to the base line when 'Absolute Angle' is off. Otherwise relative to
the horizontal line.
8.1.3.6.1.1 Lettering Transformation Options
Lettering in Box
Lettering transformation within a box shape envelope. Drag and move the control nodes to adjust the shape of
the envelope and thus the lettering inside.
Lettering in Diamond
Lettering transformation in a diamond shape envelope. Drag and move the control nodes to adjust the shape of
the envelope and thus the lettering inside.
2005-06, Sew Good Software, Inc
132
SEDS II
Lettering on 1 Line
Lettering transformation on a line. Drag and move the control nodes to adjust the shape of the line and thus
the lettering on it.
Lettering between 2 Lines
Lettering transformation between 2 lines. Drag and move the control nodes to adjust the shape of a line and
thus the lettering between the lines.
Lettering on 1 Object
Lettering transformation on a object. Click on individual letter to select and make adjustment accordingly.
Lettering between 2 Objects
Lettering transformation between 2 objects. Click on individual letter to select and make adjustment
accordingly.
8.1.3.6.2 Fill Type Settings Bar
These settings bar are used in Fill Stitch Type:
·
·
·
·
·
Normal Fill Settings Bar 132
Jagged Fill Settings Bar 133
Pattern Fill Settings Bar 133
Column Fill Settings Bar 134
Jagged Column Fill Settings Bar 134
8.1.3.6.2.1 Normal Fill Settings Bar
External Compensation Mode 143
Internal Compensation
Reserved for future.
Cycle
Number of thread passes (1 pass = 1 back and forth loop) between a given stitch point and the next time it
occurs in the same horizontal location, but further along in the fill.
Fill Offset
Distance between 1 stitch point and the closest stitch point on the thread adjacent to it, in mm.
Angle
Angle of stitch lines.
Underlay Span
Defines the density of underlay stitches, measured by the space between threads in mm.
Fill Underlay Pattern 143
Underlay Gap
Amount of space that the underlay can be set to recede from the edge of the top stitches to prevent it from
showing. Gap only appears along the direction of the stitches. Units = percentage of the width of the stitch
block.
Underlay Length
Space between underlay stitch points in mm.
Length
Distance between top stitch points in mm.
Span
Defines the density of the top stitches, measured by the space between threads in mm.
2005-06, Sew Good Software, Inc
About the Program
8.1.3.6.2.2 Jagged Fill Settings Bar
External Compensation Mode 143
Internal Compensation
Reserved for future.
Cycle
Number of thread passes (1 pass = 1 back and forth loop) between a given stitch point and the next time it
occurs in the same horizontal location, but further along in the fill.
Fill Offset
Distance between 1 stitch point and the closest stitch point on the thread adjacent to it, in mm.
Angle
Angle of stitch lines.
Maximum Jag Percentage
Defines the maximum percentage of the width of the stitch block to which the program will randomly bring
edge stitches.
Minimum Jag Percentage
Defines the minimum percentage of the width of the stitch block to which the program will randomly bring
edge stitches.
Length
Distance between top stitch points in mm.
Span
Defines the density of the top stitches, measured by the space between threads in mm.
8.1.3.6.2.3 Pattern Fill Settings Bar
External Compensation Mode 143
Internal Compensation
Reserved for future.
Angle
Angle of stitch lines.
Underlay Span
Defines the density of underlay stitches, measured by the space between threads in mm.
Fill Underlay Pattern 143
Underlay Gap
Amount of space that the underlay can be set to recede from the edge of the top stitches to prevent it from
showing. Gap only appears along the direction of the stitches. Units = percentage of the width of the stitch
block.
Underlay Length
Space between underlay stitch points in mm.
Length
Distance between top stitch points in mm.
Span
Defines the density of the top stitches, measured by the space between threads in mm.
2005-06, Sew Good Software, Inc
133
134
SEDS II
8.1.3.6.2.4 Column Fill Settings Bar
External Compensation Mode 143
Internal Compensation
Reserved for future.
Angle
Angle of stitch lines.
Underlay Span
Defines the density of underlay stitches, measured by the space between threads in mm.
Fill Underlay Pattern 143
Underlay Gap
Amount of space that the underlay can be set to recede from the edge of the top stitches to prevent it from
showing. Gap only appears along the direction of the stitches. Units = percentage of the width of the stitch
block.
Underlay Length
Space between underlay stitch points in mm.
Length
Distance between top stitch points in mm.
Span
Defines the density of the top stitches, measured by the space between threads in mm.
8.1.3.6.2.5 Jagged Column Fill Settings Bar
Maximum Jag Percentage
Defines the maximum percentage of the width of the stitch block to which the program will randomly bring
edge stitches.
Minimum Jag Percentage
Defines the minimum percentage of the width of the stitch block to which the program will randomly bring
edge stitches.
Length
Distance between top stitch points in mm.
Span
Defines the density of the top stitches, measured by the space between threads in mm.
Angle
Angle of stitch lines.
8.1.3.6.3 Satin Type Settings Bar
These settings bar are used in Satin Stitch Type:
·
·
·
·
One Line Satin Settings Bar 135
Two Line Satin Settings Bar 135
Pattern Fill Satin Settings Bar 136
Jagged Satin Settings Bar 136
2005-06, Sew Good Software, Inc
About the Program
8.1.3.6.3.1 One Line Satin Settings Bar
Underlay Span
Defines the density of underlay stitches, measured by the space between threads in mm.
Satin Underlay Pattern 142
Underlay Gap
Amount of space that the underlay can be set to recede from the edge of the top stitches to prevent it from
showing. Gap only appears along the direction of the stitches. Units = percentage of the width of the stitch
block.
Underlay Length
Space between underlay stitch points in mm.
Length
Distance between top stitch points in mm.
Span
Defines the density of the top stitches, measured by the space between threads in mm.
Width
Width of single line satin stitch in mm.
Satin Offset
Offset of the satin column from the center in percentage of total width.
External Compensation Mode 143
Highest Density Width
When auto-span is turned on, the program will automatically adjust stitch density between the Minimum
Span and Maximum Span value as a function of the width across the satin column, for which the width is
less than the Highest Density Width value. The narrower the column, the lighter the density (higher span).
Corner Compensation
Use with Corner Type 2 to set the amount of overlapping at corners.
Minimum Span
When auto-span is turned on, the program will automatically adjust stitch density between the Minimum
Span and Maximum Span value as a function of the width across the satin column, for which the width is
less than the Highest Density Width value. The narrower the column, the lighter the density (higher span).
Maximum Span
Maximum (lightest) density. When auto-span is turned on, the program will automatically varies stitch
density between the Span and Maximum Span value as a function of the width across the satin column at
any given point. The narrower the column, the lighter the density.
8.1.3.6.3.2 Two Line Satin Settings Bar
Cycle
Number of thread passes (1 pass = 1 back and forth loop) between a given stitch point and the next time it
occurs in the same horizontal location, but further along in the fill.
Fill Offset
Distance between 1 stitch point and the closest stitch point on the thread adjacent to it, in mm.
Underlay Span
Defines the density of underlay stitches, measured by the space between threads in mm.
Satin Underlay Pattern 142
Underlay Gap
Amount of space that the underlay can be set to recede from the edge of the top stitches to prevent it from
showing. Gap only appears along the direction of the stitches. Units = percentage of the width of the stitch
block.
2005-06, Sew Good Software, Inc
135
136
SEDS II
Underlay Length
Space between underlay stitch points in mm.
Length
Distance between top stitch points in mm.
Span
Defines the density of the top stitches, measured by the space between threads in mm.
External Compensation Mode 143
Highest Density Width
When auto-span is turned on, the program will automatically adjust stitch density between the Minimum
Span and Maximum Span value as a function of the width across the satin column, for which the width is
less than the Highest Density Width value. The narrower the column, the lighter the density (higher span).
Corner Compensation
Use with Corner Type 2 to set the amount of overlapping at corners.
Minimum Span
When auto-span is turned on, the program will automatically adjust stitch density between the Minimum
Span and Maximum Span value as a function of the width across the satin column, for which the width is
less than the Highest Density Width value. The narrower the column, the lighter the density (higher span).
Maximum Span
Maximum (lightest) density. When auto-span is turned on, the program will automatically varies stitch
density between the Span and Maximum Span value as a function of the width across the satin column at
any given point. The narrower the column, the lighter the density.
8.1.3.6.3.3 Pattern Fill Satin Settings Bar
External Compensation Mode 143
Underlay Span
Defines the density of underlay stitches, measured by the space between threads in mm.
Satin Underlay Pattern 142
Underlay Gap
Amount of space that the underlay can be set to recede from the edge of the top stitches to prevent it from
showing. Gap only appears along the direction of the stitches. Units = percentage of the width of the stitch
block.
Underlay Length
Space between underlay stitch points in mm.
Length
Distance between top stitch points in mm.
Span
Defines the density of the top stitches, measured by the space between threads in mm.
8.1.3.6.3.4 Jagged Satin Settings Bar
Cycle
Number of thread passes (1 pass = 1 back and forth loop) between a given stitch point and the next time it
occurs in the same horizontal location, but further along in the fill.
Fill Offset
Distance between 1 stitch point and the closest stitch point on the thread adjacent to it, in mm.
2005-06, Sew Good Software, Inc
About the Program
Maximum Jag Percentage
Defines the maximum percentage of the width of the stitch block to which the program will randomly bring
edge stitches.
Minimum Jag Percentage
Defines the minimum percentage of the width of the stitch block to which the program will randomly bring
edge stitches.
Length
Distance between top stitch points in mm.
Span
Defines the density of the top stitches, measured by the space between threads in mm.
External Compensation Mode 143
Highest Density Width
When auto-span is turned on, the program will automatically adjust stitch density between the Minimum
Span and Maximum Span value as a function of the width across the satin column, for which the width is
less than the Highest Density Width value. The narrower the column, the lighter the density (higher span).
Minimum Span
When auto-span is turned on, the program will automatically adjust stitch density between the Minimum
Span and Maximum Span value as a function of the width across the satin column, for which the width is
less than the Highest Density Width value. The narrower the column, the lighter the density (higher span).
Maximum Span
Maximum (lightest) density. When auto-span is turned on, the program will automatically varies stitch
density between the Span and Maximum Span value as a function of the width across the satin column at
any given point. The narrower the column, the lighter the density.
8.1.3.6.4 Line Type Settings Bar
These settings bar are used in Line Stitch Type:
·
·
·
·
Single Line Settings Bar 137
Double Line Settings Bar 137
E-Stitch Settings Bar 138
Bean Stitch Settings Bar 138
8.1.3.6.4.1 Single Line Settings Bar
Length
Distance between top stitch points in mm.
8.1.3.6.4.2 Double Line Settings Bar
Length
Distance between top stitch points in mm.
Span
Defines the density of the top stitches, measured by the space between threads in mm.
Double Line Offset
Offset of the double line from the center of the object in percentage of the span.
2005-06, Sew Good Software, Inc
137
138
SEDS II
8.1.3.6.4.3 E-Stitch Settings Bar
Length
Distance between top stitch points in mm.
Span
Defines the density of the top stitches, measured by the space between threads in mm.
E-Stitch Width
Width of the 'E' in mm.
E-Stitch Offset
Offset of the 'E' from the center of the object in percentage of the width.
8.1.3.6.4.4 Bean Stitch Settings Bar
Length
Distance between top stitch points in mm.
Span
Defines the density of the top stitches, measured by the space between threads in mm.
Bean Stitch Offset
Offset of the bean stitch from the center of the object in percentage of the span.
8.1.3.6.5 Lettering Type Settings Bar
These settings bar are used in Lettering Stitch Type:
·
·
·
·
Satin Lettering Settings Bar 138
Normal Fill Lettering Settings Bar 139
Line Stitch Lettering Settings Bar 140
Column Fill Lettering Settings Bar 140
8.1.3.6.5.1 Satin Lettering Settings Bar
Underlay Span
Defines the density of underlay stitches, measured by the space between threads in mm.
Satin Underlay Pattern 142
Underlay Gap
Amount of space that the underlay can be set to recede from the edge of the top stitches to prevent it from
showing. Gap only appears along the direction of the stitches. Units = percentage of the width of the stitch
block.
Underlay Length
Space between underlay stitch points in mm.
Length
Distance between top stitch points in mm.
Span
Defines the density of the top stitches, measured by the space between threads in mm.
2005-06, Sew Good Software, Inc
About the Program
External Compensation Mode 143
Highest Density Width
When auto-span is turned on, the program will automatically adjust stitch density between the Minimum
Span and Maximum Span value as a function of the width across the satin column, for which the width is
less than the Highest Density Width value. The narrower the column, the lighter the density (higher span).
Corner Compensation
Use with Corner Type 2 to set the amount of overlapping at corners.
Minimum Span
When auto-span is turned on, the program will automatically adjust stitch density between the Minimum
Span and Maximum Span value as a function of the width across the satin column, for which the width is
less than the Highest Density Width value. The narrower the column, the lighter the density (higher span).
Maximum Span
Maximum (lightest) density. When auto-span is turned on, the program will automatically varies stitch
density between the Span and Maximum Span value as a function of the width across the satin column at
any given point. The narrower the column, the lighter the density.
8.1.3.6.5.2 Normal Fill Lettering Settings Bar
External Compensation Mode 143
Internal Compensation
Reserved for future.
Cycle
Number of thread passes (1 pass = 1 back and forth loop) between a given stitch point and the next time it
occurs in the same horizontal location, but further along in the fill.
Fill Offset
Distance between 1 stitch point and the closest stitch point on the thread adjacent to it, in mm.
Span
Defines the density of the top stitches, measured by the space between threads in mm.
Angle
Angle of stitch lines.
Length
Distance between top stitch points in mm.
Fill Underlay Pattern 143
Underlay Span
Defines the density of underlay stitches, measured by the space between threads in mm.
Underlay Gap
Amount of space that the underlay can be set to recede from the edge of the top stitches to prevent it from
showing. Gap only appears along the direction of the stitches. Units = percentage of the width of the stitch
block.
Underlay Length
Space between underlay stitch points in mm.
Satin Offset
Offset of the satin column from the center in percentage of total width.
Border Width
Width of the border stitches in mm.
Border Type
143
Border Length
Length of border stitches in mm.
Border Span
Span (density) of border stitches in mm.
2005-06, Sew Good Software, Inc
139
140
SEDS II
8.1.3.6.5.3 Line Stitch Lettering Settings Bar
Length
Distance between top stitch points in mm.
Span
Defines the density of the top stitches, measured by the space between threads in mm.
Line Stitch Width
Depending on the line stitch type selected:
Width
Width of single line satin stitch in mm.
E-Stitch Width
Width of the 'E' in mm.
Line Stitch Offset
Depending on the line stitch type selected:
Double Line Offset
Offset of the double line from the center of the object in percentage of the span.
E-Stitch Offset
Offset of the 'E' from the center of the object in percentage of the width.
Bean Stitch Offset
Offset of the bean stitch from the center of the object in percentage of the span.
Line Stitch Type
143
8.1.3.6.5.4 Column Fill Lettering Settings Bar
Underlay Span
Defines the density of underlay stitches, measured by the space between threads in mm.
Fill Underlay Pattern 143
Underlay Gap
Amount of space that the underlay can be set to recede from the edge of the top stitches to prevent it from
showing. Gap only appears along the direction of the stitches. Units = percentage of the width of the stitch
block.
Underlay Length
Space between underlay stitch points in mm.
Length
Distance between top stitch points in mm.
Span
Defines the density of the top stitches, measured by the space between threads in mm.
Width
Width of single line satin stitch in mm.
Angle
Angle of stitch lines.
Border Width
Width of the border stitches in mm.
Border Type
143
2005-06, Sew Good Software, Inc
About the Program
Border Length
Length of border stitches in mm.
Border Span
Span (density) of border stitches in mm.
Satin Offset
Offset of the satin column from the center in percentage of total width.
8.1.3.6.6 Special Type Settings Bar
These settings bar are used in Special Stitch Type:
·
·
·
·
Line Motif Settings Bar 141
Fill Motif Settings Bar 141
Cross Stitch Settings Bar 141
Photo Stitch Settings Bar 142
8.1.3.6.6.1 Line Motif Settings Bar
Motif Gap
Distance between motifs in mm.
8.1.3.6.6.2 Fill Motif Settings Bar
Parallel Offset
Adjust this to shift motifs in the direction of a motif line.
Perpendicular Offset
Adjust this to shift motifs in the direction perpendicular to the motif line.
Motif Gap
Distance between motifs in mm.
Perpendicular Gap
Perpendicular distance between motif lines in mm.
Angle
Angle of stitch lines.
Displacement
Motifs are shifted by percentage of the width of a motif from the previous row.
8.1.3.6.6.3 Cross Stitch Settings Bar
Cross Stitch Length
The distance in mm of the cross stitch pattern shown in blue below:
2005-06, Sew Good Software, Inc
141
142
SEDS II
Cross Stitch Span
The distance in mm of the cross stitch pattern shown in blue below:
Cross Stitch Angle
Angle of the cross stitch pattern, as show below:
0 degree
45 degree
8.1.3.6.6.4 Photo Stitch Settings Bar
X-Gap
Space between columns in mm.
Y-Gap
Space between rows in mm.
Span
Defines the density of the top stitches, measured by the space between threads in mm.
Maximum Stitch Length
Maximum stitch length in mm.
Minimum Stitch Length
Minimum stitch length in mm.
8.1.3.6.7 Miscellaneous Settings
These are additional settings used in the settings bars:
·
·
·
·
·
Satin Underlay Pattern 142
Fill Underlay Pattern 143
External Compensation Mode 143
Border Type 143
Line Stitch Type 143
8.1.3.6.7.1 Satin Underlay Pattern
Underlay Pattern : None
Disable underlay stitches.
Underlay Pattern : Single Line
Use single line stitch for underlay.
Underlay Pattern : Double Line
Use double line stitch for underlay.
Underlay Pattern : ZigZag
Use zigzag stitch for underlay.
Underlay Pattern : Double ZigZag
Use double zigzag stitch for underlay.
Underlay Pattern : Single Line + ZigZag
Use single line stitch and zigzag stitch for underlay.
Underlay Pattern : Single Line + Double ZigZag
Use single line stitch and double zigzag stitch for underlay.
2005-06, Sew Good Software, Inc
About the Program
Underlay Pattern : Double Line + ZigZag
Use double line stitch and zigzag stitch for underlay.
Underlay Pattern : Double Line + Double ZigZag
Use double line stitch and double zigzag stitch for underlay.
8.1.3.6.7.2 Fill Underlay Pattern
Underlay Pattern : None
Disable underlay stitches.
Underlay Pattern : Fill
Use simple fill stitch for underlay.
Underlay Pattern : Double Cross
Use double cross stitch for underlay.
8.1.3.6.7.3 External Compensation Mode
External Compensation by Percentage
External compensation value calculated as a fraction of the width of the stitch block.
External Compensation by (mm)
External compensation in absolute value in mm.
8.1.3.6.7.4 Border Type
Border : None
Disable border stitches.
Border : Satin
Use satin stitch for border.
Border : Single Line
Use single line stitch for border.
Border : Double Line
Use double line stitch for border.
Border : Bean Stitch
Use bean stitch for border.
Border : E-Stitch
Use E stitch for border.
8.1.3.6.7.5 Line Stitch Type
Single Line
Use Single Line type for stitching.
Double Line
Use Double Line type for stitching.
E-Stitch
Use E-Stitch type for stitching.
Bean Stitch
Use Bean Stitch type for stitching.
Satin
Use Satin type for stitching.
8.1.3.7
Stitch View Control Bar
Slow Redraw Toolbar 146
2005-06, Sew Good Software, Inc
143
144
SEDS II
Next Stitch Block
Select the stitch block following the current selected block.
Previous Stitch Block
Select the stitch block prior to the current selected block.
Simulation Display
On/Off. Turn on/off 3D simulation display of stitches.
Search Machine Code
Search for special machine code in the active Design Window.
Image Darker
Decrease the brightness of the background image.
Image Brighter
Increase the brightness of the background image.
8.1.3.8
Pop-up Toolbars
Some icons have a small black triangle at the right side. For those icons, click on the small triangle will pop-up a toolbar for more
available functions.
·
·
·
·
·
·
·
·
·
·
·
·
Zoom Toolbar 144
Line Toolbar 144
Ellipse Toolbar 144
Rectangle Toolbar 145
Polygon/Star Toolbar 145
Object Manipulation Toolbar 145
Stitch Point Edit Toolbar 145
Stitch Block Edit Toolbar 146
Manual Stitch Toolbar 146
Machine Control Toolbar 146
OneTouch Toolbar 146
Slow Redraw Toolbar 146
8.1.3.8.1 Zoom Toolbar
Zoom
Provide Zoom functions such as zoom in, zoom out, zoom to fit window, zoom to objects and zoom to actual
size.
Pan Real-time
Drag and pan.
8.1.3.8.2 Line Toolbar
Line
Polyline drawing function.
Curve
Curve drawing function.
8.1.3.8.3 Ellipse Toolbar
Ellipse
Elliptical shape drawing function.
2005-06, Sew Good Software, Inc
About the Program
Concentric Ellipse
Concentric ellipse drawing function.
Arc
Circular arc drawing function.
8.1.3.8.4 Rectangle Toolbar
Rectangle
Rectangular shape drawing function.
Concentric Rectangle
Concentric rectangle drawing function.
8.1.3.8.5 Polygon/Star Toolbar
Polygon
Polygon shape drawing function.
Star
Star shape drawing function.
8.1.3.8.6 Object Manipulation Toolbar
Add/Delete Anchor Points
Add/Delete object anchor points.
Geometric Transform
Object transformation within a box shape envelope. Drag and move the control nodes to adjust the shape of
the envelope and thus the object inside.
Cut Object
Cut the current select object. If object is open, it will be separated into 2 objects. If closed, it will become
opened.
Join Object
If 2 objects are selected, they will be combined to become a single object. If 1 opened object is selected, it will
be closed by adding a line joining the start and the end points.
Cut Closed Object
Cut the selected closed object into 2 closed objects.
8.1.3.8.7 Stitch Point Edit Toolbar
Stitch Point Edit
Stitch point(s) editing function, including move, add, delete, change code type etc.
Short Stitch Removal
Automatically remove short stitches (stitches that shorter than a user defined length).
2005-06, Sew Good Software, Inc
145
146
SEDS II
8.1.3.8.8 Stitch Block Edit Toolbar
Edit Stitch Block(s)
Change stitch blocks' settings, types, in/out points, guide lines etc.
Design In/Out Points
Set the design in/out points manually.
Convert Manual Stitch Block
Convert a manual stitch block to internal types, such as fill or satin.
Stitch Processing
Perform stitch processing functions such as change size, number of stitches or span.
8.1.3.8.9 Manual Stitch Toolbar
Manual Stitch
Create manual stitches.
Jump Stitch
Create jump stitches.
8.1.3.8.10 Machine Control Toolbar
Insert/Remove Trim Code
Insert a trim code to the stitch block if none is present, otherwise remove it.
Insert Move Frame Code
Insert a move frame code in the design.
8.1.3.8.11 OneTouch Toolbar
OneTouch
Automatically stitches generation on a background image.
Reduce Image Color
Automatically reduce the colors of the image in the active Design Window. If there is no image, this function is
disabled.
Auto Trace
Auto trace the boundary of a color region of the background image to create an object.
8.1.3.8.12 Slow Redraw Toolbar
Slow Redraw
Redraw stitches from the start in various speeds.
Simulation Slow Redraw
Redraw stitches from the start in various speeds in 3-D simulation display.
2005-06, Sew Good Software, Inc
About the Program
8.1.3.9
Miscellaneous Toolbars
There are some toolbars which will be displayed when certain functions are selected:
· Short Stitch Removal Bar 147
· OneTouch Bar 147
· Reduce Image Color Bar 147
8.1.3.9.1 Short Stitch Removal Bar
Shortest (mm)
Stitches points spaced shorter than this distance will be considered as 'short' stitches.
Do
Start removing short stitches.
Retain Edge Stitches
If checked, preserve edge stitch points when removing short stitches.
8.1.3.9.2 OneTouch Bar
Direction
The image will be processed according to this direction.
Force Satin
If checked, satin stitch will be created no matter how wide a region is.
Auto Angle
If checked, the program will automatically select an angle for the fill stitch which matches the direction of a region.
Do All
Process the whole image.
Colors
Show all colors in the image. Right-click on a color to change its number or ignore it during processing.
8.1.3.9.3 Reduce Image Color Bar
Auto Select Color
If checked, the program will select colors automatically. Otherwise, click on the image to select/deselect colors.
Number of Colors
Final number of colors after color reduction.
Do
Start color reduction using the current settings.
Undo
Reverse the changes of the last operation.
2005-06, Sew Good Software, Inc
147
148
8.1.4
SEDS II
Status Bar
Message Bar
Different types of message are display here, like command help, program status, errors and warnings etc.
Size
Show the size of the current selected stitch blocks.
Offset from Design Center
Show the offset of the current cursor position from the design center.
8.1.5
Dialog Boxes
8.1.5.1
New Design Dialog Box
Width (mm)
Width of file in mm.
Height (mm)
Height of file in mm.
Width (inch)
Width of file in inch.
Height (inch)
Height of file in inch.
Lookup
Open the Lookup dialog box for selecting the preset hoop sizes for common machines
Set as Default
Set the current file size values as default values.
2005-06, Sew Good Software, Inc
About the Program
8.1.5.2
Open Design Dialog Box
File Name
The name of the design file.
Files of Type
Design X
Design Width in mm.
Design Y
Design Height in mm.
Number of Stitches
Total number of stitches in the design.
Number of Colors
Total number of colors (needles) of the design.
Color Changes
Total number of color (needle) changes in the design.
Date Created
Date the design was created.
Last Edited
Date the design was last edited.
Description
Description about the design.
Keywords
Keywords associated with the design.
Advanced
Display additional properties and/or options.
Browse
Invoke the Designs Browser.
2005-06, Sew Good Software, Inc
149
150
8.1.5.3
SEDS II
Save As Dialog Box
File Name
Input the name of the design you want to save as here.
Save as Type
File type to save.
Number of Stitches
Total number of stitches in the design.
Design X
Design Width in mm.
Design Y
Design Height in mm.
Number of Colors
Total number of colors (needles) of the design.
Color Changes
Total number of color (needle) changes in the design.
Date Created
Date the design was created.
Last Edited
Date the design was last edited.
Save Background Image
Check to save the background image in the design file also.
2005-06, Sew Good Software, Inc
About the Program
8.1.5.4
Import Image Dialog Box
File Name
Input the name of the image file you want to import here.
Files of Type
Available image types : BMP, JPEG, TIFF, PCX, GIF, MSP, RAS, PCT, WMF, EMF, PSD, AWD
Browse
Invoke the Image Files Browser.
Margin
Defines the top, bottom, left and right margins to be added to the image when imported.
Import as New
Import the file into a new Design Window.
Fit Design Size
Scale the file so that it just fit in the Design Window.
Constrain Proportions
Maintain the original aspect ratio if scaling of file is required.
Keep Size
Keep the original size of the size when imported.
Center
Place the imported file in the center of the Design Window.
2005-06, Sew Good Software, Inc
151
152
8.1.5.5
SEDS II
Import Simulation Background Image Dialog Box
File Name
Input the name of the image file you want to import here.
Files of Type
Available image types : BMP, JPEG, TIFF, PCX, GIF, MSP, RAS, PCT, WMF, EMF, PSD, AWD
Browse
Invoke the Image Files Browser.
8.1.5.6
Import Vector File Dialog Box
File Name
Input the name of the vector file you want to import here.
Files of Type
Available vector file types : WMF, EMF, PS, EPS
Browse
Invoke the Vector Files Browser.
Import as New
Import the file into a new Design Window.
2005-06, Sew Good Software, Inc
About the Program
Fit Design Size
Scale the file so that it just fit in the Design Window.
Constrain Proportions
Maintain the original aspect ratio if scaling of file is required.
Keep Size
Keep the original size of the size when imported.
Center
Place the imported file in the center of the Design Window.
8.1.5.7
Import from Tape Dialog Box
Format
Available formats : Tajima, Barudan, ZSK, Melco Exp
Com Port
Select the com port for output.
Settings
Click this button to change the default com port settings.
8.1.5.8
Export Image Dialog Box
File Name
Input the name of the exported image file here.
Files of Type
Available image types : BMP
2005-06, Sew Good Software, Inc
153
154
8.1.5.9
SEDS II
Export Objects Dialog Box
File Name
Input the name of the exported objects file here.
Files of Type
Available vector file types : WMF, DXF
Selected Only
Export selected objects only.
8.1.5.10
Export Motif Dialog Box
File Name
Input the name of the exported motif file here.
Files of Type
Available vector file types : MTF
2005-06, Sew Good Software, Inc
About the Program
8.1.5.11
Punch Floppy Export Dialog Box
File Name
The name of the design file.
Design X
Design Width in mm.
Design Y
Design Height in mm.
Number of Stitches
Total number of stitches in the design.
Color Changes
Total number of color (needle) changes in the design.
Description
Description about the design.
Keywords
Keywords associated with the design.
Name
Output file name.
Browse
Browse the floppy disk.
Format
Available formats : Tajima DST, Barudan FMC, Barudan FDR, ZSK, Melco Exp (DOS), Melco Exp (Normal),
Melco Cnd (DOS), Melco Cnd (Normal), Happy, HUS, SEW, PEC, PES, KSM, PCS, PCM
Filter
Machine code filter.
Trace
Check this box to add jump stitches, which runs along the boundary of the design, at the beginning of the output.
2005-06, Sew Good Software, Inc
155
156
8.1.5.12
SEDS II
Punch Tape Export Dialog Box
File Name
The name of the design file.
Design X
Design Width in mm.
Design Y
Design Height in mm.
Number of Stitches
Total number of stitches in the design.
Color Changes
Total number of color (needle) changes in the design.
Description
Description about the design.
Keywords
Keywords associated with the design.
Name
Output file name.
Format
Available formats : Tajima, Barudan, ZSK, Melco Exp
Filter
Machine code filter.
Trace
Check this box to add jump stitches, which runs along the boundary of the design, at the beginning of the output.
Com Port
Select the com port for output.
Settings
Click this button to change the default com port settings.
2005-06, Sew Good Software, Inc
About the Program
8.1.5.13
Punch Direct Export Dialog Box
File Name
The name of the design file.
Design X
Design Width in mm.
Design Y
Design Height in mm.
Number of Stitches
Total number of stitches in the design.
Color Changes
Total number of color (needle) changes in the design.
Description
Description about the design.
Keywords
Keywords associated with the design.
Name
Output file name.
Format
Available formats : Happy
Filter
Machine code filter.
Trace
Check this box to add jump stitches, which runs along the boundary of the design, at the beginning of the output.
Com Port
Select the com port for output.
Settings
Click this button to change the default com port settings.
8.1.5.14
Floppy Disk Format Dialog Box
2005-06, Sew Good Software, Inc
157
158
SEDS II
Disk Format Select
Available format types : MS-DOS Compatible, Tajima, Barudan FMC, Barudan FDR, ZSK, Melco Exp (DOS),
Melco Exp (Normal), Melco Cnd (DOS), Melco Cnd (Normal), Happy
8.1.5.15
Normal Print Dialog Box
There are 3 tabs in this dialog box:
· Design Information 158
· Thread Information 159
· Color Sequence 160
8.1.5.15.1 Design Information
Range
Check 'All' to print the whole design or 'Selected' to print the selected stitch blocks.
Magnification
Select from the pull down list a pre-defined print scale or input the scale in the pull down box.
File Name
The name of the design file.
Dimensions
Design width and height in mm.
Print Scale
Output print scale, 100% means actual size.
Number of Stitches
Total number of stitches in the design.
Number of Colors
Total number of colors (needles) of the design.
Color Changes
Total number of color (needle) changes in the design.
Thread Consumption
Estimate total thread consumption in meter.
Design Number
User defined number to specify the design.
2005-06, Sew Good Software, Inc
About the Program
Customer Number
User defined number to specify the customer for the design.
Customer Name
Name of the customer for the design, if any.
Job Number
User defined number to specify the job of the design.
Digitizer
User defined text to specify the digitizer of the design.
Description
Description about the design.
Keywords
Keywords associated with the design.
Print Date
The date the design is printed.
8.1.5.15.2 Thread Information
Range
Check 'All' to print the whole design or 'Selected' to print the selected stitch blocks.
Magnification
Select from the pull down list a pre-defined print scale or input the scale in the pull down box.
Thread Information
Check this box to print the thread information as shown.
2005-06, Sew Good Software, Inc
159
160
SEDS II
8.1.5.15.3 Color Sequence
Range
Check 'All' to print the whole design or 'Selected' to print the selected stitch blocks.
Magnification
Select from the pull down list a pre-defined print scale or input the scale in the pull down box.
Color Sequence
Check this box to print the color sequence as shown.
8.1.5.16
Design Properties Dialog Box
There are 3 tabs in this dialog box:
· General 161
· Design Information 162
· Production Information
163
2005-06, Sew Good Software, Inc
About the Program
8.1.5.16.1 General
· New Dimensions
X-(mm)
File width of design in mm.
Y-(mm)
File height of design in mm.
X-(inch)
File width of design in inch.
Y-(inch)
File height of design in inch.
Proportionate
If enabled, maintain the original aspect ratio when width or height is changed.
Canvas
If checked, just the file size of the design will be changed and the contents of the design will be placed at the
center of the new file area.
Resize Stitches and Image
If checked, the contents of the design will be scaled according to the new file size. This is ignored if Canvas is
checked.
Lookup
Open the Lookup dialog box for selecting the preset hoop sizes for common machines
Set as Default
Set the current file size values as default values.
· Design start/end point
Design Center
Design start/end points will be placed at the center of the design.
File Center
Design start/end points will be placed at the center of the file area.
At First and Last Stitch
Design start point will be the first stitch point in the design and end point will be the last stitch point.
Set Manually
Design start/end points are user defined.
2005-06, Sew Good Software, Inc
161
162
SEDS II
8.1.5.16.2 Design Information
Design Number
User defined number to specify the design.
Customer Number
User defined number to specify the customer for the design.
Customer Name
Name of the customer for the design, if any.
Job Number
User defined number to specify the job of the design.
Digitizer
User defined text to specify the digitizer of the design.
Description
Description about the design.
Keywords
Keywords associated with the design.
2005-06, Sew Good Software, Inc
About the Program
8.1.5.16.3 Production Information
Marker No.
User defined number to specify the marker used.
Hoop No.
User defined number to specify the hoop used.
Appliqué No.
User defined number to specify the appliqué used.
Backing
User defined text to specify the backing used.
Topping
User defined text to specify the topping used.
2005-06, Sew Good Software, Inc
163
164
8.1.5.17
SEDS II
Lettering Input Wizard Dialog Box
Font Type
Four types, TTF Fill, TTF Satin, SEDS Fill and SEDS Satin are available. The SEDS types are pre-digitized font
types.
Font Name
The name of the font.
Character Height
Height of characters in mm. Typically this gives the height of the capital letter 'A'.
Character Width
Width of character in percentage of the width proportional to the character height.
Character Space
Space between characters in mm.
Line Space
Space between lines in mm.
Bold
Create text in bold mode, supported in TTF fonts only.
Italic
Create text in italic mode, supported in TTF fonts only.
Auto Spacing
If checked, turn on adjust spacing between characters automatically, off otherwise.
Baseline
If selected, characters will be rotated at the given angle relative to the baseline.
Absolute
If selected, characters will be rotated at the given angle relative to the horizontal line.
Arrange
Select the type of baseline (Line, Vertical Line, Arc, Ellipse, Free Lines) or envelope (Box, 2 Lines, Diamond, 2
Free Lines) to be used for the text.
2005-06, Sew Good Software, Inc
About the Program
165
Position
Select to place text on, in middle of, or below the object.
Alignment
Select alignment of text to left, center, right or all.
Cap Corner
If checked, cap type cornering will be used for TTF satin font.
Cut Serif
If checked, for TTF satin font with serifs, the serifs will be cut separately.
Preview
If checked, a preview of the current selected options will be shown.
8.1.5.18
Pattern Browser Dialog Box
· Toolbar
Delete Item
Delete the current selected item.
Switch to Editor
Open the editor to edit the current selected item or create a new one.
Help
Display the online help.
· Folder List Window
Here you can select the folder where patterns are located.
· Preview Window
A scaled preview of the selected pattern will be shown here.
· Thumbnails Window
Patterns will be shown as thumbnails here. Click on a thumbnail will select it and its properties will be shown on the Message Bar.
Also the selected pattern will be scaled to fit in the Preview Window.
· Message Bar
· Pattern Name
· Pattern Size - width x height in mm
· Pattern span in mm
· Total number of stitches in the pattern
2005-06, Sew Good Software, Inc
166
8.1.5.19
SEDS II
Pattern Editor Dialog Box
· Toolbar
New
Create a new item.
Select Folder
Select the folder where items are stored.
Save
Save the current item.
Cut
Delete the current selected entities and place them into the clipboard.
Copy
Copy the current selected entities into the clipboard.
Paste
Place the entities in the clipboard into the current item.
Undo
Reverse the changes of the last operation.
Redo
Reverse the changes of the last Undo.
Selection
Entities selection tool.
Line Toolbar 144
Ellipse Toolbar 144
Rectangle Toolbar
145
Polygon/Star Toolbar
145
Generate Points
Generates pattern points from selected objects.
Shift Pattern
Click a point in the pattern window to shift the origin to this point.
Add/Delete Points
Click on an existing pattern point to delete and an empty space to add a pattern point.
Move Points
Click on a pattern points to select and shift-click to select multiple points. Drag on any one of the selected
points to move.
2005-06, Sew Good Software, Inc
About the Program
167
Switch to Browser
Switch to item browser.
Help
Display the online help.
· Aerial View Window
The whole pattern is scaled to display in this window. You can zoom in an area of interest by drawing a rectangle over the region.
The area thus selected will be highlighted in a gray rectangle.
· List Window
Thumbnails of all patterns in the current pattern folder will be shown here. Click on a pattern to select it for editing.
· Edit Window
This is where you perform editing functions on the pattern.
Tile Display
Display the pattern in tiles.
Show Ruler
On/Off. Turn on/off ruler display.
Shift Left
Shift the whole pattern to the left.
Shift Right
Shift the whole pattern to the right.
Shift Up
Shift the whole pattern to the up.
Shift Down
Shift the whole pattern to the down.
· Message Bar
· Pattern Name
· Absolute coordinates from the lower left corner in mm
· Relative coordinates from first point when drawing objects.
· Total number of stitches in the pattern
8.1.5.20
Motif Browser Dialog Box
· Toolbar
Delete Item
Delete the current selected item.
Switch to Editor
Open the editor to edit the current selected item or create a new one.
2005-06, Sew Good Software, Inc
168
SEDS II
Help
Display the online help.
· Folder List Window
Here you can select the folder where motifs are located.
· Preview Window
Motif will be filled according the settings below and shown here.
Parallel Offset
Adjust this to shift motifs in the direction of a motif line.
Perpendicular Offset
Adjust this to shift motifs in the direction perpendicular to the motif line.
Motif Gap
Distance between motifs in mm.
Perpendicular Gap
Perpendicular distance between motif lines in mm.
Angle
Angle of stitch lines.
Displacement
Motifs are shifted by percentage of the width of a motif from the previous row.
Align Normal
Motifs are aligned at the same position on each row.
Align Interlace
Motifs are shifted by half the width of the motif each row.
Align Overlap
Motifs are shifted by half the width of the motif each row and the distance between rows is decreased by half
the height of the motif.
Align Free
Motifs are shifted by a percentage of the width of the motif each row.
Preview Size
Set the size of the preview rectangle.
· Thumbnails Window
Motifs will be shown as thumbnails here. Click on a thumbnail will select it and its properties will be shown on the Message Bar.
Also the selected motif will be filled and shown in the Preview Window.
· Message Bar
· Motif Name
· Motif Size - width x height in mm
· Number of stitch blocks in the motif
· Total number of stitches in the motif
2005-06, Sew Good Software, Inc
About the Program
8.1.5.21
Motif Editor Dialog Box
· Toolbar
New
Create a new item.
Select Folder
Select the folder where items are stored.
Save
Save the current item.
Cut
Delete the current selected entities and place them into the clipboard.
Copy
Copy the current selected entities into the clipboard.
Paste
Place the entities in the clipboard into the current item.
Undo
Reverse the changes of the last operation.
Redo
Reverse the changes of the last Undo.
Selection
Entities selection tool.
Add Stitch Blocks
Add manual stitch blocks to the motif.
Edit Points
Perform points editing function like, insert, delete move etc.
Color List
Select a color for a stitch block from here.
Proportionate
If enabled, maintain the original aspect ratio when width or height is changed.
Motif Width
Width of the motif, in mm or percentage of original.
Motif Height
Height of the motif, in mm or percentage of original.
2005-06, Sew Good Software, Inc
169
170
SEDS II
Unit
Unit in mm or percentage of the original value.
Switch to Browser
Switch to item browser.
Help
Display the online help.
· Aerial View Window
The whole motif is scaled to display in this window. You can zoom in an area of interest by drawing a rectangle over the region.
The area thus selected will be highlighted in a gray rectangle.
· List Window
Thumbnails of all motifs in the current motif folder will be shown here. Click on a motif to select it for editing.
· Edit Window
This is where you perform editing functions on the motif.
· Preview Window
Motif will be filled according the settings below and shown here.
Parallel Offset
Adjust this to shift motifs in the direction of a motif line.
Perpendicular Offset
Adjust this to shift motifs in the direction perpendicular to the motif line.
Motif Gap
Distance between motifs in mm.
Perpendicular Gap
Perpendicular distance between motif lines in mm.
Angle
Angle of stitch lines.
Displacement
Motifs are shifted by percentage of the width of a motif from the previous row.
Align Normal
Motifs are aligned at the same position on each row.
Align Interlace
Motifs are shifted by half the width of the motif each row.
Align Overlap
Motifs are shifted by half the width of the motif each row and the distance between rows is decreased by half
the height of the motif.
Align Free
Motifs are shifted by a percentage of the width of the motif each row.
Preview Size
Set the size of the preview rectangle.
· Message Bar
· Motif Name
· Total number of stitches in the motif
2005-06, Sew Good Software, Inc
About the Program
8.1.5.22
171
Design Browser Dialog Box
· Toolbar
Open File
Open the selected design file without exiting the Designs Browser dialog box.
File Properties
Display the properties of a EDS, EDF or EDP design file.
Delete File
Delete the selected design file.
Select
Open the selected file and exit the Browser dialog box.
Exit
Exit the Browser dialog box.
Help
Display the online help.
Design File Type
Select the type of design files to be displayed. Only DOS types including EDS, EDF, EDP, DST, CND,
EXP, CND, EXP, TAP, PEC, PES, PCS, PCM, KSM, HUS and SEW are supported.
Current Folder
The current folder is show here. You can type in a new folder name and change to that folder also.
· Folder List Window
Here you can select the folder where design files are located.
· Preview Window
A scaled preview of the selected design will be shown here.
· Thumbnails Window
Designs of the selected type will be shown as thumbnails here. Click on a thumbnail will select it and its properties will be shown
on the Message Bar. Also the selected design will be scaled to fit in the Preview Window. Double click on a thumbnail will open the
design and exit the Designs Browser dialog box.
· Message Bar
· Design Name
· Design Size - design width x design height in mm or inch
· No. of Stitches - total number of stitches in design
2005-06, Sew Good Software, Inc
172
SEDS II
· No. of Colors - total number of colors in design
· Color changes - total number of color (needle) changes in design
8.1.5.23
Image Browser Dialog Box
·
Toolbar
Select
Open the selected file and exit the Browser dialog box.
Exit
Exit the Browser dialog box.
Help
Display the online help.
·
Folder List Window
Here you can select the folder where image files are located.
·
Preview Window
A scaled preview of the selected image will be shown here.
·
Thumbnails Window
Images will be shown as thumbnails here. Click on a thumbnail will select it and its properties will be shown on the Message Bar.
Also the selected image will be scaled to fit in the Preview Window. Double click on a thumbnail will open the image and exit the
Image Browser dialog box.
·
Message Bar
· Image Name
· Image Size - width x height in pixels
2005-06, Sew Good Software, Inc
About the Program
8.1.5.24
173
Vector File Browser Dialog Box
·
Toolbar
Select
Open the selected file and exit the Browser dialog box.
Exit
Exit the Browser dialog box.
Help
Display the online help.
·
Folder List Window
Here you can select the folder where vector files are located.
·
Preview Window
A scaled preview of the selected vector file will be shown here.
·
Thumbnails Window
Vector files will be shown as thumbnails here. Click on a thumbnail will select it and its properties will be shown on the Message
Bar. Also the selected vector file will be scaled to fit in the Preview Window. Double click on a thumbnail will open the vector file
and exit the Vector File Browser dialog box.
·
Message Bar
· Vector File Name
· Vector File Size - width x height in mm or inch
2005-06, Sew Good Software, Inc
174
8.1.5.25
SEDS II
Edit Machine Code Filter Dialog Box
Filter
Select an existing filter to edit.
New
Create a new filter.
Delete
Delete an existing filter.
From
Select a machine code to change.
To
Input the code sequences to replace the code in From.
8.1.5.26
Album Dialog Box
· Toolbar
New Album
Create a new album.
(refer to Create a New Album
25
for more details)
2005-06, Sew Good Software, Inc
About the Program
Delete Album
Delete the current album.
(refer to Delete an Album
26
175
for more details)
Lock/Unlock
Lock/Unlock an album. You cannot modify the contents of an album if it is locked.
(refer to Lock/Unlock an Album 26 for more details)
Refresh
Refresh the contents in the current album. Some operations will not refresh contents automatically and you
may need to refresh it manually.
Normal/Compact Mode
Toggle between Normal and Compact view modes.
(refer to View Design Information 27 for more details)
Add Item
Add a design to the current album.
(refer to Add a Design to Album 27 for more details)
Delete Item
Delete a design from the current album.
(refer to Delete a Design from Album 28 for more details)
Open
Open the selected design to a Design Window.
(refer to Open a Design from Album 28 for more details)
Search Items
Search for designs in the current album.
(refer to Search Designs in Album 28 for more details)
Print
Print out designs in the current album.
(refer to Print Designs in Album 29 for more details)
Help
Display the online help.
Album List
Show the list of available albums for selection.
· Content Window
· Archive List
Show all designs in the current album (refer to View all Designs
· Search Result
Show search result (refer to View Search Result
26
26
for more details).
for more details).
· View Selected
Show the selected design (refer to View the Selected Design
26
for more details).
· Message Bar
· Path - Full path of the selected design file.
· Size - Width x Height of the selected design file in mm.
· No. of Stitches - Total number of stitches in the selected design file.
· Items - Total number of design files in the current view.
Note that you can adjust the size of the Album Dialog Box by dragging on one of its corners. Contents will be rearranged or re-sized
to fit the newly sized window.
2005-06, Sew Good Software, Inc
176
8.1.5.27
SEDS II
Object Properties Dialog Box
· Position - for moving the objects
· X Position - horizontal distance in mm or inch relative to the "origin", positive value to the right and negative value to the left.
· Y Position - vertical distance in mm or inch relative to the "origin", positive value up and negative value down.
· Offset - "origin" at lower left corner of objects.
· From File Origin - "origin" at lower left corner of the file.
· Stretch - for re-sizing the objects
· Width - new width in mm or inch, or percentage of the old value.
· Height - new height in mm or inch, or percentage of the old value.
· At Object - defines the anchor (the point that is not moved) when re-sizing.
· Proportionate - maintain the original aspect ratio.
· Rotate - for rotating objects
· Angle - angle of rotation.
· At Object - center of rotation.
· Center Position from File Origin - when "User defined" is selected for "At Object", X Position and Y Position define the
horizontal and vertical distances of the rotation center from the file origin respectively.
2005-06, Sew Good Software, Inc
About the Program
8.1.5.28
177
Stitch Processing Dialog Box
· Change Size of Stitch Block(s)
· Width - new width of the stitch block(s), in mm or percentage of the old value.
· Height - new height of the stitch block(s), in mm or percentage of the old value.
· Proportionate - check to maintain the original aspect ratio.
· Change Number of Stitches
· Total Stitches - new number of stitches, or percentage of the old value.
· Change Span of Stitches
· Fill Stitch Span - span of fill stitch block(s), in percentage of the old value.
· Fill Stitch Density - density of fill stitch block(s), in percentage of the old value.
· Satin Stitch Span - span of satin stitch block(s), in percentage of the old value.
· Satin Stitch Density - density of satin stitch block(s), in percentage of the old value.
8.2
Program Options
To access program related options, select Options from the Tools Menu 113 . The Program Options dialog box will be shown as
below:
2005-06, Sew Good Software, Inc
178
SEDS II
· Appearance 179
· Advanced 180
· Folders 181
2005-06, Sew Good Software, Inc
About the Program
8.2.1
Appearance
Units
Either in mm or inch.
Screen Size
The size of your monitor screen. This is used for calculation in zooming to actual size. Always in 4:3 ratio.
Colors
12 user definable colors are shown on the left side. Double click on the colors to change palette. To change a
system color, click on it to select it (denoted by a small square at the center) and then click on one of the 12
colors. Click 'Default' to restore to system default colors.
Cursor
4 cursor display mode, cross1(+), cross2(x), full cross and system are available.
Dialog Font
Check "Large Font" to use large font size in dialog boxes.
Grid
· Frequency - Define grid by the number of grid lines per mm/inch given in X-Diff and Y-Diff. X-Diff denotes
the number of grid lines in the horizontal direction while Y-Diff denotes the number of grid lines in the vertical
direction.
· Spacing - Define grid by the spacing between lines given in X-Diff and Y-Diff. X-Diff denotes the spacing of
grid lines in the horizontal direction while Y-Diff denotes the spacing of grid lines in the vertical direction.
· Dot Grid - Display grid as dots.
· Line Grid - Display grid as lines.
· Show Grid - Turn grid on if checked.
· Snap Grid - Objects will be snapped to grid points if checked.
2005-06, Sew Good Software, Inc
179
180
8.2.2
SEDS II
Advanced
Backup File
A backup file with the ".bak" extension will be created when saving if checked.
File Recovery
If "Recovery Save" checked, a backup copy will be created for every n minutes given in "Wait(minutes)". In case
of abnormal termination of the program, user will have the option to restore the last backup copy when program
restarts.
Default Design Size
The default size set when creating a new design.
Com Port
Select the com port for output.
Settings
Click this button to change the default com port settings.
Lock Stitch
Select options for Lock Stitch.
Lock Stitch Pattern
Input the lock stitch pattern here. Negative values means stitch background in the direction of the last stitch.
Positive values means stitch forward in the direction of the last stitch. You can enter more than one values for
lock stitch pattern and the values should be separated by commas.
TTF Satin Font
For TrueType Satin fonts, check "Cap Corner" to use Cap Cornering options when generating stitches. Check
"Cut Serif" to have serifs generated as separated stitch blocks.
Undo Steps
Specify the number of undo steps that the program will store. Note that the program may run more slowly if this
value is set too high.
Curve Conversion
Objects will be convert to curves after transformation operations, such as rotation, cut, merge where appropriate if
this option is checked. Otherwise, they will be converted to polylines.
Auto Start Manual Stitch Drawing
If checked, the program will start Manaul Stitch automatically after stitch creation.
2005-06, Sew Good Software, Inc
About the Program
181
Display of 'Long Jump' without Trim
If checked, long jump lines will be displayed always, otherwise only if there are preceding trim codes.
SEDS Compatible Interface
Some of the user interface, like hotkeys and right-click button usage will be compatible to previos SEDS versions.
8.2.3
Folders
·
·
·
·
·
·
·
·
·
Design - default and current folder for design files
Image - default and current folder for image files
Font - default and current folder for font files
Motif - default and current folder for motif files
Pattern - default and current folder for pattern files
Vector - default and current folder for vector files
Album - default and current folder for album files
HTML - default and current folder for HTML files
Setting - default and current folder for setting files
Click on the "..." button next to each folder to browse and select a new folder, or type in a new folder name directly. Note that the
folders will be updated automatically when you open that file type in the program.
9
Appendix
9.1
End User License Agreement
Notice -- Please read this license agreement carefully before installing the software. If you do not agree to any of these terms,
we are unwilling to license this software to you, and you should not install this software. In such case, immediately return the
whole software package along with proof of payment.
1. GRANT OF LICENSE. This is a grant of license only, and NOT an agreement for sale. This license allows you, the Licensee, to
use the software program to be installed on a single computer, with the provided security device. The software is considered to be
2005-06, Sew Good Software, Inc
182
SEDS II
in use if (i) it is loaded into computer RAM, or (ii) it is residing in a computer's storage device, e.g., hard disk, or any other
removable media.
2. TRANSFER OF LICENSE. The software shall not be sold, leased, or distributed in whole or in part except provided that (i) the
software is transferred in whole with it's license, operation manual, and any accompanying material and necessary hardware; (ii)
advance written approval of Licensor is obtained. (iii) all required fees must be paid in advance. Such transfer terminates the
license of the original Licensee. The transferee must agree in writing to be licensed under the terms of this agreement. Under no
circumstance that a software without proper license be supported in any form.
3. SOFTWARE UPDATE. The Licensee is entitled to free updates, if any, within the current version at the time of sale, for a period
of twelve (12) months after original purchase of the software. Updates are defined as system maintenance, if any, and should Not
be confused with Software Upgrades. Upgrades are releases of New Software Version which contain system feature or
configuration changes. The Licensee has the option of purchasing Upgrade(s).
4. TECHNICAL SUPPORT (For Systems sold directly by Licensor to Licensee). The Licensee, who purchased a brand new
software package directly from Licensor, is entitled to seek technical advice on the use of the software program from the Licensor
for a period of 12 months from the date of sale. Further assistance and support afterwards is entirely voluntary and up to the
discretion of the Licensor.
5. TECHNICAL SUPPORT (For Systems sold by Licensor's agents or dealers). Technical Support in any form is solely the
responsibilities, and at the discretion, of the dealer, or agent, who sold the software program directly to End Users.
6. TRAINING. Training is optional.
7. COPYRIGHT. The software and accompanying written material are protected by United States and International Copyright law.
The Licensee shall not copy the software or the accompanying written material in whole or part.
8. OTHER RESTRICTIONS. The licensee shall not reverse engineer, reverse compile, modify, translate, or disassemble the
licensed software, or any physical security device that comes with it.
9. If for any reason, the Licensee wants to return the software for refund within 30 days of purchase, a restocking fee of 15% of the
software total purchase price will be charged. No return and No refunds shall be given after 30 days from the date of purchase.
Subsequent purchase(s) of Upgrade(s) are non-refundable.
10. Licensor warrants, for a period of one (1) year from date of sale that the software will perform all the functions set out within the
parameters of the said software program. If, through no fault of the Licensee, the software fails to so perform within the warranty
period, Licensee must give the Licensor at least 60 days to correct each problem. If after 60 days the problem is not resolved, the
Licensee may elect to return the software subject to the 15% restocking fee. When the One Year Warranty expires, NO return
and NO refund request will be considered.
11. SECURITY DEVICE. The Loss of the security device means the Loss of the software program. The Licensee is responsible for
the safe keeping of such device. For protection, the Licensee should carry sufficient insurance against such loss.
12. The Licensee shall pay for all shipping and handling fee as required for repair, exchange and other services.
13. NO OTHER WARRANTIES. To the maximum extent permitted by applicable law, Licensor disclaims all other warranties, either
express or implied, including, but not limited to, implied warranties of merchantability and fitness for a particular purpose, with
regard to the system and its accompanying software, written material and hardware.
14. NO LIABILITY FOR CONSEQUENTIAL DAMAGE. To the maximum extent permitted by applicable law, in no event shall
Licensor be liable for any damages whatsoever arising out of the use or inability to use this system, even if Licensor has been
advised of the possibility of such damage. In any event, the Licensor will not be liable for any damages from any cause in an
amount exceeding the software purchase price.
15. This license is governed exclusively by the laws of Florida. The Licensee agrees to submit to the exclusive jurisdiction of Florida
and not to bring suit in any other state. This is the entire agreement between Licensee an Licensor relating to this software and
supersedes any prior purchase order, communications, advertising, or representations concerning the contents of the software
package. No change or modifications of this agreement will be valid unless in writing and signed by the Licensor. Should any
individual provision of this license be held unenforceable, such provision will be severed from the agreement, and the balance of
the agreement will continue in full force and effect.
9.2
Working with Melco Condensed Format
If you are working with a file you know will be exported to a Melco DOS or Normal condensed format, or if you import a file from
Melco condensed formats, the following guidelines will help you to obtain more desirable results:
·
·
·
·
·
Objects 183
Stitch Types 183
Creating Fill Stitches 183
Satin and Line Stitches 183
Editing Fill Stitches 184
2005-06, Sew Good Software, Inc
Appendix
9.2.1
183
Objects
In some cases, the objects created when you import a condensed format file may block your view of the stitches. Simply turn off the
objects by un-checking Display Objects in the Design View submenu of the View Menu 111 .
9.2.2
Stitch Types
Currently, SEDS II Achiever supports Fill Stitches, Satin (Radial) Stitches, Single-Line Walking Stitches, and Manual
Stitches in converting to/from condensed formats. All other stitch types are converted to Manual Stitches to maintain their
artistic integrity. This means that stitch types such as Pattern Fills can be sewn out from a condensed file with no problems;
however, only minimal editing can be done to them after they are exported from SEDS II Achiever because they are Manual
Stitches.
9.2.3
Creating Fill Stitches
In condensed files, there is no native support for multi-segment and complex Fill Stitches. For this reason, any Simple Fill Stitch
that contains multiple segments, and all Complex Fill Stitches, are divided into several simple stitch blocks when converted to a
condensed file. Simple Fill Stitches may have several segments if the In and Out points do not allow for the object to be filled in a
single segment. Also, the condensed file format is limited to cycle settings of 4 or less.
Example
The fill stitch above will be segmented into 2 pieces. When it is
sewed, the "fill" fills from the In Point in the lower-left corner to
the level of the Out Point (line #1). Then, it lays down a walking
stitch (dotted line #2) to the top of the fill stitch. Finally, it stitches
from top of the stitch block to the end point (line #3).
9.2.4
Satin and Line Stitches
The condensed format also does not allow for Satin/Line Stitches with In/Out points anywhere other than at the first and last
stitch. For this reason, when a Satin Stitch is output to Condensed, SEDS II Achiever automatically segments that Satin
Stitch to meet the desired locations of the In and Out points as placed by the puncher. In the example below, the In point of the
"S" shape was placed arbitrarily on the left side in the center and the Out point placed in the middle of the right side. As can be
seen from the sequenced diagrams, SEDS II Achiever breaks the satin up into a series of walking stitches and segmented
satins.
2005-06, Sew Good Software, Inc
184
SEDS II
In and Out Points as placed in the
Satin Stitch.
In the CND file, travel stitches from It then creates the first satin segment
the In points are added...
to sew from one end to the middle.
It then travels the far left end of the Finally, it sews the last satin segment
'S'.
back to the middle right.
9.2.5
Editing Fill Stitches
When importing a file from a condensed format, multi-segment and complex fills are converted to the Melco Stitch type,
instead of the regular Fill Stitch type. Melco Stitches are somewhat limited because of limitations in condensed format - only
the stitch length can be edited numerically. Other stitch settings can be changed; however, the process is complex. Also, when
changing the shape of a Melco Stitch block, you must be aware that four object nodes, two at the end of each line defining the
stitch area, are only reference points. While Move Point functions normally on all other nodes on the stitch block, moving these
reference points in this manner has no effect. This is because, in condensed format, a fill stitch is defined as the area between
two lines, instead of as a closed object. The reference points are the ends of these two lines. To change the area between these
guidelines, you must use the Change Guidelines button in concert with the Move Point button and the internal nodes. The
lines between the reference points serve two purposes - first, they define the outer limits of the stitch block, and second, the
angle of the longer of these two lines determines the inclination of the stitches.
9.3
Trouble Shooting Guide
Listed below are possible situations that customers encounter during the installation, startup, or operation of SEDS II Achiever.
These are basic troubleshooting guidelines only, and a more comprehensive, more frequently-updated list is available in the
form of our Frequently Asked Questions list at the our website.
· Problems during Installation 184
· Problems Starting the Program 184
· Problems during Program Operation 185
9.3.1
Problems during Installation
PROBLEM: The installation CD will not startup automatically.
Possibility 1: The CD is corrupted and you need to contact our customer support department for replacement.
Possibility 2: Your CD drive and Windows do not support auto-startup. In this case, run "e:\setup.exe" directly where "e:\" should
be replace by the drive letter of your CD drive.
PROBLEM: Authentication Error during installation
Possibility 1: You probably did not plug in your security device into the USB port. Follow the installation instruction that comes with
the software to install the program.
Possibility 2: The security device is damaged. Please contact our customer support department for replacement.
9.3.2
Problems Starting the Program
PROBLEM: When starting the program, a message appears warning that the computer's display settings need to be set to at
least 800x600 pixels and at least 256 colors to run the program.
2005-06, Sew Good Software, Inc
Appendix
185
Answer: SEDS II Achiever supports multiple embroidery colors in a design, as well as on-screen simulation. These features
require display of at least 256 colors. Also, a resolution of 640x480 will not be sufficient to display all the icons and you may
experience difficulties on accessing some of the icons. If this does not bother you, click Yes, else click No. Most VGA cards
support at least 1024x768 with 256 colors. Please change your display settings in the Display Properties box in Windows. If
your video card do not support this mode, please contact the vendor or obtain a new card that supports this resolution. Although
256-color mode is the minimum requirement, 16-bit high color is strongly recommended.
PROBLEM: When I try to start the program, the startup splash screen comes up and then goes away, and nothing happens,
OR no splash screen appears, program does not start. No program window appears.
Possibility 1: Check to see that the security device is inserted properly in the USB port. If not, power down the CPU, re-insert
the device, re-start the computer and re-install the software.
Possibility 2: The program files may be corrupted. Shut off the computer for a full minute. Re-boot and re-install the software
and try again. If this does not work, delete the entire SEDS II Achiever program folder (separating out any stitch files you may
have saved into a separate folder), re-boot the computer and re-install the software.
PROBLEM: When I try to start the program, I receive a message stating that my system has timed out and suggests that I
reinstall the software.
Possibility 1: Your software has timed out due to security procedures set up when it was originally shipped (i.e. in case the
shipment fails to reach your address due to theft/mishandling). Call the customer support department.
Possibility 2: You are ineligible to access the current copy of the software. For example, you may have installed a version of the
software released after your designated period of free updates. If so, re-install the previously-working version of the software
with your installation disks. Contact the customer support department if you have any questions.
Possibility 3: Check the Windows Device Manager and troubleshoot for any conflicts for the security device.
PROBLEM: When I try to start the program, the error message "Security device not found! System quits!" appears.
Answer: Ensure that the security device is properly inserted in a working USB port as provided in the installation instructions
that came with your software.
9.3.3
Problems during Program Operation
PROBLEM: The computer crashed while I was saving a file. The next time I loaded my last saved file, the system reported the
error message, "File Does Not Exist" or "Error Opening File".
Answer: We strongly recommend that customers run Scandisk on their hard drive partitions at least every week. When the
system saves a file to a location that has lost clusters, it will stop saving and the file will be lost permanently. To minimize the
loss, take advantage of the Backup Save feature described in Program Options 177 . Computer viruses are also another
possible cause. Please obtain and install an anti-virus package to prevent this from happening.
PROBLEM: Program works for a while, but crashes unexpectedly during operation.
Possibility 1: Check your video card display driver and ensure that you have the latest version installed. There are known
issues with older versions of ATI and S3 graphics card drivers, which are both excellent product lines that work well with the
software with the newest versions of the driver installed.
Possibility 2: Check in the Windows Device Manager and troubleshoot for hardware conflicts.
2005-06, Sew Good Software, Inc
186
9.4
SEDS II
Hotkey List
File
Ctrl-N
Ctrl-O
Ctrl-S
Ctrl-F4
Ctrl-F2
Ctrl-B
Ctrl-P
Ctrl-H
Ctrl-Q
Alt-F4
Open A New File
Open an Existing File
Save the Current Design
Close the Current Design
Acquire Image
Album Manager
Print Normal
Publish HTML File
Exit
Exit
Edit
Ctrl-Z
Ctrl-Y
Ctrl-X
Ctrl-C
Ctrl-V
Del
Ctrl-A
Ctrl-D
Alt-C
Alt-X
Alt-Y
F7
F8
Alt-Enter
Undo
Redo
Cut
Copy
Paste
Delete
Select All
De-select All
Compact Design Colors
X-Mirror
Y-Mirror
Object Properties
Lettering Properties
Design Properties
View
X
Ctrl-W
Ctrl-R
Alt-G
+
Ctrl-+
Ctrl-F10
F2
F11
F12
Alt-Arrow Keys
Display Selected Stitches
with Background
Aerial View On/Off
Settings Preview On/Off
Show/Hide Grid
Zoom In
Zoom Out
Zoom to Selection
Last Zoom
Simulation Display
Free/X-Freeze/Y-Freeze
Lighten Image
Darken Image
Pan
Tools
Ctrl-F
Ctrl-M
Ctrl-T
Ctrl-L
T
Edit Machine Code Filter
Settings Manager
Statistics
Lettering Input Wizard
Go to Selection
General
F1
F3
F4
Ctrl-Arrow Keys
Online User's Guide
About
Start Punching
Move Selected
Navigation
Page Up
Page Down
Previous Stitch Block
Next Stitch Block
2005-06, Sew Good Software, Inc
Appendix
9.5
Glossary of Embroidery Terms
9.5.1
General
187
Below are some terms you may hear reference to in the manual and in the industry in general.
Backing - Material sewn beneath the beneath a piece of embroidery work that actually sews underneath the garment. Can be
used to stabilize stitches in the same manner as Underlay. Available in varying thickness and consistencies. While outside the
direct scope of digitizing, understanding of the use of backing is mentioned here as it may provide the digitizer an alternate or
supplemental means to stabilize stitching other than underlay.
Condensed Stitch Files - The conceptual opposite of Expanded stitch file types, these are stitch files that saves information
for stitch blocks not as each, individual location for every stitch; instead, stitch information is saved a set of higher-level
instructions that tell a computer about a stitch block's parameters, (i.e. size, shape, density, angle), leaving the computer to
calculate each stitch based on those parameters instead of having to remember and save each stitch point. See Expanded
Stitch Files below. Examples of condensed stitch file types are the common Melco Condensed file type (.CND), and our own
native EDS stitch file type.
Expanded Stitch Files - More basic than condensed files, expanded stitch files describe a stitch file by every individual stitch
point. No information is stored with such files regarding the relationship between each stitch point (i.e. Stitch Point A is in the
same stitch block as Stitch Point B, and that stitch block is 4mm wide and shaped like a circle, etc); because of this, such stitch
files cannot be edited or processed by simply changing the relationships between each stitch (for example, changing the stitch
length, or changing the shape, resulting in a new stitch count and stitches in new locations). This being said, the final
instructions sent to every embroidery machine are ultimately from an expanded version of that stitch file and that recent
advances in embroidery punching systems DO allow for partial or even complete processing of expanded stitch files.
Jump Stitch - As a term, Jump Stitch actually refers to a command in a stitch file that causes an embroidery machine head, at
that point in the file, to travel over a limited distance instead of sewing, still carrying that thread, to another location on the sewing
field. Jump stitches are preferable to Trims or Thread Cuts, as Trims cause a machine to pause momentarily in a sew-out;
while a thread trails the path of the jump, there are no needle insertion points, and the operator has the operation of manually
trimming this thread after sew-out.
Penetration Point - The point where a stitch hits the fabric.
MDI Windows - Multiple Document Interface. A standard Windows interface type that allows an application to have more than
one document open. SEDS II Achiever utilizes this Windows capability and allows users to open, digitize, edit, and cut-andpaste between multiple designs at the same time.
Underlay - A "skeleton" of initial stitches that are sewn underneath a stitch block; the purpose is to stabilize the underlying
fabric of a garment to prevent it from shifting or distorting the shape of those top stitches when they sew, analogous to railroad
ties underneath rails, or joists underneath floorboards. While not always necessary, almost all fabrics will distort to some degree
when subject to the tiny pull/push forces applied when stitches are sewn on top. SEDS II Achiever can generate an automatic
underlay when turned on by the user.
9.5.2
Object-Based Digitizing
Objects - Each stitch block or vector outline is an object. Each object has properties stored with it. In the case of a stitch block,
the properties are the settings to generate the stitch points based around the shape of that object or objects. (In SEDS II
Achiever, all stitch blocks must rely on an object.) For vector outlines, properties include the location of the object, and the points
that define the shape. We usually refer to vector outlines as objects, and stitch blocks as stitch blocks.
Object Nodes - These are points located along an object that determine its shape. In SEDS II Achiever, there are two types of
object nodes: Curved Nodes and Straight/Angular Nodes. Virtually any complex form in the real world can be represented as
an object whose shape is determined entirely by a series of straight or curve points.
Stitch Block (Group) - A collection of stitch points. A stitch block can be a fill stitch, a satin stitch, a line stitch, etc. Also see
Objects.
Object-Inheritance - Unique to SEDS II Achiever, one single vector-outline object can be shared and linked by multiple stitch
blocks. When modifying the object's shape and/or size, all the stitch blocks that are related to it will be changed, too. This is
called object-inheritance. For example, create an outline, then create a fill stitch. Select the outline again, and create a one-line
satin border. Now change the shape of the outline, and both the fill stitch and the satin border will follow the change. This will
save tremendous amounts of time in comparison with other systems, which need to re-shape and match each stitch block
individually. Object-inheritance allows unlimited links to an object.
TWAIN - In DOS programs, software developers need to write device drivers for the scanners that the program supports.
2005-06, Sew Good Software, Inc
188
SEDS II
Thanks to Windows, scanner manufacturers can write their own device drivers using the TWAIN interface. Therefore, software
developers just need to incorporate the TWAIN interface to be able to support a vast number of scanners. Almost all new
scanners available on the market now support TWAIN.
Scanner-Based Digitizing - Previous-generation embroidery design systems used digitizing tablets for input. Most new
systems use scanners instead. The board-based systems required the design to be enlarged and then put on the board for
input, which is inconvenient and time-consuming. Scanner-based systems allow you to use any form of artwork, e.g. business
cards, letterheads, embroidery samples, etc., to be scanned in to the computer as a template. The inputs are done on-screen
and the user can zoom or pan to an area easily. Editing is also more convenient with scanner-based systems. Although many
digitizing systems claim to be scanner-based, none support scanners like SEDS II Achiever does.
Simulation - SEDS II Achiever offers stitch simulation views in both on-screen form and as a high-resolution printout that offers
photo-realistic simulation of the stitches. In many cases, this can save the digitizer the trouble of taking a stitch file to an actual
sew-out, the simulation view does a remarkable job of mimicking an actual sew.
TrueType Fonts - A common type of font that can be found in the FONT folder in your computer's Windows directory. As the
shape of each letter is based on a vector outline, the characters output from that font will appear in any application with smooth
outlines, true to their original shape, regardless of size or style. SEDS II Achiever takes advantage of this property by importing
the vector shapes of each letter as objects, ready to build stitches on.
9.5.3
Punching
Column/Radial/Satin Stitch - All embroidery is composed of a combination of Fill Stitches, Line Stitches, and Satin
Stitches. Satin stitches are stitch blocks that fill a shape by covering an area with thread without needle insertion points except
at the edges, allowing a smooth, shiny effect. Due to the lack of needle penetrations in the center, satin stitches are generally
not used to cover wide areas. The most common applications of satin stitches are as borders around a fill or to render lettering.
While "Radial Stitch" usually refers to a satin stitch that is generated on curves, radial stitches are referred to in SEDS II
Achiever as Satin Stitches.
Short Stitch - When generating a regular sharp cornered satin stitch, a lot of stitch points will hit a small area in the inside
corner. This could cause thread or needle breaks. By applying short stitches, inside corner stitches will be arranged in levels, so
they will not hit at the same area.
Fill Stitch - A stitch block that covers an area with thread "tacked" down with needle insertion points at regular intervals
controlled one of a number of the stitch settings or parameters, such as length, offset, cycle, and angle. Usually used to fill a
large area, fills result in a smoothly-textured stitch effect that can cover virtually any shape and size.
Line Stitch - A stitch block of a type that follows the path of an object, usually as a border or to render detail. A line stitch may
be composed of elements one, two, or more layers of single stitches, or repeating motifs of stitches.
Stiel Stitch - A German term for a border stitch, usually a narrow satin stitch that is sewn to better-define the edge/outline of a
satin or fill stitch block.
Tatami - A Japanese word for Fill Stitch. Commonly used in Asia.
Complex Fill - A single fill stitch block that covers a complex shape as a single, linked collection of segments. Examples are
objects with holes, e.g. donut shapes, star shapes, etc. Most advanced systems offer this automated feature, but many low-end
systems require the puncher to divide the area into many simple fills manually before stitches can be generated. Other names
for this feature: Intelligent fill, Intelligent Tatami, Complex Fill with Holes.
Classic Column Fill - A fill stitch block whose penetration points are generated based on the outline of the object(s). Use of
this kind of fill stitch results in some motion effects.
Modern Column Fill - A fill stitch block whose penetration points are generated based on the outline of the object(s).
2005-06, Sew Good Software, Inc
Index
Index
-CCanvas
-3-
95
Change
Circle
95
36
18
Column
47
Choose Background
Fill
47
3D Simulation View
18
Import Background Image
Fill Lettering
18
Jagged Fill
Convert Manual Stitch Block
-A-
Copy
95
Font
Aerial View
Cornering
16
Create
25
Add a Design
Delete
Motif
28
26
View Designs
Align & Distribute
17
72
A Region
73
The Whole Image
73
48
44
37
72
45
Cross Stitch
58
Settings
83
179
Color
179
Freeze
106
Shape
179
Curve
-BBackup
89
Cursor
Import and Prepare an Image
Auto-Span
Pattern
Stitch
44
Auto-Digitizing
36
Square & Rectangle
38
Auto Trace
Objects
Polygon/Star
26
36
92
New Design
28
Select
Arc
Line & Curve
29
Search
36
-D180
Bean Stitch
Browser
Image
Motif
Pattern
12
32
167
165
Stitch Blocks
92
Motif
12
Design
Vector
Delete
56
99
43
2005-06, Sew Good Software, Inc
61
Lettering using Lettering Input Wizard
26
25
Print
36
38
Lettering on Screen
28
Open a Design
36
Circular Arc
26
Lock/Unlock
98
49
Circle & Ellipse
27
Delete a Design
New
40
Stitch Blocks
95
103
40
Objects
Activate
Album
71
48
92
Objects
40
Pattern
88
Stitch Blocks
98
Stitch Points
104
Designs
12
Browser
12
Canvas
95
37
61
189
190
SEDS II
Designs
Format
12
Create
44
Folders
Import from Tape
Merge
13
Font
95
Open
181
95
Activate
10
Frame Move
Properties
Save As
23
105
72
-G-
55
-E-
Glossary
187
General
187
Object-Based Digitizing
17
Align & Distribute
17
Change Color
19
Image Editing
34
Lettering
Punching
Grid
34
93
Objects
38
Pattern
90
Stitch Blocks
68
179
52
-HHotkey
How do I
99
186
95
Activate Font(s)
36
E-Stitch
Guide Lines
63
Lettering using Lettering Input Wizard
Motif
187
188
15
Settings
Image Mirror and Rotate
Ellipse
105
Freehand Satin
20
Double Line Stitch
Edit
95
95
Add Frame Move Codes
56
EULA
181
Export
23
105
Auto Trace Objects from Background Image
Change Canvas of a Design
Change Design Properties
Direct Connection
Image
23
33
Objects
To Floppy Disk
To Tape
Convert a Design File to a Non-DOS format
Create a New Design
21
22
Create a New Motif
92
89
Create Lettering on Screen
61
Create Lettering using Lettering Input Wizard
Create Stitches
71
Delete a Motif
Column
71
Delete a Pattern
Normal
69
Edit an Existing Motif
86
92
88
93
Edit an Existing Pattern
Edit Objects
45
47
Edit Stitch Blocks
96
Jagged
46
Edit Stitch Points
103
48
90
38
Column
Jagged Column
Insert Manual/Jump Stitches
72
Normal
45
Insert/Remove Trim Codes of Stitch Blocks
Pattern
46
Install the Program
Settings
Floppy Disk
Export
78
21
21
61
45
Fill Lettering
Settings
21
20
44
Create a New Pattern
-F-
Fill Stitch
105
Convert a Design File to Another Format
43
44
95
Merge Designs
95
Open a Design
10
99
9
Output a Design File to Paper Tape
22
2005-06, Sew Good Software, Inc
Index
How do I
95
Pan
16
Satin
Jump Stitches
Printout a Design
Remove Short Stitches
Rename a Design File
33
105
Lettering
20
61
Create on Screen
Save a Design File to Another Location
Search Machine Code
-L-
100
Reduce Colors of Background Image
Select a Motif
20
106
Edit
Select Object(s)
14
Select Stitch Block(s)
Start the Program
Stitch Types
Line
10
Use Aerial View to Perform Zoom and Pan
Use Album to Manage Designs
16
25
23
Satin
Line
16
72
36
Bean
55
56
Double
-I-
55
E-Stitch
56
Settings
81
Single
32
32
Browser
Settings
33
Lock Stitch
32
34
Export
33
Import
31
Mirror and Rotate
Reduce Colors
33
180
104
104
Edit Filter
13
Search
31
Vector File
24
106
Manual Stitches
Simulation Background Image
42
104
18
72
Measurement
72
19
Melco Condensed
104
9
Objects
-J-
Menu Bar
48
Column Fill
Fill
183
184
183
Satin and Line Stitches
Stitch Types
Jagged
182
Creating Fill Stitches
Editing Fill Stitches
Stitch Points
Installation
180
Pattern
Change
Image for OneTouch Auto-Digitizing
Insert
180
Options
Machine Code
13
From Tape
70
87
-M-
34
31
Image
55
Line Stitch Lettering
Adjust Brightness
Import
69
68
Line Stitch
Use the OneTouch Auto-Digitizing Function
Images
71
70
Normal Fill
Transfer a Design File using Direct Connection
Edit
68
Column Fill
14
48
46
2005-06, Sew Good Software, Inc
61
63
Edit using Lettering Input Wizard
88
Acquire
61
Create using Lettering Input Wizard
91
Select a Pattern
Image
72
19
Process Stitch Blocks
Zoom
54
183
108
Edit Menu
110
File Menu
108
Help Menu
Tools Menu
113
113
183
68
191
192
SEDS II
Menu Bar
108
View Menu
One Line Satin
111
Window Menu
Merge
113
95
Change Default Settings
Objects
40
Wizard
Stitch Blocks
92
16
Pattern
57
89
Create
57
Select
89
Delete
Manager
91
Edit
91
Settings
Move
Pan
93
Line
74
-P-
92
Delete
38
38
88
90
Fill
82
Objects
46
Manager
88
Satin Fill
53
Select
Stitch Blocks
96
Stitch Points
104
-N-
88
Photo Stitch
59
Settings
84
Polygon
37
Preview
106
Settings
Normal
45
Fill
45
Printout
69
-OObjects
106
19
Normal
Fill Lettering
72
98
92
Create
73
73
Import an Image for Auto-Digitizing
40
Fill
73
Auto-Digitizing the Whole Image
Designs
Edit
52
72
Auto-Digitizing a Region
95
Mirror
Motif
OneTouch
19
Program Options
177
Program Window
108
Properties
105
Designs
105
35
Add/Delete Anchor Points
Copy
40
Creation
Cut
-R-
40
Auto Trace Background Image
44
Recovery Save
36
Rectangle
41
180
37
Remove Short Stitches
Cut Closed
42
Resize
38
Delete
40
Objects
Editing
38
Stitch Blocks
Export
43
Rotate
Geometric Transform
Import
Join
Mirror
42
41
38
Ruler
96
39
Objects
39
Stitch Blocks
42
105
97
16
40
Move/Resize
Rotate
39
Select
14
38
-SSatin Lettering
68
2005-06, Sew Good Software, Inc
Index
Satin Lettering
Settings
85
Satin Stitch
Manual
Jagged
72
Browser
52
Pattern Fill
Settings
48
57
99
Change Color
53
99
Change Density (Span)
79
Two Line
72
Special Stitch
54
One Line
55
Satin Type
48
Freehand
Select
Line Type
68
53
Change Sequence
Change Size
91
Motif
91
14
Pattern
88
Copy
103
98
Delete
98
Stitch Blocks
14
Edit
Stitch Points
103
Insert/Remove Trim Code
Settings
99
Mirror
83
83
Move/Resize
Fill Lettering
86
Navigation
78
General
Rotate
Line Lettering
Line Stitch
Manager
Motif
87
81
76
Photo Stitch
Preview
84
106
85
79
Single Line Stitch
Slow Redraw
Cross
17
57
Line Motif
Photo
Change Size
102
102
101
48
Cornering
48
49
Guide Lines
104
37
Images
Objects
106
Status Bar
148
45
Create
52
31
Melco Condensed Format
37
45
Fill Type
Jump
102
Change Density (Span)
Auto-Span
59
Stitch Block
Stitch
104
103
Tell me about
57
104
Statistics
Select
-T-
57
58
Fill Motif
Star
104
17
Special Stitch
Square
Move
Change Number of Stitches
3D Simulation
Split
104
Stitch Processing
55
17
Normal
104
Insert
Remove
Satin Lettering
Satin Stitch
14
104
Stitch Points
82
100
97
Select
Split
96
19
Processing
77
99
98
Cross Stitch
Fill Stitch
102
98
101
Convert Manual
Objects
102
Change Number of Stitches
45
35
SEDS II Overview
9
Settings Manager
76
System Requirements
9
The Program Window
108
Things Required during Installation
72
Lettering Stitch
182
ToolBars
68
2005-06, Sew Good Software, Inc
115
Color Bar
115
9
193
194
SEDS II
ToolBars
115
Main Bar
113
Miscellaneous Toolbars
Options Bar
147
115
Pop-up Toolbars
Primary Bar
144
114
Stitch Creation Bar
130
Stitch Settings Bar
131
Stitch View Control Bar
Trim Code
143
99
Insert/Remove
99
Trouble Shoot
184
Two Line Satin
53
-UUnits
179
Default
179
-VVector
42
Browser
View
43
18
3D Simulation
18
3D Simulation Slow Redraw
Aerial View
16
Show Grid
15
Show In/Out Points
15
Show Jump Stitches
15
Show Machine Codes
15
Show Particular Stitch Blocks
Show Ruler
15
16
Show Stitch Points
14
Show Underlay Stitches
15
Show Underlay Stitches Only
Slow Redraw
17
15
17
-ZZoom
16
2005-06, Sew Good Software, Inc