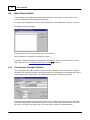
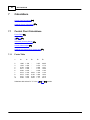
1
SPC Quickie98
© 2014 DataLyzer International, Inc.
SPC Quickie98
© 2014 DataLyzer International, Inc.
All rights reserved. No parts of this work may be reproduced in any form or by any means - graphic, electronic, or
mechanical, including photocopying, recording, taping, or information storage and retrieval systems - without the
written permission of the publisher.
Products that are referred to in this document may be either trademarks and/or registered trademarks of the
respective owners. The publisher and the author make no claim to these trademarks.
While every precaution has been taken in the preparation of this document, the publisher and the author assume no
responsibility for errors or omissions, or for damages resulting from the use of information contained in this
document or from the use of programs and source code that may accompany it. In no event shall the publisher and
the author be liable for any loss of profit or any other commercial damage caused or alleged to have been caused
directly or indirectly by this document.
Printed: March 2014 in (Wixom, MI USA)
Microsoft, ActiveX, MS, MS-DOS, MSN, Windows, and Windows NT are either registered trademarks or trademarks of
Microsoft Corporation in the USA and/or other countries.
DataLyzer International, Inc.
29445 Beck Road, Suite A-207
Wixom, MI 48393 USA
tel 248-960-3535
fax 248-946-8490
e-mail [email protected] or
[email protected]
www.datalyzer.com
Contents
3
Table of Contents
Part I Introduction
5
1 The Purpose
...................................................................................................................................
of SPC and SPC Quickie
5
2 Vocabulary
................................................................................................................................... 6
Part II Quick-Start Tutorial
7
1 New Part
...................................................................................................................................
Creation
7
2 New Characteristic
...................................................................................................................................
Creation
8
3 Entering
...................................................................................................................................
Data
10
4 Printing
...................................................................................................................................
a Chart
12
Part III Setup Menu
14
1 System
...................................................................................................................................
Definitions
14
2 Language
................................................................................................................................... 15
3 Com Port
...................................................................................................................................
Assignment
15
4 Gage ...................................................................................................................................
Template
15
Gage Tem plate
..........................................................................................................................................................
Window
17
File Menu ......................................................................................................................................................... 19
Test Menu ......................................................................................................................................................... 19
Create Template ......................................................................................................................................... 20
Test Template ......................................................................................................................................... 21
Special Menu
......................................................................................................................................................... 23
Standard
......................................................................................................................................... 23
Single Channel A/D
......................................................................................................................................... 23
Options Menu
......................................................................................................................................................... 25
Communication Options
......................................................................................................................................... 25
RS-232 Options ......................................................................................................................................... 27
Clear
......................................................................................................................................................... 27
Exam ples
.......................................................................................................................................................... 27
Single Line,.........................................................................................................................................................
Single Measurement
27
Multi-Line ......................................................................................................................................................... 29
Part IV File Menu
31
1 New Part
................................................................................................................................... 31
2 New Characteristic
................................................................................................................................... 32
Characteristic..........................................................................................................................................................
Description Window
32
File Menu ......................................................................................................................................................... 34
Options Menu
......................................................................................................................................................... 35
Scales
......................................................................................................................................... 35
Control Limits
......................................................................................................................................... 36
3 Open................................................................................................................................... 38
4 Copy ...................................................................................................................................
Part
38
© 2014 DataLyzer International, Inc.
3
4
SPC Quickie98
5 Rename
...................................................................................................................................
Part
39
6 Delete...................................................................................................................................
Part
39
7 Delete...................................................................................................................................
Characteristic
39
Part V Data Menu
40
1 Enter/Edit
................................................................................................................................... 40
Chart View Window
.......................................................................................................................................................... 40
File Menu ......................................................................................................................................................... 43
Data Input Window
......................................................................................................................................................... 43
2 Delete................................................................................................................................... 45
3 Review
................................................................................................................................... 45
Part VI Reports Menu
47
1 Control
...................................................................................................................................
Chart
48
2 Capability
...................................................................................................................................
Analysis
49
3 Titles................................................................................................................................... 50
4 Search
................................................................................................................................... 51
Part VII Calculations
52
1 Control
...................................................................................................................................
Chart Calculations
52
Factor Table .......................................................................................................................................................... 52
X-bar & R
.......................................................................................................................................................... 53
Individuals (X ..........................................................................................................................................................
m oving Range)
54
Control Chart ..........................................................................................................................................................
Analysis
54
Capability and..........................................................................................................................................................
Perform ance Assessm ent
55
Estimated Sigma
.........................................................................................................................................................
- Sigma Hat
55
Sigma
......................................................................................................................................................... 55
Cpk and Ppk
......................................................................................................................................................... 55
Cpr and Ppr
......................................................................................................................................................... 56
Cpi and Ppi......................................................................................................................................................... 56
Cpm
......................................................................................................................................................... 56
Cp vs. Pp Values
......................................................................................................................................................... 57
2 Capability
...................................................................................................................................
Study Calculations
57
Capability Statistics
.......................................................................................................................................................... 58
Distribution Curve
..........................................................................................................................................................
Form ulas
59
Part VIII Database Backup
63
Part IX References
64
Part X ASCII Table
65
Index
68
© 2014 DataLyzer International, Inc.
Introduction
1
5
Introduction
Thank you for purchasing the SPC Quickie98 program. We have taken great care to fashion the program
to be used intuitively. Though powerful, SPC Quickie98 remains easy. In fact, we are confident that SPC
Quickie98 will be one of your most valuable tools in achieving and maintaining "world-class" quality
results.
Before beginning, you may want to read the following sections to familiarize yourself with the Quickie98
program.
The Purpose of SPC and SPC Quickie98
Vocabulary
5
6
Quick-Start Tutorial
7
Or see the instructions provided for each menu in the Quickie98 main window:
Setup Menu
File Menu
14
31
Data Menu
40
Reports Menu
1.1
47
The Purpose of SPC and SPC Quickie
All production processes have inherent variation. That is, no two pieces produced are exactly alike if
measured precisely. Variation can be the result of two different sources. A stable process produces
products that vary within a predictable range. Predictable variation is called “common cause” variation.
Variations caused by non-predictable events, such as bad raw material, a broken tool, or a power sag,
are called “special causes”. SPC gives us the tools to measure the degree of both types of variation with
the goal being to eliminate special causes altogether.
Control charts and capability studies are the main tools used to describe processes. Control charts use
small samples taken at regular time intervals. They track the stability of a process' statistical location
and variation. Capability studies are used to predict the ability of the process to produce products within
the required specifications. Quickie98 provides both variable control charts and capability study reports.
There is a large burden of time and money that comes with implementing an SPC program. The benefit
and result of SPC is not reports. The benefit comes from using the reports to identify sources of
variation, then reducing or eliminating them. The intent of Quickie98 is to provide a quick and easy
means of collecting data and generating reports. By significantly reducing the time spent performing
these repetitive tasks, more time can be spent analyzing and solving the problems.
This documentation is not a complete guide to SPC. If you find yourself in need of more detailed
information regarding the implementation of an SPC program, we suggest the following books:
Fundamental Statistical Process Control by AIAG and ASQ, Quality Control Handbook by Juran,
Statistical Quality Control Handbook by Western Electric, and Statistical Quality Control by Grant and
Leavenworth. More information on these books is available here 64 .
© 2014 DataLyzer International, Inc.
6
1.2
SPC Quickie98
Vocabulary
Let's establish some common vocabulary, so you will know what we mean when using certain terms.
The part is the item being manufactured or the process being monitored. In our example, the part is a
clip. The part or process could just as easily be defined as a tank of chemicals, a service such as the
number of errors committed per hour while processing papers at a bank, or the manufacture of a soft
drink. Quickie98 will process the measurements from almost any service or manufacturing situation. The
only requirements are that the process generates measurable data over time.
The operation is a step in the process that produces the characteristic we are measuring. The
operation being performed on the clip is stamping. For other parts, or on subsequent operations of
manufacturing our example part, other operations may be performed, such as drilling, grinding, injection
molding, extrusion, cutoff, etc.
The specifications (specs) are the values between which all measurements of the characteristic should
lie. There are usually both lower and upper engineering specifications for the characteristic. However,
sometimes there will only be an upper spec or a lower spec. Quickie98 handles even these unusual
situations nicely. For our clip file example, we have a typical characteristic example involving both upper
and lower specifications.
One nice thing about SPC is that you only have to inspect a small number of part samples from a
production process to make predictions about all the other parts being made by that process. Typically,
measurements for one characteristic are taken on a group of consecutive, very recently manufactured
parts.
Samples are collected and measured carefully at regular intervals. This group of samples is called a
subgroup. With Quickie98, the subgroup size must be a fixed number from one to ten.
For each part being manufactured, (or process being monitored) you will have one or more
characteristics requiring inspection. A characteristic is a measurable feature of the part such as overall
length, number of errors, gas content or weight. For our clip, the characteristic being measured is overall
length.
Quickie98 uses a database file to store information. You will use one database to store all control
charts and data for the system. Each characteristic you define will be stored as a record in the database
on the hard drive.
© 2014 DataLyzer International, Inc.
Quick-Start Tutorial
2
7
Quick-Start Tutorial
This tutorial will show you how to get Quickie98 working for you in a few easy steps. Using a typical part
example, you will learn how to create a part 7 , create a characteristic 8 , input data 10 , and print
control charts 12 . To get the most out of this tutorial, please read through the example while typing it
into your computer.
The example part we will work with is a retaining clip manufactured by a factory in Detroit. They call the
clip type 1234-A. The part dimension or characteristic being checked is the clip's overall length. The
engineering specifications for this part characteristic are 0.500 mm to 0.900 mm. Fred, our press
machine operator, will take five clips from his machine every 30 minutes, measure them carefully, and
enter the measurements into the computer. This is all the information we need to get started.
During this tutorial, characters you are to enter in a field will be enclosed in brackets < >. Do not type
the brackets themselves, just the information between them.
We are now prepared to create a file with Quickie98. If you are following along on the computer, make
sure the program is loaded and the “main” window is visible before continuing.
Your screen should look like this:
SPC Quickie98 uses a database file to hold all the information you enter. Subgroup data are stored
along with descriptive information like specifications, subgroup size, etc. for each part and characteristic
being monitored. This one file, created by the program, holds all the parts, characteristic definitions and
the measurement data for the system. As a matter of organization, characteristics are defined and
stored as subsets of parts, so you first create a part, then you define or create characteristics under that
part.
2.1
New Part Creation
Create a part by opening the “file” menu and selecting “new part”. The “create new part” window will
appear that allows a 24-character file name entry. Part files that have already been created are listed in
alpha numeric order.
© 2014 DataLyzer International, Inc.
8
SPC Quickie98
Enter a file name into the field provided. The example we will use is <CLIP 1234-A>.
Once you have entered the part name, press the [Enter] key.
Immediately following creation of a new part, the “create new part” window will be replaced by the “create
new characteristic” window to indicate your part entry was accepted.
2.2
New Characteristic Creation
The “create new characteristic” window appears, so you can define the first characteristic of the part.
There are no logical limits to the number of characteristics that can be defined under one part.
Enter the name of the characteristic you wish to create in the “file name” field. The example we will use
is <Overall length>.
Once you have entered the characteristic name, press the [Enter] key.
The “create new characteristic” window will be replaced by the “characteristic description” window to
indicate your characteristic entry was accepted.
Complete the information in each field as thoroughly as possible. Mandatory fields include: characteristic
name (Overall length), upper spec (0.900), lower spec (0.500), and subgroup size (5). Completing all
other fields is optional.
© 2014 DataLyzer International, Inc.
Quick-Start Tutorial
9
Our example completed “characteristic description” window will look like this:
As you can see, many of the things you will type into this window have already been discussed. All you
have to do now is learn how to move the cursor around the screen and type our sample information into
the fields. The information entered in this window will be printed at the top of your reports.
Plant/Department
Enter the name of your plant, division and/or department in this field. If you are using our clip example,
type in <Detroit>, since the clips are being made at an imaginary Detroit facility. You can enter up to 24
letters for the plant or department name. No entry is necessary to create a file.
Part Number/Name
This field is filled in automatically with the part name you entered in the “create new part” window and
cannot be changed.
Operation
The operation relates to the process used to make the characteristic we are tracking. For the clips, we
would enter <Stamping - Press 1>. Again, you can enter up to 24 letters for the operation name. No
entry is necessary to create a file.
Characteristic
This field is filled in automatically with the characteristic name you entered in the “create new
characteristic” window.
Special Field Title, Special Field Contents and Comment
The next three fields, “special field title,” “special field contents,” and “comment” are useful, but we are
going to skip them for now.
Subgroup Size
The “subgroup size” field is the number of samples that you will collect at a time from your process. This
number must be between one and ten. NOTE: Once you have started to enter data for this file, you will
not be able to change the subgroup size. If you are following our clip example, enter <5>.
Upper Spec
The “upper spec” field is where you will enter the upper engineering specification limit for the
characteristic you are measuring. Our clips have an upper spec of <0.900>. The spec fields also control
the precision of your measurement input. That is, if you want to allow for measurement in thousandths,
enter enough trailing zeros in the spec to allow for that precision. In this example, any data entered
beyond three-digit precision will be truncated or cut off at three digits following the decimal. (Quickie98's
© 2014 DataLyzer International, Inc.
10
SPC Quickie98
statistical calculations always go two digits beyond input precision.) If your characteristic does not have
an upper spec, you would type in the word “none” or “infinite”; if the field is left blank, “none” will be
assumed.
Lower Spec
The “lower spec” field is where you will enter the lower engineering specification limit for the
characteristic being measured. Our clips have a lower spec of <0.500>. Again, refer to the data entry
precision mentioned in the upper spec description. Quickie98 will base its input precision definition on
the spec with the greatest number of digits following the decimal. If your characteristic does not have a
lower spec, you should type in the word “none” or “infinite”; if the field is left blank, “none” will be
assumed.
Target
We will skip the “target” field for in this tutorial. This is an optional field, and it is not necessary to create
a file.
Units
The “units” field is where you will enter the unit of measure for the specifications (e.g. mm, inches). In
our example, we are measuring in millimeters, therefore enter <mm> in the “units” field.
Natural Limits: Lower Spec
We will skip the “natural limits: lower spec” field in this tutorial.
Saving
Make sure that all entered information is correct and then save by pressing the OK button. The “main”
window will reappear. You are now ready to enter data.
2.3
Entering Data
Now that the part and characteristic have been created, you are ready to start entering data. At the
“main” window, select the “enter/edit” command from the “data” menu (notice that [Ctl]+[E] can also be
used as a shortcut from the “main” window to jump to the data entry area).
If you are following the example, select file name “CLIP 1234-A”.Select the file name from the list in the
“open part” window by double clicking on the desired file name or use the arrow keys to highlight the
name and press the “OK” button. If only one characteristic was created, the “chart view” window appears
instantly, otherwise a specific characteristic will need to be selected in a similar fashion.
© 2014 DataLyzer International, Inc.
Quick-Start Tutorial
11
The “chart view” window looks like this:
The “chart view” window contains two empty charts, a chart information area, and screen buttons.
The two charts are separated by a bold white line. The upper chart is the average or chart. The lower
chart is the range or R chart. Each chart is displayed with a scale on the left. Subgroup numbers will
appear at the bottom when data are entered.
On the right side of the window is the chart information area and screen buttons. Items in this area are
detailed in the Enter/Edit area. To get started entering data, all you really need to understand is the
“subgroup #” field and how to exit.
The “subgroup #” field shows the next subgroup number to be entered. Of course, new files will start at
number one. With the cursor blinking in this field, press the [Enter] key or double-click on the field. This
causes the “data input” window to appear:
The first fields in this window are “date” and “time”. The date the subgroup was collected belongs here
(today's date; SPC should be done real-time). To enter the current date or time, press the [Tab] or
[Enter] key when the cursor is positioned in the field.
© 2014 DataLyzer International, Inc.
12
SPC Quickie98
The number of sample lines will always be between one and ten, depending on the subgroup size
specified. Our clip example contains five sample fields (subgroup size of 5). For each of these fields,
pretend to measure a clip and type in a “measured” value. (Of course you will never do this while tracking
real parts with SPC.) If you are using the clip example, try to keep all of the values entered inside the
specs (0.500 to 0.900). After typing a value, move to the next field by pressing the [Tab] or [Enter] key or
clicking on the next sample field.
If you make a mistake, go up to the line where the incorrect entry occurred by pressing the [Up arrow] or
[Shift]+[Tab] keys or clicking on the field where the error is.
Once you have completed the subgroup, press “OK” to store the data.
After you store the data, several things happen. The “data input” window disappears, the subgroup data
will be stored and the subgroup average and range points will be plotted instantly on the charts. Also,
the “subgroup #” will be set to the next subgroup in the file. You are now ready to enter subgroup #2 by
repeating the procedure. The statistics in the chart information area will be recalculated after every
subgroup.
After a few subgroups have been entered, your chart should look something like this:
When you are done entering data, you can go back to the “main” window by selecting “exit” command in
the “file” menu.
Now that you have created a file and entered some data, it's time to print a control chart.
2.4
Printing a Chart
At the “main” window, open the “reports” menu. Select the type of report to be printed. Quickie98 will
print control charts ( & R and X moving Range) and capability study/histograms. Choose “control
charts” for this example.
Select the file and characteristic in the same way you selected the part for data entry. Select the “CLIP
1234-A” part and “Overall Length” characteristic. The selected report will be displayed. Press the “print”
button to print the report by.
A Windows® dialog box appears allowing you to specify the desired printer and other information. Once
you press the “OK” button the system prints the desired report. As a default, the control chart will use
© 2014 DataLyzer International, Inc.
Quick-Start Tutorial
13
the last 25 subgroups in the file for its analysis. The histogram will use all the data available for its
default analysis.
To select one specific set of data to print, use the “review” command in the “data” menu of the “main”
window or the “search data” button in the “open characteristic” window (when printing).
That's it. You have finished creating a file, entering data and printing a control chart. Now, create a file for
each process you want to monitor using SPC. Before you begin, however, take some time to look
through the rest of the user's manual for additional, timesaving features of SPC Quickie98.
© 2014 DataLyzer International, Inc.
14
3
SPC Quickie98
Setup Menu
The items in the “setup” menu are described here.
System Definitions
Language
14
15
Com Port Assignment
Gage Template
3.1
15
15
System Definitions
When you select the “system definitions” item in the “setup” menu, the following screen will appear:
The responses you enter into these fields will be used by the Quickie98 program as field titles and report
headings.
Company Name
The text entered into this field will be printed on the top of the control chart and histogram reports. The
maximum number of characters that accepted in this field is 40.
Header Field 1 prompt, Header Field 2 prompt, Header Field 3 prompt
The header fields allow you to enter your own titles for each of the three fields at the top of the
“characteristic description” window. They also appear at the top of the reports. If you choose to change
these field titles, 24 characters is the maximum available space.
Report Titles
A title can be defined for each report Quickie98 generates. Report 1 is the control chart. To change the
existing “Process Control” title, erase or overwrite it with the desired title. The maximum number of
characters allowed in both titles is 40. Report 2's title can also be changed. Press the “next” button to
make the “capability analysis” title appear in the field. Erase or overwrite the title as desired. Press “OK”
© 2014 DataLyzer International, Inc.
Setup Menu
15
to save the changes. Move between the titles with the “next” or “previous” buttons. Use the “defaults”
button to put the default title back into the currently displayed report.
Suppress Product Identification Check Box
Trial packages are set to print a sales oriented message on the bottom of the reports. After purchase
and software registration, this message can be suppressed so that it will no longer print on the bottom of
the reports.
Check the box with your mouse to suppress the Quickie98 sales message from printing on the bottom
of your reports.
3.2
Language
Several languages are, or will be supported by SPC Quickie98. To change a language, from the “main”
window open the “setup” menu and select “language”. A list of languages will pop up. Click on the
desired language. The package will blink briefly and reappear using the selected language. This
conversion does not change any entries you made in the file creation area, nor does it translate the
header fields or report titles you may have entered in system definitions.
3.3
Com Port Assignment
Quickie98 uses drivers to control communication between the computer's com ports and the gage or
gage interface. The computer can have up to four com ports installed, but usually computers have only
two installed. This is because the operating system can deal with only two com ports at a time. The
following window allows you to assign these drivers to individual com ports. You may find that certain
com ports are identified as “not available”. In these cases, the com port is already being used by a
mouse or other peripheral. To assign a gage driver to a com port, click on the pull-down list next to the
designated com port where your gage is connected. Find your gage driver in the list and click on it.
If your gage or gage interface cannot be found in the list of drivers, see the “gage template
information on how to create gage drivers.
3.4
15
” item for
Gage Template
Gage drivers do two things. They define the communication environment in terms of baud rate, parity,
stop bits, etc., and they tell the Quickie98 package where the actual measurement resides within the
gage's transmitted message (string).
© 2014 DataLyzer International, Inc.
16
SPC Quickie98
Each gage transmits information such as the measurement value, the +/- sign, units, etc., but it can be
located in any order within the message string. So, the driver uses a template to parse the string being
transmitted and select only characters that represent a valid measurement.
There are three fundamental steps to creating your own gage driver:
1. Configure the communication parameters to match the gage transmissions. This means the
software's baud rate, parity, data bits, and stop bits must all match the gage's settings.
2. The software must be provided with some general information about the string of characters the gage
is expected to transmit. Included in this area are commands to prompt the gage for readings,
definition of line termination characters, and how many lines will be transmitted.
3. Take a test transmission from the gage to verify that everything works and define the transmission
string template mentioned earlier.
The RS-232 cable between the gage and the computer must be pinned correctly before communication
can occur. If the individual conductors inside the cable are not connected to the correct pins on each
end, you will not be able to communicate with the gage. DataLyzer International, Inc. always
recommends purchasing this cable from the gage or interface manufacturer to eliminate cable problems.
From the “setup” menu, select the “gage template” item to display the following window:
Type in a file name for the gage file (up to 24 characters) then press the “OK” button. The “gage template
17 ” window will appear.
NOTE: Characters not allowed in gage names: " : / \ < > ? * |
Reserved words that cannot be used as gage names: CLOCK$, CON, AUX, COM1, COM2, COM3,
COM4, LPT1, LPT2, LPT3, PRN, NUL
Gage Template Examples
27
© 2014 DataLyzer International, Inc.
Setup Menu
3.4.1
17
Gage Template Window
The “gage template” window looks like this:
Port Settings
Refer to the user's manual of your RS-232 gage or multiplexing interface for information regarding its
baud rate, parity, data bits, and stop bits. Set the software's communication parameters to match the
gage by pulling down each parameter's list and selecting the appropriate value with the mouse or by
typing in the values for baud rate parity, etc. into the associated fields. Defaults are shown in the
example above: 9600 baud, no parity, eight data bits, one stop bit.
Transmission to Initialize Gage
The “transmission to initialize gage” field is used only when a gage interface requires a particular set of
characters to “wake it up” (tell it there is a computer at the other end or to set the gage in a specific
mode). This transmission from the computer to the gage is typically only required once per session.
Refer to the gage manufacturer's operating manual and enter the necessary set of characters in this
field. If the gage requires no initialization message, leave this field blank.
You can use ASCII codes or literals as entries for this field. When using ASCII codes, enter the
associated ASCII number, separated by commas. This is the only way to use characters such as
carriage return and line feed (e.g. “13,” “11”) that do not display when typed. When using literals, enclose
them in quotation marks (e.g. “WAKE UP”). “P” is a special character when used outside quotation
marks that indicates a one-second pause. It can be used between commands sent to the gage to allow
the gage enough time to process each command.
Transmission to Prompt Gage for Reading
The “transmission to prompt gage for reading” field is used when a gage interface requires a particular
set of characters to be transmitted to it before it will transmit each measurement in response. Refer to
the gage's manual for the necessary set of characters in this field.
You can use ASCII codes or literals as entries for this field. When using ASCII codes, enter the
associated ASCII number, separated by commas. This is the only way to use characters such as
carriage return and line feed (e.g. “13,” “11”) that do not display when typed. When using literals, enclose
them in quotation marks (e.g. “SEND”). “P” is a special character when used outside quotation marks
that indicates a one-second pause. It can be used between commands sent to the gage to allow the
gage enough time to process each command.
© 2014 DataLyzer International, Inc.
18
SPC Quickie98
Line Terminator for Lines Received from Gage
The software must be told what character or set of characters will be at the end of each line sent by the
gage. The “line terminator for lines received by the gage” field is used to enter the line terminator
character(s). In many cases, entries in this field will not be visible when typed, such as carriage return
and line feed. The default is carriage return (ASCII character “13”).
When more than one entry is made in this field, thereby establishing more than one character for line
termination, commas should be used between the characters. If the comma itself is a line terminator,
use the ASCII character “44” for the comma character.
Lines Per Transmission Received from Gage
The “lines per transmission received from the gage” field is used to enter the number of lines the gage
will send each time it transmits. See the gage's operating manual for this information. Sometimes
instruments will send a multi-line report via RS-232 intended to print on a printer. In cases where more
than 5 lines are transmitted, it is often necessary to use the communication options window and
increase the delay between lines by .5 seconds or more.
If it is not clear exactly how many lines are transmitted or if delays are required, use the “create
template” item in the “test” menu to take test transmission(s). This facility will display the number of
lines being received by the software. To display the number of lines, set the number of lines to a large
number such as “8” or “10” and read the gage. You'll be able to see five lines at a time.
During the “create template” test, the software will report how many lines were received from the gage
(the maximum being the number of lines set in this field). A field will appear next to the word
“transmission” that will report how many actual lines were received from the gage; then you can go back
and adjust the number of lines per transmission to match the number received in the test.
Line Number of Reading in Gage Transmission
Values for this field area must be set through the “create template” item in the “test” menu. Entries are
visible from this screen for summary purposes only and cannot be changed using the keyboard. When
multiple lines are transmitted from the gage, this feature allows you to tell the software which line will
contain the measurement you want.
Starting Column of Reading in Line
Values for this field area must be set through the “create template” item in the “test” menu. Entries are
visible from this screen for summary purposes only and cannot be changed using the keyboard. Its
purpose is to locate the position of the first character in the transmission's actual measurement value.
No measuring units, channel identifiers, or other miscellaneous information in the transmission should
be confused with the location of the first character in the measurement.
Ending Column of Reading in Line
Values for this field area must be set through the “create template” item in the “test” menu. Entries are
visible from this screen for summary purposes only and cannot be changed using the keyboard. Its
purpose is to locate the position of the last character of the transmission's actual measurement value.
Measuring units, channel identifiers, or other miscellaneous information in the transmission should not
be confused with the location of the last character in the measurement.
© 2014 DataLyzer International, Inc.
Setup Menu
19
Sign Column of Reading in Line
Values for this field area must be set through the “create template” item in the “test” menu. Entries are
visible from this screen for summary purposes only and cannot be changed using the keyboard. Enter
the location of the measurement's sign (+/-) in the transmission. The gage test option must be used to
set this field. This facility is only used when the sign of the measurement is not contiguous with (in front
of) the measurement. Of course, entering the +/- sign is not necessary if the measurements will always
be positive.
File Menu
19
Test Menu
Special Menu
23
Options Menu
25
Clear
3.4.1.1
19
27
File Menu
The “gage template” window's “file” menu contains the following items:
New [Ctl]+[N]
The “new” command allows you to create a new gage driver file.
Open [Ctl]+[O]
The “open” command allows you to open an already existing gage driver file.
Save [Ctl]+[S]
“Save” saves the selected gage template (.GAG) file. You must always save a template file before you
can use it to control the computer's RS-232 com port(s).
Save As
The “save as” command allows you to save the gage driver with a different name, essentially duplicating
it.
Print
The “print” command allows you to print the information you have entered in the gage template.
Exit
“Exit” allows you to exit without saving.
3.4.1.2
Test Menu
The “gage template” window's “test” menu contains the following items:
Create Template
Test Template
20
21
© 2014 DataLyzer International, Inc.
20
SPC Quickie98
3.4.1.2.1 Create Template
The “create template” window allows data acquisition from a com port using the baud rate, parity and
stop bit settings of the selected gage template (.gag) file. This testing process is also used to set the
“reading description” area of the gage template window.
The “create template” window looks like this:
Serial Port
The “serial port” selection area is used to temporarily designate a com port for the current test. Select
the com port from the pull-down list. This selection will not be stored permanently, because the com port
selection for ongoing use is made from the “com port assignments” item under the “setup” menu in the
“main” window.
Timeout
The “timeout” field allows you to set how long you want the software to continue trying to receive a
reading once the test has begun. If the gage is not communicating at all, this feature limits the amount
of time spent waiting for a transmission.
Clear Button
The “clear” button clears all transmission lines of previously set number/hash signs (#) and extraneous
characters that may exist from previous tests.
Message
The “message” field will display operational comments that the software reports to you about the
transmission. Messages include: opening com port, send data now, communication timeout, etc.
Transmission Field(s)
The number of transmission fields displayed in the “transmission” field(s) area is dictated by the number
entered in the “lines per transmission” field previously described under the “gage template” window.
These fields are used to create the template under which the measurement values can be found. When a
gage transmits one or more strings of information during testing, they will appear in these fields. Use the
arrow keys to access only the lines and columns that have characters received from the gage (including
spaces). Then, overwrite the desired measurement number (including the decimal point) in each line with
number/hash signs (#) and save the template. Thereafter during standard use, each time the gage
transmits a string of characters, the software will pick up values located under the designated positions
in the template and use these values as numeric input for data entry. A maximum of 130 characters can
be accommodated on each transmission line.
When the (+/-) sign of the measurement value in the transmitted string is right in front of the
measurement (i.e. they are contiguous), overwrite the sign with a number/hash sign (#) also. When they
are not contiguous, overwrite the sign with an “S” (for sign).
© 2014 DataLyzer International, Inc.
Setup Menu
21
If you are sure of the position of the measurement value within the transmitted string and do not wish to
do an actual “live” test, you can create the template in the following manner: Use the arrow keys to go to
the position in the transmission line where the reading characters belong and enter number/hash signs
(#) from the keyboard. This procedure is available, but doing an actual test with a gage connected is the
recommended approach. By testing, you functionally test the gage, cabling, and software settings; and
by overwriting the transmitted string directly, you are sure of proper placement of the number/hash signs
(#). If template placement is incorrect, you will only get part of the measurement value through to the
software during data entry. For example, a gage reading like 3.655 might come through as 655.
Up and Down Buttons
The “up” and “down” buttons allow you to use the mouse to scroll to the transmission lines off the
screen.
Decimal Button
Pressing the “decimal” button after you take a sample reading will cause each character in every line to
be replaced with its ASCII decimal equivalent. The decimal button is inactive until you take a sample
reading from the gage. This function allows you to see unprintable characters that may be in the
transmission.
Example:
Gage transmission:
1234567890
X: 5.42mm
After pressing the “decimal” button: [10][88][58][32][53][46][52][50][109][109]
Column
The “column” field shows the position of the cursor within the “transmission” field.
Read Gage Button
The “read gage” button is used to set the software to receive a transmitted string. It will continue trying to
receive a string from the gage for seven seconds, after which a “timeout error” will be reported in the
message field. This waiting interval can be changed through the “communications options” item in the
“options” menu in the “gage template” window.
Save Button
The “save” button stores all the template information. If no further changes are made to the main gage
template window, saving at the outer level is not necessary.
Cancel Button
The “cancel” button exits without storing any data entered since the last save.
3.4.1.2.2 Test Template
The “test template” window allows you to test the template filter(s) created in the “create template”
window. You could test the template in the “create template” window, but taking additional sample
readings in the “create template” window will overwrite the template that was already defined and you
would have to reenter the place holder signs (#, S, etc.) after each test. The “test template” window not
only confirms communications, but also displays the mode, reading, and channel identifiers, and any A/
D conversions that are taking place.
© 2014 DataLyzer International, Inc.
22
SPC Quickie98
The “test template” window looks like this:
Serial Port to Test
The “serial port to test” field is used to temporarily designate a com port for the current test. This
selection will not be stored permanently, because the com port selection for ongoing use is made from
the “com port assignments” item in the “setup” menu of the “main” window.
Timeout
The “timeout” field allows you to set how long you want the software to continue trying to receive a
reading once the test has begun. If the gage is not communicating at all, this feature limits the amount
of time spent waiting for a transmission.
Clear Button
The “clear” button clears the test reading window.
Message
The “message” field will display operational comments that the software reports to you about the
transmission. Messages include: opening com port, send data now, communication timeout, etc.
Filtered Readings
This area displays characters transmitted from the gage. To use this window, set the com port using the
pull-down list then press the “read gage” button.
The current template will be used and attempt to receive data from the gage.
Messages such as “reading complete” or “timeout error” may display in the message field.
If the software receives anything from the gage through the template, it will show up in the filtered
readings area along with some additional comments supplied by the software related to the number of
channels received, the line number and item number in the line associated with each measurement, etc.
Read Gage Button
The “read gage” button attempts to take measurements from the gage for seven seconds, after which
“timeout error” will be reported in the message field.
OK Button
The “OK” button exits to the “gage template” window.
© 2014 DataLyzer International, Inc.
Setup Menu
3.4.1.3
23
Special Menu
The items in the “special” menu allow selection of special gaging situations. Once anything other than
“standard” has been selected, the associated window will appear for additional settings in that area.
Standard
23
Single Channel A/D
23
3.4.1.3.1 Standard
Unless the gage is a single channel A/D type, the standard item should be checked.
3.4.1.3.2 Single Channel A/D
This item is used to master analog to digital conversion transmissions. Typically, A/D converters break
an analog DC voltage range into digital segments. An example would be a 12-bit A/D converter breaking
a given DC voltage range into 4096 digital segments. If the analog range is +2 volts DC to -2 volts DC,
this 4-volt range will be divided into 4096 segments or approximately 1000th of a volt per segment.
A/D interfaces typically transmit a measurement in terms of the number of segments the measurement
represents out of the total voltage range. Therefore, if the gage can measure +.010 inches to -.010
inches, this range will be cut into 4000 segments with each segment equating to .000005 of an inch.
This means that each 1000th of a DC volt increment is represented by .000005 of an inch travel in the
gage. Therefore, when the gage measures +.005 inches, it will transmit the representative number of
segments, or 3000. This value is then converted into inches with the result reported to the software as
the measurement from the gage. In this case, +.005 inches.
A/D data acquisition:
1. A/D interface receives a voltage corresponding to the magnitude of the part size being measured.
2. A/D interface converts the voltage coming from the gage into a corresponding number of digital
segments. This number of segments is then transmitted via RS-232 to the Quickie98 software.
3. The software reconverts the number of segments received into a value to be used as input. This is
done by interpolating or extrapolating from the master values set during the template creation.
Example:
1. 200 digital units received
200 x .001 + low master = measurement value taken as input in the software
This automatic interpolation is set up using the single channel A/D facility.
© 2014 DataLyzer International, Inc.
24
SPC Quickie98
When the “single channel A/D” item is checked, the following window will appear:
Serial Port to Test
The “serial port to test” area includes option buttons for specifying which RS-232 port will be used for
testing.
Timeout
The “timeout” field allows you to set how long you want the software to continue trying to receive a
reading once the test has begun. If the gage is not communicating at all, this feature limits the amount
of time spent waiting for a transmission.
Clear Button
The “clear” button clears the window.
Message
The message field allows Quickie98 software to report messages to you about the transmission being
received. Messages such as “reading complete” or “time out error” may display in this field.
Analog to Digital
The “analog to digital” area allows you to high- and low-master the gage and set the software to do an
automatic interpolation.
The procedure:
1. Enter the size/measurement of your high master in the “high master” field.
2. Enter the size/measurement of your low master in the “low master” field.
3. Position your cursor in the “high gage reading” field, then put your high master into the gage and
transmit a value to the software using the “master high” button.
The value will transmit from the gage in terms of a number of digital segments as discussed earlier
and will display in the “high gage reading” field.
4. Position your cursor in the low gage reading field, then put your low master into the gage and transmit
a value to the software using the “master low” button.
The value will transmit from the gage in terms of a number of digital segments as discussed earlier
and will display in the “low gage reading” field.
5. Save the gage file template by using the “save” button.
This sets up an automatic interpolation relationship. The software does the following calculation
automatically: High master is to low master as high gage reading is to low gage reading. This defines
© 2014 DataLyzer International, Inc.
Setup Menu
25
the “measurement size” corresponding to each digital segment received. The multiplication of the
number of segments by the measurement increment per segment is then done automatically in the
background so the actual measurement value is entered in the input window as the current
measurement value.
Save Button
The “save” button saves the template to a “.GAG” file.
Cancel Button
The “cancel” button exits without saving.
3.4.1.4
Options Menu
The “gage template” window's “options” menu contains the following items:
Communication Options
RS-232 Options
25
27
3.4.1.4.1 Communication Options
The “communication options” feature sets the number of characters that can be held by each com port
before processing.
Use Fixed Length Lines / Length
To use the “use fixed length lines” option, mark the check box and set the length of each line to be
accepted from the buffer.
© 2014 DataLyzer International, Inc.
26
SPC Quickie98
Accept Short Input Lines
The “accept short lines” option allows the program to attempt to process gage readings even when the
defined template extends beyond the end of the string received. If the template has # signs in positions 1
through 8, and the transmission received is only 4 characters long, normally this transmission would be
discarded as an error. However, with this button selected, the program will attempt to evaluate the
characters received.
Seconds Before Timeout
The “seconds before timeout” option is provided for gages that may take more than seven seconds to run
a test, where the gage is across the room, or any scenario where it is difficult to send a sample reading
in the default time.
Delay Between Lines 1/10 Second
When a gage sends multiple lines, the program assumes that they will be sent one after another
immediately. However, some gages do calculations between lines or have intermediate steps that cause
additional delays. If Quickie98 does not receive the complete transmission promptly, it discards the
entire transmission. By setting the delay higher, the program will wait the specified time between lines
before giving up. Regardless of the delay specified, when the reading is received, the program will display
it immediately. With a large value in this field, the program will appear to be locked up once a
transmission has started until either the transmission is completed or until the specified delay has
elapsed. The value entered is in tenths of seconds not seconds. When using BAUD rates below 2400 it
may be necessary to specify a small delay of up to 5/10 of a second to account for the slow transfer
rate.
Buffer Size
The “buffer size” option boxes must also be set to control the size of each com port character buffer.
Specific options are selectable as character buffer sizes. The default (1024) should be adequate for
almost all situations. Use larger buffer options only when pages of ASCII information are being
transferred through the com port with each transmission. If the buffer size is not large enough, data will
be lost.
Special Clear Buffer on Initialization
If a gage sends initialization information on startup, it will need to be cleared from the buffer, or it will be
treated as a reading transmission, and erroneous readings will be displayed on the screen. Select this
option to clear this information before starting normal gage entries.
Save Button
The “save” button stores the data and sends you back to the “gage template” window.
Cancel Button
The “cancel” button cancels any changes made and sends you back to the “gage template” window.
© 2014 DataLyzer International, Inc.
Setup Menu
27
3.4.1.4.2 RS-232 Options
The “RS-232 options” window looks like this:
There are three check boxes that control the way the software handles com ports.
RTS/CTS and DSR/DTR are hardware handshaking lines related to communication signals on particular
conductors of the RS-232 cable. They are not mutually exclusive, so we recommend enabling both of
them.
Click on the check boxes to enable either or both of these hardware handshaking lines. No check
indicates they are disabled. (The default is both being checked.)
Xon/Xoff is sometimes used by instrument manufacturers in lieu of hardware (control lines)
communication specs. Xon/Xoff is only used in less than 1% of the gage interfacing cases we have
seen. Typically, the instrument manufacturer's manual will indicate Xon/Xoff protocol. If the manual does
not mention it, do not use Xon/Xoff.
Click on the check boxes to enable Xon/Xoff type software communication control. No check indicates
Xon/Xoff is disabled. (Off is the default.)
3.4.1.5
Clear
The “gage template” window's “clear” menu item resets all gage template fields to their default settings.
This includes fields in the special and options menus.
3.4.2
Examples
The following examples demonstrate how to use the “gage template” item in the “setup” menu in the
“main” window.
Example 1-Single Line, Single Measurement
Example 2-Multi-Line
3.4.2.1
27
29
Single Line, Single Measurement
In this “single line, single measurement” example scenario, we selected “create template” from the “test”
menu of the “gage template” window, then took a transmission string from the gage or gage interface by
pressing the “read gage” button. The window looks like this:
© 2014 DataLyzer International, Inc.
28
SPC Quickie98
The character string received from the gage has several elements: Three spaces are transmitted at the
beginning of the string (shown as underscores), “X=”, then a space, a “-” (sign), another space, then the
measurement value (4.379). Each space these characters occupy in the line is referred to as a column.
(The decimal point is counted as a character.) So, the “X” measurement starts in column “9” and ends in
column “13”. The sign is located in column “7”.
To get the “X” measurement out of this string automatically each time it is transmitted, overwrite the “X”
measurement value (4.379) with number/hash signs (#) and the sign with an “S”. This way each time the
transmission is sent by the gage, the software will use this template to look in these column positions
for input values. NOTE: if the sign is always transmitted right next to the measurement value with no
spaces between, you can use a number/hash sign (#) to overwrite the sign making it part of the
measurement value itself. Once number/hash signs (#) are set where you want them (covering the
measurement value in the string), press the “save” button.
Information in the “gage template” window's “reading description” area is established through using the
“create template” item under the “test” menu. The “reading description” area reports column positions
where measurement values and signs reside. Zeros will appear in the fields of this area until the template
has been established through the testing procedure. As the number/hash signs (#) are entered in the
template, the software picks up their column positions and fills in the “column” fields automatically.
Once the example template has been saved, the “gage template” window will look like this:
© 2014 DataLyzer International, Inc.
Setup Menu
29
One more step is necessary to establish the gage. You must go to the com port assignments area and
assign the driver to a com port.
Each com port has a pull-down list that contains all the gage drivers available. Pull down the list
associated with the appropriate com port (the one connected to the gage). Pick the right gage driver
name. Then go to the “data” menu in the “main” window and try entering data using the gage.
NOTE: It is not a good idea to use the same gage driver file on two different com ports.
3.4.2.2
Multi-Line
In this “multi-line” reading example scenario, we selected “create template” from the “test” menu of the
“gage template” window, then took a transmission string from the gage or gage interface by pressing the
“read gage” button. The window looks like this:
In this example, each time the gage transmits, it sends an ASCII character string with two lines.
Elements of the transmission include: three spaces at the beginning of the string (shown as
underscores), “X=”, then a measurement value. An invisible carriage return/line feed also exists at the
end of the first line. The second line includes three spaces, “Y=”, and another measurement value. Each
space these characters occupy in their respective lines is referred to as a column. (The decimal point is
counted as a character.) So, the “X” measurement starts in column “6” and ends in column “10” of line
“1,” and the “Y” measurement starts in column “6” and ends in column “10” of line “2”.
Remember, Quickie98 will accept data for only one input, i.e. one variable at a time. This means you
can set the template to accept data from either the X characteristic or the Y characteristic but not for
both. To get the “X” measurement out of this string automatically each time it is transmitted, overwrite
the “X” measurement value (4.379) with number/hash signs (#). To get the “Y” measurement out of this
string automatically each time it is transmitted, overwrite the “Y” measurement value (3.465) with
number/hash signs (#). This way, each time the transmission is sent by the gage, the software will use
this template to look in these line and column positions for input values. Once number/hash signs (#) are
set where you want them (covering the measurement value in the string), press the “save” button.
Information in the “gage template” window's “reading description” area is established through using the
“create template” item under the “test” menu. The “reading description” area reports column positions
© 2014 DataLyzer International, Inc.
30
SPC Quickie98
where measurement values and signs reside. Zeros will appear in the fields of this area until the template
has been established through the testing procedure. As the number/hash signs (#) are entered in the
template, the software picks up their column positions and fills in the “column” fields automatically.
With the “Y” measurement overwritten with number/hash signs (#) and the example template saved, the
“gage template” window will look like this:
One more step is necessary to establish the gage. You must go to the com port assignments area and
assign the driver to a com port.
Each com port has a pull-down list that contains all the available gage drivers. Pull down the list
associated with the appropriate com port (the one connected to the gage). Pick the right gage driver
name. Then go to the “data” menu in the “main” window and try entering data using the gage.
NOTE: It is not a good idea to use the same gage driver file on two different com ports.
© 2014 DataLyzer International, Inc.
File Menu
4
31
File Menu
This section includes descriptions of the items in the “file” menu.
New Part
31
New Characteristic
Open
32
38
Copy Part
38
Rename Part
Delete Part
39
39
Delete Characteristic
4.1
39
New Part
The “new part” item allows you to create a new part name. The concept of creating parts is primarily an
organization issue. Actually, characteristics are the fundamental component of the Quickie98 system;
individual characteristics are used for data entry. Under any given part name you can create or define as
many characteristics for data collection as you wish. To create a new part, from the “main” window
select “new part” from the “file” menu.
The following window will appear:
Enter a file name (up to 24 characters) into the “file name” field.
NOTE: Characters not allowed in part names: ' |
Previously created parts are organized in alphanumeric order in the list under the “file name” field. When
you first create a part, the system will automatically cycle to the “create new characteristic” window, so
the first characteristic of the part can be created.
© 2014 DataLyzer International, Inc.
32
4.2
SPC Quickie98
New Characteristic
A characteristic is the variable being defined and tracked by a control chart. This item allows you to
create a characteristic under an already existing part.
To create a new characteristic, from the “main” window select “new characteristic” from the “file” menu.
The following window will appear:
Enter a file name into the “file name” field (up to 24 characters).
NOTE: Characters not allowed in characteristic names: ' |
Previously created characteristics are organized in alphanumeric order in the list under the “file name”
field. Press “OK”. The “characteristic description” window 32 will appear.
4.2.1
Characteristic Description Window
The “characteristic description” window is where the setup information for the characteristic is entered
and edited. The information entered in these fields defines the characteristic and will appear at the top of
reports printed for the characteristic. The “characteristic description” window looks like this:
The fields in this window and the restrictions placed on each field are described on the next few pages.
Some fields display fewer characters than they can accept. In these cases, the information in the field
will move out of view as you type to allow you to enter the full number of characters allowed.
© 2014 DataLyzer International, Inc.
File Menu
33
Plant/Department
This field is used to identify your plant, division and/or department. Entries in this field may be up to 24
characters long. No entry is necessary to create a file.
Part Number/Name
This field is used to identify the part number and name of the characteristic. The part name you entered
when you created the part appears automatically and cannot be edited.
Operation
This field identifies the process that produced data for the file. You may want to define the process in
terms of machine number, die number, and/or cavity number. The information should be specific when
trying to track down process problems. Entries in this field may be up to 24 characters long. No entry is
necessary to create a file.
Characteristic
The “characteristic” field is automatically filled in with the name you entered in the “create new
characteristic” window. Its purpose is to identify the part, characteristic or feature being monitored. You
can change this name by clicking in the field with a mouse and typing in a new characteristic name.
Entries in this field may be up to 24 characters long. Characteristic name is mandatory for file creation.
Special Field Title, Special Field Contents
On control chart and histogram reports, the “special field title” and “special field contents” will be
displayed as two additional lines in the part description. Add your own special information about the part
here, each up to 24 characters.
Comment
This field allows you to have a long comment print with the report, such as “5 measurements taken
hourly by the operator”. It has a 70-character input maximum. No entry is necessary to create a file.
Subgroup Size
Enter the number of samples to be collected in each subgroup. This number will become permanent
once you have started entering data. It must be an integer from one to ten, inclusive. A valid subgroup
size is mandatory to create a file.
NOTE: For a subgroup size of one, a moving range is calculated based on two consecutive subgroups
(the current measurement and the last one collected are subtracted to produce a range value).
Upper Spec
The “upper specification” is the upper engineering specification for the characteristic you are measuring
on the part. The only constraint on what you can enter here is that the upper spec must be greater than
the lower spec. If there is no upper spec, enter the word “none” or “infinite”; if the field is left blank, “none”
will be assumed. When “none” or “infinite” is entered, no CpR or CpI will be calculated. They become
statistically invalid, because no tolerance range can be supplied to the formulae.
The spec fields also control the precision of your measurement input. That is, if you want to allow for
measurement in thousandths, enter enough trailing zeros in the specs to allow for that precision. For
example, a spec of “0.900” will cause any data entered beyond three-digit precision to be truncated or
cut off at three digits following the decimal. (Quickie98's statistical calculations always go two digits
beyond input precision.)
© 2014 DataLyzer International, Inc.
34
SPC Quickie98
Lower Spec
The “lower specification” is the lower engineering specification for the characteristic you are measuring.
The only constraint here is that the lower spec must be less than the upper spec when you store the
part description. If there is no lower spec, then enter the word “none”; if the field is left blank, “none” will
be assumed. When “none” is entered, no CpR or CpI will be calculated because they become
statistically invalid, since no tolerance range can be supplied to the formulae.
A numerical value is required for the “upper” and/or “lower Spec” field.
Target
In the “target” field you may enter a blueprint nominal value. Often it is halfway between the specs, but it
does not have to be. This represents the perfect measurement. If you put a number in this field, target
pointers will appear on both sides of the X-bar graph. Both the control chart report and display will have
these pointers. Their purpose is to allow you to compare your process average (central green line on the
X-bar graph) with the target and determine whether the process needs adjustment. No entry is
necessary to create a file.
Units
The “units” field is where you will enter the unit of measure for the specifications (e.g. mm, inches).
Natural Limits
The “natural limits: lower spec” check box is only available if the lower spec equals zero. However, even
when this is true and the box is showing, you should check it only if the process cannot produce data
below zero. That's because checking the box causes special unilateral, non-normal statistics to be used
in the capability study/Histogram analysis. In other cases, zero is a specification limit, the box is
showing, but data can logically be entered below zero from the process. Therefore, “normal” two-sided
statistical analysis should be applied. In these cases, even though the natural limit box is available, it
should be left unchecked.
An example of a natural limit is if we were to measure roundness (concentricity) using total indicator run
out. We would spin the part around once with a stationary indicator touching it. In this case, zero
indicator plunger movement means the part is perfectly round. Since there is no way the process will
generate measurements less than zero, it has a natural limit.
If your lower spec represents a natural limit, then check the natural limit box.
Save the characteristic by pressing the “OK” button. To cancel and exit the window without saving, press
the “cancel” button.
File Menu
34
Options Menu
4.2.1.1
35
File Menu
The “characteristic description” window's “file” menu contains the following items:
Save [Ctrl]+[S]
The “save” command saves the information in the “characteristic description” window.
© 2014 DataLyzer International, Inc.
File Menu
35
Save As
The “save as” command allows you to save the characteristic with a different name, essentially
duplicating the characteristic under the same part. It is most helpful when you have similar
characteristics. You can create the first one, then “save as” (duplicate) another.
Exit
The “exit” command returns you to the “main” window. NOTE: This command does not save the
information entered or edited.
4.2.1.2
Options Menu
The “characteristic description” window's “options” menu contains the following items:
Scales
35
Control Limits
36
4.2.1.2.1 Scales
The fields in the “scales” window define the values for the vertical scales on the control chart graphs.
These values will replace the naturally calculated scale values. To alert you that the scale on a control
chart has been frozen, an asterisk will appear next to the frozen value on the control chart scale. This
feature is useful because the computer may calculate the scale values in 4- to 5-decimal precision that
may not be as clear to an operator as a 2-decimal scale, which you can define yourself.
Another reason to freeze scale values is to provide continuity throughout the history of the file, so each
time the statistics are recalculated the chart scaling doesn't change. This can avoid confusion when
comparing two control chart reports that came out of one file from different time periods. Because of
scaling differences, two similar control charts may look drastically different.
When the computer calculates the scales, it takes the data to be displayed and analyzes the variation
and determines the values, so the points span about three quarters of the graph.
The “scales” window looks like this:
© 2014 DataLyzer International, Inc.
36
SPC Quickie98
Control Chart Fields
To enter your own scaling, enter the top and bottom values for the X-bar graph scale in the fields
indicated (averages upper and lower). The package will divide the range between these values by 10 and
use that increment as the 10 steps for the scale of the X-bar graph. The range is done similarly (range
upper and lower) except there are only five steps in the scale for the range chart.
Histogram Fields
The“ histogram” section allows histogram manipulation. The number of histogram cells and cell
increments can be set. Possible combinations to define histogram presentation:
Lowest cell label
Number of cells
Either the cell increment or the highest cell label are combined to define a histogram presentation
If all of the above combinations are set, the system uses lowest cell increment and number of cells to
define the histogram's presentation.
The default histogram cell center and scaling presentation uses 25 cells, low cell is LSL-(USL-LSL)/10.
The high cell is USL+(USL-LSL)/10.
To save the information entered in this window and return to the “characteristic description” window,
press the “OK” button. To return to the “characteristic description” window without saving, press the
“cancel” button.
4.2.1.2.2 Control Limits
It is not necessary to use the “control limits” facility to get results with Quickie98. The program's default
operation calculates control limits naturally using up to the last 25 subgroups in the file. However, the
control limit system provides some very powerful tools for following the process more closely and making
the best possible decisions about process adjustments.
The “control limits” window looks like this:
© 2014 DataLyzer International, Inc.
File Menu
37
This window gives you access to the advanced features of control limit control. It allows you to stop and
start (naturally calculated) control limits and/or freeze control limits at historical levels, if desired. There
can be many sets of control limits visible in a Quickie98 control chart. As the process changes, you
may find it helpful to stop and restart the control limits to follow the change. This results in steps in the
control limits of the process. At some point after the process is in control and stable you may also wish
to freeze the limits. Frozen limits appear as dashed lines across the screen vs. solid lines for limits that
are calculated naturally. Though its overuse is discouraged, there is no logical limit to the number of
control limit records in a Quickie98 file/control chart.
The key fields in this window are labeled “range of data affected”. By setting the starting and ending
dates and times, you can define a control limit record. The record can store a set of frozen control limits,
or if no frozen limits are defined, the record will serve as a break in the naturally calculated limits. Each
time you add a new set of control limits using this system, the control limit “record #” field increments.
You can easily access any control limit record by using the arrows to increase or decrease the record
numbers. The associated dates and times display for each record number and change as the record
numbers increase or decrease. You can easily delete any control limit record by bringing it up (using the
arrows at the top of the window) and using the “delete” screen button at the bottom of the window. There
is no logical limit to the number of control limit records you can have in a file.
Record #
This field shows the number of control limit records that have already been set in the current
characteristic. Use the arrows to see the starting/ending dates and times along with identification and
comments for each control limit record.
New
This button creates a new control limit record at the end of the file by setting the starting date and time
for the record to the current date and time. When you save the record, the “record #” field will increment
by 1.
Identification
This field allows you to enter your name for audit trail purposes. You can add a new control limit record
without entering your name, but it is a good idea to be able to trace each record to a user and have a
comment for additional documentation.
Comments
This field allows you to enter information about why the change in control limits was necessary. Limit
records can be entered or changed without a comment, but for audit trail purposes, having a comment
available is a good idea.
Frozen Limits
This area is used to enter the historical control limits for processes that are in control and stable. Fields
for upper control limit X-bar (UCLX), lower control limit X-bar (LCLX), upper control limit range (UCLR) and
lower control limit range (LCLR) are available for use. At least the starting subgroup date and time must
be used to locate or validate the record. If you leave these fields blank, but fill in the range of data fields,
a control limit break will be established. Naturally-calculating control limits will be stopped and started at
that starting date and time point.
Range of Data Affected
These are the pivotal fields of this screen. They locate and activate the control limit records in the file.
They are used when you want to identify a set of subgroups in the chart where new control limits seem
appropriate. The starting subgroup date and time and ending subgroup date and time can be entered.
© 2014 DataLyzer International, Inc.
38
SPC Quickie98
If no ending date and time are used, the control limit record settings will go on perpetually. To change
that, go into the last control limit record and enter an ending date and time, or press the “new” button
which establishes a new record.
IMPORTANT: Anytime you add a control limit record, the system assumes there has been a process
change. Therefore, the statistical calculations are reset to zero (i.e. they start over from there). All
previous data are ignored and only new data entered since the last change are included in the
calculations for the control charts. If you wish to see stats for earlier data, you may print or preview a
chart using the starting and ending subgroup range parameters or print a capability study that ignores
stored limit boundaries in its calculations.
Press the “OK” button to save and activate the control limit records defined. The “cancel” button cancels
the current action and exits the “control limits” window without storing.
Delete Button
Delete control limit records by displaying the desired record using the “<” and “>” buttons and pressing
the “delete” button.
4.3
Open
You can open any previously created characteristic from any part by accessing it through this item. You
can then edit almost any header information in the “characteristic description” window. The only
exception is that the subgroup size cannot be changed after data has been entered into the file.
To open a part, select “open” from the “file” menu. The “open part” window will appear. Select the desired
part and press “OK”. The “open characteristic” window will then appear. Select the desired characteristic
and press “OK”. This will open the “characteristic definition” window.
4.4
Copy Part
The “copy part” menu item is used when you need to create another whole part identical to the one that
already exists. All characteristics are copied with the same specifications, comments, etc. The “copy
part” facility allows you to make a duplicate part with a new name, then edit only those fields that need
to be changed in the duplicate. This command does not allow you to copy a file to a different drive or
directory. No data will be copied, only the characteristic descriptions.
To copy a part, select “copy part” from the “file” menu. The “open part” window will appear. Select the
desired part and press “OK”. The “copy part” window will then appear.
© 2014 DataLyzer International, Inc.
File Menu
39
Enter the desired name for the new part file in the “new name” field and press “OK”. The new part will be
created along with all characteristics defined from the original part. No data will be copied. Press
“cancel” to exit without saving.
4.5
Rename Part
The “rename part” menu item is used to rename an already existing part name.
To rename a part, select “rename part” from the “file” menu. The “open part” window will appear. Select
the desired part and press “OK”. The “rename part” window will then appear.
Enter the desired name for the new part file in the “new name” field and press “OK”. All characteristics
and data associated with the original part name will now be associated with the new part. Press “cancel”
to exit without saving.
4.6
Delete Part
This menu item is used to delete an entire part including all of its characteristics and data.
To delete a part, select “delete part” from the “file” menu. The “open part” window will appear. Select the
desired part and press “OK”. A warning window will appear requiring you to confirm your desire to delete
this part, all of its characteristics and data. If you select “yes” the file will be removed with no possibility
of restoration. Pressing “no” causes the warning window to disappear with no other action.
4.7
Delete Characteristic
This menu item is used to delete a single characteristic including all of its data from a part.
To delete a characteristic, select the “delete characteristic” from the “file” menu. The “open part” window
will appear. Select the part containing the characteristic to be deleted and press “OK”. A “delete
characteristic” window will appear allowing you to choose which characteristic to delete. A warning
window will appear requiring you to confirm your desire to delete this characteristic and all of its data. If
you press “yes” the characteristic will be removed with no possibility of restoration. Pressing “no” causes
the warning window to disappear with no other action.
© 2014 DataLyzer International, Inc.
40
5
SPC Quickie98
Data Menu
The items in the “data” menu allow you to access the “chart view” and “data input” windows and
manipulate data. These items are described here.
Enter/Edit
5.1
Delete
45
Review
45
40
Enter/Edit
Access the “enter/edit” menu item and the “open part” window appears. Select the desired part from the
list of all parts available. If more than one characteristic has been defined under that part, then an “open
characteristic” window appears allowing you to select the desired characteristic. Once the characteristic
has been selected, the X-bar and R “chart view” window 40 appears. Data can be entered or edited in
this window.
5.1.1
Chart View Window
The “chart view” window looks like this:
The top line of the “chart view” window shows the name of the file and characteristic being displayed.
Charts
The upper chart on the screen is the average or X-bar chart. The lower chart is called the range or R
chart. To the left of each chart is a scale showing the range of the data for that chart. Below the two
charts is a list of subgroup numbers corresponding to the subgroups displayed in the chart. At certain
times during data editing, you will see a white square highlighting an individual point. This is the chart
cursor. It will move back and forth as you scroll the chart and it identifies which subgroup is currently
selected. You can also reposition it on a subgroup by clicking on the subgroup point with the mouse.
The charts display the control limits as red lines. A solid red line means that the control limit was
calculated by the computer “naturally”. A dotted red line means that the control limit was frozen into the
part description (i.e. it is typically an historically determined control limit). The process “grand” or overall
© 2014 DataLyzer International, Inc.
Data Menu
41
average is displayed as a green line. If you entered a target value in the part description, it will be
indicated by purple arrows at the left and right sides of the average chart.
The subgroup values are plotted as dots or characters. A green dot means the subgroup was in control
when it was originally entered. Subgroups retain their historical process status. New data are evaluated
at the time they are entered by comparing them to the rest of the process. The subgroups retain this
status even when they are edited, or when the process statistics are recalculated. Thus, an old
subgroup that is outside the control limits as they are now calculated could still be displayed with a
green dot, if it was in control when it was entered.
A red point means that the subgroup was outside the control limits when it was entered. A blue letter “T”
means that the subgroup was part of a trend, up or down, of seven or more subgroups when it was
entered. A yellow letter “R” means that the subgroup was part of a run of seven or more subgroups above
or below the process average at the time it was entered. Note that only the seventh subgroup and all
subsequent subgroups of the run or trend are flagged. This is because the run or trend is not considered
significant until that seventh subgroup was entered (level of statistical significance 99%). An “X” indicates
the point has been excluded from statistical calculations. An “N” indicates a note was entered for that
subgroup. So if the subgroup point is out of control, it becomes a red “N” or “X”.
Chart Information Area
To the right of the charts is the chart information area. Each of the fields in this area is described below.
Subgroup #
The “subgroup #” field is at the top of the chart information area. In this field, you can enter the subgroup
number that you want to edit or input. Any number is valid up to the number of subgroups already in the
file plus one. The subgroup number displayed is also the subgroup highlighted by the chart cursor.
The average and range charts have the ability to scroll back and forth allowing access to all of the
subgroups in the file during a data editing session. To scroll the charts, highlight the “Subgroup #” field,
or click on a point on the graphs and press the [Left arrow] or [Right arrow] keys.
Below the “subgroup #” field are the “date,” “time,” “X-bar” and “R” fields. These fields show the date,
time, average, and range values for the subgroup number displayed in the “subgroup #” field. As the chart
cursor is moved across the chart, these values will be updated to show the values for the subgroup
highlighted by the chart cursor. These fields are for display purposes only; you will have to edit the raw
data using the “data input” window to change them.
Press [Enter] to enter data in the current subgroup number displayed or enter the subgroup number you
want to edit and press [Enter]. The “data input” window 43 will appear.
Edit Button
The “edit” button will bring up the data input window with the subgroup data values for the subgroup #
identified. You may then change any or all values previously entered in that particular subgroup.
Note Button
The “note” button allows the entry of a 60-character comment to any subgroup. Identify the subgroup
requiring a note by clicking on it, so its number appears in the subgroup # field. Then press the “note”
button. A window appears allowing you to type in any note you wish.
© 2014 DataLyzer International, Inc.
42
SPC Quickie98
Delete Button
The “delete” button will cause the subgroup whose number is displayed in the “subgroup #” field to be
marked for deletion from the file. To mark a subgroup for deletion, first make sure the number of the
subgroup you want to delete is in the “subgroup #” field.
Once the subgroup has been deleted, the subgroup will be redisplayed with a “D,” and the chart
statistics will be recalculated as if this subgroup were excluded. The “delete” button acts like a toggle
switch, so to unmark the subgroup, repeat the above procedure. When you exit the “data input” window,
any subgroups that you have marked for deletion will be permanently deleted from the data file.
Exclude Button
The “exclude” button will cause the subgroup whose number is displayed in the “subgroup #” field to be
excluded from the statistical calculations. This feature may be used when a special cause of variation
has been identified, and if nonconforming, products from that time period have been quarantined.
Once the subgroup has been excluded, the subgroup will be redisplayed with an “X,” and the chart
statistics will be recalculated. The subgroup will be stored with an “excluded” status, and will appear as
excluded during all subsequent data entry and output. However, the excluded point will be included in
chart scaling calculations. The “exclude” button acts like a toggle switch; therefore, to “unexclude” the
subgroup, repeat the above procedure.
Statistical Status Bar
The status bar displays the condition of the last subgroup of data entered. The bar can change color as
data are entered indicating their statistical control condition. Text messages also appear inside the bar
to reinforce the message.
Status colors and indications:
Color
Text Message
Condition
Green
In control
Point within control limits
Red
Average OOC Above, Average OOC Below, Exceeding control limits (average or range
Range OOC
chart)
Cyan
(Blue)
Trend Up, Trend Down
Trend of seven consecutive points ascending
or descending
Yellow
Run Above Average, Run Below Average
Run of seven consecutive points above or
below the average
Black
No Status
Not enough new data are present to
determine status
Statistical Calculation Area
Statistics for the last 25 subgroups are displayed on the bottom, right portion of the window.
Recalculations of these statistics will be made after every five subgroups have been entered or upon exit
and reentry from the “main” window. Note that when you enter the fifth subgroup, it is not included in the
recalculation; its status is evaluated by its relationship to the previous 25 subgroups. See “calculations
52 ” for a description of the methods used to calculate the statistics.
File Menu
43
© 2014 DataLyzer International, Inc.
Data Menu
5.1.1.1
43
File Menu
The “chart view” window's “file” menu contains the following items:
Print
When you select “print”, the default set of data will print (i.e. the last 25 subgroups visible on the chart).
The Windows® print window will appear allowing selection of printer and paper source. When “OK” is
pressed from this window, the print job will be sent to the destination printer.
Exit
This option exits to the main Quickie98 “main” window.
5.1.1.2
Data Input Window
Data are entered or edited through the “data input” window that pops up over top of the “chart view
window”. To make this window appear, either use the “subgroup #” field to display the subgroup you wish
to edit, or the next subgroup number available for new data entry, then press the [Enter] key or double
click within the “subgroup #” field.
The data input window looks like this:
Date
The first field is “date”. Enter the date the subgroup was collected. To enter the current date in the field
automatically, press the [Enter] key or double click on the field.
If you are editing the subgroup, the date originally entered will be displayed. To change it, you must
overwrite it.
Time
The next field is “time”. Enter the time the subgroup was collected. To enter the current time in the field
automatically, press the [Enter] key or double click on this field.
© 2014 DataLyzer International, Inc.
44
SPC Quickie98
If you are editing the subgroup, the time originally entered will be displayed. To change it, you must
overwrite it.
Data Fields
There will be from one to ten numbered fields in the data input window, depending on how many samples
you indicated as the characteristic's subgroup size when it was created. For each of these fields, you
must enter the measured value for one of the samples you have collected for this subgroup. After you
have entered a value, move to the next field by pressing the [Enter] key or clicking once on the next
field.
If you make a mistake, you can go back up to the line with the incorrect value by using the [Up Arrow]
key, or clicking on the line with the error.
Gage Data Entry
Quickie98 can accept data directly from many standard RS-232 gage interfaces. To get data from a
gage, you must have assigned the correct gage interface file to the correct com port. If your gage is not
included in the list of drivers shipped with Quickie98, you can create a driver for it by using “gage
template” in the “setup” menu of the “main” window. We welcome any gage template files created by our
users. The drivers you send to us become public domain for all Quickie98 users.
When using keyboard wedge utilities to communicate with gages, make sure Quickie98 is set for “no
gage” on all com ports. You should not connect a mouse (bus type and serial type) on com ports where
Quickie98 will receive data. This will render the mouse inoperative.
If a gage has been installed on a com port, Quickie98 will begin to “listen” to that com port whenever the
data input window is displayed. To enter a reading directly into a Quickie98 characteristic, position the
blinking cursor in the data input window on one of the numbered data fields, then press the transmit
button on your gage or gage interface.
If your gage requires the computer to send a prompt before it will send the computer a reading, or if the
gage sends data continuously, you will see an extra set of buttons at the bottom of the data input
window. These buttons will be labeled “Gage n,” where “n” is the number of the com port where the gage
is connected. If you have more than one gage, there will be up to four of these buttons in the data input
window.
To get a reading from these gages, move the cursor to the numbered data field where you want the
reading to go, and then press the hot key combination [Alt]+[n], “n” being the number on the “Gage n”
button, or press the “Gage n” button once.
The reading will appear in the numbered data field. When you are using these kinds of gages, there may
be a delay of one or two seconds before the reading appears.
NOTE: If the gage fails to communicate, do not ignore the possibility that the RS-232 connecting cable
(between the computer and the gage interface) is defective. It is always best to purchase this connecting
cable from the gage manufacturer.
Avg and Range
The “avg” and “range” fields display the subgroup average and range. These values will be recalculated as
soon as you enter the last value of the subgroup. These fields are for display only and cannot be edited.
© 2014 DataLyzer International, Inc.
Data Menu
45
OK Button
The “OK” button causes the data values entered to be stored in the data file.
When you store the data, several things happen instantly: The data input window disappears, the
subgroup average and range points are plotted on the graphs, the subgroup's control status is evaluated
based on chart statistics for data previously entered, and the colored status bar on the right of the
screen is updated to show the new process status. If you are adding data, the next subgroup number
will be displayed in the “subgroup #” field of the “chart view” window. To continue entering new data,
press the [Enter] key once.
Note Button
The “note” button allows the entry of a 60-character note. A note window will appear on the screen. Type
in the note you want to associate with the subgroup. In the control chart, data points with notes are
displayed with the letter “N”. Process notes print on a separate page of the control chart reports.
Cancel Button
The “cancel” button allows you to stop creating a new subgroup or to stop looking at a subgroup you are
editing. If you have changed anything in the date, time or data fields, these changes will not be stored if
you press this button. When you cancel, the data input window will disappear and you will return to the
“chart view” window.
5.2
Delete
Use this item to delete selected data from an individual characteristic. After selecting the “delete” item
from the “data” menu in the “main” window, select a part and a characteristic. A spreadsheet appears
showing the data in for that characteristic. Use your mouse to click and drag to select the columns of
data you want to delete. When you are finished, press the “OK to delete this data” button to delete
selected subgroups.
NOTE: You can selectively delete individual subgroups from a data file in the “chart view” window using
the “delete” button in that window.
5.3
Review
This item is used to view raw data from any individual characteristic in spreadsheet form. It can also be
used to view selected sets of data in control chart and histogram form. To review a specific set of data,
select the “review” item under the “data” menu in the “main” window. Open the part and characteristic
desired.
© 2014 DataLyzer International, Inc.
46
SPC Quickie98
The following window will appear:
Use your mouse to click and drag, highlighting columns of data you wish to view. Once the columns
have been highlighted, choose “control chart” or “capability analysis” from the “options” menu to see the
selected data in chart form. NOTE: Once the selected data are in chart form, The chart can be printed
using the “print” buttons in those windows.
NOTE: Subgroup numbers resulting from a review are relative. This means that subgroups 1 to 12
returned by the review are the first through 12th groups selected by the review not the first through 12th
subgroups in the file.
You can also use the “search data” button in the “open characteristic” window that appears when
“control chart” or “histogram” is selected from the “reports” menu in the “main” window.
© 2014 DataLyzer International, Inc.
Reports Menu
6
47
Reports Menu
This menu allows you print control charts and histogram/capability studies and to change certain report
field titles. To print either kind of chart, you will first have to enter the part and characteristic names. The
system will display the selected report on the screen before printing. By default, the last 25 points are
used for calculations in the control chart and the entire file is used for calculations in the histogram.
Control Chart
48
Capability Analysis
Titles
49
50
Search
51
© 2014 DataLyzer International, Inc.
48
6.1
SPC Quickie98
Control Chart
The default settings will produce a control chart similar to the example.You can customize your charts
by setting the chart scales and/or control limits through the “options” menu in the “characteristic
description” window (see here 35 ).
You can analyze specific subsets of data by using the “search data 51 ” button, or by using “review
from the “data” menu of the “main” window for a spreadsheet drag-and-highlight approach to data
selection.
Calculations for all the statistics found in the report can be found here
52
45
.
© 2014 DataLyzer International, Inc.
Reports Menu
6.2
49
Capability Analysis
The default settings will produce a capability analysis similar to the example.
You can customize your histogram by accessing the scales area from the “options” menu in the
“characteristic description” window (see here 35 ). Large differences can be introduced in a histogram's
appearance by changing the number of cells and scaling.
You can analyze specific subsets of data by using the “search data 51 ” button or by using “review
from the “data” menu of the “main” window for a spreadsheet drag-and-highlight approach to data
selection.
Calculations for all the statistics found in the report can be found here
© 2014 DataLyzer International, Inc.
52
.
45
50
6.3
SPC Quickie98
Titles
When you select the “titles” item in the “reports” menu, the following screen will appear. It is identical to
the “system definitions” window in the “setup” menu.
The responses you enter into these fields will be used by the Quickie98 program as field titles and report
headings.
Company Name
Anything entered into this field will be printed on the top of the control chart and histogram reports.
Maximum number of characters that will be accepted in this field is 40.
Header Field 1 Prompt, Header Field 2 Prompt, Header Field 3 Prompt
The header fields allow you to enter your own titles for each of the three fields at the top of the “create
new characteristic” window. They also appear at the top of the reports. If you choose to change these
field titles, 24 characters is the maximum available space.
Report Titles
A title can be defined for each report Quickie98 generates. Report 1 is the control chart. To change the
existing “Process Control” title, erase or overwrite it with the desired title. The maximum number of
characters allowed in both titles is 40. Report 2's title can also be changed. Press the “next” button to
make the “capability analysis” title appear in the field. Erase or overwrite the title as desired. Press “OK”
to save the changes. Move between the titles with the “next” or “previous” buttons. Use the “defaults”
button to put the default title back into the currently displayed report.
Suppress Product Identification Check Box
Trial packages are set to print a sales oriented message on the bottom of the reports. After purchase
and software registration, this message can be suppressed so that it will no longer print on the bottom of
the reports.
Check the box with your mouse to suppress the Quickie98 sales message from printing on the bottom
of your reports.
© 2014 DataLyzer International, Inc.
Reports Menu
6.4
51
Search
You can use “review” from the “data” menu on the “main” window to select subsets of data different from
the defaults. Printing can be initiated from the options menu in that area. Many people find searching is
the easiest way to choose the data to include in your report because you can see the actual data in
spreadsheet form and select the desired subgroups using your mouse. However, you can also use the
“search data” screen button in the “open characteristic” window as you are preparing to print reports.
When the “open characteristic” window appears, select the desired characteristic for printing and press
“search data”. The following window will appear:
All subgroups between the specified dates and times (inclusive) will be included in the report. Enter the
starting date and time and ending date and time. This defines the starting and ending subgroups
(inclusive) for the analysis.
If you leave the combine date and time box checked, the system will combine the starting date and time
to define one point in time. If you uncheck the combine box, the times will filter separately from the
dates i.e. 8:00 - 17:00, 01/01/99 - 02/01/99 will find all subgroups entered 8AM and 5PM (first shift only)
during the month of January 1999.
NOTE: Subgroup numbers resulting from a search are relative. This means that subgroups 1 to 12
returned by the search are the first through 12th groups found by the search not the first through 12th
subgroups in the file.
© 2014 DataLyzer International, Inc.
52
7
SPC Quickie98
Calculations
Control Chart Calculations
52
Capability Study Calculations
7.1
57
Control Chart Calculations
Factor Table
53
&R
52
53
Individuals (X moving Range)
Control Chart Analysis
54
54
Capability and Performance Assessment
7.1.1
55
Factor Table
n
A2
2
3
4
5
6
7
8
9
10
1.880
1.023
0.729
0.577
0.483
0.419
0.373
0.337
0.308
d2
1.128
1.693
2.059
2.326
2.534
2.704
2.847
2.970
3.078
D3
0.076
0.136
0.184
0.223
D4
E2
3.267
2.574
2.282
2.114
2.004
1.924
1.864
1.816
1.777
Substitute table values for "n" in the
53
2.660
1.772
1.457
1.290
1.184
1.109
1.054
1.010
0.975
&R
53
formulas.
© 2014 DataLyzer International, Inc.
Calculations
7.1.2
X-bar & R
© 2014 DataLyzer International, Inc.
53
54
SPC Quickie98
7.1.3
Individuals (X moving Range)
7.1.4
Control Chart Analysis
Condition
Status
Description
Point out of control
OOC
1 point outside LCL or UCL
Process run
RUN ABOVE
Series of 7 or more points all above
RUN BELOW
Series of 7 or more points all below
TREND UP
Series of 7 or more points ascending
TREND DOWN
Series of 7 or more points descending
Process trend
Percent Points in Mid 1/3
This indicates the percent of the average points on the chart that lie in the middle third of the control
limits.
© 2014 DataLyzer International, Inc.
Calculations
7.1.5
Capability and Performance Assessment
Estimated Sigma - Sigma Hat
Sigma
55
Cpr and Ppr
56
Cpi and Ppi
56
Cpm
55
55
Cpk and Ppk
56
Cp vs. Pp Values
7.1.5.1
55
57
Estimated Sigma - Sigma Hat
Estimated Sigma - Sigma Hat or
=
7.1.5.2
/d2(subgroup size)
Sigma
Sigma or
n = total number of samples
X = individual reading
i = incremental value assumed to be 1
S = population standard deviation or
= population average
7.1.5.3
Cpk and Ppk
Cpk = Minimum of
Ppk = Minimum of
Note: If a specification limit is defined as NONE, INFINITE, or marked as a NATURAL LIMIT, that limit is
ignored and other specification limit is used as the minimum value.
© 2014 DataLyzer International, Inc.
56
7.1.5.4
SPC Quickie98
Cpr and Ppr
Cp Ratio or Cpr =
Pp Ratio or Ppi =
Note: Cp and Pp ratio are represented as a percentage. Cp and Pp ratio cannot be calculated if either
the LSL or USL are defined as NONE or INFINITE.
7.1.5.5
Cpi and Ppi
Cp index or Cpr =
Pp index or Ppi =
Note: Cp and Pp index cannot be calculated if either the LSL or USL are designated as a natural limit.
Cpi and Ppi will be equal to Cpk and Ppk if the process
perfectly centered between LSL and USL).
=(USL+LSL)/2 (i.e. the process average is
Cpi for a two-sided normal process is often thought of as the optimum Cpk value possible for the
process. it might be more accurately portrayed as the number of process distributions that fit inside the
specs.
7.1.5.6
Cpm
Cpm =
SUMT = (X1 - Target)2 + (X2 - Target)2 + ... +(Xm - Target)2
T
=
*AIAG Fundamental Statistical Process Control reference manual
Cpm expresses process capability in terms of each sample’s difference from “target” rather than
assuming the process should be centered between the specification limits (like CpK and PpK). As a
result, Cpm is a superior statistic to use for appraising process capability when measuring non-normal,
unilateral, or normal processes whose targets are not centered between the specification limits.
For more information about Cpm, see appendix D in Statistical Process Control Manual by AIAG or “A
New Measure for Process Capability: Cpm” Journal of Quality Technology, Vol. 20 No. 3, July, 1989.
© 2014 DataLyzer International, Inc.
Calculations
7.1.5.7
57
Cp vs. Pp Values
Cp values are known as “process capability” measures. They are calculated using the variation found in
subgrouped data to estimate the population’s variation. This is done using the average range divided by a
d2 factor for the subgroup size (sigma hat or ).
Because Cp values are derived from the control chart, some assumptions regarding the process have
been made. If these assumptions or conditions are not met, the Cp measures do very little to describe
the “true” process. The two basic precepts to these values are that the process is normally distributed
and that the process is stable or in statistical control. If either of these conditions is not met, the Cp
measures will fail to describe the process accurately. By visually inspecting the control chart, you
should be able to check for out-of-control conditions, and the percent of points in the middle third of the
control limits will give an indication of the distribution of the averages (approx. 68% for a normal
distribution). Be aware that a non-normal distribution can produce a normal distribution of subgroup
averages. The central limit theorem states that the larger the subgroup size the closer the distribution of
averages will approximate a normal curve. All these violations of the assumptions tend to generate Cp
values that are better than the “true” values of the process.
Pp values are known as “process performance” measures. They are calculated using the variation
described by the standard deviation of the individual readings to estimate the population variation (sigma
or ). This may seem like a more reasonable set of measures because a clearer definition of the
distribution is possible. However, unlike Cp, which uses time as a factor (because of its control chart
roots), Pp ignores time. If the process is shifting over time, the Pp will show a larger (or worse) process
variation than is actually the case.
If Pp and Cp values agree within a few percent, then it is most likely that you have a stable process and
can feel comfortable with their accuracy in describing your process. If they disagree, a closer inspection
of the cause of discrepancy should give a greater insight into the nature of your process.
7.2
Capability Study Calculations
Capability Statistics
58
Distribution Curve Formulas
© 2014 DataLyzer International, Inc.
59
58
7.2.1
SPC Quickie98
Capability Statistics
n = total number of samples
x = individual samples
i = incremental value assumed to be 1
S = population standard deviation or
= population average
SUMi=(X1+ X2+…+ Xn)
: Sum of individuals
SUMs =(X12+ X22+…+ Xn2)
: Sum of squares
SUMc =(X13+ X23+…+ Xn3)
: Sum of cubes
SUMf =(X14+ X24+…+ Xn4)
: Sum of fourth power
The average represents the location of the distribution.
Average (Avg) = SUMi / n
The sigma represents the variation in distribution.
sigma=0 ; indicates no variation or all identical parts
The number of cells and cell labeling are dictated by the scales option under each characteristic. The
default number of cells in a histogram is 25.
The lowest cell = LSL-(USL-LSL)/10. The highest cell is USL+(USL-LSL)/10.
Cell center labeling is also a user-selectable default.
The skewness represents the degree of asymmetry.
skewness < 0 ; indicates a skewed left distribution
skewness = 0 ; indicates a perfectly symmetrical distribution
skewness > 0 ; indicates a skewed right distribution
Skewness =
© 2014 DataLyzer International, Inc.
Calculations
59
The kurtosis represents the degree of peakedness of the distribution.
kurtosis < 0 ; indicates a flatter curve than the normal distribution
kurtosis = 0 ; indicates the same peakedness as a normal distribution
kurtosis > 0 ; indicates a steeper curve than the normal distribution
Kurtosis =
Many statistical texts and software refer to kurtosis of 3 as normal. We use a common convention of
subtracting 3 for ease of use.
A negative kurtosis may indicate that multiple processes are being mixed or that a process is shifting. A
large, positive kurtosis could indicate that some artificial means is truncating the variation, such as
sorting.
7.2.2
Distribution Curve Formulas
Skewed Distribution (2nd Approximation of the Normal Curve)
Conditions:
1. Number of readings, m >= 30
2. ABS (skewness) >
3. Does not violate natural limit
maximum skewness = 1
minimum skewness = -1
© 2014 DataLyzer International, Inc.
60
SPC Quickie98
Normal Distribution
Conditions:
1. Not a skewed distribution
2. Does not violate natural limit
Gamma Distribution
Conditions:
1. LSL marked as NATURAL LIMIT
2. Does not meet conditions for normal or skewed distributions
Where =Avg/ 2
r=Avg2/ 2
and (r) is the gamma function with the property that: (r+1)=r
(r)
Table for (r), 1<=r<2:
r
1.00
1.10
1.20
1.30
1.40
1.50
1.60
1.70
1.80
1.90
0
1.0000
.9514
.9182
.8975
.8873
.8862
.8935
.9086
.9314
.9618
0
.9943
.9474
.9156
.8960
.8868
.8866
.8947
.9106
.9341
.9652
0.02
.9888
.9436
.9131
.8946
.8864
.8870
.8959
.9126
.9368
.9688
0.03
.9835
.9399
.9108
.8934
.8860
.8876
.8972
.9147
.9397
.9724
0.04
.9784
.9364
.9085
.8922
.8858
.8882
.8986
.9168
.9426
.9761
0.05
.9735
.9330
.9064
.8912
.8857
.8889
.9001
.9191
.9456
.9799
0.06
.9687
.9298
.9044
.8902
.8856
.8896
.9017
.9214
.9487
.9837
0.07
.9642
.9267
.9025
.8893
.8856
.8905
.9033
.9238
.9518
.9877
0.08
.9597
.9237
.9007
.8885
.8857
.8914
.9050
.9262
.9551
.9917
0.09
.9555
.9209
.8990
.8879
.8859
.8924
.9068
.9288
.9584
.9958
© 2014 DataLyzer International, Inc.
Calculations
61
Expected Percent Out of Specifications
The values are calculated by integrating the distribution formula over the range of the distribution that
exceeds the specification limit being considered.
Z-values
Z values are number of sigma between the process average and the specification limit being considered.
Z LSL=(Avg LSL)/
Z USL=(USL Avg)/
For a normal distribution, a Z-table may be used to look up the area under the distribution curve within
the range of the table.
Negative Z values indicate the average is outside the specifications. Therefore, the percent out is greater
than 50%.
© 2014 DataLyzer International, Inc.
62
SPC Quickie98
Z-Table
x.x0
0.0
0.1
0.2
0.3
0.4
0.5
0.6
0.7
0.8
0.9
1.0
1.1
1.2
1.3
1.4
1.5
1.6
1.7
1.8
1.9
2.0
2.1
2.2
2.3
2.4
2.5
2.6
2.7
2.8
2.9
3.0
3.1
3.2
3.3
3.4
3.5
3.6
3.7
3.8
3.9
.5000
.4602
.4207
.3821
.3446
.3085
.2743
.2420
.2119
.1841
.1587
.1357
.1151
.0968
.0808
.0668
.0548
.0446
.0359
.0287
.0228
.0179
.0139
.0107
.0082
.0062
.0047
.0035
.0026
.0019
.0013
.0010
.0007
.0005
.0003
.0002
.0002
.0001
.0001
.0001
x.x1
.4960
.4562
.4168
.3783
.3409
.3050
.2709
.2389
.2090
.1814
.1562
.1335
.1131
.0951
.0793
.0655
.0537
.0436
.0352
.0281
.0222
.0174
.0136
.0104
.0080
.0060
.0045
.0034
.0025
.0018
.0013
.0009
.0007
.0005
x.x2
.4920
.4522
.4129
.3745
.3372
.3015
.2676
.2358
.2061
.1788
.1439
.1314
.1112
.0934
.0778
.0643
.0526
.0427
.0344
.0274
.0217
.0170
.0132
.0101
.0078
.0059
.0044
.0033
.0024
.0017
.0013
.0009
.0006
.0005
x.x3
.4880
.4483
.4090
.3707
.3336
.2981
.2643
.2327
.2033
.1762
.1515
.1292
.1093
.0918
.0764
.0630
.0516
.0418
.0336
.0268
.0212
.0166
.0129
.0099
.0075
.0057
.0043
.0032
.0023
.0017
.0012
.0009
.0006
.0004
x.x4
.4840
.4443
.4052
.3669
.3300
.2946
.2611
.2297
.2005
.1736
.1492
.1271
.1075
.0901
.0749
.0618
.0505
.0409
.0329
.0262
.0207
.0162
.0126
.0096
.0073
.0055
.0041
.0031
.0023
.0016
.0012
.0008
.0006
.0004
x.x5
.4801
.4404
.4013
.3632
.3264
.2912
.2578
.2266
.1977
.1711
.1469
.1251
.1056
.0885
.0735
.0606
.0495
.0401
.0322
.0256
.0202
.0158
.0122
.0094
.0071
.0054
.0040
.0030
.0022
.0016
.0011
.0008
.0006
.0004
x.x6
x.x7
.4761
.4364
.3974
.3594
.3228
.2877
.2546
.2236
.1949
.1685
.1446
.1230
.1038
.0869
.0722
.0594
.0485
.0392
.0314
.0250
.0197
.0154
.0119
.0091
.0069
.0052
.0039
.0029
.0021
.0015
.0011
.0008
.0006
.0004
.4721
.4325
.3936
.3557
.3192
.2843
.2514
.2206
.1922
.1660
.1423
.1210
.1020
.0853
.0708
.0582
.0475
.0384
.0307
.0244
.0192
.0150
.0116
.0089
.0068
.0051
.0038
.0028
.0021
.0015
.0011
.0008
.0005
.0004
x.x8
.4681
.4286
.3897
.3520
.3156
.2810
.2483
.2177
.1894
.1635
.1401
.1190
.1003
.0838
.0694
.0570
.0465
.0375
.0300
.0238
.0188
.0146
.0113
.0087
.0066
.0049
.0037
.0027
.0020
.0014
.0010
.0007
.0005
.0004
x.x9
.4641
.4247
.3859
.3483
.3121
.2776
.2451
.2148
.1867
.1611
.1379
.1170
.0985
.0823
.0681
.0559
.0455
.0367
.0294
.0233
.0183
.0143
.0110
.0084
.0064
.0048
.0036
.0026
.0019
.0014
.0010
.0007
.0005
.0004
Parts per Million
Parts per million (Ppm) indicates the total expected parts beyond LSL and USL per million produced
given the current distribution.
© 2014 DataLyzer International, Inc.
Database Backup
8
63
Database Backup
From the Quickie98 software main screen, go to "Help", "About Quickie 98". The 'About Quickie98'
window will display the database path. The database is named Q98DBase.mdb. Alternatively, you can
search for the Q98DBase.mdb file.
To make a backup, copy this Q98DBase.mdb file to your desired backup location.
© 2014 DataLyzer International, Inc.
64
9
SPC Quickie98
References
1.
Fundamental Statistical Process Control - Reference Manual
A.I.A.G., 1991.
AIAG Headquarters - Suite 200
26200 Lahser Rd.
Southfield, MI 48034
248-358-3570
2.
Statistical Quality Control Handbook
Western Electric Company, Inc., 1956.
AT&T Technologies
Commercial Sales Clerk
Select Code 700-744
P.O. Box 19901
Indianapolis, IN 46219
800-432-6600
3.
A Guide to Probability Theory and Application
Cyrus Derman, Leon J. Gleser, Ingram Olkin
Holt, Rinehart, and Winston, Inc. , 1973.
New York, NY
ISBN: 0-03-0-78885-4
4.
Juran's Quality Control Handbook, 4th edition
J. M. Juran, Frank M. Gryna
McGraw-Hill Book Company, 1988
New York, NY
ISBN: 0-07-033176-6
5.
Statistical Quality Control, 5th edition
Eugene L. Grant, Richard S. Leavenworth
McGraw-Hill Book Company, 1980
New York, NY
ISBN: 0-07-024114-7
© 2014 DataLyzer International, Inc.
ASCII Table
10
ASCII Table
Dec
0
1
2
3
4
5
6
7
8
9
10
11
12
13
14
15
16
17
18
19
20
21
22
23
24
25
26
27
28
29
30
31
32
33
34
35
36
37
38
39
40
41
42
43
44
45
46
47
48
49
50
51
Hex
0
1
2
3
4
5
6
7
8
9
0A
0B
0C
0D
0E
0F
10
11
12
13
14
15
16
17
18
19
1A
1B
1C
1D
1E
1F
20
21
22
23
24
25
26
27
28
29
2A
2B
2C
2D
2E
2F
30
31
32
33
© 2014 DataLyzer International, Inc.
Char
€
€
€
€
€
€
€
€
€
€
€
€
€
€
€
€
€
€
€
€
€
€
€
€
€
€
€
€
€
€
€
€
(space)
!
#
$
%
&
(
)
*
+
,
.
/
0
1
2
3
Code
NUL
SOH
STX
ETX
EOT
ENQ
ACK
BEL
BS
HT
LF
VT
FF
CR
SO
SI
SLE
CS1
DC2
DC3
DC4
NAK
SYN
ETB
CAN
EM
SIB
ESC
FS
GS
RS
US
Dec
128
129
130*
131*
132*
133*
134*
135*
136*
137*
138*
139*
140*
141
142
143
144
145
146
147*
148*
149*
150*
151*
152*
153*
154*
155*
156*
157
158
159*
160
161
162
163
164
165
166
167
168
169
170
171
172
173
174
175
176
177
178
179
Hex
80
81
82
83
84
85
86
87
88
89
8A
8B
8C
8D
8E
8F
90
91
92
93
94
95
96
97
98
99
9A
9B
9C
9D
9E
9F
A0
A1
A2
A3
A4
A5
A6
A7
A8
A9
AA
AB
AC
AD
AE
AF
B0
B1
B2
B3
Char
€
¡
¢
£
¤
¥
¦
§
¨
©
ª
«
¬
®
¯
°
±
²
³
Code
65
66
SPC Quickie98
52
53
54
55
56
57
58
59
60
61
62
63
64
65
66
67
68
69
70
71
72
73
74
75
76
77
78
79
80
81
82
83
84
85
86
87
88
89
90
91
92
93
94
95
96
97
98
99
100
101
102
103
104
105
106
107
34
35
36
37
38
39
3A
3B
3C
3D
3E
3F
40
41
42
43
44
45
46
47
48
49
4A
4B
4C
4D
4E
4F
50
51
52
53
54
55
56
57
58
59
5A
5B
5C
5D
5E
5F
60
61
62
63
64
65
66
67
68
69
6A
6B
4
5
6
7
8
9
:
;
<
=
>
?
@
A
B
C
D
E
F
G
H
I
J
K
L
M
N
O
P
Q
R
S
T
U
V
W
X
Y
Z
[
\
]
^
_
a
b
c
d
e
f
g
h
i
j
k
180
181
182
183
184
185
186
187
188
189
190
191
192
193
194
195
196
197
198
199
200
201
202
203
204
205
206
207
208
209
210
211
212
213
214
215
216
217
218
219
220
221
222
223
224
225
226
227
228
229
230
231
232
233
234
235
B4
B5
B6
B7
B8
B9
BA
BB
BC
BD
BE
BF
C0
C1
C2
C3
C4
C5
C6
C7
C8
C9
CA
CB
CC
CD
CE
CF
D0
D1
D2
D3
D4
D5
D6
D7
D8
D9
DA
DB
DC
DD
DE
DF
E0
E1
E2
E3
E4
E5
E6
E7
E8
E9
EA
EB
´
µ
¶
·
¸
¹
º
»
¼
½
¾
¿
À
Á
Â
Ã
Ä
Å
Æ
Ç
È
É
Ê
Ë
Ì
Í
Î
Ï
Ð
Ñ
Ò
Ó
Ô
Õ
Ö
×
Ø
Ù
Ú
Û
Ü
Ý
Þ
ß
à
á
â
ã
ä
å
æ
ç
è
é
ê
ë
© 2014 DataLyzer International, Inc.
ASCII Table
108
109
110
111
112
113
114
115
116
117
118
119
120
121
122
123
124
125
126
127
6C
6D
6E
6F
70
72
72
73
74
75
76
77
78
79
7A
7B
7C
7D
7E
7F
l
m
n
o
p
q
r
s
t
u
v
w
x
y
z
{
|
}
~
* Windows True Type fonts only
© 2014 DataLyzer International, Inc.
236
237
238
239
240
241
242
243
244
245
246
247
248
249
250
251
252
253
254
255
EC
ED
EE
EF
F0
F1
F2
F3
F4
F5
F6
F7
F8
F9
FA
FB
FC
FD
FE
FF
ì
í
î
ï
ð
ñ
ò
ó
ô
õ
ö
÷
ø
ù
ú
û
ü
ý
þ
ÿ
67
68
SPC Quickie98
control limits
36
customize
14, 50
example
48
print
12, 43, 45, 47
scales
35
select data
45
select data (search)
51
view
12, 45, 47
control limits
36, 40
calculations
53, 54
copy part
38
Cp vs. Pp
57
Cpi
56
Cpk
55
Cpm
56
Cpr
56
create
characteristic
8, 32
part
7, 31
custom header fields
14, 50
custom part information
8, 32
Index
-AA/D
23
ASCII table
65
average
40, 43, 53, 58
-Bbackup
63
books
64
-Ccalculations
40, 52
capability analysis
45, 47
calculations
57
customize
14, 50
example
49
print
12, 45, 47
scales
35
select data
45
select data (search)
51
statistics
58
view
12, 45, 47
capability and performance assessment
characteristic
6, 8
control limits
36
delete
39
description window
8, 32
new
8, 32
open/edit
38
scales
35
chart
control limits
36
scales
35
chart view window
10, 40
com port
17, 20, 21
assignment
15
comment
8, 32
communication options
25
company name-add to report
14, 50
control chart
45, 47
calculations
52
-D-
55
data
40
delete
40, 45
edit
40
enter
10, 40
enter from gage
43
exclude
40
review
45
search
51
data input window
10, 43
data menu
40
database
6, 63
date
10, 43
delete
characteristic
39
data
40, 45
part
39
department
8, 32
display
45, 47
capability analysis
12, 45, 47
control chart
12, 40, 45, 47
distribution curve
59
© 2014 DataLyzer International, Inc.
Index
-E-
-K-
edit
kurtosis
characteristic
38
data
40
enter data
10, 40
gage
10, 40
estimated sigma
55
exclude data/subgroup
-Llanguage
40
-Ffactor table
52
fields, custom
14, 50
file menu
31
filter data
51
flag (subgroup)
40
frozen control limits
36, 40
frozen scale
35
15
-Nnatural limit
8, 32, 55
new
characteristic
32
part
31
new characteristic
8
new part
7
nominal
8, 32
note
40, 43
-O-
-Ggage
assign to com port
15
data entry
43
single channel A/D
23
standard
23
gage template
15, 17
clear
27
communication options
25
create
17, 20
edit
17
examples
27
RS-232 options
27
special menu
23
test
21
glossary
6
-Iindividuals calculations
input data
10, 40
input precision
8, 32
introduction
5
58
54
© 2014 DataLyzer International, Inc.
open characteristic
38
operation
6, 8, 32
out of control
40, 54
-Ppart
6
copy
38
delete
39
new
7, 31
rename
39
parts per million
59
percent points in mid 1/3
54
plant
8, 32
Pp vs. Cp
57
Ppi
56
Ppk
55
Ppm
59
Ppr
56
print
45, 47
capability analysis
12, 47
control chart
12, 43, 47
data
45
gage template
19
69
70
SPC Quickie98
print
45, 47
report
45
purpose of SPC
size
8, 32
suppress product ID
14, 50
system definitions
14
5
-QQuickie98-remove from reports
-T14, 50
-Rrange
40, 43, 53
references
64
remove Quickie98 from reports
rename part
39
report
14, 50
capability analysis example
control chart example
48
customize
14, 50
header
14, 50
print
12, 43, 47
titles
14, 50
reports menu
47
review data
45
RS-232 options
27
run
40, 54
-Ssample
6, 10, 43
sample precision
8, 32
scales
35
search
51
data
51
setup menu
14
sigma
55, 58
sigma hat
55
skewness
58
SPC, purpose of 5
special fields
8, 32
specifications
6, 8, 32
spreadsheet
45
standard
23
statistics
40, 52, 58
status bar
40
subgroup
6, 10, 40, 43
exclude
40
flag/status
40
14, 50
49
target
8, 32
time
10, 43
titles (report)
14, 50
edit
14, 50
trend
40, 54
tutorial
7
-Uunits
8, 32
-Vvocabulary
6
-XX moving Range calculations
X-bar & R calculations
53
54
-ZZ values
59
© 2014 DataLyzer International, Inc.