1
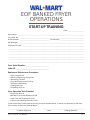
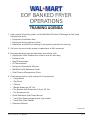
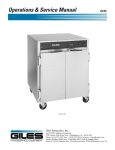
EOF BANKED FRYER
OPERATIONS
Quick Reference Guide
2750 Gunter Park Drive West • Montgomery, Alabama 36109 USA • Phone (334) 272-1457 • Fax (334) 272-3561
Service Hotline 1-800-554-4537 (USA and Canada only) • www.gilesent.com
Rel. Date: 8/02 (Rev. Date 06/01/04)
Part #60773
NOTE:
This instruction is intended as a quick reference only.
To ensure safe operation,cleaning, maintenance, and to
reduce the chance of harm to either personnel or
the equipment, always refer to the operation manual
supplied with this unit.
EOF BANKED FRYER
OPERATIONS
CONTENTS
EOF BANKED FRYER START-UP TRAINING . . . . . . . . . . . . . . . . . . . . . . . . . . . . . . . . . 3
EOF BANKED FRYER TRAINING AGENDA . . . . . . . . . . . . . . . . . . . . . . . . . . . . . . . . . . 5
WAL•MART ORDER FORM . . . . . . . . . . . . . . . . . . . . . . . . . . . . . . . . . . . . . . . . . . . . . 7
WAL•MART COOKING PROCEDURES . . . . . . . . . . . . . . . . . . . . . . . . . . . . . . . . . . . . . 9
WAL•MART FRYER FILTERING PROCEDURES . . . . . . . . . . . . . . . . . . . . . . . . . . . . . 15
WAL•MART DAILY FILTER PAN CLEANING . . . . . . . . . . . . . . . . . . . . . . . . . . . . . . . . 19
WAL•MART WEEKLY FILTER PAN CLEANING . . . . . . . . . . . . . . . . . . . . . . . . . . . . . . 21
WAL•MART BOIL OUT PROCEDURES . . . . . . . . . . . . . . . . . . . . . . . . . . . . . . . . . . . . 23
Rel. Date: 8/02(Rev. Date 06/01/04)
Page 1
Page 2
Rel. Date: 8/02 (Rev. Date 06/01/04)
EOF BANKED FRYER
OPERATIONS
START-UP TRAINING
Date: ______________________
Store Name: __________________________________________________________________________________________
City, State, Zip:
_______________________________________________________________________________________
Phone Number: _______________________________________ Fax Number: _________________________________
Deli Manager: _________________________________________________________________________________________
Employees Trained:
___________________________________________________________________________________
_______________________________________________________________________________________________________
_______________________________________________________________________________________________________
_______________________________________________________________________________________________________
_______________________________________________________________________________________________________
_______________________________________________________________________________________________________
_______________________________________________________________________________________________________
Fryer Serial Number: _______________________________
Order ID: _____________________________________
Equipment Maintenance Procedures
•
•
•
•
•
•
•
Fryer Control Panel
Boil Out/ Shortening Change Out
Shortening Filtration
Fryer Maintenance and Cleaning
Stirring the Shortening
Loading the Fryer
Unloading the Fryer
Fryer Operation Tools Provided
• Equipment Manual
• Wal-Mart Fryer Quick Reference Guide
• Cook Time and Temperature Chart
• Filtering and Cleaning Procedure Chart
I have received and understand the training and tools checked above, as well as the operation of the Giles
Fryer on each of the areas checked above.
____________________________________________
Customer Signature
Rel. Date: 8/02 (Rev. Date 06/01/04)
________________
Date
_____________________________________
Training Specialist
Page 3
Page 4
Rel. Date: 8/02 (Rev. Date 06/01/04)
EOF BANKED FRYER
OPERATIONS
TRAINING AGENDA
1. Upon receipt of training order, contact Wal-Mart Division 24 Manager or Deli Lead
Associate to verify:
• Equipment installation date
• Equipment training date and time
• Determine availability of cooking oil and poultry products for training
2. Arrive on time and make proper introductions to Deli personnel.
3. Be prepared for equipment operation instructions with:
• Appropriate Giles Foodservice uniform (one for each day)
• Hairnet or Hat
• Food Thermometer
• Oil Thermometer
• Equipment Operations Manuals
• Wal-Mart Quick Reference Guide
• Cook Time and Temperature Chart
4. Check equipment to verify receipt of all accessories:
• 1 Large Brush
• 1 Pot Brush
• 1 L-Brush
• 1 Basket Scoop per 24” Vat
• 2 Fry Baskets with Automatic Lift per 20” Vat
• 1 Fry Screen per Vat
• Quick Reference Cook Times Manual
• 1 case Filter Paper appropriate to fryer model
• 1 case Giles Filter Powder
• Operation Manual
(Continued)
Rel. Date: 8/02 (Rev. Date 06/01/04)
Page 5
5. Identify associates to be trained on fryer operations.
6. Explain fryer components and their functions. (See Quick Reference Guide.)
7. Explain fryer operation procedure:
• Demonstrate how to perform a boil out.
• Fill fryer with oil and explain pre-heating instructions.
• Demonstrate cooking procedures.
• Demonstrate fryer filtering, cleaning, and maintenance procedures.
8.
Place the Wal-Mart Quick Reference Guide on a wall-mounted hook near the fryer.
9.
Place the Wal-Mart Cook Time and Temperature Chart near the fryer using double-sided
mounting strips.
10. Place the Filtering and Cleaning Procedure Chart near the fryer using double-sided
mounting strips.
11. Monitor Deli associates operating the equipment and be available to assist and answer
questions as necessary.
12. Provide the Division 24 Manager or Deli Lead Associate with Giles Customer Service
and Technical Service telephone numbers as well as part numbers to re-order Filter
Powder and Filter Paper. (Note: Each store will issue a P.O. Number to the customer
service department at Giles Enterprises, Inc., for these items.)
•
•
•
•
Customer Service (800) 288-1555
Technical Service (800) 554-4537
Filter Powder
Filter Paper Part
A completed Warranty Card and Start-Up Form must be signed by the
Division 24 Manager or Deli Lead Associate. Return to the Accounting
Department at Giles Enterprises, Inc. within 30 days for processing.
A form received past 30 days will not be processed.
Page 6
Rel. Date: 8/02 (Rev. Date 06/01/04)
ORDER FORM
DATE: ____________________________________________
OID #:____________________________________________
CUSTOMER# _____________________________________
PO#: _____________________________________________
NAME ____________________________________________
SHIP TO WAL MART # _____________________________
ADDRESS ________________________________________
ADDRESS ________________________________________
CITY _____________________________________________
CITY _____________________________________________
STATE ______________________
STATE _____________________
ZIP ________________
ZIP ________________
PHONE# __________________________________________
PHONE# _________________________________________
FAX# _____________________________________________
FAX# ____________________________________________
CONTACT PERSON________________________________
SHIP VIA ___________________ REQ ASAP __________
QTY
PART#
MODEL #/DESCRIPTION
PRICE
SHIP DATE:
**MARK BOXES ATTN: DELI DEPT. OR RADIO GRILL **
FILTER PAPER PART# / DIMENSION / COST:
60328
19 3/8 X 32 3/8”
$43.88
60709
15 3/8 X 32 3/8”
$33.15
65490
16 1/4 X 24 1/4”
$31.30
65491
17 1/8 X 24 1/8”
$37.45
60471
9 1/8 X 25 1/4”
$25.48 (For EOF-14 Radio Grill)
FINAL TOTAL $
Rel. Date: 8/02 (Rev. Date 06/01/04)
AMOUNT
Page 8
Rel. Date: 8/02 (Rev. Date 06/01/04)
WAL• MART Cooking Procedures
STEP 1
STEP 2
Check the OIL LEVEL. Never cook with the oil level
below ADD or above MAX.
STEP 3
Place the POWER SWITCH in the ON position.
STEP 4
The GREEN INDICATOR LIGHT is ON.
Place the HEAT SWITCH in the HEAT position.
STEP 5
STEP 6
Set the cook temperature by pressing the SET
TEMP button and adjusting the up or down arrows
to 335º F (168º C).
Set Temp
Button
Rel. Date: 8/02(Rev. Date 06/01/04)
The ORANGE INDICATOR LIGHT is ON and the oil
will heat to the selected temperature.
Temp adjust
up or down
Page 9
WAL• MART Cooking Procedures
STEP 7
STEP 8
Once the oil has reached its first preheat, the
ORANGE INDICATOR LIGHT will go off and an alarm
will sound. The scroll display will read "Stir Oil and
Push Reset". Using the supplied Stir Paddle, thoroughly stir the cooking oil, then press the ALARM
RESET button. When the heat light goes off the second time, the oil is properly heated to the set point.
CAUTION HOT: USE OVEN MITTS.
• When the ORANGE INDICATOR LIGHT
goes OUT for the second time, the oil
will be at the proper temperature.
• NEVER place product in the fryer
until the oil is properly heated and
the ORANGE INDICATOR LIGHT is OFF.
• NOTE: MENU 1 for LEFT BASKET TIMER and
RIGHT BASKET TIMER should be pre-programmed
for correct cook times. Refer to the Operations &
Service Manual for the programming procedures.
STEP 9
STEP 10
Place the THIGHS, BREASTS and LEGS directly into
the FRY VAT. Use caution not to splash hot oil.
MENU 1 and LEFT BASKET TIMER buttons should
be pre-set for 4 minutes. MENU 1 and RIGHT BASKET TIMER buttons should be pre-set for 17 minutes.
Set the LEFT BASKET TIMER by pressing this button once and MENU 1 button twice. Then, immediately set the RIGHT BASKET TIMER by pressing this
button once and MENU 1 button twice.
NOTE: When the stir alarms sound off, press the
ALARM RESET button to silence.
Left Timer
Menu 1
Alarm Reset
Menu 1
Right Timer
STEP 12
STEP 11
When the LEFT TIMER ALARM sounds, press the
ALARM RESET button once to silence.
IMMEDIATELY Add the WINGS to the FRY VAT and
continue cooking all the chicken pieces.
Alarm Reset
Page 10
Rel. Date: 8/02(Rev. Date 06/01/04)
WAL• MART Cooking Procedures
STEP 13
Approximately halfway through the cook cycle,
using the STIR PADDLE, stir the chicken pieces to
ensure even cooking of all pieces.
STEP 14
When the RIGHT BASKET TIMER alarm sounds,
press the ALARM RESET button to silence.
Alarm Reset
STEP 15
Using the FRYER SHOVEL, remove the chicken
pieces from the FRY VAT and place on the LANDING
TABLE.
STEP 16
Check the INTERNAL TEMPERATURE of the
Thigh and Breast. Internal temperature must
reach 180º F (82ºC).
STEP 17
• If the product does not meet the temperature
requirement, return the product to the FRY VAT
and continue cooking in 1 MINUTE increments
until the standard is met.
• Record cooked product temperature in the TEMPERATURE LOG.
• Immediately place cooked poduct in the DISPLAY
WARMER and package according to Wal•Mart procedures.
• Follow Wal•Mart and local regulations for holding
temperatures and times.
Rel. Date: 8/02(Rev. Date 06/01/04)
Page 11
WAL• MART Cooking Procedures
STEP 18
STEP 19
BASKETS are
used to cook
Chicken
Tenders,
Potatoes,
Livers,
Gizzards and
Popcorn
Chicken.
Place the
FRY BASKET
on the
BASKET LIFT.
STEP 20
Place the BASKET LIFT SWITCH in the ON position.
STEP 22
COOK TIMES
Place the frozen product in the FRY BASKET.
STEP 21
Set the appropriate timer for the proper cooking
time of the product you are cooking. Refer to the
Operations & Service Manual for the procedure. The
basket will automatically lower into the oil.
STEP 23
At the end of the cook cycle an alarm will sound.
Press the ALARM RESET button.
Chicken Tenders . . . . . . 5 to 8 Minutes
Popcorn Chicken . . . . 2 to 2.5 Minutes
Alarm Reset
Potatoes . . . . . . . . . . . . . . . . 6 Minutes
Chicken Livers . . . . . . . . 5 to 6 Minutes
Chicken Gizzards . . . . . . 5 to 6 Minutes
Page 12
Rel. Date: 8/02(Rev. Date 06/01/04)
WAL• MART Cooking Procedures
STEP 24
The BASKET will automatically lift from the oil.
STEP 26
Check the INTERNAL TEMPERATURE of the product.
Internal temperature must reach 180º F (82ºC).
STEP 25
Remove the BASKET from the BASKET LIFT and
empty the product onto the LANDING TABLE.
STEP 27
• If the product does not meet the temperature
requirement, return the product to the FRY VAT
and continue cooking in 1 MINUTE increments
until the standard is met.
• Record cooked product temperature in the
TEMPERATURE LOG.
• Immediately place cooked poduct in the DISPLAY
WARMER and package according to Wal•Mart
procedures.
• Follow Wal•Mart and local regulations for holding
temperatures and times.
Rel. Date: 8/02(Rev. Date 06/01/04)
Page 13
Page 14
Rel. Date: 8/02(Rev. Date 06/01/04)
WAL• MART Fryer Filtering Procedures
STEP 1
(FILTER AFTER EVERY 4TH LOAD)
STEP 2
Place the POWER SWITCH in
the OFF position.
Place the HEAT SWITCH to the
OFF Position.
Open the cabinet door and disconnect the QUICK
DISCONNECT COUPLER.
WARNING: Failure to ensure
the HEAT SWITCH is in the OFF
position during this procedure
may result in equipment damage and/or personal injury.
CAUTION HOT:
USE OVEN MITTS
STEP 3
STEP 4
Slide the
FILTER PAN
forward.
Add
1 PACKAGE
of FILTER
POWDER
to the
FILTER PAN.
Remove the
CRUMB
CATCHER.
Replace the
CRUMB
CATCHER.
Check to
ensure
the FILTER
PAPER and
HOLD-DOWN
BRACKET
are properly
installed.
STEP 5
Slide the Filter Pan back into position under the unit
and ensure that the FILTER PAN COVER is in place.
Rel. Date: 8/02(Rev. Date 06/01/04)
STEP 6
Connect the QUICK DISCONNECT COUPLER.
Page 15
WAL• MART Fryer Filtering Procedures
STEP 7
On the fryer to be filtered, unlock and slowly pull
the FRYER DRAIN lever to the OPEN position to
allow the oil to completely drain into the FILTER
PAN. Turn the PUMP OIL RETURN lever to the VAT
FILL position.
STEP 9
STEP 8
Remove the CRUMB SCREEN. Use the L-BRUSH to
break away any clogs.
STEP 10
On the FFLT, place the PUMP/DISCHARGE lever in
the TO FRYERS position.
STEP 11
Leave the DRAIN VALVE OPEN, allow the oil to
circulate 3 MINUTES from the FILTER PAN to the
FRY VAT to rinse out the remaining crumbs.
Page 16
(FILTER AFTER EVERY 4TH LOAD)
After all the oil
has drained from
the FRY VAT, place
the PUMP switch
to the ON position.
STEP 12
Use the POT BRUSH to clean the elements and the
pan sides.
Rel. Date: 8/02(Rev. Date 06/01/04)
WAL• MART Fryer Filtering Procedures
STEP 13
(FILTER AFTER EVERY 4TH LOAD)
STEP 14
Push in and lock the DRAIN VALVE handle. The Fry
Vat will begin to refill.
STEP 15
Refill is complete when bubbles are seen in the oil.
STEP16
Place the PUMP
switch in the OFF
position. Turn the
PUMP OIL RETURN
lever to the CLOSE
position.
STEP 17
Replace the CRUMB CATCHER SCREEN.
Check the oil level and add additional oil if necessary.
STEP 18
To continue cooking:
Place the Power Switch in
the ON position. Place the
HEAT switch to the HEAT
position.
To discontinue cooking:
Ensure the Power Switch
is in the OFF position and
the HEAT switch is the
OFF position.
Rel. Date: 8/02(Rev. Date 06/01/04)
Page 17
WAL• MART Fryer Filtering Procedures
STEP 19
(FILTER AFTER EVERY 4TH LOAD)
STEP 20
Open the cabinet door and using OVEN MITTS DISCONNECT the QUICK DISCONNECT COUPLER.
Slide the
FILTER PAN
forward.
Using the
CRUMB SHOVEL,
scoop the crumbs
from the
CRUMB CATCHER.
Remove the CRUMB
CATCHER.
STEP 21
Using the CRUMB SHOVEL, carefully remove the
sediment from the FILTER PAPER. DO NOT TEAR
the FILTER PAPER.
STEP 22
Replace the
CRUMB CATCHER.
Slide the
FILTER PAN into
position under
the unit.
STEP 23
RECONNECT the QUICK DISCONNECT COUPLER.
Page 18
Rel. Date: 8/02(Rev. Date 06/01/04)
WAL• MART Daily Filter Pan Cleaning
STEP 1
STEP 2
• These cleaning procedures are to be performed
DAILY.
Remove the FILTER PAN COVER by sliding it forward.
Wash, dry and replace after filter pan has been
cleaned.
• Follow proper filtering procedures.
• CAUTION: HOT
WEAR OVEN MITTS
FOR THIS PROCEDURE.
STEP 4
STEP 3
Release the
4 HOLD-DOWN
BRACKETS.
Remove and
wash the
CRUMB CATCHER
using a non-soap
degreaser
cleaning solution.
Allow the CRUMB
CATCHER to
COMPLETELY DRY
before placing
it back in the
FILTER PAN.
STEP 6
STEP 5
Remove the HOLDDOWN BRACKET
from the FILTER
PAN.
Carefully remove
the top piece of
FILTER PAPER
and DISCARD.
Wash using a
non-soap degreaser
cleaning solution,
wash and
COMPLETELY DRY
before placing the
HOLD-DOWN
BRACKET in the
FILTER PAN.
Rel. Date: 8/02(Rev. Date 06/01/04)
Page 19
WAL• MART Daily Filter Pan Cleaning
STEP 8
STEP 7
Replace the
HOLD-DOWN
BRACKET and
SECURELY LOCK
all 4 handles.
Lift the remaining
piece of FILTER
PAPER and place
a new piece of
FILTER PAPER
BELOW the
existing piece.
STEP 10
STEP 9
Replace the
CRUMB
CATCHER on
the FILTER PAN.
Page 20
Slide the FILTER PAN back into position and
RECONNECT the QUICK COUPLER HOSE.
Rel. Date: 8/02(Rev. Date 06/01/04)
WAL• MART Weekly Filter Pan Cleaning
STEP 1
STEP 2
Carefully fold,
remove and
discard
BOTH PIECES
of FILTER PAPER.
• Follow DAILY FILTER PAN CLEANING
STEPS 2 THROUGH 5.
• CAUTION: HOT
USE OVEN MITTS
STEP 3
STEP 4
Remove the
FILTER PAN and
COVER.
Allow the
pieces to DRY
OVERNIGHT.
Wash and rinse
the FILTER PAN,
COVER, SCREEN
and HOLD-DOWN
FRAME with
a non-soap
degreaser
cleaning solution.
BE CERTAIN
NO WATER is
trapped in the
FILTER PAN tubing
by turning the pan
upside down.
STEP 5
At startup the
next day, place
the SCREEN in the
bottom of the
FILTER PAN.
STEP 6
Place
2 NEW PIECES
of FILTER PAPER
over the SCREEN.
Rel. Date: 8/02(Rev. Date 06/01/04)
(Continued)
Replace the
HOLD-DOWN
BRACKET and
SECURELY LOCK
all 4 handles.
Page 21
WAL• MART Weekly Filter Pan Cleaning
STEP 7
STEP 8
Replace the
CRUMB CATCHER
on the
FILTER PAN.
Page 22
Place the FILTER PAN and COVER in the proper
position and connect the FILTER PAN using the
QUICK CONNECT COUPLER.
Rel. Date: 8/02(Rev. Date 06/01/04)
WAL• MART Boil Out Procedures
STEP 1
STEP 2
Place the SELECTOR SWITCH
in the OFF position.
• Follow these BOIL-OUT PROCEDURES
EVERY TIME the OIL in the FRYER
is changed.
Place the
POWER SWITCH
in the OFF position.
• The OIL must be heated to AT LEAST
200ºF (93ºC) before starting the procedure.
• CAUTION: HOT
USE THERMAL OVEN MITTS
FOR THIS PROCEDURE
STEP 3
Open the cabinet door and ensure the FILTER PAN is
properly installed.
STEP 5
Place the DIVERTER SWITCH to the TO FRYER
position.
Rel. Date: 8/02(Rev. Date 06/01/04)
STEP 4
Unlock and pull the DRAIN VALVE HANDLE to the
OPEN position and allow the oil to drain from the
FRY VAT to the FILTER PAN. Place the PUMP OIL
RETURN HANDLE in the VAT FILL position.
STEP 6
Place the PUMP
SWITCH in the ON position.
Page 23
WAL• MART Boil Out Procedures
STEP 7
STEP 8
Allow the oil to circulate for 3 MINUTES from the
FILTER PAN to the FRY VAT to wash out the remaining crumbs. Brush COILS with the POT BRUSH.
Place the PUMP SWITCH
in the OFF position.
Allow the oil in the FRY
VAT to drain into the FILTER PAN.
STEP 9
Connect the DISCHARGE HOSE to the QUICK
DISCONNECT COUPLER beside the DIVERTER VALVE.
STEP 11
Position the DISCHARGE HOSE into the GILES OIL
CADDY or appropriate hot oil disposal unit.
Page 24
STEP 10
Turn the DIVERTER VALVE to the HOSE position.
STEP 12
Grasp the DISCHARGE HOSE on the wooden handle,
wearing an Oven Mitt. Place the PUMP SWITCH in
the ON position.
Rel. Date: 8/02(Rev. Date 06/01/04)
WAL• MART Boil Out Procedures
STEP 13
STEP 14
When all the waste oil has been removed from the
FILTER PAN, place the SELECTOR SWITCH in the
OFF position.
STEP 15
STEP 16
Turn the DIVERTER VALVE handle to the
TO FRYER position.
STEP 17
Push in and lock the DRAIN VALVE handle. Turn the
PUMP OIL RETURN lever to the CLOSE position.
STEP 18
Disconnect the
FILTER PAN
and remove
for cleaning.
Rel. Date: 8/02(Rev. Date 06/01/04)
Disconnect the
DRAIN HOSE and
drain into
WASTE OIL
CONTAINER.
Fill the FRY VAT with water to the OIL LEVEL line.
Page 25
WAL• MART Boil Out Procedures
STEP 19
Add 1 to 1-1/4 cups of GILES BOIL OUT to the water.
STEP 21
Place the HEAT SWITCH in the HEAT position.
STEP 20
Set the cook temperature by pressing the SET
TEMP button and adjusting the up or down arrows
to 200º F (93º C). CAUTION: DO NOT SET THE TEMPERATURE HIGHER.
Temp adjust
Set Temp
up or down
Button
STEP 22
Press and hold LEFT TIMER button and the Menu 2
button for 5 seconds. Adjust up or down to 30 minutes. Press LEFT TIMER button to set. Press LEFT
TIMER button, then Menu 2 button 2 times to start.
Left Timer
STEP 23
Use the POT BRUSHES during this time to remove
build-up from the FRY VAT and COILS.
Menu 2
Adjust time
up or down
STEP 24
When the LEFT TIMER ALARM sounds, press the
ALARM RESET button to silence.
Alarm Reset
Page 26
Rel. Date: 8/02(Rev. Date 06/01/04)
WAL• MART Boil Out Procedures
STEP 25
STEP 26
Place the POWER SWITCH in
the OFF position.
Turn the HEAT SWITCH to the
OFF Position.
STEP 27
Unlock and slowly pull the the DRAIN VALVE HANDLE to the open position, allowing the cleaning solution to drain from the fryer.
STEP 29
Dry FRY VAT with clean towels.
Rel. Date: 8/02(Rev. Date 06/01/04)
Position a HEAT RESISTANT PAIL beneath the
DRAIN VALVE at the bottom of the FRY VAT.
STEP 28
Rinse the inside of the FRY VAT with clean water.
STEP 30
Close and
lock the
DRAIN VALVE.
Place the
clean, dry
FILTER PAN,
CRUMB
CATCHER and
FILTER PAN
COVER
in the proper
position
under the
fryer.
Page 27
Notes
Page 28
Rel. Date: 8/02(Rev. Date 06/01/04)
GILES ENTERPRISES, INC.
2750 Gunter Park Drive West • Montgomery, Alabama 36109 USA
Telephone (334) 272-1457 • Fax (334) 272-3561
Service Hotline 1-800-554-4537
(USA and Canada only)
www.gilesent.com
Rel. Date: 8/02 (Rev. Date 06/01/04)