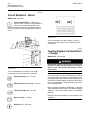
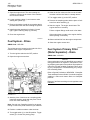
1
MAINTENANCE INTERVALS
Operation and Maintenance
Manual Excerpt
© 2010 Caterpillar
All Rights Reserved
®
®
SEBU7879-15
April 2012
Operation and
Maintenance
Manual
980H Wheel Loader
A8J1-Up (980H)
JMS1-Up (980H)
KZL1-Up (980H)
MHG1-Up (980H)
SAFETY.CAT.COM
SEBU7879-15
119
Maintenance Section
Maintenance Interval Schedule
i04876432
Maintenance Interval Schedule
SMCS Code: 7000
Ensure that all safety information, warnings, and
instructions are read and understood before any
operation or any maintenance procedures are
performed.
The user is responsible for the performance of
maintenance. All adjustments, the use of proper
lubricants, fluids, filters, and the replacement of
components due to normal wear and aging are
included. Failure to adhere to proper maintenance
intervals and procedures may result in diminished
performance of the product and/or accelerated wear
of components.
Use mileage, fuel consumption, service hours, or
calendar time, WHICH EVER OCCURS FIRST,
in order to determine the maintenance intervals.
Products that operate in severe operating conditions
may require more frequent maintenance. Refer to the
maintenance procedure for any other exceptions that
may change the maintenance intervals.
Note: The aftertreatment system can be expected
to function properly for the useful life of the
engine (emissions durability period), as defined by
regulation. All prescribed maintenance requirements
must be followed.
Note: Before each consecutive interval is performed,
all maintenance from the previous interval must be
performed.
Note: If Cat HYDO Advanced hydraulic oils are
used, the hydraulic oil change interval is extended
substantially. S·O·S services may extend the oil
change even longer. Consult your Cat dealer for
details.
The following guidlines shoud be followed if the
service hours are not met:
Items listed between 10 and 100 service hours
should be performed at least every 3 months.
Items listed between 250 and 500 service hours
should be performed at least every 6 months.
Items listed between 1000 service hours and 2500
service hours should be performed at least every
year.
When Required
Automatic Lubrication Grease Tank - Fill ............ 121
Battery or Battery Cable - Inspect/Replace ........ 124
Bucket Cutting Edges - Inspect/Replace ............ 126
Bucket Hinge and Lift Arm Clearance Shims Inspect/Adjust/Replace .....................................
Bucket Tips - Inspect/Replace ............................
Bucket Wear Plates - Inspect/Replace ...............
Camera - Clean ..................................................
Circuit Breakers - Reset ......................................
Engine Air Filter Primary Element - Clean/
Replace .............................................................
Engine Air Filter Secondary Element - Replace ..
Ether Starting Aid Cylinder - Replace .................
Fuel System - Prime ...........................................
Fuel Tank Breaker Relief Valve - Replace ..........
Fuses - Replace ..................................................
High Intensity Discharge Lamp (HID) - Replace ..
Oil Filter - Inspect ................................................
Pallet Fork - Inspect ............................................
Radiator Core - Clean .........................................
Ride Control Accumulator - Check .....................
Secondary Steering - Test ..................................
Window Washer Reservoir - Fill ..........................
Window Wiper - Inspect/Replace ........................
127
129
132
132
134
144
146
153
154
157
159
160
167
168
171
173
175
180
180
Every 10 Service Hours or Daily
Backup Alarm - Test ............................................
Cooling System Coolant Level - Check ..............
Engine Air Filter Service Indicator - Inspect ........
Engine Oil Level - Check ....................................
Fuel System Primary Filter (Water Separator) Drain .................................................................
Hydraulic System Oil Level - Check ..................
Seat Belt - Inspect ..............................................
Transmission Oil Level - Check ..........................
Windows - Clean .................................................
122
137
148
149
154
166
174
179
181
Every 50 Service Hours or Weekly
Bucket Lower Pivot Bearings - Lubricate ............
Bucket Upper Pivot Bearings - Lubricate ............
Cab Air Filter - Clean/Replace ............................
Fuel Tank Water and Sediment - Drain ...............
Hydraulic System Oil Level (Hood Tilt) - Check ..
Tire Inflation - Check ...........................................
129
131
132
158
165
177
Every 100 Service Hours or 2 Weeks
Axle Oscillation Bearings - Lubricate ..................
Bucket Linkage and Loader Cylinder Bearings Lubricate ...........................................................
Logging Fork Clamp - Lubricate .........................
Steering Cylinder Bearings - Lubricate ...............
122
128
167
176
Initial 250 Service Hours
Engine Valve Lash - Check ................................. 153
Transmission Oil Filter - Replace ........................ 179
Every 250 Service Hours
Drive Shaft Support Bearing - Lubricate ............. 143
Engine Oil Sample - Obtain ................................ 150
120
Maintenance Section
Maintenance Interval Schedule
SEBU7879-15
Every 250 Service Hours or Monthly
Battery - Clean ....................................................
Belt - Inspect/Adjust/Replace ..............................
Brake Accumulator - Check ................................
Braking System - Test .........................................
Differential and Final Drive Oil Level - Check .....
Drive Shaft Spline (Center) - Lubricate ...............
Engine Air Filter Service Indicator Inspect/Replace ................................................
123
124
125
125
141
143
148
Every 250 Service Hours or 3 Months
Engine Crankcase Breather - Clean ...................
Engine Oil and Filter - Change ...........................
Pallet Fork - Lubricate .........................................
Steering Column Play - Check ............................
149
150
171
175
Initial 500 Hours (for New Systems, Refilled
Systems, and Converted Systems)
Cooling System Coolant Sample (Level 2) Obtain ............................................................... 138
137
142
166
180
Every 500 Service Hours or 3 Months
Engine Oil and Filter - Change ........................... 150
Fuel System Primary Filter (Water Separator)
Element - Replace ............................................ 155
Fuel System Secondary Filter - Replace ............ 156
Fuel Tank Cap and Strainer - Clean ................... 158
Hydraulic System Biodegradable Oil Filter Element Replace ............................................................. 161
Hydraulic System Oil Filter - Replace ................. 164
Every 1000 Service Hours or 6 Months
Articulation Bearings - Lubricate .........................
Battery Hold-Down - Tighten ...............................
Case Drain Screen (Strainer) (Steering Pump,
Hydraulic Fan Pump, Motor) - Clean ................
Rollover Protective Structure (ROPS) - Inspect ..
Steering Pilot Oil Screen (Command Control
Steering) - Clean/Replace .................................
Transmission Oil - Change .................................
Transmission Oil Filter - Replace ........................
121
123
133
173
177
177
179
Every 2000 Service Hours or 1 Year
Brake Discs - Check ...........................................
Differential and Final Drive Oil - Change ............
Electronic Unit Injector - Inspect/Adjust ..............
Engine Valve Lash - Check .................................
Engine Valve Rotators - Inspect .........................
Hydraulic System Oil - Change ...........................
Every Year
Cooling System Coolant Sample (Level 2) Obtain ............................................................... 138
Receiver Dryer (Refrigerant) - Replace .............. 172
Every 3 Years After Date of Installation or
Every 5 Years After Date of Manufacture
Seat Belt - Replace ............................................. 174
Every 6000 Service Hours or 3 Years
Cooling System Coolant Extender (ELC) - Add .. 136
Cooling System Water Temperature Regulator Replace ............................................................. 138
Every 12 000 Service Hours or 6 Years
Cooling System Coolant (ELC) - Change ........... 134
Every 500 Service Hours
Cooling System Coolant Sample (Level 1) Obtain ...............................................................
Differential and Final Drive Oil Sample - Obtain ..
Hydraulic System Oil Sample - Obtain ...............
Transmission Oil Sample - Obtain ......................
Hydraulic Tank Breaker Relief Valve - Clean ...... 166
Service Brake Wear Indicator - Check ................ 175
Steering Column Spline (Command Control Steering)
- Lubricate ......................................................... 176
125
139
144
153
153
162
SEBU7879-15
121
Maintenance Section
Articulation Bearings - Lubricate
i03023062
Articulation Bearings Lubricate
A pressure hazard is present. Severe personal injury or death can result from removing hoses or
fittings that are under pressure. Relieve the pressure in the system before you remove hoses or
fittings.
SMCS Code: 7057-086-BD; 7065-086-BD;
7066-086-BD
Crushing Hazard. Insure that the machine ignition
switch is in the OFF position and that the parking
brake is engaged before entering the articulation
area. Failure to do so could result in serious injury
or death.
Wipe all fittings before applying grease.
Illustration 135
g01067897
Filling the Reservoir
Illustration 134
g00879717
Apply grease to one fitting on the upper pivot bearing
and one fitting on the lower pivot bearing.
i03700085
Automatic Lubrication Grease
Tank - Fill
(If Equipped)
SMCS Code: 7540-544-TNK
The Lincoln Quicklub Lubrication
System
Reference: Before any service work is performed on
the lubrication system, refer to Special Instructions,
REHS1396 or consult your Caterpillar dealer.
1. The Lincoln Quicklub pump (1) is located near the
rear fender on the right side of the machine.
2. Fill the reservoir (2) through the grease fitting (3).
The grease fitting (3) is located at the base of the
reservoir (2).
Reference: For the correct type of grease, refer
to Operation and Maintenance Manual, “Lubricant
Viscosities”.
3. Refill the reservoir when the grease reaches the
“MIN” mark on the reservoir.
4. Fill the reservoir to the “MAX” mark on the
reservoir.
Priming the System
After the reservoir has been filled with the
recommended lubricant, loosen the fitting to the
supply line. Operate the pump until lubricant flows
from the outlet. Then, tighten fitting.
122
Maintenance Section
Axle Oscillation Bearings - Lubricate
SEBU7879-15
The Automatic TWIN Greasing
System
Reference: Refer to System Operation, RENR
6331for more information on the Automatic TWIN
Greasing System.
A pressure hazard is present. Severe personal injury or death can result from removing hoses or
fittings that are under pressure. Relieve the pressure in the system before you remove hoses or
fittings.
If pumping becomes difficult, the filter behind the
coupling of the pump may be clogged. Also check the
coupling of the filler pipe. Remove the clogged parts
and clean the clogged parts. Clean the filter in the
coupling on a regular basis.
Air may be pumped into the reservoir. Air can
accumulate under the piston. In order to remove
the air, fill the reservoir slightly above the maximum
level mark. Air and grease can escape through the
overflow passage in the piston guide. Excess air and
excess grease will be released from the pump at the
overflow passage. The overflow passage is located
on the right side of the pump.
i02231817
Axle Oscillation Bearings Lubricate
SMCS Code: 3268-086-BD; 3278-086-BD
Wipe all fittings before you apply lubricant.
Illustration 136
g01068678
Grease reservoir (1) is located near the rear fender
on the right side of the machine.
Filling the Reservoir
1. Remove the dust cap (2) from the grease reservoir
(1).
2. Clean the filler tube assembly (3) and the coupling
on the filler assembly.
3. Install the filler assembly onto the filler tube
assembly (3).
Illustration 137
g01125821
Apply grease to the two remote grease fittings that
are located on the left side of the machine near the
articulation joint.
i04404608
4. Fill the grease reservoir (1) with grease to the
maximum level which is indicated on the grease
reservoir (1).
Reference: For the correct type of grease, refer
to Operation and Maintenance Manual, “Lubricant
Viscosities”.
5. Remove the filler assembly and install the dust
cap (2).
Backup Alarm - Test
(If Equipped)
SMCS Code: 7406-081
The backup alarm is on the rear of the machine.
SEBU7879-15
123
Maintenance Section
Battery - Clean
Clean the battery terminals and the surfaces of
the batteries with a clean cloth. Coat the battery
terminals with petroleum jelly. Make sure that the
battery cables are installed securely.
Repeat for the battery compartment on the left rear
side of the machine.
i02066363
Battery Hold-Down - Tighten
SMCS Code: 7257-527
Illustration 138
g01043892
Turn the engine start switch to the ON position in
order to perform the test.
Apply the service brake. Place the transmission into
REVERSE.
The backup alarm should sound immediately.
The backup alarm will continue to sound until
the transmission is placed into NEUTRAL or into
FORWARD.
i02065247
Battery - Clean
SMCS Code: 1401-070
Illustration 140
g01058828
Open the battery compartment on the right rear side
of the machine.
Over time, the vibration of an operating machine can
cause the battery hold-downs to loosen. To help to
prevent loose batteries and the possibility of loose
cable connections, tighten the nut on the hold-down
to a torque of 14.3 ± 3 N·m (10.5 ± 2.2 lb ft).
Repeat for the battery compartment on the left rear
side of the machine.
Illustration 139
g01058475
Open the battery compartment on the right rear side
of the machine.
124
Maintenance Section
Battery or Battery Cable - Inspect/Replace
SEBU7879-15
i03657099
Battery or Battery Cable Inspect/Replace
SMCS Code: 1401-040; 1401-510; 1402-040;
1402-510
Recycle the Battery
Always recycle a battery. Never discard a battery.
Always return used batteries to one of the following
locations:
• A battery supplier
• An authorized battery collection facility
Personal injury may occur from failure to properly
service the batteries.
Batteries give off flammable fumes that can explode. Electrolyte is an acid and can cause personal injury if it contacts the skin or eyes.
Prevent sparks near the batteries. Sparks could
cause vapors to explode. Do not allow jumper cable ends to contact each other or the engine. Improper jumper cable connections can cause an explosion.
• Recycling facility
i03700093
Belt - Inspect/Adjust/Replace
SMCS Code: 1397-025; 1397-040; 1397-510
Your machine is equipped with a single serpentine
belt. Stop the engine. Open the rear hood. The belt is
located at the front of the engine.
Always wear protective glasses when working
with batteries.
1. Turn the engine start switch key OFF. Turn all of
the switches OFF.
2. Turn the battery disconnect switch OFF. Remove
the key.
3. Disconnect the negative battery cable from the
disconnect switch.
Note: Do not allow the disconnected battery cable to
contact the disconnect switch.
4. Disconnect the negative battery cable at the
battery.
5. Disconnect the positive battery cable at the
battery.
6. Inspect the battery terminals for corrosion. Inspect
the battery cables for wear or damage.
7. Make any necessary repairs. If necessary, replace
the battery cables or the battery.
8. Connect the positive battery cable at the battery.
9. Connect the negative battery cable at the battery.
10. Connect the battery cable at the battery
disconnect switch.
11. Install the key and turn the battery disconnect
switch ON.
Illustration 141
(1)
(2)
(3)
(4)
(5)
(6)
g00759275
Alternator
Tensioner
Serpentine Belt
Square Drive Hole
Compressor
Drive Pulley
Inspect the condition of the serpentine belt. If the belt
is cracked or frayed, replace the belt.
Insert a ratchet with a square drive into the hole (4)
of the tensioner. Rotate the tensioner clockwise in
order to relieve tension. Remove the belt. Install
the new belt correctly, as shown. The tensioner will
automatically apply the correct amount of tension to
the new belt.
SEBU7879-15
125
Maintenance Section
Brake Accumulator - Check
i01709202
i01739721
Brake Accumulator - Check
Braking System - Test
SMCS Code: 4263-535
SMCS Code: 4251-081; 4267-081
• Fasten the seat belt before you test the brakes.
• Park the machine on a dry, level surface.
• Check the area around the machine. Make sure
that the machine is clear of personnel and clear of
obstacles.
• Make sure that the steering frame lock is in the
unlocked position.
Illustration 142
g00883720
1. Turn the engine start switch to the ON position.
The alert indicator for brake oil pressure should
come on if the braking system is not at normal
operating pressure.
2. Start the engine. Run the engine at half speed for
two minutes in order to increase the accumulator
pressure. The alert indicator for brake oil pressure
should go off.
3. Stop the engine. Apply the service brake pedal
and release the service brake pedal until the alert
indicator for brake oil pressure comes on. This will
decrease the accumulator pressure. A minimum
of five applications of the service brake pedal are
required.
4. If the alert indicator comes on after less than
five applications of the brake, measure the
accumulator precharge pressure. An authorized
Caterpillar dealer can measure the nitrogen gas
pressure in the accumulator. Use only dry nitrogen
gas for recharging.
i01732078
Brake Discs - Check
SMCS Code: 4255-535
Reference: For the correct procedure, refer to the
Testing and Adjusting Service Manual of the braking
system for your machine or consult your Caterpillar
dealer.
The following tests are used to determine whether
the braking system is functional. These tests are not
intended to measure the maximum brake holding
effort. The required brake holding effort for sustaining
a machine at a specific engine rpm varies from one
machine to another machine. The variations include
differences in the engine setting, the power train
efficiency, the brake holding ability, etc.
Service Brake Holding Ability Test
Personal injury can result if the machine moves
while testing.
If the machine begins to move during test, reduce
the engine speed immediately and engage the
parking brake.
1. Start the engine. Raise the implement slightly.
Apply the service brake. Release the parking
brake.
2. Move the transmission control to THIRD SPEED
FORWARD while the service brakes are applied.
Make sure that the autoshift control is in the OFF
position.
3. Gradually increase the engine speed to high idle.
The machine should not move.
4. Reduce the engine speed to low idle. Move the
transmission direction control to the NEUTRAL
position. Engage the parking brake. Lower the
implement to the ground. Stop the engine.
If the machine moved during the test, consult your
Caterpillar dealer for a brake inspection. Make any
necessary repairs before the machine is returned to
operation.
126
Maintenance Section
Bucket Cutting Edges - Inspect/Replace
SEBU7879-15
Parking Brake Holding Ability Test
Personal injury can result if the machine moves
while testing.
If the machine begins to move, reduce the engine
speed immediately and apply the service brake
pedal.
This test is performed when the parking brake is
engaged. If the machine begins to move, compare
the engine rpm to the engine rpm of a prior test. This
will indicate the amount of system deterioration.
1. Start the engine. Raise the implement slightly.
Engage the parking brake.
2. Move the transmission control to THIRD SPEED
FORWARD. Make sure that the autoshift control
is in the OFF position.
The parking brake indicator light should come on.
3. Gradually increase the engine speed to high idle.
The machine should not move.
4. Reduce the engine speed to low idle. Move the
transmission direction control to the NEUTRAL
position. Lower the implement to the ground. Stop
the engine.
If the machine moved during the test, consult your
Caterpillar dealer for a brake inspection. Make any
necessary repairs before the machine is returned to
operation.
i03657238
Bucket Cutting Edges Inspect/Replace
SMCS Code: 6801-040; 6801-510
Personal injury or death can result from bucket
falling.
Block the bucket before changing bucket cutting
edges.
Illustration 143
g00764365
(1) Bolts for Cutting Edge
(2) Cutting Edge
Check the cutting edges and the end bits for wear
and for damage. Use the following procedure to
service the cutting edges and the end bits:
1. Raise the bucket and place blocking under the
bucket.
2. Lower the bucket onto the blocking. Stop the
engine.
3. Remove bolts (1), cutting edge (2) and the end
bits.
4. Clean all contact surfaces.
5. If the opposite side of the cutting edge is not worn,
use the opposite side of the cutting edge. The end
bits are not reversible.
If both sides are worn, install a new cutting edge.
6. Install bolts (1). Tighten the bolts to the specified
torque.
Reference: Refer to Specifications, SENR3130,
“Ground Engaging Tool (G.E.T.) Fasteners”.
7. Start the engine. Raise the bucket and remove the
blocking. Lower the bucket to the ground.
8. After a few hours of operation, check the bolts for
proper torque.
SEBU7879-15
127
Maintenance Section
Bucket Hinge and Lift Arm Clearance Shims - Inspect/Adjust/Replace
Bucket Wear Plates
i04878904
Personal injury or death can result from the bucket
falling.
Block the bucket before changing bucket wear
plates.
Bucket Hinge and Lift
Arm Clearance Shims Inspect/Adjust/Replace
SMCS Code: 6001-025-CLR; 6001-040-CLR;
6001-510-Z4; 6119-025-CLR; 6119-040-CLR;
6119-510-Z4
Inspect the Linkage
Illustration 144
g00879740
Inspect the wear plates. Replace the wear plates
before damage to the bottom of the bucket occurs.
Consult your Caterpillar dealer for replacement of
wear plates.
Illustration 145
g03003577
(1) Lift Arm
(2) Bucket
(3) Inspection Points for the Bucket Hinge.
Periodically inspect the bucket linkage. The gap
between the bucket and the linkage should not
exceed the thinnest shim that is available for the
bucket assembly.
1. Lower the lift arm assembly (1) to suitable
blocking. Rest the bucket (2) on the ground.
2. Use a gauge to measure the gap at the hinge.
3. If the measurement exceeds the required amount,
new shims must be installed.
Installing Shims for the Hinge on
the Bucket
Note: Refer to the Disassembly and Assembly
Manual, “Bucket - Remove” for the correct procedure
for removing the pins in the linkage.
128
Maintenance Section
Bucket Linkage and Loader Cylinder Bearings - Lubricate
SEBU7879-15
i02231274
Bucket Linkage and Loader
Cylinder Bearings - Lubricate
SMCS Code: 5102-086-BD; 5104-086-BD;
6107-086-BD
Illustration 146
g01345720
(2) Bucket
(4) Install washers on lift arm.
Install washers and pin assembly to the bucket.
When possible, use washers on both sides of the lift
arm to reduce the gap between the lift arm and the
hinges on the bucket.
Note: Refer to the Disassembly and Assembly
Manual, “Bucket - Install” for the correct procedure
for installing the pins in the linkage.
Illustration 147
g01063586
Wipe off all fittings before any lubricant is applied.
Apply lubricant through fitting (1) at the rod end of
each tilt cylinder.
Apply lubricant through fitting (2) at the center pivot
point of the linkage.
Apply lubricant through fitting (3) at the bottom of the
linkage.
SEBU7879-15
129
Maintenance Section
Bucket Lower Pivot Bearings - Lubricate
Note: If necessary, the work tool may need to be
tilted forward in order to apply lubricant to the lower
pivot bearing.
i03657242
Bucket Tips - Inspect/Replace
SMCS Code: 6805-040; 6805-510
Illustration 148
g01125651
Personal injury or death can result from the bucket
falling.
Block the bucket before changing bucket tips.
(4) Rod End of LH Lift Cylinder
(5) LH Upper Lift Arm Bearing
(6) Head End of LH Tilt Cylinder
(7) Head End of RH Tilt Cylinder
(8) RH Upper Lift Arm Bearing
(9) Rod End of RH Lift Cylinder
(10) Rod End of RH Steering Cylinder
(11) Head End of RH Lift Cylinder
(12) Head End of LH Lift Cylinder
Bucket Tips
Apply lubricant through the remote grease fittings for
the upper lift arm bearings, the head ends of the tilt
cylinders, the rod ends of the lift cylinders, and the
head end of the RH lift cylinder.
Apply lubricant through grease fitting (12) for the
head end of the LH lift cylinder.
i03700100
Bucket Lower Pivot Bearings
- Lubricate
SMCS Code: 6101-086-BD; 6107-086-BD
Illustration 150
g00101352
(1) Usable
(2) Replace the tip.
(3) Replace the tip.
Check the bucket tips for wear. If the bucket tip has a
hole, replace the bucket tip.
Wipe all fittings before you apply lubricant.
1. Remove the pin from the bucket tip. The pin can
be removed by one of the following methods.
• Use a hammer and a punch from the retainer
side of the bucket to drive out the pin.
• Use a Pin-Master. Follow Step 1.a through Step
1.c for the procedure.
Illustration 149
g01000649
Apply lubricant to each fitting. There are a total of
two fittings.
130
Maintenance Section
Bucket Tips - Inspect/Replace
Illustration 151
SEBU7879-15
g00590670
(4) Back of Pin-Master
(5) Extractor
Illustration 153
g00101359
4. Install the new bucket tip onto the adapter.
a. Place the Pin-Master on the bucket tooth.
b. Align extractor (5) with the pin.
c. Strike the Pin-Master at the back of the tool (4)
and remove the pin.
Note: The bucket tip can be rotated by 180 degrees in
order to allow greater penetration or less penetration.
5. Drive the pin through the bucket tip. The pin can
be installed by using one of the following methods:
• From the other side of the retainer, drive the
pin through the bucket tip, the adapter, and the
retainer.
• Use a Pin-Master. Follow Step 5.a through Step
5.e for the procedure.
Note: To correctly install the pin into the retainer, the
pin must be driven in from the right side of the tooth.
Improper installation of the pin can result in the loss
of the bucket tip.
Illustration 152
g00590819
(6) Retainer
(7) Retaining washer
(8) Adapter
2. Clean the adapter and the pin.
3. Fit retainer (6) into retaining washer (7). Install
this assembly into the groove that is in the side
of adapter (8).
Illustration 154
g00590666
(4) Back of Pin-Master
(9) Pin setter
(10) Pin holder
a. Insert the pin through the bucket tooth.
b. Place the Pin-Master over the bucket tooth and
locate the pin in the hole of holder (10).
SEBU7879-15
131
Maintenance Section
Bucket Upper Pivot Bearings - Lubricate
c. Strike the tool with a hammer at the back of the
tool (4) in order to start the pin.
d. Slide pin holder (10) away from the pin and
rotate the tool slightly in order to align pin setter
(9) with the pin.
e. Strike the end of the tool until the pin is fully
inserted.
4. Clean adapter (6).
Installation
1. Clean the adapter and the area around the latch,
if necessary.
2. Install the new bucket tip onto the adapter with a
slight clockwise rotation.
6. After you drive the pin, make sure that the retainer
fits snugly into the pin groove.
K-Series Tip
Removal
Illustration 157
g01124736
3. Install the retainer. Make sure that the retainer's
latch catches under the tip pocket.
4. Make sure that the latch is properly seated by
trying to remove the bucket tip.
Illustration 155
g01389463
Note: Retainers are often damaged during the
removal process. Caterpillar recommends the
installation of a new retainer when bucket tips are
rotated or replaced.
i01922739
Bucket Upper Pivot Bearings
- Lubricate
SMCS Code: 6001-086-BD; 6107-086-BD
Wipe all fittings before you apply lubricant.
Illustration 156
g01175361
1. Use a pry bar in order to disengage retainer (5).
2. Use the pry bar in order to remove retainer (5)
from bucket tip (4).
3. Remove bucket tip (4) from adapter (6) with a
slight counterclockwise rotation.
Illustration 158
g01000653
Apply lubricant to each fitting. There are a total of
two fittings.
132
Maintenance Section
Bucket Wear Plates - Inspect/Replace
SEBU7879-15
i01709216
Bucket Wear Plates Inspect/Replace
SMCS Code: 6120-040; 6120-510
Personal injury or death can result from the bucket
falling.
Block the bucket before changing bucket wear
plates.
Illustration 160
g00759048
1. Remove the filter cover behind the seat. Two
threaded knobs (1) are used in order to remove
the cover. Remove the filter element (2).
2. Open the access door (3) on the left side of the
cab. Remove the filter element.
Illustration 159
g00879740
Inspect the wear plates. Replace the wear plates
before damage to the bottom of the bucket occurs.
Consult your Caterpillar dealer for replacement of
wear plates.
i01449996
Cab Air Filter - Clean/Replace
SMCS Code: 7342-070; 7342-510
3. Clean the filter elements with pressure air or
wash the filter elements in warm water with a
nonsudsing household detergent.
4. If water and detergent are used to clean the filter
elements, rinse the filter elements in clean water
and allow the filter elements to air dry thoroughly.
Note: If either filter element is damaged, install a
new filter element.
5. Install the filter elements. Install the filter cover
and close the access door.
Note: Clean the cab air filters more often if the
machine is being operated in dusty conditions.
i02816405
Camera - Clean
(If Equipped)
SMCS Code: 7348-070
In order to maintain sufficient vision, keep the Work
Area Vision System (WAVS) camera lens and the
display clean.
SEBU7879-15
133
Maintenance Section
Case Drain Screen (Strainer) (Steering Pump, Hydraulic Fan Pump, Motor) - Clean
Display
i02050852
Case Drain Screen (Strainer)
(Steering Pump, Hydraulic Fan
Pump, Motor) - Clean
SMCS Code: 4304-070-Z3; 5057-070-Z3
The screen is located in the case drain line near the
hydraulic oil tank.
Illustration 161
g01223034
WAVS display
Use a soft, damp cloth in order to clean the display.
The display has a soft plastic surface that can be
easily damaged by an abrasive material. The display
is not sealed. Do not immerse the display with
liquid.
Camera
Illustration 163
g00999347
Top view of case drain line for the implement pump
Illustration 162
g01223051
The WAVS camera is located on the rear of the machine in the
center of the fan guard.
Use a damp cloth or water spray in order to clean
the camera lens. The camera is a sealed unit. The
camera is not affected by high pressure spray.
The camera is equipped with an internal heater to
help counteract the effects of condensation, snow,
or ice.
Note: For more information on WAVS, refer to
Operation and Maintenance Manual, SEBU8157,
“Work Area Vision System”.
Illustration 164
g00999352
Side view of case drain line
Disconnect the line from the hydraulic oil tank.
Remove the screen from the hydraulic line. Wash
the screen in a clean nonflammable solvent. Dry the
screen by using pressure air. Inspect the screen for
damage. Replace the screen, if necessary. Install the
screen and connect the hydraulic oil line.
134
Maintenance Section
Circuit Breakers - Reset
SEBU7879-15
i02050226
Circuit Breakers - Reset
SMCS Code: 1420-529
Circuit Breaker Reset – Depress the
button in order to reset the circuit breakers.
If the circuit is functioning properly, the
button will remain depressed. If the button will not
remain depressed, check the appropriate electrical
circuit.
Illustration 166
g00879750
Two circuit breakers are also located in the cab
behind the operator seat. These breakers are both
15 amperes.
i01709233
Cooling System Coolant (ELC)
- Change
SMCS Code: 1350-044-NL
Illustration 165
g01051679
The circuit breakers are located in the engine
compartment on the left side of the machine.
Engine Shutdown (1) – 50 amp
Electrical Circuits in Cab (2) – 20 amp
Tilt Hood Actuator (3) – 60 amp
Main Circuit (4) – 80 amp
Alternator (5) – 105 amp
Pressurized system: Hot coolant can cause serious burn. To open cap, stop engine, wait until radiator is cool. Then loosen cap slowly to relieve
the pressure.
NOTICE
Care must be taken to ensure that fluids are contained
during performance of inspection, maintenance, testing, adjusting and repair of the product. Be prepared to
collect the fluid with suitable containers before opening any compartment or disassembling any component containing fluids.
Refer to Special Publication, NENG2500, “Caterpillar
Tools and Shop Products Guide” for tools and supplies
suitable to collect and contain fluids on Caterpillar
products.
Dispose of all fluids according to local regulations and
mandates.
SEBU7879-15
135
Maintenance Section
Cooling System Coolant (ELC) - Change
NOTICE
Topping off or mixing Cat ELC with other products that
do not meet Caterpillar EC-1 specifications reduces
the effectiveness of the coolant and shortens coolant
service life.
Use only Caterpillar products or commercial products
that have passed the Caterpillar EC-1 specification for
pre-mixed or concentrate coolants. Use only Extender
with Cat ELC.
Failure to follow these recommendations can result in
shortened cooling system component life.
Reference: For information about adding Extender
to your cooling system, refer to Operation and
Maintenance Manual, “Cooling System Coolant
Extender (ELC) - Add” or consult your Caterpillar
dealer.
If an Extended Life Coolant was previously used,
flush the cooling system with clean water. No other
cleaning agents are required. Use the following
procedure to change the Extended Life Coolant.
Illustration 168
g00879754
3. Open the drain valve. The drain valve is located
near the rear axle of the machine. Allow the
coolant to drain into a suitable container.
4. Flush the cooling system with clean water until the
draining water is clean. Close the drain valve.
5. Replace the water temperature regulator.
Reference: Refer to Operation and Maintenance
Manual, “Cooling System Water Temperature
Regulator - Replace” for the correct procedure.
6. Add the Extended Life Coolant.
Reference: Refer to Operation and Maintenance
Manual, “Capacities (Refill) ” for the refill capacity
of the cooling system.
7. Start the engine. Run the engine without the
cooling system pressure cap until the water
temperature regulator opens and the coolant level
stabilizes.
Illustration 167
g00759585
The cooling system pressure cap is located under
the engine hood at the rear of the machine.
1. Open the engine hood.
2. Slowly loosen the cooling system pressure cap (1)
in order to relieve system pressure. Remove the
cooling system pressure cap.
8. Maintain the coolant level in sight gauge (2) on the
upper right side of the radiator tank.
9. Install the cooling system pressure cap. Close the
engine hood.
136
Maintenance Section
Cooling System Coolant Extender (ELC) - Add
SEBU7879-15
i01920332
Cooling System Coolant
Extender (ELC) - Add
SMCS Code: 1352-544-NL
Pressurized system: Hot coolant can cause serious burn. To open cap, stop engine, wait until radiator is cool. Then loosen cap slowly to relieve
the pressure.
NOTICE
Care must be taken to ensure that fluids are contained
during performance of inspection, maintenance, testing, adjusting and repair of the product. Be prepared to
collect the fluid with suitable containers before opening any compartment or disassembling any component containing fluids.
Illustration 169
g00759585
Refer to Special Publication, NENG2500, “Caterpillar
Tools and Shop Products Guide” for tools and supplies
suitable to collect and contain fluids on Caterpillar
products.
The cooling system pressure cap is located under
the engine hood at the rear of the machine.
Dispose of all fluids according to local regulations and
mandates.
2. Slowly loosen cooling system pressure cap (1) in
order to relieve any system pressure. Remove the
cooling system pressure cap.
1. Open the engine hood.
NOTICE
Topping off or mixing Cat ELC with other products that
do not meet Caterpillar EC-1 specifications reduces
the effectiveness of the coolant and shortens coolant
service life.
Use only Caterpillar products or commercial products
that have passed the Caterpillar EC-1 specification for
pre-mixed or concentrate coolants. Use only Extender
with Cat ELC.
Failure to follow these recommendations can result in
shortened cooling system component life.
When a Caterpillar Extended Life Coolant (ELC) is
used, an Extender must be added to the cooling
system.
Use a 8T-5296 Coolant Test Kit to check the
concentration of the coolant.
Reference: For additional information about adding
Extender, refer to Operation and Maintenance
Manual, SEBU6250, “Caterpillar Machine Fluids
Recommendations” or consult your Caterpillar dealer.
Illustration 170
g00879755
3. If necessary, drain enough coolant from the
radiator in order to allow the addition of Extender
to the cooling system. The cooling system drain
valve is located on the lower left side of the
radiator.
4. Add the Extender to the cooling system.
SEBU7879-15
137
Maintenance Section
Cooling System Coolant Level - Check
Reference: Refer to Operation and Maintenance
Manual, “Capacities (Refill)” for the correct
amount.
5. Maintain the coolant level in sight gauge (2) on the
upper right side of the radiator.
6. Install the cooling system pressure cap. Close the
engine hood.
i02561075
Cooling System Coolant Level
- Check
4. If the coolant level is low, slowly remove cooling
system pressure cap in order to relieve system
pressure. Add coolant in order to maintain the
coolant level in the sight gauge. Add the coolant
until the coolant level reaches the bottom of the
filler neck.
5. Inspect the cooling system pressure cap and the
cap seal for damage. Replace the cap seal, if
necessary. Clean the cooling system pressure
cap.
6. Install the cooling system pressure cap. Close the
engine hood.
i03697922
SMCS Code: 1350-535-FLV
Cooling System Coolant
Sample (Level 1) - Obtain
Pressurized system: Hot coolant can cause serious burn. To open cap, stop engine, wait until radiator is cool. Then loosen cap slowly to relieve
the pressure.
1. Open the engine hood.
SMCS Code: 1350-008; 1395-008; 7542
NOTICE
Always use a designated pump for oil sampling, and
use a separate designated pump for coolant sampling.
Using the same pump for both types of samples may
contaminate the samples that are being drawn. This
contaminate may cause a false analysis and an incorrect interpretation that could lead to concerns by both
dealers and customers.
Note: Level 1 results may indicate a need for
Level 2 Analysis.
Illustration 171
g00879763
2. Maintain the coolant level in the sight gauge when
the cooling system is cool. If you need to add
coolant daily, check the cooling system for leaks.
3. Inspect the radiator core for debris. Clean the
radiator core, if necessary.
Illustration 172
g01058055
The sampling valve for the cooling system is located
on the left side of the engine compartment near the
water temperature regulator.
138
Maintenance Section
Cooling System Coolant Sample (Level 2) - Obtain
SEBU7879-15
Obtain the sample of the coolant as close as possible
to the recommended sampling interval. In order
to receive the full effect of S·O·S analysis, you
must establish a consistent trend of data. In order
to establish a pertinent history of data, perform
consistent samplings that are evenly spaced.
Supplies for collecting samples can be obtained from
your Caterpillar dealer.
Use the following guidelines for proper sampling of
the coolant:
• Complete the information on the label for the
sampling bottle before you begin to take the
samples.
• Keep the unused sampling bottles stored in plastic
bags.
• Obtain coolant samples directly from the coolant
sample port. You should not obtain the samples
from any other location.
• Keep the lids on empty sampling bottles until you
are ready to collect the sample.
• Place the sample in the mailing tube immediately
after obtaining the sample in order to avoid
contamination.
• Never collect samples from expansion bottles.
• Never collect samples from the drain for a system.
Submit the sample for Level 1 analysis.
For additional information about coolant analysis, see
Special Publication, SEBU6250, “Caterpillar Machine
Fluids Recommendations” or consult your Caterpillar
dealer.
i02196476
Cooling System Coolant
Sample (Level 2) - Obtain
SMCS Code: 1350-008; 1395-008; 7542
NOTICE
Always use a designated pump for oil sampling, and
use a separate designated pump for coolant sampling.
Using the same pump for both types of samples may
contaminate the samples that are being drawn. This
contaminate may cause a false analysis and an incorrect interpretation that could lead to concerns by both
dealers and customers.
Illustration 173
g01058055
The sampling valve for the cooling system is located
on the left side of the engine compartment near the
water temperature regulator.
Obtain the sample of the coolant as close as possible
to the recommended sampling interval. Supplies
for collecting samples can be obtained from your
Caterpillar dealer.
Refer to Operation and Maintenance Manual,
“Cooling System Coolant Sample (Level 1) - Obtain”
for the guidelines for proper sampling of the coolant.
Submit the sample for Level 2 analysis.
For additional information about coolant analysis, see
Special Publication, SEBU6250, “Caterpillar Machine
Fluids Recommendations” or consult your Caterpillar
dealer.
i02225150
Cooling System Water
Temperature Regulator Replace
SMCS Code: 1355-510; 1393-010
Pressurized system: Hot coolant can cause serious burn. To open cap, stop engine, wait until radiator is cool. Then loosen cap slowly to relieve
the pressure.
SEBU7879-15
139
Maintenance Section
Differential and Final Drive Oil - Change
i02775845
NOTICE
Failure to replace the engine's thermostat on a regularly scheduled basis could cause severe engine damage.
Differential and Final Drive Oil
- Change
SMCS Code: 3278-044; 4050-044
NOTICE
Caterpillar engines incorporate a shunt design cooling
system and require operating the engine with a thermostat installed.
If the thermostat is installed wrong, it will cause the
engine to overheat. Inspect gaskets before assembly
and replace if worn or damaged.
NOTICE
Care must be taken to ensure that fluids are contained
during performance of inspection, maintenance, testing, adjusting and repair of the product. Be prepared to
collect the fluid with suitable containers before opening any compartment or disassembling any component containing fluids.
Refer to Special Publication, NENG2500, “Caterpillar
Dealer Service Tool Catalog” for tools and supplies
suitable to collect and contain fluids on Caterpillar
products.
Dispose of all fluids according to local regulations and
mandates.
Front Differential and Front Final
Drives
Illustration 174
g01030547
Replace water temperature regulator (1) in order
to reduce the chance of problems with the cooling
system.
Replace the water temperature regulator and the
seals while the cooling system is completely drained
or while the coolant is drained to a level below the
water temperature regulator housing.
Note: If you are only replacing the water temperature
regulator, drain the coolant to a level that is below the
water temperature regulator housing.
Reference: For the correct procedure for replacing
the water temperature regulator, refer to the
Disassembly and Assembly manual for your
machine's engine.
Illustration 175
g00760167
1. Position the front wheels so that final drive drain
plugs (2) are facing downward. Remove the final
drive drain plugs and allow the oil to drain into
a suitable container. Clean the drain plugs and
install the drain plugs.
140
Maintenance Section
Differential and Final Drive Oil - Change
Illustration 176
SEBU7879-15
g00864014
Rear view
2. Remove front differential drain plug (3) and allow
the oil to drain into a suitable container. Clean the
drain plug and install the drain plug.
3. Remove front differential filler plug (4). Fill the front
differential to the bottom of the filler plug opening.
Illustration 177
g01387238
Front Magnetic Oil Filter
Reference: For the correct amount of oil, refer to
Operation and Maintenance Manual, “Capacities
(Refill)”.
4. Clean the filler plug and install the filler plug.
5. Position each front wheel so that front final drive
filler plugs (1) are flush with the centerline of each
front wheel. Remove the front final drive filler
plugs.
6. Fill the front final drives to the bottom of the filler
plug opening.
Reference: For the correct amount of oil, refer to
Operation and Maintenance Manual, “Capacities
(Refill)”.
Note: If the specified amount of oil will not fit in the
front final drives, install the filler plugs and operate
the machine on level ground for a few minutes. This
will equalize the oil level in the front differential and in
the front final drives. Then, add the remaining oil.
7. Clean the filler plugs and install the filler plugs.
Note: If your machine is equipped with the axle oil
cooler, there are 2 magnetic filters that need to be
cleaned. If your machine is not equipped with the
axle oil cooler, skip the next step.
Illustration 178
g01387239
Rear Magnetic Oil Filter
8. Remove the magnetic plug on the front filter. Clean
the magnetic plug with a clean nonflammable
solvent. Install the magnetic plug. Repeat the
process for the rear magnetic filter.
9. Operate the machine for a few minutes and
recheck the oil level. The oil level should reach the
bottom of the filler plug opening.
If the oil level is higher than the filler plug opening,
do not allow the oil to drain to the level of the filler
plug opening.
SEBU7879-15
141
Maintenance Section
Differential and Final Drive Oil Level - Check
Rear Differential and Rear Final
Drives
Reference: For the correct amount of oil, refer to
Operation and Maintenance Manual, “Capacities
(Refill)”.
Note: If the specified amount of oil will not fit in the
rear final drives, install the filler plugs and operate the
machine on level ground for a few minutes. This will
equalize the oil level in the rear differential and in the
rear final drives. Then, add the remaining oil.
7. Clean the filler plugs and install the filler plugs.
8. Operate the machine for a few minutes and
recheck the oil level. The oil level should reach the
bottom of the filler plug opening.
Illustration 179
g00760167
1. Position the rear wheels so that final drive drain
plugs (2) are facing downward. Remove the final
drive drain plugs and allow the oil to drain into
a suitable container. Clean the drain plugs and
install the drain plugs.
If the oil level is higher than the filler plug opening,
do not allow the oil to drain to the level of the filler
plug opening.
i01453263
Differential and Final Drive Oil
Level - Check
SMCS Code: 3278-535-FLV; 4050-535-FLV
NOTICE
Care must be taken to ensure that fluids are contained
during performance of inspection, maintenance, testing, adjusting and repair of the product. Be prepared to
collect the fluid with suitable containers before opening any compartment or disassembling any component containing fluids.
Illustration 180
g00864019
Front view
2. Remove rear differential drain plug (4) and allow
the oil to drain into a suitable container. Clean the
drain plug and install the drain plug.
3. Remove rear differential filler plug (3). Fill the rear
differential to the bottom of the filler plug opening.
Reference: For the correct amount of oil, refer to
Operation and Maintenance Manual, “Capacities
(Refill)”.
4. Clean the filler plug and install the filler plug.
5. Position each rear wheel so that rear final drive
filler plugs (1) are flush with the centerline of each
rear wheel. Remove the rear final drive filler plugs.
6. Fill the rear final drives to the bottom of the filler
plug opening.
Refer to Special Publication, NENG2500, “Caterpillar
Tools and Shop Products Guide” for tools and supplies
suitable to collect and contain fluids on Caterpillar
products.
Dispose of all fluids according to local regulations and
mandates.
Wipe the surfaces around any openings before you
check the oil or before you add oil.
142
Maintenance Section
Differential and Final Drive Oil Sample - Obtain
Final Drives
Differentials
Illustration 181
SEBU7879-15
g00535224
Front Differential Filler Plug
Illustration 183
g00760182
1. Position the wheel so that the final drive filler plug
is level with the centerline of the wheel. Remove
the final drive filler plug.
2. Check the oil level. The oil should be level with the
bottom of the filler opening. Add oil, if necessary.
3. Clean the final drive filler plug and install the final
drive filler plug.
4. Repeat the procedure for the remaining final
drives.
i01920699
Illustration 182
g00535225
Rear Differential Filler Plug
1. Remove the differential filler plug.
Differential and Final Drive Oil
Sample - Obtain
SMCS Code: 3278-008; 4050-008; 4070-008; 7542
2. Check the oil level. The oil should be level with the
bottom of the filler opening. Add oil, if necessary.
3. Clean the differential filler plug and install the
differential filler plug.
4. Repeat the procedure for the remaining
differential.
Illustration 184
Front Differential Filler Plug
g00535224
SEBU7879-15
Illustration 185
143
Maintenance Section
Drive Shaft Spline (Center) - Lubricate
g00535225
Rear Differential Filler Plug
The axles are not equipped with sampling valves.
Obtaining a sample of the differential and final drive
oil will require a vacuum pump or an equivalent.
Withdraw the fluid through the filler opening on the
right side of each axle.
Reference: Refer to Special Publication, SEBU6250,
“Caterpillar Machine Fluids Recommendations” for
more information about obtaining an fluid sample.
i03657243
Drive Shaft Spline (Center) Lubricate
Illustration 186
g01106848
3. Apply grease to the fitting (1). Apply grease until
the relief (2) overruns.
Note: 5P-0960 Molybdenum Grease is preferred.
1P-0808 Multipurpose Grease may be used.
4. Start the engine. Raise the bucket. Release
the parking brake. Reposition the machine in a
straight direction without articulation.
5. Lower the bucket to the ground. Apply a slight
down pressure. Engage the parking brake. Stop
the engine.
i02407821
SMCS Code: 3253-086-SN
Drive Shaft Support Bearing Lubricate
Wipe all of the fittings before you apply grease to
the fittings.
SMCS Code: 3267-086-BD
NOTICE
To prevent damage to the seal, articulate the machine
full right or left, before lubricating the splines.
1. Start the engine. Raise the bucket. Release the
parking brake. Articulate the machine to the right
or to the left in order to properly lubricate the
splined shaft.
2. Lower the bucket to the ground. Engage the
parking brake. Stop the engine.
Note: Since the steering frame lock cannot be
connected in this case, remove the engine start
switch key and turn the battery disconnect switch to
the OFF position.
Crushing Hazard. Insure that the machine ignition
switch is in the OFF position and that the parking
brake is engaged before entering the articulation
area. Failure to do so could result in serious injury
or death.
Wipe off the fitting before any lubricant is applied.
144
Maintenance Section
Electronic Unit Injector - Inspect/Adjust
SEBU7879-15
Refer to your machine's Service Manual or your
Caterpillar dealer for the complete adjustment
procedure.
i03649895
Engine Air Filter Primary
Element - Clean/Replace
SMCS Code: 1054-070-PY; 1054-510-PY
Illustration 187
g00879770
Apply lubricant through one remote fitting on the
support in the front loader frame.
i02061807
Electronic Unit Injector Inspect/Adjust
SMCS Code: 1251-025; 1251-040; 1290-025;
1290-040
The Electronic Control module produces high
voltage. To prevent personal injury make sure the
Electronic Control Module is not powered and the
unit injector solenoids are disconnected.
NOTICE
The camshafts must be correctly timed with the crankshaft before an adjustment of the unit injector lash
is made. The timing pins must be removed from the
camshafts before the crankshaft is turned or damage
to the cylinder block will be the result.
Illustration 188
g01959139
1. Access the air cleaner from the right side of the
machine. The air cleaner is located directly under
the precleaner. Open the access door.
The operation of Caterpillar engines with improper
adjustments of the electronic unit injector can reduce
engine efficiency. This reduced efficiency could result
in excessive fuel usage and/or shortened engine
component life.
Adjust the electronic unit injector at the same interval
as the valve lash adjustment.
Illustration 189
g00281967
SEBU7879-15
145
Maintenance Section
Engine Air Filter Primary Element - Clean/Replace
2. Loosen the clips which hold air cleaner housing
cover (1). Remove the air cleaner housing cover.
3. Remove primary filter element (2) from the air
cleaner housing.
The primary air filter element can be used up to
six times if the element is properly cleaned and
inspected. When the primary air filter element is
cleaned, check for rips or tears in the filter material.
The primary air filter element should be replaced at
least one time per year. This replacement should be
performed regardless of the number of cleanings.
Visually inspect the primary air filter elements before
cleaning. Inspect the air filter elements for damage
to the seal, the gaskets, and the outer cover. Discard
any damaged air filter elements.
There are two common methods that are used to
clean primary air filter elements:
• Pressurized air
• Vacuum cleaning
Illustration 190
g00101865
4. Clean the inside of the air cleaner housing.
5. Inspect the primary element. If the pleats, the
gaskets, or the seals are damaged, discard the
element. Replace the damaged primary element
with a clean primary element.
Pressurized Air
Pressurized air can be used to clean primary air filter
elements that have not been cleaned more than two
times. Pressurized air will not remove deposits of
carbon and oil. Use filtered, dry air with a maximum
pressure of 207 kPa (30 psi).
6. Close the engine hood.
Cleaning Primary Air Filter
Elements
NOTICE
Caterpillar recommends certified air filter cleaning services that are available at Caterpillar dealers. The
Caterpillar cleaning process uses proven procedures
to assure consistent quality and sufficient filter life.
Observe the following guidelines if you attempt to
clean the filter element:
Do not tap or strike the filter element in order to remove dust.
Do not wash the filter element.
Use low pressure compressed air in order to remove
the dust from the filter element. Air pressure must not
exceed 207 kPa (30 psi). Direct the air flow up the
pleats and down the pleats from the inside of the filter
element. Take extreme care in order to avoid damage
to the pleats.
Do not use air filters with damaged pleats, gaskets, or
seals. Dirt entering the engine will cause damage to
engine components.
Illustration 191
g00281692
Note: When the primary air filter elements are
cleaned, always begin with the clean side (inside)
in order to force dirt particles toward the dirty side
(outside).
Aim the hose so that the air flows inside the element
along the length of the filter in order to help prevent
damage to the paper pleats. Do not aim the stream of
air directly at the primary air filter element. Dirt could
be forced further into the pleats.
146
Maintenance Section
Engine Air Filter Secondary Element - Replace
SEBU7879-15
Vacuum Cleaning
Vacuum cleaning is another method for cleaning
primary air filter elements which require daily cleaning
because of a dry, dusty environment. Cleaning with
pressurized air is recommended prior to vacuum
cleaning. Vacuum cleaning will not remove deposits
of carbon and oil.
Inspecting the Primary Air Filter
Elements
Illustration 193
g00281694
Do not use paint, a waterproof cover, or plastic as a
protective covering for storage. An air flow restriction
may result. To protect against dirt and damage, wrap
the primary air filter elements in Volatile Corrosion
Inhibited (VCI) paper.
Illustration 192
g00281693
Inspect the clean, dry primary air filter element. Use
a 60 watt blue light in a dark room or in a similar
facility. Place the blue light in the primary air filter
element. Rotate the primary air filter element. Inspect
the primary air filter element for tears and/or holes.
Inspect the primary air filter element for light that may
show through the filter material. If it is necessary in
order to confirm the result, compare the primary air
filter element to a new primary air filter element that
has the same part number.
Do not use a primary air filter element that has any
tears and/or holes in the filter material. Do not use
a primary air filter element with damaged pleats,
gaskets or seals. Discard damaged primary air filter
elements.
Storing Primary Air Filter Elements
If a primary air filter element that passes inspection
will not be used, the primary air filter element can
be stored for future use.
Place the primary air filter element into a box for
storage. For identification, mark the outside of the
box and mark the primary air filter element. Include
the following information:
• Date of cleaning
• Number of cleanings
Store the box in a dry location.
i03649902
Engine Air Filter Secondary
Element - Replace
SMCS Code: 1054-510-SE
NOTICE
Always replace the secondary filter element. Never
attempt to reuse it by cleaning.
The secondary filter element should be replaced at the
time the primary element is serviced for the third time.
The secondary filter element should also be replaced
if the yellow piston in the filter element indicator enters the red zone after installation of a clean primary
element, or if the exhaust smoke is still black.
SEBU7879-15
147
Maintenance Section
Engine Air Filter Secondary Element - Replace
Illustration 196
g00882913
4. Remove the secondary filter element.
Illustration 194
g01959139
1. Access the air cleaner from the right side of the
machine. Open the access door.
Illustration 197
g00882914
5. Cover the air inlet opening. Clean the inside of
the air cleaner housing.
6. Inspect the gasket between the air inlet pipe and
the air cleaner housing. Replace the gasket if the
gasket is damaged.
7. Uncover the air inlet opening. Install a new
secondary filter element.
Illustration 195
g00281967
2. Loosen the clips which hold air cleaner housing
cover (1). Remove the air cleaner housing cover.
3. Remove primary filter element (2) from the air
cleaner housing.
Reference: For the correct procedure, refer to
Operation and Maintenance Manual, “Engine Air
Filter Primary Element - Clean/Replace”.
8. Install the primary filter element and the air cleaner
housing cover. Fasten the clips in order to secure
the air cleaner housing cover.
9. Close the engine hood.
148
Maintenance Section
Engine Air Filter Service Indicator - Inspect
SEBU7879-15
i01968230
i01968211
Engine Air Filter Service
Indicator - Inspect
Engine Air Filter Service
Indicator - Inspect/Replace
SMCS Code: 7452-040
SMCS Code: 7452-040; 7452-510
Some engines are equipped with a differential gauge
for inlet air pressure. The differential gauge for inlet
air pressure displays the difference in the pressure
that is measured before the air cleaner element and
the pressure that is measured after the air cleaner
element. As the air cleaner element becomes dirty,
the pressure differential rises.
Illustration 198
g01001638
Illustration 199
g01001638
The air filter service indicator is located near the air filter housing.
The air filter service indicator is located near the air filter housing.
1. Observe the performance of the air filter service
indicator. The air filter element should be cleaned
or the air filter element should be replaced when
one of the following conditions occur:
Inspect
• The yellow diaphragm enters the red zone.
• The red piston locks in the visible position.
2. If any component damage is present, replace the
service indicator.
3. If air leaks are present, replace the service
indicator.
Note: When a new service indicator is installed,
excessive force may crack the top of the service
indicator. Tighten the service indicator to a torque
of 2 N·m (18 lb in).
1. Observe the performance of the air filter service
indicator. The air filter element should be cleaned
or the air filter element should be replaced when
one of the following conditions occur:
• The yellow diaphragm enters the red zone.
• The red piston locks in the visible position.
2. If any component damage is present, replace the
service indicator.
3. If air leaks are present, replace the service
indicator.
Test
1. Check for ease of resetting. The service indicator
should reset in less than three pushes.
2. Check the movement of the yellow core when the
engine is accelerated to the engine rated speed.
The yellow core should latch approximately at the
greatest vacuum that is attained.
SEBU7879-15
149
Maintenance Section
Engine Crankcase Breather - Clean
If the service indicator does not reset easily, or if the
yellow core does not latch at the greatest vacuum,
the service indicator should be replaced. If the new
service indicator will not reset, the hole for the service
indicator may be plugged.
Replace
2. Loosen the hose clamp underneath the breather
and remove the breather.
3. Wash the breather in a clean, nonflammable
solvent. Inspect the breather and the seal for
damage. Replace the seal, if necessary.
4. Use pressure air to dry the breather.
Replace the service indicator if the following
conditions exist:
5. Install the seal, engine crankcase breather (3),
hose (2) and clamps (1).
• The machine is used in a severely dusty
environment.
i01457076
• The engine is overhauled.
Engine Oil Level - Check
• Major components are replaced.
SMCS Code: 1000-535-FLV
Note: Replace the service indicator annually
regardless of the operating conditions.
NOTICE
Do not under fill or overfill engine crankcase with oil.
Either condition can cause engine damage.
Note: When a new service indicator is installed,
excessive force may crack the top of the service
indicator. Tighten the service indicator to a torque
of 2 N·m (18 lb in).
i03091842
Engine Crankcase Breather Clean
SMCS Code: 1317-070
NOTICE
Care must be taken to ensure that fluids are contained
during performance of inspection, maintenance, testing, adjusting and repair of the product. Be prepared to
collect the fluid with suitable containers before opening any compartment or disassembling any component containing fluids.
Refer to Special Publication, NENG2500, “Caterpillar
Tools and Shop Products Guide” for tools and supplies
suitable to collect and contain fluids on Caterpillar
products.
Dispose of all fluids according to local regulations and
mandates.
Illustration 200
g01573213
Engine crankcase breather (3) is located on the top
of the valve cover.
1. Loosen clamps (1). Remove hose (2) from engine
crankcase breather (3).
Illustration 201
g00761763
150
Maintenance Section
Engine Oil Sample - Obtain
SEBU7879-15
1. Open the engine access door on the right rear
side of the machine.
2. Remove engine oil dipstick (2) and wipe the
dipstick with a clean cloth. Then, insert the dipstick
and remove the dipstick again. This will ensure
a more accurate measurement of the engine oil
level.
3. While the engine is stopped, check the “ENGINE
STOPPED” side of engine oil dipstick (2). Maintain
the oil level between the marks on the dipstick.
While the engine is running, check the “ENGINE
RUNNING” side of engine oil dipstick (2). Maintain
the oil level between the marks on the dipstick.
4. If necessary, remove oil filler plug (1) and add oil
through the oil filler tube.
5. Clean the oil filler plug and install the oil filler plug.
Illustration 202
6. Close the engine access door.
g01573337
(1) Sampling port for the engine oil
i03091884
Engine Oil Sample - Obtain
SMCS Code: 1348-008; 7542
Reference: For more information, refer to Special
Publication, SEBU6250, “Caterpillar Machine
Fluids Recommendations” and Special Publication,
PEHP6001, “How To Take A Good Oil Sample”.
i03649984
Hot oil and components can cause personal injury.
Engine Oil and Filter - Change
SMCS Code: 1318-510
Do not allow hot oil or components to contact
skin.
Selection of the Oil Change Interval
NOTICE
Care must be taken to ensure that fluids are contained
during performance of inspection, maintenance, testing, adjusting and repair of the product. Be prepared to
collect the fluid with suitable containers before opening any compartment or disassembling any component containing fluids.
NOTICE
A 500 hour engine oil change interval is available, provided that the operating conditions and recommended multigrade oil types are met. When these requirements are not met, shorten the oil change interval
to 250 hours, or use an S·O·S Services oil sampling
and analysis program to determine an acceptable oil
change interval.
Refer to Special Publication, NENG2500, “Caterpillar
Dealer Service Tool Catalog” for tools and supplies
suitable to collect and contain fluids on Caterpillar
products.
Dispose of all fluids according to local regulations and
mandates.
Operate the machine for a few minutes before you
obtain the fluid sample. This will thoroughly mix the
fluid for a more accurate sample.
If you select an interval for oil and filter change that is
too long, you may damage the engine.
The normal engine oil change interval is listed in this
Operation and Maintenance Manual, “Maintenance
Interval Schedule”.
SEBU7879-15
Abnormally harsh operating cycles or harsh
environments can shorten the service life of
the engine oil. Arctic temperatures, corrosive
environments, or extremely dusty conditions may
require a reduction in engine oil change intervals.
Also refer to Special Publication, SEBU5898, “Cold
Weather Recommendations for All Caterpillar
Machines”. Poor maintenance of air filters or of fuel
filters requires reduced oil change intervals. Consult
your Caterpillar dealer for more information if this
product will experience abnormally harsh operating
cycles or harsh environments.
151
Maintenance Section
Engine Oil and Filter - Change
References
Reference: Special Publication, SEBU6250,
“Caterpillar Machine Fluids Recommendations”
Reference: Special Publication, SEBU5898, “Cold
Weather Recommendations for All Caterpillar
Machines”
Reference: Special Publication, PEDP7035,
“Optimizing Oil Change Intervals”
Adjustment of the Oil Change Interval
Reference: Special Publication, PEDP7036, “S·O·S
Fluid Analysis”
Note: Your Caterpillar dealer has additional
information on these programs.
Reference: Special Publication, PEDP7076,
“Understanding the S·O·S Oil Analysis Tests”
Cat oil filters are recommended.
Procedure for Changing the Engine
Oil and the Filter
Program A
Verification for an Oil Change Interval of 500 Hours
This program consists of three oil change intervals of
500 hours. Oil sampling and analysis is done at 250
hours and 500 hours for each of the three intervals
for a total of six oil samples. The analysis includes
oil viscosity and infrared (IR) analysis of the oil. If
all of the results are satisfactory, the 500 hour oil
change interval is acceptable for the machine in that
application. Repeat Program A if you change the
application of the machine.
If a sample does not pass the oil analysis, take one
of these actions:
NOTICE
Care must be taken to ensure that fluids are contained
during performance of inspection, maintenance, testing, adjusting and repair of the product. Be prepared to
collect the fluid with suitable containers before opening any compartment or disassembling any component containing fluids.
Refer to Special Publication, NENG2500, “Caterpillar
Dealer Service Tool Catalog” for tools and supplies
suitable to collect and contain fluids on Caterpillar
products.
Dispose of all fluids according to local regulations and
mandates.
• Shorten the oil change interval to 250 hours.
• Proceed to Program B.
1. Open the access doors that are located on both
sides of the machine.
• Change to a preferred oil type in the “Lubricant
Viscosities for Ambient Temperatures” Table in this
Operation and Maintenance Manual
Program B
Optimizing Oil Change Intervals
Begin with a 250 hour oil change interval. The oil
change intervals are adjusted by increments. Each
increment is an additional 50 hours. Periodic oil
sampling and analysis is done during each interval.
The analysis includes oil viscosity and infrared (IR)
analysis of the oil. Repeat Program B if you change
the application of the machine.
If an oil sample does not pass the analysis, shorten
the oil change interval, or change to a preferred
multigrade oil type in the listing above.
Illustration 203
Earlier machine models
Left side of machine
g01030594
152
Maintenance Section
Engine Oil and Filter - Change
SEBU7879-15
Illustration 206
g00101318
5. Apply a thin coat of clean engine oil to the seal of
the new filter.
6. Install the new oil filter elements by hand.
Illustration 204
g01572993
Newer machine models
Location of crankcase drain valve
2. Open the crankcase drain valve (1) on the right
side of the machine. Allow the oil to drain into
a suitable container. Close the crankcase drain
valve.
Instructions for the installation of the filters are
printed on the side of each Caterpillar spin-on
filter. For non-Caterpillar filters, refer to the
installation instructions that are provided by the
supplier of the filter.
Illustration 207
g01573016
7. Remove engine oil filler cap (3). Fill the crankcase
with new oil.
Reference: Refer to Operation and Maintenance
Manual, “Capacities (Refill)”.
Illustration 205
g01572998
3. Remove the filter element (2) on the left side of
the machine with a strap type wrench. Inspect the
filter.
4. Clean the filter mounting base with a clean cloth.
Make sure that the used filter gasket has been
completely removed.
8. Clean engine oil filler cap (3). Install the engine
oil filler cap.
9. Start the engine and allow the oil to warm. Check
for leaks.
10. Check the engine oil level with engine oil level
gauge (4).
Reference: Refer to Operation and Maintenance
Manual, “Engine Oil Level - Check” for the correct
procedure.
SEBU7879-15
153
Maintenance Section
Engine Valve Lash - Check
11. Stop the engine. Close the engine access door.
i04538255
Engine Valve Lash - Check
SMCS Code: 1105-535
In order to perform the valve lash adjustment, refer to
Systems Operation, Testing and Adjusting, “Engine
Valve Lash - Inspect/Adjust”.
Note: A qualified mechanic should adjust the engine
valve lash because special tools and training are
required.
i02770364
Engine Valve Rotators - Inspect
Illustration 209
g00038585
2. Watch the top surface of each valve rotator.
Whenever an inlet valve closes or an exhaust
valve closes, each valve rotator should turn.
3. If a valve rotator fails to rotate, consult your
Caterpillar dealer for service.
SMCS Code: 1109-040
When inspecting the valve rotators, protective
glasses or face shield and protective clothing
must be worn, to prevent being burned by hot oil
or spray.
Electrical shock hazard. The electronic unit injector system uses 90-120 volts.
Note: Caterpillar recommends replacing valve
rotators that are operating improperly. An improperly
operating valve rotator will shorten valve life because
of accelerated wear on the valves.
Note: If a damaged valve rotator is not replaced,
some valve face guttering could result. Metal particles
from the valve could fall into the cylinder. This could
cause damage to the piston head and to the cylinder
head.
i02047267
Ether Starting Aid Cylinder Replace
(If Equipped)
SMCS Code: 1456-510-CD
Illustration 208
g01372247
1. Start the engine. Run the engine at low idle.
Illustration 210
g00101192
154
Maintenance Section
Fuel System - Prime
SEBU7879-15
1. Open the engine hood. The ether starting aid
cylinder is mounted in the center of the machine
next to the air cleaner.
2. Loosen retaining clamp (1) and unscrew ether
starting aid cylinder (2).
3. Remove the gasket. Install the new gasket that is
provided with each new ether starting aid cylinder.
4. Install new ether starting aid cylinder (2) hand
tight. Tighten retaining clamp (1) securely.
5. Close the engine hood.
6. Allow the air/fuel mixture to flow into the suitable
container until the fuel flows in a steady stream.
7. Turn toggle switch (1) to the OFF position.
8. Remove the sampling probe with the piece of bulk
hose from valve assembly (2).
9. Start the engine. The engine should start. The
engine should run smoothly.
Failure to tighten fittings could result in fuel leaks.
If the engine does not start or the engine misfires,
further priming is necessary.
i02197564
Fuel System - Prime
10. Clean residual fuel from the engine components.
11. Close the engine access door.
SMCS Code: 1250-548
The priming pump is located on the right side of the
machine in the engine compartment.
i02197567
1. Turn the ignition switch to the OFF position.
Fuel System Primary Filter
(Water Separator) - Drain
2. Open the engine access door.
SMCS Code: 1263-543
NOTICE
Care must be taken to ensure that fluids are contained
during performance of inspection, maintenance, testing, adjusting and repair of the product. Be prepared to
collect the fluid with suitable containers before opening any compartment or disassembling any component containing fluids.
Refer to Special Publication, NENG2500, “Caterpillar
Tools and Shop Products Guide” for tools and supplies
suitable to collect and contain fluids on Caterpillar
products.
Dispose of all fluids according to local regulations and
mandates.
Illustration 211
g01124747
3. Attach a piece of bulk hose to a sampling probe.
Install the sampling probe with the piece of bulk
hose onto valve assembly (2).
Note: Consult your Caterpillar dealer for the proper
tooling or refer to the parts manual for your machine.
4. Position a suitable container under the hose.
5. Turn toggle switch (1) to the ON position. Toggle
switch (1) is for the fuel priming pump.
SEBU7879-15
155
Maintenance Section
Fuel System Primary Filter (Water Separator) Element - Replace
i02197571
Fuel System Primary Filter
(Water Separator) Element Replace
SMCS Code: 1263-510-FQ
NOTICE
Care must be taken to ensure that fluids are contained
during performance of inspection, maintenance, testing, adjusting and repair of the product. Be prepared to
collect the fluid with suitable containers before opening any compartment or disassembling any component containing fluids.
Refer to Special Publication, NENG2500, “Caterpillar
Tools and Shop Products Guide” for tools and supplies
suitable to collect and contain fluids on Caterpillar
products.
Illustration 212
g01109758
1. Open the engine hood.
2. The fuel filters are located on the right side of the
machine in the engine compartment. The water
separator bowl is located on the bottom of primary
fuel filter. Attach a hose to the bottom of the drain
valve in order to catch the fuel. Open the drain
valve on the bottom of the water separator bowl.
Allow the water and the fuel to drain into a suitable
container.
Dispose of all fluids according to local regulations and
mandates.
NOTICE
Do not fill fuel filters with fuel before installing them.
The fuel will not be filtered and could be contaminated.
Contaminated fuel will cause accelerated wear to fuel
system parts. The fuel system should be primed prior
to starting the engine.
3. Close the drain valve.
Note: The water separator is under suction during
normal engine operation. Tighten the drain valve
securely in order to prevent air leakage into the fuel
system.
4. Close the engine hood.
Illustration 213
g01109758
1. The water separator bowl is located on the bottom
of the primary fuel filter. Open the drain valve on
the water separator bowl. Allow the water and the
fuel to drain into a suitable container.
156
Maintenance Section
Fuel System Secondary Filter - Replace
SEBU7879-15
2. Use a strap type wrench to remove the filter from
the filter mounting base.
3. Remove the water separator bowl from the filter
element. Clean the water separator bowl and the
O-ring groove.
Note: The water separator bowl is reusable. Do not
discard the water separator bowl.
4. Inspect the O-ring seal in the water separator bowl
for damage. Replace the O-ring seal, if necessary.
5. Lubricate the O-ring seal with clean diesel fuel or
with engine oil. Place the O-ring seal in the water
separator bowl.
6. Install the water separator bowl onto the new filter
element by hand. Do not use tools to tighten the
water separator bowl.
Note: The water separator element is under suction
during normal engine operation. The drain valve must
be tightened in order to prevent air leakage into the
fuel system.
10. Prime the fuel system in order to fill the filter
element with fuel.
Reference: Refer to Operation and Maintenance
Manual, “Fuel System Prime” for the correct
procedure.
i02197586
Fuel System Secondary Filter Replace
SMCS Code: 1261-510-SE
NOTICE
Care must be taken to ensure that fluids are contained
during performance of inspection, maintenance, testing, adjusting and repair of the product. Be prepared to
collect the fluid with suitable containers before opening any compartment or disassembling any component containing fluids.
Refer to Special Publication, NENG2500, “Caterpillar
Tools and Shop Products Guide” for tools and supplies
suitable to collect and contain fluids on Caterpillar
products.
Illustration 214
g00101318
7. Lubricate the gasket of the new filter element with
clean diesel fuel. Install a new filter hand tight
until the seal of the fuel filter contacts the base.
Note the position of the index marks on the filter in
relation to a fixed point on the filter base.
Note: There are rotation index marks on the fuel filter
that are spaced 90 degrees or 1/4 of a turn away
from each other. When you tighten the fuel filter, use
the rotation index marks as a guide.
8. Tighten the filter according to the instructions
that are printed on the filter. Use the index marks
as a guide. For non-Caterpillar filters, use the
instructions that are provided with the filter.
Note: You may need to use a Caterpillar strap
wrench, or another suitable tool, in order to turn
the filter to the amount that is required for final
installation. Make sure that the installation tool does
not damage the filter.
9. Tighten the drain valve on the water separator
bowl.
Dispose of all fluids according to local regulations and
mandates.
NOTICE
Do not fill fuel filters with fuel before installing them.
The fuel will not be filtered and could be contaminated.
Contaminated fuel will cause accelerated wear to fuel
system parts. The fuel system should be primed prior
to starting the engine.
SEBU7879-15
157
Maintenance Section
Fuel Tank Breaker Relief Valve - Replace
i04798701
Fuel Tank Breaker Relief Valve
- Replace
(If Equipped)
SMCS Code: 5118-510
NOTICE
Care must be taken to ensure that fluids are contained
during performance of inspection, maintenance, testing, adjusting, and repair of the product. Be prepared
to collect the fluid with suitable containers before
opening any compartment or disassembling any component containing fluids.
Refer to Special Publication, NENG2500, “Dealer Service Tool Catalog” for tools and supplies suitable to
collect and contain fluids on Cat products.
Illustration 215
g01109780
Dispose of all fluids according to local regulations and
mandates.
1. Use a strap type wrench to remove the secondary
fuel filter. The secondary fuel filter is located
on the right side of the machine in the engine
compartment. Dispose of the used filter properly.
2. Clean the filter mounting base. Remove all of the
used seal from the filter mounting base.
3. Lubricate the seal of the new fuel filter with clean
diesel fuel. Install a new secondary fuel filter hand
tight until the seal of the secondary fuel filter
contacts the base. Note the position of the index
marks on the filter in relation to a fixed point on
the filter base.
Note: There are rotation index marks on the fuel filter
that are spaced 90 degrees or 1/4 of a turn away
from each other. When you tighten the fuel filter, use
the rotation index marks as a guide.
4. Tighten the filter according to the instructions
that are printed on the filter. Use the index marks
as a guide. For non-Caterpillar filters, use the
instructions that are provided with the filter.
Note: You may need to use a Caterpillar strap
wrench, or another suitable tool, in order to turn
the filter to the amount that is required for final
installation. Make sure that the installation tool does
not damage the filter.
5. Prime the fuel filters.
Reference: Refer to Operation and Maintenance
Manual, “Fuel System - Prime” for the proper
procedure.
Illustration 216
g01121947
1. Remove the fuel tank breaker relief valve from the
top of the fuel tank.
2. Install a new fuel tank breaker relief valve.
158
Maintenance Section
Fuel Tank Cap and Strainer - Clean
SEBU7879-15
i02877628
Fuel Tank Cap and Strainer Clean
SMCS Code: 1273-070-Z2; 1273-070-STR
Illustration 218
Illustration 217
g01432143
g01431287
6. Inspect the fuel cap boot(if equipped). If the fuel
cap boot is damaged, replace the fuel cap boot.
If your machine does not have a fuel cap boot,
contact your Caterpillar dealer for information
about the fuel cap boot.
(1) Cap
(2) Strainer
(3) Fuel Tank
7. Wash the fuel cap boot in a clean, nonflammable
solvent.
The fuel tank is located on the left side of the
machine.
8. Install the fuel cap boot and the fuel tank cap.
1. Remove the fuel tank cap and the strainer from
the fuel tank .
2. Inspect the seal for damage. If the seal is
damaged, replace the cap.
3. Wash the strainer in a clean, nonflammable
solvent.
4. Install the strainer into the filler opening.
5. Install the fuel tank cap.
i01455356
Fuel Tank Water and Sediment
- Drain
SMCS Code: 1273-543-M&S
NOTICE
Care must be taken to ensure that fluids are contained
during performance of inspection, maintenance, testing, adjusting and repair of the product. Be prepared to
collect the fluid with suitable containers before opening any compartment or disassembling any component containing fluids.
Refer to Special Publication, NENG2500, “Caterpillar
Tools and Shop Products Guide” for tools and supplies
suitable to collect and contain fluids on Caterpillar
products.
Dispose of all fluids according to local regulations and
mandates.
SEBU7879-15
Illustration 219
159
Maintenance Section
Fuses - Replace
g00761041
Illustration 220
g01000750
Illustration 221
g01078009
The fuel tank drain valve is located at the left side of
the machine under the fuel tank.
1. Open the fuel tank drain valve. Allow the water
and sediment to drain into a suitable container.
2. Close the fuel tank drain valve.
i02283060
Fuses - Replace
SMCS Code: 1417-510
NOTICE
Replace fuses with the same type and size only. Otherwise, electrical damage can result.
If it is necessary to replace fuses frequently, an electrical problem may exist. Contact your Caterpillar dealer.
The fuses are located in the cab on the right side of
the operator seat.
(1) HVAC Blower ................................... 20 Amperes
(2) Neutralizer Override Switch ............. 10 Amperes
Fuses – The fuses protect the electrical
system from a circuit that has been
overloaded. Change a fuse if the element
separates. If the element of a new fuse separates,
check the circuit. Repair the circuit, if necessary.
(3) Axle Oil Cooler and Switched Autolube
Power .............................................. 10 Amperes
(4) Autodig Audible Alert ....................... 10 Amperes
(5) Rear Cab Floodlights ....................... 15 Amperes
(6) Air Seat and Heated Seat ................ 15 Amperes
(7) Switched Autolube Power ................ 10 Amperes
(8) Engine ECM Switched Power .......... 10 Amperes
(9) Front Cab Floodlights ...................... 15 Amperes
(10) Beacon and Heated Mirrors ........... 10 Amperes
160
Maintenance Section
High Intensity Discharge Lamp (HID) - Replace
(11) Turn Signal Flasher, Front Flood Relays, and
Rear Flood Relays ........................... 10 Amperes
SEBU7879-15
i02245859
(12) Machine Security System and Product
Link .................................................. 10 Amperes
High Intensity Discharge Lamp
(HID) - Replace
(If Equipped)
(13) LH Indicator Display and RH Indicator
Display ............................................. 10 Amperes
SMCS Code: 1434-510
(14) Tilt Position Sensor and Lift Position
Sensor ............................................. 10 Amperes
(15) Transmission ECM and LH Brake Pedal
Sensor ............................................. 10 Amperes
HID lamps operate at very high voltages. To avoid
electrical shock and personal injury, disconnect
power before servicing HID lamps.
(16) Implement ECM and Lever
Sensors ........................................... 10 Amperes
(17) EMS, Quad Gauge, Speedometer, Tachometer,
and Backlights ................................. 10 Amperes
(18) Wiper and Washer for the Front and the Rear
Windows .......................................... 10 Amperes
(19) Payload Control System (PCS) ..... 10 Amperes
(20) Voltage Converters and 24V
Radio ............................................... 10 Amperes
HID bulbs become very hot during operation.
Before servicing, remove power from lamp for at
least five minutes to ensure lamp is cool.
NOTICE
Although HID bulb materials may change over time,
HID bulbs produced at the time of the printing of this
manual contain mercury. When disposing of this component, or any waste that contains mercury, please
use caution and comply with any applicable laws.
(21) Center Indicator Display ................ 10 Amperes
(22) Engine ECM Unswitched Power .... 15 Amperes
(23) Product Link ................................... 15 Amperes
(24) Voltage Converter Memory
(Attachment) .................................... 10 Amperes
(25) ECAP and Unswitched Autolube
Power .............................................. 15 Amperes
1. Remove the electrical power from the high
intensity discharge lamp (HID). The electrical
power must be removed from the HID lamp for
at least five minutes, in order to ensure that the
bulb is cool.
2. Disassemble the housing for the HID lamp in order
to have access to the bulb.
(27) Hood Actuator ................................ 10 Amperes
Note: On some HID lamps, the bulb is an integral
part of the lens assembly. The bulb is not removed
separately from the lens assembly. Replace the
entire lens assembly on these HID lamps.
(28) Stop Lamps ................................... 10 Amperes
3. Remove the bulb from the HID lamp.
(29) Horn ............................................... 10 Amperes
4. Install the replacement bulb in the HID lamp.
(26) LH Tail and Clearance Lights ......... 10 Amperes
(30) Voltage Converter Memory
(Standard) ........................................ 10 Amperes
(31) Key Start Switch and Machine Security
System ............................................. 10 Amperes
(32) Dome Lamps ................................. 10 Amperes
If the bulb is an integral part of the lens assembly,
install the replacement lens assembly in the HID
lamp.
Note: In order to avoid failure to the bulb that is
premature, avoid touching the bulb's surface with
your bare hands. Clean any fingerprints from the bulb
with alcohol prior to operation.
5. Reassemble the housing for the HID lamp. Ensure
that any printing on the lens is oriented correctly
with respect to the HID lamp's mounting position
on the machine.
SEBU7879-15
161
Maintenance Section
Hydraulic System Biodegradable Oil Filter Element - Replace
6. Reattach the electrical power to the HID lamp.
7. Check the HID lamp for proper operation.
Note: Consult your Caterpillar dealer for additional
information on HID lamps.
i04004021
3. The hydraulic oil filter is located on the right side of
the machine in front of the hydraulic oil tank. Use
a strap type wrench to remove the filter element.
Dispose of the used filter element properly.
4. Clean the filter mounting base. Make sure that
all of the used gasket is removed from the filter
mounting base.
Hydraulic System
Biodegradable Oil Filter
Element - Replace
SMCS Code: 5068-510
NOTICE
Care must be taken to ensure that fluids are contained
during performance of inspection, maintenance, testing, adjusting, and repair of the product. Be prepared
to collect the fluid with suitable containers before
opening any compartment or disassembling any component containing fluids.
Refer to Special Publication, NENG2500, “Dealer Service Tool Catalog” for tools and supplies suitable to
collect and contain fluids on Cat products.
Dispose of all fluids according to local regulations and
mandates.
1. Stop the engine.
2. Drain the hydraulic oil.
Reference: For the correct procedure, refer to
Operation and Maintenance Manual, “Hydraulic
System Oil - Change”.
Illustration 223
g00101318
5. Apply a thin coat of hydraulic oil to the seal on
the new filter.
6. Install the new oil filter elements by hand.
Instructions for the installation of the filters are
printed on the side of each Caterpillar spin-on
filter. For non-Caterpillar filters, refer to the
installation instructions that are provided by the
supplier of the filter.
7. Fill the hydraulic tank with clean oil.
Reference: For the correct type of oil and for
the correct amount of oil, refer to Operation and
Maintenance Manual, “Lubricant Viscosities and
Refill Capacities”.
8. Start the engine and run the engine at low idle.
Inspect the hydraulic system for leaks.
9. Check the hydraulic oil level.
Reference: For the correct procedure, refer to
Operation and Maintenance Manual, “Hydraulic
System Oil Level - Check”.
Illustration 222
g00761222
162
Maintenance Section
Hydraulic System Oil - Change
SEBU7879-15
i03267620
• Caterpillar Biodegradable Hydraulic Oils (HEES)
Hydraulic System Oil - Change
• Caterpillar Multipurpose Tractor Oil (MTO)
SMCS Code: 5056-044
• Heavy-duty diesel engine oils with a minimum zinc
Selection of the Oil Change Interval
Your machine may be able to use a 4000 hour
interval for the hydraulic oil. The hydraulic oil is in
the system that is not integral to the service brakes,
the clutches, the final drives, or the differentials.
The standard change interval is 2000 hours. The oil
should be monitored during intervals of 500 hours.
The extended 4000 hour interval can be used if the
following criteria are met.
HYDO Advanced 10
Cat HYDO Advanced 10 is the preferred oil for use in
most Caterpillar machine hydraulic and hydrostatic
transmission systems when ambient temperature
is between −20 °C (−4 °F) and 40 °C (104 °F). Cat
HYDO Advanced 10 has an SAE viscosity grade of
10W. Cat HYDO Advanced 10 has a 50% increase
in the standard oil drain interval (up to 3000 hours)
for machine hydraulic systems over second and third
choice oils when you follow the maintenance interval
schedule for oil filter changes and for oil sampling that
is stated in the Operation and Maintenance Manual.
6000 hour oil drain intervals are possible when using
S·O·S Services oil analysis. When you switch to Cat
HYDO Advanced 10, cross contamination with the
previous oil should be kept to less than 10%. Consult
your Cat dealer for details about the benefits from
the improved performance designed into Cat HYDO
Advanced 10.
Oil Filters
Caterpillar oil filters are recommended. The interval
for changing the oil filter should be 500 hours.
Oil
The 6000 hour interval for changing the oil is specific
to HYDO Advance 10.
The 4000 hour interval for changing the oil is for the
following oil types.
• Caterpillar Hydraulic Oil (HYDO)
• Caterpillar Transmission and Drive Train Oil
(TDTO)
• Caterpillar TDTO-TMS
• Caterpillar Diesel Engine Oil
content of 900 ppm
If Caterpillar oils cannot be used, use heavy-duty oils
with the following classification: Caterpillar ECF-1,
API CG-4, API CF, and TO-4. These oils must have
a minimum zinc additive of 0.09 percent (900 ppm).
Note: Industrial hydraulic oils are not recommended
in Caterpillar hydraulic systems.
Monitoring the Condition of the Oil
The oil should be monitored during intervals of 500
hours. Caterpillar's standard SOS Fluids Analysis or
an equivalent oil sampling program should be used.
The current guidelines for cleanliness of the oil
should be observed. Refer to “Measured Data”.
If an oil sampling program is not available, the
standard 2000 oil change interval should be used.
Measured Data
The following information should be monitored
through sampling of the oil:
• Significant changes in wear metals should be
monitored. These metals include iron, copper,
chromium, lead, aluminum, and tin.
• Significant changes in the following additives
should be monitored: zinc, calcium, magnesium,
and phosphorus.
• Contaminants should not be present. These
contaminants include fuel and antifreeze. Water
content should be .5 percent or less.
• The silicon level should not exceed 15 parts per
million for new oil. The particle counts should be
monitored.
• The recommended level of cleanliness for
Caterpillar machines that are operated in the field
is ISO 18/15 or cleaner. The cleanliness should be
monitored by particle count analysis. The levels
of contamination should not exceed the normal
by more than two ISO codes. Action should be
taken in order to determine the cause of the
contamination. The system should be returned to
the original levels of contamination.
• There should not be significant changes in sodium,
silicon, copper, and potassium.
SEBU7879-15
163
Maintenance Section
Hydraulic System Oil - Change
• The allowable level of oxidation is 40 percent (0.12
Abs units).
• The kinematic viscosity of 100 °C (212 °F) oil
should not exceed a change of more than 2 cSt
from new oil.
1. Remove hydraulic tank filler cap (2) and the filler
strainer. Wash the filler cap and the strainer in a
clean, nonflammable solvent. Install the strainer.
2. Inspect the gasket on the filler cap for damage.
Replace the gasket, if necessary.
3. Remove the drain plug (4) from the bottom of the
hydraulic tank. Wash the drain plug in a clean,
nonflammable solvent.
Procedure for Changing the
Hydraulic Oil
NOTICE
Care must be taken to ensure that fluids are contained
during performance of inspection, maintenance, testing, adjusting and repair of the product. Be prepared to
collect the fluid with suitable containers before opening any compartment or disassembling any component containing fluids.
Refer to Special Publication, NENG2500, “Caterpillar
Dealer Service Tool Catalog” for tools and supplies
suitable to collect and contain fluids on Caterpillar
products.
Dispose of all fluids according to local regulations and
mandates.
Operate the machine for a few minutes in order to
warm the hydraulic oil.
Park the machine on level ground. Lower the bucket
to the ground and apply slight downward pressure.
Engage the parking brake and stop the engine.
4. Install a 6B-3156 Pipe Nipple with a hose in
order to unseat the internal drain valve. Allow the
hydraulic oil to drain into a suitable container.
NOTICE
Never start the engine while the hydraulic oil tank is
being drained or while the hydraulic oil tank is empty.
Excessive wear and damage to the hydraulic components can occur.
5. Remove the pipe nipple in order to close the drain
valve. Install the drain plug.
6. Replace the hydraulic oil filter.
Reference: Refer to Operation and Maintenance
Manual, “Hydraulic System Oil Filter - Replace” for
the correct procedure.
7. Fill the hydraulic tank with clean oil. Make sure
that the oil level is at the “FULL” mark on the sight
gauge (3). Install the filler cap.
Reference: Refer to Operation and Maintenance
Manual, “Lubricant Viscosities and Refill
Capacities” for the correct type of oil and for the
correct amount of oil.
8. Start the engine and run the engine for at least ten
seconds. Then, stop the engine and add hydraulic
oil to the tank until the oil level is at the “FULL”
mark on the sight gauge. Install the filler cap.
9. Start the engine and run the engine at low idle.
Cycle the implements so that all hydraulic systems
are filled with oil. Articulate the machine from left
to right in order to fill the steering system with oil.
Note: If the alert indicator for a low oil level comes
on, stop the engine and immediately add oil to the
hydraulic tank. The oil level should not be below the
suction ports in the hydraulic tank while the engine
is running.
Illustration 224
g00761267
The hydraulic tank is located on the right side of the
machine. Press hydraulic tank breaker relief valve (1)
in order to relieve any tank pressure.
164
Maintenance Section
Hydraulic System Oil Filter - Replace
SEBU7879-15
Note: If the pump is difficult to prime, in order to aid
pump priming, refer to Illustration 225 and 226. Install
the 5P-3415 Adapter (1) after removing the fitting
(2) on the end of the 5P-2413 Air Regulator (3). The
hydraulic tank breaker relief valve (4) is removed and
the air regulator (3) is installed in order to regulate
air pressure. Air pressure of less than 10 psi can be
applied in order to aid pump priming.
Note: The oil must be free of air bubbles. If air
bubbles are present in the hydraulic oil, air is entering
the hydraulic system. Inspect the hydraulic suction
line and the hose clamps.
12. If necessary, tighten any loose clamps or any
loose connections. Replace any damaged hoses.
i04004038
Hydraulic System Oil Filter Replace
SMCS Code: 5068-510
Illustration 225
g01662555
NOTICE
Care must be taken to ensure that fluids are contained
during performance of inspection, maintenance, testing, adjusting, and repair of the product. Be prepared
to collect the fluid with suitable containers before
opening any compartment or disassembling any component containing fluids.
Refer to Special Publication, NENG2500, “Dealer Service Tool Catalog” for tools and supplies suitable to
collect and contain fluids on Cat products.
(1) Adapter
(2) Fitting
(3) Air Regulator
Dispose of all fluids according to local regulations and
mandates.
1. Stop the engine.
2. Drain the hydraulic oil.
Reference: For the correct procedure, refer to
Operation and Maintenance Manual, “Hydraulic
System Oil - Change”.
Illustration 226
g01660894
(4) Hydraulic Tank Breaker Relief Valve
10. Add hydraulic oil to the tank until the oil level is at
the “FULL” mark on the sight gauge.
11. Stop the engine. Top off the hydraulic tank so that
the oil level is at the “FULL” mark on the sight
gauge. Install the filler cap.
Illustration 227
g00761222
SEBU7879-15
165
Maintenance Section
Hydraulic System Oil Level (Hood Tilt) - Check
3. The hydraulic oil filter is located on the right side of
the machine in front of the hydraulic oil tank. Use
a strap type wrench to remove the filter element.
Dispose of the used filter element properly.
4. Clean the filter mounting base. Make sure that
all of the used gasket is removed from the filter
mounting base.
Illustration 229
Illustration 228
g00101318
5. Apply a thin coat of hydraulic oil to the seal on
the new filter.
6. Install the new oil filter elements by hand.
Instructions for the installation of the filters are
printed on the side of each Caterpillar spin-on
filter. For non-Caterpillar filters, refer to the
installation instructions that are provided by the
supplier of the filter.
7. Fill the hydraulic tank with clean oil.
Reference: For the correct type of oil and for
the correct amount of oil, refer to Operation and
Maintenance Manual, “Lubricant Viscosities and
Refill Capacities”.
8. Start the engine and run the engine at low idle.
Inspect the hydraulic system for leaks.
9. Check the hydraulic oil level.
Reference: For the correct procedure, refer to
Operation and Maintenance Manual, “Hydraulic
System Oil Level - Check”.
i02085957
Hydraulic System Oil Level
(Hood Tilt) - Check
SMCS Code: 5050-535-HK
1. Lift the rear access cover on the left side of the
machine.
g01063820
2. Observe the level of oil in tank (2). The oil level
should be about 2.54 cm (1.0 inch) from the top
of the tank.
3. If necessary, remove filler cap (1) and add oil
through the top of the tank. Refer to Operation
and Maintenance Manual, “Lubricant Viscosities”.
4. Clean the filler cap and install the filler cap.
5. Close the rear access cover.
166
Maintenance Section
Hydraulic System Oil Level - Check
SEBU7879-15
i02214455
i01920994
Hydraulic System Oil Level Check
Hydraulic System Oil Sample
- Obtain
SMCS Code: 5056-535-FLV
SMCS Code: 5050-008; 5056-008; 7542
Illustration 231
Illustration 230
g00761333
The hydraulic oil tank is located on the right side of
the machine.
The lift arms must be lowered with the bucket flat in
order to check the hydraulic oil. Check the hydraulic
oil level while the engine is stopped. Maintain the
oil level above the “ADD COLD” mark on the sight
gauge.
If necessary, remove the hydraulic oil filler cap and
add hydraulic oil.
g00274518
Obtain a sample of the hydraulic oil from the sampling
valve. The sampling valve is located toward the
front of the hydraulic oil tank on the right side of the
machine. Refer to Special Publication, SEBU6250,
“S·O·S Oil Analysis” for information that pertains
to obtaining a sample of the oil. Refer to Special
Publication, PEHP6001, “How To Take A Good Oil
Sample” for more information about obtaining a
sample of the oil.
i04004058
Hydraulic Tank Breaker Relief
Valve - Clean
SMCS Code: 5118-070
NOTICE
Care must be taken to ensure that fluids are contained
during performance of inspection, maintenance, testing, adjusting, and repair of the product. Be prepared
to collect the fluid with suitable containers before
opening any compartment or disassembling any component containing fluids.
Refer to Special Publication, NENG2500, “Dealer Service Tool Catalog” for tools and supplies suitable to
collect and contain fluids on Cat products.
Dispose of all fluids according to local regulations and
mandates.
SEBU7879-15
167
Maintenance Section
Logging Fork Clamp - Lubricate
Apply lubricant through three fittings on each side
of the logging fork.
There is a total of six fittings.
i02106227
Oil Filter - Inspect
SMCS Code: 1308-507; 3004-507; 3067-507;
5068-507
Inspect a Used Filter for Debris
Illustration 232
g00761425
1. Remove the hydraulic tank breaker relief valve
from the front of the hydraulic tank.
2. Clean the breaker relief valve in a clean,
nonflammable solvent.
g00100013
3. Dry the breaker relief valve thoroughly by shaking
or use compressed air.
Illustration 234
4. Install the hydraulic tank breaker relief valve.
Use a filter cutter to cut the filter element open.
Spread apart the pleats and inspect the element for
metal and for other debris. An excessive amount of
debris in the filter element can indicate a possible
failure.
i03657276
Logging Fork Clamp Lubricate
(If Equipped)
The element is shown with debris.
If metals are found in the filter element, a magnet can
be used to differentiate between ferrous metals and
nonferrous metals.
SMCS Code: 6113-086-BD; 6410-086-BD
Wipe off all fittings before any lubricant is applied.
Ferrous metals can indicate wear on steel parts and
on cast iron parts.
Nonferrous metals can indicate wear on the
aluminum parts of the engine such as main bearings,
rod bearings, or turbocharger bearings.
Small amounts of debris may be found in the filter
element. This could be caused by friction and by
normal wear. Consult your Caterpillar dealer in order
to arrange for further analysis if an excessive amount
of debris is found.
Illustration 233
g01962679
Using an oil filter element that is not recommended
by Caterpillar can result in severe engine damage
to engine bearings, to the crankshaft, and to other
parts. This can result in larger particles in unfiltered
oil. The particles could enter the lubricating system
and the particles could cause damage.
168
Maintenance Section
Pallet Fork - Inspect
SEBU7879-15
i04004068
Pallet Fork - Inspect
SMCS Code: 6136-040
Descriptions of the Fork Tine
Parts
Illustration 235
g01598401
(1) Blade – The horizontal part of the fork tine that
supports the load
(2) Heel – The radius on the fork tine that connects
the blade to the shank
(3) Shank – The vertical part of the fork tine that has
the hooks that support the fork tines attached.
(4) Hook or Hanger – Carriers that mount the fork
tines to the carriage
(5) Tip – The free end of the blade
Surfaces
Illustration 236
(6) Upper Face of the Blade – The upper surface
of the blade that carries the load
g01598403
(7) Bottom of Heel – The lower surface of the blade
that includes the tapers
SEBU7879-15
169
Maintenance Section
Pallet Fork - Inspect
(8) Front Face of Shank – The distance for the load
center is measured from the front face of the shank
and the face of the shank contacts the load.
(9) Flanks – The side faces of the blade and the
shank.
(10) Blade Bevel – The upper and lower surfaces of
the tip on the blade that are tapered for easy insertion
of the fork tines
(11) Tip Flanks – The side surfaces of the tip on the
blade that are tapered for easy insertion of the fork
tines
(12) Top of Shank – The upper surface on the shank
(13) Shaft – The tubes that are mounted on the fork
tines for mounting the fork tines to the carriage
Dimensions
g01598405
Illustration 237
(T) Thickness – The thickness of the blade at the
closest point to the heel
(W) Width – The width of the blade at the closest
point to the heel
(BH) Back Height – The distance from the bottom
of the blade to the top of the shank
Check the fork tines for wear or for damage. Inspect
the welds, the locks, the shafts, and the fork tines for
damage. If the components are damaged, consult
your Cat dealer. Refer to , “Daily Inspection” for
additional information.
Blade Thickness
(BL) Length – The length of the blade is measured
from the front face on the shank to the tip on the
blade.
(A) Angle – The angle from the upper surface of the
blade to the front face of the shank.
Inspection of the Fork Tines
Check the fork tines daily for any twisting or bending
of the fork tines. If any twisting or bending is
observed, the fork tines should be changed prior to
any lifting operation. If the fork tines are damaged,
consult your Cat dealer.
Illustration 238
g01600073
170
Maintenance Section
Pallet Fork - Inspect
SEBU7879-15
1. Measure the thickness of the shank. Ensure
that the measuring device is held square across
the shank in order to acquire an accurate
measurement.
Illustration 241
Illustration 239
g01600074
2. Measure the blade of the fork tine near the heel.
Ensure that the measuring device is held square
across the blade in order to acquire an accurate
measurement.
g01600076
2. Move the upper arm of the measuring device
toward the face of the shank. Ensure that the
measuring device is held flat against the face
of the shank in order to acquire an accurate
measurement.
3. Check the angle that was measured with the
device for the angle of the heel.
3. Compare the measurement of the blade and the
measurement of the shank.
4. If the angle is between 87 degrees and 93
degrees, the fork tine can remain in service.
4. If the difference in measurements is less than
10%, the fork tine can remain in service.
5. If the angle is less than 87 degrees or greater
than 93 degrees, the fork tine must be taken out
of service. The fork tines must be inspected for
the following conditions:
5. If the difference in measurements is greater than
10%, the fork tine must be taken out of service.
Fork tine wear that is greater than 10%, represents
a 20% reduction in the capacity of the fork tine.
Consult your Cat dealer for additional information.
Angle of the Heel
Illustration 240
• permanent deformation
• stress cracks
• other defects
Consult your Cat dealer for additional information.
g01600075
1. Place a measuring device in the top inside area
of the heel on top of the blade. Ensure that the
measuring device is held flat against the blade in
order to acquire an accurate measurement.
SEBU7879-15
171
Maintenance Section
Pallet Fork - Lubricate
i03082842
i04039309
Pallet Fork - Lubricate
Radiator Core - Clean
SMCS Code: 6136-086
SMCS Code: 1353-070-KO
Ensure that the engine is off before you perform this
procedure.
1. Open the radiator grill at the rear of the machine.
2. Swing the hydraulic oil cooler and the air
conditioner condenser away from the radiator.
Illustration 242
g01563105
typical example
1. Coat the shafts with grease.
Illustration 244
g01000083
3. Open the side access panels on each side of the
radiator.
Illustration 243
g01563115
typical example
2. Coat the mounting holes for the quick coupler with
grease.
Reference: Refer to Operation and Maintenance
Manual, SEBU6250, “Caterpillar Machine Lubricant
Recommendations” for information on lubricants.
Illustration 245
g00101939
172
Maintenance Section
Receiver Dryer (Refrigerant) - Replace
SEBU7879-15
4. You can use compressed air, high-pressure water,
or steam to remove dust and other debris from
the radiator fins. The maximum air pressure
for cleaning purposes must be reduced to
205 kPa (30 psi). The maximum water pressure
for cleaning purposes must be below 275 kPa
(40 psi). However, the use of compressed air is
preferred. Refer to Operation and Maintenance
Manual, “General Hazard Information” for Safety
information about using pressurized air and water.
5. Swing the hydraulic oil cooler and the air
conditioner condenser (if equipped) back into the
operating position.
Illustration 246
6. Close the radiator grill.
g01107270
(1) Refrigerant accumulator
(2) Refrigerant dryer
i02894326
Receiver Dryer (Refrigerant) Replace
Access refrigerant accumulator (1) from the left side
of the machine. Access in-line refrigerant dryer (2)
from the right side of the machine.
SMCS Code: 7322-510
Refer to Service Manual, SENR5664, “Refrigerant
Accumulator - Remove and Install” for the
replacement procedure of accumulator (1).
Personal injury can result from contact with refrigerant.
Contact with refrigerant can cause frost bite. Keep
face and hands away to help prevent injury.
Protective goggles must always be worn when refrigerant lines are opened, even if the gauges indicate the system is empty of refrigerant.
Always use precaution when a fitting is removed.
Slowly loosen the fitting. If the system is still under pressure, release it slowly in a well ventilated
area.
Personal injury or death can result from inhaling
refrigerant through a lit cigarette.
Inhaling air conditioner refrigerant gas through a
lit cigarette or other smoking method or inhaling
fumes released from a flame contacting air conditioner refrigerant gas, can cause bodily harm or
death.
Do not smoke when servicing air conditioners or
wherever refrigerant gas may be present.
Use a certified recovery and recycling cart to properly remove the refrigerant from the air conditioning system.
Refer to Service Manual, SENR5664, “In-Line
Refrigerant Dryer - Remove and Install” for the
replacement procedure of refrigerant dryer (2).
Note: When you operate the machine in a climate
with high humidity, replace the in-line refrigerant dryer
after every 1000 service hours or 6 months.
SEBU7879-15
173
Maintenance Section
Ride Control Accumulator - Check
i01568401
Ride Control Accumulator Check
SMCS Code: 5077-535-R6
Automatic Ride Control – Press the top
of the ride control switch in order to activate
the automatic ride control system. The ride
control system will automatically turn on if the ground
speed exceeds 9.6 km/h (6 mph). The ride control
system will automatically turn off if the ground speed
is less than 9.6 km/h (6 mph) and if the bucket is
being operated. The indicator for the automatic ride
control (2) will be illuminated. The activation speed
for the automatic ride control can be adjusted by a
qualified service technician.
Place the switch into the middle position in order to
turn off the ride control system completely.
The ride control system should be in the automatic
mode or in the off position during loading operations.
i01457460
Rollover Protective Structure
(ROPS) - Inspect
SMCS Code: 7323-040; 7325-040
Illustration 247
g00814351
Illustration 248
g00754724
Travel at high speeds over rough terrain causes
bucket movement and a swinging motion. The
ride control system acts as a shock absorber by
dampening forces from the bucket. This helps to
stabilize the entire machine.
The ride control switch is located on the switch panel.
Manual Ride Control – Press the bottom
of the switch in order to turn on the ride
control system at all travel speeds. The
indicator (1) for ride control will be illuminated.
Illustration 249
g00762107
Inspect the ROPS for bolts that are loose or damaged.
Use original equipment parts only to replace bolts
that are damaged or missing. Tighten the four
cab mounting bolts to a torque of 850 ± 100 N·m
(629 ± 74 lb ft).
Note: Apply oil to all bolt threads before installation.
Failure to apply oil can result in improper bolt torque.
174
Maintenance Section
Seat Belt - Inspect
SEBU7879-15
Do not repair the ROPS by welding reinforcement
plates to the ROPS. Consult your Caterpillar dealer
for repair of cracks in any welds, in any castings, or
in any metal section of the ROPS.
i04423622
Seat Belt - Inspect
SMCS Code: 7327-040
Always inspect the condition of the seat belt and the
condition of the seat belt mounting hardware before
you operate the machine. Replace any parts that are
damaged or worn before you operate the machine.
i04421974
Seat Belt - Replace
SMCS Code: 7327-510
The seat belt should be replaced within 3 years of
the date of installation. A date of installation label is
attached to the seat belt retractor and buckle. If the
date of installation label is missing, replace belt within
3 years from the year of manufacture as indicated
on belt webbing label, buckle housing, or installation
tags (non-retractable belts).
Illustration 251
g01152685
Typical Example
Illustration 250
g02620101
Typical example
Inspect buckle (1) for wear or for damage. If the
buckle is worn or damaged, replace the seat belt.
Inspect seat belt (2) for webbing that is worn or
frayed. Replace the seat belt if the webbing is worn
or frayed.
Inspect all seat belt mounting hardware for wear or
for damage. Replace any mounting hardware that
is worn or damaged. Make sure that the mounting
bolts are tight.
If your machine is equipped with a seat belt
extension, also perform this inspection procedure for
the seat belt extension.
Contact your Cat dealer for the replacement of the
seat belt and the mounting hardware.
Note: The seat belt should be replaced within 3 years
of the date of installation. A date of installation label
is attached to the seat belt retractor and buckle. If the
date of installation label is missing, replace belt within
3 years from the year of manufacture as indicated
on belt webbing label, buckle housing, or installation
tags (non-retractable belts).
(1)
(2)
(3)
(4)
Date of installation (retractor)
Date of installation (buckle)
Year of manufacture (tag) (fully extended Web)
Year of manufacture (underside) (buckle)
Consult your Cat dealer for the replacement of the
seat belt and the mounting hardware.
Determine age of new seat belt before installing on
seat. A manufacture label is on belt webbing and
imprinted on belt buckle. Do not exceed install by
date on label.
Complete seat belt system should be installed with
new mounting hardware.
Date of installation labels should be marked and
affixed to the seat belt retractor and buckle.
Note: Date of installation labels should be
permanently marked by punch (retractable belt) or
stamp (non-retractable belt).
If your machine is equipped with a seat belt
extension, also perform this replacement procedure
for the seat belt extension.
SEBU7879-15
175
Maintenance Section
Secondary Steering - Test
i03694709
Secondary Steering - Test
SMCS Code: 4300-081-SE; 4300-081-SST;
4324-081; 4324
The service brake must be checked in order to ensure proper operation before you test the supplemental steering system.
Personal injury, death, or property damage could
occur if the supplemental steering system is tested and the service brake is not operational.
Test the service brake before you test the supplemental steering system.
i02197967
Service Brake Wear Indicator Check
SMCS Code: 4255-535-IND
Reference: For information about checking the
service brake wear indicator, refer to Testing and
Adjusting, “Braking System” for the machine that is
being serviced or consult your Caterpillar dealer.
i03589859
Steering Column Play - Check
SMCS Code: 4310-535; 4338-535
Perform the following procedure if your machine is
equipped with a ground driven supplemental steering
and if the procedure is required by local regulations.
Ensure that there are no hazards in the test area. The
test area must be unobstructed and level. Operate
the machine in second gear.
Ensure that all air tanks and accumulators are
properly charged. Ensure that there is no load in the
work tool. Position the machine with the bucket or the
work tool in the carry position with the machine in
neutral. Release the parking brake. Apply the service
brakes and put the engine at low idle. Ensure that The
area around the machine is clear of personnel. Shift
the transmission to second gear forward and slowly
release the service brakes. Moderately increase the
engine speed to high idle. Shift the transmission to
neutral. Turn the ignition to the OFF position. Allow
the machine to coast.
While the machine is in motion, turn the machine to
the left and to the right. If the machine responds to
the steering input, the supplemental steering system
is operating. Stop the machine with the service
brakes. Apply the parking brake. The machine can
then be returned to normal operation.
If there is no response to the steering input, the
supplemental steering system is not operating. Stop
the machine immediately. Repair the supplemental
steering system before returning the machine to
service.
Illustration 252
g01408466
1. Hold the steering wheel with both hands.
2. Try to move the steering wheel from one side to
the other side. The maximum allowed movement
in the steering column should not exceed 25 mm
(1.0 inch). If the value is not within the limit,
perform the following steps:
a. Inspect the pivot joint for loose bolts.
b. Tighten the bolts if the bolts are loose.
Note: Apply 9S-3263 Thread Lock Compound to
the bolts before tightening.
c. Inspect the pivot joint for excessive wear.
d. Replace the bushings if there is excessive
wear.
176
Maintenance Section
Steering Column Spline (Command Control Steering) - Lubricate
SEBU7879-15
i02231597
Failure to perform this inspection and repair may
cause loss of steering control, which may result
in personal injury or death.
Steering Cylinder Bearings Lubricate
SMCS Code: 4303-086-BD
Do not operate the machine until the inspection
and repair are completed.
Contact your Caterpillar dealer for any other required
service.
i02585698
Steering Column Spline
(Command Control Steering) Lubricate
SMCS Code: 4310-086-SN; 4338-086-SN
Illustration 254
g01125801
(1) Rod End of RH Steering Cylinder
(2) Head End of RH Steering Cylinder
(3) Head End of LH Steering Cylinder
Wipe all fittings before lubrication.
The head end of the steering cylinders are greased
with a remote fitting. Apply lubricant to the two fittings
(2) and (3) that are located on the left side of the
machine.
The rod end of the right steering cylinder is greased
with a remote fitting. Apply grease to the remote
grease fitting (1).
The rod end of the left steering cylinder is greased
with a standard grease fitting.
There are a total of four fittings.
Illustration 253
g00812993
1. Remove the steering shaft from the machine.
Reference: Refer to Disassembly and Assembly
Manual for the removal procedure and for the
installation procedure.
2. Wipe off all of the fittings before any lubricant is
applied.
3. Refer to Operation and Maintenance Manual,
“Lubricant Viscosities”for the proper grease to
use. Apply the grease through fittings (1), (2), (3),
(4), (5), (6), (7), and (8).
4. Install the steering shaft on the machine.
SEBU7879-15
177
Maintenance Section
Steering Pilot Oil Screen (Command Control Steering) - Clean/Replace
i01458229
Steering Pilot Oil Screen
(Command Control Steering) Clean/Replace
i02305841
Tire Inflation - Check
SMCS Code: 4203-535-AI
SMCS Code: 4304-070-Z3; 4304-510-Z3
Illustration 256
g01160201
Always obtain proper tire inflation pressures and
maintenance recommendations for the tires on your
machine from your tire supplier. Measure the tire
pressure on each tire.
Inflate the tires with nitrogen , if necessary.
Illustration 255
g00762227
The screen for the pilot oil is located near the
articulation joint below the steering neutralizer valves
(1).
1. Disconnect the two lines (3) and (4) from the
bottom of the screen group (2).
2. Use an allen wrench in order to remove the two
screens from the bottom of the screen group.
3. Wash the screens in a clean nonflammable
solvent. Dry each screen by using pressure air.
Inspect each screen for damage. Replace the
screens, if necessary.
4. Install the screens. Install the two lines (3) and (4).
Reference: Refer to the “Tire Inflation Information”
section of the Operation and Maintenance Manual
for more information.
i04004110
Transmission Oil - Change
SMCS Code: 3030-044
NOTICE
Care must be taken to ensure that fluids are contained
during performance of inspection, maintenance, testing, adjusting, and repair of the product. Be prepared
to collect the fluid with suitable containers before
opening any compartment or disassembling any component containing fluids.
Refer to Special Publication, NENG2500, “Dealer Service Tool Catalog” for tools and supplies suitable to
collect and contain fluids on Cat products.
Dispose of all fluids according to local regulations and
mandates.
1. Operate the machine for a few minutes in order to
warm the transmission oil.
2. Park the machine on a level surface. Lower
the attachment to the ground and apply slight
downward pressure. Engage the parking brake
and stop the engine.
178
Maintenance Section
Transmission Oil - Change
SEBU7879-15
10. Install three magnets on magnetic screen tube
assembly (3). Insert suction screen(4) and
magnetic screen tube assembly (3) in the housing.
11. Install the cover and four bolts.
12. Remove transmission oil filler cap (1) on the left
side of the machine. Fill the transmission with oil
through the transmission oil filler tube.
Reference: Refer to Operation and Maintenance
Manual, “Lubricant Viscosities” and Operation and
Maintenance Manual, “Capacities (Refill)”.
13. Clean the filler cap and install the filler cap.
Illustration 257
g00763411
Note: Remove the transmission guard from the
bottom of the machine in order to access the
magnetic screen assembly.
3. Remove the transmission oil drain plug (2).
Allow the transmission oil to drain into a suitable
container. Clean the drain plug and install the
drain plug.
4. Change the transmission oil filter.
Reference: Refer to Operation and Maintenance
Manual, “Transmission Oil Filter - Replace” for the
correct procedure.
Illustration 258
g00763494
14. Remove the transmission breather from the
top of the transmission. Wash the transmission
breather in a clean, nonflammable solvent. Allow
the transmission breather to dry. Then, install the
transmission breather.
5. Remove the bolts and the cover from the front left
side of the transmission case.
15. Start the engine and run the engine at low idle.
Apply the service brake. Slowly operate the
transmission controls in order to circulate the oil.
6. Remove magnetic screen tube assembly (3) and
suction screen (4) from the housing. Remove
three magnets from the magnetic screen tube
assembly.
16. Move the transmission control to the NEUTRAL
position. Engage the parking brake and stop the
engine. Inspect the transmission for leaks.
7. Wash the magnetic screen tube assembly and the
suction screen in a clean, nonflammable solvent.
NOTICE
Do not drop or rap the magnets against any hard objects. Replace any damaged magnets.
8. Use a cloth, a stiff bristle brush, or pressure air to
clean the magnets.
9. Clean the cover and inspect the cover seal.
Replace the seal if the seal is damaged.
17. Check the transmission oil level.
Reference: Refer to Operation and Maintenance
Manual, “Transmission Oil Level - Check”.
SEBU7879-15
179
Maintenance Section
Transmission Oil Filter - Replace
i04004116
Transmission Oil Filter Replace
6. Inspect the filter housing seal. Replace the seal
if the seal is damaged.
7. Insert a new transmission oil filter element into the
transmission filter housing.
SMCS Code: 3004-510; 3067-510
NOTICE
Care must be taken to ensure that fluids are contained
during performance of inspection, maintenance, testing, adjusting, and repair of the product. Be prepared
to collect the fluid with suitable containers before
opening any compartment or disassembling any component containing fluids.
Refer to Special Publication, NENG2500, “Dealer Service Tool Catalog” for tools and supplies suitable to
collect and contain fluids on Cat products.
Dispose of all fluids according to local regulations and
mandates.
1. Open the engine hood. The transmission oil filter
is located on the right side of the machine.
8. Install the transmission filter housing into the
filter housing base. Tighten the transmission filter
housing by hand. Install plug (2).
9. Start the engine. Apply the service brakes.
10. Slowly operate the transmission controls in
order to circulate the transmission oil. Return the
transmission to NEUTRAL.
11. Engage the parking brake. Inspect the
transmission oil filter for leaks.
12. Stop the engine.
13. Check the transmission oil level.
Reference: Refer to Operation and Maintenance
Manual, “Transmission Oil Level - Check” for the
correct procedure.
i01460230
Transmission Oil Level - Check
SMCS Code: 3030-535-FLV
The sight gauge for the transmission oil is located on
the left side of the machine.
Illustration 259
g01058312
2. Remove plug (2) and allow the oil to drain into a
suitable container.
3. Use a strap type wrench in order to remove the
transmission filter housing (1).
4. Remove the used transmission oil filter element.
Dispose of the used filter element properly.
5. Clean the transmission filter housing in a clean,
nonflammable solvent. Clean the filter housing
base.
Illustration 260
g00763130
180
Maintenance Section
Transmission Oil Sample - Obtain
SEBU7879-15
When the engine is off and the transmission oil is
cold, maintain the transmission oil level to “FULL”
mark (1). When the engine is running at low idle
and the transmission oil is warm, maintain the
transmission oil level between “FULL” mark (1) and
“LOW” mark (2). Add oil, if necessary.
i02065073
Transmission Oil Sample Obtain
SMCS Code: 3080-008; 7542
Illustration 262
g00763261
Window Washer Reservoir – The window
washer reservoir is located under the
access cover on the right cab platform.
Fill the window washer reservoir through the filler
opening.
i01460440
Window Wiper Inspect/Replace
Illustration 261
g01058363
SMCS Code: 7305-040; 7305-510
Obtain a sample of the transmission oil from the
sampling valve. The sampling valve is located on
the top of the transmission oil filter. Refer to Special
Publication, SEBU6250, “S·O·S Oil Analysis” for
information that pertains to obtaining a sample
of the engine oil. Refer to Special Publication,
PEHP6001, “How To Take A Good Oil Sample” for
more information about obtaining a sample of the
engine oil.
i01460367
Window Washer Reservoir Fill
SMCS Code: 7306-544
NOTICE
When operating in freezing temperatures, use
Caterpillar nonfreezing window washer solvent or
equivalent. System damage can result from freezing.
Illustration 263
g00763272
SEBU7879-15
181
Maintenance Section
Windows - Clean
Inspect the condition of the wiper blades. Replace
the wiper blades if the wiper blades are worn or
damaged. If the wiper blades streak the window,
replace the wiper blades.
i04412316
Windows - Clean
Polycarbonate Windows (If
equipped)
Wash polycarbonate windows with a mild soap
or detergent. Never use a cleaning solvent on
polycarbonate windows.
SMCS Code: 7310-070
Wash polycarbonate windows with warm water and a
soft sponge, or damp cloth. Never use a dry cloth or
paper towels on polycarbonate windows.
Clean the outside of the windows from the ground,
unless handholds are available.
Rinse the windows with a sufficient amount of clean
water.
Illustration 264
g00566124
Typical example
Cleaning Methods
Commercial Window Cleaner
Apply the cleaner with a soft cloth. Rub the window
with moderate pressure until all the dirt is removed.
Allow the cleaner to dry. Wipe off the cleaner with a
clean soft cloth.
Soap and Water
Use a clean sponge or a soft cloth. Wash the windows
with a mild soap or with a mild detergent. Also
use plenty of lukewarm water. Rinse the windows
thoroughly. Dry the windows with a moist chamois or
with a moist cellulose sponge.
Stubborn Dirt and Grease
Wash the windows with a good grade of naphtha, of
isopropyl alcohol, or of Butyl Cellosolve. Then, wash
the windows with soap and with water.