1
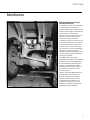
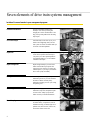
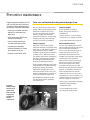
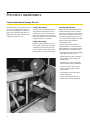
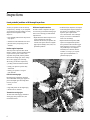
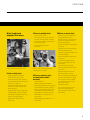
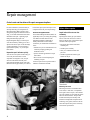
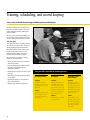
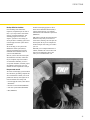
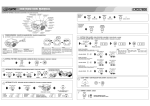
DRIVE TRAIN
®
Your Drive Train Systems Management Guide
Your drive train systems play an integral role in equipment
operation. Today’s drive trains are more sophisticated than
ever, requiring system management techniques to achieve
maximum productivity and lower costs.
While there are no substitutes for our services, there is
much you can do to lower costs. The Drive Train Systems
Management Guide enables you to plan for and predict normal
wear and avoid abnormal wear on drive train components.
It helps you and your operators manage your drive train by:
• outlining preventive maintenance techniques.
• explaining the importance of S•O•SSM fluid analysis.
• providing routine and in-depth inspection information.
• exploring repair management options.
• detailing training, scheduling, and record keeping.
We work with you to manage and maintain your drive train
systems effectively—for maximum productivity and life.
X
Contents
Introduction
Seven elements of drive train systems management
Include all seven elements in your management program
Preventive maintenance
Make sure oil properly cleans, cools, and lubricates parts
Make sure fluid filters effectively control contamination
S·O·S fluid analysis
Understand S•O•S fluid analysis
Use the correct method to take samples
Inspections
Locate potential problems with thorough inspections
Recognize repair indicators
Follow an inspection schedule
Repair management
Control costs and downtime with repair management options
Training, scheduling, and record keeping
Lower costs with effective training, scheduling,
and record keeping
3
3
4
4
5-6
5
6
7
7
7
8-11
8
9
10
12-13
12
14-15
14
DRIVE TRAIN
Introduction
Get better performance and longer
life from your drive train
Your machine’s drive train serves one purpose:
to transfer engine power to the ground.
Transmission and final drive components work
together to make this happen. The transmission
takes the output from your engine and
manipulates it to control speed, direction, and
torque. The final drives reduce speed and
increase torque. When your machine’s
components do their job well, productivity goes
up and owning and operating costs stay down.
To get maximum performance and life from
your drive train, however, you must manage
wear. Normal wear is expected and predictable.
Abnormal wear is the result of incorrect
maintenance and operating techniques, such as
extending oil change intervals or inadequately
warming up your machine.
The Caterpillar® Drive Train Systems
Management Guide outlines the seven elements
of effective drive train system management—
preventive maintenance, S•O•S fluid analysis,
inspections, repair management, training,
scheduling, and record keeping—to help you
get the most out of your drive train at the
lowest cost per hour.
The Drive Train Systems Management Guide
offers information, tips, and ideas you can
share with your staff. It is not a technical
manual or a substitute for the advice and
recommendations of our parts and service
experts. You can find specific drive train
maintenance requirements in the Lubrication
and Maintenance Guide (SEBU6250).
3
Seven elements of drive train systems management
Include all seven elements in your management program
Preventive maintenance
Preventive maintenance includes many
techniques—like correctly selecting and
changing drive train oil and fluid filters—that
help you keep small problems from becoming
major repairs.
S•O•S fluid analysis
S•O•S fluid analysis is the best way for you to
monitor what is happening inside your drive
train systems. It consists of tests that enable you
to forecast wear-related problems.
Inspections
Inspections combine your daily walkaround
checks and our periodic technical analyses.
They allow you to detect potential problems
and impending failures, so you can schedule
maintenance and repairs.
Repair management
Repair management helps you select beforefailure and after-failure repair options and
control repair costs. It allows you to plan and
schedule repairs, so you can get your machines
back to work quickly and reliably.
Training
Our training assistance helps you improve the
maintenance practices of your staff. It reduces
the chance of failures caused by faulty
maintenance and helps you lower your owning
and operating costs.
Scheduling
A good scheduling system ensures that
maintenance, inspections, and planned repairs
are done on time. It helps you prevent the
failures caused by overlooked maintenance.
Record keeping
Record keeping consists of full documentation
on machine history, component life, and cost
information. It helps you identify high-cost or
problem areas, track work flow, control costs,
and increase machine resale value.
4
DRIVE TRAIN
Preventive maintenance
Regular preventive maintenance is the
most cost-effective way to keep your
drive train systems operating at peak
performance. Preventive maintenance:
• allows you to schedule downtime
and plan for maintenance and
repair costs.
• helps prevent major failures and
failures of related parts.
• saves you money because you
can often repair before failure.
• maximizes parts reusability.
• optimizes equipment life to keep
your machines on the job.
•increases machine resale value.
Clean, cool, and lubricate drive train parts with proper oil use
Drive train oil performs three main functions:
cleaning, cooling, and lubricating transmission
and final drive components. Since today’s
Cat® drive train systems feature new metals,
elastomers, and paper disc materials that
require advanced lubrication, you must change
oil regularly and properly and use the right
drive train oil to achieve top performance.
Change oil properly
It’s also critical that you change oil
properly. You can reduce the chance of
contamination by:
Change oil regularly
Oil provides a protective film to separate
transmission and final drive components, which
operate with very tight tolerances. Changing oil
at proper intervals is critical to realizing
maximum component life. We recommend that
you change oil every 1000 hours, but that is
just a guideline. Actual oil life is determined by
many factors, including operating conditions.
By monitoring S•O•S fluid analysis results,
we’ll help you establish proper intervals.
Use the right drive train oil
For years, it was standard practice to use the
same oil in both engine and drive train systems.
Today’s transmissions and final drives,
however, require lubrication that engine oils
cannot provide. Drive train oil for your
transmissions and final drives must meet
Caterpillar TO-4 specifications, which include
frictional and gear wear requirements.
Properly managing change intervals also means
you get optimum use of the fluid’s lubricating
and protecting properties and maximum
component life. Changing fluids too early
wastes money because you throw away some
useful life. Changing fluids too late allows oil
to deteriorate and shortens component life.
Determining the best change interval takes
some effort, but the reward is significantly
lower operating costs.
• draining oil when it is warm and agitated.
• draining dirty oil as completely as possible.
• using a filtered transfer cart to add new oil.
Engine oils reduce friction between moving
parts. Drive train oils allow some friction
between discs and plates as they engage—
friction that is critical to proper drive train
performance. By using drive train oil instead of
engine oil, you dramatically extend disc life.
Using Cat Transmission/ Drive Train Oil
(TDTO) is the safest way to ensure top drive
train performance. In new Cat machines, it can
extend transmission disc life up to 45% over a
CD/SF TO-2 engine oil. Cat TDTO also:
• improves gear wear performance significantly.
• eliminates transmission slippage.
By properly
managing change
intervals, you get
optimum use of
fluid’s lubricating
and protecting
properties and
maximum
component life.
• controls brake chatter.
• increases machine break-out force.
• provides greater machine rim pull.
5
Preventive maintenance
Control contamination with proper filter use
Fluid filters work in unison with your drive train
oil to control contamination inside your drive
train system. By changing filters regularly and
properly and by selecting the right filters, you
maintain drive train system cleanliness, reduce
component wear, and lower costs.
Change filters regularly
To keep your drive train system operating at
peak performance and reduce the chance of
contamination, which can cause component
wear and system failure, always change your
fluid filters at regular intervals. We recommend
changing fluid filters every 500 hours.
Change filters properly
Old filters contain contaminants, so remove
filters carefully at change time to ensure that
contaminants do not reenter the drive train
system. In addition, keep new filters in their
packaging until you are ready to install them.
Select the right fluid filters
Quality fluid filters feature media that remove
harmful particles that can cause component
wear. They are resistant to leaks and structural
failures and are constructed to ensure every bit
of oil passes through the media. Even if only
1% of oil fails to pass through the media, filter
efficiency drops and the possibility of
contamination increases.
To protect transmission and final drive
components effectively, Cat fluid filters meet
higher standards and more rigid specifications
than standard filters. Cat fluid filters feature:
• resin-impregnated media to meet Caterpillar’s
rigid capacity and efficiency specs.
• self-lubricating, free-rotating seal design to
prevent bunching, improve sealing, and
eliminate leaks.
• non-metallic core, which is stronger than
metal and eliminates metal contamination.
• one-piece “auto-spun” canister design to
increase structural strength and prevent
possible ruptures.
• unique fiberglass spiral roving design to
eliminate pleat flexing.
• one-piece, molded methane end caps to
eliminate leaks and metal contamination.
6
DRIVE TRAIN
S•O•S fluid analysis
Understand S•O•S fluid analysis
Oil sampling at scheduled intervals detects
shortcomings in your maintenance procedures
and forecasts wear-related problems. Our S•O•S
fluid analysis program is well recognized for its
ability to detect potential problems early. We
perform four types of S•O•S analysis tests on
your drive train oil.
Use the correct method to take samples
Using an oil valve probe
• Wear Rate Analysis detects, identifies, and
assesses the amount and type of wear metals
in oil. The rate at which wear metal particles
increase from sample to sample is as important
as the quantity of particles in oil.
• Oil Cleanliness Analysis uses a particle count
test to detect both metallic and nonmetallic
debris (such as friction disc material) generated
by wear, as well as dirt from outside sources.
• Oil Contamination Analysis quantifies silicon—
which identifies dirt entry—with spectrometric
analysis. Additional tests are performed for
contamination by water or glycol, which can
enter from oil coolers.
Using vacuum extraction
S•O•S fluid analysis is different from other
analysis programs because it focuses on
component condition, not just oil condition.
Since we understand your Cat drive train system,
we can help you analyze S•O•S reports, determine
what additional tests need to be performed, and
decide on the proper corrective action.
Taking samples regularly is critical because it
allows for accurate interpretation. While a single
sample may spot contamination or a rapidly
progressing failure, only several samples taken
at regular intervals will establish trends for your
drive train system. We analyze these trends to
help you achieve maximum drive train
performance.
Set the engine at low idle and remove the dust cap from the
valve of the compartment you are sampling.
•
Insert the probe into the valve and collect about 100 ml (4 fl oz)
of oil into a waste container. Dispose of the waste oil properly.
If the bottle is slow to fill, it may be necessary to increase the
engine speed to high idle.
•
Insert the probe into the valve again and fill the sample bottle
about three-quarters full—do not fill to the top.
•
Withdraw the probe and secure the cap on the bottle. Place
the bottle with the completed label into the shipping cylinder.
NOTE: Use an oil valve probe for pressurized compartments
only. Retrofit valve kits are available for models not equipped
with valves.
• Oil Contamination Analysis determines the
loss of oil’s lubricating qualities. An infrared
analysis instrument compares the properties of
new oil to those of your used oil to determine
if the oil is performing up to specification
during the entire oil change period.
Take samples regularly
Oil analysis is the best way to detect and measure
contaminants in your drive train system and head
off problems before they result in major expenses.
•
Filling out label accurately
•
Turn off the engine and measure and cut new tubing to the
length of the dipstick. If the compartment you are sampling
does not have a dipstick, cut the tubing so that it reaches
about halfway into the oil depth.
•
Insert the tubing through the head of the vacuum pump and
tighten the retaining nut. The tubing should extend about
4 cm (1 in) beyond the base of the vacuum pump head.
•
Install a new sampling bottle onto the vacuum pump head
and insert the end of the tubing into the oil—do not allow
the tube to touch the bottom of the compartment.
•
Pump the vacuum pump handle to create a vacuum. Fill the
bottle about three-quarters full—do not fill to the top.
•
Withdraw the tubing, remove the bottle from the vacuum
pump, and secure the cap on the bottle. Place the bottle
with the completed label into the shipping cylinder.
Providing complete information on the sample label makes
processing your sample easier. Make sure you include
important information like:
•
•
•
•
machine model and serial number.
service meter units on equipment and oil.
whether or not the oil was changed when the sample
was taken.
amount of make-up oil added since last oil change.
7
Inspections
Locate potential problems with thorough inspections
You and your operators can take the first step
in inspections by “listening” to your equipment.
A good inspection program combines your daily
inspections with our periodic in-depth
analyses to:
Utilize our inspection services
We offer a number of diagnostic and repair
services to help you understand warning signs.
These services will help you make informed
repair decisions.
• locate potential problems before they become
major repairs.
• Repair Indicator Evaluation requires service
records, machine hours, and repair
indicators. We talk with your operators and
evaluate S•O•S reports and trends, magnetic
plug inspection findings, leaks, noises, and
performance problems.
• schedule drive train maintenance and service.
• plan and control your operating costs and
downtime.
Perform regular inspections
Your daily visual inspection routine should
include a complete visual and operational check
of your drive train system. Cat drive train
components will generally indicate problems
with advanced warning signs, such as strange
noises, leaks, slippage, and overheating.
We can help you with these inspections by:
• providing customized machine checklists.
• training your operators to perform daily
walkarounds.
• teaching your operators to recognize
repair indicators.
Final drive warning signs
Performing proper maintenance and taking
action when telltale warning signs appear can
prevent catastrophic gear and bearing failure.
Call us if you notice:
• oil leaks.
• large metal particles on the magnetic plug.
• unusual noises or vibrations.
Transmission warning signs
The chart on the following page summarizes
warning signs, their possible causes, and
recommended actions.
8
• Technical Analysis Inspection (TA) requires
advanced diagnostic inspection equipment
and consists of a comprehensive visual
inspection, plus a repair indicator
review and evaluation. After a thorough
analysis, we’ll issue a recommendation
based on our TA findings.
• Repair Determination Inspection (RDI)
requires a thorough internal inspection
and is performed when TA results suggest
further inspection is necessary. It consists
of a guaranteed price for component
disassembly and evaluation. After the
evaluation, we will give you a specific
repair option recommendation or a
guaranteed repair quote.
DRIVE TRAIN
Inspections
Recognize repair indicators
Indicators
Possible Causes
Options
S·O·S results
S•O•S Fluid Analysis provides the best insight into
internal transmission wear and potential failure.
Customer/Dealer Discussion
Overhaul Management Guide (OMG)
OMG indicates estimated life to overhaul
and indicates how you can extend that time by
changing operation and maintenance factors.
Customer/Dealer Discussion
Hesitation
Worn plates and discs
Wrong oil used
Linkage out of adjustment
Incorrect pressure settings
Low fluid level
Technical Analysis Inspection
Repair Determination Inspection
Customer/Dealer Discussion
Slippage
Worn plates and discs
Linkage out of adjustment
Low fluid level
Incorrect pressure settings
Wrong oil used
Technical Analysis Inspection
Repair Determination Inspection
S•O•S Fluid Analysis
Unusual noises
Worn gears/worn bearings
Dirt entry
Aeration/cavitation
Low fluid level
Technical Analysis Inspection
Repair Determination Inspection
Customer/Dealer Discussion
Vibration
Bent drive shaft
Gear failure
Bearing failure
Technical Analysis Inspection
Repair Determination Inspection
S•O•S Fluid Analysis
Customer/Dealer Discussion
Overheating
Wrong oil used
Plugged radiator
Worn pump
Worn pressure relief valve
Worn or damaged seals
Worn/dirty control valve
Technical Analysis Inspection
Repair Determination Inspection
S•O•S Fluid Analysis
Customer/Dealer Discussion
Debris in filter/on magnetic screen
Dirt entry
Wrong oil used
Extended oil change period
Worn gears or bearings
Disc disintegration
S•O•S Fluid Analysis
Customer/Dealer Discussion
Leaks
Worn, hard, or cracked seals
Repair Determination Inspection
Customer/Dealer Discussion
Bent or damaged lines
External damage
Technical Analysis Inspection
Repair Determination Inspection
Transmission service meter hours
Our PSSRs are trained to use service meter
hours as a repair indicator.
S•O•S Fluid Analysis
Customer/Dealer Discussion
Operator discussion
Talking with your machine’s operator can
reveal many potential transmission problems.
Repair Determination Inspection
9
Inspections
Follow an inspection schedule
500-hour or quarterly check
(reconditioned or rebuilt machines)
Service meter hours provide
an easy way to structure
checks and inspections.
These scheduled checks can
help you identify problems
before they become serious.
• Change fluid filters.
• Inspect for oil leaks on both sides of
sprockets.
• Replace seals and/or bearings if leakage is
noticeable. Refer to the Service Manual or
call us for the correct replacement and
adjustment procedure.
• Obtain final drive oil samples for S•O•S
Fluid Analysis.
• Obtain transmission oil sample for S•O•S
Fluid Analysis.
Do not, however, substitute
these checks for the specific
information contained in the
Lube and Maintenance Guide
(SEBU6250).
1000-hour or six-month check
Low Sprocket Tractors and
Powershift Track Loaders
Adjust the sprocket hub bearings.
250-hour or monthly check
Check final drive seals daily for leaks.
10-hour or daily check
• Complete walk-around inspection.
• Check final drive seals for leaks.
10
• Check final drive oil level. Position one final
drive so oil level is horizontal. Drain plug
should face downward. Oil level should be
at the bottom of the filler plug opening.
Clean the magnet and add oil if necessary.
• Remove the fill plug and maintain the oil
level to the bottom edge of the plug opening.
• Look for oil leaks if the level is noticeably
low—a substantial leak indicates that seals
and bearings may need replacement.
• Change the oil on both sides.
• Remove the fill and drain plugs and allow
oil to drain.
• Check the magnetic plugs (if equipped) for
metal particles. If particles are present,
schedule a repair as soon as possible.
• Wipe particles off the magnet and retain
these particles for comparison purposes
at the next change interval.
• Clean and reinstall the drain plug.
• Refill to the bottom edge of the fill plug
opening with Caterpillar Transmission/Drive
Train Oil or oil meeting Caterpillar TO-4
specifications.
• Clean and reinstall the fill plug.
2000-hour or annual check
• Adjust the sprocket hub bearings (refer to
the Service Manual for proper procedure
or give us a call).
• Adjust valves.
• Change final drive oil.
DRIVE TRAIN
Wheel Loaders and
Integrated Toolcarriers
250-hour or monthly check
2000-hour or annual check
• Check final drive oil level.
• Position one final drive so the oil level is
horizontal. Drain plug should face downward. Oil level should be at the bottom of
the filler plug opening.
• Clean the magnet and add oil
if necessary.
Perform a walk-around inspection daily.
Remove, clean, and reinstall the fill plug
every 2000 hours or annually.
• Change the oil in the front and rear
differentials and final drives.
• Park the machine on level ground and
position each wheel with the drain
plug at the lowest point.
• Remove each final drive drain plug and
drain the oil.
• Remove the front and rear differential
drain plugs and drain the oil.
• Clean and reinstall all differential and
final drive drain plugs.
• Remove the differential fill plug from
the front axle.
• Fill the front differential and final
drives with oil that meets Cat TO-4
specifications.
• Clean and reinstall the fill plug.
• Repeat the filling process for the rear
axle housing.
• Operate the machine for one hour,
then stop and inspect for leaks.
• Remove the fill plugs and maintain the
oil level to the bottom of the opening.
If the oil level is above the opening,
do not allow the oil to drain to the
bottom of the opening.
• Reinstall the fill plug.
• Add oil to bring the oil level to the
bottom of the fill plug opening.
• Use this procedure on both the front
and rear axles.
10-hour or daily check
• Complete walk-around inspection.
• Check final drive seals for leaks.
• Check lubricant levels in the front and
rear differentials and final drives if leaks
develop or are suspected.
• Operate the machine a few minutes to
allow the oil to reach a common level
before checking it.
• Park the machine on level ground, apply
the parking brake, and stop the engine.
• Add lubricant to bring the oil level to the
bottom of the fill plug opening.
• Repeat this procedure on the rear
axle housing.
500-hour or quarterly check
(reconditioned or rebuilt
machines)
• Change fluid filters.
• Align each wheel with the magnetic
drain plug up. Remove the plug and inspect
for metal particles. If present, schedule a
repair as soon as possible. Wipe particles
off the magnet and retain them for comparison purposes at the next inspection.
• Obtain final drive oil samples for S•O•S
Fluid Analysis.
• Obtain transmission oil sample for S•O•S
Fluid Analysis.
11
Repair management
Control costs and downtime with repair management options
Preventive maintenance, S•O•S fluid analysis,
and inspections help you catch problems in
their earliest stages. With a good drive train
management program that includes these three
steps, you can make informed decisions about
maintenance and repair—optimizing repair
timing and minimizing repair costs.
Repair management helps you control repair
costs and downtime by enabling you to select
options at the time of repair. To take advantage
of repair management, you must respond to
repair indicators quickly—so you can repair
before failure.
Respond to repair indicators quickly
Your Cat drive train system is built to help you
avoid costly drive train failure. Certain
components are designed to wear, and your
drive train will indicate when they need
replacement. Responding quickly to the repair
indicators listed on page 9 allows you to choose
before-failure repair options and replace worn
components before they cause major damage.
Before-failure repairs
Overhaul Management Guide
Repair before failure to save time
and money
Repairing before failure gets your machines
back to work sooner and costs two to three
times less than the price of after-failure repairs.
Our before-failure repair options:
The Overhaul Management Guide (OMG) can
significantly reduce your owning and operating
costs. When used with other drive train
management techniques, OMG helps us
identify estimated life to before-failure
overhaul for your transmission and final drives.
It also:
• indicates how you can extend the time for an
overhaul by changing operating and
maintenance factors.
• provides increased opportunities for repair
before failure.
• help prevent major failures and failure
of related parts.
• maximize parts reusability.
• allow you to schedule downtime and
plan costs.
• maximize equipment life and keep your
machine on the job.
• allows for more accurate budgeting and
scheduling of repairs.
Contact our parts and service professionals to
schedule a demonstration of OMG.
Transmission
Rebearing and reseal
Rebearing and reseal is recommended when
S·O·S results, a visible leak, or compartment
hours signal a need for repair, or when another
part of the common oil system fails and spreads
debris into the transmission. This procedure
includes disassembly and assembly of the
transmission arrangement and replacement of
all bearings, seals, gaskets, and locks. We also
clean and inspect all other parts to ensure they
meet tolerance specifications.
12
DRIVE TRAIN
Before-failure overhaul
Upper pinion rebearing and reseal
Before-failure overhaul is recommended when
the transmission is slipping, hesitating, or
overheating. Other indicators include friction
material and small iron particles in screens and
filters. This repair applies to operable
transmissions only and includes a rebearing
and reseal, plus replacement or reconditioning
of other selected parts as needed.
Upper pinion rebearing and reseal is
recommended when S•O•S reports show
unacceptable wear or contamination. It includes
removal and installation of the fuel tank, floor
cover plates, steering clutch and brake packs,
and upper pinion bearings and seals.
Steering clutch and brake reconditioning
Complete component replacement
Before-failure overhaul
Final drive
Reseal
Rebearing and reseal is signaled by
excessive leaks, elevated S·O·S results,
or target hours. It includes disassembly and
reassembly; replacement of all bearings,
seals, gaskets, and miscellaneous hardware;
oil change; operational tests; and removal and
installation of track. A brake inspection
is also included.
After-failure overhaul includes a
rebearing and reseal, plus replacement
or reconditioning of most other parts
as needed.
Complete component replacement includes
both exchange and new replacement
components. Exchange components may
be the preferred option when your application
or job situation demands minimum downtime.
Final drive
Rebearing and reseal
After-failure overhaul
Steering clutch and brake reconditioning
includes replacement and reuse of clutch
plates and discs, relining of brake band
assemblies, and inspections and adjustments to
ensure proper steering and brake performance.
Before-failure overhaul can be performed
provided no gears, shafts, bearings, or
external parts are broken. It includes rebuilding
the entire final drive, most parts and labor to
remove the axle, and rebuilding the differential
and both final drives. All parts that meet
Caterpillar reusability guidelines are reinstalled.
Brake repairs can be included at your request.
Reseal is required when oil leaks are
discovered during inspections. It includes
disassembly and reassembly of the final drive,
repair or replacement of needed seal
components, disassembly required to reach
the seal areas in the axle (both final drives and
brakes plus the differential), brake inspection,
and seal replacement. For low sprocket
machines, this repair includes adjustment of
the sprocket hub bearing.
Transmission
After-failure repairs
Control costs with our after-failure
repair options
Repairing before failure is the best way to
reduce your downtime and costs. If your drive
train system does fail, however, we are in the
best position to help you control costs and save
time. We keep part replacement costs to a
minimum, using Cat Parts Reusability
Guidelines and replacing only damaged
components. We also stock Cat Exchange parts
(including Cat Reman components), which
carry the same warranty as new components
but cost much less.
After-failure overhaul
After-failure overhaul is recommended when
large pieces of metal are discovered during
magnetic plug inspections, when failure occurs,
or when broken parts are discovered during
before-failure procedures. It includes removal
and replacement of the entire axle group and
a complete rebuild of both final drives, the
differential, and brakes. Brake actuating
mechanisms located outside the axle system
may require additional repairs. All rebuilt units
are fully reconditioned using new Caterpillar
parts when needed. Entire final drive modules
and axle groups are available for many models.
Exchange components may be preferred if your
work demands minimum downtime.
13
Training, scheduling, and record keeping
Lower costs with effective training, scheduling, and record keeping
Training, scheduling, and record keeping may
be the most important elements of drive train
system management because of their impact
on other elements.
We offer a variety of training, scheduling, and
record-keeping tools that will help you manage
your drive train systems and lower your costs.
Train your staff
Your operators are the key to getting maximum
life from your drive train system. An effective,
ongoing training program ensures that they
operate and maintain your drive train system
properly. It also helps you lower costs by
reducing the chance of drive train failures
caused by faulty maintenance practices.
We work with you to customize a training
program for your personnel by:
• making sure they know proper start-up and
shut-down procedures.
• reviewing maintenance procedures to ensure
they follow recommended lube and
maintenance guidelines.
• teaching them to recognize and react to repair
indicators.
• demonstrating the correct method for taking
S•O•S samples.
• explaining the proper way to change drive
train oil and fluid filters.
• outlining daily walk-around inspections.
Train your staff to avoid abusive operating practices
Changing direction
Backing up
Working on frozen
undercarriage
Incorrect
High-speed direction
changes can cause severe
shock loading of final drive
gear teeth.
Incorrect
Backing over stumps or off
the low-boy causes your
machine to hit the ground
with the full weight on the
sprockets. Something must
give—and it might be the
final drive gear teeth.
Incorrect
Working on a frozen
undercarriage may cause
the tracks to freeze solid.
Any attempt to drive your
machine imposes tremendous loads on the final
drive gear teeth.
Correct
Avoid backing over stumps
or off the low-boy.
Correct
In cold climates, when
operating in mud prior to
an extreme temperature
drop, block the machine
up to get the tracks out
of the mud.
Correct
Shift properly. When moving
from full speed reverse to
first speed forward, shift
down or stop.
14
DRIVE TRAIN
Develop effective schedules
Good scheduling means maintenance,
inspections, and planned repairs are done on
time, so you can prevent drive train failures
caused by overlooked maintenance. Your
scheduling program doesn’t need to be
complex—just effective. We can help you
develop an effective scheduling system with a
record-keeping and control systems manual
(PEGP6808).
We can also help you set up and use the
Maintenance Control System (MCS), a
computer program that keeps up-to-date
information on the maintenance status of
your drive train (JERD2107).
Another record-keeping program we offer is
the Preventive Maintenance Planner (PMP), a
computer program that lets you consolidate
individual drive train maintenance requirements
(SERD0162).
PMP organizes and prints an itemized checklist
that shows exactly what you want done at a
certain interval, including a list of the parts and
fluids required. We can provide computerized
checklists and parts lists or help you customize
your own.
With PMP, you can complete maintenance on
schedule, summarize the costs associated with
each drive train maintenance interval, and
reduce your overall maintenance costs.
MCS lets you know when drive train repairs
and maintenance are needed, verifies when
they are completed, and provides detailed
cost information. With MCS, you receive
cost-per-hour information, availability reports,
and summaries of labor hours, costs, and
downtime for each completed drive train job.
Keep accurate records
An accurate record-keeping system documents
drive train history by detailing component life
and cost information. It enables you to locate
problem areas that may cause higher costs or
increased downtime. We can help with:
• record-keeping and control systems manual
(PEGP6808).
• time and cost record booklet (PEEP0694).
• work order systems manual (PEGP6809).
• MCS (JERD2107).
15
For more information, see us today
or visit Caterpillar’s web site at
http://www.CAT.com
®
X
PEDP7027-01
© 1997 Caterpillar
Printed in U.S.A.