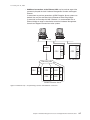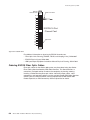
1
ERserver
zSeries 800
Installation Manual for Physical Planning
2066-IMPP-04
Level 04a, June 21, 2004
ERserver
zSeries 800
Installation Manual for Physical Planning
2066-IMPP-04
Level 04a, June 21, 2004
Level 04a, June 21, 2004
Note!
Before using this information and the product it supports, be sure to read the general information in
Appendix E, “Notices,” on page E-1.
Fifth Edition (May 2004)
| This edition, 2066-IMPP-04, applies to the IBM® zSeries™ Processors. This edition replaces 2066-IMPP-03. A
| technical change to the text or illustration is indicated by a vertical line to the left of the change.
There may be a newer version of this document in PDF format available on Resource Link. Go to
http://www.ibm.com/severs/resourcelink and click on Library on the navigation bar. A newer version is indicated by a
lower-case, alphabetic letter following the form number suffix (for example: 00a, 00b, 01a, 01b).
© Copyright International Business Machines Corporation 2002, 2004. All rights reserved.
US Government Users Restricted Rights – Use, duplication or disclosure restricted by GSA ADP Schedule Contract
with IBM Corp.
Level 04a, June 21, 2004
Contents
Figures
. . . . . . . . . . . . . . . . . . . . . . . . . . . vii
Tables . . . . . . . . . . . . . . . . . . . . . . . . . . . . ix
Safety and Environmental Notices .
Safety Notices . . . . . . . . .
World Trade Information . . . . .
Laser Safety Information . . . . . .
Laser Compliance . . . . . . .
Environmental Notices . . . . . .
Product Recycling and Disposal . .
Battery Return Program . . . . .
Cable Warning . . . . . . . .
.
.
.
.
.
.
.
.
.
.
.
.
.
.
.
.
.
.
.
.
.
.
.
.
.
.
.
.
.
.
.
.
.
.
.
.
.
.
.
.
.
.
.
.
.
.
.
.
.
.
.
.
.
.
.
.
.
.
.
.
.
.
.
.
.
.
.
.
.
.
.
.
.
.
.
.
.
.
.
.
.
.
.
.
.
.
.
.
.
.
.
.
.
.
.
.
.
.
.
.
.
.
.
.
.
.
.
.
.
.
.
.
.
.
.
.
.
.
.
.
.
.
.
.
.
.
.
.
.
.
.
.
.
.
.
. xi
. xi
. xi
. xi
. xi
. xii
. xii
. xii
. xiii
About This Publication . .
Related Publications . . . .
Education . . . . . . . .
Licensed Internal Code . .
How to Send your Comments
.
.
.
.
.
.
.
.
.
.
.
.
.
.
.
.
.
.
.
.
.
.
.
.
.
.
.
.
.
.
.
.
.
.
.
.
.
.
.
.
.
.
.
.
.
.
.
.
.
.
.
.
.
.
.
.
.
.
.
.
.
.
.
.
.
.
.
.
.
.
.
.
.
.
.
.
.
.
.
.
.
.
.
.
.
.
.
.
.
.
.
.
.
.
.
xv
xv
xvi
xvi
xvi
Chapter 1. Introduction to Planning . . . . . . . . . . . . . . . . 1-1
System Planning . . . . . . . . . . . . . . . . . . . . . . . . 1-1
Planning Checklist . . . . . . . . . . . . . . . . . . . . . . . 1-2
|
Chapter 2. Models and Physical Specifications .
General Installation Manual for Physical Planning .
Models . . . . . . . . . . . . . . . .
Physical Dimensions . . . . . . . . . . .
Plan View . . . . . . . . . . . . . . .
Weight Distribution and Service Clearance . . .
Weight Distribution . . . . . . . . . . .
Service Clearance . . . . . . . . . . .
Machine and Service Clearance Areas . . . .
Cooling Requirements and Floor Cutouts . . . .
Casters . . . . . . . . . . . . . . . .
Considerations for Multiple System Installations .
Shipping Specifications . . . . . . . . . .
Chapter 3. Power Requirements
General Requirements . . . . .
Power Installation Considerations .
Power Specifications . . . . .
Power Plugs and Receptacles . .
Grounding Specifications . . . .
Line Cord Wire Specifications . .
Line Cord Physical Protection .
Line Cord Wire Colors . . . .
Customer Circuit Breakers (CBs) .
Service Outlet (Customer-Supplied)
Unit Emergency Power Off (UEPO)
.
.
.
.
.
.
.
.
.
.
.
.
.
.
.
.
.
.
.
.
.
.
.
.
.
.
.
.
.
.
.
.
.
.
.
.
.
.
.
.
.
.
.
.
.
.
.
.
.
.
.
.
.
.
.
.
.
.
.
.
.
.
.
.
.
.
.
.
.
.
.
.
.
.
.
.
.
.
.
.
.
.
.
.
.
.
.
.
.
.
.
.
.
.
.
.
.
.
.
.
.
.
.
.
.
.
.
.
.
.
.
.
.
.
.
.
.
.
.
.
.
.
.
.
.
.
.
.
.
.
.
.
.
.
.
.
.
.
.
.
.
.
.
.
.
.
.
.
.
.
.
.
.
.
.
.
.
.
.
.
.
.
.
.
.
.
.
.
.
.
.
.
.
.
.
.
.
.
.
.
.
.
.
.
.
.
.
.
.
.
.
.
. 2-1
. 2-2
. 2-3
. 2-3
. 2-4
. 2-4
. 2-4
. 2-5
. 2-6
. 2-6
. 2-8
. 2-9
. . . . . . . . . . . 2-10
.
.
.
.
.
.
.
.
.
.
.
.
.
.
.
.
.
.
.
.
.
.
.
.
.
.
.
.
.
.
.
.
.
.
.
.
.
.
.
.
.
.
.
.
.
.
.
.
.
.
.
.
.
.
.
.
.
.
.
.
.
.
.
.
.
.
.
.
.
.
.
.
.
.
.
.
.
.
.
.
.
.
.
.
.
.
.
.
.
.
.
.
.
.
.
.
.
.
.
.
.
.
.
.
.
.
.
.
.
.
.
.
.
.
.
.
.
.
.
.
.
.
.
.
.
.
.
.
.
.
.
.
3-1
3-1
3-1
3-1
3-2
3-3
3-4
3-4
3-4
3-4
3-4
3-4
Chapter 4. Hardware Management Console and Support Element
Communications. . . . . . . . . . . . . . . . . . . . . . . 4-1
© Copyright IBM Corp. 2002, 2004
iii
Level 04a, June 21, 2004
Support Element . . . . . . . . . . . . . . . . . . . . .
Hardware Management Console . . . . . . . . . . . . . . .
LAN Connections . . . . . . . . . . . . . . . . . . . . .
Hardware Management Console and Support Element Wiring Options .
Trusted Key Entry (TKE) . . . . . . . . . . . . . . . . .
LAN Connections . . . . . . . . . . . . . . . . . . .
Sysplex Timer . . . . . . . . . . . . . . . . . . . . .
|
|
|
|
|
.
.
.
.
.
.
.
.
. 4-1
. 4-1
. 4-2
. 4-3
. . . 4-12
. . . 4-12
. . . 4-13
Chapter 5. Remote Support Facility Installation Planning . . . . . . . . 5-1
Ordering Telecommunication Service . . . . . . . . . . . . . . . . 5-1
Modems . . . . . . . . . . . . . . . . . . . . . . . . . . . 5-1
Chapter 6. Cabling and Connectivity . .
zSeries Fiber Cabling Service . . . . .
FICON Channel Feature . . . . . . .
Configuration Information . . . . . .
Connectivity Information . . . . . .
FICON References . . . . . . . .
Ordering FICON Fiber Optic Cables . .
ESCON Channel Feature . . . . . . .
Configuration Information . . . . . .
Connectivity Information . . . . . .
ESCON References . . . . . . . .
Ordering ESCON Fiber Optic Cables .
ISC-3 Link Feature . . . . . . . . .
Configuration Information . . . . . .
Connectivity Information . . . . . .
ISC-3 Reference . . . . . . . . .
Ordering ISC-3 Fiber Optic Links . .
OSA-Express LAN Connection Features .
Configuration Information . . . . .
Connectivity Information . . . . . .
OSA-Express Reference . . . . .
Ordering OSA-Express Cables . . .
External Time Reference (ETR) . . . .
Connectivity Information . . . . . .
ETR Reference . . . . . . . . .
Ordering ETR Cables . . . . . . .
Parallel Channels . . . . . . . . .
MCP Cables . . . . . . . . . . .
MCP Cables and Gigabit Links . . . .
Conversion Kit Cables . . . . . . .
Fiber Quick Connect ESCON Cabling . .
Integrated Cluster Bus Channel . . .
Preparing Configuration Definition . .
|
|
.
.
.
.
.
.
.
.
.
.
.
.
.
.
.
.
.
.
.
.
.
.
.
.
.
.
.
.
.
.
.
.
.
.
.
.
.
.
.
.
.
.
.
.
.
.
.
.
.
.
.
.
.
.
.
.
.
.
.
.
.
.
.
.
.
.
.
.
.
.
.
.
.
.
.
.
.
.
.
.
.
.
.
.
.
.
.
.
.
.
.
.
.
.
.
.
.
.
.
.
.
.
.
.
.
.
.
.
.
.
.
.
.
.
.
.
.
.
.
.
.
.
.
.
.
.
.
.
.
.
.
.
.
.
.
.
.
.
.
.
.
.
.
.
.
.
.
.
.
.
.
.
.
.
.
.
.
.
.
.
.
.
.
.
.
.
.
.
.
.
.
.
.
.
.
.
.
.
.
.
.
.
.
.
.
.
.
.
.
.
.
.
.
.
.
.
.
.
.
.
.
.
.
.
.
.
.
.
.
.
.
.
.
.
.
.
.
.
.
.
.
.
.
.
.
.
.
.
.
.
.
.
.
.
.
.
.
.
.
.
.
.
.
.
.
.
.
.
.
.
.
.
.
.
.
.
.
.
.
.
.
.
.
.
.
.
.
.
.
.
.
.
.
.
.
.
.
.
.
.
.
.
.
.
.
.
.
.
.
.
.
.
.
.
.
.
.
.
.
.
.
.
.
.
.
.
.
.
.
.
.
.
.
.
.
.
.
.
.
.
.
.
.
.
.
.
.
.
.
.
.
.
.
.
.
.
.
.
.
.
.
.
.
.
.
.
.
.
.
.
.
.
.
.
.
.
.
.
.
.
.
.
.
.
.
.
.
.
.
.
.
.
.
.
.
.
.
.
.
.
.
.
.
.
.
.
.
.
.
.
.
.
.
.
.
.
.
.
.
.
.
.
.
.
.
.
.
.
.
.
.
.
.
.
.
.
.
.
.
.
.
.
.
.
.
.
.
.
.
. 6-1
. 6-1
. 6-5
. 6-5
. 6-5
. 6-5
. 6-6
. 6-7
. 6-7
. 6-7
. 6-7
. 6-8
. 6-9
. 6-9
. 6-9
. 6-9
. 6-10
. 6-11
. 6-11
. 6-11
. 6-12
. 6-13
. 6-14
. 6-14
. 6-14
. 6-14
. 6-15
. 6-15
. 6-16
. 6-17
. 6-18
. 6-18
. 6-20
Chapter 7. Parallel Sysplex . . . . . . . . . . . . . . . . . . . 7-1
Parallel Sysplex Planning . . . . . . . . . . . . . . . . . . . . . 7-1
Appendix A. IBM Standard Symbols . . . . . . . . . . . . . . . . A-1
Appendix B. Environmental Specifications . . . . . . . . . . . . . B-1
Appendix C. Acoustics . . . . . . . . . . . . . . . . . . . . . C-1
Acoustical Noise Emission Levels . . . . . . . . . . . . . . . . . C-1
Relevant International Standards:. . . . . . . . . . . . . . . . . C-1
iv
zSeries 800: Installation Manual for Physical Planning
Level 04a, June 21, 2004
Appendix D. Dual Power Installation . . . . . . . . . . . . . . . . D-1
Appendix E. Notices . . . . . . . . . . . . . . . . . . . . . . E-1
Electronic Emission Notices . . . . . . . . . . . . . . . . . . . . E-2
Trademarks and Service Marks . . . . . . . . . . . . . . . . . . E-4
Index . . . . . . . . . . . . . . . . . . . . . . . . . . . . X-1
Contents
v
Level 04a, June 21, 2004
vi
zSeries 800: Installation Manual for Physical Planning
Level 04a, June 21, 2004
Figures
2-1.
2-2.
2-3.
2-4.
2-5.
2-6.
2-7.
4-1.
4-2.
4-3.
4-4.
4-5.
4-6.
4-7.
4-8.
6-1.
6-2.
6-3.
6-4.
6-5.
6-6.
6-7.
| 6-8.
6-9.
6-10.
6-11.
A-1.
B-1.
D-1.
D-2.
D-3.
Typical zSeries 800 system . . . . . . . . . . . . . . . .
System Dimensions . . . . . . . . . . . . . . . . . . .
System Weight Distribution . . . . . . . . . . . . . . . . .
System Service Clearance . . . . . . . . . . . . . . . . .
Raised Floor Placement . . . . . . . . . . . . . . . . . .
Frame-Caster Dimensions . . . . . . . . . . . . . . . . .
Multiple System Thermal Interaction . . . . . . . . . . . . .
Token Ring only wiring scenario . . . . . . . . . . . . . . .
Token Ring only wiring scenario with additional connections. . . . .
Ethernet only - one path wiring scenario . . . . . . . . . . . .
Ethernet only - one path wiring scenario with additional connections .
Ethernet only - two path wiring scenario . . . . . . . . . . . .
Ethernet only - two path wiring scenario with additional connections. .
Token Ring and Ethernet wiring scenario . . . . . . . . . . .
Token Ring and Ethernet wiring scenario with additional connections.
Summary of Channel Jumper Cable Connector Types . . . . . . .
Fiber Optic Cable Routing . . . . . . . . . . . . . . . . .
FICON Card . . . . . . . . . . . . . . . . . . . . . .
ESCON Card . . . . . . . . . . . . . . . . . . . . . .
ISC-3 Card . . . . . . . . . . . . . . . . . . . . . .
OSA-Express Cards . . . . . . . . . . . . . . . . . . .
ETR Card . . . . . . . . . . . . . . . . . . . . . .
Summary of Mode Conditioning Patch Cable Usage . . . . . . .
Summary of Conversion Kit Cable Usage . . . . . . . . . . .
ESCON Harnesses and Harness Bracket . . . . . . . . . . .
Integrated Cluster Bus Cabling . . . . . . . . . . . . . . .
IBM Standard Symbols . . . . . . . . . . . . . . . . . .
Table - Environmental Specifications . . . . . . . . . . . . .
Dual Power Installation - Redundant Panel and Switch . . . . . .
Dual Power Installation - Redundant Panel . . . . . . . . . . .
Single Distribution Panel - Dual Circuit Breakers. . . . . . . . .
© Copyright IBM Corp. 2002, 2004
.
.
.
.
.
.
.
.
.
.
.
.
.
.
.
.
.
.
.
.
.
.
.
.
.
.
. .
. .
. .
. .
. .
. .
. .
. .
. .
. .
. .
. .
. .
. .
. .
. .
. .
. .
.
.
.
.
.
.
.
.
.
.
.
.
.
.
.
.
.
.
.
.
.
.
.
.
.
.
. .
. .
. .
. .
. .
. .
. .
. .
. .
. .
. .
. .
. .
. .
. .
. .
. .
. .
.
.
.
.
.
.
.
.
.
.
.
.
.
.
.
.
.
.
.
.
.
.
.
.
.
.
. .
. .
. .
. .
. .
. .
. .
. .
. .
. .
. .
. .
. .
. .
. .
. .
. .
. .
.
.
.
.
.
.
.
.
.
.
.
.
.
.
.
.
.
.
.
.
.
.
.
.
.
.
. .
. .
. .
. .
. .
. .
. .
. .
. .
. .
. .
. .
. .
. .
. .
. .
. .
. .
. 2-1
. 2-4
. 2-5
. 2-6
. 2-7
. 2-8
. 2-9
. 4-4
. 4-5
. 4-6
. 4-7
. 4-8
. 4-9
. 4-10
. 4-11
. 6-3
. 6-4
. 6-6
. 6-8
. 6-10
. 6-13
. 6-14
. 6-15
. 6-17
. 6-18
. 6-19
. A-1
. B-1
. D-1
. D-2
. D-3
vii
Level 04a, June 21, 2004
viii
zSeries 800: Installation Manual for Physical Planning
Level 04a, June 21, 2004
Tables
2-1.
2-2.
2-3.
2-4.
2-5.
2-6.
3-1.
3-2.
3-3.
3-4.
| 4-1.
| 6-1.
C-1.
Processor and Coupling Facility Models . . . . . . . . . .
System Frame Specifications . . . . . . . . . . . . . .
System Cover Weights . . . . . . . . . . . . . . . .
zSeries 800 Maximum Frame Weight, Width, and Depth Used for
Weight Distribution and Floor Loading . . . . . . . . . .
Shipping Specifications . . . . . . . . . . . . . . .
Power Supply Ranges and Tolerances . . . . . . . . . .
System Power Rating. . . . . . . . . . . . . . . . .
Power Plugs and Receptacles - 200-240 Volts . . . . . . .
Line Cord Specifications . . . . . . . . . . . . . . . .
. . . . . . . . . . . . . . . . . . . . . . . .
OSA-Express Feature Codes . . . . . . . . . . . . .
Table - Declared Acoustical Noise Emission Values . . . . .
© Copyright IBM Corp. 2002, 2004
. . . . . . . . . . . 2-3
. . . . . . . . . . . 2-3
. . . . . . . . . . . 2-3
Floor Loading Calculations 2-4
. . . . . . . . . . . 2-5
. . . . . . . . . . . 2-10
. . . . . . . . . . . 3-1
. . . . . . . . . . . 3-2
. . . . . . . . . . . 3-2
. . . . . . . . . . . 3-4
. . . . . . . . . . . 4-12
. . . . . . . . . . . 6-11
. . . . . . . . . . . C-1
ix
Level 04a, June 21, 2004
x
zSeries 800: Installation Manual for Physical Planning
Level 04a, June 21, 2004
Safety and Environmental Notices
Safety Notices
Safety notices may be printed throughout this guide. DANGER notices warn you of
conditions or procedures that can result in death or severe personal injury.
CAUTION notices warn you of conditions or procedures that can cause personal
injury that is neither lethal nor extremely hazardous. Attention notices warn you of
conditions or procedures that can cause damage to machines, equipment, or
programs.
There are no DANGER notices in this manual.
World Trade Information
Several countries require the safety information contained in product publications to
be presented in their national languages. If this requirement applies to your country,
a safety information booklet is included in the publications package shipped with the
product. The booklet contains the safety information in your national language with
references to the US English source. Before using a US English publication to
install, operate, or service this IBM product, you must first become familiar with the
related safety information in the booklet. You should also refer to the booklet any
time you do not clearly understand any safety information in the US English
publications.
Laser Safety Information
All zSeries models can use I/O cards such as PCI adapters, ESCON, FICON,
OSA-Express, InterSystem Coupling-3 (ISC-3), or other I/O features which are fiber
optic based and utilize lasers or LEDs.
Laser Compliance
All lasers are certified in the U.S. to conform to the requirements of DHHS 21 CFR
Subchapter J for class 1 laser products. Outside the U.S., they are certified to be in
compliance with the IEC 825 (first edition 1984) as a class 1 laser product. Consult
the label on each part for laser certification numbers and approval information.
CAUTION:
All IBM laser modules are designed so that there is never any human access
to laser radiation above a class 1 level during normal operation, user
maintenance, or prescribed service conditions. Data processing environments
can contain equipment transmitting on system links with laser modules that
operate at greater than class 1 power levels. For this reason, never look into
the end of an optical fiber cable or open receptacle. Only trained service
personnel should perform the inspection or repair of optical fiber cable
assemblies and receptacles.
© Copyright IBM Corp. 2002, 2004
xi
Level 04a, June 21, 2004
Environmental Notices
Product Recycling and Disposal
This unit contains materials such as circuit boards, cables, electromagnetic
compatibility gaskets and connectors which may contain lead and copper/beryllium
alloys that require special handling and disposal at end of life. Before this unit is
disposed of, these materials must be removed and recycled or discarded according
to applicable regulations. IBM offers product-return programs in several countries.
Information on product recycling offerings can be found on IBM’s Internet site at
http://www.ibm.com/ibm/environment/products/prp.shtml.
IBM encourages owners of information technology (IT) equipment to responsibly
recycle their equipment when it is no longer needed. IBM offers a variety of
programs and services to assist equipment owners in recycling their IT products.
Information on product recycle offerings can be found on IBM’s Internet site at
http://www.ibm.com/ibm/environment/products/prp.shtml.
Battery Return Program
This product may contain sealed lead acid, nickel cadmium, nickel metal hydride,
lithium, or lithium ion battery(s). Consult your user manual or service manual for
specific battery information. The battery must be recycled or disposed of properly.
Recycling facilities may not be available in your area. For information on disposal of
batteries outside the United States, go to
http://www.ibm.com/ibm/environment/products/batteryrecycle.shtml or contact your
local waste disposal facility.
In the United States, IBM has established a return process for reuse, recycling, or
proper disposal of used IBM sealed lead acid, nickel cadmium, nickel metal hydride,
and other battery packs from IBM Equipment. For information on proper disposal of
these batteries, contact IBM at 1-800-426-4333. Please have the IBM part number
listed on the battery available prior to your call.
In the Netherlands, the following applies:
xii
zSeries 800: Installation Manual for Physical Planning
Level 04a, June 21, 2004
Cable Warning
WARNING: Handling the cord on this product or cords associated with accessories
sold with this product, will expose you to lead, a chemical known to the State of
California to cause cancer, and birth defects or other reproductive harm. Wash
hands after handling.
Safety and Environmental Notices
xiii
Level 04a, June 21, 2004
xiv
zSeries 800: Installation Manual for Physical Planning
Level 04a, June 21, 2004
About This Publication
This publication contains information necessary for planning the physical installation
of the zSeries 800 system.
v Chapter 1 provides an introduction to planning for your system and a planning
checklist.
v Chapter 2 gives plan views, service clearances, weight distribution, cooling
information, and floor cutouts for the system.
v Chapter 3 provides power information.
v Chapter 4 includes information on hardware management console and support
element communications.
v Chapter 5 contains remote support facility installation planning.
v Chapter 6 discusses cable connectivity information.
v The Appendices provide IBM standard symbols, environmental specifications,
acoustics, and power installation and power loads.
Related Publications
The following publications may also be used with this publication, depending on the
specific system configuration:
v System Overview, SA22-1028
v OSA Express Customer’s Guide and Reference, SA22-7476
v Planning for: S/390® Fiber Optic Links (ESCON®, FICON™, and Coupling Links),
GA23-0367
v Introducing Enterprise Systems Connection, GA23-0383
v Planning for Enterprise Systems Connection Links, GA23-0367
v LAN Cabling System Planning and Installation Guide, GA27-3361
v IBM S/390 FICON Migration Guide, SG24-5169
v FTS Direct Attach Physical and Configuration Planning Guide, GA22-7234
v IBM 7852 Modem Model 400 External Data/Fax Modem Technical Reference,
76H2773
v IBM 7852 Modem Model 400 External Data/Fax Modem Installation Guide,
76H2772
v IOCP Users Guide, SB10-7029
In addition to these printed references, there is general computer room planning
information on IBM’s Resource Link web site.
(http://www.ibm.com/servers/resourcelink)
© Copyright IBM Corp. 2002, 2004
xv
Level 04a, June 21, 2004
Education
To assist in a smooth transition to your new system, it is recommended that your
educational plans include some preliminary training for using the Hardware
Management Console interface. This education should be provided for operators,
system programmers and other users of the Hardware Management Console.
To learn about the interface, consider including the following items for user
education prior to system arrival:
v Learning To Use the S/390 CMOS Console, SK2T-0001
v Hardware Management Console Operations Guide (See Resource Link™ for the
form number and level that supports the Version of code you are using).
v Support Element Operations Guide (See Resource Link for the form number and
level that supports the Version of code you are using).
There is additional educational material on IBM’s Resource Link web site.
(http://www.ibm.com/servers/resourcelink)
Licensed Internal Code
Licensed Internal Code is provided in accordance with the terms and conditions of
the applicable IBM Customer Agreement or other applicable written agreement
between the Customer and IBM.
Licensed Internal Code (LIC) is a fundamental component of the zSeries 800 and is
copyrighted and licensed by IBM. Each zSeries 800 system is delivered with
Licensed Internal Code that is customized to the specific machine ordered. The
Licensed Internal Code enables the zSeries 800 to operate in accordance with its
Official Published Specifications.
Model upgrades, feature additions, and system engineering changes may require
updated Licensed Internal Code for the system. Updated Licensed Internal Code
replaces the existing Licensed Internal Code.
Relocation of a zSeries 800 requires that the Licensed Internal Code be reinstalled
in the server at the new location. For the procedures for relocating a zSeries 800,
see the “Preparing for Relocation”section of the zSeries 800 Installation Manual.
How to Send your Comments
Your feedback is important in helping to provide the most accurate and high-quality
information. If you have any comments about this document:
Send your comments by using Resource Link at
http://www.ibm.com/servers/resourcelink. Select Feedback on the Navigation bar on
the left. Be sure to include the name of the document, the form number, the
version, if applicable, and the specific location of the text you are commenting on
(for example, a page number or table number).
xvi
zSeries 800: Installation Manual for Physical Planning
Level 04a, June 21, 2004
Chapter 1. Introduction to Planning
This chapter of the Physical Planning Manual is intended to help you with planning
pre-installation activities. IBM Marketing and Installation Planning Representatives
are also available to help you with installation planning. Proper planning for your
new system will facilitate a smooth installation and fast system start-up.
The use of the terms, ’processor’, ’system’ and ’all models’ in this publication refer
to the zSeries 800 system.
System Planning
As part of your system planning activity, you will make decisions about where to
locate your equipment, who will operate the system, and so on. A good plan
ensures that the equipment and materials are ready to use when the zSeries 800
system arrives.
You should select an individual to serve as the coordinator for your planning efforts.
One person is generally responsible for most or all of the system planning, but it is
also possible to divide the responsibilities among other people in your business.
The type of software (operating system and application programs) that you intend to
use must support the features and devices on the system. You should already be
familiar with your software requirements, but may want to contact your IBM
marketing representative for information on planning for the software.
© Copyright IBM Corp. 2002, 2004
1-1
Level 04a, June 21, 2004
Planning Checklist
This checklist identifies installation tasks and responsibilities sequentially. If you
have to renovate your site, you will need a longer planning cycle.
Task/Consideration
Checkpoint 1
Designate a person in your organization with the responsibility for all phases
of site preparation.
Review all site planning information with the designated person. Determine
who will actually perform each site preparation task and mark this checklist.
Plan for the installation of the device cables between the devices and the
processor. Before leaving this checkpoint step, turn to Chapter 6, “Cabling
and Connectivity,” on page 6-1 and read the information now about planning
for future cable needs and the “zSeries Fiber Cabling Service” on page 6-1
Determine the schedule with your IBM marketing representative. Fill in the
dates on this form.
Identify communication needs and the source for the communication lines.
Identify modem needs.
Checkpoint 2
Lay out the floor plan. Show the locations of the processor, control units,
work stations, modems, power outlets, and accessories. If you are planning
a new computer room, information contained on IBM’sResource Link web
site (http://www.ibm.com/servers/resourcelink) may be helpful. See ″General
Information for Planning a Physical Site″. If you are planning an installation
on a non-raised floor, ask your marketing representative if your system
requires cables designed to reduce electronic noise interference.
Review the overall site preparation plan.
Place orders for cables. See Chapter 6, “Cabling and Connectivity,” on page
6-1
Contact the IBM zSeries Fiber Cabling Service (FCS) for assistance. FCS
will help you plan for the cabling solution that meets your individual system
requirements. Your marketing representative will provide you with the
information necessary to contact FCS.
Checkpoint 3
Determine if the existing programs need changes. Schedule changes as
required.
Determine if any existing devices and control units need changes. Schedule
changes as required.
Arrange for installing the device cables between the work stations,
controllers, and modems.
Arrange for installing the power receptacles and wiring.
Define a training program for employees.
Use Resource Link (http://www.ibm.com/servers/resourcelink) to obtain
required manuals (such as System Overview,IOCP Users Guide,PR/SM™
Planning Guide). See your IBM marketing representative for specific
manuals you may need.
Checkpoint 4
Review the progress of the data communication plan. Identify and resolve
any schedule conflicts.
Review the system configuration to ensure the configuration meets your
requirements Make necessary changes.
Checkpoint 5
Review the installation plan and define any points in the schedule that may
cause a problem.
1-2
zSeries 800: Installation Manual for Physical Planning
Task Assigned
(check)
_______
_______
_______
_______
_______
_______
_______
_______
_______
_______
_______
_______
_______
_______
_______
_______
_______
_______
Level 04a, June 21, 2004
Task Assigned
(check)
Task/Consideration
If you have elected to do your own I/O cabling, as cables begin to arrive,
start installing and labeling them. Label power receptacles as they are
installed.
Start employee training.
Complete the Systems Assurance Product Review with your IBM marketing
representative or Business Partner and the system installers.
Carefully measure the delivery path from the shipper drop-off point to the
install location. Accurate measurements now may prevent installation delays
later. See Figure 2-2 on page 2-4
Checkpoint 6
Prepare IOCP input statements or HCD definitions.
If you intend to remap CHPID numbers when your zSeries 800 system is
installed, use the CHPID Mapping Tool on Resource Link to create a
diskette with your CHPID assignments. (Go
tohttp://www.ibm.com/servers/resourcelink).
If you have elected to do your own I/O cabling, complete the checkout of
system cables as much as possible. Verify that the cables are properly
routed, protective end caps are in place, that the processor ends of the
cables are safely out of the way for system installation, and that cable
safety procedures are followed.
Complete the checkout of the power cables. Test for continuity and polarity,
proper grounding, correct phase wiring, and general power safety
considerations.
Complete the required changes to the existing programs and data
processing units.
Complete the site preparation.
Install communication facilities, such as telephone lines and modems.
Review setup instructions with setup personnel.
Arrival of Unit(s)
Move unit(s) to installation location. Unpack unit(s) according to instructions.
Call your service provider to install the unit(s).
_______
_______
_______
_______
_______
_______
_______
_______
_______
_______
_______
_______
You may want to make copies of the Planning Schedule for others assisting in the
system installation planning. This might include IBM personnel assisting with the
planning process, service providers, vendors, and others in your business who
require planning updates.
Chapter 1. Introduction to Planning
1-3
Level 04a, June 21, 2004
1-4
zSeries 800: Installation Manual for Physical Planning
Level 04a, June 21, 2004
Chapter 2. Models and Physical Specifications
This chapter provides the following detailed information for zSeries 800s.
v Model and frame descriptions
v Plan view and specifications
v Weight distribution data and service clearances information
v Shipping specifications
zSeries 800
Hardware
Management
Console
Figure 2-1. Typical zSeries 800 system
All zSeries 800 models are constructed using building blocks called ″cages″ that
mount in a ″frame″. A processor (CPC) cage is always placed in the top position of
the frame. Input/Output adapters are installed in a second cage, added to the
bottom of the frame.
Because of the large number of cables that can be connected to a zSeries 800
system, installation on a raised floor is strongly recommended.
If you are planning an installation on a raised floor in Canada, the installation
must be in accordance with Section 12-020 of the CEC. Certain limitations may
apply to non-raised floor applications. In any country, refer to your national electric
code if you have questions about routing data processing cables in exposed areas.
© Copyright IBM Corp. 2002, 2004
2-1
Level 04a, June 21, 2004
|
General Installation Manual for Physical Planning
|
|
|
Information contained on IBM’s Resource Link web site
(http://www.ibm.com/servers/resourcelink.) may be helpful in planning for your
raised floor. See ″General Information for Planning a Physical Site″.
|
|
The GIMPP covers the following topics :
Site Installation Coordinator
Oversees the installation
Selects contractors and vendors
Sets and maintains the schedule
Site Selection
Utility availability
Environmental considerations
External access to the site
Internal access within the site
External and internal facilities
Expansion potential
Flooring
Non-raised floor construction
Floor coverings in data center
Static electricity
Raised floor construction
Vertical underfloor space
Sealed floor
Floor panel weight capacity
Pedestal system
Stringers
Grounding
Cabling provision
Expansion Potential
Emergency Planning
Monitor environment
Computer room
Air conditioning equipment
Electrical supply
Periodic inspections
Hazard prevention/protection
Fire
Water
Lightning
Chemical
Personnel training
Emergency plans
Emergency equipment
Emergency shutdown
Emergency evacuation
Emergency contacts
Alarms
Disaster backup plans
|
|
2-2
zSeries 800: Installation Manual for Physical Planning
Space and Layout
Obstacles (walls, columns, etc)
Weight distribution
Floor loading
Machine area
Service clearance
Cable placement
Restrictive cable lengths
Power access
Safety equipment
Facilities access
Operator space and facilities
Work flow
Entrances/exits
Loading dock access
Hallways/doorways
Ramps
Lighting
Acoustics
Electro Magnetic Interference
Proximity to hazards
Potential water damage
Shock and vibration
Chemical hazards
Fire danger
Lightning protection
Office space
Storage space
Supplies space
Power Considerations
Dual power installation
Proper phase rotation
Proper wire size and color
Watertight power connectors
Proper grounding
Adequate circuit breakers
Emergency power shutoff
EPO switch
UEPO switch
Backup system power
Uniterruptible power supply
Surge protection
Brownout protection
Lightning protection
Emergency lighting
Service and utility outlets
Obvious labeling
Level 04a, June 21, 2004
Models
Table 2-1. Processor and Coupling Facility Models
5 PU Models
CPs
SAPs
Spares
Mandatory IFLs
0E1
1
1
2
1
0E1 (Japan Only)
1
1
3
0
0A1
1
1
3
0
0B1
1
1
3
0
0C1
1
1
3
0
0X2
2
1
2
0
001
1
1
3
0
0A2
2
1
2
0
002
2
1
2
0
003
3
1
1
0
004
4
1
0
0
Coupling Facility or Integrated Facility for Linux
0CF or 0LF1
1
1
3
0
2
1
2
0
3
1
1
0
4
1
0
0
Notes:
1. The 0CF and 0LF models can be 1-4 way PUs
Physical Dimensions
Table 2-2. System Frame Specifications
Packaging
Width mm
(in)
Depth mm
(in)
Height mm
(in)
Weight kg
(lb)
Frame w/o Covers
700 (27.5)
1000 (39.4)
1810 (71.3)
470 (1036)
Frame w/ Covers
720 (28.3)
1146 (45.1)
1810 (71.3)
545 (1201)
Table 2-3. System Cover Weights
Cover Description
Weight kg (lb)
Usage
Side Covers
17.91 (39.5)
(2 per frame)
Front Cover
24.94 (55)
(1 per frame)
Rear Cover
14.06 (31)
(1 per frame)
Chapter 2. Models and Physical Specifications
2-3
Level 04a, June 21, 2004
Plan View
10 mm
(0.4 in)
700 mm
(27.5 in)
30 mm
(1.2 in)
+
+
+
+
1146 mm
(45.1 in)
1000 mm
(39.4 in)
116 mm
(4.5 in)
Frame
Entry/Exit
Dimension
(mm)
(in)
Front
Rear
165 x 381 6.5 x 15.0
165 x 381 6.5 x 15.0
720 mm
(28.3 in)
Figure 2-2. System Dimensions
Weight Distribution and Service Clearance
Weight Distribution
The following table shows weights and dimensions used to calculate floor loading
for zSeries 800 systems. All floor loading calculations are intended for a raised floor
environment.
Table 2-4. zSeries 800 Maximum Frame Weight, Width, and Depth Used for Floor Loading
Calculations
Weight kg (lbs)
545 (1201)
Width mm (in)
700 (27.5)
Depth mm (in)
1000 (39.4)
Note: Weight includes covers. Width and depth are indicated without covers.
If you are planning an installation on a non-raised floor, contact a qualified
consultant or a structural engineer regarding your location choice to make sure the
floor is strong enough to support the weight of the machine.
The following figure and table show sample floor loading values for a zSeries 800
system.
2-4
zSeries 800: Installation Manual for Physical Planning
Level 04a, June 21, 2004
Rear
c
a, b, c
Weight Distribution
a
a
b
Front
Figure 2-3. System Weight Distribution
Table 2-5. Weight Distribution and Floor Loading
Example #
’a’ mm (in)
’b’ mm (in)
’c’ mm (in)
Weight
kg/m2(lbs/f2)
Example 1
10 (0.4)
116 (4.5)
30 (1.2)
718.6 (147.2)
Example 2
381 (15.0)
381 (15.0)
381 (15.0)
313.3 (64.2)
Example 3
381 (15.0)
508 (20.0)
508 (20.0)
289.2 (59.2)
Example 4
381 (15.0)
635 (25.0)
635 (25.0)
270.5 (55.4)
Example 5
381 (15.0)
762 (30.0)
762 (30.0)
255.6 (52.3)
Example 6
508 (20.0)
508 (20.0)
508 (20.0)
264.5 (54.2)
Example 7
635 (25.0).
635 (25.0)
635 (25.0)
232.2 (47.6)
Example 8
762 (30.0)
762 (30.0)
762 (30.0)
209.8 (43.0)
1. All measurements are taken from the outside edge of the machine frame,
without covers, unless specifically described otherwise.
2. Example 1 of the table shows floor loading for a maximum-weight frame in
storage, where there is no space between frames on all four sides, and covers
are installed. The ’a’, ’b’, and ’c’ dimensions represent the depth of the covers.
When a system is stored, with no spaces between frames, the floor load rating
should be at least 1000 kg/m2 (200 lb/ft2).
If weight distribution clearances are overlapped, the customer should obtain the
services of a qualified consultant or structural engineer to determine floor loading.
Service Clearance
Under typical conditions,service clearances of adjacent products may be overlapped
but weight distribution areas should not be overlapped. Regardless of floor loading,
minimum service clearances must be observed. The zSeries 800 requires 762 mm
(30 in) of service clearance on all four sides of the machine.
Chapter 2. Models and Physical Specifications
2-5
Level 04a, June 21, 2004
g
e
Minimum Service Clearances
Rear
h
d = 762 mm (30 in) - front
e = 762 mm (30 in) - rear
f
f
f = 762 mm (30 in) - each side
g = 2244 mm (88.3 in) - side to side total
h = 2670 mm (105.1 in) - front to rear total
Front
d
Figure 2-4. System Service Clearance
The system requires specific service clearances to insure the fastest possible
repair in the unlikely event that a part may need to be replaced. Failure to
provide enough clearance to open the front, rear, left, and right side covers
will result in extended service time.
Machine and Service Clearance Areas
Machine area is the actual floor space covered by the system. Service clearance
area includes the machine area, plus additional space required to open the covers
for service access to the system. For the zSeries 800 system, machine area is 0.83
M2 (8.9 ft2), and the service clearance area is 5.99 M2 (64.5 ft2).
Notes:
1. Machine area includes installed covers.
2. Service clearance area must be free of all obstacles. Units must be placed in a
way that all service areas are accessible. The weight distribution clearance area
extending beyond the service clearance area, such as the area at the outside
corners of the units, may contain support walls and columns.
Cooling Requirements and Floor Cutouts
The zSeries 800 system requires 11.1 m3/min. (400 f3/min.) of chilled airflow from
under the raised floor for adequate cooling. Air flows through the machine from
bottom to top, exiting at the top of the rear cover. Heated exhaust air should exit the
computer room above the computing equipment. If your computer room uses hot
and cold aisles, the front of the machine should face a cold aisle.
If you are planning an installation on a non-raised floor, refer to Appendix B,
“Environmental Specifications,” on page B-1 for the environmental conditions you
must provide to ensure proper machine operation. After reviewing the environmental
information, return to “Considerations for Multiple System Installations” on page 2-9
read the information about ″Inter-system cabling″, and continue from there.
2-6
zSeries 800: Installation Manual for Physical Planning
Level 04a, June 21, 2004
Important
Depending on the panel type, additional panel support pedestals may be
required to restore structural integrity of the panel. Consult the panel
manufacturer to insure that the panel can sustain a concentrated load of 181.4
kg (400 lbs) per caster. It is possible that one floor panel will bear two casters
producing loads as high as 362.8 kg (800 lbs) on the panel.
The following illustration shows the recommended placement of the zSeries 800 on
a typical raised floor.
v Perforated floor tiles are placed on either side of the frame, providing good
airflow.
v With this floor placement, the cutout panels are identical.
v Note that this placement puts two casters each on panels B1 and B3. Additional
pedestals may be positioned at the corners marked with asterisks in the
illustration.
It is possible to place a perforated panel in position B2 instead of positions A2 and
C2. This is not recommended because humidity and dust from under the raised
floor could affect performance of the air filters in the bottom of the frame.
Frame Entry/Exit
(mm)
Front and Rear 165 x 381 6.5 x 15.0
Floor Tile Cutout
(mm)
*
(in)
Frame
Entry/Exit
Perforated
Floor Tile
Additional
Pedestal
(in)
Front and Rear 203 x 381 8.0 x 15.0
Floor Tile
Cutout
B1
A1
B1
C1
*
114 mm
(4.5 in)
A2
B2
C2
*
381 mm
(15.0 in)
*
203 mm
(8.0 in)
114 mm
(4.5 in)
*
203 mm
(8.0 in)
B3
A3
B3
Front
C3
Figure 2-5. Raised Floor Placement
v Ensure adequate floor space is available to place the frames over the floor
panels exactly as shown in the drawing. Refer to “Plan View” on page 2-4
“Weight Distribution” on page 2-4 and “Service Clearance” on page 2-5for
front-to-back and side-to-side clearances. Consider all obstructions above and
below the floor.
v Cut two floor panels. Additional panel supports (pedestals) may be required to
restore the structural integrity of the panel.
Chapter 2. Models and Physical Specifications
2-7
Level 04a, June 21, 2004
v Raised floor cutouts should be protected by electrically nonconductive molding,
appropriately sized, with edges treated to prevent cable damage and to prevent
casters from rolling into the floor cutouts.
When cutting the panels, you must adjust the size of the cut for the thickness of
the edge molding you are using. The dimensions shown are finished dimensions.
v Use Figure 2-5 on page 2-7 to install the panels in the proper positions.
Casters
The following illustration shows the physical dimensions around the casters. When
planning for both the movement and positioning of the system, be aware that each
caster swivels in a circle slightly larger than 125 mm (5 in) in diameter. Exercise
caution when working around floor cutouts.
Frame - Caster Dimensions
64.2 mm
(2.5 in)
64.2 mm
(2.5 in)
33.2 mm
(1.3 in)
131.6 mm
(5.2 in)
136 mm
(5.35 in)
Swivel Diameter
Figure 2-6. Frame-Caster Dimensions
2-8
zSeries 800: Installation Manual for Physical Planning
Level 04a, June 21, 2004
Considerations for Multiple System Installations
When integrating a zSeries 800 system into an existing multiple-system
environment, or when adding additional systems to an installed zSeries 800,
consider the following factors:
v Thermal interactions
When positioning a zSeries 800 system on your raised floor, place the machine
so that the air supplied by the perforated floor tiles is delivered only to this
system. The illustration shows how to include a zSeries 800 in an existing
arrangement, allowing for both the required service clearance and adequate air
flow.
Hot
Aisle
Air Flow
Air Flow
Air Flow
Cold
Aisle
Air Flow
Air Flow
Air Flow
Air Flow
zSeries 800
Hot
Aisle
Figure 2-7. Multiple System Thermal Interaction
v Floor loading
When trying to optimize floor space utilization, floor loading may become
overlapped. Obtain the services of a qualified consultant or structural engineer if
you are uncertain of the weight distribution on your raised floor.
v Inter-system cabling
Integrated Cluster Bus (ICB) cables linking systems together are limited to 10
meters (33 ft) in length. Because some of that length is used under the covers of
Chapter 2. Models and Physical Specifications
2-9
Level 04a, June 21, 2004
the connected systems to reach internal plugging points, the usable length of
these system links is further reduced to a maximum of 7 meters (23 ft). See
Figure 6-11 on page 6-19
Shipping Specifications
In the U.S. and Canada, zSeries 800 systems are shipped with external cardboard
and plastic packaging, and roll on their own casters.
zSeries 800 systems are shipped on pallets for World Trade delivery. The pallet
includes a ramp to roll the machine off of the pallet. For shipment to some
Asia/Pacific countries the system is protected with a wooden shipping crate.
Packaging for both World Trade and A/P requires commercial lift transportation.
Review the packaged product dimensions and your site specifications to determine
if the zSeries 800 will need to be unpacked before it can be moved into its install
position.
Table 2-6. Shipping Specifications
2-10
Packaging
Width mm
(in)
Depth mm
(in)
Height mm
(in)
Weight kg
(lb)
Domestic
746 (29.4)
1299 (51.1)
1810 (71.4)
556 (1225)
World Trade
908 (35.8)
1359 (53.5)
2042 (80.4)
608 (1340)
Crated Frame
870 (34.3)
1318 (51.9)
1318 (51.9)
649 (1430)
zSeries 800: Installation Manual for Physical Planning
Level 04a, June 21, 2004
Chapter 3. Power Requirements
General Requirements
zSeries 800s require a minimum of 2 customer power feeds:
1. Two identical (redundant) feeds for the frame
2. One duplex service outlet positioned within five feet of the machine frame.
The service outlets require standard 100V to 130V or 200V to 240V, 50/60Hz,
single-phase power.
zSeries 800s operate with:
v 50/60Hz AC power
v Voltages ranging from 200V to 240V
v Single-phase wiring
Power Installation Considerations
|
|
|
|
|
|
|
zSeries 800s operate from two fully-redundant single-phase line cords. These
redundant line cords allow the system to survive the loss of customer power to
either line cord. If power is interrupted to one of the line cords, the other line cord
will pick up the entire load and the system will continue to operate without
interruption. Therefore each line cord is intended to be be wired to support the
entire power load of the system.
Important
Each power cord is intended to be supplied by a different source.
Since the zSeries 800 operates on single-phase power, power redundancy is
realized only if the source to each line cord is different. Failure to provide separate
power sources will lead to system failure in the event of a power outage. See
Appendix D, “Dual Power Installation,” on page D-1 for examples of typical
redundant facilities wiring.
The power supplies at the front end of the system use active resistive load
synthesis. Harmonic distortion of the current waveform is small enough that it need
not be considered in planning the installation. The power factor is typically 0.95.
Power Specifications
Table 3-1. Power Supply Ranges and Tolerances
Supply Type
Nominal Voltage
Range (V)
Two redundant single-phase
line cords
200-240
© Copyright IBM Corp. 2002, 2004
Voltage Tolerance Frequency Range
(V)
(Hz)
180-254
47-63
3-1
Level 04a, June 21, 2004
Table 3-2. System Power Rating
Models
All
Source Type
Single-phase
Frequency
Input Voltage
Range
50/60 Hz
200 - 240V
Rated Input
Current
16A
Notes:
1. The power factor is approximately 0.95.
2. Maximum system power is 2.95 kW.
3. Maximum kBTU/hr is 10.0 kBTU/hr.
Power Plugs and Receptacles
Plugs are shipped with the machine line cords in USA and Canada. The line cord
lengths are 4250 mm (14 ft.) except in Chicago, Illinois, USA where the length is
1830 mm (6 ft.). Power plugs in the following table are approved for use with
specified models and meet the relevant test laboratory or country/test-house
standards. The power plug must be connected to a correctly wired and grounded
receptacle.
The customer is responsible for receptacle wiring. In the U.S., Canada and Japan,
contact the vendor of your choice and provide the information (including Note 1) for
the receptacles from the following table.
For countries that require other types of plugs or receptacles, the system is shipped
without plugs on the line cords, and you are responsible for supplying and installing
both plugs and receptacles. Use the voltage and description information from the
table below (including Note 2) when contacting your vendor of choice.
Table 3-3. Power Plugs and Receptacles - 200-240 Volts
3-2
Watertight
Receptacle
Feature Code
Voltage
Description
Watertight Plug
2700 1.83 m (6
ft) Line Cord
(Chicago Only)
200V - 240V
Dual line cords
Single-phase
200-240 VAC
nominal 2 pole / 3
wire 20 Amp
IEC-309 20 Amp
IEC-309 20 Amp
Type 320R6W 1
2701 4.27 m
(14 ft) Line
Cord
(U.S./Canada)
200V - 240V
Dual line cords
Single-phase
200-240 VAC
nominal 2 pole / 3
wire 20 Amp
IEC-309 20 Amp
IEC-309 20 Amp
Type 320R6W 1
2702 4.27 m
(14 ft) Line
Cord (World
Trade)
200V - 240V
Dual line cords
Single-phase
200-240 VAC
nominal 2 pole / 3
wire 20 Amp
Not Provided2
Cut-end power
cords must be
electricianinstalled.
zSeries 800: Installation Manual for Physical Planning
Not Provided1,2
Level 04a, June 21, 2004
Table 3-3. Power Plugs and Receptacles - 200-240 Volts (continued)
Feature Code
Voltage
Description
Watertight Plug
Watertight
Receptacle
Notes:
1. IBM continues to strongly recommend the use of a metal backbox (example shown
below) with our line cords using IEC-309 plugs. Although in-line connectors and
nonmetalic backboxes are available and compatible, they are not recommended. These
recommendations are based on the metal backbox providing:
v An added level of protection against a miswired phase and ground reversal
v In some cases, a metal backbox may be better for EMI mitigation
You may choose not to use a metal backbox. In this case, please check your local code
for specific requirements.
2. The customer must obtain appropriate plugs and receptacles, based on existing
electrical codes, where those plugs and receptacles are not provided with the system.
Grounding Specifications
|
|
Every single-phase branch circuit must contain two phase conductors (or one phase
and neutral) and an insulated equipment-grounding conductor.
For 200 V ac through 240 V ac installations in the United States, the
equipment-grounding conductor must be identical in size, insulation material, and
gauge to the branch circuit phase conductors, except that it must be green with or
without one or more yellow stripes on the insulation. For installations outside the
United States, the size of the grounding conductor must be in accordance with local
codes.
Conduit must not be used as the only grounding means. However, any conduit or
cable shield must be connected at both ends in such a way that it is included in the
grounding path in parallel with the grounding conductor it contains. IBM strongly
recommends that branch circuit wiring be located in metallic conduit, or be made
from shielded cable, if located under a raised floor. Even when not required by local
regulations, some form of shield around the branch circuit wiring is preferred as a
means of reducing coupling of high-frequency electrical noise into signal and control
cables.
There is information about additional recommendations and requirements for
equipment grounding on IBM’s Resource Link web site
(http://www.ibm.com/servers/resourcelink). See ″General Information for Planning a
Physical Site″.
Chapter 3. Power Requirements
3-3
Level 04a, June 21, 2004
Line Cord Wire Specifications
Table 3-4. Line Cord Specifications
Feature
Low Voltage (200V 240V)
Style (AWG/Number of
connections)
12/3 (single-phase) 2.5
mm 2 (#12 AWG) 20 AMP
Number of
Shields
1
Bulk Outside
Diameter mm (in)
11.3 (0.445)
Line Cord Physical Protection
In US installations, the line cord must meet National Electric Code (NEC)
requirements. If you are planning an installation on a non-raised floor, when
line cords are run on the surface of the floor, they must be protected against
physical damage (See NEC 645-5). For other countries, local codes apply.
Line Cord Wire Colors
The zSeries 800 power cords use the following wire colors:
Domestic (supplied with plug)
Line 1 Brown
Line 2 Black
Ground Green/yellow
EMEA, AP, and all others (supplied without plug)
Line 1 Brown
Line 2 Blue
Ground Green/yellow
Customer Circuit Breakers (CBs)
The maximum permissible CB rating is 20A. In geographic areas where the breaker
sizes given are not available, the standard size circuit breaker giving the closest
higher numerical value of current rating should be used.
It is recommended that a 20A CB for 200-240V be used for each of the two system
power feeds.
|
|
There is no requirement for a delayed circuit breaker protecting the AC supply to
the z800, but if you are preparing a new installation site, a delayed circuit breaker is
recommended.
Service Outlet (Customer-Supplied)
A duplex service tool outlet should be installed within 1.5 m (5 ft) of the system
frame. The power requirement is 110V/120V for USA and Canada (other power
requirements are country dependent). The service tool outlet should be placed on
it’s own circuit breaker so it can be used when the processor frame circuit breaker
is off.
Unit Emergency Power Off (UEPO)
There is a unit emergency power off (UEPO) switch on the front of the frame. When
tripped, the UEPO switch will immediately disconnect utility power (AC voltage) from
the machine. All volatile data will be lost.
3-4
zSeries 800: Installation Manual for Physical Planning
Level 04a, June 21, 2004
IMPORTANT
This switch is not intended to be used for normal power-off/power-on activities.
It is for emergency use only.
A customer service representative must reset the AC power circuit breakers
inside the machine after the UEPO switch has been used. The zSeries 800
will be inoperable until these circuit breakers are reset.
Chapter 3. Power Requirements
3-5
Level 04a, June 21, 2004
3-6
zSeries 800: Installation Manual for Physical Planning
Level 04a, June 21, 2004
Chapter 4. Hardware Management Console and Support
Element Communications
|
Support Element
|
|
|
|
The zSeries 800 is supplied with a pair of integrated ThinkPad support elements
(SE). One is always active while the other is strictly an alternate. Power for the
support elements is supplied by the processor frame, and there are no additional
power requirements.
|
|
|
|
Each SE comes with two communication adapters included. The default
combination is one Token Ring adapter and one Ethernet adapter (FC0086). The
alternate choice is both SEs with dual Ethernet adapters (FC0087). Regardless of
which pair of adapters you choose, both SEs will be configured the same.
|
|
|
If you order the Token Ring-Ethernet default combination, a Multistation Access Unit
(MAU) is required to operate the Token Ring LAN. The MAU is installed in the A
frame and requires no power.
|
|
Note: zSeries 890 and 990 are the last zSeries servers that will support Token
Ring LAN connection to the Support Elements.
|
|
|
If you order your system with dual Ethernet adapters for each support element, an
Ethernet switch is required instead of a MAU. The switch is supplied with every
system order under Feature Code 0089.
|
|
Note: If you already have an Ethernet switch, or plan to use a Token Ring LAN,
you should deselect FC0089 to avoid receiving another switch.
|
|
Two 15.24 meter (50 ft) Ethernet cables are supplied to connect the Support
Elements to your LAN.
|
You will need to provide a 110/120V power source for the Ethernet switch.
|
Hardware Management Console
|
|
|
A Hardware Management Console is required to operate a zSeries 800 processor.
A single console can support multiple S/390 and zSeries processors and can be
located remotely to the physical processor sites.
|
|
|
|
The Hardware Management Console comes with two LAN communication features
supplied.
v FC0078 is the default selection when you are placing your system order. FC0078
comes with a Token Ring/Ethernet combination.
|
|
|
|
Note: zSeries 890 and 990 are the last zSeries servers that will support Token
Ring LAN connection to the Hardware Management Console.
v FC0077 is the optional alternative and must be selected. FC0077 comes with
Dual Ethernet connections.
|
|
|
The console requires a customer-supplied table to hold the following:
17-inch display monitor, 15.9 inches viewable (FC6092) or 21-inch display
monitor, 19.8 inches viewable (FC6093)
© Copyright IBM Corp. 2002, 2004
4-1
Level 04a, June 21, 2004
7852-400 modem or equivalent (for remote service support)
System Unit (processor, keyboard and mouse)
|
|
|
|
The Hardware Management Console requires three 110/120V outlets for USA and
Canada. (Other power requirements are country dependent.)
|
|
|
FC0078 and FC0077 use DVD to install LIC. If you have a Hardware Management
Console with DVD-capability, you may be able to reuse it on your zSeries 800
system.
|
LAN Connections
|
|
Shipped as a LAN connection package, your system will arrive with the following
LAN cables for connecting the console to your network:
||
Type
Description
Part Number
Quantity
|
Ethernet
15.24 m (50 ft)
05N5292
1
|
Token Ring
2.44 m (8 ft)
11P0891
1
|
Token Ring
22.86 m (75 ft)
11P0892
1
|
|
Token Ring
Wrap Plug
6165899
1
|
|
|
|
|
|
|
One end of the Token Ring cable P/N 11P0891 plugs into the D-shell connector on
the Token Ring LAN adapter card installed in the Hardware Management Console.
The other end of this cable connects to the data port on the MAU (an RJ-45
connector). If the MAU is further away from the console than 2.44 m (8 ft), use
Token Ring cable P/N 11P0892 to connect to P/N 11P0891, providing an additional
22.86 meters (75 feet) of cable length to reach your existing Token Ring LAN. P/N
11P0892 has RJ-45 connectors on both ends.
|
|
|
Token Ring LANs can operate at 4 or 16 Mbps. The Token Ring cables shipped
with your console are Unshielded Twisted Pair (UTP) cables that support a link data
rate of either 4 or 16 Mbps.
|
|
|
Ethernet cable P/N 05N5292 connects to either the Ethernet adapter card installed
with FC0077 or to the Ethernet connector on the connector panel of the processor
unit. This cable has RJ-45 connectors on both ends.
|
|
|
Ethernet LANs can operate at 10, 100, or 1000 Mbps. The Ethernet cable that
shipped with your console is Category 5 Unshielded Twisted Pair (UTP) cable that
supports a link data rate up to 1000 Mbps.
4-2
zSeries 800: Installation Manual for Physical Planning
Level 04a, June 21, 2004
Hardware Management Console and Support Element Wiring Options
A local Hardware Management Console must be connected to its Support Elements
using Local Area Network (LAN) wiring. zSeries 800s provide both Token Ring and
Ethernet options for the LAN wiring between the Hardware Management Console
and the Support Elements. The necessary LAN adapters for the Support Elements
and the Hardware Management Console may be specified as features on the
system order.
In the Support Elements, one Token Ring adapter and one Ethernet adapter are
included as standard. Two Ethernet adapters may be specified as an optional
feature. This eliminates the Token Ring adapter and replaces it with a second
Ethernet adapter.
In the Hardware Management Console, one Ethernet adapter is included as
standard, and one Token Ring adapter is available as an optional feature.
This combination of adapter options leads to 4 possible wiring scenarios:
v Token Ring only
v Ethernet only, one path
v Ethernet only, two paths
v Token Ring and Ethernet
Notes on wiring with multiple adapters:
1. It is intended that a Hardware Management Console and an SE be connected
by only one LAN
2. Multiple adapters in a Hardware Management Console allow that Hardware
Management Console to connect with two independent sets of SEs, one set on
a Token Ring and a second set on an Ethernet.
This is done to allow for migration from Token Ring environments to Ethernet
environments.
3. Multiple adapters in a Thinkpad SE are intended to allow two different
Hardware Management Consoles to have independent paths to the SE.
This is done so that the console can be controlled if one LAN goes down.
The following diagrams and paragraphs describe the 4 wiring scenarios:
Chapter 4. Hardware Management Console and Support Element Communications
4-3
Level 04a, June 21, 2004
v Token Ring only wiring scenario
The “Token Ring only ”wiring scenario is the standard wiring approach used in
previous generations of the IBM Enterprise Server Hardware Management
Console and Support Element wiring. As in previous systems, each system
includes a Multistation Access Unit (MAU) that may be used to interconnect the
Token Ring adapter wiring of the Support Elements to the Hardware
Management Console. Token Ring wiring may be used to interconnect the MAUs
to form a larger private LAN where multiple systems are to be controlled by a
single Hardware Management Console.
S/390
CMOS
S/390
CMOS
Token-Ring
LAN
P
r
i
m
a
r
y
CPC
A
l
t
e
r
n
a
t
e
S
E
S
E
zSeries
Figure 4-1. Token Ring only wiring scenario
4-4
zSeries 800: Installation Manual for Physical Planning
Level 04a, June 21, 2004
v Additional Token Ring only wiring scenario
Additional connections to the Token Ring LAN may be made to expand the
connectivity beyond the local Hardware Management Console and Support
Elements.
If connections to previous generations of Enterprise Server systems are desired,
they may be connected using the MAU in the system or they may be connected
using Token Ring-to-Token Ring bridges.
If connection to the enterprise LAN is desired, it is recommended that a Token
Ring bridge be installed to isolate the Hardware Management Console and
Support Elements from other systems.
If connection to a central site focal point is desired, a local control unit can be
attached to the LAN.
S/390
CMOS
S/390
CMOS
Token-Ring LAN
P
r
i
m
a
r
y
CPC
A
l
t
e
r
n
a
t
e
Control
Unit
S
E
S
CPC
S
E
P
r
i
m
a
r
y
A
l
t
e
r
n
a
t
e
S
E
E
Bridge
S
S
CPC
zSeries
CPC
E
S
CPC
CPC
E
S/390
Focal
Point
Parallel Transaction Server
E
S
CPC
S
E
Enterprise
LAN
E
G1 - G4 Server
G5 - G6 Server
Figure 4-2. Token Ring only wiring scenario with additional connections.
Chapter 4. Hardware Management Console and Support Element Communications
4-5
Level 04a, June 21, 2004
v Ethernet only - one path wiring scenario
This “Ethernet only” wiring scenario is intended for enterprises who currently
have Ethernet installed and who do not want Token Ring wiring introduced into
their environment. This wiring scenario requires that a second Ethernet be
specified with the Support Elements and that no Token Ring feature be ordered
on the Hardware Management Console, such that no Token Ring exists in either
the Support Elements or in the Hardware Management Console. The Ethernet
features assume the use of 10/100 Mbit Ethernet facilities, requiring the use of
CAT-5 Ethernet cabling.
Since the Support Element Ethernet only feature includes two Ethernet adapters,
there will be two Ethernet connections available. For this scenario, only the
Ethernet cable connected to the Ethernet in the first (top) PCMCIA slot of the
Support Elements will be used.
The three communication protocols (SNA, TCP/IP and NetBios) used in Support
Element to Hardware Management Console communication are defined for both
adapters in the PCMCIA slots of the Support Elements.
It will be necessary to connect the “top” Ethernet adapter cable to a customer
supplied local hub capable of 10/100 Mbit Ethernet rates. It will be necessary to
connect the Ethernet from the Hardware Management Console to either the
same hub as the Support Elements, or to a hub that connects to the Support
Element hub.
Ethernet LAN
P
r
i
m
a
r
y
CPC
A
l
t
e
r
n
a
t
e
S
E
S
E
zSeries
Figure 4-3. Ethernet only - one path wiring scenario
4-6
zSeries 800: Installation Manual for Physical Planning
Level 04a, June 21, 2004
v Additional connections to the Ethernet LAN may be made to expand the
connectivity beyond the local Hardware Management Console and Support
Element.
If connections to previous generations of IBM Enterprise Server systems are
desired, they may be connected using Ethernet-to-Token Ring bridges.
If connection to the enterprise LAN is desired, it is recommended that an
Ethernet bridge or router be installed to isolate the Hardware Management
Console and Support Element from other systems.
Ethernet LAN
P
r
i
m
a
r
y
Bridge
CPC
A
l
t
e
r
n
a
t
e
zSeries
P
r
i
m
a
r
y
S
E
CPC
S
E
A
l
t
e
r
n
a
t
e
S
E
S
E
G5 - G6 Server
Token-Ring LAN
S
CPC
E
S
CPC
G1 - G4 Server
E
S
CPC
S
S
CPC
E
E
CPC
E
Parallel Transaction Server
Figure 4-4. Ethernet only - one path wiring scenario with additional connections
Chapter 4. Hardware Management Console and Support Element Communications
4-7
Level 04a, June 21, 2004
v Ethernet only - two path wiring scenario
This “Ethernet only” wiring scenario is also intended for enterprises who currently
have Ethernet wiring and do not want Token Ring wiring introduced into their
environment. The two path scenario is included to provide the possibility of a
second, separate and redundant path to the Support Elements.
This wiring scenario requires that FC 0087 (a second Ethernet) be specified with
the Support Elements and that the Token Ring feature not be ordered with the
Hardware Management Console such that no Token Ring exists in either the
Support Elements or in the Hardware Management Console. The Ethernet
features assume the use of 10/100 Mbit Ethernet facilities, requiring the use of
CAT-5 Ethernet cabling. Since the Support Element Ethernet only feature
includes two Ethernet adapters, there will be two Ethernet connections available.
For this scenario, both the Ethernet cables will be used.
The three communication protocols (SNA, TCP/IP and NetBios) used in Support
Element to Hardware Management Console communication are defined for both
adapters in the PCMCIA slots of the Support Elements.
It will be necessary to connect the “top” Ethernet adapter cable to a customer
supplied local hub capable of 10/100 Mbit Ethernet rates. It will be necessary to
connect the Ethernet from at least one local Hardware Management Console to
the same hub as the Support Elements.
It will be necessary to connect the “bottom” Ethernet adapter cable to a customer
supplied local hub capable of 10/100 Mbit Ethernet rates. This second adapter
will have to be assigned an address on a separate subnet from the first adapter.
Any Hardware Management Consoles attached to either LAN will be able to
automatically discover the Support Elements, assuming that the LAN network
allows NetBios to flow between the devices.
S/390
CMOS
S/390
CMOS
Primary
Ethernet LAN
P
r
i
m
a
r
y
CPC
A
l
t
e
r
n
a
t
e
S
E
S
E
zSeries
Figure 4-5. Ethernet only - two path wiring scenario
4-8
zSeries 800: Installation Manual for Physical Planning
Secondary
Ethernet LAN
Level 04a, June 21, 2004
v Additional connections to the Ethernet LAN may be made to expand the
connectivity beyond the local Hardware Management Console and Support
Elements.
If connections to previous generations of Enterprise Server systems are desired,
they may be connected using Ethernet-to-Token Ring bridges.
If connection to the enterprise LAN is desired, it is recommended that an
Ethernet bridge or router be installed to isolate the Hardware Management
Console and Support Elements from other systems.
S/390
CMOS
S/390
CMOS
Primary Ethernet LAN
P
r
i
m
a
r
y
CPC
A
l
t
e
r
n
a
t
e
Secondary Ethernet LAN
P
r
i
m
a
r
y
S
E
Bridge
CPC
S
E
A
l
t
e
r
n
a
t
e
S
E
S
E
zSeries
G5 - G6 Server
Token-Ring LAN
Enterprise
LAN
CPC
S
E
S
CPC
G1 - G4 Server
E
S
CPC
S
S
CPC
E
E
CPC
E
Parallel Transaction Server
Figure 4-6. Ethernet only - two path wiring scenario with additional connections.
Chapter 4. Hardware Management Console and Support Element Communications
4-9
Level 04a, June 21, 2004
v Token Ring and Ethernet wiring scenario
The “Token Ring and Ethernet” wiring scenario is intended for enterprises that
have both Token Ring wiring and Ethernet wiring requirements. This scenario is
included to provide the possibility of controlling the Support Elements from both a
Token Ring Hardware Management Console and an Ethernet Hardware
Management Console at the same time.
This wiring scenario is supported by the default set of adapters available with the
Support Elements and the optional Token Ring adapter on the Hardware
Management Console. The Token Ring adapter assumes the use of a 16 Mbit
Token Ring facility. The Ethernet features assume the use of 10/100 Mbit
Ethernet facilities, requiring the use of CAT-5 Ethernet cabling.
For this scenario, the three communication protocols (SNA, TCP/IP and NetBios)
used in Support Element-to-Hardware Management Console communication are
defined for both the Token Ring and the Ethernet adapters of the Support
Elements. The Token Ring wiring is connected using the MAU as described
above on page 4-3. The Ethernet wiring is connected from the Support Elements
to a customer supplied local hub capable of10/100 Mbit Ethernet rates.
The Hardware Management Consoles attached to either LAN will be able to
automatically discover the Support Elements, assuming that the LAN network
allows NetBios to flow between the devices. The Ethernet adapter will have to be
assigned an address on a separate subnet from the Token Ring adapter.
S/390
CMOS
S/390
CMOS
Ethernet LAN
Token-Ring
LAN
P
r
i
m
a
r
y
CPC
A
l
t
e
r
n
a
t
e
S
E
S
E
zSeries
Figure 4-7. Token Ring and Ethernet wiring scenario
4-10
zSeries 800: Installation Manual for Physical Planning
Level 04a, June 21, 2004
v Additional connections to the Token Ring LAN may be made to expand the
connectivity beyond the local Hardware Management Console and Support
Elements. This would be done as in the “Token Ring only” case on page 4-5
Additional connections to the Ethernet LAN may be made to expand the
connectivity beyond the local Hardware Management Console and Support
Elements. This would be done as in the “Ethernet only” case on page 4-7
If connections to previous generations of IBM Enterprise Server systems are
desired, they may be connected using the Token Ring LAN.
If connection to the enterprise LAN is desired, it is recommended that an
Ethernet bridge or router be installed to isolate the Hardware Management
Console and Support Elements from other systems.
S/390
CMOS
S/390
CMOS
S/390
CMOS
Ethernet LAN
P
r
i
m
a
r
y
Bridge
CPC
Token-Ring LAN
S
CPC
E
Ethernet LAN
G1 - G4 Server
E
E
CPC
S
E
A
l
t
e
r
n
a
t
e
S
E
S
E
zSeries
S
CPC
E
Enterprise
LAN
S
S
CPC
E
G5 - G6 Server
S
CPC
A
l
t
e
r
n
a
t
e
P
r
i
m
a
r
y
S
CPC
E
Parallel Transaction Server
Figure 4-8. Token Ring and Ethernet wiring scenario with additional connections.
Chapter 4. Hardware Management Console and Support Element Communications
4-11
Level 04a, June 21, 2004
|
Trusted Key Entry (TKE)
|
|
|
|
zSeries 800s may have a cryptographic coprocessor feature for applications where
extensive data security is required. For these systems, there is a separate console
available for authorized access to the cryptographic feature. This console is named
the Trusted Key Entry (TKE) PC.
|
|
The TKE workstation includes a system unit, mouse, keyboard, monitor, and line
cord. A DVD is available for installation of Licensed Internal Code.
|
|
Note: zSeries 890 and 990 are the last zSeries servers that will support Token
Ring LAN connection to the TKE workstation.
|
|
TKE workstation LAN adapter feature codes depend on the version of the TKE
microcode.
|
Table 4-1.
|
TKE Microcode Level
Token Ring Feature Code
Ethernet Feature Code
|
3.0
0866
0869
|
3.1
0876
0879
|
4.0
0886
0889
|
|
4.1
0896
0899
|
Notes:
1. Older levels of LAN connection Feature Codes can be carried forward on
system upgrades.
2. FC 0886 and FC 0889 are only orderable with zSeries 990.
3. zSeries 990 and zSeries 890 require TKE microcode levels at either 4.0 or 4.1.
|
|
|
The Token Ring adapter supports a link data rate of 4 or 16 Mbps. Ethernet on the
system unit motherboard supports a link data rate of 10, 100, or 1000 Mbps. The
Ethernet adapter supports a link data rate of 10 or 100 Mbps.
|
|
|
The TKE workstation attaches to the customer LAN, providing a security-rich,
flexible method of providing master key and operational key entry to locally and
remotely managed Cryptographic Coprocessor features.
|
|
Customers with TKE 3.x installed workstations may carry them forward to control
legacy systems only.
|
|
|
|
To use the TKE function on zSeries 800, the CMOS Cryptographic Coprocessor
Facility(CCF) feature must be enabled and the PCICC feature (FC 0861) must be
installed. An update from TKE 3.0 or TKE 3.1 microcode level to TKE 4.0 or TKE
4.1 microcode level is required for use with the zSeries 890.
|
|
The TKE PC requires two 110/120 volt outlets in the U.S. and Canada. Power
requirements vary in other countries.
|
|
|
|
|
LAN Connections
|
LAN cabling is a customer responsibility.
|
|
To connect the TKE workstation with Token Ring to a LAN, use either
v Unshield Twisted Pair (UTP) cable terminated with an RJ-45 connector
4-12
zSeries 800: Installation Manual for Physical Planning
Level 04a, June 21, 2004
|
|
OR
v Shielded Twisted Pair (STP) cable terminated with a DB9 D Shell connector.
|
|
To connect the TKE workstation with Ethernet to a LAN, a Category 5 Unshielded
Twisted Pair (UTP) cable terminated with an RJ-45 connector is required.
Sysplex Timer®
The Sysplex Timer synchronizes each system’s time-of-day clock with the other
system’s clocks in multiple system installations. Each zSeries 800 system comes
with two integrated timer cards, which allow connection of two Sysplex Timers for
continuous availability. The cable connection at the zSeries 800 is ESCON Duplex,
and matches the cable connection at the Sysplex Timer.
Chapter 4. Hardware Management Console and Support Element Communications
4-13
Level 04a, June 21, 2004
4-14
zSeries 800: Installation Manual for Physical Planning
Level 04a, June 21, 2004
Chapter 5. Remote Support Facility Installation Planning
This section describes the telephone line and modem requirements for the
Hardware Management Console Remote Support Facility (RSF). The Remote
Support Facility provides communication to a centralized IBM support network for
problem reporting and service, as well as providing a means for remote operation of
the Hardware Management Console.
It is the customer’s responsibility to arrange for installation and all costs of
common-carrier equipment.
Ordering Telecommunication Service
Each Hardware Management Console (HMC) comes with a modem. One telephone
line is required for each modem installed.
When ordering telecommunications service, be prepared to identify the following:
v The type of telephone jack required (country dependent)
v The long distance carrier
v The selection of either dual-tone multi-frequency (DTMF) or rotary (pulse) to be
installed
v Installer of the telephone wiring and jack
The telephone line must be a dial-up (public switched network) analog type* with
24-hour, 7-day-a-week availability.
Note: *Digital telephone lines must not be used.
Modems
All models require a modem for RSF. An IBM 7852-400 or equivalent is supplied In
the U.S. and Canada. EMEA, AP, and LA countries, will require an IBM 7852, IBM
7858 or equivalent. The specifications1 of the IBM 7852-400 Modem are as follows:
v FCC registration number FVZUSA-21751-MM-E
v 28,800 bps line speed
v Tone or pulse dialing
v Standard CCITT V.24 or EIA-232-D interface cable to the data terminal
equipment (DTE): 3 m (10 ft.)
v Country Dependent Telecommunication cable: 4.6 m (15 ft.)2
v Country Dependent Line Cord: 1.8 m (6 ft.)2
v Power Requirements: 115 V single-phase 60 Hz (0.3amp) or 240 V/50 Hz
v Heat Output: 11 W
v
v
v
v
Operating Temperature Requirements: 0-50 °C (32-120 °F)
Operating Relative Humidity: 8-80% (no condensation)
Weight: 1.18 kg (2.6 lb) with power transformer
Size:
– Width: 156 mm (6.15 in)
– Length: 229 mm (9 in)
– Height: 35 mm (1.375 in)
© Copyright IBM Corp. 2002, 2004
5-1
Level 04a, June 21, 2004
Notes:
1. For more detailed information about the IBM 7852-400 Modem see theIBM 7852
Modem Model 400 External Data/Fax Modem Technical Reference, 76H2773, or
the IBM 7852 Modem Model 400 External Data/Fax Modem Installation Guide,
76H2772.
2. Telecommunication cable plugs and power cord plugs will vary depending on
country code used when ordering (see Sales Manual for details)
Important
In countries where the IBM Hardware Management Console modem is not
approved by the national communication authority a modem is needed which
is in accordance with CCITT standard V.26bis. For non-IBM modems a 7852
equivalent, country approved modem is required that meets the following
specifications:
v Line speed - 9600 bps or greater
v Command set - CCITT V.25 Bis for Synchronous, AT command set for
Asynchronous
v Mode - Synchronous or Asynchronous
v Connection - Switch public network
It is the responsibility of the country to approve a local modem in these cases
using local procedures.
5-2
zSeries 800: Installation Manual for Physical Planning
Level 04a, June 21, 2004
Chapter 6. Cabling and Connectivity
Cable Installation Planning
Before you place your cable order, consider your future growth needs. You
may wish to order cables longer than you need right now to avoid expansion
problems in the future.
As processor packaging evolves, internal locations for various cable
connections may shift, necessitating longer cables, even though the floor
locations of connected devices have not changed.
The zSeries 800 family recognizes industry trends toward the use of standardized
channel cable connectors. The same types of fiber optic connectors used in local
area and storage area networks are also used to connect channel features in the
zSeries 800.
Following are:
v A description of the new zSeries Fiber Optic Cabling Service and a list of
customer responsibilities if you elect not to use the service
v A chart showing the various fiber optic cable connectors
v An illustration showing how to correctly route fiber optic cables to provide proper
cable strain relief and ensure design performance.
v Descriptions of the channel features for the zSeries 800 system, including the
Fiber Quick Connect trunking system for ESCON cables.
Note: The Fiber Quick Connect trunking system cannot be used in a non-raised
floor installation. There is not enough space to obtain correct cable bend
radius at the tailgate exit area.
zSeries Fiber Cabling Service
The connectivity environment has become much more complex, and proper
planning and installation of fiber cabling is critical to maximize the benefits of high
speed protocols such as FICON, Fibre Channel Protocol, Coupling Facility links and
Gigabit Ethernet. These protocols require planning for different fiber types, new fiber
optic connectors, and current and future data rates to determine optimal
connectivity and cabling options.
IBM Global Services provides a fixed-price services offering that includes planning
and consulting with you about your cabling choices, and ordering, labeling, and
installing the correct cables for your system. IBM Network Integration and
Deployment Services for zSeries fiber cabling provides the right level of services
and products needed to quickly and efficiently integrate your zSeries 800 system
into the IT infrastructure and minimize installation costs.
Features of the offering include:
v Configuration services to effectively plan the fiber optic cabling needed.
v Consulting to design a scalable, flexible solution that supports the new system
configuration.
v Procurement of fiber optic cables and components that are reliable and meet IBM
physical specifications.
© Copyright IBM Corp. 2002, 2004
6-1
Level 04a, June 21, 2004
v Installation services, including physical routing and labeling, to integrate the
cabling system into the customer’s infrastructure.
v Documenting the fiber optic cable installed.
External I/O cables and cable routing are a customer responsibility.
If you elect not to use the zSeries Fiber Cabling Service offered by IBM, then you
will be responsible for performing the following tasks prior to system installation.
1. All cable planning and support
2. All purchasing of correct qualified cables
3. All installation of any required mode conditioners
4. All installation of any required conversion cables
5. All installation of any required jumper cables
6. All routing of cables to correct front/back cable tailgates for proper installation to
the machine
7. All labeling of cables with CHPID numbers for proper installation to the machine.
Failure to accomplish these cabling tasks properly could lead to additional
service charges during the machine installation in order to correct any
problems incurred.
If you are planning a non-raised floor installation, it is imperative that you
protect fiber optic cabling from damage. Proper strain relief and routing of fiber optic
cable is essential to achieve advertised cable performance.
6-2
zSeries 800: Installation Manual for Physical Planning
Level 04a, June 21, 2004
I/O Card
Feature Code
I/O Card
Description
Port Type
2 port
FICON Express LX
Single Mode LC Duplex
(9 micron)
2320
2 port
FICON Express SX
Multimode LC Duplex
(50 and 62.5 micron )
2362
2 port
OSA Express
ATM SM
Single Mode SC Duplex
(9 micron)
2363
2 port
OSA Express
ATM MM
Multimode SC Duplex
(50 and 62.5 micron )
2364
2 port
OSA Express
GbE LX
Single Mode SC Duplex
(9 micron)
2365
2 port
OSA Express
GbE SX
Multimode SC Duplex
(50 and 62.5 micron )
2366
2 port
OSA Express
Fast Ethernet
RJ-45
2367
2 port
OSA Express
Token Ring
RJ-45, DB-9
0218
4 port
ISC-3
Single Mode LC Duplex
(9 micron)
1 port
External Time
Reference
Multimode ESCON Duplex
(62.5 micron)
B
2319
A
Multimode MT-RJ
(62.5 micron)
B
15/16 port
ESCON
A
2323
Illustration of
Jumper Cable Connector
Figure 6-1. Summary of Channel Jumper Cable Connector Types
|
|
This illustration provides a brief description and shows the connectors for each type
of I/O channel jumper cable used on the zSeries 800 system.
Chapter 6. Cabling and Connectivity
6-3
Level 04a, June 21, 2004
Rear View
Front View
Input/Output
Cable Area
Figure 6-2. Fiber Optic Cable Routing
This illustration shows that the I/O cables route upward out of the I/O cage, across
the top of the cage, down through three cable guides, and out through the tailgate.
6-4
zSeries 800: Installation Manual for Physical Planning
Level 04a, June 21, 2004
FICON Channel Feature
|
|
|
|
|
|
The FICON channel delivers a 1 or 2 Gbps link data rate to servers, switches,
control units and storage devices. The link speed is auto-negotiated, point-to-point,
between server and device and is transparent to users and applications. FICON
channels offer fast, efficient data transfer while allowing reuse of currently installed
single mode and multimode fiber optic cables. FICON channels can coexist with
ESCON channels on all zSeries 800 server models.
Configuration Information
|
|
|
|
The table below lists the FICON channel cards. Both FC 2319 and FC 2320 support
3 three modes of operation:
v FC - native FICON
v FCV - Fibre Channel Converter - used with the 9032 Model 5 Director with bridge
card
Note: The FICON Express LX feature is limited to 1Gpbs.
v FCP - Fibre Channel Protocol - attachment to SCSI disks in Linux environments.
Feature Code
Description
Fiber Type
Connector Type
|
|
FC 2319
FICON Express LX
(Long Wavelength)
single mode 9 micron
LC Duplex
|
FC 2320
FICON Express SX
(Short Wavelength)
multimode 50 and 62.5 micron
LC Duplex
|
|
FICON channel adapters have two ports per adapter card. Both short wavelength
and long wavelength features can coexist in the same I/O cage.
Connectivity Information
|
|
|
|
FICON Express LX (Long Wavelength)
v Cable type is single mode 9 micron fiber optic
v Cable connector is LC duplex
v See “FICON References” for information about link distances and light loss
budget.
FICON Express SX (Short Wavelength)
v Cable type is multimode 50 and 62.5 micron fiber optic
v Cable connector is LC duplex
v See “FICON References” for information about link distances and light loss
budget.
FICON References
The following illustration shows the FICON channel card, the channel ports on the
card, and the type of fiber optic connector that plugs to the channel ports.
Chapter 6. Cabling and Connectivity
6-5
Level 04a, June 21, 2004
LC Duplex Connector
FICON Channel Port
FICON Express
LC Duplex Connector
FICON Channel Port
Figure 6-3. FICON Card
For additional information on planning for FICON channels see:
v Introduction to IBM S/390 FICON, SG24-5176
v IBM S/390 FICON Migration Guide, SG24-5169 and
v Planning for: S/390® Fiber Optic Links (ESCON®, FICON™, and Coupling Links),
GA23-0367
v FICON Physical I/O Interface, SA24-7172
Ordering FICON Fiber Optic Cables
Fiber optic cables for the zSeries 800 system may be ordered using the zSeries
Fiber Cabling Service offered by IBM Global Services. This Service delivers a
convenient, packaged solution to reduce the complexity of planning, ordering,
installing, and documenting fiber optic cables. Individual jumper cables, cable
components, and connector options are also available through IBM Global Services.
Contact your local IBM Installation Planning Representative, IBM zSeries 800
Product Specialist, or IBM Connectivity Services Specialist for details.
6-6
zSeries 800: Installation Manual for Physical Planning
Level 04a, June 21, 2004
ESCON Channel Feature
|
|
|
The ESCON channel delivers up to 17 Mbps link data rate to servers, switches,
control units and storage devices. ESCON channels can coexist with FICON on all
zSeries 800 server models.
The zSeries 800 system uses the 16 port ESCON card. Fifteen of the ports are
used on this card. The sixteenth port is reserved as a spare.
Configuration Information
The table below shows the ESCON channel card description
||
Feature Code
Description
Fiber Type
Connector Type
|
|
|
FC 2323
16-Port ESCON
(15 ports plus 1 spare)
Multimode 62.5 micron
MT-RJ
v Use FC 2324 to order channels in 4-port increments. There can be a maximum
of 60 FC 2324s per system, for a total of 240 ESCON channels, maximum.
v The system configuration tool places FC 2324s across an appropriate number of
ESCON cards for high availability.
Connectivity Information
|
16 Port ESCON
v Cable type is multimode 62.5 micron fiber optic
v Cable connector is MT-RJ
v Existing ESCON multimode fiber can be reused with an MT-RJ to ESCON
Duplex conversion kit. See Figure 6-9 on page 6-17
v See “ESCON References” for information about link distances and light loss
budget.
ESCON References
The following illustration shows the ESCON channel card, the channel ports on the
card, and the type of fiber optic connector that plugs to the channel ports.
Chapter 6. Cabling and Connectivity
6-7
Level 04a, June 21, 2004
ESCON
Channel Ports
0
1
2
3
4
5
6
7
8
9
10
11
12
13
14
15
MT-RJ Connector
ESCON 16-Port
Channel Card
Spare Port
Figure 6-4. ESCON Card
For additional information on planning for ESCON channels see:
v Fiber Optic Links Planning (ESCON, FICON, and Coupling Links), GA23-0367
v ESCON Physical Layer, SA23-0394
v IBM Input/Output Equipment Installation Manual-Physical Planning, GC22-7064
Ordering ESCON Fiber Optic Cables
Fiber optic cables for the zSeries 800 system may be ordered using the zSeries
Fiber Cabling Service offered by IBM Global Services. This Service delivers a
convenient, packaged solution to reduce the complexity of planning, ordering,
installing, and documenting fiber optic cables. Individual jumper cables, cable
components, and connector options are also available through IBM Global Services.
Contact your local IBM Installation Planning Representative, IBM zSeries 800
Product Specialist, or IBM Connectivity Services Specialist for details.
6-8
zSeries 800: Installation Manual for Physical Planning
Level 04a, June 21, 2004
ISC-3 Link Feature
|
|
|
|
|
|
ISC-3 links provide Parallel Sysplex connectivity between a coupling facility and
production systems using z/OS® and OS/390® operating systems. ISC-3 links
operate at 1 Gbps in compatibility mode (connection between zSeries 800 and 9672
systems) or 2 Gbps in peer mode (connection between zSeries 800 systems or
zSeries 800 and zSeries 900, zSeries 890, or zSeries 990 systems) at unrepeated
distances up to 10 kilometers.
Configuration Information
The table below lists the ISC-3 link feature code.
||
Feature Code
Description
Fiber Type
Connector Type
|
|
|
|
|
|
|
|
|
|
|
|
FC 0218
4-Port ISC-3
9 micron single mode
LC Duplex
v ISC-3 links are comprised of:
– FC 0218 - A “daughter” adapter card with two ISC-3 ports per card.
– FC 0217 - A “mother” card into which can be plugged two “daughter” cards.
– FC 0219 - LIC that activates the ports on a daughter card. Each port on a
daughter card is activated individually.
– The “mother” card, two “daughter” cards, and the individual port LIC can
combine to provide up to four ports per ISC-3 adapter.
v The system configuration tool places the ISC-3 feature port LIC across an
appropriate number of cards for high availability.
v There can be a maximum of 24 ports activated across 8 ISC-3 features.
Connectivity Information
|
|
4-Port ISC-3
v Cable type is single mode 9 micron fiber optic
v Cable connector is LC duplex
v See Fiber Optic Links Planning (ESCON, FICON, and Coupling Links),
GA23-0367 for information about link distances and light loss budget.
ISC-3 Reference
The following illustration shows the ISC-3 link card, the link ports on the card, and
the type of fiber optic connector that plugs to the ports.
Chapter 6. Cabling and Connectivity
6-9
Level 04a, June 21, 2004
LC Duplex Connectors
ISC-3 Links
ISC-3
ISC-3 Links
LC Duplex Connectors
Figure 6-5. ISC-3 Card
Ordering ISC-3 Fiber Optic Links
Fiber optic cables for the zSeries 800 system may be ordered using the zSeries
Fiber Cabling Service offered by IBM Global Services. This Service delivers a
convenient, packaged solution to reduce the complexity of planning, ordering,
installing, and documenting fiber optic cables. Individual jumper cables, cable
components, and connector options are also available through IBM Global Services.
Contact your local IBM Installation Planning Representative, IBM zSeries 800
Product Specialist, or IBM Connectivity Services Specialist for details.
6-10
zSeries 800: Installation Manual for Physical Planning
Level 04a, June 21, 2004
|
|
|
|
OSA-Express LAN Connection Features
Open Systems Adapter-Express (OSA-Express) features enable connectivity to
industry-standard local area networks (LANs). OSA-Express features (GbE, Fast
Ethernet, Token Ring and 155 ATM) are all available with the zSeries 800 system.
Configuration Information
The table below lists the OSA-Express LAN features.
|
Table 6-1. OSA-Express Feature Codes
|
Feature Code
Description
Fiber Type
Connector Type
|
|
FC 2362
2-Port
ATM SM
Single Mode (9 micron)
SC Duplex
|
|
FC 2363
2-Port
ATM MM
Multimode (62.5 micron)
SC Duplex
|
|
FC 2364
2-Port
LX Gigabit Ethernet
Single Mode (9 micron)
SC Duplex
|
|
FC 2365
2-Port
SX Gigabit Ethernet
Multimode (50 and 62.5 micron) SC Duplex
|
|
FC 2366
2-Port
Fast Ethernet
Category 5 UTP copper
RJ-45
|
|
|
|
FC 2367
2-Port
Token Ring
Category 5 UTP copper or
150 ohm STP copper
(ISO/IEC 11801)
RJ-45,
DB-9 D shell
OSA-Express cards each have two ports, and are ordered in 2-port increments. The
maximum number of OSA-Express cards is 12 with any mix of features.
Connectivity Information
|
OSA-Express 155 ATM Single Mode
v Cable type is single mode 9 micron fiber optic
v Cable connector is SC duplex
v See Fiber Optic Links Planning (ESCON, FICON, and Coupling Links),
GA23-0367 for information about link distances and light loss budget.
|
OSA-Express 155 ATM Multimode
v Cable type is multimode 62.5 micron fiber optic
v Cable connector is SC duplex
v See Fiber Optic Links Planning (ESCON, FICON, and Coupling Links),
GA23-0367 for information about link distances and light loss budget.
|
OSA-Express Gigabit Ethernet (GbE) LX Single Mode
v Cable type is single mode 9 micron fiber optic
v Cable connector is SC duplex
v See Fiber Optic Links Planning (ESCON, FICON, and Coupling Links),
GA23-0367 for information about link distances and light loss budget.
|
OSA-Express Gigabit Ethernet (GbE) SX Multimode
v Cable type is multimode 50 and 62.5 micron fiber optic
v Cable connector is SC duplex
v See Fiber Optic Links Planning (ESCON, FICON, and Coupling Links),
GA23-0367 for information about link distances and light loss budget.
Chapter 6. Cabling and Connectivity
6-11
Level 04a, June 21, 2004
OSA-Express Fast Ethernet
v Cable type is copper wire:
– Two pairs of Category 5 Unshielded twisted pair (UTP) cable, or
v Cable connector is RJ-45
|
OSA-Express High Speed Token Ring
v Cable type is copper wire:
– Two pairs of Category 5 Unshielded twisted pair (UTP) cable, or
– Two pairs of 150 ohm shielded twisted pair (STP) cable (ISO/IEC 11801
specification)
v Cable connector is RJ-45 or 9-pin DB-9.
|
|
|
|
OSA-Express Reference
The following illustration shows the OSA-Express LAN cards, the LAN ports on the
cards, and the type of fiber optic or copper connectors that plug to the ports.
6-12
zSeries 800: Installation Manual for Physical Planning
Level 04a, June 21, 2004
OSA-Express
SM ATM
LAN Port
OSA-Express
MM ATM
OSA-Express
Fast Ethernet
LAN Port
LAN Port
A
B
Single Mode
SC Duplex Connectors
Multimode
SC Duplex Connectors
RJ-45 Connectors
A
B
LAN Port
OSA-Express
Gigabit Ethernet LX
LAN Port
LAN Port
LAN Port
OSA-Express
Gigabit Ethernet SX
OSA-Express
Token Ring
DB-9 Connector
LAN Port
A
B
RJ-45 Connector
Single Mode
SC Duplex Connectors
Multimode
SC Duplex Connectors
LAN Ports
RJ-45 Connector
A
B
LAN Port
LAN Port
DB-9 Connector
Figure 6-6. OSA-Express Cards
For additional information on planning for OSA-Express see:
v OSA Express Customer’s Guide and Reference, SA22-7476 and
v Planning for the Open System Adapter -2 Feature, GA22-7477.
|
Ordering OSA-Express Cables
Fiber optic cables for the zSeries 800 system may be ordered using the zSeries
Fiber Cabling Service offered by IBM Global Services. This Service delivers a
convenient, packaged solution to reduce the complexity of planning, ordering,
installing, and documenting fiber optic cables. Individual jumper cables, cable
components, and connector options are also available through IBM Global Services.
Contact your local IBM Installation Planning Representative, IBM zSeries 800
Product Specialist, or IBM Connectivity Services Specialist for details.
Chapter 6. Cabling and Connectivity
6-13
Level 04a, June 21, 2004
External Time Reference (ETR)
The External Time Reference function is part of the processor in the zSeries 800
system. There is an ESCON duplex port on each ETR card for the cable connection
to a Sysplex Timer. Each ETR card should connect to a different Sysplex Timer in
an Expanded Availability configuration.
Connectivity Information
v Cable is multimode 62.5 micron fiber optic
v Cable connector is ESCON Duplex
v See Fiber Optic Links Planning (ESCON, FICON, and Coupling Links),
GA23-0367 for information about link distances and light loss budget.
|
ETR Reference
The following illustration shows the ETR cards, the channel ports on the cards, and
the type of fiber optic connector that plugs to the channel ports.
ETR ESCON Duplex Port
ETR ESCON Duplex Connector
External Time Reference
(ETR)
Cards
ETR ESCON Duplex Port
ETR ESCON Duplex Connector
Figure 6-7. ETR Card
Ordering ETR Cables
Two ESCON Duplex cables for the ETR feature on the zSeries 800 system will
automatically be added to any zSeries Fiber Cabling Service contract offered by
IBM Global Services. Contact your local IBM Installation Planning Representative,
IBM zSeries 800 Product Specialist, or IBM Connectivity Services Specialist for
details. If you choose not to use this Service, you may purchase the two ESCON
Duplex cables separately, or provide them yourself from another source.
6-14
zSeries 800: Installation Manual for Physical Planning
Level 04a, June 21, 2004
Parallel Channels
Customers using parallel channel-attached devices must purchase a parallel
channel converter box. This box converts ESCON channel signal inputs to parallel
channel outputs. ESCON channel fiber optic cables are required from the zSeries
800 to the converter.
MCP Cables
|
|
|
The following table describes how mode conditioning patch cables (abbreviated in
the table as MCP) are used.
MCP Cable
Part
Number
SC Duplex
Connector
to
ESCON Duplex
Receptacle
9 micron Single Mode
to
50 micron Multimode
LC Duplex
Connector
to
SC Duplex
Receptacle
9 micron Single Mode
to
62.5 micron Multimode
LC Duplex
Connector
to
SC Duplex
Receptacle
9 micron Single Mode
to
62.5 micron Multimode
LC Duplex
Connector
to
ESCON Duplex
Receptacle
05N6771
11P4658
11P4150
B
9 micron Single Mode
to
62.5 micron Multimode
21L4175
to
A
SC Duplex
Connector
to
SC Duplex
Receptacle
B
9 micron Single Mode
to
62.5 micron Multimode
to
A
SC Duplex
Connector
to
SC Duplex
Receptacle
B
21L4173
9 micron Single Mode
to
50 micron Multimode
Illustration of MCP
Cable Connector/
Cable Receptacle
A
21L4172
MCP Cable Description
Description of MCP
Cable Connector/
Cable Receptacle
to
to
to
to
Figure 6-8. Summary of Mode Conditioning Patch Cable Usage
|
|
|
|
|
|
v MCP cables are 2 m (6.5 ft) long
v MCP cables have a link loss budget of 5.0 dB
v MCP cables are always used in pairs, as described in the following manner:
– Target device with an LX transceiver, connected to an
– MCP cable, connected to an
– existing 50 or 62.5 micron fiber optic cable, connected to an
Chapter 6. Cabling and Connectivity
6-15
Level 04a, June 21, 2004
– MCP cable, connected to a
– Target device with an LX transceiver
|
|
|
|
MCP Cables and Gigabit Links
IBM supports the use of Mode Conditioning Patch (MCP) cables with the following
coupling links:
v ISC-3 (in 1 gigabit compatibility mode)
v HiPerLinks (ISC-2)
v OSA-Express Gigabit Ethernet LX
v FICON LX
v FICON Express LX
|
|
|
|
These links all have a long wavelength optical transceiver designed to be used with
9 micron single mode fiber optic cables. MCP cables accommodate the reuse of
existing 50 and 62.5 micron multimode links with the features listed above.
MCP cables are only used on 1 Gbps links. Under this condition, ISC-3 features
can only use MCP cabling to operate in compatibility mode with ISC-2 features on
Parallel Enterprise Servers Generations 3 through 6.
As technology evolves, speeds will increase to two and four Gbps. MCP cables will
not be supported beyond the one Gbps rate.
6-16
zSeries 800: Installation Manual for Physical Planning
Level 04a, June 21, 2004
Conversion Kit Cables
The following table describes how conversion kit cables are used.
Conversion
Kit
Cable
Part Number
Conversion Kit
Cable Description
05N4808
Description of
Conversion Kit
Cable Connector/
Cable Connector
9 micron Single Mode
LC Duplex
to
SC Duplex
62.5 micron Multimode
MTRJ
to
ESCON Duplex
50 micron Multimode
LC Duplex
to
SC Duplex
62.5 micron Multimode
LC Duplex
to
SC Duplex
62.5 micron Multimode
LC Duplex
to
ESCON Duplex
62.5 micron Multimode
LC Duplex
to
MTRJ
62.5 micron Multimode
SC Duplex
to
LC Duplex
9 micron Single Mode
SC Duplex
to
LC Duplex
05N4804
11P1373
11P1374
11P2979
11P4417
Illustration of
Conversion Kit
Cable Connector/
Cable Receptacle
to
to
to
to
to
to
A
B
11P4418
to
A
B
11P4419
to
Figure 6-9. Summary of Conversion Kit Cable Usage
Chapter 6. Cabling and Connectivity
6-17
Level 04a, June 21, 2004
Fiber Quick Connect ESCON Cabling
Note: The Fiber Quick Connect trunking system cannot be used in a non-raised
floor installation. There is not enough space to obtain correct cable bend
radius at the tailgate exit area.
Ordered in conjunction with a Fiber Transport Services direct-attach, trunk cabling
solution, the Fiber Quick Connect feature enables trunk cables to connect to
ESCON channels using under-the-cover attachment harnesses. These harnesses
are installed when your system is built, and your zSeries 800 arrives ready to
connect the trunk cables at your site.
This illustration shows that the Fiber Quick Connect feature allows the use of
MT-RJ cables.
MTP Harness Brackets
MTP Connector
MT-RJ Harness
MT-RJ Connectors
Figure 6-10. ESCON Harnesses and Harness Bracket
There can be from one to four rows of trunk connectors on the bracket. The trunk
brackets use an MTP connector, and the ESCON connectors are routed to the
ESCON feature cards in each frame.
If you are planning to use the Fiber Quick Connect feature for ESCON
channels, contact Networking Services for assistance. Networking Services will
help you plan for the trunk cabling solution that meets your individual system
requirements. Your IBM installation planning representative, IBM product specialist,
or IBM service representative will provide you with the information necessary to
contact Connectivity Services.
|
|
|
|
|
|
Integrated Cluster Bus Channel
The integrated cluster bus (ICB) uses a Self-Timed Interconnect (STI) to perform
coupling communication between systems. If you are planning to install integrated
6-18
zSeries 800: Installation Manual for Physical Planning
Level 04a, June 21, 2004
cluster bus channels, you will have to place connected devices closer than 10
meters to allow for cable routing between equipment, including the distance under
your raised floor and vertical routing to the physical cable connectors in the system
frames.
7m
ete
rs
or
les
s
Figure 6-11. Integrated Cluster Bus Cabling
You must plan the floor placement of connected equipment carefully, subtracting the
appropriate amount of cable length for your particular situation.
Chapter 6. Cabling and Connectivity
6-19
Level 04a, June 21, 2004
ICB-3 cables connect between two zSeries systems. Note that, for each pair of ICB
features, you order only one ICB cable, (FC 0227).
|
|
|
Integrated Cluster Bus - 3
Input port from one of the two STI
connectors on the processor
Output port to a
z900/z800 system
ICB-3
Output port to a
z900/z800 system
|
|
|
ICB cables are NOT supplied under the Fiber Cabling Service offering. They must
be ordered, the same as other optional features.
Preparing Configuration Definition
The customer is responsible for preparing a definition of the I/O configuration for the
new processor. You should use the CHPID report from the Configurator as a guide
for planning and defining the new configuration. Depending on the current operating
environment there may be several methods for accomplishing this.
z/VM®
If you use HCM and HCD, develop the configuration using HCM and HCD.
Otherwise, develop the IOCP statements necessary to define your configuration and
use the level of the ICP IOCP program that supports the new processor to verify the
input statements. You do not need to initially assign PCHID values to the channel
paths in your configuration. You can use the CHPID Mapping Tool, available from
Resource Link, to aid you in assigning PCHIDs to CHPIDs. HCM and HCD users
must build an IOCP input data set from a validated work IODF and use this as input
to the CHPID Mapping Tool. The CHPID Mapping Tool updates the IOCP input and
assigns PCHIDs to the CHPIDs.
Note: An IOCP input file that was created by HCM and HCD without PCHIDs must
be migrated back into HCM and HCD after PCHID numbers have been
added to the file by the CHPID Mapping Tool. An IOCDS can then be written
from a production IODF or IOCP statements can be built for the install
diskette.
If upgrading from a 2064 z900 model at EC J10638 or later, use the ″Write IOCDS
in Preparation for an Upgrade″ option in HCD from a production IODF, or the
6-20
zSeries 800: Installation Manual for Physical Planning
Level 04a, June 21, 2004
″NOCHKCPC″ execution parameter option in IOCP, and write your new IOCDS to
the Support Element prior to the upgrade. This eliminates saving the IOCP source
to a diskette and running Stand-alone IOCP during the install. Simply tell the install
team which IOCDS (A0-A3) you have pre-written with the new configuration.
If you are installing a new processor, transfer the IOCP statements for your
configuration to a diskette. If necessary, the IOCP input file can be compressed
using a zip-compatible program. When the new system arrives, give the diskette
containing the IOCP input statements to the install team.
If you are installing a new processor, instead of using a diskette you can remotely
write the IOCDS from an HCD that is running on an installed CPC in the same
HMC cluster. Inform the install team that plans are in place to use the ″Build and
manage S/390 microprocessor IOCDSs″ option in HCD to write the IOCDS.
VSE/ESA™
Develop the IOCP statements necessary to define your configuration and use the
level of the ICP IOCP program that supports the new processor to verify the input
statements. You do not need to initially assign PCHID values to the channel paths
in your configuration. You can use the CHPID Mapping Tool, available from
Resource Link, to aid you in assigning PCHIDs to CHPIDs. The CHPID Mapping
Tool updates the IOCP input and assigns PCHIDs to the CHPIDs.
If upgrading from a 2064 z900 model at EC J10638 or later, use the
″CHECKCPC=NO″ execution parameter option in IOCP, and write your new IOCDS
to the Support Element prior to the upgrade. This eliminates saving the IOCP
source to a diskette and running Stand-alone IOCP during the install. Simply tell the
install team which IOCDS (A0-A3) you have pre-written with the new configuration.
If you are installing a new processor, transfer the IOCP statements for your
configuration to a diskette. If necessary, the IOCP input file can be compressed
using a zip-compatible program. When the new system arrives, give the diskette
containing the IOCP input statements to the install team.
OS/390 and z/OS HCD
Develop the configuration using HCD. You do not need to initially assign PCHID
values to the channel paths in your configuration. You can use the CHPID Mapping
Tool, available from Resource Link, to aid you in assigning PCHIDs to CHPIDs.
Build an IOCP input data set from a validated work IODF and use this as input to
the CHPID Mapping Tool. The CHPID Mapping Tool updates the IOCP input and
assigns PCHIDs to the CHPIDs. Migrate the modified IOCP input file back into HCD
after PCHID numbers have been added to the file by the CHPID Mapping Tool. An
IOCDS can then be written in preparation for an upgrade using a production IODF.
Note: An IOCP input file that was created by HCD without PCHIDs must be
migrated back into HCD after PCHID numbers have been added to the file
by the CHPID Mapping Tool. An IOCDS can then be written from a
production IODF or IOCP statements can be built for the install diskette.
If upgrading from a 2064 z900 model at EC J10638 or later, use the ″Write IOCDS
in Preparation for an Upgrade″ option in HCD from a production IODF and write
your new IOCDS to the Support Element prior to the upgrade. This eliminates
saving the IOCP source to a diskette and running Stand-alone IOCP during the
install. Simply tell the install team which IOCDS (A0-A3) you have pre-written with
the new configuration.
Chapter 6. Cabling and Connectivity
6-21
Level 04a, June 21, 2004
If you are installing a new processor, build an IOCP input data set for your
configuration from a production IODF and transfer the IOCP statements to a
diskette. In the unlikely event that the IOCP input file exceeds the capacity of the
diskette, the IOCP input file can be compressed using a zip-compatible program.
When the new system arrives, give the diskette containing the IOCP input
statements to the install team.
If you are installing a new processor, instead of using a diskette you can remotely
write the IOCDS from an HCD that is running on an installed CPC in the same
HMC cluster. Inform the install team that plans are in place to use the ″Build and
manage S/390 microprocessor IOCDSs″ option in HCD to write the IOCDS.
CHPID Numbers
The zSeries 800 system provides the capability to change the CHPID numbers
assigned to channels by the order process configurator. The CHPID Assignment
function is accessible only from Service (CE) Mode. If you want to reassign CHPID
numbers when your system is installed, you must create a diskette with the new
assignments to be imported into the CHPID Assignment function.
The CHPID Mapping Tool, available on IBM’s Resource Link web site, is used to
create the diskette. You can access Resource Link any time after your order is sent
to manufacturing. Using your input and the machine order (CFReport), the Mapping
Tool creates the diskette, customized for your specific configuration, and also
creates a new CHPID Report.
Remember to use the CHPID report generated by the Mapping Tool (not the report
created by the configurator) to create and/or verify your HCD/IOCP input, and for
documenting your final CHPID assignments.
6-22
zSeries 800: Installation Manual for Physical Planning
Level 04a, June 21, 2004
Chapter 7. Parallel Sysplex®
Parallel Sysplex Planning
This chapter is intended to provide guidance to those customers who operate in a
Parallel Sysplex environment. A Parallel Sysplex typically involves multiple
processors and coupling facilities, shared I/O devices, and a host of interconnection
possibilities. Detailed planning for a Parallel Sysplex is essential to meet technical
objectives, such as performance and high availability, within the constraints of a
specific raised floor configuration. Consider using the zSeries Fiber Optic Cabling
Service to plan your sysplex environment. A list of tasks the Service can perform is
provided under “zSeries Fiber Cabling Service” on page 6-1 Different technologies
for servers, links and coupling facilities affect your ability to configure a productive
sysplex. Following are some guidelines to help you better plan for multiple system
interconnection.
The basic premise for a successful Parallel Sysplex installation is to centralize the
physical location of the coupling facilities, and then position the sysplex servers
around that center.
1. Position the coupling facilities (or servers with internal coupling facilities) in the
center of an open area of raised floor large enough to accommodate all of the
servers and other coupling facilities to which you want to connect.
Central
Coupling
Facilities
Central
Coupling
Facilities
= 610 mm (24 in) floor tiles
= Cool aisle, 1.22 meters (48 inches) wide
= Perforated floor tile
= Exhaust (heated air from equipment)
v Use physical planning information for each type of server/coupling facility you
intend to add to the Parallel Sysplex to help determine how much floor space
you will need.
v Remember to consider weight distribution, service clearances, power, and
cooling for each piece of equipment you want to include.
2. Arrange the sysplex in two rows, with the fronts of servers and coupling facilities
facing each other (see the illustration under “Considerations for Multiple System
Installations” on page 2-9). Allow a 1.22 meter (48 inch) aisle width between the
rows. Although this may be a larger aisle than you have used before, your
Parallel Sysplex will benefit from the improvement in cooling that a wider aisle
provides (see the illustration under “Considerations for Multiple System
Installations” on page 2-9).
Note: The system air flow illustration shows a minimum aisle width of 941 mm
(37 in). Although this width is adequate for a congested computer room
floor, it is the minimum you should use. An aisle 1.22 m (48 in) wide will
© Copyright IBM Corp. 2002, 2004
7-1
Level 04a, June 21, 2004
better serve the cooling and cabling needs of a Parallel Sysplex
configuration.
Central
Coupling
Facilities
Central
Coupling
Facilities
= 610 mm (24 in) floor tiles
= Cool aisle, 1.22 meters (48 inches) wide
= Perforated floor tile
= Exhaust (heated air from equipment)
3. Sysplex connections will be made using ISC-3 and ICB-3 link cabling.
Note: Integrated cluster bus (ICB) links use a Self-Timed Interface (STI) to
perform coupling communication between systems. If you are planning to
install integrated cluster bus channels, you will have to place connected
devices closer to each other than 10 meters to allow for cable routing
between equipment. Allow 7 meters maximum of real space between
system frames.
ICB
r
23
s(
7
7-2
zSeries 800: Installation Manual for Physical Planning
te
me
s
ft
r
)o
les
Level 04a, June 21, 2004
4. As the Parallel Sysplex grows, add new servers evenly on either side of the
central coupling facilities.
Central
Coupling
Facilities
Central
Coupling
Facilities
= 610 mm (24 in) floor tiles
= Cool aisle, 1.22 meters (48 inches) wide
= Perforated floor tile
= Exhaust (heated air from equipment)
5. As the Parallel Sysplex evolves, you may eventually exceed the 7 meter usable
length of ICB cables at the ends of a two-row configuration. At this point, it may
be possible to add a third and fourth row, using ISC links, which provide
connectivity over greater distances than ICB links. With the equipment in these
new rows centered on the original central coupling facilities, the Parallel Sysplex
now assumes the shape of a diamond.
Central
Coupling
Facilities
Central
Coupling
Facilities
= 610 mm (24 in) floor tiles
= Cool aisle, 1.22 meters (48 inches) wide
= Perforated floor tile
= Exhaust aisle, 1.22 meters (48 inches) wide
By following these guidelines, you will be able to configure a Parallel Sysplex, using
the minimum amount of floor space, that meets your performance and availability
objectives. The use of technology combinations - zSeries 990, zSeries 900 (both
single and double frame systems), zSeries 800, and Enterprise Server G5/G6
Chapter 7. Parallel Sysplex®
7-3
Level 04a, June 21, 2004
servers and coupling facilities - may complicate your physical planning, but the
basic strategies outlined here will result in a successful Parallel Sysplex
environment.
7-4
zSeries 800: Installation Manual for Physical Planning
Level 04a, June 21, 2004
Appendix A. IBM Standard Symbols
In Plan Views:
Cable Entry and Exit Area in the
base of the machine. Locating
dimensions are measured from
the edge of the frame, not the
cover. This does not indicate the
floor cutout.
(Without
feature)
Service Area Boundary
(Service clearances are measured
from the machine with covers closed)
Casters
Locating dimensions are measured
from the edge of the frame, not the cover.
Cable Exit Area, recommended
Power Cord exit, 50/60 Hz
Leveling pads or glides
(90 mm [3 1/2 in] typical diameter)
Locating dimensions are measured
from the edge of the frame, not the cover.
Power Cord exit, 400 Hz
Legs
Power cords are supplied in 4.2 m (14 ft) lengths
unless otherwise noted on the specification page.
The length is measured from the symbol
or .
Non-raised floor cable exit
Meter location
Swinging Gate
Unit Emergency Switch
Standard equipment outline
(shows the machine with covers closed)
Hinged Covers
Optional equipment outline
Single
Customer Engineer
Indicator Panel
In Cabling Schematics:
801
Indicates a cable group
coming from a machine
Bifold
Offset Bifold
800
503
Indicates a cable group
going to a machine
504
Figure A-1. IBM Standard Symbols
© Copyright IBM Corp. 2002, 2004
A-1
Level 04a, June 21, 2004
A-2
zSeries 800: Installation Manual for Physical Planning
Level 04a, June 21, 2004
Appendix B. Environmental Specifications
Unless otherwise noted on individual specification pages, the following
environmental specifications, based on an altitude from sea level to 2134 meters
(7000 feet), apply:
Figure B-1. Table - Environmental Specifications
Environment, Operating:
Temperature
10° to 35°C (50°F to 95°F)
Relative Humidity
20% - 80%
Maximum Dew Point
21°C (70°F)
Environment, Nonoperating:
Temperature
10°C to 52°C (50°F to 125°F)
Rel Humidity
8% - 80%
Maximum Wet Bulb
27°C (80°F)
Maximum Dew Point
21°C (70°F)
Environment, Shipping:
Temperature
-40°C to 60°C (-40°F to 140°F)
Relative Humidity
5% - 100% (no condensation)
Maximum Wet Bulb
29°C (84°F)
Environment, Storage: All Models
Temperature
1°C to 60°C (34°F to 140°F)
Relative Humidity
5% -80%
Maximum Wet Bulb
29°C (84°F)
Note:
Prior to the installation of an IBM system, careful consideration should be
given to the computer room environment. If there is any question about
potential corrosive gases or level of particulates, contact your IBM
representative for assistance in monitoring the environment.
© Copyright IBM Corp. 2002, 2004
B-1
Level 04a, June 21, 2004
B-2
zSeries 800: Installation Manual for Physical Planning
Level 04a, June 21, 2004
Appendix C. Acoustics
This appendix provides information on acoustics for the zSeries 800.
Acoustical Noise Emission Levels
Relevant International Standards:
v Measurements: ISO 7779
v Declaration: ISO 9296
Table C-1. Table - Declared Acoustical Noise Emission Values
LWAd
Configuration
All models
LpAm
Operating
(B)
6.9
Idling
(B)
Operating
(dB)
6.9
N/A
<LpA>m
Idling
(dB)
N/A
Operating
(dB)
52
Idling
(dB)
52
Note:
LWAd
The declared (upper limit) sound power level for a random sample of machines.
LpAm
The mean value of the A-weighted sound pressure levels at the operator position
(if any) for a random sample of machines.
<LpA>m
The mean value of the A-weighted sound pressure levels at the one-meter
(bystander) positions for a random sample of machines.
N/A
Not applicable (no operator position).
B, dB Abbreviations for bels and decibels, respectively.
All measurements made in accordance with ISO 7779, and reported in conformance with
ISO 9296.
© Copyright IBM Corp. 2002, 2004
C-1
Level 04a, June 21, 2004
C-2
zSeries 800: Installation Manual for Physical Planning
Level 04a, June 21, 2004
Appendix D. Dual Power Installation
|
|
|
|
|
|
The zSeries 800 models are designed with a fully redundant power system. Each
computer has two line cords attached to two power input ports which, in turn, power
a fully redundant power distribution system within the computer. To take full
advantage of the redundancy/reliability that is built into the computer system, the
system is intended to be powered from two distribution panels.
IMPORTANT
Each power cord is intended to be supplied by a different source.
Since the zSeries 800 operates on single-phase power, power redundancy is
realized only if the source to each line cord is different. Failure to provide separate
power sources will lead to system failure in the event of a power outage.
Here we will present three examples of redundancy.
Example 1 (redundant distribution panel and switch gear)
In this example, the computer receives power from two separate power distribution
panels. Each distribution panel receives power from a separate piece of building
switch gear. This level of redundancy is not available in most facilities.
Switch Gear
Distribution
Panel
Switch Gear
Distribution
Panel
Figure D-1. Dual Power Installation - Redundant Panel and Switch
© Copyright IBM Corp. 2002, 2004
D-1
Level 04a, June 21, 2004
Example 2 (redundant distribution panel)
In this example, the computer receives power from two separate power distribution
panels. The two distribution panels receive power from the same piece of building
switch gear. Most facilities should be able to achieve this level of redundancy. In
this case, loss of switch gear (building power) will result in system outage, but loss
of one distribution panel will not.
Distribution
Panel
Switch Gear
Distribution
Panel
Figure D-2. Dual Power Installation - Redundant Panel
D-2
zSeries 800: Installation Manual for Physical Planning
Level 04a, June 21, 2004
Example 3 (single distribution panel)
In this example, the computer receives power from two separate circuit breakers in
a single power panel. This does not make use of the redundancy provided by the
processor. It is, however, acceptable if a second power distribution panel is not
available.
This type of power distribution will result in system outage in the event of a power
failure at either the switch gear or the distribution panel.
Switch Gear
Distribution
Panel
Figure D-3. Single Distribution Panel - Dual Circuit Breakers
Appendix D. Dual Power Installation
D-3
Level 04a, June 21, 2004
D-4
zSeries 800: Installation Manual for Physical Planning
Level 04a, June 21, 2004
Appendix E. Notices
This information was developed for products and services offered in the U.S.A.
IBM may not offer the products, services, or features discussed in this document in
other countries. Consult your local IBM representative for information on the
products and services currently available in your area. Any reference to an IBM
product, program, or service is not intended to state or imply that only that IBM
product, program, or service may be used. Any functionally equivalent product,
program, or service that does not infringe any IBM intellectual property right may be
used instead. However, it is the user’s responsibility to evaluate and verify the
operation of any non-IBM product, program, or service.
IBM may have patents or pending patent applications covering subject matter
described in this document. The furnishing of this document does not give you any
license to these patents. You can send license inquiries, in writing, to:
IBM Director of Licensing
IBM Corporation
North Castle Drive
Armonk, NY 10504-1785 U.S.A.
The following paragraph does not apply to the United Kingdom or any other
country where such provisions are inconsistent with local laws:
INTERNATIONAL BUSINESS MACHINES CORPORATION PROVIDES THIS
PUBLICATION ″AS IS″ WITHOUT WARRANTY OF ANY KIND, EITHER EXPRESS
OR IMPLIED, INCLUDING, BUT NOT LIMITED TO, THE IMPLIED WARRANTIES
OF NON-INFRINGEMENT, MERCHANTABILITY OR FITNESS FOR A
PARTICULAR PURPOSE. Some states do not allow disclaimer of express or
implied warranties in certain transactions, therefore, this statement may not apply to
you.
This information could include technical inaccuracies or typographical errors.
Changes are periodically made to the information herein; these changes will be
incorporated in new editions of the publication. IBM may make improvements and/or
changes in the product(s) and/or the program(s) described in this publication at any
time without notice.
Any references in this information to non-IBM Web sites are provided for
convenience only and do not in any manner serve as an endorsement of those
Web sites. The materials at those Web sites are not part of the materials for this
IBM product and use of those Web sites is at your own risk.
IBM may use or distribute any of the information you supply in any way it believes
appropriate without incurring any obligation to you.
Information concerning non-IBM products was obtained from the suppliers of those
products, their published announcements or other publicly available sources. IBM
has not tested those products and cannot confirm the accuracy of performance,
compatibility or any other claims related to non-IBM products. Questions on the
capabilities of non-IBM products should be addressed to the suppliers of those
products.
© Copyright IBM Corp. 2002, 2004
E-1
Level 04a, June 21, 2004
If you are viewing this information softcopy, the photographs and color illustrations
may not appear.
Electronic Emission Notices
The following statement applies to this IBM product. The statement for other IBM
products intended for use with this product will appear in their accompanying
manuals.
Federal Communications Commission (FCC) Statement
Note: This equipment has been tested and found to comply with the limits for a
Class A digital device, pursuant to Part 15 of the FCC Rules. These limits
are designed to provide reasonable protection against harmful interference
when the equipment is operated in a commercial environment. This
equipment generates, uses, and can radiate radio frequency energy and, if
not installed and used in accordance with the instructions contained in the
installation manual, may cause harmful interference to radio communications.
Operation of this equipment in a residential area is likely to cause harmful
interference, in which case the user will be required to correct the
interference at his own expense.
Properly shielded and grounded cables and connectors must be used in
order to meet FCC emission limits. IBM is not responsible for any radio or
television interference caused by using other than recommended cables and
connectors, by installation or use of this equipment other than as specified in
the installation manual, or by any other unauthorized changes or
modifications to this equipment. Unauthorized changes or modifications could
void the user’s authority to operate the equipment.
This device complies with Part 15 of the FCC Rules. Operation is subject to
the following two conditions: (1)this device may not cause harmful
interference, and (2)this device must accept any interference received,
including interference that may cause undesired operation.
Canadian Department of Communications Compliance Statement
This equipment does not exceed Class A limits per radio noise emissions for digital
apparatus, set out in the Radio Interference Regulation of the Canadian Department
of Communications. Operation in a residential area may cause unacceptable
interference to radio and TV reception requiring the owner or operator to take
whatever steps are necessary to correct the interference.
Avis de conformlté aux normes du ministère des Communications du Canada
Cet équipement ne dépasse pas les limites de Classe A d’émission de bruits
radioélectriques pour les appareils numériques, telles que prescrites par le
Règlement sur le brouillage radioélectrique établi par le ministère des
Communications du Canada. L’exploitation faite en millieu résidentiel peut entrainer
le brouillage des réceptions radio et télé, ce qui obligerait le propriétaire ou
l’opérateur à prendre les dispositions nécessaires pour en éliminer les causes.
The United Kingdom Telecommunications Act 1984
E-2
zSeries 800: Installation Manual for Physical Planning
Level 04a, June 21, 2004
This apparatus is approved under General Approval number NS/G/1234/J/100003
for indirect connections to public telecommunications systems in the United
Kingdom.
Taiwan Communications Statement
European Union (EU) Electromagnetic Compatibility Directive
This product is in conformity with the protection requirements of EU Council
Directive 89/336/EEC on the approximation of the laws of the Member States
relating to electromagnetic compatibility. IBM cannot accept responsibility for any
failure to satisfy the protection requirements resulting from a non-recommended
modification of the product, including the fitting of non-IBM option cards.
EC Declaration of Conformity (In German)
Zulassungsbescheinigung laut dem Deutschen Gesetz über die
elektromagnetische Verträglichkeit von Geräten (EMVG) vom 18. September
1998 (bzw. der EMC EG Richtlinie 89/336).
Dieses Gerät ist berechtigt, in Übereinstimmung mit dem Deutschen EMVG das
EG-Konformitätszeichen - CE - zu führen.
Verantwortlich für die Konformitätserklärung nach Paragraf 5 des EMVG ist die IBM
Deutschland GmbH, 70548 Stuttgart.
Informationen in Hinsicht EMVG Paragraf 4 Abs. (1) 4:
Das Gerät erfüllt die Schutzanforderungen nach EN 55024 und EN 55022
Klasse A.
EN 55022 Klasse A Geräte müssen mit folgendem Warnhinweis versehen werden:
″Warnung: dies ist eine Einrichtung der Klasse A. Diese Einrichtung kann im
Wohn-bereich Funkstörungen verursachen; in diesem Fall kann vom Betreiber
verlangt werden, angemessene Maßnahmen durchzuführen und dafür
aufzukommen.″
Anmerkung:
Um die Einhaltung des EMVG sicherzustellen, sind die Geräte wie in den IBM
Handbüchern angegeben zu installieren und zu betreiben.
Appendix E. Notices
E-3
Level 04a, June 21, 2004
Trademarks and Service Marks
The following terms are trademarks of International Business Machines Corporation
in the United States, other countries, or both:
ESCON
FICON
ibm.com
IBM
OS/390
Resource Link
Sysplex Timer
S/390
ThinkPad
VSE/ESA
z/OS
zSeries
z/VM
|
E-4
zSeries 800: Installation Manual for Physical Planning
Level 04a, June 21, 2004
Index
A
acoustics
M
C-1
C
casters 2-8
channel jumper cable connetors
conduit 3-3
conversion kit cables 6-17
cooling requirements 2-6
customer circuit breakers 3-4
customer power feeds 3-1
6-3
non-raised floor
environmental conditions
in Canada 2-1
line cord protection 3-4
weight 2-4
2-6
D-1
O
E
OSA-E channels
outlets 3-1
environmental specifications B-1
ESCON channels 6-7
ETR 6-14
external tim reference 6-14
6-11
P
F
fiber cabling service, description 6-1
fiber quick connect feature 6-18
FICON channels 6-5
floor loading 2-5
floor tile cutouts 2-7
G
grounding
6-15
N
D
dual power installation
machine area 2-6
maximum kBTU/hr 3-2
maximum system power 3-2
MCP cables 6-15
mode conditioning patch cables
Models 2-3
parallel channels 6-15
physical dimensions 2-3
plan view 2-4
Planning Checklist 1-2
power plugs 3-2
power receptacles 3-2
power redundancy 3-1
power requirements 3-1
power supply ranges 3-1
power supply rating 3-2
preparing configuration definition
6-20
3-3
R
H
recommended floor placement 2-7
remote support facility modems 5-1
Hardware Management Console
FC 0074 4-1
token ring adapter
token ring wrap plug 4-1
wiring options 4-3
S
I
ICB channels, system placement
inter-system cabling 2-9
ISC-3 channels 6-9
L
line cord specifications 3-4
line cord wire colors 3-4
© Copyright IBM Corp. 2002, 2004
6-18
service clearance 2-5
service outlet 3-4
shipping specifications 2-10
Support Element
FC 0086 and FC 0087 4-1
wiring options 4-3
sysplex timer 4-13
T
thermal interaction 2-9
TKE PC 4-12
trusted key entry PC 4-12
X-1
Level 04a, June 21, 2004
U
UEPO 3-4
unit emergency power off switch
3-4
W
weight distribution 2-4
wiring options
additional Ethernet only - one path 4-7
additional Ethernet only - two paths 4-9
additional token ring and Ethernet 4-11
additional token ring only 4-5
Ethernet only - one path 4-6
Ethernet only - two paths 4-8
token ring and Ethernet 4-10
token ring only 4-4
X-2
zSeries 800: Installation Manual for Physical Planning
Level 04a, June 21, 2004
Printed in USA
2066-IMPP-04