1
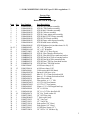
*** FOR COMPETITION USE ONLY per US EPA regulations ***
Factory Pipe
Bill of Materials
Kawasaki STX-R Triple Pipe
Item
1
2
3
4
5
6
7
8
9
10-12
13
14
15
16
17
18
19
20
21
22
23
24
25
26
27
28
29
30
31
32
33
34
35
36
37
38
39
40
41
42
Qty
1
1
1
1
1
2
1
1
1
1
3
1
3
1
1
1
1
1
2
8
12
6
6
6
3
3
3
3
6
2
5
9
16
2
1
2
1
3
1
1
1
Part Number
COMASM0935
COMASM0936
COMASM0937
COMASM0938
COMASM0939
COMASM0941
COMASM0942
COMASM0943
COMASM0944
COMASM0945
COMHOS0053
COMHOSA180
COMFTG0023
COMBRK0225
COMBRK0221
COMBRK0224
COMBRK0222
COMBRK0223
COMBRK0220
COMCLP0007
COMCLP0010
COMFAS0001
COMASM0790
COMFAS0023
COMFAS0026
COMFAS0036
COMFAS0205
COMMNT0052
COMMNT0030
COMFAS0045
COMFAS0090
COMFAS0100
COMFAS0070
COMFTG0095
COMADH0002
COMFTG0122
COMFTG0121
COMFTG0110
COMFTG0105
COMCLP0015
COMFTG0034
Part Description
STX-R PTO Chamber assembly
STX-R CTR Chamber assembly
STX-R MAG Chamber assembly
STX-R Collector assembly
STX-R Center stinger tube assembly
STX-R MAG/CTR, Flange assembly
STX-R PTO Flange assembly
STX-R Flange water bypass assembly
STX-R Inline water assembly
STX-R Hardware kit (includes items 10-55)
3/8” x 15” Waterline
1/4” x 24” Waterline
1/8” BSP x 3/8” Hose ftg strt
STX-R/ Ultra Throttle cable bracket
STX-R/ Ultra MAG Pipe crankcase bracket
STX-R/Ultra MAG Pipe to housing bracket
STX-R/Ultra MAG Rear mount bracket
STX-R/Ultra CTR Pipe front head bracket
STX-R/Ultra CTR Head bracket
#4 SS hose clamp (1/4”)
#6 SS hose clamp (3/8”)
2 Hole spring hook SS (8mm)
Spring w/clear hose cover
8mm x 1.25 x 35mm Socket head SS
8mm x 1.25 x 40mm Socket head bolt
8mm Flat washer SS
Fiber washer, w/ 1 ½” OD
# J11729-190 Lord mount
# J11729-177 Lord mount
10mm x 1.25 x 20 Flanged head cap
3/8”-16 SS Nut
3/8”-16 x 3/4” Hex head bolt SS
3/8” Ext. Tooth washer SS
3/8” NPT Pipe plug
7” Stick repair putty
3/8” Vinyl cap
1/2” Vinyl Cap
Side squirter (3/8” Hose)
Side squirter (1/4” Hose)
#12 SS Hose clamp (1/2”)
3/8” NPT x 3/4” Strt hose ftg
1
43
45
46
47
48
49
50
51
52
53
54
55
56
57
1
3
1
16
2
2
4
5
3
1
1
1
1
1
COMCRB0001
COMCRB0003
COMFAS0048
COMFAS0086
COMFAS0281
COMMNT0150
COMCLP0021
COMFAS0212
COMFAS0210
COMFAS0211
COMTUB0011
COMHOS0091
COMCAB0001
COMINT0001
#170 Keihin main jet
Keihin pop-off spring
10mm x 1.5 x 30mm Hex head cap scrw
3/8” Flat washer w/1” O.D. SS
3/8”-16 x 1-3/4” SS Hex head cap
1-1/2” x 1-3/4” Long spacer mount
#250 High torque SS hose clamp (2”)
5-1/2” Plastic zip tie
4” Plastic zip tie
15” Zip tie
STX-R Crossover tube
3" Silicone coupler (2 ½”)
STX-R / ULTRA Throttle cable modified
1200 STX-R Video instructions
Required Parts Not Included in Kit: Modified Kawasaki CDI module (Factory Pipe Part #
FIN1200ST02) (DO NOT use the stock CDI module as engine damage will occur, Tau-Ceti
Flame Arresters (use with stock CV carbs).
Special Tools Required for Installation: 1/2", 3/8", 37/64" and 23/64"drill bits, 3/8" x 18
N.P.T. pipe thread tap, thread sealant.
•
•
•
•
Check contents against Bill of Materials. Immediately report any shortages where you
purchased your Factory Pipe.
Read all instructions carefully before starting installation.
You must run fuel with minimum octane rating of 92 (premium pump fuel). Running a
lower octane fuel can cause detonation and serious engine damage
Always warm up the engine prior to full throttle/high speed operation.
2
Factory Pipe
Instructions
Kawasaki STX-R Triple Pipe
1. Disconnect the battery. Disconnect the exhaust heat sensor at the connector that is located
in front of the pipe near the gas tank. Be sure to leave sensor in the pipe and disconnect at
the connector.
2. Remove the stock flame arrestor, both sides front and back. Do not remove the adapters.
3. Remove the throttle/choke/oil injection cable bracket connected to the stock exhaust
system. Then disconnect the cables from the bracket and at the carbs, choke & oil
injection pump. Retain the allen bolt from the oil injection cable as you will reuse this
with the new cable.
4. Remove the choke cable from boat or zip tie it out of the way. It will not be used in this
installation.
5. Remove the carbs and disconnect the throttle position sensor (TPS) at the connector. The
(TPS) is located at the rear of the carbs. Now disconnect all fuel lines at the fuel pump
(fuel in, return, pulse). Disconnect the oil injection line at the carb and leave all the lines
in the boat as you will reuse them later.
6. Remove the intake manifold and pulse line. Leave the reeds in place and cover with a
towel or rag to prevent debris falling into the reed cages.
7. Remove the stock exhaust system and exhaust manifold. Do not remove the waterbox.
8. Remove all the exhaust manifold studs that are connected to the cylinders. Retain the
exhaust manifold gaskets as you will use with the triple pipe install.
9. Remove all three cylinder head water bypass lines and the three 90 deg. brass fittings
from the heads. Remove cylinder head brackets that are between heads.
10. Remove the water intake manifold (water into cylinders) that is located on the back of the
cylinders. Retain manifold as you will modify later.
11. Remove drive line coupler cover.
12. Remove the fuel line holders that are glued to the hull on the intake side of the boat.
13. Remove stock CDI box.
14. Remove the zip ties that hold the TPS and the heat sensor. Leave the wire harness loose
at this time.
15. Remove the waterbox and crossover tube with the sound suppressor.
3
16. Remove the water bypass lines from the fittings in the hull that are located behind the
crossover tube. Two of these lines were connected to the cylinder heads and one was
connected to the stock exhaust system.
17. Remove the fuel filter from holder and leave in boat. Remove the fuel filter holder from
boat.
You are now ready to begin installation of the Factory Pipe Triple Pipe System. It is highly
recommended that you watch the included video instructions before you begin the
installation process. Taking the time to watch the video will save you hours of frustration.
The procedures in the video follow the same order as the written instructions.
18. On the right side of the boat, route the fuel filter to the front and locate a spot around the
front of the fuel tank (rubber tank strap, etc. to secure it using a 15" zip tie (item #53).
Make sure the filter is secured in a vertical fashion. Route the rest of the fuel line back
down the left side of the boat and let it hang out side the engine compartment at this time.
19. Install the two 3/8" rubber caps (item #37), and the one 1/2" rubber cap (item #38) on the
bypass outlets on the top of the pump box. Secure all three using 4" zip ties (item #52).
20. Install the modified Kawasaki CDI Module in ignition box.
21. Locate the water in line assy. (item #9) and place the 3/4" waterline under the motor strap
and up towards where the water intake manifold is located. Measure 4" in from where the
current 1/2" water line comes in thru the hull and cut. Connect the 1/2"side of the water
in line assembly to the 4" piece you just cut and secure with a 1/2" hose clamp (item
#41).
22. Locate the water intake manifold which you previously removed from the engine.
Remove the 90 deg water in brass fitting. Using a 37/64" drill bit, drill out the water in
hole and then tap using a 3/8" x 18 N.P.T. tap. After tapping make sure all chips are
removed. Install the 3/8 N.P.T. x 3/4 barbed straight fitting (item #42) using pipe sealant
on the threads.
23. Reinstall the water intake manifold back on the engine making sure all three gaskets are
in place. Attach the 3/4" water in line to the straight barbed fitting using the stock hose
clamp previously used on the 90 deg fitting.
24. Remove the pump nozzle and stator assembly (you will have to drop the ride plate for
this). Drill out the water in brass fitting using a 23/64" drill bit (the brass fitting does not
need to be removed while drilling). Make sure you drill all the way thru the brass fitting
and pump stator. Reinstall the pump nozzle and stator, making sure all hoses are secured.
25. Remove Stock throttle / oil injection cable and install the new modified throttle/oil
injection cable (item #56).
26. Install one of the #177 lord mounts (item #30) and one of the fiber washers (item #28)
onto each of the two CTR pipe head brackets (item #20).
4
27. Install one of the #177 lord mounts (item #30) and one of the fiber washers (item #28)
onto the CTR pipe front head bracket (item #19) and secure the mount to the bracket
using a 3/8" flat washer (item #47), 3/8" ext tooth washer (item # 34) and 3/8" x 16 S.S.
nut (item # 32).
28. Install all three brackets onto the cylinder heads. Torque the cylinder head bolts to 22 ft
lbs.
29. Locate the MAG pipe crankcase bracket (item #16) and two 10mm x 1.25 x 20mm
flanged head bolt (item #??). Install the bracket to the crankcase (there are two open
threaded holes) just below the intakes with the slot facing the rear of the boat.
30. Locate the three 3/8" x 1/8-27 B.S.P. straight fittings (item #14). Using pipe thread
sealant on the threads install one into each cylinder head where you previously removed
the 90 deg fittings.
31. Install the MAG and center exhaust flanges (item #6), and the PTO exhaust flange (item
#7) to the cylinders reusing the stock metal gaskets. (Note: the MAG and center flanges
have the straight brass fitting and the PTO has the 90 deg brass fitting, Fig. 3). Attach the
each flange using two 8mm x 1.25 x 35mm bolts (item #25), and two spring hooks, 8mm
(item #23), on the top of the flange and one 8mm x 1.25 x 40mm bolts (item #26) for the
bottom of the flange.
32. Install the exhaust flange water bypass assembly (item #8)(Fig.2) to each of the exhaust
flange fittings using #4 hose clamps (item #21). The 24" section of the assembly goes
toward the rear of the boat (will attach later to the overboard bypass fitting). See video
instructions.
33. Remove the two forward outside bolts on the grab handle located next to the rear air
vents. Drill these holes out using a 3/8" drill bit.
34. Remove the two air vents. (Note: With the air vents removed it is important to remember
that if the watercraft gets tipped upside down without these vents installed, it will fill with
water quickly and cause damage).
35. Locate two areas on each side of the rear of the top deck to install water overboard
bypass fittings (side squirters). These areas should not be obstructed so that the waterlines
going to them have a clean route. Once you have marked where your fittings will go,
drill the holes with a 1/2” drill bit. Install one 1/4” side squirter (item #40) and one 3/8”
side squirter (item #39) in the port (left) side of the top deck. The other two 3/8” side
squirters go on the starboard (right) side of the top deck. When securing the side squirters
angle the flow direction to the rear.
36. Locate the two previously retained pieces of stock 3/8" black waterline. One piece should
be approximately 41" long. Attach this piece to the left 3/8 side squirter using a #6 hose
clamp (item #22). Cut the remaining piece of waterline to produce 19" length and a 27"
length. Attach these pieces to the two 3/8 side squirters on the right side of the boat using
#6 hose clamps (item #22). Leave these waterlines hang outside the engine compartment
at this time.
5
37. Install stock waterbox and secure with rubber strap. (Note: The smaller opening goes to
the rear)
38. Remove the black plastic sound suppressor from the exhaust crossover hose in the rear of
the boat. Replace the suppressor with the 3.3” dia. x 3 1/2” long tube splice )item #54).
Make sure it is routed as low as possible then secure using the stock clamps. (Note: The
tube splice is intended for recreational and superstock set ups. If you are racing in
Limited class the sound suppressor must be in place)
39. Install the three 3/8" x 15" waterlines (item #10, 11, 12) onto the straight 3/8 fittings on
the top of each cylinder head. Secure all with a #6 hose clamps (item #22).
40. Locate the two small indentations between the engine compartment opening and the rear
storage compartment opening. Align the PTO chamber mount template with the existing
dents making sure the arrow points toward the front of the boat. Drill the hole using a
3/8" drill bit.(Fig. 4)
41. Remove the two front bolts which attach the black plastic grab handle.(Fig. 5). Drill these
holes out using a 3/8" drill bit.
42. Install one spring (item #24) on each exhaust flange spring hook (total of six, two per
flange) and leave them hang at this time.
43. Remove the three phillips head screws that hold the solenoid and fuse box bracket to the
top deck. Lay it in the bottom of the hull for now.
44. Install the PTO pipe (item #1) into the rear of the engine compartment. Do not attach it to
the exhaust flange at this time.
45. Install a #190 lord mount (item# 29) into one of the 1-1/2 x 1-3/4 long spacer mounts
(item #49) and a #177 lord mount (item #30) into the remaining spacer mount. Attach the
lord mount side of these assemblies to the two rear mount brackets on the PTO pipe using
a 3/8"-16 x 3/4" hex head bolt, 3/8" ext. tooth washer and 3/8" flat washer (item
#33,34,47). (Note: The assembly with the longer lord mount goes on the right side and
the short lord mount assembly goes on the left side)
46. Attach a #190 lord mount (item #29) to the remaining front PTO bracket using a 3/8"-16
S.S. nut, 3/8" ext. tooth washer, and 3/8" flat washer (item #32,34,47). Do not mount the
PTO pipe to the top deck at this time. Push the pipe as far back as possible and let sit.
47. Reattach the solenoid and fuse box bracket to the top deck.
48. Install the CTR pipe (item # 2). Do not attach any to the exhaust flange or mounts. Just
lay it in position.
49. Located the MAG pipe (item #3) and remove the 90 deg brass fitting on the head pipe
which has the 3/8" clear line attached to it (this must be remove for installation purposes).
Install the MAG pipe into the boat but do not attach it to the exhaust flange at this time.
6
50. Install a #177 lord mount (item #30) into the MAG pipe bracket using a 3/8"-16 S.S. nut,
3/8" ext tooth washer, and 3/8" flat washer (item #32,34,47). The rubber mount will face
the rear with the stud end going forward and fastening to the pipe bracket.
51. Remove the two bolts from the MAG housing just above where the counter balance is
located. Install the MAG pipe bracket / oil cable bracket (item #17) using the same bolts.
52. Install the oil injection cable to the oil pump and then attach the cable to the bracket.
Adjust the cable per Kawasaki STX-R service manual instructions.
53. Install a #177 lord mount (item #30) to the middle MAG pipe bracket using a 3/8"-16 x
3/4 hex head bolt, 3/8” ext. tooth washer, and 3/8" flat washer (item #33,34,47). The
rubber mount will sit on top of the bracket and bolted from underneath. The stud of the
rubber mount faces upward and will fit into the slot on the crankcase mount bracket.
54. Slide the MAG pipe onto the MAG exhaust flange.
55. Install a 3/8"-16 x 3/4 bolt, 3/8" flat washer and 3/8" ext. tooth washer (item #33,47,34),
into the front MAG bracket / oil injection bracket and secure.
56. Install a 3/8"-16 S.S. nut, 3/8" ext. tooth washer, and 3/8" flat washer (item #32,34,47)
onto the mount stud which goes into the slot of the crankcase bracket.
57. Remove the left rear motor mount bolt.
58. Locate the MAG pipe rear bracket (item #18). Attach the stud end of a #190 lord mount
(item #29) to the rear bracket using a 3/8"-16 S.S. nut, 3/8" ext. tooth washer, and 3/8"
flat washer (item #32,34,47). Install the bracket on top of the motor mount plate and
loosely secure with the 10mm x 1.5 x 30mm bolt (item #46). Adjust the mount so it
aligns with the rear mount bracket on the MAG pipe and secure the bracket to the lord
mount using a 3/8-16 x 3/4 bolt, 3/8" ext. tooth washer, and 3/8" flat washer (item #
33,34,47). Now tighten the motor mount bolt.
59. Reinstall the coupler cover.
60. Attach the two springs on the MAG exhaust flange to the pipe.
61. Reinstall the 90 deg brass fitting to the MAG pipe and attach the 3/8" clear waterline.
Note: If you are going to be installing aftermarket carburetors do so at this time as per the
manufacturers instructions.
62. On the stock carburetors install the 1/4"x 24"pulse line (item #13) to the brass fitting on
the rear intake using a #4 hose clamp (item #21).
63. Remove the two bolts from the rear counter shaft housing area. Using the same bolts
install the new throttle cable bracket (item #15).
7
64. On the Stock intake manifold remove the balance tube hose and fittings and install the
two 3/8" N.P.T. x 1/2" plugs (item #35). Using Pig putty (item #36), fill in the holes
which go between each intake manifold.
65. Install the intake manifold back onto the engine
Carburetor Adjustments
These carburetor recommendations are for 730 feet above sea level. No claims are made by
Factory Pipe for the performance, reliability or function of this exhaust system on a
modified engine. Carburetor adjustments will vary depending on engine modifications,
fuel, altitude and other variables. Please consult a qualified technician if you are not
familiar with tuning your carburetor(s). These changes MUST be done prior to running the
engine with this exhaust system. High performance engines require precise jetting and
damage can occur if the carburetor(s) are not properly tuned.
Note: The carburetors will be reversed when installed with the Factory Pipes vs. the stock pipe.
Rear carburetor ( Has the throttle linkage)
Main Jet: 170
Pilot Jet: Stock
Replace with supplied valve seat spring
Center carburetor
Main Jet: Stock
Pilot Jet: Stock
Replace with supplied valve seat spring
Front carburetor
Main Jet: Stock
Pilot Jet: Stock
Replace with supplied valve seat spring
66. Remove the throttle position sensor (TPS). You will not need this as the TPS circuit in
the new CDI module is disabled.
67. Lightly seat all three low speed screws (turn clockwise) and the turn out (counterclockwise) 3/8 to 1/2 turn.
68. Place the carburetors in the boat and attach the oil lines, pulse line, return line and main
fuel in line using #4 hose clamps (item #21). (Note: Make sure the main fuel in line and
the return line (fuel out) are connected to the correct fitting. It is marked on the
carburetors)
69. Install the carburetors on the engine making sure the gaskets are in place. Install your
aftermarket flame arrestors at this time. We recommend the Tau-Ceti flame arrestor kit
for the STX-R.
8
70. Attach the throttle cable to the throttle cable bracket. Adjust and tighten. This completes
the reinstallation of the carburetors.
71. Slip the CTR pipe into the center exhaust flange.
72. Install and secure the three pipe mount brackets to the three head brackets using the 3/8"16 x 3/4" hex head bolts, 3/8" ext. tooth washers, and 3/8" flat washers (item #33,34,47).
73. Install the two springs on the center exhaust flange to the pipe.
74. Attach all three waterlines from each cylinder head to the 90 deg brass fitting on each
pipe using #6 hose clamps (item #22).(Fig. 6)
75. Install all three spark plug boots to the spark plugs
76. On the port (left) side of the boat, attach the 1/4" waterline from the exhaust flange to the
1/4" side squirter using a #4 hose clamp (item #21). Route the black 3/8" waterline
coming from the 3/8" side squirter to the 90 deg brass fitting on the rear of the MAG
pipe. You mad need to cut this to length depending on your routing.
77. On the starboard (right) side of the boat attach the longer 3/8" black waterline from the
side squirter to the brass mender coming from the CTR pipe using a # 6 hose clamp (item
#22). You may need to cut this to length depending on your routing.
Note: Do not use grease or oil on silicone couplers. Use only glass cleaner or water with dish
soap if required.
78. Locate your center stinger assembly (item #5). Install a 2" high torque hose clamp (item
#50) on the coupler going to the CTR pipe outlet. Slide the assembly in the boat under the
cylinders and slide the coupler onto the pipe outlet. Leave the hose clamp loose at this
time.
79. Using one of the two retained stock 3" exhaust clamps, install the 3" x 2 1/2" long
silicone coupler (item #55) onto the waterbox inlet and tighten the clamp. Slide the
remaining retained hose clamp on the 3" hose but leave loose at this time.
80. Locate the collector assembly (item #4) and loosen the two clamps on the 2" silicone
couplers. Push the couplers down on the tubes until the hoses are flush with the ends.
Install the collector into boat through the rear storage compartment opening. Remember,
the PTO pipe should not be mounted yet. Getting the collector in can be very tricky.
Please refer to the instructional video.
81. Mount the PTO pipe to the top deck. Use two 3/8"x 16 x 1 3/4" hex head screws, 3/8"
ext. tooth washers, and 3/8" flat washers (item #48,34, 47) for securing the rear mounts.
Use a 3/8"- 16 x 3/4" hex head bolt, 3/8" ext. tooth washer, and 3/8" flat washer (item #
33,34,47) for securing the front mount. Attach the springs on the PTO exhaust flange to
the pipe.
9
82. Attach the 3/8" black waterline coming from the side squirter to the 90 deg brass fitting at
the end of the PTO pipe. Secure it with a #6 hose clamp (item #22).
83. Slide a 2" high torque hose clamp (item #50) over each of the three tubes on the collector
and leave loose at this time. Place the collector outlet into the 3" coupler on the waterbox.
Attach all three couplers from the collector to the pipes and stinger tube. (Note: You may
need to move the collector, waterbox and stinger tube around for proper alignment)
84. Once the collector is properly aligned secure all the hose clamps including the center
stinger tube coupler under the cylinders, all couplers on the collector, and the 3" coupler
on the water box.
85. Secure any loose wires using zip ties (item #51).
86. Insert the air temp sensor bypass connector supplied with your Modified Kawasaki CDI
module (green). Operating without this connector will cause the timing to retard and
cause poor engine performance.
87. Double check that all hardware, couplers, clamps and waterlines are secure. Reconnect
the battery cables. We suggest you run the boat in the water with the seat off to look for
any leaks and make sure there is good flow coming from all four side squirters.
10
11
12