Download VFC Gen III Installation
Transcript
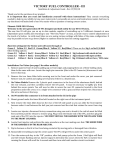
Rev. 05/20/10 Thank you for the purchase of our product. It is important that you read and familiarize your self with these instructions! They contain everything needed to help in your ability to tune your motorcycle. I personally am not an avid instructions reader but have to say that these will make both of our lives easier when a question or tuning concern arises. Fitment; All 2000-2007 Victory- All Models Welcome to the new Generation III VFC designed and built solely for Victory Motorcycles. The New Gen III will give us an up to date module capable of controlling up to 5 different channels at once (dependant upon model) and returning to you the user / tuner an easy, accurate way to control adjustments at the touch of a button. Installation: 1. Remove gas tank as per service manual procedure 2. Disconnect negative lead from battery 3. Determine a location for the VFC III unit. Suggested locations are as follows: on left or right side under the covers, on top or side of battery, on inside of the side covers, on PCM or under seat 4. Locate rear injector, disconnect factory connection using care not to break it, the red tab must be lifted first and then push the release to remove plug. Plug it into the female end of the VFC, Then plug the male end of the VFC into the injector. 5. Locate connection of front jumper harness- it is located on the right side of frame - in the center of air box. Disconnect and plug appropriate VFC connectors in place. 6. Zip tie harness so that it is free from being contacted 7. Install gas tank and connect ground terminal of VFC along with the factory ground lead. Note, On Vegas, Kingpin, Jackpot & Hammer Models. Be sure not to pinch VFC harness under rear tank mounting bracket, the harness must run on the side of or under the frame in this area as not to contact the rear tank mount. 8. Turn the motorcycle key to the “ON” position, after fuel pump cycles the Green / Red lights will flash and will remain flashing until an injector signal is detected, this occurs when the M/C is started. Once running the green will scroll for 4 seconds and then turn solid until another circuit is activated. Some 2000-2001 bikes will not light the box until started. The module controls your basic fuel adjustments and your fuel delivery for the Nitrous when activated. The following functions and colors that represent them are as follows. Basic Module description and adjustments; the module has 3 button adjustments, Center is the mode selector, this scrolls through and chooses the feature that you want to adjust. To the left of it is the button in which minus’s in value the selected feature. To the right of the mode button is the plus button which makes the feature selected go higher in value. If a fuel feature is selected the minus button will diminish fuel down to the lowest level of the current download and plus will add fuel up to the maximum amount calibrated into the module. There are 8 LED lights on the front panel with 15 points of adjustment ranging from 0 to 8 in increments of .5 or 1/2 . Ex. 1 - 1.5 – 2 - 2.5 – 3 – 3.5 – 4 – 4.5 – 5 – 5.5 – 6 – 6.5 – 7 – 7.5 – 8 The Gen III module is a more load sensitive module then the Gen ll and will have the appearance that different gears result is different light behavior; this is true as this unit has the ability to adjust more throughout different gearing and loads. Please note, after your settings are adjusted and 4 seconds elapse, you may see that the lights go higher during operation then the value you selected. This is normal and is an indication of our measured duty cycle. Ex. If you select number 4 as a value, you may see under driving conditions the lights on that circuit go to 7. It’s recommended that you tune following the instruction after each feature. Base lines (initial settings) can be used but are not a true method of tuning do to the wide range of inconsistent downloads and download programs. Be safe and use caution when tuning your motorcycle, always tune on a safe and closed coarse. This unit has advanced tuning capabilities and requires a higher degree of tuning knowledge. If you are uncomfortable in your ability to properly tune the unit it is recommended to seek experienced help. All features can be adjusted by feel. We’ve been asked if one could set the unit on the tank so that they could look at the lights as they function. This is not recommended do to the safety concerns that could arise from taking your eyes off the road and looking down at the unit. Main Features, Note, Main features are set at an average base line for all bikes. Adjust in numbered sequence. 1. Green Light only Feature: The green light works as if it were a pilot or “fuel screw in a carburetor, this is the fuel that is controlled at idle and part throttle positions. The green adjustment should be adjusted as follows, Starting from 0 or far left ride the bike concentrating on part throttle you should feel the bike in a lean condition as explained in “Lean Conditions” adjust by pressing mode until the green flashes, pressing the plus button increases fuel. Use small adjustments of 1-2 light movements, do this until the surging and jerkiness just disappear and smoothness and response are best. 2. Yellow Light Only Feature: Feature The yellow light works like an accelerator pump in a carburetor, this adds fuel over and above the green light under heavy or quick acceleration and helps in the M/C’s ability to accelerate faster and harder. Adjusting this feature can also be done by feel. Start adding fuel by selecting the mode button by pressing it twice; this brings up the yellow for adjustment. Increase the fuel to this circuit until the bike pulls the strongest and hardest. Over fueling will result in a bike that starts to fall on it face and by having excessive black smoke. 3. Red Light Only Feature: The red light works as if it were a main jet in a carburetor and applies fuel at WOT (wide open throttle). The red light works by it’s self and while the red is on the others are off. Adjusting this circuit needs to have caution taken, as it requires WOT and an open and safe testing place. This circuit will have a feel of a continuous hard pull when correct and feeling that the bike is getting sluggish when over fueled (too Rich). Secondary Features; Note, Secondary features are set on a default base line. Green / Blue Feature: Adjust only when using Nos The green/blue light controls fuel delivery for the Nitrous system when activated. When the Nitrous button is pushed the Gen III instantly adds fuel from the injectors for pin point fuel addition and increased power over other Nitrous systems on the market. The fuel addition of this circuit goes from 8% to 23% so every LED light increase results in a 1% change in fuel delivery. For 20 HP shots we want to start out with a 10% increase (light number 2), for 30 HP a 15% increase is needed (light number 4). It’s better and safer to start higher and work down. 4. Yellow / Blue Feature: For added adjustability we supplied you with the ability to set the sensitivity or “load” at which the yellow circuit is applied, this option comes up as Yellow / blue on the module. The default setting on this is light 4 or half way. When adjusted all the way to the left sensitivity is at it’s greatest or load at the lowest, which makes the circuit come on sooner. It is not recommended for most application to have the sensitivity to low or fuel economy will suffer drastically. Good acceleration fuel (yellow) should come on under moderate to heavy throttle opening, having the yellow come on under slight tip in is not recommended for optimum performance. (Yellow Yellow light only adjusts fuel, Yellow / Blue changes the sensitivity at which it comes on) 5. Red / Blue Feature: For Added adjustability we supplied you with the ability to set the point at which the red or main fuel comes on. This is defined by a combination of P/W (pulse width) and rpm. In different gears this circuit comes on at different points. We don’t want the red circuit to come on prematurely or performance and fuel economy will suffer. A recommended setting is to have the Red fuel come on at or above 3700 rpm’s. (Red light only changes fuel, Red / Blue changes the sensitivity at which it comes on) Tuning Issues Explained! You now have a state-of-the-art fuel control for your Victory motorcycle and it works best when fitted with the right combination of parts. When this product is used with the correct combination you will experience better results over any other fuel control unit available. Gen III, just like Gen II, is built for easy do-it-yourself installation and tuning without the need for expensive installs or Dyno adjustments. I’ve always had a straightforward approach to Motorcycle tuning and relating to my customers. Some may feel that the next couple of paragraphs aren’t necessary. I feel you need to know all you can about your bike and the money you spend on it. If all else fails in an attempt to tune your bike properly and have it run at its peak performance you may have other problems. Please keep a mental note of the following issues: - A (not ideal) combination of parts can dramatically effect performance and drive qualities. Making more power requires more fuel! The need to take away fuel just tells us one thing...you have a bad combination of parts installed that aren’t working properly together. Some (not ideal) combinations are as follows. - Very open exhausts (ones with no baffles or too large of a diameter pipe). - Poor air box designs (open air boxes with no radius in the lower plate). - Too large of a cam profile (ones that have too much overlap and duration). - Not enough compression for the performance upgrades. - Or a combination these together We’re seeing a fast-growing parts and exhaust system aftermarket for Victory. Many of the available parts were not designed or tested to work in conjunction with other bolt-on items and goodies. Some just won’t work at all together! That exhaust that looks and sounds great, that cam that claims all sorts of gains, that air box that looks more appealing, those are some of the items that combined together can create total HAVOC on the way your bike runs and performs, leaving you on your own to fix the problem. What can be done? We’ll I could write a book explaining all the pro’s and con’s but that would change monthly and be extensive. Your best bet is to choose wisely and do research. If you’re experiencing some of these symptoms, you can add Band-Aids to slow the bleeding or fix the true problem. Your best bet is to select optimum performing parts and packages like those at www.lloydz.com. A BIKE THAT IS LEAN WILL HAVE THE FOLLOWING CONDITIONS: - Backfiring or popping out exhaust after roll-out ( Ex. leaks will also do this and Freedom Motor Ex gaskets are hard and don’t seal well. Use Part # 5211770 they are softer and seal better) Surging @ Cruising speeds or light throttle Overly sensitive throttle feel (Jerky) Coughing through Intake Excessively high Fuel Mileage (Stg 1 Above 45mpg Stg 2 Above 42) Excessive Heat from Motor White to light tan spark plug insulator Pinging or Detonation under roll-on A BIKE THAT IS RICH WILL HAVE THE FOLLOWING CONDITIONS. - Poor Fuel mileage under normal riding conditions - Heavy soot build up on pipes or fenders - Lazy or Mushy full throttle feel - Revert to a Stock Download before tuning with the VFC If a Stock Download is present and these conditions persist: the Air box design, too open an exhaust, too large a cam or a bad oil temp sensor or combination of 2 or more may be to blame For further Technical support e-mail us at [email protected] Please Note the Gen III label: The combination, Lloydz Logo and Victory Motor with Script is a free label upgrade Installed at no charge to you. (Standard labels are clear) If you would prefer a Standard label over the nicely decorated One it can be supplied by contacting us.


