1
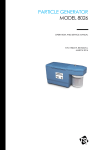
Respirator Fit Testing
Model 8095
N95-Companion™ Mask Fit Tester to the
PORTACOUNT® Plus Respirator Fit Tester
Operation and Service Manual
1980308, Revision J
January 2010
Copyright©
TSI Incorporated / November 1997–2010 / Revision J / All rights reserved.
Address
TSI Incorporated / 500 Cardigan Road / Shoreview, MN 55126 / USA
Fax No.
(651) 490-3824
LIMITATION OF WARRANTY AND LIABILITY (effective July 2000)
Seller warrants the goods sold hereunder, under normal use and service as described in the operator's manual,
shall be free from defects in workmanship and material for (24) months, or the length of time specified in the
operator's manual, from the date of shipment to the customer. This warranty period is inclusive of any
statutory warranty. This limited warranty is subject to the following exclusions:
a.
Hot-wire or hot-film sensors used with research anemometers, and certain other components when
indicated in specifications, are warranted for 90 days from the date of shipment.
b.
Parts repaired or replaced as a result of repair services are warranted to be free from defects in
workmanship and material, under normal use, for 90 days from the date of shipment.
c.
Seller does not provide any warranty on finished goods manufactured by others or on any fuses,
batteries or other consumable materials. Only the original manufacturer's warranty applies.
d.
Unless specifically authorized in a separate writing by Seller, Seller makes no warranty with respect to,
and shall have no liability in connection with, goods which are incorporated into other products or
equipment, or which are modified by any person other than Seller.
The foregoing is IN LIEU OF all other warranties and is subject to the LIMITATIONS stated herein. NO
OTHER EXPRESS OR IMPLIED WARRANTY OF FITNESS FOR PARTICULAR PURPOSE OR
MERCHANTABILITY IS MADE.
TO THE EXTENT PERMITTED BY LAW, THE EXCLUSIVE REMEDY OF THE USER OR BUYER,
AND THE LIMIT OF SELLER'S LIABILITY FOR ANY AND ALL LOSSES, INJURIES, OR DAMAGES
CONCERNING THE GOODS (INCLUDING CLAIMS BASED ON CONTRACT, NEGLIGENCE, TORT,
STRICT LIABILITY OR OTHERWISE) SHALL BE THE RETURN OF GOODS TO SELLER AND THE
REFUND OF THE PURCHASE PRICE, OR, AT THE OPTION OF SELLER, THE REPAIR OR
REPLACEMENT OF THE GOODS. IN NO EVENT SHALL SELLER BE LIABLE FOR ANY SPECIAL,
CONSEQUENTIAL OR INCIDENTAL DAMAGES. SELLER SHALL NOT BE RESPONSIBLE FOR
INSTALLATION, DISMANTLING OR REINSTALLATION COSTS OR CHARGES. No Action,
regardless of form, may be brought against Seller more than 12 months after a cause of action has accrued.
The goods returned under warranty to Seller's factory shall be at Buyer's risk of loss, and will be returned, if
at all, at Seller's risk of loss.
Buyer and all users are deemed to have accepted this LIMITATION OF WARRANTY AND LIABILITY,
which contains the complete and exclusive limited warranty of Seller. This LIMITATION OF WARRANTY
AND LIABILITY may not be amended, modified or its terms waived, except by writing signed by an Officer
of Seller.
Service Policy
Knowing that inoperative or defective instruments are as detrimental to TSI as they are to our customers, our
service policy is designed to give prompt attention to any problems. If any malfunction is discovered, please
contact your nearest sales office or representative, or call TSI's Customer Service department at (800) 8742811 (USA) or (001 651) 490-2811 (International) or visit www.tsi.com.
Patents
N95-Companion is patented under U.S. Patent No. 6,125,845.
Trademarks
TSI, TSI logo, PORTACOUNT and N95-Companion are trademarks of TSI Inc. Tygon is a registered
trademark of Norton Performance Plastics. Windows is a registered trademark of Microsoft
Corporation.
CONTENTS
Safety Information ............................................................................. iii
Chapters
1. Unpacking and Parts Identification ........................................... 1
Unpacking the N95-Companion™ Mask Fit Tester Kit .................. 1
Parts Identification for the N95-Companion™ Mask Fit Tester ..... 2
Replacement Parts and Supplies .................................................. 6
2. Setting Up the Model 8095 N95-Companion™ Mask Fit
Tester ............................................................................................ 7
Introduction .................................................................................... 7
Selecting a Fit Testing Location .................................................... 7
Setting up the Model 8026 Particle Generator .............................. 8
Setting up the N95-Companion™ Mask Fit Tester........................ 9
Installing the Probe ...................................................................... 12
Switching the Hardware Configuration from the
N95-Companion™ Mask Fit Tester to the PORTACOUNT®
Plus Respirator Fit Tester ........................................................ 14
3. Fit Testing with the N95-Companion and the PORTACOUNT®
Plus Respirator Fit Tester......................................................... 17
Introduction .................................................................................. 17
Fit Test Procedure ....................................................................... 17
4. Maintenance ............................................................................... 21
Overview...................................................................................... 21
Daily Checks................................................................................ 21
Periodic Maintenance .................................................................. 23
5. Troubleshooting ........................................................................ 33
A. Specifications ............................................................................ 37
Visit the TSI web site at www.tsi.com.
i
(This page intentionally left blank)
ii
SAFETY INFORMATION
Although the supply voltage to the Model 8095 N95-Companion™ Mask Fit
Tester is low-voltage, the instrument contains an internal high-voltage
converter. To minimize the danger of shock, always unplug the instrument
before removing the cover for maintenance or replacement of parts.
Internal High Voltage Warning Label
Warning Labels on bottom of N95-Companion™ Mask Fit Tester
iii
(This page intentionally left blank)
iv
Chapter 1
Unpacking and Parts Identification
Unpacking the N95-Companion™ Mask Fit Tester Kit
Carefully unpack the Model 8095 N95- Companion™ Mask Fit Tester and
accessories from the carrying case. Use the tables and illustrations below to
make certain that there are no missing components. Contact TSI immediately
if anything is missing or damaged.
Table 1-1: Model 8095 N95 Companion™ Mask Fit Tester Kit
Component Parts
Quantity
1
1
1
1
1
1
1
1
1
1
1
1
1
100
100
1
1
1
1
1
Item Description
N95-Companion™ Mask Fit Tester
Sampling pendant
Pendant interconnect tube
Pendant sample tube
N95-Companion interconnect tube
N95-Companion interconnect cable
Water trap
Model 8095 Operation and Service
Manual
Particle generator
Particle generator power cord
Package of 100 salt tablets
Model 8026 Particle Generator
Operation and Service Manual
Probe insertion tool set (1 pair)
Sample probes
Push nuts
Water trap sponge, extra
PORTACOUNT® Technical Reference and
FitPlusTM Fit Test software CD
Neck strap
Syringe, 10 cc
3” Tygon® tubing
Part/Model
8095
801500
801502
801501
3900049
1303522
801503
1980308
8026
1303567
2918035
1980319
801549
n/a*
n/a*
n/a
1083506
2913124
n/a
n/a
*Reorder refill kit 8025-N95R which includes 500 sample probes and 500
push nuts
Tygon® is a registered trademark of Norton Performance Plastics.
1
Parts Identification for the N95-Companion™ Mask Fit Tester
Figures 1-1 through 1-9 identify the parts of the Model 8095
N95-Companion™ Mask Fit Tester. Please become familiar with these
components before proceeding.
Neck Strap
Sampling
Pendant
PORTACOUNT®
Plus
Respirator
Fit Tester
N95-Companion™
Mask Fit Tester
N95-Companion™
Fit Tester
Interconnect Tube
Water Trap
Pendant
Sample Tube
Pendant
Interconnect
Tube
Figure 1-1. N95-Companion™ Mask Fit Tester, PORTACOUNT® Plus
Respirator Fit Tester, and Sampling Pendant
2
Chapter 1
Port and
Connector to
Sampling
Pendant
Port to
PORTACOUNT®
Plus Respirator
Fit Tester
Figure 1-2 Model 8095 N95-Companion™ Mask Fit Tester–
Top Front View
Connector for
Factory Use
Only
Particle
Classifier
Check
Button
Connector to
PORTACOUNT®
Respirator Fit
Tester
Figure 1-3: Model 8095 N95-Companion™ Mask Fit Tester–
Top Back View
Unpacking and Parts Identification
3
Figure 1-4: Model 8095 N95-Companion™ Mask Fit Tester–
Bottom View
Figure 1-5: Model 8026 Particle Generator
4
Chapter 1
Figure 1-6: Sampling Pendant
Probe Insertion
Tools
Sampling
Probes
Push Nuts
Figure 1-7: N95 Probe Insertion Kit
Unpacking and Parts Identification
5
Pendant
Interconnect
Tube
Pendant
Sample Tube
N95-Companion™
Fit Mask Tester
Interconnect Tube
N95- Companion™
Fit Mask Tester
Interconnect Cable
Figure 1-8: Tubes and Cables
Figure 1-9: Salt Tablets
Replacement Parts and Supplies
The following items are sold by TSI as replacement parts and supplies for
the Model 8095 N95-Companion™ Fit Mask Tester.
Table 1-2: Replacement Parts and Supplies
Quantity
Item Description
1
Sample probe refill kit: includes 500 sample
probes and 500 push nuts
1 package
Salt tablets (100 each)
6
Part/Model
8025-N95R
2918035
Chapter 1
Chapter 2
Setting Up the Model 8095 N95-Companion™
Mask Fit Tester
Introduction
Before you can begin fit testing with the PORTACOUNT® Plus Respirator Fit
Tester and N95-Companion™ Mask Fit Tester, you must:
•
•
•
•
Select a fit testing location
Set up the particle generator
Set up the instrument
Insert the probe into the type of mask you wish to test
You also must have the Model 8020 PORTACOUNT® Plus fit tester with the
Revision A modification to use the N95-Companion™ fit tester. Look for
“8020A” on serial number tag.
Refer to the following instructions to complete the set-up procedures.
Selecting a Fit Testing Location
To obtain valid results using the N95-Companion™ fit tester with the
PORTACOUNT® Plus fit tester for fit testing, you must conduct the fit tests in
a suitable location while running the supplied Model 8026 Particle
Generator.
The N95-Companion™ fit tester uses a small portion of the room aerosol for
fit testing. To obtain consistent and repeatable fit tests, TSI recommends that
you operate the particle generator to supplement the naturally occurring
room aerosol. For the generator to function properly, you must conduct the
fit tests in an enclosed area. A medium-sized room is normally a suitable
location. The particle generator does not function efficiently in an open area
or a very large room.
7
Setting up the Model 8026 Particle Generator
The purpose of the particle generator is to supplement the naturally
occurring particles in the room environment. The N95-Companion™ fit
tester requires a minimum count of 70 particles/cc to operate. The target is
100 to 300 particles/cc for optimal performance.
Follow the steps below to set up the particle generator:
1.
Fill the reservoir with clean tap water to the fill line. You may use hot
water to help the salt tablet dissolve more quickly.
2.
Drop one salt tablet into the reservoir. Each tablet contains 1.0 grams of
salt. Break the tablet before dropping it into the water to dissolve it
more quickly.
3.
Place the temporary cover tightly on the reservoir and shake it gently to
dissolve the salt tablet.
4.
Once the tablet is dissolved, remove the temporary cover and screw the
reservoir into the particle generator.
5.
Place the particle generator at least five feet away from the N95Companion™ fit tester and PORTACOUNT® Plus fit tester. Make sure
the ventilation louvers on the back and bottom of the generator are not
obstructed, as this could cause the instrument to overheat.
!
6.
Caution
Do not place the particle generator on the table. The
internal vibrations in the generator will cause it to move
and eventually fall off the table.
Locate the power cord and connect it to the particle generator and to a
grounded wall outlet. Turn on the power to the generator. The power
switch is located next to the power cord receptacle.
You must run the particle generator in the testing room, with the door
closed, for at least 15 minutes before you begin fit testing to allow the
particle count to stabilize. You must operate the generator in an upright
position at all times, and leave it running until all fit tests for the day are
complete.
One reservoir full of salt solution will last from 8 to 16 hours, depending on
the generator setting. Refer to the Model 8026 Particle Generator
Operations Manual for information on changing the output setting.
8
Chapter 2
You can save and reuse the solution if you wish. However, do not mix old
solution with fresh solution. If you need to mix new solution, first discard
whatever remains in the reservoir.
If you wish to reuse solution, be sure to detach the reservoir from the
generator, cover it tightly with the temporary cover, and store it in its
designated space inside the carrying case. Never attempt to store the particle
generator in the carrying case with a full or partially filled reservoir
attached, as the solution will leak out and damage the generator.
Setting up the N95-Companion™ Mask Fit Tester
1. If this is the first time you are setting up the instrument, remove the
rubber plugs from the left and right sides of the PORTACOUNT® Plus
Respirator Fit Tester to allow it to lock into place on top of the N95Companion™ Mask Fit Tester.
Place the PORTACOUNT® Plus Respirator Fit Tester on top of the N95Companion™ case. When properly positioned, the PORTACOUNT® Plus
Respirator Fit Tester will lock into place as the spring clips on the cover
of the N95-Companion™ Mask Fit Tester connect with the base of the
PORTACOUNT® Plus Respirator Fit Tester.
Remove
Rubber Plug
Here
2.
Attach the pendant sample tube, using the ends of the tube that are of
equal lengths, to the sampling pendant. The tube barbs are color coded
to the tubing colors (blue-to-blue and clear-to-clear).
Setting up the Model 8095 N95-Companion™ Mask Fit Tester
9
Pendant
Sample Tube
Pendant
Interconnect
Tube
3.
Attach the pendant interconnect tube to the sampling pendant.
4.
Attach the water trap, using the supplied short tubing, to the N95Companion™ Mask Fit Tester sampling port. This is the left-most
barbed fitting on the front of the N95-Companion™ Mask Fit Tester.
5.
Attach the loose end of the pendant interconnect tube to the water trap.
Short Tubing
Water Trap
6.
10
Attach the cable connector to the N95-Companion™ Mask Fit Tester.
Chapter 2
7.
Connect the N95-Companion™ Mask Fit Tester to PORTACOUNT® Plus
Respirator Fit Tester interconnect tube between the N95-Companion™
Mask Fit Tester output (the right-most barbed fitting on the front of the
unit) and the PORTACOUNT® Plus Respirator Fit Tester sample input
(marked "S" on the front of the PORTACOUNT® Plus Respirator Fit
Tester).
Interconnect
Tube
8.
Connect the N95-Companion™ Mask Fit Tester interconnect cable from
the accessory port on the back of the PORTACOUNT® Plus Respirator Fit
Tester to the matching port on the back of the N95-Companion™ Mask
Fit Tester. The cable is the same on both ends.
Interconnect
Cable
This Port For
Factory Use
Only
Note: The black port on the back of the N95-Companion™ Mask Fit
Tester is used for factory calibration only.
Setting up the Model 8095 N95-Companion™ Mask Fit Tester
11
Installing the Probe
1.
Select the mask you wish to test.
2.
Slide the sampling probe onto the piercing tool. As the pointed end of
the piercing tool is very sharp, be extremely careful when handling it!
Sampling
Probe
3.
Choose a location on the mask that is in front of the person's
nose/mouth region. Avoid seams and folds in the mask.
4.
Pierce the mask at the selected location, using the piercing tool with the
loaded sampling probe. Be sure to pierce the mask from the inside!
Push Nut
Positioned on
Anvil Tool
Sampling
Probe Pushed
Through Mask
12
Chapter 2
5.
Push the sampling probe through the mask until the end of the tool point
is visible from the outside of the mask. Leave a few millimeters of the
tool point visible.
6.
Place the push nut on the anvil tool with the "dished" side up. A magnet
prevents the push nut from falling off.
7.
Position the anvil tool, with the loaded push nut, over the protruding
point. The mask should now be pinched between the two tools.
8.
Press the two tools firmly together to force the push nut as far as
possible onto the probe. The mask material should be tightly pinched
and the mask, sampling probe, and push nut should be joined together
as illustrated.
Push the Tools
Together to
Fasten the
Probes
9.
Inspect the sampling probe to be sure it is not plugged. Try to rotate the
probe with your fingers. If it moves freely, use the probe insertion tool
kit to press the push nut firmly onto the sampling probe and pinch the
mask material more tightly.
Setting up the Model 8095 N95-Companion™ Mask Fit Tester
13
Note:
Once you install a sampling probe into a disposable mask, the mask
cannot be used for respiratory protection. Probed masks are to be
used for quantitative fit testing only. Discard each probed
disposable mask after a fit test is completed.
Switching the Hardware Configuration from the N95Companion™ Mask Fit Tester to the PORTACOUNT® Plus
Respirator Fit Tester
The following steps describe how to convert from N95-Companion™ Mask
Fit Tester fit testing mode to PORTACOUNT® Plus Fit Tester fit testing mode.
1.
Disconnect the N95-Companion™ Mask Fit Tester interconnect cable
from the back connector on the PORTACOUNT® Plus Fit Tester.
N95-Companion™
Mask Fit Tester
Interconnect Cable
14
Chapter 2
Note: If the PORTACOUNT® fit tester is turned on when the cable is
disconnected, the PORTACOUNT® fit tester screen will go blank for
several seconds, and then turn back on. This is normal. The
PORTACOUNT® fit tester detects that the N95-Companion™ Mask Fit
Tester is no longer connected and resets itself with new timing
parameters.
2.
Disconnect the pendant interconnect tube on the front of the N95Companion™ Mask Fit Tester.
Pendant
Interconnect
Tube
3.
Disconnect the N95-Companion™ Mask Fit Tester interconnect tube.
N95-Companion™
Mask Fit Tester
Interconnect Tube
Setting up the Model 8095 N95-Companion™ Mask Fit Tester
15
4.
If desired, detach the PORTACOUNT® fit tester from the N95Companion™ Mask Fit Tester. Using your thumbs, pull outward on the
two spring clips located on the base of the PORTACOUNT® fit tester,
while gently lifting the PORTACOUNT® fit tester up.
5.
Attach the standard PORTACOUNT® fit tester twin-tube assembly to the
blue and clear ports on the front of the PORTACOUNT® fit tester. The
PORTACOUNT® fit tester is now ready for fit testing respirators with
class 99 or class 100 filters.
Standard
®
PORTACOUNT
Fit Tester Twin
Tube Assembly
16
Chapter 2
Chapter 3
Fit Testing with the N95-Companion™ Mask
Fit Tester and the PORTACOUNT® Plus
Respirator Fit Tester
Introduction
Before you begin fit testing, during the time the particle generator is
stabilizing the room environment, turn on the PORTACOUNT® Plus Respirator
Fit Tester and allow it to warm up. Be sure to perform the daily checks!
Refer to Chapter 4, Maintenance, for daily check instructions.
If your fit test subject is a smoker, make sure that he or she has not smoked
for at least half an hour before starting the fit test.
Note: The N95-Companion™ Mask Fit Tester has no power supply of its
own, but is powered by the PORTACOUNT® Plus Respirator Fit
Tester. Because the N95-Companion™ Mask Fit Tester increases the
load on the PORTACOUNT® Plus fit tester, use the AC adapter
whenever possible for your power supply. If you choose to use the
optional battery pack, be aware that the battery life is significantly
reduced when it must supply power for both instruments.
A maximum fit factor of 200 can be displayed when you use the N95Companion™ Mask Fit Tester and the PORTACOUNT® Plus fit tester
together. If you require a higher fit factor, you must use the PORTACOUNT®
Plus fit tester without the N95-Companion™ Fit Tester.
Note: Fit testing of class 95 respirators requires the use of the N95Companion™ Mask Fit Tester. Class 99 and class 100 respirators
should be fit tested with the PORTACOUNT® fit tester alone.
Fit Test Procedure
1. Have the fit-test subject hang the N95-Companion™ Mask Fit Tester
sampling pendant around his or her neck, adjusting the neck strap on the
assembly to a comfortable position. Make sure the TSI logo label is
facing outward. The sampling pendant should be positioned high
enough so that the tubing does not pull the mask off the person’s face.
2.
Attach the sampling tube (clear sample line) from the pendant to the
mask sampling probe. Make sure you do this before the subject dons the
mask.
17
3.
Have the subject don the mask without assistance. Fit test results
depend on the subject knowing how to properly don the mask. All
subjects should be trained in proper mask-donning techniques before
being fit tested. Do not allow the subject to adjust the mask during the
exercises, as this invalidates previous results.
4.
Start the FitPlus™ for Windows® fit test process. (If you are not using
FitPlus™ for Windows® software, refer to the PORTACOUNT® Plus
Respirator Fit Tester Operation Manual for alternate procedures. Also,
only the basic fit test steps are provided here. Refer to the FitPlus™ Fit
Test Software for Windows® online help for detailed information.)
a. Select the test subject from the People database. Create a new
record if necessary. Click NEXT.
b. Select the respirator to be used from the Respirator database. Click
NEXT.
c. Type in the mask size, and check that the displayed pass/fail level
and exercise protocol are correct. Click NEXT.
d. Click START to begin the fit test.
18
Chapter 3
5.
Have the test subject follow the exercises one after another when
prompted by the software. Each exercise takes approximately 90
seconds to complete. When the test is complete, the overall fit factor is
displayed on the screen.
6.
Review the results.
a. If the fit test passed, issue that exact size and model respirator to the
test subject.
b.
7.
If the fit test failed, determine the reason and repeat the test. Some
common reasons for failure are: incorrect mask size for test
subject; cigarette smoking less than an hour before the test;
incorrect mask donning technique.
If you are fit testing with a disposable respirator, discard it when the fit
test is complete. Probed respirators are intended for fit testing only and
are never to be reused. You may be able to sanitize and reuse other
types of respirators. Contact the respirator manufacturer for specific
information.
Fit Testing with the N95-Companion™ Mask Fit Tester and the
PORTACOUNT® Plus Respirator Fit Tester
19
(This page intentionally left blank)
20
Chapter 3
Chapter 4
Maintenance
Overview
The N95-Companion™ Mask Fit Tester and PORTACOUNT® Plus Respirator
Fit Tester both require daily and periodic maintenance. Refer to the
PORTACOUNT® Plus Respirator Fit Tester Operation and Service Manual for
PORTACOUNT® Plus Respirator Fit Tester maintenance information. The
N95-Companion™ Mask Fit Tester maintenance information appears below.
Daily Checks
The daily checks are designed to determine if the instrument is working
properly. They must be done in the order specified. There are four daily
checks:
• Particle check
• Classifier check
• Zero check
• Maximum fit factor check
Note:
FitPlus™ for Windows® software can be used to automate the daily
checks if desired.
Performing the Particle Check
After you set up the N95-Companion™ Mask Fit Tester and
PORTACOUNT® Plus Respirator Fit Tester, run the particle generator
for at least 15 minutes, touch the count switch on the
PORTACOUNT® Plus Respirator Fit Tester. The concentration
number will appear in the PORTACOUNT® Plus Respirator Fit Tester
display. You must have a particle count of at least 70 to pass this
test.
Note: The N95-Companion™ Mask Fit Tester will not operate at
concentrations below 70 particles per cc. Do not be
concerned if concentrations are higher than 250 to 300
particles/cc. This may simply indicate a high concentration
of naturally occurring aerosol. Also, if concentrations are
this high, you may be able to operate the particle generator
at a lower setting, or not at all. Refer to the Model 8026
Particle Generator Operation and Service Manual for more
information.
21
Performing the Classifier Check
After you perform the particle check with the PORTACOUNT® Plus
Respirator Fit Tester still in the count mode, press and hold the
classifier check button on the back of the N95-Companion™ Mask
Fit Tester for a minimum of 15 seconds. This disables power to the
particle classifier. The PORTACOUNT® Plus Respirator Fit Tester
display should gradually return to a count of 0.0. This verifies that
there are no leaks in the instrument and that the classifier is
functioning properly.
Classifier
Check Button
Note: Do not be concerned with an occasional 0.6 particle/cc
reading. However, if the display reads 1.2 particles/cc or
higher, you may need to return the N95-Companion™
Mask Fit Tester to TSI for servicing or repair. Refer to
Chapter 5, “Troubleshooting,” for help in diagnosing the
problem before you return the instrument to TSI.
Performing the Zero Check
Put the PORTACOUNT® fit tester in count mode. You should see a
reading greater than 70 particles/cc. Attach the small HEPA filter
provided with the PORTACOUNT® fit tester to the clear sample hose
coming out of the sampling pendant. The particle count should drop
to zero within 30 seconds to pass this test. An occasional reading of
0.6 is acceptable, but the display should read 0.0 most of the time.
If a zero reading cannot be achieved, make sure all tubing is
properly attached. Check for leaks where the tubing connects to a
barb. Try a different filter or put two filters in-line if nothing else
works.
22
Chapter 4
Performing the Maximum Fit Factor Check
Make sure all previous checks have been completed successfully
before proceeding.
Put the PORTACOUNT® fit tester into fit test mode. If the small
HEPA filter supplied with the PORTACOUNT® fit tester is not
already attached to the sample hose coming out of the sampling
pendant, attach it now. Do not proceed until the HEPA filter has
been on the sample hose for at least 30 seconds.
Start a fit test by pressing the Test Start/Stop key on the
PORTACOUNT. This causes the instrument to do a fit test on the
HEPA filter, thereby simulating a perfect respirator. The result
should be a very high fit factor of at least 200. A fit factor of 200 is
the highest number that can be displayed when N95-Companion™
Mask Fit Tester is in use. If the instrument is being used without
software, the word “Fit Factor” will flash when a fit factor over 200
is computed.
A value below 10 suggests that the switching valve inside the
sampling pendant is stuck on the ambient side. See the chapter on
maintenance.
A “Low Particle Count” message indicates that the valve inside the
sampling pendant is stuck on the sample (mask) side. See the
chapter on maintenance.
A value between 10 and 200 indicates a leak someplace in the
system. Inspect all tubing and hose connections.
Periodic Maintenance
The following components of the N95-Companion™ Mask Fit Tester
require periodic maintenance.
•
•
•
•
Flexible tubing
Pendant switching valve
Water trap
Particle classifier
There are no other user-serviceable components inside the N95Companion™ Mask Fit Tester. Do not attempt to adjust any components
except those described in this manual or you may invalidate your warranty.
In addition to the procedures outlined below, TSI recommends annual
factory service for the N95-Companion™ Mask Fit Tester.
Maintenance
23
Pendant Switching Valve
To perform the purging procedure, you will need these tools and
supplies:
•
Small dish or cup of warm water
•
TSI purge kit
1.
Assembling the valve purge kit:
2.
24
•
Remove the cover from the syringe tip.
•
Press the 3” tube onto the syringe tip.
Filling the valve purge syringe with water:
•
Fill the particle generator cup up to the line with warm
water.
•
Draw a full syringe of water from the cup.
Chapter 4
3.
Preparing the fully assembled N95-Companion™ Mask Fit
Tester for the purge procedure:
•
4.
Maintenance
Disconnect the main air sample tube.
To purge the mask sample side (silver connector), do the
following:
•
Connect the valve purge syringe to the (now available)
sample connector.
•
With the PORTACOUNT® fit tester and N95-Companion™
Mask Fit Tester turned off, force the entire contents
through pendant, you will notice the mask sample side
draining.
25
5.
26
To purge the ambient side (blue connector), do the following:
•
Refill the valve purge syringe with warm water and
reconnect it to the pendant as before.
•
Turn on the PORTACOUNT® fit tester and N95Companion™ Mask Fit Tester.
•
After the PORTACOUNT® fit tester has completed the initial
countdown, press “start/ test” and begin to force the entire
contents through the pendant—you will notice the ambient
side draining for the first 15 seconds followed by the mask
side draining.
Chapter 4
6.
7.
8.
Clear the remaining moisture out of both sample sides with
forced air:
•
The mask sample side can be done with the
PORTACOUNT® fit tester and N95-Companion™ Mask Fit
Tester turned off.
•
The ambient side must be done in the same sequence as
described in step 5 for purging the valve.
If either side did not appear to allow purge water to run freely:
•
Repeat steps 2 though 6.
•
If problems persist send the unit in for service.
Re-assemble the N95-Companion™ Mask Fit Tester sample
tube back onto the pendant as before, and discard the purge
water.
Note: Save the valve purge syringe for future use.
9.
This procedure is intended to remove salt build-up from N95Companion™ Mask Fit Tester new and old style pendant
valves (but not PORTACOUNT® fit tester) it is recommended
that this procedure be done monthly or more often depending
on frequency of use.
Water Trap
The water trap contains a sponge to absorb the condensation that
occurs during fit testing. The trap requires very little maintenance
under normal operating conditions.
Maintenance
27
The transparent cover on the water trap allows you to visually
inspect the condition of the sponge and the trap's interior. If you
wish to clean the interior or clean/replace the sponge:
1.
Remove the two screws that hold the cover in place and
remove the cover, along with the gasket.
Water Trap
2.
Clean the trap and sponge with alcohol to sterilize them.
3.
Dry the trap and sponge thoroughly before reassembling them
to prevent the growth of molds.
One extra sponge is included with the N95-Companion™ Mask Fit
Tester. You can order additional sponges from TSI if necessary.
Particle Classifier
The particle classifier requires annual cleaning under normal usage
conditions. TSI recommends that the N95-Companion™ Mask Fit
Tester receive factory service each year. It is best (but not a
requirement) to send the N95-Companion™ Mask Fit Tester and
the PORTACOUNT® Plus Respirator Fit Tester to TSI at the same
time so the two instruments can be checked out together. A problem
that appears to be caused by the N95-Companion™ Mask Fit Tester
may actually be caused by the PORTACOUNT® Plus Respirator Fit
Tester.
The cleaning procedure that follows should only be attempted in the
event of an instrument malfunction. It is not a substitute for the
recommended annual factory service.
Low particle counts can be caused by a dirty particle classifier;
however, there are several other possible causes that are much more
28
Chapter 4
likely and should be investigated first. Consult the chapter on
troubleshooting for details.
Note:
The technician attempting this procedure must take special
care to make certain that none of the internal tubes become
pinched or blocked when the unit is reassembled. Pinched
tubing is a common problem that will prevent the instrument
from working properly after this procedure is completed.
WARNING
!
Be sure to disconnect the power supply before
beginning this procedure to avoid the risk of electric
shock.
To clean the particle classifier:
1.
Disconnect all tubes and cables from the N95-Companion™
Mask Fit Tester. Remove the top cover by removing the six
screws underneath.
2.
Examine the placement of the thumbscrew clamps on the
particle classifier. The existing clamp locations are selfevident, due to the screw "scoring" marks on the top housing of
the classifier.
3.
Remove each of the three clamps in turn by loosening the
thumbscrews and tilting the clamp until it slides off. Do not
disconnect any tubing or wires.
Thumbscrew
Clamps
Maintenance
29
4.
Remove the silicone tubing from the top of the particle
classifier.
Silicone
Tubing
5.
With the clear tubing still attached, rotate the top housing up
and out, to expose the inside of the particle classifier.
Inside of the
Particle
Classifier
30
Chapter 4
6.
Using a damp (not wet) lint-free cloth, gently wipe off the
interior surfaces of the classifier, removing the accumulated
dust particles.
Clean Both
Surfaces
7.
Make sure the O-ring is properly positioned in the lower
housing groove.
O-ring in
Proper
Position
Maintenance
31
8.
Rotate the upper housing back into position. Note the correct
orientation below.
Correct
Position of
Upper Housing
9.
Replace the three thumbscrew clamps in the original locations.
Do not overtighten! (See step #2 for picture.)
10. Continue to tighten the thumbscrews, in sequence, until they
are finger-tight. Be careful not to tighten any one screw
excessively, as this may cause the cover to twist and produce a
leak.
11. Verify the correct orientation of the top cover, the thumbscrew
clamps, and all the tubing.
12. Attach the silicone tubing to the top of the particle classifier.
Make sure the silicone tubing is not located directly over the
thumbscrew, as it will pinch when the cover is closed. Relocate
the thumbscrew clamp if necessary to avoid any interference.
13. Re-attach the top cover using the six screws.
14. Re-attach all cables and tubes and turn power back on to the
PORTACOUNT® Plus Respirator Fit Tester and N95Companion™ Mask Fit Tester.
15. Perform the daily check procedures to verify that there are no
leaks in the system.
32
Chapter 4
Chapter 5
Troubleshooting
This chapter describes the symptoms, possible causes and recommended
solutions for common problems encountered with the N95-Companion™
Mask Fit Tester. Always perform the daily checks, described in Chapter 4,
“Maintenance,” before you begin troubleshooting. This will help you to
detect most problems quickly.
Note: This information assumes that the PORTACOUNT® Plus Respirator Fit
Tester is operating correctly.
The most recent version of this manual and the Model 8026 Particle
Generator Operation and Service Manual can be found on the TSI website at
www.tsi.com.
Some common problems you may encounter include:
Symptom
Possible Cause
Corrective Action
Low particle
counts
The particle generator is
not running.
Turn on the power to the
particle generator.
______________________
The N95-Companion™ is
connected but the twin tube
is connected directly to the
PORTACOUNT instead of
the N95-Companion.
______________________
The testing room is
inappropriate.
• It is too large
• It is not a closed room
• It has too high an air
exchange rate
______________________
The switching valve inside
the pendant is not
switching.
Check fuse.
______________________
Verify that all tubes are
connected correctly.
______________________
If the room is too large or
not closed, select another
location. If the air
exchange rate is too high,
increase the output of the
particle generator.
______________________
Perform the purge
procedure on the pendant
switching valve. See
Maintenance chapter.
33
Symptom
Possible Cause
Corrective Action
Low particle
counts
(cont.)
The atomizer head on the
particle generator is
clogged.
Clean the atomizer head.
Refer to the maintenance
procedure in the Model
8026 Particle Generator
Operation and Service
Manual.
______________________
Refer to the mixing
instructions in the Model
8026 Particle Generator
Operation and Service
Manual.
______________________
Mix a new batch of
solution and fill the
reservoir.
______________________
Adjust the pressure to a
higher setting, as
necessary. Refer to the
setup procedure in the
Model 8026 Particle
Generator Operation and
Service Manual.
______________________
Perform the particle
classifier maintenance
procedure.
Check the internal and
external tubing for kinks or
other blockage.
______________________
The salt solution is mixed
incorrectly.
______________________
The salt solution reservoir
is empty.
______________________
The particle generator
pressure is set too low.
______________________
The particle classifier is
dirty.
Red status light
A potential problem with
the internal flows in the
N95-Companion™ Mask
Fit Tester.
Unusual fit test
results
The results are unusual
although the fit test
proceeded correctly.
34
Check the interconnect
tube between the N95Companion™ Mask Fit
Tester and the
PORTACOUNT® Plus
Respirator Fit Tester. If the
tube is attached incorrectly,
reattach the tube and run
the fit test again.
Chapter 5
Symptom
Possible Cause
Corrective Action
Zero count above
1.2 particles/cc
Leak in the flow system.
If you recently cleaned the
particle classifier, verify
that the O-ring is in place
and the tubing is connected
correctly.
______________________
Tighten screw and fittings.
______________________
Leak in water trap.
______________________
Restricted flow.
______________________
Pump failure.
______________________
N95-Companion™ Mask
Fit Tester interconnect
cable failure.
Very high zero
count (does not
zero when zero
count switch is
pressed)
Troubleshooting
Water has been drawn into
N95-Companion™ Mask
Fit Tester.
______________________
Check the internal and
external tubing for kinks or
other blockage.
______________________
Return the instrument to
TSI for servicing.
______________________
Make sure the green light
comes on and the pump
turns on when you plug the
N95-Companion™ tester
into the PORTACOUNT®
Plus tester. If not, replace
the N95-Companion™
interconnect cable.
Use water trap.
______________________
Replace sponge with dry
one.
______________________
Dry out N95-Companion™
a) Leave all components
connected including
water trap and N95Companion™
interconnect tube.
b) Let PORTACOUNT®
tester and N95Companion™ tester run
overnight to dry out unit
Repeat zero count
procedure.
35
(This page intentionally left blank)
36
Chapter 5
Appendix A
Specifications
The Model 8095 N95-Companion™ Mask Fit Tester specifications, when it
is used with the Model 8020 PORTACOUNT® Plus Respirator Fit Tester, are
as follows. Specifications are subject to change without notice.
Size
9.5 in. x 7.5 in. x 2.3 in.
(24 cm x 19 cm x 6 cm)
Weight
2 lbs. (0.9 kg)
Fit factor range
1 to 200
Concentration range
0.01 to 5 x 10⁵ particle/cm3
Test particle size
0.04 micrometer (nominal)
Minimum ambient
concentration
70 particles/cm3
Typical fit factor accuracy
±10% of reading
Minimum exercise duration
Approximately 90 seconds
Temperature range
Operation
32 to 100° F (0 to 38° C)
Storage
Flow rate
Carrying case
Size
40 to 160° F (5 to 71° C)
700 cm3/min (nominal)
19 in. x 14 in. x 4.8 in.
(48 cm x 36 cm x 12 cm)
Weight with accessories
and case
Pass/Fail setting
14 lbs. (6.4 kg)
Factory recalibration interval
One year
Warranty
Two years on workmanship and materials
User selectable: 0, 10, 25, 50, 100, 125,
166, or 200
37
(This page intentionally left blank)
38
Appendix A
TSI Incorporated – 500 Cardigan Road, Shoreview, MN 55126 U.S.A
USA
Tel: +1 800 874 2811 E-mail: [email protected]
Website: www.tsi.com
UK
Tel: +44 149 4 459200 E-mail: [email protected]
Website: www.tsiinc.co.uk
France
Tel: +33 491 11 87 64 E-mail: [email protected] Website: www.tsiinc.fr
Germany Tel: +49 241 523030 E-mail: [email protected] Website: www.tsiinc.de
India
Tel: +91 80 41132470 E-mail: [email protected]
China
Tel: +86 10 8260 1595 E-mail: [email protected]
Singapore Tel: +65 6595 6388
E-mail: [email protected]
Contact your local TSI Distributor or visit our website www.tsi.com for more detailed specifications.
P/N 1980308 Rev. J
Copyright © 2010 by TSI Incorporated
Printed in U.S.A