1
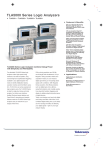
TLA5000 Series
Logic Analyzer
Installation Manual
This document supports TLA System Software Version 5.00
and above.
Warning
The servicing instructions are for use by qualified personnel
only. To avoid personal injury, do not perform any servicing
unless you are qualified to do so. Refer to all safety summaries
prior to performing service.
www.tektronix.com
071-1301-01
Copyright © Tektronix, Inc. All rights reserved. Licensed software products are owned by Tektronix or its
subsidiaries or suppliers, and are protected by national copyright laws and international treaty provisions.
Tektronix products are covered by U.S. and foreign patents, issued and pending. Information in this publication
supersedes that in all previously published material. Specifications and price change privileges reserved.
TEKTRONIX and TEK are registered trademarks of Tektronix, Inc.
Tektronix, Tek, MagniVu, and iView are registered trademarks of Tektronix, Inc.
Contacting Tektronix
Tektronix, Inc.
14200 SW Karl Braun Drive
P.O. Box 500
Beaverton, OR 97077
USA
For product information, sales, service, and technical support:
In North America, call 1-800-833-9200.
Worldwide, visit www.tektronix.com to find contacts in your area.
Warranty 2
Tektronix warrants that this product will be free from defects in materials and workmanship for a period of one (1)
year from the date of shipment. If any such product proves defective during this warranty period, Tektronix, at its
option, either will repair the defective product without charge for parts and labor, or will provide a replacement
in exchange for the defective product. Parts, modules and replacement products used by Tektronix for warranty
work may be new or reconditioned to like new performance. All replaced parts, modules and products become
the property of Tektronix.
In order to obtain service under this warranty, Customer must notify Tektronix of the defect before the expiration of
the warranty period and make suitable arrangements for the performance of service. Customer shall be responsible
for packaging and shipping the defective product to the service center designated by Tektronix, with shipping
charges prepaid. Tektronix shall pay for the return of the product to Customer if the shipment is to a location within
the country in which the Tektronix service center is located. Customer shall be responsible for paying all shipping
charges, duties, taxes, and any other charges for products returned to any other locations.
This warranty shall not apply to any defect, failure or damage caused by improper use or improper or inadequate
maintenance and care. Tektronix shall not be obligated to furnish service under this warranty a) to repair damage
resulting from attempts by personnel other than Tektronix representatives to install, repair or service the product;
b) to repair damage resulting from improper use or connection to incompatible equipment; c) to repair any damage
or malfunction caused by the use of non-Tektronix supplies; or d) to service a product that has been modified or
integrated with other products when the effect of such modification or integration increases the time or difficulty
of servicing the product.
THIS WARRANTY IS GIVEN BY TEKTRONIX WITH RESPECT TO THE PRODUCT IN LIEU OF ANY
OTHER WARRANTIES, EXPRESS OR IMPLIED. TEKTRONIX AND ITS VENDORS DISCLAIM ANY
IMPLIED WARRANTIES OF MERCHANTABILITY OR FITNESS FOR A PARTICULAR PURPOSE.
TEKTRONIX’ RESPONSIBILITY TO REPAIR OR REPLACE DEFECTIVE PRODUCTS IS THE SOLE
AND EXCLUSIVE REMEDY PROVIDED TO THE CUSTOMER FOR BREACH OF THIS WARRANTY.
TEKTRONIX AND ITS VENDORS WILL NOT BE LIABLE FOR ANY INDIRECT, SPECIAL, INCIDENTAL,
OR CONSEQUENTIAL DAMAGES IRRESPECTIVE OF WHETHER TEKTRONIX OR THE VENDOR HAS
ADVANCE NOTICE OF THE POSSIBILITY OF SUCH DAMAGES.
Warranty 9(b)
Tektronix warrants that the media on which this software product is furnished and the encoding of the programs on
the media will be free from defects in materials and workmanship for a period of three (3) months from the date of
shipment. If any such medium or encoding proves defective during the warranty period, Tektronix will provide
a replacement in exchange for the defective medium. Except as to the media on which this software product is
furnished, this software product is provided “as is” without warranty of any kind, either express or implied.
Tektronix does not warrant that the functions contained in this software product will meet Customer’s requirements
or that the operation of the programs will be uninterrupted or error-free.
In order to obtain service under this warranty, Customer must notify Tektronix of the defect before the expiration
of the warranty period. If Tektronix is unable to provide a replacement that is free from defects in materials and
workmanship within a reasonable time thereafter, Customer may terminate the license for this software product
and return this software product and any associated materials for credit or refund.
THIS WARRANTY IS GIVEN BY TEKTRONIX WITH RESPECT TO THE PRODUCT IN LIEU OF ANY
OTHER WARRANTIES, EXPRESS OR IMPLIED. TEKTRONIX AND ITS VENDORS DISCLAIM ANY
IMPLIED WARRANTIES OF MERCHANTABILITY OR FITNESS FOR A PARTICULAR PURPOSE.
TEKTRONIX’ RESPONSIBILITY TO REPLACE DEFECTIVE MEDIA OR REFUND CUSTOMER’S
PAYMENT IS THE SOLE AND EXCLUSIVE REMEDY PROVIDED TO THE CUSTOMER FOR BREACH
OF THIS WARRANTY. TEKTRONIX AND ITS VENDORS WILL NOT BE LIABLE FOR ANY INDIRECT,
SPECIAL, INCIDENTAL, OR CONSEQUENTIAL DAMAGES IRRESPECTIVE OF WHETHER TEKTRONIX
OR THE VENDOR HAS ADVANCE NOTICE OF THE POSSIBILITY OF SUCH DAMAGES.
Table of Contents
General Safety Summary .........................................................................................
Service Safety Summary...........................................................................................
Environmental Considerations ...................................................................................
Preface .............................................................................................................
TLA5000 Series Logic Analyzers .........................................................................
Documentation ...............................................................................................
Basic Installation ...................................................................................................
Check the Shipping List.......................................................................................
Environmental Considerations ...............................................................................
Chassis Ground Connections .................................................................................
Connecting Accessories.......................................................................................
Connecting Probes .............................................................................................
First Time Operation ..........................................................................................
Performing the Incoming Inspection ........................................................................
Backing Up User Files ........................................................................................
Connecting Probes to the Target System ....................................................................
Additional Information........................................................................................
Product Overview ..................................................................................................
Front Panel Controls...........................................................................................
External Connectors ...........................................................................................
Restoring and Installing Software ...............................................................................
Restoring the Hard Disk Image .............................................................................
Reinstalling the Hard Disk Image...........................................................................
Installing the TLA Application Software ..................................................................
Upgrading or Restoring Firmware ..........................................................................
Appendix A: User Service Procedures ..........................................................................
General Care ..................................................................................................
Self Calibration ...............................................................................................
Preventive Maintenance......................................................................................
In Case of Problems ..........................................................................................
Repacking for Shipment .....................................................................................
Appendix B: Accessories and Options ..........................................................................
Standard Accessories .........................................................................................
Optional Accessories .........................................................................................
Options.........................................................................................................
Index
TLA5000 Series Logic Analyzer Installation Manual
iii
v
vi
vii
vii
vii
1
1
1
1
2
4
5
7
7
7
8
9
9
9
11
11
11
14
16
17
17
17
17
19
22
23
23
23
24
i
Table of Contents
List of Figures
Figure i: TLA5000 series logic analyzer....................................................................... vii
Figure 1: Location of the ground connection.................................................................... 2
Figure 2: Accessory connections ................................................................................. 3
Figure 3: Connecting the P64xx logic analyzer probes ........................................................ 5
Figure 4: Power cord connector location ........................................................................ 6
Figure 5: Logic analyzer front panel ............................................................................. 9
List of Tables
Table i: Related Documentation ................................................................................
Table 1: Accessory connection information .....................................................................
Table 2: TLA user file suffixes...................................................................................
Table 3: BIOS Boot settings for reinstalling software from the CD-ROM .................................
Table 4: Failure symptoms and possible causes................................................................
ii
viii
4
12
13
21
TLA5000 Series Logic Analyzer Installation Manual
General Safety Summary
General Safety Summary
Review the following safety precautions to avoid injury and prevent damage to
this product or any products connected to it.
To avoid potential hazards, use this product only as specified.
Only qualified personnel should perform service procedures.
While using this product, you may need to access other parts of a larger system.
Read the safety sections of the other component manuals for warnings and
cautions related to operating the system.
To Avoid Fire or Personal
Injury
Use Proper Power Cord. Use only the power cord specified for this product and
certified for the country of use.
Connect and Disconnect Properly. Do not connect or disconnect probes or test
leads while they are connected to a voltage source.
Ground the Product. This product is grounded through the grounding conductor
of the power cord. To avoid electric shock, the grounding conductor must be
connected to earth ground. Before making connections to the input or output
terminals of the product, ensure that the product is properly grounded.
Observe All Terminal Ratings. To avoid fire or shock hazard, observe all ratings
and markings on the product. Consult the product manual for further ratings
information before making connections to the product.
The inputs are not rated for connection to mains or Category II, III, or IV circuits.
Connect the probe reference lead to earth ground only.
Power Disconnect. The power cord disconnects the product from the power source.
Do not block the power cord; it must remain accessible to the user at all times.
Do Not Operate Without Covers. Do not operate this product with covers or panels
removed.
Do Not Operate With Suspected Failures. If you suspect that there is damage to this
product, have it inspected by qualified service personnel.
Avoid Exposed Circuitry. Do not touch exposed connections and components
when power is present.
Use Proper Fuse. Use only the fuse type and rating specified for this product.
TLA5000 Series Logic Analyzer Installation Manual
iii
General Safety Summary
Do Not Operate in Wet/Damp Conditions.
Do Not Operate in an Explosive Atmosphere.
Keep Product Surfaces Clean and Dry.
Provide Proper Ventilation. Refer to the manual’s installation instructions for
details on installing the product so it has proper ventilation.
Terms in this Manual
These terms may appear in this manual:
WARNING. Warning statements identify conditions or practices that could result
in injury or loss of life.
CAUTION. Caution statements identify conditions or practices that could result in
damage to this product or other property.
Symbols and Terms on the
Product
These terms may appear on the product:
DANGER indicates an injury hazard immediately accessible as you read
the marking.
WARNING indicates an injury hazard not immediately accessible as you
read the marking.
CAUTION indicates a hazard to property including the product.
The following symbols may appear on the product:
iv
TLA5000 Series Logic Analyzer Installation Manual
Service Safety Summary
Service Safety Summary
Only qualified personnel should perform service procedures. Read this Service
Safety Summary and the General Safety Summary before performing any service
procedures.
Do Not Service Alone. Do not perform internal service or adjustments of this
product unless another person capable of rendering first aid and resuscitation is
present.
Disconnect Power. To avoid electric shock, switch off the instrument power, then
disconnect the power cord from the mains power.
Use Care When Servicing With Power On. Dangerous voltages or currents may
exist in this product. Disconnect power, remove battery (if applicable), and
disconnect test leads before removing protective panels, soldering, or replacing
components.
To avoid electric shock, do not touch exposed connections.
TLA5000 Series Logic Analyzer Installation Manual
v
Environmental Considerations
Environmental Considerations
This section provides information about the environmental impact of the product.
Product End-of-Life
Handling
Observe the following guidelines when recycling an instrument or component:
Equipment Recycling. Production of this equipment required the extraction and
use of natural resources. The equipment may contain substances that could be
harmful to the environment or human health if improperly handled at the product’s
end of life. In order to avoid release of such substances into the environment and
to reduce the use of natural resources, we encourage you to recycle this product
in an appropriate system that will ensure that most of the materials are reused or
recycled appropriately.
The symbol shown below indicates that this product complies with the European
Union’s requirements according to Directive 2002/96/EC on waste electrical and
electronic equipment (WEEE). For information about recycling options, check the
Support/Service section of the Tektronix Web site (www.tektronix.com).
Mercury Notification. This product uses an LCD backlight lamp that contains
mercury. Disposal may be regulated due to environmental considerations.
Please contact your local authorities or, within the United States, the Electronics
Industries Alliance (www.eiae.org) for disposal or recycling information.
Restriction of Hazardous
Substances
vi
This product has been classified as Monitoring and Control equipment, and is
outside the scope of the 2002/95/EC RoHS Directive. This product is known to
contain lead, cadmium, mercury, and hexavalent chromium.
TLA5000 Series Logic Analyzer Installation Manual
Preface
Preface
This manual contains all information needed to install your Tektronix logic
analyzer and related accessories.
To prevent personal injury or damage, consider the following requirements before
attempting service:
The procedures in this manual should be performed only by qualified service
personnel.
Read the General Safety Summary and Service Safety Summary found at
the beginning of this manual.
Be sure to follow all warnings, cautions, and notes in this manual.
TLA5000 Series Logic Analyzers
The TLA5000 series logic analyzers consist of four portable logic analyzer
mainframes, which differ by channel width, and all of the accessories and supports
that used with them. The logic analyzers are built upon the Microsoft Windows
operating system, which allows you to install any PC-compatible, third-party
hardware and software on the instrument.
Figure i: TLA5000 series logic analyzer
Documentation
The following table lists related documentation available for your logic analyzer.
The documentation is available on the TLA Documentation CD and on the
Tektronix Web site (www.Tektronix.com).
TLA5000 Series Logic Analyzer Installation Manual
vii
Preface
Table i: Related Documentation
viii
Item
Purpose
TLA Quick Start User
Manual
High-level operational
overview
Online Help
In depth operation and UI
help
Installation Quick Reference
Cards
High-level installation
information
Installation Manuals
Detailed first-time
installation information
XYZs of Logic Analyzers
Introduction to logic analyzer
basics
TLA Product Specifications
Complete list of TLA product
specifications
TPI.NET Documentation
Detailed information for
controlling the logic analyzer
using .NET
Field upgrade kits
Upgrade information for
logic analyzer products
Optional Service Manuals
Self-service documentation
for modules and mainframes
Location
TLA5000 Series Logic Analyzer Installation Manual
Basic Installation
This chapter describes all of the steps needed to install your Tektronix logic
analyzer and its related accessories.
Check the Shipping List
Check that you have received all of the parts of your logic analyzer using the
shipping list. Also check the following:
That you have the correct power cords for your geographical area.
That you have backup copies of the installed software. Store the backup
software in a safe location where you can easily retrieve the software for
maintenance purposes.
That you have all the standard and optional accessories that you ordered.
Fill out and return the customer registration card that is packaged with this manual.
Environmental Considerations
Read this section before installing the logic analyzer. This section describes
site considerations, power requirements, and ground connections for your logic
analyzer.
CAUTION. Allow a 5.1 cm (2 in) clearance around the top, back, and sides of
the instrument to ensure proper cooling. Inadequate clearances can cause the
instrument to overheat and shut down.
You can use the logic analyzer on a bench or on a cart in the normal position (on
the bottom feet).
Chassis Ground Connections
Use the chassis ground connections to connect the grounds of the target system
(system-under-test) to the logic analyzer to ensure a common ground connection
between instruments. (See Figure 1.)
TLA5000 Series Logic Analyzer Installation Manual
1
Basic Installation
Figure 1: Location of the ground connection
Connecting Accessories
After installing the mainframe, you can connect accessories such as an external
monitor, keyboard, and printer. Connect the accessories to the side of the
instrument; depending on your model, the number of connectors and locations
may differ. (See Figure 2.)
2
TLA5000 Series Logic Analyzer Installation Manual
Basic Installation
Figure 2: Accessory connections
Additional information on accessories is provided. (See Table 1.)
TLA5000 Series Logic Analyzer Installation Manual
3
Basic Installation
Table 1: Accessory connection information
Item
Description
Monitor
If you use a non plug & play monitor, you
may need to change the Windows display
settings to achieve the proper resolution.
Printer
Connect the printer to the LPT (parallel) port.
Rackmount
The logic analyzer can be installed in
rackmount kits. Refer to the respective
rackmount kit instructions for installation
information.
Connecting Probes
After you have connected all the accessories, you can connect the probes to the
instrument. Refer to the appropriate section for your instrument.
For additional information on the individual probes, refer to the instructions that
accompanied your probes.
CAUTION. When attaching the probe to the logic analyzer, you must use care to
evenly tighten probe screws until they are snug. First slightly tighten screws, then
snug each screw to 4 in-lbs (max). Undertightening the probe screws can result in
intermittent performance. Over tightening can result in stripped screws.
Connect the logic analyzer probes and the optional retaining brackets as shown.
(See Figure 3.)
4
TLA5000 Series Logic Analyzer Installation Manual
Basic Installation
Figure 3: Connecting the P64xx logic analyzer probes
First Time Operation
CAUTION. Connect the keyboard, mouse, and other accessories before applying
power to the logic analyzer. Connecting the accessories after turning on the logic
analyzer can damage the accessories.
TLA5000 Series Logic Analyzer Installation Manual
5
Basic Installation
Follow these steps to turn on the logic analyzer for the first time:
1. Connect the power cord. (See Figure 4.)
2. If you have an external monitor, connect the power cord and turn on the
monitor.
Figure 4: Power cord connector location
3. Turn on the logic analyzer as follows:
a. Press the On/Standby switch on the front of the instrument to turn on
the logic analyzer. (See Figure 4.)
b. Wait for the logic analyzer to complete power-on self-tests and start
Windows.
6
TLA5000 Series Logic Analyzer Installation Manual
Basic Installation
Performing the Incoming Inspection
Incoming inspection consists of verifying the basic operation of the logic analyzer.
The power-on diagnostics check the basic functionality. The diagnostics run
every time you turn on the logic analyzer.
You can also verify more detailed functionality by running the self-calibration and
extended diagnostics.
NOTE. Allow the mainframe to warm up for 30 minutes before running the
self-calibration.
To run self-calibration and diagnostics, perform the following:
1. Disconnect any probes that are attached to the input connectors.
2. Select the System menu and click Calibration and Diagnostics.
3. Run the self-calibration and then the extended diagnostics by selecting the
proper tab. Results of the tests display on the individual property page.
Checking the P64xx Logic
Analyzer Probes (Optional)
Connect the P64xx logic analyzer probes to a signal source, start an acquisition,
and verify that the acquired data is displayed in either the listing or waveform
windows. You can also use the Activity Indicators in the logic analyzer Setup
window to view signal activity at the probe tips.
NOTE. If you connect probes to any channels other than the A2 and A3 groups,
you must define the groups and channels in the Setup window before acquiring
data on other probe channels.
Backing Up User Files
Back up your user files on a regular basis. Use the Windows back up tools or copy
the files to another media. Always keep a backup copy of files that you access
on a regular basis.
Connecting Probes to the Target System
The logic analyzer connects to the target system through probes. The logic
analyzer probes allow you to connect to the target system in several different
ways. For probe-specific connection details, refer to the appropriate probe
instruction manual or browse the Tektronix Web site.
TLA5000 Series Logic Analyzer Installation Manual
7
Basic Installation
Additional Information
Product Overview provides a quick overview of your Tektronix logic analyzer.
(See page 9.) For detailed information on using the logic analyzer refer to the
TLA online help.
Release Notes. To access the Logic Analyzer Release Notes, click Start →
Programs → Tektronix Logic Analyzer → TLA Release Notes.
8
TLA5000 Series Logic Analyzer Installation Manual
Product Overview
This chapter briefly describes the product controls and connectors of the logic
analyzers. Refer to the online help for detailed operating information for the
logic analyzer.
Front Panel Controls
You can use the front panel controls to operate the logic analyzer. You can also
attach an external keyboard, monitor, and mouse to operate the logic analyzer.
You can use the front panel keys as an alternative to an external keyboard. Most
keys and key combinations are available using the front panel. (See Figure 5.)
Figure 5: Logic analyzer front panel
External Connectors
Use the external connectors on the rear panel of the logic analyzer to connect
external accessories. (See Figure 2 on page 3.)
Use the four front panel BNC connectors to send signals between the logic
analyzer and other instruments. For example, use the iView cable to connect
the logic analyzer to an oscilloscope.
TLA5000 Series Logic Analyzer Installation Manual
9
Product Overview
10
TLA5000 Series Logic Analyzer Installation Manual
Restoring and Installing Software
Most of the software comes factory-installed when you receive your logic
analyzer. Refer to this section if you need to reinstall your software. These
instructions only refer to reinstalling the application software and operating
system. This section also provides information on installing related logic analyzer
software on a PC for remote operation or for offline applications.
NOTE. If you install or reinstall software on a remote PC, make sure that the
software version matches that of the main application on the logic analyzer.
Restoring the Hard Disk Image
CAUTION. The software installation procedure using the Hard Disk Image CD
will overwrite the entire contents of your hard disk. To save files or software
applications from the hard disk, back them up to another media before continuing
with this procedure.
Setting up the Controller
BIOS
This procedure is necessary after replacing the hard disk or when the BIOS
settings are corrupted or lost. To configure the Controller BIOS, complete the
following steps:
1. Power on the logic analyzer and press the F2 function key before the logic
analyzer boots the Windows operating system.
2. Press the F9 function key, select Yes, and then press Enter to set all settings to
their default values. Verify that the hard disk was auto-recognized and that the
correct size of the hard disk is displayed in the Primary Master setting.
3. Using the arrow keys, navigate to the Advanced page.
4. Under Peripheral Configuration, perform the following:
a. Set the Parallel Port Mode to ECP
b. Set the Audio to Disabled.
5. Under Diskette Configuration, set the Diskette Controller to Disabled.
6. Under Video Configuration, set the Primary Video Adapter to PCI.
7. Press the F10 function key to exit and save the BIOS setup.
Reinstalling the Hard Disk Image
The Tektronix Logic Analyzer comes with CDs containing the Microsoft Windows
operating system and the latest application software. All software required to run
TLA5000 Series Logic Analyzer Installation Manual
11
Restoring and Installing Software
the logic analyzer comes with the CDs except for any microprocessor support
packages or non-logic analyzer application software. The process of reloading
the software on the hard disk will destroy any files or programs installed on the
hard disk.
CAUTION. To avoid destroying the entire contents of your hard disk, save any files
or applications by backing them up to another media before continuing with
this procedure.
Backing Up Files
Before loading the Hard Disk Image software, make sure that you back up any
files and personal documents to an external storage device.
You can find most TLA user files using the Windows Search utility. Locate the
files in the current folder and all subfolders using file suffixes. (See Table 2.)
You may want to search for other file suffixes depending on the files installed on
your instrument.
Table 2: TLA user file suffixes
Suffix
Description
.tla
TLA setup files
.tsf
TLA symbol files
.tbf
Tektronix binary format
.tls
TLA script file
.tpg
Tektronix pattern generator files
.txt
Tektronix TLA data exchange format files
.stk
.spz
Stack files
Protocol files
Once you find the files, copy them to the external storage device.
If you purchased any microprocessor support packages, you need to reinstall the
software after you reinstall the hard disk image. If you don’t have a copy of the
microprocessor support software, contract your Tektronix Account Manager to
order a replacement copy. If you cannot contact the account manager, contact
the Tektronix Support Center (refer to Contacting Tektronix at the beginning
of this document).
NOTE. You can reinstall the Microsoft Windows operating system and other
software only from the Hard Disk Image CDs that came with your instrument.
These software applications are licensed and cannot be reinstalled by any other
method without violating the license agreements.
12
TLA5000 Series Logic Analyzer Installation Manual
Restoring and Installing Software
Installing the Operating
System and TLA
Application Software
This procedure overwrites all data on the hard drive with the new product software
image. Because this procedure reformats the hard disk drive, be sure to back
up any files or software that you want to preserve by following the steps in the
previous section.
CAUTION. To avoid losing user files on your hard disk, back them up before
proceeding.
Change the BIOS Boot Settings. Before installing the Hard Disk Image, you may
need to change the BIOS settings to enable booting the logic analyzer from the
CD-ROM.
1. Restart the logic analyzer and then press the F2 function key to enter the
BIOS setup.
2. In the BIOS setup, go to the Boot menu.
3. Set the Boot devices for your instrument. (See Table 3.) Follow the on-screen
instructions to change the settings.
Table 3: BIOS Boot settings for reinstalling software from the CD-ROM
Instrument
Setting
TLA5000 series
First Boot Device: [ATAPI CDROM Drive]
Second Boot Device: [Floppy]
Third Boot Device: [IDE-HDD]
4. Save the settings by pressing function key F10 and confirm that you want to
save the new settings.
Load the Hard Disk Image. Complete the following steps to load the Hard Disk
Image:
1. Insert the Hard Disk Image CD in the CD-ROM drive.
2. Reboot the logic analyzer and follow the on-screen instructions. The
procedure automatically installs and sets up the logic analyzer application.
3. After the image is loaded, remove the CD and reboot the logic analyzer.
4. The Systems Settings Change error message displays, prompting you to
restart the instrument before your changes can take effect. Click Yes to restart
the instrument.
5. Reinstall any user files that you backed up previously. Reinstall any software
(such as the microprocessor support software) to use on the logic analyzer.
6. If desired, reconfigure the TLA network interface.
TLA5000 Series Logic Analyzer Installation Manual
13
Restoring and Installing Software
Installing the TLA Application Software
The TLA application software is installed when your instrument is shipped from
the factory. The TLA application software includes the TPI client software
that allows you to programmatically control the logic analyzer from a remote
PC. Perform the following procedure to reinstall the latest version of the TLA
application software on your logic analyzer or to install the software on a PC for
remote or offline operation. Use these steps as a first resort to recovering from
application software problems. If you experience problems with the software after
completing these steps, you may have to restore your software. (See page 11,
Restoring the Hard Disk Image.)
Installing the TLA
Application Software on
the Logic Analyzer
When using this procedure with the logic analyzer you will be asked to log on
as Administrator. The logic analyzer is initially set up to automatically log on as
Administrator (with no password) so you may not see the login prompt. If the
network setups have been changed on your instrument, make sure that you log on
as Administrator or as a user who has administrator privileges. Failure to do so
can prevent the software upgrade from completing successfully.
1. Log on to the instrument as Administrator and quit any applications.
2. Install the TLA Application Software CD in the CD-ROM drive of the logic
analyzer.
3. If the installation software does not start automatically, browse to the TLA
Application software folder on the CD and run the Setup.exe program.
4. Follow the on-screen instructions.
If you have an older version of the software on the hard disk, the installation
program will detect it and ask if you want to remove it. Follow the on-screen
instructions to remove the software, answering "Yes" to any prompts. Restart
the instrument when prompted. Repeat Step 3 to reinstall the software.
Installing the TLA
Application Software on a
PC
You can install the TLA application software on a PC for the following purposes:
To run the TLA application software in the Offline mode (similar to TLAVu
in earlier software versions).
To control a logic analyzer with TLA Application Software 5.0, or higher,
over a network. Refer to the TLA online help for information on connecting
the logic analyzer to a network.
Install Third-Party Software.
To use all of the features of the TLA application software on your PC, you must
install additional third-party software. The following third-party software is
available on the TLA Application Software CD V5.0, or higher:
14
TLA5000 Series Logic Analyzer Installation Manual
Restoring and Installing Software
The NI-GPIB-USB software allows you to use the iView software with your
PC.
The SnagIt software is useful for copying screen shots of logic analyzer data
for use with other applications.
Complete the following steps to install the third-party software on your PC:
1. Install the TLA Application Software CD in the CD drive.
2. Browse to the NI-GPIB-USB folder on the CD and run the Setup.exe program.
Follow the on-screen instructions and note the items below:
When prompted, select the Typical installation option.
When the Add GPIB wizard appears, select GPIB-USB-B.
After restarting the instrument, the NI-488.2 Getting Started wizard
displays. This is not need; select Do not show at Windows startup.
When you first connect the iView cable, the instrument will detect the new
hardware. Select Install the software automatically (Recommended).
3. Browse to the SnagIt folder on the CD and run the Setup.exe program. Follow
the on-screen instructions.
Install the TLA Application Software. Browse to the TLA Application software
folder on the CD and run the Setup.exe program. Follow the on-screen instructions
to install the TLA application software.
If you have an older version of the software on the hard disk, the installation
program will detect it and ask if you want to remove it. Follow the on-screen
instructions to remove the software, answering "Yes" to any prompts. Restart the
instrument when prompted and run the Setup.exe program again.
Start the TLA Application. If you have installed the TLA application software on
a PC for remote operation, start the software by double-clicking on the TLA
Application icon. The TLA Connection dialog box displays.
1. Select an instrument in the TLA Connection dialog box and then click
Connect. If your instrument is connected to a network, you can connect to
any unused instrument on your local network.
2. Click Offline to start an offline version of the TLA application software.
The TLA Offline software allows you to run the TLA application without
connecting to an instrument. You can analyze previously acquired data from a
logic analyzer, create or modify reference memories, or perform system tests
without being connected to an instrument.
TLA5000 Series Logic Analyzer Installation Manual
15
Restoring and Installing Software
Upgrading or Restoring Firmware
You may have to upgrade the firmware on the logic analyzer if the firmware
version is not compatible with the current TLA application software version. The
most current firmware for the TLA application software resides in a file on the
hard disk of the logic analyzer.
1. Exit the logic analyzer application.
2. Click Start → Programs → Tektronix Logic Analyzer → TLA Firmware
Loader. If the TLA Connection dialog box displays, select an instrument,
and click the Connect button.
3. Select the module from the Supported list box near the top of the window.
4. Select Load Firmware from the Execute menu.
5. Click the TLA520x.lod file.
6. Click OK. You will be prompted to confirm your action; click Yes.
7. Locate the big label on the back of the instrument.
8. Record the firmware version that is printed on the label. You will need this
information to see that the firmware version matches the label.
9. Power on the instrument.
10. After the logic analyzer completes the power-on diagnostics, select System
Properties from the System menu.
11. Click the LA1 tab.
12. Verify that the firmware version matches the version on the label that you
recorded earlier.
13. If the firmware versions do not match, update the label on the back of the
instrument.
16
TLA5000 Series Logic Analyzer Installation Manual
Appendix A: User Service Procedures
This appendix describes high-level service information and procedures for the
Tektronix logic analyzers. Additional troubleshooting procedures are located
in the service manual.
General Care
Protect the instrument from adverse weather conditions. The instrument is not
waterproof.
Do not store or leave the instrument where the LCD display will be exposed to
direct sunlight for long periods of time.
CAUTION. To avoid damage to the instrument, do not expose it to sprays, liquids,
or solvents.
Self Calibration
Use the Self Calibration property page to run self calibration procedures for the
instrument. You will want to run these procedures after repair. At a minimum, run
these procedures once a year.
Perform self-calibration after a 30 minute warm up.
Complete the following steps to run the self-calibration procedure:
1. From the System menu and select Calibration and Diagnostics.
2. Click the Self Calibration tab.
3. Select the instrument to calibrate.
4. Click the Run button.
Preventive Maintenance
Once a year the electrical performance should be checked and the instrument
accuracy certified (calibrated). This service must be performed by a qualified
service technician using the procedures outlined in the appropriate service manual
for the Tektronix Logic Analyzer product.
Preventive maintenance mainly consists of periodic cleaning. Periodic cleaning
reduces instrument breakdown and increases reliability. Clean the instrument as
needed, based on the operating environment. Dirty conditions may require more
frequent cleaning than computer room conditions.
TLA5000 Series Logic Analyzer Installation Manual
17
Appendix A: User Service Procedures
Cleaning the Flat Panel
Display
The LCD flat panel is a soft plastic display and must be treated with care during
cleaning.
CAUTION. Improper cleaning agents or methods can damage the flat panel
display.
Do not use abrasive cleaners or commercial glass cleaners to clean the display
surface.
Do not spray liquids directly on the display surface.
Do not scrub the display with excessive force.
Avoid getting moisture inside the instrument while cleaning the display; use only
enough solution to dampen the wipe.
Clean the flat panel display surface by gently rubbing the display with a
cleanroom wipe (such as Wypall Medium Duty Wipes, #05701, available from
Kimberly-Clark Corporation).
If the display is very dirty, moisten the wipe with distilled water or a 75%
isopropyl alcohol solution and gently rub the display surface. Avoid using excess
force or you may damage the plastic display surface.
Exterior Surfaces
Clean the exterior surfaces with a dry, lint-free cloth or a soft-bristle brush. If dirt
remains, use a cloth or swab dampened with a 75% isopropyl alcohol solution. A
swab is useful for cleaning in narrow spaces around the controls and connectors.
Do not use abrasive compounds on any part of the instrument.
CAUTION. To avoid damaging the instrument, follow these precautions:
Avoid getting moisture inside the instrument during external cleaning and use
only enough solution to dampen the cloth or swab.
Do not wash the front-panel On/Standby switch. Cover the switch while washing
the instrument.
Use only deionized water when cleaning. Use a 75% isopropyl alcohol solution
as a cleanser and rinse with deionized water.
Do not use chemical cleaning agents; they may damage the instrument. Avoid
chemicals that contain benzene, toluene, xylene, acetone, or similar solvents.
Floppy Disk Drive
18
The floppy disk drive requires routine maintenance to operate at maximum
efficiency. The disks can be damaged if dirt and dust accumulate on the recording
surfaces. To prevent damage, store the disks in their protective containers where
TLA5000 Series Logic Analyzer Installation Manual
Appendix A: User Service Procedures
they will not be exposed to dust or dirt. In addition, you must clean the disk
drive head periodically.
You will need a 3.5-inch floppy disk head-cleaning kit for routine maintenance.
Perform the routine maintenance as follows:
Clean the face of the floppy disk drive monthly with a dampened cloth.
CAUTION. Do not allow moisture to enter the disk drive. When power is applied,
the internal components can be damaged.
Clean the disk drive head monthly following the instructions provided with the
head-cleaning kit.
In Case of Problems
This section provides information to help you address problems you may
encounter while installing and using your logic analyzer.
Diagnostics
The logic analyzer runs power-on diagnostics every time you power on the
instrument. You can view the results of the diagnostics by selecting Calibration
and Diagnostics from the System menu. You can run more detailed diagnostics by
selecting Extended diagnostics. Here you can run all tests, loop on one or more
tests, or loop on a test until a failure occurs.
The following diagnostic tools are available with your logic analyzer:
Power-On Diagnostics. Power-on diagnostics run when you turn on the logic
analyzer, or when you start the TLA or the pattern generator application. If any
diagnostic failures occur during turn on, the Calibration and Diagnostics property
page appears.
Extended Diagnostics. Extended diagnostics test the logic analyzer more
thoroughly than the power-on diagnostics. You can use the extended diagnostics
to isolate problems to an individual module.
Before running the extended diagnostics, disconnect any attached probes.
TLA Mainframe Diagnostics. The TLA mainframe diagnostics program is a
stand-alone application. These diagnostics check the operation of the mainframe
beyond the basic PC circuitry. These diagnostics also check the front-panel knobs
of the instrument.
Other Diagnostic Software. Other diagnostic software may be installed on your
instrument and accessible from the Windows Start menu. This diagnostic software
may vary depending on your instrument. Use the online help that comes with
TLA5000 Series Logic Analyzer Installation Manual
19
Appendix A: User Service Procedures
the diagnostic software or check with your local Tektronix representative for
additional information on troubleshooting instrument problems.
Software Problems
Your logic analyzer comes with most software installed. Before running any of
the diagnostics, check the online release notes to verify that the logic analyzer
software is compatible with the module firmware.
Many software problems can be due to corrupted or missing software files. In
most cases the easiest way to solve software problems is to reinstall the software
and follow the on-screen instructions. (See page 11, Restoring and Installing
Software.)
If you suspect problems with the application software, contact your local
Tektronix representative.
Hardware Problems
If you are certain that you have installed the logic analyzer correctly, run the
extended diagnostics (located under the System menu) to identify any problems.
If your logic analyzer powers up so that you have access to the desktop, run any
other diagnostic software on your instrument to identify possible problems.
Network Connection
Problems
Version 5.0 or higher of the TLA application software allows you to connect
your instrument to a network where you can control the instrument from a PC.
Verify that the PC and the logic analyzer are connected to the network. The TLA
application software must be installed on the PC and the logic analyzer. The TLA
server must be running on the logic analyzer.
Complete the following steps to start the TLA server:
1. On the logic analyzer, click Start → Programs → Tektronix Logic Analyzer
→ TLA Server. An icon with a red circle appears in the toolbar.
2. Right-click the TLA Server icon and select Start TLA Server. The red circle
disappears indicating the server is running.
Check with your system administrator to address other network problems.
20
TLA5000 Series Logic Analyzer Installation Manual
Appendix A: User Service Procedures
Check for Common
Problems
Use the following table isolate problems. This list is not exhaustive, but it may
help you eliminate problems that are easy to fix, such as an open fuse.
Table 4: Failure symptoms and possible causes
Symptom
Possible causes and recommended action
Instrument does not turn on.
Verify that the power cord is connected to the
instrument and to the power source.
Check that the instrument receives power when you
press the On/Standby switch. Check that fans start
and that front-panel indicators light.
Check that power is available at the power source.
Instrument failure: contact your local Tektronix service
center.
External monitor does not turn on.
Check the monitor power cord connection.
Check for failed fuse, if one exists.
Check external display connection.
Monitor failure: contact the vendor of your monitor for
corrective action.
Monitor display is blank.
Check that the monitor is connected to the mainframe;
replace the cable if necessary.
If instrument display is blank, try connecting an external
monitor; if both displays are blank, contact your local
Tektronix service center.
External monitor controls turned down; adjust monitor
controls for brightness and contrast.
Check the controller BIOS setups for the monitor.
Faulty monitor: contact the vendor of your monitor for
corrective action.
Instrument turns on but does not
complete the power-on sequence.
Make sure that the instrument boots from the hard disk
drive. Remove any disks from the floppy disk drive.
Possible software failure or corrupted hard disk drive;
see Software Problems at the beginning of this chapter.
Power-on diagnostics fail.
Instrument failure: contact your local Tektronix service
center.
Instrument does not recognize
accessories such as monitor,
printer, or keyboard.
Check that accessories are properly connected
or installed. Try connecting other standard PC
accessories or contact your local Tektronix service
center.
Windows comes up but the TLA
application does not.
Instrument not set up to start the TLA application
at power-on. Start application from the desktop, by
double-clicking the TLA icon located on your desktop.
Faulty or corrupt software. Reinstall the application
software.
TLA5000 Series Logic Analyzer Installation Manual
21
Appendix A: User Service Procedures
Table 4: Failure symptoms and possible causes, (cont.)
Symptom
Possible causes and recommended action
Windows comes up in Safe mode.
Exit the Safe mode and restart the instrument.
Incompatible hardware and hardware driver software.
Either install hardware driver or remove the
incompatible hardware.
Application starts but modules do
not display in System window.
Firmware has not been updated.
Instrument failure: contact your local Tektronix service
center.
Repacking for Shipment
If a mainframe or module is to be shipped to a Tektronix service center for repair,
attach a tag to the mainframe or module showing the owner’s name and address,
the serial number, and a description of the problem(s) encountered and/or service
required. Always include the module and the probes so that the entire unit can
be tested.
When packing an instrument for shipment, use the original packaging. If it is
unavailable or not fit for use, contact your Tektronix representative to obtain
new packaging.
22
TLA5000 Series Logic Analyzer Installation Manual
Appendix B: Accessories and Options
Standard Accessories
Quantity
Accessory
1
TLA Family Application Software CD, V5.0
Part number
—
1
TLA520x Hard Disk Image CD
—
1
Mouse, optical, wheeled, USB
119-7054-xx
1
Keyboard, mini, USB
119-7083-xx
1
Accessory Pouch
016-1935-xx
1
Front-Panel Cover
200-4651-xx
1
EasyRestore License (for TLA HD Recovery CD)
063-3430-xx
1
Nero OEM Suite 3 License
1
Windows XP Professional License
061–xxxx-xx
—
1
Windows XP Professional Certificate of Authenticity
—
1
CheckIt Utilities Sticker
—
1
TLA Mouse Pad
1
Certificate of Traceable Calibration
016-1524-xx
—
2
Probe retainer brackets with fasteners (TLA5201)
407-4435-xx
4
Probe retainer brackets with fasteners (TLA5202)
407-4435-xx
6
Probe retainer brackets with fasteners (TLA5203)
407-4435-xx
8
Probe retainer brackets with fasteners (TLA5204)
407-4435-xx
1
Literature Package
001-1366-xx
Optional Accessories
Accessory
Part number
17-channel general purpose logic analyzer probe with accessories
P6417
P6417 Probe replacement kit
020-2196-xx
P6417 Podlet replacement kit
020-2200-xx
17-channel general purpose logic analyzer probe with accessories
P6418
P6417/P6418 Probe accessories kit
020-2198-xx
17-channel high-density compression probe
P6419
34-channel probe interface kit -barrel connectors
020-2199-xx
34-channel probe interface kit -mini PV connectors
020-3000-xx
1-channel reduced bias voltage leadset
196-3478-xx
8-channel reduced bias voltage leadset
196-3477-xx
34-channel high density mictor probe
P6434
TLA5000 Series Logic Analyzer Installation Manual
23
Appendix B: Accessories and Options
Options
Option
Description
Part number
1C
Add iView External Oscilloscope Cable Kit
7S
Increase acquisition record length to 2 M @ 235 MHz
012-1614-xx
—
8S
Increase acquisition record length to 8 M @ 235 MHz
—
L0
English Manuals
L5
L10
24
TLA5000 Installation Manual
071-1301-xx
Tektronix Logic Analyzer Quick Start User Manual
071-1575-xx
TLA5000 Logic Analyzer Quick Reference
Installation Card
071-1343-xx
Tektronix Logic Analyzer Documentation CD
063-3671-xx
Windows XP Professional, Multi-Language
Instruction Sheet
071-1533–xx
Japanese Manuals
TLA5000 Installation Manual (Japanese)
071-1435-xx
Tektronix Logic Analyzer Quick Start User Manual
(Japanese)
071-1746-xx
TLA5000 Logic Analyzer Quick Reference
Installation Card
071-1343-xx
Tektronix Logic Analyzer Documentation CD
063-3671-xx
Windows XP Professional, Multi-Language
Instruction Sheet
071-1533–xx
Russian Manuals
TLA5000 Installation Manual
071-1301-xx
Tektronix Logic Analyzer Quick Start User Manual
(Russian)
071-1578-xx
TLA5000 Logic Analyzer Quick Reference
Installation Card
071-1343-xx
Tektronix Logic Analyzer Documentation CD
063-3671-xx
Windows XP Professional, Multi-Language
Instruction Sheet
071-1533–xx
L99
No Manuals
—
A0
North America Power Cord
161-0104-00
A1
Universal Euro Power Cord
161-0104-06
A2
United Kingdom Power Cord
161-0104-07
A3
Australia Power Cord
161-0104-14
A4
240 V North America Power Cord
161-0104-08
A5
Switzerland Power Cord
161-0167-00
A6
Japan Power Cord
161-0322-00
A10
China Power Cord
A99
No power cord or AC adapter (Option A99)
161-0306-00
—
TLA5000 Series Logic Analyzer Installation Manual
Index
A
H
O
Accessories, 23
connecting, 2
optional accessories, 23
standard accessories, 23
Hard disk image,
installing, 11
Hard disk,
reformatting, 13
Optional accessories, 23
Options, 24
B
I
BIOS,
configuring, 11
Incoming inspection,
checking probes, 7
performing, 7
Installing,
software on a PC, 14
software, 13
software:TPI software, 14
Power-on diagnostics, 19
Preventive maintenance, 17
cleaning, 18
disks, floppy disk drive, 18
LCD display, 18
Probes,
connecting, 4
Problems,
checklist, 21
software, 20
C
Chassis ground location, 1
Checking the shipping list, 1
Cleaning, 18
LCD display, 18
Connecting,
accessories, 2
probes, 4
Customer registration card, 1
D
Diagnostics, 19
extended, 19
instrument, 19
power on, 19
TLA Mainframe, 19
Documentation, vii
E
Extended diagnostics, 19
F
Firmware,
upgrading, 16
Front panel controls, 9
G
General maintenance, 17
K
Keypad, 9
L
Logic analyzer description, vii
Logic analyzer,
chassis ground connections, 1
connecting probes, 4
incoming inspection, 7
installing software, 11
reinstalling software, 11
self calibration, 17
shipping list, 1
site considerations, 1
M
Maintenance,
BIOS configuration, 11
common problem
checklist, 21
installing software, 11
N
P
R
Registration card, 1
Reinstalling software, 13
TLA application software, 14
Related documentation, vii
Remote operation, 15
Repacking for shipment, 22
Requirements,
site consideration, 1
S
Safety Summary, iii
Self calibration, 17
Service,
common problem
checklist, 21
instrument diagnostics, 19
Service, user,
preventive maintenance, 17
Shipping list,
checking, 1
Shipping, 22
Network connection problems, 20
TLA5000 Series Logic Analyzer Installation Manual
25
Index
Software,
BIOS configuration, 11
extended diagnostics, 19
installing on a PC, 14
installing, 11
installing:TPI software, 14
other diagnostics, 19
power on diagnostics, 19
problems, 20
third-party, 14
TLA Mainframe
diagnostics, 19
26
Standard accessories, 23
T
Third-party software, 14
TLA Offline, 15
TLA Online, 15
TLA Server, 20
Troubleshooting, 19
common problem
checklist, 21
network problems, 20
U
Upgrading firmware, 16
User service,
general maintenance, 17
preventive maintenance, 17
TLA5000 Series Logic Analyzer Installation Manual