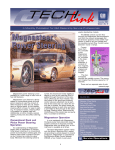
1
1130cc.com Keyless Modification
Tools you will need:
Dremel tool or other cutting device to cut the airbox bottom.
Wire Cutters
Crimpers
Heat Gun
5mm Hex Wrench
10mm Wrench
Drill
Contents:
Digital Guard Dawg Relay with Smart Chip and Dawg Tag (Optional)
Keyless Wiring Harness
3 Amp Mini Fuse
12 Gauge Butt Connector x 1
14 Gauge Butt Connector x 2
18 Gauge Butt Connector x 2
¼ inch Ring Connector x 1
Mini Relay x 2
Bridge Connector x 1
¼” Heat-Shrink x 1
Zip Tie x 5
Installation:
Please Read ALL DIRECTIONS CAREFULLY BEFORE PROCEEDING.
1. Remove Right Side Cover and Remove Maxi-fuse
2. Remove Airbox “Tin” and entire Airbox assembly. (Refer to your service manual for full
instructions for this step.)
3. Cover Throttle Bodies with Duct Tape to prevent Foreign Object Debris from entering engine
4. Cut back left corner out of the airbox to allow for routing the wires. It need only be big
enough to pull the relay harness through. A small hole will work to route the wires, but when
the bike needs maintenance; there will be no easy way to take the airbox off for maintenance
in the future. (If using the Digital Guard Dawg, make sure the hole you cut will have room for
the RELAY while it is plugged into the harness can be pulled through to avoid cutting the
Positive power feed for the Digital Guard Dawg during future service.)
5. Feed the Relay Wires through the hole in the airbox. Lay the Keyless Wiring block in the
airbox where you want to mount it. Verify the gray and blue wire is long enough to route to
the right side hand control connector. Verify the Ground wire is long enough to reach the
negative battery terminal or the ground wire attachment to the front head. Verify the Orange,
Blue, and Red wires are long enough to reach the area of the fuse box. Verify the GREEN
WIRES to the accessory switch will reach the area of the ignition bolt, or another area where
you wish to locate your accessory switch.
6. Drill 2 holes in the airbox bottom along the side where you wish to mount your Keyless
Modification Relay assembly. A single zip tie around the module and through these two
holes will hold your module in place. Making the holes SLIGHTLY CLOSER together than
the width of the relay/fuse housing will provide a better grip of the assembly.
7. Attach the negative ground to the ground wire or directly to the negative battery terminal.
8. Remove the Duct Tape from the Throttle body, Remount the Airbox bottom AND the AIR
FILTER.
9. Remove Left Side Cover and identify the BLACK DEUTSCH CONNECTOR for the RIGHT
SIDE hand controls. (On 2002-2003 VRSCA’s the connector will be inside the stock clamshell
near the instrument cluster see extra step below.)*
10. Unplug the connector, and remove it from the retention slot. You need to freely work the
wiring harness end of this connector.
11. Remove the Retention plug from the center of the wire harness (PIN END) of the connector.
You can use a hook tool, or make one out of a paper clip or other wire metal like the one
pictured.
12. Use a small flat blade screw driver to lift the retention tabs on the white with black stripe wire
while gently pulling the wire from the back of the housing. It should pull out of the rubber
weather seal with MINOR friction.
13. Remove the gray wire pin the same way.
14. Using supplied jumper: Put one end over the gray terminal pin, and one end over the
white/black terminal pin. Use heat-shrink to cover both pin assemblies and to hold the
jumper in place. Heat with hair dryer or heat gun for firm fit
15. The gray wire on the Keyless Modification Harness will replace the gray wire for the hand
control connector pin on the wire harness side of the connection. Just push the wire into the
empty pin terminal until the tab clicks down.
16. The Blue wire on the Keyless Modification Harness will replace the White/black wire for the
hand control connector pin on the wire harness side of the connection. Just push the wire into
the empty pin terminal until the tab clicks down.
17. Replace the locking wedge into the middle of the connector and push it down flat until it
clicks. You can now reassemble that connector leave it loose for the testing procedure.
18. Remove the 10mm bolt holding on the ignition module. Remove the two 10mm bolts holding
the seat latch mechanism.
19. Cut the 3 wires from the ignition module. If you think you may want to go back to stock, leave
enough wire on the terminals to re-splice them if you should choose to do so later.
20. Route the three wires under the cross member and behind the wires for the fuse box. This is
how we want it to look when finished.
21.Strip the Thick Red wire from the Ignition about 3/8 to 1/2 inch. Using the Yellow Butt
Connector, attach that red wire to the Thick Red wire from the Keyless Wiring Harness. Crimp
both wires firmly.
22. Strip the Red with Grey stripe wire as above. Using a BLUE Butt connector, attach it to the
ORANGE wire from the Keyless wiring Harness. Crimp both wires firmly. Heat the butt connector
to activate the Heat-Shrink.
23 Strip the Red with Black Stripe wire as in step 19. Using the other BLUE Butt connector
attach it to the BLUE wire from the Keyless Wiring Harness. Heat the butt connector to activate
the Heat-Shrink.
24. Place the accessory switch in the hole for the bolt for the Original location for the Ignition
Switch. Use the rubber boot and screw to secure the switch in place.
25. Route the two GREEN wires from the Keyless wiring harness to the right side of the frame
and under the frame toward the switch leads. See Above.
26. Using the 2 Red butt connectors, attach one green wire to a lead for the switch. Crimp each
wire firmly. Repeat for the second side. Heat the butt connectors to activate the Heat-Shrink
covering.
27. If using the Digital Guard Dawg: Thread the black Power Lead through the Hole on the face
of the Wiring Harness. That black wire is to be connected to the extra 3 inch RED wire from the
fuse terminal. The digital guard Dawg is to be used in the END Plug for the Relay. This will be
done for you if you ordered your Digital Guard Dawg with the Keyless harness.
28. Double-check all your connections. Every wire should be covered with either a butt
connector, or Heat shrink tubing.
*2002-2003 V-Rods with Connectors under the instrument cluster: You have a couple choices.
1. You will need to fish the two wires from the Keyless Mod through the wire sleeve to the cluster. You will
need to disassemble the cluster. Follow the V-Rod Manual for this procedure, as there are SMALL
PLASTIC TABS that hold the Chrome bezel in that are VERY FRAGILE. It is best to use a wire hanger to
push through the protective sleeve, and tape the ends of the wires to the coat hanger using electrical tape.
Stagger the pin connectors to minimize bulk. Gently pull the whole apparatus through the sleeve. If you
meet resistance, stop. DO NOT FORCE THIS as you can damage the wires inside that sleeve.
2. You can cut the appropriate wires (Grey and White with black stripe) under the left side cover. This
would require connecting the gray wire and white w/black stripe wire on the BIKE side of the cut together.
You can solder them together and cover them with heat-shrink or butt-connect them. You would then need
to cut the Grey Wire from the Keyless wiring harness and then connect it to the gray wire from the hand
control. You can use a butt connector, or solder and Heat-Shrink insulation. You will then need to do the
same for the white/black wire from the hand control and the BLUE wire from the Wiring harness.
Test your Setup:
1. Replace the Maxi fuse.
2. Put the Run/Stop switch to RUN position. (If using the Digital Guard Dawg, Make sure it
is on your person when you flip this switch.)
3. The Cluster should light, Headlight should come on, and Fuel pump should prime.
4. Wait the required 3-5 seconds for the engine light to go out.
5. Start the bike.
6. Put the Run/Stop Switch to the Stop position.
7. Engine should turn off and all lights should turn off.
8. Push the accessory button. The gauges should cycle and sweep. The LED illumination
should be visible.
9. Push the accessory button again. The entire bike should be “off.”
Additional Testing if you have the Digital Guard Dawg:
STEP 1.
Testing the Ignition Interrupt
10. Walk 30’ away from your bike and set the “Dawg Tag” down on a motionless surface.
Wait 30 Seconds for the system to ARM.
11. Approach the bike without the Dawg Tag and attempt to start it (the bike should not start).
STEP 2.
Testing the system Range
12. Leaving your Stop / Run switch “ON”, return to the Dawg Tag, Pick it up and give it a brief
shake. Now slowly walk towards your bike (one step per second) and note when the bike
powers.
Reattach the Black Hand Control Connector on the perch. Secure all wires with supplied zip ties.
You can mount the Relay body to the side of the airbox lower by drilling 2 holes and securing the
block with a zip tie. Replace the Side Covers, Air cover if desired, and Airbox “Tin.”
Trouble Shooting:
Since all of the wiring harnesses are bench tested, double-check all your connections.
If there is NO POWER with the run/stop switch, then:
1. Make sure your Dawg Tag is in proximity. Swing it from side to side over the relay.
2. Check the connection from the wire from the Digital Guard Dawg and the positive power
wire.
3. Check your Maxi-fuse is in place.
4. Check the 3 amp switch fuses
5. Check the connections to the right hand control, black plug.
6. Check the jumper for the gray and white with black wire.
7. Check your ground wire.
8. Check the RED lead to the ignition. (The thick RED wire from the Keyless Harness)
9. Check the RED w/ Black Stripe lead to the ignition. (The thick BLUE wire from the
Keyless Harness)
If there is NO POWER with the Accessory Switch:
1. Check your Maxi-fuse.
2. Check your 3-amp switch fuse.
3. Check the connections to the switch.
4. Check the RED lead to the ignition. (The thick RED wire from the Keyless harness)
5. Check the Red w/ Grey Stripe lead to the ignition. (The thick Orange Wire from the
Keyless Harness)
If you continue to have issues, please contact [email protected] or on www.1130cc.com. Please
start a new thread.
Special Thanks to:
Max Millender for sharing this original concept and creating 1130cc.com as a place where these ideas are
discussed and shared.
Joe Albe of Heavycycles.com for lending his expertise and indulging the “look at me” crowd.
Bruce McKinley of Digital Guard Dawg for expanding his product into the Motorcycle segment, as well as
having an open mind for new applications for his product.
Adjusting Your System Range
The Digital Guard DawgTM is bench tuned to achieve approximately 10' feet of
operating range. Actual system operating range can very depending on several
factors including the amount of metal nearby to the Smart Relay install location.
For this reason, we have provided a way that you can fine tuning the operating range
specifically to your bike. Should you desire to Decrease or Increase the operating range
of your Digital Guard DawgTM system you can do so with the following instructions.
C Digital Guard Dawg, Inc 2006