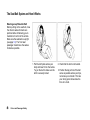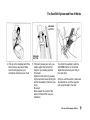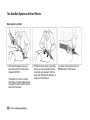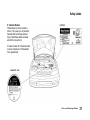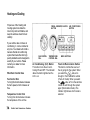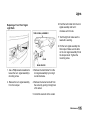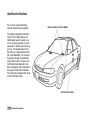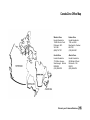
1
1996 Accord Sedan Online Reference Owner's Manual
Use these links (and links throughout this manual) to navigate through this reference.
For a printed owner's manual, click on authorized manuals or go to www.helminc.com.
Contents
Owner's Identification Form
Introduction ......................................................................................................................................... i
A Few Words About Safety................................................................................................................. ii
Driver and Passenger Safety .............................................................................................................. 3
Proper use and care of your vehicle's seat belts, and Supplemental Restraint System.
Instruments and Controls................................................................................................................. 33
Instrument panel indicator and gauge, and how to use dashboard and steering column controls.
Comfort and Convenience Features ..............................................................................................
How to operate the climate control system, the audio system, and other convenience features.
73
Before Driving.................................................................................................................................. 101
What gasoline to use, how to break-in your new vehicle, and how to load luggage and other cargo.
Driving .............................................................................................................................................. 113
The proper way to start the engine, shift the transmission, and park, plus towing a trailer.
Maintenance ..................................................................................................................................... 133
The Maintenance Schedule shows you when you need to take your vehicle to the dealer.
Appearance Care.............................................................................................................................. 195
Tips on cleaning and protecting your vehicle. Things to look for if your vehicle ever needs body repairs.
Taking Care of the Unexpected ...................................................................................................... 203
This section covers several problems motorists sometimes experience, and how to handle them.
Technical Information..................................................................................................................... 227
ID numbers, dimensions, capacities, and technical information.
Warranty and Customer Relations (U.S. and Canada only) ........................................................ 241
A summary of the warranties covering your new Acura, and how to contact us.
Authorized Manuals (U.S. only)...................................................................................................... 247
How to order manuals and other technical literature.
Index...................................................................................................................................................... I
Gas Station Information
I
nf
or
mat
i
onPr
edby:
A summary of information you need when you pull
up
toovidthe
fuel pump.
Introduction
Congratulations ! Your selection of a 1996 Honda Accord was a wise investment. It will give you years of driving
pleasure.
One of the best ways to enhance the enjoyment of your new Honda is to read this manual. In it, you will learn about
your vehicle's many safety features, and how to operate its driving controls and convenience items. Afterwards, keep
this owner's manual in your vehicle so you can refer to it at any time.
Several warranties protect your new Honda. Read the warranty booklet thoroughly so you understand the coverages
and are aware of your rights and responsibilities.
Maintaining your vehicle according to the schedules given in this manual helps to keep your driving trouble-free while
it preserves your investment. When your vehicle needs maintenance, keep in mind that your Honda dealer's staff is
specially-trained in servicing the many systems unique to your Honda. Your Honda dealer is dedicated to your
satisfaction and will be pleased to answer any questions and concerns.
The Anniversary Edition (25th Anniversary Edition) model referred to in this manual is a DX model sold in the U.S.
with a special option package.
Safety Messages
Your safety and the safety of others is very important. We have provided
many important safety messages in this manual and on the vehicle. Please
read these messages carefully.
A safety message alerts you to potential hazards that could hurt you or
others. Each safety message is preceded by a safety alert symbol
and
one of three words, DANGER, WARNING or CAUTION.
These mean:
You WILL be KILLED or
SERIOUSLY HURT if you don't
follow instructions.
You CAN be KILLED or
SERIOUSLY HURT if you don't
follow instructions.
You CAN be HURT if you don't
follow instructions.
Each safety message tells you what the hazard is, what can happen and what
you can do to avoid or reduce injury.
You will also see another important
symbol:
NOTICE
Your Honda or other property can be
damaged if you don't follow instructions.
The purpose of these messages is to
help prevent damage to your vehicle,
other property, or the environment.
Driver and Passenger Safety
This section gives you important
information about occupant protection. It shows how to use seat belts
properly. It explains the Supplemental Restraint System. And it
gives useful information about how
to protect infants and children in
your car.
Your Occupant Protection System.. 4
The Seat Belt System
and How It Works...................... 5
Why Wear Seat Belts.................... 5
Important Safety Reminders........ 5
Seat Belt System Components..... 6
Lap/Shoulder Belt......................... 6
Lap Belt........................................... 7
Wearing Seat Belts Properly........ 7
Wearing a Lap/Shoulder Belt...... 8
Wearing the Lap Belt.................. 10
Advice for Pregnant Women...... 11
Seat Belt Maintenance................ 11
Supplemental Restraint System..... 12
SRS Components......................... 12
What Happens In a Crash........... 13
Important Facts About
Airbags...................................... 14
How the Driver's Airbag
Works........................................15
How the Passenger's Airbag
Works........................................ 16
How the SRS Indicator Light
Works........................................17
System Service............................. 17
System Service Precautions....... 18
Additional Safety Information........ 19
Seat-back Position........................ 19
Head Restraint Position.............. 19
Door Locks................................... 20
Storing Cargo Safely................... 20
Driving with Pets......................... 20
Child Safety...................................... 21
Where Should Children Sit?....... 21
Important Safety Reminders...... 22
General Guidelines
for Restraining Children
Under 18 kg (40 Ibs)............... 23
Restraining
an Infant Who Weighs
Less Than 9 kg (20 Ibs).......... 23
Restraining
a Child Who Weighs Between
9 and 18 kg (20 and 40 Ibs)..... 24
Restraining a Child Who Weighs
Over 18 kg (40 Ibs).................. 25
Securing a Child Seat with a
Lap/Shoulder Belt................... 25
Using Child Restraints
with Tethers............................. 26
Storing a Child Seat..................... 27
Alcohol and Drugs........................... 28
Carbon Monoxide Hazard.............. 29
Safety Labels.................................... 30
Driver and Passenger Safety
Your Occupant Protection System
Your Honda is equipped with seat
belts and other features that work
together to protect you and your
passenger during a crash.
Seat belts are the most important
part of your occupant protection
system. When worn properly, seat
belts can reduce the chance of
serious injury or death in a crash.
For added protection during a severe
frontal collision, your Accord has a
Supplemental Restraint System
(SRS) with airbags for the driver and
a front seat passenger.
Two indicator lights are also part of
your safety system. One reminds you
to make sure you and your passengers wear seat belts. The other
alerts you to a possible problem with
your supplemental restraint system
(see page 17).
The seats, head restraints, and door
locks also play a role in occupant
safety. For example, reclining the
seat-back can decrease the effectiveness of your seat belt. Head
restraints can help protect your neck
and head, especially during rear-end
impacts. Door locks help keep your
doors from being accidentally
opened during a crash.
To get the maximum protection from
your occupant protection system,
check the following before you drive
away:
Eveiyone in the car is wearing a
seat belt properly (see page 7).
Infants and small children are
properly secured in child safety
seats (see page 21).
All doors are closed and locked
(see page 20).
Seat-backs are upright and head
restraints are properly adjusted
(see pages 19 and 59).
There are no loose items that
could be thrown around and hurt
someone during a crash or sudden
stop (see page 20).
By following these guidelines, you
can reduce injuries to yourself and
your passengers in many crash
situations. Remember, however, that
no safety system can prevent all
injuries or deaths that can occur in
severe crashes.
Driver and Passenger Safety
The Seat Belt System and How It Works
Why Wear Seat Belts
Wearing seat belts, and wearing
them properly, is fundamental to
your safety and the safety of your
passengers.
During a crash or emergency stop,
seat belts can help keep you from
being thrown against the inside of
the car, against other occupants, or
out of the car.
Of course, seat belts cannot completely protect you in every crash.
But, in most cases, seat belts reduce
your chance of serious injury. They
can even save your life. That is why
many states and all Canadian provinces require you to wear seat belts.
Not wearing a seat belt
increases the chance of being
killed or seriously hurt in a
crash.
Be sure you and your
passengers always wear seat
belts and wear them properly.
Important Safety Reminders
Seat belts are designed for adults
and larger children. All infants and
small children must be properly
restrained in child safety seats (see
page 21).
Two people should never use the
same seat belt. If they do, they could
be very seriously injured in a crash.
Do not place the shoulder portion of
a lap/shoulder belt under your arm
or behind your back. This could
increase the chance of serious
injuries in a crash.
Do not put shoulder belt pads or
other accessories on seat belts. They
can reduce the effectiveness of the
belts and increase the chance of
injury.
A pregnant woman needs to wear a
seat belt to protect herself and her
unborn child (see page 11).
Driver and Passenger Safety
The Seat Belt System and How It Works
Seat Belt System Components
Your Honda has seat belts in all five
seating positions. The front seats
and the outside positions of the rear
seat have lap/shoulder belts. The
center position of the rear seat has a
lap belt.
Your seat belt system also includes a
light on the instrument panel to
remind you to fasten your seat belt,
and to make sure your passengers
fasten theirs. This light comes on
when you turn on the ignition if you
have not fastened your seat belt. A
beeper also sounds for several
seconds (see page 36).
The following pages cover more
about the seat belt components and
how they work.
Driver and Passenger Safety
Lap/Shoulder Belt
SHOULDER
PORTION
UPPER SEAT
BELT ANCHOR
To retractor
LATCH
PLATE
LAP
PORTION
BUCKLE
This style of seat belt has a single
belt that goes over your shoulder,
across your chest, and across your
hips.
Each lap/shoulder belt has an
emergency locking retractor. In
normal driving, the retractor lets you
move freely in your seat while it
keeps some tension on the belt.
During a collision or sudden stop,
the retractor automatically locks the
belt to help restrain your body.
The lap/shoulder belt retractor in
each passenger seating position has
an additional locking mechanism
that is intended to secure a child seat
(see page 25). If the shoulder part of
the belt is pulled all the way out, this
mechanism will engage. The belt will
retract, but it will not allow the
passenger to move freely. If the belt
feels too tight, unlatch it, let it retract
fully, then pull it out as far as needed.
The Seat Belt System and How It Works
Lap Belt
BUCKLE
Wearing Seat Belts Properly
You can increase the effectiveness of
your seat belts if you take a little
time to read the following pages and
make sure you know how to wear
seat belts properly.
Not wearing a seat belt
increases the chance of being
killed or seriously hurt in a
crash.
Be sure you and your
passengers always wear seat
belts and wear them properly.
LATCH PLATE
The lap belt has one manuallyadjusted belt that fits across the hips.
It is similar to safety belts used in
airplanes.
Driver and Passenger Safety
The Seat Belt System and How It Works
Wearing a Lap/Shoulder Belt
Before putting on the seat belt, move
the driver's seat as far back as is
practical while still allowing you to
maintain full control of the vehicle.
Make sure the seat-back is upright
(see page 19). The front seat
passenger should move the seat as
far back as possible.
1. Pull the latch plate across your
body and insert it into the buckle.
Tug on the belt to make sure the
latch is securely locked.
Driver and Passenger Safety
2. Check that the belt is not twisted.
3. Position the lap portion of the belt
as low as possible across your hips,
not across your stomach. This lets
your strong pelvic bones take the
force of a crash.
The Seat Belt System and How It Works
RELEASE
BUTTON
RELEASE
BUTTON
4. Pull up on the shoulder part of the
belt to remove any slack. Make
sure the belt goes over your
collarbone and across your chest.
5. If the belt crosses your neck, you
need to adjust the belt anchor
height or your seating position.
Front seats:
Adjust the belt anchor by squeezing the two buttons and sliding the
anchor downward (it has four positions) .
Rear seat:
Move toward the center of the
seat until the belt fits over your
collarbone.
To unlatch the seat belt, push the
red PRESS button on the buckle.
Guide the belt across your body to
the door pillar.
After you exit the vehicle, make sure
the seat belt is out of the way and
will not get closed in the door.
Driver and Passenger Safety
The Seat Belt System and How It Works
Wearing the Lap Belt
1. Pull the latch plate across your
hips and insert it into the buckle
marked CENTER.
If the belt is too short, hold the
latch plate at a right angle and pull
to extend the belt. Insert the latch
plate into the buckle.
Driver and Passenger Safety
2. Position the belt as low as possible
across your hips and pelvic bones,
not across your stomach. Pull the
loose end of the belt to adjust for a
snug but comfortable fit.
To unlatch the belt, push the red
PRESS button on the buckle.
The Seat Belt System and How It Works
Advice for Pregnant Women
If possible, use the lap/shoulder seat
belt, remembering to keep the lap
portion as low as possible (see page
8).
Each time you have a check-up, ask
your doctor if it's okay for you to
drive and how you should position a
lap/shoulder seat belt.
Seat Belt Maintenance
For safety, you should check the
condition of your seat belts regularly.
Pull out each belt fully and look for
frays, cuts, burns, and wear. Check
that the latches work smoothly and
the lap/shoulder belts retract easily.
Any belt not in good condition or not
working properly should be replaced.
If a seat belt is worn during a crash,
have your dealer replace the belt and
inspect the anchors for damage.
Protecting the mother is the best
way to protect her unborn child.
Therefore, a pregnant woman should
wear a properly-positioned seat belt
whenever she drives or rides in a car.
For information on how to clean your
seat belts, see page 200.
Driver and Passenger Safety
Supplemental Restraint System
Your car is equipped with a Supplemental Restraint System (SRS) to
help protect the head and chest of
the driver and front seat passenger
during a severe frontal collision.
This system does not replace your seat
belts. It supplements, or adds to, the
protection offered by seat belts and
other occupant protection features.
Driver and Passenger Safety
Not wearing seat belts
increases the chance of serious
injury or death in a crash, even
if you have airbags.
Be sure you and your
passengers always wear seat
belts and wear them properly.
SRS Components
Your supplemental restraint system
includes:
One airbag in the steering wheel
for the driver and another in the
dashboard for the passenger.
Sensors that can detect a severe
frontal collision.
Supplemental Restraint System
A sophisticated electronic system
that continually monitors the
sensors, control unit, airbag
activators, and all related wiring
when the ignition is ON (II).
An indicator light on the instrument panel to alert you to a possible problem with the system.
Emergency backup power in case
your car's electrical system is
disconnected in a crash.
What Happens In a Crash
If you ever have a severe frontal
collision, the sensors will detect
rapid deceleration and signal the
control unit to instantly inflate the
airbags.
After the crash, you may see what
looks like smoke. This is actually
powder from the airbag's surface.
People with respiratory problems
may experience some temporary
discomfort from the chemicals used
by the airbag's activators.
During a crash, your seat belt will
help to restrain your lower body and
torso. The airbags will provide a
cushion to absorb crash energy and
help keep the head and chest of the
driver and front passenger from
striking the interior of the car.
After inflating, the airbags will
immediately deflate. The entire
process, from detection to deflation,
takes a fraction of a second. This
process occurs so quickly that you
may not hear the loud noise created
by the airbag inflators, or realize
what has happened.
Driver and Passenger Safety
Supplemental Restraint System
Important Facts About Airbags
Airbags inflate only when needed; in
a severe frontal collision. A severe
collision would be similar to a crash
into a parked vehicle of similar size
at 25 mph (40 km/h). Airbags will
not inflate in a moderate frontal
collision, or during a rear impact,
side impact, or rollover — even if the
impact is severe.
Frontal collision range
Airbags inflate and deflate only once.
They cannot protect you during any
additional impacts that can occur
during a crash sequence.
Injuries, including fatal injuries, can
occur in a severe collision, even if
seat belts are worn properly and the
airbags inflate. No safety system can
provide complete protection in a
severe crash.
Driver and Passenger Safety
Just from viewing the vehicle
damage after a crash, it is very
difficult to accurately determine if
the airbags should or should not
have inflated. In some cases where
the airbag did not inflate, extensive
visible damage indicated that the car
absorbed much of the crash energy,
and the airbags were not needed. In
other cases, a severe jolt, such as an
impact to the undercarriage, may not
cause extensive body damage but
cause the airbags to inflate.
Supplemental Restraint System
How the Driver's Airbag Works
If you ever have a severe frontal
collision, your airbag will instantly
inflate to help protect your head and
chest.
To do its job, the airbag inflates with
considerable force. So, while it can
reduce serious injuries and even save
your life, the airbag might cause
some facial abrasions or other
injuries. To reduce the possibility of
injury, you should always sit back as
far from the steering wheel as is
practical while still maintaining full
vehicle control.
After the bag completely inflates, it
immediately starts deflating so it
won't interfere with your visibility,
ability to steer, or ability to operate
other controls. The total time for
inflation and deflation takes a
fraction of a second. You may not
even be aware that the airbag has
been fully inflated.
CONTINUED
Driver and Passenger Safety
Supplemental Restraint System
The driver's airbag is stored in the
center of the steering wheel. For
your safety, do not attach any items
to the steering wheel. They could
interfere with the proper operation
of the airbag. Or, if the airbag
inflates, they could be propelled
inside the car and hurt someone.
How the Passenger's Airbag
Works
If you ever have a severe frontal
collision, the passenger's airbag will
inflate at the same time as the driver's
airbag.
Driver and Passenger Safety
This airbag is quite large and inflates
with considerable force. It can
seriously hurt a front seat passenger
who is not in the proper position and
wearing the seat belt properly. Front
seat passengers should move the
seat as far back as practical and sit
well back in the seat.
We strongly recommend that you do
not put an infant seat in the front
passenger's seat. If the airbag
inflates, it can hit the infant seat with
great force. The infant seat can be
dislodged or struck with enough
force to cause very serious injury to
the infant.
If a toddler seat is used in the front
passenger's seat, the vehicle seat
should be moved as far back as
possible. If the passenger's bag
inflates, it could seriously hurt a
toddler who is not in the proper
position or properly restrained.
Supplemental Restraint System
The passenger's airbag is stored
near the top of the dashboard, under
a lid marked SRS. Do not place any
objects on top of this lid. If the airbag
inflates, those objects can be
propelled inside the car and possibly
hurt someone.
How the SRS Indicator
Light Works
The purpose of the SRS light on your
instrument panel is to alert you of a
potential problem with your supplemental restraint system.
SRS
Have the system checked if:
The light does not come on when
you turn the ignition ON (II).
The light stays on after the engine
starts.
The light comes on or flashes
while you are driving.
If you see any of these indications,
the airbag may not work when
needed in an accident. Take the
car to your dealer promptly for
diagnosis and service.
System Service
Your supplemental restraint system
is virtually maintenance-free. There
are no parts you can safely service.
You must have the system serviced
by an authorized Honda dealer:
If your airbags ever inflate, the
airbags and control unit must be
replaced. Do not try to remove or
discard the airbags by yourself.
This must be done by a Honda
dealer.
If the SRS indicator light alerts
you of a problem. Have the
supplemental restraint system
checked as soon as possible.
Otherwise, your airbags might not
inflate when you need them.
When the car is ten years old.
Have the dealer inspect the
system. The production date is on
the driver's doorjamb for your
convenience.
Driver and Passenger Safety
Supplemental Restraint System
System Service Precautions
Do not modify your steering wheel
or any other part of the supplemental
restraint system. Modifications could
make the system ineffective.
Do not tamper with the system's
components or wiring. This could
cause the airbags to inflate inadvertently, possibly injuring someone
very seriously.
Tell anyone who works on your car
that you have a supplemental
restraint system. Failure to follow
the procedures and precautions in
the official Honda service manual
could result in personal injury or
damage to the system.
Driver and Passenger Safety
Scrapping an entire car that has
uninflated airbags can be dangerous.
Get assistance from a Honda dealer
if your car must be scrapped.
If you sell your car, please be sure to
tell the new owner that the car has a
supplemental restraint system. Alert
them to the information and precautions in this part of the owner's
manual.
Additional Safety Information
The seat belts and airbags are obviously important parts of your occupant protection system.
In addition, you should know that
sitting upright, adjusting the head
restraints properly, locking the doors,
and stowing things properly can also
increase your safety and possibly
even save your life.
Seat-back Position
The seat-backs should be in an
upright position for you and your
passengers to get the most protection from the seat belts.
Head Restraint Position
If you recline a seat-back, you reduce
the protective capability of your seat
belt. The farther a seat-back is
reclined, the greater the risk that
you will slide under the belt in a
severe crash and be very seriously
injured.
For information on how to adjust the
seat-back, see page 56.
Head restraints can help protect you
from whiplash and other injuries. For
the best protection, adjust the top of
the restraint so it is even with the
tops of your ears, or as high as possible. For instructions on adjusting the
head restraints, see page 59.
Driver and Passenger Safety
Additional Safety Information
Door Locks
It is not safe to leave your car doors
unlocked. A passenger, especially a
child, could open a door and accidentally fall out. Also, there is a
greater chance of being thrown out
of the car during a crash when the
doors are not locked.
Be sure to keep compartment doors
closed when the car is moving. If a
front passenger hits the door of an
open glove box, for example, he
could injure his knees.
Storing Cargo Safely
Before you drive, make sure you
first securely store or tie down any
items that could be thrown around
the car and hurt someone, or
interfere with your ability to operate
the controls.
Driving with Pets
Loose pets can be a hazard while you
are driving. An unrestrained pet can
interfere with your ability to drive
the car. In a crash or sudden stop,
loose pets or cages can be thrown
around inside the car and hurt you or
your passengers. It is also for their
safety that pets should be properly
restrained in your car.
Do not put any items on top of the
rear shelf. They can block your view
and they could be thrown about the
car in a crash.
Driver and Passenger Safety
For information on loading cargo,
seepage 111.
The recommended way to restrain a
medium-sized or larger dog is with a
special traveling harness. This harness can be secured to the rear seat
with a seat belt. Travel harnesses are
available at pet stores.
A small dog, cat, or other small
animal will be safest in a pet carrier
with rigid sides. Choose a style that
allows you to secure it to the car's
seat by routing a seat belt through
the carrier's handle.
For further information, contact your
veterinarian or local animal protection society.
Child Safety
An infant or child who is not
properly restrained can be killed
or seriously injured in a crash.
Be sure any child too small for
seat belts is properly secured in
a child restraint.
Children depend on adults to protect
them. To help make sure we do,
every state and Canadian province
has laws requiring infants and young
children to be properly restrained
whenever they ride in a car.
Where Should Children Sit?
According to accident statistics,
children of all sizes and ages are
safer when they are properly
restrained in the rear seat rather
than the front seat.
We recommend that, whenever
possible, you secure your child's
infant or toddler seat in the center
position of the rear seat with the lap
belt.
We strongly recommend that you do
not put an infant seat in the front
passenger's seat. If the airbag
inflates, it can hit the infant seat with
great force. The infant seat can be
dislodged or struck with enough
force to cause very serious injury to
the infant.
CONTINUED
Driver and Passenger Safety
Child Safety
If a toddler seat is used in the front
passenger's seat, the vehicle seat
should be moved as far back as
possible. If the passenger's bag
inflates, it could seriously hurt a
toddler who is not in the proper
position or properly restrained.
Important Safety Reminders
Never hold a baby or child on your
lap when riding in a car. If you are
wearing your seat belt, the violent
forces created during a crash will
tear the child from your arms. The
child could be seriously hurt or killed.
We also recommend that any child
who is too large to use an infant or
toddler seat ride in one of the outside positions of the rear seat. The
child should then wear the lap/
shoulder belt properly for protection.
If you are holding a child and not
wearing a seat belt in a crash, you
could crush the child against the car's
interior.
If the child is not large enough to
wear the lap/shoulder belt properly,
you should use a booster seat.
Driver and Passenger Safety
Never put your seat belt over
yourself and a child. During a crash,
the belt could press deep into the
child, causing serious internal
injuries.
Two children should never use the
same seat belt. If they do, they could
be very seriously injured in a crash.
If you are driving with small children
in the car, you should use the
childproof door locks to prevent
them from opening the rear doors
(see page 54).
For their safety, do not leave
children alone in your car without
adult supervision.
Child Safety
General Guidelines for
Restraining Children Under
18 kg (40 Ibs)
Use an approved child seat. The seat
must meet Federal Motor Vehicle
Safety Standard 213 (FMVSS-213) or
Canadian Motor Vehicle Safety
Standards. Look for the manufacturer's statement of compliance on
the box and seat.
To properly route a seat belt through
a child seat, follow the seat maker's
instructions. If you use a lap/
shoulder belt, follow the instructions
on page 25.
Restraining an Infant Who
Weighs Less Than 9 kg
(20 Ibs)
Secure the child in the child seat. Make
sure the infant or child is firmly
secured to the child seat. Use the
straps provided, and carefully follow
the manufacturer's instructions.
Use a seat of the right size. Make sure
the seat fits your child. Check the
seat manufacturer's instructions and
labels for height and weight limits.
Secure the child seat to the car. All
approved child seats are designed to
be secured to the car seat by the lap
belt or the lap belt portion of a lap/
shoulder belt. A child whose seat is
not properly secured to the car can
be endangered in a crash.
An infant up to about 9 kg (20 Ibs)
must be restrained in an infant seat
or a convertible seat designed for a
baby. Because infants must ride in a
reclining position, be sure the infant
seat always faces the REAR of the
car as shown.
CONTINUED
Driver and Passenger Safety
Child Safety
We recommend that, whenever
possible, you put the infant seat in
the center position of the rear seat
and secure it to the car with the lap
belt.
Restraining a Child Who Weighs
Between 9 and 18 kg
(20 and 40 Ibs)
If you decide to put a toddler seat in
an outside seating position, make
sure the toddler seat is held securely
by the locking mechanism of the
lap/shoulder belt (see page 25).
If you decide to put an infant seat in
any other seating position, make
sure the infant seat is held securely
by the locking mechanism of the
lap/shoulder belt (see page 25).
We strongly recommend that you do
not put an infant seat in the front
passenger's seat. If the airbag
inflates, it can hit the infant seat with
great force. The infant seat can be
dislodged or struck with enough
force to cause very serious injury to
the infant.
Driver and Passenger Safety
The preferred place to put a toddler
seat is in the center position of the
rear seat. Use the car's lap belt to
secure the seat to the car.
Toddler seats are designed for
children who weigh between 9 and
18 k g (20 and 40 Ibs).
If you are using a toddler seat in the
front passenger's seat, move the
passenger's seat as far back as
possible before installing the child
seat. If the passenger's bag inflates,
it could seriously hurt a toddler who
is not in the proper position or
properly restrained.
Child Safety
Restraining a Child Who Weighs
Over 18 kg (40 Ibs)
Put the seat belt on your child and
check its fit. The shoulder belt
should fit over the collarbone and
across the chest. The lap belt should
sit low on your child's hips, not
across the stomach.
If the shoulder belt crosses the neck,
have your child move toward the
center of the rear seat until the belt
fits properly. If the belt still crosses
the child's neck, you should use a
booster seat.
We recommend that, whenever
possible, a child who has outgrown a
toddler seat ride in one of the
outside positions of the rear seat and
use a lap/shoulder belt.
Several styles of booster seats are
available. We recommend a design
that allows the child to use the car's
lap/shoulder belt.
Whichever style you select, follow
the booster seat manufacturer's
instructions.
Securing a Child Seat with a Lap/
Shoulder Belt
The lap/shoulder belt retractors in
the passenger seating positions have
a built-in locking mechanism
intended to secure a child seat. If
you are placing a child seat in one of
the outside seating positions, do the
following:
1. Place the child restraint in the
desired seating position. Route the
lap/shoulder belt through the seat
according to the seat manufacturer's instructions.
2. Insert the latch plate into the
buckle. Make sure it is fully
latched.
3. Slowly pull the shoulder portion of
the belt out of the retractor until it
stops.
CONTINUED
Driver and Passenger Safety
Child Safety
4. Allow the belt to slowly feed back
into the retractor. You should hear
a clicking noise that indicates the
locking mechanism has engaged.
Using Child Restraints with
Tethers
111 mm (4.4 in)
306 mm (12.0 in)
5. After the belt has retracted fully,
pull up on the shoulder portion to
remove any slack.
6. Push and pull on the child seat to
verify that it is held firmly in place.
If not, unlatch the seat belt, allow
it to retract fully, and repeat these
steps.
To unlatch the seat belt, push the
red PRESS button on the buckle.
Guide the belt across to the door
pillar. If the belt doesn't retract
easily, pull it out and check for twists
or kinks.
Driver and Passenger Safety
Canadian Models
Select the attachment point you want
to use and remove the plug with a
small flat-tipped screwdriver or
fingernail file.
Install the tether hardware that came
with the child seat.
Tighten to:
22 N.m (2.2 kgf.m , 16 lbf.ft)
310 mm (12.2 in)
If you are not sure how to install the
bracket, have it installed by your
Honda dealer.
Your Honda has three attachment
points for tether-style child seat.
They are located on the rear shelf.
If you need an anchor plate and
mounting hardware, you can obtain
them by writing to:
U.S. Models
Use the dimensions in the illustration to locate either of the outside
attachment points you want to use.
Cut a 22 mm (7/8 inch) diameter
hole in the rear shelf.
American Honda Motor Co., Inc.
Consumer Affairs
1919 Torrance Blvd.
Torrance, CA 90501-2746
Child Safety
Canadian Cars
TOOTHED WASHER
Storing a Child Seat
When you are not using an infant
seat or other child restraint, either
remove it or make sure it is properly
secured so it cannot be thrown
around the car during a crash.
The anchor plate and mounting
hardware for a top tether are
supplied with the car. When installing, make sure the toothed washer is
on the bottom of the bolt.
The supplied anchor plate is
designed only for mounting a child
restraint. Do not use it for any other
purpose.
Driver and Passenger Safety
Alcohol and Drugs
Driving a car requires your full attention and alertness. Traffic conditions change rapidly. You must be
able to react just as rapidly. Alcohol
or drugs directly affect your alertness and ability to react. Even prescription and non-prescription medicines can have this effect.
There are laws that deal with
drunken driving. These laws define
how much alcohol it takes in your
system to be legally "drunk." However, your judgment and reaction
time get worse with every drink—
even the first one.
Driver and Passenger Safety
The safest thing you can do is never
drink and drive. This can be done if
you plan ahead. If you know you are
going to be drinking, make plans to
ride with a friend who will not be
drinking.
If you have no choice but to drive,
stop drinking and give yourself lots
of time to sober up. Time is the only
thing that can make you sober.
Things like coffee or a cold shower
don't speed up the process.
What if you find that you've been
drinking and cannot get a ride from a
friend? Find alternative transportation. Call a taxi. Take a bus. Many
communities have transportation
services devoted to shuttling people
who have been drinking.
If you see friends trying to get
behind the wheel after drinking, stop
them. Drive them yourself or
arrange other transportation. If you
think you are interfering, remember
that your interference will keep them
from sharing the road with you.
Carbon Monoxide Hazard
Your car's exhaust contains carbon
monoxide gas. You should have no
problem with carbon monoxide
entering the car in normal driving if
you maintain your car properly.
Have the exhaust system inspected
for leaks whenever:
The car is raised for an oil change.
You notice a change in the sound
of the exhaust.
The car was in an accident that
may have damaged the underside.
High levels of carbon monoxide can
collect rapidly in enclosed areas,
such as a garage. Do not run the
engine with the garage door closed.
Even with the door open, run the
engine only long enough to move the
car out of the garage.
With the trunk lid open, air flow can
pull exhaust gas into your car's
interior and create a hazardous
condition. If you must drive with the
trunk lid open, open all the windows
and set the heating and cooling
system as follows.
If you must sit in your parked car,
even in an unconfined area, with the
engine running, adjust the heating
and cooling system as follows:
1. Push the
button.
2. Select the
mode.
3. Turn the fan on high speed.
4. Set the temperature control to a
comfortable setting.
Carbon monoxide gas is toxic.
Breathing it can cause
unconsciousness and can even
kill you.
Avoid any enclosed areas or
activities that expose you to
carbon monoxide.
Driver and Passenger Safety
Safety Labels
4 Cylinder Models
These labels are in the locations
shown. They warn you of potential
hazards that could cause serious
injury. Read these labels carefully
and don't remove them.
If a label comes off or becomes hard
to read, contact your Honda dealer
for a replacement.
BATTERY
Driver and Passenger Safety
RADIATOR CAP
Safety Labels
6 Cylinder Models
These labels are in the locations
shown. They warn you of potential
hazards that could cause serious
injury. Read these labels carefully
and don't remove them.
BATTERY
If a label comes off or becomes hard
to read, contact your Honda dealer
for a replacement.
RADIATOR CAP
Driver and Passenger Safety
Instruments and Controls
This section gives information about
the controls and displays that
contribute to the daily operation of
your Honda. All the essential
controls are within easy reach.
Control Locations............................ 34
Indicator Lights................................ 35
Gauges.............................................. 39
Speedometer................................ 39
Tachometer.................................. 39
Odometer...................................... 39
Trip Meter.................................... 39
Temperature Gauge.................... 40
Fuel Gauge................................... 40
Maintenance Required
Indicator.................................... 40
Controls Near the Steering
Wheel........................................ 41
Headlights.................................... 42
Daytime Running Lights............. 42
Instrument Panel Brightness..... 43
Turn Signals................................. 43
Windshield Wipers...................... 44
Windshield Washers................... 45
Hazard Warning........................... 45
Rear Window Defogger.............. 45
Steering Wheel Adjustment....... 46
Steering Wheel Controls ................ 48
Cruise Control.............................. 48
Keys and Locks................................ 51
Keys............................................... 51
Ignition Switch............................. 52
Door Locks................................... 53
Power Door Locks....................... 53
Childproof Door Locks............... 54
Trunk........................................... 54
Glove Box..................................... 55
Seat Adjustments............................. 56
Driver's Seat Power
Adjustments............................. 56
Driver's Seat Manual
Adjustments............................. 58
Driver's Lumbar Support............ 59
Head Restraints........................... 59
Folding Rear Seat........................ 60
Rear Seat Armrest....................... 62
Trunk Pass-through Cover......... 62
Power Windows............................... 63
Moonroof.......................................... 64
Mirrors.............................................. 65
Adjusting the Power Mirrors..... 66
Parking Brake.................................. 67
Digital Clock..................................... 68
Beverage Holder.............................. 69
Vanity Mirror................................... 69
Cigarette Lighter............................. 70
Ashtrays............................................ 70
Interior Lights.................................. 71
Ceiling Light................................. 71
Courtesy Lights........................... 71
Instruments and Controls
Control Locations
MIRROR
CONTROLS
(P.65)
DIGITAL CLOCK
(P.68)
DOOR LOCK
SWITCH
(P.53)
AUDIO SYSTEM
(P.81)
POWER WINDOW
SWITCHES
(P.63)
FUEL FILL
DOOR RELEASE
(P.104)
TRUNK RELEASE
HANDLE
(P.54)
Instruments and Controls
HEATING/COOLING
CONTROL
(P.74)
HOOD RELEASE
HANDLE
(P.105)
Indicator Lights
The instrument panel has many
indicators to give you important
information about your car.
Lamp Check
Many of the indicator lights come on
when you turn the ignition switch
ON (II), allowing you to see that they
are working. If an indicator does not
light during this test, it cannot alert
you if that system develops a problem. Have the dealer check your car
for burned-out bulbs or other
problems.
HIGH BEAM INDICATOR
SUPPLEMENTAL RESTRAINT
SYSTEM INDICATOR
SEAT BELT REMINDER
LIGHT
PARKING BRAKE AND
BRAKE SYSTEM INDICATOR*
CRUISE CONTROL
INDICATOR
CHARGING SYSTEM INDICATOR
LOW OIL
PRESSURE
INDICATOR
* The U.S. instrument panel is
shown. Differences for the Canadian
model are noted in the text.
DOOR AND BRAKE
LAMP MONITOR
LOW FUEL
INDICATOR
MALFUNCTION INDICATOR LAMP
ANTI-LOCK BRAKE
SYSTEM INDICATOR*
Instruments and Controls
Indicator Lights
Seat Belt Reminder Light
This indicator lights when you turn
the ignition ON (II). It is a reminder
to you and your passengers to
protect yourselves by fastening the
seat belts. A beeper also sounds if
you have not fastened your seat belt.
If you do not fasten your seat belt,
the beeper will stop after a few
seconds but the light stays on until
you do. Both the light and the beeper
stay off if you fasten your seat belt
before turning on the ignition.
Instruments and Controls
Low Oil Pressure
Indicator
The engine can be severely damaged
if this light flashes or stays on when
the engine is running. For complete
information, see page 216.
Charging System
Indicator
If this light comes on when the
engine is running, the battery is not
being charged. For complete
information, see page 217.
Parking Brake
and Brake
BRAKE
System
Indicator
This light has two functions:
U.S.
Canada
1. It lights as a reminder that you
have set the parking brake.
Driving with the parking brake set
can damage the brakes and tires,
and cause the Anti-lock brake
system to turn off (see page 124).
2. It can indicate the brake fluid level
is low if it remains lit after you
release the parking brake or
comes on while driving. This is
normally due to worn brake pads.
Have your dealer check the
braking system for worn pads or
fluid leaks.
Indicator Lights
Supplemental Restraint
System Indicator
See page 17.
SRS
Malfunction Indicator
Lamp
See page 218.
Door and Brake Lamp Monitor
U.S.
ABS
Anti-lock Brake System
(ABS) Indicator
Canada
Only on cars equipped with ABS (see
page 124)
This light normally comes on when
you turn the ignition ON (II) and
goes off after the engine starts. If it
comes on at any other time, there is
a problem in the ABS. If this happens,
take the car to your dealer to have it
checked. With the light on, your car
still has normal braking ability but no
anti-lock.
The appropriate light comes on in
this display if the trunk or any door
is not closed tightly. If a brake light
does not work, the BRAKE LAMP
indicator comes on when you push
the brake pedal with the ignition
switch ON (II).
A burned out brake light is a hazard
when drivers behind you cannot tell
you are braking. Have your brake
lights repaired right away.
All the lights in the monitor display
come on for a few seconds when you
turn the ignition switch ON (II).
Instruments and Controls
Indicator Lights
Turn Signal and
Hazard Warning
Indicators
The left or right turn signal light
blinks when you signal a lane change
or turn. If the light does not blink or
blinks rapidly, it usually means one
of the turn signal bulbs is burned out
(see page 185 ). Replace the bulb as
soon as possible, since other drivers
cannot see that you are signalling.
When you turn on the Hazard
Warning switch, both turn signal
lights blink. All turn signals on the
outside of the car should flash.
D R L "Daytime Running
Lights" Indicator
Canadian models only
This indicator lights when you turn
the ignition to ON (II) with the
headlight switch off and the parking
brake set. It should go off if you turn
on the headlights or release the
parking brake. If it comes on at any
Instruments and Controls
other time, it means there is a
problem with the DRL. There may
also be a problem with the high
beam headlights.
High Beam Indicator
This light comes on with the high
beam headlights. See page 42 for
information on the headlight
controls.
CRUISE
CONTROL
Cruise Control Indicator
Only on cars equipped with Cruise
Control System
This lights when you set the cruise
control. See page 48 for information
on operating the cruise control.
Low Fuel Indicator
This light comes on as a reminder
that you must refuel soon.
Gauges
TEMPERATURE
GAUGE
TACHOMETER
TRIP METER
SPEEDOMETER
MAINTENANCE
ODOMETER
REQUIRED INDICATOR
Speedometer
U.S. Models
This shows your speed in miles per
hour (mph). The smaller inner
numbers are the speed in kilometers
per hour (km/h).
FUEL GAUGE
TRIP METER
RESET BUTTON
Tachometer
The tachometer shows the engine
speed in revolutions per minute
(rpm). To protect the engine from
damage, never drive with the
tachometer needle in the red zone.
Odometer
The odometer shows the total distance your car has been driven. It
measures miles in U.S. models and
kilometers in Canadian models.
It is illegal under federal law (in the
U.S.) and provincial regulations (in
Canada) to disconnect, reset, or alter
the odometer with the intent to
change the number of miles or
kilometers indicated.
Trip Meter
This meter shows the number of
miles (U.S.) or kilometers (Canada)
driven since you last reset it. To
reset it, push the trip meter reset
button.
Canadian Models
This shows your speed in kilometers
per hour (km/h). The smaller inner
numbers are the speed in miles per
hour (mph).
Instruments and Controls
Gauges
Temperature Gauge
This shows the temperature of the
engine's coolant. During normal
operation, the pointer should rise
from the bottom white mark to about
the middle of the gauge. In severe
driving conditions, such as very hot
weather or a long period of uphill
driving, the pointer may rise to the
upper white mark. If it reaches the
red " H " (Hot) mark, pull safely to
the side of the road. Turn to page
214 for instructions and precautions
on checking the engine's cooling
system.
Fuel Gauge
This shows how much fuel you have.
It is most accurate when the car is on
level ground. It may show slightly
more or less than the actual amount
when you are driving on curvy or
hilly roads.
The gauge stays at the same fuel
level reading after you turn off the
Instruments and Controls
ignition. When you add fuel, the
gauge slowly changes to the new
reading after you turn the ignition
back ON (II).
Maintenance Required Indicator
This indicator reminds you that it is
nearing 12,000 km (7,500 miles)
since the last scheduled maintenance.
Refer to the Maintenance Schedules
for Normal and Severe driving
conditions on page 138.
When the distance driven since the
last scheduled maintenance nears
12,000 km (7,500 miles), the
indicator will turn yellow. If you
exceed 12,000 km (7,500 miles), the
indicator will turn red.
INDICATOR
SLOT
Your dealer will reset the indicator
when he performs the scheduled
maintenance. If someone else
performs the maintenance, reset the
indicator by inserting your key in the
slot below the indicator.
Controls Near the Steering Wheel
The two levers on the steering
column contain controls for driving
features you use most often. The left
lever controls the turn signals,
headlights, and high beams. The
right lever controls the windshield
wipers.
The rear window defogger switch is
on the dashboard to the right of the
steering column.
INSTRUMENT PANEL
BRIGHTNESS
REAR WINDOW
DEFOGGER
WINDSHIELD
WIPERS/WASHERS
MOONROOF
SWITCH
The controls under the left air vent
are for the moonroof, cruise control
and instrument panel brightness.
The lever on the underside of the
steering column allows you to tilt the
steering wheel.
CRUISE
CONTROL
HEADLIGHTS/
TILT ADJUSTMENT
TURN SIGNALS
HORN
HAZARD WARNING LIGHTS
Instruments and Controls
Controls Near the Steering Wheel
Headlights
If you leave the lights on with the
ignition switch in ACCESSORY (I)
or LOCK (0), you will hear a
reminder chime when you open the
driver's door.
To flash the high beams, pull back
and hold the turn signal lever.
Release the lever and the high
beams will go off.
The high beams will stay on for as
long as you hold the lever, no matter
what position the headlight switch is
in.
The rotating switch on the left lever
controls the lights. Turning this
switch to the first position
turns on the parking lights, taillights,
instrument panel lights, side-marker
lights, and rear license plate lights.
Turning the switch to the second
position
turns on the
headlights.
Instruments and Controls
To change between low beams and
high beams, pull back on the turn
signal lever until you hear a click,
then let go. The blue high beam
indicator will light (see page 38).
Daytime Running Lights
(Canadian Models)
With the headlight switch off, the
high beam headlights come on with
reduced brightness when you turn
the ignition switch to ON (II) and
release the parking brake. They
remain on until you turn the ignition
off, even if you set the parking brake.
The headlights revert to normal
operation when you turn them on
with the switch.
Controls Near the Steering Wheel
Instrument Panel Brightness
Turn Signals
To signal a lane change, push lightly
on the turn signal lever in the proper
direction and hold it. The lever will
return to the center position as soon
as you release it.
TURN SIGNAL LEVER
The knob on the dashboard to the
left of the instrument panel controls
the brightness of the instrument
panel lights. Push the knob to get it
to pop out. Turn the knob to adjust
the brightness.
Signal a turn or lane change with this
lever. Push down on the lever to
signal a left turn, and up to signal a
right turn. If you push it up or down
all the way, the turn signal continues
to blink even when you release the
lever. It shuts off automatically as
you complete the turn.
Instruments and Controls
Controls Near the Steering Wheel
Windshield Wipers
The right lever controls the windshield wipers and washers. The
rotary switch at the end of the lever
has three positions:
INT: intermittent
: low speed
: high speed
In intermittent, the wipers operate
every few seconds. In low speed and
high speed, the wipers run continuously.
Instruments and Controls
To operate the wipers in mist mode,
push the control lever down. The
wipers run at high speed until you
release the lever. This gives you a
quick way to clear the windshield.
Except for the U.S. DX model and the
Canadian LX model
In intermittent, the wipers operate
every few seconds. You can adjust
this delay by turning the INT TIME
ring on the lever. This allows you to
vary how often the windshield
wipers sweep when driving in light
rain or snow. In low speed and high
speed, the wipers run continuously.
Controls Near the Steering Wheel
Windshield Washers
Hazard Warning
Rear Window Defogger
To clean the windshield, pull back on
the wiper control lever. The washers
spray until you release the lever. The
wipers run at low speed while you're
pulling the lever, then complete one
more sweep of the windshield after
you release it.
Push the red button to the left of the
clock to turn on the hazard warning
lights (four-way flashers). This
causes all four outside turn signals
and both indicators in the instrument
panel to flash. Use the hazard
warning lights if you need to park in
a dangerous area near heavy traffic,
or if your car is disabled.
The rear window defogger will clear
fog, frost, and thin ice from the
window. Push the defogger button to
turn it on and off. The light in the
button lights to show the defogger is
on. If you do not turn it off, the
defogger will shut itself off after
about 25 minutes. It also shuts off
when you turn off the ignition. You
have to turn it on again when you
restart the car.
CONTINUED
Instruments and Controls
Controls Near the Steering Wheel
Make sure the rear window is clear
and you have good visibility before
starting to drive.
The defogger wires on the inside of
the rear window can be accidentally
damaged. When cleaning the glass,
always wipe side to side.
Steering Wheel Adjustment
You can adjust the steering wheel
height to suit your preference. Do
this before you begin driving.
Adjusting the steering wheel
position while driving may
cause you to lose control of the
car and be seriously injured in a
crash.
Adjust the steering wheel only
when the car is stopped.
1. Adjust the seat so you are a
comfortable distance from the
pedals.
2. The lever to tilt the steering wheel
is under the steering column to
the left. Push this lever all the way
down.
Instruments and Controls
Controls Near the Steering Wheel
3. Move the steering wheel up or
down to the desired position.
Position the wheel so you can see
all the instrument panel gauges
and warning lights. Push the lever
up to lock the steering wheel in
that position.
4. Make sure you have securely
locked the steering wheel in place
by trying to move it up and down.
Instruments and Controls
Steering Wheel Controls
Cruise Control
Except for DX model in the U.S.
Cruise control allows you to maintain
a set speed above 25 mph (40 km/h)
without keeping your foot on the
accelerator pedal. It is for cruising on
straight, open highways. It is not
recommended for conditions such as
city driving, winding roads, slippery
roads, heavy rain, or bad weather.
You should have full control of the
car under those conditions.
Using the Cruise Control
Improper use of the cruise
control can lead to a crash.
CRUISE CONTROL MASTER SWITCH
Use the cruise control only
when traveling on open
highways in good weather.
NOTICE
The cruise control, as it operates,
moves the accelerator pedal. You
can damage your car's accelerator
mechanism by resting your foot
under the pedal and blocking the
movement.
1. Push in the Cruise Control Master
Switch to the left of the steering
column. The indicator in the
switch will light.
2. Accelerate to the desired cruising
speed above 25 mph (40 km/h).
Instruments and Controls
Steering Wheel Controls
Changing the Set Speed
RESUME/
accel
You can increase the set cruising
speed in either of two ways:
Press and hold the RESUME/
accel button. The car will accelerate slowly. When you reach the
desired cruising speed, release the
button.
SET/decel
3. Press and hold the SET/decel
button on the steering wheel until
the CRUISE CONTROL light next
to the speedometer comes on.
This shows the system is now
activated.
Push on the accelerator pedal. Accelerate to the desired cruising
speed and press the SET/decel
button.
You can decrease the set cruising
speed in either of two ways:
Press and hold the SET/decel
button. The car will decelerate.
Release the button when you
reach the desired speed.
Tap the brake or clutch pedal
lightly with your foot. The
CRUISE CONTROL light on the
instrument panel will go out.
When the car slows to the desired
speed, press the SET/decel button.
The car will then maintain the
desired speed.
The set speed may vary slightly,
particularly on hills.
CONTINUED
Instruments and Controls
Steering Wheel Controls
Even with the cruise control turned
on, you can still use the accelerator
pedal to speed up for passing. After
completing the pass, take your foot
off the accelerator pedal. The car
will return to the set cruising speed.
Resting your foot on the brake or
clutch pedal will cause the cruise
control to cancel.
Cancelling the Cruise Control
Any of these actions cause the cruise
control to cancel.
Tap the brake or clutch pedal.
Press the SET/decel and RESUME/accel buttons at the same
time.
Press the Cruise Control Master
Switch.
When you tap the brake or clutch
pedal, or press the SET and RESUME buttons at the same time, the
CRUISE CONTROL light on the
instrument panel will go out and the
car will begin to slow down. You can
use the accelerator pedal in the
normal way.
Instruments and Controls
If you use the brake or clutch pedal
to cancel cruise control, the system
retains the previously-set cruising
speed. To return to that speed, accelerate to above 25 mph (40 km/h)
and press the RESUME/accel button
until the CRUISE CONTROL light
comes on. The car will accelerate to
the same cruising speed as before.
If you cancel cruise control by
pressing the SET and RESUME
buttons at the same time, the
previously-set cruising speed is
erased. To use the cruise control,
accelerate to the desired cruising
speed and press the SET/decel
button.
Pressing the Cruise Control Master
Switch turns the system completely
off and erases the previous cruising
speed from memory. To use the
system again, refer to Using the
Cruise Control.
Steering Wheel Controls, Keys and Locks
Keys
KEY
NUMBER
PLATE
VALET
KEY
MASTER
KEY
The valet key only works the ignition
and the door locks. You can keep the
trunk, trunk release handle, trunk
pass-through cover and glove box
locked when you leave your car and
valet key at a parking facility (see
Trunk, page 54).
You should have received a key
number plate with your set of keys.
You will need this key number if you
ever have to replace a lost key. Store
this plate in a safe place.
Your car comes with two kinds of
keys: a master key and a valet key.
The master key fits all the locks on
your car:
Ignition
Doors
Trunk
Glove box
Trunk release handle
Trunk pass-through cover
When replacing keys, use only
Honda-approved key blanks.
Instruments and Controls
Keys and Locks
Ignition Switch
The ignition switch is on the right
side of the steering column. It has
four positions: LOCK (0), ACCESSORY (I), ON (II), and START (III).
LOCK (0) — You can insert or
remove the key only in this position.
When you turn the key from LOCK
to ACCESSORY, you may have to
turn the steering wheel to release
the anti-theft lock. To switch from
ACCESSORY to LOCK, you must
push the key in slightly as you turn it.
If your car has an automatic transmission, it must also be in Park. The
anti-theft lock will lock the steering
column when you remove the key.
Removing the key from the
ignition switch while driving
locks the steering. This can
cause you to lose control.
Remove the key from the
ignition switch only when
parked.
Instruments and Controls
ACCESSORY (I) — In this position,
you can operate the audio system
and cigarette lighter.
ON (II) — This is the normal key
position when driving. All features
and accessories on the car are usable.
Several of the lights on the instrument panel come on as a test when
you turn the ignition switch from
ACCESSORY to ON (see page 35).
START (III) — Use this position
only to start the engine. The switch
returns to ON when you let go of the
key.
You will hear a reminder beeper if
you open the driver's door with the
key in the LOCK or ACCESSORY
position. Remove the key to turn it
off.
Keys and Locks
Door Locks
LOCK TAB
Each door has a lock tab on the top.
Push the tab down to lock the door
and pull it up to unlock.
To lock any passenger's door when
getting out of the car, push the lock
tab down and close the door. To lock
the driver's door, pull the outside
door handle and push the lock tab
down. Release the handle then close
the door.
The front doors can be locked and
unlocked from the outside with the
key.
Power Door Locks
MASTER DOOR LOCK SWITCH
On LX, LX V-6, EX and EX V-6 models in
the U.S., and EX, EX V-6, EX-R and EX-R
V-6 models in Canada
Each front door has a master door
lock switch. Either switch locks and
unlocks all doors. Push the switch
down to lock all doors, and up to
unlock them.
CONTINUED
Instruments and Controls
Keys and Locks
To lock any passenger's door when
getting out of the car, push the lock
tab in and close the door. To lock the
driver's door, pull the outside door
handle and push the lock tab in or
push the master switch down.
Release the handle, then close the
door.
All doors can be locked from the
outside by using the key in either
front door. To unlock only the driver's
door from the outside, turn the key
and release it. If you turn the key
and hold it, all doors will unlock. All
four doors will unlock when you
unlock the passenger's door with the
key.
Instruments and Controls
Trunk
Childproof Door Locks
LEVER
TRUNK RELEASE
HANDLE
The childproof door locks are
designed to prevent children seated
in the rear from accidentally opening
the rear doors. Each rear door has a
lock lever near the edge. With the
lever in the LOCK position, the door
cannot be opened from the inside
regardless of the position of the lock
tab. To open the door, pull the lock
tab up and use the outside door
handle.
You can open the trunk in two ways:
Pull the trunk release handle to
the left of the driver's seat.
Use the master key to open the
trunk lock. The valet key does not
work in this lock.
Keys and Locks
Glove Box
MASTER KEY
To close the trunk, press down on
the trunk lid.
See page 111 for cargo loading and
weight limit information. Keep the
trunk lid closed at all times while
driving to avoid damaging the lid and
getting exhaust gas in the interior.
See Carbon Monoxide Hazard on
page 29.
MASTER KEY
To protect items in the trunk when
you need to give the key to someone
else:
1. Lock the trunk release handle
with the master key.
2. Give the person the valet key.
GLOVE BOX
Open the glove box by pulling the
bottom of the handle. Close it with a
firm push. Lock or unlock the glove
box with the master key.
The glove box light comes on only
when the instrument panel lights are
on.
CONTINUED
Instruments and Controls
Keys and Locks, Seat Adjustments
adjustment. A l l other seat adjustments
in that model are manual.
An open glove box can cause
serious injury to your passenger
in a crash, even if the
passenger is wearing the seat
belt.
The 4-cylinder DX and LX models in
the U.S., the LX and EX models in
Canada, have manual seat adjustments (see page 58).
Always keep the glove box
closed while driving.
The front passenger's seat in all
Accord models adjusts manually.
Driver's Seat Power Adjustments
Seat Adjustments
All V-6 models, the 4-cylinder EX
model with leather interior in the U.S.,
and the 4-cylinder EX-R model in
Canada have power adjustments for
the seat bottom. The EX V-6 models
in the U.S. and the EX-R V-6 model in
Canada also have a power
adjustment for the seat-back angle.
The 4-cylinder EX model without
leather interior in the U.S. and the
4-cylinder EX-R model in Canada
have a power seat bottom height
Instruments and Controls
On all V-6 models, the 4-cylinder EX
model with leather interior in the U.S.,
and the 4-cylinder EX-R model in Canada
The two power seat adjustment
switches are on the outside edge of
the seat bottom. The horizontal
switch adjusts the seat bottom in
several directions. The short vertical
switch adjusts the seat-back angle.
Push the horizontal switch forward
or backward to adjust the distance to
the steering wheel and pedals.
Seat Adjustments
On U.S. EX V-6, LX V-6, and Canadian
EX-R V6, EX V-6
Pull up or push down on the front of
the switch to move the seat bottom's
front edge up or down. Pull up or
push down on the rear of the switch
to move the rear of the seat bottom
up or down.
On the EX V-6, LX V-6 and EX in
the U.S. and EX-R V-6, EX V-6
and EX-R in Canada
Pull the center of the horizontal
switch up to raise the seat. Push it
down to lower the seat.
On the EX V-6 in the U.S. and
EX-R V-6 in Canada models only
Adjust the seat-back angle by
pushing the rear switch in the
direction you want to move.
CONTINUED
Instruments and Controls
Seat Adjustments
Driver's Seat Manual
Adjustments
Reclining the seat-back can
decrease the protection you get
from your seat belt in a crash.
You can slide under the seat
belt and be seriously injured.
Adjust the seat-back to an
upright position and sit well
back in the seat.
On DX, LX and EX models in the U.S.,
and LX and EX models in Canada
Adjust the seat before you start
driving.
To adjust the seat forward and
backward, pull up on the lever under
the seat cushion's front edge. Move
the seat to the desired position and
release the lever. Try to move the
seat to make sure it is locked in
position.
Instruments and Controls
On DX, LX and EX models in the U.S.,
and LX, EX and EX-R models in Canada
To change the angle of the seat-back,
pull up on the lever on the outside of
the seat bottom. Move the seat-back
to the desired position and release
the lever. Let the seat-back latch in
the new position.
Seat Adjustments
Driver's Lumbar Support
Reclining the seat-back can
decrease the protection you get
from your seat belt in a crash.
You can slide under the seat
belt and be seriously injured.
Head Restraints
The front head restraints help
protect you and your passenger from
whiplash and other injuries. They are
most effective when you adjust them
so the top of the restraint is even
with the top of your ears.
Adjust the seat-back to an
upright position and sit well
back in the seat.
On EX, EX V-6 models in the U.S., and
EX-R, EX-R V-6 models in Canada
Vary the lumbar support by moving
the lever on the right side of the
seat-back. Pivot the lever forward
until it stops, then let it return. Doing
this several times adjusts the lumbar
support through its full range.
CONTINUED
Instruments and Controls
Seat Adjustments
To remove a head restraint for
cleaning or repair, pull it up as far as
it will go. Push the release button
and pull the restraint out of the seatback.
RELEASE BUTTON
The front head restraints adjust for
height. You need both hands to
adjust the restraint. Do not attempt
to adjust it while driving. To raise it,
pull upward. To lower the restraint,
push the release button and push the
restraint down.
Instruments and Controls
Folding Rear Seat
MASTER
KEY
Driving your car without head
restraints can lead to serious
injury to you and your
passenger in a crash.
Make sure the head restraints
are in place and adjusted
properly before driving.
The back of the rear seat folds down,
giving you direct access to the trunk.
The seat-back can be released from
inside the car or inside the trunk.
To fold down the seat-back from
inside the car, insert the master key
in the lock on the rear shelf. Turn
the key clockwise, pull down the top
of the seat-back, then release the
key.
Seat Adjustments
Pull
Make sure both rear shoulder belts
are positioned in front of the rear
seat-back whenever the seat-back is
in its upright position.
Never drive with the seat-back
folded down and the trunk lid open.
See Carbon Monoxide Hazard on
page 29.
Make sure all items in the trunk, or
items extending through the opening
into the back seat, are tied down.
Loose items can fly forward and
cause injury if you have to brake
hard. See Loading Cargo on page
111.
To release the seat-back from inside
the trunk, pull the release loop under
the rear shelf.
To lock the seat-back upright, push it
firmly against the rear shelf. Make
sure it is latched in place by pulling
on the top of the seat.
Instruments and Controls
Seat Adjustments
Rear Seat Armrest
Trunk Pass-through Cover
On LX, LX V-6, EX and EX V-6 models in
the U.S., and EX, EX V-6, EX-R and EX-R
V-6 models in Canada
KNOB
For security, this cover can be
locked and unlocked only with the
master key. To lock the cover, insert
the key and turn it clockwise.
Never drive with this cover open,
especially if the trunk lid is also open.
See Carbon Monoxide Hazard on
page 29.
LID
The cover behind the rear seat
armrest allows you to reach small
objects in the trunk from the interior.
The rear seat armrest is located at
the center of the rear seat. Pivot it
down to use it.
Instruments and Controls
Open the cover by sliding the knob
downward and pulling on the cover.
To close the cover, swing it up and
push firmly on the top. Make sure it
latches closed.
Power Windows
Only on LX, LX V-6, EX and EX V-6
models in the U.S., and EX, EX V-6,
EX-R and EX-R V-6 models in Canada
Your car's windows are electricallypowered. Turn the ignition switch to
ON (II) to raise or lower any window.
Each door has a switch that controls
its window. To open the window,
push the switch down and hold it.
Release the switch when you want
the window to stop. Close the
window by pushing the switch up
and holding it.
The master control panel also contains these extra features:
AUTO — To open the driver's
window fully, push the window
switch firmly down and release it.
The window automatically goes all
the way down. To stop the window
from going all the way down, push
the window switch up briefly.
DRIVER'S WINDOW
SWITCH
MAIN
SWITCH
The driver's armrest has a master
power window control panel. To
open any of the passengers' windows,
push down on the appropriate switch
and hold it down until the window
reaches the desired position. To
close the window, push up on the
window switch. Release the switch
when the window gets to the position
you want.
To open the driver's window only
partially, push the window switch
down lightly and hold it. The window
will stop as soon as you release the
switch.
The AUTO function only works to
lower the driver's window. To raise
the window, you must push the
window switch up and hold it until
the window reaches the desired
position.
CONTINUED
Instruments and Controls
Power Windows, Moonroof
The MAIN switch controls power to
the passengers' windows. With this
switch off, the passengers' windows
cannot be raised or lowered. The
MAIN switch does not affect the
driver's window. Keep the MAIN
switch off when you have children in
the car so they do not injure themselves by operating the windows
unintentionally.
The power window system has a keyoff delay function. The windows will
still operate for up to ten minutes
after you turn off the ignition.
Opening either front door cancels
the delay function. You must turn
the ignition ON (II) again before you
can raise or lower the windows.
Closing a power window on a
child's hands or fingers can
cause serious injury.
Make sure your children are
away from the windows before
closing them.
Instruments and Controls
Moonroof
MOONROOF SWITCH
On EX, EX V-6 models in the U.S., and
EX-R, EX-R V-6 models in Canada
Use the switch on the dashboard to
open and close the moonroof. The
ignition must be ON (II). Push and
hold the
switch to open the
moonroof. Release the switch when
the moonroof reaches the desired
position. To close the moonroof,
press and hold the
switch.
Moonroof, Mirrors
The moonroof has a key-off delay.
You can still open and close the
moonroof for up to ten minutes after
you turn off the ignition. The key-off
delay cancels as soon as you open
either front door. You must then
turn the ignition ON (II) for the
moonroof to operate.
Closing the moonroof on
someone's hands or fingers can
cause serious injury.
Make sure passengers are
clear of the moonroof before
closing it.
NOTICE
Mirrors
If you try to open the moonroof in
below-freezing temperatures, or when
it is covered with snow or ice, you can
damage the moonroof panel or motor.
TAB
Keep the inside and outside mirrors
clean and adjusted for best visibility.
Be sure to adjust the mirrors before
you start driving.
The inside mirror has day and night
positions. The night position reduces
glare from headlights behind you.
Flip the tab on the bottom edge of
the mirror to select the day or night
position.
Instruments and Controls
Mirrors
Adjusting the Power Mirrors
SELECTOR SWITCH
1. Turn the ignition switch ON (II).
2. Move the selector switch to L
(driver's side) or R (passenger's
side).
ADJUSTMENT SWITCH
On U.S. LX, LX V-6, EX and EX V-6
models, and Canadian EX, EX V-6, EX-R
and EX-R V-6 models
Adjust the outside mirrors with the
adjustment switch on the driver's
door armrest:
Instruments and Controls
3. Push the appropriate edge of the
adjustment switch to move the
mirror right, left, up or down.
4. When you finish, move the
selector switch to the center (off)
position. This turns off the
adjustment switch so you can't
move a mirror out of position by
accidentally bumping the switch.
Parking Brake
NOTICE
Driving the car with the parking brake
applied can damage the rear brakes
and axles.
PARKING BRAKE LEVER
To apply the parking brake, pull the
lever up fully. To release it, pull up
slightly, push the button, and lower
the lever. The parking brake light on
the instrument panel should go out
when the parking brake is fully
released (see page 36). If you try to
drive the car without releasing the
parking brake, the ABS cannot work
properly.
Instruments and Controls
Digital Clock
H
M
RESET
3. Press and hold the H button until
the hour advances to the desired
time.
4. Press and hold the M button until
the numbers advance to the
desired time.
The digital clock displays the time
with the ignition switch ON (II). To
see the time with the ignition off,
press and hold the wide button
under the clock.
To set the clock:
1. Turn the ignition switch ON (II) to
display the time.
2. Swing down the front cover of the
wide button under the clock
display. You will see H, M, and
RESET buttons.
Instruments and Controls
You can use the RESET button to
quickly set the time to the nearest
hour. If the displayed time is before
the half hour, pressing the RESET
button sets the clock back to the
previous hour. If the displayed time
is after the half hour, pressing the
RESET button sets the clock forward to the beginning of the next
hour.
For example:
1:06 would RESET to 1:00.
1:52 would RESET to 2:00.
Beverage Holder, Vanity Mirror
Beverage Holder
Vanity Mirror
Push
To open the beverage holder, push
on the top. It is spring-loaded and will
swing open. To close it, push it down
until it latches.
Use the beverage holder only when
the car is parked. If you place cups in
the holder while driving, the liquid
may spill when you go over bumps or
around corners.
The inner liner can be removed if
you want to hold a larger cup.
Be careful when you are using the
beverage holder. A spilled liquid that
is very hot can scald you or your
passenger. Spilled liquids can also
damage the upholstery, carpeting,
and electrical components in the
interior.
Some models have lighted vanity
mirrors.
The light beside the mirror comes
on only when the light switch is
turned on.
Instruments and Controls
Cigarette Lighter, Ashtrays
Cigarette Lighter
Ashtrays
CIGARETTE LIGHTER
ASHTRAY
ASHTRAY
The ignition switch must be in
ACCESSORY (I) or ON (II) for the
cigarette lighter to work. To heat up
the lighter, push it in. It will pop out
when it is ready for use. Do not hold
the lighter in while it is heating up,
you could cause it to overheat.
Open the front ashtray by swinging
the lid down. To remove it for
emptying, open the lid then pull the
ashtray straight outward.
The rear ashtray is at the rear end of
the center console. Open the ashtray
by swinging the upper edge of the lid
down. To remove the ashtray for
emptying, open it then lift up and out.
NOTICE
Use the ashtray only for cigarettes,
cigars and other smoking materials. To
prevent a possible fire and damage to
your car, don't put paper or other
things that can burn in the ashtray.
Instruments and Controls
Interior Lights
Ceiling Light
Courtesy Lights
Spot Light
IGNITION SWITCH LIGHT
Push
OFF
ON
Push
DOOR ACTIVATED
The ceiling light has a three-position
switch. In the OFF position, the light
does not come on. In the center
position, the ceiling light comes on
when you open any door. In the ON
position, the ceiling light stays on
continuously.
DOOR LIGHT
On LX, EX, LX V-6 and EX V-6
models in the U.S., and EX, EX-R,
EX V-6 and EX-R V-6 models
in Canada
Turn on the spotlight by pushing the
button next to each light. Push the
button again to turn it off. You can
use the spotlights at all times.
On LX, LX V-6, EX and EX V-6 models in
the U.S., and EX, EX V-6, EX-R and EX-R
V-6 models in Canada
Each door has a courtesy light. This
light comes on when yon open any
door.
Your car also has a courtesy light in
the ignition switch. This light comes
on when you open the driver's door.
It remains on for several seconds
after the door is closed.
Instruments and Controls
Comfort and Convenience Features
The heating and air conditioning*
systems in your Honda provide a
comfortable driving environment in
all weather conditions.
* Air conditioning is optional on U.S.
DX and Canadian LX models. The
Anniversary Edition in the U.S.
comes equipped with air conditioning.
The audio system that is standard
equipment on some models has
many features. This section
describes those features and how
to use them. (If you selected an
optional audio system, refer to the
operating instructions that came
with it.)
* Audio sound system is optional on
the U.S. DX model. The audio system
is standard on the Anniversary Edition
Heating and Cooling........................ 74
What Each Control Does............ 74
How to Use the System............... 76
To Turn Everything Off............. 80
Audio System (Canadian LX)......... 81
Operating the Radio.................... 82
Adjusting the Sound.................... 84
Operating the Cassette Player... 85
Tape Search Functions............... 86
Audio System (Except U.S. DX and
Canadian LX)........................... 87
Operating the Radio.................... 87
Auto Select................................... 89
Adjusting the Sound.................... 90
Radio Frequencies....................... 91
Radio Reception........................... 91
Operating the Cassette Player... 93
Caring for the Cassette Player... 95
Operating the Optional CD ........ 96
Protecting Compact Discs.......... 98
CD Error Indications................... 99
Theft Protection........................ 100
Comfort and Convenience Features
Heating and Cooling
Proper use of the Heating and
Cooling system can make the
interior dry and comfortable, and
keep the windows clear for best
visibility.
If your vehicle does not have air
conditioning, it can be installed at
any time. Your dealer will install a
Genuine Honda air conditioning
system that meets Honda's high
quality standards and is designed to
exactly fit your vehicle. Please
contact your dealer for more
information.
What Each Control Does
Fan Control Dial
Turning this dial clockwise increases
the fan's speed, which increases air
flow.
Temperature Control Dial
Turning this dial clockwise increases
the temperature of the air flow.
Comfort and Convenience Features
FRESH AIR/RECIRCULATION
BUTTON
FAN CONTROL
DIAL
TEMPERATURE
CONTROL DIAL
Air Conditioning (A/C) Button
This button turns the air conditioning ON and OFF. The indicator
above the button lights when the
A/C is on.
AIR CONDITIONING
BUTTON
MODE BUTTONS
Fresh Air/Recirculation Button
This button controls the source of
the air going into the system. When
you select the
side, air is
brought in from outside the vehicle
(Fresh Air mode). When you select
the
side, air from the vehicle's
interior is sent through the system
again (Recirculation mode). The
indicator light shows which mode is
selected.
Heating and Cooling
Mode Buttons
These buttons let you select which
vents the air flows from.
Air flows from the center
and corner vents in the dashboard.
Air flow is divided between
the vents in the dashboard and the
floor vents.
Air flows from the floor
vents.
Air flow is divided between
the floor vents and the defroster
vents at the base of the windshield.
Air flows from the defroster
vents at the base of the windshield.
Comfort and Convenience Features
Heating and Cooling
Vent Controls
CENTER VENT
You can adjust the direction of the
air coming from the dashboard vents
by moving the tab in the center of
each vent up-and-down and side-toside.
Comfort and Convenience Features
SIDE VENT
The vents in the corners of the
dashboard can be opened and closed
with the dials next to them.
How to Use the System
This section covers how to set up the
system controls for ventilation,
heating, cooling, dehumidifying, and
defrosting.
The engine must be running for the
heater and air conditioning to
generate hot and cold air. The heater
uses engine coolant to warm the air.
If the engine is cold, it will be several
minutes before you feel warm air
coming from the system.
The air conditioning does not rely on
engine temperature.
Heating and Cooling
It is best to leave the system in
mode under almost all
conditions. Keeping the system in
mode, particularly with the
A / C off, can cause the windows to
fog up. Switch to
mode when
you are driving through smoky or
dusty conditions, then switch back to
mode when the condition
clears.
The outside air intakes for the
heating and cooling system are at
the base of the windshield. Keep
these clear of leaves and other
debris.
FRESH AIR/RECIRCULATION
BUTTON
FAN CONTROL
DIAL
TEMPERATURE
CONTROL DIAL
Ventilation
The flow-through ventilation system
draws in outside air, circulates it
through the interior, then exhausts it
through vents near the rear window.
AIR CONDITIONING
BUTTON
MODE BUTTONS
1. Turn the temperature control dial
all the way to the left.
Make sure the A/C is off.
2. Select
and
3. Set the fan to the desired speed.
CONTINUED
Comfort and Convenience Features
Heating and Cooling
To Cool with A/C
FRESH AIR/RECIRCULATION
BUTTON
1. Turn on the A/C by pressing the
button. The light above the button
should come on.
2. Make sure the temperature
control dial is all the way to the left.
3. Select
and
4. Set the fan to the desired speed.
If the interior is very warm from
being parked in the sun, you can cool
it down more rapidly by setting up
the controls this way:
1. Start the engine.
2. Turn on the A / C by pressing the
button. Make sure the temperature control dial is all the way to
the left.
3. Set the fan to maximum speed.
4. Open the windows partially. Select
and
Comfort and Convenience Features
FAN CONTROL
DIAL
TEMPERATURE
CONTROL DIAL
When the interior has cooled down
to a more comfortable temperature,
close the windows and set the
controls as described for normal
cooling.
AIR CONDITIONING
BUTTON
MODE BUTTONS
Air conditioning places an extra load
on the engine. Watch the engine
coolant temperature gauge (see page
40) when driving in stop-and-go
traffic or climbing a long, steep hill.
If it moves near the red zone, turn
off the A / C until the gauge reads
normally.
Heating and Cooling
To Heat
To warm the interior:
1. Start the engine.
2. Select
and
3. Set the fan to the desired speed.
4. Adjust the warmth of the air with
the temperature control lever.
To Heat and Dehumidify with Air
Conditioning
Air conditioning, as it cools, removes
moisture from the air. When used in
combination with the heater, it
makes the interior warm and dry.
1. Switch the fan on.
2. Turn on the air conditioning.
3. Select
and
4. Adjust the temperature control
dial so the mixture of heated and
cooled air feels comfortable.
To Defog and Defrost
To remove fog from the inside of the
windows:
1. Switch the fan on.
2. Turn on the air conditioning.
3. Select
and
4. Adjust the temperature control
dial so the air flow from the
defroster vents feels warm.
5. Turn on the rear window defogger
to help clear the rear window.
This setting is suitable for all driving
conditions whenever the outside
temperature is above 32°F (0°C).
CONTINUED
Comfort and Convenience Features
Heating and Cooling
To remove exterior frost or ice from
the windshield and side windows
after the car has been sitting out in
cold weather:
1. Start the engine.
2. Select
and
3. Switch the fan and temperature
controls to maximum.
To rapidly remove exterior frost or
ice from the windshield (on very cold
days), first select
Once the
windshield is clear, select
to
avoid fogging the windows.
Comfort and Convenience Features
These settings direct all the air flow
to the defroster vents at the base of
the windshield and the side window
defroster vents. The air flow will get
warmer and clear the windows faster
as the engine warms up. You can
close the side vents with the dial
beside each vent. This will send
more warm air to the windshield
defroster vents.
For safety, make sure you have a
clear view through all the windows
before driving away.
To Turn Everything Off
To shut off the system temporarily,
turn the fan speed and temperature
control dial all the way to the left.
You should shut the system completely off only for the first few
minutes of driving in cold weather,
until the engine coolant warms up
enough to operate the heater. Keep
the fan on at all other times so stale
air does not build up in the interior.
Audio System
AM/FM/Cassette Stereo Audio
System
SW-VOL/BAL KNOB
TUNE/SEEK BAR
For Canadian LX model only
Your Honda's audio system provides
clear reception on both AM and FM
bands, while the preset buttons allow
you to easily select your favorite
stations.
The cassette player features autoreverse for continuous play.
AM/FM BUTTON
PRESET BUTTONS
Comfort and Convenience Features
Audio System
Operating the Radio
The ignition switch must be in
ACCESSORY (I) or ON (II) to
operate the audio system. Turn the
system on by pushing the SW-VOL/
BAL knob.
SW-VOL/BAL KNOB
TUNE/SEEK BAR
STEREO INDICATOR
Adjust the volume by turning the
SW.VOL/BAL knob.
AM/FM BUTTON
The band and frequency that the
radio was last tuned to is displayed.
To change bands, press the A M / F M
button. On the FM band, ST will be
displayed if the station is broadcasting in stereo. Stereo reproduction on
AM is not available.
Comfort and Convenience Features
PRESET BUTTONS
Audio System
You can use any of three methods to
find radio stations on the selected
band: TUNE, SEEK, or the Preset
buttons.
TUNE — Use the TUNE/SEEK bar
to tune the radio to a desired
frequency. Press the upper part
(
) to tune to a higher frequency,
or the lower part (
) to tune to a
lower frequency. The frequency
numbers will start to change rapidly.
Release the bar when the display
reaches the desired frequency. To
change the frequency in small
increments, press and release the
TUNE/SEEK bar quickly.
SEEK — The SEEK function
searches the band for a station with
a strong signal. To activate it, press
the TUNE/SEEK bar until you hear
a beep, then release it. Depending on
which part of the bar you pressed,
the system scans upward or downward from the current frequency. It
stops when it finds a station with a
strong signal.
To store a frequency:
Preset — You can store the
frequencies of your favorite radio
stations in the six preset buttons.
Each button will store one frequency
on the AM band, and two on the FM
band.
3. Pick the Preset button you want
for that station. Press the button
and hold it until you hear a beep.
1. Select the desired band, AM or
FM. FM1 and FM2 let you store
two frequencies with each Preset
button.
2. Use the TUNE or SEEK bar to
tune the radio to the desired
station.
4. Repeat steps 1 to 3 to store a total
of six stations on AM and twelve
on FM.
Once a station's frequency is stored,
simply press and release the proper
preset button to tune to it.
The preset frequencies will be lost if
your vehicle's battery goes dead or is
disconnected.
Comfort and Convenience Features
Audio System
Adjusting the Sound
Balance/Fader — These two
controls adjust the strength of the
sound coming from each speaker.
The Balance control adjusts the sideto-side strength, while the Fader
control adjusts the front-to-back
strength.
BALANCE CONTROL
Adjust the Fader to your liking by
turning the outside ring. Adjust the
Balance by pulling out the SW-VOL/
BAL knob and turning it.
Treble/Bass — Use these controls
to adjust the tone to your liking.
Adjust the Bass by turning the knob.
Adjust the Treble by pulling out the
knob and turning it.
Comfort and Convenience Features
FADER
CONTROL
TONE
CONTROL
Radio Frequencies and Reception
For information, See page 91.
Audio System
Operating the Cassette Player
Turn the audio system ON. Make
sure the tape opening on the cassette
is facing to the right, then insert the
cassette most of the way into the slot.
The system will pull it in the rest of
the way, and begin to play.
The tape direction indicator will light
to show you which side of the
cassette is playing. The
indicates
the side you inserted facing upward
is now playing. If you want to play
the other side, press the Fast
Forward/Rewind buttons at the
same time.
FAST FORWARD
BUTTON
EJECT
BUTTON
TAPE DIRECTION
INDICATOR
REWIND
BUTTON
CASSETTE
SLOT
When the system reaches the end of
the tape, it will automatically reverse
direction and play the other side. If
you want to remove the cassette
from the drive, press the EJECT
button.
Comfort and Convenience Features
Audio System
Tape Search Functions
FF/REW — Fast Forward and
Rewind move the tape rapidly. Press
the REW button to rewind the the
tape, or the FF button to fast
forward. To take the system out of
rewind, press the FF button briefly.
To take the system out of fast
forward, press REW briefly. If the
system reaches the end of the tape
while in fast forward or rewind, it
automatically stops that function,
reverses direction, and begins to play.
Caring for Cassettes
Damaged cassettes can jam inside
the drive or cause other problems.
See page 95 for information on
cassette care and protection.
Comfort and Convenience Features
FAST FORWARD
BUTTON
REWIND
BUTTON
Audio System
AM/FM/Cassette Stereo Audio
System
For Anniversary Edition, LX, LX V-6,
EX and EX V-6 in the U.S. and EX,
EX V-6, EX-R and EX-R V-6 in Canada
Your Honda's audio system provides
clear reception on both AM and FM
bands, while the preset buttons allow
you to easily select your favorite
stations.
The cassette system features Dolby
B* noise reduction, automatic
sensing of chromium-dioxide (CrO2)
tape, and autoreverse for continuous
play.
For EX and EX V-6 in the U.S. and EX-R
and EX-R V-6 in Canada
The Anti-theft feature disables the
system if it is disconnected from the
car's battery. To get the system
working again, you must enter a
code number.
* Dolby noise reduction manufactured under
license from Dolby Laboratories Licensing Corporation. "DOLBY" and the double-D symbol
are trademarks of Dolby Laboratories
Licensing Corporation.
Operating the Radio
The ignition switch must be in ACCESSORY (I) or ON (II). Turn the
system on and adjust the volume by
turning the ON/OFF/VOL knob.
The band and frequency that the
radio was last tuned to is displayed.
To change bands, press the A M / F M
button. On the FM band, ST will be
displayed if the station is broadcasting in stereo. Stereo reproduction on
AM is not available.
You can use any of three methods to
find radio stations on the selected
band: TUNE, SEEK, or the Preset
buttons.
TUNE — Use the TUNE/SEEK
switch to tune the radio to a desired
frequency. Push the switch up to
tune to a higher frequency, and push
the switch down to tune to a lower
frequency. The frequency numbers
will start to change rapidly. Release
the switch when the display reaches
the desired frequency. To change
the frequency in small increments,
push and release the TUNE/SEEK
switch quickly.
SEEK — The SEEK function
searches the band for a station with
a strong signal. To activate it, push
the TUNE/SEEK switch until you
hear a beep, then release it.
Depending on which way you pushed
the switch, the system scans upward
or downward from the current
frequency. It stops when it finds a
station with a strong signal.
Preset — You can store the
frequencies of your favorite radio
stations in the six preset buttons.
Each button will store one frequency
on the AM band, and two on the FM
band.
CONTINUED
Comfort and Convenience Features
Audio System
To store a frequency:
1. Select the desired band, AM or
FM. FM1 and FM2 let you store
two frequencies with each Preset
button.
2. Use the TUNE or SEEK function
to tune the radio to a desired
station.
3. Pick the Preset button you want
for that station. Press the button
and hold it until you hear a beep.
4. Repeat steps 1 to 3 to store a total
of six stations on AM and twelve
on FM.
(U.S.: Anniversary
Edition, LX, LX V-6
Canada: EX, EX V-6)
ON/OFF/VOL KNOB
TUNE/SEEK
FF/REW/TMS
SWITCH
AM/FM
BUTTON
ON/OFF/VOL
(U.S.: EX, EX V-6,
Canada: EX-R, EX-R V-6)
KNOB
CASSETTE SLOT
PRESET
BUTTONS
CASSETTE SLOT
Once a station's frequency is stored,
simply press and release the proper
preset button to tune to it.
The preset frequencies will be lost if
your vehicle's battery goes dead or is
disconnected.
Comfort and Convenience Features
TUNE/SEEK
FF/REW/TMS
SWITCH
AM/FM
BUTTON
PRESET
BUTTONS
Audio System
For EX and EX V-6 models in the U.S.
and EX-R, EX-R V-6 models in Canada
AUTO SELECT - If you are
traveling far from home and can no
longer receive the stations you
preset, you can use the Auto Select
feature to find stations in the local
area.
To activate Auto Select, press the A.
SELECT button. A. SELECT will
appear in the display, and the system
will go into scan mode for several
seconds. It automatically scans both
bands, looking for stations with
strong signals. It stores the frequencies of six AM stations and twelve
FM stations in the preset buttons.
You can then use the preset buttons
to select those stations.
If you are in a remote area, Auto
Select may not find six strong AM
stations or twelve strong FM stations.
If this happens, you will see a "0"
displayed when you press any preset
button that does not have a station
stored.
(U.S.: EX, EX V-6,
Canada: EX-R, EX-R V-6)
AUTO SELECT LIGHT
AUTO SELECT BUTTON
With Auto Select on, you cannot
manually store any frequencies in
the preset buttons. If you do not like
the stations found by Auto Select,
you can use the TUNE and SEEK
functions to find other stations.
Auto Select does not erase the
frequencies that you preset
previously. When you return home,
turn off Auto Select by pressing the
A. SELECT button. The preset
buttons will then select the
frequencies you originally set.
Comfort and Convenience Features
Audio System
Adjusting the Sound
Balance/Fader — These two
controls adjust the strength of the
sound coming from each speaker.
The Balance control adjusts the sideto-side strength, while the Fader
control adjusts the front-to-back
strength.
To use these controls, push on the
knob to get them to pop out. Adjust
the Fader to your liking by turning
the outside ring. Adjust the Balance
by turning the knob. Push the
controls back in when you are done.
Treble/Bass — Use these controls
to adjust the tone to your liking.
Push on the controls to get them to
pop out. Adjust the Bass by turning
the outer ring. Adjust the Treble by
turning the knob. Push the controls
back in when you are finished so you
cannot change the settings by
accidentally bumping them.
Comfort and Convenience Features
FADER
TREBLE
BALANCE BASS
CONTROL CONTROL CONTROL CONTROL
You can use the Balance control
knob to turn off the illumination of
the audio system. Push the Balance/
Fader controls so they pop out, then
pull the Balance control knob out
slightly farther.
Check the Balance control knob if
the audio system does not illuminate
with the instrument panel lights.
Audio System
Radio Frequencies
Your Honda's radio can receive the
complete AM and FM bands.
Those bands cover these frequencies:
AM band:
530 to 1,710 kilohertz
FM band:
87.7 to 107.9 megahertz
Radio stations on the AM band are
assigned frequencies at least ten
kilohertz apart (530, 540, 550).
Stations on the FM band are
assigned frequencies at least 0.2
megahertz apart (87.9, 88.1, 88.3).
Stations must use these exact
frequencies. It is fairly common for
stations to round-off the frequency in
their advertising, so your radio could
display a frequency of 100.9 even
though the announcer may identify
the station as "FM101."
Radio Reception
How well your Honda's radio
receives stations is dependent on
many factors, such as the distance
from the station's transmitter,
nearby large objects, and atmospheric conditions.
A radio station's signal gets weaker
as you get farther away from its
transmitter. If you are listening to an
AM station, you will notice the sound
volume becoming weaker, and the
station drifting in and out. If you are
listening to an FM staion, you will
see the stereo indicator flickering off
and on as the signal weakens.
Eventually, the stereo indicator will
go off and the sound will fade
completely as you get out of range of
the station's signal.
Driving very near the transmitter of
a station that is broadcasting on a
frequency close to the frequency of
the station you are listening to can
also affect your radio's reception.
You may temporarily hear both
stations, or hear only the station you
are close to.
CONTINUED
Comfort and Convenience Features
Audio System
Electrical interference from passing
vehicles and stationary sources can
cause temporary reception problems.
Radio signals, especially on the FM
band, are deflected by large objects
such as buildings and hills. Your
radio then receives both the direct
signal from the station's transmitter,
and the deflected signal. This causes
the sound to distort or flutter. This is
a main cause of poor radio reception
in city driving.
Comfort and Convenience Features
Radio reception can be affected by
atmospheric conditions such as
thunderstorms, high humidity, and
even sunspots. You may be able to
receive a distant radio station one
day and not receive it the next day
because of a change in conditions.
Audio System
Operating the Cassette Player
Turn the audio system ON. Make
sure the tape opening on the cassette
is facing to the right, then insert the
cassette most of the way into the slot.
The system will pull it in the rest of
the way, and begin to play.
The tape direction indicator will light
to show you which side of the
cassette is playing. The
indicates
the side you inserted facing upward
is now playing. If you want to play
the other side, press the PROG
button.
Dolby B noise reduction turns on
when you insert a cassette. If the
cassette was not recorded using
Dolby noise reduction, turn it off by
pressing the
button.
When the system reaches the end of
the tape, it will automatically reverse
direction and play the other side. If
you want to remove the cassette
from the drive, press the EJECT
button.
The system will automatically eject
the cassette whenever you turn off
the system or the ignition switch.
Tape Search Functions
With a cassette playing, you can use
the FF, REW, TMS, or REPEAT
function to find a desired program.
FF/REW — Fast Forward and
Rewind move the tape rapidly.
Push the FF/REW/TMS switch
down to rewind the tape. Push the
switch up to fast forward. Press the
PLAY button to take the system out
of rewind or fast forward. If the
system reaches the end of the tape
while in fast forward or rewind, it
automatically stops that function,
reverses direction, and begins to play.
TMS — The Tape Music Search
Function allows you to find the
beginning of a song or passage. You
activate TMS with the FF/REW/
TMS switch. To find the beginning
of the song or passage currently
playing, push the switch down and
hold it until you hear a beep. You will
see REW flashing in the display as
the tape rewinds. To find the
beginning of the next song, push the
switch up and hold it until you hear a
beep. You will see FF flashing in the
display as the tape fast forwards.
When the system finds the beginning of a song or passage, it goes
back to PLAY mode.
CONTINUED
Comfort and Convenience Features
Audio System
REPEAT — The Repeat function
continuously replays the current
song or passage. Press the REPEAT
button to activate it; you will see RPT
displayed as a reminder. When the
system reaches the end of the song
or passage currently playing, it will
automatically go into rewind.
When it senses the beginning of the
same song or passage, the system
returns to PLAY mode. It will
continue to repeat this same
program until you deactivate
REPEAT by pressing the button
again.
The TMS and REPEAT functions
use silent periods on the tape to find
the end of a song or passage. These
features may not work to your
satisfaction if there is almost no gap
between selections, a high noise
level between selections, or a silent
period in the middle of a selection.
Comfort and Convenience Features
(U.S.: Anniversary
Edition, LX, LX V-6
Canada: EX, EX V-6)
CASSETTE SLOT
FF/REW/TMS EJECT
BUTTON
SWITCH
PROG
BUTTON
CASSETTE SLOT
(U.S.: EX, EX V-6,
Canada: EX-R, EX-R V-6)
FF/REW/TMS EJECT
BUTTON
SWITCH
PROG
BUTTON
TAPE DIRECTION INDICATOR
PLAY
BUTTON
DOLBY
BUTTON
REPEAT
BUTTON
TAPE DIRECTION INDICATOR
PLAY
BUTTON
DOLBY
BUTTON
REPEAT
BUTTON
Audio System
Caring for the Cassette Player
The cassette drive picks up dirt and
oxides whenever you play a tape.
This builds up over time and causes
the sound quality to degrade. To
prevent this, you should clean the
cassette drive after every 30 hours of
use.
If you do not clean the cassette drive
regularly, it may eventually become
impossible to remove the deposits
with a normal cleaning kit.
The cassette player automatically
ejects cassettes that do not play
normally. If it ejects a cassette
before it begins to play, it is probably
defective and should not be inserted
again. You may have a cassette
suddenly stop playing, reverse
directions once or twice and then
eject. This is normally an indication
the tape is wound unevenly. It should
play normally after being manually
rewound.
Use 100-minute or shorter cassettes.
Cassettes longer than 100 minutes
use thinner tape that may break or
jam the drive.
CLEAN INDICATOR
Look at a cassette before you insert
it. If the tape is loose, tighten it by
turning one of the hubs with a pencil
or your finger.
If the label is peeling off, do not put
it in the player. It may cause the
cassette to jam in the drive mechanism when you try to eject it.
Do not leave cassettes sitting where
they are exposed to high heat or
humidity, such as on top of the
dashboard or in the player. If a
cassette is exposed to extreme heat
or cold, let it reach a moderate
temperature before putting it in the
player.
(Except for Canadian LX model)
After 30 hours of tape use, you will
see CLEAN flashing for 5 seconds in
the display when you insert a tape
into the tape slot. If you are already
regularly cleaning the tape drive at
least every 30 hours, reset the
indicator by pressing the Preset 6
button while the system is in the
tape operation mode. Hold the
button until you hear a beep and the
CLEAN indicator goes out.
Comfort and Convenience Features
Audio System
Operating the Optional CD
Changer
Optional for U.S. Anniversary Edition,
LX, LX V-6, EX and EX V-6 models
and Canadian EX, EX V-6, EX-R and
EX-R V-6 models
A Compact Disc changer is available
through your dealer. It holds up to
six discs, providing several hours of
continuous entertainment. You
operate the CD changer with the
same controls used for the radio and
cassette player.
Your dealer also has an accessory indash single CD player available that
is operated by the radio controls. To
operate this unit, use the instructions
(except for those relating to multiple
discs) in this section.
Using the instructions that came
with the changer, load the desired
CDs in the magazine, and load the
magazine in the changer.
Comfort and Convenience Features
RPT INDICATOR
ON/OFF/VOL KNOB
(U.S.: Anniversary
Edition, LX, LX V-6
Canada: EX, EX V-6)
TUNE/SEEK
SWITCH
(U.S.: EX, EX V-6
Canada: EX-R, EX-R V-6)
CD BUTTON
ON/OFF/VOL
KNOB
TUNE/SEEK
SWITCH
To operate the CD changer, the
ignition must be in ACCESSORY (I)
or ON (II) and the audio system
must be on. If you are listening to a
cassette, eject it.
REPEAT
BUTTON
A. SELECT
INDICATOR
CD BUTTON
RPT
INDICATOR
A. SELECT/
REPEAT BUTTON
Press the CD button until "CD"
appears in the display. The system
will start to play the first track of the
first disc in the magazine.
When that disc ends, the next disc in
the magazine is loaded and played.
After the last disc finishes, the
system returns to disc 1.
Audio System
To select a different disc than the
one that is playing, press the
appropriate preset button (1-6).
The system will load that disc and
begin playing it from the first track.
You can use the TUNE/SEEK
switch to select tracks within a disc.
If you press and release the T U N E /
SEEK switch, the system will move
to the beginning of a track. Push the
switch up to move to the beginning
of the next track, and push the
switch down to move to the beginning of the current track.
If you push and hold the TUNE/
SEEK switch, the system will
continue to move across tracks.
Release the switch when you think it
has reached the desired place on the
disc.
REPEAT — When you activate the
Repeat feature by pressing the
Repeat button, the system continuously replays the current track. You
will see RPT in the display as a
reminder. Press the Repeat button
again to turn it off.
(U.S.: EX, EX V-6,
Canada: EX-R, EX-R V-6)
RANDOM PLAY — This feature,
when activated, plays the tracks on a
CD in random order, rather than in
the order they are recorded on the
CD. To activate Random Play, press
the A. SELECT/REPEAT button
until you see A. SEEECT in the
display. The system will then select
and play tracks randomly on the
current disc. When all tracks on that
disc have been played, the next disc
is loaded and played randomly. This
continues until you deactivate
Random Play by pressing A.
SELECT/REPEAT again.
If the system is in Repeat mode, you
must turn it off by pressing A.
SELECT/REPEAT before you can
select Random Play. Then press the
button again until you see A.
SELECT displayed.
To take the system out of CD mode,
press the AM or FM button, or insert
a cassette in the player. When you
return to CD mode, play will continue at the same disc and track.
If you turn the system off while a CD
is playing, either with the ON-OFF/
VOL knob or the ignition switch,
play will continue at the same disc
and track when you turn it back on.
Comfort and Convenience Features
Audio System
Protecting Compact Discs
Handle a CD by its edges; never
touch either surface. Contamination
from fingerprints, liquids, felttip
pens, and labels can cause the CD to
not play properly, or possibly jam in
the drive.
When a CD is not being played, store
it in its case to protect it from dust
and other contamination. To prevent
warpage, keep CDs out of direct
sunlight and extreme heat.
To clean a disc, use a clean soft cloth.
Wipe across the disc from the
center to the outside edge.
A new CD may be rough on the
inner and outer edges. The small
plastic pieces causing this roughness
can flake off and fall on the recording surface of the disc, causing
skipping or other problems. Remove
these pieces by rubbing the inner
and outer edges with the side of a
pencil or pen.
Never try to insert foreign objects in
the CD player or the magazine.
Comfort and Convenience Features
Audio System
CD Error Indications
If you see an error indication in the
display while in CD mode, find the
cause in the chart to the right. If you
cannot clear the error indication,
take the car to your Honda dealer.
Comfort and Convenience Features
Audio System
Theft Protection
On U.S. EX, EX V-6 and Canadian EX-R,
EX-R V-6 models
Your car's audio system will disable
itself if it is disconnected from
electrical power for any reason. To
make it work again, the user must
enter a specific five-digit code in the
Preset buttons. Because there are
hundreds of number combinations
possible from five digits, making the
system work without knowing the
exact code is nearly impossible.
You should have received a card that
lists your audio system's code
number and serial number. It is best
to store this card in a safe place at
home. In addition, you should write
the audio system's serial number in
this Owner's Manual. If you should
happen to lose the card, you must
obtain the code number from your
Honda dealer. To do this, you will
need the system's serial number.
Comfort and Convenience Features
If your car's battery is disconnected
or goes dead, the audio system will
disable itself. If this happens, you
will see "Code" in the frequency
display the next time you turn on the
system. Use the Preset buttons to
enter the five-digit code. If it is
entered correctly, the radio will start
playing.
If you make a mistake entering the
code, do not start over or try to
correct your mistake. Complete the
five-digit sequence, then enter the
correct code. You have three tries to
enter the correct code. If you are
unsuccessful in three attempts, you
must then leave the system on for
one hour before trying again.
You will have to store your favorite
stations in the Preset buttons after
the system begins working. Your
original settings were lost when
power was disconnected.
Before Driving
Before you begin driving your Honda,
you should know what gasoline to
use, and how to check the levels of
important fluids. You also need to
know how to properly stow luggage
or packages. This section will help
you. If you plan to add any accessories to your car, please read the
information in this section first.
Break-in Period.............................. 102
Gasoline.......................................... 102
Oxygenated Fuels...................... 102
Driving in Foreign Countries... 103
Service Station Procedures .......... 104
Filling the Fuel Tank................. 104
Opening the Hood..................... 105
Fuel Economy................................ 109
Vehicle Condition...................... 109
Driving Habits............................ 109
Accessories..................................... 110
Loading Cargo................................ 111
Before Driving
Break-in Period, Gasoline
Break-in Period
Help assure your car's future
reliability and performance by paying
extra attention to how you drive
during the first 1,000 km (600 miles).
During this period:
Avoid full-throttle starts and rapid
acceleration.
If you need to add oil, use the
engine oil recommended in this
owner's manual.
Avoid hard braking. New brakes
need to be broken-in by moderate
use for the first 300 km (200
miles).
You should follow these same recommendations with an overhauled
or exchanged engine, or when the
brakes are relined.
Before Driving
Gasoline
Your Honda operates most effectively on unleaded gasoline with a
pump octane number of 86 or higher.
Use of a lower octane gasoline can
cause a persistent, heavy metallic
rapping noise in the engine that can
lead to mechanical damage.
We recommend gasolines containing
detergent additives that help prevent
fuel system and engine deposits.
Using gasoline containing lead will
damage your car's emission controls.
This contributes to air pollution and
can void certain parts of your
warranty.
Oxygenated Fuels
Some conventional gasolines are
being blended with alcohol or an
ether compound. These gasolines
are collectively referred to as
oxygenated fuels. To meet clean air
standards, some areas of the United
States and Canada use oxygenated
fuels to help reduce emissions.
If you use an oxygenated fuel, be
sure it is unleaded and meets the
minimum octane rating requirement.
Before using an oxygenated fuel, try
to confirm the fuel's contents. Some
states/provinces require this
information to be posted on the
pump.
Gasoline
The following are the EPA-approved
percentages of oxygenates:
ETHANOL (ethyl or grain alcohol)
You may use gasoline containing up
to 10% ethanol by volume. Gasoline
containing ethanol may be marketed
under the name "Gasohol."
MTBE (Methyl Tertiary Butyl
Ether)
You may use gasoline containing up
to 15% MTBE by volume.
METHANOL (methyl or wood
alcohol)
You may use gasoline containing up
to 5% methanol by volume as long as
it also contains cosolvents and
corrosion inhibitors to protect the
fuel system. Gasoline containing
more than 5% methanol by volume
may cause starting and/or performance problems. It may also damage
metal, rubber and plastic parts of
your fuel system.
If you notice any undesirable
operating symptoms, try another
service station or switch to another
brand of gasoline.
Fuel system damage or performance
problems resulting from the use of
an oxygenated fuel containing more
than the percentages of oxygenates
given above are not covered under
warranty.
Driving in Foreign Countries
If you are planning to take your
Honda outside the U. S. or Canada,
contact the tourist bureaus in the
areas you will be traveling in to find
out about the availability of unleaded
gasoline with the proper octane
rating.
If unleaded gasoline is not available,
be aware that using leaded gasoline
in your Honda will affect
performance and fuel mileage, and
damage its emissions controls. It will
no longer comply with U. S. and
Canadian emissions regulations, and
will be illegal to operate in North
America. To bring your car back into
compliance will require the
replacement of several components,
such as the oxygen sensor and the
catalytic converter. These
replacements are not covered under
warranty.
Before Driving
Service Station Procedures
Filling the Fuel Tank
Pull
Gasoline is highly flammable
and explosive. You can be
burned or seriously injured
when handling fuel.
Stop the engine and keep
heat, sparks, and flame away.
Handle fuel only outdoors.
Wipe up spills immediately.
4. Stop filling the tank after the fuel
pump automatically clicks off. Do
not try to "top off" the tank, leave
some room for the fuel to expand
with temperature changes.
5. Screw the fuel fill cap back on,
tighten it until it clicks more than
twice.
1. The fuel fill is on the driver's side
of the car. Park with that side
closest to the service station
pumps.
6. Push the fuel fill door until it
latches.
2. Open the fuel fill door by pulling
on the handle to the left of the
driver's seat.
FUEL FILL CAP
Before Driving
3. Remove the fuel fill cap slowly.
You may hear a hissing sound as
pressure inside the tank escapes.
Place the fuel fill cap on the inside
of the door as shown.
Service Station Procedures
Opening the Hood
SUPPORT ROD
HOOD RELEASE HANDLE
LATCH
1. Shift to Park or Neutral and set
the parking brake. Pull the hood
release handle, located under the
left lower corner of the dashboard.
The hood will pop up slightly.
2. Standing in front of the car, put
your fingers under the front edge
of the hood to the right of center.
Slide your hand to the left until
you feel the hood latch handle.
Push this handle up until it
releases the hood. Lift the hood.
4 cylinder models
3. Pull the support rod out of its clip
and insert the end into the hole on
the front of the hood around the
center.
To close the hood, lift it up slightly to
remove the support rod from the
hole. Put the support rod back into
its holding clip. Lower the hood to
about a foot above the fender, then
let it drop.
CONTINUED
Before Driving
Service Station Procedures
Oil Check
4 cylinder models
6 cylinder models
3. Lift the hood up most of the way.
The hydraulic supports will lift it
up the rest of the way and hold it
up.
To close the hood, lower it and press
down firmly with your hands.
Before Driving
DIPSTICK
Check the engine oil level every time
you fill the car with fuel. Wait at least
two minutes after turning the engine
off before you check the oil.
1. Remove the dipstick (orange
handle).
6 cylinder models
DIPSTICK
Service Station Procedures
4 cylinder models
2. Wipe the dipstick with a clean
cloth or paper towel.
6 cylinder models
3. Insert it all the way back in its tube.
CONTINUED
Before Driving
Service Station Procedures
Engine Coolant Check
MAX
RESERVE TANK
MAX
RESERVE TANK
UPPER MARK
LOWER MARK
4 cylinder models
4. Remove it again and check the
level. It should be between the
upper and lower marks.
If it is near or below the lower mark,
see Adding Oil on page 146.
Before Driving
MIN
Look at the coolant level in the
radiator reserve tank. Make sure it is
between the MAX and M I N lines. If
it is below the MIN line, see Adding
Engine Coolant on page 152 for
information on adding the proper
coolant.
6 cylinder models
MIN
Refer to Periodic Checks on page
142 for information on checking
other items in your Honda.
Fuel Economy
The condition of your car and your
driving habits are the two most
important things that affect the fuel
mileage you get.
Vehicle Condition
Always maintain your car according
to the maintenance schedule. This
will keep it in top operating condition.
An important part of that maintenance is the Periodic Checks (see
page 142). For example, an underinflated tire causes more "rolling
resistance," which uses fuel. It also
wears out faster, so check the tire
pressure at least monthly. In winter,
the build-up of snow on your car's
underside adds weight and rolling
resistance. Frequent cleaning helps
your fuel mileage and reduces the
chance of corrosion.
Driving Habits
You can improve fuel economy by
driving moderately. Rapid acceleration, abrupt cornering, and hard
braking use more fuel.
Always drive in the highest gear that
allows the engine to run and accelerate smoothly.
Depending on traffic conditions, try
to maintain a constant speed. Every
time you slow down and speed up,
your car uses extra fuel. Use the
cruise control, when appropriate, to
increase fuel economy.
A cold engine uses more fuel than a
warm engine. It is not necessary to
"warm-up" a cold engine by letting it
idle for a long time. You can drive
away in about a minute, no matter
how cold it is outside. The engine
will warm up faster, and you get
better fuel economy. To cut down on
the number of "cold starts," try to
combine several short trips into one.
The air conditioning puts an extra
load on the engine which makes it
use more fuel. Turn off the A / C to
cut down on air conditioning use.
Use the flow-through ventilation
when the outside air temperature is
moderate.
Before Driving
Accessories
Your Honda dealer has many
Genuine Honda Accessories that
allow you to personalize your car.
These have all been approved for
installation and use on your car, and
are covered by warranty.
Your car has several computercontrolled systems, including the
SRS system, the engine's fuel
injection, and the Anti-lock brake
system. Strong electronic interference can affect their operation.
Some non-Honda accessories you
can buy in the "aftermarket" are
designed for universal applications.
Although they may fit your Honda,
they may not be within factory
specifications. For example, aftermarket wheels may not meet Honda's
specifications for width and offset.
They could cause suspension
problems which would not be
covered by your warranty. Improperly-designed accessories can
adversely affect your car's handling
and stability.
Electronic communications equipment, such as cellular telephones
and two-way radios are regulated by
the FCC (DOC in Canada) and
should not interfere with your car's
systems. Improper installation, or
using electrical equipment not intended for mobile use may interfere
with your car's operation. If you want
to install a cellular telephone, other
mobile communications equipment
or even add-on stereo amplifiers,
please discuss it first with your
Honda dealer.
Before Driving
In many cases, improper installation
is the real cause of problems with
aftermarket accessories. Have these
accessories installed by qualified
technicians who are familiar with
your Honda. If possible, have your
Honda dealer inspect the final
installation.
Loading Cargo
The maximum load you can carry in
your Honda is 395 kg (850 Ibs). It
includes the total weight of all
passengers and their belongings, any
accessories, and the tongue weight
of a trailer. This 395 kg (850 Ibs)
figure is shown as the Vehicle
Capacity Weight on the tire information label attached to the passenger's doorjamb.
To figure out how much cargo you
can carry:
Figure the total "occupant weight"
you will be transporting. To do this,
multiply the number of people
(driver and all passengers) by 70
kg (150 Ibs).
Subtract this number from the
Vehicle Capacity Weight (395 k g /
850 Ibs).
If you are towing a trailer, subtract
the tongue weight. See Towing a
Trailer on page 127.
This final number is the total weight
of cargo you can load in or on the car.
With five occupants (driver and four
passengers), the maximum recommended weight for cargo is 45 kg
(100 Ibs).
Where you store this cargo, and how
well you secure it, are just as
important as how much it weighs.
Make sure you load cargo so it will
not shift while driving. When storing
items in the trunk, place them as far
forward as possible. You could store
additional items on the floor behind
the front seats. Make sure they
cannot roll under the front seat and
interfere with the pedals.
If you must carry large objects that
prevent you from closing the trunk
lid, be aware that exhaust gas can
enter the interior. See Carbon
Monoxide Hazard on page 29.
Never place items on the shelf
behind the back seat. Those items
can fly forward and injure you or
your passengers if you brake hard or
are involved in a collision.
Before Driving
Driving
This section gives you tips on
starting the engine under various
conditions, and how to operate the
manual and automatic transmissions.
It also includes important information on your car's braking system
and facts you need if you are planning to tow a trailer.
Preparing to Drive......................... 114
Starting the Engine........................ 115
Starting in Cold Weather
at High Altitude ..................... 116
5-speed Manual Transmission..... 117
Recommended Shift Points...... 117
Maximum Speeds...................... 118
Automatic Transmission............... 118
Shift Lever Positions................. 119
Maximum Speeds...................... 122
Shift Lock Release..................... 122
The Braking System...................... 123
Brake Wear Indicators.............. 123
Brake System Design................ 123
Anti-lock Brakes........................ 124
Driving in Bad Weather................ 125
Towing a Trailer............................ 127
Driving
Preparing to Drive
You should do the following checks
and adjustments every day before
you drive your car.
1. Make sure all windows, mirrors,
and outside lights are clean and
unobstructed. Remove frost, snow,
or ice.
2. Check that the hood and trunk are
fully closed.
3. Visually check the tires. If a tire
looks low, use a gauge to check its
pressure.
4. Check that any items you may be
carrying with you inside are stored
properly or fastened down
securely.
Driving
5. Check the adjustment of the seat
(see page 56).
6. Check the adjustment of the
inside and outside mirrors (see
page 65).
7. Check the adjustment of the
steering wheel (see page 46).
8. Make sure the doors are securely
closed and locked.
9. Fasten your seat belt. Check that
your passengers have fastened
their seat belts (see page 7).
10.Turn the ignition ON (II). Check
the indicator lights in the instrument panel.
11. Start the engine (seepage 115).
12.Check the gauges and indicator
lights in the instrument panel (see
page 35).
Starting the Engine
1. Apply the parking brake.
2. In cold weather, turn off all
electrical accessories to reduce
the drain on the battery.
3. Manual Transmission:
Push the clutch pedal down all the
way. START (III) does not
function unless the clutch pedal is
depressed.
Automatic Transmission:
Make sure the shift lever is in
Park. Press on the brake pedal.
4. Without touching the accelerator
pedal, turn the ignition key to the
START (III) position. If the engine
does not start right away, do not
hold the key in START (III) for
more than 15 seconds at a time.
Pause for at least 10 seconds
before trying again.
5. If the engine does not start within
15 seconds, or starts but stalls
right away, repeat step 4 with the
accelerator pedal pressed half-way
down. If the engine starts, release
pressure on the accelerator pedal
so the engine does not race.
6. If the engine still does not start,
press the accelerator pedal all the
way down and hold it there while
starting in order to clear flooding.
As before, keep the ignition key in
the START (III) position for no
more than 15 seconds. Return to
step 5 if the engine does not start.
If it starts, lift your foot off the
accelerator pedal so the engine
does not race.
Driving
Starting the Engine
Starting in Cold Weather at High
Altitude (Above 2,400 meters/
8,000 feet)
An engine is harder to start in cold
weather. The thinner air found at
high altitude above 2,400 meters
(8,000 feet) adds to the problem.
Use the following procedure:
Driving
1. Turn off all electrical accessories
to reduce the drain on the battery.
2. Push the accelerator pedal halfway to the floor and hold it there
while starting the engine. Do not
hold the ignition key in START
(III) for more than 15 seconds.
When the engine starts, release
the accelerator pedal gradually as
the engine speeds up and smooths
out.
3. If the engine fails to start in step 2,
push the accelerator pedal to the
floor and hold it there while you
try to start the engine for no more
than 15 seconds. If the engine
does not start, return to step 2.
5-speed Manual Transmission
Come to a full stop before you shift
into reverse. You can damage the
transmission by trying to shift into
reverse with the car moving.
The manual transmission is synchronized in all forward gears for
smooth operation. It has a lockout so
you cannot shift directly from Fifth
to Reverse. When shifting up or
down, make sure you push the clutch
pedal down all the way, shift to the
next gear, and let the pedal up
gradually. When you are not shifting,
do not rest your foot on the clutch
pedal. This can cause your clutch to
wear out faster.
You can get extra braking from the
engine when slowing down by
shifting to a lower gear. This extra
braking can help you maintain a safe
speed and prevent your brakes from
overheating while going down a
steep hill. Before downshifting,
make sure engine speed will not go
into the tachometer's red zone in the
lower gear. Refer to the Maximum
Speeds chart.
Recommended Shift Points
Drive in the highest gear that lets
the engine run and accelerate
smoothly. This will give you the best
fuel economy and effective emissions control. The following shift
points are recommended:
Rapid slowing or speeding-up
can cause loss of control on
slippery surfaces. If you crash,
you can be injured.
Use extra care when driving on
slippery surfaces.
Driving
5-speed Manual Transmission, Automatic Transmission
Maximum Speeds
The speeds in this table are the
maximums for the given gears. If
you exceed these speeds, the engine
speed will enter into the tachometer's
red zone. If this occurs, you may feel
the engine cut in and out. This is
caused by a limiter in the engine's
computer controls. The engine will
run normally when you reduce the
RPM below the red zone.
(U.S.: LX)
(U.S.: EX, Canada: EX-R)
(U.S.: DX, Canada: LX, EX)
Driving
Automatic Transmission
Your Honda's transmission has four
forward speeds, and is electronically
controlled for smoother shifting. It
also has a "lock-up" torque converter
for better fuel economy. You may
feel what seems like another shift
when the converter locks.
Automatic Transmission
Shift Lever Positions
SHIFT
LEVER
This display is on the instrument
panel between the speedometer and
tachometer. It shows you the
position of the shift lever. It also
indicates a possible problem in the
transmission if the "D4" indicator
light flashes.
The shift lever has seven positions.
It must be in Park or Neutral to start
the engine. When you are stopped in
D4, D3, 2 , 1 , N or R, press firmly on
the brake pedal and keep your foot
off the accelerator pedal.
CONTINUED
Driving
Automatic Transmission
Park (P) — This position mechanically locks the transmission. Use
Park whenever you are turning off or
starting the engine. To shift out of
Park, you must press on the brake
pedal and have your foot off the
accelerator pedal. Press the release
button on the side of the shift lever
to move it.
Neutral (N) — Use Neutral if you
need to restart a stalled engine, or if
it is necessary to stop briefly with
the engine idling. Shift to Park position if you need to leave the car for
any reason. Press on the brake pedal
when you are moving the shift lever
from Neutral to another gear.
If you have done all of the above and
still cannot move the lever out of
Park, see Shift Lock Release on page
122.
You must also press the release
button to shift into Park. To avoid
transmission damage, come to a
complete stop before shifting into
Park. The shift lever must be in Park
before you can remove the key from
the ignition switch.
Driving
Reverse (R) — To shift to Reverse
from Park, see the explanation under
Park. To shift to Reverse from
Neutral, come to a complete stop and
then shift. Press the release button
before shifting into Reverse from
Neutral.
Drive (D4) — Use this position for
your normal driving. The transmission automatically selects a suitable
gear for your speed and acceleration.
You may notice the transmission
shifting up at higher speeds when
the engine is cold. This helps the
engine warm up faster.
Automatic Transmission
Drive (D3) — This position is similar
to D4, except only the first three
gears are selected. Use D3 when
towing a trailer in hilly terrain, or to
provide engine braking when going
down a steep hill. D3 can also keep
the transmission from cycling
between third and fourth gears in
stop-and-go driving.
For faster acceleration when in D3 or
D4, you can get the transmission to
automatically downshift by pushing
the accelerator pedal to the floor.
The transmission will shift down one
or two gears, depending on your
speed.
Second (2) — To shift to Second,
press the release button on the side
of the shift lever. This position locks
the transmission in second gear. It
does not downshift to first gear
when you come to a stop. Second
gives you more power when climbing,
and increased engine braking when
going down steep hills. Use second
gear when starting out on a slippery
surface or in deep snow. It will help
reduce wheelspin.
First (1) — To shift from Second to
First, press the release button on the
side of the shift lever. With the lever
in this position, the transmission
locks in First gear. By upshifting and
downshifting through 1, 2, D3 and D4,
you can operate this transmission
much like a manual transmission
without a clutch pedal.
Whenever you move the shift lever
to a lower gear, the transmission
downshifts only if the engine's
redline will not be exceeded in the
lower gear.
Driving
Automatic Transmission
Maximum Speeds
The speeds in this table are the
maximums for the given position. If
you exceed these speeds, the engine
speed will enter into the tachometer's
red zone. If this occurs, you will feel
the engine cut in and out. This is
caused by a limiter in the engine's
computer controls. The engine will
run normally when you reduce the
RPM below the red zone.
4 cylinder models
6 cylinder models
Shift Lock Release
This allows you to move the shift
lever out of Park if the normal
method of pushing on the brake
pedal and pressing the release
button does not work.
RELEASE BUTTON
SHIFT LOCK RELEASE SLOT
4. Push down on the key while you
press the release button and move
the shift lever out of Park to
Neutral.
1. Set the Parking brake.
2. Remove the key from the ignition
switch.
3. Insert the key in the Shift Lock
Release slot next to the shift lever.
Driving
5. Remove the key from the Shift
Lock Release slot. Depress the
brake pedal and restart the engine.
If you need to use the Shift Lock
Release, it could mean your car is
developing a problem. Have the car
checked by your Honda dealer.
The Braking System
Your Honda is equipped with front
disc brakes. The brakes on the rear
wheels may be disc or drum,
depending on model. The braking
system is power-assisted to reduce
the effort needed on the brake pedal.
Put your foot on the brake pedal only
when you intend to brake. Resting
your foot on the pedal keeps the
brakes applied lightly, causing them
to build up heat. Heat build-up can
reduce how well your brakes work. It
also keeps your brake lights on all
the time, confusing drivers behind
you.
Constant application of the brakes
when going down a long hill builds
up heat and reduces their effectiveness. Use the engine to assist the
brakes by downshifting to a lower
gear and taking your foot off the
accelerator pedal.
Check your brakes after driving
through deep water. Apply the
brakes moderately to see if they feel
normal. If not, apply them gently and
frequently until they do. Since a
longer distance is needed to stop
with wet brakes, be extra cautious
and alert in your driving.
Brake Wear Indicators
The front disc brakes on all cars
have audible brake wear indicators.
They are also on the rear brakes of
cars equipped with ABS.
When the brake pads need replacing,
you will hear a distinctive metallic
"screeching" sound when you apply
the brakes. If you do not have the
brake pads replaced, they will begin
screeching all the time.
Your brakes may sometimes squeal
or squeak when you apply them
lightly. Do not confuse this with the
brake wear indicators. They make a
very audible "screeching".
Brake System Design
The hydraulic system that operates
the brakes has two separate circuits.
Each circuit works diagonally across
the car (the left-front brake is
connected with the right-rear brake,
etc.). If one circuit should develop a
problem, you will still have braking
at two wheels.
Front
CONTINUED
Driving
The Braking System
If this happens, you will immediately
notice that the brake pedal goes
down much farther and you need to
press on it much harder. A much
longer distance will be needed to
stop the car.
Slow the car by downshifting to a
lower gear and removing your foot
from the accelerator pedal. Pull to
the side of the road as soon as it is
safe. Because of the longer stopping
distance needed, brake system
failure is very hazardous. It is best to
have your car towed, but if you must
drive the car in this condition, be
extremely cautious. Have your car
repaired as soon as possible.
Anti-lock Brakes
The U.S. EX, EX V-6 and Canadian
EX-R, EX-R V-6 models have an Antilock Brake System (ABS) as
standard equipment. It is optional on
some of the other models.
ABS helps you maintain steering
control during braking. It does this
Driving
by helping you to prevent the wheels
from locking up and skidding.
The ABS is always "On". It requires
no special effort or driving technique.
You will feel a pulsation in the brake
pedal when the ABS activates.
Activation varies with the amount of
traction your tires have. On dry
pavement, you will need to press on
the brake pedal very hard before you
feel the pedal pulsation that means
the ABS has activated. However, you
may feel the ABS activate immediately if you are trying to stop on
snow or ice. Under all conditions, the
ABS is helping to prevent the wheels
from locking so you can retain
steering control. You should continue to press on the brake pedal
with the same force.
You may feel a slight movement of
the brake pedal just after you start
the engine. This is the ABS working.
ABS INDICATOR*
* U.S. indicator shown
The ABS is self-checking. If anything
goes wrong, the ABS indicator on
the instrument panel comes on (see
page 37). This means the Anti-lock
function of the braking system has
shut down. The brakes still work like
a conventional system, providing
normal stopping ability. You should
have the dealer inspect your car as
soon as possible.
The Braking System, Driving in Bad Weather
A car with ABS may require a longer
distance to stop on loose or uneven
surfaces than an equivalent car without Anti-lock. The ABS cannot make
up for road conditions or bad judgment. It is still your responsibility to
drive at reasonable speeds for
weather and traffic conditions, and
to leave a margin of safety.
Driving in Bad Weather
For a technical description of the
ABS hardware, refer to page 233.
Rain, fog, and snow conditions require a different driving technique
because of reduced traction and
visibility. Keep your car wellmaintained and exercise greater
caution when you need to drive in
bad weather. The cruise control
should not be used in these conditions.
Driving Technique — Always drive
slower than you would in dry
weather. It takes your car longer to
react, even in conditions that may
seem just barely damp. Apply
smooth, even pressure to all the
controls. Abrupt steering wheel
movements or sudden, hard application of the brakes can cause loss of
control in wet weather. Be extra
cautious for the first few miles of
driving while you adjust to the
change in driving conditions. This is
especially true in snow. A person can
forget some snow-driving techniques
during the summer months. Practice
is needed to relearn those skills.
Exercise extra caution when driving
in rain after a long dry spell. After
months of dry weather, the first
rains bring oil to the surface of the
roadway, making it slippery.
CONTINUED
Driving
Driving in Bad Weather
Visibility — Being able to see
clearly in all directions and being
visible to other drivers are important
in all weather conditions. This is
more difficult in bad weather. To be
seen more clearly during daylight
hours, turn on your headlights.
Traction — Check your tires
frequently for wear and proper
pressure. Both are important in
preventing "hydroplaning" (loss of
traction on a wet surface). In the
winter, mount snow tires on all four
wheels for the best handling.
Inspect your windshield wipers and
washers frequently. Keep the windshield washer reservoir full of the
proper fluid. Have the windshield
wiper blades replaced if they start to
streak the windshield or leave parts
unwiped. Use the defrosters and air
conditioning to keep the windows
from fogging up on the inside (see
page 79).
Watch road conditions carefully,
they can change from moment to
moment. Wet leaves can be as slippery as ice. "Clear" roads can have
patches of ice. Driving conditions
can be very hazardous when the
outside temperature is near freezing.
The road surface can become
covered with areas of water puddles
mixed with areas of ice, so your
traction can change without warning.
Be careful when downshifting. If
traction is low, you can lock up the
drive wheels for a moment and cause
a skid.
Driving
Be very cautious when passing, or
being passed by, other vehicles. The
spray from large vehicles reduces
your visibility, and the wind buffeting
can cause you to lose control.
Towing a Trailer
Your Honda is designed primarily to
carry passengers and their cargo.
You can use it to tow a trailer if you
carefully observe some general rules.
The total weight of the trailer and
everything loaded in it must not
exceed 450 kg (1,000 Ibs).
The "tongue load" should never
exceed 45 kg (100 Ibs). This is the
amount of weight the trailer puts
on the hitch when it is fully-loaded.
As a rule of thumb, the tongue
load should be 10% of the total
trailer package.
For example, if the trailer and its
load weigh 225 kg (500 Ibs), the
tongue load should be 22.5 kg (50
Ibs). Adjust the trailer's cargo to
change the tongue load. Start by
putting approximately 60% of the
cargo toward the front and 40%
toward the rear. Never load the
trailer so the back is heavier than
the front. This takes weight off
your car's rear axle and reduces
traction.
The combined weight of the car,
all passengers and their luggage,
and tongue load must not exceed
the Gross Vehicle Weight Rating.
The GVWR is printed on the
Certification label attached to the
driver's doorjamb (see page 228).
The combined weight of the car,
all passengers and their luggage,
and tongue load also must not
exceed the Gross Axle Weight
Rating. The GAWR is also shown
on the Certification label. It tells
you the maximum load for the
front and rear axles. It is possible
that your towing package does not
exceed the GVWR but does
exceed the GAWR. Improper
trailer loading, and/or too much
luggage in the trunk can overload
the rear axle. Redistribute the load
and check the axle weights again.
CONTINUED
Driving
Towing a Trailer
Improperly loading your car and
trailer can seriously affect its
steering and braking
performance, causing a crash
in which you can be seriously
injured.
Check the loading of your car
and trailer carefully before
starting to drive.
The best way to confirm that your
total towing package is within these
specifications is to get it weighed.
Load the car and trailer as you
normally would while towing, and
take them to a public scale. Have
them check the total weight and the
weight at each axle, then compare
the weights to the specifications.
Trailer Hitches
Your Honda dealer, or the Honda
Customer Relations Zone Office, can
give you advice on the proper hitch
for your car. Never use a hitch that
mounts only to the rear bumper. The
bumper is not designed to handle
that type of load. The hitch should
bolt to the underbody of the car and
distribute the load over a wide area.
Always have a trailer hitch installed
by a qualified technician.
NOTICE
A trailer hitch that is not adequate for
the size of the trailer, or a hitch that is
improperly installed, can cause damage
to the underside of your car.
Driving
Towing a Trailer
Mirrors
Many states and provinces have laws
requiring special outside mirrors
when you are towing a trailer. Check
the laws in your area. You may want
to install mirrors, even if they are not
required. Hook up the trailer and see
how much it obscures your ability to
see behind you with the standard
mirrors. If you cannot see directly
behind you, or have a large blind
spot next to the trailer or the car,
you should install mirrors intended
for towing.
Connecting the Trailer
Most trailers that have a gross
weight of 450 kg (1,000 Ibs) do not
have their own braking system. If
you are thinking of getting a trailer
that does have brakes, make sure
they are electrically-operated. There
are no provisions in your car to tap
into its hydraulic braking system.
Any attempt to attach the trailer's
brakes to your car's hydraulic
system, no matter how successful it
may seem, will lower braking
effectiveness and create a potential
hazard.
Always use a safety chain when
towing a trailer. Connect the safety
chain securely at both ends. Make
sure the chain crosses under the
tongue so it will catch the trailer if it
becomes unhitched. Leave enough
slack in the chain so it can't bind in a
sharp turn. Do not let it drag on the
ground.
CONTINUED
Driving
Towing a Trailer
GROUND
(BLACK)
RIGHT TURN SIGNAL
(GREEN/YELLOW)
BACK-UP LIGHT
(GREEN/BLACK)
BRAKE LIGHT
(GREEN/WHITE)
Your car has a trailer lighting
connector in the trunk. To use the
connector, remove the left cover by
unscrewing the knob. Refer to the
drawing above for the wiring color
code and purpose of each connector
pin.
Driving
LEFT TURN SIGNAL
(GREEN/BLUE)
TAILLIGHT
(RED/BLACK)
Since the lighting and wiring can be
different for various brands of
trailers, have a technician who is
familiar with your trailer modify its
lighting plug. A converter may be
required between the car and trailer
for the lights to work correctly.
Before Starting Out
As you are preparing to tow your
trailer, do the following:
Measure the trailer's tongue load.
You can do this with a bathroom
scale.
Verify that the hitch and safety
chain are securely fastened.
Check the condition and air
pressure of all tires on the trailer
and your car. Low tire pressure
can seriously affect the handling.
Also check the spare tire.
With everything loaded and the
trailer connected, check that the
rear of the car is not sagging. If so,
redistribute the load in the car.
Check that all lights on the car and
trailer are working properly.
Towing a Trailer
Towing Safety
Your car will not stop as quickly with
a trailer in tow. Leave extra distance
between your car and other vehicles.
Avoid braking or turning suddenly.
This could cause the trailer to
jackknife or possibly turn over.
Keep in mind that your total vehicle
is now much longer. Leave more
room when making turns. The trailer
tracks a smaller arc than the car and
can hit or run over something that
the car misses. When passing
another vehicle, make sure the
trailer is clear before changing lanes.
The car/trailer combination is more
affected by crosswinds and buffeting.
When being passed by a large
vehicle, keep a constant speed and
steer straight ahead. If there is too
much wind buffeting, slow down to
get out of the other vehicle's air
turbulence.
Towing a trailer puts an extra load
on your car. You should have your
car serviced according to the
"Maintenance schedule under severe
driving conditions" on page 139.
This extra load is magnified when
you are driving in hilly terrain.
Watch the temperature gauge
closely when climbing hills. If it gets
near the hot area, turn off the air
conditioning (if it is on). If this does
not reduce the heat, it may be
necessary to pull to the side of the
road and wait for the engine to cool.
If the automatic transmission shifts
frequently between 3rd and 4th
gears, put it in D3. This will help
prevent the transmission from
overheating. Help keep the brakes
from overheating by shifting to a
lower gear when going downhill.
CONTINUED
Driving
Towing a Trailer
If you have to stop while going uphill,
do not hold the car in place by
pressing on the accelerator. This can
cause the automatic transmission to
overheat. Use the parking brake or
footbrake.
When parking your car and trailer,
especially on a hill, be sure to follow
all the normal precautions. Turn
your front wheels into the curb, set
the parking brake firmly, and put the
transmission in 1st or Reverse
(manual) or Park (automatic). In
addition, place wheel chocks at each
of the trailer's tires.
Driving
Backing up with a trailer is difficult
and takes practice. Drive slowly,
make small movements with the
steering wheel, and have someone
stand outside to guide you. Grip the
steering wheel on the bottom (rather
than the usual position near the top).
Move your hand to the left to get the
trailer to move to the left, and right
to move the trailer right.
Maintenance
This section explains why it is
important to keep your car well
maintained and to follow basic
maintenance safety precautions.
This section also includes
Maintenance Schedules for normal
driving and severe driving conditions,
a Maintenance Record, and instructions for simple maintenance tasks
you may want to take care of
yourself.
If you have the skills and tools
required to perform more complex
maintenance tasks on your Honda,
you may want to purchase the
Service Manual. See page 247 for
information on how to obtain a copy,
or see your Honda dealer.
Maintenance Safety....................... 134
Important Safety Precautions.. 135
Maintenance Schedule.................. 136
Maintenance Record..................... 140
Periodic Checks............................. 142
Fluid Locations............................... 143
Engine Oil....................................... 145
Checking Engine Oil................. 145
Adding Oil................................... 146
Recommended Oil..................... 146
Synthetic Oil............................... 148
Additives..................................... 148
Oil and Filter Changes.............. 148
Cooling System.............................. 151
Checking the Engine Coolant
Level........................................151
Adding Engine Coolant............. 152
Replacing Engine Coolant........ 153
Windshield Washers..................... 158
Transmission Fluid........................ 159
Automatic
Transmission.......................... 159
5-speed Manual
Transmission.......................... 161
Brake and Clutch Fluid................. 161
Brake System............................. 162
Anti-lock Brake System............ 162
Clutch System............................ 163
Power Steering............................... 163
Air Cleaner..................................... 164
Spark Plugs..................................... 167
Replacement............................... 167
Specification............................... 168
Battery............................................ 171
Windshield Wipers........................ 174
Air Conditioning............................. 176
Drive Belts...................................... 177
Tires................................................ 177
Inflation....................................... 178
Inspection................................... 179
Maintenance............................... 179
Tire Rotation.............................. 180
Replacing Tires and Wheels .... 180
Wheels and Tires....................... 181
Winter Driving........................... 181
Snow Tires.............................. 182
Tire Chains............................. 182
Lights.............................................. 183
Replacing Bulbs......................... 183
Storing Your Car............................ 194
Maintenance
Maintenance Safety
Regularly maintaining your car is the
best way to protect your investment.
Proper maintenance is essential to
your safety and the safety of your
passengers. It will also reward you
with more economical, trouble-free
driving and help reduce air pollution.
Improperly maintaining this car
or failing to correct a problem
before driving can cause a
crash in which you can be
seriously hurt or killed.
Always follow the inspection
and maintenance
recommendations and
schedules in this owner's
manual.
Maintenance
This section includes instructions for
simple maintenance tasks, such as
checking and adding oil. Any service
items not detailed in this section
should be performed by a Honda
technician or other qualified
mechanic.
Some of the most important safety
precautions are given in the next
page. However, we cannot warn you
of every conceivable hazard that can
arise in performing maintenance.
Only you can decide whether or not
you should perform a given task.
Failure to properly follow
maintenance instructions and
precautions can cause you to
be seriously hurt or killed.
Always follow the procedures
and precautions in this owner's
manual.
Maintenance Safety
Important Safety Precautions
Before you begin any maintenance,
make sure your car is parked on
level ground and that the parking
brake is on. Also, be sure the engine
is off. This will help to eliminate
several potential hazards:
Carbon monoxide poisoning
from engine exhaust. Be sure
there is adequate ventilation
whenever you operate the engine.
Burns from hot parts. Let the
engine and exhaust system cool
before touching any parts.
Read the instructions before you
begin, and make sure you have the
tools and skills required.
To reduce the possibility of fire or
explosion, be careful when working
around gasoline or batteries. Use a
nonflammable solvent, not gasoline,
to clean parts. Keep cigarettes,
sparks, and flames away from the
battery and all fuel-related parts.
You should wear eye protection and
protective clothing when working
near the battery or when using
compressed air.
Injury from moving parts. Do
not run the engine unless instructed to do so.
Maintenance
Maintenance Schedule
The Maintenance Schedule specifies
how often you should have your car
serviced and what things need
attention. It is essential that you have
your car serviced as scheduled to
retain its high level of safety,
dependability, and emission control
performance.
The services and time or distance
intervals shown in the maintenance
schedule assume you will use your
car as normal transportation. You
should:
Avoid exceeding your car's load
limit. This puts excess stress on
the engine, brakes, and many
other parts of your car. The load
limit is shown on the label on the
driver's doorjamb.
Operate your car on reasonable
roads within the legal speed limit.
Drive your car regularly over a
distance of several kilometers
(miles).
Always use unleaded gasoline with
the proper octane rating (see page
102).
Maintenance
Which Schedule to Follow:
Service your car according to the
time and mileage periods on one of
the Maintenance Schedules on pages
138 and 139. Select the schedule for
"Severe Conditions" if most of your
driving is done under one or more of
the conditions listed on that page.
Otherwise, follow the schedule for
"Normal Conditions."
Maintenance Schedule
Your authorized Honda dealer
knows your car best and can provide
competent, efficient service.
However, service at a dealer is not
mandatory to keep your warranties
in effect. Maintenance may be done
by any qualified service facility or
person who is skilled in this type of
automotive service. Keep all the
receipts as proof of completion, and
have the person who does the work
fill out the Maintenance Record.
Check your warranty booklet for
more information.
We recommend the use of Genuine
Honda parts and fluids whenever you
have maintenance done. These are
manufactured to the same highquality standards as the original
components, so you can be confident
of their perfomance and durability.
U.S. Cars:
Maintenance, replacement or
repair of emission control devices
and systems may be done by any
automotive repair establishment
or individual using parts that are
"certified" to EPA standards.
According to state and federal
regulations, failure to perform
maintenance on the items marked
with an asterisk (*) will not void your
emissions warranties. However,
Honda recommends that all maintenance services be performed at the
recommended time or mileage
period to ensure long-term reliability.
Maintenance
Maintenance Schedule (Normal Conditions)
Follow the Normal Maintenance
Schedule if the severe driving
conditions specified in the
Severe Conditions Maintenance
Schedule on the next page do
not apply.
For Canadian Owners:
This Maintenance Schedule
outlines the minimum required
maintenance that you should
perform to ensure the troublefree operation of your vehicle.
Due to regional and climatic
differences, some additional
servicing may be required.
Please consult your warranty
handbook for a more detailed
description.
* 1 : For 4 cylinder models only.
Maintenance
Maintenance Schedule (Severe Conditions)
Follow the Severe Maintenance
Schedule if you drive your
vehicle MAINLY under one or
more of the following conditions:
Driving less than 8 km (5
miles) per trip or, in freezing
temperatures, driving less
than 16 km (10 miles) per trip.
Driving in extremely hot
[over 90° F (32° C)] conditions.
Extensive idling or long
periods of stop-and-go driving.
Trailer towing, driving with a
car-top carrier, or driving in
mountainous conditions.
Driving on muddy, dusty, or
de-iced roads.
NOTE: If you only
OCCASIONALLY drive under a
"severe" condition, you should
follow the Normal Conditions
Maintenance Schedule on the
previous page.
Maintenance
Required Maintenance Record
Have your servicing dealer record all Required Maintenance below. Keep receipts for all work done on your car.
Maintenance
Non-Scheduled Maintenance Record
Record additional maintenance for severe driving conditions or non-scheduled maintenance on this page (see page 139).
Maintenance
Periodic Checks
You should check the following
items at the specified intervals. If
you are unsure of how to perform
any check, turn to the page given.
Engine oil level — Check every
time you fill the fuel tank. See
page 106.
Engine coolant level — Check the
radiator reserve tank every time
you fill the fuel tank. See page 108.
Windshield washer fluid — Check
the level in the reservoir monthly.
If weather conditions cause you to
use the washers frequently, check
the reservoir each time you stop
for fuel. See page 158.
Automatic transmission — Check
the fluid level monthly. See page
159.
Brakes, clutch and power steering
— Check the fluid level monthly.
See page 162.
Maintenance
Tires — Check the tire pressure
monthly. Examine the tread for
wear and foreign objects. See page
177.
Battery — Check its condition and
the terminals for corrosion
monthly. See page 172.
Air conditioning — Check its
operation weekly. See page 176.
Lights — Check the operation of
the headlights, parking lights,
taillights, high-mount brake light,
turn signals, brake lights, and
license plate lights monthly. See
page 183.
Fluid Locations
4 Cylinder Models
BRAKE FLUID
(Gray cap)
(5-M/T only)
CLUTCH FLUID
(Gray cap)
ENGINE OIL
FILL CAP
ENGINE OIL DIPSTICK
(Orange loop)
COOLANT
RESERVOIR
ANTI-LOCK BRAKE
RESERVOIR
(Gray cap)
AUTOMATIC
TRANSMISSION
FLUID DIPSTICK
(Yellow loop)
POWER STEERING
FLUID (Red cap)
WASHER FLUID
(Blue cap)
Maintenance
Fluid Locations
6 Cylinder Models
ENGINE OIL
FILL CAP
BRAKE FLUID
(Gray cap)
ANTI-LOCK BRAKE
RESERVOIR
COOLANT
RESERVOIR
POWER STEERING
FLUID (Red cap)
AUTOMATIC
TRANSMISSION
FLUID DIPSTICK
(Yellow loop)
ENGINE OIL DIPSTICK
(Orange loop)
Maintenance
Engine Oil
Checking Engine Oil
UPPER MARK
LOWER MARK
4 cylinder models
DIPSTICK
Check the engine oil a couple of
minutes after shutting off the engine.
This will allow the oil to drain down
to the bottom of the engine. Make
sure the car is parked on level
ground.
6 cylinder models
DIPSTICK
3. Pull it out again and look at the oil
level at the end of the dipstick. If it
is between the upper and lower
marks, the level is correct. Add oil
if the level is at or below the lower
mark.
1. Pull out the dipstick (orange loop)
and wipe it with a cloth or paper
towel.
2. Insert it all the way back in its tube.
Maintenance
Engine Oil
Adding Oil
ENGINE OIL FILL CAP
ENGINE OIL FILL CAP
4 cylinder models
6 cylinder models
To add oil, unscrew and remove the
engine oil fill cap on top of the valve
cover. Pour in the oil, and replace the
engine oil fill cap. Tighten it securely.
Wait a few minutes and recheck the
oil level. Do not fill above the upper
mark; you could damage the engine.
Maintenance
Recommended Oil
Oil is a major contributor to your
engine's performance and longevity.
Always use a premium-grade detergent oil.
Engine Oil
You can determine an oil's SAE
viscosity and Service Classification
from the API Service label on the oil
container.
A fuel-efficient oil is recommended
for your Honda. This is shown on the
API Service label by the words
"Energy Conserving I I . " This oil is
formulated to help your engine use
less fuel.
The API Service label also tells you
the service classification of the oil.
Always use an oil that says "API
Service SH."This service rating may
also include other designations, such
as CD. These additional
classifications are not a problem, as
long as the label also carries the SH
classification. An oil that is only
classified SF is not recommended.
The oil container may also display
the API Certification mark shown
below. Make sure it says "For
Gasoline Engines."
API CERTIFICATION MARK
API SERVICE LABEL
CONTINUED
Maintenance
Engine Oil
The SAE numbers tell you the oil's
viscosity or weight. Select the oil for
your car according to this chart.
Ambient Temperature
An oil with a viscosity of 5W-30 is
preferred for improved fuel economy
and year-round protection in your
Honda. You may use a 10W-30 oil if
the temperature in your area never
goes below 20°F ( — 7°C).
Maintenance
Synthetic Oil
You may use a synthetic motor oil if
it meets the same requirements
given for conventional motor oil;
energy conserving, a service
classification of SH, and the proper
weight as shown on the chart. When
using synthetic oil, you must follow
the oil and filter change intervals
given in the maintenance schedule.
Additives
Your Honda does not need any oil
additives. Purchasing additives for
the engine or transmission will not
increase your car's performance or
longevity. It only increases the cost
of operating your car.
Oil and Filter Changes
Always change the oil and filter
according to the time and distance
recommendations in the maintenance schedule. The oil and filter
collect contaminants that can damage your engine if they are not
removed regularly.
Changing the oil and filter requires
special tools and access from
underneath the car. The car should
be raised on a service station-type
hydraulic lift for this service. Unless
you have the knowledge and proper
equipment, you should have this
maintenance done by a skilled
mechanic.
1. Run the engine until it reaches
normal operating temperature,
then shut it off.
Engine Oil
DRAIN BOLT
WASHER
4 cylinder models
2. Open the hood and remove the
engine oil fill cap. Remove the oil
drain bolt from the bottom of the
engine. Drain the oil into an
appropriate container.
WASHER
6 cylinder models
DRAIN BOLT
OIL FILTER
4 cylinder models
3. Remove the oil filter and let the
remaining oil drain. A special
wrench (available from your
Honda dealer) is required to
remove the filter.
4. Install a new oil filter according to
instructions that come with it.
5. Put a new washer on the drain bolt,
then reinstall the drain bolt.
Tighten it to:
43 N.m (4.4 kgf.m, 32 Ibf.ft)
Maintenance
Engine Oil
OIL FILTER
7. Replace the engine oil fill cap.
Start the engine. The oil pressure
indicator light should go out within
five seconds. If it does not, turn off
the engine and reinspect your
work.
8. Let the engine run for several
minutes and check the drain bolt
and oil filter for leaks.
6 cylinder models
6. Refill the engine with the recommended oil.
Engine oil change capacity
(including filter):
(U.S.: DX, LX, Canada: LX, EX)
3.8 (4.0 US q t , 3.3 Imp qt)
(U.S.: EX, Canada: EX-R)
4.3 (4.5 US q t , 3.8 Imp qt)
(U.S.: LX V-6, EX V-6, Canada: EX
V-6, EX-R V-6)
4.4 (4.6 US q t , 3.9 Imp qt)
Maintenance
9. Turn off the engine, let it sit for
several minutes, then check the oil
level. If necessary, add oil to bring
the level to the upper mark on the
dipstick.
NOTICE
If you change your own oil, please
dispose of the used oil properly. Put it
in a sealed container and take it to a
recycling center. Do not discard it in a
trash bin or dump it on the ground.
Cooling System
Checking the Engine Coolant
Level
RESERVE TANK
RESERVE TANK
MAX
4 cylinder models
MIN
Always use Genuine Honda Antifreeze/Coolant. The cooling system
contains many aluminum components that can corrode if an improper
antifreeze is used. Some antifreeze,
even though labeled as safe for
aluminum parts, may not provide
adequate protection.
MAX
6 cylinder models
MIN
Check the level of the engine coolant
by looking at the radiator reserve
tank next to the battery. If the
coolant level in the reserve tank is at
or below the M I N line, add coolant to
bring it up to the MAX line. Inspect
the cooling system for leaks. This
coolant should always be a mixture
of 50% antifreeze and 50% water.
Never add straight antifreeze or
plain water.
Maintenance
Cooling System
Adding Engine Coolant
If the reserve tank is completely
empty, you should also check the
coolant level in the radiator.
Removing the radiator cap
while the engine is hot can
cause the coolant to spray out,
seriously scalding you.
Always let the engine and
radiator cool down before
removing the radiator cap.
1. Make sure the engine and radiator
are cool.
Maintenance
4 cylinder models
RADIATOR CAP
2. Turn the radiator cap counterclockwise, without pressing down
on it, until it stops. This relieves
any pressure remaining in the
cooling system.
6 cylinder models
RADIATOR CAP
3. Remove the radiator cap by
pushing down and turning
counterclockwise.
Cooling System
Replacing Engine Coolant
The cooling system should be
completely drained and refilled with
new coolant according to the time
and distance recommendations in
the maintenance schedule. Only use
recommended antifreeze.
4 cylinder models
RESERVE TANK
4. The coolant level should be up to
the base of the filler neck. Add
coolant if it is low.
5. Put the radiator cap back on.
Tighten it fully.
6 cylinder models
RESERVE TANK
Draining the coolant requires access
to the underside of the car. Unless
you have the tools and knowledge,
you should have this maintenance
done by a skilled mechanic.
6. Pour coolant into the reserve tank.
Fill it to halfway between the MAX
and M I N marks. Put the cap back
on the reserve tank.
Do not add any rust inhibitors or
other additives to your car's cooling
system. They may not be compatible
with the coolant or engine components.
CONTINUED
Maintenance
Cooling System
4 cylinder models
1. Start the engine. Turn the heater
temperature control dial to
maximum heat and turn off the
engine. Open the hood. Make sure
the engine and radiator are cool to
the touch.
2. Remove the radiator cap.
Maintenance
6 cylinder models
DRAIN
BOLT
DRAIN
PLUG
4 cylinder models
4 cylinder models
3. Loosen the drain plug on the
bottom of the radiator. The
coolant will drain through the
splash guard. Remove the drain
bolt from the engine block.
Cooling System
DRAIN PLUG
8 cylinder models
DRAIN BOLTS
6 cylinder models
3. Loosen the drain plug on the
bottom of the radiator. The
coolant will drain through the
splash guard. Remove the drain
bolts from the engine block.
RESERVE TANK
4 cylinder models
RESERVE TANK CAP
HOLDER
RESERVE TANK
6 cylinder models
RESERVE TANK CAP
HOLDER
4. Remove the reserve tank from its
holder by pulling it straight up.
Drain the coolant, then put the
tank back in its holder.
5. When the coolant stops draining,
tighten the drain plug in the
bottom of the radiator. Apply nonhardening sealant to the drain bolt
threads and reinstall the bolts in
the engine block. Tighten it
securely.
CONTINUED
Maintenance
Cooling System
FILLER NECK
4 cylinder models
FILLER NECK
Fill up to here
6. Mix the recommended antifreeze
with an equal amount of purified
or distilled water in a clean
container. The cooling system
capacity is:
With manual transmission:
5.4 ( 1.43 US gal, 1.19 Imp gal)
With automatic transmission:
5.3 ( 1.40 US gal, 1.17 Imp gal)
6 cylinder models
6.8 ( 1.80 US gal, 1.50 Imp gal)
Maintenance
6 cylinder models
Fill up to here
7. Pour coolant into the radiator up
to the base of the filler neck.
4 cylinder models
BLEEDER BOLT
8. Loosen the bleeder bolt on top of
the engine. Tighten it again when
coolant comes out in a steady
stream with no bubbles.
9. Refill the radiator to the base of
the filler neck. Put the cap on the
radiator, only tighten it to the first
stop. Start the engine and let it run
until it warms up (the radiator
cooling fan comes on at least
twice).
Cooling System
BLEEDER BOLT
6 cylinder models
Removing the radiator cap
while the engine is hot can
cause the coolant to spray out,
seriously scalding you.
RESERVE TANK
RESERVE TANK
4 cylinder models
6 cylinder models
10.Turn off the engine. Check the
level in the radiator, add coolant if
needed. Install the radiator cap,
tighten it fully.
11.Fill the reserve tank to the MAX
mark. Install the reserve tank cap.
Always let the engine and
radiator cool down before
removing the radiator cap.
Maintenance
Windshield Washers
Windshield Washers
Check the level in the windshield
washer reservoir at least monthly
during normal usage. In bad weather,
when you use the washers often,
check the level every time you stop
for fuel.
LEVEL GAUGE
The windshield washer reservoir is
located behind the headlight.
4 cylinder models
Check the reservoir's fluid level by
removing the cap and looking at the
level gauge attached to the cap.
6 cylinder models
Check the reservoir's fluid level by
removing the cap and looking at the
float. It should be up to the top of the
neck. If the float is at the bottom of
the neck, the reservoir is nearly
empty.
Fill the reservoir with a good-quality
windshield washer fluid. This
increases the cleaning capability and
prevents freezing in cold weather.
Maintenance
4 cylinder models
NOTICE
Do not use engine antifreeze or a
vinegar/water solution in the windshield washer reservoir.
Antifreeze can damage your car's paint,
while a vinegar/water solution can
damage the windshield washer pump.
Use only commercially-available
windshield washer fluid.
6 cylinder models
FLOAT
Transmission Fluid
5. If the level is below the lower
mark, add fluid into the tube to
bring it to the upper mark. Use
Honda Premium Formula Automatic Transmission Fluid or an
equivalent DEXRON® II Automatic Transmission Fluid (ATF)
only.
Automatic Transmission
4 cylinder models
UPPER MARK
LOWER MARK
DIPSTICK
Check the fluid level with the engine
at normal operating temperature.
3. Insert the dipstick all the way into
the transmission.
1. Park the car on level ground. Shut
off the engine.
4. Remove the dipstick and check
the fluid level. It should be
between the upper and lower
marks.
2. Remove the dipstick (yellow loop)
from the transmission and wipe it
with a clean cloth.
6. Insert the dipstick all the way back
in the transmission.
The transmission should be drained
and refilled with new fluid according
to the time and distance recommendations in the maintenance schedule.
Maintenance
Transmission Fluid
5. If the level is below the lower
mark, add fluid into the tube to
bring it to the upper mark. Use
Honda Premium Formula Automatic Transmission Fluid or an
equivalent DEXRON® II Automatic Transmission Fluid (ATF)
only.
Automatic Transmission
6 cylinder models
UPPER MARK
LOWER MARK
DIPSTICK
Check the fluid level with the engine
at normal operating temperature.
3. Insert the dipstick all the way into
the transmission.
1. Park the car on level ground. Shut
off the engine.
4. Remove the dipstick and check
the fluid level. It should be
between the upper and lower
marks.
2. Remove the dipstick (yellow loop)
from the transmission and wipe it
with a clean cloth.
Maintenance
6. Insert the dipstick all the way back
in the transmission.
The transmission should be drained
and refilled with new fluid according
to the time and distance recommendations in the maintenance schedule.
Transmission Fluid, Brake and Clutch Fluid
5-speed Manual Transmission
FILLER BOLT
Correct
level
Check the fluid level with the
transmission at normal operating
temperature and the vehicle sitting
on level ground. Remove the
transmission filler bolt and carefully
feel inside the bolt hole with your
finger. The fluid level should be up
to the edge of the bolt hole. If it is
not, add genuine Honda Manual
Transmission Fluid until it starts to
run out of the hole. Reinstall the
filler bolt and tighten it securely.
If Honda MTF is not available, you
may use an API service SG or SHrated motor oil with a viscosity of
SAE 10W-30 or 10W-40 temporarily.
Motor oil can cause increased transmission wear and higher shifting
effort, so you should have the transmission drained and refilled with
Honda MTF as soon as possible.
The transmission should be drained
and refilled with new fluid according
to the time and distance recommendations in the maintenance schedule.
Brake and Clutch Fluid
Check the fluid level in the reservoirs monthly. There are up to three
reservoirs, depending on model.
They are:
Brake fluid reservoir
Clutch fluid reservoir (manual
transmission only)
ABS reservoir (cars with ABS)
The brake fluid in the brake and
Anti-lock brake systems should be
replaced every 3 years or 72,000 km
(45,000 miles), whichever comes
first.
Maintenance
Brake and Clutch Fluid
Anti-lock Brake System
Brake System
MAX
MAX
MAX
MIN
4 cylinder models
MIN
The fluid should be between the
MIN and MAX marks on the side of
the reservoir. If the level is at or
below the MIN mark, it is an
indication that your brake system
needs attention. Have the brake
system inspected for leaks or worn
brake pads.
Maintenance
6 cylinder models
MIN
If you add brake fluid to bring it up
to the MAX mark, use Genuine
Honda Brake Fluid or an equivalent
from a sealed container that is
marked DOT3 or DOT4 only. Brake
fluid marked DOT5 is not compatible
with your car's braking system.
4 cylinder models
The fluid should be between the
MIN and MAX marks on the side of
the reservoir. If it is at or below the
M I N mark, it indicates a possible
problem in the ABS. Have the dealer
inspect the system as soon as
possible.
Brake and Clutch Fluid, Power Steering
Clutch System
Power Steering
UPPER LEVEL
MAX
MIN
MAX
6 cylinder models
MIN
4 cylinder models
The fluid should be between the
M I N and MAX marks on the side of
the reservoir. If it is not, add brake
fluid to bring it up to that level. Use
the same DOT3 or DOT4 brake fluid
specified for the brake system.
Low fluid level can indicate a leak in
the clutch system. Have this system
inspected as soon as possible.
LOWER LEVEL
You should check the fluid level in
the power steering reservoir
monthly. Check the level when the
engine is cold. Look at the side of
the reservoir. The fluid should be
between the UPPER LEVEL and
LOWER LEVEL. If it is below the
LOWER LEVEL, add power steering
fluid to the UPPER LEVEL.
CONTINUED
Maintenance
Power Steering, Air Cleaner
NOTICE
UPPER LEVEL
6 cylinder models
LOWER LEVEL
Using automatic transmission fluid or
another brand of power steering fluid
will damage the system. Use only
GENUINE HONDA Power Steering
Fluid-V.
A low power steering fluid level can
indicate a leak in the system. Check
the fluid level frequently and have
the system inspected as soon as
possible.
NOTICE
Turning the steering wheel to full left
or right lock and holding it there can
damage the power steering pump.
Maintenance
Air Cleaner
The air cleaner element should be
cleaned or replaced according to the
time and distance recommendations
in the maintenance schedule.
Cleaning (Severe Conditions)
Clean the air cleaner element by
blowing compressed air through it in
the opposite direction to normal air
flow. If you do not have access to
compressed air (such as a service
station), ask your Honda dealer to do
this service.
Follow the replacement procedure
for removal and reinstallation.
Air Cleaner (4 Cylinder Models)
DUCT
BOLTS
AIR CLEANER ELEMENT
The air cleaner element is inside the
box on the passenger's side of the
engine compartment.
To replace it:
1. Remove the duct by pulling it
straight out.
3. Loosen the four bolts and remove
the air cleaner housing cover.
5. Place the new air cleaner element
in the air cleaner housing.
4. Remove the old air cleaner
element.
Clean the inside of the air cleaner
housing with a damp rag.
6. Reinstall the air cleaner housing
cover and the duct, tighten the
four bolts.
7. Tighten the battery set plate.
2. Loosen the battery set plate and
push it away from the air cleaner.
Maintenance
Air Cleaner (6 Cylinder Models)
The air cleaner element is inside the
box on the driver's side of the engine
compartment.
To replace it:
BOLTS
1. Loosen the battery set plate and
push it away from the air cleaner.
AIR CLEANER ELEMENT
Maintenance
2. Loosen the four bolts and remove
the air cleaner housing cover.
4. Place the new air cleaner element
in the air cleaner housing.
3. Remove the old air cleaner
element.
Clean the inside of the air cleaner
housing with a damp rag.
5. Reinstall the air cleaner housing
cover, tighten the four bolts.
6. Tighten the battery set plate.
Spark Plugs (4 Cylinder Models)
The spark plugs in your car need to
be replaced every 2 years or 48,000
km (30,000 miles), whichever comes
first.
Replacement
SPARK PLUG CAP
1. Clean up any dirt and oil around
the spark plug caps.
2. Remove the spark plug cap by
pulling it straight out.
4. Put the new spark plug into the
socket, then thread it into the hole.
Screw it in by hand so you do not
crossthread it.
3. Remove the spark plug with a 16
mm (5/8 inch) spark plug socket.
CONTINUED
Maintenance
Spark Plugs (4 Cylinder Models)
NOTICE
Tighten the spark plugs carefully. A
spark plug that is too loose can
overheat and damage the engine.
Overtightening can cause damage to
the threads in the cylinder head.
6. Install the spark plug cap.
7. Repeat this procedure for the
other three spark plugs.
5. Torque the spark plug. (If you do
not have a torque wrench, tighten
the spark plug 2/3 turn after it
contacts the cylinder head.)
Tightening torque:
18 N.m (1.8 kgf.m, 13 Ibf.ft)
Maintenance
Specifications:
NGK:
ZFR5F-11
Nippondenso: KJ16CR-L11
Spark Plug Gap:
1.1 mm (0.04 in)
Spark Plugs (6 Cylinder Models)
The spark plugs in your car need to
be replaced every 2 years or 48,000
km (30,000 miles), whichever comes
first.
Replacement
SPARK PLUG CAP
1. Clean up any dirt and oil around
the spark plug caps.
2. Remove the spark plug cap by
pulling it straight out.
4. Put the new spark plug into the
socket, then thread it into the hole.
Screw it in by hand so you do not
crossthread it.
3. Remove the spark plug, using a 16
mm (5/8 inch) spark plug socket.
CONTINUED
Maintenance
Spark Plugs (6 Cylinder Models)
NOTICE
Tighten the spark plugs carefully. A
spark plug that is too loose can
overheat and damage the engine.
Overtightening can cause damage to
the threads in the cylinder head.
6. Install the spark plug cap.
7. Repeat this procedure for the
other five spark plugs.
5. Torque the spark plug. (If you do
not have a torque wrench, tighten
the spark plug 2/3 turn after it
contacts the cylinder head.)
Tightening torque:
18 N.m (1.8 kgf . m, 13 Ibf.ft)
Maintenance
Specifications:
NGK:
Nippondenso:
ZFR5F-11
KJ16CR-L11
Spark Plug Gap:
1.1 mm (0.04 in)
Battery
Check the condition of your car's
battery monthly. You should check
for proper electrolyte level and
corrosion on the terminals.
Emergency Procedures
The battery contains sulfuric
acid (electrolyte) which is highly
corrosive and poisonous.
Getting electrolyte in your eyes
or on your skin can cause
serious burns.
Wear protective clothing and
eye protection when working
near the battery.
Eyes — Flush with water from a cup
or other container for at least fifteen
minutes. (Water under pressure can
damage the eye.) Immediately call a
physician or 911.
Skin — Remove contaminated
clothing. Flush the skin with large
quantities of water. Call a physician
immediately.
Swallowing — Drink water or milk.
Call your local Poison Control Center
or a physician immediately.
CONTINUED
Maintenance
Battery
TEST INDICATOR WINDOW
TEST INDICATOR WINDOW
4 cylinder models
6 cylinder models
Check the battery condition by
looking at the test indicator window
on the battery.
The label on the battery explains the
test indicator's colors.
Maintenance
Check the battery terminals for
corrosion (a white or yellowish
powder). To remove it, cover the
terminals with a solution of baking
soda and water. It will bubble up and
turn brown. When this stops, wash it
off with plain water. Dry off the
battery with a cloth or paper towel.
Coat the terminals with grease to
help prevent future corrosion.
4 cylinder models
If the terminals are severely corroded, clean them with baking soda
and water. Then use a wrench to
loosen and remove the cables from
the terminals. Always disconnect the
negative (—) cable first and reconnect it last. Clean the battery terminals with a terminal cleaning tool or
wire brush. Reconnect and tighten
the cables, then coat the terminals
with grease.
Battery
NOTICE
The battery gives off explosive
hydrogen gas during normal
operation.
A spark or flame can cause the
battery to explode with enough
force to kill or seriously hurt you.
6 cylinder models
If you need to connect the battery to
a charger, disconnect both cables to
prevent damage to the car's electrical system.
Charging the battery with the cables
connected can seriously damage your
car's electronic controls. Detach the
battery cables before connecting the
battery to a charger.
Wear protective clothing and a
face shield, or have a skilled
mechanic do the battery
maintenance.
On the U.S. EX, EX V-6 and Canadian
EX-R, EX-R V-6 models
If your car's battery is disconnected
or goes dead, the audio system will
disable itself. The next time you turn
on the radio you will see "Code" in
the frequency display. Use the
Preset buttons to enter the five-digit
code (see page 100).
Maintenance
Windshield Wipers
Check the condition of the windshield wiper blades at least every six
months. Look for signs of cracking
in the rubber, or areas that are
getting hard. Replace the blades if
you find these signs, or they leave
streaks and unwiped areas when
used.
WIPER ARMS
LOCK TAB
To replace:
1. Raise the wiper arm off the
windshield.
Maintenance
2. Disconnect the blade assembly
from the wiper arm by pushing in
the lock tab. Hold it in while you
push the blade assembly toward
the base of the arm.
Windshield Wipers
BLADE
BLADE
5. Slide the new wiper blade into the
holder until the tabs lock.
6. Slide the wiper blade assembly
onto the wiper arm. Make sure it
locks in place.
7. Lower the wiper arm down against
the windshield.
REINFORCEMENT
3. Remove the blade from its holder
by grasping the tabbed end of the
blade. Pull firmly until the tabs
come out of the holder.
4. Examine the new wiper blades. If
they have no plastic or metal reinforcement along the back edge,
remove the metal reinforcement
strips from the old wiper blade and
install them in the slots along the
edge of the new blade.
Maintenance
Air Conditioning
Optional for the U.S. DX and Canadian
LX models
AIR CONDITIONING
CONDENSER
Your car's air conditioning is a sealed
system. Any major maintenance,
such as recharging, should be done
by a qualified technician. There are a
couple of things you can do to make
sure the air conditioning works
efficiently.
Periodically check the engine's
radiator and air conditioning
condenser for leaves, insects, and
dirt stuck to the front surface. These
block the air flow and reduce cooling
efficiency. Use a light spray from a
hose or a soft brush to remove them.
NOTICE
The condenser and radiator fins bend
easily. Only use a low-pressure spray
or soft-bristle brush to clean them.
Maintenance
If the air conditioning does not get as
cold as before, have your dealer
check the system. Recharge the
system with Refrigerant HFC-134a
(R-134a). (See Specifications on page
230.)
NOTICE
Run the air conditioning at least once
a week during the cold weather
months. Run it for at least ten
minutes while you are driving at a
steady speed with the engine at
normal operating temperature. This
circulates the lubricating oil contained in the refrigerant.
Whenever you have the air conditioning
system serviced, make sure the service
facility uses a refrigerant recycling
system. This system captures the
refrigerant for reuse. Releasing
refrigerant into the atmosphere can
damage the environment.
Drive Belts, Tires
Drive Belts
POWER STEERING BELT
4 cylinder models ALTERNATOR BELT
Check the condition of the two drive
belts. Examine the edges of each
belt for cracks or fraying.
Check the tension of each belt by
pushing on it with your thumb
midway between the pulleys.
The belts should have the following
"play" or deflection.
POWER STEERING BELT
6 cylinder models ALTERNATOR BELT
Alternator belt:
(On cars without A/C)
10.5 — 12.5 mm (0.41 — 0.49 in)
(On cars with A/C)
8.0 — 10.5 mm (0.31 — 0.41 in)
(6 cylinder models)
14.0 — 16.5 mm (0.55 — 0.65 in)
Power steering belt:
13.0 — 16.0 mm (0.51 — 0.63 in)
(6 cylinder models)
14.5 — 17.0 mm (0.57 — 0.67 in)
If you see signs of wear or looseness,
have your dealer adjust or replace
the belts.
Tires
To safely operate your car, your tires
must be the proper type and size, in
good condition with adequate tread,
and correctly inflated. The following
pages give more detailed information
on how and when to check air
pressure, how to inspect your tires
for damage and wear, and what to do
when your tires need to be replaced.
Using tires that are excessively
worn or improperly inflated can
cause a crash in which you can
be seriously hurt or killed.
Follow all instructions in this
owner's manual regarding tire
inflation and maintenance.
Maintenance
Tires
Inflation
Keeping the tires properly inflated
provides the best combination of
handling, tread life and riding
comfort. Underinflated tires wear
unevenly, adversely affect handling
and fuel economy, and are more
likely to fail from being overheated.
Overinflated tires can make your car
ride more harshly, are more prone to
damage from road hazards, and wear
unevenly.
before checking the tire pressure,
the tires can still be considered
"cold" if you drive less than 1.6 km
(1 mile).
If you check the pressure when the
tires are hot (the car has been driven
several miles), you will see readings
30 to 40 kPa (0.3 to 0.4 kg/cm 2 , 4 to
6 psi) higher than the cold reading.
This is normal. Do not let air out to
match the specified cold pressure.
The tire will be underinflated.
We recommend that you visually
check your tires every day and use a
gauge to measure the air pressure at
least once a month. If you think a tire
might be low, check it immediately.
Remember to check the spare tire at
the same time you check all the
other tires.
Recommended Tire Pressures for
Normal Driving
Check the pressure in the tires when
they are cold. This means the car
has been parked for at least three
hours. If you have to drive the car
Maintenance
The following chart shows the
recommended cold tire pressures for
most normal driving conditions and
speeds. Tire pressures for high
speed driving are shown on page
235.
The compact spare tire pressure is:
420 kPa (4.2 kgf/cm 2 , 60 psi)
The pressures are also given on the
tire information label on the driver's
doorjamb.
Tires
You should get your own tire
pressure gauge and use it whenever
you check your tire pressures. This
will make it easier for you to tell if a
pressure loss is due to a tire problem
and not due to a variation between
gauges.
Tubeless tires have some ability to
self-seal if they are punctured.
However, because leakage is often
very slow, you should look closely
for punctures if a tire starts losing
pressure.
You should look for:
Bumps or bulges in the tread or
side of the tire. Replace the tire if
you find either of these conditions.
Cuts, splits, or cracks in the side
of the tire. Replace the tire if you
can see fabric or tread.
Excessive tread wear.
INDICATOR
LOCATION
MARKS
Inspection
Every time you check inflation, you
should also examine the tires for
damage, foreign objects, and wear.
Your car's tires have wear indicators
molded into the tread. When the
tread wears down to that point, you
will see a 12.7 mm (1/2 inch) wide
band running across the tread. This
shows there is less than 1.6 mm
(1/16 inch) of tread left on the tire.
A tire that is this worn gives very
little traction on wet roads. You
should replace the tire if you can see
the tread wear indicator in three or
more places around the tire.
Maintenance
In addition to proper inflation,
correct wheel alignment helps to
decrease tire wear. If you find a tire
is worn unevenly, have your dealer
check the wheel alignment.
TREAD WEAR
INDICATORS
CONTINUED
Maintenance
Tires
The tires were properly balanced by
the factory. They may need to be
rebalanced at some time before they
are worn out. Have your dealer
check the tires if you feel a consistent vibration while driving. A tire
should always be rebalanced if it is
removed from the wheel for repair.
Make sure the installer balances the
wheels when you have new tires
installed. This increases riding
comfort and tire life. Your car's
original tires were dynamic or "spin"
balanced at the factory. For best
results, have the installer perform a
dynamic balance.
NOTICE
(U.S.: EX, EX V-6, Canada: EX-R,
EX-R V-6)
Improper wheel weights can damage
your car's aluminum wheels. Use only
genuine Honda wheel weights for
balancing.
Maintenance
Tire Rotation
Front
Front
(For Non-directional (For Directional
Tires and Wheels)
Tires and Wheels)
To help increase tire life and
distribute wear more evenly, you
should have the tires rotated every
12,000 km (7,500 miles). Move the
tires to the positions shown in the
chart each time they are rotated.
When shopping for replacement
tires, you may find that some tires
are "directional." This means they
are designed to rotate only in one
direction. If you use directional tires,
they should be rotated only front-toback.
Replacing Tires and Wheels
The tires that came with your car
were selected to match the performance capabilities of the car while
providing the best combination of
handling, ride comfort, and long life.
You should replace them with radial
tires of the same size, load range,
speed rating, and maximum cold tire
pressure rating (as shown on the
tire's sidewall). Mixing radial and
bias-ply tires on your car can reduce
its braking ability, traction, and
steering accuracy.
Tires
Installing improper tires on your
car can affect handling and
stability. This can cause a crash
in which you can be seriously
hurt or killed.
Always use the size and type of
tires recommended in this
owner's manual.
It is best to replace all four tires at
the same time. If that is not possible
or necessary, then replace the two
front tires or the two rear tires as a
pair. Replacing just one tire can
seriously affect your car's handling.
If you ever need to replace a wheel,
make sure the wheel's specifications
match those of the original wheel
that came on your car. Replacement
wheels are available at your Honda
dealer.
Wheels and Tires
Wheel:
(U.S.: DX, Canada: LX)
14x5J
(U.S.: LX, Canada: EX)
15 x 5 1/2 JJ
(U.S.: EX, Canada: EX-R)
15 x 5 1/2 JJ
(U.S.: LX V-6, Canada: EX V-6)
15x6J
(U.S.: EX V-6, EX-R V-6)
15x6JJ
Tire:
(U.S.: DX, Canada: LX)
P185/70R1487S
(U.S.: LX, Canada: EX)
185/65R15 88S
(U.S.: EX, Canada: EX-R)
195/60R15 88H
(U.S.: LX V-6, EX V-6,
Canada: EX V-6, EX-R V-6)
205/60R15 91V
See Tire Information on page 234 for
additional information about tire and
wheel size designations. See page
235 for information about DOT Tire
Quality Grading.
The ABS works by comparing the
speed of the wheels. When replacing
tires, use the same size originally
supplied with the car. Tire size and
construction can affect wheel speed
and may cause the system to work inconsistently.
Maintenance
Tires
Winter Driving
Tires that are marked "M + S" or
"All Season" on the sidewall have an
all-weather tread design. They
should be suitable for most winter
driving conditions. Tires without
these markings are designed for
optimum traction in dry conditions.
They may not provide adequate
performance in winter driving.
For the best performance in snowy
or icy conditions, you should install
snow tires or tire chains. They may
be required by local laws under
certain conditions.
Snow Tires
If you mount snow tires on your
Honda, make sure they are radial
tires of the same size and load range
as the original tires. Mount snow
tires on all four wheels to balance
your car's handling in all weather
conditions. Keep in mind the traction
provided by snow tires on dry roads
may not be as high as your car's
original equipment tires. You should
drive cautiously even when the roads
are clear. Check with the tire dealer
for maximum speed recommendations.
Tire Chains
Mount snow chains on your car
when warranted by driving conditions or required by local laws. Make
sure the chains are the correct size
for your tires. Install them only on
the front tires. If metal chains are
used, they must be SAE class "S".
Cable type traction devices can also
be used.
Maintenance
When installing chains, follow the
manufacturer's instructions and
mount them as tightly as you can.
Drive slowly with chains installed. If
you hear the chains contacting the
body or chassis, stop and tighten
them. If they still make contact, slow
down until it stops. Remove the
chains as soon as you begin driving
on cleared roads.
NOTICE
Chains of the wrong size or that are
improperly installed can damage your
car's brake lines, suspension, body, and
wheels. Stop driving if you hear the
chains hitting any part of the car.
Lights
Check the operation of your car's
exterior lights at least once a month.
A burned out bulb can create an
unsafe condition by reducing your
car's visibility and the ability to
signal your intentions to other
drivers.
Check the following:
Headlights (low and high beam)
Parking lights
Taillights
Brake lights
High-mount brake light
Turn signals
Back-up lights
Hazard light function
License plate light
Side marker lights
Daytime running lights
(Canadian cars)
If you find any bulbs are burned out,
replace them as soon as possible.
Refer to the chart on page 231 to
determine what type of replacement
bulb is needed.
Replacing a Headlight Bulb
Your car has two bulbs on each side,
four in total. Make sure you are
replacing the bulb that is burned out.
Your car uses halogen headlight
bulbs. When replacing a bulb, handle
it by its plastic case and protect the
glass from contact with your skin or
hard objects. If you touch the glass,
clean it with denatured alcohol and a
clean cloth.
CONTINUED
Maintenance
Lights
NOTICE
BULB
Halogen headlight bulbs get very hot
when lit. Oil, perspiration, or a scratch
on the glass can cause the bulb to
overheat and shatter.
4. Insert the new bulb into the hole
and turn it one-quarter turn clockwise.
5. Push the electrical connector back
onto the bulb. Make sure it is on
all the way.
6. Turn on the headlights to test the
new bulb.
TAB
1. Open the hood.
If you need to change a bulb on
the passenger's side, remove the
radiator reserve tank.
2. Remove the electrical connector
from the bulb by squeezing the
connector to unlock the tab while
you push down on the connector.
3. Remove the bulb by turning it onequarter turn counterclockwise.
Maintenance
7. (Passenger's side)
Reinstall the radiator reserve tank.
Lights
Replacing a Front Turn Signal
Light Bulb
TURN SIGNAL ASSEMBLY
6. Push the bulb holder into the turn
signal assembly and turn it
clockwise until it locks.
7. Test the lights to make sure the
new bulb is working.
BULB
8. Put the turn signal assembly into
the bumper. Make sure the tabs
on the turn signal assembly fit into
the bumper slots. Tighten the
mounting screw.
BULB HOLDER
1. Use a Phillips-head screwdriver to
loosen the turn signal assembly's
mounting screw.
3. Remove the bulb holder from the
turn signal assembly by turning it
counterclockwise.
2. Remove the turn signal assembly
from the bumper.
4. Remove the burned out bulb from
the socket by pulling it straight out
of its socket.
5. Install the new bulb in the socket.
Maintenance
Lights
5. Put the bulb holder back into its
hole in the lens, and turn it
clockwise until it locks.
Replacing Front Side Marker and
Parking Light Bulbs
SCREW
6. Turn on the parking lights and
check that the new bulb is
working.
7. Put the side marker assembly
back into the body. Push on the
front edge until it snaps into place.
Install the mounting screw and
tighten it securely.
1. Use a Phillips-head screwdriver to
remove the screw from the top of
the fender.
3. Turn the bulb holder one-quarter
turn counterclockwise to remove it
from the lens.
2. Move the side marker light
assembly forward until it pops out
of the body.
4. Pull the bulb straight out of its
socket.
Push the new bulb straight into
the socket until it bottoms.
Maintenance
Lights
5. Install the new bulb in the socket.
Replacing Rear Bulbs
(in Fenders)
KNOB
6. Reinstall the socket into the light
assembly.
COVER
7. Test the lights to make sure the
new bulb is working.
8. Reinstall the taillight assembly
cover.
1. Open the trunk and remove the
taillight cover by turning the knob.
3. Remove the socket by turning it
one-quarter turn counterclockwise.
2. Determine which of the two bulbs
is burned out: tail/stoplight or turn
signal.
4. Remove the burned out bulb from
the socket by pulling it straight out
of its socket.
Maintenance
Lights
Replacing Rear Bulbs (in Trunk
Lid)
5. Install the new bulb in the socket.
6. Reinstall the socket into the light
assembly.
7. Test the lights to make sure the
new bulb is working.
1. Open the trunk.
2. Determine which of the two bulbs
is burned out: taillight or back-up
light.
Maintenance
3. Remove the socket by turning it
one-quarter turn counterclockwise.
4. Remove the burned out bulb from
the socket by pulling it straight out
of its socket.
Lights
5. Insert the socket in the assembly.
Turn it clockwise to lock it in place.
Replacing a Rear Side Marker
Light Bulb
6. Reinstall the side marker assembly in the fender. Tighten the
mounting screw securely.
SCREW
1. Use a Phillips-head screwdriver to
loosen the side marker assembly
mounting screw.
3. Remove the socket from the light
assembly by turning it counterclockwise.
2. Remove the assembly from the
fender by pulling out the back
edge and sliding the assembly
backwards.
4. Remove the bulb from the socket
by pulling it straight out.
Install the new bulb. Turn on the
headlights to test the bulb.
Maintenance
Lights
Replacing a High-mount Brake
Light Bulb
3. Install the new bulb and reinstall
the socket. Make sure the new
bulb is working.
Replacing a Rear License Bulb
BULB
1. Open the trunk and remove the
socket from the light assembly by
turning it one-quarter turn counterclockwise.
2. Remove the burned-out bulb by
pulling it straight out of the socket.
Maintenance
1. Remove the two screws and
remove the license light assembly.
2. Remove the lens from the rubber
seal and the metal cover.
3. Pull the bulb straight out of its
socket. Push the new bulb in until
it bottoms in the socket.
Lights
4. Turn on the parking lights and
check that the new bulb is
working.
5. Reinstall the cover and the lens.
Put the license light assembly in
place. Reinstall the two screws and
tighten them securely.
Replacing Bulbs in the Interior
Lights
The ceiling light, door light and
vanity mirror light come apart the
same way. They do not all use the
same bulb.
CEILING LIGHT
1. Remove the lens by carefully
prying on the edge of the lens with
a fingernail file or a small flat-tip
screwdriver. Do not pry on the
edge of the housing around the
lens.
Door light:
Not available on the U.S. DX model
and Canadian LX model
pry on the top middle of the lens.
Ceiling light:
pry on the front edge of the lens
in the middle.
Spotlight:
2. Remove the bulb by pulling it
straight out of its metal tabs.
3. Push the new bulb into the metal
tabs. Snap the lens back in place.
Not available on the U.S. DX model
and Canadian LX model
CONTINUED
Maintenance
Lights
On U.S. LX, LX V-6, EX and EX V-6
models, and Canadian EX, EX V-6, EX-R
and EX-R V-6 models
SPOTLIGHT
Maintenance
On U.S. EX, EX V-6, EX and EX V-6
models, and Canadian EX, EX V-6, EX-R
and EX-R V-6 models
DOOR LIGHT
On U.S. Anniversary Edition, LX, LX V-6,
EX and EX V-6 models, and Canadian
EX, EX V-6, EX-R and EX-R V-6 models
SUN VISOR
Lights
Replacing a Trunk Light Bulb
TRUNK
1. Remove the lens by carefully
prying on the edge of the lens with
a fingernail file or a small flat-tip
screwdriver. Do not pry on the
edge of the housing around the
lens.
2. Remove the bulb by pulling it
straight out of its metal tabs.
3. Push the new bulb into the metal
tabs. Snap the lens back in place.
Maintenance
Storing Your Car
If you need to park your car for an
extended period (more than 1
month), there are several things you
should do to prepare it for storage.
Proper preparation helps prevent
deterioration and makes it easier to
get your car back on the road. It is
best to store your car indoors if at all
possible.
Block the rear wheels.
If the car is to be stored for a
longer period, it should be
supported on jackstands so the
tires are off the ground.
Leave one window open slightly (if
the car is being stored indoors).
Fill the fuel tank.
Disconnect the battery.
Change the engine oil and filter
(see page 148).
Support the front wiper blade
arms with a folded towel or rag so
they do not touch the windshield.
Wash and dry the exterior
completely.
Clean the interior. Make sure the
carpeting, floor mats, etc. are
completely dry.
Leave the parking brake off. Put
the transmission in Reverse
(manual) or Park (automatic).
Maintenance
Apply a silicone spray lubricant to
all door and trunk seals. Also,
apply wax to the painted surfaces
that mate with the door and trunk
seals.
Cover the car with a "breathable"
car cover, one made from a porous
material such as cotton.
Nonporous materials, such as
plastic sheeting, trap moisture
which can damage the paint.
If possible, run the engine for a
while periodically (preferably once
a month).
If you store your car for 12 months
or longer, have your Honda dealer
perform the inspections called for in
the 24 months/48,000 km (30,000
miles) maintenance schedule
(Normal Conditions) as soon as you
take it out of storage (see page 138).
The replacements called for in the
maintenance schedule are not
needed unless the car has actually
reached that time or mileage.
Appearance Care
Regular cleaning and polishing of
your Honda helps to keep it "new"
looking. This section gives you hints
on how to clean and preserve your
car's appearance: the paint, brightwork, wheels and interior. Also
included are several things you can
do to help prevent corrosion.
Exterior Care.................................. 196
Washing...................................... 196
Waxing........................................197
Aluminum Wheels..................... 197
Paint Touch-up........................... 198
Interior Care................................... 199
Carpeting.................................... 199
Fabric.......................................... 199
Vinyl............................................ 199
Leather........................................199
Seat Belts.................................... 200
Windows..................................... 200
Air Fresheners........................... 200
Corrosion Protection..................... 201
Body Repairs.................................. 202
Appearance Care
Exterior Care
Washing
Frequent washing helps preserve
your car's beauty. Dirt and grit can
scratch the paint, while tree sap and
bird droppings can permanently ruin
the finish.
Wash your car in a shady area, not in
direct sunlight. If the car is parked in
the sun, move it into the shade and
let the exterior cool down before you
start.
NOTICE
Chemical solvents and strong cleaners
can damage the paint, metal, and
plastic on your car.
Rinse the car thoroughly with cool
water to remove loose dirt.
Fill a bucket with cool water. Mix
in a mild detergent, such as
dishwashing liquid or a product
made especially for car washing.
Appearance Care
Wash the car, using the water and
detergent solution and a softbristle brush, sponge, or soft cloth.
Start at the top and work your way
down. Rinse frequently.
Check the body for road tar, tree
sap, etc. Remove these stains with
tar remover or turpentine. Rinse it
off immediately so it does not
harm the finish. Remember to rewax these areas, even if the rest of
the car does not need waxing.
When you have washed and rinsed
the whole exterior, dry it with a
chamois or soft towel. Letting it
air-dry will cause dulling and water
spots.
As you dry the car, inspect it for
chips and scratches that could allow
corrosion to start. Repair them with
touch-up paint (see page 198).
Exterior Care
Waxing
Always wash and dry the whole car
before waxing it. You should wax
your car, including the metal trim,
whenever water sits on the surface
in large patches. It should form into
beads or droplets after waxing.
You should use a quality liquid or
paste wax. Apply it according to the
instructions on the container. In
general, there are two types of
products:
Waxes — A wax coats the finish and
protects it from damage by exposure
to sunlight, air pollution, etc. You
should use a wax on your Honda
when it is new.
Polishes — Polishes and cleaner/
waxes can restore the shine to paint
that has oxidized and lost some of its
shine. They normally contain mild
abrasives and solvents that remove
the top layer of the finish. You
should use a polish on your Honda if
the finish does not have its original
shine after using a wax.
Cleaning tar, insects, etc. with
removers also takes off the wax.
Remember to re-wax those areas,
even if the rest of the car does not
need waxing.
Aluminum Wheels
On the U.S. EX, EX V-6 and Canadian
EX-R, EX-R V-6 models
Clean your Honda's aluminum alloy
wheels as you do the rest of the
exterior. Wash them with the same
solution, and rinse them thoroughly.
The wheels have a protective clearcoat that keeps the aluminum from
corroding and tarnishing. Using
harsh chemicals, including some
commercial wheel cleaners, or stiff
brushes can damage this clear-coat.
Only use a mild detergent and soft
brush or sponge to clean the wheels.
Appearance Care
Exterior Care
Paint Touch-up
Your dealer has touch-up paint to
match your car's color. The color
code is printed on a sticker on the
driver's doorjamb. Take this code to
your dealer so you are sure to get
the correct color.
Appearance Care
Inspect your car for frequently for
chips or scratches in the paint.
Repair them right away to prevent
corrosion of the metal underneath.
Use the touch-up paint only on small
chips and scratches. More extensive
paint damage should be repaired by
a professional.
Interior Care
Carpeting
Vacuum the carpeting frequently to
remove dirt. Ground-in dirt will make
the carpet wear out faster.
Periodically shampoo the carpet to
keep it looking new. Use one of the
foam-type carpet cleaners on the
market. Follow the instructions that
come with the cleaner, applying it
with a sponge or soft brush. Keep
the carpeting as dry as possible by
not adding water to the foam.
Fabric
Vacuum dirt and dust out of the
material frequently. For general
cleaning, use a solution of mild soap
and lukewarm water, letting it air dry.
To clean off stubborn spots, use a
commercially-available fabric cleaner.
Test it on a hidden area of the fabric
first, to make sure it does not bleach
or stain the fabric. Follow the
instructions that come with the
cleaner.
Leather
On U.S. EX V-6, optional for U.S. EX
Vacuum dirt and dust from the
leather frequently. Pay particular
attention to the pleats and seams.
Clean the leather with a soft cloth
dampened with clear water, then
buff it with a clean, dry cloth. If
further cleaning is needed, use a
soap specifically for leather, such as
saddle soap. Apply this soap with a
damp, soft cloth. Wipe down and
buff as described above.
Vinyl
Remove dirt and dust with a vacuum
cleaner. Wipe the vinyl with a soft
cloth dampened in a solution of mild
soap and water. Use the same
solution with a soft-bristle brush on
more difficult spots. You can also use
commercially-available spray or
foam-type vinyl cleaners.
Appearance Care
Interior Care
Seat Belts
METAL LOOP
If your seat belts get dirty, you can
use a soft brush with a mixture of
mild soap and warm water to clean
them. Do not use bleach, dye, or
cleaning solvents. They can weaken
the belt material. Let the belts airdry before you use the car.
Appearance Care
Dirt build-up in the metal loops of
the seat belt anchors can cause the
belts to retract slowly. Wipe the
inside of the loops with a clean cloth
dampened in isopropyl alcohol or a
mixture of mild soap and warm
water.
Windows
Clean the windows, inside and out,
with a commercially-available glass
cleaner. You can also use a mixture
of one part white vinegar to ten parts
water. This will remove the haze that
builds up on the inside of the
windows. Use a soft cloth or paper
towels to clean all glass and clear
plastic surfaces.
NOTICE
The rear window defogger and
antenna wires arc bonded to the inside
of the glass. Wiping vigorously up-anddown can dislodge and break these
wires. When cleaning the rear window,
use gentle pressure and wipe side-toside.
Air Fresheners
If you want to use an air freshener/
deodorizer in the interior of your car,
it is best to use a solid type. Some
liquid air fresheners contain chemicals that may cause parts of the
interior trim and fabric to crack or
discolor.
If you use a liquid air freshener,
make sure you fasten it securely so it
does not spill as you drive.
Corrosion Protection
Two factors normally contribute to
causing corrosion in your car:
1. Moisture trapped in body cavities.
Dirt and road salt that collects in
hollows on the underside of the
car stays damp, promoting
corrosion in that area.
2. Removal of paint and protective
coatings from the exterior and
underside of the car.
Many corrosion-preventive measures
are built into your Honda. You can
help keep your car from corroding
by performing some simple periodic
maintenance:
Repair chips and scratches in the
paint as soon as you discover them.
Inspect and clean out the drain
holes in the bottom of the doors
and body.
Check the floor coverings for
dampness. Carpeting and floor
mats may remain damp for a long
time, especially in winter. This
dampness can eventually cause
the floor panels to corrode.
Use a high-pressure spray to clean
the underside of your car. This is
especially important in areas that
use road salt in winter. It is also a
good idea in humid climates and
areas subject to salt air. Cars
equipped with ABS have a sensor
and wiring at each wheel. Be
careful not to damage them.
Have the corrosion-preventive
coatings on the underside of your
car inspected and repaired
periodically.
Appearance Care
Body Repairs
Body repairs can affect your car's
resistance to corrosion. If your car
needs repairs after a collision, pay
close attention to the parts used in
the repair and the quality of the
work.
Make sure the repair facility uses
genuine Honda replacement body
parts. Some companies make
sheetmetal pieces that seem to
duplicate the original Honda body
parts, but are actually inferior in fit,
finish, and corrosion resistance.
Once installed, they do not give the
same high-quality appearance.
Appearance Care
When reporting your collision to the
insurance company, tell them you
want genuine Honda parts used in
the repair. Although most insurers
recognize the quality of original
parts, some may try to specify that
the repairs be done with other
available parts. You should investigate this before any repairs are
begun.
Take your car to your authorized
Honda dealer for inspection after the
repairs are completed. He can make
sure that quality materials were used,
and that corrosion-preventive
coatings were applied to all repaired
and replaced parts.
Taking Care of the Unexpected
This section covers the morecommon problems that motorists
experience with their cars. It gives
you information about how to safely
evaluate the problem and what to do
to correct it. If the problem has
stranded you on the side of the road,
you may be able to get going again.
If not, you will also find instructions
on getting your car towed.
Compact Spare Tire....................... 204
Changing a Flat Tire..................... 205
If Your Engine Won't Start........... 210
Nothing Happens....................... 210
The Starter Operates
Normally................................. 211
Jump Starting................................. 211
If Your Engine Overheats............. 214
Low Oil Pressure........................... 216
Charging System Indication......... 217
Malfunction Indicator Lamp ........ 218
Closing the Moonroof................... 219
Fuses............................................... 220
Checking and Replacing........... 221
Towing............................................ 225
Taking Care of the Unexpected
Compact Spare Tire
Your car has a compact spare tire
that takes up less space. Use this
spare tire as a temporary replacement only. Get your regular tire
repaired or replaced and put back on
your car as soon as you can.
Check the inflation pressure of the
compact spare tire every time you
check the other tires. It should be
inflated to:
420 kPa (4.2 kgf/cm 2 , 60 psi)
Follow these precautions whenever
you are using the compact spare tire:
Do not exceed 50 mph (80 km/h)
under any circumstances.
This tire gives a harsher ride and
less traction on some road surfaces than the regular tire. Use
greater caution while driving on
this tire.
Do not mount snow chains on the
compact spare.
The wheel of the compact spare
tire is designed especially to fit
your car. Do not use your spare
tire on another car unless it is the
same make and model.
Taking Care of the Unexpected
INDICATOR
LOCATION
MARK
TREAD WEAR
INDICATOR
BAR
The compact spare tire has a shorter
tread life than a regular tire. Replace
it when you can see the tread wear
indicator bars. The replacement
should be the same size and design
tire, mounted on the same wheel.
The compact spare tire is not
designed to be mounted on a regular
wheel, and the compact wheel is not
designed for mounting a regular tire.
Changing a Flat Tire
If you have a flat tire while driving,
stop in a safe place to change it.
Stopping in traffic or on the shoulder
of a busy road is dangerous. Drive
slowly along the shoulder until you
get to an exit or an area to stop that
is far away from the traffic lanes.
The car can easily roll off the
jack, seriously injuring anyone
underneath.
Follow the directions for
changing a tire exactly, and
never get under the car when it
is supported only by the jack.
3. Open the trunk. Raise the trunk
floor by lifting up on the back edge.
TRUNK FLOOR
4. Take the tool kit out of the spare
tire well.
TOOL
KIT
SPARE TIRE
5. Unscrew the wing bolt and take
the spare tire out of its well.
JACK
1. Park the car on firm, level ground
away from traffic. Turn on the
hazard warning lights and turn the
ignition to LOCK (0).
2. Put the transmission in Park
(automatic) or Reverse (manual).
Set the parking brake. Have your
passengers get out of the vehicle.
CONTINUED
Taking Care of the Unexpected
Changing a Flat Tire
6. The jack is behind a cover in the
right fender. Remove the cover by
turning the handle clockwise, then
pulling on the cover.
WHEEL NUTS
JACK
7. Turn the jack's end bracket
counterclockwise to loosen it, then
remove the jack.
Taking Care of the Unexpected
8. Loosen the four wheel nuts 1/2
turn with the wheel wrench.
Changing a Flat Tire
EXTENSION
JACKING POINT
9. Find the jacking point nearest the
wheel you are removing. Place the
jack under the jacking point. Turn
the end bracket clockwise until
the top of the jack contacts the
jacking point. Make sure the
jacking point tab is resting in the
jack notch.
WHEEL WRENCH
10. Use the extension and wheel
wrench as shown to raise the car
until the flat tire is off the ground.
11. Remove the wheel nuts and flat
tire. Temporarily place the flat tire
on the ground with the outside
surface of the wheel facing up.
Placing the wheel face down could
mar its finish.
CONTINUED
Taking Care of the Unexpected
Changing a Flat Tire
BRAKE HUB
12. Before mounting the spare tire,
wipe any dirt off the mounting
surface of the wheel and hub with
a cloth.
Taking Care of the Unexpected
13. Put on the spare tire. Put the
wheel nuts back on finger-tight,
then tighten them in a crisscross
pattern with the wheel wrench
until the wheel is firmly against
the hub. Do not try to tighten
them fully.
14. Lower the car to the ground and
remove the jack.
Changing a Flat Tire
WING BOLT
SPACER
CONE
4 cylinder models
15.Tighten the wheel nuts securely in
the same crisscross pattern. Have
the wheel nut torque checked at
the nearest automotive service
facility.
Tighten the wheel nuts to:
108 N.m(11 kgf . m,80 Ibf.ft)
16.Place the flat tire face down in the
spare tire well.
17.Remove the spacer cone from the
wing bolt, turn it over, and put it
back on the bolt.
18.Secure the flat tire by screwing
the wing bolt back into its hole.
WING BOLT
SPACER
CONE
6 cylinder models
19.Store the jack in its holder. Turn
the jack's end bracket to lock it in
place. Replace the cover. Store the
tool kit.
20.Store the wheel cover or center
cap in the trunk. Make sure it does
not get scratched or damaged.
Taking Care of the Unexpected
If Your Engine Won't Start
Diagnosing why your engine won't
start falls into two areas, depending
on what you hear when you turn the
key to START (III):
You hear nothing, or almost
nothing. The engine's starter
motor does not operate at all, or
operates very slowly.
You can hear the starter motor
operating normally, but the engine
does not start up and run.
Nothing Happens or the Starter
Motor Operates Very Slowly
When you turn the ignition switch to
START (III), you do not hear the
normal noise of the engine trying to
start. You may hear a clicking sound
or series of clicks, or nothing at all.
Check these things:
Check the transmission interlock.
If you have a manual transmission,
the clutch pedal must be pushed
all the way to the floor or the
starter will not operate. With an
automatic transmission, it must be
in Park or Neutral.
Turn the ignition switch to ON (II).
Turn on the headlights and check
their brightness. If the headlights
are very dim or don't light at all,
the battery is discharged. See
Jump Starting on page 211.
Taking Care of the Unexpected
Turn the ignition switch to START
(III). If the headlights do not dim,
check the condition of the fuses. If
the fuses are OK, there is probably something wrong with the
electrical circuit for the ignition
switch or starter motor. You will
need a qualified technician to
determine the problem. (See
Towing on page 225.)
If the headlights dim noticeably or
go out when you try to start the
engine, either the battery is discharged or the connections are
corroded. Check the condition of
the battery and terminal connections (see page 172). You can
then try jump starting the car from
a booster battery (see page 211).
If Your Engine Won't Start, Jump Starting
The Starter Operates Normally
In this case, the starter motor
sounds normal when you turn the
ignition switch to START (III), but
the engine does not run.
Are you using the proper starting
procedure? Refer to Starting the
Engine on page 115.
Do you have fuel? Turn the
ignition switch to ON (II) for a
minute and watch the fuel gauge.
The low fuel level warning light
may not be working, so you were
not reminded to fill the tank.
There may be an electrical
problem, such as no power to the
fuel pump. Check all the fuses
(see page 220).
If you find nothing wrong, you will
need a qualified technician to find
the problem. See Towing on page
225.
Jump Starting
If your car's battery has run down,
you may be able to start the engine
by using a booster battery. Although
this seems like a simple procedure,
there are several precautions you
should take. Follow the directions
closely.
A battery can explode if you do
not follow the correct procedure,
seriously injuring anyone
nearby.
Keep all sparks, open flames,
and smoking materials away
from the battery.
You cannot start a Honda with an
automatic transmission by pushing
or pulling it.
To jump start your car:
1. Open the hood and check the
physical condition of the battery
(see page 171). In very cold
weather, check the condition of
the electrolyte. If it seems slushy
or like ice, do not try jump starting
until it thaws.
NOTICE
If a battery sits in extreme cold, the
electrolyte inside can freeze.
Attempting to jump start with a frozen
battery can cause it to rupture or
explode.
2. Turn off all the electrical accessories: climate control, stereo
system, lights, etc.
Put the transmission in Neutral or
Park and set the parking brake.
CONTINUED
Taking Care of the Unexpected
Jump Starting
4 cylinder models
3. Connect one jumper cable to the
positive ( + ) terminal on the
booster battery. Connect the other
end to the positive ( + ) terminal
on your Honda's battery.
6 cylinder models
4 cylinder models
4. Connect the second jumper cable
to the negative (—) terminal on
the booster battery. Connect the
other end to the grounding strap
as shown. Do not connect this
jumper cable to any other part of
the engine.
5. If the booster battery is in another
car, have an assistant start that car
and run it at a fast idle.
Taking Care of the Unexpected
Jump Starting
6 cylinder models
4 cylinder models
BOOSTER
BATTERY
6. Start your car. If the starter motor
still operates slowly, check the
jumper cable connections to make
sure they have good metal-tometal contact.
6 cylinder models
BOOSTER
BATTERY
7. Once your car is running, disconnect the negative cable from your
car, then from the booster battery.
Disconnect the positive cable from
your car, then the booster battery.
Taking Care of the Unexpected
If Your Engine Overheats
The pointer of your car's temperature gauge should stay in the midrange under most conditions. It may
go higher if you are driving up a long
steep hill on a very hot day. If it
climbs to the red mark, you should
determine the reason.
NOTICE
Driving with the temperature gauge
pointer at the red mark can cause
serious damage to your engine.
Your car can overheat for several
reasons, such as lack of coolant or a
mechanical problem. The only
indication may be the temperature
gauge climbing to or above the red
mark. Or you may see steam or
spray coming from under the hood.
In either case, you should take
immediate action.
Steam and spray from an
overheated engine can
seriously scald you.
Do not open the hood if steam
is coming out.
Taking Care of the Unexpected
1. Safely pull to the side of the road.
Put the transmission in neutral or
park and set the parking brake.
Turn off the heating and cooling
system and all other accessories.
Turn on the hazard warning
indicators.
2. If you see steam and/or spray
coming from under the hood, turn
off the engine.
3. If you do not see steam or spray,
leave the engine running and
watch the temperature gauge. If
the high heat is due to overloading
(climbing a long, steep hill on a
hot day with the A/C running, for
example), the engine should start
to cool down almost immediately.
If it does, wait until the temperature gauge comes down to the midpoint then continue driving.
If Your Engine Overheats
4. If the temperature gauge stays at
the red mark, turn off the engine.
reaches the middle of the temperature gauge, or lower, before checking the radiator.
5. Wait until you see no more signs
of steam or spray, then open the
hood.
6. Look for any obvious coolant leaks,
such as a split radiator hose.
Everything is still extremely hot,
so use caution. If you find a leak, it
must be repaired before you
continue driving (see Towing on
page 225).
7. If you don't find an obvious leak,
check the coolant level in the
radiator reserve tank (see page
152). If the level is below the
MIN mark, add coolant to half-way
between the MIN and MAX marks.
8. If there was no coolant in the
reserve tank, you may also have to
add coolant to the radiator. Let the
engine cool down until the pointer
Removing the radiator cap
while the engine is hot can
cause the coolant to spray out,
seriously scalding you.
Always let the engine and
radiator cool down before
removing the radiator cap.
9. Using gloves or a large heavy
cloth, turn the radiator cap
counterclockwise, without pushing
down, to the first stop. This
releases any remaining pressure in
the cooling system. After the
pressure releases, push down on
the cap and turn it until it comes
off.
10.Start the engine and set the
temperature control dial to
maximum. Add coolant to the
radiator up to the base of the filler
neck. If you do not have the
proper coolant mixture available,
you can add plain water.
Remember to have the cooling
system drained and refilled with
the proper mixture as soon as you
can.
11. Put the radiator cap back on
tightly. Run the engine and watch
the temperature gauge. If it goes
back to the red mark, the engine
needs repair. (See Towing on
page 225.)
12.If the temperature stays normal,
check the coolant level in the
radiator reserve tank. If it has
gone down, add coolant to the
MAX mark. Put the cap back on
tightly.
Taking Care of the Unexpected
Low Oil Pressure
LOW OIL PRESSURE INDICATOR
NOTICE
Running the engine with low oil
pressure can cause serious mechanical
damage almost immediately. Turn off
the engine as soon as you can safely get
the car stopped.
1. Safely pull off the road and shut
off the engine.
This indicator should light when the
ignition is ON (II), and go out after
the engine starts. It should never
come on when the engine is running.
If it starts flashing, it indicates that
the oil pressure dropped very low for
a moment, then recovered. If the
indicator stays on with the engine
running, it shows that the engine has
lost oil pressure and serious engine
damage is possible. In either case,
you should take immediate action.
Taking Care of the Unexpected
2. Let the car sit for a minute. Open
the hood and check the oil level
(see page 145). Although oil level
and oil pressure are not directly
connected, an engine that is very
low on oil can lose pressure during
cornering and other driving
maneuvers.
3. If necessary, add oil to bring the
level back to the full mark on the
dipstick (see page 146).
4. Start the engine and watch the oil
pressure light. If the light does not
go out within ten seconds, turn off
the engine. There is a mechanical
problem that needs to be repaired
before you can continue driving.
(See Towing on page 225.)
Charging System Indication
Immediately turn off all electrical
accessories: radio, heater, A/C, rear
defogger, cruise control, etc. Try not
to use other electrically-operated
controls such as the power windows.
Keep the engine running and take
extra care not to stall it. Starting the
engine will discharge the battery
rapidly.
By eliminating as much of the
electrical load as possible, you can
drive several miles before the
battery is too discharged to keep the
engine running. Drive to a service
station or garage where you can get
technical assistance.
CHARGING SYSTEM INDICATOR
This indicator should come on when
the ignition is ON (II), and go out
after the engine starts. If it comes on
brightly when the engine is running,
it indicates that the charging system
has stopped charging the battery.
Taking Care of the Unexpected
Malfunction Indicator Lamp
If this indicator light comes on, have
your car checked by the dealer as
soon as possible. Drive moderately
until the dealer has inspected the
problem. Avoid full-throttle acceleration and driving at high speed.
MALFUNCTION INDICATOR LAMP
This indicator comes on for a few
seconds when you turn the ignition
switch ON (II). If it comes on at any
other time, it indicates that one of
the engine's emissions control
systems may have a problem. Even
though you may feel no difference in
your car's performance, it can
reduce your fuel economy and cause
your car to put out excessive
emissions. Continued operation may
cause serious engine damage.
Taking Care of the Unexpected
You should also have the dealer
inspect your car if the indicator light
comes on frequently, even though it
goes off when you follow the above
procedure.
NOTICE
If you keep driving with the malfunction indicator lamp on, you can damage
your car's emission controls and engine.
Those repairs may not be covered by
your car's warranties.
Closing the Moonroof
If the electric motor will not close
the moonroof, do the following:
ROUND PLUG
SOCKET
1. Check the fuse for the moonroof
motor (see page 220). If the fuse
is blown, replace it with one of the
same or lower rating.
2. Try closing the moonroof. If the
new fuse blows immediately or the
moonroof motor still does not
operate, you can close the
moonroof manually.
3. Get the tool kit out of the trunk.
4. Use a screwdriver or coin to
remove the round plug in the
center of the headliner.
5. Insert the moonroof wrench into
the socket behind this plug. Turn
the wrench until the moonroof is
fully closed.
6. Remove the wrench. Replace the
round plug.
Taking Care of the Unexpected
Fuses
All the electrical circuits in your car
have fuses to protect them from a
short circuit or overload. These
fuses are located in two or three fuse
boxes.
UNDER-HOOD
INTERIOR
TAB
KNOB
The interior fuse box is underneath
the dashboard on the driver's side.
To open it, turn the knob as shown.
Taking Care of the Unexpected
The under-hood fuse box is located
in the front of the engine compartment on the passenger's side. To
open it, push the tab as shown.
Fuses
ABS FUSE BOX
Cars equipped with ABS have a third
fuse box for the ABS. It is in the
engine compartment on the right
side.
Checking and Replacing Fuses
If something electrical in your car
stops working, the first thing you
should check for is a blown fuse.
Determine from the chart on pages
223 and 224, or the diagram on the
fuse box lid, which fuse or fuses
control that component. Check those
fuses first, but check all the fuses
before deciding that is not the cause.
Replace any blown fuses and check
the component's operation.
1. Turn the ignition switch to LOCK
(0). Make sure the headlights and
all other accessories are off.
2. Remove the cover from the fuse
box.
BLOWN
3. Check each of the large fuses in
the under-hood fuse box by
looking through the top at the wire
inside. Removing these fuses
requires a Phillips-head screwdriver.
CONTINUED
Taking Care of the Unexpected
Fuses
FUSE PULLER
BLOWN
If you replace the blown fuse with a
spare fuse that has a lower rating, it
might blow out again. This does not
indicate anything wrong. Replace the
fuse with one of the correct rating as
soon as you can.
NOTICE
4. Check the smaller fuses in the
under-hood fuse box and all the
fuses in the interior fuse box by
pulling out each fuse with the fuse
puller provided in the interior fuse
box.
Taking Care of the Unexpected
5. Look for a burned wire inside the
fuse. If it is burned out, replace it
with one of the spare fuses of the
same rating or lower.
If you cannot drive the car without
fixing the problem, and you do not
have a spare fuse, take a fuse of the
same rating or a lower rating from
one of the other circuits. Make sure
you can do without that circuit
temporarily (such as the cigarette
lighter or radio).
Replacing a fuse with one that has a
higher rating greatly increases the
chances of damaging the electrical
system. If you do not have a replacement fuse with the proper rating for the
circuit, install one with a lower rating.
6. If the replacement fuse of the
same rating blows in a short time,
there is probably a serious
electrical problem in your car.
Leave the blown fuse in that
circuit and have your car checked
by a qualified technician.
Fuses
UNDER-HOOD FUSE BOX
* 1 : On Canadian cars
* 2 : U.S.: EX, LX V-6 and EX V-6, Canada: EX-R, EX V-6, EX-R V-6
*3 : U.S.: LX V-6, EX V-6, Canada: EX V-6, EX-R V-6
* 4 : U.S.: EX, LX V-6 and EX V-6, Canada: EX-R, EX V-6 and EX-R V-6
CONTINUED
Taking Care of the Unexpected
Fuses
ABS FUSE BOX
Taking Care of the Unexpected
INTERIOR FUSE BOX
Towing
If your car needs to be towed, call a
professional towing service or, if you
belong to one, an organization that
provides roadside assistance. Never
tow your car behind another car with
just a rope or chain. It is very
dangerous.
Emergency Towing
There are three popular methods of
towing a car:
Flat-bed Equipment — The operator
loads your car on the back of a truck.
This is the best way of transporting your Honda.
Wheel Lift Equipment — The tow
truck uses two pivoting arms that go
under the tires (front or rear) and lift
them off the ground. The other two
tires remain on the ground.
Sling-type Equipment — The tow
truck uses metal cables with hooks
on the ends. These hooks go around
parts of the frame or suspension and
the cables lift that end of the car off
the ground. Your car's suspension
and body can be seriously damaged
if this method of towing is attempted.
If your Honda cannot be transported
by flat-bed, it should be towed with
the front wheels off the ground. If
due to damage, your car must be
towed with the front wheels on the
ground, do the following:
5-speed Manual Transmission
Release the parking brake.
Shift the transmission to Neutral.
NOTICE
Improper towing preparation will
damage the transmission. Follow the
above procedure exactly. If you cannot
shift the transmission or start the
engine (automatic transmission), your
car must be transported on a flat-bed.
It is best to tow the car no farther
than 80 km (50 miles), and keep
the speed below 35 mph (55
km/h).
NOTICE
Trying to lift or tow your car by the
bumpers will cause serious damage.
The bumpers are not designed to
support the car's weight.
Automatic Transmission
Release the parking brake.
Start the engine.
Shift to D4, then to N.
Turn off the engine.
Taking Care of the Unexpected
Technical Information
The diagrams in this section give
you the dimensions and capacities of
your Honda, and the locations of the
identification numbers. The explanations of several electronic and
mechanical systems on your Honda
are for the more technically-oriented
owner.
Identification Numbers................. 228
Specifications................................. 230
Anti-lock Brake System................ 233
Tire Information............................ 234
Tire Size Designation................ 234
Wheel Size Designation............ 234
Tire Speed Ratings.................... 234
Tire Pressure Adjustment
For High Speed Driving........ 235
DOT Tire Quality Grading....... 235
Treadwear.............................. 235
Traction.................................. 236
Temperature.......................... 236
Emission Controls......................... 237
The Clean Air Act...................... 237
Crankcase Emission Control
System.....................................237
Evaporative Emission Control
System..................................... 237
Exhaust Emission Controls...... 238
PGM-FI System..................... 238
Ignition Timing Control
System................................. 238
Exhaust Gas Recirculation
(EGR) System.................... 238
Three Way Catalytic
Converter............................ 238
Warm-up Three Way
Catalytic Converter........... 238
Replacement Parts..................... 238
Three Way Catalytic Converter... 239
Technical Information
Identification Numbers
Your car has several identifying
numbers located in various places.
VEHICLE IDENTIFICATION NUMBER
The Vehicle Identification Number
(VIN) is the 17-digit number your
Honda dealer uses to register your
car for warranty purposes. It is also
necessary for licensing and insuring
your car. The easiest place to find
the VIN is on a plate fastened to the
top of the dashboard. You can see it
by looking through the windshield
on the driver's side. It is also on the
Certification label attached to the
driver's doorjamb, and is stamped on
the engine compartment bulkhead.
The VIN is also provided in bar code
on the Certification label.
CERTIFICATION LABEL
Technical Information
Identification Numbers
The Engine Number is stamped into
the engine block. It is on the front.
4 Cylinder Models
AUTOMATIC TRANSMISSION NUMBER
The Transmission Number is on a
label on top of the transmission.
MANUAL
TRANSMISSION
NUMBER
ENGINE NUMBER
6 Cylinder Models
ENGINE NUMBER
AUTOMATIC TRANSMISSION NUMBER
Technical Information
Specifications
* 1 : 6 cylinder models
*2 : U.S.: DX, LX, EX, Canada: LX, EX
(Air conditioning is optional on U.S. DX and Canadian LX models)
*1 :
Technical Information
Including the coolant in the reserve tank and that remaining in the
engine.
Reserve tank capacity: 0.6 (0.16 US g a l , 0.13 Imp gal)
* 2 : Excluding the oil remaining in the engine.
* 3 : U.S.: EX, Canada: EX-R
* 4 : 6 cylinder models
Specifications
pages 168 and 170
page 224
page 223
CONTINUED
Technical Information
Specifications
*1:
*2:
*3:
*4:
*5:
*6:
U.S.: DX, Canada: LX
U.S.: LX, Canada: EX
U.S.: EX, Canada: EX-R
6 cylinder models
U.S.: DX, LX without ABS, Canada: LX, EX without ABS
U.S.: LX with ABS, EX, Canada: EX Automatic Transmission with
ABS, EX-R
Technical Information
Anti-lock Brake System
The Anti-lock Brake System (ABS)
is standard equipment on the EX, EX
V-6 models in the U.S. and the EX-R,
EX-R V-6 models in Canada. It is
optional on the LX, LX V-6 models in
the U.S. and the EX with Automatic
transmission, EX V-6 models in
Canada.
The ABS works by measuring how
fast the wheels are turning during
braking and comparing their speeds.
If any wheel is rotating much slower
than the others (on the verge of
locking up and skidding), the system
reduces hydraulic pressure to that
wheel's brake caliper. When that
wheel's speed matches the other
wheels, the system applies normal
hydraulic pressure. This can take
place several times per second at
each wheel. You feel the ABS
working as rapid pulsations in the
brake pedal.
Each wheel has a wheel speed
sensor assembly. As the wheel
rotates, the sensor sends electrical
pulses to the ABS control unit. The
pulse frequency varies with the
wheel speed.
The electrical output of the ABS
control unit is connected to the
modulator/solenoid unit. During
braking, the ABS control unit
monitors the pulse frequencies from
the four wheels. When the control
unit detects a wheel locking up, it
energizes the appropriate solenoid in
the modulator/solenoid unit. There
are six solenoids: two for each front
wheel, and two for the rear wheels.
The energized solenoid reduces
hydraulic pressure to one side of a
modulator valve. This, in turn,
reduces hydraulic pressure in the
brake line going to the affected
wheel. When that wheel speeds up
because of the reduced braking
effort, the control unit de-energizes
the solenoid. This builds hydraulic
pressure on the modulator valve.
The pressure increases in the
hydraulic line to the wheel.
For the system to react quickly, the
modulator/solenoid unit must have
brake fluid under high pressure.
This is supplied by a piston-type
accumulator that is pressurized by
an electric pump. A pressure-sensing
switch on the accumulator controls
this pump.
The control unit also contains error
detection circuitry. It monitors the
operation of the wheel sensors,
solenoids, pump, and electronics. If
the control unit detects any faults, it
shuts off power to the pump motor
and solenoids. The light on the
instrument panel comes on. The
brakes then work like a conventional
system without anti-lock capabilities.
Technical Information
Tire Information
Tire Size Designation
A tire's sidewall is marked with a tire
size designation. You will need this
information when selecting replacement tires for your car. The following explains what the letters and
numbers in the tire size designation
mean.
(Example tire size designation)
P185/70R14 87S
P — Applicable vehicle type (tires
marked with the prefix "P" are
intended for use on passenger cars;
however, not all tires have this
marking).
87 — Load Index, a numerical code
associated with the maximum load
the tire can carry.
S — Speed Rating Symbol. See the
speed rating chart in this section for
additional information.
Wheel Size Designation
Wheels are also marked with
important information that you need
if you ever have to replace one. The
following explains what the letters
and numbers in the wheel size
designation mean.
(Example wheel size designation)
15 x 5-1/2 JJ
185 — Tire width in millimeters.
15 — Rim diameter in inches.
70 — Aspect ratio. The tire's section
height as a percentage of its width.
5-1/2 — Rim width in inches.
R — Tire construction code (Radial).
JJ — Rim contour designation.
14 — Rim diameter in inches.
Technical Information
Tire Speed Ratings
The chart below shows many of the
different speed ratings currently
being used for passenger car tires.
The speed rating symbol is part of
the tire size designation on the
sidewall of the tire. This symbol
corresponds to that tire's designed
maximum safe operating speed.
Tire Information
Tire Pressure Adjustment For
High Speed Driving
Honda strongly recommends that
you not drive faster than posted
speed limits and conditions allow. If
you decide it is safe to drive at high
speeds, be sure to adjust the cold tire
pressures as shown below. If you do
not adjust the tire pressure, excessive heat can build up and cause
sudden tire failure.
Be sure to readjust the pressure for
normal driving speeds. You should
wait until the tires are cold before
adjusting the tire pressure (see page
178).
DOT Tire Quality Grading
(U.S. Cars)
The tires on your car meet all U.S.
Federal Safety Requirements. All
tires are also graded for treadwear,
traction, and temperature performance according to Department of
Transportation (DOT) standards.
The following explains these
gradings.
Treadwear
The treadwear grade is a comparative rating based on the wear rate of
the tire when tested under controlled
conditions on a specified government
test course. For example, a tire
graded 150 would wear one and one
half (1-1/2) times as well on the
government course as a tire graded
100. The relative performance of
tires depends upon the actual conditions of their use, however, and may
depart significantly from the norm
due to variations in driving habits,
service practices and differences in
road characteristics and climate.
Technical Information
Tire Information
Traction
Temperature
The traction grades, from highest to
lowest, are A, B, and C, and they
represent the tire's ability to stop on
wet pavement as measured under
controlled conditions on specified
government test surfaces of asphalt
and concrete. A tire marked C may
have poor traction performance.
The temperature grades are A (the
highest), B, and C, representing the
tire's resistance to the generation of
heat and its ability to dissipate heat
when tested under controlled
conditions on a specified indoor
laboratory test wheel. Sustained high
temperature can cause the material
of the tire to degenerate and reduce
tire life, and excessive temperature
can lead to sudden tire failure. The
grade C corresponds to a level of
performance which all passenger car
tires must meet under the Federal
Motor Vehicle Safety Standard No.
109. Grades B and A represent
higher levels of performance on the
laboratory test wheel than the
minimum required by law.
Warning: The traction grade assigned to this tire is based on braking (straight ahead) traction tests
and does not include cornering
(turning) traction.
Technical Information
Warning: The temperature grade for
this tire is established for a tire that
is properly inflated and not overloaded. Excessive speed, underinflation, or excessive loading either
separately or in combination, can
cause heat build-up and possible tire
failure.
Emission Controls
The burning of gasoline in your car's
engine produces several byproducts.
Some of these are carbon monoxide
(CO), oxides of nitrogen (NOx) and
hydrocarbons (HC). Gasoline
evaporating from the tank also
produces hydrocarbons. Controlling
the production of NOx, CO, and HC
is important to the environment.
Under certain conditions of sunlight
and climate, NOx and HC react to
form photochemical "smog." Carbon
monoxide does not contribute to
smog creation, but it is a poisonous
gas.
The Clean Air Act
The United States Clean Air Act*
sets standards for automobile
emissions. It also requires that
automobile manufacturers explain to
owners how their emission controls
work and what to do to maintain
them. This section summarizes how
the emission controls work.
Scheduled maintenance is on page
138.
Crankcase Emission Control
System
Your car has a Positive Crankcase
Ventilation System. This keeps
gasses that build up in the engine's
crankcase from going into the
atmosphere. The Positive Crankcase
Ventilation valve routes them from
the crankcase back to the intake
manifold. They are then drawn into
the engine and burned.
* In Canada, Honda vehicles comply
with the Canadian Motor Vehicle
Safety Standards (CMVSS) for
Emissions valid at the time they are
manufactured.
Evaporative Emission Control
System
As gasoline evaporates in the fuel
tank, an evaporative emission control
canister filled with charcoal adsorbs
the vapor. It is stored in this canister
while the engine is off. After the
engine is started and warmed up, the
vapor is drawn into the engine and
burned during driving.
Technical Information
Emission Controls
Exhaust Emission Controls
The exhaust emission controls
include four systems: PGM-FI,
Ignition Timing Control, Exhaust
Gas Recirculation and Three Way
Catalytic Converter. These four
systems work together to control the
engine's combustion and minimize
the amount of HC, CO, and NOx that
comes out the tailpipe. The exhaust
emission control systems are
separate from the crankcase and
evaporative emission control
systems.
PGM-FI System
The PGM-FI System uses sequential
multiport fuel injection.
It has three subsystems: Air Intake,
Engine Control, and Fuel Control.
The Engine Control Module (ECM)
or the Powertrain Control Module
(PCM) uses various sensors to
determine how much air is going
into the engine. It then controls how
much fuel to inject under all operatTechnical Information
ing conditions.
Ignition Timing Control System
This system constantly adjusts the
ignition timing, reducing the amount
of HC, CO and NOx produced.
Exhaust Gas Recirculation (EGR)
System
The Exhaust Gas Recirculation
(EGR) system takes some of the
exhaust gas and routes it back into
the intake manifold. Adding exhaust
gas to the air/fuel mixture reduces
the amount of NOx produced when
the fuel is burned.
Three Way Catalytic Converter
The three way catalytic converter is
in the exhaust system. Through
chemical reactions, it converts HC,
CO, and NOx in the engine's exhaust
to carbon dioxide (CO2), dinitrogen
(N 2 ), and water vapor.
Warm-up Three Way Catalytic
Converter
(For some types)
This is in the exhaust system, near
the exhaust manifold. During engine
warm-up, it converts HC, CO, and
NOx to carbon dioxide (CO 2 ),
dinitrogen (N 2 ), and water vapor.
Replacement Parts
The emission control systems are
designed and certified to work together in reducing emissions to
levels that comply with the Clean Air
Act. To make sure the emissions
remain low, you should use only new
genuine Honda replacement parts or
their equivalent for repairs. Using
lower quality parts may increase the
emissions from your car.
The emissions control systems are
covered by warranties separate from
the rest of your car. Read your
warranty manual for more information.
Three Way Catalytic Converter
Keep the engine tuned-up.
The three way catalytic converter
contains precious metals that serve
as catalysts, promoting chemical
reactions to convert the exhaust
gasses without affecting the metals.
The catalytic converter is referred to
as a three-way catalyst, since it acts
on HC, CO, and NOx. A replacement
unit must be an original Honda part
or its equivalent.
The three way catalytic converter
must operate at a high temperature
for the chemical reactions to take
place. It can set on fire any combustible materials that come near it.
Park your car away from high grass,
dry leaves, or other flammables.
Have your car diagnosed and
repaired if it is misfiring, backfiring, stalling, or otherwise not
running properly.
THREE WAY CATALYTIC CONVERTER
A defective three way catalytic
converter contributes to air pollution,
and can impair your engine's performance. Follow these guidelines to
protect your car's three way catalytic
converter.
Always use unleaded gasoline.
Even a small amount of leaded
gasoline can contaminate the
catalyst metals, making the three
way catalytic converter ineffective.
Technical Information
Warranty and Customer Relations
Warranty Coverages..................... 242
Customer Relations
Information................................. 243
U.S. Zone Office Map.................... 244
Canada Zone Office Map.............. 245
Reporting Safety Defects
(U.S. Cars)...................................... 246
Authorized Manuals...................... 247
Warranty and Customer Relations
Warranty Coverages
U.S. Owners
Your new Honda is covered by these
warranties:
Seat Belt Limited Warranty — a seat
belt that fails to function properly is
covered for the useful life of the car.
New Car Limited Warranty — covers
your new car, except for the battery,
emissions control systems and
accessories, against defects in
materials and workmanship.
Rust Perforation Limited Warranty
Emissions Control Systems Defects
Warranty and Emissions
Performance Warranty — these two
warranties cover your car's emissions control systems. Time, mileage,
and coverage are conditional. Please
read the warranty manual for exact
information.
Original Equipment Battery Limited
Warranty — this warranty gives up
to 100% credit toward a replacement
battery.
Warranty and Customer Relations
Replacement Battery Limited
Warranty — provides prorated
coverage for a replacement battery
purchased from a Honda dealer.
— all exterior body panels are
covered for rust-through from the
inside for the specified time period
with no mileage limit.
Replacement Muffler Lifetime
Limited Warranty — provides
coverage for as long as the purchaser of the muffler owns the car.
Accessory Limited Warranty —
Restrictions and exclusions apply to
all these warranties. Please read the
1996 Honda Warranties booklet that
came with your car for precise
information on warranty coverages.
Your Honda's original tires are
covered by their manufacturer. Tire
warranty information is in a separate
booklet.
Genuine Honda Accessories are
covered under this warranty. Time
and mileage limits depend on the
type of accessoiy and other factors.
Please read your warranty manual
for details.
Replacement Parts Limited
Warranty — covers all Genuine
Honda replacement parts against
defects in materials and workmanship.
Canadian Owners
Please refer to the 1996 Warranty
and Maintenance Guide that came
with your car.
Customer Relations Information
Honda dealership personnel are
trained professionals. They should
be able to answer all your questions.
If you encounter a problem that your
dealership does not solve to your
satisfaction, please discuss it with
the dealership's management. The
Service Manager or General
Manager can help. Almost all
problems are solved in this way.
If you are dissatisfied with the
decision made by the dealership's
management, contact your Honda
Customer Relations Zone Office.
Refer to the U.S. and Canadian Zone
Office maps on the following pages.
When you call or write, please give
us this information:
Vehicle Identification Number
(see page 220)
Name and address of the dealer
who services your car
Date of purchase
Mileage on your car
Your name, address, and telephone number
A detailed description of the
problem
Name of the dealer who sold the
car to you
Warranty and Customer Relations
U.S. Zone Office Map
Mid-Atlantic Zone
902 Wind River Ln., Suite 200
Gaithersburg, Maryland 20878
(301) 990-2020
Western Zone
P.O. Box 2260
700 Van Ness Avenue
Torrance. California
90501-2260
(310) 781-4565
Northwestern Zone
P.O. Box 20186
12439 N.E. Airport Way
Portland. Oregon 97220
(503)256-0943
(also includes
Alaska and Hawaii)
South Central Zone
4529 Royal Lane
Irving, Texas 75063
(214) 929-5481
Central Zone
101 South Stanfield Road
Troy, Ohio 45373
(513) 332-6250
Northeastern Zone
P.O. Box 337
Eastgate Industrial Park
115 Gaither Drive
Moorestown, New Jersey 08057
(609) 235-5533
Includes: NYC Metro area and
Fairfield County, CT area
Southeastern Zone
1500 Morrison Parkway
Alpharetta, Georgia 30201
(770) 442-2045
North Central Zone
601 Campus Drive, Suite A-9
Arlington Heights. Illinois 60004
(847) 870-5600
New England Zone
555 Old County Road
Windsor Locks. Connecticut 06096
(203) 623-3310
See Zone 5 for: NYC Metro area
and Fairfield County, CT area
West Central Zone
1600 South Abilene Street. Suite D
Aurora. Colorado 80012
(303) 696-3935
Puerto Rico and U.S. V.I.
Bella International
P.O. Box 190816
San Juan. PR 00919-0816
(809) 250-8070
The above addresses and telephone numbers are subject to change. If you cannot
reach your Zone office, ask your Honda dealer for the current information.
Warranty and Customer Relations
Canada Zone Office Map
Western Zone
Honda Canada Inc.
13240 Worster Court
Richmond, B.C.
V6V 2B8
(604)278-7121
Quebec Zone
Honda Canada Inc.
1750 rue Eiffel
Boucherville, Quebec
J4B 7W1
(514) 655-6161
Central Zone
Honda Canada Inc.
715 Milner Avenue
Scarborough, Ontario
M1B2K8
(416) 299-3400
Atlantic Zone
Honda Canada Inc.
800 Windmill Road
Dartmouth, N.S.
B3B 1L1
(902) 468-4416
Warranty and Customer Relations
Reporting Safety Defects (U.S. Cars)
If you believe that your vehicle has a
defect which could cause a crash or
could cause injury or death, you
should immediately inform the
National Highway Traffic Safety
Administration (NHTSA) in addition
to notifying American Honda Motor
Co., Inc.
Warranty and Customer Relations
If NHTSA receives similar complaints, it may open an investigation,
and if it finds that a safety defect
exists in a group of vehicles, it may
order a recall and remedy campaign.
However, NHTSA cannot become
involved in individual problems
between you, your dealer, or
American Honda Motor Co., Inc.
To contact NHTSA, you may either
call the Auto Safety Hotline toll-free
at 1-800-424-9393 (or 366-0123 in
Washington D.C. area) or write to:
NHTSA, U.S. Department of
Transportation, Washington,
D.C. 20590. You can also obtain
other information about motor
vehicle safety from the Hotline.
Index
Accessories
Installation.................................. 110
ACCESSORY (Ignition Key
Position)........................................ 52
Adding
Automatic Transmission
Fluid............................... 159, 160
Brake Fluid................................. 161
Clutch Fluid................................ 163
Engine Coolant........................... 152
Engine Oil................................... 145
Manual Transmission Fluid ..... 161
Power Steering Fluid................. 163
Windshield Washer Fluid......... 158
Additional Safety Information........ 19
Door Locks................................... 20
Driving with Pets......................... 20
Head Restraint Position.............. 19
Seat-back Position........................ 19
Storing Cargo Safely................... 20
Additives, Engine Oil..................... 148
Adjustments
Mirrors.......................................... 65
Head Restraints........................... 59
Seats.............................................. 56
Steering Wheel............................ 46
Airbag (SRS).................................... 12
Air Cleaner..................................... 164
Air Conditioning............................... 74
Maintenance............................... 176
Usage............................................. 74
Air Pressure, Tires........................ 178
Alcohol and Drugs........................... 28
Alcohol in Gasoline........................ 102
Antifreeze....................................... 151
Anti-lock Brakes (ABS)
Description................................. 233
Indicator Light.................... 37, 124
Operation.................................... 124
Anti-theft Steering Column Lock .. 52
Appearance Care........................... 195
Ashtray.............................................. 70
Audio System................................... 81
Automatic Speed Control................ 48
Automatic Transmission............... 118
Capacity, Fluid........................... 230
Checking Fluid Level................ 159
Shifting........................................118
Shift Lever Positions................. 119
Shift Lock Release..................... 122
Battery
Charging System Light............... 36
Jump Starting............................. 211
Maintenance............................... 171
Specifications............................. 231
Before Driving............................... 101
Belts, Seat........................................... 5
Beverage Holder.............................. 69
Body Repair.................................... 202
Brakes
Anti-lock System (ABS)............ 124
Break-in, New Linings .............. 102
Fluid............................................ 161
Light, Burned-out...................... 183
Parking.......................................... 67
System Indicator.......................... 36
Wear Indicators......................... 123
Brakes, ABS
Description................................. 233
Operation.................................... 124
System Indicator................. 37, 124
Braking System.............................. 123
CONTINUED
Index
Break-in, New Car......................... 102
Brightness Control, Instruments... 43
Brights, Headlights......................... 42
Bulb Replacement
Back-up Lights........................... 187
Brake Lights............................... 187
Ceiling Light............................... 194
Front Parking Lights................. 190
Front Side Marker Lights......... 190
Headlights.................................. 187
High-mount Brake Light.......... 193
License Plate Lights.................. 193
Rear Side Marker Lights.......... 192
Specifications............................. 235
Turn Signal Lights..................... 189
Bulbs, Halogen............................... 187
Cables, Jump Starting With.......... 211
Capacities Chart............................. 230
Carbon Monoxide Hazard.............. 29
Cargo, Loading............................... 111
Cassette Player
Care
95
Operation............................... 85, 93
CAUTION, Explanation of............... ii
CD Changer...................................... 96
Certification Label......................... 228
Chains............................................. 182
Change Oil
How to......................................... 148
When to....................................... 138
Changing a Flat Tire..................... 205
Changing Engine Coolant............. 153
Charging System Indicator.... 36, 217
Check Engine Light........................ 37
Checking
Automatic Transmission
Fluid........................................ 159
Battery Condition...................... 171
Brake Fluid................................. 162
Clutch Fluid................................ 163
Drive Belts.................................. 177
Engine Coolant........................... 151
Engine Oil................................... 145
Fuses........................................... 220
Manual Transmission Fluid..... 161
Power Steering Fluid................. 163
Checklist, Before Driving............. 114
Child Safety...................................... 21
Cigarette Lighter............................. 70
Cleaner, Air.................................... 164
Cleaning
Aluminum Wheels..................... 197
Carpeting.................................... 199
Exterior....................................... 196
Fabric.......................................... 199
Interior........................................ 199
Seat Belts.................................... 200
Vinyl............................................ 199
Window....................................... 200
Clock, Setting the ............................ 68
Clutch Fluid.................................... 163
CO in the Exhaust......................... 237
Cold Weather, Starting in............. 116
Compact Spare............................... 204
Consumer Information *................ 243
Controls, Instruments and.............. 33
Coolant
Adding.........................................152
Checking..................................... 151
Proper Solution.......................... 151
Temperature Gauge.................... 40
Corrosion Protection..................... 201
Crankcase Emission Control
System........................................ 237
Index
Cruise Control Operation............... 48
Customer Relations Office........... 243
DANGER, Explanation of................. ii
Dashboard........................................ 34
Daytime Running Eights................. 42
Dead Battery, What to Do............ 211
Defects, Reporting Safety............. 246
DEXRON® II Automatic
Transmission Fluid.................... 159
Dimensions..................................... 230
Dimming the Headlights................ 42
Dipstick
Automatic Transmission...159, 160
Engine Oil................................... 145
Directional Signals........................... 43
Disabled, Towing Your Car If...... 225
Disc Brake Wear Indicators......... 123
Disposal of Used Oil...................... 150
Doors
Eocking and Unlocking............... 53
Power Door Eocks....................... 53
DOT Tire Quality Grading........... 235
Downshifting, 5-speed Manual
Transmission.............................. 117
Drive Belts...................................... 177
Driving............................................ 113
Economy..................................... 109
In Bad Weather.......................... 125
In Foreign Countries................. 103
Economy, Fuel............................... 109
Emergencies on the Road............. 203
Battery, Jump Starting.............. 211
Changing a Flat Tire................. 205
Charging System Indicator...... 217
Check Engine Eight.................. 218
Checking the Fuses................... 221
Low Oil Pressure Indicator...... 216
Malfunction Indicator Eamp.... 218
Manually Closing Moonroof.... 219
Overheated Engine................... 214
Emergency Brake............................ 67
Emergency Flashers....................... 45
Emission Controls......................... 237
Engine
Belts.............................................177
Check Light......................... 37, 218
Coolant Temperature Gauge ..... 40
Malfunction Indicator
Eamp................................. 37, 218
Oil Pressure Indicator......... 36, 216
Oil, What Kind to Use............... 146
Overheating................................ 214
Specifications............................. 231
Ethanol in Gasoline ....................... 102
Evaporative Emission Controls.... 237
Exhaust Fumes................................ 29
Expectant Mothers, Use of Seat
Belts by......................................... 11
Exterior, Cleaning the................... 196
Fabric, Cleaning............................. 199
Fan, Interior...................................... 74
Features, Comfort and
Convenience................................. 73
Filling the Fuel Tank..................... 104
Filter
Oil................................................ 148
CONTINUED
Index
First Gear, Shifting........................ 117
5-speed Manual Transmission,
Checking Fluid Level................ 161
5-speed Manual Transmission,
Shifting the................................. 117
Flashers, Hazard Warning.............. 45
Flat Tire, Changing a.................... 205
Fluids
Automatic Transmission ..159, 160
Brake........................................... 161
Clutch..........................................163
Manual Transmission............... 161
Power Steering........................... 163
Windshield Washer................... 158
FM Stereo Radio
Reception...................................... 91
Folding Rear Seat............................ 60
Foreign Countries, Driving in...... 103
Four-way Flashers........................... 45
Front End, Towing by
Emergency Wrecker................. 225
Fuel..................................................102
Fill Door and Cap....................... 104
Gauge............................................ 40
Octane Requirement................. 102
Oxygenated................................ 102
Tank, Filling the......................... 104
Fuses, Checking the...................... 221
Gas Mileage, Improving................ 109
Gasohol........................................... 102
Gasoline.......................................... 102
Gauge............................................ 40
Octane Requirement................. 102
Tank, Filling the......................... 104
Gas Station Procedures................. 104
Gauges
Engine Coolant Temperature .... 40
Fuel............................................... 40
Gearshift Lever Positions
Automatic Transmission........... 119
5-speed Manual
Transmission.......................... 117
Glass Cleaning............................... 200
Glove Box......................................... 55
Halogen Headlight Bulbs.............. 183
Hazard Warning Flashers............... 45
Headlights......................................... 42
Daytime Running Lights............. 42
High Beam Indicator................... 38
High Beams, Turning on............ 42
Low Beams, Turning on ............. 42
Reminder Chime.......................... 42
Replacing Halogen Bulbs ......... 183
Turning on.................................... 42
Head Restraints............................... 59
Heating and Cooling........................ 74
High Altitude, Starting at.............. 116
High-Low Beam Switch .................. 42
Hood, Opening the ........................ 105
Hot Coolant, Warning about........ 152
Hydraulic Clutch............................ 163
Hydroplaning.................................. 125
Identification Number, Vehicle.... 228
If Your Car Has to be Towed....... 225
Ignition
Keys............................................... 51
Switch............................................ 52
Timing Control System............. 238
Index
Indicator Lights, Instrument
Panel............................................. 35
Infant Restraint................................ 23
Inflation, Proper Tire .................... 178
Inside Mirror.................................... 65
Inspection, Tire.............................. 179
Instrument Panel............................. 34
Instrument Panel Brightness......... 43
Interior Cleaning............................ 199
Interior Lights.................................. 71
Introduction......................................... i
Jacking up the Car......................... 211
Jack, Tire........................................ 209
Jump Starting................................. 211
Keys................................................... 51
Label, Certification........................ 228
Lane Change, Signaling.................. 43
Lap Belt............................................... 7
Lap/Shoulder Belts........................... 6
Leaking of Exhaust into Car.......... 29
Lighter, Cigarette............................ 70
Lights
Bulb Replacement..................... 183
Indicator........................................ 35
Parking.......................................... 42
Turn Signal................................... 43
Loading Cargo................................ 111
LOCK (Ignition Key Position)....... 52
Locks
Anti-theft Steering Column........ 52
Fuel Fill Door............................. 104
Glove Box..................................... 55
Power Door.................................. 53
Trunk............................................ 54
Low Coolant Level......................... 151
Lower Gear, Downshifting to a.... 117
Low Oil Pressure Indicator.... 36, 216
Lubricant Specifications Chart.... 230
Luggage.......................................... 111
Maintenance................................... 133
Periodic Items............................ 142
Record.................................. 140-141
Required Indicator....................... 40
Safety...........................................134
Schedule.............................. 138-139
Malfunction Indicator Lamp.. 37, 218
Manual Transmission.................... 117
Manual Transmission Fluid ......... 161
Maximum Shift Speeds.........118, 122
Meters, Gauges................................ 39
Methanol in Gasoline.................... 103
Mirrors, Adjusting........................... 65
Moonroof.......................................... 64
Closing Manually....................... 219
Operation...................................... 64
Neutral Gear Position.................... 120
New Vehicle Break-in ................... 102
Normal Shift Speeds...................... 117
CONTINUED
Index
NOTICE, Explanation of................... ii
Numbers, Identification................ 228
Occupant Protection System............ 4
Octane Requirement, Gasoline.... 102
Odometer.......................................... 39
Odometer, Trip................................ 39
Oil
Change, How to ......................... 148
Change, When to....................... 138
Checking Engine....................... 145
Pressure Indicator....................... 36
Selecting Proper Viscosity
Chart....................................... 146
ON (Ignition Key Position)............ 52
Opening the Hood ......................... 105
Operation in Foreign Countries... 103
Outside Mirrors............................... 66
Overheating, Engine..................... 214
Panel Brightness Control............... 43
Park Gear Position......................... 120
Parking Brake.................................. 67
Parking Eights.................................. 36
Parking Over Things that Burn... 239
PGM-FI System.............................. 238
Polishing and Waxing................... 197
Power
Door Eocks................................... 53
Mirrors.......................................... 66
Steering....................................... 163
Windows....................................... 63
Pregnancy, Using Seat Belts.......... 11
Proper Seat Belt Usage..................... 7
Radiator Overheating.................... 214
Radio/Cassette Sound System....... 81
Rear End Towing........................... 225
Rear Eights, Bulb Replacement... 191
Rear Seat, Folding........................... 60
Rear View Mirror............................. 65
Rear Window Defogger.................. 45
Reclining the Seat Backs.......... 57, 58
Recommended Shift Speeds ........ 117
Reminder Eights.............................. 35
Replacement Information
Air Cleaner................................. 164
Coolant........................................ 153
Engine Oil and Filter................. 148
Fuses........................................... 220
Eight Bulbs................................. 183
Schedule..................................... 138
SparkPlugs....................... 167, 169
Tires............................................ 180
Wiper Blades.............................. 174
Replacing Seat Belts After a
Crash.............................................11
Reserve Tank, Coolant.................. 155
Restraint, Child................................ 21
Reverse Gear Position................... 120
Rotation, Tire................................. 180
Safety Belts......................................... 5
Safety Defects, Reporting* .......... 246
Safety Eabels, Eocation of........ 30, 31
Safety Messages................................ ii
Seat Belts............................................ 5
Advice for Pregnant Women...... 11
Child Seat Anchor Plate.............. 27
Index
Cleaning...................................... 200
Frayed or Torn............................. 11
Maintenance................................. 11
Reminder Light and Beeper....... 36
Replacement................................. 11
System Components...................... 6
Tether Attachment Points.......... 26
Use During Pregnancy................ 11
Wearing a Lap/Shoulder Belt...... 8
Wearing the Lap Belt.................. 10
Seats, Adjusting the......................... 56
Serial Number................................ 228
Service Intervals............................ 138
Service Manual*............................ 247
Service Station Procedures .......... 104
Setting the Clock............................. 68
Shifting
The Automatic
Transmission.......................... 119
The 5-speed Manual
Transmission.......................... 117
Shift Lever Position Indicator...... 119
Side Marker Lights, Bulb
Replacement in.......................... 190
Signaling Turns................................ 43
Snow Tires...................................... 182
Solvent-type Cleaners.................... 196
Sound System................................... 81
Spare Tire
Inflating....................................... 204
Specifications............................. 231
Spark Plugs, Replacing........ 167, 169
Specifications Charts..................... 230
Speed Control................................... 48
Speedometer.................................... 39
SRS Indicator.............................. 17, 37
START (Ignition Key Position) ..... 52
Starting the Engine........................ 115
In Cold Weather at High
Altitude................................... 116
With a Dead Battery ................. 211
Steam Coming from Engine......... 214
Steering Wheel
Adjustment................................... 46
Anti-theft Column Lock.............. 52
Stereo Sound System ...................... 81
Storing Your Car............................ 194
Supplemental Restraint System
Service Precautions..................... 18
Servicing....................................... 17
SRS Indicator.......................... 17, 37
System Components.................... 12
Tachometer...................................... 39
Taillights, Changing Bulbs in....... 191
Taking Care of the Unexpected .. 203
Tape Player................................. 85, 93
Technical Descriptions
Anti-lock Brake System............ 233
Emission Control Systems........ 237
Three Way Catalytic
Converter.............................. 239
Tire Information........................ 234
Temperature Gauge........................ 40
Tether Attachment Points.............. 26
Three Way Catalytic Converter... 239
Time, Setting the............................. 68
Tire Chains..................................... 182
Tire, How to Change a Flat.......... 205
Tires................................................ 177
Air Pressure............................... 178
Checking Wear.......................... 179
Compact Spare........................... 204
DOT Tire Quality Grading....... 235
Inflation.......................................178
CONTINUED
Index
Tires
Inspection................................... 179
Replacing.................................... 180
Rotating....................................... 180
Snow............................................ 182
Specifications............................. 231
Tools,Tire Changing.................... 205
Torn Seat Belts ................................ 11
Towing
A Trailer...................................127
Emergency Wrecker................. 225
Transmission
Checking Fluid Level,
Automatic........................ 159, 160
Checking Fluid Level,
Manual................................... 161
Fluid Selection ...................159, 160
Identification Number............... 228
Shifting the Automatic.............. 118
Shifting the Manual................... 117
Treadwear...................................... 235
Trip Meter........................................ 39
Trunk................................................. 54
Opening the.................................. 54
Open Monitor Light.................... 37
Turn Signals..................................... 43
Underside, Cleaning...................... 201
Unexpected, Taking Care
of the........................................... 203
Uniform Tire Quality Grading..... 235
Unleaded Gasoline......................... 102
Upholstery Cleaning...................... 199
Used Oil, How to Dispose of........ 150
Vanity Mirror................................... 69
Vehicle Capacity Load .................. 111
Vehicle Dimensions....................... 230
Vehicle Identification Number..... 228
Vehicle Storage.............................. 194
VIN.................................................. 228
Vinyl Cleaning................................ 199
Viscosity, Oil................................... 146
Warning Beepers
Key in Ignition.............................. 52
Seat Belts...................................... 36
WARNING, Explanation of.............. ii
Warning Labels, Location of.... 30, 31
Warranty Coverages*................... 242
Washer, Windshield
Checking the Fluid Level......... 158
Operation...................................... 45
Washing.......................................... 196
Waxing and Polishing................... 197
Wheels
Adjusting the Steering................ 46
Alignment and Balance............. 179
Compact Spare........................... 204
Wrench....................................... 207
Windows
Cleaning......................................200
Operating the Power................... 63
Rear, Defogger............................ 45
Windshield
Cleaning........................................ 44
Wipers, Windshield
Changing Blades........................ 174
Operation...................................... 44
Worn Tires..................................... 179
Wrecker, Emergency Towing...... 225
*: U.S. and Canada only
Gas Station Information
Gasoline:
UNLEADED gasoline
Pump octane of 86 or higher
Fuel Tank Capacity:
64.5 l (17.04 US g a l , 14.19 Imp gal)
Recommended Engine Oil:
API SH grade
"Energy Conserving II" oil
SAE 5W-30 viscosity
Tire Pressure (measured cold):
(DX, LX, EX, EX-R)
Front/Rear:
2
220 kPa(2.2 k g f / c m , 3 2 psi)
(LX V-6, EXV-6, EX-RV-6)
Front:
2
220 kPa (2.2 k g f / c m , 32 psi)
Rear:
200 kPa (2.0 k g f / c m 2 , 29 psi)
Spare Tire Pressure:
420 kPa (4.2 kgf/cm 2 , 60 psi)
Automatic Transmission Fluid:
Honda Premium Formula Automatic Transmission Fluid or an
equivalent DEXRON® II type Automatic Transmission Fluid (ATF)