1
1993
PONTIAC
Bonneville
(SE, SSE, SSEi)
OWNER'S MANUAL
1993 Owner’s Manual
Pontiac Bonneville
Table of Contents
. . . . . . . . . . . . . . .3
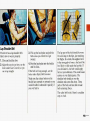
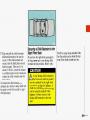
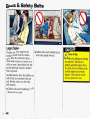
P a r t 1 Seats & SafetyBelts . . . . . . . . . . . . . . . . .s
P a r t 2 Features & Controls . . . . . . . . . . . . . . ..45
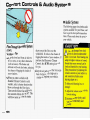
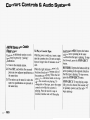
P a r t 3 Comfort Controls & Audio Systems . . . .119
P a r t 4 Your Driving and the Road ......... .I45
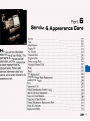
P a r t 5 Problems on the Road . . . . . . . . . . . . . .191
P a r t 6 Service & Appearance Care . . . . . . . . .221
P a r t 7 Maintenance Schedule. . . . . . . . . . . . .275
P a r t 8 Customer Assistance Information ... ,297
Introduction
How to Use this Manual
I
I
Includes “Reporting Safety Defects” on page 302
Parts
Index ............................
311
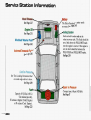
Service StationInformation. . . .Last Page
Printed in USA
10202135 B
SecondPrinting
..
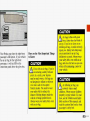
Important Notes About this Manual
Please keep this manual in your Pontiac, so it will be there if you ever need it when you’re on the road. If you sell
the vehicle, please leave this manual in it so the new owner can use it.
This manual includes the latest information at the time
it was printed. We reserve the right to make changes in the
product afterthat time without furthernotice.
Note to Canadian Owners
For vehicles first sold in Canada, substitute the name “General Motors of Canada Limited” for Pontiac Division
whenever it appears in this manual.
For Canadian Owners Who Prefer a French Language Manual:
Aux proprietaires canadiens: Vous pouvez vous procurer un exemplaire de ce guide en francais chez votre
concessionaire ou au DGN Marketing Services Ltd., 1500 Bonhill Rd., Mississauga, Ontario L5T 1C7.
Published by Pontiac Division
General Motors Corporation
The word Pontiac, the Pontiac emblem and the
name Bonneville are registered trademarks of
General Motors Corporation.
The word Delco is a registered trademark of General
Motors Corporation.
0Copyright 1992 General Motors Corporation, Pontiac Division.All rights reserved.
... 2
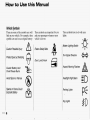
+ow to Use this Manual
c
Using Your 1993 Pontiac
Owner’s Manual
There are nine parts with color-tabbed
Many people read their owner’s manual pages in this manual. Each part begins
with a brief list of contents, so you can
from beginning to end when they first
receive their new vehicle. This will help usually tell at a glance if that part
you learn about the features and controls contains the information you want.
for your vehicle. In this manual, you’ll
You can bend the manual slightly to
find that pictures and words work
reveal the color tabs that help you find a
together to explain things quickly.
part.
Part 1: Seats and Safety Belts
This part tells you how to use your seats
and safety belts properly.
Part 2: Features & Controls
This part explains how to start and
operate your Pontiac.
Part 3: Comfort Controls & Audio
Systems
This part tells you how to adjust the
ventilation and comfort controls and
how to operate your audio system.
3
How t o Use this Manual
Using bur 1993 Pontiac
Owner’sManual (CONT.)
Part 7: Maintenance Schedule
Part 9: Index
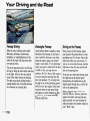
Part 4: Your Driving and the Road
This part tells you when to perform
Here’s an alphabetical listingof almost
Here you’ll find helpful information and vehicle maintenance and whatfluids and every subject that’s in this manual. You
lubricants to use.
can use it to quickly find something you
tips about the road and how todrive
want to read.
under different conditions.
Part 8: Customer Assistance
Service Station Information:
Information
Part 5: Problems on the Road
This is a quick reference of service
This part tells you how to contact
This part tells you what to do if you
information.
You can find it on the last
Pontiac
for
assistance
and
how
to
get
have a problem whiledriving, such as a
page
of
this
manual.
service publications. It also gives you
flat tire or engine overheating.
information on Reporting Safety Defects.
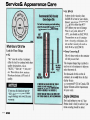
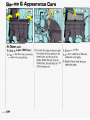
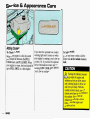
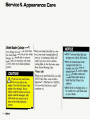
Part 6: Service & Appearance Care
Here the manual tellsyou how to keep
your Pontiac running properly and
looking good.
. I .
4
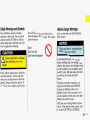
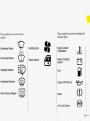
Vehicle Damage Warnings
Safety Warnings and Symbols
You will also find a red circle with a Also,
in this book you will find these
slash through it in this book. This safety blue notices:
symbol means:
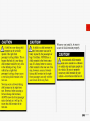
You will find a number of safety
cautions in this book.We use yellow
and the word CAUTION to tell you
about things that couldhurt you-if you
were to ignore the warning.
I
Don’t
Don’t do this
Don’t let this happen
bAU I I U I V
These mean thereis something
L that could hurtyou or other
people.
In the yellow cautionarea, we tell you
what the hazard is. Thenwe tell you
what to do to help avoidor reduce the
hazard. Please read these cautions.If
you don’t, you or others could behurt.
c
I
These mean there is something that
could damage your vehicle.
In the blue notice area, we tell you
about something thatcan damage your
vehicle. Many times, this damage would
not be covered by your warranty, and it
could be costly. But the notice will tell
you what to do to help avoid the
damage.
When you read other manuals, you
might see CAUTION and NOTICE
warnings in different colors or in
different words. In this manual, we’ve
used the familiar words andcolors that
Pontiac has used for years.
You’ll also see warning labels on your
vehicle. They use the same colors, and
the words CAUTION or NOTICE.
5
...
How to Use this Manual
Vehicle Symbols
These are some of the symbols you will
find on your vehicle. For example, these
symbols are used on an original battery:
Caution Possibleinjury
Protect Eyes by Shielding
Caustic Battery Acid
Could Cause Burns
A
@
These symbols are important for you
and your passengers whenever your
vehicle is driven:
These symbols have to do with your
lights:
Master Lighting Switch
Fasten Safety Belts
Turn Signal Direction
Door LocWUnlock
Hazard Warning Flashers
Avoid Spark or Flames
Headlight High Beam
Sparks or Flame Could
Explode Battery
Parking Lights
Fog Lights
m . .
6
pf
$0
r
These symbols are used on warning and
indicator lights:
These symbols are on some of your
controls:
I
Ventilating Fan
Windshield Wipers
Windshield Washer
Power Window
Headlight Washers
Windshield Defroster
Rear Window Defogger
L
a
Engine Coolant
Temperature
Battery Charging
System
Fuel
Engine Oil Pressure
Q@
Brake
Anti-Lock Brakes
How t o Use this Manual
Here are some other symbols you may
see:
Fuse
Trunk Release
Lighter
Horn
Speaker
Hood Release
m m .
8
t
r
Y
.
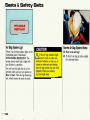
Part 1
Seats & Safety Belts
H e r e youW find information about
the seats in your Pontiac. your
Supplemental Inflatable Restraint
(“air bag”) system and how to use
. You can
your safety belts properly
also learn about some things you
should not do with safety belts.
Seats and Seat Controls . . . . . . . . . . . . . . . . . . . . . . . . . . . . . . . . . . . . . . . . . . .
10
SafetyBelts . . . . . . . . . . . . . . . . . . . . . . . . . . . . . . . . . . . . . . . . . . . . . . . . . . . . . . 13
How to Wear Safety Belts Properly . . . . . . . . . . . . . . . . . . . . . . . . . . . . . . . . . . . .
18
. . . . . . 18
Driver Position . . . . . . . . . . . . . . . . . . . . . . . . . . . . . . . . . . . . . . .
Supplemental Inflatable Restraint System (Air Bag) . . . . . . . . . . . . . . . . . . . . . 22
Safety Belt Use During Pregnancy . . . . . . . . . . . . . . . . . . . . . . . . . . . . . . . . . . . . 29
Right Front Passenger Position . . . . . . . . . . . . . . . . . . . . . . . . . . . . . . . . . . . . . . . 29
Center Passenger Position . . . . . . . . . . . . . . . . . . . . . . . . . . . . . . . . . . . . . . . . . . . 30
Rear
Seat
Passengers
.....................
. . . . . . . . . . . . . . . . . . . . . . 31
Children . . . . . . . . . . . . . . . . . . . . . . . . . . . . . . . . . . . . . . . . . . . . . . . . . . . . . . . . . 33
Smaller Children and Babies . . . . . . . . . . . . . . . . . . . . . . . . . . . . . . . . . . . . . . . . . 33
Child Restraints . . . . . . . . . . . . . . . . . . . . . . . . . . . . . . . . . . . . . . . . . . . . . . . . . . . 34
LargerChildren . . . . . . . . . . . . . . . . . . . . . . . . . . . . . . . . . . . . . . . . . . . . . . . . . . . 42
Safety Belt Extender . . . . . . . . . . . . . . . . . . . . . . . . . . . . . . . . . . . . . . . . . . . . . . . 43
Replacing Safety Belts Aftera Crash. . . . . . . . . . . . . . . . . . . . . . . . . . . . . . . 44
9
...
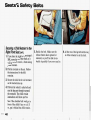
Seats & Safety Eelts
.
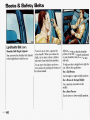
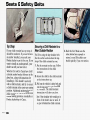
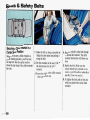
rn Seats and Seat Controls
This section tells you about the seatshow to adjust them-and also about
reclining seatbacks and head restraints.
10
Y
.
Manual Front Seat
A You can lose control of the
vehicle if you try to adjust a
manual driver's seat while the
vehicle is moving. The sudden
movement could startle and
confuse you, or make you push a
pedal when you don't want to.
Adjust the driver's seat only when
the vehicle is not moving.
1
Move the control lever under the front
of the seat to unlockit. Slide the seat to
where you want it. Then release the
lever and try to move the seat with your
body, to make sure the seat is locked
into place.
Power Seat(OPTION)
Adjustable Suppot Seat (omoN)
To adjust the power seaton some
models:
Front Control (A): Raise the front of
the seat by holding the switch up. Lower
the front of the seat by holding the
switch down.
Center Control (B): Move the seat
forward or back by holding the control
to the right or left.
Move the seat higherby holding the
control up. Lower the seat by holding
the control down.
Rear Control (C): Raise the rearof the
seat by holding the switchup. Lower the
rear of the seat by holding the switch
down.
On some models, you'll find the
controls on the center console. Slide the
selector switch to L or R to choose the
front seat you want to adjust.
JbAdjusts
the seat forward or back.
AJ
Adjusts the seat up or down.
I
4
*or
Adjusts the seatback to an upright
reclined position. Don't have a
seatback reclined if your vehicle
is moving.
Adjusts the position of the
seatback side bolsters.
'9down.
Tilts the rear the seat up or
Addown.
Tilts the front of the seat up or
of
Seats & Safety 6elts
Adjustable Support Seat (CONTJ
Manual Reclining Seatback
Lumbar Controls
(OPTION)
I
Reshapes the lower back area of
the seat.
d.the
Reshapes the middle back area of
seat.
n
& Reshapes the upper back area of
the seat.
Lift the lever to release the seatback,
then tilt the seatback forward or
backward, as desired. Release the lever
to lock the seatback in place.
But don’t have a seatback reclined if
your vehicle is moving.
L Sitting in a reclined position
I Len yourvehicle is in
motion can be dangerous. Even if
you
up, your safety belts
I can’tbuckle
do their job whenyou’re
reclined like this.
The shoulder beltcan’t do its job
because it won’t be against your
body. Instead, it will be in front of
you. In a crash you could go into
receiving neck or other injuries.
;+
ne lap belt can’t do its job either.
In a crash the belt could go up over
your abdomen. The belt forces
would be there, not at your pelvic
(Cantinued)
I . .
12
1
(Continued)
- )ones. This could cause
serious internal injuries.
For proper protection when the
vehicle is in motion, have the
seatback upright. Then sit well
back in the seat and wear your
safety belt properly.
I
I
Belts:
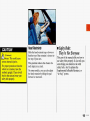
They’re For Everyone
Head Restraints
1 Safety
Slide the head restraint upor down so
that the top of the restraint is closest to
the top of your ears.
This position reduces the chance of a
neck injury in a crash.
On some models, you can also adjust
the head restraint by tilting the pad
forward or rearward.
This part of the manual tells you how to
use safety belts properly. It also tells you
some things you should not do with
safety belts. And it explains the
Supplemental Inflatable Restraint, or
“air bag” system.
3
I
Seats & Safety Eelts
P
Safety Belts: Zley ’re For
Everyone (Cont.)
A
Don’t let anyone ride where
they can’t wear a safety belt
properly. If you are in a crash and
you’re not wearing a safetybelt,
your injuries can be much worse.
You can hit things inside the
vehicle or be ejected from it. You
can be seriously injured or killed.
In the same crash, you might not
be if you are buckled up. Always
%ten your safety belt, and check
at your passengers’ belts are
-_stenedproperly too.
L
14
This figure lights up whenyou turn the
key to Run or Start when your safety
belt isn’t buckled, and you’ll hear a
chime, too. It’s the reminder to buckle
up. In many states and Canadian
provinces, the law says to wear safety
belts. Here’s why: They work.
You never know if you’ll be ina crash.
If you do have a crash, you don’t know
if it will be a bad one.
A few crashes are very mild. In them,
you won’t get hurt even if you’re not
buckled up. And some crashes can be so
serious, like being hit by a train, that
even buckled up a person wouldn’t
survive. But most crashes are in
between. In many of them, people who
buckle up can survive and sometimes
walk away. Without belts they could be
badly hurt or killed.
After 25 years of safety belts in vehicles,
the facts are clear. In most crashes
buckling up doesmatter. . .a lot!
Why Safety Belfs Work
When you ride in or on anything, you
go as fast as it goes.
1. For example, if the bike is going
10 mph (16 kmlh), so is the child.
2. When the bike hits the block, it
stops. But the child keeps going!
3. Take the simplest ‘‘car.’’ Suppose
it’s just a seat on wheels.
15
Seats & Safety Belts
Why Safety Belts Work (CONI)
4. Put someone on it.
5. Get it up to speed. Then stop the
“car.” The rider doesn’t stop.
6. The person keeps going until
stopped by something. In a real
vehicle, it could be the
windshield.. .
With safety belts, you slow down as the
vehicle does. You get more time to stop.
You stop over more distance, and your
strongest bones take the forces. That’s
why safety belts make such good sense.
7. or the instrument panel.. .
... 1 6
8. or the safety belts!
Here Are Questions Many People
Q: Why don’t they just put in air
Ask About Safety Beltsbags so people won’t have to wear
and the Answers
Q: If I’m agood driver, and I never
drive far from home, why should I
wear
safety belts?
safety
belts?
Q: Won’t 1 be trapped in the vehicle
A: You may be an excellent driver, but
after an accident if I’m wearing a A: “Air bags,” or Supplemental
if you’re in an accident-even one
Inflatable
Restraint
systems,
are
in
safety belt?
that isn’t your fault-you and your
some vehicles today and will be in
A: You could be-whether you’re
passengers can be hurt. Being a good
more
of
them
in
the
future.
But
they
wearing a safety belt or not. But you
driver doesn’t protect you from
are supplemental systemsonly-so
can easily unbuckle a safety belt,
things beyond your control, such as
they
work
with
safety
belts,
not
even if you’re upside down. And
bad drivers.
instead of them. Every “air bag’’
your chance of being conscious
system
ever
offered
for
sale
has
Most accidents occur within 25 miles
during and after an accident,so you
required
the
use
of
safety
belts.
Even
(440 h)
of home. And the greatest
can unbuckle and getout, is much
if
you’re
in
a
vehicle
that
has
“air
number
of
serious injuries and deaths
greater if you are belted.
bags,” you still have to buckle up to
occur at speeds of less than 40 mph
get the most protection. That’s true
(65 km/h).
not only in frontal collisions, but
Safety belts are for everyone.
especially in side and other
collisions.
17
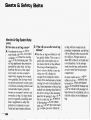
Seats & Safety Eelts
Satiety Belt ReminderLight
w How to Wear Safety Belts Driver Position
Properly-Adults
When the key is turned to Run or Start,
This section is onlyfor people of adult
a light will come on for about eight
seconds to remind people to fasten their size.
safety belts. Unless the driver’s safety
belt is buckled, a chime will also sound.
First, you’ll want to know which
restraint systems your vehicle has.We’ll
start with the driver position.
This section describes the driver’s
restraint system.
LapShoulder Belt
The driverhas a lap-shoulderbelt.
Here’s how to wear it properly.
1. Close and lock the door.
2. Adjust the seat (to see how, see the
Index under Seat Controls) so you
can sit up straight.
3. Pick up the latch plate and pullthe
belt across you. Don’tlet it get
twisted.
4. Push the latch plate intothe buckle
until it clicks.
If the belt isn’t long enough, see the
Index under Safety Belt Extender.
Make sure the release button onthe
buckle faces upwardor outward so you
would be able to unbuckle it quickly if
you ever had to.
The lap part of the belt should be worn
low and snug on the hips, just touching
the thighs. In a crash, this applies force
to the strong pelvic bones. And you’d be
less likely to slide under the lap belt. If
you slid under it, the belt would apply
force at your abdomen.This could cause
serious or even fatal injuries. The
shoulder belt should go overthe
shoulder and across the chest. These
parts of the body are best able to take
belt restraining forces.
The safety belt locks if there’s asudden
stop or crash.
IS
Seats & Safety 6elts
Lap-Shoulder Belt (CONTI
Shoulder Belt Height Adjuster
You can move the shoulder belt adjuster
to the height that is right for you.
To move it up or down, squeeze the
release handle. When you release the
handle, try to move it down a little to
make sure it has locked into position.
You can move the adjuster up from a
lower position by pushing the bottom of
the release handle.
Adjust the height so that the shoulder
portion of the belt is properly positioned
on your shoulder, away from your face
and neck.
To help you find a height that is right for
you, follow these guidelines:
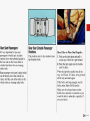
For a Tall Person:
Use the upper or upper-middle position.
For a Person of Average Height:
Use a position somewhere in the
middle.
For a Short Person:
Use the lower or lower-middle position.
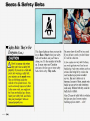
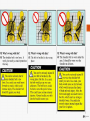
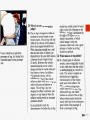
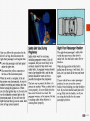
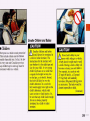
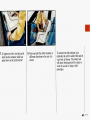
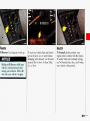
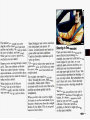
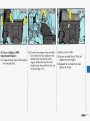
Q: What’s wrong with this?
A: The shoulder belt is too loose. It
won’tgivenearlyasmuchprotectionplace.
this way.
your shoulder
belt
too
is
wrong
place
like
this.
loose. In a crash, youwouldmove
forward too much; which could
increase injury. The shoulder belt
should fit against your body.
Q: What’s wrong with this?
A: The shoulder belt is worn under the
Q: What’s wrong with this?
A: The belt is buckled in the wrong
arm. It should be worn over the
shoulder at all times.
1
You can be seriomusly injured if
your belt is buck;led in the
In a crasn,
the beltwould go up
abdomen. The belt forces would
be there, not at the pelvic bones.
This could cause serious internal
injuries. Always buckle your belt
3veryour
into the buckle nearest
you.
T
’
You can be seriously injured if
.-you wear the shoulder belt
3I
under your arm. In a crash, your
body would move too far forward,
which would increase the chance
of head and neck injury. Also, the
belt would apply too much force to
the ribs, which aren’t as strong as
shoulder bones. You could also
severely injure internal organs like
your liver or spleen.
I
21
...
Seats & Safety Belts
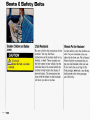
x1102
!ap-Shoulder Belt (CONI)
2: What’s wrong with this?
4: The belt is twisted across the body.
You MLI~be seriously injured
ky a twisted belt. In a crash,
you wouldn’t have the full width of
the belt to spread impact forces. If
a belt is twisted, make it straight
so it can work properly, or ask
your dealer to fix it.
... 22
To unlatch the belt. just push the button
on the buckle. The belt should go back
out of the way.
Before you close the door, be sure the
belt is out of the way. If you slam the
door on it, you can damage both the belt
and your vehicle.
I
H1132
Supplemental Znjlatable
Restraint System (Air Bag)
This section explains the driver’s
Supplemental Inflatable Restraint (SIR)
or “air bag” system. Your Pontiac may
have an air bag for the driver and for the
right-front passenger.
Your Pontiac may have the right-front
passenger’s SIR option. If your vehicle
has an air bag for the right-front
passenger, it will say SIR on the
instrument panel above the glove box.
Here are the Most Important Things
to Know:
Even with an air bag, if you’re
notwearingasafetybelt
and
you.re in a crash, your injuries
may be much worse. Air bags are
“not designed to inflate in rollovers
or in rear, side or low-speed
frontal crashes. You need to wear
your safety belt to reduce the
chance of hitting things insidethe
vehicle or being ejected fromit.
Always wear your safetybelt, even
with an air bag.
Y
Air bags inflate with great
force, faster than the blink of
an eye. If you’re too close to an
inflating air bag, it could seriously
injure you. Safety belts help keep
you in position for an air bag
inflation in a crash. Always wear
your safety belt, even with an air
bag, and sit as far back as you can
while still maintaining control of
your vehicle.
A An inflating air bag can
seriously injure small
children. Always secure children
properly in your vehicle. To read
how, see the Children and Safe9
Belts section of this manual,and
read the caution label on the front
passenger’s safety belt.
-
Seats & Safety 6elts
3
Air Bag System Light
How the Air Bag System Works
There is an air bag readiness light on the
instrument panel, which shows
INFLATABLE RESTRAINT. The
system checks itself andthe light tells
you if there is a problem.
You will see this light flash for a few
seconds when you turn your ignition to
Run or Start. Then the light should go
out, which means the system is ready.
Q: Where is the air bag?
A: The driver’s air bag is in the middle
If the air bag readiness light
on when you
s t your vehicle, or stays on, or
comes on when you are driving,
your air bag system may not work
properly. Have your vehicle
serviced right away.
L
4
b doesn’t come
of the steering wheel.
.
.
d
A
x1210
If your vehicle hasa right-front
passenger air bag, it is located in the
instrument panel on the passenger’s
side.
I
should have inflated cannot be based
Q: When is an air bag expected to
solely on the level of damage on the
inflate?
vehicle(s).
Inflation is determined by
A: The air bag is designed to inflate in
the angle of the impact andthe
moderate to severefrontal or nearvehicle’s deceleration, of which
frontal crashes. The air bag will only
vehicle damage is only one
inflate if the velocity of the impact is
indication. Repair cost is not a good
above the designed threshold level.
indicator of whether an air bag
When impacting straight intoa wall
should have deployed.
that does not move or deform, the
threshold level for most GM vehicles Q: What makes an air bag inflate?
is between 9 and 14 mph (14 and
A: In a frontal impact of sufficient
23 km/h). However, this velocity
severity, sensors strategically located
threshold depends on the vehicle
on the vehicle detect thatthe vehicle
design and may be several miles-peris suddenly stoppingas a result of a
hour faster or slower. In addition,
crash. These sensors complete an
this threshold velocity will be
electrical circuit, triggering a
considerably higher if the vehicle
chemical reaction of the sodium
strikes an object such as a parked car
azide sealed in the inflator. The
which will move and deform on
reaction produces nitrogen gas,
impact. The air bag is also not
which inflates thecloth bag. The
designed to inflate in rollovers, side
inflator, cloth bag, and related
impacts, or rear impacts where the
hardware are all part of the air bag
inflation would provide no occupant
inflator module packedinside the
protection benefit.
steering wheel and in the instrument
panel
in front of the passenger if
In any particular crash, the
there is a passenger air bag.
determination of whether the air bag
26
D
D
D
Seats & Safety Belts
How the Air Bag System Works
(CONX)
Q: How does an air bag restrain?
Q: What will you see after an air bag
inflation?
A: In moderate to severe frontalor
near-frontal collisions, even belted
A: After the air bag has inflated, itwill
occilpants can contact the steering
then quickly deflate. This occurs so
wheel or the instrument panel. The
quickly that some people may not
air bag supplements the protection
even realize that the air bag inflated.
provided by safety belts. Air bags
The airbag will not impede the
distribute the force of the impact
driver’s vision or ability to steer the
more evenly over the occupant’s
vehicle, nor will it hinder the
upper body, stopping the occupant
occupants from exiting the vehicle.
more gradually. But air bags would
There will be small amounts
of smoke
not provide protection in many types
coming from vents in the deflatedair
of collisions, including rollovers and
bag. Some components of the air bag
rear and side impacts, primarily
module in the steering wheel hub for
because an occupant’s motion is not
the driver’s air bag or the instrument
toward the air bag. Air bags should
panel for the passenger’s bag may be
never be regarded as anything more
hot for a short time, but the portion
than a supplement to safety belt
of the bag that comes into contact
protection in moderate to severe
with you will not be hot tothe touch.
frontal and near-frontal collisions.
The nitrogen gas used to inflate the
m m .
26
L
air bag will have vented into the
passenger compartment, andthe bag
will be deflated within seconds after
the collision. Nitrogen makesup
about 80%of the air we breathe and
is not hazardous. As the nitrogen
vents from the bag, small particles
are also vented into the passenger
compartment.
In many crashes severe enough to
inflate an air bag, windshields may
be broken by vehicle deformation.
Additional windshield breakage may
occur in vehicles with passenger air
bags because the windshield acts as a
reaction surface for the inflatingair
bag.
Don’t attach anything tothe steering wheel pad. It might injure the
b driver if the air bag inflates.
If your vehicle has the right-front passenger’s air bag, don’t set anythingon
or attach anything to the instrumentpanel. It might injure the passenger if
the air bag inflates.
The air bags are designed to inflateonly once. After they inflate, you’ll need
some new parts for yourair bag system. If you don’t get them, the air bag
system won’t be there to help protect you inanother crash. A new system
will include the air bag modules and possibly other parts. The service
manual has information about the needto replace other parts.
Let only qualified technicians work on your air bag system. Improper
service can mean that yourair bag system won’t work properly.S e e your
dealer for service.
If you damage the cover for the
right-front passenger’s air bag, it
may not work properly. You may
have to replace both the air bag
and the instrument panel. Don’t
open or break the air bag cover.
7
27
Servicing Bur Pontiac with the
Air Bag System
Please tell or remind anyone who works
on your Pontiac that it hasthe air bag
system. There areparts of the airbag
system in severalplaces around your
vehicle. You don’t want the system to
inflate while someone is workingon
your vehicle. The airbag system does
not need regular maintenance. Your
Pontiac dealer and the 1993 Bonneville
Service Manual have information about
the air bag system, including repair or
disposal.
For up to two minutes after
L b the ignition key is turned off
and the battery disconnected, an
air bag can still inflateduring
improper service. You can be
injured if you are closeto an air
bag when it inflates. Be sure to
follow the proper service
procedures.
When electricalwork is done underthe
hood or inside your vehicle, the ignition
should be inLOCK, if possible.
Avoid wires wrapped with yellowtape,
or yellow connectors. Theyare probably
part of the airbag system.
If your vehicle hasa driver’s air bag and
a right-front passenger’s air bag, both
bags must be disconnectedif the
ignition hasto be on for electricalwork
Dr if the steering column is to be
disassembled.
First, disconnect the driver’s air bag like
this:
Turn off the ignition.
Remove the SIR (air bag) fuse (see the
Index under Fuses & Circuit Breakers).
Disconnect the yellow connector at
the base of the steering column.
.
.
.
Safety Belt Use During
Pregnancy
After you follow this procedure for the
driver’s air bag, then disconnect the
Safety belts work for everyone,
right-front passenger’sair bag like this: including pregnant women. Like all
Lower the passenger side hush panel occupants, they-are more likely to be
seriously injured if they don’t wear
under the glove box.
safety belts. A pregnant woman should
Disconnect the yellow connector at
wear a lap-shoulder belt, and the lap
the base of the instrument panel.
portion should be worn as low as
When the work is complete,if the air
possible throughout the pregnancy.
bag system was disconnected, be sure to
reattach everything and replace the fuse The best way to protect the fetus is to
protect the mother. When a safety belt is
before turning the ignitionon. When
you turn the ignition key on, be sure you worn properly, it’s more likely that the
fetus won’t be hurt in a crash. For
see the inflatable restraint light onthe
pregnant women, as for anyone, the key
instrument panel. If you don’t see this
to
light flash and then go out as usual, have making safety belts effective is
wearing them properly.
your air bag system repaired.
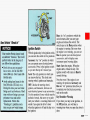
Right Front Passenger Position
The right-front passenger’s safety belt
works the same way as the driver’s
safety belt. See the Index under Driver
Position.
When the lap portion of the belt is
pulled out all the way, it will lock. If it
does, let it go back all the way and start
again.
If your vehicle has a center passenger
position, be sure to use the correct
buckle when buckling your lap-shoulder
belt. If you find that the latch plate will
not go fully into the buckle, see if you
are using the buckle for the center
passenger position.
29
Seats & Safety 6elts
Center Passenger Position
If your vehicle has rear and/or front
bench seats, someone can sit in the
center positions.
a m .
30
When you sit in a center seating
position, you have a lap safety belt,
which has no retractor.
To make the belt longer, tilt the latch
plate and pull it alongthe belt.
To make the belt shorter, pull its free
end as shown until the belt is snug.
Buckle, position and release it the same
way as the lap partof a lap-shoulder
belt.
If the belt isn't long enough, see the
Index under Safety Belt Extender.
Make sure the release buttonon the
buckle faces upward or outward so you
would be able to unbuckle it quickly if
you ever had to.
Rear Seat Passengers
Rear Seat Outside Passenger
Positions
It’s very important for rear seat
passengers to buckle up! Accident
The positions next to the windows have
statistics show that unbelted people
in
lap-shoulder belts.
the rear seat arehurt more often in
crashes than those who are wearing
safety belts.
Rear passengers who aren’t safety belted
can be thrown outof the vehicle in a
crash. And they can strike othersin the
vehicle who are wearing safety belts.
I
Here’s How to Wear One Properly:
1. Pick up the latch plate and pull it
across you. Don’t let it get twisted.
2. Push the latch plate into the buckle
until it clicks.
When the lap belt is pulled out all the
way, it will lock. If it does, let it go back
all the way and start again.
If the belt is not long enough, see the
Index under Safety Belt Extender.
Make sure the release button on the
buckle faces upwardor outward so you
would be able to unbuckle it quickly if
you ever had to.
31
Ifety 6elts
Rear Seat Outside Passenger
Positions (CONT:)
The lappart of the belt should be worn
low and snug onthe hips, just touching
the thighs. In a crash, this applies force
to the strong pelvic bones. And you’d be
less likely to slideunder the lap belt. If
you slid under it, the belt would apply
force at your abdomen. This could cause
serious or even fatal injuries. The
shoulder belt should go over the
shoulder and across the chest. These
parts of the body are best able to take
belt restraining forces.
32
The safety belt locks if there’s a sudden
stop or a crash.
can be seriously hurt if
your shoulder belt is too
loose, a crash, you would m m
o
f
w
ra
n
d too much, which could
increase injury. The shoulder belt
should fit against your body.
a,You€n
To unlatch the belt, just push the button
on the buckle.
IChildren
Everyone in a vehicle needs protection!
That includes infants and all children
smaller than adult size. In fact, the law
in every state and Canadian province
says children up to some age must be
restrained while in a vehicle.
Srmaller Children and Babies
Smaller children and babies
should always be restrained in
a child or infant restraint. The
instructions for the restraint will
say whether it is the right type and
size for your child. A very young
child’s hip bones are so small that
a regular belt might not stay low
on the hips, as itshould. Instead,
the belt will likely be over the
child’s abdomen. In a crash the
belt would apply force right on the
child’s abdomen, which could
cause serious or fatal injuries. So,
be sure that any child small enough
for one is always properly
restrained in a child or infimt
restraint *
, Never hold a baby in your
-L arms while riding in a vehicle.
A baby doesn’t weigh much-until
a crash. During a crash a baby will
become so heavy you can’t hold it.
For example, in a crash at only
25 mph (40 km/h), a E-pound
(5.5kg) baby will suddedy
become a 240-pound (110 kg) force
on your arms. The baby would be
.almost impossible to hold.
(Coratinud]
33
...
Seats & Safety 6elts
xi11
I
Smaller Children and Babies
Child Restraints
Where to Put the Restraint
(CONT)
Be sure to follow the instructions for the
restraint. You may find these
instructions on the restraint itself or in a
booklet, or both. These restraints use
the belt system in your vehicle, but the
child also has to be secured within the
restraint to help reduce the chance of
personal injury. The instructions that
come with the infant or child restraint
will show you how to do that.
Accident statistics show that children are
safer if they are restrained in therear
rather than the front seat.We at General
Motors therefore recommend thatyou
put your child restraintin the rear seat.
If your vehicle has anair bag for the
front passenger, never put a rear-facing
child restraint in the front passenger
seat. Here’s why :
... 34
I
A child in a rear-facing child
L restraint can be seriously
1nJured if the right-front
passenger’s air bag inflates. This is
because the backof a rear-facing
child restraint would,be very close
to the inflatingair bag. If your
vehicle has a right-front
passenger’s air bag, always secure
a rear-facing child restraintin the
rear seat.
You may secure a forward-facing
child restraint in the right-front
seat. However, before securing a
forward-facing child restraint,
ALWAYS move the front passenger
seat as far back as it will go. Or,
secure the child restraint in the
rear seat.
A
A child in a child restraint in
L the front-center seat can be
badly injured by the passenger air
bag if it inflates. NEVER use a
child restraint inthe front-center
seat. It’s always better to secure a
child restraint in the rear seat. You
may, however, secure a forwardfacing child restraint in the rightfront passenger seat only with the
seat moved all the way back.
:cure the child restraint properly.
A
An unsecured child restraint
can move around in a collision
or sudden stop andinjure people in
the vehicle. Be sure to properly
secure any child restraint in your
vehicle-even when no child is in it.
I
35
Seats & Safety 6elts
A
I TOP strap
If your child restraint has a top strap, it
should be anchored. If you need to have
an anchor installed, you can ask your
Pontiac dealer to put it in for you. If you
want to install an anchor yourself, your
dealer can tell you how to do it.
Vehicles first sold in Canada have child
restraint anchor bracket hardware in the
glove box, along with instructions for
installing it. This should be used only
with a child restraint, and only to secure
a child restraint at the center rear seating
position. Additional anchor brackets for
child restraints at one or both of the rear
outside seating positions are available at
Pontiac dealerships in Canada.
Securing a Child Restraint ina
Rear Outside Position
You’ll be using the lap-shoulder belt.
See the earlier section about the top
strap if the child restraint has one.
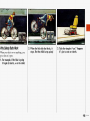
1. Put the restraint on the seat. Follow
the instructions for the child
restraint.
2. Secure the child in the child restraint
as the instructions say.
3.Pull out the vehicle’s safety belt and
run the lap part through or around
the restraint. The child restraint
instructions will show you how.
See if the shoulder belt would go in
front of the child’s face or neck. If
so, put it behind the child restraint.
4. Buckle the belt. Makesure the
release button faces upwardor
outward, so you’ll be able to unbuckle it quickly if you ever need to.
5. Pull the restof the lap belt all theway 6 . To tighten the belt, feed it into the
out of the retractor to set the lock.
retractor while you push down on the
child restraint.
7 . Push and pull the child restraint in
different directions to be sure it is
secure.
To remove the child restraint, just
unbuckle the vehicle's safety belt and let
it go back all the way. The safety belt
will move freely again and be readyto
work for an adult or larger child
passenger.
37
Seats & Safety 6elts
Securing a Child Restraint ina
Center Seat Position
When you secure a child restraint in a
center seating position, you'll be using
the lap belt. See the earlier section
about the top strap if the child restraint
has one.
1
X1117
1. Make the belt as long as possible by
tilting the latch plate and pullingit
along the belt.
2. Put the restraint on the seat. Follow
the instructions for the child
restraint.
3.Secure the child in the child restraint
as the instructions say.
1
4. Run the vehicle's safety belt through
or around the restraint. The child
restraint instructions will showyou
how.
5. Buckle the belt. Make sure the
release button faces upwardor outward, so you'll be able to unbuckle it
quickly if you ever need to.
6. To tighten the belt, pull its free end
while you push down on the child
restraint.
7. Push and pullthe child restraint in
different directions tobe sure it is
secure. If the child restraint isn’t
secure, turn the latch plate over and
buckle it again. Then seeif it is
secure. If it isn’t, secure the restraint
in a different place in the vehicle
and
contact the child restraint makerfor
their advice.
To remove the child restraint,just
unbuckle the vehicle’s safety belt. Itwill
be ready to work for an adult or larger
child passenger.
A rear-fixing child restraint in
the front seat could be pushed
into the seatback by the right-front
passenger’s air bag if it inflates. A
child in a rear-facing child restraint
can be seriously injured if this
happens. Always secure a rearfacing child restraint in the rear
seat.
Seats & Safety m
Securing a Child Restraint in the
Right Font Seat (CONTJ
.
1 If you have the right-front passenger’s
SIR, move the seat as far back as it
will go beforesecuring a front-facing
child restraint.
2. Put the restraint on the seat. Follow
the instructions for the child
restraint.
3. Secure the child in the child restraint
as the instructions say.
4. Pull out the vehicle’s safety belt and
run the lap part through or around
the restraint. The child restraint
instructions will show you how.
See if the shoulder belt would go in
front of the child’s face or neck. If
so, put it behind the child restraint.
s
5. Buckle the belt. Make sure the
release button faces upwardor
outward, so you’ll be able to unbuckle it quickly if you ever need to.
6. Pull the restof the lap belt all the way
out of the retractor to set thelock.
... 40
L
L
7. To tighten the belt, feed thelap belt
back into the retractor whileyou
push down on the child restraint.
8. Push and pull the child restraint in
different directions to be sure it is
secure.
To remove the child restraint, just
unbuckle the vehicle’s safetybelt and let
it go back all the way. The safety belt
will move freely again andbe ready to
work for an adultor larger child
passenger.
41I
Seats & Safety 6elts
Larger Children
Children who have outgrown child
restraints should wear the vehicle's
safety belts. If you have the choice, a
child should sit next to a windowso the
child can wear alap-shoulder belt and
get the additional restraint a shoulder
belt can provide.
Accident statistics show thatchildren are
safer if they are restrained in the rear
seat. But they need to use the safety
belts properly.
Children who aren't buckled upcan be
thrown out in a crash.
...
t
42
c
Children who aren't buckled up can
strike other people who are.
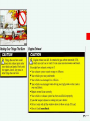
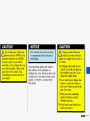
CAUTION
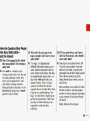
'Here two children are wearing
the same belt. The belt can't
properly spread the impact forces.
In a csash, the two children can be
crushed together and seriously
injured. A belt must k used by
only one person at a time.
I
... ..
Q: What if a child is wearing a lapshoulder belt, but the child isso
small that the shoulder beltis very
close to the child’s faceor neck?
A: Move the child toward the center of
the vehicle, but be sure that the
shoulder belt still is on the child’s
shoulder, so that in a crash the
child’s upper body would have the
restraint that belts provide.
If the child is so small that the
shoulder belt is still very close to the
child’s face or neck, you might want
to place the child in the center seat
position, the one that has only a lap
belt.
CAUTION
A
Never do this.
Here a child is sitting in a seat
that has a lap-shoulder belt, but the
shoulder part is behind the child.
If the child wean the belt in this
way, in a.crash the child might
slide under the belt. The belt’s
force would then be applied right
on the child’s abdomen. Thatcould
cause serious or fatal injuries,
Jherever the child sits, the lap portion
f the belt should beworn low and snug
n the hips, just touching the child’s
lighs. This applies belt force to the
nild’s pelvic bones in a crash.
Belt Extender
I Safety
If the vehicle’s safety belt will fasten
around you, you should use it. But if a
safety belt isn’t long enough to fasten,
your dealer will orderyou an extender.
It’s free. When you go in to order it,
take the heaviest coatyou will wear, so
the extender will be long enough for
you. The extender will be just for you,
and just for the seat in your vehicle that
you choose. Don’t let someone else use
it, and use it only for the seat it is made
to fit. To wear it, just attach it to the
regular safety belt.
43
m . .
Seats & Safety 6elts
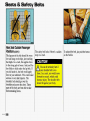
Checking Your Restraint Systems Replacing Safety Belts After
a
Now and then, make sure all your belts, Crash
buckles, latch plates, retractors,
anchorages and reminder systems are
working properly. Look for any loose
parts or damage. If you see anything that
might keep a restraint system from
doing its job, have it repaired.
If you’ve had a crash, do you need new
belts?
After a very minor collision, nothing
may be necessary. But if the belts were
stretched, as they would be if worn
during a more severe crash, then you
need new belts.
If belts are cut or damaged, replace
them. Collision damage also may mean
you will have to have safety belt parts,
like the retractor, replaced or anchorage
locations repaired-even if the belt
wasn’t being used atthe time of the
collision.
If your seat adjuster won’t work after a
crash, the special part of the safety belt
that goes through the seat to the adjuster
may need to be replaced,
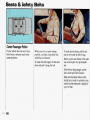
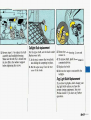
Q: What’s wrong with this?
A: The belt istorn.
II
.
.
.
Part
2
Features & Controls
Keys . . . . . . . . . . . . . . . . . . . . . . . . . . . . . . . . . . . . . . . . . . . . . . . . . . . . . . . . . . . .
Locks . . . . . . . . . . . . . . . . . . . . . . . . . . . . . . . . . . . . . . . . . . . . . . . . . . . . . . . . . . .
Remote Keyless Entry . . . . . . . . . . . . . . . . . . . . . . . . . . . . . . . . . . . . . . . . . . . . . .
GloveBox . . . . . . . . . . . . . . . . . . . . . . . . . . . . . . . . . . . . . . . . . . . . . . . . . . . . . . .
Ignitionswitch . . . . . . . . . . . . . . . . . . . . . . . . . . . . . . . . . . . . . . . . . . . . . . . . . . .
StartingYourEngine . . . . . . . . . . . . . . . . . . . . . . . . . . . . . . . . . . . . . . . . . . . . . . .
H e r e you can learn about the
Shifting the Transaxle . . . . . . . . . . . . . . . . . . . . . . . . . . . . . . . . . . . . . . . . . . . . .
many standard and optional features ParkingBrake . . . . . . . . . . . . . . . . . . . . . . . . . . . . . . . . . . . . . . . . . . . . . . . . . . . .
on your Pontiac. and information on ShiftingintoPark
........
......................................
Windows
.
.
.
.
.
.
.
.
.
.
.
.
.
.
.
.
.
.
.
.
....................................
starting. shifting and braking. Also
Turn SignaUHeadlight Beam Lever. . . . . . . . . . . . . . . . . . . . . . . . . . . . . . . . . . . .
explained are the instrument panel
Windshield
Wipers. . . . . . . . . . . . . . . . . . . . . . . . . . . . . . . . . . . . . . . . . . . . . . . . .
and the warning systems that tell
Windshield Washer . . . . . . . . . . . . . . . . . . . . . . . . . . . . . . . . . . . . . . . . . . . . . . . .
you if everything is working
properly-and what to do if you have CruiseControl . . . . . . . . . . . . . . . . . . . . . . . . . . . . . . . . . . . . . . . . . . . . . . . . . . . .
Lightcontrols . . . . . . . . . . . . . . . . . . . . . . . . . . . . . . . . . . . . . . . . . . . . . . . . . . . .
a problem.
Interior Lights . . . . . . . . . . . . . . . . . . . . . . . . . . . . . . . . . . . . . . . . . . . . . . . . . . . .
Mirrors . . . . . . . . . . . . . . . . . . . . . . . . . . . . . . . . . . . . . . . . . . . . . . . . . . . . . . . . .
Sunroof . . . . . . . . . . . . . . . . . . . . . . . . . . . . . . . . . . . . . . . . . . . . . . . . . . . . . . . . .
Ashtrays and Lighter . . . . . . . . . . . . . . . . . . . . . . . . . . . . . . . . . . . . . . . . . . . . . .
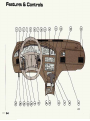
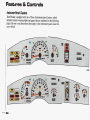
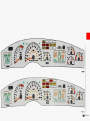
Instrument Panel . . . . . . . . . . . . . . . . . . . . . . . . . . . . . . . . . . . . . . . . . . . . . . . . . . .
Warning Lights, Gages and Indicators . . . . . . . . . . . . . . . . . . . . . . . . . . . . . . . . . .
Gages . . . . . . . . . . . . . . . . . . . . . . . . . . . . . . . . . . . . . . . . . . . . . . . . . . . . . . . . . .
Driver Information Center . . . . . . . . . . . . . . . . . . . . . . . . . . . . . . . . . . . . . . . . . .
Electronic Compass . . . . . . . . . . . . . . . . . . . . . . . . . . . . . . . . . . . . . . . . . . . . . . .
Head-Up Display . . . . . . . . . . . . . . . . . . . . . . . . . . . . . . . . . . . . . . . . . . . . . . .
46
47
48
56
57
58
-61
67
68
73
73
75
76
77
81
84
86
89
-91
94
99
108
111
113
116
Features & Controls
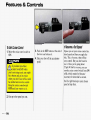
Keys
The ignition keys are for the ignition
only.
,
Leaving young children in a
with the ignition key
\ vehicle
I
1s dangerous for many reasons. A
child or others could be badly
injured or even killed. They could
lerate power windows or other
ntrols or even make the vehicle
move. Don’t leave the keys in a
vehicle with young children.
The door keys are for the doors and all
other locks.
I . .
46
When a new Pontiac is delivered, the
dealer removes the plugs from the keys
and gives themto the first owner.
However, the ignition key may not have
a plug.
Each plug has a code onit that tells your
dealer or a qualified locksmithhow to
make extra keys. Keep the plugs in a
safe place. If you lose your keys, you’ll
be able to have new ones made easily
using these plugs. If your ignition keys
don’t have plugs, go to your Pontiac
dealer for the correctkey code if you
need a new ignition key.
There are 15 alternative PASS-Key@
blanks, to help discouragetheft. Your
dealer can help determine which blank
you need.
Your Pontiac has a number of new
features that can help prevent theft.
But you can have a lot of trouble
getting into your vehicleif you ever
lock your keys, inside.
You may even
have to darnage
your vehicle to get in.
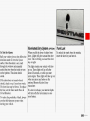
So be sure you have extra keys.
Door Locks
Unlocked doors can be
dangerous.
Passengers-especially childrencan easily open the doors and fall
out. When a door is locked, the
inside handle won't open it.
Outsiders can easily enter through
an unlocked door when you slow
down or stop your vehicle.
This may not be so obvious: You
increase the chanceof being
thrown out of the vehicle in a crash
if the doors aren't locked. Wear
safety belts properly, lock your
doors, and you will be far better
off whenever you drive your
vehicle.
There are several ways to lock and
unlock your vehicle.
From the Outside:
Use your door key or Remote Keyless
Entry, if vour vehicle has this option. If
you have the Theft Deterrent System,
you will also unlock and lock alldoors
when you unlock or lock either front
door with your key.
From the Inside:
To lock the door, slide the locking lever
rearward.
To unlock the door, slide the locking
lever forward.
47
= = =
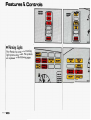
Remote KeylessEntry (omoiy)
If your Pontiac has this option, you can
lock and unlock yourdoors or unlock
your trunk from about 15 feet (4.5 m)
away using the key chain transmitter
The lever on each rear door works only supplied with your vehicle.
Operation
that door's lock. It won't lock (or
unlock) all of the doors-that's a safety
The driver's door will unlock when
feature.
UNLOCK is pressed. If pressed again
within 25 seconds, all doors will
Leaving Your Vehicle
unlock. All doors will lock when
If you are leaving the vehicle, open your LOCK is pressed.
door and set the locks from inside, then The trunk will unlock when the opened
get out and close the door.
trunk symbol is pressed, but only when
If your vehicle has the Theft-Deterrent
the ignition is off.
System option, see Zieft-Deterrent
Press any button to illuminate the
System later in this section.
interior lights (see the Index under
Illuminated Entry System).
. I .
48
Matching Transmitters toYour Vehicle
Each key chain transmitter is coded to
prevent another transmitter from
unlocking your vehicle.If a transmitter
is lost or stolen, a replacement can be
purchased through your dealer.
Remember to bring the remaining
transmitter with you when you go to
your dealer. When the dealer matches
the
replacement
transmitter
to
your
I
vehicle, the remaining transmitter must
also
matched.
be
Once
the
new
transmitter is coded, the lost transmitter
will not unlock your vehicle.
~
r
Should interference to this system occur,
You can match a transmitter to as many
try this:
Aifferent vehicles as you own, provided
Battery Replacement
they are equipped with exactly the same Check to determine if battery
Under normal use, the batteries in your
model system. (General Motors offers
replacement is necessary. See the
key
chain transmitter should last about
several different modelsof these systems
instructions on battery replacement.
two years.
on their vehicles.) Each vehicle can have
Check
the
distance.
You
may
be
too
only two transmitters matched toit. See
You can tell the batteriesare weak if the
far
from
your
vehicle.
This
product
your dealer to match transmitters to
transmitter won’t work at the normal
has a maximum range.
another vehicle.
range in any location. If you have to get
Check
the
location.
Other
vehicles
or
close to your vehicle beforethe
Your Remote Keyless Entry operates on
objects
may
be
blocking
the
signal.
transmitter works, it’s probably time to
a radio frequency subject to Federal
S e e your Pontiac dealer or aqualified change the batteries.
Communications Commission (FCC)
technician for service.
Rules.
To Replace Batteries inthe Remote
This device complies withPart 15 of the Changes or modifications to this system Keyless Entry:
by other than an authorized service
FCC Rules. Operation is subject to the
1. Remove the screw from back cover.
facility
could
void
authorization
to
use
following two conditions:(1) This
2. Lift the front cover
off, bottom half first.
this equipment.
device may not cause harmful
3. Remove and replace the two batteries
interference, and (2) This device must
(2016).
accept any interference received,
including interference thatmay cause
4. Reassemble the transmitter.
undesired operation.
5. Check the transmitter operation.
49
m . .
Features 4
S Controls
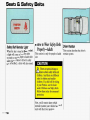
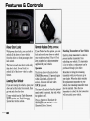
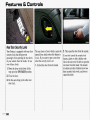
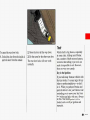
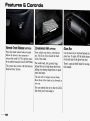
Rear Door Security Locks
Your Pontiac is equipped with rear door
security locks thathelp prevent
passengers from opening the rear doors
of your vehicle from the inside. To use
one of these locks:
1. Move the lever on the door all the
way up to the ENGAGED position.
2. Close the door.
3. Do the same thing to the other rear
door lock.
50
The rear doors of your vehicle cannotbe
opened from inside when this feature is
in use. If you want to open a rear door
when the security lock is on:
1. Unlock the door from the inside.
!. Then open the door from the outside.
f you don’t cancel the security lock
eature, adults or older childrenwho
,ide in the rear won’t be able to open the
ear door from the inside.You should
et adults and older children know how
hese security locks work, and how to
:ancel the locks.
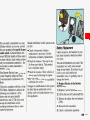
Theft
To cancel the rear door lock:
1. Unlock the door from the inside and
open the door from the outside.
2. Move the lever all the way down.
3. Do the same for the other rear door.
The rear door locks will now work
normally.
Vehicle theft is big business, especially
in some cities. Although your Pontiac
has a numberof theft-deterrent features,
we know that nothing we put on it can
make it impossible to steal. However,
there are ways you can help.
Key in the Ignition:
If you walk away from your vehicle with
the keys inside, it’s an easy targetfor joy
riders or professional thieves-so don’t
do it. When you park your Pontiac and
open the driver’s door, you’ll hear a tone
reminding you to remove your key from
the ignition and take it with you. Always
do this. Your steering wheel will be
locked, and so will your ignition and
transaxle.
51
Features & Controls
Theft (CONI)
PASS-Key /ITM
Parking at Night:
Park in a lightedspot, close all windows
and lock your vehicle. Rememberto keep
your valuables out of sight. Put them in
a storage area, or take them with you.
Parking Lots:
If you park in a lot wheresomeone will
be watching your vehicle, it’s bestto
lock it up and take your keys. But what
if you have to leave yourignition key?
What if you have to leave something
valuable in your vehicle?
Put your valuables in a storage area,
like your trunk or glove box.
Lock the glove box.
Lock all the doors except the driver’s.
Then take the door key with you.
Your vehicle is equipped with the PASSKey I F M (Personalized Automotive
Security System) theft-deterrent system.
PASS-Key IFMis a passive theftdeterrent system. This means you don’t
have to do anything to arm ordisarm the
system. It works when you insert or
remove the key from the ignition. PASSKeyTMuses a resistor pelletin the
ignition key that matches a decoder in
your vehicle.
52
When the PASS-Key I F M system senses
that someone is usingthe wrong key, it
shuts down the vehicle’s starter and fuel
systems. For about three minutes, the
starter won’t work and fuel won’t go to
the engine. If someone tries to start your
vehicle againor uses anotherkey during
this time, the vehicle will not start. This
discourages someone from randomly
trying different keys with different
resistor pellets in an attempt to make
a
match.
locksmith who can service the
PASS-Key IITM
If you accidentally use a key that has a
damaged or missing resistor pellet, the
starter won’t work and the SECURITY
The ignitionkey must be cleanand dry
light will flash. Butyou don’t have to
before it’s inserted in the ignition or the wait three minutes before trying one of
engine may not start.
the other ignition keys. See your Pontiac
dealer or a locksmith who can service
If the engine does not start and the
SECURITY light is on, the key may be the PASS-Key I I T M to have a new key
made.
dirty or wet. Turn the ignitionoff.
Clean and dry the key. Wait aboutthree If you’re ever driving and the
minutes and try again.The security light SECURITY light comes on and
may remain on during this time.If the
remains on, you will be ableto restart
starter stillwon’t work, and the key
your engine if you turn it off. Your
appears to be clean and dry, wait about PASS-Key II? system, however, is not
three minutes and try theother ignition working properly and must beserviced
key. At this time, you may also want to
by your Pontiae dealer. Your vehicle is
check the fuse (see the
Index under
not protected by the PASS-Key I F M
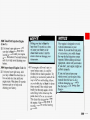
Fuses & Circuit Breakers). If the starter system.
won’t work withthe other key, your
If you lose or damage a PASS-Key I F M
vehicle needs service.If your vehicle
ignition key, see your Pontiac dealer or a
does start, the first ignitionkey may be
locksmith who can service PASSfaulty. See your Pontiac dealeror a
Key I F M to have a new key made.
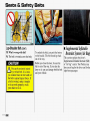
Theft-Deterrent System (omoN)
If your Pontiachas this option, it has a
theft-deterrent alarm system. With this
system, the SECURITY light will flash
when you open the door (if your ignition
is off).
This light reminds you to arm thetheftdeterrent system when leaving your
vehicle.
To Arm the System:
1. Open the door.
2. Lock the door with the power door
lock switch or Keyless Entry
transmitter. The SECURITY light
should come on and stay on.
3.Close all doors. The SECURITY
light will go off after about 30 seconds
and the system will then be armed.
53
Features & Controls
Theft-Deterrent System(CONI:)
If the SECURITY light comes on for
one minute and then shuts off while the
ignition is on, the security system has
detected a problem with itself. See your
dealer for service.
If a door or the trunk is opened without
the key or the Keyless Entry transmitter,
the alarm will go off. It will also go off
if the trunk lock is damaged or if the
ignition is turned on. Your vehicle’s
lights will flash and the horn will sound
for three minutes, then will gooff to
save battery power. And your vehicle
will not start.
Remember, the theft-deterrent system
won’t arm if you lock the doors with a
key or manual door lock. It arms only if
you use a power door lock switch or
Keyless Entry transmitter.
. . I
54
To Avoid Setting Off the Alarm by
Accident:
If you don’t want to arm the theftdeterrent system, the vehicle should be
locked with a key after the doors are
closed.
Always unlock a door with a key, or use
the Keyless Entry System transmitter.
Unlocking a door any other way will set
off the alarm.
To Stop the Alarm:
If you set off the alarm by accident,
unlock any door with yourkey. You can
also turn off the alarmby pressing the
UNLOCK button on the Keyless Entry
System transmitter. Thealarm won’t
stop if you try to unlocka door any
other way.
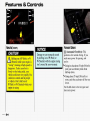
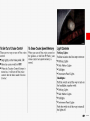
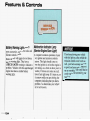
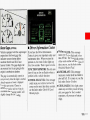
H2344
tIEumhated Enfry Spkm ~
~ K N Trunk
W ) h
I
k
To Test the Almn:
Roll p u r window down, then follow the
directions under221A m the System
earlier. Once tbe alarm is set, reach
through the window and manually
unlock the door from the inside or turn
on the ignition. The alarmshould
sound.
If the d a m does not sound when it
should, check to see if yourhorn works.
The horn fuse may be Mown. Ta replace
the fuse, see theIndex under FEares &
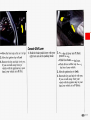
When you lift the leverof either front
Ta unlock the trunk from the outside,
door, a light will glowaround the door
insert the door key and turn it.
lock. This will help you insert the door
key at night.
The lights inside your vehiclewill also
go on. Theselights will go off after
about 20 seconds, or when you start
your engine. These lights willalso go on
when you press my button on the
optional Remote Keyless Entry
transmitter.
If a door is left ajar, yourinterior lights
Circuit Breakers.
will turn off after ten minutes to save
To reduce the possibility of theft, always your battery.
arm the theft-deterrent system when
leaving your vehicle.
55
m . .
Remote Trunk Release(opTIoN)
Convenience Net(OPTION)
Press the trunk release button located
below the driver’s door armrest to
release the trunk lid. The ignition must
be on and the transaxle must be
in P (Park).
The system also works with the Remote
Keyless Entry System.
Glove Box
Your vehicle may have a convenience
net. You’ll see it just inside the back
wall of the trunk.
Put small loads, like grocery bags,
behind the net to help keep them from
falling over during sharp turns or quick
starts and stops.
The net isn’t for larger, heavierloads.
Store them in the trunk as far forward as
you can.
You can unhook the net so that it will lie
flat when you’re not using it.
Use the door key to lock and unlock the
glove box. To open, lift the latch release
on the left sideof the glove box door.
There’s a special shelf inside for storing
this manual.
56
New Venice bbBreak-ln”
Your modern Pontiac doesn’t need
an elaborate “break-in.” But it will
perform better in the long run if
you follow these guidelines:
Don’t drive at any one speedfast or slow-for the first 500
.miles (804 km). Don’t make fullthrottle starts.
Avoid making hard stops for the
first 200 miles (322 km) or so.
During this time your new brake
linings aren’t yet broken in. Hard
stops with new linings can mean
premature wear andearlier
replacement. Follow this
“breaking-in” guideline every
time you get new brake linings.
Run: An “on” position to which the
switch returns after you start your
engine and release theswitch. The
switch stays inthe Run position when
the
engine is running. But even when
Ignition Switch
With the ignition key
in the ignition switch, the engine is not running, you can use
you can turn the switch to five positions: Run to operate your electrical power
accessories, and to display some
Accessory: An “on” position in which
instrument panel warning lights.
you can operate your electrical power
accessories. Press in the ignition switch Start: Starts the engine. When the
engine starts, release the key. The
as you turn the top of it toward you.
ignition switch willreturn to Run for
Lock: The only position in which you
normal driving.
can remove the key. This locks your
Note that evenif the engine is not
steering wheel, ignition and transaxle.
running, the positions Accessory and
Off: Unlocks the steering wheel,
Run are “on” positions that allow you
ignition, and transaxle, but does not
to operate your electrical accessories,
send electrical power to any accessories. such as the radio.
Use this position if your vehiclemust be
pushed or towed, but never try to push- Key Reminder Warning
start your vehicle. A warning chime will If you leave your key inthe ignition, in
sound if you open the driver’s door
the Off position, you will hear a
when the ignition is off and the key is in warning tone when you open the driver’s
door.
the ignition.
57
= = =
3800 Tuned Port Injection Engine
(Code L):
3, If it doesn’t start rightaway, hold
your key in Start for about three
seconds at a timeuntil your engine
starts. Wait about 15 seconds between
each try to help avoid draining your
battery.
3800 Supercharged Engine (Code1):
3. If it doesn’t start right away, hold
your key in Start for about three to
five seconds at a time until your
engine starts. Wait about 15 seconds
between each try to help avoid
draining your battery.
I
Holding your key inStart for
longer than 15 seconds at a time
will cause
your
battery
to be
drained much sooner.-And the
excessive heat can damage your
starter motor.
I
I
4. If your engine still won’t start (or
starts but then stops), it could be
flooded with too much gasoline. Try
pushing your accelerator pedal all the
way to the floor and holding it there
as you hold the key in Start for about
three seconds. If the vehicle starts
briefly but then stops again, do the
same thing, but this time keep the
pedal down for five or six seconds.
This clears the extra gasoline from
the engine. After waiting about 15
seconds, repeat the normal starting
procedure.
53
Features & Controls
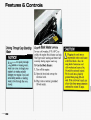
Driving Through Deep Standing Engine Block Heater (opTIoN)
In very cold weather, 0°F (-18”C) or
Water
..
-
.
If you drive too quickly through
deep puddles or standing water,
water can come in through your
engine’s air intake and badly
damage your engine. If you can’t
avoid deep puddles or standing
water, drive through them very
slowly.
... 60
colder, the engine block heater can help.
You’ll get easier starting and better fuel
economy during engine warm-up.
To Use the Block Heater:
1 Turn off the engine.
2. Open the hood and unwrap the
electrical cord.
3.Plug it into a normal, grounded
110-volt outlet.
.
b!!
A
Plugging the cord into an
ungrounded outlet could cause
an electrical shock. Also, the
wrong kind of extension cord
could overheat and cause a fire.
You could be seriously injured.
Plug the cord into a properly
grounded three-prong 110-volt
outlet. If the cord won’t reach, use
a heavy-duty three-prong extension
cord rated for at least 15 amps.
-‘
I
After you’ve used the block heater,
be sure to store the cordas it was
before, to keep it away from
moving engine parts. Ifyou don’t,
it could be damaged.
How long should you keep the block
Ieater plugged in? The answer depends
In the weather, the kind of oil you have,
md some other things. Instead of trying
:o list everything here, we ask that you
:ontact a Pontiac dealer in the area
ahere you’ll be parking your vehicle.
The dealer can give you the best advice
For that particular area.
__
Shiftins the Automatic
Transaxle
Your automatic transaxle may have a
shift lever located onthe console
between the seats or on the steering
column. Both are shown.
There are several shift positions. In this
manual, these are referred to by the
commonly used symbols in the right
column below:
Park
P
R
Reverse
N
Neutral
Overdrive
IDI
D
Drive
2
Second
First
1
61
5
& Controls
Park
P (Park): This locks your front wheels. It’s the best position to use when you start
your engine because your vehicle can’t move easily.
1 It is dangerous to get out of your vehicle if the shift lever is not m y in
-P
(park) with the parking brake firmly set. Your vehicle can roll.
Don’t leave your vehicle whenthe engine is running unless youhave to. If you
have left the engine running, the vehicle can move suddenly. You or others
could be injured. To be sure your vehicIe won’t move, even when you’re on
fkirly level ground, always set your parking brake and move the shift lever to
P (Fark). See the Inda under Shiping into P (Park).If you are parking on a
hill, or if you’re pulling a trailer, also see the Inda under Parking on HilZs or
Towing a llailer.
I..
62
Ensure the shift leveris fully in P (Park)
range before starting the engine. Your
Pontiac has a brake-transaxle shift
interlock. You have to fully apply your
regular brakesbefore you can shift from
P (Park) when the ignitionkey is in the
On position. If you cannot shift outof
P (Park), ease pressureon the shift
lever-push the shift lever all the way
into P (Park) and also release the shift
lever button on floor shift console
models as you maintain brake
application. Then move the shift lever
into the gear you wish. (Press the shift
lever button before moving the shift
lever on floor shift console models.) Se
Shifting Out of P (Park} later in this
section.
r
Severse
R (Reverse): Use this gear to back up.
Shifting toR (Reverse) while your
vehicle is moving forward could
damage your transaxle. Shift toR
only after your vehicle is stopped.
Neutral
To rock your vehicle back and forth to
get out of snow, ice, or sand without
damaging your transaxle, see the Index
under If You ’re Stuck: In Sand, Mud,
Ice, or Sy10w.
N (Neutral): In this position, your
engine doesn’t connect with the wheels.
To restart when you’re already moving,
use N (Neutral) only. Also, use N when
your vehicle is being towed.
63
. . I
“r Controls
I Neutral
I
I
...
Shifting out of P (Park) or N
(Neutral) while your engineis
“racing”
(running at high speed) i:
’
ngerous. Unless your foot is
llrmly on the brake pedal, your
vehicle could move very rapidly.
You
could lose control and hit people
or objects. Don’t shift out of
P (Park) or N (Neutral) whill- - - ~ u r
engine is racin-
64
Forward Gears
(CONTJ
Damage to your transaxle caused
by shifting out of P (Park) or
N (Neutral) with the engine racing
isn’t covered by your warranty.
(Automatic Overdrive): This
position is for normal driving. If you
need more power for passing, and
you’re:
Going less than about 35 mph km/h),
(56
push your accelerator pedal about
halfway down.
Going about 35 mph (56 h / h ) or
more, push the accelerator all theway
down.
You’ll shift down to the next gear and
have more power.
r
If your vehicle seems tostart up
rather slowly, or if it seems not to
shift gears as you go faster,
something may be wrong with a
transaxle system sensor. If you
drive very far that way, your
vehicle can be damaged. So, if this
happens, have your vehicle
serviced right away. Until then,
you can use 2 (Second Gear) when
vou are driving less than35 mDh
i56 km/h) a n z a (0
higher speeds.
D (Third Gear): Thisislike
, but
you never go into Overdrive. Here are
some times you might choose D instead
ofm:
When driving on hilly, winding roads.
When towing a trailer, so there is less
shifting between gears.
When going down a steep hill.
2 (Second Gear): This position gives
you more power but lower fuel
economy. You can use 2 on hills. It can
help control your speed asyou go down
steep mountain roads, but then you
would also want to use your brakes off
and on.
Don't drive in 2 (Second Gear) for
more than 5 miles (8 km), or at
speeds over 55 mph (88 km/h), or
you can damage yourtransaxle. Use
or D as much as possible.
Don't shift into 2 unless you are
going slower than65 mph
(105 km/h), or you can damage
your engine.
I
65
m m m
Features & Controls
Forward Gears(CONT.)
1 (First Gear): This position gives you
even more power (but lower fuel
economy) than 2. You can use it on very
steep hills, or in deep snow or mud. If
the selector lever is put in 1, the
transaxle won’t shift into first gear until
the vehicle is going slowly enough.
66
Performance Shifting(opTIoN)
If your front wheels can’t rotate,
don’t try to drive. This might
happen if you were stuck in very
deep sand or mud or were up
against a solid object. You could
damage your transaxle.
Also, if you stop when going uphill,
don’t hold your vehicle there with
only the accelerator pedal. This
could overheat and damage the
transaxle. Use your brakes or shift
into P (Park) to hold your vehicle
in position on a hill.
Press PERFORM SHIFT to allow the
transaxle to shift at higher engine
speeds, increasing acceleration
performance. An indicator light on the
switch will glow when performance
shifting is in operation.
Downshifts will occur at a lower
percentage of accelerator application
while you’re in thePERFORM SHIFT
mode.
Press NORMAL SHIFT to have the
transaxle shift at lower engine speeds,
increasing fueleconomy. An indicator
light on the switch will glow when
normal shifting is in operation.
c
L
Parking Brake
To Set the Parking Brake:
Hold the regular brake pedal down with
your right foot. Push down the parking
brake pedal with your left foot. If the
ignition is on, the brake system warning
light will come on. A chime will sound
after the vehicle has traveled46 feet
(14 meters),
To Release the Parking Brake:
Hold the regular brake pedal down. Pull
the BRAKE RELEASE lever. If you
try to drive off with the parkingbrake
on, the brake light stays on and achime
sounds until you release the parking
brake or recycle the ignition.
If You are on a Hill:
See the Index under Parking on Hitls.
That section shows how to turn your
front wheels.
If You are Towing a Trailerand are
Parking on Any Hill:
See the Index under Towing a Trailer.
That section shows what to do first to
keep the trailer from moving.
67
...
Features & Controls
1
Shifting Znto P (Park)
Steering Column Shift Lever
1. Hold the brake pedal down with your
right foot and set the parking brake.
~
It can be dangerous to get out
your vehicle if the shift
lever is not fully in P (Park) with
the parking brake firmly set. Your
vehicle can roll. If you have left the
engine running, the vehicle can
move suddenly. You or others
could be injured. To be sure your
vehicle won’t move, when you’re
on fairly level ground, use the
steps that follow. If you are parking
on a hill, or if you’re pulling a
trailer, also see the Index under
rking on Hills or Towing a
rrailer.
68
b of
2. Move the shift lever into theP (Park)
position as follows:
Pull the lever toward you.
Console ShiR Lever
Move the lever up as far as it will go. 1. Hold the brake pedal down with your
right foot and setthe parking brake.
3. Move the ignition key to Lock.
4. Remove the key and take it with you.
If you can walk away from your
vehicle with the ignition key in your
hand, your vehicle is in P (Park).
2. Move the shift lever into P (Park)
position like this:
Hold in the button on the lever.
Push the lever all the way toward
the front of your vehicle.
3.Move the ignition key to Lock.
4. Remove the key and take it with you.
If you can walk away from your
vehicle with the ignition key in your
hand, your vehicle is in P (Park).
69
Features & Controls
Leaving Your Vehicle With the
Engine Running
It is dangerous to leave your
vehicle with the engine
nning. Your vehicle could move
ddenly if the shift lever is not
d y in P (Park) with the parking
brake firmly set. And, if you leave
the vehicle with the engine
running, it could overheat and even
catch fire. You or others could be
injured. Don’t leave your vehicle
with the engine running unless you
have to.
\
Shifting Outof P (Park)
Your Pontiac has a brake-transaxle shift
interlock. You have to fully apply your
regular brakes before you can shift from
P (Park) when the ignition is inthe On
position. See the Index under Shifting
the Automatic Transaxle.
If you have to leave your vehicle with
the engine running, be sure your vehicle If you cannot shift outof P (Park), ease
is in P (Park) and your parking brake is pressure on the shift lever-push the
shift lever all the way into P (Park) and
firmly set before you leave it. After
also release the shift lever buttonon
you’ve moved the shift lever into the
P (Park) position, hold the regular brake floor shift console models as you
pedal down. Then, see if you can move maintain brake application. Then move
the shift lever into the gear you wish.
the shift lever away from P (Park)
without first pulling it towardyou (or, if (Press the shift lever button before
you have the console shift lever, without moving the shift leveron floor shift
console models.) If you ever hold the
first pushing the button).
brake pedal down but still can’t shift out
If you can, it means that the shift lever
of P (Park), try this:
wasn’t fully locked into P (Park).
I
70
1. Turn the key to Off. Open and close
the driver’s door toturn off the
Retained Accessory Power feature.
2. Apply and hold the brake until the
end of Step 4.
3. Shift to N (Neutral).
4. Start the vehicle and then shift to the
drive gear you want.
5. Have the vehicle fixed as soon as you
can.
I
r
CAUTION
I
Engine exhaust cankill. It contains the gas carbon monoxide (eo),
which you can't see or smell. It can cause unconsciousness and death.
You might have exhaust coming inif:
0 Your exhaust system sounds strange or different.
Your vehicle gets rustyunderneath.
0 Your vehicle was damaged in a collision.
Your vehicle was damaged when driving over high points on the road or
over road debris.
0 Repairs weren't done correctly.
* Your vehicle or exhaust system has beenmodified improperly.
If you ever suspect exhaust is coming into your vehicle:
0 Drive it only with all the windows down to blow out any CO; and
0 Have it fixed immediately.
A
A
Things that can burn could
touch hot exhaust parts under
your vehicle and ignite. Don't park
over papers, leaves, dry grass or
other things that can burn.
I
Features & Controls
Running Your Engine While You’re Parked
It’s better not topark with the engine running. But if you ever have to, here are
I some things to know.
I
the engine with the air system control OFF could allow dangerous
‘ Idling
xhaust into your vehicle (see the
earlier CAUTION under Engine Exhaust).
I
so, idling in a closed-in place can let deadlycarbon monoxide (CO) into
your vehicle even if the fan switch is at the highest setting. One place this can
happen is a garage. Exhaust-with CO-can come
in easily. Never park in a
garage with the engine running.
Another closed-in place canbe a blizzard. (See the Index under Bliaard.)
It can be dangerous to get out of your vehicle if the shift lever isnot fully in
P (Park) with the parking brake firmly set. Your vehicle can roll. Don’t leave
your vehicle when the engine is running unlessyou have to. If you’ve left the
engine running, the vehicle can move suddenly. You or others could be
injured. To be sure your vehicle won’t move, even when you’re on fairly level
ground, always set your parking brake and movethe shift lever to P (Park).
If you are parking on a hill, or if you’re pulling a trailer, also see the Zndex
under Parking on Hills or Towing a Truik
rn.1
72
Horn
You can sound thehorn by pressing the
horn symbols on your steering wheel,
r
Tilt Steering Wheel
Power Windows
Turn SignallHeadlight
A tilt steering wheel allowsyou to
adjust the steering wheel beforeyou
drive. You can also raise it to the highest
level to give your legs more room when
you exit and enter the vehicle.
To tilt the wheel, hold the steering
wheel and pull the lever. Move the
steering wheel to a comfortable level,
then release the leverto lock the wheel
in place.
Switches on the driver’s armrest control
each of the windows when the ignition
is on. In addition, each passenger door
has a control switchfor its own window.
When the driver’s window switchis
held rearward for more than a half
second, the window will lower
completely. The window can be opened
in smaller amounts by pressing the
switch rearward and releasing it
immediately.
To stop the window while it is lowering,
press the switch again, then release. To
raise the window, hold the switch
forward.
Beam Lever
The lever on the left sideof the steering
column includes your:
Headlight High-Low Beam
Headlight Washers
(SSE and SSEi only)
Windshield Wipers
Windshield Washer
0 Cruise Control (Option)
Turn Signal and Lane Change
Indicator
The High-Low Beam feature is
discussed under Headlights. See the
Index under Headlights.
73
t
==
Features & Controls
Turn Signal and Lane Change
Indicator
The turn signal has two upward (for
Right) and two downward (for Left)
positions. These positions allow you to
signal a turnor a lane change.
To signal a turn, move the lever all the
way up or down. When the turn is
finished, the lever willreturn
automatically.
...
.
74
c
L
A green arrow on the instrument panel
will flash in the direction of the turn or
lane change.
To signal a lane change, just raise or
lower the lever untilthe green arrow
starts to flash. Hold it there until you
complete your lane change.The lever
will return by itself when you release it.
As you signal a turn or a lane change, if
the arrows don’t flash but just stay on, a
signal bulb may be burned out and other
drivers won’t see your turn signal. If you
have the Driver Information Center, it
will tell you if you have a burned out
bulb. See the Index under Driver
Information Center.
If a bulb is burnedout, replace it to help
avoid an accident. If the green arrows
don’t go on at all when you signala
turn, check the fuse (see theIndex under
Fuses & Circuit Breakers) and for
burned-out bulbs.
If you have a trailer towing option with
added wiring for the trailer lights, a
different turn signal flasher is used.
With this flasher installed, the signal
indicator will flash even if turn
a signal
bulb is burned out. Check the front and
rear turn signal lights regularly to make
sure they are working.
Windshield Wipers
You control the windshield wipersby
turning the band marked WIPER.
For a single wiping cycle, turn the band
to MIST. Hold it there until the wipers
start, then let go. The wipers will stop
after one cycle. If you want more cycles,
hold the band onMIST longer.
For steady wiping at low speed, turn the
band away from you to the LO position.
For high speed wiping, turn the band
further, to HI. To stop the wipers, move
the band to OFF.
You can set the wiper speed for a long
or short delay between wipes. This can
be very useful in light rain or snow.
Turn the band to choose the delay time.
The closer to L O , the shorter the delay.
A
Damaged wiper blades may
prevent you from seeing well
enough to drive safely. To avoid
damage, be sure to clear ice and
snow from the wiper blades before
using them. If they’re frozen to the
windshield, carefully loosen or
thaw them. If your blades do
become damaged, get new blades
or blade inserts.
Heavy snow or ice can overload your
wipers. A circuit breaker will stop them
until the motor cools. Clear away snow
or ice to prevent an overload.
75
...
Windshield Washer
At the top of the turn signal/high beam
lever there’s a paddle with the word
PUSH on it. To spray washer fluid on
the windshield, push the paddle for less
than a second. The wipers will clear the
window and then either stop or return to
your preset speed. For more washer
cycles, push and holdthe paddle.
Some models have a WASHER FLUID
warning, that indicates if the fluid level
in the windshield washer is low. See the
Index under Low Washer Fluid Warning
Light.
When using concentrated washer
fluid, follow the manufacturer’s
instructions for addingwater.
Don’t mix water with ready-touse washer fluid. Water can
cause the solutionto freeze an ’
damage your washer fluidtank
and other parts of the washer
system. Also, water doesn’t clean
as well as washer fluid.
Fill your washer fluid tank only
% full when it’s very cold. This
allows for expansion, which
could damage the tank if it is
completely full.
Don’t use radiator antifreeze in
your windshield washer. It can
damage your washer system and
paint.
Y
Headlight Washers (opT1oN)
If you have this option, you can wash
your headlights in bad weather or
whenever desired. Here’s how:
To operate the headlight washers, the
ignition must be on. Pull the paddleon
the turn signal/headlight beam lever
labeled PULL. Each headlight will get
a spray of washer fluid.
Control
H Cruise
(OPTION)
With cruise control, you can maintain a
speed of about 25 mph (40 h / h ) or
more without keeping your foot onthe
accelerator. This can really help on long
trips.
Cruise control does not work at speeds
below about 25 mph (40 km/h).
When you apply your brakes, the cruise
control shuts off.
1
Cruise control can be
- b dangerous where you can’t
drive safely at a steady speed.
So, don’t use your cruise control
on winding roads or in heavy
traffic.
,Cruisecontrol can be dangerous
on slippery roads. On such
roads, fast changes in tire
traction can cause needless wheel
spinning, and you could lose
control. Don’t use cruise control
on slippery mads.
77
Features & Controls
To Resume a Set Speed
To Set Cruise Control
1. Move the cruise control switch to
ON.
I CAUlfON
A
If you leave your cruise
control switch ON when
u’re not using cruise, you might
hit a button and go into cruise
when you don’t want to. You could
be startled and even lose control.
Keep the cruise control switch
OFF until you want to use it.
2. Get up to the speed you want.
78
3. Push in the SET button at the end of
the lever and release it.
4. Take your foot off the accelerator
pedal.
Suppose you set your cruise control at a
desired speed and then you apply the
brake. This, of course, shuts off the
cruise control. But you don’t need to
reset it. Once you’re going about
25 mph (40 b / h ) or more, you can
move the cruise control switch fromON
to R/A (which stands for Resume/
Accelerate) for about half a second.
You’ll go right back up to your chosen
speed and stay there.
r
If you hold the switch atR/A
longer than half a second, the
vehicle will keep going faster until
you release the switch or apply the
brake. You could be startled and
even lose control. So unless you
want to go faster, don’t hold the
switch at R/A.
A
To Increase Speed While Using
Cruise Control
Here’s the second way to go to a higher
speed:
There are two ways to go to a higher
speed. Here’s the first:
Move the cruise switch from ON to
R/A. Hold it there until you get up to
1 Use the accelerator pedal to get to the
the speed you want, and then release
higher speed.
the switch.
2. Push the buttonat the end of the
To increase your speed in very small
lever, then release the button and the
amounts, move the switch to RIA for
accelerator pedal. You’ll now cruise
less than half a second and then
at the higher speed.
release it. Each time you do this, your
vehicle will go about 1 mph
(1.6 km/h) faster.
The accelerate feature will only work
after you turn on the cruise control by
pushing the SET button.
.
79
8
8
8
Features & Controls
To Reduce Speed While Using
Cruise Control
Passing Another Vehicle While
Using Cruise Control
There are two ways to reduce your
speed while using cruise control:
Push in the button at the end of the
lever until you reach the lower speed
you want, then release it.
To slow down in very small amounts,
push the button for less than half a
second. Each time you do this, you’ll
go 1 mph (1.6 km/h) slower.
Use the accelerator pedal to increase
your speed. When you take your footoff
the pedal, your vehicle will slow down
to the cruise control speed you set
earlier.
BO
Using Cruise Controlon Hills
How well your cruise control will work
on hills depends upon your speed,load,
and the steepnessof the hills. When
going up steep hills,you may have to
step on the accelerator pedal to mainta
your speed. When going downhill, you
may have to brake or shift to a lower
gear to keep your speed down. Of
course, applying the brake takesyou out
of cruise control. Many drivers find this
to be too much trouble and don’t use
cruise control on steep hills.
To GetOut of CruiseControl
To EraseCruiseSpeedMemory
There are two ways to turn off the cruise When you turn off the cruise control or
ion,
the
control:
into
or shift
P (Park), your
Step
lightly
on
the
brake
pedal;
OR
cruise control
set
speed
is
erased.
Move the cruise switch to OFF.
When the Traction Control System is
turned on, it will turn off the cruise
control. See the Index under Tractiorz
Control.
Light Controls
Parking Lights:
Pull the switch to the first stop
to turn on:
Parking Lights
Side Marker Lights
Taillights
Instrument Panel Lights
Headlights:
Pull the switch out all theway to turn on
the headlights, together with:
Parking Lights
Side Marker Lights
Taillights
Instrument Panel Lights
Push the switch in all the way to turn all
the lights off.
81
Features & Controls
Operation of lights
Although your vehicle's lighting system
(headlamps, parking lamps, fog lamps,
side marker lamps and taillamps) meets
all applicable federal lighting
requirements, certain states and
provinces may apply their own lighting
regulations that may require special
attention beforeyou operate these
lamps. For example, some jurisdictions
may require that you operate your lower
beam lamps with fog lamps atall times,
... 62
lights On Reminder
'
or that headlamps be turned on
whenever you must use your windshield
wipers. In addition, most jurisdictions
prohibit driving solely with parking
lamps, especially at dawn or dusk. It is
recommended that you check with your
own state or provincial highway
authority for applicable lighting
regulations.
If you open the door while leaving the
lights on, you will hear a warning tone.
I
Daytime Running Lights
(CANADA ONLY)
The Canadian federal government has
decided that Daytime Running Lights
(DRL) are a useful feature, in that DRL
can make your vehicle more visible to
pedestrians and other drivers during
daylight hours. DRL are required on
new vehicles sold in Canada.
Your DRL work with a light sensor on
top of the instrument panel. Don't cover
it up. The low beam headlights will
come on at reduced brightness in
daylight when:
The ignition is on
The headlight switch is off, and
The transaxle is not in P (Park).
At dusk, the exterior lights will come on
automatically and the low beams will
Headlight High-LowBeam
change to full brightness. At dawn, the
exterior lights will go out and the low
Changer
beams will change to the reduced
To change the headlightsfrom low beam
brightness of DRL (if the headlight
to high, or high to low, pull the turn
switch is off)..
signal lever allthe way toward you.
Of course, you may still turn on the
Then release it.
headlights any time you need to.
When the high beamsare on, a blue
To idle your vehicle with the DRL off,
light on the instrument panel also will
shift the transaxle into P (Park). The
be on.
DRL will stay off until you shift out of
P (Park).
At night, you can turn off all exterior
lights when you are in P (Park) by
moving the Twilight Sentinel control all
the way past MIN to turn it off, if it was
on. If it was off, move the control to the
right to turn it on, then back off. The
lights will come back on when you put
the transaxle in gear.
83
r
...
Features & Controls
Instrument Panel Intensity
Control
You can brighten or dim your
instrument cluster lights by rotating the
headlight switch. Rotate the switch all
the way counterclockwise to turn on the
interior courtesy lights. Rotate the
switch clockwise to turn off the
instrument cluster lights and displays.
m m m
84
~
l
Twilight Sentinel(opTIoN)
If You Have this Option, Here’sHow
it Works:
1. Push in the headlight switch to turn
your headlights off.
2. Rotate the Twilight Sentinel switch
counterclockwise from OFF.
The Twilight Sentinel Does Two
Things:
First, depending on how dark it
becomes outside, the Twilight Sentinel
turns your headlights on automatically,
when they’re needed. Avoid covering the
sensor located near the windshield,by
the defroster outlet-otherwise your
headlights will stay on.
Also, it’s possible that your headlights
might go out if you drove from a dark
area into a bright area, such as a lighted
parking lot. If this happens, turn on
your headlights with the regular
headlight switch.
Second, to light your way when you
leave your vehicle, the Twilight Sentinel
will keep your headlights on foras long
as three minutes. Rotate the Twilight
Sentinel switch toMAX for a threeminute delay, Rotate it the other way to
reduce the delay.
Fog Lights
Front Reading Ljghts
The switch for your fog lightsis in the
overhead console.
An indicator light in the switch will
glow when the fog lights are switched
on. Your headlights must beon low
beams, or your parking lights must be
on, for your fog lights to work.
These lights and theinterior courtesy
lights will come on when you open the
doors.
To turn on a reading light whenthe
doors are closed, press either switch.
Press it again to turnthe light off.
To avoid draining your vehicle's battery,
be sure to turn off the reading lights
when leaving your vehicle.
Features & Controls
Rear Reading Lights
Inside Manual Day/Night
Rearview Mirror
These overhead lights and the interior
courtesy lights will come on whenyou
To reduce glare from lights behind you,
open the doors.
pull the lever toward you to the night
position.
To turn on the reading light when the
door is closed, slide the switch up. Slide
it down to turn offthe light.
Electrochromic DayINight
Rearview Mirror
This mirror automatically changes to
reduce glare when set in theMIN or
MAX positions. One photocell on the
back of the mirror senses whenit is
becoming dark outside. Another
photocell is built into the mirror surface
to sense headlights behind you.
The mirror will darken gradually to
reduce glare. This change may take a
few moments.
E l030
I
Convex Outside Mirror
Setting the Sensitivity:
Your right side mirror is convex. A
MIN: The mirror will gradually reduce convex mirror’s surface is curved so you
can see more from the driver’s seat.
glare when headlights behind you are
very close. This is a good position for
city driving, where theremay be light
r
from many sources.
- If you aren’t used to aconvex II
MAX: The mirror will begin to
mirror, you can hit another
gradually reduce glare when headlights
vehicle. A convex mirror can make
are far behind you. Thisis a good
things (like other vehicles) look
setting for rural driving.
farther away than they really are. If
you cut too sharply into the right
The mirror goes to a clear position
lane, you could hit a vehicle on
whenever you shift to R (Reverse).
your right. Check your inside
OFF: Shuts off the Day/Night function.
mirror or glance over your
The mirror will stay in the Day setting.
shoulder before changinglanes.
To keep the photocells operating well,
occasionally clean them with a cotton
swab and glass cleaner.
-
I
Manual Remote Control Mirror
The outside rearview mirror should be
adjusted so you can just see the side of
your vehicle when you are sitting in a
comfortable driving position.
Adjust the driver side outside mirror
with the control leveron the driver’s
door.
To adjust your passenger side mirror, sit
in the driver’s seat and have apassenger
adjust the mirror for you.
D
Features & Controls
laaria1
Power Remote Control Mirrors
Sun Visors
Visor Vanity Mirrors
(OPTION)
To block out glare, you can swing down
the visors. You can also remove them
from the center mount and swing them
to the side, while the auxiliary sunshade
remains to blockglare from the front.
Standard Mirror:
Open the cover to expose the vanity
mirror.
Lighted Mirrors:
If your vehicle has the optional lighted
vanity mirrors, the lights comeon when
you open the cover. These can even be
used for reading. You can adjust the
brightness of the lights with the switch.
A control lever on the driver's door
controls both outside rearview mirrors.
Select the mirror you want to adjust by
rotating the lever to the leftor right.
Adjust each mirror so that you can just
see the side of your vehicle when you
are sitting in a comfortable driving
position.
When you operate the optionalrear
window defogger, the outside rearview
mirrors are also heated to help clear
them of ice and snow.
m . .
C2260
88
e
t
r-
Express Open Sunroof(OPTION)
Your express open sunroof provides an
airy, spacious feel to your vehicle's
interior and can also increase
ventilation. It includes a sliding glass
panel and a sliding sunshade. The
control switch will work only when the
ignition is on, or during Retained
Accessory Power, if you have that
option. See the Index under Retained
Accessory Power.
To Open the SunroofRear Vent:
To Open the Sunroof:
Press the control switch forward when
Press the control switch rearward and
the sunroof is closed. Open the
release it to open the glass panel and
sunshade by hand.
sunshade. If you want to stop the
sunroof in a partially open position,
To Close the Sunroof Rear Vent:
lightly press the switch again. Press the
switch rearward again to open fully. The Press the switch rearward.
sunshade can also be opened by hand.
To Close the Sunroof:
Press and hold the control switch
forward to close the glass panel. The
sunshade can only be closedby hand.
The sunroof glass panel cannot be
opened or closed if your vehicle has an
electrical failure.
L
Features & Controls
Door Cup Holder
Storage Armrest (OPTION)
Console Shift Models:
Press the button at the front edge to
open the armrest storage area for
cassette tapes, gloves, etc. A cup holder
flips forward for use.
There’s alsoa bin for storage underneath
the armrest storage area.
I . .
c
Column Shift Models:
The front armrest opens into a storage
area for cassette tapes, gloves, etc.To
open it, hold down the base and lift the
lid. A cup holder flips forward and
unfolds to hold two cups.
so
Y
The front doors provide space for
holding a cup or soft drink.
Ashtrays
Rear Storage Compartment
Lift the rear of the armrest toreveal the
storage space.
Pull down the interior door to access the
trunk for storing long objects.
Lift the cover to reveal the front ashtray.
To clean the ashtray, lift it out by pulling
on the snuffer.
91
...
Features & Controls
t
I.ighters
Ashtrays (CONT.:)
On models without a console, there’s an
ashtraykup holder under the instrumlent
panel. To clean the ashtray, lift it outbY
pulling up on the tabs on either side. It
snaps back into place.
To open the rear ashtrays, lift the cover.
1Y
o use a lighter,just push it in all the
Vvay
NOTICE
and let go. When it’s ready, it will
bop back by itself.
1
Don’t put papers and other things
that bum into your ashtrays. If you
do, cigarettes or other smoking
materials could set themon fire,
causing damage.
Sung/asses Storage
Don’t hold a cigarette lighterin
with your hand while it is heating.
If you do, it won’t be able to back
away from the heating element
when it’s ready. That can make it
overheat, damaging the lighter and
the heating element.
I With the overhead console, you have a
storage door for sunglasses. Press the
rear edge of the storage door to release
it. Place your sunglasses inside the door.
To close the door, raise it and press it
into position.
Accessory Outlet
On models with the overhead console,
there is a 12-volt outlet. Slide the cover
aside to access the outlet.
Adding some electrical equipment
to your vehicle candamage it or
keep other things from working as
they should. This wouldn’t be
covered by your warranty. Check
with your dealer before adding
electrical equipment, and never use
anything requiring more than 20
amps.
93
I
Features & Controls
H2379
r
The Instrument &ne/bur Information System
Your instrument panel is designed tolet
you know at a glancehow your vehicle
is running. You’ll know how fast you’re
going, how much fuel you’re using, and
many other things you’ll need to drive
safely and economically.
The main componentsof your
instrument panel are:
1. Light Controls/Twilight Sentinel
(Option)
2. Side Vent
3. Turn SignaUHeadlight Beam Lever
4. Electronic Compass (Option)
5. Instrument Cluster
6. Ignition Switch
7. Driver Information Center (Option)
8. Trip Odometer Reset
9. Gage Cluster
10. Climate Controls/Rear Window
Defogger
11. Lighter
i2. Temperature Sensor
13. Glove Box
14. Side Vents
1 5.Center Vent
16. Audio System
17. Gear Shift Lever
18. Ashtray
19. Console Switch Bank (Option)
20. Gain Control (Option)
21. Hazard Warning Flashers Switch
22. Horn
23. Steering Wheel AudioControls
(Option)
24. Head-Up Display Control (Option)
25. Parking Brake Release
26. Hood Release
27. Tilt Wheel Lever
95
m m m
Features & Controls
Instrument Panel Clusters
Your Pontiac is equipped with one of these instrument panel clusters, which
includes indicator warning lights and gages thatare explained on the following
pages. Be sure to read about thosethat apply to the instrument panel cluster for
your vehicle.
H2303
...
96
H 2312
Features & Controls
Speedometer and Odometer
Tamper Resistant Odometer
Trip Odometer
Your speedometer lets you see your
speed in both miles per hour (mph) and
kilometers per hour (km/h). The
odometer shows how far your vehicle
has been driven, in either miles (used in
the U.S.) or kilometers (used in
Canada).
The odometer and trip odometer are
displayed in the Driver Information
Center on vehicles so equipped.
Your Pontiac has a tamper resistant
odometer. If you see silver lines
between the numbers, you’ll know that
someone has probably tried to turn it
back, so the numbers may not be true.
You may wonder what happensif your
vehicle needs a new odometer installed.
If the new one can be set tothe mileage
total of the old odometer, then it must
be. But if it can’t, then it’s set at zero
and a label must be put onthe driver’s
door to show the old mileage reading
when the new odometer was installed.
The trip odometer can tellyou how far
you have driven sinceyou last reset it.
To set it to zero:
On vehicles with the Driver
Information Center, press the button
labeled TRIP.
On vehicles with the Systems Monitor,
the button is next to the trip odometer.
Push and release in a smooth,
continuous motion until all zeroes
appear.
Tachometer (OFTION)
The tachometer shows your engine
speed in revolutions per minute(rpm).
Do not run your engine at speeds inthe
red area.
c
Warning Lights, Gages
and Indicators
Gages can indicate when there may be
or is a problem with oneof your vehicle’s
This section describes the warning lights functions. Often gagesand warning
and gages thatmay be on your vehicle.
lights work togetherto let you know
The pictures will help you locate them.
when there’sa problem with your vehicle.
Warning lights and gages cansignal that When one of the warning lights comes
something is wrong before it becomes
on and stays an when you are driving,
serious enough to cause an expensive
or whtm one of the gages shows there
repair or replacement. Paying attention
may be a problem, check the seetion
to your warning lights and gages could that tells you what to do about it. Please
also save you or others from injury.
follow the manual’s advice. Waiting to
Warning lights go on whenthere may be do repairs can be costly-and even
or is a problem with one of your
dangerous. So please get to know your
vehicle’s functions. As you will see in
warning lights and gages. They’re a big
the details on the next few pages, some help.
warning lights come on briefly when
Your vehicle may also have a Driver
you turn the ignition key just to let you
Information Center that works along with
know they’re working. If you are
the warning lights and gages.See the
familiar with this section, you should
Index under Driver Information Center.
not be alarmed when this happens.
9s
m . .
Features & Controls
Warning Lights
Your Pontiac has some of the warning
light systems shown here. The symbols
are explained on the following pages.
...
100
Engine Coolant Temperature
Warning Light
Low Coolant Warning light
This light tells you that your engine
coolant has overheated or your radiator
cooling fans are not working. If you
have been operating your vehicle under
normal driving conditions, you should
pull off the road, stop your vehicle and
turn the engine off as soon as possible.
HOT COOLANT CAN BURN YOU
BADLY! In Problems on the Road, this
manual shows what to do. Seethe Index
under Engine Overheating.
Some clusters with gages do not have a
coolant temperature warning light. In
those clusters a CHECK GAGES
warning light willalert you of a
potential coolant heating problem.
If this light comes on, your system may
be low on coolant and the engine may
overheat. Check to see if the level is
low, and add coolant if necessary. See
the Index under Engine Coolant.
The LOW COOLANT warning light
will also come on when you turn on the
ignition, but your engineis not running,
as a check to show you it is working. If
it doesn’t come on then, have it fixed
right away.
(OPT/ON)
101
Features & Controls
Oil Warning Light
If you have a problem with youroil, this
light may stay on after you start your
engine, or come on when you are
driving. This indicates that oil is not
going through your engine quickly
enough to keep it cool. The engine
could be low on oil, or could have some
other oil problem. Have it fixed right
away.
The oil light could also come on in two
other situations:
When the ignition is on but the engine
is not running, the light will comeon
as a test to show you it is working, but
the light willgo out when you turn the
ignition to Start. If it doesn't come on
with the ignition on, you may have a
problem with the fuse or bulb. Have it
fixed right away.
If you make a hard stop,the light may
come on for a moment. This is
normal.
Clusters with gages usethe CHECK
GAGES warning light toalert you of a
potential oil pressure problem.
4 i U I JUN
Don't keep driving if the oil
pressure is low. If you do,
your engine can become so hot that
it catches fire. You or others could
be burned. Check your oil as soon
as possible and have your vehicle
serviced.
[
Damage to your engine from,: . ..
.
',
neglectedoilproblemscanbe
.,'
costly and is not coveredby your
.I'
,l
,
,
Check Oii Levei Warning Light
fO#-rn#)
This light indicates when the engine
oil
level is 1 to 1%quarts (0.95 L to 1.4 L)
low. It will goon for one to three
seconds when the ignition is turned to
the Run position, as a bulb check. It
will then go off. Even if you havea law
oil level, it willgo off for 15 to 20
seconds. Then, if the oil levelis low,
and it has been at least eight minutes
since your engine was last running,
the
CHECK OIL LEVEL light will come
on for20 to 40 seconds. The eightminute delay allows the majority of the
oil to drain back into
the oil pan and
prevent a false low condition.
Battery Warning,Lighf
This light will come on briefly when
If the CHECK OIL LEVEL warning
you start the vehicle, as a check to show
comes on, the oil level should be
checked at the oil dipstick. If the level is you it is working, then it should go out.
low, the engine oil should be brought up If it stays on, OF comes on while you are
driving, you may have a problem with
to the proper level (see the Index under
the electrical charging system. It could
Engine Oil). After restoring the proper
indicate that you have a loose generator
level and waiting for the eight-minute
drive belt, or another electrical
drainback, the key can be turned to the
problem. Have it checked right away.
Run position and the CHECK OIL
Driving while this lightis on could
LEVEL warning light shouldonly
drain your battery.
come on as a bulb check.
If you must drive a short distance with
the light on, be certain to turn off all
103
Features & Controls
Battery Warning Light(CONI:)
your accessories, such as.the radio and
climate control system.
Some clusters with gagesdo not have a
battery warning light. They have a
CHECK GAGES warning to indicate a
problem. Vehicles with the supercharged
engine also have a similar battery
warning light.
a m .
Malfunction IndicatorLamp
(Service Engine Soon Light)
A computer monitors operation of your
fuel, ignition and emission controls
systems. This light should come on
when the ignition is on but the engine is
not running, as a check to showyou it is
working. If it does not come on at all,
have it fixed right away. If it stays on, or
it comes on while you are driving, the
computer is indicating that you have a
problem. You should take your vehicle
in for service soon.
104
b
c
Low Washer Fluid Warning Light Brake System Warning Light
(OPTION)
Your Pontiac’s hydraulic brake system is
divided into twoparts. If one part isn’t
working, the other part can still work
and stop you. For good braking, though,
you need both parts working well. If the
warning light goes on, there could be a
brake problem. Have your brake system
inspected right away.
This light should come on as you start
the vehicle. If it doesn’t come on then,
have it fixed so it will be ready to warn
you if there’s a problem.
This light will come on when your
windshield washers are working and the
fluid container is less than one-third
full.
Driving without washerfluid
- :anbe dangerous. A bad mud
splash can block your vision. You
could collide with another vehicle.
Check your washer fluid often, and
add only the proper fluid. See the
I d e x under Windshiel$ Washer
Fluid.
I
I
This light will also come on when you
set your parking brake, and the light
will stay on if your parking brake
doesn’t release fully. If you try to drive
off with the parking brake set, a chime
will also come on until you release the
parking brake. If the light and chime
stay on after your parking brake is fully
released, it means you have a brake
problem. If the light and chime come on
while driving, pull off the road and stop
carefully. You may notice that the pedal
is harder to push. Or, the pedal may go
closer to the floor. It may take longer to
stop. If the light is still on, have the
vehicle towed for service. (See the Index
under Towing Your Pontiac.)
105
J
Controls
Features
Brake System Warning Light
(CONT.)
Your brake system may not be
working properly if the brake
warning light is on. Driving with
the brake warning lighton can lead
to an accident. If the light is still
on after you’ve pulled off the road
and stopped carefully, have the
vehicle towed for service.
m m .
106
c
Y
Anti-lock Brake System
Warning light
brake system warning light is alsoon,
see the Index under Brake System
With anti-lock, this light will go on
when you start your engine andmay stay Warning Light.
on for several seconds or so. That’s
The anti-lock brake system warning
normal. If the light doesn’t comeon,
light may also come on when youare
have it fixed so it will be ready to warn
driving with a compact spare tire.
If this
you if there is a problem.
happens, the light meansyou won’t have
anti-lock until you replace the compact
If the light stays on or comes on when
If the warning
you’re driving, stop as soon as possible spare with a full-size tire.
and turn the key off. Then start the engine light stays on after you replace the
to reset the system. If the light still stays compact spare with a full-size tire, or
on, or if it comes on again while you’re comes on again while you are driving,
your Pontiac needs service.
driving, your Pontiac needs service.
Unless the regular brake system warning
light is also on, you will still have brakes,
but not anti-lock brakes. If the regular
L
Traction Control System Warning
Light (OPTION)
The TRACTION OFF warning light
means that the system is not working.
This warning light may come on for the
following reasons:
If your transaxle overheats, the
traction control system automatically
shuts off until the transaxle cools.The
warning light will come on and stay
on during that time.
If your brakes overheat, the traction
control system will go off and the
warning light will come on until your
brakes cool down. The warning light
will come on for varying periods of
time.
If you turn the system off by pressing
the switch on the center console while
the vehicle is stopped, the warning
light will come on and stay on. To
turn the system back on, bring the
vehicle to a stop and press the switch
again. The warning light should go
off. The system will also turn itself on
if you turn your ignition off and back
on again.
If the TRACTION OFF warning
light comes on and stays on for an
extended period of time, even when
you've switched the system on, your
vehicle needs service.
If you let your tires spin at
high sped when the
TRACTION OFF warning light is
on, they can explode and you or
othm could be injured. And,
spinning your tires with the
TRACTION OFF'warning light
on can cause the transaxle to
overheat or can cause other
problems. That could cause an
engine fire or other damage. When
you're stuck, spin the wheels as
little as possible. Don't spin the
wheels above 35 mph (56 h / h ) as
shown on the speedometer.
e
Features & Controls
Traction Control System Warning rn Gages
Light (CONT.)
Your Pontiac may have many of the
following gages. Be sure to read about
the ones that came with your vehicle.
. . I
.
I
108
d
Check Gage5 Warning Light
(OPTION)
This light willcome on briefly when
you are starting the engine.If the light
comes on and stays on while you are
driving, check your gages
for fuel,
coolant temperature, oil pressure or
voltage. This light will stay on if your
engine is not running.
Fuel Gage
You will either have this fuel gage or
one very similar. Your fuel gage tells
you about how much fuel you have left,
when the ignition is on. When the gage
reads in the yellow band, a warning
chime will sound and theCHECK
GAGES warning light will go on, if you
have it.
Here are five things that some owners
ask about. None of these show a
problem with your fuel gage:
At the gas station, the gas pump shuts
off before the gage readsF (Full).
It takes a little more or less fuel to fill
up than the gage indicated. For
example, the gage may have indicated
the tank was half full, but it actually
took a little more or less than half the
tank's capacity to fill the tank.
The gage moves a little when youturn
a corner or speed up.
The gage doesn't go back toE (Empty)
when you turn off the ignition.
If you have the large span (220") gage,
the needle moves more for a given
amount of fuel. This does not indicate
excessive fuel consumption, and is
normal.
For your fuel tank capacity, see Sewice
Station Informution on the last page of
this manual.
Engine Coolant Temperature
Gage (OPTION)
A coolant temperature gage shows the
engine coolant temperature.
If the gage pointer moves into the red
warning area, your engine is too hot!
The CHECK GAGES light will go on
and a warning chime will sound, if you
have this option. It means that your
engine coolant has overheated. Ifyou
have been operating your vehicle under
normal driving conditions, you should
pull off the road, stop your vehicle and
turn off the engine as soon as possible.
HOT COOLANT CAN BURN YOU
BADLY! In Problems on the Road, this
manual shows what to do. Seethe Index
under Engine Overheating.
10s
Oil Pressure Gage (OPTION)
The oil pressure gage shows the engine
oil pressure in psi (pounds per square
inch) when the engine is running.
Canadian vehicles indicatepressure in
kPa. Oil pressure may vary with engine
speed, outside temperature and oil
viscosity, but readings above the red
warning zone indicatethe normal
operating range.
A reading in the red zone may be caused
by a dangerously low oil level or other
problem causing low oil pressure. The
CHECK GAGES light will go on and a
warning chime will sound, if you have
this option.
Driving your vehicle with low oil
pressure can cause extensive engine
damage.
I . .
I10
Voltmeter
1 Unless
you have the supercharged
(OPTION)
Don’t keep driving if the oil
pressure is low. If you do,
your engine can become so hot that
it catches fire. You or others could
be burned. Check your oil as soon
as possible and have your vehicle
rviced.
I
Damage to your engine from
neglected oil problems can be
costly and is not covered by your
warranty.
I
engine, you may have a voltmeter.
When the engine is running, the gage
shows the condition of the charging
system. Readings outside the red
warning zone indicate the normal
operating range.
Readings in the red warning zone
indicate a possible problem in the
electrical system. The CHECK GAGES
light will also come on, and a warning ,
chime will sound. Have your vehicle
serviced immediately.
When your engine is not running, but
the ignition is on (in theRun position),
the gage shows your battery’s stateof
charge in DC volts.
Boost Gage (OPTION)
rn Driver
Vehicles equipped with the supercharged
engine have this boost gage that
indicates vacuum during light to
moderate throttle and boost under
heavier throttle. The gage displays the
air pressure level in psi going into the
engine’s combustion chamber.
The gage is automatically centered at
zero psi every time the engine is started.
Actual vacuum or boost is displayed
from this zero point. Changes in
ambient pressure, such as drivingin
mountains and changing weather, will
slightly changethe zero reading.
If you have the Driver Information
Center, it gives you important safety and
maintenance facts. When you turn the
ignition on, the entire Center lightsup
for a few seconds. Then it goes to work.
FUNCTION MONITOR: This lets you
know if you are low on fluids or have a
problem with a vehicle function:
CHECK OIL LEVEL: This message
could mean your oil level is low. If it
comes on for more than three seconds,
see the Index under Check Oil Level
Warning Light.
I
ZnformationCenter
WASHER FLUID: This message
means your washer fluid tank is less
than 30% full. The windshield portion
of the vehicle outline will also glow. If
these come on, see the Index under
Windshield WasherFluid.
LOW COOLANT This message
means your coolant level has fallento
about half full. If it comes on, see the
Index under Engine Coolant.
CHECK GAGES: If this light comes
on and stays on whileyou are driving,
check your gages for fuel, coolant
temperature, oil pressure or battery
voltage.
111
Features & Controls
Diver Information Center
(Cont.)
LAMP MONITOR: Whenever you try
to useone of the following lights,
LAMP MONITOR will tell you if a
bulb is out.
Head Lamp (Low and High beam)
Turn Signal
Park Lamp
Brake Lamp
Back-up Lamp
Tail Lamp
If a bulb is out, you will see a message,
such as PARK LAMP, and you will
also see where the problem ison the
vehicle outline. The message stays on
until the problem is fixed. See the Index
under Replacement Bulbs for bulb details.
m m m
112
If a burned-out bulb is replaced, the
warning light willstay on until the bulb
is used (for example,by turning on your
lights).
If you pull a trailer, the extra trailer
lamp bulbs will not allow the lamp
monitor to properly detecta burned-out
bulb. When the trailer lights are
disconnected, the lamp monitor will
again monitorthe bulbs.
SECURITY You’ll get a DOOR AJAR
message if a door isnot fully closed.
The vehicle outline will showyou which
door it is. You will alsoget a HOOD
AJAR or TRUNK AJAR message if
the hood or the trunk isn’t fully closed.
The vehicle outline will alsoshow you
these are ajar.
Electronic Compass
I
(OPTION) Calibrating the Compass
The compass should be calibrated
On some vehicles, an electronic
according to the proper Zone Setting:
compass comes on when you start the
engine. As with all compasses, it senses
At least once a year.
magnetic north to determine direction.
Any time it displays the word
But magnetic north is not located at the
CALIBRATE.
same place as true north, so a zone
Any time it seems to showincorrect
value is used to improve accuracy.
directions.
Setting Up Your Compass Consists of
Two Steps:
1. Calibrating the compass to magnetic
north.
2. Setting the zoneso the compass
points to true north.
Calibrating to Magnetic North:
1. Drive to an open area such as a large,
empty parking lot. Be sure the area is
not only freeof other vehicles but
also away from power lines or large
metal objects.
2. Push and hold MODE for more than
six seconds. After three seconds,
CALIBRATE and the heading
display will go off. ZONE and the
zone number will be displayed.
After six seconds, CALIBRATE will
flash and the heading display will
rotate. ZONE and the zone number
will go blank.
Release theMODE button.
113
.
'
Features & Controls
Calibrating the Compass(CONT.)
Setting the Zone
3. Drive slowly in a circle at about
5 mph (8 km/h). Try to keep your
Setting the zone corrects for differences
between magnetic and true north.
You can set the zone in two ways: By
selecting the zoneyou are located in or
by pointing your vehicle north and
telling the compass the directionof
north. Perform only oneof the two
methods (A or B) each time you change
zones. The last zone selection is
remembered.
If CALIBRATE continues to flash after
about seven circles, your compass isnot
calibrated. You could be too close to a
vehicle level.
power
line or large metal object, or
4. When CALIBRATE stops flashing,
something magnetic in your vehicle (like
your compass is calibrated to
a CB antenna) could keepthe compass
magnetic north.
from calibrating.
If CALIBRATE stops flashing before
If you are uncertain about where you are
1%circles, the calibration may not be
accurate. However, if you are certain the in the calibration sequence, or want to
start over, simply push and release the
calibration is accurate after the zone is
MODE
or SET button, or turn the
set, then recalibration is not needed.
Otherwise, repeat the calibration. If this ignition off and restart the engine.
condition continues, move the vehicle to
a new area and recalibrate.
... 114
A. By Geographic Location:
1. With the engine running, press and
hold MODE for more than three
seconds. After three seconds,
CALIBRATE and the heading
display will go blank.ZONE and the
zone number will be displayed.
Release the MODE button.
2. Check,thechart to see which zone
you are in.
3. Press or hold SET until the display
shows the numberof your zone.
4. Press MODE again to enter your
zone in the compass.
B. By Pointing Vehicle North:
1 Point your vehicle totrue north.
2. Press and hold MODE until ZONE
appears on the display.
3. Press or hold SET until ZONE 00 is
displayed.
4. Press MODE. The display will show
a northern heading and the direction
bars will flash.
5. Press MODE again. The display will
show the current zone setting for two
seconds, then keep that setting unless
you change it.
6. When your engine is running, your
comoass should displaytrue north.
.
You can change your zone any time you
move to another zone without
calibrating to magnetic north. However,
if you are uncertain of accuracy, repeat
the entire sequenceby starting with step 1.
Temporary Disturbances:
Your compass may sometimes display a
different heading for a momentas you
pass under bridges, power linesor large
metal objects, or when you are driving
on steep hills. This is normal.
115
Features & Controls
pH2119
Head-Up Display (omorq
If you have the optional Head-Up
Display (HUD), you can see the
speedometer reading in English or
metric units displayed “through” the
windshield.
The HUD also shows:
Turn signal indicator lights.
A high beam indicator symbol.
A CHECK GAGES message. (For
low oil pressure, high coolant
temperature, low oil level and low
fuel.)
A low fuel warning symbol.
The HUD shows these lights when they
are lit on the instrument panel.
... 116
When you sit straight in yourseat, the
HUD image will appear slightly to the
right in front of the driver.
When the ignition is turned to Run, all
possible HUD images will come on as
shown above. Then the Head-Up
Display will operate normally.
If you never look at your
1 4 b instrument panel, you may not
see something important, such as a
warning light. So be sure to scan
your displays andcontrols and the
driving environment just as you
would in a vehicle without HUD.
NOTEE
Although the HUD image appears
to be near the front
of the vehicle,
do not use it as a parkingaid. The
HUD was not designed for that
purpose. If you try to use it that
way, such as in a parkinglot, you
may misjudge distance and run into
something.
To Adjust the HUD so You Can See it
Properly:
The HUD controls are located to the left
of the steering column.
1, Start your engine and slide the DIM
(dimmer) control all the way up.
The brightness of the HUD image is
determined by whether the headlight
switch is on or off, and where you have
set the HUD dimmer control.
2. Adjust the seat, if necessary, before
setting the heightcontrol.
control all the way up, raising the
image as far as possible. Then slide
the HUD image height control
downward so the image is as low as
possible but in full view.
3. Slide the dimmer control down until
the HUD image is no brighter than
necessary. To turn the HUD off, slide
the dimmer control all the way down.
If the sun comes out, or it becomes
cloudy, or if you turn on your
headlights, you may need to adjust the
HUD’s brightness using the HUD
dimmer control. Polarizing sunglasses
could make the HUD image harder to
see.
I\bright, or too high in your
field of view, it may take you more
time to see things you need to see
when it’s dark outside. Be sure to
keep the HUD image dim and
placed low in your field of view.
Pushing theENGIMET (English/Metric)
button will switch the HUD
speedometer indicator from English
(conventional) to metric units, or back
again.
117
I . .
Care of the Head-Up Display
Clean the inside of the windshield as
If You Can’t See the HUD Image
needed to remove any dirt or film that
When the Ignitionis On:
reduces the sharpness or clarity of the
Is anything covering the HUD unit?
HUD image.
Is the HUD dimmer control far
To Clean theHUD:
enough up?
Spray household glass cleaner on a soft,
Is the HUD image adjustedto the
clean cloth. Wipe the HUD lens gently,
proper height?
then dry it. Do not spray cleaner
Still no HUD image? Check the fuse
directly on the lens, because the cleaner
Idex under
in
the fuse panel. See the n
fluid could leak inside the unit if you do.
Fuses & Circuit Breakers.
Ifthe HUD Image is Not Clear:
It could be too bright. Slide the HUD
dimmer control further downward.
You may need to clean the windshield
and HUD lens.
Your windshield is part of the HUD
system. If you ever have to have a new
windshield, be sure to get one designed
for HUD. If you don’t, the HUD image
may look blurred and out of focus.
Part
3
Comfort Controls &
Audio Systems
I n this part you’ll
find out how to
Climate
operate the comfort
control systems
Climate
Clock
the
and audio
systems offered
with your
Pontiac. Be sure toRadio
read aboutthe
particular system supplied with your
vehicle.
Mast
Mast
Antenna
n
Standard
Control. . . . . . . . . . . . . . . . . . . . . . . . . . . . . . . . . . . . . . .l20
Electronic
Control . . . . . . . . . . . . . . . . . . . . . . . . . . . . . . . . . . . . . . . . . 123
Setting
. . . . . . . . . . . . . . .E7
.................................
. . . . . . . . . . . . . . . . . . . . . . . . . . . . . . . . . . . . . . . . . . . . .128
AM/FM Stereo
AMlFM Stereo with Cassette Player . . . . . . . . . . . . . . . . . . . . . . . . . . . . . . . . . .I29
AM/FM Stereo with Cassette Player andGraphic Equalizer . . . . . . . . . . . . . . . . 131
AM/FM Stereo with Compact Disc Player . . . . . . . . . . . . . . . . . . . . . . . . . . . . .134
Steering Wheel Controls for Audio System . . . . . . . . . . . . . . . . . . . . . . . . . . . . .139
Gaincontrol . . . . . . . . . . . . . . . . . . . . . . . . . . . . . . . . . . . . . . . . . . . . . . . . . . . . 140
Understanding Radio Reception . . . . . . . . . . . . . . . . . . . . . . . . . . . . . . . . . . . . . .140
Care of Your Cassette Tape Player . . . . . . . . . . . . . . . . . . . . . . . . . . . . . . . . . . .
.141
Care of Your Compact Discs . . . . . . . . . . . . . . . . . . . . . . . . . . . . . . . . . . . . . . . .141
Fixed
Antenna. . . . . . . . . . . . . . . . . . . . . . . . . . . . . . . . . . . . . . . . . . . . . ..I42
Power
Care . . . . . . . . . . . . . . . . . . . . . . . . . . . . . . . . . . . . . . . . .I42
119
=
=
Comfort Controls & Audio Systems
~
~~
I9
(Bi-Level): Useon cool, but
sunny days. This setting brings in the
Air Conditioning Settings
Standard
outside air, but directs it in two ways.
There are three air conditioning settings. The cool air is directed to the upper
The air conditioner and heater work
On very hot days, open the windows
portion of your body through the
best if you keep your windows closed
long enough to let hot inside air escape. instrument panel outlets, but warmed air
while using them.
This reduces the time your air
is directed through the heater ducts and
: Selects the force of air you want. conditioner's compressor will have to
defroster vents.At times this
The fan is always running unless the
run, which should help fuel economy.
temperature difference may be more
mode control is moved to OFF.
apparent than others.
MAX: Provides maximum cooling or
Temperature Control: The center
quick cool-down on very hot days. This The air conditioner compressor operates
control regulates the temperatureof the
setting recirculates muchof the air
in all air conditioner positions, and in
air coming through the system.
inside your vehicle, and it should not be (@ (Defrost) and
(Defog) when
used for long periods because the air
Mode Control: The right control has
the outside temperatureis above 50°F
settings for air conditioning and non-air may become too cold and dry.
(IOOC). When the air conditioner is on,
conditioning modes.
A/C: Use for normal cooling on hot
you may sometimes notice slight
days. This setting cools outsideair and
changes in your vehicle's engine speed
directs it through the instrument panel
and power. This is normal, because the
outlets.
system is designed to cycle the
compressor on and off to keep the
desired cooling and help fuel economy.
Climate Control
e
,>
I
120
c
1
~
I
Non-Air Conditioning Settings
2
(Vent): This setting brings in the
outside air and directs it to the upper
portion of your body through the
instrument panel outlets.
A
! (Heat): This setting directs
warmed air through the heater ducts.
The air conditioner compressor doesn’t
run in the non-air conditioning settings.
This reduces engine load, resulting in
improved fuel economy. If no non-air
conditioning setting maintainsthe
comfort of the air inside your vehicle, or
it causes your windows to fogup, move
the right selector toMAX or A/C, or
to (@ (Defrost).
Defrosting
The
setting
(Defrost) directs most
air through the defroster vents, and
some through the heater ducts. Use this
for when you have fogor ice on the
windshield. When it’s 50°F (10°C) or
warmer outside, you’ll get cooled air.
U
Defogging Windows with
Standard Climate Control
Move the temperature control to -maximum heat.
To quickly defog the windshield, set the
right selector to (@ and turn the fan
control to HIGH.
~2
Use
(Defog) for normal defogging
of the windshield.
121
s m m
*
Comfort Controls & Audio Systems
Defogging Windows with
Standard Climate Control(CONT:)
Rear Window Defogger(OPTION)
The rear window defogger uses a
warming grid to remove fog from the
To defog the side windows, move the
mode control to
and the fan control rear window. Press the @ button and
to HIGH. Aim the side vents toward the release it. A light will glow in the
side windows. For increased air flow to switch while the defogger is working.
The defogger will return to off
the side vents, close the center vents.
automatically after about 10 minutes of
use. If you turn it on again, the defogger
will operate for about five minutes only.
You can also turn the defogger offby
turning off the ignition or pressing the
button again.
Do not attach a temporary vehicle
license across the defogger grid on the
rear window.
,g
. m a
rl
122
t
A
~
Don't use a razor blade or
something else sharpon the inside
of the rear window. If you do, you
could cut or damage the warming
grid, and the repairs wouldn't be
covered by your warranty.
.
,
...
-.
AUTO: To allow the systemto
automatically control the temperature,
air distribution and fan speed:
Electronic Climate Control
1. Set the temperatureyou want with the
(OPTION)
the compressor on and off to keep the
TEMP switch.
desired cooling andhelp fuel economy.
With this system, you can control the
2. Press the AUTO switch.
ventilation, heating and air conditioning TEMP: Sets the interior temperature
EXT. TEMP: Press to have the outside
in your vehicle, or you can use the auto- you want. The temperature you set will
temperature displayedon the digital
matic setting.
be displayed on the digital screen.
screen (unless the system is off). Press
The digital screen displays the outside
Once you set the temperature, the system again to return to the inside temperature
temperature, the inside temperature
will try to maintain the set temperasetting. When the system is off, the
setting, the fan speed, and the heating
ture, whether or not you are using the
outside temperature willbe displayed.
mode you have selected.
heating or cooling controls. But if you
Use the following controls when AUTO
The air conditioner compressor operates set the temperature for 60°F (16°C) or
is not desired.
90" F (32"C), the fan will stay on HI
in all AUTO setting positions,and in
speed unless you select a different
(@ when the outside temperature is speed.
: Sets the fan speed. Press the top
of the switch to raise the fan speed, the
above 49°F (9°C).When the air
bottom of the switch to lower the fan
conditioner is on, you may sometimes
speed.
notice slight changes in your vehicle's
engine speed and power. This is normal,
because the system is designed to cycle
%
123 ' '
Comfort Controls & Audio Systems
Electronic Climate Control
(Defrost): Press this to remove
Do not attach a temporary vehicle
fog
or
ice
from
the
windshield.
It
will
license
across thedefogger grid on the
O F / ” C: Press this to read
the temperature
rear window.
start at the high fan speed, but you can
in degrees Fahrenheit or Celsius.
select another speed if you want. It’s a
OFF: Shuts the system off. The outside good idea to remove any iceor snow
temperature will be displayed.Air will
from the hood and from the air inlet
still flow through your vehicle if it is
Don’t use a razor blade or something
between the hood and windshield.
moving. Also, the system will try to
else sharp on the inside of the rear
@ (Rear Window Defogger): Press window. If you do, you could cut
maintain the temperature you set, but
to warm the defogger grid on the rear
may not be able to if it’s very warmor
or damage the warminggrid, and
window. On some models, the outside
cold outside.
the repairs wouldn’t be covered by
rearview mirrors are also warmed. The
your warranty.
ECON: Use in cold or cool weather.
rear
window
defogger
will
turn
off
This saves fuel because the air
conditioner compressor doesn’t run. But automatically after about 10 minutes of
use. If you turn it on again, the defogger
this setting doesn’t remove humidity
will operate for about five minutes only.
from the air.
You can also turn the defoggeroff by
turning off the ignition or pressing the
switch again.
(Cont.)
1 . 1
124
Extended Idling with Electronic
Ciimate Control
When the engine idles fora long time,
the outside temperature sensormay
cause the system to blow air that is too
cool. This should stop once the vehicle
is moving again. Extended idling is not
recommended. See the Index under
Engine Exhaust.
Rear Venfs
Flow-Through Ventilation System
Slide the center control up to direct air
Upward. Slide it down to direct air
downward. The center position will
direct air both UP and dOwn.
Your Pontiac's flow-through ventilation
system supplies outside air into the
vehicle when it is moving. Outside air
will also enter the vehicle when the
heater or the air conditioning fan is
running.
125
Comfort Controls & Audio
rn Audio Systems
The following pages describe the audio
systems available for your Pontiac, and
how to get the best performance from
them. Please read about the systemin
your vehicle.
Flow-Through Ventilation System
(CONT)
Ventilation Tips
Keep the hood and front air inlet free
of ice, snow, or any other obstruction
(such as leaves). The heater and
defroster will work far better, reducing
the chance of fogging the inside of
your windows.
When you enter a vehicle with
Standard Climate Control in cold
weather, select a heater function that
blows air through the floor ducts.
Then turn the blower fan toHI for a
few moments before driving off. This
will blow moist air from the intake
. . I
126
ducts toward the floor, not the
windshield. It reduces the chance of
fogging the inside of your windows.If
you have the Electronic Climate
Control, the AUTO setting does this
for you.
Keep the air path under the front seats
clear of objects. This helps air to
circulate throughout your vehicle.
Hearing damage from loud
noise is almost undetectable
until it is too late. Your hearing can
adapt to higher volumesof sound.
Sound that seems normal can be
loud and harmful to your hearing.
Take precautions by adjusting the
volume control on your radio to a
safe sound level before your
hearing adapts to it.
To help avoid hearing loss or
damage:
1. Adjust the volume control tothe
lowest setting.
2. Increase volume slowly until
youhe:
:omfortablyand
clearly.
I
Before you add any sound
equipment to your vehicle-like a
tape player, CB radio, mobile
telephone or two-way radio-be
sure you can add what you want. If
you can, it’s very important to do it
properly. Added sound equipment
may interfere with the operationof
your vehicle’s engine, Delco@ radio
or other systems, and can even
damage them. And, your vehicle’s
systems may interfere with the
operation of sound equipment that
has been added improperly.
So, before adding sound
equipment, check with your dealer
and be sure to check federal rules
covering mobile radio and
telephone units.
Setting the Clock
For Radios with 4SEEKb :
1. With the radio off, press SET. The
SET indicator will appear on the
digital screen for five seconds.
2. Within that five seconds, press ani
hold SEEK, until the correct
minute appears on the display.
3. Before another five seconds pass,
press and hold 4SEEK until the
correct hour appears.
For Radios with V S E E U :
1. With the radio on or off, press SET.
The SET indicator will appear on the
digital display for five seconds.
2. Within that five seconds, press and
hold SEEuntil the correct
minute appears on the display.
3. Before another five seconds pass,
press and hold WEEK until the
correct hour appears.
127
...
Comfort Controls & Audio Systems
A#.FM Stereo Radio
BAL (Balance): The control ring
The digital display indicates information behind the upper knob adjusts the
lefthight speaker balance.
on time or radio station frequency, the
AM or FM radio band, whether the stationLower Knob (TUNE): This knob does
is in stereo, and other radio functions.
two things:
Upper Knob (PWRoVOL): This knob
Rotate it to tune in radio stations.
does three things:
Press it to change between the AM or
Rotate it to turn the system on and off
FM band.
(PWR).
FADE: The control ring behind the
Rotate it to control the volume.
lower knob adjusts thefronthear
speaker balance.
Press it to recall the station frequency
when the radio is on.
7 SEEK A:Press to seek and stop on
the next station higher or lower on the
radio band.
m . .
128
TREB (Treble):Slide this lever up to
increase treble,or down to decrease it.
If a station isweak or noisy, reduce the
treble.
BASS: Slide this leverup to increase
bass, or down to decrease it.
To Preset Radio Stations:
1. Tune in the desired station.
2. Press SET. The word SET will appear
on the digital screen for five seconds.
3. While SET is displayed, press oneof
the four pushbuttons.
The station is now preset. You can
tune to it immediately by pressing the
same numbered pushbutton.
4. Repeat steps 1-3 for each of four AM
and four FM stations.
Up to three additional stations on each
band may be preset by “pairing”
pushbuttons:
1 .Tune in the desired station.
2. Press SET, and within five seconds
press any two adjacent pushbuttons at
the same time.
3. The station can be tuned in when the
same two pushbuttons are pressed at
the same time.
V SEEK A:Press to seek and stop on
AM/FM Stereo with Cassette
Player
When a tape is playing, press it to
hear the other side of the tape.
The digital display indicates information
on time or radio station frequency, the
BAL (Balance): The control ring
AM or FM radio band, whether the stationbehind the upper knob adjusts the
lefthight speaker balance.
is in stereo, and other radio functions.
Upper Knob (PWRoVOL): This knob Lower Knob (TUNE): This knob does
two things:
does four things:
Rotate it to turn the system on and off Rotate it to tune in radio stations.
(PWR)*
Press it to change between the AM or
Rotate it to control the volume.
FM band.
Press it to recall the station frequency FADE: The control ring behind the
when the radio is on.
lower knob adjusts the fronthear
speaker balance.
the next station higher or lower on the
radio band.
TREB (Treble): Slide this lever up to
increase treble, or down to decrease it.
If a station is weak or noisy, reduce the
treble.
BASS: Slide this lever up to increase
bass, or down to decrease it.
To Preset Radio Stations:
1. Tune in the desired station.
2. Press SET. The word SET will
appear on the digital screen for five
seconds.
3.While SET is displayed, press one of
the four pushbuttons.
The station is now preset. You can
tune to it immediately by pressing the
same numbered pushbutton.
4. Repeat steps 1-3 for each of four AM
and four FM stations.
129
...
Comfort Controls & Audio Systems
AMIFM Stereo with Cassette
Player (CONX:)
To Play a Cassette Tape:
FAST FORWARD: Depress the button
Up to three additional stations on each
With the power switch on, insert a tape with the arrow pointingin the same
direction that the tape is playing.
To stop
band may be preset by “pairing”
into the cassette door.Do not use tapes
fast
forward,
press
the
STOP-EJECT
pushbuttons:
that are longer than 45 minutes on each
button.
side.
1. Tune in the desired station.
REWRSE: Depress the button with the
When the rightindicator arrow is lit,
2. Press SET, and within five seconds
arrow pointing in the opposite direction
press any two adjacent pushbuttonsat selections listed on the bottom side of
that
the tape is playing.To stop reverse,
the cassette are playing. When the left
the same time.
press the STOP-EJECT button.
3. The station can be tuned in whenthe arrow is lit, selections listed on the top
STOP-EJECT To stop playing a tape,
same two pushbuttons are pressed at side of the cassette are playing. To
change sides of the tape, press the upper fully press this button (the cassette will
the same time.
be partially ejected, and the radio will
control knob whilethe cassette is
begin playing).
playing. When the end of a tape is
reached, the other side will then play.
1
,
AM/FM Stereo with Cassette
Player and Graphic Equalizer
Upper Knob (VOL): This knob does
The digital display indicates information two things:
on time or radio station frequency, the
Rotate it slightly tothe left or right to
AM or FM radio band, whether the stationcontrol the volume.
is in stereo, and other radio functions.
Press it to mute the radio or tape
PWR (Power):Turns the unit onand
player. Press again to listen.
off when the ignitionis on.
BAL (Balance): The control ring
behind the upper knob adjusts the
lefthight speaker balance. The digital
display shows the balance selected.
Lower Knob (TUNE): This knob does
two things:
Rotate it slightly to the left or right to
tune in radio stations.If you hold it to
the left or right, it will tune rapidly.
You can also rotate it one stop at a
time to fine-tune a specific frequency.
Press to change between the AM,
FM1 or FM2 bands. (FM1 allows you
to preset five stations, FM2 allows you
to preset another five stations.)
Your radio has an AMAX-certified
receiver. It can produce quality AM
stereo sound and receive C-Quam@
stereo broadcasts. AMAX reduces noise
without reducing the highfrequencies
you need for the best sound. You don’t
have to do anything to your Delco/GM
radio because AMAX is automatic.
131
Comfort Controls & Audio Systems
AM/FM Stereo with Cassette
Player and Graphic Equalizer
EQUALIZER: Boost the bass,
To Preset Radio Stations:
emphasize a voice in a song, brighten
The five pushbuttons under the digital
the treble-your equalizer gives you
FADE: The control ring behind the
displaycanbeusedtopreset UP to 15 I
freedom to adjust five separate
lower knob adjusts the fronthear
radio stations (five A M , five FMl and
frequencies
of sound to your individual five FM2). The buttons have other uses
speaker balance. The digital display
taste. Move a lever up to emphasize a
shows the degree of fade selected,
when you are playing a tape (seeTape
frequency,
move
it
down
to
de-emphasize.
Player).
4SEEKb: Press to seek and stop on
It’s best to begin with the levers in the
1. Tune the digital display to the station
the next station higheror lower on the
middle
position,
then
adjust
each
lever
you want.
radio band.
as you like.
2. Press SET. The SET indicator will
RCL: Press to alternate the display
appear on the digital screen for five
between the time and station frequency.
seconds.
3.While the SET indicator is displayed,
press oneof the five pushbuttons.
4. Repeat steps 1-3 for each of five AM,
five FM1 and five FM2 stations.
(CONI)
m . .
132
~
To Play a Cassette Tape:
Press PWR to turn the radioon. The
radio will play until a cassette is pushed
into the cassette entry door (the tape
side goes in first). Do not use tapes that
are longer than90 minutes (45 minutes
on each side).
This audio system has automatic 00
Dolby@B Noise Reduction to
reduce background noise on Dolby@
encoded tapes. Dolby@B Noise
Reduction is manufactured under license
from Dolby Laboratories Licensing
Corporation. Dolby@ andthe
00 symbol are trademarks of Dolby
Laboratories Licensing Corporation.
PROG (Program): Press to change the
side of tape being played. When the end
Df a tape is reached, the other side will
then play.
CrOa:This button sets tape bias. When
playing high bias chrome or metal tapes,
press the button to turn the Cr02 display
on. When playing standard tapes, press
again to turn the display off.
REV (Reverse): Press to reverse the
tape rapidly; press again toplay the
tape. (The radio plays while a tape is
rewinding.)
FWD (Fast Forward): Press to advance
the tape rapidly; press again toplay.
(The radio plays while the tape is
advancing.)
PREV (Previous): Press PREV to
repeat a passage.The tape will back up
and stop at the first four-second quiet
spot in the tape, or when you press
PREV or PROG again.
NEXT Press to go to the next selection
on the tape. The tape will stop at the
first four-second quiet spot in thetape,
or if you press NEXT or PROG again.
ST-PL (Stop-Play): Press to switch
from the tape to the radio. Press again to
resume playing the tape.
EJECT Press to eject the cassette tape
(the radio will then play).
Comfort Controls & Audio Systems
Your radio has an AMAX-certified
receiver. It can produce qualityAM
stereo sound and receive C-Quam@
stereo broadcasts. AMAX reduces noise
without reducing the high frequencies
you need for the best sound.You don’t
have to do anything to your Delco/GM
radio because AMAX is automatic.
FADE: The control ring behind the
lower knob adjusts the fronthear
speaker balance. The digital display
shows the degree of fade selected.
BAL (Balance): The control ring
AM/FM Stereo with Compact
behind the upper knob adjusts the
4SEEKF : Press to seek and stop on
Disc Player
lefthight
speaker
balance.
The
digital
the
next station higher or lower on the
The digital display indicates information
display shows the balance selected.
radio band.
on time or radio station frequency,the
Lower Knob (TUNE): This knob does RCL: Press to alternate the display
AM or FM radio band, whether the station
two
things:
between the time and station frequency.
is in stereo, and other radio functions.
Rotate it slightly to the left or right to
EQUALIZER: Boost the bass, emPWR (Power): Turns the unit on and
tune
in
radio
stations.
If
you
hold
it
to
phasize a voice in a song, brighten the
off when the ignition ison.
the left or right, it will tune rapidly.
treble-your equalizer gives you
Upper Knob (VOL): This knob does
You can also rotate it one stop at a
freedom to adjust five separate
two things:
time to fine-tune a specific frequency. frequencies of sound to your individual
Rotate it slightly tothe left or right to
taste. Move a lever up to emphasize a
Press to change between the AM,
control the volume.
FMl or FM2 bands. (FM1 allows you frequency, move it down to de-emphasize.
Press it to mute the radio or tape
to preset five stations, FM2 allows you It’s best to begin with the levers in the
player. Press again to listen.
middle position, then adjust each lever
to preset another five stations.)
as you like.
134
Compact Disc Controls
The five pushbuttons at the lower right
can be used to preset up to15 radio
stations (five AM, five FM1 and five
FM2). The buttons have other uses
when you are playing a compact disc
(see Compact Disc Controls).
To Preset Radio Stations:
1. Tune the digital display to the station
you want.
2. Press SET. The SET indicator will
appear on the digital screen for five
seconds.
3. While the SET indicator is displayed,
press one of the five pushbuttons.
4. Repeat steps 1-3 for each of five AM,
five FM1 and five FM2 stations.
Many of the controls for the radio also
have functions for the compact disc
player, as explained here.
To Play a Compact Disc:
Don’t use mini-discs that are called
singles. They won’t eject. Use only fullsize compact discs.
1 Press PWR to turn the radio on.
2. Insert a disc part-way into the slot,
with the label side up. The player
will pull it in. In a few seconds, the
disc should play.
.
If the disc comes back out and/or Err
appears on the display:
The disc may be upside down.
The disc may be dirty, scratched or
wet.
There may be too much moisture in
the air (wait about one hour and try
again).
The player may be too hot, or the road
may be too rough forthe disc to play.
As soon as things get back tonormal,
the disc should play.
135
c
I . .
Comfort Controls & Audio Systems
Compact Disc Controk (CONI)
While a disc is playing, the CD indicator is displayed on the digital screen,
as is the clock.
RCL (Recall): Press once to see which
track is playing. Press again while the
track number is displayed to see how
long your selection has been playing.
The track number also will be displayed
when the volumeis changed or a new
track starts to play.
COMP (Compression): Depressing this
button makes soft and loud passages
more equal in volume. Press again
to
resume normal play.
RDM (Random): Press to play tracks in
random order.
4
REV (Reverse): Press and hold to
rapidly back up to a favorite passage.
Release to resume playing.
FWD (Fast Forward): Press and hold
to rapidly advance the disc. Release to
resume playing.
PREV (Previous): Press to play a track
again. If you keep pressing the PREV
button, the disc will keep backing upto
previous tracks.
NEXT Press when you want to hear the
next track. If you keep pressing the
NEXT button, the disc will keep
advancing to other tracks.
When Finished with the Compact
Disc Player:
If you press PWR or turn off the
ignition, the disc willstay in the player
and start again when you turn on the
ignition or power switch. The disc will
begin playing atthe point where it had
been stopped.
ST/PL (Stop/Play): Press to stop the
disc player; the radio willplay. Press
again to play the disc (the player will
start playing the disc whereit was
stopped earlier).
EJECT Press to eject the disc; the
radio will play. After eject, ifyou turn
the ignition off with the disc part-way
out, the player will pull the disc back in
after about 30 seconds. When the player
is turned on, it will begin play on the
first track.
CD Player Anti-Theft Feature
Delco LOC 11is a security feature for
the compact disc player. It can be used
or ignored. If ignored, the system plays
normally. If it is used, your playerwon’t
be usable if it is ever stolen, because it
will go to LOC mode any time battery
power is removed. Until an unlock code
is entered, it will notturn on.
The instructions below tellyou how to
enter a secret code into the system.If
your vehicle loses battery power for any
reason, you must unlock the system with
the secret code before the radio will
turn
on.
1. Write down any six-digit number and
keep it in a safe place.
2. Turn the ignition to theAccessory or
Run position.
7. Rotate the TUNE knob right or left
to make the second and third
radio off.
numbers agree with your code.
4. Press the 1 and 4 buttons together.
8. Press the lower (BAND) knob and
Hold them down until “- - -” shows
000 will appear again. Now you are
on the display. You are ready to enter
ready to enter the last three digits of
your secret code.
your code.
NOTE: If you allow more than 15
seconds to elapse between any steps, the 9. Repeat steps 6 and 7 for the last
three digits of your code.
radio automatically revertsto time and
you must start the
procedure over at step
4. IO. Press the lower (BAND) knob and
REP will appear for five seconds
5. Press SET and 000 will appear on the
and then 000 will appear.
display.
6. Press the SEEK, button to make the 11. Repeat steps 6 through 10. This time
SEC will appear, indicating that the
first number of your code appear.
radio is secure.
3.Press the PWR button to turn the
Comfort Controls & Audio Systems
CD Player Anti-Theftkature
(WNX)
To Unlock the System Aftera Power
Loss:
When battery power is reapplied toa
secured radio, the radio won't turn on
and LOC will appear on the display.
Enter your secret code as follows; pause
no more than l5 seconds between steps.
1. Turn the ignition on. (Radio off.)
2. Press the SET button. The display
will show 000.
3. Enter the six digits of the code
following steps 6-9 above. The
display will show the numbers as
entered.
4. Press the lower (BAND) knob and
SEC appears, then the time,
indicating that the disabling sequence
was successful.
I . .
Disabling the Anti-Theft System:
4. Press the lower (BAND) knob. The
radio will display000.
1. Press the1 and 4 buttons together for
five seconds with ignition on and
5. Enter the second three digitsof the
radio power off. The display will
code. The display will show the
numbers as entered.
show SECURED, indicating the unit
is in the secure mode.
6. Press the lower (BAND) knob. If the
display shows "- - -," the disabling
2. Press the SET button. The display
will show 000.
sequence was successful (the
numbers matched the user-selected
3. Enter thefirst three digits of the code
code or the factory back-up code)
following steps 6-7 earlier in this
and the unit is in theUNSECURED
section. The display will show the
mode.
If the display showsSEC, the
numbers as entered.
disabling sequencewas unsuccessful
and the numbers did not matcheither
of the codes and the unit will remain
in the SECURED mode.
138
c
t
L
Steering WheelControls for
Audio System
SEEK: Each time you press an up or
Some audio functions can be operated down arrow on SEEK, you will tune in
the next station up or down the AM or
with these controls:
FM radio band.
AM/FM: Press to select either theAM
or FMl and FM2 radio bands. The band When listening to a cassette tape or
compact disc, you can change to the
you select will be displayed on the
previous or next selection by pressing
digital screen. The frequencyof the
the
SEEK up or down arrow.
station will be displayed, andif the
station is in stereo, the stereo indicator
RCL (Recall): When the radio is on,
will also be displayed.
press to change between the clock and
the radio station frequency displayed on
the digital screen.
PRE-SET Press this to hear the radio
stations that are set on your system.
VOL (Volume): Press A to increase
volume. Press 7 to lower the volume.
PWR: Turns the unit on and off when
the ignition is on.
I
139
t
Comfort Controls & Audio Systems
Gain Control
Understanding Radio Reception
Some models have this control below
the audio system.
To get more bass sound, move the
GAIN control to adjust the amountof
bass.
F M Stereo
AM Stereo
FM stereo will give you the best sound,
but FM signals will reach only about
10 to 40 miles (16 to 65 km). Tall
buildings or hills can interfere with FM
signals, causing the soundto come and
go.
Your Delco@ systemmay be able to
receive C-Quam@ stereo broadcasts.
Many AM stations around the country
use C-Quam@ to produce stereo, though
some do not. C-Quam@ isa registered
trademark of Motorola, Inc. If your
Delco@ system can get C-Quam@
signals, your stereo indicator light will
come on whenyou are receiving it.
AM
The range for most AM stations is
greater than for FM, especially at night.
The longer range, however, can cause
stations to interfere with each other. AM
can also pick up noise from things like
storms and power lines. To lower this
noise, try reducing the treble level.
' 140
I
Care of Your Cassette
Tape Player
A tape player that is not cleaned
regularly can cause reduced sound
quality, ruined cassettes, or a damaged
mechanism. Cassette tapes shouldbe
stored in their cases away from
contaminants, direct sunlight, and
extreme heat. If they aren’t, theymay
not operate properly or cause failure of
the tape player.
Your tape player should be cleaned
regularly each month or after every 15
hours of use. If you notice a reduction in
sound quality, try a known good cassette
to see if the tape or the tape player is at
fault. If this other cassette has no
improvement in sound quality, cleanthe
tape player.
U
Care of Your Compact Discs
Clean your tape player with a wipingaction, non-abrasive cleaning cassette,
and follow the directions provided
with it.
Cassettes are subject to wear and the
sound quality may degrade over time.
Always make sure that the cassette tape
is in good condition before you have
your tape player serviced.
Handle discs carefully. Store them in
their original cases or other protective
cases and away from direct sunlight and
dust. If the surface of a disc is soiled,
dampen a clean, soft cloth in a mild,
neutral detergent solution andclean it,
wiping from the center to the edge.
Be sure never to touchthe signal surface
when handling discs. Pick up discs by
grasping the outer edges or the edge of
the hole andthe outer edge.
141
I . .
Comfort Controls & Audio Systems
. . I
Fixed Mast Antenna
Power Antenna Mast Care
The fixed mast antenna can withstand
most car washes without being
damaged. If the mast should ever
become slightly bent, you can straighten
it out by hand. If the mast is badly bent,
as it might be by vandals, you should
replace it.
Check every once in a while to be sure
the mast is still tightened to the fender.
Your power antenna will look its best
Don’t lubricate the power antenna.
and work well if it’s cleaned from time
Lubrication
could
damage
it.
to time.
To Clean the Antenna Mast:
1. Turn on the ignition and radioto
raise the antenna tofull mast
extension.
2. Dampen a clean cloth with mineral
spirits or equivalent solvent.
3. Wipe the cloth over the mast sections,
removing any dirt.
4. Wipe dry with a clean cloth before
retracting.
5. Make the antennago up and down by
turning the radioor ignition on and off.
6. Then repeat if necessary.
142
1
Before entering an automatic car
wash, turn off your radio to make
the power antenna go down. This
will prevent the mast from possibly
getting damaged. If the antenna
does not go down whenyou turn
the radio off, itmay be damaged or
need to be cleaned. In either case,
lower the antenna by hand by
carefully pressing the antenna
down.
If the mast portion of your antenna is
damaged, you can easily replace it. See
your dealer for a replacement lut, and
follow the instructions in thekit.
143 ' '
Notes
Your Driving and the Road
H e r e you'll find information about
driving on different kinds of roads
and in varying weather conditions.
We've also included many other
useful tips on driving .
Road Signs . . . . . . . . . . . . . . . . . . . . . . . . . . . . . . . . . . . . . . . . . . . . . . . . . . . . . .
Defensive Driving . . . . . . . . . . . . . . . . . . . . . . . . . . . . . . . . . . . . . . . . . . . . . . . .
Drunken Driving . . . . . . . . . . . . . . . . . . . . . . . . . . . . . . . . . . . . . . . . . . . . . . . . .
Control of a Vehicle
Braking . . . . . . . . . . . . . . . . . . . . . . . . . . . . . . . . . . . . . . . . . . . . . . . . . . . . .
. . . . . . . . . . . . . . . . . . . . . . . . . . . . . . . . . . . .Brakes
...........
Anti-Lock
.
.
.
.
.
.
.
.
.
.
.
.
.
.
.
.
.
.
.
.
.
.
.
.
.
.
.
.
.
.
.
.
.
.
.
.
.
.
.
.
...........
Steering Tips
Steering in Emergencies . . . . . . . . . . . . . . . . . . . . . . . . . . . . . . . . . . . . . . . . . .
Passing . . . . . . . . . . . . . . . . . . . . . . . . . . . . . . . . . . . . . . . . . . . . . . . . . . . . . . .
DrivingatNight . . . . . . . . . . . . . . . . . . . . . . . . . . . . . . . . . . . . . . . . . . . . . . . . . .
Driving in the Rain . . . . . . . . . . . . . . . . . . . . . . . . . . . . . . . . . . . . . . . . . . . . . . .
Driving in Fog, Mist and Haze . . . . . . . . . . . . . . . . . . . . . . . . . . . . . . . . . . . . . .
CityDriving . . . . . . . . . . . . . . . . . . . . . . . . . . . . . . . . . . . . . . . . . . . . . . . . . . . . .
Freeway Driving . . . . . . . . . . . . . . . . . . . . . . . . . . . . . . . . . . . . . . . . . . . . . . . . . .
Driving a Long Distance . . . . . . . . . . . . . . . . . . . . . . . . . . . . . . . . . . . . . . . . . . .
HillandMountainRoads . . . . . . . . . . . . . . . . . . . . . . . . . . . . . . . . . . . . . . . . . . .
ParkingonHills . . . . . . . . . . . . . . . . . . . . . . . . . . . . . . . . . . . . . . . . . . . . . . . . . .
Winter Driving . . . . . . . . . . . . . . . . . . . . . . . . . . . . . . . . . . . . . . . . . . . . . . . . . . .
TowingaTrailer . . . . . . . . . . . . . . . . . . . . . . . . . . . . . . . . . . . . . . . . . . . . . . . . . .
146
150
151
154
155
160
161
163
165
168
170
171
172
174
176
177
179
183
Your Driving and the Road
STOP1
1
STOP
DO NOT
ENTER
WRONG
WAY
RR ADVANCE
NARROW
PASSING
NO
CROSSING
ZONE
BRIDGE
Color of Road Signs
Road Signs
The road signs you see everywhere are
coded by color, shape and symbols. It's
a good idea to know these codes so that
you can quickly grasp the basic meaning
or intent of the sign even beforeyou
have a chance to readit.
Yellow indicates a general warning.
Slow down and be careful whenyou see
Red means Stop. It may also indicate
a yellow sign. It may signal a railroad
that some movement is not allowed.
Examples are Do Not Enter and Wrong crossing ahead, a no-passing zone, or
some other potentially dangerous
Way.
situation. Likewise, ayellow solid line
painted on the road meansDon't Cross.
INFORMATION
HOSPITAL
... 146
heen is used to guide the driver. Green Blue signs with white letters show
igns may indicate upcoming freeway
motorists' services.
:xits or show the direction you should
urn to reach a particular place.
STOPII
LOW
HEAD
SHOULDER
WORKERS
FLAGGER
Orange indicatesroadconstruction or
rnaincnance. You’ll want to slow down
when you see an orange sign, as part of
the road may be closed off or torn up.
And there may be workers and
maintenance vehicles around, too.
Shape Of Road S@S
The shape of the sign will tell you
something, too.
An octagonal (eight-sided) sign means
Stop. It is always red with white letters.
A diamond-shaped sign is a warning of
something ahead-for example, a curve,
steep hill, soft shoulder, or a narrow
bridge.
SWIMMING
CANOEING
Brown signs point out recreation areas
or points of historicor cultural interest.
A triangle, pointed downward, indicates
Yield. It assigns the rightof way to
traffic on certain approaches to an
intersection.
A triangular sign also is used on twolane roads to indicate aNo Passing
Zone. This sign will beon the left side
of the roadway.
147
Your Uriving and the Road
KEEP
RIGHT
LEFT OR
THROUGH
RIGHT TURN
ONLY
Shape of Road Signs(CONI:)
Symbols on Road Signs
Rectangular (square or oblong) signs
show speed limits, parking regulations,
give directions, and such information as
distances to cities.
Traffic Lights
There are many international road signs
in use today.
We’re all familiarwith traffic lightsor
stop lights. Often green arrowsare being
used in the lights for improved traffic
control. On some multilane roads, green
arrows light up, indicating that trafficin
one or more lanes can move or make a
turn. Green arrows don’t mean “go no
matter what.” You’ll still need to
proceed with caution, yielding the right
of way to pedestriansand sometimes to
other vehicles.
Some traffic lights also usered arrows
to signify thatyou must stop before
turning on red.
I
NO U
TURN
NO
PARKING
NO
BICYCLES
The basic message of many of these
signs is in picturesor graphic symbols.
A picture within acircle with a diagonal
line across it shows what not to do.
m . .
148
bur Own Signals
Drivers signal to others, too. It’s not
only more polite, it’s safer to let other
drivers know what you are doing. And
in some places the iaw requires driver
signals.
REVERSIBLE LANE ON MULTllANE ROADWAY
NO PASSING ZONE
“urn and Lane Change Signals:
Always signal whenyou plan to turn or
Pavement Markings
change lanes.
Pavement markings addto traffic signs
Many city roads and expressways, and
If necessary, you can use hand signals
even bridges, use reversible-lane traffic and signals. They give information to
out the window: Left arm straight out
control during rush hours. A red X light drivers without taking attentionfrom the for a left turn, down for slow or aboutroadway. A solid yellowline on your
above a lane meansno driving in that
to-stop, and up for a right turn.
lane at that time. A green arrow means side of the road or lane means Don’t
Slowing Down: If time allows, tap the
you may drive in that lane.Look for the Cross.
brake pedal once or twice in advanceof
signs posted to warn drivers what hours
slowing or stopping. This warns the
and days these systems are in effect.
driver behind you.
Disabled: Your four-way flashers signal
that your vehicle is disabled or isa
hazard. See the Index under Hazard
Warning Flashers.
Tm#k Officer
The traffic police officer is also a source
of important information. The officer’s
signals govern, no matterwhat the
traffic lights or other signs say.
The next section discussessome of the
road conditions you may encounter.
149
Your Driving and the Road
Defensive Driving
Expect other drivers to run stop signs
The best advice anyonecan give about
when you are on a through street. Be
driving is: Drive defensively.
Please start with a very important safety ready to brake if necessary as you go
device in your Pontiac: Buckle up. (See through intersections. You may not have
to use the brake, but ifyou do, you will
the Index under Safev Belts.)
be ready.
Defensive driving really means “be
If you’re driving through a shopping
ready for anything.” On city streets,
center parking lot wherethere are wellrural roads, or freeways, it means
marked lanes, directional arrows, and
“always expect the unexpected.”
designated parking areas, expect some
Assume that pedestriansor other drivers drivers to ignore all thesemarkings and
are going to be careless and make
dash straight toward one part of the lot.
mistakes. Anticipate what they might
Pedestrians can be careless. Watch for
do. Be ready for their mistakes.
them. In general, you must give way to
Expect children to dash out from behind pedestrians even if you know you have
parked cars, often followed by other
the right of way.
children. Expect occupants in parked
cars to open doors into traffic. Watch for Rear-end collisions are about the most
preventable of accidents. Yet they are
movement in parked cars-someone
common. Allow enough following
may be about to open a door.
distance. It’s the best defensive driving
maneuver, in both city and rural
driving. You never know when the
vehicle in frontof you is going to brake
or turn suddenly.
Here’s a final bitof information about
defensive driving. The most dangerous
time for driving in the U.S. is very early
on Sunday morning. In fact, GM
Research studies show that the most and
the least dangerous times for driving,
every week, fall on the sameday. That
day is Sunday. The most dangerous time
is Sunday from 3a.m. to 4 a.m. The
safest time is Sunday from 10 a.m. to
11 a.m. Driving the same distance on a
Sunday at 3 a.m. isn’t just a little more
dangerous than it is at10 a.m. It’s about
134 times more dangerous!
That leads to thenext section.
Drunken Driving
Death and injury associated with
drinking and driving is a national
tragedy. It’s the number one contributor
to the highwizy death toll, claiming
thousands of victims every year.
Alcohol takes awaythree things that
anyone needs to drive a vehicle:
Judgment
Muscular Coordination
Vision
Police records show that half
of all
motor vehicle-related deaths involve
alcohol-a driver, a passenger or
someone else, suchas a pedestrian, had
been drinking. In most cases, these
deaths are the result of someone who
was drinking and driving. Over 25,000
motor vehicle-related deaths occur each
year becauseo€alcohol, and thousands
of people areinjured.
Just how much alcohol is too much if a
person plans to drive? Ideally,no one
should drink alcohol and thendrive. But
if one does, then what’s ‘900 much”? It
can be a lot less than many might think.
Although it depends an each person and
situation, here is some general
information on the problem.
The Blood Alcohol Content(BAC) of
someone who is drinking depends upon
four things:
How much alcohol is in the drink.
The drinker’s body weight.
The amount of food that is consumed
before and during drinking.
The length of time it has takenthe
drinker to consume the alcohol.
According tothe American Medical
Association, a 18.O-pound (82 kg) person
who drinks three 12-ounce (355 ml)
bottles of beer in an hour will end up
with a BAC of about 0.06 percent. The
person would reach the same BAC by
drinking thee 4-ounce (120ml) glasses
of wine or three mixed drinks if each
had 1% ounces (45 rnl) of a liquor like
whiskey, gin or vodka.
It’s the amount of alcohol that counts.
For example, ifthe same person drank
three double martinis (3 ounces or
90 ml of liquor each) within an hour,
the person’s BAC would be close to
0.12percent. A person who consumes
food just before or during drinking will
have a slightly lower BAC level.
151
Your Driving and the Road
Drunken Driving(CONK)
The law in most U.S. states sets the
legal limit at aBAC of 0.10 percent. In
Canada the limitis 0.08 percent, and in
some other countries it’s lower than
that. The BAC will be over 0.10 percent
after three to six drinks (in one hour).
I
Of course, as we’ve seen, it depends on
how much alcohol is in the drinks, and
how quickly the person drinks them.
But it’s very important to keepin mind
that the abilityto drive is affected well
below a BAC of 0.10 percent. Research
shows that thedriving skills of many
people are impaired at aBAC
approaching 0.05 percent, and that the
effects are worse at night. All drivers
are impaired atBAC levels above 0.05
percent. Statistics show that the chance
of being in an accident increases sharply
for driverswho have a BAC of 0.05
percent or above. A driver with a BAC
level of 0.06 percent (three beersin one
hour for a 180-pound or 82 kg person)
has doubled his or her chance
of having
an accident. At a BAC level of 0.10
percent, the chanceof that driver having
an accident is six times greater; ata
level of 0.15 percent, the chances are
twenty-five times greater! And, the
body takes about an hour to rid itselfof
the alcohol in one drink. No amount of
coffee or number of cold showers will
speed that up.
I
V
4
Control of a Vehicle
the chance of a crash itself is higher for
“I’ll be careful” isn’t the right answer.
What if there’s an emergency, a need to drinking drivers.
take sudden action,as when a child
darts into the street?A person with a
higher BAC might not be able to react
Drinking and then driving is
quickly enough to avoidthe collision.
very dangerous. Your reflexes,
There’s something else about drinking
perceptions, and judgment will be
and driving that many people don’t
affected by even a small amount of
know. Medical research shows that
alcohol. You could have a
alcohol in a person’s system can make
serious-or even fatal-accident
if
crash injuries worse. That’s especially
you drive after drinking. Please
true for brain, spinal cord and heart
don’t drink and drive or ride with a
injuries. That means that if anyone who driver who has been drinking.
has been drinking-driver or
Ride home in acab; or if you’re
passenger-is in a crash, the chance of
with a group, designate a driver
being killed or permanently disabled is
who will not drink.
higher than if that person had not been
drinking. And we’ve already seen that
’
You have three systems that make your
vehicle go where you want it to go.
They are the brakes, the steering and the
accelerator. All three systems have to do
their work atthe places where the tires
meet the road.
Sometimes, as when you’re driving on
snow or ice, it’s easy to ask more of
those control systems thanthe tires and
road can provide. That means you can
lose control of your vehicle.
3
Your Driving and the Road
Braking
.
~
Braking action involves perception time
and reaction time.
First, you have to decide to push on the
brake pedal. That’s perception time.
Then you have to bring up your foot and
do it. That’s reaction time.
Average reaction time is about %
of ia
second. But that’s only an average. It
might be less withone driver and as
long as two or three seconds or more
with another. Age, physicalcondition,
alertness, coordination, and eyesight all
play a part. So do alcohol, drugs and
frustration. But even in % of a second, a
vehicle moving at 60 mph (100 km/h)
travels 66 feet (20 m). That could be a
lot of distance in an emergency, so
keeping enough space between your
vehicle and others is important.
8
C
8
I
And, of course, actual stopping
distances vary greatly with the surface
of the road (whether it’s pavementor
gravel); the condition of the road (wet,
dry, icy); tire tread; and the condition of
your brakes.
Most drivers treat their brakes with
care. Some, however, overwork the
braking system withpoor driving habits.
Avoid needless heavy braking. Some
people drive in spurts-heavy
acceleration followed by heavy
braking-rather than keeping pace
with traffic. This is a mistake. Your
brakes may not have time to cool
between hard stops. Your brakes will
wear out much fasterif you do-alot of
heavy braking.
V
c
_,. , <.,
,,I
,
1:
,
Don’t “ride” the brakes by letting your
left foot rest lightlyon the brake pedal
while driving.
154
b
-<
L
’
I
If you keep pace withthe traffic and
allow realistic followingdistances, you
Anti-Lock Brakes
will eliminate a lotof unnecessary
“Riding” your brakes can
braking. That means better braking and Your Pontiac has an advancedelectronic
cause them to overheat to the
braking system that willhelp prevent
longer brake life.
point that they won’t work well.
You might not be able to stop your
If your engine ever stops while you’re skidding.
vehicle in time to avoid an
driving, brake normally but don’t
accident. If you “ride” your
pump your brakes. If you do, the pedal
brakes, they will get so hot they
may get harder to push down. If your
will require a lot of pedal force to
engine stops, you will still have some
sIow you down. Avoid “riding” the
power brake assist. But you will use it
brakes.
when you brake. Once the power
assist is used up, it may take longer to
stop and the brake pedal will be
harder to push.
NOTICE
I
1
“Riding” the brakes wearsthem
out much faster. You would need
costly brake replacement much
sooner than normal, and it also
reduces fuel economy.
!
Your Driving andthe Road
4nti-Lock Brakes (CONT.)
rhis light on the instrument panel will
;o on when you start your vehicle. See
he Index under Anti-Lock Bruke System
iVarning Light.
m m m
156
-Iere's how anti-lock works. Let's say
he road is wet. You're driving safely.
Suddenly an animal jumps out in front
>f you.
Y'ou slam on the brakes. Here's what
lappens with ABS.
4 computer senses that wheels are
;lowing down. The computer separately
works the brakes at each front wheel
md at the rear wheels.
The anti-lock system can changethe
)rake pressure faster than any driver
:ould. The computer is programmed to
nake the most of available tire and road
:onditions.
'ou can steer around theobstacle while
raking hard. As you brake, your
omputer keeps receiving updates on
{heel speed and controls braking
ressure accordingly.
1
*,nti-lockdoesn'tchangethe
---me you need to get your foot
up to the brake pedal. If you get
too closeto the vehicle in front of
you, you won't have time to apply
your brakes if that vehicle suddenly
slows or stops. Always leave enough
room up ahead tostop, even though
you have anti-lock brakes.
A
I
-
Tiction Control (omm)
To Use Anti-Lock: Don't pump the
brakes. Just hold the brake pedal down
and let anti-lock work for you.
When you start your vehicle and begin
to drive away, you may hear a
momentary motor or clicking noise and
you may even notice that your brake
pedal moves a little while thisis going
on. This is theABS system testing itself.
You also may hear this during a hard
stop.
Your vehicle may have a traction control
system that limits wheel spin. This is
especially useful inslippery road
conditions. The tractidn control system
works at low speeds only, such as when
you accelerate from a stop. It applies
brake pressure to an individual wheel
that the system senses is about to spin.
You may feel the system working, or you
may notice some noise, but. this is
normal.
A TRACTION OFF warning light in
the instrument cluster lets you know if
your traction control system is not
working. See the Index under Traction
Control System Warning Light.
To turn the system off, press the
TRACTION CONTROL switch on the
center console while the vehicle is
stopped. The TRACTION OFF
warning light will comeon and stay on.
To turn the system back on, bring the
vehicle to a stop and press theswitch
again. The warning light should go off.
The system will also turn itself on if you
turn your ignition off and back on again.
157
Your Driving andthe Road
Disc Brake Wear Indicators
Your Pontiac has front disc brakes and
rear drum brakes. Disc brake pads have
built-in wear indicators that make a
high-pitched warning sound whenthe
brake pads are worn and new pads are
needed. The sound may come and go or
be heard all the time your vehicle is
moving (except when you are pushing
on thebrake pedal firmly).
I
bAUI I U I V
Continuing to drive with worn-out
brake pads could result in costly
brake repair.
Some driving conditions or climates
may cause a brake squeal when the
brakes are first applied or lightly
applied. This does not mean something
is wrong with your brakes.
I
Rear Drum Brakes
Brake Adjustment
Braking In Emergencies
Your rear drum brakes don’t have wear
indicators, but if you ever hear a rear
brake rubbing noise, have the rear brake
linings inspected. Also, the rear brake
drums should be removed and inspected
each time the tiresare removed for
rotation or changing. Whenyou have the
front brakes replaced, have the rear
brakes inspected, too.
Brake linings should always be replaced
as complete axle sets.
Every time you make a moderatebrake
stop, your brakes adjust for wear. If
you
rarely make a moderateor heavier stop,
then your brakes might not adjust
correctly. If you drive in that way,
then-very carefully-make a few
moderate brake stops about every1,000
miles (1 600 km), so your brakes will
adjust properly.
Use your anti-lock braking systemwhen
you need to. With anti-lock, you can
steer and brake atthe same time. In
many emergencies, steering can help
you more than even the very best
braking.
Brake Pedal Travel
See your dealer ifthe brake pedal does
not return to normal height, or if there
is a rapid increase in pedal travel. This
could be a signof brake trouble.
159
...
Your Driving and the Road
Power Steering
Variable Effort Steering
If you lose power steering assist because If your vehicleis equipped with this
option, you have a variable effort
the engine stops or the system fails to
steering system thateases steering effort
function, you can steer but it will take
at
speeds less than 20 mph (32 W h ) .
much more effort.
This is particularly useful when parking
your vehicle.
m m m
160
Steering Tips-Driving on Curves
It’s important to take curves at a
reasonable speed.
A lot of the “driver lost control”
accidents mentioned on the news happen
on curves. Here’s why:
Experienced driver or beginner, each
of
us is subject tothe same laws of physics
when driving on curves. The tractionof
the tires againstthe road surface makes
it possible for the vehicle to change
its
path when you turn the front wheels.If
there’s no traction, inertia will keep the
vehicle going in the same direction. If
you’ve ever tried to steer a vehicle on
wet ice, you’ll understand this.
The traction you can get in a curve
depends on the condition of your tires
and the road surface, the angle at which
the curve is banked, and your speed.
While you’re in a curve, speed is the
one factoryou can control.
Suppose you’re steering through asharp
curve. Then you suddenly accelerate.
Those two control systems-steering
and acceleration-can overwhelm those
places where the tires meet the road and
make you lose control.
What should you do if this ever
happens? Let up on the brake or
accelerator pedal, steer the vehiclethe
way you want it to go, and slow down.
Speed limit signs near curves warn that
you should adjust your speed. Of
course, the posted speeds are based on
good weather and road conditions.
Under less favorableconditions you’ll
want to go slower.
If you need to reduce your speedas you
approach a curve,do it before you enter
the curve, while your front wheels are
straight ahead.
Try to adjust your speed so you can
“drive” through the curve. Maintain a
reasonable, steady speed. Wait to
accelerate untilyou are out of the curve,
and then accelerate gently intothe
straightaway.
When you drive into a curve at night,
it’s harder to see the road ahead of you
because it bendsaway from the straight
beams of your lights. This is one good
reason to drive slower.
Steering in Emergencies
There are times when steering can be
more effective than braking. For
example, you come over a hill and find a
truck stopped in your lane, or a car
suddenly pulls out fromnowhere, or a
child darts out from between parked
cars and stops right in front of you. You
can avoid these problems by braking-if
you can stop in time. But sometimes you
can’t; there isn’t room. That’s the time
for evasive action-steering around the
problem.
Your Pontiac can perform very well in
emergencies like these. First apply your
brakes. It is better to removeas much
speed as you can from a possible
collision. Then steer around the
problem, to the left or right depending
on the space available.
161
‘Your Driving andthe Road
Steering in Emergencies(CONI)
An emergency like this requires close
attention and aquick decision. If you
are holding the steering wheelat the
recommended 9 and 3 o’clock positions,
you can turn it a full 180 degrees very
quickly without removing either hand.
But you have to act fast, steer quickly,
and just as quickly straighten the wheel
once you have avoided the object. You
must then be preparedto steer back to
your original lane and then brake to a
controlled stop.
Depending on your speed, this can be
rather violent for an unprepared driver.
This is one of the reasons driving
experts recommend that you use your
safety belts and keep both handson the
steering wheel.
The fact that such emergency situations
are always possible is a good reason to
practice defensive driving at all times.
162
Off-Road Recovery
You may find sometime that your right
wheels have dropped off the edge of a
road onto the shoulder while you’re
driving.
If the level of the shoulder is only
slightly below the pavement, recovery
should be fairly easy. Ease off the
accelerator and then, if there is nothing
in the way, steer so that your vehicle
straddles the edge of the pavement. You
can turn the steering wheel up to 5/4 turn
until the right front tire contacts the
pavement edge. Then turn your steering
wheel to go straight down the roadway.
If the shoulder appears to be about four
inches (100 mm) or more below the
pavement, this differencecan cause
problems. If there is not enough room to
pull entirely onto the shoulder and stop,
then follow the same procedures. But if
the right front tire scrubs against the
side of the pavement,do not steer more
sharply. With too much steering angle,
the vehicle may jump back onto the road
with so much steering input thatit
crosses over into the oncoming traffic
before you can bring it back under
control. Instead, easeoff again on the
accelerator and steering input, straddle
the pavement once more, thentry again.
Passing
The driver of a vehicle about to pass
another on a two-lane highway waits for
just the right moment, accelerates,
moves around the vehicle ahead, then
goes back into the right lane again.A
simple maneuver?
Not necessarily! Passing another vehicle
on a two-lane highway is a potentially
dangerous move, since the passing
vehicle occupies the same lane as
oncoming traffic for several seconds. A
miscalculation, an error in judgment, or
a brief surrender to frustration or anger
can suddenly put the passing driver face
to face with the worst ofall traffic
accidents-the head-on collision.
So here are some tips for passing:
“Drive ahead.” Look down the road,
to the sides, and to crossroads for
situations that might affect your
passing patterns. If you have any doubt
whatsoever about making a successful.
pass, wait for a better time.
Watch for traffic signs, pavement
markings, and lines. If you can see a
sign up ahead that might indicate a
turn or an intersection, delay your
pass. A broken centerline usually
indicates it’s all right to pass
(providing the road ahead is clear).
Never cross a solid line on your side
of the lane or a double solid line, even
if the road seems empty
of approaching
traffic.
If you suspect that thedriver of the
vehicle you want to pass isn’t aware of
your presence, tap the horn a couple
of times before passing.
Do not get too close to the vehicle you
want to pass while you’re awaiting an
opportunity. For one thing, following
too closely reduces yourarea of
vision, especially if you’re following a
larger vehicle. Also, you won’t have
adequate space if the vehicle ahead
suddenly slows or stops. Keep back a
reasonable distance.
When it looks like achance to pass is
coming up, start to accelerate but stay
in the right lane and don’t get too
close. Time your move so you will be
increasing speed as the time comes to
move into the other lane. If the way is
clear to pass, you will have a “running
start’’ that more than makes upfor the
distance you would lose by dropping
back. And if something happens to
cause you to cancel yourpass, you
need only slow down and drop back
again and wait foranother opportunity.
If other cars are lined up to pass a
slow vehicle, wait yourturn. But take
care that someone isn’t trying to pqss
you as you pull out to pass the slow
vehicle. Remember to glance over
your shoulder and check the blind
spot.
Check your mirrors, glance over your
shoulder, and start your leftlane
change signal before movingout of the
163
L
Your Driving and the Road
Passing (CONX:)
right lane to pass. Whenyou are far
enough aheadof the passed vehicle to
see its front in yourinside mirror,
activate your rightlane change signal
and move back into the right lane.
(Remember that yourright outside
mirror is convex. The vehicle you just
passed may seem to befarther away
from you than it really is.)
Try not to pass morethan one vehicle
at a time on two-lane roads.
Reconsider before passingthe next
vehicle.
Don’t overtake a slowly moving
vehicle too rapidly. Even though the
brake lights are not flashing, it may be
slowing downor starting to turn.
If you’re being passed, make it easy
for the following driver to get ahead of
you. Perhaps you can ease alittle to
the right.
Loss of Control
Skidding
Let’s review what driving experts say
about what happens when thethree
control systems (brakes, steering and
acceleration) don’t have enough friction
where the tires meet the roadto do what
the driver has asked.
In any emergency, don’t give up. Keep
trying to steer and constantly seekan
escape route or area of less danger.
In a skid, a driver can lose controlof
the vehicle. Defensive driversavoid
most skids by taking reasonable care
suited to existing conditions, andby not
“overdriving” those conditions. But
skids are always possible.
The three typesof skids correspondto
your Pontiac’s three control systems. In
the braking skid your wheels aren’t
rolling. In the steering or cornering
skid, too much speed or steering in a
curve causes tires to slip and lose
cornering force. And in the acceleration
skid too much throttle causes the driving
wheels to spin.
A cornering skid and an acceleration
skid are best handledby easing your
foot off the accelerator pedal.If your
vehicle starts to slide (aswhen you turn
Driving at Night
a corner on a wet, snowor ice-covered
road), easeyour foot off the accelerator
pedal as soon as you feel the vehicle
start to slide. Quickly steer theway you
want the vehicle to go. If youstart
steering quickly enough, your vehicle
will straighten out. As it does, straighten
the front wheels.
Of course, traction is reduced when
water, snow, ice, gravel, or other
material is on the road. For safety, you’ll
want to slow down and adjust your
driving to these conditions. It is
important to slow down on slippery
surfaces because stopping distance will
be longer and vehicle control more
limited.
While driving on a surface with reduced
traction, try your best to avoid sudden
steering, acceleration, or braking
(including engine braking by shifting to
a lower gear). Any sudden changes
could cause the tires to slide. You may
not realize the surface is slippery until
your vehicle is skidding. Learn to
recognize warning clues-such as
enough water, ice or packed snow on
the road to make a “mirrored
surface”-and slow down when you
have any doubt.
Remember: Any anti-lock braking system
(ABS) helps avoid only the braking
slud. Steer the way you want to go.
Night driving is more dangerous than
day driving. One reason is that some
drivers are likely to be impaired-by
alcohol or drugs, with night vision
problems, or by fatigue.
Here are some tips on night driving.
Drive defensively. Remember, this is
the most dangerous time.
Don’t drink and drive. (See the Index
under Drunken Driving for more on
this problem.)
Adjust your inside rearview mirror to
reduce the glare from headlights
behind you.
165
Your Driving and the Road
Driving at Night (CONT.:)
Since you can’t see as well, you may
need to slow down and keep
more
space between you and other vehicles.
It’s hard to tell how fastthe vehicle
ahead is going just by looking at its
taillights.
Slow down, especially on higher
speed roads, Your headlights can light
up only so much road ahead.
In remote areas, watch for animals.
If you’re tired, pull off the road in a
safe place and rest.
m m m
166
Night Hsion
No one can see as well at night as in the
daytime. But as we get older these
differences increase. A 50-year-old
driver may require at least twice as
much light to see the same thing at night
as a 20-year-old.
What you do in the daytime canalso
affect your night vision.For example, if
you spend the day in bright sunshine you
are wise to wear sunglasses.Your eyes
will have less trouble adjusting to night.
But if you’re driving, don’t wear
sunglasses at night. They may cut down
on glare from headlights, but they also
make a lotof things invisible that should
remain visible-such as parked cars,
obstacles, pedestrians, or even trains
blocking railway crossings. You may
want to put on your sunglassesafter you
have pulled into a brightly-lighted
service or refreshment area. Eyes
shielded from that glaremay adjust
more quickly to darkness backon the
road. But be sure to remove your
sunglasses beforeyou leave the service
area.
You can be temporarily blindedby
approaching lights. It can take a second
or two, or even several seconds, for your
eyes to readjust to thedark. When you
are faced with severe glare (as from a
driver who doesn’t lower the high
beams, or a vehicle with misaimed
headlights), slow down a little.Avoid
staring directly into the approaching
lights. If there is a lineof opposing
traffic, make occasional glances over the
line of headlights to make certain that
one of the vehiclesisn’t starting to move
into your lane. Onceyou are past the
bright lights, give your eyes time to
readjust before resuming speed.
High Beams
A Few More Night Driving
Suggestions
If the vehicle approachingyou has its
high beams on, signal by flicking yours Keep your windshield and allthe glass
to high and then back to low beam. This on your vehicle clean-inside and out.
is the usual signal to lower the headlight Glare at night is made much worse by
beams. If the other driver still doesn’t dirt on the glass. Even the inside of the
lower the beams, resist the temptation
to glass can build up a film causedby dust.
put your high beams on. This only
Tobacco smoke also makes inside glass
makes two half-blinded drivers.
surfaces very filmy and can be a vision
hazard
if it’s left there.
On a freeway, use your high beams only
in remote areas where you won’t impair Dirty glass makes lights dazzle and
approaching drivers. In some places,
flash more than clean glass would,
like cities,using high beams is illegal.
making the pupils of your eyes contract
repeatedly. You might even want to keep
When you follow another vehicleon a
a cloth and some glass cleaner in your
freeway or highway, use low beams.
vehicle
if you need to clean your glass
True, most vehicles now have day-night
mirrors that enablethe driver to reduce frequently.
glare. But outside mirrors are not of this
type and high beams from behind can
bother the driver ahead.
Remember that your headlights light up
far less of a roadway when you are in a
turn or curve.
Keep your eyes moving; thatway, it’s
easier to pick out dimly lighted objects.
Just as your headlights should be
checked regularly forproper aim, so
should your eyes be examined regularly.
Some drivers suffer from night
blindness-the inability to see in dim
light-and aren’t even aware of it.
167
Your Driving andthe Road
Driving inthe Rain
Rain and wet roads can meandriving
trouble. On a wet road you can’t stop,
accelerate or turn as well because your
tire-to-road traction isn’t as good as on
dry roads. And, if your tires don’t have
much tread left, you’ll get even less
traction.
It’s always wise to go slower and be
cautious if rain starts to fall while you
are driving. The surface may get wet
suddenly when your reflexes are tuned
for driving on dry pavement.
The heavier the rain, the harder it is to
see. Even if your windshield wiper
blades are in good shape, a heavy rain
can make it harder to see road signs and
traffic signals, pavement markings, the
edge of the road, and even people
I
168
walking. Road spray can often be worse
for vision than rain, especially if it
comes from a dirty road.
So it is wise to keep your wiping
equipment in good shape and keep your
windshield washer tank filled. Replace
your windshield wiper inserts when they
show signs of streaking or missing areas
on the windshield, or when strips of
rubber start to separate from the inserts.
Driving too fast through large water
puddles or even going through some car
washes can cause problems, too. The
water may affect your brakes. Try to
avoid puddles. But if you can’t, try to
slow down before you hit them.
u I I(
I
\
Wet brakes can cause
accidents. They won’t work
w in a quickstopandmaycause
pulling to one side. You could lose
control of the vehicle.
After driving througha large
puddle of water or a car wash,
apply your brake pedal lightlyuntil
your brakes work normally.
l
Some Other Rainy WeatherTips
Hydroplaning
Hydroplaning is dangerous. So much
water can build up under your tires that
they can actually ride on the water.This
can happen if the road is wet enough
and you’re going fast enough. When
your vehicle is hydroplaning, it haslittle
or no contact with the road.
You might not be awareof hydroplaning.
You could drive along for some time
without realizing your tires aren’t in
constant contact with the road.You
could find out the hard way:when you
have to slow, turn, move out to pass-or
if you get hit bya gustof wind. You could
suddenly find yourself out of control.
Hydroplaning doesn’t happen often. But
it can if your tires haven’t much treador
if the pressure in one or more is low. It
can happen if a lot of water is standing
on the road. If you can see reflections
from trees, telephone poles, or other
vehicles, and raindrops “dimple” the
water’s surface, there could be
hydroplaning.
Hydroplaning usuallyhappens at higher
speeds. There just isn’t a hard and fast
rule about hydroplaning. The best
advice is to slow down when it is
raining, and be careful.
Turn on your headlights-not just your
parking lights-to help make you more
visible to others.
Look for hard-to-see vehicles coming
from behind. You may want to use
your headlightseven in daytime if it’s
raining hard.
Besides slowing down, allow some
extra following distance. And be
especially careful when youpass
another vehicle. Allow yourself more
clear room ahead, and be prepared to
have your view restricted by road
spray. If the road spray is so heavy you
are actually blinded, drop back. Don’t
pass until conditions improve. Going
more slowly is better than having an
accident.
Use your defogger if it helps.
Have good tires withproper tread
depth. (See the Index under Tires.)
Your Driving andthe Road
Tips on Driving in Fog
Everybody then has a better chance to
avoid hitting the vehicleahead.
A patch of dense fog may extend only
Driving inFog, Mist andHaze
for a few feet (meters) or for miles
Fog can occur with high humidity or
(kilometers); you can’t really tell while
heavy frost. It can be so mild that you
you’re in it. You can only treat the
can see through it for several hundred
situation with extreme care.
feet (meters). Or it might be so thick
that you can see only a few feet (meters) One common fog condition-sometimes
called mist or ground fog-can happen
ahead. It may come suddenly to an
in weather that seems perfect, especially
otherwise clear road. And it can be a
at night or in the early morning in valley
major hazard.
and low, marshy areas. You can be
When you drive into a fog patch, your
suddenly enveloped in thick, wet haze
visibility will be reduced quickly. The
that may even coat your windshield. You
biggest dangers are striking the vehicle
can often spot these fog patches or mist
ahead or being struck by the one
layers with your headlights. But
behind. Try to “read” the fog density
sometimes they can be waiting for you
down the road. If the vehicle ahead
as you come over a hill or dip into a
starts to become less clear or, at night, if
shallow valley. Start your windshield
the taillights are harder to see, the fog is
wipers and washer to helpclear
probably thickening. Slow down to give
accumulated road dirt. Slow down
traffic behind you a chance to slow
carefully.
down.
m m .
170
If you get caught in fog, turn your
headlights on low beam, even in
daytime. You’ll see-and be seenbetter. Use your fog lights.
Don’t use your high beams. The light
will bounce off the water droplets that
make up fog and reflect back at you.
Use your defogger. In high humidity,
even a light buildup of moisture on the
inside of the glass will cut down on your
already limited visibility. Run your
windshield wipers and washer
occasionally. Moisture can build up on
the outside glass, and what seems to be
fog may actually be moisture on the
outside of your windshield.
Treat dense fog as an emergency. Try to
find a place to pull off the road. Of
course you want to respect another’s
property, but you might need to put
City Driving
something between you and moving
vehicles-space, trees, telephone poles,
a private driveway, anything that
removes you from other traffic.
If visibility is near zero andyou must
stop but are unsure whether you are
away from the road, turn your lights on,
start your hazard warning flashers, and
sound your horn at intervals or when
you hear approaching traffic.
Pass other vehicles in fog only if you
can see far enough ahead to pass safely.
Even then, be prepared to delay your
pass if you suspect the fog is worse up
ahead. If other vehicles try to pass you,
make it easy for them.
One of the biggest problems with city
streets is the amount of traffic on them.
You’ll want to watchout for what the
other drivers are doing and pay attention
to traffic signals.
Here are ways to increase your safetyin
city driving:
Know the best way to get to where you
are going. Try not to drive around
trying to pick out a familiarstreet or
landmark. Get a city map and plan
your trip into an unknownpart of the
city just asyou would for a crosscountry trip.
Try to use the freeways that rim and
crisscross most large cities. You’ll save
time and energy. (See the next section,
Freeway Driving.)
Treat a green light as a warning
signal. A traffic light isthere because
the corner is busy enough to need it.
When a lightturns green, and just
before you start to move, check both
ways for vehicles that have notcleared
the intersection or may be running the
red light.
Obey all posted speed limits. But
remember that they are for ideal road,
weather and visibility conditions. You
may need to drive below the posted
limit in bad weather or when visibility
is especially poor.
Pull to the right (with care) and stop
clear of intersections when you see or
hear emergency vehicles.
171
Your Driving and the Road
Fmeway Driving
Entering the Freeway
Driving on the Freeway
Mile for mile, freeways(also called
thruways, parkways, expressways,
turnpikes, or superhighways) are the
safest of all roads. But they havetheir
own special rules.
The most important advice on freeway
driving is: Keep up with traffic and keep
to the right. Drive at the same speed
most of the other drivers are driving.
Too-fast or too-slow driving breaks a
smooth traffic flow. Treat the left lane
on a freeway as a passing lane.
At the entrance there is usually a ramp
that leads to the freeway. If you have a
clear view of the freeway as you drive
along the entrance ramp, you should
begin to check traffic. Try to determine
where you expect to blend with theflow.
If traffic is light, you may have no
problem. But if it is heavy, find a gap as
you move along the entering lane and
time your approach. Try to merge into
the gap at close to the prevailing speed.
Switch on your turn signal, check your
rearview mirrors as you move along,
and glance over your shoulder as often
as necessary. Try to blend smoothly
with the traffic flow.
Once you are on the freeway, adjust
your speed to the posted limitor to the
prevailing rate if it’s slower. Stay in the
right lane unlessyou want to pass. If
you are on a two-lane freeway, treat the
right lane as the slow lane and theleft
lane as the passing lane.
If you are on a three-lane freeway, treat
the right lane as the slower-speed
through lane, the middle lane as the
higher-speed through lane, and the left
lane as the passing lane.
Before changing lanes, check your
rearview mirrors. Then use yourturn
signal. Just before you leave the lane,
glance quickly over your shoulder to
make sure there isn’t another vehicle in
your “blind” spot.
... 172
Leaving the Freeway
If you are moving from an outside to a
center lane on a freeway having more
than two lanes, makesure another
vehicle isn't about to move into the same
spot. Look at the vehicles two lanes
over and watch for telltale signs: turn
signals flashing, an increase inspeed, or
moving toward the edge of the lane. Be
prepared to delay your move.
Once you are moving on the freeway,
make certain you allow a reasonable
following distance. Expect to move
slightly slower at night.
When you want to leavethe freeway,
move to the proper lane well in advance.
Dashing across lanes at the last minute
is dangerous. If you m i s s your exit do
not, under any circumstances, stop and
back up. Drive on to the next exit.
At each exit point is a deceleration lane.
Ideally it should be long enough for you
to enter itat freeway speed (after
signaling, of course) and then do your
braking before movingonto the exit
ramp. Unfortunately, not all deceleration
lanes are long enough-some are too
short for all the braking.Decide when
to start braking. If you must brake on
the through lane, and if there is traffic
close behind you, you can allow a little
extra time and flash yourbrake lights (in
addition to yourturn signal) as extra
warning that you are about to slow
down and exit.
The exit ramp can be curved, sometimes
quite sharply. The exit speed is usually
posted. Reduce your speed according to
your speedometer, not to your sense of
motion. After driving for any distance at
higher speeds, you may tend to think
you are going slower thanyou actually
are. For example, 40 mph (65 km/h)
might seem like only 20 mph (32 W h ) .
Obviously, this could lead to serious
trouble on a ramp designedfor 20 mph
(32 km/h)!
Your Driving andthe Road
Driving a Long Distance
Before Leaving ona Long Trip
Although most longtrips today are
made on freeways, there are still many
made on regular highways.
Long-distance driving on freeways and
regular highways is the same in some
ways. The trip has to be planned andthe
vehicle prepared, you drive at higherthan-city speeds, and there are longer
turns behind the wheel. You’ll enjoy
your trip more if you and your vehicle
are in good shape. Here are some tips
for a successful long trip.
Make sure you’re ready. Try to be well
Here are some things you can check
rested. If you must start when you’re not before a trip:
fresh-such as after a day’s work-don’t
Windshield Washer Fluid:Is the
plan to make toomany miles that first
reservoir full? Are all windows clean
part of the journey. Wear comfortable
inside and outside?
clothing and shoes you can easily drive
Wiper Blades:Are they in good
in.
shape?
Is your vehicle ready for a long trip?
If
Fuel, Engine Oil, Other Fluids:
you keep it serviced and maintained,it’s
Have you checked all levels?
ready to go. If it needsservice, have it
Lights: Are they all working? Are the
done before starting out. Of course,
lenses clean?
you’ll find experienced and able service
Tires: They are vitally important to a
experts in Pontiac dealerships all across
safe, trouble-free trip.Is the tread
North America. They’ll be ready and
good enough for long-distance
willing to help if you need it.
driving? Are the tires all inflated to
the recommended pressure?
Weather Forecasts: What’s the
weather outlook along your route?
Should you delay your trip a short
time to avoid a major storm system?
Maps: Do you have up-to-date maps?
174
3n the Road
Highway Hypnosis
Keep your eyes moving. Scan the road
Is there actually such a condition as
Mess you are the only driver, it is
ahead and to the sides. Check your
“highway hypnosis”? Or is it just plain
;ood to share the driving task with
rearview mirrors frequently and your
Ithers. Limit turns behind the wheel to falling asleep at the wheel? Call it
instruments from time to time. This
highway hypnosis, lack of awareness, o
ibout 100 miles (160 km) or two hours
can help you avoid a fixed stare.
it a sitting. Then, either change drivers whatever.
x stop for some refreshment like coffee, There is something about an easy stretch Wear good sunglasses in bright light.
:ea or soft drinks and some limbering
Glare can cause drowsiness. But don’t
of road with the same scenery, along
lp. But do stop and move around. Eat
wear sunglasses at night. They will
with the hum of the tires on the road,
lightly along the way. Heavier meals
drastically reduce your overallvision
the drone of the engine, and the rush of
:end to make some people sleepy.
at the very time you need all the
the wind against the vehicle that can
seeing power you have.
make you sleepy. Don’t let it happen to
3 n two-lane highways or undivided
you! If it does, your vehicle can leave
multilane highways that do not have
If you get sleepy, pull offthe road into
the road in less than a second, and you
;ontrolled access, you’ll want to watch
a rest, service, or parking area and
for some situations not usually foundon could crash and be injured.
take a nap, get some exercise,or both.
freeways. Examples are: stop signs and What can you do about highway
For safety, treat drowsiness on the
signals, shopping centers with direct
highway as an emergency.
hypnosis? First, be aware that it can
access to the highway, no passing zones happen.
As in any driving situation, keep pace
and school zones, vehicles turning left
with traffic and allow adequate
Then here are some tips:
and right off the road, pedestrians,
following
distances.
Mike sure your vehicle is well
cyclists, parked vehicles, and even
ventilated, with a comfortably cool
animals.
interior.
Your Driving and the Road
If you don’t shift down, your
brakes could getso hot that
they wouldn’t work well. You
would then have poor braking or
even none going down a hill. You
could crash. Shift down to let your
engine assist your brakes ona
steep downhill slope.
Hi// and Mountain Roads
Driving on steep hills or mountains is
different from driving in flat or rolling
terrain. If you drive regularly in steep
country, or if you’re planning to visit
there, here are some tips that can make
your trips safer and more enjoyable.
Keep your vehicle in good shape.
Check all fluid levels andalso the
I CAUTION
brakes, tires, cooling system and
transaxle. These parts can work hard
on mountain roads.
Know how to go down hills. The most
important thing to know is this: let
your enginedo some of the slowing
down. Don’t make your brakes do it
all. Shift to a lower gear when you go
down a steep or long hill. That way,
you will slow down without excessive
use of your brakes.
I
176
,
Know how to go uphill. Shift down to
D (Drive). This will help cool your
engine and transaxle, andyou can
climbthe hill better.
Stay in your own lane when driving on
two-lane roads in hills or mountains.
Don’t swing wide or cut across the
center of the road. Drive at speeds that
let you stay in your own lane. That
way, you won’t be surprised by a
vehicle coming toward you in the
same lane.
It takes longer to pass another vehicle
when you’re going uphill. You’ll want
to leave extra room to pass.If a
vehicle is passing you and doesn’t have
enough room, slow down to make it
easier for the other vehicle to getby.
Parking on Hills
As you go over the top of a hill, be
alert. There could be something in
your lane, likea stalled car or an
accident.
Youmay see highway signs on
mountains that warn of special
problems. Examples are long grades,
passing or no passing zones, a falling
rocks area, or winding roads. Be alert
to these and take appropriate action.
Winter driving can present special
problems. See theIndex under Winter
Driving.
Hills and mountains mean spectacular
scenery. But please be careful where you
stop if you decide to look at the view or
take pictures. Look for pull-offs or
parking areas provided forscenic
viewing.
Another part of this manual tells how to
use your parking brake (see the I d e x
under Parking Brake). But on a
mountain or steep hill, you can do one
more thing. You can turn your front
wheels to keep your vehiclefrom rolling
downhill or out into traffic.
Here’s how:
Parking Downhill
Turn your wheels to theright.
You don’t have toj a m your tires against
the curb, if there is a curb. A gentle
contact is all you need.
your Driving and the Road
Parking on Hills (CONI:)
Parking Uphill
If there is a curb, turn your wheels to
the left if the curb is at the right side of
your vehicle.
... 178
If you’re going uphillon a one-way
street and you’re parking on the left
side, your wheels should point to the
right.
If there is no curb when you’re parking
uphill, turn the wheels to the right.
If there is no curb when you’re parking
uphill on the left side of a one-way
street, your wheels should be turned to
the left.
Toque Lock
Winter Driving
If you are parking on a hill andyou
Here are some tips for winter driving:
don’t shift your transaxle intoP (Park)
Have your Pontiac in good shapefor
properly, the weightof the vehicle may
winter.
Be sure your engine coolant
put too much force on the parking pawl
mix
is
correct.
in the transaxle.You may find it difficult
to pull the shift lever out of P (Park).
Snow tires can help in loose snow, but
This is called “torque lock.” To prevent
they may give you less traction on ice
torque lock, always be sure to shift into
than regular tires. If you do not expect
P (Park) properly beforeyou leave the
to be driving in deep snow, but may
driver’s seat. To find out how, see the
have to travel over ice, you may not
Index under Shifing Into P (Park).
want to switch to snowtires at all.
When you are ready to drive, move the
shift lever out of P (Park) before you
release the parking brake.
If torque lock does occur, you may need
to have another vehicle push yours a
little uphill to take some of the pressure
from the transaxle,so you can pull the
shift lever outof P (Park).
I
You may want to put winter
emergency supplies in your trunk.
Include an ice scraper, a small brush
or broom, a supply of windshield
washer fluid, a rag, some winter outer
clothing, a small shovel, a flashlight, a
red cloth, and a coupleof reflective
warning triangles. And, if you will be
driving under severe conditions,
include a small bagof sand, a piece of
old carpet or a couple of burlap bags
to help provide traction. Be sure you
properly secure these items in your
vehicle.
17s
...
Your Driving and the Road
Whatever the condition-smooth ice,
on dry pavement. See the
I d e x under
packed, blowing or loose snow-drive
Anti-Lock Brake System.
Most of the time, those places where
with caution. Accelerate gently.Try not
Allowgreaterfollowingdistance on I
your tires meetthe road probably have
to break the fragile traction. If you
any slippery road.
good traction.
accelerate too fast, the drive wheels will
Watch for slippery spots. The road
However, if there is snow or ice
spin and polish the surface under the
might be fine untilyou hit a spot that’s
between your tires and the road, you can tires even more. If you have the traction
covered with ice. On an otherwise
have a very slippery situation. You’ll
control system, it will improve your
clear road, ice patchesmay appear in
have a lot less traction or “grip” and
ability to accelerate when driving on a
shaded areas where the sun can’t
will need to be very careful.
slippery road. Even though your vehicle
reach: around clumpsof trees, behind
has a traction control system, you’ll
What’s the worst time for this? “Wet
buildings,
or under bridges.
ice.” Very cold snow or ice can be slick want to slow down and adjust your
Sometimes the surfaceof a curve or
and hard to drive on. But wet ice can be driving to the road conditions. S e e the
an overpass may remain icy when the
Index under Traction Control.
even more trouble because it may offer
surrounding roads are clear. If you see
the least traction of all. You can get
Your anti-lock brakes improve your
a patch of ice ahead of you, brake
“wet” ice when it’s about freezing
ability to makea hard stop on a slippery
before youare on it. Try not to brake
(32°F; OOC) and freezing rain begins to road. Even though you have the antiwhile you’re actually on the ice, and
fall. Try to avoid driving on wet ice
lock braking system, you’ll want to
avoid sudden steering maneuvers.
until salt and sand crewscan get there.
begin stopping sooner than you would
Driving on Snow or Ice
..I
180
If You’re Caught in a Bli’ard
If you are stopped by heavy snow, you
could be in a serious situation.You
should probably stay with your vehicle
unless you know for sure that you are
near help andyou can hike through the
snow. Here are some things todo to
summon help and keep yourself and
your passengers safe:
Turn on your hazard flashers.
Tie a red cloth to your vehicle toalert
police that you’ve been stoppedby the
snow.
Put on extra clothing or wrap a
blanket around you. If you have no
blankets or extra clothing, make body
insulators from newspapers, burlap
bags, rags, floor mats-anything you
can wrap around yourselfor tuck
under your clothing to keep warm.
You can run the engine to keep warm,
but be careful.
cause deadly CO (carbon
monoxide) gas toget inside. CO
could overcome you and kill you.
You can’t see it or smell it, so you
might not know it was in your
vehicle. Clear away snow from
around the baseof your vehicle,
especially any that is blocking your
exhaust pipe. And check around
again from timeto time to be sure
snow doesn’t collect there.
Open a windowjust a little on the
side of the vehicle that’s awayfrom
the wind. This will help keep CO
out.
Your Driving and the Road
If You’re Stuck in Deep Snow
If bu’re Caught in a Blizzard
(CONT)
Run your engine onlyas long as you
must. This saves fuel. When you run
the engine, make it go a little faster
than just idle. That is, push the
accelerator slightly. This uses less fuel
for the heat that you get andit keeps
the battery charged. You will need a
well-charged battery to restart the
vehicle and possibly for signaling later
on with your headlights. Let the heater
run for a while.
Then, shut the engine off and close
the window almost all the way to
preserve the heat. Start the engine
again and repeat this only whenyou
feel really uncomfortablefrom the
cold. But do it as little as possible.
Preserve the fuel as long as you can.
To help keep warm, you can get outof
the vehicle and do some fairly
vigorous exercises every half-hour or
so until help comes.
This manual explains how to get the
vehicle out of deep snow without
damaging it. See theIndex under
Rocking Your Whicle.
Towing a Tmiler
II
If you don't use thecorrect
\ equipment and drive properly,
you can lose control whenyou pull
a trailer. For example, if the trailer
is too heavy, the brakes may not
work well-or even at all. You and
your passengers could be seriously
injured. Pull a trailer onlyif you
have followed all the steps in this
section.
NOTICE
I;
Pullinga trailer improperly can : _
damage your vehicle and resultin' ; '
costly repairs not covered by your
follow the advice in this section.
Your Pontiac can tow a trailer, unless it
is equipped with the 3800 Supercharged
Engine (Code 1). Do not attempt to tow
a trailer if equipped withthe 3800
Supercharged Engine (Code 1). To
identify what the vehicle trailering
capacity is for your vehicle,you should
read the information in Weight of the
Trailer that appears later in this section.
But trailering is different thanjust
driving your vehicle by itself. Trailering
means changes in handling, durability,
and fuel economy. Successful, safe
trailering takes correct equipment, and it
has to be used properly.
That's the reason for this section. In it
are many time-tested, important
trailering tips and safety rules. Many of
these are important for your safetyand
that of your passengers. So please read
this section carefully before youpull a
trailer.
Load-pulling components such as the
engine, transaxle, wheel assemblies, and
tires are forced to work harder against
the drag of the added weight. The engine
is required to operate at relativelyhigher
speeds and under greater loads, generating
extra heat. What's more, the trailer adds
considerably to windresistance,
increasing the pulling requirements.
Your Driving andthe Road
If bu Do Decideto Pulla Trailer
If you do, hereare some important
points.
There aremany different laws having
to do with trailering. Make sure your
rig will be legal, not only where you
live but also where you’ll be driving.
A good source for thisinformation can
be state or provincial police.
Consider using a sway control if your
trailer will weigh2,000 pounds (900 kg)
or less. You should always use a sway
control if your trailer will weigh more
than 2,000 pounds (900 kg). You can ask
a hitch dealer about sway controls.
Don’t tow a trailer at allduring the first
500 miles (804 km) your new vehicleis
driven. Your engine, axle orother parts
could be damaged.
m m m
184
Then, during the first 500 miles
(804 km) that you tow a trailer, don’t
drive over 50 mph (80 km/h) and
don’t make starts at full throttle. This
helps your engine and other parts of
your vehicle wearin at the heavier
loads.
Three important considerations have
to do with weight:
Weight of the Trailer
How heavy can a trailer safely be? It
should never weigh more than 1,000
pounds (450 kg) unless you have the
special optional3,000 pound (1 360 kg)
towing package. But even that can be
too heavy. It depends onhow you plan
to use your rig. For example, speed,
altitude, road grades, outside
temperature and how much your
vehicle is used to pull a trailer are all
important. And, it can also depend
on
any special equipment thatyou have
on your vehicle. You can ask your
dealer forour trailering information
or advice, or write us at:
Pontiac Customer Services
Department
One Pontiac Plaza
Pontiac, Michigan 48340-2952
In Canada, write to:
General Motors of Canada Limited
Customer Assistance Center
1908 Colonel Sam Drive
Oshawa, Ontario, L1H 8P7
Weight of the nailer Tongue
The tongue load (A) of any trailer is
an important weight to measure
because it affectsthe total, gross
weight of your vehicle. The gross
vehicle weight (GVW) includes the
curb weight of the vehicle, any cargo
you may carry in it, and the people
who will be riding in the vehicle. And
if you will tow a trailer, you must add
the tongue load tothe GVW because
your vehicle willbe carrying that
weight, too. See the Index under
Loading Your &hide for more
information about your vehicle’s
maximum load capacity.
If your vehicle is not equipped to tow
a trailer weighing more than 2,000
pounds (900 kg), the trailer tongue
(A) should weigh 10%of the total
loaded trailer weight (B). If your
vehicle is equipped with the optional
3,000 pound (1 360 kg) towing
package, and you’re using a “deadweight” hitch, the trailer tongue (A)
should weigh 10%of the total loaded
trailer weight (B). Or, if you have a
“weight-distributing” hitch, the trailer
tongue (A) should weigh 12% of the
total loaded trailer weight (B).
After you’ve loaded yourtrailer, weigh
the trailer and then the tongue, separately,
to see if the weights are proper. If they
aren’t, you may be ableto get them right
simply by moving some items around in
the trailer.
185
Your Driving andthe Road
If bu Do Decide to Pull a Trailer
(CONT.)
Hitches
Total Weight on Your Vehicle’s Tires It’s important to have the correct hitch
Be sure your vehicle’stires are inflated equipment. Crosswinds, large trucks
to the limit for cold tires. You will find going by, and rough roads are a few
reasons why you’ll need the right hitch.
these numbers on the Certification
label at the rear edge of the driver’s
Here are some rules to follow:
door (or, see the Index under 7ire
If you’ll be pulling a trailer that, when
Loading). Then be sure you don’t go
loaded, will weigh more than 2,000
over the GVW limit for your vehicle.
pounds (900 kg), be sure to use a
properly mounted, weight-distributing
hitch and sway controlof the proper
size. This equipment is very important
for proper vehicle loading and good
handling when you’redriving.
I
186
4
Will you have to make any holes inthe
body of your vehicle,when you install
a trailer hitch? If you do, then be sure
to seal the holes later when
you remove
the hitch.If you don’t seal them, deadly
carbon monoxide (CO) from your
exhaust can get into your vehicle. (See
the Index under Carbon Monoxide in
Exhaust.) Dirt and watercan, too.
The bumpers on your vehicle are not
intended for hitches. Do not attach
rental hitches or other bumper-type
hitches to them. Use only a framemounted hitch that does not attach to
the bumper.
Driving witb a Traiiler
Safety Chains
You should always attach chains
between your vehicle and your trailer.
Cross thesafety chains under the tongue
of the trailer so that the tongue will not
drop to the road if it becomes separated
from the hitch. Instructions about safety
chains may be provided by the hitch
manufacturer or by the trailer
manufacturer. Follow the manufacturer’s
recommendation for attaching safety
chains. Always leavejust enough slack
so you can turn with your rig. And, never
allow safety chainsto drag on theground.
Towing a trailer requires a certain
amount of experience. Before setting out
for the open road, you’ll want to get to
knowyourrig.Acquaintyourselfwith
Tiai/er Brakes
the
feel of handling and braking with the
If your trailer weighs more than 1000
pounds (450 kg) loaded, then it needs its added weight of the trailer. And always
own brakes-and they must be adequate. keep in mind that the vehicle you are
driving is now a good deal longer and
Be sure to read and follow the
not
nearly so responsive as your vehicle
instructions for the trailer brakes so
is by itself.
you’ll be able to install, adjust and
Before you start, check the trailer hitch
maintain them properly.
and platform, safety chains, electrical
Because you have anti-lock brakes, do
connector, lights, tires and mirror
not try to tap into your vehicle’s brake
adjustment. If the trailer has electric
system. If you do, both brake systems
brakes,
start your vehicle andtrailer
won’t work well, or at all.
moving and then apply the trailer brake
controller by hand to be sure the brakes
are working. This lets you check your
electrical connection at the same time.
During your trip, check occasionally to
be sure that the load is secure, and that
the lights and any trailer brakes are still
working.
I
‘Your Driving andthe Road
Driving with a Tmiler (CONX)
Following Distance
Stay at least twice as far behind the
vehicle ahead as you would when
driving your vehicle without a trailer.
This can help you avoid situations that
require heavy braking and suddenturns.
Passing
You’ll need more passing distance up
ahead when you’re towing a trailer.
And, because you’re a good deal longer,
you’ll need to go much farther beyond
the passed vehicle beforeyou can return
to your lane.
Backing Up
Hold the bottom of the steering wheel
with one hand. Then, to move the trailer
to the left, just move that hand tothe
left. To move the trailer to the right,
move your hand tothe right. Always
back up slowly and, if possible, have
someone guide you.
188
behind you are seeing your signal when
Making ’hrns
they
are not. It’s important to check
When you’re turning with a trailer,
occasionally to be sure the trailer bulbs
make wider turns than normal. Do this
are still working.
so your trailer won’t strike soft
Vehicles with the optional Lamp
shoulders, curbs, road signs, trees, or
Monitor System will warnyou when a
other objects. Avoid jerky or sudden
bulb burns out. But when you plug
maneuvers. Signal well in advance.
trailer
lights into yourvehicle’s lighting
Turn Signals When Towinga Trailer
system, its bulb warning lightsmay not
When you tow a trailer, your vehicle has let you know if one of your lights goes
to have a differentturn signal flasher
out. So, when you have trailer lights
and extra wiring. The green arrows on
plugged in, be sure to check your
your instrument panel will flash
vehicle and trailer lights from time to
whenever you signal a turn or lane
time to be sure they’re all working.
change. Properly hooked up, the trailer
Once you disconnect the trailer lights,
lights will also flash, telling other
your Lamp Monitor System again can
drivers you’re about to turn, change
tell you if one of your vehicle lightsis
lanes or stop.
out.
When towing a trailer, the green arrows
on your instrument panel will flash for
turns even if the bulbs on the trailer are
burned out. Thus, you may think drivers
Driving on Grades
Parking on Hills
Reduce speed and shift to a lowergear
You really should notpark your vehicle,
with a trailer attached, on a hill. If
before you start down a longor steep
downgrade. If you don’t shift down, you something goes wrong, your rig could
might have to use yourbrakes so much
start to move. People can be injured,
and
both your vehicle andthe trailer can
that they would get hot and no longer
work well.
be damaged.
On a long uphill grade, shift down to But if you ever have to park your rig on
D (Drive) and reduce your
speed to around a hill, here’s how to do it:
45 mph (70 km/h) to reduce the possibility
1. Apply your regular brakes, but don’t
of engine and transaxle overheating.
shift into P (Park) yet.
If you are towing a trailer that weighs 2. Have someone placechocks under
more than 1,000 pounds (454 kg), and
the trailer wheels.
you have an automatic transaxle with
Overdrive, it’s best to drive inD instead 3. When the wheel chocks are in place,
release the regular brakes until the
of Overdrive (or, as you need to, a lower
chocks absorb the load.
gear). This will minimize heat build-up
and extend the lifeof your transaxle.
4. Reapply the regular brakes. Then
apply your parking brake, and then
shift to P (Park).
5. Release the regular brakes.
When You Are Ready to Leave After
Parking on a Hill
1, Apply your regularbrakes and hold
the pedal down while you:
Start your engine;
Shift into a gear; and
Release the parking brake.
2. Let up on the brake pedal.
3. Drive slowly until thetrailer is clear
of the chocks.
4. Stop and have someone pick up and
store the chocks.
Your Driving andthe Road
Maintenance When Tmiler
Towing
Your vehicle will need service more
often when you’re pullinga trailer. See
the Maintenance Schedulefor more on
this. Things that are especially
important in trailer operation are
automatic transaxle fluid (don’t overfill),
engine oil, belts, cooling system, and
brake adjustment. Each of these is
covered in this manual, andthe Index
will help you find them quickly.If
you’re trailering, it’s a good idea to
review these sections before youstart
your trip.
Check periodically to see that all hitch
nuts and boltsare tight.
...
190
Part
5
Problems on the Road
H e r e you’llWarning
find out what to do
Hazard
Flashers . . . . . . . . . . . . . . . . . . . . . . . . . . . . . . . . . . . . . . . . . . . 192
about some problems that can occur Jumpstarting . . . . . . . . . . . . . . . . . . . . . . . . . . . . . . . . . . . . . . . . . . . . . . . . . . . . 193
. . . . . . . . . . . . . . . . . . . . . . . . . . . . . . . . . . . . . . . . . . . . . . 197
Your
Towing
on the road
.
. . . . . . . . . . . . . . . . . . . . . . . . . . . . . . . .Overheating
. . . . . . . . . . . . . . . 202
Engine
.
.
.
.
.
.
.
.
.
.
.
.
.
.
.
.
.
.
.
.
.
.
.
.
.
.
.
.
.
.
.
.
.
.
. . . . . . . . . . . . . . 208
Flat
If a Tire Goes
a
Changing Flat Tire . . . . . . . . . . . . . . . . . . . . . . . . . . . . . . . . . . . . . . . . . . . . . . .
210
Compactspare . . . . . . . . . . . . . . . . . . . . . . . . . . . . . . . . . . . . . . . . . . . . . . . . . . . 217
If You’re Stuck: In Sand, Mud, Ice or Snow . . . . . . . . . . . . . . . . . . . . . . . . . . 218
Problems on the Road
Hazard Warning Flashers
Your hazard warning flashers let you
warn others. They also let police know
you have a problem. Your front and rear
turn signal lights will flash on and off.
Press the button in to make your front
and rear turn signal lights flash on and
off.
Your hazard warning flashers work no
matter what position your key is in, and
even if the key isn’t in.
To turn off the flashers, pull out on the
collar.
When the hazard warning flashers are
on, your turn signals won’t work.
Other Warning Devices
If you carry reflective triangles, you can
set one upat the side of the road about
300 feet (100 m) behind your vehicle,
Jump Starting
If your battery has run down, you may
want to use another vehicle and some
jumper cables to start your Pontiac. But
please follow the steps here to doit
safely.
-*
'
Batteries can hurt you. They
L be dangernus because:
:y contain acid that a n burn
YQU.
Ignoring these steps could result in
costly damage to your vehicle that
To Jump Start Your Pontiac:
1. Check the other vehicle. It must have
a 12-volt battery with a negative
charge system.
I
If the other system isn't a 12-volt
system with a negativeground,
both vehicles can bedamaged.
I
They contain gas that can
explode or ignite.
They contain enough electricity
to burn you.
If you don't follow these steps
pyactly, some or all of these things
0
193
Problems on the Road
Jump Starting (CONT:)
2. Get the vehicles close enough so the
jumper cables can reach, but be sure
the vehicles aren't touching each
other. If they are, it could cause a
ground connection you don't want.
You wouldn't be able to start your
Pontiac, and the bad grounding could
damage the electrical systems.
*
You could be injured if the
Jehicles roll. Set the parking
brake firmly on each vehicle. Put
an automatic transaxle in P (Park)-.
or a manual transaxle in N (Neut] .
L
~
4. Open the hoods and locate the
batteries.
vehicles. Turn off all lights that aren't
needed, and radios. This will avoid
sparks and help save both batteries.
CAUTlON
And it could save your radio!
An electric fancan start up
I even when the engine is not
running and can injure you. Keep
hands, clothing and tools away
If you leave your radio on, it could
from any underhood electric fan.
be badly damaged. The repairs
wouldn't be covered by your
warranty.
Find the positive (+) and negative
3.Turn off the ignition on both
I
I
I
(-) terminals on each battery.
II
, Using a match near a battery
-
b can cause battery gas to
explode. People have been hurt
doing this, and some have been
blinded. .Use a flashlight
if you
need more light.
Be sure the batteries have enough
water. You don’t need to add water
to the Delco Freedom@ battery
installed in every newGM vehicle.
But if a battery has filler caps,be
sure the right amountof fluid is
there. If it is low, add water to take
care of that first. If you don’t,
explosive gas could be present.
Battery fluid contains acid that can
burn you. Don’t get it on you. If
you accidentally get it in your eyes
or on your skin, flush the place
with water and get medical help
immediately.
5. Check that thejumper cables don’t
have loose or missin.g insulation. If
they do, you could get a shock. The
vehicles could be damaged, too.
Before you connect the cables, hereare
some things you should know. Positive
(+) will go to positive (+) and negative
(-) will go to negative (-) or a metal
engine part. Don’t connect (+) to (-) or
you’ll get a short that would damage the
battery and maybe other parts, too.
Fans or other moving engine
running.
Problems on the Road
Jump Starting (CONI)
6. Connect the red positive (+) cable to
the positive (+) terminal of the
vehicle with the dead battery. Use a
remote positive (+) terminal if the
vehicle has one.
m . .
196
7 . Don’t let the other end touch metal.
Connect it to the positive (+)
terminal of the good battery. Use a
remote positive (+) terminal if the
vehicle has one.
8. Now connect the black negative (-)
cable to the good battery’s negative
(-) terminal.
Don’t let the other end touch anything
until the next step. The other end of the
negative cable doesn’t go to the dead
battery. It goes to a heavy unpainted
metal part on the engine of the vehicle
with the dead battery.
9. Attach the cable at least 18 inches
(45 cm) away from the dead battery,
but not near engine parts that move.
The electrical connection isjust as
good there, but the chance of sparks
getting back to the battery is much
less.
10. Now start the vehiclewith the good
battery and run the engine for a
while.
11. Try to startthe vehicle with the
dead battery. If it won’t start after a
few tries, it probably needs service.
Towing Your Pontiac
12. Remove the cables in reverseorder
to prevent electrical shorting.Take
care thatthey don't touch each other
or any other metal.
Try to have a GM dealer or a
professional towingservice tow your
Pontiac. The usual towing equipment is:
(A) Sling-type tow truck
(B) Wheel-lift tow truck
(C) Car carrier
If your vehicle has been changed
or
modified since it was factory-new by
adding aftermarket items like fog lamps,
aero skirting, or special tires and
wheels, these instructions and
illustrations may not be correct.
Before you do anything, turn on the
hazard warning flashers.
When you call, tell the towing service:
That your vehicle can onlybe towed
with certain equipment, as described
later in thissection.
That your vehicle has fi-ont-wheel
drive.
The make, model, and year of your
vehicle.
Whether you can still move the shift
lever.
If there was an accident, what was
damaged.
When the towing service arrives, let the
tow operator know that this manual
contains detailed towinginstructions and
illustrations. The operator may want to
see them.
197
Problems on the Road
I Towing Your Pontiac (CONI:)
To help avoid injury to you or
Ithers:
Never let passengers ride in a
vehicle that is beingtowed.
Never tow faster than safe or
posted speeds.
Never tow with damaged parts
not fully secured.
Never get under your vehicleafter
it has been liftedby the towtruck.
Always use separate safety chains
on each side when towing
a vehicle.
Never use “J” hooks. Use Thooks instead.
198
When your vehicle is being towed, have
the ignition key off. The steering wheel
should be clamped in a straight-ahead
position, with a clamping device
designed for towing service. Do not use
the vehicle’s steering column lock for
this. The transaxle should be in Neutral
and the parking brake released.
Don’t have your vehicle towed on the
front wheels, unless you must. If the
vehicle must be towed on the front
wheels, don’t go more than 35 mph
(56 km/h) or farther than 50 miles
(80 km) or your transaxle will be
damaged. If these limits must be
exceeded, then the front wheels have to
be supported on a dolly.
I
Towing from the FrontVehicle Hook-up (EXCEPT SSE & SSEI’) 2.Across sling chains, position a 4x4
Before hoolung up toa tow truck, be
sure to read all the information on
Towing Your Pontiac earlier in this
section.
1. Attach T-hook chains into the bottom
slots in the cradle behind the front
wheels, on both sides.
wood beam against bottom of
radiator support behind the front
bumper.
x6019 I
3.Attach a separate safety chain around
the outboard endof each control
arm.
.r
Problems on the Road
A
r
L
bwing
from
Frontthe
@hickHook-up (SSE & SSEi ONLY)
X6019
I
Attach a separate safety chain around
leforehookinguptoatow
truck, betheoutboardend
of eachcontrol arm.
ure to read all the information on
bwing Your Pontiac earlier in this
xtion.
Do not tow with sling-type
equipment orhcia/fog light damage
will occur. Use wheel-lift or car
carrier equipment (additional
ramping may be required for car
carrier equipment). Use safety
chains and wheel straps.
... 200
To help avoid damaging a vehicle
during a tow over rough surfaces,
install a towing dolly beneath the
wheels that would otherwise be on
the ground during thetow. This
will increase clearance between the
wheel-lift equipment and the
underbody of the towed vehicle.
lowing from the RearVehice Hook-up (ALL)
Before hooking up to a tow truck, be
sure to read all the information on
Towing Your Pontiac earlier in this
section.
1. Attach T-hook chains on both sidesin
the slotted holes in the floor pan
support rails just ahead of the rear
wheels.
2. Position the lower sling crossbar
directly under the rear bumper.
3.Attach a separate safety chain around
the outboard end of each lower
control arm.
201
r
m m m
I'
Problems on the Road
Engine Overheating
You will find a coolant temperature gage
or the warning light about a hotengine
on your Pontiac's instrument panel. See
the Index under Coolant Temperature
Gage and Coolant Temperature Warning
Light.
202
'
If your engine catches fire because
you keep driving with no coolant,
your vehicle canbe badly
damaged. The costly repai
not be covered by your warranty.
Steam is Coming fromYour Engine:
Steam from an overheated
, engine
can burnyou badly,
even if you just open the hood. Stay
away h m the engine if you see or
hear steam coming from it. Just
turn it off and get everyone away
from the vehicle untilitmols down.
Wait until there is no sign of steam
or coolant before opening the hood.
If you keep driving when your
engine is overheated, the liquidsin
it can catch fmYou or-others
could be badly burned. Stop your
engine if it wetheats, and get out
of the vehicle until the engine is
cool.
If No Steam is Coming from Your
Engine:
If you get the overheat warning butsee
or hear no steam, the problemmay not
be too serious. Sometimes the engine
can get a little too hot when you:
Climb a long hill on a hot day.
Stop after high speed driving.
Idle for long periods in traffic.
Tow a trailer.
If you get the overheat warning withno
sign of steam, try this for a minute or so:
1 Turn off your air conditioner.
2. Turn your heater to full hot at the
highest blower speed andopen the
window as necessary.
3.If you’re in atraffic jam, shift to
N (Neutral).
If you no longer havethe overheat
warning, you can drive. Just to be safe,
drive slower for about ten minutes. If
the warning doesn’t come back on, you
can drive normally.
If the warning continues, pull over, stop,
and park your vehicle right away.
If there’s still no sign of steam, you can
idle the engine for two or three minutes
while you’re parked, to see if the
warning stops.
.
But then, if you still have the warning,
TURN OFF THE ENGINE AND GET
EVERYONE OUT OF THE VEHICLE
until it cools down. You may decide not
to lift the hood but to getservice help
right away.
203
Problems on the Road
Engine Overheating(CONK)
Cooling System
When you decide it’s safe to lift the
hood, here’s what you’ll see:
(A) Coolant recovery tank
(B) Radiator pressure cap
(C) Electric engine fan
If the coolant inside the coolant
recovery tank is boiling, don’t do
anything else until it cools down.
The coolant level should be at or above
the FULL COLD mark. If it isn’t, you
may have a leak in the radiator hoses,
heater hoses, radiator, water pump or
somewhere else in the cooling system.
I I-1 other
Heaterandradiatorhoses,
engineparts,canbe
very hot. Don’t touch them. If you
do, you can be burned.
Don’t run the engine if there isa
leak. If you run the engine, it
could lose all coolant. That could
cause an engine fire, andyou could
be burned. Get any leak fixed
before you drive the vehicle.
An electric fan under the hood
h can start up even when the
engine is not running and can
injure you. Keep hands, clothing
and tools away from any
underhood electric fan.
.. .
204
anc
I
Engine damage from running your
engine without coolantisn’t
covered by your warranty.
If there seems to beno leak, check to
see if the electric enginefan is running.
If
the
engine
is overheating, the fan
should be running.If it isn’t, your
vehicle needs service.
How to Add Coolant to the Coolant
Recovery Tank:
If you haven’t found a problem yet, but
the coolant level isn’t up to theFULL
COLD mark, add a 50/50 mixture of
clean water (preferably distilled) and a
proper antifreeze at the coolant recovery
tank. See the Index under Coolant for
more information about the proper
coolant mix.
I b-AuI IUN
,k
Adding only plain water to
L your
cooling system can be
I
You can be burned if you spill
coolant on hot engine parts.
Coolant contains ethylene glycol
and it will burnif the engine parts
are hot enough. Don’t spill coolant
on a hot engine.
L
dangerous. Plain water, or some
other liquid like alcohol, can boil
before the proper coolant mix will.
Your vehicle’s coolant warning
system is set for the proper coolant
I
mix. With plain wateror the
When the coolant in the coolant
tank is at or above FULL
wrong mix, Your engine couldgetrecovery
too hot but you wouldn’t get the
COLD, start your vehicle. If the
overheat warning. Your engine
overheat warning continues, there’s one
could catch fm and you or others
more thing you can try. You can add the
be
Use a
mix
proper coolant mix directly to the
of clean water and a proper
radiator, but be sure thecooling system
antifreeze.
is cool beforeyou do it.
In coldweather,watercanfreeze
and crack the engine, radiator,
heater core and other parts. Use
the recommended coolant.
r
II
I
205
”
Problems on the Road
i
'.
'k
I Engine Overheating (CONT.)
\
I
Steam and scalding liquids
From a hot cooling system can
3w out and burn you badly. They
ale under pressure, and if you turn
thl= radiator pressure cap-even a
tle-they can come out at high
eed. Never turn the pressure cap
when the cooling system, including
the radiator pressure cap, is hot.
Wait for the cooling system and
radiator pressure cap to cool if you
ever have to turn. the pressure cap.
I
How to Add Coolant to the Radiator: 2. Then keep turning the pressure cap,
but now push down as you turn it.
1. You can remove the radiator pressure
Remove the pressure cap.
cap when the cooling system,
including the radiator pressure cap
and upper radiator hose, is no longer
hot. Turn the pressure cap slowly to
the left until it first stops. (Don't
press down while turning the
pressure cap.)
If you hear a hiss, wait for that to stop.
A hiss means there is still some pressure
left.
3. Fill the radiator with the proper mix,
up to the base of the filler neck.
4. Then fill the coolant recovery tank to
I
the FULLCOLD mark.
5. Put the cap back on the coolant
recovery tank, but leave the radiator
pressure cap off.
207
'.
Problems on the Road
I Engine Overheating
Ifa Tire Goes Flat
(CONT.)
6. Start the engine andlet it run until
you can feel the upper radiator hose
getting hot. Watch out for the engine
fan.
7. By this time, the coolant level inside
the radiator filler neck may be lower.
If the level is lower, add more of the
proper mix through the filler neck
until the level reaches the baseof the
filler neck.
8. Then replace the pressure cap. Be
sure the arrows on the pressure cap
line up like this.
It’s unusual for atire to “blow out”
while you’re driving, especiallyif you
maintain your tires properly. Ifair goes
out of a tire, it’s much more likely to
leak out slowly. But if you should ever
have a “blowout:’ here are a few tips
about what to expect and what todo:
If a fronttire fails, the flat tire will
create a drag that pullsthe vehicle
toward that side. Take your foot off the
accelerator pedal and grip the steering
wheel firmly. Steer to maintain lane
position, then gently brake to a stop well
out of the traffic lane.
1
Air lnflator Sysfem
A rear blowout, particularly on a curve,
acts much like a skid and may require
the same correctionyou'd use in askid.
In any rear blowout, remove your foot
from the accelerator pedal. Get the
vehicle under control by steering the
way you want the vehicle togo. It may
be very bumpy and noisy, but you can
still steer, Gently brake to a stop, well
off the road if possible.
If your tire goesflat, the next section
shows how to use your jacking
equipment to change a flat tire safely.
Some vehicles have an airinflator for
use in bringing tires up to the proper
pressure. The air inflator is located in
the trunk. The ON switch will work
even with the ignition off.
The air inflator comes with a kit that
includes a 20-foot hose andan air
pressure gage, as well as instructions
and special adapters for inflating things
like an air mattress or basketball.
Inflating something too much
can make it explode, and you
or others could be injured. Be sure
to read the inflator instructions,
and inflate any object onlyto its
1 recommendedpressure.
1
209I
Problems on the Road
Changing a Flat Tire
If a tire goes flat, avoid further tire and
wheel damage by driving slowly to a
level place. Turn on your hazard
warning flashers.
I . .
r -0
The following steps will tellyou how to
use thejack and change a tire.
The equipment you’ll need is in the
trunk.
1. Turn the center retainer bolt on the
3.Open the jack storage coverby
twisting the knob % turn counterspare tire cover counterclockwise to
clockwise.
remove it, then lift the tire cover.
2. Remove the spare tire from the trunk.
211
m . .
Problems on the Road
Changing a Flat Tire (CONT.)
4. Remove thejack and wheel wrench.
5.If you have wheel nut caps, remove
them.
6. If you have aluminum wheels, remove
the centercover that conceals the
wheel nuts by using the flat end of
the wheel wrench to pry it off.Do
not drop the cover or lay it face
down, as it could be scratchedor
damaged.
Do not use a hammer or mallet to
install the cover.
7. If your wheel has the special locking
lug nut, use the special adapter
supplied with your vehicle to remove
the locking wheel nut by turning
counterclockwise.
8. Use the wheel wrench to loosenthe
wheel nuts, but don’t remove them.
9. Attach the wheel wrench tothe jack,
and rotate the wrench clockwise to
raise thejack head a few inches.
Problems on the Road
I
Changing a Flat lire (CONT.:)
12. Raise the vehicle by rotating the
10. Near each wheel well is a notch in
11. Position the jack and raise the jack
the frame into whichto put the jack
head until it fits firmly on the ridge
wheel wrench clockwise in thejack.
head. The front notch is 10 inches
in the vehicle's frame nearest the
Raise the vehicle far enough off the
back from the front wheel well. The
ground so there is enough room for
flat tire. Do not raise the vehicle
rear notch is 8 inches forward from
the spare tire tofit.
yet. Put the compact spare tire near
the rear wheel well. The wheel
you.
wrench has these 8 and 10 inch
I
distances stamped onthe handle.
Raising your vehicle with thejack
Use the wheel wrench to measure to
improperly
positioned will damage
the notch by flipping the socket into
the vehicle or may allow the
the handle, then measuring from the
vehicle
to falloff the jack. Be sure
socket end of the wrench.
to fitthe jack lift head into the
proper location before raising your
vehicle.
I
13. Remove all the wheel nuts and take
off the flat tire.
4. Remove any corrosion from the
wheel bolts, mounting surface or
spare wheel.
5. Place the spare tire on the mounting
surface.
Rust or dirt on the wheel, or
b on the parts to which it is
fastened, can make the wheel nuts
become loose after a time. The
wheel could comeoff and cause an
accident. When you change a
wheel, remove any rust or dirt
from the places where the wheel
attaches to the vehicle. In an
emergency, you can use a cloth or
a paper towel to do this; but be
sure to use a scraper or wire brush
later, if you need to, to get all the
rust or dirt off.
16. Replace the wheel nuts with the
rounded end of the nuts toward the
wheel. Tighten each nut by hand
until the wheel is held against the
hub.
A
hTweruse oil or grease on
aLddsor nuts. If you do, the
nuts might come loose. Your wheel
could fall off, causing a serious
accident.
II I
215
Problems on the Road
Changing a Flat Tire (CONI)
17. Lowerthevehicle by rotating the
wheel
wrench counterclockwise on
the jack. Lower the jack completely.
m m m
216
18. Ina criss-cross sequence, tighten
the wheel
nuts firmly.
Incorrect wheel nutsor
improperly tightened wheel
nuts can cause the wheel to
become loose and even come off.
This could lead to an accident.Be
sure to use the correct wheel nuts.
If you have to replace them, be
sure to get the rightkind.
Stop somewhere as soon asyou
can and have the nuts tightened
with a torque wrench to
100 pound-feet (140 Nom).
Compact Spare Tire
Don’t try to put the wheel cover on the
19. Store the flat tire as far forward in
compact spare tire. It won’t fit. Store the
the trunk as possible. Store thejack
wheel cover in the trunk until you have
and wheel wrench in their
replaced the compact spare tire with a
compartment in the trunk.
regular tire.
1 Storing a jack, a tire, or other
Wheel covers won’t fit on your
compact spare. Ifyou try to put a
wheel cover on your compact
spare, you could damage the cover
or the spare.
I
equipment in the passenger
compartment of the vehicle could
cause injury. In a sudden stop or
collision, loose equipment could
strike someone. Store all these in
the proper place.
The compact spare is for temporary use
only. Replace the compact spare tire
with a full-sizetire as soon as you can.
See Compact Spare Tire later in this
section.
Although the compact spare was fully
inflated when your vehicle was new, it
can lose air after a time. Check the
inflation pressure regularly. It should be
60 psi (420 kPa). The compact spare is
made to go up to 3,000 miles (5 000 km),
so you can finish your trip and have
your full-size tire repaired or replaced
where you want. Of course, it’s best to
replace your spare with a fill-size tire as
soon as you can. Your spare will last
longer and be in good shape in case you
need it again.
r
Problems on the Road
Compact Sparelire (CONI)
Don’t use your compact spare on some
Your anti-lock brake system warning
light may come on when you are driving other vehicle.
with a compact spare. See the Index
And don’t mix your compactspare or
under Anti-Lock Brake System Warning wheel with other wheels or tires. They
Light.
won’t fit. Keep your spare and its wheel
together.
. I .
218
If You’re Stuck: In Sand,Mud,
Ice or Snow
What you don’t want to do when your
vehicle is stuck is to spin your wheels.
The method known as “rocking” can
help you get out when you’re stuck, but
you must use caution.
I
CAUTION
If you let your tires spin at
high speed, they can explode
and you or others could be injured.
And, the transaxle or other parts of
the vehicle can overheat. That
could cause an engine compartment
fire or other damage. When you're
stuck, spin the wheels as little as
possible. Don't spin the wheels
above 35 mph (56 km/h) as shown
on the speedometer.
Spinning your wheels can destroy
parts of your vehicle as well as the
tires. If you spin the wheels too
fast while shifting your transaxle
back and forth, you can destroy
your transaxle.
Rocking Your Vehicle to Get it Out:
First, turn your steering wheel left and
right. That will clear the area around
your front wheels. Then shift back and
forth between R (Reverse) and a
forward gear, spinning the wheels as
little as possible. Release the accelerator
pedal while you shift, and press lightly
on the accelerator pedal when the
transaxle is in gear. If that doesn't get
you out after a few tries, you may need
to be towed out. If you do need to be
towed out, see the Index under Towing
Your Pontiac.
Notes
Part
Service
I
.
COO25
H e r e you will find information
. This
about the care of your Pontiac
part begins with service and fuel
information. andthen it shows how
to check importantfluid and
lubricant levels. There is also
technical information about your
vehicle. and a section devoted to its
appearance care
.
6
G Appearance Care
Service . . . . . . . . . . . . . . . . . . . . . . . . . . . . .
. . . . . . . . . . . . . . . . . . 222
222
Fuel . . . . . . . . . . . . . . . . . . . . . . . . . . . . . . . . . . . . . . . . . . . . . . . . . . . . . . . . .
HoodRelease . . . . . . . . . . . . . . . . . . . . . . . . . . . . . . . . . . . . . . . . . . . . . . . . . . . .
227
231
Engineoil . . . . . . . . . . . . . . . . . . . . . . . . . . . . . . . . . . . . . . . . . . . . . . . . . . . . . .
Aircleaner . . . . . . . . . . . . . . . . . . . . . . . . . . . . . . . . . . . . . . . . . . . . . . . . . . . . .
233
TransaxleFluid . . . . . . . . . . . . . . . . . . . . . . . . . . . . . . . . . . . . . . . . . . . . . . . . . . 236
Enginecoolant . . . . . . . . . . . . . . . . . . . . . . . . . . . . . . . . . . . . . . . . . . . . . . . . . . 238
Power Steering Fluid . . . . . . . . . . . . . . . . . . . . . . . . . . . . . . . . . . . . . . . . . . . . . . 242
Windshield Washer Fluid. . . . . . . . . . . . . . . . . . . . . . . . . . . . . . . . . . . . . . . . . . . 242
243
Brakes . . . . . . . . . . . . . . . . . . . . . . . . . . . . . . . . . . . . . . . . . . . . . . . . . . . . . . . . .
Battery . . . . . . . . . . . . . . . . . . . . . . . . . . . . . . . . . . . . . . . . . . . . . . . . . . . . . . . . . . 245
Bulb Replacement . . . . . . . . . . . . . . . . . . . . . . . . . . . . . . . . . . . . . . . . . . . . . . 246
......................
. . . . . . .248
WindshieldWiperBladeReplacement
Loading Your Vehicle . . . . . . . . . . . . . . . . . . . . . . . . . . . . . . . . . . . . . . . . . . . . . 248
Tires . . . . . . . . . . . . . . . . . . . . . . . . . . . . . . . . . . . . . . . . . . . . . . . . . . . . . . . . . . 250
Appearance Care . . . . . . . . . . . . . . . . . . . . . . . . . . . . . . . . . . . . . . . . . . . . . . . . . 257
Vehicle Identification Number (VIN) . . . . . . . . . . . . . . . . . . . . . . . . . . . . . . . . . 264
Add-on Electrical Equipment . . . . . . . . . . . . . . . . . . . . . . . . . . . . . . . . . . . . . . .265
Fuses & Circuit Breakers . . . . . . . . . . . . . . . . . . . . . . . . . . . . . . . . . . . . . . . . . . .
266
Capacities & Specifications . . . . . . . . . . . . . . . . . . . . . . . . . . . . . . . . . . . . . . . . . 270
Normal Maintenance Replacement Parts . . . . . . . . . . . . . . . . . . . . . . . . . . . . . . . 271
Fluids & Lubricants . . . . . . . . . . . . . . . . . . . . . . . . . . . . . . . . . . . . . . . . . . . . . . . 272
Replacement Bulbs. . . . . . . . . . . . . . . . . . . . . . . . . . . . . . . . . . . . . . . . . . . . . . . . 273
221
...
Service & Appearance Care
You should keep a record with all parts
receipts and list the mileage and dateof
any service work you perform. See the
Index under Maintenance Record.
AC’
I
-
Service
Your Pontiac dealer knows your vehicle
best and wants you to be happy with it.
We hope you’ll go to your dealer for all
your service needs. You’ll get genuine
GM parts and GM-trained and
supported service people.
We hope you’ll want to keep your GM
vehicle all GM. Genuine GM parts have
one of these marks.
I
I
Doing Your Own Service Work
If you want to do some of your own
service work, you’ll want to get the
proper Pontiac Service Manual. It
tells you much more about how to service
your Pontiac than this manual can. To
order the proper service manual, see the
Index under Service Publications.
m . .
222
You can be injured if you try
to do service work on a
vehicle without knowing enough
about it.
Be sure you ha! uffcient
knowledge, experience, and the
proper replacementparts and
tools before you attempt any
vehicle maintenancetask.
Be sure to use the proper nuts,
bolts, and other fasteners.
“English” and “metric” fasteners
can be easily confused. If you
use the wrong Edsteners, parts
can later break or fall off. You
could be hup
r
If you try to do service work
without knowing enough about it,
your vehicle could be damaged.
Fuel
The eighth digitof your Vehicle
Identification Number (VIN) shows the
code letter for your engine. You will
find the VIN at the top left
of your
instrument panel. (See theIndex under
&hide Identljication Number-.)
3800 Engine (Code L):
Use regular unleaded gasoline rated at
87 octane or higher. It should meet
specifications ASTM D4814 in the U.S.
and CGSB 3.5-92 in Canada. These
fuels should have the proper additives,
so you should not have to add anything
to the fuel.
[n the U.S. and Canada, it’s easy to be
sure you get the right kind of gasoline
‘unleaded). You’ll see “UNLEADED”
Pight on the pump. And only unleaded
specifications ASTM D4814 in the U.S.
aozzles will fit into your vehicle’s filler and CGSB 3.5-92 in Canada. These
neck.
fuels should have the proper additives,
so you should not have to add anything
Be sure the posted octane is at least
87.
[f the octane is less than87, you may get to the fuel.
1 heavy knocking noise when you drive.
In the U.S. and Canada, it’s easy to be
[fit’s bad enough, it can damage your
sure you get the right kind of gasoline
:ngine.
(unleaded). You’ll see “UNLEADED”
[f you’re using fuel rated at87 octane or right on the pump. And only unleaded
nozzles will fit into your vehicle’s
filler
nigher and you still hear heavy
neck.
knocking, your engine needs service.
But don’t worry if you hear a little
Be sure the posted octaneis at least 91.
inging noise when you’re accelerating If the octane is less than 91, you may get
3r driving up a hill. That’s normal, and a heavy knocking noise when you drive.
vou don’t have to buy a higher octane
(In an emergency,you may be able to
Fuel to get rid of pinging. It’s the heavy, use lower octane-as low as 87-if
:onstant knock that means you have a
heavy knocking does not occur.) If
xoblem.
you’re using 91 or higher octane
unleaded gas andyou still get heavy
knocking, your engine needs service.
MTBE is “methyl tertiary-butyl
ether:’ Fuel that is no more than 15%
MTBE is fine for your vehicle.
Ethanol is ethyl or grain alcohol.
Properly-blended fuel that is no more
than 10%ethanol is fine for your
vehicle.
Methanol is methyl or wood alcohol.
Service & Appearance Care
:#el (CONTI
Fuel that is more than 5 %
methanol is bad for your vehicle.
Don’t use it. It can corrode metal
parts in your fuel system and also
damage plastic andrubber parts.
That damage wouldn’t be covered
under your warranty. And even at
5% or less, there must be
“cosolvents” and corrosion
preventers in this fuel to help avoid
these problems.
bel Capacity: 18 U.S. Gallons (68L).
Ise unleaded fuel only.
Gasolines for Cleaner Air
Your use of gasoline with detergent
additives will help prevent deposits from
forming in your engine and fuel system.
That helps keep yourengine in tune and
your emission control system working
properly. It’s good for your vehicle, and
you’ll be doing your part forcleaner air.
Many gasolines are now blended with
materials called oxygenates. General
Motors recommends that you use
gasolines with these blending materials,
such as MTBE and ethanol. By doing
so, you can help clean the air, especially
in those pa@ of the country that have
high carbon monoxide levels.
In addition, some gasoline suppliers are
now producing reformulated gasolines.
These gasolines are specially designed
to reduce vehicle emissions. General
Motors recommends thatyou use
reformulated gasoline. By doing so, you
can help clean the air, especially in
those parts of the country that have high
ozone levels.
You should ask your service station
operators if their gasolines contain
detergents and oxygenates, andif they
have been reformulated to reduce
vehicle emissions.
Fuel DoorLock (omoN)
Fuels in Foreign Countries
tf you plan on driving in another
country outside the U.S. or Canada,
unleaded fuel may be hard to find.
Do not use leaded gasoline. If you use
even one tankful, your emission controls
won’t work well or at all. With
continuous use, spark plugs can get
fouled, the exhaust system cancorrode,
and your engine oil can deteriorate
quickly. Your vehicle’s oxygen sensor
will be damaged. All of that means
costly repairs that wouldn’t be covered
by your warranty.
To check on fuel availability, ask an auto
club, or contact a major oil company
that does business in the country where
you’ll be driving.
You can also write us at the following
address for advice. Just tell us where
you’re going and give your Vehicle
Identification Number (VIN).
General Motors of Canada Ltd.
International Export Sales
P. 0. Box 828
Oshawa, Ontario L1H 7N1, Canada
On SSE and SSEi models equipped with
the Theft-Deterrent System option, the
fuel door is locked and unlocked
together with the power door locks.
Therefore, to unlock thefuel filler door,
you may use the outside door key lock,
the inside powerdoor lock button, or
the Remote Keyless Entry key chain
transmitter. To unlock the fuel door, just
unlock the driver’s door.
225
Service & Appearance Care
Filling Your Tank
The cap is behind a hinged door on the
left side of your vehicle.
I
I
Gasoline vapor is highly
flammable. It burns violently,
and that can cause very bad
injuries. Don’t smoke ifyou’re
ar gasoline or refueling your
vehicle. Keep sparks, flames, and
smoking materials away from
gasoline.
To take off the cap, turn it slowly to the
left (counterclockwise),
I
While refueling, hang the cap inside the
fuel door.
A
If you get gasoline on you and
L thensomethingignites it, you
L.uddbe badly burned. Gasoline
can spray out on you if you open
the fuel filler cap too quickly. This
spray can happen if your tank is
nearly full, and is more likely in
hot weather. Open the fuel filler
cap slowly and wait for any “hiss”
noise to stop. Then unscrew the
cap all the way.
When you put the cap back on, turn it to
the right until you hear a clicking noise.
m . .
226
If you need a new cap, be sureto
get the right type. Your dealer
get one for you. If you getthe
wrong type, it may not fit or have
proper venting, and your fuel tank
and emissions system might be
damaged.
Fuel Door Manual Release
Checking Things Under
the Hood
[f your vehicle has a fuel doorlock, the
Fuel door can be opened manuallyin
The following sections tell you how to
;ase of an electrical power failure.To
check fluids, lubricants and important
io so, first open the trunk. The release
mechanism is on the driver's sideof the parts underhood.
vehicle, at the top of the trunk
2ompartment. Pull the tab to release the
fuel door.
Hood Release
To open the hood, first pull the hood
release handle inside the vehicle.
Service & Appearance Care
I
Hood Release (CONT.)
Then go to the frontof the vehicle and
pull up on the underhood release.
Lift the hood.
I GAUTION
I
I
11
An electric fim under the hood
can start up and injure you
even when the engine is not
running. Keep hands, clothing and
tools away from any underhood
electric fan.
Qr
lefore closing the hood, be sure all the
Her caps are on properly. Thenjust
ull the hood down and close it firmly.
hderhood light
bur parking lights or headlights must
le on for the underhood light to
unction when you open the hood.
D
m
.
228
3800 Engine (CODE L)
When you open the hood, you’ll see:
1. Engine Coolant Recovery Tank
2. Power Steering Fluid Reservoir
3.Automatic Transaxle Fluid Dipstick
4. Brake Fluid Reservoir
5. Windshield Washer Fluid Reservoir
6. Air Cleaner
7 . Engine Oil Dipstick
8. Engine Oil Fill Cap
9. Radiator Pressure Cap
10 . Battery
229
Service & Appearance Care
.... . .
3800 SC Engine (CODE I)
When you open the hood, you'll see:
1. Engine Coolant Recovery Tank
2. Automatic Transaxle Fluid Dipstick
3. Power Steering Fluid Reservoir
4. Brake Fluid Reservoir
5. Windshield Washer Fluid Reservoir
6. Air Cleaner
7 . Engine Oil Dipstick
8. Engine Oil Fill Cap
9. Radiator Pressure Cap
10. Battery
Engine Oil
It’s a good idea to check your engine oil
every time you get fuel. In order to get
an accurate reading, the oil mustbe
warm and the vehicle must be on level
ground. Turn off the engine and give the
oil a few minutes to drain back into the
oil pan. If you don’t, the oil dipstick
might not show the actual level.
To Check Engine Oil:
Pull out the dipstick and clean it with a
paper towel or cloth, then push it back
in all the way. Remove it again, keeping
the tip lower.
When to Add Oil:
If the oil is at or below the ADD line,
then you’ll need to add some oil. But
you must use the right kind. This
section explains what kind of oil to use.
For crankcase capacity, see theZr.z&x
under Capacities & Specijicatiow.
Don’t add too much oil. If your
engine has so much oil that the oil
level gets above the cross-hatched
area that shows theproper
operating range, your engine could
be damaged.
I
Just fill it enough to put the level
somewhere in the proper operating
range. Push the dipstick all the way
back in when you’re through.
231
Service tS Appearance Care
SAE low-30
As shown in the viscosity chart,
SAE 1OW-30 is best for your vehicle.
.
However, you can use SAE 5W-30 if
For best fuel economy and cold starting,
it’s going to be colder than 60°F
select thelowest SAE viscosity grade oil’;,:;:?,:,!
for the expected temperature range,:?$’:&,:, (16°C) before your next oil change.
When it’s very cold, below 0°F
(-18”C), you should use SAE 5W-30.
These numbers on an oil container
show its viscosity, or thickness. Do
not use other viscosityoils such as
SAE 1OW-40 or SAE 20W-50.
Energy Conserving 11
Oils with these wordson the container
will help you save fuel.
This doughnut-shaped logo (symbol) is
used on most oil containers to help you
select the correctoil.
You should look for this on the oil
container, and use only those oils that
display the logo.
IF NEITHER SAE 5W-30 NOR SAE 1OW-30
GM Goodwrench@ Oil(in Canada, GM
GRADE OILS ARE AVAILABLE, SAE 30
Engine Oil) meets all the requirements
GRADE MAY BE USEDATTEMPERATURES
for your vehicle.
ABOVE 40 DEGREES F (4 DEGREES C).
’,”,,
,,
4
What Kindof Oil to Use
1
Look for Three Things:
SG
“SG” must be on the oil container,
either by itself or combined with other
quality designations, such as
“SGICC,” “SGICD,” “SF, SG, CC,”
etc. These letters show American
Petroleum Institute (API) levelsof
quality.
’
If you use oils that don’t have the
“SG” designation, you can cause
engine damage not covered by your
warranty.
... 232
’
,
.
DO NOT USE SAE 1OW-40, SAE 20W-50 OR
ANY OTHER GRADE OIL NOT RECOMMENDED.
’
,
,,
i’
Engine Oil Additives
Don’t add anything to your oil. Your
Pontiac dealer is ready to advise if you
think something should be added.
When to Change Engine Oil
See if any one of these is true for you:
Most trips are less than
4 miles (6 km).
It’s below freezing outside and most
trips are less than 10 miles (16 km).
The engine is at low speed most ofthe
time (as in door-to-door delivery, or in
stop-and-go traffic).
You tow a trailer often.
Most trips are through dusty places.
If any one of these is true for your
vehicle, you need to change your oil and
filter every 3,000 miles (5 000 km) or 3
months-whichever comes first.
If none of them is true, change the oil
every 7,500 miles (12 500 km) or 12
months-whichever comes first. Change
the filter at the first oil change and at
every other oil change after that.
Engine Block Heater
An engine block heater can be a big
help if you have to park outsidein very
cold weather, 0°F (-18OC) or colder. If
your vehicle has this option, see the
Index under Engine Block Heater.
What
to Do with
Used
Oil
Air
Cleaner
1
Refer to the Maintenance Schedule to
determine when to replace the air filter.
See the Index under Scheduled
Maintenance Services.
things that have caused skin
cancer in laboratory animals. Don’t
let used oil stay on your skin fbr
very long. Clean your skin and
nails with soaQ and water,or a
good hand cleaner. Wash or
properly throw away clothing or
rags containing usedengine oil.
CAUTION
1%
I
Usedoil can bearealthreatto the
environment. If you change your own
oil, be sure to drain all free-flowing oil
from the filter before disposal. Don’t
ever dispose of oil by pouring it on the
ground, into sewers, or into streams or
bodies of water. Instead, recycle it by
taking it to a place that collects used
oil.
If you have a problem properly
disposing of your used oil, ask your
dealer, a service station or a local
recycling center for help.
I
I
I
Operating the engine with the
air cleaner off can cause you
uz others to be burned. The air
cleaner not only cleans the air, it
stops flame if the engine backfires.
If it isn’t there, and the engine
backfires, you could be burned.
Don’t drive with it off, and be
careful working on the engine with
the air cleaner off.
I
If the air cleaner is off, a backfire
can cause a damaging engine fire.
And, dirt can easily get into your
engine, which will damage it.
Always have the air cleaner in
place when you’redriving.
...
Service & Appearance Care
4
Air Cleaner (CONT.)
To Check or Replace (3800 Engine):
1. Unscrew the three wing screws in the
housing cover and pull back.
I . .
234
2.Unscrew the clamp on the air intake
hose where the hose attaches to the
throttle body near the top of the
engine. Detach the hose from the
throttle body, then pull back the rear
of the housing cover.
3. Remove the air filter.
4. Be sure to install the air filter and
replace the cover tightly.
5. Reattach the air intake hose and
tighten the clamp.
2. Unscrew the clamp on the air intake
To Check or Replace (3800
hose where the hose attaches to the
Supercharged Engine):
throttle
body near the topof the
1, Unsnap the three clips in the housing
engine. Detach the hose from the
cover and pull back.
throttle body, then pull back the rear
of the housing cover.
3. Remove the air filter.
4. Be sure to install theair filter and
replace the cover tightly.
5.Reattach the air intake hose and
tighten the clamp.
Service & Appearance Care
Automatic Transax/eFluid
When to Check and Change:
A good time to check your automatic
transaxle fluid level is when the engine
oil is changed. Refer to the Maintenance
Schedule to determine when to change
your fluid. See the Index under
Scheduled MaintenanceServices.
How to Check:
Because this operation can be alittle
difficult, you may choose to have this
done at a dealership Service
Department. If you do it yourself, be
sure to follow all the instructions here,
or you could get a false reading on the
dipstick.
Too much or too little fluid can
damage your transaxle. Too much
can mean that some of the fluid
could come out and fall on hot
engine parts, starting a fire. Be
sure to get an accurate reading if
you check your transaxle fluid.
Wait at least 30 minutes before checking
the transaxle fluid level if you have been
driving:
When outside temperatures are above
90"F (32"C).
At high speed for quite a while.
In heavy traffic-especially in hot
weather.
While pulling a trailer.
To get the right reading,the fluid should
be at normal operating temperature,
which is 180°F to 200°F (82°C to
93"C).
Get the vehicle warmed upby driving
about 15 miles (24 km) when outside
temperatures are above 50"F (10"C). If
it's colder than 50°F (lO°C), you may
have to drive longer.
To Check the Fluid Level:
Park your vehicle on a level place.
Place the shift lever in P (Park) with
the parking brake applied.
With your foot onthe brake pedal,
move the shift lever through eachgear
range, pausing for about three seconds
in each range. Then, position the shift
lever in P (Park).
Let the enginerun at idle for threeto
five minutes.
Then, Without ShuttingOff the
Engine, Follow These Steps:
1. Pull out the dipstick and wipe it with
a clean ragor paper towel.
2. Push it back in all the way, wait three
seconds and then pull it backout
again.
3.Check both sides of the dipstick, and
read the lower level. The fluid level
must be in the crosshatched area.
4. If the fluid level iswhere it should
be, push the dipstick back inall the
way.
c
Service & Appearance Care
Engine Coolant
Automatic Transaxle Fluid(CONTJ
How to Add Fluid:
Refer to the Maintenance Schedule to
determine what kind of transaxle fluid to
use. See theIndex under Fluids &
Lubricants.
If the fluid level is low, add only enough
of the proper fluid to bringthe level up
into the cross-hatched area on the
dipstick. It doesn't take much fluid,
generally less than a pint (0.5 L). Don't
overfill. We recommend that you use
only fluid labeled DEXRON@-IIE,
because fluids with that labelare made
especially for your automatictransaxle.
Damage caused by fluid other than
DEXRON@-IIEis not covered by your
new vehicle warranty.
I . .
238
After adding fluid, recheck the fluid
level as described under How to Check.
When the correct fluid level is obtained,
push the dipstick back in all the way.
The following explains your cooling
system and how to add coolant when it
is low. If you have a problem with
engine overheating, see theIndex under
Engine Overheating.
The proper coolant foryour Pontiac
will:
Give freezing protection down to
-34°F (-37°C).
Give boiling protection up to 262°F
(128"C).
Protect against rust and corrosion.
Help keep the proper engine
temperature.
a
Let the warning lights workas they
should.
What to Use:
Use a mixture of one-half clean water
‘preferably distilled) and one-half
intifreeze that meets “GM Specification
1825-M,” which won’t damage
aluminum parts. You can also use a
recycled coolant conforming to GM
Specification 1825-M with a complete
2oolant flush and refill. If you use this
mixture, you don’t need to add anything
1: se.
Adding only plain water to
your cooling system can be
wgerous. Plain water, or some
other liquid like alcohol, can boil
:forethe proper coolant mix will.
Your vehicle’s coolant warning
system is set for the proper coolant
mix. With plain water or the wrong mix, your engine couId get
too hot but you wouldn’t get the
overheat warning. Your engine
could catch fire and you or others
could be burned. Use a S0/50 mix
of clean water and a proper
antifreeze.
If you use an improper coolant
mix, your engine could overheat
and be badly damaged. The repair
cost wouldn’t be covered by your
warranty. Too much water in the
mix can freeze and crack the
engine, radiator, heater core
other parts.
Service & Appearance Care
A’
Adding Coolant
To Check Coolant:
When your engine is cold, the coolant
level should be between the FULL
COLD mark and FULL HOT. When
your engine is warm, the level should be
up to FULL HOT, or a little higher.
If you have the optional low coolant
warning light and it comes on when
your engine is running, you’re low on
coolant. Or, if you have the optional
Driver Information Center and the
warning LOW COOLANT appears,
you’re low on coolant.
To Add Coolant:
If you need more coolant, add the
proper mix at the coolant recovery
tank.
Turning the radiator pressure
1
I I
1 cap when the engine and
raalator are hot can allow steam
and scalding liquids to blow out
and bum you badly. With the
coolant recovery tank, you will
almost never have to add coolant at
the radiator. Never turn the
radiator pressure cap-even a
little-when the engine and
radiator are hot.
-
m . .
240
Radiator Pressure Cap
Add coolant mix at the recovery tank,
but be careful notto spill it.
I "-"
You can be burned ifyou spill
1,.
""IW
L coolant on hot engine parts.
Coolant contains ethylene glycol,
and it will burn if the engine parts
are hot enough. Don't spill coolant
on a hot engine.
I
Your radiator pressure cap is a 15
psi (105 kPa) pressure-type cap and
must be tightly installedto prevent. .
coolant loss andpossibleengine i.
damage from overheating. Be sure
the arrows on the cap line up with
the overflow tube on the radiator
I Thermostat
Engine coolant temperature is controlled
by a thermostat in the engine coolant
system. The thermostat stops the flow of
coolant through the radiatoruntil the
coolant reaches a presettemperature.
When you replace your thermostat, an
AC@thermostat is recommended.
When you replace your radiatorpressure
cap, an AC@ cap is recommended.
241
c
Service & Appearance Care
Power Steering Fluid
How to Check Power Steering Fluid:
Unscrew the cap and wipe the dipstick
with a clean rag. Replace the cap and
completely tighten it. Then remove the
cap again and look at the fluid level on
the dipstick.
When the engine Compartment is hot,
the level should be at the H mark.
When the engine compartment is cool,
the level should be at the C mark.
I . .
242
Windshield Washer Fluid
To Add:
Open the cap labeled WASHER FLUID
ONLY. Add washer fluid until the bottle
is full.
What to Add:
Refer to the Maintenance Schedule to
determine what lund of fluid to use. See
the Index under Fluids & Lubricants.
I
When adding power steering fluid
or making a complete fluid change,
always use the proper fluid. Failure
to use the proper fluid can cause
leaks and damage hoses andseals.
1
Brake Master Cylinder
When using concentrated washerfluid, follow the manufacture^
instructions for adding water.
* Don’t mix water with ready-to-use washer fluid. Watercan cauL, ;he
solution to freeze and damage your washer fluid tank andother parts of
washer system. Also, water doesn’tclean as well as washer fluid.
Fillyourwasherfluidtankonly
% fullwhenit’svery cold. This a for
expansion, which could damagethe tank if it is completely full.
Don’t use radiator antifreeze in your windshield washer. It can damage your
washer system and paint.
Your brake master cylinder is here. It is
filled with DOT-3 brake fluid.
There are only two reasons why the
brake fluid level in your master cylinder
might go down. The first is that the
brake fluid goes down to an acceptable
level during normal brake lining wear.
When new linings are put in, the fluid
level goes back up.
The other reason is that fluid is leaking
out of the brake system. If it is, you
should have your brake system fixed,
since a leak means thatsooner or later
your brakes won’t work well, or won’t
work at all.
So, it isn’t a good idea to “top off’ your
brake fluid. Adding brake fluid won’t
correct a leak. If you add fluid when
243
Service & Appearance Care
Brake Master Cylinder (CONI:)
your linings are worn, then you’ll have
too much fluid whenyou get new brake
linings. You should add (or remove)
brake fluid, as necessary, only when
work is done on the brake hydraulic
system.
,Ifhid,
you have too much brake
it can spill on the
engine. The fluid will burn if the
engine is hot enough. You or
others could be burned, and your
engine could be damaged. Add
brake fluid only when work is
done on the brake hydraulic
system.
I
244
When your brake fluid falls to a low
level, your brake warning light will
come on. A continuous chime will
sound if you try to drive with this
warning light on. See the Index under
Brake System Warning Light.
What to Add:
When you do need brake fluid, use only
DOT-3 brake fluid-such as Delco
Supreme ll@(GM Part No. 1052535).
Use new brake fluid from a sealed
container only.
DOT-5 silicone brake fluid can
damage your vehicle. Don’t useit.
Don’t let someone put in the
wrong kind of fluid. For
example, just a few drops of
mineral-based oil, such as engine
oil, in your brake system can
damage brake system partsso
badly that they’ll have to be
replaced.
Brake fluid can damage paint, so
be careful not to spill brake fluid
on your vehicle.
Replacing Brake System Pants
The braking system on a modem vehicle
is complex. Its many parts have to be of
top qualityand work well together if the
vehicle is tohave really good braking.
Vehicles we design and test have topquality GM brake parts in them, as your
Pontiac does when it is new. When you
replace partsof your braking systemfor example, when your brake linings
wear down and you have to have new
ones put in-be sure you get new
genuine GM replacement parts. If you
don’t, your brakes may no longer work
properly. For example, if someone puts
in brake linings that are wrong for your
vehicle, the balance between your front
and rear brakes can change, for the
worse. The braking performance you’ve
come to expect can changein many
other ways if someone puts in the wrong
replacement brake parts.
Battery
Vehicle Storage
Every new Pontiac has a Delco
Freedom@ battery.You never have to
add water to one of these. When it’s
time for a new battery, we recommend a
Delco Freedom@ battery. Getone that
has the catalog number shown on the
original battery’s label.
If you’re not going to drive your vehicle
for 25 days or more, take off the black
negative (-) cable from the battery.
This will help keep your battery from
running down.
Jump Starting
For jump starting instructions, see the
Index under Jump Starting.
Batteries have acid that can
burn you and gas that can
explode. You can be badly hurt if
you aren’t careful. Seethe Index
under Jump Starting for tips on
working around a battery without
getting hurt.
1
Contact your dealer to learn howto
prepare your vehicle for longer storage
periods.
245
...
Service & Appearance Care
Halogen Bulbs
L Halogen bulbs have
pressurized gas insideand can
if you drop or scratch the
bulb. You or others could be
' jured. Take special care when
llmdling and disposing of halogen
bulbs.
l
Headlight Bulb Replacement
For the type of bulb, see the Index under 3. Twist the bulb assembly$/6 turn and
Replacement Bulbs.
pull out the bulb assembly.
1. Remove the two screws from the top
4. Unclip the bulb assembly from the
of the headlight housing.
wiring harness and replace the bulb
assembly.
2. Lift the entire headlight housing and
tilt it forward.
Taillight Bulb Replacement
5. Reverse steps 1-3 to replace the bulb
assembly and headlight housing.
Make sure the tab (A) is locked into
the slot (B) in the radiator support
before tightening the screws.
For the type of bulb, see the Index under
Replacement Bulbs.
1 In the trunk, remove the two plastic
nuts holding the carpeting in place.
2. Pull the carpet away from the rear
corner of the trunk.
.
3. Rotate the bulb housing turn and
remove it.
4. To remove bulb, push in and rotate it
counterclockwise.
5. Replace the bulb.
6. Reverse the steps to reassemble the
taillight.
Fog Light Bulb Replacement
If you have fog lights, don’t change your
fog light bulbs unlessyou have the
proper aiming equipment. See your
Pontiac dealer if you have any further
questions.
247
Service & Appearance Care
Windshield Wiper Blade
Replacement
...
Loading bur Vehicle
Two labels on your vehicle show how
the GVWR (Gross Vehicle Weight
much
weight
it
may
properly
carry.
The
Replacement blades come in different
Rating). The GVWR includes the
types and are removed in different ways. Tire-Loading Information label found on weight of the vehicle, all occupants, fuel
the rear edge of the driver’s door tells
Here’s how to remove the type with a
and cargo. Never exceed the GVWR for
you the proper size, speed rating and
release clip:
your vehicle, or the Gross Axle Weight
recommended inflation pressuresfor the Rating (GAWR) for either the frontor
1. Pull the windshield wiper arm away
tires on your vehicle. Italso gives you
rear axle.
from the windshield.
important information about the number And, if you do have a heavy load, you
2. Lift the release clip with a
of people that can be in your vehicle and should spread it out. Don’t carry more
screwdriver and pull theblade
the total weight thatyou can carry. This than 176 lbs. (80 kg) in your trunk.
assembly off the wiper arm.
weight is called the Vehicle Capacity
On vehicles equipped with electronic
3.Push the new wiper blade securely on Weight and includes the weight of all
level control, the rearof the vehicle is
the wiper arm.
occupants, cargo, and all nonfactoryautomatically
kept level as you load or
installed options.
unload your vehicle.
The other label is the Certification
label, also on the rear edge of the
driver’s door. It tellsyou the gross
weight capacity of your vehicle, called
248
I
bAUIIUN
- heavier than the GVWR or the
or components that fail becauseof
overloading.
b
maximum front and rearGAWRs.
If you do, partson your vehicle
can break, or it can changethe way
your vehicle handles. These could
cause you to lose control. Also,
overloading can shorten the life of
your vehicle.
I
If you put things inside your vehiclelike suitcases, tools, packages, or
anything else-they will go as fast as the
vehicle goes. If you have to stop or turn
quickly, or if there is a crash, they’ll
keep going.
- b vehicle can strike and injure
people in a sudden stop or turn, or
in a crash.
* Put things in the trunk of your
vehicle. In a trunk, put them as
far forward as you can. Try to
spread the weight evenly.
* Never stack heavierthings, like
suitcases, inside the vehicle so
that some of them are above the
tops of the seats.
0 When you carry something
inside the vehicle, secure it
whenever you can.
Don’t leave a seatfolded down
unless you need to.
249
I
Service & Appearance Care
Tires
We don’t make tires. Your new vehicle comes with high qualitytires made by a
leading tire manufacturer. These tires are warranted by the tire manufacturers and
their warranties are delivered with every new Pontiac. If your spare tire is a
different brand than your roadtires, you will have a tire warranty folder from each
of these manufacturers.
I CAUTION
A
~~~~
~~
Poorly maintained and improperly used tires are dangerous.
Overloading your tires can cause werhe;atiqg as a result of too much
I friction. You could have an &-out and a serious accident..See the I&
under Lading .bur F.’ehick.
Underinflated tires pose the same danger as werlioaded tires. The resulfing
accident could cause serious injury. Check all tires fr\equently to maintain
the recommended pressure. Tire pressure should be checked when the tires
are cold.
* Overinflated tires are more likely to be cut, punctured, or broken by
sudden impact, such as when you hit a pothole. Keep tires at the
recommended pressure.
Worn, old tires can cause accidents. If your tread is badly worn, or if your
tires have been damaged, replace them.
... 250
lnflation-Tire Pressure
The Tire Loading Information label
which is on the rear edgeof the driver’s
door shows the correct inflation
pressures for your tires, when they’re
cold. “Cold” means your vehicle has
been sitting for at least three hoursor
driven no more than a mile.
;1
Don'tletanyonetell you that
,~
underinflation or overinflation
all right. It's not. If your tires don't
, 1\
,%$:
Tire lnspection and Rotation
When to Check:
Check your tiresonce a month or more.
Don't forget your compact spare tire. It
should be at 60 psi (420 kpa).
To make your tires last longer, have
them inspected and rotatedat the
mileages recommendedin your Maintenance Schedule. See the Index under
Scheduled MaintenanceServices.
Use this rotationpattern.
How to Check:
Use a good quality pocket-type gage to After the tires have beenrotated, adjust
the front and rear inflation pressure as
check tire pressure. Simply looking at
shown on the Tire-Loading Information
the tires will not tellyou the pressure,
label. Make certain that all wheel nuts
especially if you have radial tiresare
properly tightened. See the Index
which may look properly inflated even if
under Wheel Nut Torque.
they're underinflated.
If your tires have valvecaps, be sure to
put them back on. They help prevent
leaks by keeping out dirt and moisture.
Service & Appearance Care
Buying New Tires
Tire Inspection and Rotation
When It’s Time forNew Tires
(CONT)
One way to tell when it’s time for new
tires is to check the treadwear
indicators, which will appear when your
tires have only 2/32 inch (1.6 mm) or
less of tread remaining.
You need a new tire if
You can see the indicators at three
places around the tire.
You can see cord or fabric showing
through the tire’s rubber.
The tread or sidewall is cracked, cut
or snagged deep enough to show cord
or fabric.
The tire has a bump, bulgeor split.
The tire has a puncture, cut, or other
damage that can’t be repaired well
because of the size or location of the
damage.
r
st or dirt on a wheel, or on
tne parts to which it is
stened, can make the wheel nuts
“dome loose after a time. The
wheel could come off and cause an
- cident . When you change a
wheel, remove any rust or dirt
from places where the wheel
attaches to the vehicle. In an
emergency, you can use a cloth or
a paper towel to do this; but be
sure to use a scraper or wire brush
’-kr, if you need to, to get all the
st or dirt off. See the Index
,Adder changing a Flat Ere.
.
.
... 252
I
To find out what kind and size of tires
you need, look at the Tire-Loading
Information label. The tires installed on
your vehicle when it was new had a Tire
Performance Criteria Specification
(TPC Spec) number on each tire’s
sidewall. When you get new tires, get
ones with that sameTPC Spec number.
That way, your vehicle will continue to
have tires that are designed to give
proper endurance, handling, speed
rating, traction, rideand other things
during normal service on your vehicle.
If your tires have an all-season tread
design, the TPC number will be followe
by a “MS” (for mud and snow).
If you ever replace your tires with those
not having a TPC Spec number, make
sure they are the same size, load range,
speed rating and construction type (bias
bias-belted or radial) as your original
tires.
I CAUTION
A
Mixing tires could causeyou
to lose control while driving.
If you mix tires of different sizes
or types (radial and bias-belted
tires), the vehicle may not handle
properly, and you could have a
crash. Be sure to use the same size
and type tires on all wheels. It’s all
right to drive with your compact
spare, though. It was developed for
limited use on your vehicle.
rn Uniform Tire Quality
Grading
The following information relatesto the
system developed by the United States
National Highway Traffic Safety
Administration whichgrades tires by
treadwear, traction and temperature
performance. (This applies only to
vehicles sold in the United States.)
Treadwear
The treadwear grade is acomparative
rating based on the wear rateof the tire
when tested under controlled conditions
on a specified government testcourse.
For example, a tire graded 150 would
wear one and a half (1%) times as well
on the government course as a tire
graded 100. The relative performance of
tires depends upon the actualconditions
of their use, however, and may depart
significantly from the normdue to
variations in driving habits, service
practices and differencesin road
characteristics and climate.
253
Service & Appearance Care
Traction-A, 5, C
Temperature-A, B, C
Warning: The temperature grade for
this tire is established for a tire that is
The traction grades, from highest to
The temperature grades are A (the
properly
inflated and not overloaded.
lowest are: A, B, and C. They represent highest), B, and C, representing the
the tire’s ability tostop on wet pavement tire’s resistance tothe generation of heat Excessive speed, underinflation, or
excessive loading, either separatelyor in
as measured under controlled conditions and its abilityto dissipate heat when
combination, can cause heat buildup
on specified government test surfaces of tested under controlled conditions on a
and
possible tire failure.
specified indoor laboratory test wheel.
asphalt and concrete. A tire marked C
Sustained high temperature cancause
may have poor traction performance.
Those grades are moldedon the
the
material
of
the
tire
to
degenerate
and
sidewalls of passenger car tires.
Warning: The traction grade assigned
reduce
tire
life,
and
excessive
to this tire is based on braking (straightWhile the tires available as standardor
temperature can lead tosudden tire
ahead) traction tests and does not
optional equipment on General Motors
failure. The grade C corresponds to a
include cornering (turning) traction.
vehicles may vary with respect to these
level of performance which all
grades, all such tires meet General
passenger car tires must meetunder the Motors performance standardsand have
Federal Motor Vehicle Safety Standard
been approved for useon General
No. 109. Grades B and A represent
Motors vehicles. All passenger type
higher levels of performance on the
(P Metric) tires must conform to Federal
laboratory test wheel than the minimum safety requirements in addition to these
required by law.
grades.
254
Wheel Alignment and
Tire Balance
The wheels on your vehicle were
iligned and balanced carefully at the
'actory to give you the longest tire life
md best overall performance.
:n most cases, you will not need to have
jour wheels aligned again. However, if
jou notice unusual tire wear or your
iehicle pulling one way or the other, the
dignment may need to be reset. If you
lotice your vehicle vibrating when
hiving on a smooth road, your wheels
nay need to be rebalanced.
Wheel Replacement
Replace any wheel that is bent, cracked
or badly rusted. If wheel nuts keep
coming loose, the wheel, wheel bolts,
and wheel nuts should be replaced. If
the wheel leaks air out, replace it
(except some aluminum wheels, which
can sometimes be repaired). See your
Pontiac dealer if any of these conditions
exist.
Your dealer will know what kind of
wheel you need.
Each new wheel should have the same
load carrying capacity, diameter, width,
offset, and be mountedthe same way as
the one it replaces.
If you need to replace any
of your wheels,
wheel bolts, or wheel nuts, replace them
only with new GM original equipment
parts. This way, you will be sure you
have the right wheel, wheel bolts, and
wheel nuts for your Pontiacmodel.
A
Using the wrong replacement
wheels, wheel bolts, or wheel
nuts on your vehicle can be
dangerous. It could affect the
braking and handling of your
vehicle, make your tires lose air
and make you lose control. You
could have a collision in whichyou
or others could be injured. Always
use the correct wheel, wheel bolts,
and wheel nuts for replacement.
Service & Appearance Care
Wheel Replacement(CONI:)
Used Replacement Wheels
Putting a used wheel on your
vehicle is dangerous. You
I’t know how it’s been used or
how many miles it’s been driven. It
could fail suddenly and cause an
accident. If you have to replace a
wheel, use a new GM original
equipment wheel.
\
... 256
Tire Chains
Appearance care
A
Cleaning products can be hazardous. Someare toxic. Others can burst
into flame if you strike a match or get them on a hot partof the vehicle.
Some are dangerous if you breathe their fumes in a closed space. Whenyou
use anything in a container to clean your Pontiac, be
sure to follow the
instructions. And always open your doors or windows when you're cleaning
the inside.
Never use these to clean your vehicle:
Carbon Tetrachloride
Gasoline
Turpentine
Benzene
Acetone
Lacquer Thinner
Naphtha
Paint Thinner
Nail Polish Remover
They can all be hazardous-some more than others-md they can all damage
your
Don't use any of these unless this
manual says you can. In many
uses, they will damage your
vehicle:
Laundry Soap
Bleach
Reducing Agents
I
Service
Appearance Care
Cleaning the insideof bur
Pontiac
Use a vacuum cleaner often to get ridof
dust and loose dirt. Wipe vinyl with a
clean, damp cloth.
Your Pontiac dealer has two GM
cleaners-a solvent-type spot lifter and a
foam-type powdered cleaner. They will
clean normal spots and stains very well.
Here are some cleaning tips:
Always read the instructions on the
cleaner label.
Clean up stains as soon as you canbefore they set.
Use a clean cloth or sponge, and
change to a cleanarea often. A soft
brush may be used if stains are
stubborn.
Use solvent-type cleanersin a wellventilated area only. If you use them,
don’t saturate the stained area.
If a ring forms after spot cleaning,
clean the entire area immediately or it
will set.
Using Foam-Type Cleaner on
Fabric
Vacuum and brush the area toremove
any loose dirt.
Always clean a whole trim panelor
section. Mask surrounding trim along
stitch or welt lines.
Mix Multi-Purpose Powdered Cleaner
following the directions on the
container label.
Use suds only and apply with a clean
sponge.
Don’t saturate the material.
Don’t rub it roughly.
As soon as you’ve cleaned the section,
use a sponge to remove the suds.
Rinse the section with aclean, wet
sponge.
Wipe off what’s left with a slightly
damp papertowel or cloth.
Then dry it immediately with an air
hose, a hair dryeror a heat lamp.
Wipe with a clean cloth.
Using Solvent-Type Cleaner on
Fabric
Special Cleaning Problems
Greasy or Oily Stains:
First, see if you have to use solvent-type Like grease, oil, butter, margarine, shoe
cleaner at all. Some spots and stains will polish, coffee with cream, chewing
clean off better withjust water and mild gum, cosmetic creams, vegetable oils,
soap.
wax crayon, tar and asphalt.
If you need to use it, then:
Carefully scrape off excess stain.
Gently scrape excess soil from the
Then follow the solvent-type
trim material with aclean, dull knife
instructions above.
or scraper. Use very little cleaner,
Shoe polish, wax crayon, tar and
light pressure and clean cloths
asphalt will stain if left on a vehicle
(preferably cheesecloth). Cleaning
seat fabric. They should be removed
should start at the outsideof the stain,
as soon as possible. Be careful,
“feathering” toward the center. Keep
because the cleaner will dissolve them
changing to a clean sectionof the
and may cause them to bleed.
cloth.
Non-Greasy Stains:
When you clean a stain from fabric,
Like catsup, coffee (black), egg, fruit,
immediately dry the area with anair
hose, hair dryer, or heat lamp to help fruit juice, milk, soft drinks, wine,
vomit, urine and blood.
prevent a cleaning ring. (See the
previous NOTICE.)
Carefully scrape off excess stain, then
sponge the soiled area with cool water.
If a stain remains, follow the foamtype instructions above.
If an odor lingers after cleaning vomit
or urine, treat the area with a water/
baking soda solution: 1 teaspoon
(5 ml) of baking soda to 1 cup
(250 ml) of lukewarm water.
Finally, if needed, clean lightly with
solvent-type cleaner.
Combination Stains:
Like candy, ice cream, mayonnaise,
chili sauce and unknownstains.
Carefully scrape off excess stain, then
clean with cool water and allow to
dry.
If a stain remains, clean it with
solvent-type cleaner.
0
259
Service & Appearance Care
Cleaning Vinyl or Leafher
Just use warm water and aclean cloth.
Rub with a clean, damp cloth to
remove dirt. You may have to do it
more than once.
Things like tar, asphalt and shoe
polish will stain if you don’t getthem
off quickly. Use a cleancloth and
solvent-type vinyl/leather cleaner.
I . .
260
Cleaning theTop of fhe
Instrument Panel
Use only mild soap and water to clean
the top surfaces of the instrument panel.
Sprays containingsilicones or waxes
may cause annoying reflections in the
windshield and even make it difficult to
see through the windshield under certain
conditions.
Care of Safety Belts
Keep belts clean anddry.
A
Do not bleach or dye safety
A belts. If you do, it may
Deverely weaken them. In a crash
they might not be able to provide
adequate protectinrl. Clean safety
belts only with 1 d soapand
lukewarm water
Glass
Glass should be cleaned often. GM
Glass Cleaner (GM Part No. 1050427)
or a liquid household glass cleaner will
remove normal tobacco smoke anddust
films.
Don’t use abrasive cleaners on glass,
because they may cause scratches. Avoid
placing decals on the inside rear
window, since they may have to be
scraped off later.
If abrasive cleanersare used on the
inside of the rear window, an electric
defogger element may be damaged. Any
temporary license should not be
attached across the defoggergrid.
Cleaning the Outsideof the
Windshield and Wiper Blades
Cleaning the Outsideof Your
Pontiac
If the windshield is not clear after using
the windshield washer,or if the wiper
blade chatters when running, wax or
other material may be on the blade or
windshield.
Clean the outside of the windshield with
GM Windshield Cleaner, Bon-Ami
Powder@ (GMPart No. 1050011). The
windshield is clean if beads do not form
when you rinse it with water.
Clean the blade by wiping vigorously
with a cloth soaked in full strength
windshield washer solvent. Then rinse
the blade with water.
Wiper blades should be checkedon a
regular basis and replaced whenworn.
The paint finish on your vehicle
provides beauty, depth of color, gloss
retention and durability.
Washing Your Vehicle
The best way to preserve your vehicle’s
finish is to keep it clean by washing it
often with lukewarm or cold water.
Don’t wash your vehicle in the direct
rays of the sun. Don’t use strong soaps
or chemical detergents. Use liquid hand,
dish or car washing (non-detergent)
soaps. Don’t use cleaning agents that
contain acid or abrasives. All cleaning
agents should be flushed promptly and
not allowed to dry on the surface, or
they could stain. Dry the finish with a
soft, clean chamois or a 100%cotton
towel to avoid surface scratches and
water spotting.
High pressure vehicle washes may cause
water to enter your vehicle.
261
8
8
8
Service & Appearance Care
Finish Care
Aluminum Wheels(IF so EQUIPPED) White Sidewall Tires
Occasional waxing or mild polishing of
your Pontiac may be necessary to
remove residue from the paint finish.
You can get GM approved cleaning
products from your dealer. (See the
Index under Appearance Care.)
Your Pontiac has a “basecoatl
clearcoat paint finish. The clearcoat
gives more depth and gloss to the
colored basecoat.
Your aluminum wheels have a protective
coating similar to the painted surface of
your Pontiac. Don’t use strong soaps,
chemicals, chrome polish, or other
abrasive cleaners on them because you
could damage this coating. After rinsing
thoroughly, a waxmay be applied.
”
Machine compounding or
aggressive polishing on a
basecoatklearcoat paint finish may
dull the finish or leave swirl
marks.
262
. _
If you have aluminum wheels,
don’t use an automatic vehicle
wash that has hard silicon carbide
cleaning brushes. These brushes
can take off the protective coating.
Your Pontiac dealer has a GM White
Sidewall Tire Cleaner.You can use a
stiff brush withit.
Weatherstrips
These are places where glass
or metal
meets rubber. Silicone grease there will
make them last longer, seal better, and
not squeak. Apply silicone grease with a
clean cloth at least every six months.
Sheet Metal Damage
Foreign Material
Finish Damage
If your vehicle is damaged and requires
sheet metal repair or replacement, make
sure the body repair shop applies anticorrosion material to the parts repaired
or replaced to restore corrosion
protection.
Calcium chloride and other salts, ice
melting agents, road oiland tar, tree sap,
bird droppings, chemicals from
industrial chimneys, and other foreign
matter can damage your vehicle’s finish
if they remain on painted surfaces. Use
cleaners that are marked safe for painted
surfaces for these stains.
Any stone chips, fractures or deep
scratches in the finish should be
repaired right away. Bare metal will
corrode quickly and may develop into a
major repair expense.
Minor chips and scratches can be
repaired with touch-upmaterials
available from your dealer or other
service outlets. Larger areas of finish
damage can be correctedin your
dealer’s body and paint shop.
m . .
Undenbody Maintenance
Chemical Paint Spotting
Chemicals used forice and snow
removal and dust control can collect on
the underbody. If these are not removed,
accelerated corrosion (rust) can occur
on the underbody parts such as fuel
lines, frame, floor pan, and exhaust
system even though they havecorrosion
protection.
At least every spring, flush these
materials from the underbody with plain
water. Clean any areas where mud and
other debris can collect. Dirt packed in
closed areas of the frame should be
loosened before being flushed. Your
dealer oran underbody vehicle washing
system can do this for you.
Some weather and atmospheric
conditions can create a chemical fallout.
Airborne pollutants can fall upon and
attack painted surfaces on your vehicle.
This damage can take twoforms:
blotchy, ringlet-shapeddiscolorations,
and small irregular dark spots etched
into the paint surhce.
Although no defect in the paint
job
causes this, Pontiac will repair, at no
charge to the owner, the surfaces of new
vehicles damagedby this fdlout
condition within 12 months or l2,OOO
miles (20 0oO km) of purchase,
whichever comes first.
264
Vehicle Identification Number
WIN)
This is the legal identifier for your
Pontiac. It appears ona plate in the front
corner of the instrument panel, on the
driver’s side. You can see itif you look
through the windshield from outside
your vehicle. The VIN also appears on
the Vehicle Certification and Service
Parts labels and the certificates of title
and registration.
Engine Identification
Service Parts Identification LabelAdd-on Electrical Equipment
The eighth character in your VIN is
the You’ll find this label on your spare tire
cover. It’s very helpful if you ever need
engine code for yourGM engine. This
code will help you identify your engine, to order parts. On this label is:
specifications, and replacement parts in
Your VIN.
this section.
Its model designation.
Paint information.
A list of all production options and
special equipment.
Be sure that this label is not removed
from the vehicle.
Don’t add anythingelectrical to
your Pontiac unless you check with
your dealer first. Some electrical
equipment can damage your
vehicle and the damage wouldn’t
be covered by your warranty. Some
of it canjust keep other things
from working as they should.
265
I
Service & Appearance Care
Fuses & Circuit Breakers
The wiring circuits in your vehicleare
protected from short circuits by a
combination of fuses and circuit
breakers.
The main fuse panel is located to theleft
of the steering wheel, under the
instrument panel. Pinch the release
levers to lower the fuse panel for ease of
viewing, then pull the fuse panel toward
you to lock it down.
. . I
266
Snap off the cover to revealthe fuses.
You’ll find a fuse puller clipped to the
inside of the cover. Place the wide end
of the fuse puller over the plastic end of
the fuse. Squeeze the ends over the fuse
and pull it out.
Spare fuses are located in the slots
labeled “Spare” on the following chart.
Look at the silver-colored band inside
the fuse. If the band is brokenor
melted, replace the fuse. Be sure you
replace a bad fuse with a new oneof the
correct size.
When finished, replace the cover and
pinch the release levers again to unlock
the panel. Pressit back up into place.
Fuses & Circuit Breakers
PositionRating
(AMP.)
10
20
30
30
10
15
7
8
10
20
9
10
10
15
15
20
20
15
ll
12
Left SideFuse Panel
13
14
15
16
17
18
19
20
21
22
23
24
25
15
10
25
10
10
10
20
25
10
25
Circuitry
Start-upSignal-SIR
Trunk Release/Back-Up Lights/Brake-Shift Interlock
(with Retained Accessory Power Option)
Breaker-Power Window/Sunroof
Breaker-Power Accessory
Heated Mirror/Compass
IgnitiodRetained Accessory Power/Illuminated EntryKeyless
Entry
Supplemental Inflatable Restraint(Air Bag)
Cornering Lights/Turn Signals/(Back-Up Lights/Trunk
Release/Brake-Shift Interlock without Retained Accessory
Power Option)
Spare
Spare
Battery/Radio/Instrument Panel/Oil Level
Electronic Level Control
Brake/Hazard Warning Flashers
Parking Lights
Courtesy Lights/PowerMirrors
CooIing Fan/Transaxle
Air Conditioning
Blank
Anti-Lock Brake System
Low Coolant/Light Monitor/Oil Level/HUD/Compass
Instrument Panel Lighting
Spare
Spare
IgnitiodRadio
WipedWasher
267
Service & A
.ante Care
Righf Side Fuse Panel
Fuses
Maxifuse/Relay Center
Additional fuses are located in the relay
center, on the far right side, below the
instrument panel. %u must remove the
sound insulator on the right side of the
passenger foot well to replace these
fuses.
Replacing these fuses is difficult. We
recommend that you see your dealer if
you need one replaced.
Position Rating Circuitry
To check the fusesin this underhood
fuse center, turn the twoknobs % turn
counterclockwise and loosenthe metal
wing nut on the passenger sideof the
cover. Then remove the cover. The
inside of the cover has a chart that
explains the features and controls
governed by each fuse and relay.
(AMP.)
1
2
3
4
5
6
7
8
a m .
268
10
15
15
20
15
20
10
10
A/C Programmer
Fog Lamps
Power Antenna/Door
Locks
Horns
Engine Relays and
Miscellaneous Engine
Content
Fuel Pump
Fuel Injectors
Engine Control Module,
PASS-KeyTM
Headlight Wiring
Windshield Wipers
The headlight wiringis protected by a
circuit breaker in the light switch. An
electrical overload will cause the lights
to go on and off,or in some cases to
remain off. If this happens, have your
headlight system checked right away.
The windshield wiper motor is protected
by a circuit breaker and a fuse. If the
motor overheats due to heavy snow, etc.,
the wiper willstop until the motor
cools. If the overload is caused by some
electrical problem, have it fixed.
Power Windows and Other
Power Options
Circuit breakers in the fuse panel protect
the power windows and other power
accessories. When the current load is
too heavy, the circuit breaker opens and
closes, protecting the circuit until the
problem is fixed.
Service & Appearance Care
Capacities & Specifications
I
Automatic Transaxle AT 440-T4 (Overdrive)
When draining or replacing torque converter, morefluid may be needed.
Pan Removal and Replacement . . . . . . . . . . . . . . . . . . . . . . . . 6% quarts
After Complete Overhaul . . . . . . . . . . . . . . . . . . . . . . . . . . . .
11 quarts
CoolingSystem . . . . . . . . . . . . . . . . . . . . . . . . . . . . . . . . . . . . . . .
13 quarts
6.00 L
10.50 L
12.00 L
See refrigerant charge label under hood.
Refrigerant, Air Conditioning. . . . . . . . . . . . . . . . . . . . . . . . . . .
Not all air conditioning refrzgerants are the same.I f the air
conditioning system in yourvehicle needs refiigerant, be sure
the proper refngerant is used. I f you 're not sure, ask your
Pontiac dealer.
EngineCrankcase . . . . . . . . . . . . . . . . . . . . . . . . . . . . . . . . . . . .
4 quarts
When changing filter, up to I quart (I liter) more oil may be needed.
Fuel Tank . . . . . . . . . . . . . . . . . . . . . . . . . . . . . . . . . . . . . . . . . . .
18 gallons
3.75 L
68.00 L
Power Steering
Pump Only . . . . . . . . . . . . . . . . . . . . . . . . . . . . . . . . . . . . . . . . .
Complete System . . . . . . . . . . . . . . . . . . . . . . . . . . . . . . . . . . . .
Tire Pressures, Sizes. . . . . . . . . . . . . . . . . . . . . . . . . . . . . . . . . . .
1 pint
0.50 L
1!h pints
0.75 L
S e e Tire-Loading Information labelon driver's door.
Wheel Nut Torque . . . . . . . . . . . . . . . . . . . . . . . . . . . . . . . . . . . . .
100 pound-feet (140 Nom)
NOTE: All capacities are approximate. When adding, be sure to fill to the appropriate level, as recommended in this manual.
I . .
270
Engine Specifications
3800 fined Port Injection and 3800 Supercharged Engines
VIN Engine Code (Tuned Port) . . . . . L
VINEngineCode(Supercharged) . . . 1
Type . . . . . . . . . . . . . . . . . . . . . . . . . .
V6
Displacement . . . . . . . . . . . . . . . . . . . 3.8 Liters
CompressionRatio . . . . . . . . . . . . . . . 8S:l (Code L)
9.0:l (Code 1)
FiringOrder . . . . . . . . . . . . . . . . . . . .
1-6-5-4-3-2
Thermostat Temperature Specification 195" F (91 C)
n
O
Normal Maintenance Replacement PaHs
Air CleanerElement . . . . . . . . . . . . . . .
EngineOilFilter . . . . . . . . . . . . . . . . . .
PCV Valve . . . . . . . . . . . . . . . . . . . . . . .
Remote Lock ControlBattery (2) . . . . .
SparkPlugs . . . . . . . . . . . . . . . . . . . . . .
AC Type A-1096C
AC TypePF-47
AC TypeCV-892C
2016
AC Type 41-600
Gap: 0.060 inch (1.52 mm)
271
Service & Appearance Care
Fluids & Lubricants
ITEM
Antifreeze Coolant. . . . .
(Ethylene Glycol Base)
Chassis Lubricant . . . . . . . . . .
(Grease Gun Insert)
Delco Supreme 1 l@Brake Fluid . . .
DEXRONF IIE Automatic
Transmission Fluid . . . . . . . . . . . . . . . .
GM PART NUMBER
APPLICATION
Year-round antifreeze for . . . . . . . . . . . . 1052753
coolant mixtures
General chassis lube, etc. . . . . . . . . . . . 1052497
14 oz.
(397 g)
Brakesystem .....................
16 oz.
(0.5 L)
Automatic Transaxle . . . . . . . . . . . . . . .
1234588 1
32 oz. (1 .O L)
12345006
1 gal. (3.8 L)
Engine lubrication . . . . . . . . . . . . . . . . . See Engine OiE in this section.
16
OZ.
(0.5 L)
See your dealer for advice . . . . . . . . . . . 1052367
Engine Oil .......................
GM Engine Oil Supplement . . . . . . . . .
(E.O.S.)
Engine Oil .......................
Hood, trunk and door hinges
Windshield Washer Solvent. . . . . . . . . . Windshield washer fluid
Power Steering Fluid (Normal) . . . . . Power Steering System . . . . . . . . . . . . .
Power Steering Fluid (Cold Climate) . . Power Steering System . . . . . . . . . . . . .
(System must bedrained and refilled
with it.)
Silicone Grease . . . . . . . . . . . . . . . . . . Weatherstrips. ....................
Spray-A-Squeak Silicone Lubricant . . . General purpose silicone lubricant . . . .
...
Supercharger Oil . . . . . . . . . . . . . . . . . . Supercharger lubricant . . . . . . . . . . . . .
272
1052535
SIZE
1 gal. (3.8 L)
1050017
1052884
12345867
12345866
32 oz.
16 OZ.
32 oz.
16 oz.
(1.0 L)
(0.5 L)
(1 .O L)
(0.5 L)
12345579
1 oz. (28 g)
1052276 (aerosol) 4.5 oz. (127 g)
1052277
12
oz. (0.35 L)
12345982
4
oz. (113 g)
Replacement Bulbs
OUTSIDE LIGHTS
BULB
LAMP (Light) MONITOR MESSAGE
(OPTION)
Halogen Headlights
LowBeam . . . . . . . . . . . . . . . . . . . . . . . . . . . . . . . . . . . .
HighBeam . . . . . . . . . . . . . . . . . . . . . . . . . . . . . . . . . . . .
Front Park/Turn
FrontPark . . . . . . . . . . . . . . . . . . . . . . . . . . . . . . . . . . . .
FrontTurn . . . . . . . . . . . . . . . . . . . . . . . . . . . . . . . . . . . .
FrontSideMarker . . . . . . . . . . . . . . . . . . . . . . . . . . . . . .
Taillights
Taillights. . . . . . . . . . . . . . . . . . . . . . . . . . . . . . . . . . . . . .
Stoplights . . . . . . . . . . . . . . . . . . . . . . . . . . . . . . . . . . . . .
RearTu .......................................
RearSideMarker . . . . . . . . . . . . . . . . . . . . . . . . . . . . . . .
Back-up Lights . . . . . . . . . . . . . . . . . . . . . . . . . . . . . . . . . .
CenterHigh-MountedStopLight ....................
LicensePlateLight . . . . . . . . . . . . . . . . . . . . . . . . . . . . . . .
FogLight . . . . . . . . . . . . . . . . . . . . . . . . . . . . . . . . . . . . . . . .
Trunk Light . . . . . . . . . . . . . . . . . . . . . . . . . . . . . . . . . . . . .
UnderhoodLight . . . . . . . . . . . . . . . . . . . . . . . . . . . . . . . . .
9006
9005
HEAD LAMP
HIGH BEAM LAMP
2057NA
2057NA
194
PARK LAMP
TURN SIGNAL LAMP
PARK LAMP
194/2057
2057
1156
194
1141
1156
194
880
93
561
TAIL LAMP
BRAKE LAMP
TURN SIGNAL LAMP
TAIL LAMP
BACK UP LAMP
BRAKE LAMP
TAIL LAMP
Service & Appearance Care
Replacement Bulbs (CONT.:)
INSIDE LIGHTS
Courtesy Lights . . . . . . . . . . . . . . . . . . . . . . . . . . . . . . . . . . . . . . .
Front Courtesy/Reading Lights . . . . . . . . . . . . . . . . . . . . . . . . . . .
Rail CourtesylReading Lights . . . . . . . . . . . . . . . . . . . . . . . . . . . .
Glove Compartment Light . . . . . . . . . . . . . . . . . . . . . . . . . . . . .
Turn Signal Indicators . . . . . . . . . . . . . . . . . . . . . . . . . . . . . . . . . .
Visor Vanity Light . . . . . . . . . . . . . . . . . . . . . . . . . . . . . . . . . . . . .
Hush Panel (Lower Floor Lighting) . . . . . . . . . . . . . . . . . . . . . . . .
AshTray . . . . . . . . . . . . . . . . . . . . . . . . . . . . . . . . . . . . . . . . . . . .
a . .
274
BULB
74
563
A3173B
194
74
7065
168
161
KEEP ENGINE OIL
AT THE PROPER
LEVEL AND CHANGE AS
RECOMMENDED
Part
7
Section
T h i s part covers the maintenance
required for your Pontiac. Your
vehicle needsthese services to
retain its safety.dependability and
emission controlperformance.
Have you purchased the
GM Protection Plan?
The Plan supplements your
new vehicle warranties.
See your Pontiac dealer for details
.
Introduction
A Word About Maintenance . . . . . . . . . . . . . . . . . . . . . . . . . . 276
Your Vehicle and the Environment. . . . . . . . . . . . . . . . . . . . . . . . . . 276
How This Part is Organized . . . . . . . . . . . . . . . . . . . . . . . . . . . . . . . 277
A . Scheduled Maintenance Services
Using Your Maintenance Schedules. . . . . . . . . . . . . . . . . . . . . . . 278
Selecting the Right Schedule . . . . . . . . . . . . . . . . . . . . . . . . . . . . . . 278
Schedule1 . . . . . . . . . . . . . . . . . . . . . . . . . . . . . . . . . . . . . . . . . . . 280
.
Schedule11 . . . . . . . . . . . . . . . . . . . . . . . . . . . . . . . . . . . . . . . . . . . 282
Explanation of Scheduled Maintenance Services . . . . . . . . . . . . . .284
B. Owner Checks & Services
AtEachFuelFill . . . . . . . . . . . . . . . . . . . . . . . . . . . . . . . . . . . . . . . 287
At Least Once a Month . . . . . . . . . . . . . . . . . . . . . . . . . . . . . . . . . . 287
At Least Once a Year . . . . . . . . . . . . . . . . . . . . . . . . . . . . . . . . . . . . 288
C. Periodic Maintenance Inspections . . . . . . . . . . . . . . . . . . . . . . . . . . . 290
D Recommended Fluids & Lubricants . . . . . . . . . . . . . . . . . . . . . . . . . 291
E MaintenanceRecord . . . . . . . . . . . . . . . . . . . . . . . . . . . . . . . . . . . . . . 294
.
.
875
Maintenance Schedule
Introduction
m m m
A Word About Maintenance
bur Vehicle and the Environment
We at General Motors want to helpyou keep your vehicle in
good working condition. But we don’t know exactly how
you’ll drive it. You may drive very short distances only a
few times a week. Or you may drive long distances all the
time in very hot, dusty weather. You may use your vehicle in
making deliveries. Or you may drive it to work, to do
errands orin many other ways.
Because of all the different ways people use their GM vehicles,
maintenance needs vary. You may even need more frequent
checks and replacements than you will find inthe schedules
in this part. So please read this part and note how youdrive.
If you have any questions on how to keep your vehiclein
good condition, see your Pontiac dealer, the place many GM
owners choose to have their maintenance work done. Your
dealer can be relied upon to useproper parts and practices.
Proper vehicle maintenance not only helps to keep
your
vehicle in good working condition, but also helps the
environment. All recommended maintenance procedures are
important. Improper vehicle maintenanceor the removal of
important components can significantly affect the quality
of
the air we breathe. Improper fluid levelsor even the wrong
tire inflation can increase the
level of emissions from your
vehicle. To help protect our environment, and to help keep
your vehiclein good condition, please maintain your vehicle
properly.
276
How ThisPart is Organized
The remainder of this part is divided into five sections:
Section A: Scheduled MaintenanceServices shows what to
have done and how often. Some of these services can be
complex, so unless you are technically qualified and have
the necessary equipment,you should let your dealer’s
service department or another qualifiedservice center do
these jobs.
1 CAUTION
Pe~%oxming
maintenance work on a vehicle can be
dangerous. In trying to do some jobs, you can be
seriously injured.Do your own maintenance work
only if you have the requited know-how and the proper
tools and equipment for the job. If’you have any doubt,
have a qualified technician do the work.
A
I
If you are skilled enough todo some work on your vehicle,
you will probably want to get the service information GM
publishes. You will find a list of publications andhow to get
them in this manual. See theIndex under Sewice
Publications.
Section B: Owner Checks & Services tells you what should
be checked whenever you stop for fuel. It also explains what
you can easily do to help keep your vehicle in good
condition.
Section C : Periodic Maintenance Inspectionsexplains
important inspections that your Pontiac dealer’sservice
department or anotherqualified service center should
perform.
Section D: Recommended Fluids & Lubricants lists some
products GM recommends to help keep your vehicle
properly maintained. These products, or their equivalents,
should be usedwhether you do the work yourself or have it
done.
Section E: Maintenance Record providesa place for you to
record the maintenance performed on your vehicle.
Whenever any maintenance is performed, be sure to write it
down in thissection. This will help you determine when
your next maintenance should be done. Inaddition, it is a
good idea to keep your maintenance receipts. Theymay be
needed to qualify your vehicle for warrantyrepairs.
Maintenance Schedule
Section A: Scheduled Maintenance Services
m m .
Using Your Maintenance Schedules
Selecting the Right Schedule
This section tells you the maintenance services you should
have done and when you should schedule them. Your
Pontiac dealer knows your vehicle best and wants you
to be
happy with it. If you go to your dealer for your service
needs, you’ll know that GM-trained and supportedservice
people will perform the work using genuine GM parts.
These schedules are for vehicles that:
carry passengers and cargo within recommended limits.
You will find these limits on your vehicle’sTire-Loading
Information label. See the Index under Loading Your
Ehicle.
are driven on reasonable road surfaces within legal driving
limits.
use the recommended unleaded fuel.See the Index under
Fuel.
First you’ll need to decide which
of the two schedules is
right for your vehicle.Here’s how to decide which schedule
to follow:
278
Schedule I
Schedule I1
Is any one of these true for your vehicle?
Most trips are less than
4 miles (6 km).
Most trips are less than10 miles (16 km) when outside
temperatures are below freezing.
The engine is at low speed most
of the time (as in door-todoor delivery, or in stopand-go traffic).
You operate your vehicle in dustyareas.
You tow a trailer. (With some models, you shouldn’t ever
tow a trailer. See theIndex under Towing a Trailer.)
If any one (or more)of these is truefor your driving, follow
Schedule I.
Follow Schedule 11only if none of the above conditions is
true.
27s
..
Maintenance Schedule
Section A: Scheduled Maintenance Services lcont.1
Schedule I
281
Maintenance Schedule
Section A: Scheduled Maintenance Services [cant.]
Schedule I1
Follow ScheduleI1 ONLY if none of
the driving conditions specified in
Schedule I apply.
TO BE SERVICED
ITEM
NO.
8
WHEN TO PERFORM
See Explanation of ScheduledMaintenance
Services following Schedules I and II.
Miles (kilometers) or Months
(whichever occursfirst).
I Spark Plug Replacement *
10
I Air CleanerFilter
12
1
Replacement"
SuperchargerOilCheck (3.8L Code 1 engine only)
Every 30,000 Miles (50 000 krn).
~
I Every 30,000 Miles (50 O00 km).
1
Every 3 0 ,Miles
~ (50 OOO km)or 36 Months.
I
The services shown in this schedule up to45,000 miles (75 000 km) are to be
performed after 45,000 miles at the same intervals.
MILES (000)
7.5
15
KILOMETERS (000)
12.5
0
I
25
1
22.5
I
30
37.5
I
45
37.5
I
50
62.5
I
75
0
0
*An Emission Control Service.
A The US. Environmental Protection Agency
has determined that the failure to perjorm this
maintenance item willnot nullify the emission
warranty or limit recall liabilityprior to the
completion of vehicle use&l life. General
Motors, however, urges that all recommended
maintenance services be performed at the
indicated intervals and the maintenance be
recorded in Section E: Maintenance Record.
283
Maintenance Schedule
Section A: Scheduled Maintenance Services [cant.]
Explanation of Scheduled Maintenance Services
Below are explanations of the services listed in ScheduleI
and Schedule II.
ITEM
NO. SERVICE
1
2
Engine Oil and Filter Change-Always use SG
Energy Conserving II oils of proper viscosity. The
“SG” designation may be shown alone or in
combination with others, such as “SG/CC,”
“SG/CD” or “SF, SG, CC,” etc. To determine the
preferred viscosity for your vehicle’s engine(e.g.,
SAE 5W-30 or SAE 10W-30), see the Index under
Engine Oil.
Chassis Lubrication-Lubricate the transaxle shift
linkage, parking brake cable guides, underbody
contact points and linkage.Lubricate the front and
rear suspension andsteering linkage.
The proper fluids and lubricants to use are listed
in
Section D. Make sure whoever services your vehicle uses
these. All parts should be replaced and all necessary repairs
done before you or anyone else drivesthe vehicle.
ITEM
NO. SERVICE
3
4
Throttle Body Mounting Bolt Torque-Check
the torque of the mounting boltsand/or nuts.
Tire and Wheel Rotation and Inspection-For
proper wear and maximum tire life, rotate your
tires following the instructions in this manual. See
the Index under fires, Inspection & Rotation.
Check the tires foruneven wear or damage. If you
see irregular or premature wear, check the wheel
alignment. Check for damaged wheels also.
*An Emission Control Service.
a The US.Environmental Protection Agency has determined that the
failure to pe$orm this maintenance itemwill not nullifL the emission warranty or
limit recall liabilityprior tothe completion of vehicle useful life. GeneralMotors, however, urges thatall recommended maintenancesewices be
pe$ormed at the indicated intervals and the maintenance be recorded
in Section E: Maintenance Record.
m . .
284
ITEM
NO. SERVICE
5
6
Engine Accessory Drive Belt Inspection*Inspect the belt for cracks, fraying, wear and
proper tension. Replace asneeded.
Cooling System Service*-Drain, flush and refill
the system with new or approved recycled coolant
conforming to GM Specification 1825M. Keep
coolant at the proper mixtureas specified. See the
Index under Coolant. This provides proper freeze
protection, corrosion inhibitor level and engine
operating temperature.
Inspect hoses and replaceif they are cracked,
swollen or deteriorated. Tighten screw-type hose
clamps. Clean the outsideof the radiator andair
conditioning condenser. Wash the pressure cap and
neck.
To help ensure proper operation, we recommend a
pressure testof both the cooling system andthe
pressure cap.
ITEM
NO. SERVICE
7
8
Transaxle Service-Changeboththe fluid and
filter every 15,000 miles (25 000 km) if the vehicle
is mainly drivenunder one or more of these
conditions:
In heavy city traffic wherethe outside temperature regularly reaches 90°F (32OC) or higher.
In hilly or mountainous terrain.
When doing frequent trailer towing.
Uses such as found in taxi, police car or delivery
service.
If you do not use your vehicle under anyof
these .conditions, change boththe fluid and filter
every 100,000 miles (160 000 km).
SparkPlug Replacement*-Replace spark plugs
with the proper type. See the Index under
Replacement Parts.
285
Maintenance Schedule
Section A: Scheduled Maintenance Services
ITEM
NO. SERVICE
9
10
Spark Plug Wire Inspection*
*-Inspect for
burns, cracks or other damage. Check the boot fit
at the coils and at thespark plugs. Replace wires as
needed.
Air Cleaner Filter Replacement*-Replace every
30,000miles (50 OOO krn) or more often under
dusty conditions. Ask your dealer for the proper
replacement intervals for yourdriving conditions.
[cant.]
ITEM
NO. SERVICE
11
12
Fuel 'hnk, Cap andLines Inspection**Inspect fuel tank, cap and lines (including fuel rails
and injection assembly) for damageor leaks.
Inspect fuel cap gasket for
an even filler neck
imprint or any damage. Replace parts as needed.
Periodic replacementof the fuel filter is not
required.
Supercharger Oil Check-Checkoilevery
30,000
miles (50 000 km) or 36 months. Add the proper
synthetic oil. See theI d a under Recommended
Fluids & Lubricants.
*An Emission Control Service.
...
b R e US.Environmental Protection Agency has determinedthat thefailure to perform this maintenance item will not nulliJjl the emission warrantyor
limit recall liabilityprior to the completionof vehicle us@l lije. General Motors, however, urges that all recommended maintenance services be
performed at the indicated intervals and the maintenance be recorded
in Section E: Maintenance Record.
286
Section B: Owner Checks & Services
Listed below are owner checks and services which should
be performed at the intervals specified tohelp ensure the
safety, dependability and emission control performance of
your vehicle.
Be sure any necessary repairs are completed at once.
Whenever any fluids or lubricants are added to your
vehicle, make sure they are the proper ones, as shown in
Section D.
At Each Fuel Fill (It is importantfor you or a service station attendant toperform these underhood checks at each fuel
fill.)
I
i
I
CHECK
OR SERVICE
WHAT TO DO
Engine Oil Level
Check the engine oil level and addthe proper oil if necessary. See theIndex under Engine Oil for
further details.
Engine Coolant Level
Check the engine coolant level in the coolant recovery tank and add the proper coolant mix if
necessary. See the Index under Coolant for further details.
Windshield Washer
Fluid Level
Check the windshield washer fluid levelin the windshield washer tank and addthe proper fluid
if necessary. See the Index under Windshield Washer Fluidfor further details.
At least Once a Month
CHECK
OR SERVICE
Tire Inflation
WHAT TO DO
Check tire inflation. Make sure they are inflated to the pressures specified on the Tire-Loading
Information label located on the rear edge of the driver’s door. Seethe Index under Tires for
further details.
287I
Maintenance Schedule
Section B: Owner Checks & Services [cant.]
At Least Once a Year
CHECK
OR SERVICE
Key Lock Cylinders
I
WHAT TO DO
I Lubricate the key lock cylinders with the lubricant specified in Section D.
~
Body Lubrication
~~~~~
~~
Lubricate all body door hinges. Also lubricate all hinges and latches, including those for the
hood, rear compartment, glove box door, console doors and any folding seat hardware. Section D
tells you what to use.
1. Before you start, be sure you have enough room around the vehicle.
2. Firmly apply both the parking brake (seethe Index under Parking Brake if necessary) and the
regular brake.
NOTE: Do not use theaccelerator pedal, and be ready to turn off the engine immediately if it
starts.
3. Try to start the engine in each gear.The starter should work only in P (Park) or N (Neutral).
If the starter works in any other position, your vehicle needs service.
Steering Column Lock
I . .
288
While parked, and with the parking brake set, try to turn the key to Lock in each shift lever
position.
The key should turn to Lock only when the shift lever is in P (Park).
The key should come out only in Lock.
CHECK
OR SERVICE
Interlock (BTSI)
I
WHAT TO DO
I
b
When you are doing this check, the vehicle could move suddenly. If it does, you or others
could be injured. Follow the steps below.
1. Before you start, be sure you have enougl- - >om around the vehicle. It shoulc -e parked on a
level surface.
2. Firmly apply the parking brake (see the Index under Parking Brake if necessary).
NOTE: Be ready to apply the regular brake immediatelyif the vehicle begins to move.
3. With the engine off, turn the key to the Run position, but don’t start the engine. Without
applying the regular brake, try to move the shift lever out of P (Park) with normaleffort. If
the shift lever moves out of P (Park), your vehicle’s BTSI needs service.
Parking Brake and
Automatic Transaxle
P (Park) Mechanism
Check
When you are doing this check, your vehicle could begin to move.You or others could be
L
injured and property could be damaged. Make sure there is room in front of your vehicle
in case it begins toroll. Be ready to apply the regular brakeonce
at should the vehicle begin to move.
P a l R ulla fairly steep hill, with the vehicle facing downhill. Keeping your foot on the regular
brake, set the parking brake.
To check the parking brake: With the engine running and transaxle in N (Neutral), slowly
remove foot pressure from the regular brake pedal. Do this until the vehicleis held by the
parking brake only.
To check the P (Park) mechanism’s holding ability: Shift to P (Park). Then release all brakes.
Underbody Flushing
At least every spring, use plain water to flushany corrosive materials from the underbody.Take
care to clean thoroughly anyareas where mud and other debris can collect.
289
Maintenance Schedule
Section C: Periodic Maintenance Inspections
Listed below are inspections and services which should be performed at least twice a year (for instance,
each spring and fall).
You should let your GM dealer’sservice department or other qualified service center do thesejobs. Make sure any necessary
repairs are completed at once.
-
INSPECTION
OR SERVICE
I
WHAT SHOULD BE DONE
Steering, Suspension
and Front-Wheel-Drive
Axle Boot and Seal
Inspection
Inspect the front and rear suspension and steering system for damaged, loose or missing parts,
signs of wear, or lack of lubrication. Inspect the power steering lines and hoses for proper
hookup, binding, leaks, cracks, chafing, etc. Clean and then inspect the drive axle boot seals for
damage, tears or leakage. Replace seals if necessary.
Exhaust System
Inspection
Inspect the complete exhaust system. Inspect the
body near the exhaust system. Look for broken,
damaged, missing or out-of-position parts as well as open seams, holes, loose connections,or
other conditions which couldcause a heat build-upin the floor pan or could let exhaust fumes
into the vehicle. See the Index under Engine Exhaust.
Throttle Linkage
Inspection
Inspect the throttle linkage for interference or binding, and for damaged or missing parts.
Replace parts as needed.
Brake System
Inspection
Inspect the complete system. Inspect brake lines and hoses for proper hookup, binding, leaks,
cracks, chafing, etc. Inspect disc brake pads for wear and rotors for surface condition. Also
inspect drum brake linings for wear and cracks. Inspect other brake parts, including drums,
wheel cylinders, calipers, parking brake, etc. Check parking brake adjustment.You may need to
have yourbrakes inspected more often if your
driving habits or conditions resultin frequent braking.
NOTE: A low brake fluid levelcan indicate worn disc brake pads whichmay need to be
serviced. Also, if the brake system warning light stays on or comes on, something may be wrong
with the brake system. See the Index under Brake System Warning Light. If your anti-lock brake
system warning light stayson or comes on, something may be wrong with the anti-lock brake
system. See the Index under Anti-Lock Brake System Warning Light.
Section I
Recommended
:
Fluids& Lubricants
NOTE: Fluids and lubricants identified below by name, part number or specification may be obtained from your GM dealer.
FWID/WBRICANT
I Engine Oil
GM Goodwrench Motor Oilor equivalent for API service SG Energy Conserving II oils of the
proper viscosity. The “SG” designation may be shown alone or in combination with others, such
as “SG/CC,” “SG/CD,” or “SF, SG, CC,” etc. To determine the preferred viscosity for your
vehicle’s engine, see the Index under Engine Oil.
A 50/50 mixture of water (preferably distilled) and good quality ethylene glycol baseantifreeze
(GM Part No. 1052753 or equivalent) conforming to GM Specification1825M or approved
recycled coolant conforming to GM Specification 1825M.
Hydraulic Brake
System
Delco Supreme ll@Brake Fluid (GM Part No. 1052535) or equivalent DOT-3 brakefluid.
Parking Brake Guides
Chassis lubricant meeting requirements of NLGI Grade 2, Category LB or GC-LB (GM Part No.
1052497 or equivalent).
t
Power Steering System GM Hydraulic Power Steering Fluid (GM Part No. 1052884) or equivalent.
Automatic Transaxle
DEXRON@-IIEAutomatic Transmission Fluid (GM Part No. 12345881).
Supercharger
Supercharger Oil (GM Part No. 12345982).
~~~
~~
~~~
~~
291
Maintenance Schedule
Section I
Recommended
:
Fluids & Lubricants lcont.1
USAGE
Key Lock Cylinders
I
FLUD/UIBRICANT
I
Lubricate with Multi-Purpose Lubricant (GM Part No. l2345l20), syntheticSAE 5W-30 engine
oil or silicone lubricant (GM Part No. 1052276 or 1052277).
Automatic Transaxle
Shift Linkage
Engine oil.
Floor Shift Linkage
Engine oil.
Chassis Lubrication
Chassis lubricant meeting requirements of NLGI Grade 2, Category LB or GC-LB
(GM Part No. 1052497 or equivalent).
Windshield Washer
Solvent
GM Optikleen@ Washer Solvent (GM
Part No. 1051515) or equivalent.
USAGE
Hood Latch Assembly
a. Pivots and Spring
Anchor
b. Release Pawl
FLUID/LUBRICANT
a. Engine oil.
b. Chassis lubricant meeting requirementsof NLGI Grade 2, Category LB or GC-LB
(GM Part No. 1052497 or equivalent).
Hood and Door Hinges, Engine oil or Lubriplate Lubricant (GM Part No. 1050109).
Fuel Door Hinge, Rear
Compartment Lid
Hinges
Weatherstrips
Dielectric Silicone Grease (GM Part No. 12345579 or equivalent).
See the Index under Replacement Parts for recommended replacement filters, valves and spark plugs.
293
Maintenance Schedule
Section E: Maintenance Record
After the scheduled services are performed, record the date,
odometer reading and whoperformed the service in the
columns indicated. When completing the Maintenance
Performed column, insert the numbers from the Schedule I
DATE
ODOMETER
READING
SERVICED BY
or Schedule I1 maintenance charts which correspondto the
maintenance performed. Also,you should retain all
maintenance receipts. Your owner information portfolio is a
convenient placeto store them.
MAINTENANCE PERFORMED
DATE
ODOMETER
READING
SERVICED BY
MAINTENANCE PERFORMED
Maintenance Schedule
Section E: Maintenance Record[cant.]
DATE
ODOMETER
READING
SERVICED BY
MAINTENANCE PERFORMED
Part
8
Customer Assistance
Information
H e r e you will find out how to
contact Pontiac if you need
assistance. This part alsotells you
how to obtain service publications
and how to report any safety defects.
Customer Satisfaction Procedure . . . . . . . . . . . . . . . . . . . . . . . . . . . . . . . . . . . . .298
Customer Assistance for the Hearing or Speech Impaired. . . . . . . . . . . . . . . . . .299
BBB MediatiodArbitration Program . . . . . . . . . . . . . . . . . . . . . . . . . . . . . . . . .
.300
Reporting Safety Defects . . . . . . . . . . . . . . . . . . . . . . . . . . . . . . . . . . . . . . . . . . .302
Pontiac Roadside Assistance Program . . . . . . . . . . . . . . . . . . . . . . . . . . . . . . . .
.303
Service Publications . . . . . . . . . . . . . . . . . . . . . . . . . . . . . . . . . . . . . . . . . . . . . .304
c
297
...
Customer Assistance Information
STEP ONE: Discuss your concern with For prompt assistance, please have the
following information available to give
a member of dealership management.
the Customer Assistance Representative:
Complaints can often be quickly
resolved at that level. Ifthe matter has
Your name, address, telephone
already been reviewed with theSales,
number
Service, or Parts Manager, contact the
Vehicle Identification Number (This is
owner of the dealership or the General
Customer Satisfaction Procedure Manager.
available from the vehicle registration
or title, or the plate attached to the left
Your satisfaction and goodwill are
STEP TWO: If after contacting a
top of the instrument panel and visible
important to your dealer and Pontiac.
member of Dealership Management, it
through the windshield.)
Normally, any concern with the sales
appears your concern cannot be resolved
transaction or the operation of your
Dealership name and location
vehicle will be resolvedby your dealer’s by the dealership without further help,
Vehicle delivery date and present
contact the Pontiac Customer Assistance
Sales or Service Departments.
mileage
Center
by
calling
1-800-PM
CARES.
In
Sometimes, however, despite the best
Canada, contact GM of Canada
Nature of concern
intentions of all concerned,
Customer
Assistance
Centre
in
Oshawa
misunderstandings can occur. If your
concern has not been resolved to your by calling 1-800-263-3777 (English) or
1-800-263-7854 (French).
satisfaction, the following steps should
In Mexico, call (525) 254-3777. In
be taken:
Puerto Rico or U.S. Virgin Islands, call
1-809-763-1315. In all other overseas
locations, contact GM International
Export Sales in Canada by calling
1-416-644-4112.
...
298
We encourage you to call the toll free
number listed previously in order to
give your inquiry prompt attention.
However, if you wish to write Pontiac,
write to:
United States
Pontiac Division
Customer Assistance Center
One Pontiac Plaza
Pontiac, MI 48340
Canada
General Motors of Canada Limited
Customer Assistance Centre
1908 Colonel Sam Drive
Oshawa, Ontario L1H 8P7
A listing of all Pontiac Zone Officesand
offices outside the U.S. which can assist
you can also be found in the warranty
booklet.
When contacting Pontiac,please
remember that your concern will likely
be resolved in the dealership, using the
dealership’s facilities, equipment and
personnel. That is why we suggest you
follow Step One first if you have a
concern.
Customer Assistance Fiorthe
Hearing or Speech Impaired
0
To assist owners who have hearing
difficulties, Pontiac has installed special
TDD (Telecommunication Devicesfor
the Deaf) equipment at itsCustomer
Assistance Center.Any hearing or speech
impaired customer who hasaccess to a
TDD or a conventional teletypewriter
(TTY) can communicate with Pontiacby
dialing: 1-800-TDD-PONT. (TDD users
in Canada can dial 1-800-263-3830.)
299
r
Customer Assistance Information
GM Participation In Better
Business Bureau
Mediationhlrbitration Program*
Our experience has shown that the
Customer SatisfactionProcedure
described earlier in this part has been
very successful in achieving customer
satisfaction. However, ifyou have not
been substantially satisfied, Pontiac
wants you to be aware of GM’s
voluntary participation in a no-charge
mediatiodarbitration program called
BBB AUTO LINE. This program is
administered by the Council of Better
Business Bureaus through local Better
Business Bureaus. It can resolve
individual disputes involving vehicle
repairs and the interpretation of your
New Vehicle Limited Warranty.
300
We prefer that you not resort to BBB
AUTO LINE until after a final decision
is made under the Customer Satisfaction
Procedure. However, you may file a
claim at any time by contacting your
local Better Business Bureau (BBB) at
the following toll-free number:
1-800-955-5100. For further information
about filing a claim, you may also write
to:
BBB AUTO LINE
Council of Better Business Bureaus
4200 Wilson Boulevard
Suite 800
Arlington, VA 22203
In order to file a claim, you will have to
provide your name and address, the
vehicle identification number (VIN)of
your vehicle, and a statementof the
nature of your complaint. BBB staff may
try to help resolve your dispute through
mediation. If mediation is not
successful, or if you do not wish to
participate in mediation, eligible
customers may present their case toan
impartial third-party arbitrator at an
informal hearing. The arbitrator will
render a decision in your case, which
you may accept or reject. If you accept a
valid arbitrator decision, GM will be
bound by that decision. The entire
dispute settlement process should
ordinarily take about40 days from the
time you file your complaint to the time
a decision is rendered (or47 days if you
did not first contact your dealeror
Pontiac) .
We encourage you to use this program
before or insteadof resorting to the
courts. We believe it offers advantages
over courts in most jurisdictions because
it is fast, freeof charge, and informal
(lawyers are not usually present,
although you may retain one at your
expense if you choose). Arbitrators
make decisions based onthe principles
of fairness and equity, and are not
required to duplicate the functionsof
courts by strictly applying state or
federal law. If you wish to go to court,
however, we do not require thatyou first
file a claim with BBB AUTO LINE**
unless state law provides otherwise.
Whatever your preferencemay be,
remember that if you are unhappy with
the results of BBB AUTO LINE, you
can still go to court because an
arbitrator’s decision is binding on GM
but not on you, unless you acceptit.
Eligibility is limited by vehicle
agehileage and other factors. For
further information concerning the
program, call the BBB at
1-800-955-5100. You may also call the
Pontiac Customer Assistance Center.
* This program may not be available in
all states, depending on state law.
Canadian owners referto your
warranty booklet. General Motors
reserves the right to change eligibility
limitations and/or to discontinue its
participation in this program.
** Some states may require thatyou$le
a claim with BBB AUTO LINE before
resorting to state-operated
procedures (including court).
301
...
Customer Assistance Information
Reporting Safety Defects to the
United States Government
If you believe that your vehicle has a
defect which could cause a crash or
could cause injury or death, you should
immediately informthe National
Highway Traffic Safety Administration
(NHTSA), in additionto notifying
General Motors.
If NHTSA receives similar complaints,
it may open an investigation, andif it
finds that a safety defect existsin a
group of vehicles, it may order a recall
and remedy campaign. However,
NHTSA cannot become involved in
individual problems between you, your
dealer, or General Motors.
To contact NHTSA, you may either call
the Auto Safety Hotline toll-free at
1-800-424-9393 (or 366-0123 in the
Washington, D.C. area) or write to:
NHTSA
U.S. Department of Transportation
Washington, D.C. 20590
You can also obtainother information
about motor vehicle safety from the
Hotline.
302
Reporting Safety Defects to the Reporting Safety Defects to
General Motors
Canadian Government
If you live in Canada, and you believe
that your vehicle has a safety defect,you
should immediately notify Transport
Canada, in addition to notifying General
Motors of Canada Limited. You may
write to:
Transport Canada
Box 8880
Ottawa, Ontario KlG 352
In addition to notifying NHTSA (or
Transport Canada) in a situation like
this, we certainly hope you’ll notify us.
Please call us at 1-8OO-PM-CARES, or
write:
Pontiac Division
Customer Assistance Center
One Pontiac Plaza
Pontiac, MI 48340
In Canada, please callus at
1-800-263-3777 (English) or
1-800-263-7854 (French). Or, write:
General Motors of Canada Limited
Customer Assistance Centre
1908 Colonel Sam Drive
Oshawa, Ontario L1H 8P7
Pontiac Roadside
Assistance Program
information over the phone or making
arrangements to tow your vehicle to the
nearest Pontiac dealer.
We will provide the following services
Security While B u Travel
for 3 years/36,000 miles, atno expense
1-800-ROADSIDE
- 1-800-762-3743
to you:
As the proud ownerof a new Pontiac
Vehicle out of fuel
vehicle, you are automatically enrolled
Keys locked in vehicle
in the Pontiac Roadside Assistance
Tow to nearest dealer for warranty
Program?’ This value-added serviceis
intended to provide you with peace of
Change a flattire
mind as you drive inthe city or travel
Jump starts
the open road.
We have quick, easy access to telephone
Pontiac’s Roadside Assistance toll-free
numbers of the following services
number is staffed by a teamof technically depending on your needs:
trained advisors, who are available
Hotels
24 hours a day, 365 days a year.
Glass replacement
We take anxiety out of uncertain
Rental vehiclesor taxis
situations by providing minor repair
Police, fire department or hospitals
In many instances, mechanical failures
are covered under Pontiac’s
comprehensive warranty. However,
when other services are utilized, our
advisors will explain any payment
obligations you might incur.
Pontiac reservesthe right to limit
services or reimbursement to an owner
or driver when in Pontiac’s judgement
the claims become obsessive in
frequency or type of occurrence.
*In Canada, call1-8OO-268-68OOfor details
on Roadside Assistance.
303
Customer Assistance Information
w Pontiac Roadside
Assistance Program (em.)
For prompt and efficient assistance
when calling, please providethe
following information tothe advisor:
Location of vehicle
Telephone number of your location
Vehicle model, year and color
Mileage of vehicle
Vehicle identification number
Vehicle license plate number
While we hope that you never have the
occasion to use our service, it is added
security while travellingfor you and
your family. Remember, we’re only a
phone call away. Pontiac Roadside
Assistance-1-800-ROADSIDE
-or
1-800-762-3743.
Service Publications
Information on how to obtain Product
Service Publications and Indexesas
described below is applicable only in
the fifty US. states (and the District of
Columbia) and only for cars and light
trucks with GVWR less than 10,000
pounds (4536 kg).
In Canada, information pertaining to
Product Service Bulletins and Indexes
can be obtainedby writing to:
General Motors of Canada Limited
Service Publications Department
1908 Colonel Sam Drive
Oshawa, Ontario L1H 8P7
Pontiac regularly sends its dealers useful
service bulletins about Pontiac products.
Pontiac monitors product performance
in the field. We then prepare bulletins
for servicing our products better.
Now,
you can get these bulletins too.
Bulletins cover various subjects. Some
pertain to the proper use and care of
your vehicle. Some describe costly
repairs. Others describe inexpensive
repairs which, if done on timewith the
latest parts, may avoid future costly
repairs. Some bulletins tell a technician
how to repair anew or unexpected
condition. Others describe a quicker
way to fix your vehicle. They can help a
technician service your vehicle better.
Individual PSP’s
If you don’t want to buy all the PSP’s
Most bulletins apply to conditions
issued by Pontiac for all models in the
affecting a small numberof cars or
model year, you can buy individual
trucks. Your Pontiac dealer or a
PSP’s, such as those which may pertain
qualified technicianmay have to
determine if a specific bulletin applies to to a particular model. To do this, you
will first need to see our index of PSP’s.
your vehicle.
It provides a varietyof information.
Here’s what you’ll find in the index and
how you can get one:
What You’ll Find in the Index
A list of all PSP’s publishedby
Pontiac in a model year(1990 or
later). PSP’s covering all models of
Pontiac vehicles are listed inthe same
index.
Ordering information so you can buy
the specific PSP’s you may want.
Price information for the PSP’s you
may want to buy.
Customer Assistance Information
How You Can Get an Index
Indexes are published periodically. Most
of the PSP’s which could potentially
apply to the most recent Pontiac models
will be listed inthe most recent
publication for that model year. This
means you may want to wait until the
end of the model year beforeordering
an index, if you are interested in buying
PSP’s pertaining to acurrent model year
car or truck.
Some PSP’s pertaining to aparticular
model year vehiclemay be published in
later years, and these would be listedin
the later year’s index. When you order
an index for a model year thatis not
over yet, we’ll send you the most
recently published issue. Check the
order form for indexes forearlier model
years.
Pontiac Service Publications
Cut out the order form, fill it out, and
mail it in. We will then see to it that an
index is mailed to you. There is no
charge for indexes for the 1990-1993
model years.
Toll-Free Telephone Number
If you want an additionalorder form for
an index, just call toll-free andwe’ll be
happy to send you one. Automated
recording equipment will take your
name and mailing address.The number
to call is 1-800-551-4123.
A Very Important Reminder
These PSP’s are meant for technicians.
They are not meant for the “do-ityourselferl’ Technicianshave the
equipment, tools, safety instructions,
and know-how to do a job quickly and
safely.
You can get these by using the following
order form.
Pontiac Division service manuals are
intended for useby professional,
qualified technicians. Attempting repairs
or service without the appropriate
training, tools, and equipment could
cause injury toyou or others and
damage to your vehicle thatmay cause it
not to operate properly.
1993 PONTIAC SERVICE PUBLICATIONS ORDERING INFORMATION
The following publications covering the operation
and servicing of your vehiclecanbe purchasedby filling out
the Service Publications Order Form
in this bookand mailing it with your check, money order
or creditcard information to H8h, Incorporated(address listed below).
CURRENT PUBLICATIONS FOR1993 PONTIAC BONNEVILLE
PRODUCT SERVICE PUBLICATIONS
SERVICE MANUALS
Product Service Publications (PSP’s), are bulletins, letters
articles
and
Service Manualshave the diagnosis, repair and overhaul information
published for trained dealer service personnel. See Service Publicaon engines, transmission, axle, suspension, brakes, electrical, steertions listed previously
in this section.
ing, body, etc.
A cumulative index is published quarterly during the current model
Number
Model
Price
year. The indexeslist all PSP’s
published by Pontiac
inForm
the modelyear.
1993
Pontiac
Bonneville
. . . . . . . . . . . . . S-9310-H
$43.00
PSP Index
*Please specify special bodyor engine types on order form. Write
information in the Form Number column. For example: Turbo,
Year
Price
Convertible.
1993
PSPI-93-P . . . . . . . . . . . . . . .
Free
Free
1992
PSPI-92-P. . . . . . . . . . . . . . . . . . . . . . . . .
OWNER’S INFORMATION
PSPI-91-P .. . . . . . . . . . . . . . . . . . . . . . . . . . . . .
Free
1991
Owner
publications
are written directly for Owners and intended to pro1990
PSPI-90-P. . . . . . . . . . . . . . . . . . . . . . . . . . . . . .
Free
vide basic operational information about the vehicle. The Owner’s
NOTE: Form Numbers for individual Product Service Publications mayManual includes the Maintenance Schedule
for all models.
be found in the PSP Index. Prices are $4.00
the first
for PSP and$2.00
1993 Pontiac Bonneville Owner’s Manual
for each additional PSP
on the same order.
In Portfolio:lnClUd8Shtffolio, Owner‘s ManualandWarranty Booklet.
PSP Bound Bulletin Book (Complete
Year Bulletins)
SE In-Portfolio . . ,10202134
$15.00
1993PontiacBonneville
Number
Year Form
Description
Price
1993
Pontiac
Bonneville
SSEl
In-Portfolio
.lo215984
$15.00
1991 All PSP’S . . . . . . . . . . . . . . . . . . . .
15.00
S-91-PSP-4
Without Portfolio:lncludes Owner’s Manual.
1990 All PSP’S . . . . . . . . . . . . . . . . . . . .
S-90-PSP-4
15.00
1993
Pontiac
Bonneville
Without
Portfolio
.lo202135
$11.00
For subscription information callHelm, Incorporated.
CURRENT & PAST MODEL ORDER FORMS
Service Publications are available for current and past model Pontiac
vehicles. To request an order form, please specify year and model
name of vehicle.
c
Address all inquiries to: HELM,INCORPORATED
PO. Box 07130
Detroit, MI 48207
Credit Card Orders ONLV: 1-800-782-4356
For information and inqulries call: (313) 883-1430
307
’’
Notes
PONTIAC SERVICE PUBLICATIONS ORDER FORM
NOTE: Please complete form below (Print or Type) and MAIL TO:
c-L
Post Office Box 07130,Detroit, Michigan 482(
I
*Minimum Credit Card Order $10.00
I
Orders Only)
ORDER TOLL FREE
For
Card "Older
Iffurtherinformation is needed,writeHelm or call (:
1-800-782-4356
(Monda -Frida 8130A.M.-~:oo P.M. EST)
PUBLICATIONFORM NUMBER'
NUMBER.
ORDER INFORMATION NOT AVAILABLE THROUGH THE TOLL FREE
VEHICLE MODEL
DESCRIPTION
ITEM
I
I
(ATTENTION)
#)883-1430.
NAME
I
(CUSTOMER NAME)
(STREET ADDRESS-NO P.0 BOX NUMBERS)
(STATE)
(ZIP CODE)
address isdinerent from your
shipping address shown.
DAYTIME TELEPHONE NO. CODE
fCUSTOMER SIGNATURE)
Index
l
A B S Warning Light . . . . . . . . . . . .106
Accessory Outlet . . . . . . . . . . . . . . . .93
Adding
Brake Fluid . . . . . . . . . . . . . . . . . .243
ElectricalEquipment . . .93, 126. 265
Engine Coolant . . . . . . . . . . . . . . .238
EngineOil . . . . . . . . . . . . . . . . . .231
Power Steering Fluid . . . . . . . . . .242
SoundEquipment . . . . . . . . . . . . .126
Transaxle Fluid . . . . . . . . . . . . . . 238
Windshield Washer Fluid . . . . . . .243
Adjustable Support Seat . . . . . . . . . . . 11
AirBag . . . . . . . . . . . . . . . . . . . . . . . 22
Air Cleaner Filter . . . . . . . . . . .233. 271
Air Conditioner . . . . . . . . . . . .120.123
Air Conditioner Refrigerant . . . . . . . 270
Air Inflator System . . . . . . . . . . . . .209
Alcohol, Driving Under the Influence
of . . . . . . . . . . . . . . . . . . . . . . . . . . 151
Alcohol in Gasoline . . . . . . . . . . . . .223
Aluminum Wheels
Cleaning . . . . . . . . . . . . . . . . . . . . 262
Removing . . . . . . . . . . . . . . . . . . .212
Antenna
Fixed . . . . . . . . . . . . . . . . . . . . . . . 142
Power . . . . . . . . . . . . . . . . . . . . . . 142
Antifreeze . .205.206.239.240.270. 272
Anti-Lock Brake System (ABS) . . . . 155
Warning Light . . . . . . . . . . . . . . . .106
Appearance Care . . . . . . . . . . . . . . .257
Armrest. Storage . . . . . . . . . . . . . . . .90
Ashtrays & Lighter . . . . . . . . . . . .91. 92
Audio Systems . . . . . . . . . . . . . . . . .126
AM/FM Stereo Radio. . . . . . . . . . 128
AM/FM Stereo Radio with
Cassette Player . . . . . . . . . . . . .129
AM/FM Stereo with Cassette
Player and Graphic Equalizer . . 131
AM/FM Stereo with Compact
Disc Player . . . . . . . . . . . . . . . .134
Care of Audio Systems . . . . . . . . . 141
CD Player Anti-Theft Feature. . . . 137
Gain Control . . . . . . . . . . . . . . . . .140
Hearing Damage Warning . . . . . . 126
Radio Reception.
For the Best . . . . . . . . . . . . . . . .140
Setting the Clock . . . . . . . . . . . . .127
Steering Wheel Controls . . . . . . . . 139
Automatic Transaxle
Adding Fluid . . . . . . . . . . . . . . . .238
Checking Fluid. . . . . . . . . . . . . . .236
Shifting . . . . . . . . . . . . . . . . . . . . . . 61
Battery . . . . . . . . . . . . . . . . . . . . . . 245
Jump Starting . . . . . . . . . . . . . . . . 193
Battery Warning Light . . . . . . . . . . .104
Blizzard . . . . . . . . . . . . . . . . . . . . . . 181
Block Heater. Engine . . . . . . . . . . . . .60
“Blowout.” Tire . . . . . . . . . . . . . . . .208
Boost Gage . . . . . . . . . . . . . . . . . . . . 111
Brakes
Adjustment . . . . . . . . . . . . . . . . . .159
Anti-Lock . . . . . . . . . . . . . . . . . . .155
Drums . . . . . . . . . . . . . . . . . . . . . . 159
Fluid . . . . . . . . . . . . . . . . . . .243. 272
Master Cylinder . . . . . . . . . . . . . .243
Parking . . . . . . . . . . . . . . . . . . . . . . 67
Pedal Travel . . . . . . . . . . . . . . . . . 159
Replacement . . . . . . . . . . . . . . . . .245
Warning Light . . . . . . . . . . . . . . . . 105
Wear Indicators-Front Brakes . . . 158
Brake System Warning Light
Standard Brakes . . . . . . . . . . . . . . 105
Anti-Lock Brake System. . . . . . . . 106
Braking . . . . . . . . . . . . . . . . . . . . . . . 154
Braking in Emergencies . . . . . . . . . . 159
Braking Technique . . . . . . . . . . . . . .154
“Break-In,” New Vehicle . . . . . . . . . .57
Buckling Up (see Safety Belts)
311
Index
Bulb Replacement
Headlight . . . . . . . . . . . . . . .246. 273
Taillight . . . . . . . . . . . . . . . .247.273
Bulbs. Replacement . . . . . . . . . . . . .273
Capacities & Specifications . . . . . . 270
Carbon Monoxide
in Exhaust . . . . . . . . . . . . .71. 72. 181
Cassette Tape Player
(see Audio Systems)
Center Front Lap Belt
(see Safety Belts)
Center Passenger Position . . . . . . . . . 30
Chains. Tire . . . . . . . . . . . . . . .218. 256
Changing a FlatTire . . . . . . . . . . . . .210
Check Gages Warning Light. . . . . . . 108
Checking
Brake Fluid. . . . . . . . . . . . . . . . . . 243
Engine Coolant . . . . . . . . . . .205, 239
Engine Oil Level . . . . . . . . . . . . . .231
Power Steering Fluid . . . . . . . . . .242
Restraint Systems . . . . . . . . . . . . . .44
Transaxle Fluid . . . . . . . . . . . . . .236
Checking Things Under the Hood . . .227
. . I
312
Check Oil Level Warning Light . . . 103
Chemical Paint Spotting . . . . . . . . . 264
Child Restraints . . . . . . . . . . . . . . . . . 34
Children and Safety Belts . . . . . .33. 42
Cigarette Lighter . . . . . . . . . . . . . . . . 92
Circuit Breakers & Fuses . . . . . . . .266
City Driving . . . . . . . . . . . . . . . . . . . 171
Cleaner. Air . . . . . . . . . . . . . . .233, 271
Cleaning
Aluminum Wheels . . . . . . . . . . . . 262
Cassette Player . . . . . . . . . . . . . . .141
Fabric . . . . . . . . . . . . . . . . . .258. 259
Finish Care . . . . . . . . . . . . . . . . .262
Glass ....................... 2.61
Head-Up Display . . . . . . . . . . . . . 118
Inside of Your Pontiac . . . . . . . . . 258
Outside of Your Pontiac . . . . . . . .261
Power Antenna . . . . . . . . . . . . . . -142
Safety Belts . . . . . . . . . . . . . . . . .260
Special Problems . . . . . . . . . . . . .259
Underbody Maintenance . . . . . . .264
Vinyl or Leather . . . . . . . . . . . . .260
Warnings . . . . . . .257. 258. 260. 262
Weatherstrips . . . . . . . . . . . . . . . .262
White Sidewall Tires . . . . . . . . . .262
Windshield and Wiper Blades . . .261
Climate Control
Electronic . . . . . . . . . . . . . . . . . . . 123
Standard .................... 120
Clock. Setting the . . . . . . . . . . . . . . 127
Clusters. Instrument Panel . . . . . . . .96
Comfort Controls
Electronic Climate Control . . . . . 123
Standard Climate Control . . . . . . 120
Compact Spare Tire . . . . . . . . . . . . .217
Compass ......................
113
Control of a Vehicle . . . . . . . . . . . . . 153
Convenience Net . . . . . . . . . . . . . . . .56
Convex OutsideMirror . . . . . . . . . . . 87
Coolant
Checking &
Adding . . . . . . .205. 206. 239. 240
Function Monitor . . . . . . . . . . . . . 111
“Low” Warning Light . . . . . . . . . 101
Proper Mixture to Use. . . . . . . . .239
Safety Warnings About . . .202. 204.
205. 206. 228. 240. 241
Temperature Gage . . . . . . . . . . . .109
Temperature Warning Light . . . . . 101
Cruise Control . . . . . . . . . . . . . . . . . .77
Curves. Driving on . . . . . . . . . . . . . 160
Customer Assistance Information. .297
Daytime Running Lights . . . . . . . . . 83
Dead Battery: What to Do . . . . . . . .193
Defects. Safety
(See Safety Defects. Reporting)
Defensive Driving . . . . . . . . . . . . . . 150
Defogger. Rear Window . . . . . .l22. 124
Defogging Windows . . . . . . . . .l21. 124
Defrosting . . . . . . . . . . . . . . . ..l21. 124
Delco LOC II . . . . . . . . . . . . . . . . . .137
Door Cup Holder . . . . . . . . . . . . . . . 90
DoorLocks .................... 47
Downshifting . . . . . . . . . . .65. 176.189
Driver Information Center. . . . . . . . . 111
Driver Fosition . . . . . . . . . . . . . . . . . . 18
Driving
At Night .................... 165
City ........................ 171
Controlling a Skid . . . . . . . . . . . . . 164
Defensively . . . . . . . . . . . . . . . . . . 150
Drunken . . . . . . . . . . . . . . . . . . . . 151
Freeway .................... 172
Hill and Mountain . . . . . . . . . . . .176
In a Foreign Country . . . . . . . . . .225
In Fog. Mist and Haze . . . . . . . . .170
In the Rain . . . . . . . . . . . . . . . . . .168
Long Distance . . . . . . . . . . . . . . . . 174
Loss of Control . . . . . . . . . . . . . . . 164
On Curves. . . . . . . . . . . . . . . . . . .160
Passing .....................
163
Through Deep StandingWater . . . . 60
Winter Driving . . . . . . . . . . . . . . . 179
Drunken Driving . . . . . . . . . . . . . . .151
Disposing of Used Oil . . . . . . . . .233
Energy Conserving. . . . . . . . . . . . 232
Oil Warning Light . . . . . . . . . . . . . 102
Pressure Gage . . . . . . . . . . . . . . . .110
Warning. Used . . . . . . . . . . . . . . .233
When to Change. . . . . . . . . . . . . .233
Engine Overheating . . . . . . . . . . . . .202
Engine Specifications . . . . . . . . . . . .271
Engine, Starting Your . . . . . . . . . . . . .58
Ethanol in Gasoline . . . . . . . . . . . . . 223
Exhaust
Dangerous Gas in . . . . . . . .71.72, 181
Parking with the
Engine Running . . . . . . . . . . .70. 72
Expectant Mothers. Use of
Safety Belts . . . . . . . . . . . . . . . . . . 29
Express Open Sunroof . . . . . . . . . . . .89
Expressway Driving . . . . . . . . . . . . .172
Extender, Safety Belt . . . . . . . . . . . . .43
Exterior Appearance
(see Appearance Care)
Electrical Equipment.
Adding . . . . . . . . . . . . . . .93.126. 265
Electronic Climate Control . . . . . . .123
Electronic Compass . . . . . . . . . . . . . 113
Emergencies. Braking . . . . . . . . . . . 159
Emergencies on the Road . . . . . . . . . 191
Emergencies. Steering in . . . . . . . . .161
Emergency Starting . . . . . . . . . . . . . 193
Emergency Towing . . . . . . . . . . . . . .197
Engine Block Heater . . . . . . . . .60. 233
Engine Coolant . . . . . . . . . . . . . . . . 238
Engine Coolant Temperature Gage. . 109
Engine Coolant Temperature
Warning Light . . . . . . . . . . . . . . . . 101
Engine Exhaust . . . . . . . . . . . . . .71. 181
Engine Identification . . . . . . . . . . . . 265
Engine Oil .................... 231 Fabric Cleaning
Additives . . . . . . . . . . . . . . . . . . -232
(see Appearance Care)
Checking & Adding . . . . . . . . . . .231 Fan Warnings . . . . . . . . . .194. 195, 204
Check Level Light . . . . . . . . . . . . 103 Filling Your Tank . . . . . . . . . . . . . . .226
313
Index
Filter
Air Cleaner . . . . . . . . . . . . . .233. 271
Fuel . . . . . . . . . . . . . . . . . . . . . . . . 271
Oil ....................
.233. 271
Finish Damage . . . . . . . . . . . . . . . . .263
Flashers. Hazard Warning . . . . . . . . 192
Flat Tire ...................... 208
Flooded Engine . . . . . . . . . . . . . . . . .59
Flow-Through Ventilation . . . . . . . . 125
Fluid
Brake . . . . . . . . . . . . . . . . . .243. 272
Capacities . . . . . . . . . . . . . . . . . . .270
Power Steering. . . . . . .242. 270.272
Transaxle . . . . . . . . . . .238. 270. 272
Windshield Washer .76. 242. 272. 292
Fluids & Lubricants . . . . . . . . . . . . . 272
Fog. Driving in . . . . . . . . . . . . . . . . . 170
Fog Lights . . . . . . . . . . . . . . . . .85. 247
Foreign Material . . . . . . . . . . . . . . . 263
Foreign Operation . . . . . . . . . . . . . .225
Freeway Driving . . . . . . . . . . . . . . . . 172
French Language Manual . . . . . . . . . . 2
Fuel ..................... 222. 223
Alcohol in Fuel . . . . . . . . . . . . . .223
Capacity .................... 224
Door Lock . . . . . . . . . . . . . . . . . . 225
Door Release. Manual . . . . . . . . . 227
Door Release. Remote . . . . . . . . . 225
Exhaust Warnings . . . . . . .71.72. 181
Filling Your Tank . . . . . . . . . . . . .226
Fuels with Alcohol . . . . . . . . . . . .223
Gage . . . . . . . . . . . . . . . . . . . . . . . 109
In Foreign Countries . . . . . . . . . .225
Low. Warning . . . . . . . . . . . . . . . . 109
Requirements . . . . . . . . . . . .222. 223
Function Monitor . . . . . . . . . . . . . . . 1ll
FusePanel .................... 267
Fuses & Circuit Breakers . . . . . . . . .266
Gages . . . . . . . . . . . . . . . . . . . . . . .
108
Fuel . . . . . . . . . . . . . . . . . . . . . . . . 109
Coolant Temperature . . . . . . . . . . 109
Oil Pressure . . . . . . . . . . . . . . . . . . 110
Voltmeter ....................
110
Gasoline ...................... 222
Gasoline Tank. Filling Your . . . . . . .226
Gas Station Information . . . . . . . . . .320
Gear Positions
(see Shifting the Transaxle)
Gearshift Lever
(see Shifting the Transaxle)
Glove Box . . . . . . . . . . . . . . . . . . . . .56
Graphic Equalizer (seeAudio Systems)
Halogen Bulb Replacement . .246. 273
Hazard Warning Flashers . . . . . . . . .192
Headlight & Taillight. Removing
and Replacing . . . . . . . . . . . .246. 247
Headlight Washers . . . . . . . . . . . . . . .77
Head-Up Display . . . . . . . . . . . . . . . 116
Headlights . . . . . . . . . . . . . . . . . . . . . 81
High-Low Beam Changer . . . . . . .83
Instrument Panel Intensity
Control . . . . . . . . . . . . . . . . . . . . 84
Lamp Monitor . . . . . . . . . . . . . . . . 112
“On” Reminder . . . . . . . . . . . . . . .82
Replacement Bulb . . . . . . . . . . . . . 273
Washers . . . . . . . . . . . . . . . . . . . . .77
Wiring . . . . . . . . . . . . . . . . . . . . . 269
Head Restraints . . . . . . . . . . . . . . . . . 13
Heater (see Comfort Controls)
Heater, Engine Block. . . . . . . . . . . . .60
High Beams . . . . . . . . . . . . . . . .83. 167
“Highway Hypnosis” . . . . . . . . . . . . 175
Hill and Mountain Roads . . . . . . . . .176
Hills, Parking on . . . . . . . . . . . .177. 189
Hood Release . . . . . . . . . . . . . . . . . .227
Safety Warning . . .194. 195. 204. 228
Warning. Overheated Engine . . . .196.
204.205.206.228.240. 241
Horn . . . . . . . . . . . . . . . . . . . . . . . . . 72
Hot Engine. Safety Warnings . . . . .196.
204.205.206.228.240. 241
How the Anti-Lock Brake
System Works . . . . . . . . . . . . . . .-156
Hydroplaning . . . . . . . . . . . . . . . . . .169
’
Identification Number. Vehicle . . . .264
Idling Your Engine . . . . . . . . . . . .70. 72
If You’re Stuck in Sand. Mud.
Ice. or Snow . . . . . . . . . . . . . . . . .218
Ignition
Key . . . . . . . . . . . . . . . . . . . . . . . . . 46
Positions . . . . . . . . . . . . . . . . . . . . . 57
Illuminated Entry . . . . . . . . . . . . . . . .55
Indicator Lights (see Warning Lights)
Infant Restraint (see Child Restraints)
Inflation. Tires . . . . . . . . . . . . . . . .250
Inside Rearview Mirror . . . . . . . . . .86
Instrument Panel . . . . . . . . . . . . . . . .94
Instrument Panel Clusters . . . . . . . . .96
Instrument Panel Warning Lights . . .99
Intensity Control . . . . . . . . . . . . . . . .84
J
ack. Tire . . . . . . . . . . . . . . . . . . . . 211
Jump Starting . . . . . . . . . . . . . . . . . . 193
Keyless Entry. Remote . . . . . . . . . . .49
Keys . . . . . . . . . . . . . . . . . . . . . . . . . . 46
L a m p Monitor . . . . . . . . . . . . . . . . .112
Lane Change Indicator . . . . . . . . . . . . 72
Lap-Shoulder Safety Belt . . . . . . . . . . 19
Front . . . . . . . . . . . . . . . . . . . . . . . 30
Rear . . . . . . . . . . . . . . . . . . . . . . . . 31
Use by Children . . . . . . . . . . . . . . .33
Light Controls . . . . . . . . . . . . . . . . . .81
Lighters . . . . . . . . . . . . . . . . . . . . . . . 92
Lights
Air Bag System . . . . . . . . . . . . . . .24
Daytime Running Lights. . . . . . . . . 83
FogLights . . . . . . . . . . . . . . . . . . .85
Headlights . . . . . . . . . . . . .81, 83, 246
“On” Reminder . . . . . . . . . . . . . . .82
Parking . . . . . . . . . . . . . . . . . . . . . . 81
Reading . . . . . . . . . . . . . . . . . . . . . 85
Removing & Replacing
Bulbs . . . . . . . . . . . . .246. 247. 273
Replacement Bulbs . . . . . . . . . . . . 273
Taillights . . . . . . . . . . . . . . ..247. 273
Turn Signal . . . . . . . . . . . . . . . . . . .74
Underhood . . . . . . . . . . . . . . . . . .228
Warning Lights . . . . . . . . . . . . . . .100
Loading Your Vehicle . . . . . . . . . . . .248
Locks . . . . . . . . . . . . . . . . . . . . . . . . . 47
Locks. Rear Door Security . . . . . . . .50
Locks. Remote Control . . . . . . . . . . .48
Long Distance Driving . . . . . . . . . . . 174
Low Battery . . . . . . . . . . . . . . . . . . . 193
Low Fuel Warning . . . . . . . . . . . . . . 109
Low Oil Pressure Warning . . . . . . . . 102
Low Washer Fluid
Warning Light . . . . . . . . . . . . . . . . 105
Lubricants & Fluids . . . . . . . . .272
Maintenance Record . . . . . . . . . . . 294
Maintenance Schedule . . . . . . . . . . . 275
Maintenance Services. Scheduled . .278
Malfunction Indicator Lamp . . . . . . 104
Index
Manual Front Seat . . . . . . . . . . . . . . .10
Manual Reclining Seatback . . . . . . . .12
Manual Remote Control Mirror . . . . . 87
Maxifuse/Relay Center . . . . . . . . . . 268
Methanol in Gasoline. . . . . . . . . . . . 223
Mileage Indicator
(see Odometer & Speedometer)
Mirrors
Convex Outside . . . . . . . . . . . . . . . 87
Electrochromic Day/Night . . . . . . .86
Inside Manual Day/Night . . . . . . . .86
Manual Remote Control . . . . . . . . . 87
Power Remote Control . . . . . . . . . . 88
Visor Vanity . . . . . . . . . . . . . . . . . . 88
Mountain Driving . . . . . . . . . . . . . . . 176
N e w Vehicle “Break-In”
Requirements . . . . . . . . . . . . .57. 184
Night Driving . . . . . . . . . . . . . . . . . .165
Oil. Engine .................... 231
Capacity .................... 270
Pressure Gage . . . . . . . . . . . . . . . . 110
Quality ..................... 232
Thickness . . . . . . . . . . . . . . . . . . . 232
Used Oil .................... 233
Warning Lights . . . . . . . . . . .102. 103
When to Change. . . . . . . . . . . . . .233
Oil Level Warning . . . . . . . . . . . . . .103
Operation of Lights . . . . . . . . . . . . . .82
Outside Rearview Mirrors . . . . . . . . .87
Overdrive. Automatic . . . . . . . . . . . . 64
Overheated Engine Warnings . . . . .202.
204.205.206.228.240. 241
Overheated Engine Coolant
Warning . . . . . . . . . . . .202.204.205.
206.228.240. 241
Owner Checks & Services . . . . . . . .287
Over Things That Burn . . . . . . . . . .71
With the Engine Running . . . . .70. 72
Parking Brake . . . . . . . . . . . . . . . . . .67
PASS-Key I I T M . . . . . . . . . . . . . . . . . .52
Passenger Belts (seeSafety Belts)
Passing ....................... 163
Performance Shifting . . . . . . . . . . . . .66
Polishing and Waxing
(see Appearance Care)
Power Antenna . . . . . . . . . . . . . . . . . 142
Power Door Locks . . . . . . . . . . . . . . .48
Power Mirrors . . . . . . . . . . . . . . . . . . 88
Power Seat ..................... 11
Power Steering . . . . . . . . . . . . . . . . . 160
Power Steering Fluid . . . .242. 270, 272
Power Windows . . . . . . . . . . . . .73. 269
Pregnancy. Use of Safety Belts
During ...................... 29
Publications (seeService Publications)
P a r k . . . . . . . . . . . . . . . . . 1 . . . . . . .62
Park. Shifting Into . . . . . . . . . . . .68. 69 Radiator Overheating
(see Overheated Engine)
Park. Shifting Out of . . . . . . . . . . . . .70
o c t a n e Requirements
Radiator Pressure Cap . . . . . . .206. 241
Parking
(see Fuel Requirements)
On Hills . . . . . . . . . . . . . . . . .177. 189 Radio (see Audio Systems)
Odometer and Speedometer. . . . . . . .98
... 316
Smaller Children and Babies . . . . . 33
Reading Lights . . . . . . . . . . . . . . . . . . 85 Rocking Your Vehicle . . . . . . . .182. 219
Top Strap .................... 36
Rearview Mirror . . . . . . . . . . . . . . . . 86 Rotation. Tire . . . . . . . . . . . . . . . . . . 251
Torn . . . . . . . . . . . . . . . . . . . . . . . . 44
Rear Window Defogger . . . . . . .121, 124
Reclining Seatbacks . . . . . . . . . . . . . . 12
Twisted . . . . . . . . . . . . . . . . . . . . . . 22
Remote Keyless Entry . . . . . . . . . . . . 49
Why Your Should Wear
afety Belts. . . . . . . . . . . . . . . . . . . . 13
Safety Belts . . . . . . . . . . . . . . . . . 15
Adults . . . . . . . . . . . . . . . . . . . . . . .
18
Remote Fuel Door Lock . . . . . . . . .225
Remote Trunk Release. . . . . . . . . . . . 56
Center Passenger Position . . . . . . . 30 Safety Defects, Reporting. . . . . . . . . 302
Replacement Bulbs. . . . . . . . . . . . . . 273
Checking . . . . . . . . . . . . . . . . . . . . 44 Scheduled MaintenanceServices . . .278
Replacement Parts . . . . . . . . . . . . . . 271
Children . . . . . . . . . . . . . . . . . .33, 42 Seat Belts (seeSafety Belts)
Replacement, Windshield Wiper . . .248
Child Restraints . . . . . . . . . . . . . . . 34 Seat Controls . . . . . . . . . . . . . . . . . . .10
Replacing Brake System Parts . . . . .245
Child Restraints-How to
Adjustment . . . . . . . . . . . . . . . . . . . 10
Install Them . . . . . . . . . . . . . . . . 36
Replacing Safety Belts . . . . . . . . . . . . 44
Adjustable Support Seat . . . . . . . . . 11
Replacing Tires . . . . . . . . . . . . . . . .252
Child Restraints, Where to Put . . . . 34
Head Restraints . . . . . . . . . . . . . . . . 13
Replacing Wheels . . . . . . . . . . . . . . 255
Cleaning .................... 260
Manual Front Seat . . . . . . . . . . . . . 10
Driver Position . . . . . . . . . . . . . . .18
Reporting Safety Defects . . . . . . . . .302
Manual Reclining Seatback . . . . . . 12
Extender . . . . . . . . . . . . . . . . . . . . . 43
Restraints, Child . . . . . . . . . . . . . . . . 34
Power Seat . . . . . . . . . . . . . . . . . . . 11
Restraints, Head . . . . . . . . . . . . . . . . . 13
Lap-Shoulder Belt. . . . . . . . . . . . . . 19
Reclining Seatback . . . . . . . . . . . . . 12
Retained Accessory Power. . . . . . . . .58
How to Wear. . . . . . . . . . . . . . . . . . 18 Service Engine Soon Light
Roads, Hill and Mountain . . . . . . . . . 176
Passenger Belts . . . . . . . . . . . . . . . . 29
(Malfunction Indicator Lamp) . . . 104
Road Signs .................... 145
Pregnancy, Use During . . . . . . . . . .29 Service Information . . . . . . . . . . . . . 222
Color . . . . . . . . . . . . . . . . . . . . . . 146
Questions &
Service parts Identification Label . . -265
Shape . . . . . . . . . . . . . . . . . . . . . . 147
Answers . . . . . . .17,21. 22.43. 44 Service Publications . . . . . . . . . . . . 304
Symbols ....................
Rear Safety Belts . . . . . . . . . . . . . . 31 Service Publications Order Form . .307
148
Traffic Lights . . . . . . . . . . . . . . . . 148
Reminder Light . . . . . . . . . . . . . . . . 18 Service Station Information . . . . . . 320
Replacement . . . . . . . . . . . . . . . . . . 44 Setting the Clock . . . . . . . . . . . . . . . 127
Your Own Signals . . . . . . . . . . . . . 149
Right Front. Adult Passenger . . . . .29 Setting the Trip Odometer . . . . . . . .98
Roadside Assistance Program . . . . . 303
S
317
Index
Sheet Metal Damage . . . . . . . . . . . .263
Shifting Into P (Park). . . . . . . . . .68. 69
Shifting Out of P (Park) . . . . . . . . . . .70
Shifting the Transaxle . . . . . . . . . . . . 61
Signaling Turns . . . . . . . . . . . . .74. 149
Signs. Road . . . . . . . . . . . . . . . . . . . 146
SIR (Air Bag) . . . . . . . . . . . . . . . . . .22
Skidding . . . . . . . . . . . . . . . . . . . . . . 164
Snowstorm. If You’re Caught in a . . . 181
Sound Equipment. Adding . . . . . . . . 126
Sound Systems (seeAudio Systems)
Spare Tire. Compact . . . . . . . . . . . . .218
Specifications & Capacities . . . . . . .271
Speed Control (see Cruise Control)
Speedometer and Odometer. . . . . . . . 98
Stains. Removing . . . . . . . . . . . . . . .259
Standard Climate Control. . . . . . . . . 120
Starting Your Engine . . . . . . . . . . . . .58
Starting Your Vehicle if the Battery
is “Dead” (see Jump Starting)
Steering
In Emergencies . . . . . . . . . . . . . . . 161
Off-Road Recovery . . . . . . . . . . . . 162
Power . . . . . . . . . . . . . . . . . . . . . . 160
Tips . . . . . . . . . . . . . . . . . . . . . . . . 160
Variable Effort . . . . . . . . . . . . . . . 160
Steering Wheel Controls . . . . . . . . . 139
c
43 1 8
Steering Wheel. Tilt. . . . . . . . . . . . . .73
Stereo Sound Systems (see
Audio Systems)
Storage
Armrest . . . . . . . . . . . . . . . . . . . . . 90
Convenience Net . . . . . . . . . . . . . -56
Door Cup Holder . . . . . . . . . . . . . .90
Glove Box. . . . . . . . . . . . . . . . . . . .56
Rear Compartment . . . . . . . . . . . . .91
Sunglasses . . . . . . . . . . . . . . . . . . .93
Storing Your Vehicle . . . . . . . . . . . . 245
Stuck; If You Are . . . . . . . . . . . . . . .218
Sunroof. Express Open . . . . . . . . . . . 89
Sun Visors . . . . . . . . . . . . . . . . . . . . . 88
Supplemental Inflatable Restraint
System . . . . . . . . . . . . . . . . . . . . . . 22
Tachometer . . . . . . . . . . . . . . . . . . . . 99
Tape Player (seeAudio Systems)
Technical Facts & Specifications
Bulbs . . . . . . . . . . . . . . . . . . . . . .273
Electrical Equipment.
Add-on . . . . . . . . . . . .93. 126. 265
Fluid Capacities & Types . . .270. 272
Fuses & Circuit Breakers . . . . . . .266
Service Parts Identification
Label . . . . . . . . . . . . . . . . . . . . . 265
Vehicle Identification Number
(VIN) . . . . . . . . . . . . . . . . . . . . 264
TemperatureWarning . . . . . . . .101,109
Theft-Deterrent System . . . . . . . . . . .51
Security Light. . . . . . . . . . . . . . . . .53
Thermostat . . . . . . . . . . . . . . . . . . . .241
Tilt Steering Wheel . . . . . . . . . . . . . .73
Time, Setting the . . . . . . . . . . . . . . . 127
Tires . . . . . . . . . . . . . . . . . . . . . . . . . 250
Air InflatorSystem . . . . . . . . . . . .209
Blowout . . . . . . . . . . . . . . . . . . . . 208
Buying New . . . . . . . . . . . . . . . . .252
Chains . . . . . . . . . . . . . . . . . .218, 256
Flat, Changing . . . . . . . . . . . . . . .210
Inflation . . . . . . . . . . . . . . . . . . . . 250
Inspection & Rotation . . . . . . . . . .251
Loading . . . . . . . . . . . . . . . . . . . . 250
Pressure . . . . . . . . . . . . . . . . .218, 250
Quality Grading . . . . . . . . . . . . . .253
Spare, Compact . . . . . . . . . . . . . . .218
Wear Indicators . . . . . . . . . . . . . .253
Wheel Alignment &
Tire Balance . . . . . . . . . . . . . . .255
Wheel Replacement . . . . . . . . . . .255
When to Replace Wheels . . . . . . .255
Winter Driving . . . . . . . . . . . . . . .179
Torque Lock . . . . . . . . . . . . . . . . . . .179
Towing a Trailer. . . . . . . . . . . . . . . .183
Towing Your Pontiac . . . . . . . . . . . .197
Traction Control . . . . . . . . . . . . . . . . 157
Traction Control System
Warning Light . . . . . . . . . . . . . . . . 107
Traffic Lights . . . . . . . . . . . . . . . . . . 148
Trailer Towing . . . . . . . . . . . . . . . . . 183
Transaxle, Automatic
(see Automatic Transaxle)
Transmission, Automatic
(see Automatic Transaxle)
Trip Odometer . . . . . . . . . . . . . . . .98
Trunk
Lock . . . . . . . . . . . . . . . . . . . . . . . . 55
Release, Remote Power . . . . . . . . .56
Turn Signal Indicator . . . . . . . . . . . . .74
Turn SignaUHeadlight Beam
Lever . . . . . . . . . . . . . . . . . . . . . . . 73
Cruise Control . . . . . . . . . . . . . . . .77
Headlight High-Low
Beam Changer . . . . . . . . . . . . . .83
Lane Change Signals . . . . . . . . . . .74
Turn Signal Indicator . . . . . . . . . . .74
Windshield Washer . . . . . . . . . . . . .76
Windshield Wipers . . . . . . . . . . . . .75
Twilight Sentinel . . . . . . . . . . . . . . . .84
Underhood Light . . . . . . . . . . . . . .228
Oil . . . . . . . . . . . . . . . . . . . . . 102. 103
Service Engine Soon . . . . . . . . . . . 104
Unleaded Gasoline. . . . . . . . . . . . . .222
Traction Control System . . . . . . . . 107
Upholstery Care . . . . . . . . . . . . . . . .258
Urban Driving . . . . . . . . . . . . . . . . .171 Washer. Windshield . . . . . . . . . . . . . .76
Weight
Gross Axle Weight Rating
(GAWR) . . . . . . . . . . . . . . . . . . 248
. . . 160
Variable Effort Steering . . .
Gross Vehicle Weight Rating
Vehicle Identification Number
(GVWR) . . . . . . . . . . . . . . . . . .248
(VIN) . . . . . . . . . . . . . . . . . . . . . . 264
Vehicle Loading . . . . . . . . . . . . . . . .248 Wheel Alignment&Tire Balance . . . 255
Vehicle Storage . . . . . . . . . . . . . . . .245 Wheel Covers.
How to Remove. . . . . . . . . . . . . . .212
Ventilation . . . . . . . . . . . . . . . . .l21, 125
VIN . . . . . . . . . . . . . . . . . . . . . . . . . 264 Wheel Nut Torque . . . . . . . . . .216. 270
Visor Vanity Mirrors . . . . . . . . . . . . . 88 Wheel Replacement . . . . . . . . . . . . . 255
Voltmeter . . . . . . . . . . . . . . . . . . . . . . 110 Windows. Power . . . . . . . . . . . . . . . .73
Windshield Washer. . . . . . . . . . . . . . . 76
Fluid . . . . . . . . . . . . . . . . . . . .76. 242
warning Flashers. Hazard . . . . . . . 192
Low Fluid Warning Light . . . . . . . 105
Warning Lights . . . . . . . . . . . . . . . . . 100 Windshield Wiper Replacement. . . .248
Anti-Lock Brake System. . . . . . . . 106 Windshield Wipers . . . . . . .75. 261. 269
Battery . . . . . . . . . . . . . . . . . . . . . 104 Winter Driving . . . . . . . . . . . . . . . . . 179
105
If Your Vehicle is Stuck in
Brake ......................
Deep Snow . . . . . . . . . . . . . . . . 182
Check Gages. . . . . . . . . . . . . . . . .108
Coolant Temperature. . . . . . . . . . . 101
If You’re Caught in a Blizzard . . . . 181
Low Washer Fluid . . . . . . . . . . . . 105 Wrecker Towing . . . . . . . . . . . . . . . . 197
Malfunction Indicator Lamp. . . . . 104
319
Service Station Information
Hood ReleaseSee Page 227
The Delco Freedom@ batter
y needs
no water. See Page 245
Engine 011
See Page 231
See Page 242
See Page 236
Check and add coolantonly at the
coolant recoverytank. The fluid should be
at or a little above the
FULL HOT mark
when the engine is warm. If the engineis
cool, the level should be betweenthe
FULL COLD and FULL HOT marks.
See Page 238
See Tire-Loading Information label
on inside edgeof driver’s door.
See Page 250
FuelCapacity 18 U.S. Gal. (68 L)
Use unleaded gas only,
87 oc:&ne or higher (Code L Engine)
or 91 octane (Code 1 Engine).
.
See Page 222
8 . .
320
Compact Spare: 60 psi (420
See Page 217
WE SUPPORT
VOLUNTARY TECHNICIAN
CERTIFICATION THROUGH
Nattonal Institute for
AUTOMOTIVE
SERVICE
EXCELLENCE