1
"_._
The 1996 Pontiac Sunfire Owner’s Manual
SeatsandRestraint Systems
.............................................................
1-1
This section tells you how to use your seats and safety belts properly. It also explains the “SRS” system.
FeaturesandControls
..................................................................
2-1
This section explains how to start and operate your Pontiac.
Comfort Controls and Audio Systems
.....................................................
3-1
This section .tellsyou how to adjust the ventilation and comfort controls and how to operate your
audio system.
YourDrivingandtheRoad
..............................................................
4-1
Here you’ll find helpful information and tips about the road and how to drive under different conditions.
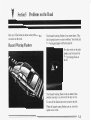
ProblemsontheRoad
..................................................................
5-1
This section tells you what to do if you have a problem while driving, such as a flat tire or
overheated engine, etc.
Service and Appearance Care
............................................................
6-1
Here the manual tells you how to keep your Pontiac running properly and looking good.
Maintenanceschedule
..................................................................
7-1
This section tells you when to perform vehicle maintenance and what fluids and lubricants to use.
CustomerAssistanceInformation
........................................................
8-1
This section tells you h o ~ vto contact Pontiac €or assistance and how eo get service and owner publications.
It also gives you information on “Reporting Safety Defects” on page 8-9.
Index
................................................................................
9-1
Here’s an alphabetical listing of almost every subject in this manual. You can use it to quickly find
something you want to read.
1
-.
I
We support voluntary
technician certification,
GENERAL MOTORS, GM and the GM Emblem,
PONTIAC and the PONTIAC Emblem and the name
SUNFIRE are registered trademarks of General Motors
Corporation.
This manual includes the latest information at the time it
was printed. We reserve the right to m a k e changes in the
product after that time without further notice. For
vehicles first sold in Canada, substitute the name
“General Motors of Canada Limited” forPontiac
Division whenever it appears in this manual.
Please keep this manual in your Pontiac, so it will be
there if you ever need it when you’re on the road. If you
sell the vehicle, please leave this manual in itso the new
owner can use it.
Litho in U.S.A.
Part No. 10273195 B First Edition
ii
WE SUPPORT
VOLUNTARY TECHNICIAN
CERTIFICATIONTHROUGH
National Institute for
AUTOMOTIVE
SERVICE
EXCELLENCE
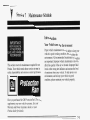
?or Canadian Owners Who Prefer a
?rench Language Manual:
Aux propribtaires canadiens: Vous pouvez vous
procurer un exemplaire de ce guide en frangais chez
votre concessionaire ou au:
DGN Marketing Services Ltd.
1500 Bonhill Rd.
Mississauga, Ontario L5T 1C7
@CopyrightGeneral Motors Corporation 1995
All Rights Reserved
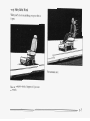
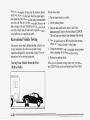
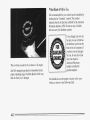
How to Use This Manual
Many people read theirowner3 manual from beginning
to end when they first receive their new vehicle. If you
do this, it will help you learn about the €eaturesand
controls foryour vehicle. In this manual, you’ll find that
pictures and words work together to explain things
quickly.
Index
A good place tolook for what you need is the Index in
the back of the manual. It’s an alphabetical list of all
that’s in the manual, and the page number where you’ll
find it.
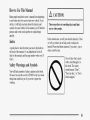
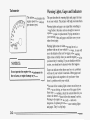
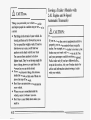
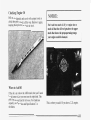
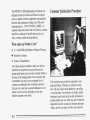
Safety Warnings and Symbols
You will finda number of safety cautions inthis book.
We use a box and the word CAUTION to tell you about
things that could hurt you if you were to ignore the
warning.
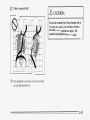
These mean there is something that could hurt
you or other people.
In the caution area, we tell you what the hazard is. Then
we tell you what to do to help avoid or reduce the
hazard. Please read these cautions. If you don’t, you or
others could be hurt.
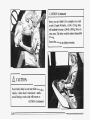
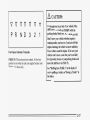
fi
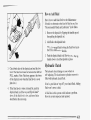
You will also find a circle
1 with a slash through it in
1 this book. This safety
symbol means “Don’t,”
“Don’t do this,” or “Don’t
let this happen.”
iii
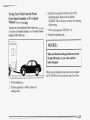
Vehicle Damage Warnings
Also, in this book youwill find these notices:
i
h
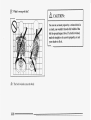
NOTICE:
i
:
These mean there is something that could
7iam;rge y w r vekicie,
iV
In the notice area, wetell you about something that can
damage your vehicle.Many times, this damage would
not be covered by your warranty, and it could be costly.
But the notice will tell you what to do to help avoid the
damage.
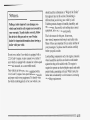
When you read other manuals, you might see CAUTION
and NOTICE warnings in different colors or in different
=vw3.&.
You’ll also see warning labels on your vehicle. They use
the same words, CAUTION or NOTICE.
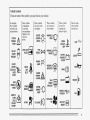
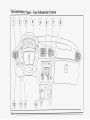
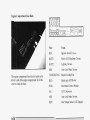
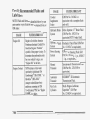
Vehicle Symbols
These are some of the symbols you may find on your vehicle.
For example,
these symbols
are used on an
original battery:
CAUTION
POSSIBLE
INJURY
A
These symbols
are important
for you and
your passengers
whenever your
vehicle is
driven:
DOOR LOCK
UNLOCK
PROTECT
EYES BY
SHIELDING
CAUSTIC
BAlTERY
ACID COULD
CAUSE
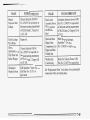
These symbols
are on some of
your controls:
These symbols
have to do with
your lights:
These symbols
are used on
warning and
indicator lights:
WINDSHIELD
WIPER
TURN
SIGNALS
WINDSHIELD
DEFROSTER
FASTEN
SEAT
BELTS
ENGINE
COOLANT
TEMP
k
-t-
BATTERY
CHARGING
SYSTEM
F l
BRAKE
BURNS
COOLANT
AVOID
SPARKS OR
FLAMES
SPARK OR
FLAME
COULD
EXPLODE
BAITERY
--
,111,
DAYTIME
e
RUNNING *
LAMPS - * *
FOG LAMPS
0
$0
WINDOW
DEFOGGER
ENGINE OIL
PRESSURE
VENTILATING
FAN
ANTI-LOCK
BRAKES
(@)
a
w,
Here are some
other symbols
you may see:
-
FUSE -%J-
LIGHTER
HORN
SPEAKER
FUEL
+'
k3
b
n3
(@)
V
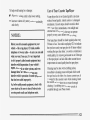
NOTES
v
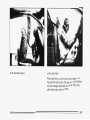
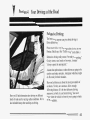
Section 1 SeatsandRestraintSystems
Here you’ll find in€omation a b u t the seats in your
Pontiae and how to use your safety belts properly. You
can also learn aboutsome things you should not do with
air bags and safety belts.
Seats and Seat Controls
This section tells you about the seats -- how to adjust
them -- and also about reclining seatbacks and head
restraints.
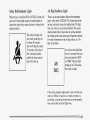
Manual Front Seats
,!%, CAUTION:
.
.
You can lose controlof the vehicle if you try to
adjust a manual driver’s seat while the vehicle is
moving, The sudden movement codd startle and
confuse you, or make you pusha pedal when you
don’t want to. Adjust the driver’s seat
only when
the vehicle is not moving.
Driver’s Seat
.
Move the lever under the driver’s seat to unlock it. Slide
the seat to whereyou want it. Then release the lever and
try to move the seat with your body, to make sure the
seat is locked intoplace.
1-1
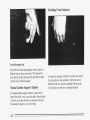
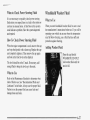
Reclining Front Seatbacks
I
Front Passenger Seat
Move the lever under the passenger’s seat to unlock it.
Slide the seatto where you want it. Then release the
lever and try to move the seat with your body, to make
sure the seat is locked into place.
Manual Lumbar Support (Option)
The manual lumbar support control is located at the
front of the driver’s seat, toward the right. Turn the knob
clockwise or counterclockwise to increase or decrease
the amount of support to your lower back.
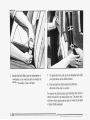
To adjust the seatback, lift the lever onthe outer side of
the seat and movethe seatback to where you want it.
Release the leverto lock the seatback. Pullup on the
lever and the seatwill go to an upright position.-
A CAUTION:
Sitting in a reclined position when yourvehicle is
in motion canbe dangerous. Even if you buckle
up, your safety belts can’t do their
job when
you’re reclined like this.
do its job because it
The shoulder belt can’t
won’t be against your body. Instead, it will be in
front of you. In a crash you could go into it,
redv&&w
&her kMier%
The lap belt can’tdo its job either. In a crash the
belt could goup over your abdomen.The belt
forces wouId be there, notat your pelvic bones.
This could caw serious internal injuries,
For proper protectionwhen the vehicle is in
motion, have the seatback upright.Then sit
well back in the seatand wearyour safety
belt properly.
But don’t have aseatback reclined if your vehicle
is moving.
1-3
.
Head Restraints
Slide the head restraint up or down so that the top of the
restraint is closest to the top of your ears. This position
reduces the chance of a neck injury in a crash.
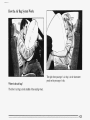
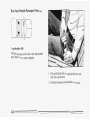
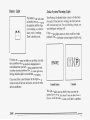
Seatback Latches (2-Door Models)
i
1-4
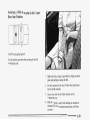
To fold a frontseat forward, lift the seatback latch.
When you return thes'eatbackto its original position, the
seatback will lock.
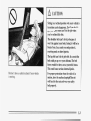
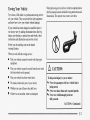
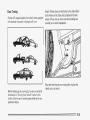
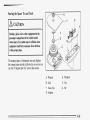
Easy Entry Seat (2-Door Models)
Rear Seats-
t
Fording the Rear Seat
A CAUTION:
If an easy entry right frontseat isn’t locked, it
can move. In a sudden stop or crash, the person
sitting there could be injured. After you’ve used
it, be sure to push rearward on an easy entry seat
to be sure itis locked.
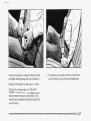
The right front seat of your vehicle makes it easy to get
in and out of the rear seat.
Tilt the right front seatback completely forward and
the whole seat will slide forward.
(.
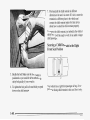
Move the right front seatback to its original position
after W M m gets into the rear seat a?%a.Then mwiie
Seat, PuU forwad
the seat rearward until it locks.
TO Open the f d d - d ~ w n
seat tab.
Tilt the seatback completely forward again to
get out.
To close the seat, push the seatbackup to itsoriginal
position.
the
Push the seatback solidly up against the back plate to
ensure that the latch will hook.
1-5
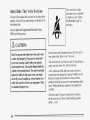
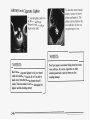
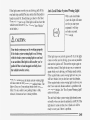
Safety Belts: They’re for Everyone
This part of the manual tells you how to use safety belts
properly. It also tells you some things you should not do
with safety belts.
Your vehiclehas a light
that comes on as a reminder
to buckle up. (See “Safety
Belt Reminder Light” in
the Index.)
And it explains the Supplemental Restraint System
(SRS), or air bag system.
I A CAUTION:
Don’t let anyone ride where he
or she can’t wear
a safety belt properly.If you are in a crash and
you’re not wearing a safety belt, your injuries
can be muchworse. You can hit things inside the
vehicle or be ejectedfrom it. You can be seriously
injured or killed. In the same crash,you might
not beif you are buckled up. Always fasten your
your passengers’ belts
safety belt, and check that
are fastened properlytoo.
1-6
In most statesand Canadian provinces, the law says to
wear safetybelts. Here’s why: They work.
You never know if you’ll be in a crash. If you do have a
crash, you don’t know if it will be a bad one.
A few crashesare mild, and some crashes can beso
serious thateven buckled up a person wouldn’t survive.
But most crashes are in between. In many of them,
people whobuckle up can survive and sometimes walk
away. Without belts they could have been badly hurt
or killed.
After morethan 25 years of safety belts invehicles,
the facts areclear. In most crashes buckling up does
mater ... a let!
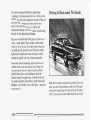
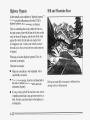
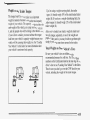
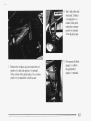
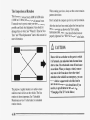
Why Safety Belts Work
When you ride in or on anything, you go as fast as
it goes.
Put someone on it.
Take the simplest vehicle. Suppose it's just a seat
on wheels.
4
1-7
I
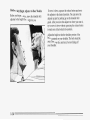
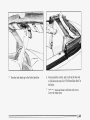
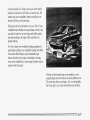
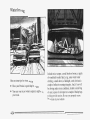
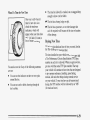
Get it up to speed. Then stop the vehicle. The
rider
doesn’t stop.
1-8
The person keepsgoing until stopped by something.
In a real vehicle, it could be the windshield ...
or the instrument panel ...
or the safety belts!
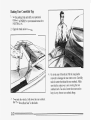
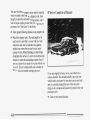
With safety belts, you slow down as the vehicle does.
You get more time to stop. You stop over more distance,
and your strongest bones take the forces. That's why
safety belts make such good sense.
1-9
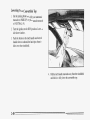
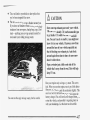
Here Are Questions Many People Ask
About Safety Beits -- and the Answers
Won’t I be trapped in the vehicle after an
accident if I’m wearing a safety belt?
A:
You could be -- whether you’re wearing a safety
belt or not. But you can unbu’cklea safety belt,
even if you’re upside down. And your chance of
being conscious during and after an accident,so
you can unbuckle and get out, is much greater if
you are belted.
Q:
If my vehicle has air bags, why shouldI have to
wear safety belts?
A:
Air bags are in many vehicles today and will be in
most of them in the future. But they are
supplemental systems only; so they work with
safety belts -- not instead of them. Every air bag
system ever offeredfor sale has required the use of
safety belts. Even if you’re in a vehicle that has air
bags, you still have to buckle up to get the most
protection. That’s true not only in frontal collisions,
but especially in side and other collisions.
e: Ifhome,
I’m
A:
a good driver, and I never drive far from
why should I wear safety belts?
You may be an excellent driver, but if you’re in an
accident -- even one that isn’t your fault -- you and
your passengers can behurt. Being a good driver
doesn’t protect you from things beyond your
control, such as bad drivers.
Most accidents occur within 25 miles (40 km)of
home. And the greatest numberof serious injuries
and deaths occur at speedsof less than 40 mph
(65 hh).
Safety belts are for everyone.
How to Wear Safety Belts Properly
Driver Position
Adults
This part describes the driver’s restraint system.
This part is only for people of adult size.
Lap-Shoulder Belt
Be aware that there are special things to know about
safety belts and children. And there are different rules
for
smaller children and babies. If a child will
be riding in
your Pontiac, see thepart of this manual called
“Children.” Follow those rulesfor everyone’s protection.
The driver has a lap-shoulder belt. Here’s how to wear
it properly.
First, you’ll want to know which restraint systems your
vehicle has.
1. Close and lock the door.
2. Adjust the seat (to see how, see “Seats” in the Index)
so you can sit up straight.
We’ll start withthe driver position.
1-11
1
3. Pick up the latch plate and pull the belt across you.
Don’t let it get twisted.
If the belt stops before it reaches the buckle, tilt the latch
plate and keep pullinguntil you can buckle the belt.
4. Push the latch plate into thebuckle until it clicks.
Pull up on the latch plate to make sure it is secure. If the
belt isn’t long enough,see “Safety Belt Extender” at the
end of this section.
Make sure the release brsttm on the buckle I s psitiwed
so you would be able to unbuckle thesafety belt quickly
if you ever had to.
1-12
~
I
5. To make the lap part tight, pull down on the buckle
end of the belt as you pull up on the shoulder belt.
L
I
I
I
I
I
I
I
I
I
I
1
The lap part of the belt should be worn low and snug
on the hips,just touching the thighs. In a crash, this
applies force to the strong pelvic bones. And you’d be
less likely to slide under the lap belt. If you slid under
it, the belt would apply force at your abdomen. This
could cause serious or even fatal injuries. The shoulder
belt should go over the shoulder and acrossthe chest.
These parts of the body are best able to take belt
restraining forces.
The safety belt locks if there’s a sudden stopor crash.
1-13
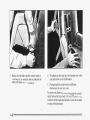
Shoulder Belt Height Adjuster (4-Door Models)
Before you begin to drive, move the shoulder belt
adjuster to the height thatis right for you.
To move it down, squeeze the releasebutton and move
the adjuster to the desired position. You can movethe
adjuster up just by pushing up on the shoulder belt
guide. After you move the adjusterto where you want it,
try to move it down without squeezing the releasebutton
to make sure it has locked into position.
Adjust the height so that the shoulderportion of the
belt is centered on your shoulder. The belt should be
away from your faceand neck, but not falling off
your shoulder.
1-14
&:
What's wrong with this?
- -A
A:
The shoulder belt is too loose. It won't give nearly
as much protection this way.
A CAUTION:
You can be seriously hurt if your shoulder belt is
too loose. In a crash, you would move forward
too much, which could increase injury. The
shoulder belt should fit againstyour body.
e:
What’s wrong with this?
A CAUTION:
You can be seriously injured if your belt
is
buckled in the wrong place like this. Ina crash,
the belt would go up over your abdomen.The belt
forces would be there, not
at the pelvic bones. This
could cause serious internal injuries. Always
buckle your belt into thebuckle nearest you.
A:
The belt is buckled in the wrong place.
1-16
What's wrong with this?
A CAUTION:
You can be seriously injured
if you wear the
shoulder belt under your arm. In a crash, your
body would move too far forward, whichwould
kLa-tzzrsethe L*iTCe
of head and neck inbq.
Also, the belt would apply too much force to the
ribs, which aren't as strong as shoulder bones.
You could also severelyinjure internal organs
like your liveror spleen.
1
A:
I
I
I
I
I
I
I
I
I
The shoulder belt is worn under the arm. It should
be worn over the shoulder at all times.
1-17
Q:
What’s wrong with this?
A CAUTION:
You can be seriously injured by a twisted belt. In
a crash, you wouldn’t have the full width of the
belt to spread impact forces. If a belt is twisted,
make it straight so it can work properly,or ask
your dealer to fix it.
A:
The belt is twisted across the body.
1-18
Your Pontiac has two air bags -- one air bag for the
driver and another airbag for the right front passenger.
Here are the most important things to know about the air
bag system:
A CAUTION:
You can be severely injuredo r killed in a crash if
you aren’t wearing your safety belt even if
you have an air bag. Wearing your safety belt
during a crash helps re-duse.your s-bnse.of
hitting things inside the vehicle or being ejected
from it. The air bagis only a “supplemental
restraint.” That is, it works with safety belts but
--
To unlatch the belt, just push the button on the buckle.
The belt should go back out of the way.
Before you close the door, be sure the belt is out of the
way. If you slam the door on it, you can damage both the
belt and your vehicle.
Supplemental Restraint System(SRS)
This part explains the Supplemental Restraint System
(SRS) or air bag system.
doesn’t replace them. Air bags are designed to
work only inmoderate to severe crashes where
the frontof your vehicle hits something. They
aren’t designed to inflatea t all in rollover, rear,
side or low-speed frontal crashes. Everyone in
your vehicle, including the driver, should wear
a
safety belt properly whether or not there’s an
air bag for that person.
--
1-19
CAUTION:
Air bags inflate with great force, faster
than the
blink of an eye. If you’re too closeto a n inflating
air bag, it could seriouslyinjure you. Safety belts
help keep you in position fora n air bag inflation
in a crash. Always wear your safety belt, even
as far
with an airbag. The driver should sit
back as possible while stillmaintaining control
of the vehicle.
AIR
The system checks the air bag’s electrical system for
malfunctions. The light tells you if there is anelectrical
problem. See “Air Bag Readiness Light” in the Index
for more information.
/11 CAUTION:
~
~~
An inflating air bag can seriously injure small
your
children. Always secure children properly in
vehicle. To read how, see the partof this manual
called “Children” and the caution label on the
right frontpassenger’s safety belt.
1-20
There is an air bag
readi1?ess light or,the
instrument panel, which
shows AIR BAG.
How the Air Bag System Works
The right front passenger’s air bagis in the instrument
panel on the passenger’s side.
Where is the air bag?
The driver’s air bag is in the middle of the steering wheel.
1-21
A CAUTION:
Don’t put anything on, orattach anything to, the
steering wheel or instrument panel. Also, don’t
put anything(such as pets or objects) between
any occupantand the steering wheel or
instrument panel.If something is between an
occupant andan air bag, it could affect the
performance of the air bag or worse, it could
cause injury.
--
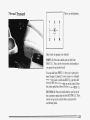
When should an air bag inflate?
The air bag is designed to inflate in moderate to severe
frontal or near-frontal crashes. The air bag will inflate
only if the impactspeed is above the system’s designed
“threshold level.”If your vehicle goes straight into a
wall that doesn’tmove or deform, the threshold level is
about 9 to 15 mph ( 14 to 24 km/h). The threshold level
can vary, however,with specific vehicle design, so that
it can be somewhat above or below this range. If your
vehicle strikes something that will move or deform, such
as a parked car, thethreshold level will be higher. The
air bag is not designed to inflate in rollovers, side
impacts or rearimpacts, because inflation would not
help the occupant.
In any particular crash, no one can say whether an air
bag should have inflated simply becauseof the damage
to a vehicle or because of what the repair costs were.
Inflation is determined by the angleof the impact and
the vehicle’s deceleration. Vehicle damage is only one
indication of this.
What makes an air bag inflate?
In a frontal or near-frontal impact of sufficient severity,
the air bag sensing system detects that the vehicle is
suddenly stopping as a result of a crash. The sensing
system triggers a chemical reactionof the sodium azide
sealed in the inflator. The reactionproduces nitrogen
gas, which inflates the air bag. The inflator, air bag and
related hardware are all part of the airbag modules
packed inside the steering wheel and in the instrument
panel in front of the right front passenger.
How does an air bag restrain?
In moderate to severe frontal or near-frontal collisions,
even belted occupantscan contact the steering wheel or
the instrument panel.The air bag supplements the
protection provided by safety belts. Air bags distribute
the force of the impactmore evenly overthe occupant’s
upper body, stoppingthe occupant more gradually. But
air bags would nothelp you in many typesof collisions,
including rollovers,rear impacts and side impacts,
primarily because an occupant’s motion isnot toward the
air bag. Air bags should never be regarded
as anything
more than a supplementto safety belts, and then onlyin
moderate to severe frontal or near-frontal collisions.
What will you seeafter an air bag inflates?
After the air bag inflates, it quickly deflates. This occurs
so quickly that some people may not even realize the air
bag inflated. Some components of the air bag module in
the steering wheel hub for the driver’s air bag, orthe
instrument panel for the right front passenger’s bag, will
be hot for a short time.The part of the bag that comes
into contact with you may be warm, but it will never be
too hot to touch. There will be some smoke and dust
coming from vents in the deflated air bags. Air bag
inflation will notprevent the driver from seeing or from
being able to steer the vehicle, nor will it stop people
from leaving the vehicle.
/d
CAUTION:
When an air bag inflates, there is dust in the air.
This dust could cause breathing problems for
people with a history of asthma or other
breathing trouble. To avoid this, everyone in the
vehicle shbuld get out as soon as it is safe todo so.
If you have breathing problems but can’t getout
of the vehicle after an air bag inflates, thenget
fresh air by opening a window or door.
I
In many crashes severe enough to inflate an airbag,
windshields are broken by vehicle deformation.
Additional windshield breakage may also occur from the
right front passenger air bag.
0
The air bags are designed to inflate only once. After
they inflate, you’ll need some new parts foryour air
bag system. If you don’t get them, the air bag system
won’t be there to help protect you in another crash.
A new system will include air bag modules and
possibly other parts. The service manual for your
vehicle covers the need to replaceother parts.
1-23
0
0
Your vehicle is equipped with a crash sensing and
diagnostic module, which records information
about the air bag system. Themodule records
information about the readiness of the system,
when the sensors are activated and driver’s safety
belt usage at deployment.
Let only qualified technicians work on your air
bag system. Improper service canmean that your
air bag system won’t work properly. See your dealer
for service.
NOTICE:
Servicing Your Air Bag-Equipped Pontiac
Air bags affect how your Pontiac should be serviced.
There are parts of the air bag system in severalplaces
around your vehicle. You don’t want the system to
inflate while someone is working on your vehicle. Your
Pontiac dealer and the Sunfire ServiceManual have
information about servicing your vehicle and the airbag
system. To purchase a service manual, see “Serviceand
Owner Publications” in the Index.
A CAUTION:
~~~
If you damage the cover for the driver’s or the
they may not
right front passenger’s air bag,
work properly. You may have to replace the air
bag modulein the steeringwheel or both the air
bag module and the instrument panel for the
Do not open or
right front passenger’s air bag.
break the airbag covers.
For up to10 minutes after the ignition key
is
turned off and the batteryis disconnected, an air
bag can still inflate during improper service.
You
can be injured if you are close to an air bagwhen
it inflates. Avoid wires wrapped withyellow tape
of
or yellow connectors. They are probably part
the airbag system. Be sure to follow proper
service procedures, and makesure the person
so.
performing work foryou is qualified to do
The air bag system does not need regular maintenance.
1-24
Safety Belt Use During Pregnancy
Safety belts workfor everyone, including pregnant
women. Like all occupants, they are more likely to be
seriously injuredif they don’t wear safety belts.
The best way to protect the fetus is to protect the
mother. When a safety belt is worn properly, it’s more
likely that the fetus won’t be hurt in a crash. For
pregnant women, as for anyone, the key to making
safety belts effective iswearing them properly.
Right Front Passenger Position
The right front passenger’s safety belt works the same
way as the driver’s safety belt. See “Driver Position,”
earlier in this section.
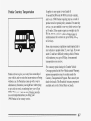
Rear Seat Passengers
It’s very important for rear seat passengers to buckle up!
Accident statistics show that unbelted people in the rear
seat are hurt more often in crashes than those who are
wearing safety belts.
Rear passengers who aren’t safety belted can be thrown
out of the vehicle in a crash. And they can strike others
in the vehicle who are wearing safety belts.
A pregnant womanshould wear a lap-shoulder belt, and
the lap portion should be worn as
low as possible, below
the rounding, throughout the pregnancy.
1-25
Rear Seat Outside Passenger Positions
n
U
Lap-Shoulder Belt
The positions next to the windows have lap-shoulder
belts. Here’s how towear one properly.
1. Pick up the latch plate and pull the belt across you.
Don’t letit get twisted.
2. Push the latch plate into the buckle until it clicks.
1-26
If the belt stopsbefore it reaches the buckle, tilt the
latch plate and keep pullinguntil you can buckle it.
3. To make the lap part tight, pull down on the buckle
end of the belt as you pull up on the shoulder part.
PulI up on the latch plate to make sure it is secure.
If the belt is not long enough,see “Safety Belt
Extender” at theend of this section. Make sure the
release button on the buckle is positioned so you
would be able to unbuckle the safety belt quickly if
you ever had to.
1-27
1
I
force to the strong pelvic bones.And you’d be less
likely to slide under the lap belt.If you slid under it,
the belt would apply force at your abdomen. This
could cause serious or even fatal injuries. Theshoulder
belt should go over the shoulder and across the chest.
These partsof the body are best able to take belt
restraining forces.
The safetybelt locks if there’s a sudden stopor a crash.
I A CAUTION:
You can be seriously hurt if your shoulder belt is
too loose. In a crash, you would move forward
too much, which could increase injury. The
shoulder belt should fit against your body.
The lappart of the belt should be worn low and snug on
the hips, justtouching the thighs. In a crash, this applies
1-28
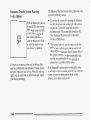
Rear Safety Belt Comfort Guides for
Children and Small Adults
Rear shoulderbelt comfort guides will provide added
safety belt comfort for children who have outgrown
child restraints and for small adults.When installed on a
shoulder belt,the comfort guide pulls the belt away
from the neck and head.
Thew is one guide for each wtside passenger psskim ill
the rear seat. To provide added safety belt comfort for
children whohave outgrown child restraints and for
smaller adults,the comfort guides may be installed on
the shoulder belts. Here’s how to install a comfort guide
and use the safety belt:
To unlatch the belt, just push the button on the buckle.
1-29
Y
1. Pull the elastic cord out from between the edge of
the seatback and the interior body to remove the
guide from its storage clip.
2. Slide the guide under and past the belt. The elastic
cord must be under the belt. Then, place the guide
over thebelt, and insert the two edges of the belt into
the slots of the guide.
3. Be sure that the belt is not twisted and it lies flat.
T k elastic cord must be under the belt and the guide
on top.
4. Buckle, position and release the safety belt as
d e s € ~ k in
d “Rear Seat Outside Passenger Positions”
earlier in this section. Make sure thatthe shoulder
belt crosses the shoulder.
1-31
To remove and store the comfort guides, justperform
thsese steps in reverse order. Squeeze the belt edges
together so that you can take them out from the guides.
Pull the guide upward to expose its storage clip, and
then slide the guide onto the clip. Rotatethe guide and
clip inward and in between the seatback and the interior
body, leaving only theloop of elastic cord exposed.
Lap Belt
Center Passenger Position
When you sit inthe center seating position,
you have a
lap safety belt, which has no retractor.To make the belt
longer, tilt the latch plate and pull it along the belt.
1-32
,
t
.
’
:‘I
Children
Everyone in a vehicle needs protection! That includes
infants and all children smaller than adult size. In fact,
the law in every state in the United States and in every
Canadian province says children up to some age must be
restrained while in a vehicle.
Smaller Children and Babies
I A CAUTION:
I
~
l
~
I
To make the belt shorter, pull its free end as shown until
the belt is snug.
Buckle, position andrelease it the same wayas the lap
part of a lap-shoulder belt. If the belt isn’t long enough,
see “Safety Belt Extender’’at the end of this section.
Make sure the release button on the buckle is positioned
s o you would be able to unbc& the sawy belt quickly
if you ever had to.
~
Smaller children and babiesshould always be
restrained in a childor infant restraint. The
instructions for the restraintwill say whether it is
the right type andsize for your child. A very
young child’s hip bones are so small that a
regular belt might not staylow on the hips, as it
should. Instead, thebelt will likely be over the
child’s abdomen. In a crash, the beltwould apply
force right onthe child’s abdomen, which could
1 cause serious or fatal injuries.
So, be sure that
I any child small enough for oneis always properly
! restrained in it child or infant restraint.
1
l
~
~
1-33
CAUTION: (Continued)
I
heavy you can’t hold it. For example, ina crash
a t only 25 mph (40 km/h), a 12-1b. (5.5 kg) baby
will suddenly becomea 2404b. (110 kg) force on
impossible
your arms. The baby would almost
be
to hold.
Secure the baby inan infant restraint.
’ 4
P
A CAUTION:
Never hold a baby in yourarms while riding ina
vehicle. A baby doesn’t weigh much until a
crash. During acrash a baby will become so
CAUTION: (Continued)
9-
1-34
Child Restraints
Be sure the child restraint is designed to be used in a
vehicle. If it is,it will have a label saying that it meets
Federal Motor Vehicle Safety Standards.
Then follow the instructions for the restraint. You may
find these instructions on the restraint itself or in a
booklet, or both. These restraints use the belt system in
your vehicle, but thechild also has to besecured within
the restraint to help reduce the chance of personal injury.
The instructions that come with the infantor child
restraint will show you how to do that.
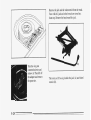
Where to Put the Restraint
Accident statistics show that children are saferif they
are restrained in therear rather than thefront seat. We at
General Motors therefore recommend that youput your
child restraint in the rear seat. Never put a rear-facing
child restraint in thefront passenger seat. Here’s why:
I A CAUTION:
A child in a rear-facing child restraint canbe
seriously injured if the right frontpassenger’s air
bag inflates. This is because the backof a
rear-facing child restraint would
be very close to
the inflating air
bag. Always secure a rear-facing
child restraint in the rear seat.
You may, however, secure a forward-facing child
re!&raint in the right front seat* Befclre.you sewre
a forward-facing child restraint,always muve the
front passenger seatas far back as it will go. Or,
secure thechild restraint in the rear seat.
Wherever you install it, be sure to secure the child
restraint properly.
Keep in mind that an unsecured child restraint can move
around in a collision or sudden stopand injure peoplein
the vehicle. Be sure to properly secure anychild
restraint in your vehicle-- even when no child is in it.
1-35
Top Strap
If your vehicle isnot a convertibleand you need to have
an anchor installed, you can ask your Puntiac b e a k to
put one in for you. If you want to install an anchor
yourself, your dealer can tell you how to do it.
For cars first sold in Canada, child restraints with a top
strap must beanchored according to Canadian law.
Your dealer can obtain the hardware kitand install it for
you, OF you may installit yourself using the instructions
provided in the kit.
Use the tether hardware kit available from the dealer.
The hardware and installation instructions were
specifically designed for this vehicle.
If your child restraint has a top strap, it should be
anchored. If you have a convertible,don't use a restraint
like that in your vehiclebecause the top strapanchor
cannot be installed properly. You shouldn't use this type
of restraint without anchoring the top strap.
1-36
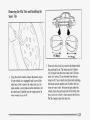
Securing a Child Restraint in a Rear
Outside Seat Position
‘D
You’ll be using thelap-shoulder belt. See the earlier part
about the top strap if the child restraint has one.
1. Put the restraint on the seat. Follow the instructions
for the child restraint.
2. Secure the child in the child restraint as the
instructions say.
3. Pick up the latch plate, and run the lap and shoulder
portions of the vehicle’s safety belt through or
around the restraint. The child restraint instructions
will show you how.
Tilt thelatch plate to adjust the belt if needed.
If the shoulder belt goes in front of the child’s face or
neck, put it behind the child restraint.
1-37
4. Buckle the belt. Make sure the release button is
positioned so you would be able to unbuckle the
safety beltquickly if you ever had to.
5. To tighten the belt, pull up on the shoulder belt while
you push down on the child restraint.
6. Push and pull the child restraint in different
directions to be sure it is secure.
To remove the child restraint, just unbuckle the vehicle's
safety belt and let it go back all theway. The safety belt
will move freely again and be ready to work for an adult
or larger child passenger.
1-38
Securing a Child Restraint in the Center
Rear Seat Position
You’ll be using the lap belt.
See the earlier part about the top strap if the child
restraint has one.
1 . Make the belt aslong as possible by tilting the latch
plate and pulling it along the belt.
2. Put the restraint on the seat. Follow the instructions
for the child restraint.
3. Secure the child in the child restraint as the
instructions say.
4. Run the vehicle’s safety belt through oraround the
restraint. The child restraint instructions will show
you how.
1-39
7. Push and pull the child restraint in different
directions to be sure it is secure.If it isn’t, securethe
restraint ina different place in the vehicle and
contact thechild restraint maker for their advice
about howto attach the child restraintproperly.
To remove thechild restraint, justunbuckle the vehicle’s
safety belt. Itwill be ready to work for an adult or larger
child passenger.
‘*R
&
5. Buckle the belt. Make sure the release button is
positioned so you would be able tounbuckle the
safety belt quickly if you ever had to.
6. To tighten the belt, pull its freeend while you push
down on thechild restraint.
1-40
Securing a Child Restraint in the Right
Front Seat Position
ff
Your vehicle has a right front passenger air bag. Never
put a rear-facing child restraint in this seat. Here’s why:
IA
CAUTION:
A child in a rear-facing child restraint can be
seriously injured if the right front passenger’sair
’ bag inflates. This is because the back of a
rear-facing child restraint would be very close to
the inflatingair bag. Always secure a rear-facing
child restraint in the rear seat.
~
’
You’ll be using the lap-shoulder belt. See theearlier part
about the top strap if the child restraint has one.
1. Because your vehicle has a right front passenger air
bag, always move the seat as far back as it will go
before securing a forward-facing child restraint. (See
“Seats” in the Index.)
2. Put the restraint on the seat. Follow the instructions
for the child restraint,
I
Tilt the latch plate to adjust the belt if needed.
If the shoulder belt goes in frontof the child’s face or
neck, put it behind the childrestraint.
3. Secure the child in the child restraint as the
instructions say.
4. Pick up the latch plate, and run the lap and shoulder
portions of the vehicle’s safety belt through or
around the restraint. The child restraint instructions
will show you how.
1-41
i. Buckle the belt. Make sure the release button is
positioned so you would be able to unbuckle the
safety belt quickly if you ever had to.
6. To tighten the belt, pull up on the shoulder belt while
you push down on the child restraint.
7. Push,and pullthe child restraint in different
directions to be sure it is secure.
To remove the childrestraint, just unbuckle the vehicle's
safety belt and let itgo back all the way. The safety belt
will move freely again and be ready to work for an a&Jt
or larger child passenger.
1-42
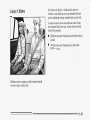
Larger Children
If you have the choice, a child should sit next to a
window so the child can wear a lap-shoulder belt and
get the additional restraint a shoulder belt can provide.
Accident statistics show that children are safer if they
are restrained in the rear seat. But they need to use the
safety belts properly.
Children who aren’t buckled up can be thrown out in
a crash.
Children who aren’t buckled up can strike other
people who are.
Children who have outgrown child restraints should
wear the vehicle’s safety belts.
1-43
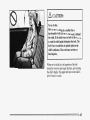
A CAUTION:
Never do this.
Here two childrenare wearing the samebelt. The
belt can’t properly spread the impact
forces. In a
crash, the two children can be crushed together
and seriously injured.A belt must be used by
only one personat a time.
What if a child is wearing a lap-shoulder
belt,
but thechild is so small that the shoulder
belt is
very close to the child’s face or neck?
A:
Move the child toward the center of the vehicle, but
be sure that the shoulder belt still is on the child’s
shoulder, so that in a crash the child’s upper body
would have the restraint that belts provide. If the
child is sitting in a rear seat outside position, see
“Rear Safety Belt Comfort Guides” in the Index. If
the child is so small that the shoulder belt is still
very close to the child’s face or neck, you might
want to place the child in the center seat position,
the one that has only a lap belt.
A CAUTION:
.
Never do this.
Here a child is sitting ina seat that hasa
lap-shoulder belt, but the shoulderpart is behind
way, in
the child. If the child wears the belt in this
a crash the child might slide under the
belt. The
belt’s force would then be applied right on the
child’s abdomen. That could cause seriousor
fatal injuries.
Wherever the child sits, the lap portionof the belt
should be worn low and snug on the hips,just touching
the child’s thighs. This applies belt force tothe child’s
pelvic bones in a crash.
1-45
Safety Belt Extender
If the vehicle’s safety belt will fasten around you, you
should useit.
But if a safety beltisn’t long enough to fasten, your
dealer will order you an extender. It’s free. When you go
in to order it, takethe heaviest coat you will wear,so the
extender will belong enough for you. The extender will
be just foryou, and just forthe seat in your vehicle that
you choose. Don’t let someone else use it, and use it
it
only for the seat it is madeto fit. To wear it, just attach
to the regular safety belt.
Checking Your Restraint Systems
Now and then, make sure the safety belt reminder light
and all your belts, buckles, latch plates, retractors and
anchorages are working properly.Look for any other
loose or damaged safety belt system parts. If you see
anything that mightkeep asafety belt system from
doing its job,have it repaired.
Torn or frayed safety k l t s may not protect you in a
crash. They can Tip -ap;art mb-er i q a d fmceces. If a beit is
torn or frayed,get a new one right away.
Also look forany opened or broken air bag covers, and
have them repaired or replaced. (The air bag system
does notneed regular maintenance.)
Replacing RestraintSystem Parts
After a Crash
If you’ve had a crash, )doyou need new belts?
After avery minor collision, nothing may be necessary.
But if the belts were stretched, as they would be if worn
during ‘amore severe crash, thenyou need new belts.
If belts are cut or damaged, replace them. Collision
damage also may mean you will need to have safety belt
or seatparts repaired or replaced. New parts and repairs
may be necessary evenif the belt wasn’t being used at
the time of the collision.
If an air bag inflates, you’ll need to replace air bag
system parts. See the part on the air bag system earlier
in this section.
1-46
~~
Section 2 FeaturesandControls
Here you can learn about the many standard and
optional features on your Pontiac, and information on
starting, shifting and braking. Also explained are the
instrument panel and the warning systems that tell you if
everything is working properly -- and what to do if you
have a problem.
Keys
A CAUTION:
Leaving youngchildren in a vehicle with the
ignition key is dangerous for many reasons.
A child or others could be badly injured or
even killed.
They could operate power windows or other
controls or even makethe vehicle move. Don’t
leave the keys in a vehicle with young children.
2-1
~
~
One key is used for the
ignition, the doors and
all otherlocks.
NOTICE:
Your Pontiac has a number of new features that
can help prevent theft. But you can have a lot
of trouble getting into your vehicle if you ever
lock your keys inside. You may even have to
damage your vehicle to get in. So be sure you
have extra keys.
When a new Pontiac is delivered, the dealer removes the
key tag from the key, and gives it to the first owner.
Keep the tagin a safe place. If you lose your key, you’ll
be able to have a new one made easily using the tag.
If you need a new key,contact your Pontiac dealer who
can obtain thecorrect key code. Remember to carry the
pre-cut emergency key which Pontiac sends after
delivery. In an emergency, call the Pontiac Roadside
Assistance Program at 1-800-ROADSIDE or
1-800-762-3743.
2-2
,
use your key to k x k and
A CAUTION:
Unlocked doors canbe dangerous.
Passengers especially children can easily
open the doors andfall out. When a door is
locked, the inside handlewon’t open it.
Outsiders can easily enter through
an unlocked
door when you slow downor stop yourvehicle.
This may notbe so obvious: You increase the
chance of being thrown outof the vehicle ina
crash if the doors aren’tlocked. Wear safety belts
properly, lock yourdoors, and you will be far
better off whenever you drive yourvehicle.
--
--
unlock your vehicle from
the outside. You can also
use the optional Remote
Keyless Entry system to
lock and unlock your
vehicle.
There are several ways to lock and unlock your vehicle.
2-3
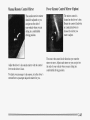
To lock the door from the
inside, push the locking
lever forward.
Power Door Locks (Option)
You can lock orunlock all
doors of your vehiclefrom
the driver or front passenger
C k m iszk switch.
To unlock the door, pull the locking lever backward.
Push the lowerportion of the switch to lock your doors.
Push the upperportion of the switchto unlock your doors.
The lever on each rear door works only that door’s lock.
It won’t lock (or unlock) all of the doors -- that’s a
safety feature.
2-4
Rear Door Security Lock (4-DOor Models)
Your Pontiac is equipped
with rear door security
locks that help prevent
passengers from opening
the rear dooh of your car
from the inside.
If you don’t cancel the security lock feature, adults or
older children who ridein the rear won’t be able to open
the rear door from the inside. You should let adults and
older children know how to cancel the locks.
To cancel the rear door lock:
1. Unlockthe door from the inside and open thedoor
from the outside.
2. Use a key to move the lock all the way down.
3. Do the same for the other reardoor.
The rear door locks will now work normally.
To use one of these locks:
1.
use a key to move the lock all the way u p
2. Close the door.
3. Do the same thing to the other rear door lock.
The rear doors of your vehicle cannot be opened from
inside when this feature is in use. If you want to open
a rear door when the security lockis on:
1. Unlock the door from the inside.
Leaving Your Vehicle
If you are leaving the vehicle, openyourdoor and.set
the Iocks from inside. Then get out and close the dmr.
2. Then open the door from the outside.
2-5
Remote Keyless Entry (Option)
If your Pontiac has this option, you can lock and unlock
your doors orunlock your trunk from up to 30 feet (9 m)
away using the key chain transmitter supplied with
your vehicle.
Your Remote Keyless Entry
system operates on a radio
frequency subject to
Federal Communications
Commission (FCC) Rules.
Check the distance. You may be too far from your
vehicle. Thisproduct has a maximum range.
Check the location. Other vehicles or objects may be
blocking the signal.
See your Pontiac deder or a qualified technician
for service.
Changes or modifications to this system by other than an
authorized service facility could void authorization to
use this equipment.
Operation
The driver’s door will unlock automatically when
UNLOCK is pressed. If UNLOCK is pressed twice
quickly, all doors will unlock. All the doors will lock
when DOOR is pressed.
This device complies with Part 15 of the FCC Rules.
Operation is subject to the following two conditions:
{ 1) This device m y not case kLann€ulintedereae,
and (2)This device must accept any intexference
received, including interference thzt may cause
undesired operation.
Should interference to this system occur, try this:
Check to determine if battery replacement is necessary.
See the instructions on batfey replacement.
The trunk will unlock anytime when the openedtrunk
symbol remote on the Remote Keyless Entry Control is
pressed and the ignition key is OFF.On vehicles
qui@ with B rnam.~ltransaxle, the parking brake
must:be set.
Press DOOR or UNLOCK to illuminate the interior lamps.
The lamps will then go off after 40 seconds when
UNLOCK is pressed and fora few seconds when DOOR
is pressed. When the ignitionis turned on, the lamps will
also fade out. See “Illuminated Entry” in the index.
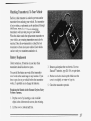
Matching Transmitter(s) To Your Vehicle
Each key chain transmitter is coded to prevent another
transmitter from unlocking your vehicle. If a transmitter
is lost or stolen, a replacement can be purchased through
your dealer.Remember to bring any remaining
transmitters with you when you go to your dealer.
When the dealer matches the replacement transmitter to
your vehicle, any remaining transmitters must also be
matched. Once the new transmitter is coded,the lost
transmitter will notunlock your vehicle. Each vehicle
can have only two transmitters matched to it.
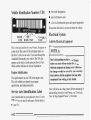
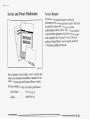
Battery Replacement
Under normal use, the batteries in your key chain
transmitter should last about two years.
You can tell the batteries are weak if the transmitter
won’t work at the normal range in any location. If you
have to get close to your vehicle before the transmitter
works, it’s probably time to change the batteries.
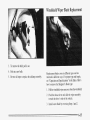
3. Remove and replace the two batteries. Use two
Duracell@batteries, type DL-2016, or equivalent.
4. Put the two halves back together. Make sure the
cover is on tightly, so water won’t get in.
5. Check the transmitter operation.
Replacing the Batteries in the Remote Keyless Entry
System Transmitter
1. Pop the cover off by inserting a coin or similar
object in the slot between the covers, then twisting.
2 . Lift the cover off, bottom half first.
2-7
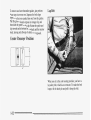
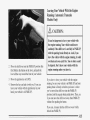
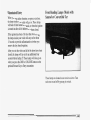
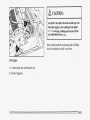
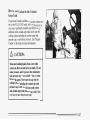
Trunk
Remote Trunk Release (Option)
I A CAUTION:
It can be dangerous to drive with the trunk lid
(CO)gas can
open because carbon monoxide
come into your vehicle. You can’t see o r smell
CO. I t can cause unconsciousnessand even death.
If you must drive with the trunk
lid open orif
electrical wiring or other cable connections must
pass through the seal
between the body and the
trunk lid:
Make sure all windows are shut.
Turn the fan onyour heating or cooling
system *u i4s highest speed with the setting
on any airflow selection except
MAX. That
will force outsideair into yourvehicle. See
“Comfort Controls” in the Index.
If you have air outletson or under the
instrument panel, open themall the way.
See ‘LEngineExhaust” in the Index.
2-8
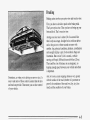
Pull upward on the remote
release handle, located on
the floor near the left sideof
the driver’s seat, to release
the trunklid.
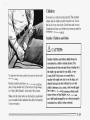
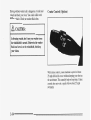
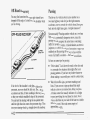
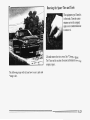
Theft
Vehicle theft is big business, especiallyin some cities.
Although your Pontiac has a number of theft-deterrent
features, we know that nothing we put on it can make it
impossible to steal. However, thereare ways you can help.
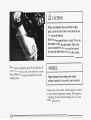
Key in the Ignition
If you leave your vehicle with the keys inside, it’s an easy
target forjoy riders or professional thieves -- s o don’t do it.
When you park your Pontiac and open the driver’s door,
you’ll hear a chime reminding you to remove your key
from the ignition and take it with you. Always do this.
Your steering wheel will be locked, and so will your
ignition. If you have an automatic transaxle, taking
your key out also locks your transaxle. And remember
to lock the doors.
Parking at Night
Park in a lighted spot, closeall windows and lock your
vehicle. Remember to keep your valuables out of sight.
Put them in a storage area, or take them with you.
Parking Lots
If you park in alot where someone will be watching
your vehicle, it’s best to lock it up and take your keys.
But whatif you have to leave your ignition key? What if
you have to leave something valuable in your vehicle?
*
Put your valuables in a storage area, like your trunk
or glove box.
e Lock the glove box.
0
Lock all the doors except the driver’s.
0
Then take the door key with you.
Passlock
TM
Your vehicle is equipped with the Passlock
theft-deterrent system.
Passlock is a passive theft-deterrent system.
The system is
armed once the keyis removed from the ignition. Passlock
enables fuelif the ignition lock cylinderis turned with a
valid key. If a correct key is not used,fuel is disabled.
During normal operation,the THEFT SYSTEM light will
go off after the engine isstarted. Ln the unlikely eventthat
the engine stalls and the THEFT SYSTEM light flashes,
wait until the light stopsflashing before trying to restart
the engine. Remember to release the
key from the START
position as soon as the enginestarts. If after several tries
the vehicle still does not start, the vehicle may need
service. At this time, you mayalso want to check the fuses
(see “Fuses and Circuit Breakers” in the Index). Seeyour
Pontiac dealerfor service.
If the THEFT SYSTEM light comes on while the engine
is running, a problem has been detected and the system
may need service. See your dealer for service.
In an emergency,call the Pontiac Roadside Assistance
Program at 1-800-ROADSIDE or 1-800-762-3743.
2-9
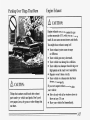
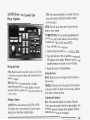
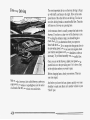
New Vehicle “Break-In”
Ignition Switch
C
NOTICE:
Your modern Pontiacdoesn’t need an elaborate
“break-in.” But it will perform better in the long
run if you follow these guidelines:
Don’t drive at anyone speed fast or
slow for the first500 miles (804 km).
Don’t make full-throttle starts.
Avoid making hard stops for the first
200 miles (322km) or so. During this time
your new brake linings arenSf yetbroken
in. Hard stops with new linings can mean
premature wear and earlier replacement.
Follow this breaking-in guideline every
time you get new brake linings.
0 Don’t tow a trailer during break-in.
See “Towing a Trailer’’ inthe Index for
more information.
--
--
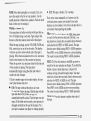
With the ignition key in the ignition switch, you can turn
the switch to five position.
ACCESSORY (A): An on position in which you can
operate your electrical power accessories. Press in the
ignition switch as you turn the top of it toward you.
LOCK (B):The only position in which you can
remove the key. This locks your steering wheel, ignition
and transaxle.
OFF (C): Unlocks the steering wheel, ignition and
transaxle, but does not send electrical power to any
accessories. In the OFF position, the instrument cluster
and the automatic transaxle gear shiftindicator have
electrical p w w . use $hiisparsi-rimif yl;w vchick mas
be pushed or towed, but never try to push-start your
vehicle. A warning chime will sound if you open the
driver’s door when the ignition is off and the key isin
the ignition.
RUN (D): An on position to which the switch returns
after you start your engine and release the switch. The
switch stays in the RUN position when the engine is
running. But even when the engine isnot running, you
can use RUN to operate your electrical power
accessories, and to display some instrument panel
warning lights.
START (E): Starts the engine. Whenthe engine starts,
release the key. The ignition switch will return to RUN
for normal driving.
Note that evenif the engine is not running, the positions
ACCESSORY and RUN are on positions that allow youto
operate yum electrical accessories,such as the radio.
A CAUTION:
On RXlnlral trXW3Xk W!&&2& tUr!3iw the key tQ
LOCK will lock the steering column and result in
a loss of ability to steer the
vehicle. This could
cause a collision. If you need to turn theengine
off while the vehicle is moving, turn thekey only
to OFF. Don’t press thekey release button while
the vehicle is moving.
NOTICE:
If your key seems stuck in LOCK and you can’t
turn it, be sure it is all the way in. If it is, then
turn the steeringwheel left and right whileyou
turn thekey hard. But turn the
key only with
your hand. Using a tool to force itcould break
the key or the ignitionswitch. If none ef this
works, then yourvehicle needs service.
2-11
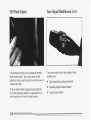
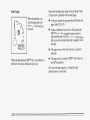
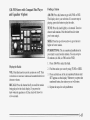
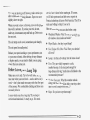
Key Release Button (Manual Transaxle)
The ignition key cannot be
removed from the ignition
unless the key release
button is used.
Automatic transaxle
Move your shift lever toPARK (P) or NEUTRAL (N).
Your engine won’t start in any other position -- that’s a
safety feature. To restart when you’re already moving,
use NEUTRAL (N) only.
r
NOTICE:
~~
~~
Don’t try to shift to PARK (P) if your Pontiac
is moving. If you do, you could damage the
transaxle. Shift to PARK (P) only when your
vehicle is stopped.
To remove the key, turn the key to the OFF position.
Press the key release button while turning the key from
OFF to LOCK. Keeping your finger on the button, pull
the key straight out.
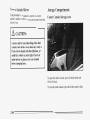
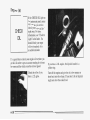
Starting Your Engine
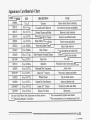
Engines start differently. The 8thdigit of your Vehicle
Identification Number (VIN) shows the code letter or
number for your engine.You will find the VIN at the top
left of your instrument panel. (See “Vehicle
Identification Number” in the Index.) Follow the proper
steps to start the engine.
2-12
Manual transaxle
The gear selector should be in NEUTRAL (N). Hold the
clutch pedal to the floor and start the engine. Your
vehicle won’t start if the clutch pedal is not all the way
down -- that’s a safety feature.
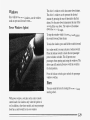
Starting Your 2.2 Liter Engine
1. Without pushing the accelerator pedal, turn your
ignition key to START. When the engine starts,let
go of the key. The idle speed will go down as your
engine gets warm.
L
NOTICE:
Holding your key in START for longer than
15 seconds a t a time will cause your battery to
be drained much sooner. And the excessive heat
can damage your starter motor.
2. If your engine still won’t start (or starts but then
stops), it could be flooded with too much gasoline.
Try pushing your accelerator pedal all the way to the
floor and holding it there as you hold the key in
START for about three seconds. If the vehicle starts
briefly but then stops again, do the same thing, but
this time keep the pedal down for five or sixseconds.
This clears the extra gasoline from the engine.
NOTICE:
Your engine is designed to work with the
electronics in yourvehicle. If you add electrical
parts or accessories, you could change theway
the engine operates. Before adding electrical
equipment, check with your dealer.
If you don’t,
your engine might not perform properly.
If you ever have to have your
vehicle towed, see
the partof this manual thattells how to do it
without damaging yourvehicle. See “Towing
Your Vehicle” in the Index.
2-13
Try pushing your accelerator pedal all the way to the
Starting Your 2.4 Liter Engine
floor and holding itthere as you hold the key in
START for about three seconds. This clearsthe extra
gasoline from the engine. If the vehicle startsbriefly
but then stops again, dothe same thing,but this time
keep the pedal about one-quarter of the way down
for five or six seconds.
1. Without pushing the accelerator pedal, turn your
ignition key to STAI2T. When the engine starts, let
go of the key. The idlespeed will go down asyour
engine gets warm.
NOTICE:
NOTICE:
Holding yourkey in START for longer than
15 seconds at a time
will cause yourbattery to
be drained muchsooner. And the excessive heat
can damage your startermotor.
1
2. If it doesn’t start right away, and if the weather is
very cold (below -20°F or -29”C), push the
accelerator pedal about one-quarter of the way down
while you turn the keyto START.Do this until the
engine starts. As soon as it does, let go of the key.
3. If your engine still won’t start (or starts but then
stops), it could beflooded with too much gasoline.
2-14
Your engine is designed to work with the
electronics in your vehicle. If you add electrical
parts oraccessories, you could change theway
the engine operates. Before adding electrical
equipment, cheek with your dealer. If you dan’t,
your engine might not perform properly.
If you ever have to haveyour vehicle towed, see
toit
the partof this manual th,at tells how do
without damagingyour vehicle. See “Towing
Your Vehicle” in the Index.
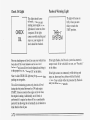
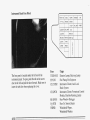
Engine Coolant Heater (Option)
2.4L (Code T) Engine
2.2L (Code 4) Engine
In very cold weather, 0 "F (- 18 C) or colder, the engine
coolant heater can help. You'll get easier starting and
better fuel economy during enginewarm-up. Usually,
the coolant heater should be plugged in a minimum of
four hours prior to starting your vehicle.
O
2-15
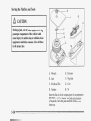
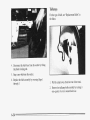
To use the coolant heater:
1. Turn off the engine.
2. Open the hood and unwrap the electrical cord.
3. Plug it into a normal, grounded 110-volt AC outlet.
1
A CAUTION:
Plugging the cord mtu an m p n n d e b u d e t
could cause an electrical shock. Also, the wrong
kind of extension cord could overheat and cause
a fire. You could be seriously injured.Plug the
cord into a properly grounded three-prong
110-volt AC outlet. If the cord won’t reach,use
a heavy-duty three-prong extensioncord rated
for atleast 15 amps.
4. After you’ve used the coolant heater, besure to store
the cord as it was before to keep it awayfrom moving
engine parts. If you don’t, it could be damaged.
How long should you keep the coolant heater plugged
in? The answer depends on the outside temperature, the
kind of oil you have, and some other things. Insteadof
trying to list everything here, we ask that you contact
2-16
your Pontiac dealer in the area where you’llbe parking
your vehicle. The dealer can give you the best advicefor
that particular area.
Automatic Transaxle Operation
Your Pontiac may be equipped witha three-speed
automatic ora four-speed automatic transaxle. Theshift
lever is located on the console between the seats.
There are six different positions for the shift lever on the
three-speed automatic and seven positions for the
four-speed m m a t i c b a l s d a . m e P
!(P),
REVERSE (R)and NEUTRAL
operate identically
for both transaxles, the forward gear positions represent
different gearing and operation. See “Forward Gears
(3-Speed)” or “Forward Gears (4-Speed)”
later in
this section.
(N>
V V V V V V
P
R
N D
Three-Speed Automatic Transaxle
2
1
A CAUTION:
P R
N D 3
2
1 )
Four-Speed Automatic Transaxle
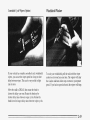
PARK (P): This locks your front wheels. It’s the best
position to use when you start your engine because your
vehicle can’t move easily.
It is dangerous toget out of your vehicle if the
ski€%
k v w is m rwRy in BARK (Fjw i a t k
parking brake firmlyset. Your vehicle can roll.
Don’t leave your vehicle when the engineis
running unlessyou have to. If you have left the
engine running, thevehicle can move suddenly.
You or others could be injured.
To be sure your
vehicle won’t move, even when you’re
on fairly
level ground, always set your parking brake and
move the shift leverto PARK (P).
See “Shifting Into PARK (P)” in theIndex. If
you’re pulling a trailer, see “Towing a Trailer” in
the Index.
2-17
Ensure the shift lever is fully in PARK (P) range before
starting the engine. Your Pontiac has a brake-transaxle
shift interlock. You have to fully apply your regular
brakes before you can shift from PARK (P) when the
ignition key is in the RUN position. If you cannot shift
out of PARK (P), ease pressure on theshift lever -- push
the shift leverall the wayinto PARK (P) and also
release the shift lever button on floorshift console
models asyou maintain brake application. Then move
the shift leverinto the gear you wish. (Press the shift
lever button before moving the shift lever.) See
“.Shifting Out of PARK (PI” in the Index.
REVERSE (R): Use this gear to back up.
NOTICE:
Shifting to REVERSE
(R)’while your vehicleis
moving forward could damage your transaxle.
Shift to REVERSE (R) only after your
vehicle
is stopped.
To rock your vehicle back and forth to get out of snow,
ice or sand without damaging your transaxle, see “If
You’re Stuck: In Sand, Mud, Ice or Snow” in the Index.
NEUTRAL (N): In this position, your enginedoesn’t
connect with the wheels. To restart when you’re
already moving, use NEUTRAL (N) only. Also, use
NEUTRAL (N) when your vehicle is being towed.
A CAUTION:
.
Shifting outof PARK (P) or NEUTRAL(N) while
your engine is “racing” (running at high speed)
is dangerous. Unless your foot
is firmly on the
bralie pedal, your vehicle could move very
rapidly. You could lose control and hitpeople
or objects. Don’t shift outof PARK (P)or
NEUTRAL (N) while your engine is racing.
NOTICE:
Damage to your transaxle caused
by shifting out
of PARK (P) or NEUTRAL (N) with the engine
racing isn’t covered by your warranty.
Forward Gears (3-Speed)
NOTICE:
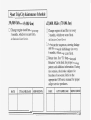
DRIVE (D): This positionis for normal driving.
SECOND (2): This position gives you more power but
lower fuel economy. You can use SECOND ( 2 ) on hills.
It can help control your speed as you go down steep
mountain roads, but then you would also want to use
your brakes off and on.
If your front wheelsc a n 9 rotate, don’t try to
drive. This might happen
if you were stuck in
a solid
very deep sando r mud or were up against
object. You could damage your transaxle.Also,
if you stop when going uphill, don’t hold your
vehicle there with only the accelerator pedal. This
could overheat and damage the transaxle.
Use
PARK (P) to hold your
your brakes or shift into
vehicle in position ona hill.
NOTICE:
1
Don’t drive in SECOND (2)for more than
25 miles (41 km), or at speeds over55 mph
(88 km/h), oryou can damage your transaxle.
Use DRIVE (D) as much as possible. Don’t shift
into SECOND (2) unless you are going slower
than 65 mph (105 km/h), oryou can damage
y w r engine.
FIRST (1): This position gives you even more
power (but
lower fuel economy) than SECOND (2).You can use it on
very steep hills, or in deep snow or mud. If the selector
lever is put in FIRST (l),the transaxle won’t shift into
first gear until the vehicleis going slowly enough.
Forward Gears (4-Speed)
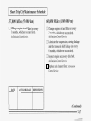
AUTOMATIC OVERDRIVE (D): This position is for
normal driving with the four-speed automatic transaxle.
If you need more power for passing, and you’re:
Going less than about 35 mph (56 km/h), push your
accelerator pedal about halfway down.
0
Going about 35 mph (56 km/h), push your
accelerator all the way down.
2-19
THIRD (3): This position is also used for normal
driving, however, it offers more power and lower fuel
economy than AUTOMATIC OVERDRIVE(D). Here
are some times you might choose THIRD (3) instead of
AUTOMATIC OVERDRIVE (D):
0
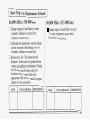
FIRST (1): This position gives you even more power (but
lower fuel economy) than SECOND (2). You can use it on
Jery steep hills, or in deep snow or mud. If the selector
.everis put in’FIRST(l),the transaxle won’t shift into
%st gear until the vehicleis going slowly enough.
When driving on hilly, winding roads.
When going down a steep hill.
SECOND (2): This position gives you more power but
lower fuel economy. You can use SECOND (2) on hills.
It can help control your speed as you go down steep
mountain roads, but then you would also want to use
your brakes off and on.
NOTICE:
Don’t drive in SECOND (2) for more than 25 miles
(41 km), orat speeds over 55 mph (88 k d h ) , o r
you can damage your transaxle. Use AUTOMATIC
OVERDRIVE (D) or THIRD (3)as much as
possible. Don’t shift into SECOND (2) unless you
are going slower than 65 mph (105 k d h ) , or you
can damage yourengine.
NOTICE:
If your frontwheels can’t rotate, don’t try to
drive. This mighthappen if you were stuck in
very deep sandor mud or were up againsta solid
object. You could damage your transaxle.Also,
if you stop when going uphill, don’t hold your
vehicle there with only the accelerator pedal. This
could overheat and damage the transaxle.
Use
PARK (P) to hold your
your brakes or shift into
vehicle in positionon a hill.
’ This is your shift pattern.
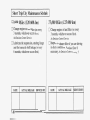
Manual Transaxle
Here’s how to operate your transaxle:
FIRST (1): Press the clutch pedaland shift into
FIRST (1). Then, slowly let up onthe clutch pedal as
you press the accelerator pedal.
You can shift into FIRST (1) when you’re going less
than 20 mph (32 km/h). If you’ve come to a complete
stop andit’s hard to shift into FIRST (1)’put the shift
lever in NEUTRAL (N) and let up on the clutch. Press
the clutch pedal back down. Then shift into FIRST (1).
SECOND (2): Press the clutch pedal as you let up on
t k accekxat~
pedal & shift i-nmSE€OND (2). Tbwx,
slow-ly-let up m the dLStc)I pedal 8 5 y m press the
accelerator pedal.
2-21
THIRD (3), FOURTH (4) and FIFTH (5): Shift into
THIRD (3), FOURTH (4) AND FIFTH ( 3 , the same
way you do for SECOND(2). Slowly let up on the
clutch pedal as you press the accelerator pedal.
To stop, let up on the accelerator pedal and press the
brake pedal. Just before the vehicle stops, press the
clutch pedal and the brake pedal,and shift to
NEUTRAL (N).
NEUTRAL (N): Use this position when you start or
idle your engine.
REVERSE (R): To back up, press down the clutch
pedal and shift into REVERSE (R). Let up on the clutch
pedal slowly while pressing the accelerator pedal.
NOTICE:
Shift to REVERSE (R) only after your vehicle is
stopped. Shifting to REVERSE (R) while your
vehicle is moving could damage your transaxle.
Shift Speeds
I A CAUTION:
If you skip more thanone gear when you
downshift, you could lose control of your vehicle.
And you could injure yourself or others. Don’t shift
from FIFTH (5),to SECOND (2),or from
FOURTH (4) to .FIRST(1).
Acceleration Shift Speeds
This chart shows you when to shift to the next higher
gear for best fuel economy.
FIRST (1)to SECOND (2)
SECOND (2) to THIRD (3)
THIRD (3) to FOURTH (4)
FOURTH (4) to FIFTH (5)
17 mph (27 kmh)
30 rnph (48 h/h)
39 mph (63 h/h)
45 mph (72 b/h)
;
Also, use REVERSE (R), along with the parking brake,
for parking your vehicle.
If your speed drops below 20 mph (32 km/h), or if the
engine is not running smoothly, you should downshift to
the next lower gear. You may have to downshift two or
more gears to keep the engine running smoothly or for
good performance.
Shift Light (Manual Transaxle)
ii
Parking Brake
If you have a manual
transaxle, you have a
SHIFT light. This light
will show you whento shift
to the nexthigher gear for
best fuel economy.
SHIFT
When this light comes on, you can shift to the next
higher gear if weather, road and traffic conditions let
you. For the best fuel economy, accelerate slowly and
shift when the light comes on.
While you accelerate, it is normal for the light to go
on and off if you quickly change the positionof the
accelerator. Ignore the SHIFT light when youdownshift.
The parking brake leveris loca,ted between the buck:et seats.
2-23
To set the parking brake, hold the brake pedaldown and
pull up on the parking brake lever. If the ignition is on,
the brake system warning light will come on.
To release the parkingbrake, hold the brake pedal down.
Pull the parking brake lever upuntil you can pressthe
release button. Hold the release button in as you move
the brake lever all the way down.
NOTICE:
Driving with the parking brake on can cause
your rear brakes to overheat.
You may have to
replace them, andyou could also damage other
parts of your vehicle.
Shifting Into PARK (P)
(Automatic Transaxle Models Only)
A CAUTION:
It can be dangerous to get out
of your vehicle if
the shift leveris not fully inPARK (P) with the
parking brake firmlyset. Your vehicle can roll.
If you have left the engine running, thevehicle
can move suddenly. You or others couldbe
injured. To be sure yourvehicle won’t move, even
when you’re on fairly level ground, use the steps
that follow. If you’re pulling a trailer, see
‘‘Topring a Tr&kr” in the _Index0
1. Hold the brake pedal down and set the parking brake.
2-24
Leaving Your Vehicle With the Engine
Running (Automatic Transaxle
Models Only)
A CAUTION:,
I
2. Move the shift lever into the PARK (PI position like
this: Hold in the button on the lever, and push the
lever all the way toward the frontof your vehicle.
3. Move the ignition key to LOCK.
4. Remove the key and take it with you. If you can
leave your vehicle with the ignition key in your
hand, your vehicle is in PARK (P).
It canbe dangerous toleave your vehicle with
the engine running.Your vehicle could move
suddenly if the shiftlever is not fully in PARK (P)
with the parking brake firmly
set. And, if you
leave the vehicle with the engine running, could
it
overheat and even catch
fire. You or otherscould
be injured. Don’t leave your vehicle with the
engine running unlessyou have to.
If you have to leave your vehicle with theengine
running, be sure your vehicle is in PARK (P) and your
parking brake isfirmly set before you leave it. After
you’ve moved theshift lever into the PARK (P)
position, hold the regular brake pedal down. Then, see
if you can move the shift lever away from PARK (P)
without first pushing the button.
If you can, it means that the shift lever wasn’t fully
locked into PARK (P).
2-25
Torque Lock (Automatic Trans’axle)
If you are parking on a hill and you don’t shift your
transaxle intoPARK (P) properly, the weight of the
vehicle may puttoo much force onthe parking pawl in
the transaxle. You may find it difficult to pull the shift
lever out of PARK (“1. This is called “torque lock.”To
prevent torque lock,set the parking brake and thenshift
into PARK (P) properly before you leave the driver’s
seat. To find outhow, see “Shifting Into PARK (P)”
in the Index.
When you are ready to drive, movethe shift lever out of
PARK (P) before you release the parking brake.
i
PARK (P) and also release the shift lever button on floor
shift consolemodels as you maintain brake application.
Then movethe shift lever into thegear you wish. (Press
the shiftlever button before moving the shift lever.)
If you ever hold the brake pedal down but still can’t
Shift Out QfPARK (P), this:
1. Turn the key to OFF.
2. Apply and hold the brake until the end of Step 4.
3. Shift to NEUTRAL (N).
4. Start the vehicle and then shift to the drive gear
you want.
If torque lock doesoccur, you may need to have another
vehicle push yours a little uphill to take some of the
pressure from the transaxle, so you can pull the shift
lever outof PARK (PI.
5. Have the vehicle fixed as soon as you can.
Shifting Out of PARK (P)
(Automatic Transaxle)
Before you get out of your vehicle, put your manual
transaxle in REVERSE (R) and firmly apply the
parking brake.
Your Pontiac hasa brake-transaxle shift interlock. You
haye tQ fully Q&@Y YQUr ZEgUlXC’bE3kS bf?fQE‘
yQU Can
shift fromPARK (P) when the ignition is in the RUN
position. See “Automatic Transaxle” in the Index.
If you cannot shift out of PARK (P), ease pressure on
the shift lever push the shift lever all the way into
--
2-26
Parking Your Vehicle
(Manual Transaxle Models Only)
If you are parking ona hill, or if your vehicle is quipped
to tow a trailer, see “Towing a Trailer” in the Index.
Parking Over Things That Burn
Engine Exhaust
A CAUTION:
L
i
1 /r\ CAUTION:
Things that can burn could touch
hot exhaust
parts under yourvehicle and ignite. Don’t park
over papers, leaves, dry grass or other things that
can burn.
Engine exhaust cankill. It contains the gas
carbon monoxide (CO), which you can’t see or
smell. It cancause unconsciousness and death.
You might have exhaust comingin i f
0 Your exhaust system sounds strange
or different.
0 Your vehicle gets rusty underneath.
0 Your vehicle was damaged in a collision.
0 Your vehicle was damaged when driving over
Kih psints m t
k m a & w over r o d &rk.
0 Repairs weren’t done correctly.
0 Your vehicle or exhaust system had been
modified improperly.
If you ever suspect exhaustis coming into
your vehicle:
Drive it only with all the windows down to
blow out any CO; and
0 Have your vehicle fixed immediately.
2-27
Running Your Engine WhileYou’re
Parked (Automatic Transaxle)
A CAUTION:
It’s better not to parkwith the enginerunning. But if you
ever have to, here are some thingsto know.
~~~
~~
~
A CAUTION:
Idling the engine with the air system control
off
could allow dangerous exhaust into your
vehicle
(see the earlier Caution under “Engine
Exhaust”).
Also, idling ina closed-in place can let deadly
carbon monoxide (CO) into your vehicle even if
the fan switchis at the highest setting. One place
this can happenis a garage. Exhaust with
CO can come in easily. NEVER park in a
garage with the engine running.
Another closed-in place canbe a blizzard. (See
“Blizzard” in the Index.)
--
2-28
--
It canbe dangerous to get out
of your vehicle if
the shift leveris not fulIy in PARK (P) with the
parking brake firmlyset. Your vehiclecan roll.
Don’t leave your vehicle when the engine
is
running unlessyou have to. If you’ve left the
engine running, the vehicle can
move suddenly.
You or others could be injured.
To be sureyour
vehicle won’t move, even when you’re on fairly
level ground, always set your parking brake and
move the shift lever to
PARK (P).
Follow the proper steps to be sure your vehicle won’t
move. See “Shifting IntoPARK (P)” in the Index.
If you are parking on a hill and if you’re pulling a
trailer, also see “Towing a Trailer’’ in the Index.
’
The driver’s window switch has an auto-down feature.
The driver’s window can be opened to the desired
amount by pressing the rear of the switch tothe first
detent. For the auto-down feature, press therear of the
switch allthe way down. The window will continue
down until it is fully open.
Windows
On a vehicle with manual windows, use the window
crank to open and close each window.
Power Windows (Option)
To stop the window while it is lowering, briefly press
the switch forward, then release.
To raise the window, press and hold the switch forward.
In a sedan model, you may also have a lockout switch.
Press tie lockout switch to disable the rear-passenger
power window switches. This will prevent rear
passengers from opening and closing thewindows. The
driver can still control all windows with the switch in
the lock position.
Press the lockout switch again to unlock the passenger
window switches.
I
1
Horn
You can sound the horn by pressing the center of your
steering wheel.
With power windows, switches on the center console
control eachof the windows only when the ignition is
on. In addition, in four-door models, each rear passenger
door hasa control switch for its own window.
2-29
A tilt steering wheel allows you to adjust thesteering
wheel before you drive. You can also raiseit to the
highest level to give your legs more room when you exit
md enter the vehicle.
To tilt the wheel, hold the steering wheel and pull the
lever. Move the steering wheel to a comfortable level,
:hen release the lever tolock the wheel in place.
2-30
The lever onthe left side of the steering column
includes your:
0
Turn Signal and Lane Change Indicator
0
Headlamp Highbow Beam Changer
0
Cruise Control (Option)
Turn and Lane Change Signals
The turn signal has two upward (for right) and two
downward (for left)positions. These positions allow you
to signal a turn or alane change.
As you signal a turn or alane change, if the arrows don’t
flash but just stay on, a signal bulb may be burned out
and other drivers won’t see your turn signal.
If a bulbis burned out, replace it to help avoid an
accident. If the arrows don’t go on at all when you
To signal a turn,move the leverall the way up or down.
signal a turn, checkthe fuse (see “Fuses and Circuit
When theturn is fashed, the leverwill return automatically. Breakers” in the Index) and for burned-out bulbs.
An arrow on the instrument
Headlamp High/Low Beam Changer
panel will flash in the
To change the headlamps from low beam to highor high
direction of the turn or lane
to low, pull the turn signal lever all the way toward you.
change.
Then release it.
When the high beams
are on, this light on the
instrument panel also
will be on.
To signal a lanechange, just raise orlower the lever
until the arrow starts to flash. Hold it there until you
complete your lane change. The lever will return by
its&€when y m release it.
2-3J
Flash-to-Pass
This feature letsyou use your high-beam headlamps to
signal a driver in front of you that you want to pass.
To use it, pull the turn signal/multifunction lever toward
you until the high-beam headlamps come on, then
release the leverto turn them off.
Windshield Wipers
You control the windshield wipers by moving the stalk
with the windshield wiper symbol on it up or down.
clown until the
For a single wiper cycle, press the stalk
wipers start, then let go. The wipers will stop after one
cycle. For more cycles, holdthe wiper stalk down longer.
For fixeddelay wiper cycles, move the wiper switchto
DELAY for wiper cycles witha fixed time delay
between them.
For steady wiper cycles, move the wiper stalk up to
either 1 or 2, depending on the wiper speedyou want.
To turn wipers off, move the stalk down to OFF.
F-
Remember that damaged wiper blades
may prevent you
from seeing well enough to drive safely. To avoid damage,
be sure to clear iceand snow from the wiper blades before
using them. If they're frozen to the windshield, carefully
loosen or thaw them. If your bladesdo become damaged,
get new blades or blade inserts.
Heavy snow or ice can overload your wipers. A circuit
breaker will stop them until the motor cools. Clearaway
snow or ice to prevent an overload.
2-32
Controlled Cycle Wipers (Option)
Windshield Washer
I
If your vehicle has variable controlled-cycle windshield
wipers, you can set the wiper speed for a long or short
delay between wipes.This can bevery useful in light
rain or snow.
To wash your windshield, pull the stalk with the wiper
symbol on it toward you one time.The wipers will clear
the window and then either stop or return to your preset
speed. If you had no speed selected, the wipers will stop.
Move the stalkto DELAY, then rotate the band to
choose the delay youwant. Rotate the band .up for
shorter delay timesbetween wiper cycles. Rotate the
band down for longer delay times between wiper cycles.
2-33
Driving without washer fluid is dangerous. A bad mud
splash can block your vision. You could collide with
another vehicle. Check your washer fluid often.
1
Cruise Control (Option)
CAUTION:
~~
I
~~
I
~
In freezing weather, don't use your washer until
the windshield is warmed. Otherwise thewasher
fluid can form ice on the windshield, blocking
your vision.
With cruise control, you can maintain a speed of about
25 mph (40 km/h) or more without keeping your foot on
the accelerator. This can really help on long trips. Cruise
control does not work at speeds below about 25 mph
(40kmr7h)
2-34
When you apply yourbrakes, or the clutch pedal,the
cruise control shutsoff.
I A CAUTION:
Cruise control can be dangerous where you
can’t drive safely at a steady speed. So,
don’tuse
cruise controlanwinding
roads orin heavy traffic.
Crllise control can be bngerolls on
slippery roads. On such roads, fast changes
in tire traction can cause needless wheel
spinning, and you could losecontrol. Don’t
use cruise control on slippery roads.
Setting Cruise Control
I A CAUTION:
~
~
~
If you leave your cruise control switch on when
you’re not using cruise, you might hit a button
and go into cruise whenyou don’t want to. You
1C ~ B e ~ ~ a n ~ e v ~ b s S e c m
t ~ ~ K e e p
I1 he cruise controlswitch OFF until you want to
use 56.
1. Move the cruise control switch to ON.
2. Get up to the speed you want.
2-35
Resuming a Set Speed
L
b-
3, Pmb in the SET button at the end 'of the lever and
release it.
4. Take your foot off the accelerator pedal.
Suppose you set your cruise controlat a desired speed
and then you apply the brake or clutch pedal. This, of
course, shutsoff the cruise control.But you don't need
to resetit. Once you're going about 25 mph (40 km/h)
or more, you can move the cruise control switch from
ON to RIA for about half a second.
You'll go right back up to your chosen speed and
stay there.
If you hold the switch at R/A longer than half a second,
the vehicle will keep going faster until you release the
switch or apply thebrake or clutch pedal. You could be
startled and even lose con&d.So unless you wmf fo go
faster, do not hold the switch at R/A.
Increasing Speed While Using Cruise Control
There are two ways togo to a higher speed:
Use the accelerator pedal to get to the higher speed.
Press the SET button at the end of the lever, then
release the button and the accelerator pedal. You'll
now cruise at the higher speed.
Reducing Speed While UsingCruise Control
There are two ways to reduce your speed while using
cruise control:
0
Press the button at the end of the lever until you
reach the lower speed you want, thenrelease it.
0
To slow down in very small amounts, press the
button for less than half a second.Each time you do
this, you'llgo about 1 mph (1.6 km/h) slower.
Passing Another VehicleWhile Using Cruise Control
Use the accelerator pedal to increase your speed. When
you take your foot off the pedal, your vehiclewill slow
down to the cruise control speedyou set earlier.
Move the cruise switch from ON to R/A. Hold it
there until you get up to the speed you want, and
then release the switch. To increase your speed in
very small amounts,move the switch to R/A for less
than half a second and thenrelease it. Each time you
do this,your vehicle willgo about 1 mph (1.6 h/h)
faster.
2-37
Using Cruise Control on Hills
How well your cruise controlwill work on hills depends
upon your speed, load and the steepness of the hills.
When going upa steep hill, you may have to stepon the
accelerator pedal to maintain your speed. When going
downhill, you may have tobrake or shift to a lower gear
to keep your speed down. Of course, applying the brake
or clutch pedal takes you out of cruise control. Many
drivers find this to be too much trouble and don't use
cruise controlon steep hills.
Lamps
CL-'4.1ij:.
Ending Cruise Control
There are several ways to turn off the cruise control:
Step lightly on the brake pedal, or push the clutch
pedal, if you have a manual transaxle, OR
Move the cruise switch to OFF.
Erasing Cruise Speed Memory
When you turn off the cruise control or the ignition,
your cruise control set speed memory is erased.
2-38
The band on the turn signal/multifunction lever controls
your vehicle's lamps.
Daytime Running Lamps
Daytime Running Lamps (DRL)can make it easier for
others to see the front of your vehicle during theday.
DRL can be helpful in many different driving
conditions, but they can be especially helpful in the
short periods after dawn and before sunset.
, .
The DRL system will make your high-beam headlamps
come on at a reduced brightness in daylight when:
Headlamps
a g This position will turn on thefollowing:
.
0
,
the parking brake is released and
., .
Sidemarker Lamps
.
.
0
the headlamp switch is OFF,
Headlamps
Parking Lamps
.
the ignition is on with the enginerunning,
- .
. .
0
the transaxle is not in PARK (P) or NEUTRAL (N)
on models with an automatic transaxle only.
.
Taillamps
Instrument Panel Lights
This indicator light onyour
instrument panel comeson
Turn the band clockwise all the wayto t u n the
lamps off.
Lamps On Reminder
If you open the driver's door with theignition off and
the lamps on, you will hear a warning chime.
2-39
When theDRL are on, only your high-beam headlamps
will be on at a reduced brightness. The taillamps,
sidemarker and other lamps won’t be on. Your
instrument panel won’t be lit up either.
Interior Lamps
Instrument Panel Intensity Control
When you turn on the headlamp switch, your high-beam
headlamps will go out, and your headlamps will come
on. The other lamps that come on with your headlamps
will also come on.
When you turn of€the headlamp switch, the regular
lamps will go off, and your high-beam headlamps will
come on to the reduced brightness.
To idle y w r v&i&
with the DRL off, set &e prking
b&e. The DRL will slay off until you release the
parking brake.
As with any vehicle, you should turn on the regular
headlamp system when you need it.
You can brighten or dimthe instrument panel lights by
turning the dial up or down.
Turn the dial up all the way to turn on the interior
courtesy lamps.
Illuminated Entry
When you open either frontdoor, or open a rear door,
the lamps inside your vehicle will go on. These lamps
will fadeoff after about 40 seconds, or when the ignition
is turned on after all of the doors have been closed.
Front Reading Lamps (Models with
Sunroof or Convertible Top)
If the ignitionhas been off for less than two minutes,
the lampsinside your vehicle will stay on for about
15 seconds toprovide an illuminated exit when you
remove the key from theignition.
A€er you exit the vehicle and all o€the dcwm have been
closed, the h p s w i l l shy on far an additional four
seconds beforefading off. These lamps will also go on
when you press the DOOR or UNLOCK button on the
optional Remote Keyless Entry transmitter.
These lamps arelocated on the rearview mirror. Turn
each one on and off by pressing its switch.
2-41
Battery Saver
Mirrors
Your Pontiac is equipped with a battery saver feature
designed to protect your vehicle's battery.
Inside Day/Night Rearview Mirror
When any interior lamp (trunk, reading, dome, glove
box, etc.) is left on and the ignition is turned OW, the
battery saver system will automatically turn the lampoff
after 20 minutes. This will avoid draining the battery.
This system does not protect against leaving on the
headlamps or parking lamps.
To reactivate the interior lamps, either:
0
The ignition must be turned on,
0
The activated lamp switch must be turned off,
then on, OR
A front door must be opened.
The battery saver feature will also be activated when
any door is left open.
If your vehicle isleft with the ignition off for over
24 days, the battery power to the clock and audio
system will turn off to reduce the battery drain. When
the ignition is turned on again, battery power will be
resupplied. Under these conditions it will be necessary
to reset theclock and audio system settings.
2-42
To reduce glare from lamps behind you, move the lever
toward you to the night position.
Manual Remote Control Mirror
-
Tk.LmSide-E m i e w -m i m
should be adjusted so you
can just see the side of
1 your vehicle when you are
sitting in a comfortable
driving position.
Adjust the driver’s side outside mirror with the control
lever on thedriver’s door.
Power Remote Control Mirror (Option)
T k l-nin-arciir&al is
located on the driver’s door.
Rotate the controlclockwise
or counterclockwise to
choose the mirroryou
want to adjust.
Then move the control in the direction you want the
mirror to move. Adjust each mirror so you can just see
the side of your vehicle whenyou are sittingin a
comfortable driving position.
To adjust your passenger’s side mirror, sit in the driver’s
seat and have apassenger adjust the mirror for you.
2-43
Convex Outside Mirror
Storage Compartments
Your passenger’s side mirror is convex. A convex
mirror’s surface is curved so you can see more from the
driver’s seat.
Center Console Storage Area
A CAUTION:
I
A convex mirror can make things (like other
vehicles) look farther away than they really are.
If you cut too sharply into the right lane, you
could hit a vehicleon your right. Check your
inside mirror orglance over your shoulder
before changing lanes.
To open the center console,press the latch button and
lift the lid back.
To close the center console, press the lid down
until it clicks.
Center Console Cupholders
Convenience Net (Option)
There isa cupholder built into the front of the center
console for your convenience. To access it,remove
the ashtray.
There are alsocupholders
for the rear seat passengers
in the back of the console.
Grab the cupholder cover from both sides and
pull it down.
Floor Mat Retainer
Your vehicle may be equipped with a floor mat retainer
for the driver. This retainer is located at the rear, right
side of the floor mat. To remove, twist the tab
one-quarter of a turn to the right or left. Lift the mat
straight up over the tab. Reverse this procedure to
replace and secure the floor mat.
Your vehicle may have a convenience net. You’ll see it
just inside the back wallof the trunk. Put small loads, like
grocery bags, behindthe net. It can help keep them from
falling over during sharpturns or quick starts and stops.
Unclip a corner of the convenience net fit
to larger objects
behind the net, then reclip it to secure them in place.
The net isn’t for larger, heavier loads. Store them in the
trunk as farforward as you can.
You can unhook the net so that it will lie flat when
you’re not using it.
2-45
Ashtrays and Cigarette Lighter
I
To clean the center console
ashtray, remove the entire
ashtray and empty it. The
ashtray can be placed in the
rear cupholder for the rear
seat passengers to use.
To use the lighter, push it in
’ all the way and letgo.
When it’s ready, it willpop
back out by itself.
~
NOTICE:
I NOTICE:
:
Don’t hold a cigarette lighter in with your hand
while it is heating. If~ Q d~~
U It W Q I Z ’ ~be able to
back away fromthe heating element when it’s
ready. That canmake it overheat, damaging the
lighter and theheating element.
.
Don’t put papers and other things that burn into
your ashtrays. If you do, cigarettes or other
smoking materials could set them on fire,
causing damage.
2-46 m
-
Sun Visors
Convertible Top (Option)
To block out glare, you can swing down the visors. You
The followingsteps explain the proper operation of your
convertible top.
can also swingthem to the side.
Sunroof (Option)
Press and release the rear o€
the. switch and the glass
panel will open to the vent
position.
Open the sunshade by hand
when using the vent
position.
NOTICE:
0
0
0
Press and releasethe rear of the switch again to open the
glass panel and the sunshade. Press the front of the
s-witchto stop the p i e l in m y -position.
Press and hold the front of the switch to close the glass
panel. The sunshade can only be closed by hand.
Remove any items from the convertible top
storage area beforeyou lower the top.Even
small items in the storage area can damage
the topor other partsof the system.
Don’t raise o r lower the convertibletop
when the temperature is below 20°F
(-7°C). The cold can cause cracks and
other damageto the topas it is being
lowered or raised.
Don’t raise or lower the convertible top
while the vehicle ismoving. The wind could
damage the top. Bring the
vehicle to a
complete stop before attempting to raise
or lower the tog. Always make sure that
the top is securely latched before driving
the vehicle.
The sunroof glass panel cannot be opened or closed if
your Pontiac has an electrical failure.
2-47
Lowering Your Convertible Top
1. Set theparking brake and shift your automatic
transaxle to PARK (P) or your manual transaxle
to NEUTRAL (N).
2. Turn the ignition to the RUN position. Lower the
side doorwindows.
3. Push the button in the latch handle and turn the
handle down to unhook the latch pins from the
holes over the windshield.
4. f i l l the latch handle rearward awayfrom the windshield
and hold it to fully lower the convertible top.
2-48
-
6. From inside $hevehkle, pull the rab 4x2 the rear seat
to fold down the seat.See "Fold-Down Rear Seat" in
the Index.
7. Open the trunk and remove both boot side covers.
Leave the trunk open.
2-49
1
8. Install the boot side cover by inserting the tab (A) on
the underside of the cover into the slot (B) at the top
of the quarter trim panel. Place the rear flap of the
boot side cover in the trunk lid opening,aligning the
eyelet (C) over the boot snap ball stud (D).
2-50
3. Attach the two snaps on the inside flap to the top of
the quarter trim panel. Attach the front snap(E) first
and then the rear snap (F). The rear snapis
adjustable for easeof installation.
I
10. Pull the boot center cover from behind the rear
seatback and place it over the inner sides of the boot
side covers and the loweredtop.
11. Go to the rear of the vehicle. Place the boot center
cover flap along the trunklid opening. Alignone
snap to snap ball stud and push forward. Repeat for
other snap.
12. Close the trunk lid.
13. Raise the rear seatback to the up position. Push the
seat back to make sureit is latched.
2-51
3 . From inside the vehicle, fold down the rear seatback.
See “Fold-Down Rear Seat” in the Index.
2-52
r
I
5. Unsnap both boot side cover snaps (E an(1 F) from
the top of the quarter trim panel.
). Lift side cover eyelet (C) at rear of side boot cover
from snap ball stud (D). Raise the back of the boot
side cover to unhook the tab (A) from the slot (B) in
the quarter trim panel. Do the same on the other side.
7. Store both boot side covers in the tmnk.
8. Close the trunk.
9. Raise the rear seatback to the up position. Push the
seat back to make sure it is latched.
2-53
10.
Turn the ignitionto the RUN position.
11. Lower both door windows to avoid wear to the
weather strips.
13. Turn the latch handle up to lock the top.
12. Push the button in the latchhandle and turn the
handle down. Push thehandle forward toward the
windshield and hold it until the convertible top is
fully raised, and the latch pins are all the way in the
holes above the windshield.
2-54
Before you do these steps, check to make sure that
the bypass switch in the trunk is switched up to the
NORMAL OPERATION position. If it isnot, switch it
to the NORMAL OPERATION position and see if the
power top works.
Lowering the Top Manually
NOTICE:
Do not attempt to lower the top manually as
damage to the vehicle will occur. If the top fails to
raise or lower completely, see “Raising the Top
Manually” following.
Raising the Top Manually
1 . Set the parking brake and shift your automatic
transaxle to PARK (P) or yourmanual transaxle to
NEUTRAL (N). Turn the engine off.
’
2. Push the button in the latch handle and turn the
handle down.
3. Open the trunk.
If your vehicle loses power, or something else happens
that prevents youfrom raising the top electrically, you
may need to raise the top manually. This will allow you
to safely drive t k v-ehickuntil you can get the top
repaired. Raising theconvertible top manually should
only be done in an emergency and requires two people.
2-55
5. Remove the top boot as described in Steps 4 through 7
in “Raising Your Convertible Top” earlierin ths
section.
6. Lower the door windows completely.
7. Position one person on each sideof the vehicle.
Carefully lift the top by grasping the frontcorners of
the top, not the linkage.
NOTICE:
_.
~~~~
~
4. Press the bypass switch down to the EMERGENCY
OVERRIDE position, The switch is located under
the shelf panel on the driver’s sidein the trunk.
2-56
Do not attempt to force thetop up if it does not
move freely. Thetop or its linkage can be
damaged. Make sure both sides are being lifted
together to avoid twisting. See your dealer if you
still can’t move the top easily.
I
I
8. Raise the top until it is all the way up. Line up the
top so the pins are even with the holes.
9. Pull down on the top and turn the latch handle up to
lock the convertible top.
10. Press the bypass switch up to the NORMAL
OPERATION position.
11. Close the trunk.
12. Raise the rear seatback to the up position. Push the
seat back to make sure it is latched.
2-57
The Instrument Panel -- Your Information System
2-58
Your instrument panel is designed to let you know at a glance how your vehicle is running. You’ll know howfast
you’re going, how much fuel you’reusing, and many other things you’ll need to drive safely and economically.
The main components of your instrument panel are:
1. Instrument Panel Intensity Control
7. Cupholder/Ashtray
2. Turn Signal/Multifunction Lever
8. Climate Controls and Rear Window Defogger
4. Ignition Switch
9. Parking Brake Lever
10. Tilt Steering Wheel Lever (Option)
5 . Windshield Wipermasher Controls
1 1. Hood Release Lever
6. Audio System
12. Fuse Panel
3. Hazard Warning Flashers Switch
2-59
Instrument Panel Cluster
v v v v v v v
I n n n n nnl
n
'I
'I
I
n
1
Speedometer and Odometer
Your speedometer lets you see yourspeed in both miles
per hour (mph) and kilometers per hour (km/h). Your
odometer shows how far your vehicle has been driven,
in either miles (used inthe United States) or kilometers
(used in Canada).
Trip Odometer
APd
Tamper Resistant Odometer
Your Pontiac has a tamper resistant odometer. If you
.see siLves k s .between tAe-numbers>:ymL’!.!. k-!.QW thAt
someone has probably tried to turnit back, so the
numbers may not be true.
You may wonder what happens if your vehicle needs a
new odometer installed.
The tripodometer can tell you how far your vehicle has
been driven since you last set the trip odometer to zero.
If the new one can beset to the mileagetotal of the old
odometer, then it must be. But if it can’t, then it’s set
at zero and a label must be put on the driver’s door to
show the old mileage readin.g when the new odometer
was installed.
To set the trip odometer to zero, press the knob to the
left of it.
2-61
Tachometer
Warning Lights, Gages and Indicators
The tachometer displays the
engine speed in revolutions
per minute (rpm).
NOTICE:
Do not operate the enginewith the tachometer in
the red area,or engine damage mayoccur.
This part describes the waming lightsand gages that may
be on your vehicle. The pictures will help you locate them.
Warning lights and gages can signalthat something is
wrong before it becomes serious enough to cause an
expensive repair or replacement. Paying attentionto
your warning lights and gages could also saveyou or
others from injury.
Warning lights come on when theremay be or is a
problem with oneof your vehicle’s functions.As you will
see in the details on the next few pages,some warning
lights comeon briefly when you start the enginejust to let
you know they’re working. If you are familiar with this
section, you should not be alarmed when this happens.
Gages can indicate when there may be or is a problem
with one of your vehicle’s functions. Often gagesand
waming lights work together to let you know when
there’s a problem with your vehicle.
When one of the warning lights comes on and stays on
when you are driving, or when one of the gagesshows
there may be aproblem, check the section that tells you
what to do about it. Please follow thismanual’s advice.
Waiting to do repairs can be costly -- and even
dangerous. So please get to know your warning lights
and gages. They’re a bighelp.
2-62-
-
Safety Belt Reminder Light
Air Bag Readiness Light
When the key is turned to RUN or START, a chime will
come on forabout eight seconds to remind people to
fasten theirsafety belts, unless the driver’s safety belt is
already buckled.
There is an air bag readiness light on the instrument
panel, which shows AIR BAG. The system checks the
air bag’s electrical system for malfunctions. The light
tells you if there is an electrical problem. The system
check includes the air bag sensor, the air bag modules,
the wiring and the crash sensingand diagnostic module.
For more information on the airbag system, see “Air
Bag” in the Index.
The safety belt light will
also come on and stay on
for about 20 seconds,
then it will flash for about
55 seconds. If the driver’s
belt is already buckled,
neither the chime rxx the
light will corne on.
AIR
BAG
You will see this light flash
for a few seconds when you
turn you$-ignition to RUN
OT START. Tnen tke light
should go out. This means
the system is ready.
If the air bag readiness light doesn’t come on when you
start your vehicle, or stays on, or comes on when you
are driving, your air bag system may not work properly.
Have your vehicle serviced right away.
2-63
Battery Light
Brake System Warning Light
The batkry light will come
on briefly when you turn on
the ignition, and the engine
is not running, as a check to
show you it is working.
Then it should go out.
If it stays on, or comes on while you are driving, you may
have a problem with the electrical charging system. It
could indicate that you have a loose generator drive belt,
or another electrical problem. Have it checked right away.
m
g While this light is m Lcxmkl ckaii=lymf lEiEery.
If YOU must drive a short distance with the light on, be
certain to turn off all your accessories, such as the radio
and air conditioner.
Your Pontiac’s hydraulic brakesystem is divided into
two parts. If one part isn’t working, the other part can
still work and stopyou. For good braking, though, you
need both parts working well.
If the warning light comes on, there could be a brake
problem. Have yourbrake system inspected right away.
BRAKE
United States
Canada
This light should come on briefly
when you turn the
ignition key to RUN. If it doesn’t come on then, have it
fixed so it will be ready to warn you if there’s a problem.
I
I.
i
2-64
If the light comes on while you are driving, pull off the
road and stop carefully. You may notice that the pedal is
harder to push. Or, the pedal may go closer to the floor.
It may take longer to stop. If the light is still on, have the
vehicle towed for service.(See “Towing Your Vehicle”
in the Index.)
A CAUTION:
Your brake system may not be working properly
if the brakesystem warning light is on. Driving
with the brakesystem warning light on can lead
to an accident.If the light is still on after you’ve
pulled off the rmd and stopped carefully, haye
the vehicle towedfor service.
When the ignition is on, the brake system warning light
will also come on when you set your parking brake. The
light will stay on if your parking brake doesn’trelease
fully. If it stays on after your parking brake is fully
released, it means you have a brake problem.
Anti-Lock Brake System Warning Light
With the anti-lock brake
system, this light will come
on when you start your
engine and it will stay
on for three seconds.
That’s normal.
If the light stays on, turn the ignition off. Or, if the light
comes on when you’re driving, stop as soon as possible
and turn the ignition off. Then start the engine again to
reset: the system. If E
h Eight s m stays on, or comes en
again while you’re driving, your Pontiac needs service.
If the regular brake system warning light isn’t on, you
still have brakes, but you don’t have anti-lock brakes.
If the regular brake system warning light is also on, you
don’t have anti-lock brakes and there’s a problem with
your regular brakes. See “Brake System Warning Light”
earlier in this part.
The anti-lock brake system warning lightshould come
on briefly when you turn the ignition keyto RUN. If the
light doesn’t come on then, have it fixed so it will be
ready to warn you if there is a problem.
2-65
Enhanced Traction System Warning
Light (Option)
ETS
OFF
With the Enhanced Traction
system (ETS), this warning
light should come on briefly
as you start the engine. If
the warning light doesn’t
come on then, have it fixed
so it will be ready to warn
you if there’s a problem.
If it stays on, or comes on when you’re driving, there
may be a problem with your Enhanced Traction System
and your vehicle may needservice. When this warning
light is on, the systemwill not limit wheel spin. Adjust
your driving accordingly.
2-66
The Enhanced Traction System warning light may come
on for thefollowing reasons:
0
If you turn the system off by pressing thebutton on
the shiftlever knob, the warning light will comeon
and stay on To turn the system back on, press
the button again. The warning light shouldgo off.
(See “Enhanced Traction System” in the Index
for more information.)
0
The warning light will come onwhen you set your
parking brake with the engine running, and it will
stay on if your parking brake doesn’t release fully. If
the system isturned on andthe warning light stays
on after your parking brake is fully released, it
means there’s a problem with the system.
If the Enhanced Traction System warning light comes
on and stays on for an extended period of time when the
system isturned on and the parking brake is fully
released, your vehicle needs service.
Enhanced Traction System Active Light
LOW
TRAC
When your Enhanced
Traction System is limiting
wheel spin, this light will
come on. Slipperyroad
conditions may exist if the
Enhanced Traction System
active light comes on, so
adjust your driving
accordingly.
The light will stay onfor a few seconds after the
Enhanced Traction System stops limiting wheel spin.
The Enhanced Traction System active light also comes
on briefly when you turn the ignition key to RUN. If the
light doesn’t come on then, have it fixed so it will be
there to tell you when the systemis active.
Engine Coolant Temperature Gage
With the ignition in
the RUN position, this
gage shows the engine
coolant temperature.
Lf the gage pointer moves intothe red area, your engine is
too hot! It means that your engine coolant has overheated.
If you have been operating your vehicle under normal
conditions, you should pull off the road, stop your vehicle
and turn off the e n p e as soon as possible.
In “Problems on the Road,” thismanual shows what to
do. See“Engine Overheating’’ in the Index.
2-67
Low Coolant Warning Light
If this light comes on and
stays on, your system is low
on coolant and the engine
may overheat.
Malfunction Indicator Lamp
(Check Engine Light)
Your Pontiac isequipped
with a computer which
monitors operation of the
fuel, ignitionand emission
control systems.
CHECK
See “Engine Coolant” in the Index and have your
vehicle
senriced
as soon a s you can.
This system is called OBD II {On-Bawd
Diagnostics- Second Generation) and is intended to
assure that emissions areat acceptable levels for thelife
of the vehicle, helping to produce a cleaner
environment. (In Canada, OBD I1 is replaced by
Enhanced Diagnostics.) The CHECK ENGINE light
comes on to indicate thatthere is a problem and service
is required. Malfunctions often will be indicated by the
system before any problem is apparent, which may
prevent more serious damage to your vehicle. This
system is also designed to assist your service technician
in correctly diagnosingany malfunction.
2-68
NOTICE:
If the Light Is Flashing
The following may prevent more serious damage to
your vehicle:
If you keep driving yourvehicle with this light
on, after a while, your emission controls may not
work as well, your fuel economy may not be as
good and your engine maynot run as smoothly.
This could lead to costly repairs that may not be
covered by your warranty.
This light should come on, a a check to show you it is
working, when the ignition is on and the engine is not
running. If the light doesn’t: come on, have it repaired.
This light will also come on duringa malfunction in one
of two ways:
0
0
Light Flashing -- A misfire condition has been
detected. A misfire increases vehicle emissions and
may damage the emission control system on your
vehicle. Dealer or qualified service center diagnosis
and service is required.
Reduce vehicle speed.
Avoidhard accelerations.
0
Avoid steep uphill grades.
0
If towing a trailer, reduce the amount of cargo being
hauled as soon as it ispossible.
If the light stops flashing and remains on steady, see “If
&e tight 1s mSteady” €aHowing.
If the light continues to flash, whea it is safe to do so,
stop the vehicle. Put your vehicle in PARK (P). Turn the
key off, wait at least 10 seconds and restart the engine.
If the light remains on steady,see “If the Light Is On
Steady” following. If the light is still flashing follow the
previous steps, and drive the vehicle to your dealer or
qualified service center for service.
Light On Steady -- An emission control system
malfunction has been detected on yourvehicle.
Dealer or qualified service center diagnosis and
service may be required.
2-69
If the Light Is On Steady
Have you recently changed brands of fuel?
Did you just putfuel into your vehicle?
If so, be sure to fuel your vehicle with quality fuel (see
“Fuel” in the Index). Poor fuel quality willcause your
engine not to run as efficiently as designed. You may
If so, reinstall the fuel cap,
making sure to fully install
the cap. The diagnostic system can determine if the fuel
cap has been left off or improperly installed. This will
allow fuel to evaporate into the atmosphere. A few
driving trips should turn the light off.
Did you just drive through a deep puddle of water?
If so, your electricalsystem may be wet. The condition
will usually be corrected when the electrical system
dries out. A few driving trips should turn the light off.
Are you low on fuel?
As your engine starts to run out of fuel, your engine may
not run as efficiently as designed since small amounts of
air are sucked into the fuel linecausing a misfire. The
system can detectthis. Adding fuel should correct this
condition. Make sure to install the fuel cap properly. It
will take a few driving trips to turn the light off.
2-70
notice this as stalling after start-up, stalling
when you
put the vehicle into gear, misfiring, hesitation on
acceleration or stumbling on acceleration. (These
conditions may go away once theengine is warmed up.)
This will be detected by the system and cause the light
to turn on.
If you experience this condition,change the fuel brand
yuu use. It will require at least onefull tank of the
off.
proper fuel to turn the light
If none of the above steps have made the light turn off,
have your dealer or qualified service center check the
vehicle. Your dealer has theproper test equipment and
diagnostic tools to f i x any mechanical or electrical
problems that may have developed.
Oil Warning Light
If you’re idling at a stop sign, the light may blink on
and then off.
’
If you have a low engine oil
pressure problem, this light
will stay on after you start
your engine, or comeon
when you are driving. This
indicates that your engine is
not receiving enough oil.
The engine could be low onoil, orcould have some
other oil problem. Have it fixed immediately.
The oil light could also come on in two other situations:
When the ignition is on but the engine is not running,
the light will come on as a test to show you it is
working, but the light willgo out when you turn the
ignition to START. If it doesn’t come onwith the
ignition on, you may have a problem with the fuse or
bulb. Have it fixed right away.
If you make a hard stop, the light may come on for a
moment. This is normal.
A CAUTION:
Don’t keep drivingif the oil pressure is low. If
you do, your engine canbecome so hot that it
catches fire.You or otherscould be burned.
Check your oil as soon as possible and have
your vehicle serviced.
NOTICE:
Damage to your engine
from neglected oil
problems canbe costly and is not covered
by
your warranty.
2-71
Check Oil Light
CHECK
OIL
Passlock Warning Light
This light should come
on briefly while you are
-s&rzingymr eaghe. If Ihe
light doesn’t comeon, have
it repaired. If the light
comes on while starting and
stays on, your engine oil
level should be checked.
Prior to checking your oillevel, be sureyour vehicle has
been shut off for several minutes and is on a level
surface. Check youroil level on the dipstick and bring it
to the proper level. See “Engine Oil” in theIndex.
Note: A false CHECK OIL light may be generated when
parking on steep grades.
The oil level monitoring system only checks oillevel
during the Ixieef period between key ON arid eilgine
START.It does not monitor the engine uii level when
the engine is running, Additionally, an oil check is
performed if the engine hasbeen off for a considerable
period of time allowing the oil normally in circulation to
drain back into theoil pan.
2-72
THEFT
SYSTEM
This light will come on
briefly when you turn
the key tow& -r;tre
START position.
If the light flashes, the Passlock system has entered a
tamper mode. If the vehicle fails to start, see “Passlock”
in theIndex.
If the light comes on continuously while driving and
stays on, there may be a problem with the Passlock
system. Your vehicle will not be protected byPasslock
and you should see your dealer.
Up-Shift Light (Manual Transaxle)
Check Gages Light
This light comes on when
you need to shift to the next
higher gear. See “Manual
Transaxle” in the Index.
SHIFT
CHECK
GAGES
This light will come on
briefly when you are
starting the engine. If the
light comes on and stays
on while you are driving,
check your various gages
to see if they are in the
warning zones.
2-73
Fuel Gage
Here are four things that some owners ask about. None
of these show a problem with your fuel gage:
When the ignition is on,
your fuel gage tells you
about how much fuel you
have left.
At the gas station, the gas pump shuts off before the
gage reads WLL (F).
It takes a little more or less fueltu fill up than the
gage indicated. For example, thegage may have
indicated the tank was half full, but it actually tooka
little more or less than half the tank’s capacity to fill
the tank.
The gage moves a little when you turn a corner or
speed up.
When the indicator nears EMPTY (E), you still have a
little fuel left, but you should get more soon.
The gage doesn’tgo back to EMPTY (E) when YOU
turn off the ignition.
For your fuel tank capacity, see “Capacities and
Specifi~tions”in the €sbex.
2-74
In this section you'll find out how to operate the comfort
control and audio systemsoffered with your Pontiac. Be
sure to read about the particular systems supplied with
your vehicle.
Standard Climate Control System
Comfort Controls
This section tells you howto make your a ~ system
r
work
for you. The optional climate control system with air
conditioning uses ozone-friendly R- 134a refrigerant.
With these systems, you can control the vcntilation
and heating inyour vehicle. Your vehicle also has the
flow-through ventilation system described later in
this section.
3-1
Fan Knob
The left knob selects the forceof air you want. Turn
the knob clockwiseto increase fan speed and counter
clockwise todecrease fan speed. To turn the fanoff, turn
the mode knob all the way counterclockwise. In any
other setting, the fan will Tun continuously.
BI-LEVEL: This setting brings in outside air and
directs it two ways. Some air isdirected through the
instrument panel outlets, Most of the air isdirected
through the floor ductsand a little to the defrost and side
window vents.
Temperature Knob
'The center knob changes t-hetemperature of he air
coming through the system. Turn this knob toward
red (clockwise) for warmer air. Turn it toward blue
(counterclockwise) for cooler air.
the ducts near the floor. The rest comes out of the
defroster and side window vents.
Mode Knob
The right knob hasseveral settings to control the
direction of airflow. For eachsetting, set the
temperature to a comfortable setting.
2 VENT This setting brings in outside air and
directs it through the instrument panel outlets.
3-2
1
2
'!!
FLOOR: This setting sends most of the air through
9 DEFOG: his setting a ~ o w half
s of the air
$0go
to the floor ducts andhalf to the defroster and side
window vents.
9DEFROST This settingdirects most of the air
through the defroster and side window vents. Some of
the air goes to the floor ducts.
Climate C m t r d System with Air
Conditioning (Option)
The centerknob changes the temperature of the air
coming through the system. Turn this knob toward
red (clockwise) forwarmer air. Turn it toward blue
(counterclockwise) for cooler air.
Mode Knob
The rightknob has several settingsto control the
direction of airflow. For each setting, set the temperature
to a comfortable setting.
0
Fan Knob
The left knob selects the force of air you want. Turn the
knob clockwise to increase fan speed and counter
clockwise to decrease fan speed. To turn the fan off, turn
the mode knob allthe way counterclockwise. In any
other setting, the fan will run continuously. The fan must
be on to run the airconditioning compressor.
MAX: This setting recirculatesmuch of the air
inside your vehicle and sends it through the instrument
panel outlets. The air conditioningcompressor will run
automatically in this setting when it isneeded to help
dry the airin the vehicle.
2 VENT This setting bringsin outside air and
directs it through the instrument panel.
1 2 BI-LEVEL: This setting brings in outside air
and directs it two ways. Some air isdirected through the
instrument panel outlets. Most of the air isdirected
through the floor ductsand a little to thedefrost and
side window vents.
3-3
FLOOR: This setting sends most of the air through
the ducts near the floor.The rest comes out of the
defroster and side window vents.
I
!
9 DEFOG: This setting allows half of the air to go
to the floor ducts and half to the defroster and side
window vents.
9DEFROST This setting directsmost of the air
through the defroster and side window vents. Some of
the air goes to the floor ducts. Theair conditioning
compressor will run automatically in this setting when
it is needed to help dry the air in the vehicle.
Air Conditioning Compressor Button
Press the A/C button to operatethe air conditioner
compressor. The indicator light above the button will
glow when the button is pressed. You don’t have
to press the button to run the compressor in MAX
or DEFROST.
3-4
Air Conditioning (Option)
On very hot days, open the windows long enough to
let hot inside air
escape. This reduces the time it takes
for your vehicle to cool down,which should help
fuel economy.
For quickcool-down on very hot days, use MAX with
the temperature knob all the way in the blue area. If this
setting isused for long periods of time, the air in your
vehicle may become too dry.
For normalcooling on hot days,use VENT with the
temperature knob in the blue areaand the A/C button
pushed in. The system will bring in outside air and
cool it.
On cool,but sunny days, the sunmay warm your upper
body, but your lower body may not be warm enough.
You can use BI-LEVEL with the temperature knob in
the middle and the A/C button pushed in. The system
will bring inoutside air and directslightly warmer air to
your lower body. You may notice this temperature
difference more at some times thanothers.
Heating
On cold days, use FLOOR with the temperatureknob all
the way in the red area. The system will bring in outside
air, heat it and send it to the floor ducts.
Your vehicle has heat ducts that are directed toward
the rear seat. Keep the area under the front seatsclear
of obstructions so the heated air can reachthe rear
seat passengers.
If your vehicle has an engine coolant heater, you can use
it to help your system provide warm air faster when it’s
C O W OWZ& (0°F (- 1SiT)rQT h m - j -An engine G O Q
heater w m s the coolmt your engine and heating
system use to provide heat. See “Engine Coolant
Heater” in the Index.
Ventilation System
For mild outside temperatures when little heating or
cooling is needed, use VENT to direct outside air
through your vehicle. Your vehicle alsohas the
flow-through ventilation system.
Your vehicle’s flow-through ventilation system supplies
outside air into the vehicle when it is moving. Outside
air will also enter the vehicle when the airconditioning
fan is running,
~
~
Ventilation Tips
Keep the hood and front air inlet free of ice, snow or
any other obstruction, such as leaves. The heater and
defroster will work far better, reducing the chance of
fogging the inside of your windows,
When you enter a vehicle in cold weather, adjust the
mode knob to FLOOR and thefan to the highest speed
off. This helps clear
for a few moments before driving
the intake ductsof snow and moisture and reduces the
chance of fogging the insideof your windows.
Keep the air path under the front seats clearof objects.
This helps air circulate throughout your vehicle.
3-5
Defogging and Defrosting Windows
Rear Window Defogger (Option)
Your system has two settings €or clearing the front and
side windows. To defrost the windows quickly, use
DEFROST with the temperature knob all the way in
the red area. To warm passengers while keeping the
windows clean, use DEFOG.
To defog the side windows, set the right control to
BI-LEVEL and the fan control tothe highest setting.
To defog the side windows while usingthe air conditioner,
set the right controlto BI-LEVEL, the fan control to
the highest setting,and press the A/C button.
For both systems, aim the side vents toward the side
windows. For increased airflow to the side vents, close
the center vents.
The rearwindow defogger
uses a warming grid to
remove fog fromthe
rear window.
Press the button to turn
the defogger on. It will
turn itself off after about
10 minutes.
If you turn iton again, the defogger will only run for
about five minutes before turning off. You can also turn
it off by pressing the button again.
Do not attach a temporary vehicle license acrossthe
defogger grid on the rear window.
I NOTICE:
Don’t use a razor blade or something else sharp
on the inside of the rear window. If you do, you
could cut or damage the warming grid, andthe
repairs wouldn’t be coveredby your warranty.
3-6
Audio Systems
AM-FM Stereo
Your Delco@audio system has been designed to operate
easily and give years of listening pleasure. You will get
the most enjoyment out of it if you acquaint yourself
with it first. Find out what your Delco system can do
and how to operate all its controls, to be sure you’re
gettizqg the M S t e& c-fthe 2d-vancedengineering t h - t
went into it.
v
Setting the Clock for AM-FM Stereo
Press SET. Within five seconds, press and hold the
SEEK down arrow until the correct hour appears on the
display. Press and hold the SEEK up arrow until the
correct minute appears on the display.
Setting the Clock for All Systems Except
AM-FM Stereo
Press and hold HR until the correct hour appears. Press
and hold MIN until the correct minute appears. There
will be a two-second delay before the clock goes into
time-set mode, and the colon on the display will blink
while in this mode.
Playing the Radio
VOLUME: Turn this knob to turn the system on or off.
Turn the knob clockwise to increase volume. Turn it
counterclockwise to decrease volume.
RCL: Press the upper knob briefly torecall the station
being played or the clock display.
Finding a Station
AM-FM: Press the lower knob toget AM or FM. The
display shows your selection.
TUNE-:Turn the lower h o b to c h o w radio stations.
3-7
SEEK: Press the up or down arrow to go to the next
Setting the Tone
higher or lower station.
BASS: Slide the leverup or down to increase or
PUSHBUTTONS: The fournumbered pushbuttons let
you return to your favorite stations. You can set upto
14 stations (seven AM and seven FM).
decrease bass.
1. Press AM-FM to select the band.
TREB: Slide the leverup or down to increaseor
decrease treble. If a station is weak or noisy, slide the
lever down to reduce thenoise.
2. Tune in the desired station.
Adjusting the Speakers
3. Press SET.
BALANCE: Turn the control behind the upper knob to
move the sound to theleft or right speakers. Use the
middle position to balance these speakers.
4. Within five seconds, press one of the four numbered
pushbuttons. Whenever you press that numbered
pushbutton, the station you set will return.
5 . Repeat the steps for eachpushbutton.
In addition to the four stations set asabove, up to
three additional stations may be preset on each band by
pressing two adjoining buttons at the same time. Just:
1. Tune in the desired station.
2. Press SET.
3. Press any two adjoining pushbuttons at the same
time (within five seconds).
4. Whenever you press the same buttons, the station
you set will return.
FADE: Turn the control behind the lower knob to move
the sound tothe front or rear speakers. Use the middle
position to balance these speakers.
AM-FM Stereo with Cassette Tape
Player (Option)
Playing the Radio
VOL: Push this knob to turn thesystem on or off. Turn
it clockwise to increase volume and counterclockwise to
decrease volume.
RECALL: Press this button brieflyto recall the
station being played or the clock display. If you press
the knob when the ignition is off,the clock will show for
a few seconds.
Finding a Station
AM-FM: Press this button to getAM, FM1 or FM2.
The display shows your selection. If a cassette tape is
playing, press this button to play theradio.
TUNE: Press this knob lightly so it extends.Turn it to
choose radio stations. Push the knobback in when
you're not using it.
SEEK: Press the up or down arrow to go to thenext
higher or lower station.
PUSHBUTTONS: The six numbered pushbuttons let
you return to your favorite stations. You can set up to
18 stations (six AM, six FM1 and six FM2).
1. Press AM-FM to select the band.
2. Find the station you want by using TUNE or SEEK.
3. Press and hold one of the six numbered buttons until
SET appears on the display. Whenever you press that
numbered button, the station you set will return.
4. Repeat the steps for each pushbutton.
Setting the Tone
BASS: Slide the lever tothe right or leftto increase or
decrease bass.
TREBLE: Slide the leverto the right or left toincrease
or decrease treble. If a station is weak or noisy, slide the
lever down to reduce the noise.
Adjusting the Speakers
BAL: Press this knob lightly so it extends. Turn this
knob to move the sound to the left or right speakers. Use
the middle position to balance these speakers. Push the
knob back in when you're not using it.
3-9
FADE: Press this knob lightly so it extends. Turn this
knob to move the sound to the front orrear speakers.
Use the middle position to balance these speakers. Push
the knob back in when you’re not using it.
Playing ;a Cassette Tape
Your tape player is built to work best with tapes that are
30 to 45 minutes long on each side. Tapes longer than
that are so thin they may not work well in this player.
While the tape is playing, use the VOL, FADE, BAL,
TREBLE and BASS controls just asyou do for the
radio. The display will show an arrow to show which
side of the tape is playing. When the down indicator
arrow is lit, selections listed on the bottom side of the
cassette are playing. When the up arrow is lit, selections
listed on the top side of the cassette are playing. The
tape player automatically begins playing the other side
when it reaches the end of the tape.
If E and a number appear on the radiodisplay, the tape
won’t play because of an error.
0 E10: The tape is tight and the player can’tturn
the tape hubs. Remove the tape. Hold the tape with
the open end down andtry to turn the right hub
counterclockwise witha pencil. Turn the tape over and
repeat. If the hubs do not turn easily, your tape may be
damaged and should not be used in the player.-Try a
new tapeto make sure your playeris working properly.
3-10
E l l : The tape is broken. Try a new tape.
If any error occurs repeatedly or if an errorcan’t be
corrected, please contact your dealer. If your radio
displays an error number, write it down and provide it to
your dealer when reporting the problem.
PREV (1):Press this button or the SEEK down arrow to
search for theprevious selection on the tape. Your tape
must have atleast three seconds of silence between each
seiectiunr fur PREV m SEEK =toWO‘PC. The tape direction
arrow blinks during PREV ur SEEK operation. Press
PREV or the SEEK down arrow to stop searching.The
sound is muted during PREV or SEEK operation.
NEXT (2): Press this buttonor the SEEK up arrow to
search for the next selection on the tape. If you hold the
button or press it more than once, the player will continue
moving forward through the tape.Your tape must have at
least three seconds of silence between each selection for
NEXT or SEEK to work. The tape direction arrow blinks
during NEXT or SEEK operation. Press PREV or the
SEEK up m o w to stop searching. The sound is muted
during NEXT or SEEK operation.
PROG (3): Press this button to play the other sideof
the tape.
00 (4): Press this buttonto reduce background noise.
Note that the double-D symbol will appearon the display.
Dolby@Noise Reduction is manufactured under a
license from Dolby Laboratories Licensing Corporation.
Dolby and the double-D symbol are trademarks of
Dolby Laboratories Licensing Corporation.
REV (5): Press this button to reverse thetape rapidly. Press
it again to return to playing speed. The radio will play the
last-selected station while the tape reverses. You may select
stations during REV operation by usingSEEK or TUNE.
FWD (6): Press this button to advance quickly to
another part of the tape. Press the button again toreturn
to playing speed. The radiowill play the last-selected
station while the tape advances. You may select stations
during FWD operation by using SEEK or TUNE.
AM-FM: Press this button to playthe radio when a
tape is in the player.
TAPE/PLAY: Press this button to change to thetape
function when the radio ison. The tape symbol with an
arrow will appear on the display when the tape is active.
To return to playing the radio,press the AM-FM button.
EJECT Press this button to remove the tape. The radio
will play. EJECT may be activated with either the
ignition or radio off. Cassettesmay be loaded with the
radio and ignition off if this button is pressed first.
CLN: This message may appear on the display. If it
does, your cassette tape playerneeds to be cleaned. It
will still play tapes, but you should clean it as soon as
possible to prevent damage to your tapes and player.
See “Care of Your Cassette Tape Player” in the Index.
After you clean the player, press and hold EJECT for
five seconds to reset theCLN indicator. The radio will
display --- to show the indicatorwas reset.
CD Adapter Kits
It is possible to use a CD adapter kit with your cassette
tape player after activating thebypass feature on your
tape player.
To activate the bypass feature,the ignition must beon.
Turn your radio off. Press TAI?E/PLAY and hold for
three seconds. After three seconds, the tape symbol
in the
display will flash for two seconds indicating the featureis
active. Turn the radio on and insert the adapter.
This override feature willremain active until EJECT
is press.
3-11
AM-FM Stereo with Cassette Tape Player
and Equalizer (Option)
TUNE: Press this knob lightly so it extends. Turn it to
choose radiostations. Push the knob back in when
you're not using it.
SEEK: Press the up or down arrow to go to the next
higher or lower station.
PUSHBUTTONS: The six numbered pushbuttons let
you return to your favorite stations. You can set up to
18 stations (six AM, six FM1 and six FM2).
1. Press AM-FM to select the band.
Playing the Radio
VOL: Push this knob to turn thesystem on or off. Turn
it clockwise to increasevolume and counterclockwise to
decrease volume.
RECALL: Press this buttonbriefly to recall thestation
being played or the clock display. If you press the
knob when the ignition is off, the clock will show for
a few seconds.
Finding a Station
AM-FM: Press this button to get AM, FM1 or FM2.
The displayshows your selection. If a cassette tape is
playing, pressthis button to play the radio.
2. Find the station you want by using TUNE or SEEK.
3. Press and hold one of the six numbered buttons until
SET appears on the display. Whenever you press that
numbered button, the station you set will return.
4. Repeat the steps for each pushbutton.
Setting the Tone
EQUALIZER: A seven band equalizer is part of your
audio system. Slide the levers up to boost or down to
reduce frequency range.
Adjusting the Speakers
BAL: Press this knob lightly so it extends. Turn it to
move the sound to the left or right speakers. Use the
middle position to balance these speakers. Push the knob
back in when you're not using it.
FADE: Press t h s knob lightly so it extends. Turn it to
move the sound to the front or rear
speakers. Use the
middle position to balancethese speakers. Push the knob
back in when you’re not using it.
Playing a Cassette Tape
Your tape player is built towork best with tapes that are
30 to 45 minutes long on each side. Tapes longer than
that are so thin they may not work well in this player.
While the tape is playing,
use the VOLUME, FADE and
BAL controls justas you do for the radio. The display
will show an arrow to show which side of the tapeis
playing. When the downindicator arrow is lit,selections
listed on the bottom side of the cassette are playing.
When the up arrow is lit, selections listed on thetop side
of the cassette are playing. The tapeplayer
automatically begins playing the other side when it
reaches the end of the tape.
If E and a number appear on the radiodisplay, the tape
won’t play because of an error.
E10: The tape is tight and the player can’t turn
the tape hubs.Remove the tape. Hold the tapewith the
open end downand try to turn the right hub
counterclockwise with a pencil. Turn the tape over and
repeat. If the hubs do not turn easily, your tape may be
in the player.Try a
damaged and should not be used
new tape to make sure your playeris working properly.
E l l : The tape is broken. Try a new tape.
If any error occurs repeatedly or if an error can’t be
0
corrected, please contact your dealer. If your radio
displays an error number, write it down and provide it to
your dealer when reporting theproblem.
PREV (1): Press this button or the SEEK down arrow
to search for the previous selectionon the tape. Your
tape must have at least three seconds of silence between
each selection for PREV or SEEK towork. The tape
direction arrow blinks during PREV or SEEK operation.
Press PREV or the SEEK down arrow to stop searching.
The sound is muted during PREV orSEEK operation.
NEXT (2): Press this button or the SEEK up arrow to
search for the next selection on the tape. If you holdthe
button or press it more than once, the playerwill
continue moving forward through the tape. Your tape
must have at least three seconds of silence between each
selection for NEXT or SEEK to work. The tape
direction arrow blinks during NEXT or SEEK operation.
Press PREV or the SEEK up arrow to stop searching.
The sound is muted during NEXT or SEEK operation.
PROG (3): Press this button to play the other side of
the tape.
nu(4):Press this buttonto reduce background noise.
Note that the double-D symbol will appear onthe display.
Dolby Noise Reduction is manufactured under a license
from Dolby Laboratories Licensing Corporation. Dolby
and the double-D symbol are trademarks of Dolby
Laboratories Licensing Corporation.
REV ( 5 ) : Press this button to reverse the tape rapidly.
Press it again to return to playing speed. The radio will
play the last-selected station while the tape reverses.
You may select stations during REV operation by using
SEEK or TUNE.
FWD (6): Press this button to advance quickly to
another part of the tape. Press the button again to return
to playing speed. The radio will play the last-selected
statim W & i k the q x a d % J a u sYW
. m y -Sdec4 -sIatiQns
during FWD operation by using SEEK or TUNE.
AM-FM: Press this button to play the radio when a tape
is in the player.
TAPE/PLAY Press this button to change to the tape
function .when theradio is on. The tape symbol with an
arrow will appear on the display when the tape is active.
To return to playing the radio, press the AM-FM button.
EJECT: Press this button to remove the tape. The radio
will play.EJECT may be activated with either the
3-14
ignition or radiooff. Cassettes maybe loaded with the
radio off if this button is pressed first.
CLN: This message may appear on the display. If it
does, yourcassette tape player needsto be cleaned. It
will stillplay tapes, but you should clean it as soon as
possible toprevent damage to your tapes and player.
See “Care of Your Cassette Tape Player” in the Index.
After you clean the player, press and hold EJECT for
five seconds to reset the CLN indicator. The radio will
display --- to show the indicator wasreset.
CD Adapter Kits
It is possibleto me a CD adapter kitwith your cassette
tape playerafter activating the bypassfeature on your
tape player.
To activate the bypass feature, theignition must be on.
Turn your radio off. Press TAPEPLAY and hold for
three seconds. After three seconds, thetape symbol
in the displaywill flash for twoseconds indicating
the feature isactive. Turn the radio onand insert
the adapter.
This overridefeature will remain active until EJECT
is press.
AM-FM Stereo with Compact Disc Player
and Equalizer (Option)
Finding a Station
AM-FM: Press this button to get AM, FM1 or FM2.
The displayshows your selection. If a cassette tape is
playing, pressthis button to play the radio.
TUNE: Press this knob lightly so it extends. Turn it to
choose radio stations. Push the knob back in when
you’re not using it.
SEEK: Press the up ordown arrow to go to the next
higher or lower station.
PUSHBUTTONS: The six numbered pushbuttons let
you return to your favorite stations. You can set up to
18 stations (six AM, six FM1 and six FM2).
1. Press AM-FM to select the band.
Playing the Radio
VOL: Push this knob to turn the system on or off. Turn
it clockwise to increase volume and counterclockwise to
decrease volume.
RECALL: Press this button briefly to recall the station
being played or theclock display. If you press the
knob when the ignition isoff, the clock will show for
a few seconds.
2. Find the station you want by using TUNE or SEEK.
3 . Press and hold one of the six numbered buttons until
SET appears on the display. Whenever you press that
numbered button, the station you set will return.
4. Repeat the steps for each pushbutton.
3-15
Setting the Tone
EQUALIZER: A seven band equalizer ispart of your
audio system. Slide the levers upto boost or down to
reduce frequency range.
If you’re driving on a very rough roador if it’s very hot,
the disc may not play and E (error) and a number may
appear on the radio display. If the disc comes out, it
could be that:
The disc is upside down.
Adjusting the Speakers
BAL: Press this knob lightly so it extends. Turn it to
move the sound to the left or right speakers.Use the
middle position tobalance these speakers.Push the knob
back in when you’renot using it.
FADE: Press this knob lightly so it extends. Turn it to
move the sound to the front or rear speakers. Use the
middle position to balance these speakers.Push the knob
back in when you’re notusing it.
Playing a Compact Disc
The integral CD player can play8 cm “single”
mini-discs. Full-size compact discs and mini-discs are
loaded in the same manner.
Insert a disc partway into the slot, label sideup. The
player will pull it in. If the ignition is on, but the radio is
off, the disc will begin playing. If you want to insert a
disc when the ignition isoff, first press EJECT.
3-16
0
It is dirty, scratched or wet.
0
The air is very humid. (If so, wait about an hour
and try again.)
If any error occurs repeatedly or if an error can’t be
corrected, please contact your dealer. If your radio
displays ;an enor number, write it down and provideit to
your dealer when reporting the problem.
RECALL: Press this button to see what track is playing.
Press it again within five seconds to see how long ithas
been playing (elapsed time). The track number also
appears whenthe discis inserted, the volume is changed
or whena new track starts playing.
PREV (1): Press this button or the SEEK down arrow to
go to the start of the current track if more than eight
seconds have played. If you hold the button or press it
more than once, the player will continue movingback
through thedisc.
NEXT (2): Press this button or the SEEK up arrow to go
to the start of the next trackif more than eight seconds
it than
have played. If you hold the button or press more
once, the player will continue moving forward through
the disc.
RDM (3): Press this button to hear the tracksin a random
order. It will change discs and tracksin a random, rather
than sequential order. PressRDM again to turn off random
play. The radio will play duringthis operation.
REV (5): Press and hold this button to return to a
passage quickly.Release it to play the passage. You will
hear sound ata reduced volume. The display will show
elapsed time.
FWD (6): Press and holdthis button to advance to a
passage quickly. You will hear s m d at a reduced
volume, The display will show elapsed time,
AM-FM: Press this button to play the radio when a disc
is playing. The disc will stop but remain in theplayer.
CD/PLAY: Press this button to change to the disc
function when the radio is on.
EJECT Press this button to remove the disc or stop the
disc and switch to the radio. EJECT will work with the
radio off.
Theft-Deterrent Feature
THEFTLOCK
is designed to discourage theft of your
radio. It works by using a secret codeto disable all radio
TM
functions whenever battery power is removed.
The THEFTLOCKfeature for theradio may be used or
ignored. If ignored, the system plays normally and the
radio is not protected by the feature. If THEFTLOCK is
activated, your radio will not operate if stolen.
When THEFTLOCK is activated, the radiowill display
LOC to indicate a locked condition anytime battery
power is removed. If your battery loses powerfor any
reason, you must unlock the radiowith the secretcode
before it will operate.
The instmctions which fo~~ow
explain how to enter your
secret code to activate the THEFTLOCK system. It is
recommended that you read through all nine steps
before starting the procedure.
NOTE: If you allow more than 15 seconds to elapse
between any steps, the radioautomatically reverts to
time and you must start the procedureover at Step 4.
1 . Write down any three or four-digit number from
000 to 1999 and keep it in a safe place separate from
the vehicle.
3-15
2. Turn the ignition to the ACC or RUN position.
3. Turn the radio off.
4. Press the 1 and 4 buttons together. Hold them down
until --- shows on the display. Next you will use the
secret code number which you have written down.
Unlocking the Theft-Deterrent Feature Aftera
Power Loss
Enter your secret code as follows; pause no more than
15 seconds between steps:
1. LOC appears when the ignition is on.
5. Press MIN and 000 will appear on the display.
2. Press MIN and 000 will appear on the display.
6. Press MIN again to make the last two digits agree
with your code.
3. Press MIN again to make the last two digits agree
with your code.
7 . Press HR to make the first one ortwo digits agree
with your code.
4. Press HR to make the first one or two digits agree
with your code.
8. Press AM-FM after you have confirmed that the
code matches the secret code you have written down.
The display will show REP to let you know that you
need'to repeat Steps 5 through 7 to confirm your
secret code.
5. Press AM-FM after you have confirmed that the
code matches the secret code you have written down.
The display will show SEC, indicating the radio is
now operable and secure.
9. Press AM-FM and this time the display will show
SEC to let you know that your radio issecure.
3-18
If you enter the wrong code eight times, INOP will
appear on the display. You will have to wait an hour
with the ignition on before you can try again. When you
try again, you will only have three chances to enter the
correct code before INOP appears.
If you lose or forget your code, contact your dealer.
Disabling the Theft-Deterrent Feature
Enter your secret code asfollows; pause no more than
15 seconds between steps:
Steering Wheel Controls (Option)
1. Turn the ignitionto the ACCESSORY or
RUN position.
2. Turn the radio off.
MUTE
3. Press the 1 and 4 buttons together. Hold them down
until SEC shows on the display.
4. Press MIN and 000 will appear on the display.
5 Press MIN again to make the last two digits agree
with your code.
6. Press HR to make thefirst one ortwo digits agree
with your code.
7. Press AM-FM after you have confirmed that the
code matches the secret code you have written down.
The display will show ---,indicating that the radio is
no longer secured.
If your vehicle has this feature, you can controlcertain
radio functions using the buttons on your steering wheel.
SEEK: Press the up arrow to tune to the next radio
station and the down arrow to tune to the previous radio
station. If a cassette tape or compact disc is playing, the
player will advance with the up arrow and rewind with
the down arrow.
If the code entered is incorrect,SEC will appear on the
display. The radio willremain secured until the correct
code is entered.
When battery power is given to a secured radio, the
radio won’t turn on andLOC will appear on the display.
3-19
AM-FM: Press this button to choose AM, FM1 or
FM 2. If a cassette tapeor compact disc is playing, it
will stop and the radio will play.
PRESET Press this button to play a station you have
programmed on the radio preset buttons.
PLAY: Press this button to play a cassettetape or
compact disc when the radio is playing.
MUTE: Press this button to silencethe system. Press it
again, or any otherradio button, to turn on the sound.
VOL: Press the up arrow to increasethe volume and the
down arrow to decrease volume.
Understanding Radio Reception
FM Stereo
FM stereo wiil give you the best sound. But FM signals
will reach d y about 19 to 40 miles (16 to 55 km). Tall
buildings or hills can interfere with FM signals, causing
the sound to come and go.
AM
The range €or most AM stations is greater than for
FM,
especially at night. The longer range, however,
can
cause stationsto interfere with each other.AM can pick
up noise from things like stonnsand power lines. Try
reducing the treble to reduce this noise if you ever get it.
Tips About Your Audio System
Hearing damage from loud noiseis almost undetectable
until it is too late.Your hearing can adaptto higher
volumes of sound. Sound that seems normalcan be
by
loud and harmful to your hearing. Take precautions
adjusting the volume control onyour radio to a safe
sound level before your hearing adapts toit.
To help avoid hearing loss or damage:
Adjust the volume control to the lowest setting.
0
Increase volume slowly until you hear comfortably
and clearly.
t
NOTICE:
Before you add any sound equipment to your
vehicle like a tape player, CB radio, mobile
telephone or two-way radio be sure you can add
what you want. If you can, it’s very important
to do itproperly. Added sound equipment may
interfere with the operation of your vehicle’s
engine, Delco radio or othersystems, and even
damage them.Your vehicle’s systems may
interfere with the operationof sound equipment
that hasbeen added improperly.
So, before adding sound equipment, check with
your dearer and be sure to check Federal rules
covering mobile radio and telephone units.
--
--
Care of Your Cassette Tape Player
A tape playerthat is not cleaned regularly can cause
reduced sound quality, ruined cassettes or a damaged
mechmism. cass-ettetapes shoufd be stored in their
cases away from contaminants, direct sunlight and
extreme heat. If they aren’t, they may not operate
properly or may cause failureof the tape player.
Your tape player should be cleaned regularly after every
50 hours of use. Your radio may display CLN to indicate
that you have used your tape player for 50 hours without
resetting the tape clean timer. If you noticea reduction in
sound quality,try a known good cassette to see if the tape
or the tape player is at fault. If this other cassette hasno
improvement in sound quality, clean the tape player.
Cleaning may be done with a scrubbing action,
non-abrasive cleaning cassette with pads which scrub
the tape head as the hubs of the cleaner cassette turn. It
is normal for the cassette to eject while cleaning. Insert
the cassette at least three times to ensure thorough
cle~ngA
, . scmbbing action cleaning cassette is
available through your Pontiac dealer.
3-21
You may also choose a non-scrubbing action, wet-type
cleaner which uses a cassette with a fabric belt to clean
the tape head. Thistype of cleaning cassette will not
eject. It may not clean as thoroughly as the scrubbing
type cleaner.
Cassettes are subject to wear and the sound quality may
degrade over time. Always make sure that the cassette
tape is ingood condition before you have your tape
player serviced.
Care of Your Compact Discs
Handle discs carefully. Store them intheir original cases
or other protective cases and away from direct sunlight
and dust. If the surface of a disc is soiled,dampen a
clean, soft cloth in a mild, neutral detergent solution and
clean it, wiping from the center to the edge.
3-22
Be sure never to touch the signal surface whenhandling
discs. Pick up discs by grasping the outer edges or the
edge of the hole and the outer edge.
Fixed Mast Antenna
The fixedmast antenna can withstand most carwashes
without being damaged. If the mast should ever become
slightly bent, you can straighten it out by hand. If the
mast is badly bent, as it might be by vandals, you should
replace it.
Check every once in a while to be sure the mastis still
tightened to the fender.
Defensive Driving
The best advice anyone can give about driving
is:
Drive defensively.
Please start with a very important safety device in your
Pontiac: Buckle up. (See “Safety Belts” in the Index.)
Defensive driving really means “beready for anything.”
On city streets, rural roads or freeways, it means
“always expect the unexpected.”
Assume that pedestrians or other drivers aregoing to be
carekess a& make mist,&es. Antkip&!what t h y might
do. Be ready €ortheir mistakes.
Here you’llfind information about driving on different
kinds of roads and in varying weather conditions. We’ve
also included many other useful tips on driving.
Rear-end collisions are about themost preventable of
accidents. Yet they are common. Allow enough
following distance. It’s the best defensivedriving
maneuver, in bothcity and rural driving.You never
know when the vehicle in frontof you is going to brake
or turn suddenly.
4-1
Drunken Driving
,jli , ’.
A
.
’ I
.
..:.
Death and injury associated with drinking and driving
is a national tragedy. It’s the number one contributor to
the‘highwaydeath toll, claiming thousands of victims
every spear.
Alcohol affects four things that anyone needs to drive
a vehicle:
0
Judgment
The Blood Alcohol Concentration (BAC) of someone
who is drinking depends upon four things:
0 The mount of alcohol consumed
Muscular Coordination
0
The drinker’s body weight
Vision
0
The amount of food that is consumed before and
during drinking
The length oftime it has taken the drinker to
consume the alcohol.
Attentiveness.
Police records show that almost half of all motor
vehicle-related deaths involve alcohol. In most cases,
these deaths are the result of someone who was drinking
and driving. In recent years, some 18,000 annual motor
vehicle-related deaths have been associated with the use
of alcohol, with morethan 300,000 people injured.
Many adults -- by some estimates, nearly half the adult
population -- choose never to drink alcohol, so they
W V e T &ve a€xer&inking. F a pt3YXms u&.r 2 1, ilk
against the law in every U.S. state to drink ak&ol.
There are good medical, psychological and
developmental reasons for these laws.
I
The obvious way to solve this highway safety problem
is forpeople never to drink alcoholand then drive. But
what if people do? How much is “toomuch” if the
driver plans to drive? It’s a lot less than many might
think. Although it depends on each person and situation,
here is surne genemi inlimnation m the pmbim.
4-2
According to theAmerican Medical Association, a
180-lb. (82 kg) person who d r i n k s three 12-ounce
(355 ml) bottles of beer in an hour will end up with a
BAC of about 0.06 percent. The person would reach the
same BAC by drinking three 4-ounce (120ml) glasses
of wine or three mixed drinks if each had 1- 1/2 ounces
(45 ml) of a liquor like whiskey, gin or vodka.
woman generally will reach a higher BAC level than a
man of her same body weight when each has the same
number of drinks.
The law in many U.S. states sets the legal limit at a BAC
of 0.10 percent. In a growing number of U.S. states, and
th-i3u@amCma&a, tke iimit is-0-08p m t .In s0iI-E
other countries, it’s even lower. The BAC limit for all
commercial drivers in the United States is 0.04 percent.
The BAC will be over 0.10 percent after three to
six drinks (in one hour). Of course, as we’ve seen, it
depends on how much alcohol is in the drinks, and how
quickly the person drinks them.
It’s the amount of alcohol that counts. For example, if
the same person drank three double martinis (3 ounces
or 90 ml of liquor each) within an hour, the person’s
BAC would be close to 0.12 percent. A person who
consumes food just before or during drinking will have a
somewhat lower BAC level.
There is a gender diEerence, too. Women generally have
a lower relative percentage of body water than men.
Since alcohol is carried in body water, thismeans that a
But the ability to drive is affected well below a
BAC of 0.10 percent. Research shows that the
driving skills of many people are impaired at a BAC
approaching 0.05 percent, and that the effects are
worse at night. All drivers are impaired at BAC levels
above 0.05 percent. Statistics show that the chance of
being in a collision increases sharply for drivers who
have a BAC of 0.05 percent or above. A driver with
a BAC level of 0.06 percent has doubled his or
her chance of having a collision. At a BAC level of
0.10 percent,^ the chance of this driver having a collision
is 12 times greater; at a level of 0.15 percent, the chance
is 25 times greater!
4-2
The body takes about an hour to riditself of the alcohol
in one drink.No amount of coffee ornumber of cold
showers will speed that up.“I’ll be careful” isn’t the
right answer. What if there’s an emergency, a need to
take sudden action, as when achild darts into the street?
A person with even a moderateBAC might not be able
to react quickly enough toavoid the collision.
There’s something else about drinking and driving that
many people don’t know. Medical research shows that
alcohol ina person’s system can make crash injuries
worse, especially injuries to the brain, spinal cord or
h e a t This means that when anyone who has been
drinking -- driver or passenger -- is in a crash,that
person’s chance of being killed orpermanently disabled
is higher than if the person had not beendrinking.
~
A CAUTION:
Drinking and then driving
is very dangerous.
Your reflexes, perceptions, attentivenessand
judgment canbe affected by evena small amount
of alcohol. You can have‘aserious o r even
fatal collision if you drive after drinking.
a driver
Please don’t drink and drive or ride with
who has been drinking. Ride home ina cab; or if
*vou’re with a group, designate a driver who
will
not drink.
--
--
Control of a Vehicle
You have three systems that make your vehicle go where
you want it to go. They are the brakes, the steering and
the accelerator. All three systems have to do their work
at the places where the tires meet the road.
4-4
Sometimes, as when you’re driving on snowor ice,it’s
easy to ask more of those control systems than the tires
and road can provide. That means youcan losecontrol
of your vehicle.
And, of course, actual stopping distances vary greatly
with the surface of the road (whether it’s pavement or
gravel); the condition of the road (wet, dry, icy); tire
tread; and the condition of your brakes.
4-5
Avoid needless heavy braking. Some people drive
in spurts -- heavy acceleration foUowed by heavy
braking -- rather than keeping pace with traffic. This
is a mistake.Your brakes may not have time to cool
between hard stups. Yuur brakes will wear out much
faster if you do a lot of heavy braking. If you keep pace
with the traffic and allow realistic following distances,
you will eliminate a lotof unnecessary braking. That
means better braking and longer brake life.
If your engine ever stopswhile you’re driving, brake
normally but don’t pump your brakes. If you do, the
pedal may get harder to push down. If your engine
stops, you will still have some power brake assist. But
you will use it when you brake. Once the power assist is
used up, it may take longer to stop and the brake pedal
will be harder to push.
4-6
Anti-Lock Brakes
Your vehicle has anti-lockbrakes (ABS). ABS is an
advanced electronicbraking system that will help
prevent a braking skid.
When you start your engine, orwhen you begin to drive
away, your anti-lock brakesystem will check itself. You
may hear a momentarymotor or clicking noise while
this test is going on,and you may even notice that your
brake pedal moves a little. This isnormal.
If there’s a problem with the
anti-lock brake system, this
warning light will stay on.
See “Anti-Lock Brake
System Warning Light” in
the Index.
The anti-lock system can change the brake pressure faster
than any driver could. The computer is programmed to
make the mostof available tire and road conditions.
Here’s how anti-lock works. Let’s say the road is wet.
You’re driving safely. Suddenly an animal jumps outin
front of you.
You slam on the brakes. Here’s what happens with ABS.
You can steer around the obstacle while braking hard.
A computer senses that wheels are slowing down. If one
of the wheels is aboutto stop rolling, the computer will
separately work the brakes at each front wheel and at the
As you brake, your computer keeps receiving updates on
wheel speed and controls braking pressure accordingly.
rear wheels.
4-7
Remember: Anti-lock doesn’t change the time you need
to get your foot up to the brake pedal oralways decrease
stopping distance. If you get too closeto the vehicle in
front of you, you won’t have time to apply your brakes
if that vehicle suddenly slows or stops. Always leave
enough room up ahead to stop, eventhough you have
anti-lock brakes.
LOW
TRAC
Using Anti-Lock
Don’t pump the brakes. Just hold the brake pedal
down and let anti-lock work for you. You may feel the
system working, or you may notice some noise, but
this is normal.
Enhanced Traction System
Xf y e w vehicle has the q&iamlfwr-speed -a~temati-c
transaxle, it also has an Enhanced Traction System
(ETS) that limits wheel spin. This is especially useful in
slippery road conditions. The system operates only if it
senses that one orboth of the front wheels are spinning
or beginning to lose traction. When this happens, the
system reduces engine power and may also upshift the
transaxle to limit wheel spin.
when your Enhanced
Traction System islimiting
wheel spin. See “Enhanced
Traction System Active
Light” in the Index. You
may feelor hear thesystem
working, but this is normal.
L
The Enhanced Traction Systemoperates in all transaxle
shift lever positions. But the system can
upshift the
transaxle only as high as the shift lever position you’ve
chosen, so you should use the lower gears only when
necessary. See “Automatic Transaxle” in the Index.
,
ETS
OFF
When the system is on
and the parking brake is
fully released, this warning
light will come on to let
you know if there’s a
problem with the system.
See “Enhanced Traction
System Warning Light” in
the Index.
When this warning light is on, the system will not limit
wheel spin. Adjust your driving accordingly.
To limit wheel spin, especially in slippery road
conditions, you should always leave the Enhanced
Traction system m. But you can turn the system e€€if
you ever need t5. (You should turn the system off if your
vehicle ever gets stuck in sand, mud, ice or snow. See
“Rocking Your Vehicle” inthe Index.)
To turn the system on oroff, press the buttonon the shift
lever hob.
When you turn the system off, the EnhancedTraction
System warning light will come on and stay on. If the
Enhanced Traction System is limitingwheel spin when
you press the button to turnthe system off, the warning
light will come on -- but thesystem won’t turn off right
away. It will wait until there’s no longer a current need
to limit wheel spin.
You can turn the system back on at any time by pressing
the button again. The Enhanced Traction System
warning light should g o off.
4-9
Braking in Emergencies
Use your anti-lock braking system when you need to.
With anti-lock, you can steer and brake at the same
time. In many emergencies, steeringcan help you more
ttan even the very best braking.
Steering
Power Steering
If you lose power steering assist because the engine
stops or the system is not functioning, you can steer but
it will take much more effort.
Steering Tips
Driving on Curves
It’s important to take curves at areasonable speed.
A lot of the “driver lost control” accidents mentioned on
the news happen on curves. Here’s why:
Experienced driver or beginner, each of us is subject to
the same laws of physics when driving on curves. The
traction of the tires against the road surface makes it
possible for the vehicle to change itspath when you turn
the front wheels. If there’s no traction, inertia will keep
the vehicle going in the same direction.If you’ve ever
tried to steer a vehicle on wet ice, you’ll understand this.
4-10
The traction you can get in a curve depends on the
condition of your tires andthe road surface, the angle at
which the curveis banked, and your speed.While you’re
in a curve, speed is the one factor you can control.
Suppose you’re sleering through a sharp curve, Then you
suddenly accelerate. Bothcontrol systems -- steering and
acceleration -- have to do their work where the tires meet
the road. Unlessyou have the Enhanced Traction System
and the system is on, adding the sudden acceleration can
demand too much of those places. You can lose control.
What should you do if this everhappens? Ease up on the
accelerator pedal, steer the vehicle the way you want it
to go, and slow down.
Speed limit signs near curves warn that you should
adjust your speed. Of course, the posted speeds are
based on good weather and road conditions. Under less
favorable conditions you’ll want to go slower.
If you need to reduce your speed as you approach a
curve, doit before you enter the curve, while your front
wheels are straight ahead.
Try to adjust your speed so you can “drive” through the
curve. Maintain a reasonable,steady speed. Wait to
accelerate until you are out of the curve, and then
accelerate gently into the straightaway.
Steering in Emergencies
There are times when steering can be more effective
than br&ng. For example, you L-ome over a hill and
find a truck stopped in your lane, ora car suddenly pulls
out from nowhere, or a child darts out from between
parked cars and stops right in front of you. You can
avoid these problems by braking -- if you can stop in
time. But sometimes you can’t; there isn’t room.
That’s the time for evasiveaction -- steering around
the problem.
Your Pontiac can perform very well in emergencies
like these. First apply your brakes. (See “Braking in
Emergencies” earlier in this section.) It is better to
remove as much speed as you can from a possible
collision. Then steer around the problem, to the left
or rightdepending on the space available.
An emergency like thisrequires close attentionand a
quick decision. If you are holding the steering wheel at
the recommended 9 and 3 o’clock positions, you can
turn it a full 180 degrees very quickly without removing
either hand. But you have to act fast, steer quickly,and
just as quickly straighten the wheel once you have
avoided the object.
The fact that such emergency situations are always
possible is a good reason to practice defensive drivingat
all times and wear safety belts properly.
4-11
Off-Road Recovery
Passing
You may find sometime that your right wheels have
dropped off the edge of a road onto the shoulder while
you ’re driving.
The driverof a vehicle about to pass another on a
two-lane highway waits for just the right moment,
accelerates, moves around the vehicle ahead, then goes
back into the right laneagain. A simple maneuver?
Not necessarily! Passing another vehicleon a two-lane
,highway isa potentially dangerous move, sincethe
passing vehicle occupiesthe same lane asoncoming
traffic for several seconds. A mi-scalc~~at~m,
am e m r in
judgment, or a brief surrender to frustration or anger can
suddenly put the passing driver faceto face with the
worst of all traffic accidents -- the head-on collision.
So here are sometips for passing:
If the levelof the shoulderis only slightly below the
pavement, recovery should be fairly easy.
Ease off the
accelerator and then,if there is nothingin the way, steer
so that your vehicle straddles theedge of the pavement.
You can turn the steeringwheel up toone-quarter turn
until the right front tirecontacts the pavement edge.Then
turn your steering wheel to go straight downthe roadway.
4- 12
0
“Drive ahead.” Look down the road, to the sides and
to crossroads for situations that might affect your
passing patterns. If you have anydoubt whatsoever
about making a successful pass, waitfor a better time.
0
Watch for traffic signs, pavement markings and
lines. If you can see a sign up ahead that might
indicate a turn or an intersection, delay your pass.
A broken center lineusually indicates it’s allright
to pass (providing the road aheadis clear). Never
cross a solid line on your side of the lane ora double
solid line, evenif the road seemsempty of
approaching traffic.
Do not get too close tu the vehicle you want to pass
while you’re awaiting an opportunity. For one thing,
following too closely reduces your area of vision,
especially if you’re following a larger vehicle.
Also, you won’t have adequate space if the vehicle
ahead suddenly slowsor stops. Keep back a
reasonable distance.
0 When it looks like
a chance to pass is coming up,
start to accelerate but stay in the right lane and don’t
get too close. Time your move so you will be
increasing speed as the time comes to move into the
other lane. If the way is clear to pass, you will have a
“running start” thatmore than makes up for the
distance you would loseby dropping back. And if
something happens tocause you to cancelyour pass,
you need only slow down and drop back again and
W a i t f c l r aslother a p p d y ,
e If other carsare lined up to pass a slow vehicle, wait
your turn.But take carethat someone isn’t trying to
pass you as you pull out
to pass the slow vehicle.
Remember to glance over your shoulder and check
the blind spot.
Check your mirrors, glance over your shoulder, and
start your left lane
change signal before moving out
of the right lane to pass. When you are far enough
8
ahead of the passed vehicle to see its frontin your
inside mirror, activate your right lane change signal
and move back into the right lane. (Remember that
your right outsidemirror is convex. The vehicle you
just passed may seem to be farther away from you
than it really is.)
0
Try not to pass more than one vehicle at a time
on two-laneroads. Reconsider beforepassing the
next vehicle.
0
Don’t overtake a slowly moving vehicle too rapidly.
Even though the brake lamps are notflashing, itmay
be slowing down or starting to turn.
0
If you’re being-passed,make it easy for the
foilowing driver to get ahead of you. Perhaps you
can easea little. to the right.
4-13
Loss of Control
Let’s review what driving experts say about what
happens when the three control systems (brakes, steering
and acceleration) don’t have enough frictionwhere the
tires meet theroad to do what the driverhas asked.
In any emergency, don’t give up. Keep trying to steer
and constantly seek an escape routeor area of less
danger.
If you do not have the Enhanced Traction System, if
or
the system is off, then an acceleration skid is alsobest
handled by easing your footoff the accelerator pedal.
If your vehicle starts to slide, ease your foot
off the
accelerator pedal and quickly steer theway you want the
vehicle to go. If you sku%steering qnickzy mough, y m
vehicle may straighten out. Always be ready for a
second skid if itoccurs.
A corneringskid is best handledby easing your foot off
the accelerator pedal.
Of course, traction is reduced when water, snow, ice,
gravel or other material is on the road. For safety, you’ll
want to slow down and adjust your drivingto these
conditions. It is important to slow down on slippery
surfaces because stopping distancewill be longerand
vehicle control more limited.
While drivingon a surface with reduced traction, try your
best to avoid suddensteering, acceleration or braking
(including engine brakingby shifting to a lower gear).
Any sudden changes couldcause the tires to slide. You
may not realize the surface is slippery until your vehicle
is skidding. Learn to recognize warning clues -- such as
enough water, iceor packed snow on the road to make a
“mirrored surface”-- and slow down when you have
any doubt.
If you have theEnhanced Traction System, remember: It
helps avoid only the acceleration skid.
Remember: Any anti-lock brakesystem (ABS) helps
avoid only the brakingskid.
Skidding
In a skid, a driver can lose controlof the vehicle.
Defensive drivers avoid most skids @king
by
reasonable
care suited to existing conditions,and by not “overdriving”
those conditions. But skids are always possible.
The three typesof skids correspond to your Pontiac’s
three control systems. In the braking skid, your wheels
aren’t rolling. In the steering or cornering skid, too
much speed or steering in a curve causes tires to slip and
lose corneringforce. And in the acceleration skid, too
much throttle causesthe driving wheels to spin.
Driving at Night
e Don’t drink and drive.
0
Adjust your inside rearview mirror to reduce the
glare from headlamps behind you.
e Since you can’t see as well, you may need to
slow down and keep more space between you
and other vehicles.
0
Slow down, especially on higher speed roads. Your
headlamps can light up only so much road ahead.
0
In remote areas, watch for animals.
I€you’re tired, pull o€€the road in a safe place
and rest.
Night Vision
Night driving is more dangerous than day driving. One
reason is that some driversare likely to be impaired -- by
alcohol or drugs, with night vision problems, or by fatigue.
Here are some tips on night driving.
Drive defensively.
No one can see as well at night as in the daytime. But as
we get older these differences increase. A 50-year-old
driver may require at least twice as much light to see the
same thing at night as a 20-year-old.
What you do in the daytime can also affect your
night
vision. For example, if you spend the day in bright
sunshine you are wise to wear sunglasses. Your eyes will
have less trouble adjusting to night. But if you’re
driving, don’t wear sunglasses at night. They maycut
down on glare from headlamps, but they also make a lot
of things invisible.
4-15
You can be temporarily blinded by approaching
headlamps. It can take a second or two, or even several
seconds, for your eyes to readjust to the dark. When you
are faced with severe glare (as from a driver who
doesn't lower the high beams, or a vehicle with
misaimed headlamps), slow down a little. Avoid staring
directly into theapproaching headlamps.
Driving in Rain and on Wet Roads
Keep your windshield and all theglass on your vehicle
clean -- inside and out. Glare at night is made much
worse by dirt on theglass. Even theinside of the glass
can build up a film caused by dust. Dirty glass makes
lights dazzle and flash more than clean glass would,
making the pupils of your eyes contractrepeatedly.
Remember that your headlamps light up far less of a
roadway when you are in a turn or curve. Keep your
eyes moving that w q ,it'-s-ea&- to pkek mt d i d y
lighted objects. Just as your headlamps should be
checked regularly for proper aim, so should your eyes
be examined regularly. Some drivers suffer from night
blindness -- the inability to see in dim light -- and aren't
even aware of it.
4-16
Rain and wet roads can mean driving trouble. On a wet
road, you can't stop, accelerate or turn as well because
your tire-to-road traction isn't as good as on dry roads.
And, if your tires don't have much tread left, you'll get
even less traction. It’s always wise to go slower and be
cautious if rain starts to fall while you are driving. The
surface may get wet suddenly when your reflexes are
tuned for driving on dry pavement.
The heavier the rain, the harder it is to see. Even if your
windshield wiper blades are in good shape, a heavy rain
can make it harder to see road signs andtraffic signals,
pavement markings, the edge of the road and even
people walking.
It’s wiseto keep your windshield wiping equipment in
good shape and keep your windshield washer tank filled
with washer fluid.Replace your windshield wiper
inserts when theyshow signs of streaking or missing
areas on the windshield, or when strips of rubber start to
separate from the inserts.
Driving too fast through large water puddles or even
going through some car washes can causeproblems, too.
The water may affectyour brakes. Try to avoid puddles.
But if you can’t, try to slow down before you hit them.
4-17
A CAUTION:
Driving Through Deep Standing Water
NOTICE:
Wet brakes can cause accidents. Theywon’t work
well in a quick stop and may cause pulling to one
side. You could lose control of the vehicle.
After driving througha large puddleof water or
a car wash, apply your brake pedal lightly until
your brakes worknormally.
~~
If you drive tooquickly through deep puddles or
standing water, water can come in through your
engine’s air intake and badly damage your
engine. Never drive through water that
is slightly
lower than the underbodyof your vehicle. If you
can’t avoid deep puddles
or standing water, drive
through themvery slowly.
Hydroplaning
Hydroplaning is dangerous. So mudh water can buiid up
under your tires that they can actually ride on the water,
This can happen if the road is wet enough and you’re
going fast enough. When your vehicle is hydroplaning,
it has little or no contact with the road.
Hydroplaning doesn’t happen often. But it can if your
tires haven’t much tread or if the pressure in one or
more islow. It can happen if a lot of water is standing on
the road.If you can see reflections from trees, telephone
poles or other vehicles, and raindrops “dimple” the
water’s surface, there could be hydroplaning.
Hydroplaning usually happens at higher speeds. There
just isn’t a hard and fast rule about hydroplaning. The
best advice is to slow down when it is raining.
0
0
Turn on your low-beam headlamps -- not just
your parking lamps -- to help make you more
visible to others.
Besides slowing down, allow some extra following
distance. And be especially careful when you pass
another vehicle. Allow yourself more clear room
ahead, and be prepared to have your view restricted
by road spray.
Have good tires with proper tread depth. (See
“Tires” in the Index.)
City Driving
Here are ways to increase your safety in city driving:
0
Know the best way to get to where you are going. Get
a city map andplan your trip intoan unknown part of
the cityjust as you would for a cross-country trip.
Try to use the freeways that rim and crisscross most
large cities. You’ll save time and energy. (See the
next part, “Freeway Driving.”)
Treat a green light as a warning signal. A traffic
light isthere because the corner is busy enough to
need it. When a light turns green,and just before you
start to move, check both ways forvehicles that have
not cleared the intersection or may be running the
red light.
One of the biggest problems with city streets is the
amount of traffic on them. You’ll wantto watch out for
what the other drivers are doing. and pay
attention to
traffic signals.
4-19
Freeway Driving
/,
*,,.,,,./.
- ,
I
.
The most important advice on freeway driving is: Keep
up with traffic and keep to the right. Drive at the same
speed most of the othe; drivers &e driving. Too-fast or
too-slow driving breaks a smooth traffic flow. Treat the
left lane on a freeway as a passing lane.
At the entrance,there is usually a ramp that leads to the
freeway. If you have a clearview of the freewayas you
drive along the entrance ramp, you should begin to
check traffic. Try to determine where you expect to
blend with the flow. Try to merge into thegap at close to
1433 prevailing sped. -SwIt& OIZ p u r turn .signd3check
your mirrors and glance over your shoulder as often as
necessary. Tryto blend smoothly with the traffic flow.
Once you are onthe freeway, adjust your speed to the
posted limit or to the prevailing rate if it’s slower. Stay
in the right lane unless you want to pass.
Before changing lanes, check your mirrors. Then use
Once you are moving on the freeway, make certain you
allow a reasonable following distance.Expect to move
slightly slower at night.
When you want to leave the freeway, move to the proper
lane well in advance. If you miss your exit,do not,
under any circumstances, stop and back up. Drive on to
the next exit.
service, have it done before starting out. Of course,
you'll find experienced and able service expertsin
Pontiac dealerships all across North America. They'll be
ready and willing to help if you need it.
Here are some things you can check beforea trip:
0
The exit ramp can be curved, sometimes quitesharply.
*.-
Wiper Blades:Are they in good shape?
exit "q!eed is wuauy p a d
Reduce your speed according to your speedometer, not
to your sense of motion. After driving forany distance
at higher speeds, you may tend to think you are going
slower than you actually are.
Fuei; Engine OiL, Other Fluids: Have you checkedall levels?
0
Lamps: Are they all working? Are the lenses clean?
0
Tires: They are vitally important to a safe,
trouble-free trip. Is the tread good enough for
long-distance driving? Are the tires all inflated to the
recommended pressure?
0
Weather Forecasts: What's the weather outlook
along yourroute? Should you delay your trip a short
time to avoid a major storm system?
0
Maps: Do you have up-to-date maps?
Before Leaving on a Long Trip
Make sure you're ready. Try to be well rested. If you
must start when you're not fresh -- such as after a day's
work -- don't plan to make too many miles that first part
of the journey. Wear comfortable clothingand shoes you
can easily drive in.
Windshield Washer Fluid:Is the reservoir full? Are
all windows clean inside and outside?
Is your vehicle ready for a long trip? If you keep it
serviced and maintained, it's ready to go. If it needs
4-21
Highway Hypnosis
Hill and Mountain Roads
Is there actuallysuch a condition as “highway hypnosis”?
Or is it just plain falling asleep at the wheel?Call it
highway hypnosis,lack of awareness, or whatever.
There is something about an easy stretch of road with
the same scenery, along with the hum of the tires on the
road, the drone of the engine, and the rush of the wind
against the vehicle that can make you sleepy. Don’t
let it happen to you! If it does, your vehicle can leave
the road in less than a second, and you could crash and
be injured.
What can you do about highway hypnosis? First, be
aware that it can happen.
Then here aresome tips:
M&e swe yew vehk-le is well ventilated, with a
comfortably cool interior.
Keep your eyes moving. Scan the road ahead and to
the sides. Check your rearview mirrors and your
instruments frequently.
If you get sleepy, pull off the road into a rest, service
or parking area and take a nap, get some exercise, or
both. For safety, treat drowsiness on the highway as
an emergency.
Driving on steep hills or mountains is different from
driving in flator rolling terrain.
If you drive regularly in steepcountry, or if you’re
planning to visit there,here are some tips that canmake
your trips safer and more enjoyable.
I A CAUTION:
~~
a Keep your vehicle in good shape. Check all fluid
levels and also the brakes, tires, cooling system
and transaxle. These parts can work hard on
mountain roads.
Know how to go down hills. The most important
thing to know is this: let your engine do some of the
slowing down. Shift to a lower gear when you go
down a steep or long hill.
A CAUTION:
If you don’t shift down, your brakes could get
so hot that they wouldn’t work well. You would
then have poor braking or
even none going
to
down a hill. You could crash. Shift down let
your engine assist your brakes
on a steep
downhill slope.
Coasting downhill in NEUTRAL (N) or with the
ignition off is dangerous. Your brakes will have to
do all the workof slowing down. They could get so
hot that they wouldn’t work well. You would then
have poor braking oreven none going down a hill.
You could crash. Always have your engine running
and your vehicle in gear when you go downhill.
a Know how to go uphill. You may want to shift down
to a lower gear. The lower gears help cool your engine
and transaxle, and you can climb the
hill better.
stay in ymr w - nlam when dzivi-ng $wc?-l-ane
roads in hills or mountains. Don’t swing wide or cut
across the center of the road.Drive at speeds that let
you stay in your own lane.
a As you go over the top of a hill, be alert. There
could be something in your lane, like a stalled car
or an accident.
a You may see highway signs on mountains that warn of
special problems. Examplesare long grades, passing or
no-passing zones, a falling rocks area or winding
roads. Be alert to these and take appropriate action.
4-23
Winter Driving
Here are some tips for winter driving:
0
Have your Pontiac in good shape for winter.
0
You may want to put winter emergency supplies in
your trunk.
b
Include an ice scraper, a small brush or broom, a supply
of windshield washer fluid, a rag, some winter outer
clothing, a small shovel, a flashlight, a red cloth and a
couple of reflective warning triangles. And, if you will
be driving under severe conditions, include a small bag
of sand, a piece of old carpet or a couple of burlap bags
to help provide traction. Be sure you properly secure
these items in your vehicle.
Driving on Snow or Ice
Most of the time, those placeswhere yourtires meet the
road probably have good traction.
However, if there is snow orice between your tires and
the road, you can have a very slippery situation. You’ll
have a lot less traction or “grip” and will need to be
very careful.
What’s the worst time for this? “Wet ice.” Very cold
snow or ice can be slick and hard to drive on. But wet
ice can be even more trouble because it may offer the
least traction of all. You can get wet ice when it’s about
freezing (32”F; 0 C ) and freezing rain begins to fall.
Try to avoid driving on wet ice until salt and sand crews
can get there.
O
Whatever the condition -- smooth ice, packed,blowing
or loose snow -- drive with caution.
If you have the Enhanced Traction System, keepthe
system on. It will improve your ability to accelerate
when driving on a slippery road. Even though your
vehicle has this system, you’ll want to slow down and
adjust your driving to the road conditions. See
“Enhanced Traction System” in the Index.
If you don’t have the Enhanced Traction System,
?..
accelerate gently.Try not to break the fragile traction. If
you accelerate too fast, the drive wheels will spin and
polish the surface under the tires even more.
4-25
Your anti-lock brakes improve your vehicle’s stability
when you makea hard stop ona slippery road. Even
though you have the anti-lockbraking system, you’ll
want to begin stopping soonerthan you would on dry
pavement. See “Anti-Lock” in the Index.
0
Allow greater following distance on any slippery road.
0
Watch for slippery spots. The road might be fine
until you hit a spot that’s covered with ice. On an
otherwise clear road,ice patches may appear in
shaded areas where the suncan’t reach: around
clumps of trees, behind buildings or under bridges.
Sometimes the surface of a curve or an overpass may
remain icy when the surrounding roads are clear. If
you see a patch of ice ahead of you, brake before you
are on it. Try not to brake while you’re actually on
the ice, and avoid sudden steering maneuvers.
If You’re Caught in a Blizzard
I
If you are stopped by heavy snow, you could be in a
serious situation.You shouId probabiy stay with yum
vehicle unless you know for sure that you are near help
and you can hike through thesnow. Here are some
things to do to summon help and keep yourself and your
passengers safe:
0 Turn on your hazard flashers.
4-26
0
Tie a red cloth to your vehicle to alert police that
you’ve been stopped by the snow.
0
Put on extra clothing or wrap a blanket around you.
If you have no blankets orextra clothing, make body
insulators from newspapers, burlapbags, rags, floor
mats -- anything you can wrap around yourself or
tuck under your clothing to keepwarm.
A CAUTION:
Snow can trap exhaust gases under
your vehicle.
This can cause deadly CO (carbon monoxide)
gas
to get inside. CO could overcome you and kill
you. You can’t see it or smell it, so you might not
know it is in your vehicle. Clear away snow from
around the baseof your vehicle, especially any
that is blocking your exhaust pipe. And check
around again from time to timebetosure snow
doesn’t collect there.
Open a window just a little on the sideof the
vehicle that’s awayfrom the wind. This
will help
keep CO out.
/
You can run the engine to keep warm, but be careful.
Run your engine only as long as you must. This saves
fuel. When you run the engine, make it go a little faster
than just idle.That is, push the accelerator slightly. This
uses less fuel for theheat that you get and it keeps the
battery charged. You will need awell-charged battery to
restart the vehicle, and possibly for signalinglater on
with your headlamps. Let the heater run forawhile.
4-27
Then, shut the engine off and close the window almost
all the way to preserve the heat. Start the engine again
and repeat this only when you feel really uncomfortable
from the cold. But do itas little as possible. Preserve the
fuel as long as you can. To help keep warm,you can get
out of the vehicle and do somefairly vigorous exercises
every half hour orso until help comes.
Recreational Vehicle Towing
You can tow your vehicle behind another vehicle for use
at yourdestination. Be sure to use proper towing
equipment designed for recreational towing. Follow the
instructions for the towing equipment.
Towing Your Vehicle from the Front
(With a Dolly)
4-28
Follow these steps:
1. Put the front wheels on a dolly.
2. Set the parking brake.
3. Open the fuse panel on the driver’s side of the
instrument panel. Remove the fuse labeledCLS/PICM.
This will keep your battery fkom draining while towing.
4. Turn the ignition key to OFF to unlock the steering
wheel, see “Ignition Switch” in the Index.
5. Clamp the steering wheel in a straight-ahead position
with a clamping device designedfor towing.
6. Release the parking brake.
When you are finished towing, makesure you replace
the CLS/PCM fuse in the instrument panelfuse block.
Towing Your Vehicle from the Front
(Four-Speed Automatic or Five-Speed
Manual Transaxles Only)
3. Open the fuse panelon the driver’s side of the
You may tow yourvehicle withall four wheels on theg o m d
if you have a four-speed automatic or a five-speed manual
transaxle. Follow these steps:
4. Shift your transaxle to NEUTRAL (N).
instrument panel. Removethe fuse labeled
CLS/PCM. This will keep your battery from draining
while towing.
5. Release the parking brake.
I
I NOTICE:
Make sure that the towing speed does not exceed
55 mph (90 km/h), or your vehicle could be
badly damaged.
When you are finished towing, make sure you replace
the CLS/PCM fuse in the instrument panel fuse block.
1. Set the parking brake.
2. Turn the ignition key to OFF to unlock the
steering wheel.
4-29
Towing Your Vehicle from the Rear
Loading Your Vehicle
(m
I
OCcEF~~C$DING INFORMATION
VEHICLE CAP. WT.
FRT. CTR. RR.
TOTAL LBS.
KG
.
MAX. LOADING & GVWR SAME AS VEHICLE
CAPACITY WEIGHT
XXX
COLD TIRE
PRESSURE
SPEED
TIRE SIZE
PSI/KPa
RTG
FRT.
RR.
SPA.
IF TIRES ARE HOT, ADD 4PS1;28KPa
SEE OWNER'S MANUAL FOR ADDITIONAL
INFORMATION
NOTICE:
Do not tow your vehicle from the rear. Your
vehicle could be badly damaged and the repairs
would not be covered by your warranty.
4-30
Two labels on your vehicle show how much weight it
may properly carry. The Tire-Loading Information label
found on the rear edge of the driver's door tells you the
proper size, speed rating andrecommended inflation
pressures for the tires on your vehicle. It also givesyou
important information about thenumber of people that
can be in your vehicle and the total weight that you can
carry. This weight is called the vehicle capacity weight
and includes the weight of all occupants, cargo and all
nonfactory-installed options.
MFD BY GENERAL MOTORS CORP
DATE GVWR GAWR FRT GAWR RR
THIS VEHICLE CONFORMS TO ALL APPLICABLE U.S.FEDERAL MOTOR VEHICLE
SAFETY, BUMPER, AND THEFT PREVENTION
STANDARDS IN EFFECT ON THE DATE OF
MANUFACTURE SHOWN ABOVE.
The other label is theCertification label, found on the
rear ed-geof the driver’s dear. k tells yeu-&?egmss
weight capacity of your vehick, called the G V M
(Gross Vehicle Weight Rating). The GVWR includes
1 A CAUTION:
Do not load your vehicleany heavier than the
GVWR, or either the maximum frontor rear
GAWR. If you do, parts on your vehicle can break,
or it can change the way your vehicle handles.
These could cause youto lose control. Also,
overloading can shorten the lifeof your vehicle.
If you put things inside your vehicle -- like suitcases,
tools, packages, or anything else -- they will go as fast
ast h \ r e u gcles, E you h v e t-0 stop or tusn q.tliCuv,
.x
or if there is a crash, the.y’ll keep going.
the weight of the vehicle,all occupants, fuel and cargo.
Never exceed the GVWR for your vehicle, or the
Gross Axle Weight Rating (GAWR) for either the front
or rear axle.
And, if you do have a heavy load, you should spread it
out. Don’t carry more than 132 lbs. (60 kg) in your
vehicle’s trunk.
4-31
A CAUTION:
Things p u put inside your vehicle MR strike
and injurepeople in a sudden stopor turn, or in
a crash.
0 Put thingsin the trunkof your vehicle. In a
trunk, put themas far forward asyou can.
Try to spread theweight evenly. If you have
fold-down rear seats,you’ll find four
anchors on the back
wall of your trunk.
You can use theseanchors to tie down
lighter loads. They’re not strong enough for
heavy things,however, so put them as far
forward asyou can in the trunk.
0 Never stack heavier things, like suitcases,
inside thevehicle so that some of them are
above the topsof the seats.
e W’tIeavean unwred child restrm.iar
your vehicle.
0 When you carry something inside the
vehicle, secure it whenever you can.
0 Don’t leave a seat folded down unlessyou
need to.
4-32
Towing a Trailer (Models with
2.4L Engine and 4-Speed
Automatic Traasde)
A CAUTION:
If you don’t use the correct equipment and drive
properly, you can lose control whenyou pull a
trailer. For example, if the trailer is too
heavy, the
brakes may not workwell or even a t all. You
and your passengers could be seriously injured.
Pull a trailer only if you have followedall the
steps in thissection. Ask your Pontiac dealer for
a trailer
advice and information about towing
with your vehicle.
9-
NOTICE:
Pulling a trailer improperlycan damage your
vehicle and result in costly repairs not covered by
your warranty. To pull a trailer correctly, follow
the advice in this part,and see your Pontiac
dealer for important information abouttowing a
trailer with your vehicle.
Do- not tow a trailer if your vehic.Ie.is. equipp-edwith a
should read the information in “Weight of the Trailer’
that appears laterin this section. But trailering is
different than just drivingyour vehicle by itself.
Trailering meanschanges in handling, durability, and
fuel economy. Successful, safe trailering takes correct
equipment, and it has to be used properly.
That’s the reason for this part. In it are many
time-tested, important trailering tips and safety rules.
Many of these are important for your safety and that of
your passengers. So please read this section carefully
before you pull a trailer.
Your vehicle can tow a trailer if it is equipped with a
Laad-punr’ng camponenrs such as ffe engine, transaxk7
wheel assemblies and tires are forcedto work harder
against the drag of the added weight. The engine is
required to operate atrelatively higher speeds and under
greater loads, generatingextra heat. What’s more, the
2.4L (Code T) engine, a four-speed automatic transaxle
and proper trailer towing equipment. To identify what
trailer adds considerably to wind resistance, increasing
the pulling requirements.
2.2L (Code 4) engine. You a h carnot taw- a trailer if
your vehicle is equipped with a manual or a three-speed
automatic transaxle, or is a convertible model.
the vehicle trailering capacity is for your vehicle, you
If You Do Decide To Pull A Trailer
If you do, here are some important points:
0
There are many different laws, including speed limit
restrictions, having to do with trailering. Makesure
your rig will be legal, not only where you live but
also where you’ll be driving. A good source forthis
information can be state orprovincial police.
0
Consider using a sway control. You can ask a hitch
dealer about sway controls.
0
Don’t tow a trailer at all during the first1,000 miles
(I 600 km) your new vehicle is driven. Your engine,
axle or other parts could be damaged.
0
Tmee importanT considemtims kave ‘to do with =w-ighc
the weight of the trailer,
the weight of the trailer tongue
and the total weight on yourvehicle’s tires.
Weight of the Trailer
Your vehicle can townormally up to 1,000 lbs. (450 kg).
It depends on how you plan to use your rig. For
example, speed, altitude, road grades, outside
temperature and how much your vehicle is used to pull a
trailer are all important. And, it can also depend on any
special equipment that you have on yourvehicle.
You can ask your dealer for our trailering information or
Then,during the first 500 miles (800 km) that you
tow a trailer, don’t drive over50 mph (80 km/h) and
don’t make starts at full throttle. This helps your
engine and other parts of your vehicle wear in at the
heavier loads.
advice, or you can write us at:
Obey speed limit restrictions whentowing a trailer.
Don’t drive faster than the maximum posted speed
for trailers (or no more than 55 mph (90 km/h)) to
save wear on your vehicle’s parts.
In Canada, write to:
Pontiac Customer Services Department
One Pontiac Plaza
Pontiac, Michigan 48340-2952
General Motors of Canada Limited
Customer Assistance Center
1908 Colonel Sam Drive
Oshawa, Ontario L1H 8P7
Weight of the Trailer Tongue
The tongue load (A) of any trailer is an important
weight to measure becauseit affects the total capacity
weight of your vehicle.The capacity weight includes the
curb weight of the vehicle, any cargo you may carry in
it, and the people who will be riding inthe vehicle. And
if you will tow a trailer, you must subtract the tongue
load from your vehicle’s capacity weight because your
vehicle will be carrying that weight, too. See “Loading
Your Vehicle” in the Index formore information about
your vehicle’smaximum load capacity.
If you’re using a weight-carrying hitch, the trailer
tongue (A) should weigh 10%of the total loaded trailer
weight (B). If you have a weight-distributing hitch, the
trailer tongue (A) should weigh 12%of the total loaded
trailer weight (B).
After you’ve loaded your trailer, weigh the trailer and
then the tongue, separately, to see if the weights are
proper. If they aren?, you may be able to get them righi
simply by moving some items aroundin the trailer.
Total Weight on Your Vehicle’s Tires
Be sure your vehicle’s tires are inflated to the
recommended pressure for cold tires. You’ll find these
numbers on the Certificationlabel at the rear edge of the
driver’s door or see “Loading Your Vehicle”in the Index.
Then be sure you don’t go over the GVW limit for your
vehicle, includingthe weight of the trailer tongue.
w
A
B
4-35
Hitches
Safety Chains
It’s important to have the correct hitch equipment.
Crosswinds, large trucks going by and rough roads are a
few reasons why you’ll need the right hitch.Here are
some rules to follow:
You should always attach chainsbetween your vehicle
and your trailer. Cross the safety chains underthe tongue
of the trailer so that the tongue will not drop tothe road
if it becomes separated from the hitch. Instructions
about safety chains may be provided by the hitch
manufacturer or by the trailermanufacturer. Follow the
manufacturer’s recommendation for attaching safety
chains and do not attach themto the bumper. Always
leave just enough slack so you can turn withyour rig.
And, never allow safety chains to drag on the ground.
Will you have to make any holes in the body of your
vehicle when you install a trailer hitch? If you do,
then be sure to seal the holes later when you remove
the hitch. If you don’t seal them, deadly carbon
monoxide (CO) from your exhaust can get intoyour
vehicle (see “Carbon Monoxide” in the Index). Dirt
andswater can, too.
The bumpers on yourvehicle are not intended
for hitches. Do not attach rental hitchesor other
bumper-type hitches to them. Use only a
frame-mounted hitch that does not attach to
the bumper.
Trailer Brakes
DSeS 3 7 Q W &Zi&!Z‘
hVC!
its OWn bE3ke.S? Be -SUX10
m d fallow irrstmrions for the tsailer brakes so yodU be
able to install, adjust and maintain them properly.
Because you have anti-lock brakes, do not try to tap into
your vehicle’s brake system. If you do, both brake
systems won’t work well, or at all.
Driving with a Trailer
Following Distance
Towing a trailer requires a certain
amount of experience.
Before setting out for theopen road, you’ll want to get
to know your rig. Acquaint yourself with the feelof
handling and braking with the added weight of the
trailer. And always keep in mind that the vehicle you are
driving is now a good deal longerand not nearly as
responsive as your vehicle isby itself.
Stay at leasttwice as far behind the vehicle ahead as you
would when driving your vehicle without a trailer. This
can help you avoid situations that require heavy braking
and sudden turns.
Before you start, check the trailer hitch and platform
(and attachments), safety chains, electrical connector,
lamps, tires and mirror adjustment. If the trailer has
electric brakes, start your vehicle and trailer moving and
then apply the trailer brake controller by hand to be sure
the brakes are working. This letsyou check your
electrical connection at the same time.
During your trip, check occasionally to be surethat the
load is secure, and that the lamps and any trailer brakes
are still working.
Passing
You’ll need more passing distance up ahead when
you’re towing a trailer. And, because you’re a good deal
longer, you’ll need to go much farther beyond the
passed vehicle before you can return to your lane.
Backing Up
Hold the bottom of the steering wheel with one hand.
Then, to move the trailer to the left, just move that hand
to the left. To move the trailer to the right, move your
hand to the right. Always back up slowly and, if
possible, have someone guide you.
4-37
Making lhrns
NOTICE:
Making very sharp turns while trailering could
cause the trailer to come incontact with the
vehicle. Your vehicle could be damaged. Avoid
making very sharp turns while trailering.
,
When you’re turning with a trailer, make wider
turns than normal. Do this so your trailer won’t
strike soft shoulders, curbs, road signs, trees or other
objects. Avoid jerky or sudden maneuvers. Signal
well in advance.
Turn Signals When Towing a Trailer
The green arrows on your instrumentpanel will flash
whenever you signal a turn or lane change. Properly
hooked up, the trailer lamps will also flash, telling other
drivers you’re about to turn, change lanesor stop.
When towing a trailer, the green arrowson your
instrument panel will flash for turns evenif the bulbs on
the trailerare burned out. Thus, you may think drivers
&hind jT43U CK
i e Seeing YQW S & d When ~ e ari3
y not, It’s
important to check occasionally to be sure
the trailer
bulbs are still working.
Driving On Grades
Reduce speed and shift to a lower gear before you start
down a long or steep downgrade.If you don’t shift
down, you might have to use your brakes so much that
they would get hotand no longer work well.
On a long uphill grade, shift down and reduce your
speed to around 45 mph (70 km/h) to reduce the
possibility of engine and transaxle overheating.
4-3s
Parking on Hills
You reaIIy should not park your vehicle, with a trailer
attached, on a hill. If something goes wrong, your rig
could start to move. People can be injured, and both
your vehicle and the trailer can be damaged.
But if you ever have to park your rig on a hill, here’s
how to doit:
1. Apply your regular brakes,but don’t shift into
PARK (P) yet.
2. Have someone place chocks under thetrailer wheels.
3. When the wheel chocks are in place, release the
regular brakes until the chocks absorb theload.
4. Reapply the regular brakes. Then apply your parking
brake, and then shift to PARK (P).
When You Are Ready to Leave After
Parking on 8 HiH
1. Apply your regular brakes and hold the pedal down
while you:
Start your engine;
0
Shift into a gear; and
Release the parking brake.
2. Let up on the brake pedal.
3. Drive slowly until the trailer is clear of the chocks.
4. Stop and have someone pick up and store the chocks.
5 . Release the regular brakes.
4-39
Maintenance When TrailerTowing
Towing A Trailer (Except Models
with 2.4L Engine and 4-Speed
Automatic Transaxle)
Your vehicle will need service more often when you’re
pulling a trailer.See the Maintenance Schedule formore
on this. Things that are especially important in trailer
operation are automatic transaxle fluid (don’t overfill),
engine Oil? bek, C C l O k i g S g m m m b tJl=akeadflmmit.
Each of these is covered in this manual, and the Index
will help you find them quickly. Ifyou’re trailering, it’s
a good idea to review these sections before you start
your trip.
Do not tow a trailer with a Sunfire if your vehicleis:
4 a cmvertible model.
e equipped with a 2.2L (Code 4) engine.
equipped with a manual transaxle or a three-speed
automatic transaxle.
Check periodically to seethat all hitch nuts and bolts
are tight.
Your Sunfire is neither designed nor intendedto tow a
trailer.
4-40
Section 5
Problems on the Road
Here you'll find what to do about some problems that
can occur on the road.
Your hazard warning flashers let you warn others. They
also let police know you havea problem. Your front and
rear turn signal lamps will flash on and off.
Hazard Warnine Flashers
c3
Move the switch to the right
to makeyour front and rear
turn signal lamps flash on
and off.
-
1
~
~
Yw-r h-a-2aFd-W A I - i - n g flashers work no matter W h t
psition your key is. in, and even if !he k y isn't Isl,
To turn off the flashers, move the switch to the left.
When the hazard warning flashers are on, your turn
signals won't work.
5-1
Other Warning Devices
If you carry reflectivetriangles, you can set one up at
the side of the road about300 feet (100m) behind
your vehicle.
Jump Starting
If your battery has run down, you may want to use
another vehicle and some jumper cables to start your
Pontiac. But please follow the steps blelow to do it safely.
A CAUTION:
Batteries can hurtyou. They can be dangerous
because:
They contain acid that can burnyou.
They contain gas that can explode or ignite.
They contain enough electricityto burn you.
If you don’t followthese stepsexactly, some or all
of these things can hurt
you.
NOTICE:
Ignoring these stepscould result in costly damage
to yourvehicle that wouldn’t be coveredby
your warranty.
Trying to startyour Pontiac by pushing or
pulling it could damage your vehicle,
even if you
have a manual transaxle. And
if you have an
automatic transaxle, itwon’t start thatway.
1. Check the other vehicle. It must have a 12-volt
battery with a negative ground system.
NOTICE:
If the other systemisn’t a 12-volt system witha
negative ground, both vehicles can be damaged.
I
2. Get the vehicles close enough so the jumper cables
can reach, but be sure the vehicles aren’t touching
each other. If they are, it could cause aground
connection you don’t want. You wouldn’t be able
to start your Pontiac, and the bad grounding could
damage the electrical systems.
You could be injured if the vehicles roll. Set the
parking brake firmly on each vehicle. Put an
automatic transaxle in PARK (P) or amanual
&m-saxlein P4EUTWAL @?)-.
3. Turn off the ignition on both vehicles. Unplug
unnecessary accessories plugged into the cigarette
lighter. Turn off all lamps that aren’t needed, as well
as radios. This will avoid sparks and help saveboth
batteries. In addition, it could save your radio!
I NOTICE:
~~~~~
~~
~~~
If you leave your radio on, it could be badly
damaged. The repairs wouldn’t be covered by
your warranty.
4. Open the hoods and locate the batteries.
A CAUTION:
An electric fan can start up even when the engine
is not running and can injure you. Keep hands,
clothing and tools away from any underhood
electric fan.
5-3
5. Find the positive (+) and negative (-) terminals on
each battery.
1
A CAUTION:
6. Check that the jumper cablesdon’t have loose or
missing insulation.If they do, you could get ashock.
The vehicles could be damaged, too.
Before you connect the cables, here are some
basic
things you should know. Positive (+) will go to
positive (+) and negative (-) will go to negative (-)
or a metal engine part.Don’t connect positive (+) to
negative (-) or you’ll get ashort that would damage
the battery and maybe other parts too.
Using a match near a battery can cause battery
this,
gas to explode. People have been hurt doing
and some have been blinded. Use a flashlight if
you need more light.
Be sure the batteryhas enough water. You don’t
CAUTION:
need to add water to the Delco Freedom@ battery
installed in every new GM vehicle. But if a
Fans or other moving engine parts can injure
you
battery has filler caps, be sure the right amount
badly. Keep your hands away from moving parts
of fluid is there. If it is low, add waterto take
: 4mce $heea*are ruaaing,
care of that first. If you don’t, expiosive gas
-.
could be present.
Battery fluid contains acid that can burn
you.
Don’t get it on you. If you accidentally get it in
your eyes or on your skin, flush the place with
water and get medical help immediately.
A
8. Don’t let the other end
touch metal. Connect
it to the positive (+)
terminal of the good
battery. Use a remote
positive (+) terminal
if the vehicle has one.
I
7. Remove the red plastic cap, and connect the red
positive (+) cable tothe positive (+) terminal
of the vehicle with the dead battery. Use a remote
positive (+) terminal if the vehicle has one.
9. Now connect the black
negative (-) cable to
the good battery’s
negative (-) terminal.
5-5
Don’t let the other end touch anything until the next
step. The other end of the negative cabledoesn’t go to
the dead battery. It goes to a heavy unpainted metal part
on the engine of the vehicle with the dead battery.
10. Attach the cable at least 18 inches (45 cm) away
from the dead battery, but not near engine parts that
move. The electrical connection is justas good
there, but the chance of sparks getting back to the
battery is much less.
11. Now start the vehicle with the good battery and run
the engine for a while.
12. Try to start the vehicle with the dead battery. If it
won’t start after a few tries,it probably needs service.
13. Remove the cablesin reverse order toprevent
electrical shorting. Take care that they don’t touch
each otheror any other metal.
A. Heavy Metal Engine Part
B. Good Battery
C. Dead Battery
Towing Your VehicIe
n
y to bye. a GM &&.r
or a pr&sSional tawing sewice
tow yourvehicle. They can provide the rightequipment
and know howto tow your vehicle withoutdamage.
If your vehicle has been changed or modified since it
was factory-new by adding aftermarket items like fog
lamps, aero skirting, or special tires and wheels, these
instructions and illustrations may not be correct.
Before you do anything, turn on the hazard
warning flashers.
When you call, tell the towing service:
That your vehicle cannot be towed with sling-type
equipment.
That your vehicle cannot be towed from the rear with
the front wheels on the ground.
That your vehicle has front-wheel drive.
The make, model and year of your vehicle.
Whether you can still move the shift lever.
If there was an accident, what was damaged.
To help avoid injuryto you or others:
Never let passengers ride in a vehicle that is
being towed.
Never tow faster than safe or posted speeds.
Never tow with damaged parts not
fully secured.
CAUTION: (Continued)
5-7
CAUTION: (Continued)
0
0
0
Never get under yourvehicle after it has
been lifted by the tow truck.
Always secure thevehicle on each side with
separate safety chainswhen towing it.
Never use J-hooks, Use T-hooks instead.
When your vehicle isbeing towed, have the ignition
key OFF. The steering wheel should beclamped in a
straight-ahead position with a clamping device designed
for towing service. Do not use the vehicle’s steering
column lock for this. The transaxle should bein
NEUTRAL (N) and the parking brake released.
5-8
A CAUTION:
A vehicle can fall from a car carrier if it isn’t
adequately secured. This cam came a -cssii-fSisI-i,
serious personal injury andvehicle damage. The
vehicle should be tightly secured with chainsor
steel cables beforeit is transported.
Don’t use substitutes (ropes, leather straps,
canvas webbing, etc.) that can be cut by sharp
edges underneath thetowed vehicle. Always use
T-hooks inserted in the T-hook slots. Never use
J-hooks. They will damage drivetrain and
suspension components.
Front Towing
Attach T-hook chains into the slots in the bottom of the
floor pan, just behind the front wheels, on both sides.
These slots are used when loading and securing to car
carrier equipment.
Before hooking up to a tow truck, be sure to read all
the information in “Towing Your Vehicle” earlier in
this section.
5-9
NOTICE:
Do not tow with sling-type equipment or
fascia/fog lamp damagewill occur. Use wheel-lift
or car carrier equipment. Additional ramping
may be required forcar carrier equipment. Use
safety chainsand wheel straps.
Towing over rough surfaces could damage
a
vehicle. Damage can occur fromvehicle to
ground or vehicle to wheel lift equipment. To help
avoid damage, installa towing dolly and raise
vehicle until adequate clearanceis obtained
between the ground and/orwheel lift equipment.
m3 Hat attack winch cabkes or J - h k s t.0
suspension components when using
car carrier
equipment. Always use T-hooks inserted the
in
T-hook slots.
Attach a separate safety chain around the outboard end
of each locn6er control a.rm.
Rear Towing
Towing dolly required under front wheels when equipped
with automatic transaxle or damagewill occw:
Before hooking up to a tow truck, be sure to read allthe
information in “Towing Your Vehicle” earlier in this
section. Also be sure to use the proper hook-up for your
particular vehicle.
Attach T-hook chains on both sides in the slotted holes
in the bottomof the frame rail just ahead of the rear
wheels. Theseslots are to be used when loading and
securing to car carrier equipment.
Place thefront wheels on a towing dolly or place the
vehicle on a car carrier.
NOTICE:
Do not tow your Sunfirefrom the rearwith the
or your transaxle can
front wheels on the ground
be damaged.Do not tow with sling-type
will be damaged. Use
equipment or rear facia
wheel-lift equipment or car carrier equipment.
Additional ramping maybe required for car
carrier equipment.Use safety chains and
wheel straps.
Towing over rough surfaces could damage
a
vehicle. Damage can occur from vehicle to
ground or vehicle to wheel-lift equipment. To
help avoidthis, install a towing dollyand raise
vehicle until adequate clearanceis obtained
between the ground and/or
wheel liftequipment.
Do not attach winch cables or
J-hooks to
suspension componentswhen using car carrier
equipment. Always use T-hooks inserted in the
T-hook slots.
I
Attach a separate safety chain to each side of the axle
inboard of the rear shock absorber attachment. (Do not
use this chain as a tie down.)
Engine Overheating
A CAUTION:
You will find a coolant temperature gage and a low
coolant warning light on your Pontiac’s instrument panel.
Steam from an overheated engine can burn
you
badly, even if you just open the hood. Stay away
from the engineif you see or hear steamcoming
from it. Just turn itoff and get everyone away
from thevehicle until it cools down. Wait until
there is nosign of steam or coolant before
opening thehood.
If you keep driving when your engine
is
overheated, the liquids in it can catch fire.
You or
others could be badly burned. Stop your engine
if
it averheats, and get out of the vehicle until the
engine is cool.
If Steam Is Coming From Your Engine
c
NOTICE:
. ...
If your engine catches fire because you keep
be
driving with no coolant, your vehicle can
badly damaged. The costly repairs would notbe
covered by your warranty.
5-13
If No Steam Is Coming From Your Engine
If you get the overheat warning but see or hear no
steam, the problem may not betoo serious. Sometimes
fne engine can get a
~ Q O
hol when you:
Climb a long hill on a hot day.
Stop after high-speed driving.
Idle for long periods in traffic.
Tow a trailer.
If you get the overheat warning with no sign of steam,
try this for a minute or so:
If the warning continues, pull over, stop, and park your
vehicle right away.
If there’s still no sign of steam, you can idle the engine
for twx3 m three minutes whik ly’0ti’l-eparked, t’0 see
if the warning stops. But then, if you still have the
warning, turn ofSthe engine and get everyone out of
the vehicle until it cools down.
You may decide not to lift the hood but to get service
help right away.
When you decide it’s safe to lift the hood, here’s what
you’ll see:
1. If you have an air conditioner, turn it off.
2. Turn on your heater to full hot at the highest fan
speed and open the window as necessary.
3. If you’re in a traffic jam, shift to NEUTRAL (N);
otherwise, shift to the highest gear while
driving -- AUTOMATIC OVERDRIVE (D)
for four-speed automatic or DRIVE (D) for
three-speed automatic transaxles.
If you no longer havethe overheat warning, you can drive.
Just to be safe, drive slower for about10 minutes. If the
warning doesn’t come backon, you can drive normally.
2.2L Engine
IQAUTION:
An electric fan under the hood canstart up even
when the engine is not running and can injure
you. Keep hands, clothing and tools away from
any underhood electric fan.
If the coolant inside the coolant surge tank is boiling,
don't do anything else until it cools down.
2.4L Engine
1
..--,r_
A. Coolant Surge Tank with Pressure Cap
B. Electric Engine Fan
.
1
,
,:.
. .
.
5-15
A CAUTION:
Heater and radiatorhoses, and other engine
parts, can be very hot. Don’t touch them.If you
do, you can be burned.
Don’t run the engineif there is a leak. If you run
the engine, itcould lose all coolant. That could
cause an enginefire, and you could be burned.
Get any leakfixed before you drive the vehicle.
The coolant level should be at the FULL COLD line. If
it isn’t, you may have a leak in the radiator hoses, heater
hoses, radiator, water pump or somewhere else in the
cooling system.
NOTICE:
If there seems to be no leak, with the engine on, checkto
see if the electric engine fan is running. If the engine is
overheating, the fan should be running. If it isn’t, your
vehicle needs service.
5-16
How to Add Coolant to the Coolant
Surge Tank
If you haven't found a problem yet, but the coolant level
isn't at the FULL COLD mark, add a 50/50 mixture of
clean water (preferably distilled) and DEX-COOL TM
antifreeze at the coolant surge tank, but be sure the
cooling system, including the coolant surge tank
pressure cap, is cool before you do it. (See"Engine
Coolant" in the Index for more .information.)
A CAUTION:
Steam and scalding liquids from a hot cooling
system can blow out and burn you badly. They are
under pressure,and if you turn thecoolant surge
tank pressure cap even a little they can come
out at high speed. Never turn the capwhen the
cooling system, including the coolant surge tank
pressure cap,is hot. Wait for the cooling system
and coolant surge tank pressurecap to cool if you
ever have to turn thepressure cap.
--
--
A CAUTION:
Adding only plain water to your cooling system
can be dangerous. Plain water, orsome other
liquid like alcohol, canboil before the proper
coolant mixwill. Your vehicle’s coolant warning
system is set for the proper coolantmix. With
plain water or the wrongmix, your engine could
get too hot but you wouldn’t get the overheat
and you or
warning. Your engine could catch fire
others could be burned.Use a 50/50 mix of clean
water and DEX-COOL antifreeze.
TM
5-18
t
NOTICE:
In cold weather, watercan freeze and crack the
engine, radiator, heatercore and other parts.So
use the recommended coolant.
A CAUTION:
You can be burned if you spill coolant on hot
engine parts. Coolant contains ethylene glycol
and it will burn if the engine parts are
hot
enough. Don’t spill coolanton a hot engine.
Then keep turning the
pressure cap slowly, and
remove it.
1. You can remove the coolant surge tank pressure cap
when the cooling system, including the coolant surge
tank pressure cap and upper radiator hose, is no
longer hot.Turn the pressure capslowly about
one-quarter turn to the leftand then stop.
If you hear ahiss, wait for thatto stop. A hiss means
there is still some pressure left.
5-19
3. Then fill the coolant surge tank with the proper mix,
up to the FULL COLD mark.
4. With the coolant surge tank pressure cap off, start
the engine and let it m until you can feel the upper
radiator hose getting hot.Watch out for the engine fan.
By thistime, the coolant level inside the coolant surge
tank may be lower. If the level is lower,add more of the
If a Tire Goes Flat
proper mix to the coolant surge tank until the level
reaches the FULL COLD mark.
It’sunusual for a tire to “blow out’’while you’re driving,
especially if you maintain your tires properly. If air goes
out of a tire, it’s much more likely to leak out slowly.
But if you should ever have a “blowout,” here area few
tips about what to expect and what to do:
If a front tire fails, the flat tire will create a drag that
pulls the vehicle toward that side. Take your foot off the
accelerator pedal and grip the steering wheel firmly.
Steer to maintain lane position, and then gently brake to
a stop well out of the traffic lane.
5. Then replace the
pressure cap. Be sure the
pressure cap is tight.
:.
,
,*
9
,
__
I
..
,
“’.
.
?
4
.,
~,
:
,
%$
,,
1
,I
.
;. ; -.;
’
.
.
--,, .
.
,.
,
.1
.;...
.., .
, .._(
~,>$,...
i
,. ,.
..
.
. .
I
, :., .:
. . . ..-.
5-21
A rear blowout, particularly on a curve, acts much like a
skid and may require the same correction you’d use in a
skid. In any rear blowout, remove your foot from the
accelerator pedal. Get thevehicle under control by
steering the way you want the vehicle to go. It may be
very bumpy and noisy, but youcan still steer. Gently
brake to a stop-- well off the road if possible.
If a tire goes flat, the next part shows how to use your
jacking equipment to change a flat tire safely.
. .!. .
Changing a Flat Tire
If a tire goes flat, avoid further tireand wheel damage
by driving slowly to a level place. Turn on your hazard
warning flashers.
A CAUTION:
Changing a tire can causean injury. The vehicle
cam slip -offthe jaek and d
l over yeti 8F &k
people. You and they couldbe badly injured.
tire. To help
Find a level place to change your
prevent the vehicle from moving:
1. Set the parking brake firmly.
2. Put an automatic transaxle shift lever in
PARK (P), or shift a manual transaxle to
FIRST (1) or REVERSE(R).
3. Turn off the engine.
To be even more certain the vehicle won’t move,
you can put blocks at the front and rear
of the
tire farthest away from the one being changed.
of the
That would be the tire on the other side
vehicle, at the opposite end.
Removing the Spare Tire and Tools
The equipment you’ll needis
.. .
R “ ’
“?yq
in the trunk. Turn the center
retainer nuton the compact
spare cover counterclockwise
to remove it.
Lift and remove the tire cover. See “Compact Spare
Tire” later in this section for more information about the
compact spare.
The following steps will tell you how to use the jack and
change a tire.
5-23
Remove the jack and the wheel. wrench f r ~ m
the W,
Your vehicle's jack and wheel wrench are stored in a
foam tray. Remove the band aroundthe jack.
A
A
A
c
B
Turn the wing nut
counterclockwise and
remove it. Then lift off
the adapter and remove
the spare tire.
The toolsyou'll be using include the jack (A) and wheel
wrench (B).
Removing the Flat Tire and Installing the
Spare Tire
18” (46cm)
1, Using the wheel wrench, remove the plastic cap nuts
(if your vehicle is so equipped) and loosen all the
wheel nuts. Don’tremove the wheel nuts yet. On
some models, a cover platemust be removed to find
the wheel nuts. Carefully usethe wedge end of the
wheel wrench to pry it off.
18“ (46cm)
2. Near each wheel well is a notch in the frame which
the jack head fits in. The frontnotch is 9 inches
(23 cm) back from the front wheel well. The rear
notch is 8 inches (20 cm) forward from therear
wheel well. If your vehicle hasflared side moldings,
both front and rear notches are 18 inches (46 cm)
from the wheel wells.Position the jack underthe
vehicle. Raise the jack head until it fits firmly into
the notch in thevehicle’s frame nearest the flattire.
Put the compact spare tirenear you.
5-25
A CAUTION:
~~
Getting under a vehicle when itis jacked up is
dangerous. If the vehicle slipsoff the jack,you
could be badly injured orkilled. Never get under
a vehicle when it is supported only by a jack.
~~
~
NOTICE:
Raising your vehicle with the jack improperly
positioned will damage the vehicle or may allow
the vehicle tofall off the jack.Be sure to fit the
jack lift head into the properlocation before
raising your vehicle.
NOTICE:
Do not jack orlift the vehicle usingthe oil pan.
Pans could crack and begin to leak fluid.
>
5-26
3. Raise the vekick by rotating the wheel. wench
clockwise. Raisethe vehicle far enough off the ground
so there is enough room for the spare tire to fit.
4. Remove all of the wheel nuts.
6 . Remove any rust or dirt
from the wheel bolts,
mounting surfaces and
spare wheel.
5. If you have a wheel cover, use your fingers to
carefully pry the wheel cover from the wheel. Then
remove the flat tire.
Rust or dirt on thewheel, or on the parts to
which it is fastened, can make the wheel nuts
come
become looseafter a time. The wheel could
off and cause an accident.
When you change a
wheel, remove any rustor dirt from theplaces
where thewheel attaches to thevehicle. I n a n
emergency, you can use a cloth or a paper towel
to do this; butbe sure touse a scraper or wire
brush later, if you need to, to get all the
rust or
dirt off.
5-27
A CAUTION:
Never use oil or grease on studs or nuts. Ifyou
do, the nuts might come loose. Your wheel could
fall off, causing a serious accident.
7. Replace the wheel nuts
with the rounded end
of the nuts toward the
wheel. Tighten each nut
by hand until the wheel
is held against the hub.
L
8. Lower the vehicle by rotating the wheel wrench
counterclockwise. Lower the jack completely.
5-28
9. Tighten the wheel nuts
firmly in a criss-crcw
sequence, as shown.
~
-
NOTICE.:
Improperly tightened wheel nuts can
read to
brake pulsation and rotor damage.
To avoid
expensive brake repairs, evenly tighten the
wheel
nuts in the proper sequence and to the proper
torque specification.
Don’t try to put a wheel cover on your compact spare
tire. It won’t fit. Store the wheel cover and plastic caps in
the trunk until you havethe flat tire repaired or replaced.
A CAUTION:
Incorrect wheel nuts or improperly tightened
wheel nuts can cause the wheel to become
loose
and even come off. This could lead to an accident.
Be sure touse the correct wheel nuts. you
If have
Qareplace-them, be
to get ne- GM original
equipment wheel nuts.
Stop somewhere assoon as you can and have the
nuts tightened witha torque wrench to100 lb-ft
(140 N-m).
S
m
~
.
I NOTICE:
r
~~
~~~
~~~
~
Wheel covers won’t fit on your compact spare.
If you try to puta wheel cover on your compact
Spare, y m collld damage the C D W F w the spare.
5-29
1
Storing the Flat Tire and Tools
1 A CAUTION:
e\
H
B
A
Storing a jack, a tire orother equipment in the
passenger compartment of the vehiclecould
cause injury. In a sudden stop or collision, loose
equipment could strike someone. Store all these
in the proper place.
A. Wrench
E. Extension
F. Wing Bolt
B. Jack
C . Flat Road Tire
G. Cover
D. Adapter
H. Nut
Store the flat tire in the compact spare tire compartment
and secure with the adapter, wingbolt and extension
(If rquired).Smre &e *k a d wheel wrench in &e
foam tray.
Storing the Spare Tire and Tools
I A CAUTION:
F
B
I.
Storing a jack, a tireor other equipment in the
passenger compartmentof the vehicle could
cause injury. In asudden stop or collision, loose
equipment could strike someone. Store all these
in the proper place.
The compact spare is for temporary use only. Replace
the compact spare tire with a full-size tire as soon as you
can. See “Compact Spare Tire” next in this section.
A. Wrench
E. Wing Bolt
B. Jack
F. Cover
G. Nut
C. Spare Tire
D. Adapter
5-31
Compact Spare Tire
Although the compact spare tirewas fully inflated when
your vehicle was new,it can lose air after a time. Check
the inflation pressure regularly. It should be 60 psi
(420 P a ) .
After installing the compact spare onyour vehicle, you
should stop assoon as possible and make sure your
spare tire is correctly inflated. The compact spare is
made to perform well at posted speed limits for
distances up to 3,000 miies (5 880 km), so yun can
finish your trip and have your full-size tire repaired m
replaced where you want. Of course, it’s bestto replace
your spare with a full-size tire as soon as you can.
Your spare will last longer and be in good shape in
case you need it again.
I NOTICE:
When the compact spare
is installed, don’t take
your vehicle through an automatic
car wash with
guide rails. The compact spare can get caught on
the rails. That can damage the tire and
wheel,
of your vehicle.
and maybe other parts
Don’t use your compact spare on other vehicies.
And don’t mix your compact spare tire or wheel with
other wheels or tires. They won’t fit. Keep your spare
tire and its wheel together.
NOTICE:
Tire chainswon’t fit your compact spare.
Using
them can damageyour vehicle and can damage
the chainstoo. Don’t use tire chains on your
compact spare.
If You’re Stuck: In Sand, Mud,
Ice or Snow
What you don’t want to dowhen your vehicle is stuck is
to spin your wheels too fast.The method known as
“rocking” can help you get out when you’re stuck, but
you must use caution.
NOTICE:
Spinning your wheels can destroy parts
of your
vehicle aswell as thetires. If you spin the wheels
too fast while shifting your transaxle back and
forth, you can destroy your transaxle.
For information about using tire chains on your vehide,
see “Tire Chains” in the Index.
If you let your tires spin at high
speed, they can
explode, andyou or otherscould be injured. And,
of the vehicle can
the transaxle or other parts
overheat. That could cause an
engine
compartment fire or other damage. When
you’re
stuck, spinthe wheels as little as possible. Don’t
spin the wheels above 35 mph (55 km/h) as shown
on the speedometer.
I
Rocking your vehicle to getit out:
First, turn your steering wheelleft and right. That will
clear the area around yourfront wheels. If your vehicle
has the Enhanced TractionSystem, you should turn the
system off. (See “Enhanced TractionSystem” in the
Index.) Then shift back and forth between REVERSE (R)
and a forward gear (or with a manual transaxle, between
FIRST (1) or SECOND (2) and REVERSE (R)),
spinning the wheels as little as possible. Release the
accelerator pedal while you shift, and press lightly on the
accelerator pedal whenthe transaxle is in gear. If that
doesn’t get you out after a few tries, you may need to be
towed out. If you do need to be towed out, see “Towing
Your Vehicle” in the Index.
5-33
NOTES
5-34
Section 6 Service and Appearance Care
~
~
~~~
Here you will find information about the careof your
Doing Your Own Service Work
Pontiac. This section begms with service and fuel
information, and then it shows how to check important fluid If you want to do some of your own service work, you’ll
want to get the proper Pontiac Service Manual. It tells
and lubricant levels. There isalso technical information
to its appearance care. you much more about how toservice your Pontiac than
about your vehicle, and a part devoted
this manual can. To order the proper service manual, see
“Service and Owner Publications” in the Index.
Service
Your Pontiac dealer knows your vehicle best and wants
you to be happy with it. We hope you’ll go to your
deatIe7 fbr a11 yonr sei-ike rxxxfs. y-it1711g& gefi-ukieGM
parts and GM-trained and supported service people.
We hope you’ll want to keep your GM vehicle all GM.
Genuine GM parts have one of these marks:
Your vehicle has an airbag system. Before attempting to
do your own servicework, see “Servicing Your Air
Bq-EqtE~qpedPmtiac” in- t k I d e x .
You should keep a record with all parts receipts and
list the mileage andthe date of any service work you
perform. See “Maintenance Record” in the Index.
6-1
A CAUTION:
You can be injured and your vehicle could be
damaged if you tryto do service work on a
vehicle without knowing enough about it.
Be sure you have sufficient knowledge,
experience, and the proper replacement
parts and tools before you attempt any
vehicle maintenance task.
0 Be sure to use the proper nuts, boltsand
other fasteners. “English” and “metric”
fasteners canbe easily confused. If you use
the wrong fasteners, parts can later break
or fall off. You could be hurt.
Fuel
Use regular unleaded gasoline rated at87 octane or higher.
A< a ~ ~ ~ R WitT~ ZMI1, -md t ~ @ € k a t h ASTk?
~
D48 14 in the United States and CGSB 3.5-M93 in Canada.
Improved gasoline specifications have been developed
by
the American Automobile Manufacturers Association
(AAMA) for better vehicle performance and engine
protection. Gasolines meeting the AAMA specification
6-2
could provide improved driveability
and emission control
system protection compared to othergasolines.
Be surethe posted octane is at least 87. If the octane is
less than 87, you may get a heavy knockingnoise when
you drive. If it’s bad enough, it can damageyour engine.
If you’re using fuel rated at 87 octane or higher and you
still hear heavy knocking, your engineneeds service.
But don’t worry if you hear a little pinging noise when
you’re accelerating or driving up a hill. That’s normal,
and you don’t have to buy a higher octane fuelto getrid
of pinging. It’s theheavy, constant knock that means
you have a problem.
If your vehicle is certified to meet California Emission
Standards (indicated on the underhoodtune-up label),
it is designed to operate on fuelsthat meet California
specifications. If such fuels are notavailable in states
adopting California emissions standards,your vehicle
will operate satisfactorily on fuelsmeeting federal
specifications, but emission control system performance
may be affected. The malfunction indicator lamp on
y a r ins&l2w”atp
n
e
may
l t-gma 2 and/m y@!rvehicle.
may fail a smog-check test. If this occurs, return to your
authorized Pontiac dealer for diagnosis
to determine the
cause of failure. In the event it is determined that the
cause of the condition is the typeof fuels used,repairs
may not be covered by your warranty.
In Canada, some gasolines contain anoctane enhancing
additive called MMT. If you use such fuels, your
emission control system performancemay deteriorate
and the malfunction indicator lampon your instrument
panel may turn on. If this happens, return POyour
authorized Pontiac dealer for service.
To provide cleaner air, all gasolines are now required to
contain additives that willhelp prevent deposits from
forming in your engine and fuel system, allowing your
emission control system to function properly. Therefore,
you should not have to add anything to the fuel. In
addition, gasolines containing oxygenates, such as ethers
and ethanol, and reformulated gasolines may be
available in your area to help cleanthe air. General
Motors recommends that you use these gasolines if they
comply with the specifications described earlier.
NOTICE:
Fuels in Foreign Countries
If you plan on driving in another country outside the
U-nited-States 0-rC2-nada, the-p-ropr€!El-ma-y be-hxd tofind, Never use leaded gasoline or any other fuel not
recommended inthe previous text onfuel. Costly repairs
caused by use of improper fuel wouldn’t be covered by
your warranty.
To check onfuel availability, ask an auto club, or
contact a major oil company that does business in the
country where you’ll be driving.
You can also write us at the following address for
advice. Just tell us where you’re going and give your
Vehicle Identification Number (VIN).
General Motors Overseas Distribution Corporation,
North American Export Sales (NAES)
1908 Colonel Sam Drive
Oshawa, Ontario L1H 8P7
Y e w vehkle was net &signed for €
W
$hat
l
contains methanol. Don’t useit. It can corrode
metai parts inyour fuel system and also damage
plastic and rubber parts.That damage wouldn’t
be covered underyour warranty.
6-3
Filling Your Tank
A CAUTION:
Gasoline vaporis highly flammable. It burns
violently, and that can cause very bad injuries.
Don9tsmoke if you’re near gasoline or refueling
your vehicle.Keep sparks, flames and smoking
materials away from gasoline.
The cap is behind a hinged door onthe right side of
your vehicle.
While refueling, hang the cap inside the fuel door.
To take off the cap, turn it slowly to the left
(counterclockwise).
A CAUTION:
If you get gasoline on yourself and then
something ignites it,you could be badly burned.
Gasoline can spray out
on you if you open the
fuel filler captoo quickly. This spray can happen
if your
is ~ e a r w
full, and is more like@ in
hot weather. Open the fuel filler cap
slowly and
wait for any “his” noise to stop, Then unscrew
the cap all the
way.
Be careful notto spill gasoline. Clean gasoline from
painted surfaces as soon as possible. See “Cleaning the
Outside of Your Pontiac” in the Index.
When you put the capback on, turn it to the right until
you hear at least three clicks. Make sure you fully install
ihe cap. The diagnostic system can determine if the fuel
cap has been left off or improperly installed. This would
allow fuel to evaporate into theatmosphere. See
“Malfunction Indicator Lamp” in the Index.
-
NOTZC-E:
If you need a new cap, be sure to get the right
type. Your dealer can get one for
you. If you get
the wrong type, it may not fit or have proper
venting, and your fuel tank and emissions system
might be damaged.
6-5
Checking Things Under the Hood
A CAUTION:
An electric fan under the hood can start up and
injure you even when the engineis not running.
Keep hands, clothing and tools
away from any
I
underhood electric fan.
A CAUTION:
~~~
-
Things that burn can get
on hot engine parts and
start a fire. These include liquids like gasoline,
oil, coolant, brake fluid, windshield washer and
You or others
other fluids, and plastic or rubber.
could be burned. Be careful not
to dropor spill
things that will burn onto a hot
engine.
Hood Release
The following sections tellyou how to check fluids,
lubricants and important parts underhood.
To open the hood, first
pull the handle inside
the vehicle.
Lift the hood, release the
hood prop from its retainer
and put the hood prop into
the slot in the hood.
Use the proprod sleeve
when handling the prop rod.
.
Then go to the front of the vehicle and lift up on the
secondary hood release lever, The secondary hood
release lever is located near the front center of the hood
towards the driver’s side.
Lubricate the hood latch at least once a year.
Before closing the hood, be sure all the filler caps are on
properly. Then lift the hood to relieve pressure on the
hood prop. Remove the hood prop from the slot in the
hood and return the prop to its retainer. Lower the hood
8 to 10 inches (20 to 25 cm) above the vehicle and
release to latch fully. Check to make sure the hood is
closed and repeat if necessary.
6-7
2.2L Engine (Code 4)
When you open up the hood you’ll see:
A. Coolant SurgeTank
B. Power Steering Fluid Reservoir
C. Automatic Transaxle Fluid
Dipstick (if equipped)
D. Engine Oil Fill CapDipstick
E. Brake Fluid Reservoir
E Hydraulic Clutch Fluid
Reservoir (if equipped)
G. Air Cleaner
H. Battery
I. Windshield Washer
Fluid Reservoir
2.4L Engine (Code T)
When you open up the hood you’ll see:
A.
B.
C.
D.
Coolant Surge Tank
Engine Oil Fill Cap
Engine Oil Dipstick
Power Steering Fluid Reservoir
E. Brake Fluid Reservoir
F. Hydraulic Clutch Fluid
Reservoir (if equipped)
G . Battery
H. Air Cleaner
I. Windshield Washer
Fluid Reservoir
6-9
Engine Oil
CHECK
OIL
If the CHECK OIL light on
the instrument panel comes
on, it means you need to
check your engine oillevel
right away. For more
information, see “Check Oil
Light” in the Index. You
should check your engine
oil levelregularly; this is
an added reminder-
It’s a good idea to check your engine oil every time you
get fuel. In order to get an accurate reading, the oil must
be warm and the vehicle must be on level ground.
If you have a 2.4L engine, the dipstick handle is a
yellow ring.
Turn offthe engine and give the oil a few minutes to
drain back into the oil pan. If you don’t, theoil dipstick
might not show the actual level.
Checking Engine Oil
Pull out the dipstick and clean itwith a paper towel or
cloth, then push it back in all theway. Remove it again,
keeping the tip down, and check the level.
NOTICE:
Don’t addtoo much oil. If your engine has so
much oil that theoil level gets above the upper
mark that shows the proper operatingrange,
your engine could be damaged.
When to Add Oil
If the oil is at or below the ADD mark, then you’ll need
to add some oil. But you must use the right kind. This
part explains what kind of oil to use.For crankcase
capacity, see “Capacities and Specifications” in
the Index.
This is where you add oil if you have a 2.2L engine.
6-11
1
What Kind of Oil to Use
Oils recommended for yourvehicle can beidentified by
looking for the “Starburst” symbol. This symbol
indicates that the oil has been certified by the American
Petrdmm IfiSIiPdtt! (Am). m ROT BSe 2Ry oil which
does not carry this Starburst symbol.
This is whereyou add oil if you have a 2.4L engine.
Just fillit enough to put the level somewhere in the
proper operating range. Push the dipstickall the way
back in when you’re through.
6-12
If you change your own oil,
be sure you use oil thathas
the Starburst symbol on the
front of the oil container. If
you have your oil changed
for you, be sure theoil put
into your engineis
American Petroleum
Institute certified for
gasoline engines.
You should also use the properviscosity oil foryour
vehicle, as shown in the following chart:
RECOMMENDED SAE VISCOSITY GRADE ENGINE OILS
FOR BEST FUEL ECONOMY AND COLDSTARTING,SELECTTHELOWEST
SAE VISCOSITY GRADE 011 FOR THE EXPECTED TEMPERATURE RANGE.
LOOK
FOR THIS
SYMBOL
HOT
WEATHER
i
OF
1
TUU:
+ 80
!I
+io/
t QO!
+ 20 -
,”
\ ‘
I
-
SAL 1OW
0-
SAE SW-30
-30
PREFERREO
As shown in the chart, SAE 5W-30 is best for your
vehicle. However, you can use SAE 1OW-30 if it’s going
to be 0°F (- 18 C) or above. These numbers on an oil
container show its viscosity, or thickness. Do not use
other viscosityoils, such asSAE 20W-50.
O
NOTICE:
Use only engine oil with the American Petroleum
Institute Certified For Gasoline Engines
“Starburst” symbol. Failure to use the
recommended oil can result in engine damage
not covered by your warranty.
GM Goodwrench@ oilmeets all the requirements for
your vehicle.
Engine Oil Additives
Don’t add anything to your oil. Your Pontiac dealer is
ready to advise if you think something should be added.
COLD
WEATHER
00 NOT USE SAE 2OW-50 OR ANY OTHER
GRADE OIL NOT RECOMMENDED
6-13
When to Change Engine Oil
What to Do with Used Oil
See if any one of these is true for you:
Did you know that used engine oil contains certain
elements that may be unhealthy for your skin andcould
even cause cancer? Don’t let used oil stay on your skin
for very long. Clean your skin and nails with soap and
water, or a good hand cleaner. Wash or properly throw
away clothing or rags containing used engine oil. (See
the manufacturer’s warnings about the use and disposal
of oil products.)
0
Most trips are less than 5 to 10 miles (8 to 16km).
This is particularly important when outside
temperatures are below freezing.
0
Most trips include extensive idling (such as frequent
driving instop-and-go traffic).
0
Most trips are through dusty areas.
0
You frequently tow a trailer or use a carrier on top of
your vehicle.
0
The vehicle is used for delivery service, police, taxi
Or OihCT C S ~ ~ 4 T C ~k&dd i C L t t C K L
Driving under these conditions causes engine oil to
break down sooner. If any oneof these is true for your
vehicle, then you need to changeyour oil and filter
every 3,000 miles (5 000 km)or 3 months -- whichever
occurs first. (See “Check Oil Light” in the Index.)
If none of them is true, change the oil and filter every
7,500 miles (12 500 km) or 12 months -- whichever
occurs first. Driving a vehicle with a fully warmed
engine underhighway conditions causes engine oil
to break down slower.
6-14
Used oil can be a real threat to the environment. If you
change your own oil, be sure to drain all free-flowing oil
from the filter before disposal. Don’t ever disposeof oil
by putting it in the trash, pouring it on the ground, into
sewers, or into streams b0die.s of water, In-stead,
recycle it by taking it to a place that collects used oil. If
you have a problem properly disposing of your used oil,
ask yourdealer, a service station or a local recycling
center forhelp.
Air Cleaner
....
The air cleaner is located on the driver’s sideof the
engine compartment near the battery.
To check or replace the filter, remove the screws that
hold the coveron andlift the cover. Be sure to reinstall
the air cleaner filter and replace the cover tightly.
Refer to the Maintenance Schedule to determine when tc
replace the air filter.
See “Scheduled Maintenance Services” in the Index.
A CAUTION:
Operating the engine with the air cleaner
off can
cause you or others tobe burned. The air cleaner
not only cleans the
air, it stops flame if the engine
backfires. If it isn’t there, and the engine
backfires, you could be burned.Don’t drive with
it off, and be careful workingon the engine with
the air cleaneroff.
Automatic Transaxle Fluid
(Except 2.4L Code T Engine)
When to Check and Change
A good time to check your automatic transaxle fluid
level is whenthe engine oil is changed.
Change both the fluid and filter every 50,000 miles
(83 000 km) if the vehicle is mainly driven under
one or
more of these conditions:
4
h k w y city tra€€kwhere the outside temperature
regularly reaches 90°F (32°C) or higher.
In hilly or mountainous terrain.
NOTICE:
When doing frequent trailer towing.
Uses such as found in taxi, police or delivery service.
If the air cleaneris off, a backfire can cause a
damaging engine fire.And, dirt caneasily get
into yourengine, which will damage it. Always
have theair cleaner in placewhen you’re driving.
If you do not use your vehicle under any of these
conditions, thefluid and filter donot require changing.
See “Scheduled Maintenance Services” in the Index.
How to Check
Because this operation can be alittle difficult, you
may choose to have thisdone at your Pontiac dealership
Service Department.
If you do it yourself, be sure tofollow all the instructions
here, or you could get a false readingon the dipstick.
NOTICE:
Too much or too little fluid can damage your
transaxle. Too much can mean thatsome of the
fluid could come out and fall onhot engine parts
or exhaust system parts, startinga fire. Be sure to
get an accurate reading if you check your
To get theright reading, the fluid should be at normal
operating temperature, which is 180°F to 200°F
(82°C to 93°C).
Get the vehicle warned up by driving about 15 miles
(24 km) when outside temperatures are above 50°F
(10°C). If it's colder than 50°F (lO°C), you may '
have to drive longer.
Checking the Fluid Level
Park your vehicle on a level place. Keep the engine
running.
With the parking brake applied, place the shift lever
in PARK (P).
With your foot on the brake pedal, move the shift
lever through each gear range, pausing for about
three seconds in each range. Then, position the shift
lever in PARK (P).
transaxle fluid.
Wait at least 30 minutes before checking the transaxle
fluid levelif you have been driving:
*
9
Let the engine run at idle for three to five minutes.
IVhm m t g i d e L ~ x ~ & i
abd
~e 90°F
~
(32 "Q.
At high speed for quite a while.
In heavy traffic -- especially in hot weather.
While pulling a trailer.
I
6-17
Then, without shutting off the engine, follow these steps:
/
The handle on the
transaxle dipstick is
a red ring. Pull out
the dipstick and
wipe it with a clean
rag or paper towel.
2. Push it back in all the way, wait three seconds and
then pull it back out again.
6-18
3. Check both sides of
the dipstick, and read
the lower level. The
fluid level must be in
the cross-hatched
area.
4. If the fluid level is in the acceptable range, push the
dipstick back in all the way.
How to Add Fluid
Refer to the Maintenance Schedule to determine what
kind of transaxle fluid to use. See“Recommended
Fluids and Lubricants” in the Index.
If the fluid levelis low, add only enough of the proper
fluid to bring the level into the cross-hatched area on
the dipstick.
1. Pull out the dipstick.
2. Using a long-neck funnel, add enough fluid at the
dipstick hole to bringit tothe proper level.
It doesn’t take much fluid, generally less than a pint
(OSL). Don’t overfill. We recommend you use only fluid
labeled DEXRON@-111,because fluid with that
label is madeespecially for your automatic transaxle.
Damage caused by fluid other than DEXRON@-111is
not covered by your newvehicle warranty.
0
After adding fluid, recheck the fluid level as
described under “How to Check.”
0
When the correct fluid level is obtained, push the
dipstick back in allthe way.
Automatic Transaxle Fluid
(2.4L Code T Engine Only)
If you have the optional 2.4L Code T engine (see
“Engine Identification” in the Index) andan automatic
transaxle, it is not necessary to check the transaxle fluid
level. A transaxle fluid leak is the only reasonfor fluid
loss. If a leak occurs, take the vehicle to yourPontiac
dealer Service Department and have it repaired as soon
as possible. You may also have your fluid levelchecked
by your dealeror service center when you have your
oil changed.
Manual Transaxle Fluid
When to Check
A good time to have it checked is when the engine oil is
changed. However, the fluid in your manual transaxle
doesn’t require changing.
6-19
How to Check
Because this operation can be a little difficult, you
may choose to have this done at yourPontiac dealership
Service Department.
If you do it yourself,be sure tofollow all the instructions
here, or you could get afalse reading on the dipstick.
NOTICE:
Too much or too little fluid can damage your
transaxle. Too much can mean that some of the
fluid could come out and fall on hot engine parts
w exhaust system parts, starting a fire. Be sure te
get an accurate reading if you check your
transaxle fluid.
Check the fluid levelonly when your engine is off, the
vehicle is parked on a level place and the transaxleis cool
enough for you to rest your fingers on the transaxlecase.
6-20
Then, follow these steps:
1. The manual
transaxle dipstick is
located below the
brake master
cylinder, near the
rear of the transaxle
case. Flip the handle
up and then pull out
the dipstick and
clean it with a rag or
paper towel.
How to Add Fluid
Here’s how to add fluid. Refer to the Maintenance
Schedule to determine what kind of fluid to use. See
“Recommended Fluids and Lubricants” inthe Index.
1. Remove the dipstick by flipping the handle up and
then pulling the dipstick out.
2. Add fluid at the dipstick hole.
Add only enough fluid to bring the fluid level up to
the FULL mark on the dipstick.
3. Push the dipstick back in all the way; then flip the
handle down to lock the dipstick in place.
3. Check both sides of the dipstick and read the lower
level. The fluidlevel must be between the ADD and
FULL marks. (Note: Fluid may appear at the bottom
of the dipstick evenwhen the fluid levelis several
pints low.)
4. If the fluid level is where it should be,push the
dipstick back inall the wayand flipthe handle
down. If the fluid level islow, add more fluid as
described in the next steps.
Hydraulic CIutch
The hydraulic clutch linkage in your vehicleis
self-adjusting. The clutch master cylinder reservoir is
filled with hydraulicclutch fluid.
It isn’t a good idea to “top off’ your clutchfluid. Adding
fluid won’t correct a leak.
A fluid loss inthis system could indicate a problem.
Have the system inspected and repaired.
6-21
When to Check and What to Use
Engine Coolant
The cooling systemin your vehicle is filled with new
DEX-030L (orange-colored, silicate-fke)engine
coolant. This coolant is designed to remain in your
vehicle for 5 years or 100,000 miles (166 000 km),
whichever occurs first.
The following explains yourcooling system and how to
add coolant when it is low. If you have a problem with
engine overheating, see“Engine Overheating” in
the Index.
A 50/50 mixture of water and the proper coolant for
your Pontiac will:
0
Give freezing protection down to -34°F (-37°C).
Give boiling protection up to 265 OF ( 129 C ) .
0
Protect against rust and corrosion.
0
Refer to the Maintenance Schedule to determine how
often you should check the fluid level in your clutch
master cylinder reservoir and for the proper fluid. See
“Owner Checks and Services”and “Recommended
Fluids and Lubricants” in the Index.
How to Check
You do not need to check the fluid level unless you
suspect a clutch problem. To check the fluid level, take
the cap off. If the fluid reaches the step inside the
reservoir, the fluid level is correct.
O
Help keep the proper engine temperature.
0
Let the warning lights and gages work as they should.
NOTICE:
A CAUTION:
When adding coolant itis important thatyou use
DEX-COOL Rul (orange-colored, silicate-free)
coolant meetingGM Specification 6277M.
If silicated coolant is added to thesystem,
premature engine, heater coreor radiator
corrosion may result.In addition, the engine
coolant will require change sooner a t
30,000 miles (50 000 km) or24 months
whichever occurs first.
Adding only plain water to yourcooling system
can be dangerous. Plain water, or some other
liquid like alcohol, can boil before the proper
coolant mix will. Your vehicle’s coolant warning
system is set for the proper coolant
mix. With
plain water or the wrong
mix, your enginecould
get too hot butyou wouldn’t get the overheat
warning. Your engine could catch fire and
you or
others could be burned. Use a 50/50 mix of clean
wa*er and DEX-COOL (orange-cQlQreQ,
silicate-free) antifreeze.
--
TM
What to Use
Use a mixtureof one-half clean water (preferably
distilled) and one-half DEX-COOL (orange-colored,
silicate-free) antifreeze that meets GM Specification
6277M, which won’t damage aluminum parts. Use
GM Engine Coolant Supplement (sealer) (GM Part
No. 3634621) with any complete coolant change. If you
use this mixture, you don’t needto add anything else.
6-23
Checking Coolant
I NOTICE:
If you use an improper coolant mix, your engine
could overheat andbe badly damaged. The
repair cost wouldn’t be covered by your
warranty, Too much waterin the mix can freeze
and crack the engine, radiator, heater core and
other parts.
If you have to add coolant more than four timesa year,
have your dealer check your cooling system.
__
~~
If you use the proper coolant,you don’t have to
add extra inhibitors or additives which claim to
improve the system. These can
be harmful.
6-24
The surge tank is iocated on the passengerside of the
engine compartment.
Adding Coolant
If you need more coolant, add the proper mix at the
surge tank, but only when the engine iscool.
A CAUTION:
Turning the surge tank pressure cap
when the
engine and radiator are hot can
allow steam and
scalding liquids to blow out
and burnyou badly.
Never turn the surge tank pressure capeven a
little when the engine and radiator are
hot.
--
--
When your engine is cold,the coolant level should be at
the FULL COLD mark.
If thislight comes on, it
means you’re low on
engine coolant.
A CAUTION:
You can be burned if you spillcoolantonhot
engine parts. Coolant contains ethyleneglycol,
and it will burn if the engine parts are hot
enough. Don’t spill coolant on a hot engine.
Whenreplacing the pressure cap, make sure it istight.
See “Low Coolant Light” in
the Index.
6-25
I
Surge Tank Pressure Cap
NOTICE:
Power Steering Fluid
I
Your surge tank cap is a 15 psi (105 kPa)
pressure-type cap and must be tightly installed to
prevent coolant loss andpossible engine damage
from overheating.
When you replace your surge tank pressure cap, a GM
cap is recommended.
Thermostat
Engine coolant temperature is controlled by a thermostat
in the engine coolant system. The thermostat stops the
flow of coolant through the radiator until the coolant
reaches a preset temperature.
When you replace your thermostat, an AC@thermostat
is recommended.
6-26
~
When to Check Power Steering Fluid
Windshield Washer Fluid
It is not necessary to regularly check power steering
fluid unless y m suspect these is a leak in the system or
you hear an unusual noise. A fluid lossin this system
could indicate a problem. Have the system inspected
and repaired.
What to Use
How To Check Power Steering Fluid
When the engine compartment is ~0~01,
unscrew the cap
and wipe the dipstick with a clean rag. Replace the cap
and completely tighten it. Then remove the cap again
and look at the fluid level on the dipstick.
The level should be at the C mark. If necessary, add
enough fluid to bring the levelup to the mark.
When you need windshield washer fluid, be sure to read
the manufacturer’s instructions before use. If you will be
operating your vehicle in an areawhere the temperature
may fall below freezing, use a fluid that has sufficient
protection against freezing.
Adding Washer Fluid
Open the cap labeled
WASHER FLUID ONLY.
Add washer fluid until the
tank is full.
What to Use
Refer to the Maintenance Schedule to determine what
kind of fluid to use. See “Recommended Fluids and
Lubricants” in the Index. Always use the proper fluid.
Failure $0use the p r q w fluid e m cause leaks and
damage hoses and seals.
6-27
Brakes
Brake Fluid
0
When using concentrated washer fluid,
follow the manufacturer’s instructions for
adding water.
Don’t mix water with ready-to-use washer
fluid. Water can cause the solution
to freeze
and damage your washer fluid tank and
other parts of the washer system.Also,
water doesn’t clean as weil as washer fluid.
Fill your washer fluid tank only
3/4 full
when it’s very cold. This allows for
expansion, which could damage the tank
if it is completely full.
Don’t use radiator antifreeze in your
windshield washer. It can damage your
washer system and paint.
Your brake master cylinder
reservoir is here.It is filled
with DOT-3 brake fluid.
There areonly two reasons why the brakefluid level in the
reservoir might go down. The first is that the brake fluid
goes down to an acceptable level during normal hake
lining wear. When newlinings are put in, the fluid level
goes back up. The other reason is that fluid is leaking out
of the brake system. If it is, you should have your brake
system fixed, since a leak means that sooner or later your
brakes won’t work well, or won’t work at all.
So, it isn’t a good idea to“top off’ your brake fluid.
Adding brake fluid won’t correct a leak. If you add fluid
when your linings are worn, then you’ll have too much
fluid when you get new brake linings. You should add
(or remove) brake fluid, asnecessary, only when work is
done on the brake hydraulic system.
What to Add
When you do need brake fluid, use only DOT-3 brake
fluid -- such as Delco Supreme11 (GM Part
No. 1052535).Use new brake fluid from a sealed
container only, and always cleanthe brake fluid
reservoir cap beforeremoving it.
@
A CAUTION:
If’you have too much brake fluid, it canspill on
the engine. The fluid will burn if the engine is hot
enough. You or otherscould be burned, and your
vehicle could be damaged. Add brake fluid only
when work is done on the brake hydraulic system.
With the wrong kindof fluid in your brake
system, your brakes maynot work well, or they
may not evenwork at all. This could cause a
crash. Always use the proper brakefluid.
When your brake fluid fallsto a low level, your brake
warning light will come on. See “Brake System Warning
Light” in the Index.
6-29
A CAUTION:
NOTICE:
0
Using the wrong fluid can badly damage
brake system parts. For example, justa few
drops of mineral-based oil, such as engine
oil, in your brake system can damage brake
system parts so badly thatthey’ll have to be
replaced. Don’t let someone put in the
wrong kind of fluid.
If you spill brake fluid on your vehicle’s
be
painted surfaces, the paint finish can
damaged. Be careful not tospill brake fluid
on your vehicle. If you do, wash itoff
immediately. See “Appearance Care” in
the Index.
The brake wear warning sound means that
sooner or later your brakes won’t work
well.
That could lead to an accident. Whenyou hear
the brake wear warning sound, have your
vehicle serviced.
NOTICE:
Continuing to drive with worn-out brake pads
could result in costly brake repair.
J
Brake Wear
Your Pontiac has front discbrakes and rear drum brakesDisc brakepads have built-in wear indicators that makea
high-pitched warning sound when the brake padsare worn
and new pads are needed. The sound may come and go or
be heard all the time your vehicle is moving (except when
you are pushing on the brake pedal f d y ) .
Some driving conditions or climates may cause a brake
squeal when the brakesare first applied or
lightly
applied. This does not mean something is wrong with
your brakes.
Free movement of brake calipers and properly torqued
wheel nuts are necessary to help prevent brake
pulsation. When tires are rotated, inspectbrake calipers
for movement, brake pads forwear, and evenly torque
wheel nutsin the proper sequence to GM specifications.
If your brakepedal goes down farther than normal, your
rear drumbrakes may need adjustment. Adjust them by
backing up and firmly applying the brakes a few times.
Your rear drum brakes don’t have wear indicators, but
if
you ever hear a rear brake
rubbing noise, have the rear
brake linings inspected. Also,the rear brake drums
should be removed and inspectedeach time the tires are
removed for rotation or changing. When you have the
front brakes replaced, have the reax brakes inspected, toas
The braking system on a modern vehicle is complex.
Its many partshave to be of top quality and work well
together if the vehicle is to have really good braking.
Vehicles we design and test have top-quality GM brake
parts in them, asyour Pontiac does when it is new.
When you replace parts of your braking system -- for
example, when your brake liningswear down and you
have to havenew ones putin -- be sure you get new
genuine GM replacement parts. If you don’t, your
brakes may no longer work properly. For example, if
someone puts in brake linings that are wrong for your
vehicle, thebalance between your front and rear brakes
can change -- for the worse. The braking performance
you’ve come to expect can change
in many other ways
if someone puts in the wrong replacement brake parts.
Brake linings should always be replaced a3 complete
axle sets.
Brake Pedal Travel
See your dealer if the brake pedal does not return to
normal height, or if there is a rapid increase in pedal
travel. This could be asign of brake trouble.
Brake Adjustment
Every time you make amoderate brake stop, your disc
brakes adjust for wear. If you rarely make a moderate or
heavier stop, then your brakes might not adjust correctly.
If you drive in that way, then -- very carefully -- make
a few moderate brake stops about every 1,000miles
(1 600 km), so your brakes will adjust properly.
Replacing Brake System Parts
Battery
Every new Pontiac has a Delco Freedom@battery. You
never haveto add water to one of these. When it’s time
for a new battery, we recommend aDelco Freedom@
battery. Get one that has thereplacement number shown
on the original battery’s label.
6-31
Vehicle Storage
If you’re not going to drive your vehicle for 25 days
or more, take off the black, negative (-) cable from
the battery. This will help keep your battery from
running down.
A CAUTION:
Batteries have acid that can burn
you and gas
that canexplode. You can be badlyhurt if you
aren’t careful. See “Jump Starting” in the Index
for tips on working around a battery without
getting hurt.
Contact your dealer to learn how to prepare your vehicle
for longer storage periods.
Also, for your audio system,see “Theft-Deterrent
Feature” in the Index.
Bulb Replacement
Halogen Bulbs
A CAUTION:
Halogen bulbs have pressurized gas inside and
can burst if you drop or scratch the bulb.You or
others could be injured. Be sure to read and
follow the instructions on the bulb package.
Headlamps
For the type of bulb, see “Replacement Bulbs”in
the Index.
1. Remove the first bolt and carefully pry up the shield
that covers the headlamp assembly. Be careful not to
break the fasteners that hold the shieldin place.
2. Remove the bolt that anchors the headlamp
assembly. Pull the headlamp assembly toward the
front of the vehicle to access the bulb assembly.
3. Twist the bulb retainer one-eighth of a turn
counterclockwise and pull the bulb assembly out.
6-33
Taillamps
For the type of bulb, see “Replacement Bulbs” in
the Index.
i“
$&
I,
I
.-
c
4. Disconnect the bulb base from the socket by lifting
the plastic locking tab.
5. Snap a new bulb into the socket.
6. Replace the bulb assembly by reversing Steps 1
through 3.
1. Pull the carpet away from the rear of the trunk.
2. Remove the taillamp bulb assembly by turning it
one-quarter of a turn counterclockwise.
Windshield WiperBlade Replacement
3. To remove the bulb, pull it out.
4. Push in a new bulb.
5. Reverse all steps to replace the taillamp assembly.
Replacement blades come in different types and are
removed in different ways. For proper type and length,
see “Capacities and Specifications” in the Index. Here’s
how to remove the Sheppard’s Hook type:
1. Pull the windshield wiper
arm away from the windshield.
2. Push the release lever and slide the wiper assembly
toward the driver’s side of the vehicle.
3. Install a new blade by reversing Steps 1 and 2.
6-35
Tires
We don’t make tires. Your new Pontiac comes with
high-quality tires made by a leading tire manufacturer. If
you ever have questions a b u t your tire warranty and
where to obtain service, see your Pontiac Warranty
booklet for details.
A CAUTION:
Poorly maintained and improperly
used tires are
dangerous.
0 Overloading your tires can cause
overheating as a result
of too much friction.
You could have an air-out anda serious
accident. See ‘LLoadingYour Vehicle’’ in
the Index.
CAUTION: (Continued)
6-36
CAUTION: (Continued)
Underinflated tires pose the same dangeras
overIoaded tires.The resulting accident
could cause serious injury. Check all tires
frequently to maintain the recommended
pressure. Tire pressure should be checked
when your tiresare cold.
0 Overinflated tiresare morelikely to be
cut, punctured or broken
by a sudden
impact such as when you hit a pothole.
Keep tires at the recommended pressure.
a Worn, old tires can cause accidents.
If your
tread is badly worn, or if your tires have
been damaged, replace them.
0
--
Inflation - Tire Pressure
The Tire-Loading Information label which is on the rear
edge of the driver’s door shows the correct inflation
pressures for your tires when they’re cold. “Cold”
means your vehicle has been sitting forat least three
hours or driven no more than a mile.
NOTICE:
Den2 b-a n y m $e!%
y-txl%a$ M&!FJnn&h OF
overinflation isall right. It’s not. If your tires
don’t have enough air (underinflation),you can
get the following:
Too much flexing
Too much heat
0
0
Tire overloading
Bad wear
Bad handling
Bad fuel economy.
NOTICE: (Continued)
NOTICE: (Continued)
If your tires havetoo much air (overinflation),
you can get the following:
Unusual wear
Bad handling
Rough ride
0 Needless damage from road hazards.
- ,~ .
,
When to Check
.
.. .
..~,.
1
Check your tires oncea month or more.
Don’t forget your compact spare tire. It should be at
60 psi (420 P a ) .
How to Check
Use a good quality pocket-type gageto check tire
pressure. You can’t tell if your tires are properly inflated
simply by looking at them. Radial tires may look
properly inflated even when they’re underinflated.
Be sure to put the valve caps back on the valve stems.
They help prevent leaks by keeping outdirt and moisture.
Tire Inspection and Rotation
Tires should be inspected every 6,000 to 8,000 miles
(10 000 to 13 000 km)for any signs of unusual wear.
If unusual wear is present, rotate your tires as soon as
possible and check wheel alignment. Also check for
damaged tires or wheels. See “When It’s Time for New
Tires” and “Wheel Replacement” later in this sectionfor
more information.
When rotating your tires, always use the correct rotation
pattern shown here.
Don’t include the compact spare tire in your tirerotation.
After the tires have been rotated, adjust the front and rear
inflation pressures as shown on the Tire-Loading
Information label.Make certain that all wheel nuts are
properly tightened.See “Wheel Nut Torque” in the Index.
A CAUTION:
I-
r
I
The purpose of regular rotation is to achieve more
uniform wear for all tires on the vehicle. The first
rotation is the most important. See“Scheduled
Maintenance Services” in the Index for scheduled
rotation intervals.
6-38
1
Rust or dirt ona wheel, or on the parts to which
it is fastened, can makewheel nuts become loose
after a time. The wheel could comeoff and cause
an accident. When you change a wheel, remove
any rust or dirt fromplaces where the wheel
attaches to thevehicle. In a n emergency, you can
use a cloth ora paper towel to do this;but be
sure touse a scraperor wire brush later,if you
need to, to get all the rustor dirt off. (See
“Changing a Flat Tire” in the
Index.)
When It’s Time for New Tires
One way to tell when it’s
time for new tires is to
check the treadwear
indicators, which will
appear when your tires have
only 1/16 inch (1.6 mm) or
less of tread remaining.
0
The tread or sidewall is cracked, cut or snagged deep
enough to show cord or fabric.
The tire has a bump, bulge or split.
The tire has a puncture, cut or other damage that
can’t be repaired well because of the size or location
of the damage.
Buying New Tires
To find out what kind and size of tires you need, look at
the Tire-Loading Information label.
You need a new tire if any of the following statements
are true:
0 You can see the indicators at three ormore places
around the tire.
0
You can see cord or fabric showing through the
tire’s rubber.
The tires installed on your vehiclewhen it was new had
a Tire Performance Criteria Specification (TPC Spec)
number on each tire’s sidewall. When you get new tires,
get ones with that same TPC Specnumber. That way
your vehicle will continue tohave tires that are designed
to give proper endurance, handling,speed rating,
traction, ride and other things duringnormal service
on your vehicle. If your tires have an all-season tread
design, the TPC number will be followed by an “MS”
(for mud and snow).
6-39
If you ever replace your tires with those not having a
TPC Spec number, make sure they are the same size,
load range, speed rating and construction type(bias,
bias-belted or radial) as your originaltires.
I A CAUTION:
Mixing tires couldcause you to lose control while
driving. If you mix tires of different sizes or types
(radial and bias-belted tires), the vehicle may not
handle properly, and you could have a crash.
Using tires of different sizes may also cause
dmmige h p l L F velmida Be m e h use fie Sam&
size and type tires on all four wheels.
It’s all right to drive with your compact spare,
though. It was developed for use on your vehicle.
6-40
Uniform Tire Quality Grading
The following information relatesto the system
developed by the United StatesNational Highway
Traffic Safety Administration, which grades tiresby
treadwear, traction and temperatureperformance. (This
applies only to vehicles sold in the United States.) The
grades are molded on the sidewallsof most passenger
c a ,tires. The Uniform Tire Quality Grading system
does not apply to deep tread,winter-type snow tires,
space-saver or temporary use spare tires,tires with
nominal rim diameters of 10 to 12 inches (25 to 30 cm),
or to some limited-production tires.
While the tires available on GeneralMotors passenger
cars and h g h lxucks may vary w& respect 10 &ese
grades, they must also conformto Federal safety
requirements and additional General Motors Tire
Performance Criteria (TPC) standards.
-
Treadwear
Temperature A, B, C
The treadwear grade is a comparative rating based on
the wear rate of the tire when tested under controlled
conditions on a specified government test course. For
example, a tire graded 150 would wear one and a half
(I 1/2) times as well on the government course as a tire
graded IW.The relative gm-hmrnce of tires depends
upon the actual conditions oftheir use, however, and
may depart significantly from the norm due to variations
in driving habits, service practices and differences in
road characteristics and climate.
The temperature grades are A (the highest),B, and C,
representing the tire’s resistance to the generation of
heat and its ability to dissipate heat when tested under
controlled conditions on a specified indoor laboratory
test wheel. Sustained high temperature can cause the
rnate~alof the tire $0degenerate d redwe €ireMe, d
excessive temperature can leead to sudden tire €aihre.
The gradeC corresponds to a level of performance
which all passenger car tires must meetunder the
Federal Motor Vehicle Safety Standard No. 109. Grades
B and A represent higher levelsof performance on the
laboratory test wheel than theminimum required by law.
*action
- A, B, C
The traction grades, from highest to lowest, are A, B,
and C, and they represent the tire’sability to stop on wet
pavement as measured under controlled con&tions on
specified government test surfaces of asphalt and concrete.
A tire markedC may have poor traction performance.
Warning: The temperature grade for this tire is
established for a tire that is properly inflated and not
overloaded. Excessive speed, underinflation, or
excessive loading, either separately or in combination,
can cause heat buildup and possible tire failure.
Warning: The traction grade assigned to this tire is based
on braking (straightahead) traction tests and does not
include cornering (turning) traction.
6-41
Wheel Alignment and Tire Balance
The wheels on your vehicle were aligned and balanced
carefully atthe factory to giveyou the longest tire life
and bestoverall performance.
In most cases, you will not need to have your wheels
aligned again. However, if you notice unusual tire wear
or your vehicle pulling oneway or the other, the
alignment may need to be reset. If you notice your
vehicle vibrating when driving on a smooth road, your
wheels may need to be rebalanced.
Wheel Replacement
Replace any wheel that is bent, cracked, or badly rusted
or corroded. If wheel nuts keep coming loose, the wheel,
wheel bolts and wheel nuts should be replaced. If the
wheel leaks air, replace it (except some aluminum
wheels, which can sometimes be repaired). See your
Pontiac dealer if any of these conditions exist.
Your dealer will know the kind of wheel you need.
6-42
Each new wheel should have the same loadcarrying
capacity, diameter, width, offset and be mounted the
same way as the one it replaces.
If you need to replace any of your wheels, wheel bolts
or wheel nuts, replace them only with new GM original
equipment parts. This way, you will be sure to have
the right wheel, wheel bolts and wheel nuts for your
Pontiac model.
I A CAUTION:
I
Using the wrongreplacement wheels, wheel bolts
or wheel nuts onyour vehicle can be dangerous.
It could affect the braking and handling of your
vehicle, make yourtires lose air and make you
lose control. You could have a collision in which
you or others could be injured. Always use
the correct wheel, wheel bolts and wheel nuts
for replacement.
NOTICE:
The wrong arkel can a b c a w -problems with
bearing life, brake cooling,
speedometer/odometer calibration, headlamp
aim, bumper height,vehicle ground clearance
and tire or tire chain clearance to the body
and chassis.
I
See “Changing a Flat Tire” in the Index for more
information.
Used Replacement Wheels
A CAUTION:
Putting a used wheel on yourvehicle is
dangerous. You can’t knowhow it’s been used or
haw IXEmy miles it’s been driven, It cauld fail
If you have to
suddenly and cause an accident.
replace a wheel, use a new GM original
equipment wheel.
Tire Chains
NOTICE:
If your Pontiac has P195/65R15
or P205155RI6
size tires, don’t use tire chains. They can damage
your vehicle.
If you have other tires, use tire chains only where
legal and only when you must. Use only SAE
Class “S’ type chains that are the proper
size for
your tires. Install them on the front tires
and
tighten them as tightly as possible with the ends
securely fastened. Drive slowlyand follow the
chain manufacturer’s instructions.If you can
hear the chains contacting your
vehicle, stop
and retighten them.If the contact continues,
slow down until it stops. Driving too fast or
spinning thewheels with chains onwill damage
your vehicle.
6-43
Appearance Care
Remember, cleaning products can behazardous. Some
are toxic. Others can burst into flame if you strike a
match or get them on a hot part of the vehicle, Someare
dangerous if you breathe their fumes ina closed space.
When you use anything from a container to cleanyour
Pontiac, be sure to follow the manufacturer’s warnings
and instructions. And always open your doors or
windows when you’re cleaning the inside.
Never use these to cleanyour vehicle:
0
Gasoline
0
Benzene
0
Naphtha
Carbon Tetrachloride
0
0
Acetone
Paint Thinner
0
Turpentine
0
Lacquer Thinner
0
Nail Polish Remover
0
They can all be hazardous -- some more than
others -- and they can all damage your vehicle, too.
Don’t use any of these unless this manual says you can.
In many uses, these will damage your vehicle:
Alcohol
Laundry Soap
Bleach
Reducing Agents
Cleaning the Inside of Your Pontiac
Use a vacuum cleaner often to get rid of dust and loose
dirt. Wipevinyl or leather with a clean, damp cloth.
Your Pontiac ‘dealerhas two GM cleaners, a
solvent-type spot lifter and a foam-type powdered
cleaner. They will clean normal spots and stains very
well. Do not use them on vinyl or leather.
Here are some cleaning tips:
0
0
0
0
Always read the instructions on the cleaner label.
Clean up stains as soon as you can -- before they set.
Use a clean cloth or sponge, and change toa clean area
often. A soft brush may be used if stains are stubborn.
Use solvent-type cleaners in a well-ventilated area
only. If you use them, don’t saturate the stained area.
If a ring forms after spot cleaning, clean the entire
area immediately or it will set.
.
-. ..
8.
~
If you need to use a solvent:
Using Foam-Type Cleaner on Fabric
0
Vacuum andbrush the area to remove any loose dirt.
0
Always clean a whole trim panel or section.Mask
surrounding trim along stitch orwelt lines.
0
Mix Multi-Purpose Powdered Cleaner following the
0
Gently scrape excesssoil from the trim material with
a clean, dull knife
or scraper. Use very little cleaner,
light pressure and clean cloths (preferably
cheesecloth). Cleaning should start at the outside of
the stain, “feathering”toward the center. Keep
changing to a cleansection of the cloth.
0
When you clean a stain from fabric,immediately
dry the area with a blow dryer to help prevent a
cleaning ring.
directions on the container label.
0
Use suds only and apply with a clean sponge.
0
Don’t saturate the material.
0
Don’t rub it roughly.
0
As soon as you’ve cleanedthe section, use a sponge
to remove the suds.
0
- ...
Special Cleaning Problems
Greasy or Oily Stains
Rinse the section witha clean,wet sponge.
Stains caused by grease, oil, butter, margarine, shoe
0 Wipe off what’s left with a slightly damp paper towel polish, coffee with cream, chewing gum, cosmetic
creams, vegetable oils, wax crayon, tar and asphalt can
. . , . i.
cloth.
or
be removed as follows:
0 Then dry it immediately with a blow dryer.
Carefully scrape off excess stain.
0 Wipe with a clean cloth.
Follow the solvent-type instructions described earlier.
Using Solvent-’Qpe Cleaner on Fabric
Shoe polish, wax crayon, tar and asphalt will stain if
left on a vehicle’s seat fabric. They shouldbe removed
First, see if you have to use solvent-type cleaner at all.
as soon as possible. Be careful, because the cleaner
Some spots and stains will clean off better with just
will dissolve them and may causethem to spread.
water and mild soap.
i.
,1
,
.
,<
,
. ”.-?,
I
2
(I...
. ,.I.:
’
6-45
Non-Greasy Stains
Stains causedby catsup, coffee (black),egg, fruit, fruit
juice, milk, soft drinks, wine, vomit,
urine and blood can
be removed as follows:
0
Carefully scrapeoff excess stain, then sponge the
soiled area with cool water.
0
If a stain remains, follow the foam-typeinstructions
described earlier.
If an odor lingers after cleaning
vomit or urine,
treat the area with a waterbakingsoda solution:
1 teaspoon ( 5 ml) of baking soda to 1 cup (250 ml)
of lukewarm water.
0
If needed, cleanlightly with solvent-type cleaner.
0
Rub with a clean, damp clothto remove dirt. You
may have to do it more than once.
Things like tar, asphalt and shoe polish will stain if
you don't get them off quickly. Use a clean cloth
and
a GM Vinylbeather Cleaner or equivalent product.
Cleaning the Top of the Instrument Panel
Use only mild soap and water to clean the top surfaces
of the insxmment panel. Sprays containing S ~ ~ ~ C Q WorS
waxes may cause annoying reflections in the windshield
and even make it difficult to see through the windshield
under certain conditi'ons.
Care of Safety Belts
Keep belts clean and dry.
Combination Stains
Stains causedby candy, ice cream,mayonnaise, chili
sauce and unknown stainscan be removed as follows:
0
Carefully scrapeoff excess stain, then clean with
cool waterand allow to dry.
If a stain remains, cleanit with solvent-type cleaner.
Cleaning Vinyl
Use warm water and a clean cloth.
j.
A CAUTION:
Do not bleach or dye safety belts. If you do, it
may severely weaken them. In a crash they might
not be able to provide adequate protection.
Clean safety beltsonly with mild soap and
lukewarm water.
Glass
Glass should be cleaned often. GM Glass Cleaner (GM
Part No. 1050427)or a liquid household glass cleaner
will remove normal tobacco smoke and dust films.
Don’t use abrasive cleaners on glass, because they may
cause scratches. Avoid placing decals on the insiderear
window, since they may have to be scraped off later.
If abrasive cleaners are usedon theinside of the rear
window, an electric defogger element may be damaged.
Any temporary license should not beattached across the
defogger grid.
Cleaning the Outsideof the
Windshield and Wiper Blades
If the windshield is not clear after using the windshield
washer, or if &e wiper blade chatters when mming, wax
or O t k F material may be on tke black or windshie.k€.
Clean the outside of the windshield withGM Windshield
Cleaner, Bon-Ami Powder@(GM Part No. 1050011).The
windshield is clean if beads do not form when you rinse it
with water.
Clean the blade by wiping vigorously with a cloth soaked
in full-strength windshield washersolvent. Then rinse the
blade with water.
Wiper blades should be checked ona regular basis and
replaced when worn.
Weatherstrips
Silicone grease on weatherstrips will make them last
longer, seal better, and notstick or squeak. Apply
silicone grease with a clean clothat least every six
months. During very cold, damp weathermore frequent
application may be required. (See “Recommended
Fluids and Lubricants” in the Index.)
Cleaning the Outside of Your Pontiac
The paint finish on your vehicle providesbeauty, depth
of Color, gloss retention m d durability.
Washing Your Vehicle
The best way to preserve your vehicle’sf i s h is to keep
it clean by washing it often with lukewarm or cold water.
6-47
Don’t wash your vehicle in the direct rays of the sun.
Don’t use strong soaps or chemical detergents. Use
liquid hand, dish or car washing (mild
detergent) soaps.
Dm3 use cleaning agents that me petroleum based, or
that contain acid or abrasives.All cleaning agents
should be flushed promptly and not allowed to dry on
the surface, orthey could stain. Dry the finish with a
soft, clean chamois or a 100%cotton towel to avoid
surface scratches and water spotting.
High pressure carwashes may cause water to enter
your vehicle.
Finish Care
Occasional waxing or mild polishing of your Pontiac by
hand may be necessary to remove residue from the paint
finish. You can get GM-approved cleaning products
from your dealer. (See “AppearanceCare and Materials”
in the Index.)
I
I NOTICE:
Foreign materialssuch as calcium chloride and other
salts, ice melting agents, road oiland tar, tree sap,bird
droppings, chemicals from industrial chimneys, etc.
can
damage your vehicle’s finish if they remain on painted
surfaces. Wash the vehicle as soon as possible. If
necessary, use non-abrasive cleaners that are marked
safe for painted surfaces to remove foreign matter.
Exterior painted surfaces are subjectto aging, weather
and chemical falloutthat can take their toll over aperiod
of years. You can help to keep thepaint finish looking
new by keeping your Pontiac garaged or covered
Your Pontiac has a “basecoat/clearcoat” paintfinish. The
whenever possible.
clearcoat gives more depth and gloss to the colored basecoat.
Always use waxesand polishes that are non-abrasive and
made far a basecoat/clearcoat paintf ~ s h .
6-48
Cleaning Your Convertible Top
0
If you decide to go through an automatic car wash,
ask the manager if the equipment could damage your
Your convertible top should be cleaned often. If you use
an automatic car wash, use one with water jets and
hanging cloths. High pressure car washes may cause
water to enter your vehicle.
top. Before entering a car wash, set the climate
control to VENT and the fan control to the highest
speed. This will help to prevent water under high
pressure from entering around the convertible top.
When you hand wash the top, do it in partial shade. Use
a mild soap, lukewarm water and a soft sponge. A
chamois or cloth may leave lint on the top, and a brush
can chafe the threads in the top fabric.
Don’t use
detergents, harsh cleaners, solvents or bleaching agents.
Aluminum Wheels (If So Equipped)
When you clean the top, put one hand under it to
support it. Wet the entire vehicle and wash the top
evenly to avoid spots or rings. Let the soap remain on
the fabric for a few minutes. When the top is really dirty,
use a mild foam-type cleaner. Thoroughly rinse the
entire vehicle, then let the top dry in direct sunlight.
To protect the convertible top:
After you wash the vehicle, make sure the top is
completely dry before you lower it.
Keep your wheels clean using a soft clean cloth with
mild soap and water. Rinse with clean water. After
rinsing thoroughly, dry with a soft clean towel. A wax
may then be applied.
The surface of these wheels is similarto the painted
surface of your vehicle. Don’t use strong soaps,
chemicals, abrasive polishes, abrasive cleanersor
abrasive cleaning brushes on them because you could
damage the surface.
Don’t take your vehicle through an automatic carwash
that has silicon carbide tire cleaning brushes. These
brushes can also damage the surface of these wheels.
Don’t get any cleaner on the vehicle’s painted finish;
it could leave streaks.
6-49
Tires
To clean your tires, use a stiff brush with a tire cleaner.
NOTICE:
~~
When applying a tire dressing always take careto
wipe off any overspray or splash from all painted
surfaces on the body or wheeis of the vehicle.
Petroleum-based products may damage the
paint finish.
Sheet Metal Damage
If your vehicle is damaged and requires sheet metal
repair or replacement, make sure the body repair shop
applies anti-corrosion material to the parts repaired or
replaced to restore corrosion protection.
Finish Damage
Any stone chips, fractures or deep scratches in the finish
should be repaired right away. Bare metal will corrode
quickly and may develop into a major repair expense.
Minor chips and scratches can be repaired with touch-up
materials available from your dealer or other service
6-50
outlets. Larger areas of finish damage can be corrected
in your dealer’s body and paint shop.
Underbody Maintenance
Chemicals usedfor ice and snow removal and dust control
can collect on the underbody. If these are not removed,
accelerated corrosion (rust) can occur onthe underbody
parts such as fuel lines, frame, floor pan, and exhaust
system even though they have corrosion protection.
At least -ev-evspring, flush these mateals frol.-irthe
underbody with plain water. Clean any areas where mud
and other debriscan collect. Dirt packed in closed areas
of the frame should be loosened before being flushed.
Your dealer or anunderbody vehicle washing system
can do this for you.
Chemical Paint Spotting
Some weather and atmospheric conditions can create a
chemical fallout. Airborne pollutants can fall upon and
attack painted surfaceson your vehicle. This damage can
take two forms: blotchy, ringlet-shaped discolorations, and
small irregulardark spots etched into the paint surface.
Although no defect in the paint job causes this, Pontiac
will repair, at nocharge to the owner, the surfaces of
new vehicles damaged by this fallout condition within
12 months or 12,000 miles (20 000 km) of purchase,
whichever occurs first.
Appearance Care Materials Chart
I
I
I
I
I
I
I
1052870
16 oz. (0.473 L)
Wash and Wax Concentrate
Exterior wash
1052918**
Protects vinyl, leather and rubber
8 oz. (0.237 L)
Armor All Protector
1052929
16 02. (0.473 L)
Wheel Cleaner
Spray on wheel cleaner
1052930
Capture Dry Spot Remover
8 oz. (0.237 L)
Attracts and absorbs soils
Cleans vinyl, leather and rubber
12345002**
Armor All Cleaner
16 oz. (0.473 L)
12345725
Silicone Tire Shine
Shines tires
12 oz. (0.354 L)
See your General Motors Parts Department for these products.
* Not recommended for pigskin suede leather.
See “Fluids and Lubricants” in the Index.
**Not recommended for use on instrument panel vinyi-.
TM
TM
I
Vehicle Identification Number (VIN)
the model designation,
paint information, and
a list of all production options and special equipment.
I I1 111111111111111111111111111111II 111111111111111111111II
r
SAMPLE4UXTM072675
,
ENGINE
~~
CODE
MODEL YEAR
ASSEMBLY
PLANT
This is the legalidentifier for your Pontiac. It appears on
a plate in the front cornerof theinstrument panel, on
the driver’s side. You can see it if you look through the
windshield from outsideyour vehicle.The VTN also
appears on the Vehicle Certification and Service Parts
labels and the certificates of title and registration.
Engine Identification
The eighth characterin your VIN is the engine code.
This codewill help you identify your engine.
specifications, and replacement parts.
Service Parts Identification Label
You’ll find this labelon your spare tire cover. It’s very
helpful if you ever need to order parts. On this label is:
0
your VIN,
Be sure that this label is not removed from the vehicle.
Electrical System
Add-on Electrical Equipment
NOTICE:
~~~
~
~~~
Don’t add anything electrical to your Pontiac
unless you check with your dealer first. Some
electrid equipment a n damage your vehicle and
the damage wouldn’t be coveredby your warranty.
Some add-on electrical equipment can keep other
components from working as they should.
Your vehicle has an air bag system. Before attempting to
add anything electrical to your Pontiac, see “Servicing
Your Air Bag-Equipped Pontiac” inthe Index.
Headlamp Wiring
Fuses and Circuit Breakers
The headlamp wiring is protectedby fuses. Should your
headlamps fail to function have your headlampfuses
checked right away-
The wiring circuits in your vehicle are protected from
short circuits by a combinationof fuses, circuitbreakers
and fusible thermal links. This greatly reducesthe
chance of damage caused by eketkcd probkrns.
Windshield Wipers
The windshield wiper motor is protected by a circuit
breaker and a fuse.If the motoroverheats due to heavy
snow, etc., thewiper will stop until the motor cools. If
the overload is caused by some electrical problem, have
it fixed.
Power Windows and Other Power Options
Circuit breakers in thefuse panel protect thepower
windows and other power accessories. When the current
load is too heavy, the circuitbreaker opens and closes,
protecting the circuit until the problem is fixed.
Look at the silver-colored band insidethe fuse. If the
band is broken or melted, replace the fuse.
Be sure you
replace a bad fuse witha new oneof the identical size
and rating.
If you ever have a problem on the road and don’t have a
spare fuse, you can borrow one that has the same
amperage. Just pick some featureof your vehicle that
you can get along without -- like the radio or cigarette
lighter -- and use its fuseif it is the correctamperage.
Replace it as soon as you can.
There are two fuse blocks in your vehicle: the
instrument panel fuse block and the engine compartment
fuse block.
6-53
Instrument Panel Fuse Block
The fusepanel is located under the left end of the
instrument panel. Toopen,'push the tab on the access
door to the left and pull the door forward. Make sure to
insert the tabs first when replacing the cover.
Fuse
TURN-B/U
F/P-INJ
CLUSTER
CLSPCM
6-54
Usage
Exterior Lamps,Back-up Lamps
Fuel Pump, Fuel Injectors
Instrument Cluster,Anti-Lock
Brake System
Instrument Cluster, Powertrain Control
Module, Daytime Running Lamps
RR DFOG
Rear Window Defogger
0 2 HTR
WIPER
Rear 0 2 Sensor, Heater
Windshield Wipers,
Windsi=ii-e<d
%L&hm
Fuse
ERLS
Usage
Automatic Transaxle, Brake-Transaxle
Shift Interlock, A/C Compressor,
Cruise Control, Exhaust Gas
Recirculation, Cannister Purge Valve,
A/C Compressor
AIR BAG
Air Bag System
EXT LAMP Exterior Lamps, Instrument Panel
Lights
PRiR A€C hwer Dmx L
-&, flrnV&H& TGp
(Convertible Model)
Heater and A/C Control, Anti-Lock
HVAC
Brake System
Radio, Remote Keyless Entry
RADIO
ALARM
Interior Lamps, Alarm Module,
Warning Chimes
CRUISE
Cruise Control
L HDLP
Left Headlamp
CIG
Cigarette Lighter, Horn,
Diagnostic Connector
Fuse
Usage
INST LPS
Instrument Panel Lights,
Warning Chimes
STOP/HAZ Exterior Lamps,Anti-Lock Brakes,
Cruise Control
Power Windows, Power Sunroof,
PWR
WINDOW Top Controls (Convertible Models)
(Circuit Breaker)
Powertrain Control Module
PCM/ICN
E
S
&
&
5NT LAMP N3nrs&%c&c ElkWarning Chimes, Overhead Lamps,
Mapmeading Lamps, Glove Box
Lamp, Trunk Lamp, Radio, Power
Mirrors, Remote Keyless Entry
Engine Ignition
IGN
R HDLP
Right Headlamp
Steering Wheel Controls (If Equipped)
Fuse Panel
Your steering wheelradio controls are protected
by fuses. For service, contact your Pontiac
Service Department.
Engine Compartment Fuse Block
The enginecompartment fuse block is located on the
driver’s side of the engine compartment. Lift off the
cover to check the fuses.
Fuse
Usage
IGN
Ignition Switch Circuits
BATT 1
Power ACC/Stoplamp Circuits
BATT 2
Lighting Circuits
ABS
Anti-Lock Brake System
COOLING FAN
Engine Cooling Fan
BLO
Heater and A/C Blower
PCM
Powertrain Control Module
A/C
A/C Compressor
ABS
Anti-Lock Brake System
GEN
Gen Voltage Sensor (2.2L Engine)
OUTSIDE LAMPS
BULB
Back-up Lamps
Sedan . . . . . . . . . . . . . . . . . . . . . . . . . . . . . . . .
3156
Coupe . . . . . . . . . . . . . . . . . . . . . . . . . . . . . . . 3057
Front Parkingnurn Signal Lamps
AllexceptGT .........................
3357
GT . . . . . . . . . . . . . . . . . . . . . . . . . . . . . . . . 3357NA
Center High-Mounted Stoplamp
Inside (Carpet-Covered) . . . . . . . . . . . . . . . . . 1141
912
Outside (Spoiler) ........................
Halogen Headlamps
HighLow Beam . . . . . . . . . . . . . . . . . . . . . . . 9007
Front S i d e m k r Lamps ........................ 194
Rear Sidemarker Lamps . . . . . . . . . . . . . . . . . . . .
194
Stopnail Lamps .........................
3057
Trunk Lamp .............................
906
Rear Turn Signal Lamps . . . . . . . . . . . . . . . . . . 3057
License Plate Lamp (Sedan) . . . . . . . . . . . . . . . . 194
Rear Applique Lamp (Coupe) . . . . . . . . . . . . . . . 912
Rear Applique Lamp (Sedan) . . . . . . . . . . . . . . . 194
INSIDE LAMPS
BULB
Courtesy Lamps . . . . . . . . . . . . . . . . . . . . . . . . . .
168
Dome Lamp . . . . . . . . . . . . . . . . . . . . . . . . . . . . .
562
Reading Lamp (If Equipped) . . . . . . . . . . . . . . . 2 12-2
Heater and A/C Control ....................
194
194
High-Beam Indicator . . . . . . . . . . . . . . . . . . . . . .
GloveBox . . . . . . . . . . . . . . . . . . . . . . . . . . . . . . 194
Rear Courtesy Lamp (If Equipped) . . . . . . . . . . . 563
6-57
Capacities and Specifications
EngineCrankcase ......................................
4.0 quarts (3.8 L)
Automatic Transaxle (4-Speed Automatic Transaxle Not Owner Serviceable)
Pan Removal and Replacement ............................
4.0 quarts (3.8 L)
After Complete Overhaul ................................
6.9 quarts (6.6 L)
When draining or replacing torque converter, more fluid may be needed.
Manual Transaxle
Complete
and
Drain
Refill . . . . .
2.0 quarts (1.9 L)
Cooling System
2.2L . . . . . . . .
10.3 quarts (9.8 L)
2.4L .............................
10.7 quarts (10.1 L)
Refrigerant (R=134a),
Air Conditioning . . ,
- . See refrigerant charge label under the hood.
FuelTank .......................
15.2 gallons (57.5 L)
Tire Pressures, Sizes . .
See Tire-Loading Information
label on driver’s door.
WheelNutTorque .............................
100 Ib-ft (140 N-m)
Windshield
Wiper
Blade (Sheppard’s Type)Left Side . . . . . . . . .
22 inches (56 cm)
NOTE: All capacities are approximate. When adding,
be sure to fill to the appropriate level, as recommended
in this manual.
Air Conditioning Refrigerants
Not all air conditioning refrigerants are the same. If the airconditioning system in yourvehicle needs refrigerant, b’e
sure the proper refrigerant is used. If you’re not sure, ask your Pontiac dealer.
2.2L Engine Specifications
VIN Engine Code . . .
Type . . . . . . . . . . .
.
Horsepower . . . . . . .
.
Firing Order . . . . . . . . .
.
Thermostat Temperature . . . . . .
4
L4
120
1-3-4-2
195 "F (91 "C)
2.4L Engine Specifications
VIN Engine Code . . . . . . . . . . . . T
Type . . . . . . . . . . .
Horsepower . . . . . . .
Firifig &der . . . . . . . . .
Thermostat Temperature
.L4
.
.
150
. 1-3-42
. 180°F (82°C)
Normal Maintenance Replacement
Parts
Air Cleaner Element
2.2L . . . . . . . . . . . . , AC Type A- 1172C
2.4L . . . . . . . . . . . . , AC Type A-1 l72C
Engine Oil Filter
, AC Type PF-47
2.2L . . . . . . . .
, AC Type PF-44
2.4L . . . . . . . .
PCV Valve
. . . AC Type CV-900C
2.2L . . . . . . . .
2.4L . . . . . . . . . .
, N/A
Spark mugs
. . . . . . . . . . AC Type 41-928
2.2L . . . . . .
GM Part Number 25 16 1677
Gap: 1.52 mm (0.060 inch)
. . . . . . . . . . AC Type 41-910
2.4L . ,
GM Part Number 25133291
Gap: 1.52 mm (0.060 inch)
6-59
Dimensions
Length
Coupe . . .
Sedan . . . .
Convertible
Width
Coupe . . .
Sedan . . . .
Convertible
Height
Coupe . . .
Sedan . . . .
Convertible
. . 18 1.9 inches (462.2 crn)
. . 181.9 inches (462.2 cm)
. . . . . . . . . . 18 1 .~9inches (462.2 cm)
. . . 75.4 inches (191.6 cm)
.
. . . 75.4 inches (191.6 cm)
. . . 75.4 inches (191.6 cm)
.
. . . 53.2 inches (135.1 cm)
. . . 54.9 inches (139.4 cm)
. . . 53.9 inches (136.9 cm)
Wheelbase
Coupe . .
sedan .....
Convertible . .
Front Tread
Coupe . .
Sedan . . . . .
Convertible . .
Rear Tread
Coupe . . .
Sedan . . . . . . .
Convertible . .
,
.
.
*
,
,
,
104.1 inches (264.4 cm)
104-1 inches (254-4
cm)
104.1 inches (264.4 cm)
. . 57.6 inches (146.2 cm)
. . 57.6 inches (146.2 em)
. . 57.6 inches (146.2 cm)
. . 56.8 inches (144.2 cm)
. . 56.8 inches (144.2 cm)
. . 56.8 inches (144.2 cm)
Section 7 Maintenance Schedule
Introduction
I
IMPORTAN+
Your Vehicle and the Environment
Ffaperv-e-$cle m&=rtmznLT
namrly.p--@ to kLTP ym.r
KEEP ENGINE OjL
AT IrK PRO!%@
LEVEL AND CHANGE AS
RECOMMENDE~
This section covers the maintenance required for your
Pontiac. Your vehicleneeds these services to retain its
safety, dependabilityand emission control performance.
vehicle in good working condition,but also helps the
environment. All recommended maintenance procedures
are important. Improper vehicle maintenance can even
affect thequality of the airwe breathe. Improper fluid
levels or thewrong tire inflation can increase the level
of emissions from yourvehicle. To help protect our
environment, and to keep your vehicle in good
condition, please maintain your vehicle properly.
Plan
Have you purchased the GM Protection Plan? The Plan
supplements your new vehicle warranties. Seeyour
Warranty and Owner Assistance booklet,or your
Pontiac dealer for details.
7-1
How TEs.lis Section is Organized
The remainder of this section is divided into fiveparts:
“Part A: Scheduled MaintenanceServices” shows
what to have done and how often. Some of these
services can be complex, so unless you are technically
qualified and have the necessary equipment, you should
let your dealer’s service department or anotherqualified
service center do these jobs..
I A CAUTION:
Performing maintenance workon a vehicle can
be dangerous.In trying to do some jobs, you can
be seriously injured.Do your own maintenance
work only if you have the requiredknow-how
and the proper tooIs and equipment
for the job.
If you have any doubt, have a qualified
technician do the work.
If you are skilled enough to do some work on your
vehicle, you will probably want to get the service
information GM publishes. See “Service and Owner
Publications” in the Index.
7-2
’’Part €3:Owner Checks and Services?’teEs you what
should be checked whenever you stop for fuel.It also
explains what you can easily do to help keep your
vehicle in good condition.
“Part C: Periodic Maintenance Inspections’’
explains important inspections that your Pontiac dealer’s
service department or another qualified service center
should perform.
“Part D: Recommended Fluids and Lubricants” lists
some products GM recommends to help keepyour
vehicle properly maintained. These products, ortheir
equivalents, should be used whether you do the work
yourself or have it done.
“Part E: Maintenance Record” provides a place for
you to record the maintenance performed on your
vehicle. Whenever any maintenance is performed, be
sure to write it down in this part. This will help you
determine when your next maintenance should be done.
In addition, it is a good idea to keepyour maintenance
receipts. They may be needed to qualify your vehicle for
warranty repairs.
Part A: Scheduled Maintenance
Services
Using Your Maintenance Schedule
We at General Motors want to helpyou keep your
vehicle in good working condition. But we don’t know
exactly how you’ll driveit. You may drive very short
distances only a few times a week. Or you may drive
long distances all the time invery hot, dusty weather.
You may use your vehicle inmaking deliveries. Or
you may drive it to work, to do errands or many
in
other ways.
Because of all the different ways people use their GM
vehicles, maintenance needs vary. You may even need
more frequent checks and replacements than you’ll find
in the schedules in this section.So please read this
section and note how you drive. If you have any
questions on how to keep your vehicle in good
condition, see your Pontiac dealer.
The proper fluids and lubricants to use are listed in
Part D. Make sure whoever services your vehicle
uses these. All parts should be replaced and all
necessary repairs done before you or anyone else
drives the vehicle.
These schedules are for vehicles that:
0
carry passengers and cargo within recommended
limits. You will find these limits on your vehicle’s
Tire-Loading Information label. See “Loading Your
Vehicle” inthe Index.
0
are driven on reasonable road surfaces within legal
driving limits.
use the recommended fuel. See “Fuel” in the Index.
Selecting the Right Schedule
First you’l need to decide which o€ the. two !schedules is
right for your vehicle. Here’s how to decide which
schedule to follow:
This part tells you the maintenance services you should
have done and when you should schedule them. If you
go to your dealer for yourservice needs, you’ll know
that GM-trained and supported service people will
perform the work using genuine GM parts.
7-3
Maintenance Schedule
Short Trip/City Definition
Follow the Short Trip/City Maintenance Schedule if any
one of these conditions is true for your vehicle:
Most trips are less than 5 to 10 miles (8 to 16 km).
This isparticularly important when outside
temperatures are below freezing.
0
Most trips include extensive idling (such as frequent
driving in stop-and-go traffic).
Most trips are through dusty areas.
You frequently tow a trailer or use a carrier on top of
your vehicle. (With some models, you should never
tow a trailer. See “Towing a Trailer” in the Index.)
If the vehicle is used for delivery service, police,
taxi, orother commercial application.
h e ofthe rea.sonsyou should follow this schedule if
you opera& yow v & k k under any of these C,~ditiQ?2S
is that these conditions cause engine oil to break
down sooner.
7-4
Short Trip/City Intervals
Every 3,000 Miles (5 008 km): Engine Oil and Filter
Change (or 3 months, whichever occurs first).
Every 6,000 Miles (10 000 km): Chassis Lubrication
(or 6 months, whichever occurs fist).
At 6,000 Miles (10 000 km) Then Every
12,000 Miles (20 000 km): Tire Rotation.
Every 15,000 Miles (25 000 km): Air Cleaner Filter
Inspection, if driving in dusty conditions.
-
Every 30,000 Miles (50 000 km): Air Cleaner Filter
R’eplacement.Fuel Tank, Cap and Lines Inspection.
Exhaust Gas Recirculation (EGR) System Inspection
(2.2L Code 4 engine only).
Every 50,000 Miles (83 000 km): Automatic Transaxle
Service (severe conditions only).
Every 60,000 Miles (X00000 km): Engine Accessory
Drive Belt Inspection.
Ewxy iM$tM Miles (166 W km): Coding System
Service (or every 60 months, whichever occurs first).
Spark Plug Wire Inspection. Spark Plug Replacement.
These intervalsonly summarize maintenance services.
Be sure to followthe complete maintenance schedule on
the following pages.
Maintenance Schedule
ILong Trip/Higlhway Definition
w-$hway
Follow this maintenance schedule only if none of the
conditions from the Short Trip/City Maintenance
- Schedule is true.
Every 7,500 Miles (12500 km): 'Engine Oil and Filter
Change (or every 12 months, whichever occurs first).
Chassis Lubrication (or every 12 months, whichever
occurs first).
At 7,500 Miles (12 500 km) Then Every
15,000 Miles(25 000 km): Tire Rotation.
Every 30,000 Miles (50 000 km): Exhaust Gas
Recirculation (EGR) System Inspection (2.2L Code 4
Engine only). Air Cleaner Filter Replacement. Fuel
Tank, Cap and Lines Inspection.
Every 50,000 Miles (83 000 km): Automatic Transaxle
Service (severe conditions only).
Every 60,000 Miles (100 000 km): Engine Accessory
Drive Belt Inspection.
Every 100,000 Miles (166 000 km): Cooling System
Service (or every 60 months, whichever occurs first).
Spark Plug Wire Inspection. Spark Plug Replacement.
These iB&n~als#KT@ szlmma~zernaintmancs?sewicm..
Be sure to followthe complete maintenance scheduleon
the following pages.
Driving a vehicle with fully
a
warmed engine under
highway conditions causes engineoil to break
down slower.
Intervals
-
7-5
I
Short Trip/City Maintenance Schedule
1,
.
-.
.
"
,
. ,
.
.
,
.
.. . ; ..
..
i".
.
. ,
I
.
..
...
.
, I I '
I
.-
. ... , ..is..
'I
.
.
I
3,000 Miles (5 000 km)
,:
The services shown in this schedule up to 100,000 miles
(166 000 km)should be performed after 100,000 miles
(166 000 km) at the same intervals.
0Change engine oiland filter (or every
3 months, whichever occurs first).
An Emission Control Service.
Footnotes
3- The U.S. Envkmmmtd &x~ectirnAgency OT &e
California Ai Resources Board has determined that the
failure toperform this maintenance item will notnullify
the emission warranty or limitrecall liability prior to the
completion of the vehicle's useful life.We, however,
urge that all recommended maintenance services be
performed at the indicated intervals and the maintenance
be reco'rded.
:
ACTUAL MILEAGE
7-6
SERVICED BY:
Short TriplCity Maintenance Schedule
~~
6,000 Miles (10 000 km)
9,000 Miles (15 000 km)
0Change engine oil and filter (or every
0Change engine oil and filter (or every
3 months, whichever occurs first).
3 months, whichever occurs first).
An Emission Control Service.
An Emission ControlService.
0Lubricate the suspension, steering linkage
and the transaxle shift linkage (or every
6 months, whichever occurs first).
0Rotate tires. See “Tire Inspection and
Rotation” in the Index for proper rotation
p&tteE3a d additional-infomation. During
tise ratation, check brake cdiiers for
freedom of movement. Refer to the
appropriate GM service manual for proper
caliper service procedures.
DATE
ACTUAL MILEAGE
SERVICED B Y
DATE
ACTUAL MILEAGE
SERVICED B Y
7-7
I
Short Trip/City Maintenance Schedule
Change engine oil and filter (or every
3 months, whichever occurs first).
An Emission Control Service.
Cl Change engine oil and filter (or every
3 months, whichever occurs first).
An Emission Control Service.
0Lubricate the suspension, steering linkage
and the transaxle shift linkage (or every
6 months, whichever occurs first).
4
I
0Inspect air cleaner filter if you are driving
in dusty conditions. Replace filter if
necessary. An Emission Control Service.
I
DATE
;
7-8
ACTUAL MILEAGE
SERVICED BY:
c
DATE
ACTUAL MILEAGE
>
SERVICED BY:
Short Trip/City Maintenance Schedule
18,000 Miles (30 000 kmj
21,000 Miles (35 000 km)
0Change engine oil and filter (or every
17 Change engine oil and filter (or every
3 months, whichever occurs first).
3 months, whichever occurs first).
An Emission Control Service.
An Emission Control Service.
13 Lubricate the suspension, steering linkage
and the transaxle shift linkage (or every
6 months, whichever occurs first).
0Rotate tires. See “TireInspection and
Rotation’’ in the Index for proper rotation
pattern and additional information. During
tire rotation, check brake calipers for
freedom of movement. Refer to the
appropriate GM service manual for proper
caliper service procedures.
DATE
ACTUAL MILEAGE
SERVICED BY:
DATE
ACTUAL MILEAGE
SERVICED BY:
24,000 Miles (40 000 km)
27,000 Miles (45000 km)
0Change engine oil and filter (or every
0Change engine oil and filter (or every
3 months, whichever occurs first).
3 months, whichever occurs first).
An Emission Control Service.
An Emission Control Service.
Cl Lubricate the suspension, steering linkage
and the transaxle shift linkage (or every
6 months, whichever occurs first).
I
i
DATE
I
ACTUAL MILEAGE
SERVICED BY: I
DATE
ACTUAL MILEAGE
SERVICED BY:
Short TriplCity Maintenance Schedule
30,000 Miles (50 000 km)
0Change engine oil and filter (or every
0Inspect fuel tank, cap and lines for damage
3 months, whichever occurs first).
or leaks. Inspect fuel cap gasket for any
damage. Replace parts as needed.
An Emission Control Service.
0Lubricate the suspension, steering linkage
and the transaxle shift linkage (or every
6 months, whichever occurs first).
Replace air cleaner filter. An Emission
Control Service.
0Inspect Exhaust Gas Recirculation (EGR)
system (2.2L Code 4 engine only).
An Emission Control Service.
An Emission Control Service. ?
0Rotate tires. See “Tire Inspection and
Rotation” in the Index for proper rotation
pattern and additional information. During
tire rotation, check brake calipers for
freedom of movement. Refer to the
appropriate GM service manual for proper
caliper serviceprocedures.
DATE
ACTUAL MILEAGE
SERVICED BY:
I
I
Short Trip/City Maintenance Schedule
33,000 Miles (55 000 km)
36,000 Miles (60 000 km)
Change engine oil and filter (or every
3 months, whichever occurs first).
Change engine oil and filter (or every
3 months, whichever occurs first).
An Emission Control Service.
An Emission Control Service.
IJ Lubricate the suspension, steering linkage
and the transaxle shift linkage (or every
6 months, whichever occurs first).
I
DATE
I
ACTUAL MILEAGE
t
7-12
SERVICED BY:(
I
DATE
I
ACTUAL MILEAGE
ISERVICED
BY: I
I
Short TriplCityMaintenance Schedule
I
39,000 Miles (65 000 km)
42,000 Miles (70000 km)
0Change engine oil and filter (or every
0Change engine oil and filter (or every
3 months, whichever occurs first).
3 months, whichever occurs first).
An Emission Control Service.
An Emission Control Service.
ULubricate the suspension, steering linkage
-and the transaxle shift linkage (orevery
6 months, whichever occurs first).
c]Rotate tires. See “Tire Inspection and
Rotation” in the Index for proper rotation
pattern and additional information. During
tire rotation, check brake calipers for
freedom of movement. Refer tothe
appropriate GM service manual for proper
caliper service procedures.
I
DATE
I
ACTUAL MILEAGE
SERVICED BY: I
DATE
ACTUAL MILEAGE
SERVICED BY:
7-13
1
Short Trip/CityMaintenance Schedule
45,000 Miles (75 000 km)
Change engine oil and filter (or every
3 months, whichever occurs first).
0Inspect air cleaner filter if you are driving
in dusty conditions. Replace filter if
necessary. An Emission Control Service.
7-14
ACTUAL MILEAGE
48,000 Miles (80 000 km)
0Change engine oil and filter (or every
3 months, whichever occurs first).
An Emission Control Sewice.
An Emission Control Service.
DATE
I
SERVICED B Y
0Lubricate the suspension, steering linkage
and the transaxle shift linkage (orevery
6 months, whichever occurs first).
Short Trip/City Maintenance Schedule
50,000 Miles (83 000 km)
E-Change automatic trans-axk fluid and m e r
- Uses sudl as fwnd in taxi, @ice or .
if the vehicle is mainly driven under one or
more of these conditions:
- In heavy city traffic where the outside
temperature regularly reaches 90 O F
(32 O C) or higher.
- In hilly or mountainous terrain.
- When doing frequent trailer towing.
delivery s-emice.
If you do not use your vehicleunder any of these
conditions, thefluid andfilter do
not require changing.
Manual transaxle fluid doesn’t
require change.
.
DATE
.
ACTUAL MILEAGE
-SERVICED B Y .
7-15
I
Short Trip/City Maintenance Schedule
51,000 Miles (85 000 km)
I
0Change engine oil and filter (or every
54,000 Miles (90 000 km)
W Change engine oil and filter (or every
3 months, whichever occurs first).
3 months, whichever occurs first).
An Emission Control Service.
An Emission Control Service.
Lubricate the suspension, steering linkage
and the transaxle shift linkage (or every
6 months, whichever occurs first).
0Rotate tires. See “Tire Inspection and
Rotation” in the Index for proper rotation
pattern and additional information. During
tire rotation, check brake calipers for
freedom of movement. Refer to the
appropriate GM service manual for proper
caliper service procedures.
7-16
I
Short TriplCityMaintenance Schedule
I
60,000 Miles (100 000 km)
Cl Change engine oil and filter (or every
57,000Miles (95000 km)
0Change engine oil and filter (or every
3 months, whichever occurs first).
3 months, whichever occurs first).
An EmissionControl Service.
An Emission Control
Service.
0Lubricate the suspension, steering linkage
and the transaxle shift linkage (or every
6 months, whichever occurs first).
0Inspect engine accessory drive belt.
An Emission Control Service.
Replace air cleaner filter. An Emission
Control Service.
I
DATE
1
ACTUAL
MILEAGE
}SERVICED
BY:
1
(Continued)
7-17
Short Trip/City Maintenance Schedule
60,000 Miles (100 000 km) (Continued)
63,000 Miles (105 000 km)
0Inspect fuel tank, cap and lines for damage
0Change engine oil and filter (orevery
or leaks. Inspect fuel cap gasket for any
damage. Replace parts as needed.
3 months, whichever occurs first).
An Emission Control Service.
An Emission Control Sewice.
Inspect Exhaust Gas Recirculation (EGR)
system (2.2L Code 4 engine only).
An Emission Control Service.
DATE
I
7-18
-f-
ACTUAL MILEAGE
SERVICED B Y
DATE
ACTUAL MILEAGE
SERVICED B Y
I
Short TriplCity Maintenance Schedule
66,000 Mikes (110 000 km)
0Change engine oil and filter (or every
I
69,000 Miles (115 000 km)
3 months, whichever occurs first).
Change engine oil and filter (or every
3 months, whichever occurs first).
An Emission Control Service.
An Emission Control Service.
0Lubricate the suspension, steering linkage
and the transaxle shift linkage (or every
6 months, whichever occurs first).
0Rotate tires. See “Tire Inspection and
Rotation” in the Index for proper rotation
pattern a d additional in€oma$ion.During
tire meatim, check k&e calipesrs for
freedom of movement. Refer to the
appropriate GM service manual for proper
caliper service procedures.
DATE
ACTUAL MILEAGE
SERVICED BY:
7-19
I
Short Trip/City Maintenance Schedule
I
72,QOQLMile-s
(120 OOO km)
0 Change engine oil and filter (or every
0Change engine oil and filter (or every
3 months, whichever occurs first).
3 months, whichever occurs first).
An Emission Control Service.
An Emission Control Service.
0Lubricate the suspension, steering linkage
0Inspect air cleaner filter if you are driving
and. the transaxle shift linkage (or every
6 months, whichever occurs first).
1
in dusty conditions. Replace filter if
necessary. An Emission Control Service.
1 DATE I
~~
DATE
ACTUAL
MILEAGE
SERVICED
7-20
BY:
ACTUAL MILEAGE
]SERVICED BY
I
I
Short Trip/City Maintenance Schedule
81,000 *Wiles(135 000 km}
0Change engine oil and €ilter (or every
3 months, whichever occurs first).
Change engine oil and filter (or every
3 months, whichever occurs first).
An Emission Control Service.
An Emission Control Service.
0Lubricate the suspension, steering linkage
and the transaxle shift linkage (or every
6 months, whichever occurs first).
0Rotate tires. See “Tire Inspection and
Rotation” in the Index for proper rotation
pattern and additional information. During
tire rotation, check brake calipers for
freedom of movement. Refer to the
appropriate GM service manual for proper
caliper service procedures.
DATE
ACTUAL MILEAGE
.SERVICED BY:
1
DATE
1
1
ACTUALMILEAGE
7
SERVICED BY:
7-21
I
Short Trip/City Maintenance Schedule
I
84,000 Miles (140 000 km)
87,000 Miles (145 000 km)
0Change engine oil and filter (or every
0Change engine oil and filter (or every
3 months, whichever occurs first).
3 months, whichever occurs first).
An Emission Control Service.
An Emission Control Service.
0Lubricate the suspension, steering linkage
and the transaxle shift linkage (or every
6 months, whichever occurs first).
DATE
ACTUAL MILEAGE
1
7-22
SERVICED BY.
DATE ACTUAL
MILEAGE
SERVICED BY:
I
I
Short Trip/City Maintenance Schedule
I
90,000 Miles (150 000 km)
E-I n s p t E*l..lst
3 months, whichever occurs first).
Gas Reckc*latim-l @GR>
system (2.2L Code 4 engine only).
An Emission Control Service.
An Emission Control Service.
l-7 Change engine sit and filter (or every
u
123 Lubricate the suspension, steering linkage
?
c]Rotate tires. See “Tire Inspection and
Rotation” in the Index for proper rotation
pattern and additional information. During
tire rotation, check brake calipers for
freedom of movement. Refer to the
appropriate GM service manual for proper
caliper service procedures.
and the transaxle shift linkage (or every
6 months, whichever occurs first).
Replace air cleaner filter. An Emission
Control Service.
17 Inspect fuel tank, cap and lines for damage
or leaks. Inspect fuel capgasket for any
damage. Replace parts as needed.
An Emission Control Service. -f‘
~
~
~~
-
~~
DATE
ACTUAL MILEAGE
SERVICED BY:
7-23
I
I
ShortTrip/CityMaintenance Schedule
93,000 Miles (155 000 km)
96,000 Miles (160 000 km)
0 Change engine oil and filter (or every
0Change engine oil and filter (or every
3 months, whichever occurs first).
3 months, whichever occurs first).
An Emission Control Service.
An Emission Control Service.
0Lubricate the suspension, steering linkage
and the transaxle shift linkage (or every
6 months whichever occurs first).
DATE
ACTUAL MILEAGE
DATE
SERVICED BY:
I
ACTUAL MILEAGE
-
I
SERVICED BY:
I
1
Short Trip/City Maintenance Schedule
I
99,000 Miles (165 000 km)
100,000 Miles (166 000 km)
0Change engine oil and filter (or every
0Drain, flush and refill cooling system
3 months, whichever occurs first).
An Emission Control Service.
(or every 60 months since last service,
whichever occurs first). See “Engine
Coolant” in the Index for what to use.
Inspect hoses. Clean radiator, condenser,
pressure cap and neck. Pressure test cooling
system and pressure cap. An Emission
Control Service.
0Inspect spark plug wires (except 2.4L
Code T engine). A n Emission Control Service.
Replace spark plugs. An Emission
Control Service.
(Continued)
I
Short Trip/City Maintenance Schedule
I
100,000 Miles (166 000 km) (Continued)
c]Change automatic transaxle fluid and filter
if the vehicle is mainly driven under one or
more of these conditions:
In heavy city traffic where the outside
temperature regularly reaches 90 O F
(32 C ) or higher.
In hilly or mountainous terrain.
When doing frequent trailer towing.
O
- Uses such as found in taxi, police or
delivery service.
If p a da n m use ~
under any of these
conditions, thefluid andfilter not
do require changing
Manual transaxle fluid doesn’t
require change.
DATE
i
7-26
Q M
vehicle
ACTUAL MILEAGE
SERVICED BY:
I Long TriplHighwayMaintenanceSchedule 1
7,500 Miles (12 500 km)
The services shown in this schedule up to 100,000 miles
(166 000 km) should be performed after 100,000 miles
(166 000 km)at the same intervals.
0Change engine oil and filter (or every
Footnotes
ClLubricate the suspension, steering linkage
T The U.S. Environmental Protection Agency or the
and the transaxle shift linkage (or every
12 months, whichever occurs first).
0Rotate tires. See “Tire Inspection and
Rotation” in the Indexfor proper rotation
pattern and additional information. During
tire rotation, check brake calipers for
freedom of movement. Refer to the
appropriate GM service manual for proper
caliper service procedures.
California Air Resources Board has determined thatthe
failure to perform this maintenance item willnot nullify
the emission warranty or limit recall liabilityprior to the
completion of the vehicle’s usefullife. We, however,
urge that all recommended maintenance services be
performed at theindicated intervals and themaintenance
be recorded.
12 months, whichever occurs first).
An Emission ControlService.
DATE SERVICED
ACTUAL MILEAGE
BY
1-
7-27
Long Trip/Highway Maintenance Schedule
15,000 Miles (25 000 km)
CI Change engine oil and filter (or every
22,500 Miles (37 500 km)
0Change engine oil and filter (or every
12 months, whichever occurs first).
12 months, whichever occurs first).
An Emission ControlService.
An Emission ControlService.
El Lubricate the suspension, steering linkage
0Lubricate the suspension, steering linkage
and the transaxle shift linkage (orevery
12 months, whichever occurs first).
and the transaxle shiftlinkage (or every
12 months, whichever occurs first).
0Rotate tires. See “Tire Inspection and
Rotation” in the Index for proper rotalion
pattern and additionalMomation. During
tire rotation, check brake calipers €or
freedom of movement. Refer to the
appropriate GM service manual for proper
caliper service procedures.
I
DATE
ACTUAL MILEAGE
SERVICED B Y
DATE SERVICED
ACTUAL MILEAGE
BY
30,000 Miles (50 000 km)
Change engine oil and filter (or every
12 months, whichever occurs first).
An Emission Control Service.
0Lubricate the suspension, steering linkage
and the transaxle shift linkage (or every
12 months, whichever occurs first).
Replace air cleaner filter. An Emission
0Inspect fuel tank, cap and lines for damage
or leaks. Inspect fuel cap gasket for any
damage. Replace parts as needed.
An Emission Control Service.-f
c]Inspect Exhaust Gas Recirculation (EGR)
system (2.2L Code 4 engine only).
An Emission Control Service.
Control Sewice.
DATE
ACTUAL MILEAGE
SERVICED B Y
7-29
Long Trip/Highway Maintenance Schedule
37,500 Miles (62 500 km)
45,000 Miles (75 000 km)
CI Change engineoil and filter (01e-very
-
E
l Change engine oil and filter (or every
12 months, whichever occurs first).
12 months, whichever occurs first).
An Emission Control Service.
An Emission Control Service.
c]Lubricate the suspension, steering linkage
c]Lubricate the suspension, steering linkage
and the transaxle shift linkage (or every
12 months, whichever occurs first).
0Rotate tires. See “Tire Inspection and
Rotation” in the Index for proper rotation
pattern and additional information. During
tire rotation, check brake calipers for
freedom of movement. Refer to the
appropriate GM service ‘manualfor proper
caliper service procedures.
and the transaxle shift linkage (or every
12 months, whichever occurs first).
J
7-30
DATE
I
ACTUALMILEAGE ~SERVICEDBY:]
I
1
Long TriplHighway Maintenance Schedule
50,000 Miles (83 000 km)
0Change automatic transaxle fluid and filter
if the vehicle is mainly driven under one or
more of these conditions:
- In heavy city traffic where the outside
temperature regularly reaches 90 O F
(32O C) .or higher.
- In hilly or mountainous terrain.
- When doing frequent trailer towing.
-
Uses such as found in taxi, police or
delivery service.
If you do not use your vehicle under any of these
conditions, thefluid andfilterdo not require changing.
Manual transaxle fluid doesn’t
require change.
7-31
wav lb inten,
52,500 Miles (87 500 km)
60,000 Miles (100 000 km)
0Change engine oil and filter (or every
0Change engine oil and filter (or every
12 months, whichever occurs first).
12 months, whichever occurs first).
An Emission Control Service.
An Emission Control Service.
0Lubricate the suspension, steering linkage
and the transaxle shi€t linkage (or every
12 months, whichever occurs first).
Rotate tires. See “Tire Inspection and
Rotation” in the Index for proper rotation
pattern and additional information. During
tire rotation, check brake calipers for
freedom of movement. Refer to the
appropriate GM service manual for proper
caliper service procedures.
DATE
7-32
ACTUAL MILEAGE
SERVICED B Y
Lubricate the suspension, steering linkage
and the transaxle shift linkage (or every
12 months, whichever occurs first).
0Inspect engine accessory drive belt.
An Emission Control Service.
Replace air cleaner filter. An Emission
Control Service.
..
I-
F-
67,500 Miles (112 500 km)
c] Inspect fuel tank, cap and lines for damage
or leaks. Inspect fuel cap gasket for any
damage. Replace parts as needed.
An Emission Control Service.
*r
0Change engine oil and filter (or every
12 months, whichever occurs.first).
An E.missioF2 CQnts‘QlS P Y V i C 4 .
0Lubricate the suspension, steering linkage
0Inspect Exhaust Gas Recirculation (EGR)
system (2.2L Code 4 engine only).
An Emission Control Service. -f- 1
-
.,
: I :
and the transaxle shift linkage (or every
12 months, whichever occurs first).
0Rotate tires. See “Tire Inspection and
Rotation” in the Index for proper rotation
pattern and additional information. During
tire rotation, check brake calipers for
freedom of movement. Refer to the
i-
appropriate GM service manual for proper
caliper service procedures.
c
ACTTJAL MILEAGE
DATE SERVICED
BY
7-33
ILo:ngTridHighway Maintenance Schedule
75,000 Miles (125 000 km)
82,500 Miles (137 500 km)
0Change engine oil and filter (or every
0Change engine oil and filter (or every
12 months, whichever occurs first).
12 months, whichever occurs first).
An Emission Control Service.
An Emission Control Service.
CI Lubricate the suspension, steering linkage
Lubricate the suspension, steering linkage
and the transaxle shift linkage (or every
12 months, whichever occurs first).
Rotate tires. See “Tire Inspection and
Rotation” in the Index for proper rotation
pattern arid additional ififormatio-rr.Dwirig
tire rotation, check brake calipers for
freedom of movement. Referto the
appropriate GM service manual for proper
caliper service procedures.
and the transaxle shift linkage (or every
12 months, whichever occurs first).
DATE
ACTUAL MILEAGE
I
DATE
ACTUAL MILEAGE
SERVICED B Y
90,000 Miles (150 000 km)
0Change engine oil and filter (or every
C
l Inspect fuel tank, cap and lines for damage
12 months, whichever occurs first).
or leaks. Inspect fuel cap gasket for any
damage. Replace parts as needed.
An Emission Control Service.
0Lubricate the suspension, steering linkage
and the transaxle shift linkage (or every
12 months, whichever occurs first).
!
Replace- air c.1eane.r filter, An.ErniSskK?
An Emission Control Service.
0Inspect Exhaust Gas Recirculation (EGR)
system (2.2L Code 4 engine only).
An Emission Control Service.
CQrttCllSewice.
DATE SERVICED
ACTUAL MILEAGE
BY:
7-35
97,500 Miles (162 500 km)
100,000 Miles (166 000 km)
0Change engine oil and filter (or every
0Drain, flush and refill cooling system
12 months, whichever occurs first).
An Emission Control Sewice.
0Lubricate the suspension, steering linkage
and the transaxle shift linkage (or every
12 months, whichever occurs first).
0Rotate tires. See “Tire Inspection and
Rotation” in the Index for proper rotation
pattern and additional information.
I DATE
I
i
I ACTUAL
MILEAGE
ISERVICED
BY: I
(or every 60 months since last service,
whichever occurs first). See “Engine
Coolant” in the Index for what to use.
Inspect hoses. Clean radiator, condenser,
pressure cap and neck. Pressure test the
cooling system and pressure cap. An Emission
Control Sewice.
0Inspect spark plug wires (except 2.4L
Code T engine). An Emission Control Service.
17 Replace spark plugs. An Emission
Control Service.
0Change automatic transaxle fluid and filter
if the vehicle is mainly driven under one or
more of these conditions:
- In heavy city traffic where the outside
temperature regularly reaches 90°F
(32O C) or higher.
- In hilly or mountainous terrain.
- When doing frequent trailer towing.
-
Uses such as found in taxi, police or
delivery service.
If you do not
useyour vehicle under any of these
conditions, the
fluid andfilter do not require changing.
Manual transaxle fluid doesn’t
require change.
-7-37
Part B: Owner Checks and Services
Listed below are owner checks and services which
should be performed at the intervals specified to help
ensure the safety, dependability and emission control
performance of your vehicle.
Be sureany necessary repairs are completed at once.
Whenever any fluids or lubricants are added to yom
vehicle, make sure they are the proper ones, as shown
in Part D.
At Each Fuel Fill
It is importantfor you or a service station attendant to
perform theseunderhood checks at each.fuel fill.
Engine Oil Level Check
Check the engine oil leveland add the proper oil if
necessary. See “Engine Oil” in the Index for
further details.
7-38
Engine Coolant Level Ch’eck
Check the engine coolant level and add the proper
coolant mix if necessary. See “Engine Coolant” in the
Index for further details.
Windshield Washer Fluid Level Check
Check the windshield washer fluid level inthe
windshield washer tank and add the proper fluid if
necessary. See “Windshield Washer Fluid” in the Index
for furtherdetails.
At Least Once a Month
Tire Inflation Check
Make sure tires are inflated to the correct pressures. See
“Tires” in the Index for furtherdetails.
Cassette Deck Service
Clean cassette deck. Cleaning should be done every
50 hours of tape play. See “Audio Systems” in the
Index for further details.
At Least Twice a Year
Automatic Transaxle Inspection
(2.4LCode T Engine Only)
Restraint System Check
Make sure the safety belt reminder light and all your
belts, buckles, latch plates, retractorsand anchorages are
working properly. Look for any other iooseor damaged
safety belt system parts. If you see anythingthat might
keep a safety belt system €rom doing itsjob, have it
repaired. Have any torn or frayed safety belts replaced.
If you have the optional 2.4L Code T engine (see
“Engine Identification” in the Index) and an automatic
transaxle, it is not necessary to check the transaxle fluid
level. A transaxle fluid leak is the onIy reason for fluid
loss. Check for leaks. If a leak occurs, take the vehicle
to your Pontiac dealer Service Department md have it
repaired as soon as possible. You may also have your
fluid checked by your dealer or service center when you
have your engine oil changed.
Also look for any opened or broken air bag covers, and
have them repaired or replaced. (The airbag system
does not needregular maintenance.)
Manual Transaxle Check
Check the transaxle fluid level; addif needed. See
“Manual Transaxle”in the Index. A fluid loss may
indicate a problem. Check the system and repair if needed.
!
Automatic Transaxle Check
(Except 2.4L Code T Engine)
Check the transaxle fluid level; addif needed. See
“Automatic Transaxle”in the Index. A fluid loss may
irKk2ite 8 p b k i n C k k th? s y s b md re@ if n e .
Hydraulic ClutchSystem Check
Check the fluid level in the clutch reservoir. See
“Hydraulic Clutch Fluid” inthe Index. A fluid loss in
this system could indicate a problem. Have the system
inspected and repaired atonce.
.I
.
7-39
At Least Once a Year
1. Before you start, be sure you have enough room
around the vehicle.
Key Lock Cylinders Service
Lubricate the key lock cylinders with the lubricant
specified in Part D.
2. Firmly apply both the parking brake (see “Parking
Brake” in the Index if necessary) and the regular brake.
Body Lubrication Service
Lubricate all body door andrear compartment hinges.
Also lubricate all hinges andlatches, including the
primary and secondary hood latch, glove box door,
console door and any foldingseat hardware. Part D tells
you what to use. More frequent i~bsicarionmay be
required when exposed to a corrosiveenvironment.
Starter Switch Check
1A
CAUTION:
When you are doing this check, the vehicle could
move suddenly. If it does, you or others could be
injured. Followthe steps below.
7-40
NOTE: Do not use the accelerator pedal, and be
ready to turnoff the engine immediatelyif it starts.
3. On automatic transaxle vehicles, try to start the
engine ineach gear. The starter should work only in
PARK (P) or NEUTRAL (N). If the starter works in
any other position, your vehicle needs service.
On manual transaxie vehicks, put the shift lever in
NEUTRAL (N), push the clutch down halfway and
try to start the engine. Thestarter should work only
when the clutch is pushed down all the way to the
floor. If the starter works when the clutch isn’t
pushed all the way down, your vehicle needsservice.
Brake-Transaxle Shift Interlock (BTSI) Check
(Automatic Transaxle)
CAUTION:
When you are doing this check, the vehicle could
move suddenly. If it does, you or others could be
injured. Follow the steps below.
1. Before you start, be sure you have enough room
around thevehicle. It should be parkedon a
level surface.
2. Firmly apply the parking brake (see “Parking Brake”
in the Index ifnecessary).
NOTE: Be ready to apply the regular brake
immediately if the vehicle begins to move.
3. With the engine off, turn the key to the RUN
position, but don’t start the engine. Without applying
the regular brake, try to move the shift lever out
of PARK (P) with normal effort. If the shift lever
moves out of PARK (P), your vehicle’sBTSI
needs service.
Steering Column Lock Check
While parked, and with the parking brake set, try to turn
the key to LOCK in each shift leverposition.
With an automatic transaxle, thekey should turn to
LOCK only when theshift lever is in PARK (P).
With a manual transaxle, the key should turn
to LOCK only when the shift lever is in
REVERSE (R).
On vehicleswith a key releasebutton, try to turn the key
as LOCK without pressing the button. T k key h u l d
turn to LOCK only when you press the key button.
On all vehicles, the key should comeout only in LOCK.
Turn the steering wheel to the leftand to the right. It
should only lock when turned to the right.
Park ona fairly steep hill, with the vehicle facing
downhill. Keeping your foot onthe regular brake, set the
parking brake.
Parking Brake and Automatic Transaxle
PARK (P)
Mechanism Check
A CAUTION:
i
I
’,
.I
3
.
To check the parking brake: With the engine running
and transaxle in NEUTRAL (N), slowly remove foot
pressure from the regular brakepedal. Do this until
the vehicle is held by the parkingbrake only.
When you are doing this check, your vehicle
could begin to move. You or others couldbe
injured and property couldbe damaged. Make
sure thereis room in frontof your vehicle in case
it beginsto roll. Be ready to apply the regular
brake at once should thevehicle begin to move.
0
To check the PARK (P) mechanism’s holding ability:
With the engine running, shiftto PARK (P). Then
release all brakes.
Underbody Flushing Service
I
At least everyspring, use plain waterto flush any
corrosive materials from theunderbody. Take care to
clean thoroughly any areas wheremud and other debris
can c&ec%.
Part C: Periodic Maintenance
Inspections
build-up in the floor pan or could let exhaust fumes into
the vehicle. See “Engine Exhaust” in the Index.
Listed below are inspections and services which should be
performed at least twicea year (for instance, each spring
and fhll)..~ You should let your GM dealer’s service
beor txkm qu&& sewke center dotkse -&s.
Make sure any necessary repairs are completed at once.
Radiator and Heater Hose Inspection
Proper procedures to perform these services may be
found in a Pontiac service manual. See“Service and
Owner Publications’’in the Index.
Steering, Suspension and Front-Wheel-Drive
Axle Boot andSeal Inspection
Inspect the front and rear suspension and steering system
for damaged, looseor missing parts, signsof wear, or lack
of lubrication. Inspectthe power steering lines and hoses
for proper hook-up, binding, leaks, cracks, chafing, etc.
€or
Clean and then inspect the drive axle boot seals
damage, tears or leakage. Replace sealsif necessary.
Inspect the hoses and have them replaced if they are
c.racke, s-wolIeE-4or &teriar*d h p e c t ablpipes,
€it‘rlrs,vs:Znd clamps; r€@acX as rD3Xiek
Throttle Linkage Inspection
Inspect the throttle linkage for interference or binding,
and for damage or missingparts. Replace parts as
needed. Replace any cables that have high effort or
excessive wear. Do not lubricate accelerator and cruise
control cables.
Brake System Inspection
Inspect the complete system. Inspect brake lines and
hoses for proper hookup, binding, leaks, cracks, chafing,
etc. Inspect disc brake pads forwear and rotors for
surface condition. Also inspect drum brake linings for
wear and cracks. Inspect other brakeparts, including
drums, wheel cylinders, calipers, parking brake, etc.
Exhaust System Inspection
Inspect the complete exhaust system. Inspect the body near Check parking brake adjustment. You may need to have
your brakes inspected more often if your driving habits
the exhaust system. Leek for broken, damaged?missing or
or
conditions result in frequent braking.
uut-o€-pusitiun parts as well as open seams, holes, loose
connections, or other conditions which could causeheat
a
7-43
Part D: Recommended Fluids and
Lubricants
USAGE
NOTE: Fluids and lubricants identified below by name,
part number or specification may be obtained from your
GM dealer.
USAGE
FLUID/LUBRICANT
FLUID/LUBRICANT
Coolant
Supplement
Sealer
GM Part No. 3634621 or
equivalent with a complete flush
and refill.
Hydraulic Brake
System
Delco Supreme 11 Brake Fluid
(GM Part No. 1052535 or
equivalent DOT-3 brake fluid).
@
~
Engine Oil
Engine Coolant
Engine oil with theAmerican
Petroleum Institute Certified For
Gasoline Engines “Starburst”
symbol of the proper viscosity. To
determine the preferred viscosity
for your vehicle’s engine, see
“Engine Oil” in the Index.
50/50 mixture of clean water
(preferably distilled) andGM
Goodwrench@
DEX-COOL or
Havoline@DEX-COOL TM
(orange-colored, silicate-free)
antifreeze conformingto GM
Specification 6277M.See “Engine
Coolant” in the Index.
~
~~~~
~
Hydraulic Clutch Hydraulic Clutch Fluid (GM Part
No. 12345347 or equivalent).
System
-
Power Steering
System
GM Power Steering Fluid (GM
Part NO. 1052884 - 1 Pt., 1050017
- I qt., or equivalent).
Manual
Synchromesh Transmission Fluid
Transaxle
(GM Part No. 12345349 or
equivalent).
Automatic
Transaxle
DEXRON@-I11Automatic
Transmission Fluid.
Key Lock
Cylinders
Multi-Pu oseLubricant,
Superlube% (GM Part
No. 12346241 or equivalent).
USAGE
FLUID/LUBRICANT
Chassis lubricant (GM Part
No. 1052497 or equivalent) or
lubricant meeting requirements
of NLGI Grade 2, Category LB
or GC-LB.
Hood Latch
Assembly Pivots,
Spring Anchor
and Release
Pawl
Lubriplate lubricant aerosol (GM
Part No. 12346293 orequivalent)
or lubricant meeting requirements
of NLGI Grade 2,Category LB or
GC-LB.
Clutch Linkage
Pivot Points
Engine oil.
Chassis
Lubrication, Fuel
Filler Door and
Striker Plunger
Chassis lubricant (GM Part
No. 1052497 or equivalent) or
lubricant meeting requirements
of NLGI Grade 2, Category LB
or GC-LB.
Hood and Door
Hinges, Rear
Compartment Lid
Hinges and Rear
Multi-pu ose lubricant,,
%
Superlube
(GM Part
No. 12346241 or equivalent).
Weatherstrip
Conditioning
Dielectric Silicone Grease(GM
Part No. 12345579 or equivalent).
USAGE
FLUIDlLUBRICANT
~
Manual
Transaxle Shift
Linkage
_ _ _ _ ~
~~
GM Optikleen@Washer Solvent
(GAMPart No- lOs.l5l,s).or
equivalent.
See “Replacement Parts”in the Index forrecommended
repk3Cermt filters and spark phgs.
7-45
Part E: Maintenance Record
After the scheduled services are performed,record the
date, odometer reading and who performedthe service
in the boxes provided after the maintenance interval.
7-46
Any additional information from “Owner Checks and
Services” or “Periodic Maintenance” can be added on
the following record pages. Also, you should retain all
maintenance receipts. Your owner infomation portfolio
is a convenient place to store them.
Maintenance Record
.
DATE
ODOMETER
READING
SERVICED BY
MAINTENANCE PERFORMED
---
7-47
Maintenance Record
7-48
Section 8
CustomerAssistanceInformation
Here you will find out how to contact Pontiac if you
need assistance. This section also tells
you how to obtain
service publications and how to report any safety
defects.
Pontiac Cares
This section includes infomation on:
The Pontiac Cares Program
0
The Customer Satisfaction Procedure
Customer Assistance for Text Telephone (TTY)
Users
Roadside Assistance
0
Courtesy Transportation
0
BBB Auto Line - Alternative Dispute Resolution
Program
Reporting Safety Defects
0
Service and Owner Publications
0
With the PONTIAC CARES program, you are never
more than a phone call away from having your concern
taken care of.
The PONTIAC CARES philosophy
and elements are
designed tomake you realize that Pontiac recognizes
you as a valuable customer, appreciates your purchase
decision, and is dedicated to taking care of the most
important person ... YOU! PONTIAC CARES is: A
valuable feature that comes with every Pontiac, a feature
that offers a multitude of benefits that can give you
safety, security, comfort and convenience.
Customer Satisfaction Procedure
What makes up Pontiac Cares?
0
A 3 year/36,000 mile Bumper to Bumper Warranty
Roadside Assistance
0
Courtesy Transportation
All of these elements combine to makeyour driving
experience an mjuyabk m e , and -are dismssed in
greater detail further in your owner’s manual. Pmtlac is
focusing onthe changing needs of our customers and
is committed in giving you an exceptional level of
customer care throughout the ownership experience.
Our goal is to create total customer enthusiasm in our
product and our services, and makeyou the most
satisfied customer in the world.
8-2
Your satisfaction and goodwill are importantto your
dealer and Pontiac. Normally, any concern youmay
have with your vehicle can be handled by your selling
or servicing dealer.Your dealer has the facility, trained
technicians, special tools and up-to-date information to
promptly address any issue which may arise. Pontiac has
empowered its dealers to make any decisions and repair
vehicles, and they are eagerto resolve your concernto
your complete satisfaction. If your concern has not been
resolved to your satisfaction, take the following steps:
In the Bahamas: 1-800-389-0009
In Bermuda, Barbados, Antigua and the British
STEP ONE -- Discuss your concern with a member
of dealer management.Normally, concerns can be
quickly resolved at thatlevel. If the matter has already
been reviewed with the Sales, Service, or Parts Manager,
contact theowner of the dealership or theGeneral
Manager.
Virgin Islands: 1-800-534-0 122
STEP TWO -- If after contacting a memberof
dealership management, it appears your concern cannot
be resolved by the dealership without further help,
contact the Pontiac Customer Assistance Center by
calling 1-800-PM-CARES. In Canada, contact GM
of Canada Customer Assistance Center in Oshawa by
calling 1-8QQ-263.-3.777(&.g].i.&)
1-8.00.-2&785.4
(French).
For help outside of the United States and Canada, call
the following numbers as appropriate:
0
In Mexico: (525) 625-3256
In Puerto Rico: 1-800-496-9992 (English) or
1-800-496-9993 (Spanish)
In all other Caribbean countries: 1-809-763- 13 15
In other overseas locations, call GM North American
Export Sales in Canada at 1-905-644-41 12
For prompt assistance, please have the following
information available to givethe Customer Assistance
Representative:
Your name, address, home and business telephone
numbers
Vehicle Identification Number (This is available
from the vehicle registration or title,. or the plate at
the top left of the i<strurnent panel and visible
through the windshield.)
Dealership name and location
Vehicle delivery date and present mileage
Nature of concern
In the U.S. Virgin Islands: 1-800-496-9994
In the Dominican Republic: 1-800-75 1-4135
(English) or 1-800-751-4136 (Spanish)
8-3
We encourage you to call us so we can give your inquiry
prompt attention. However, if you wish to write Pontiac,
write to:
United States
Pontiac Division
Customer Assistance Center
One Pontiac Plaza
Pontiac, MI 48340-2952
Canada
General Motors of Canada Limited
Customer Assistance Center, 163-005
1908 Colonel Sam Drive
Oshawa, Ontario L1H 8P7
Refer to your Warranty and Owner Assistance
Information booklet for addresses of Canadian and
GM Overseas offices.
When contactingPontiac, please remember that your
concern will likely beresolved in the dealership, using
the dealer's facilities, equipmenT and penurme-i."hat 4s
why we suggest you follow Step One first if you have a
concern.
Customer Assistance for Text
Telephone (TTY) Users
To assist customers who are deaf, hard of hearing, or
speech-impaired and who use Text Telephones (TTYs),
Pontiac has TTY equipment available at its Customer
Assistance Center. Any TTY user can communicate with
Pontiac by dialing: 1-800-833-PONT. (TTY users in
Canada can dial 1-800-263-3830.)
Pontiac Roadside Assistance Program
Pontiac's Roadside Assistance toll-free number is
staffed by a team of technically trained advisors, who
are available 24 hours a day, 365 days a year.
We take anxiety out of uncertain situations by providing
minor repair information over the phone
or making
arrangements to tow your vehicle to the nearest Pontiac
dealer.
Ir
We will provide the following services for
3 years/36,000 miles, at no expenseto you:
0
Vehicle out of fuel
Keys fsckeb in vehicle
Tow to nearest dealership for warranty service
0
Change a flat tire
0
Jump starts
Courtesy Transportation -- See Pontiac Courtesy
Transportation section for details
Security While You Travel
I -800-ROADSIDI ( I -800-762-3743)
As the proud owner of a new Pontiac vehicle, you are
automatically enrolled in thePontiac Roadside
Assistance program. This value-added service is
intended to provide you with peace of mind as you drive
in the city or travel the open road.
8-5
-
We have quick, easy access to telephone numbers of the
following additional services depending on yourneeds:
0
H’otels
0
Glass replacement
Rental vehicle or taxis
0
Police, fire department or hospitals
In many instances, mechanical failures are covered
under Pontiac’scomprehensive warranty. However,
when other services are utilized, our advisors will
explain any paymentobligations you might incur.
For prompt and efficient assistance when calling, please
provide the following information to give the advisor:
Location o’fvehicle
Telephone number of your iucatiun
0
Vehicle model, year and color
0
Mileage of vehicle
0
Vehicle identification number
Vehicle license plate number
8-6
Pontiac reserves the right
to limit servicesor
reimbursement to an owner or driverwhen in Pontiac’s
judgement the claims become excessive in frequency or
type of occurrence.
W i l e we hope that younever have the occasion touse
our service, it is added security while traveling for you
and your family. Remember, we’re only a phone call
away. Pontiac RoadsideAssistance -- 1-800-ROADSIm
or 1-800-762-3743.
Canadian Roadside Assistance
Vehicles purchased in Canada have an extensive
Roadside Assistance Program accessible fromanywhere
in Canada or the United States. Please referto the
separate brochure provided by the dealeror call
1-800-268-6800 for emergency services.
Pontiac Courtesy Transportation
It applies to any repair covered under the
36 month/36,000 mile(60 000 km) limited warranty,
and to any 1996 Pontiac requiring repair as a result of
product recall or special policy situations. For same day
service, you are entitled to one-way shuttle service of up
to 10 miles. If the repairs requirean overnight stay for
the car, you’re entitled to either a Pontiac loaner or
reimbursement fora rental car, up to $30/day, for up
to five days.
Some state insuranceregulations make it impractical to
rent vehicles to people under 21 years of age. If you are
under 21 and have difficulty renting a vehicle, Pontiac
will reimburse you, up to $30/day, for documented
transportation you receive.
Po-ntkc srives te-give y w a wony free cJx2ershipe-f
your vehicle, and we realize the inconvenience of being
without a car. So Pontiac has come up with a way to
eliminate any frustrations you might have when trying
to get a ride to work, or wondering how you will get
home. Well, your worries are over. Pontiac provides
no-cost transportation when you bring your
1996 Pontiac in for warranty service.
For warranty repairs during the Complete Vehicle
Coverage period in theNew Vehicle Limited Warranty,
intwi-mtTan3pmasiGfl-may be available--&der the
Courtesy Transportation Program. Please consult your
dealer fordetails. The Roadside Assistance program is
available only in the United States or Canada.
8-7
GM Participation in BBB AUTO
LINE - Alternative Dispute
Resolution Program*
BBB AUTO LINE is an out-of-courtprogram
administered by the Better Business Bureau system to
settle disputes between customers and automobile
manufacturers. This program is available freeof charge
to customers who curreniiy ow11 01; lease a u/-in
lvl vt;~~lut;.
I _.-1-:-1-
*This pregram m2y mt be avaiiabie in ail -stzttes,
depending on state law. Canadian owners refer to your
Warranty and Owner Assistance Information booklet.
General Motors reserves the rightto change eligibility
limitations and/or to discontinueits participation in this
program.
Both Pontiac and your Pontiac dealerare committed to
making sure you are completely satisfied with your new
vehicle. Our experience has shown that, if a situation
arises where you feel your concern has not been
adequately addressed, the CustomerSatisfaction
Procedure described earlier in thissection is very
successful.
There may be instances where an impartial third party
can assist in arriving at a solution toa disagreement
regarding vehicle repairs or interpretation of the New
Vehicle Limited Warranty. To assist in resolving these
disagreements, Pontiac voluntarily participates in
BBB AUTO LINE.
8-8
If you are not satisfied after following the Customer
Satisfaction Procedure, you may contact the BBB using
the toll-free telephone number, or write them at the
following address:
BBB AUTO LINE
Council of Better Business Bureaus
4200 Wilson Boulevard
Suite 800
Arlington, VA 22203
Telephone: 1-800-955-5 100
To file aclaim, you will be asked to provide your name
and address, your Vehicle Identification Number (VIN),
and a statement of the nature of your complaint.
Eligibility is limited by vehicle age and mileage, and
other factors.
We prefer you utilize the Customer Satisfaction
Procedure before you resort toAUTO LINE, but you
may contact the BBB at any time. The BBB will attempt
to resolve the complaint serving as an intermediary
between you and Pontiac. If this mediation is
unsuccessful, an informal hearing will be scheduled
where eligible customers may present their case to an
impartial third-party arbitrator.
The arbitrator will make a decision which you may
accept or reject. If you accept the decision, GM will be
bound by that decision. The entire dispute resolution
procedure should ordinarily take about 40 days from the
time you file a claim until a decision is made.
Some statelaws mayrequire you to use this program
before filing a claim with a state-run arbitration program
or in the courts. For further information, contact the
BBB at 1-800-955-5100 or the Pontiac Customer
Assistance Center at 1 -800-PM-CARES.
REPORTING SAFETY DEFECTS
TO THE UNITED STATES
GOVERNMENT
If you believe that your vehicle has a defect which could
cause a crash orcould cause injury or death, you should
immediately inform the National Highway Traffic
Safety Administration (NHTSA), in addition to
notifying General Motors.
If NHTSA receives similar complaints, it may open an
investigation, and if it finds that a safety defect exists in
a g.p+q v.e&x{q it may GT& a pyal.1.
re&.y.
campaign. However, NHTSA cannot become involved
in individual problems between you, your dealer, or
General Motors.
To contact NHTSA, you may either call the Auto Safety
Hotline toll-free at 1-800-424-9393 (or 366-0123 in the
Washington, D.C. area) or write to:
NHTSA, U.S. Department of Transportation
Washington, D.C. 20590
You can also obtain other information about motor
vehicle safety from the Hotline.
8-9
REPORTING SAFETY DEFECTS
TO THE CANADIAN
GOVERNMENT
If you live in Canada, and you believe that your vehicle
has a safety defect, you should immediately notify
Transport Canada, in addition to notifying General
Motors of Canada Limited. You may write to:
Transport Canada
Box 8880
Ottawa, Ontario K1G 3J2
REPORTING SAFETY DEFECTS
TO GENERAL MOTORS
In addition to notifyingNHTSA (or Transport Canada)
in a situation like this,we certainly hope you’ll notify
us. Please call us at 1-800-PM-CARES or write:
Pontiac Division
Customer Assistance Center
One Pontiac Plaza
Pontiac, MI 48340-2952
In Canada, please call us at 1-800-263-3777 (English)
or 1-800-263-7854 (French). Or, write:
General Motors of Canada Limited
Customer Assistance Center
1908 Colonel Sam Drive
Oshawa, Ontario L1H 8P7
8-10
Service and Owner Publications
Service Manuals
Service manuals contain diagnostic and repair
information for all chassis and body systems. They may
be useful for owners who wish to get a greater
understanding of their vehicle. They are also useful for
owners with the appropriate skill level or training who
wish to perform “do-it-yourself’ service. These are
authentic General Motorsservice manuals meant for
professional, qualified technicians.
Service manuals, service bulletins, owner’s manuals and
other service literature are available forpurchase for all
current and manypast model General Motors vehicles.
Toll-free telephone numbers for ordering information:
United States . . . . . . . 1-800-55 1-4123
Canada . . . . . . . . . . . . 1-800-668-5539
8-11
Service Bulletins
Owner Publications
Service bulletins covering various subjects are regularly
sent to all General Motors dealerships. GM monitors
product performance in the field.When service methods
are foundwhich promote better service on GM vehicles,
bulletins are created to help the technician perform
better service.Service bulletins may involve any
number of vehicles. Some will describe inexpensive
service; others will describe expensive sewice. Some
will advise of new or unexpected conditions, and others
may help avoid future costly repairs. Service bulletins
are meant for qualified technicians. In some cases
bulletins refer to service manuals, specialized tools,
equipment and safety procedures necessary to service
the vehicle. sine tkzse l33lx#etins are isstid &iflmghOrr-:
the model year and beyond, an index is required and
published quarterly to help identify specific bulletins.
Subscriptions areavailable. You can order an index at
the toll-free numbers listed previously, or ask a GM
dealer to see an index or individual bulletin.
Owner’s manuals, warranty folders and various owner
assistance booklets provide owners with general
operation and maintenance information.
8-12
I
Section 9 Index
~~~
~~~~
Adapter Kits. CD . . . . . . . . . . . . . . . . . . . . . . . . .
3- 11. 3. 14
Air Bag . . . . . . . . . . . . . . . . . . . . . . . . . . . . . . . . . . . . . . .
1 .19
How Does it Restrain . . . . . . . . . . . . . . . . . . . . . . . . . .
1-23
How it Works . . . . . . .
.Check
. . . . . . . . . . . . . . . . . . 1-21
Location . . . . . . . .
.Fluid
. . . . . 1-21
Readiness Light . . . . . . . . . . . . . . . . . . . . .
1.20. 2.63
Servicing . . . . . . . . . . . . . . . . . . . . . . . . . . . . . . . . . . .
1-24
What
Makes it Inflate . . . . . . . . . . . . . . . . . . . . . . . . . .
1-22
What
Will You See After it Inflates . . . . . . . . . . . . . . . 1-23
When Should it Inflate . . . . . . . . . . .
. . . . 1-22
AirCleaner . . . . . . . . . . . . . . . . . . . . . . . . . . . . . . . . . . 6-15
Airconditioning . . . . . . . . . . . . . . . . . . . . . . . . . . . . . . . . 3-4
Air Conditioning Refrigerants . . . . . . . . . . . . . . . . . . . . . 6-58
Alignment and Balance, Tire . . . . . . . . . . . . . . . . . . 6-42
Aluminum Wheels, Cleaning . . . .
. . . . 6-49
Antenna, Fixed . . . . . . . . . . . . . . .
. . . . 3-2 2.
Better Anti-Lock
Brake System Warning Light . . . .
. . 2-65, 4-6
Brakes . . . . . . . . . . . . . . . . . . .
. . . . . 4-6
Anti-Theft, Radio . . . . . . .
. . . . . . . . . . . . 3-17
Antifreeze . . . . . . . . . . . . . . . . . . . . . . . . . . . . . . . . . . .
6-22
Appearance Care . . . . . . . . . . . . . . . . . . . . . . . . . . . . . . .
6-44
Appearance Care Materials . . . . . . . . . . . . . . . . . . . . . . . 6-5 1
Arbitration Program . . . . . . . . . . . . . . . .
. . . 8-8
Ashtrays . . . . . . . . . . . . . . . . . . . . . . . . . . . . . . . . . . . . 2-46
Audio Controls, Steering Wheel . . . . . . . . . . . . . . . . . . . 3- 19
Audio Equipment, Adding . . . . . . . . . . . . . . . . . . . . . . . .
3-21
Audio Systems . . . . . . . . . . . . . . . . . . . . . . . . . . . . . . . . . .
3-7
Auto-Down Window . . . . . . . . . . . . . . . . . . . . . . . . . . . .
2-29
Automatic Overdrive . . . . . . . . . . . . . . . . . . . . . . . . . . . . 2-19
Automatic Transaxle
.........
. . . . . . . . 7-39
..............
. . . . . . 6.16. 6.19
Operation . . . . . . . . . . . . . . . . . . . . . . . . . . . . . . . . .
2-16
Park Mechanism Check . . . . . . . . . . . . . . . . . . . . . . . .
7-42
Shifting . . . . . . . . . . . . . . . . . . . . . . . . . . . . . . . . . . . . . 2-16
Starting Your Engine . . . . . . . . . . . .
. . . . . . 2-12
Battery . . . . . . . . . . .
. . . 6-31
Jump Starting . . . . . . . . . . . . . . . . . . . . . .
. . . . . . . 5-2
Light . . . . . . . . . . . . . . . . . . . . . . . . . . . . . . . . . . . . . . .
2-64
Replacement,
Remote Keyless Entry . . . . . . . . . . . . . . . 2-7
2-42
Saver . . . . . . . . . . . . . . . . . . . . . . . . . . . . . . . . . . . . . .
Warnings . . . . . . . . . . . . . . . . . . . . . . .
. . . . . 5-2
BBB Auto Line . . . . . . . . . . . . . . . . .
. . 8-8
Bureau Business
Mediation . . .
. . 8-8
Brake
. . . 6-31
Adjustment . . . . . . . . . . . . . . . .
Fluid . . . . . . . . . .
. . . . . .
. . . . . . 6-28
Master Cylinder . . . . . . . . . . . . . . . . . . . . . . . . . . . .
6-28
.
.
.
.
.
.
.
.
.
.
.
.
.
.
.
.
.
.
.
.
.
.
.
.
.
.
.
.
.
.
.
.
.
.
.
.
.
.
Parking
2-23
PedalTravel . . . . . . . . . . . . . . . . . . . . . . . . . . . . . . . . .
6-31
Replacing System Parts . . . . . . . . . . . .
. . . . . . 6-31
System Warning Light . . . . . . . . . . . . . . . . . . . . .
2-64
Trailer . . . . . . . . . . . . . . . . . . . . . . . . . . . . . . . . . . . . . .
4-36
Transaxle Shift Interlock Check . . . . . . . . . . . . . . . . . . 7-41
Wear . . . . . . . . . . . . . . . . . . . . . . . . . . . . . . . . . . . . . . .
6-30
9-1
Brakes. Anti-Lock . . . .
. . . . 4-6
Braking . . . . . . . . . . . . .
...
. . . . 4-5
Braking in Emergencies . . . . . . . . . . . . . . . . . . . . . . . . . . 4- 10
2-10
Break-In. NewVehicle ..........................
Brightness Control . . . . . . . . . . . . . . . . . . . . . . . . . . . . . . 2-40
7-41
BTSICheck . . . . . . . . . . . . . . . . . . . . . . . . . . . . . . . . . . .
Bulb Replacement .........................
6.32. 6-57
Canadian Roadside Assistance ....................
8-6
Capacities and Specifications . . . . . . . . . . . . . . . . . . . . . .
6-58
Carbon Monoxide . . . . . . . . . . . . . . . 2-27. 2.28.4.27. 4.36
Cassette Deck Service . . . . . . . . . . . . . . . . . . . . . . . . . . .
7-38
Cassette Tape Player . . . .
. . . . . . 3.9. 3.12
Cassette Tape Player Care . . . . . . . . . . . . . . . . . . . . . . 3-21
Cassette Tape Player Errors . . . . . . . . . . . . . . . . . . 3.10. 3 .13
CD Adapter Kits . . . . . . . . . . . . . . . . . . . . . . . . . .
3.11.3.14
CD Player Theft-Deterrent Feature . . . . . . . . . . . . . . . . . 3- 17
Center Console Storage Area . . . . . . . .
. . 2-44
Center Rear Passenger Position ....................
1-32
Certification Label . . . . . . . . . . . . . . . . . . . . . . . . . . . . . . 4-3 1
Certificationmire Label . . . . . . . . . . . . . . . . . . . . . . . . . .
4-30
Chains. Safety . . . . . . . . . . . . . . . . . . . . . . . . . . . . . 4-36
Chains. Tire . . . . . . . . . . . .
...
. . 6-43
Changing a Flat Tire . . . . . . . . . . . . . . . . . . . . . . . . . . .
5 -2 1
Check Engine Light . . . . . . . . . . . . . . . . . . . . . . . . . . . . . 2-68
Check Gages Light . . . . . . . . . . . . . . . . . . . . . . . . . . . . . .
2-73
CheckOilLight . . . . . . . . . . . . . . . . . . . . . . . . . . . . . . . .
2-72
Checking Your Restraint Systems . . . . . . . . . . . . . . . . . . 1-46
Chemical Paint Spotting . . . . . . . . . . . . . . . . . . . . . . . . . .
6-50
Child Restraints . . . . . . . . . . . . . . . . . . . . . . . . . . . . . . . .
1-35
Securing in a Rear Outside Seat Position . . . . . . . . . . . 1-37
Securing inthe Center Rear Seat Position . . .
. . 1-39
Securing in the Passenger Seat Position . . . . . . . . . . . 1-40
n 3
Securing in the Right Front Seat Position . . . . . . . . . . 1-40
TopStrap . . . . . . . . . . . . . . . . . . . . . . . . . . . . . . . . . . . 1-36
Wheretoput . . . . . . . . . . . . . . . . . . . . . . . . . . . . . . . .
1-35
Cigarette Lighter . . . . . . . . . . . . . . . . . . . . . . . . . . . . . . . 2-46
6-53
Circuit Breakers and Fuses . . . . . . . . . . . . . . . . . . . . . . .
Cleaner, Air . . . . . . . . . . . . . . . . . . . . . . . . . . . . . . . . . . .
6-15
Cleaning . . . . . . . . . . . . . . . . . . . . . . . . . . . . . . . . . . . . . . 6-44
Aluminum Wheels . .
. . 6-49
Convertible Top . . . . . . .
...
...
. . . . . 6-49
Fabric . . . . . . . . . . . . . . . . . . . . . . . . . . . . . . . . . . . . . .
6-45
Glass . . . . . . . . . . . . . . . . . . . . . . . . . . . . . . . . . . . . . . . 6-47
Inside of Your Pontiac . . . . . . . . . . . . . . . . . . . . . . . 6-44
Instrument Panel . . . . . .
.. .. ..
. . . . . 6-46
Outside of Your Pontiac . . . . . .
...
. . . . . 6-47
Special Problems . . . . . . . . . . . . . . . . . . . . . . . . . . . . . 6-45
Stains . . . . . . . . . . . . . . . . . . . . . . . . . . . . . . . . . . . . . .6-45
Tires . . . . . . . . . . . . . . . .
...
...
. . . . . 6-50
Vinyl . . . . . . . . . . . . . . . . . . . . .
. . 6-46
Wheels . . . . . . . . . . . . . . . . . . . . . . . . . . . . . . . . . . .
6-49
Windshield and Wiper Blades . . . . . . . . . . . . . . . . . . . 6-47
Climate Control System, Standard . . . . . . . . . . . . . . . . . . . 3-1
Climate Control System with Air Conditioning . . . . . . . . . 3-3
Clock,
Setting the . . . . . . . . . . . . . . . . . . . . . . . .
. . . 3-7
Clutch, Hydraulic . . . . . . . . . . . . .
. . . . . . . . . . . . 6-21
Clutch Fluid, Hydraulic . . . . . . . . . . . . . . . . . . . . . . . . . .
6-21
Comfort Controls . . . . . . . . . . . . . . . . . . . . . . . . . . . . . . . .
3-1
Compact Disc Adapter Kits . . . . .
. . . . . . . . . 3-11,3-14
Compact Disc Care . . . . . . . . . . . . . . . . . . . . . . . . . . .
3-22
Compact Disc Player . . . . . . . . . . . . . . . . . . . . . . . . . . . .
3-15
Compact Disc Player Errors . . . . . . . . . . . . . . . . . . . . . . .
3-16
Compact Spare Tire . . . . . . . . . . . . . . . . . . . . . . . . .
5-32
Control of a Vehicie . . . .
...
. . . 4-4
Convenience Net . . . . . . . . . . . . . . . . . . . . . . . . . . . . . . . 2-45
-
Convertible Top
Cleaning . . . . . . . . . . . . . . . . . . . . . . . . . . . . . . . . . . . .
6-49
Lowering . . . . . . . . . . . . . . . . . . . . . . . . . . . . . . . . . . .
2-47
Lowering Manually . . . . . . . . . . . . . . . . . . . . . . . . . . . 2-55
Raising . . . . . . . . . . . . . . . . . . . . . . . . . . . . . . . . . . . . .
2-52
Raising Manually . . . . . . . . . . . . . . . . . . . . . . . . . . . . .
2-55
Convex Outside Mirror . . . . . . . . . . . . . . . . . . . . . . . . . .
2-44
Coolant . . . . . . . . . . . . . . . . . . . . . . . . . . . . . . . . . . . . . . .
6-23
2- 15
Heater, Engine . . . . . . . . . . . . . . . . . . . . . . . . . . . . . . .
SurgeTank . . . . . . . . . . . . . . . . . . . . . . . . . . . . . . . . . .
5-17
Surge Tank Pressure Cap . . . . . . . . . . . . . . . . . . . . . . .
6-26
Cooling System . . . . . . . . . . . . . . . . . . . . . . . . . . . . . . . .
5-17
Courtesy Transportation . . . . . . . . . . . . . . . . . . . . . . . . . . .
8-7
Cruise Control . . . . . . . . . . . . . . . . . . . . . . . . . . . . . . . . .
2-34
2-45
Cupholders . . . . . . . . . . . . . . . . . . . . . . . . . . . . . . . . . . . .
Customer Assistance for Text Telephone Users . . . . . . . . . 8-4
Customer Assistance Information . . . . . . . . . . . . . . . . . . . 8- 1
Customer Satisfaction Procedure ....................
8-2
~~
..Finish . . . . . . . . . . . . . . . . . . . . . . . . . . . . . . .
Damage. Sheet Metal . . . . . . . . . . . . . . . . . . . . . . . . . . . .
6-50
6-50
Daytime Running Lamps . . . . . . . . . . . . . . . . . . . . . . . . .
2-39
Dead
Battery
. . . . . . . . . . . . . . . . . . . . . . . . . . . . . . . . . . . 5-2
Defects. Reporting Safety . . . . . . . . . . . . . . . . . . . . . . . . .
8-9
Defensive Driving . . . . . . . . . . . . . . . . . . . . . . . . . . . . . . .
4-1
Defogger. Rear Window . . . . . . . . . . . . . . . . . . . . . . . . . .
3-6
Defogging . . . . . . . . . . . . . . . . . . . . . . . . . . . . . . . . . . . . .
3-6
Defrosting . . . . . . . . . . . . . . . . . . . . . . . . . . . . . . . . . . . . .
3-6
Dimensions.Vehicle . . . . . . . . . . . . . . . . . . . . . . . . . . . .
6-60
Dolby@B Noise Reduction . . . . . . . . . . . . . . . . . . 3-1 1. 3- 14
DoorLocks . . . . . . . . . . . . . . . . . . . . . . . . . . . . . . . . . . . . .
2-3
Drive. Automatic Transaxle . . . . . . . . . . . . . . . . . . . . . . .
2- 19
Driver Position . . . . . . . . . . . . . . . . . . . . . . . . . . . . . . . . .
1- 11
Driving
City . . . . . . . . . . . . . . . . . . . . . . . . . . . . . . . . . . . . . . . . 4-19
Defensive . . . . . . . . . . . . . . . . . . . . . . . . . . . . . . . . . . . .
4-1
Drunken . . . . . . . . . . . . . . . . . . . . . . . . . . . . . . . . . . . . . 4-2
Freeway . . . . . . . . . . . . . . . . . . . . . . . . . . . . . . . . . . . .4-20
InaBlizzard . . . . . . . . . . . . . . . . . . . . . . . . . . . . . . . . . 4-26
In Foreign Countries . . . . . . . . . . . . . . . . . . . . . . . . . . . 6-3
IntheRain . . . . . . . . . . . . . . . . . . . . . . . . . . . . . . . . . . 4-16
Night . . . . . . . . . . . . . . . . . . . . . . . . . . . . . . . . . . . . . .
4-15
OnCurves . . . . . . . . . . . . . . . . . . . . . . . . . . . . . . . . . .
4-10
On Grades While Towing a Trailer . . . . . . . . . . . . . . . 4-38
On Hill and Mountain Roads . . . . . . . . . . . . . . . . . . . . 4-22
On Snow and Ice . . . . . . . . . . . . . . . . . . . . . . . . . . . . .
4-25
4-18
Throughwater . . . . . . . . . . . . . . . . . . . . . . . . . . . . . . .
WetRoads . . . . . . . . . . . . . . . . . . . . . . . . . . . . . . . . . .
4-16
Winter . . . . . . . . . . . . . . . . . . . . . . . . . . . . . . . . . . . . . . 4-24
With a Trailer . . . . . . . . . . . . . . . . . . . . . . . . . . . . . . . .
4-37
DrunkenDriving . . . . . . . . . . . . . . . . . . . . . . . . . . . . . . . .
4-2
E a s y Entry Seat . . . . . . . . . . . . . . . . . . . . . . . . . . . . . . . .
1-5
Electrical Equipment. Adding . . . . . . 2- 13. 2- 14. 3-2 I. 6.52
Electrical. .System
Engine
. . . . . . ........................................................ . . . 6-8.6-52
6-9
Coolant . . . . . . . . . . . . . . . . . . . . . . . . . . . . . . . . . . . . .
Coolant Heater . . . . . . . . . . . . . . . . . . . . . . . . . . . . . . .
Coolant Level Check . . . . . . . . . . . . . . . . . . . . . . . . . .
Coolant Temperature Gage .....................
Exhaust . . . . . . . . . . . . . . . . . . . . . . . . . . . . . . . . . . . . .
FuseBlock . . . . . . . . . . . . . . . . . . . . . . . . . . . . . . . . . .
Identification . . . . . . . . . . . . . . . . . . . . . . . . . . . . . . . .
OilLevelCheck . . . . . . . . . . . . . . . . . . . . . . . . . . . . . .
Overheating . . . . . . . . . . . . . . . . . . . . . . . . . . . . . . . . .
Running While Parked . . . . . . . . . . . . . . . . . . . . . . . . .
Specifications . . . . . . . . . . . . . . . . . . . . . . . . . . . . . . . .
StartingYour . . . . . . . . . . . . . . . . . . . . . . . . . . . . . . . .
6-22
2-15
7-38
2-67
2-27
6-56
6-52
7-38
5-13
2-28
6-59
2-12
9-3
Engineoil . . . . . . . . . . . . . . . . . . . . . . . . . . . . . . . . . . . . 6-10
Adding . . . . . . . . . . . . . . . . . . . . . . . . . . . . . . . . . . . . .
6-11
Additives . . . . . . . . . . . . . . . . . . . . .
. . . . . . 6-13
. . . . . . . . . . . . . . 6-11
Checking . . .
Used . . . . . . . . . . . . . . . . . . . . . . . . . . . . . . . . . . . . . . . 6-14
What To Use . . . . . . . . . . . . . . . . . . . . . . . . . . . . . . . . .
6- 12
Whentochange . . . . . . . . . . . . . . . . . . . . . . . . . . . . . .
6-14
Ethanol . . . . . . . . . . . . . . . . . . . . . . . . . . . . . . . . . . . . . . . .
6-2
ETS (Enhanced Traction System)
Active Light . . . . . . . . . . . . . . . . . . . . . . . . . . . . . 2-67, 4-8
Warning Light . . . . . . . . . . . . . . . . . . . . . . . . . . .
2-66, 4-9
Exhaust, Engine . . . . . . . . . . . . . . . . . . . . . . . . . . . . . . . . 2-27
F a b r i c Cleaning . . . . . . . . . . . . .
. . . 6-45
Fifth Gear, Manual Transaxle . . .
. . . . . . 2-22
Filling Your Tank . . . . . . . . . . .
. . . . 6-4
Filter, Air . . . . . . . . . .
. . . . . . . . . . . . . . . . . . . . . . . 6-15
Finisheare . . . . . . . . . . . . . . . . . . . . . . . . . . . . . . . . . . . .
6-48
Finish Damage . . . . . . . . . . . . . . . . . . . . . . . . . . . . . . . . .
6-50
First Gear, Automatic Transaxle . . . . . . . . . . . . . . 2-19, 2-20
First Gear, Manual Transaxle . . . . . . . . . . .
. . . . . . 2-21
Flashers, Hazard Warning . . . . . . . . . . . . . . . . . . . . . . . . . 5- 1
Flat Tire, Changing . . . . . . . . . . . . . . . . . . . . . . . . . . . . .
5-2 1
Floor Mat Retainer ..............................
2-45
Fluids and Lubricants ............................
7-44
Foreign Countries. Fuel . . . . . . . . . . . . . . . . . . . . . . . . . . . 6-3
Fourtls Ge.a Mmud Transaxie
.
. 2-22..
French Language Manual . . . . . . . . . . . . . . . . . . . . . . . . . . . u
Front Reading Lamps . . . . . . . . . . . . . . . . . . . . . . . . . . . . 2-41
Front Towing . . . . . . . . . . . .
. . . . . . . . . . . . . . 5-9
Fuel . . . . . . . . . . . . . .
. . . . . . . . . . . . . . . . . 6-2
Filling Your Tank . .
. . . . . . . . . . . . . . . . . . . . . . 6-4
=
9-4
+
= =
= =
%
I I
=
%
Gage . . . . . . . . . . . . .
In Foreign Countries . .
Fuses and Circuit Breakers
. . . 2-74
.
. . . . 6-3
. . . 6-53
Gages
Engine Coolant Temperature . . .
. . . 2-67
. . . 2-74
Fuel . . . . . . . . . . . . . . . . . . . .
Speedometer . . . . . . .
... 2-61
Tachometer . . . . . . . . . . . . . . . . . . . . . . . . . . . . . . . .
2-62
GAWR . . . . . . . . . . . . . . . . . . . . . . . . . . . . . . . . . . . . . . .
4-31
Gear Positions, Automatic Transaxle . . . . . . . . . . . . . . . . 2-16
Gear Positions, Manual Transaxle . . . . . . . . . . . . . . . . 2-21
Graphic Equalizer . . . . . . . . . . . . . . . . . .
. . . 3-13, 3-16
Gross Axle Weight Rating . . . . . . . . . . . . . . . . . . . . . . . .
4-31
Gross Vehicle Weight Rating . . . . . . . . . . . . . . . . . . . . . . 4-31
..
Guide en Fraqais . . . . . . . . . . . . . . . . . . . . . . . . . . . . . . . . .
11
GVWR . . . . . . . . . . . . . . . . . . . . . . . . .
. . . . . . . . 4-31
Halogen Bulbs . . . . . . . . . . . . . . . . . . . . . . . . . . . . . . . . 6-32
Hazard Warning Flashers . . . . . . . . . . . . . . . . . . . . . . . . . . 5-1
Head Redtraints . . . . . . . . . . . . . . . . . . . . . . . . . . . . . . .
1-4
Headlamps . . . . . . . . . . . . . . . . .
...
. . . . . . . . 2-38
Bulb Replacement . . . . . . . . . . . . . . . . . . . . . . .
6-32, 6-57
High/Low Beam Changer . . . . . . . . . . . . . . . . . . . . . .
2-31
On Reminder . . . . . . . . . . . . . . . . . . . . . . . . . . . . . . . .
2-39
Wiring . . . . . . . . . . . . . . . . . . . . . . . . . . . . . . . . . . . . . 6-53
Hearing ki=i@aird,c m t a i a Asiij-tarnce . . .
.... 8 4
HeatiTlg . . . . . . . . . . . . . . . . . . . . . . . . . . . . . . . . . . . . . . . . 3-5
High-Beam Headlamps . . . . . . . . . . . . . . . . . . . . . . . . . .
2-31
Highway Hypnosis . . . . . . . . . . . . . . . . . . . . . . . . . . . . . .
4-22
Hill and Mountain Roads . . . . . . . . . . . . . . . . . . . . . . .
4-22
Hitches, Trailer . . . . . . . . .
. . . . . . . . . . 4-36
Hood
Checking Things Under . . . . . . . . . . . . . . . . . . . . . . . . .
Prop . . . . . . . . . . . . . . . . . . . . . . . . . . . . . . . . . . . . . . . .
Release . . . . . . . . . . . . . . . . . . . . . . . . . . . . . . . . . . . . . .
Horn . . . . . . . . . . . . . . . . . . . . . . . . . . . . . . . . . . . . . . . . .
Hydraulic Clutch . . . . . . . . . . . . . . . . . . . . . . . . . . . . . . .
Hydraulic Clutch Fluid . . . . . . . . . . . . . . . . . . . . . . . . . . .
Hydraulic Clutch System Check . . . . . . . . . . . . . . . . . . .
Hydroplaning . . . . . . . . . . . . . . . . . . . . . . . . . . . . . . . . . .
6-6
6-7
6-6
2-29
6-2 1
6-21
7-39
18
4-
Ignition Switch . . . . . . . . . . . . . . . . . . . . . . . . . . . . . . . .
2-10
Illuminated Entry . . . . . . . . . . . . . . . . . . . . . . . . . . . . . . .
2-41
Inflation, Tire . . . . . . . . . . . . . . . . . . . . . . . . . . . . . . . . . .
6-37
Inside Daymight Rearview Mirror . . . . . . . . . . . . . . . . . 2-42
Inspections . . . . . . . . . . . . . . . . . . . . . . . . . . . . . . . . . . . .
7-43
Brake System . . . . . . . . . . . . . . . . . . . . . . . . . . . . . . . .
7-43
Exhaust Systems . . . . . . . . . . . . . . . . . . . . . . . . . . . . .
7-43
Front-Wheel-Drive Axle Boot and Seal . . . . . . . . . . . 7-43
Radiator and Heater Hose ......................
7-43
Steering . . . . . . . . . . . . . . . . . . . . . . . . . . . . . . . . . . . .
7-43
Suspension . . . . . . . . . . . . . . . . . . . . . . . . . . . . . . . . . .
7-43
Throttle Linkage . . . . . . . . . . . . . . . . . . . . . . . . . . . . . .
7-43
Instrument Panel . . . . . . . . . . . . . . . . . . . . . . . . . . . . . . . 2-58
Brightness Control . . . . . . . . . . . . . . . . . . . . . . . . . . . .
2-40
.
.
.
.
.
.
.
.
.
.
.
.
.
.
.
.
.
.
.
.
.
.
.
.
.
.
.
.
.
.
.
.
.
.
.
.
6-46
Cleaning
Cluster . . . . . . . . . . . . . . . . . . . . . . . . . . . . . . . . . . . . .
2-60
FuseBlock . . . . . . . . . . . . . . . . . . . . . . . . . . . . . . . . . .
6-54
Interior Lamps . . . . . . . . . . . . . . . . . . . . . . . . . . . . . . . . .
2-40
2-7
Jack, Tire . . . . . . . . . . . . . . . . . . . . . . . . . . . . . . . . . . . .
Jump Starting . . . . . . . . . . . . . . . . . . . . . . . . . . . . . . . . . . .
5-21
5-2
K e y Lock Cylinders Service .....................
Key Release Button . . . . . . . . . . . . . . . . . . . . . . . . . . . . .
Keys . . . . . . . . . . . . . . . . . . . . . . . . . . . . . . . . . . . . . . . . . .
7-40
2-12
2-1
Labels ..................................
4-30, 6-52
Certification . . . . . . . . . . . . . . . . . . . . . . . . . . . . . . . . .
4-31
Certificationnire . . . . . . . . . . . . . . . . . . . . . . . . . . . . .
4-30
Service Parts Identification .....................
6-52
Tire-Loading Information ......................
4-30
Vehicle Identification Number . . . . . . . . . . . . . . . . . . . 6-52
Lamps . . . .. .. .. .. .. .. .. .. .. .. .. .. .. .. .. .. .. .. .. .. .. .. .. .. .. .. .. .. .. .. .. .. ..........
2-38
Interior
2-4C
On Reminder . . . . . . . . . . . . . . . . . . . . . . . . . . . . . . . .
2-39
Latches, Seatback . . . . . . . . . . . . . . . . . . . . . . . . . . . . . . . .
1-4
Leaving Your Vehicle .............................
2-2
Leaving YourVehicle with the Engine Running . . . . . . . 2-25
Lighter . . . . . . . . . . . . . . . . . . . . . . . . . . . . . . . . . . . . . . .
2-4f
Lights
Air Bag Readiness . . . . . . . . . . . . . . . . . . . . . . .
1-20, 2-62
Anti-Lock Brake System Warning . . . . . . . . . . . . 2-65, 4 4
Battery . . . . . . . . . . . . . . . . . . . . . . . . . . . . . . . . . . . . .
2-61
Brake System Warning .........................
2-6~
Check Engine . . . . . . . . . . . . . . . . . . . . . . . . . . . . . . . .
2-62
Check Gages . . . . . . . . . . . . . . . . . . . . . . . . . . . . . . . .
2-7:
Check Oil . . . . . . . . . . . . . . . . . . . . . . . . . . . . . . . . . . .
2-72
ETS Active (Enhanced Traction System) . . . . . . 2-67, 4 4
ETS Warning (Enhanced Traction System) . . . . . 2-66, 4-!
Interior . . . . . . . . . . . . . . . . . . . . . . . . . . . . . . . . . . . . .
2-4(
Low Coolant Warning ....................
2-68, 6-2.
Oil Warning . . . . . . . . . . . . . . . . . . . . . . . . . . . . . . . . .
Passlock Warning . . . . . . . . . . . . . . . . . . . . . . . . . . .
2-71
Safety Belt Reminder ......................
1-6, 2-6.
Up-Shift . . . . . . . . . . . . . . . . . . . . . . . . . . . . . . . . . . . .
2-7.
Loading YourVehicle . . . . . . . . . . . . . . . . . . . . . . . . . . .
4-31
9-5
Locks
....
. . . . . . . . . . . 2-3
Cylinders . . . . . . . . . . . . .
. . . . . . 7-40
Door ....................
...
. . . . 2-3
Key Lock Cylinder Service . . . . . . . . . . . . . . . . . . . . .
7-40
PowerDoor . . . . . . . . . . . . . . . . . . . . . . . . . . . . . . . . . .
2-4
Rear Door Security . . . . . . . . . . . . . . . . . . . . . . . . . . . . .
2-5
Steering Column Lock Check . . . . . . . . . . . . . . . . . . . 7-41
Low Coolant Warning Light . . . . . . . . . . . . . . . . . 2-68, 6-22
Lowering the Convertible Top Manually . . . . . . . . . . . . . 2-55
Lowering Your Convertible Top . . . . . . . . . . . . . . . . . . . 2-47
Lubricants and Fluids . . . . . . . . . . . . . . . . . . . . . . . . . . . . 7-44
Lubrication Service, Body . . . . . . . . . . . . . . . . .
. . . 7-40
Maintenance, Normal Replacement Parts . . . . . . . . . . . 6-59
Maintenance Record ............................
7-46
Maintenance Schedule ............................
7- 1
Long Tripmighway Definition . . . . . . . . . . . . . . . . . . . 7-5
Long Tripmighway Intervals .....................
7-5
Owner Checks and Services .....................
7-38
Periodic Maintenance Inspections . . . . . . . . . . . . . . . . 7-43
Recommended Fluids and Lubricants . . . . . . . . . . . . . 7-44
-SckduleSl &Maintenaae
Services ................... 7-3
Short Trip/City Definition .......................
7-4
Short Trip/City Intervals ........................
7-4
Maintenance, Underbody .........................
6-50
Maintenance When Trailer Towing . . . . . . . . . . . . . . . . . 4-40
Malfunction Indicator Lamp ......................
2-68
ManualFrontSeat ...............................
1-1
Manual Lumbar Support . . . . . . . . . . . . . . . . . . . . . . . . . .
1-2
Manual Remote Control Mirror ....................
2-43
Manual Transaxle ...............................
2- 12
Shifting .....................................
2-21
Starting Your Engine ..........................
2- 12
9-6
.
hfanrral Transaxle Fluid . .
Methanol . . . . . . . . . . .
Manual Transaxle Check
. . 7-33
..
.......
...
. . 6-19
. . . . . . 6-2
Mirrors . . . . . . . . . . . . . . . . . . . . . . . . . . . . . . . . . . . . .
Convex Outside . . . . . . . . . . . . . . . . . . . . . . . . . . . . . .
Inside Daymight Rearview . . . . . . . . . . . . . . . . . . . . .
Manual Remote Control . . . . . . . . . . . . . . . . . . . . . .
Power Remote Control . . . . . . .
............
Mountain Roads . . . . . . . . . . . . . . . . . . . . . . . . . . . . . . . .
Multifunction Lever . . . . . . . . . . . . . . . . . . . . . . . . . . . . .
2-42
2-44
2-42
2-43
2-43
4-22
2-30
Neutral, Automatic Transaxle .
. . 2-18
Neutral, Manual Transaxle . . . . . . . .
. . . . . . . . . . 2-22
New Vehicle “Break-In” . . . . . . . . . . . . . . . . . . . . . . . . .
2-10
Nightvision . . . . . . . . . . . . . . . . . . . . . . . . . . . . . . . . . . .
4-15
. . 2-61
odometer . . . . . . . .
Odometer, Trip . . . . . . . . . .
. . . . . . . . . . . . . . . 2-61
Off-Road Recovery . . . . . . . . . . . . . . . . . . . . . . . . . . . . .
4-12
Oil, Engine . . . . . . . . . . . . . . . . . . . . . . . . . . . . . . . . . . . .
6-10
Oil Warning Light . . . . . . . . . . . . . . . . . . . . . . . . . . . . . .
2-71
OYerdriY€&-4Um&ie Tl-m.axle .
. .
. . 2-1 9
Uverheating Engine . . . . . . . . . . . . . . . . . . . . . . . . . . . . .
5-13
Owner Checks and Services .......................
7-38
Owner Publications, Ordering . . . . . . . . . . . . . . . . . . . . . 8-11
=
5
5
5
5
5
5
5
5
5
L
c
c
L
P a i n t Spotting, Chemical . . .
. . 6-50
Park
Automatic Transaxle . . . . . . . . . . . . . . . . . . . . . . . . . .
2-17
Shifting Into . . . . . . . . . . . . . . . . . . . . . . . . . . . . . . . . .
2-24
Shifting Out of . . . . . . . . . . . . . . . . . . . . .
2-26
Parking
AtNight . . . . . . . . . . . . . . . . . . . . . . . . . . . . . . . . . . . . .
2-9
Brake . . . . . . . . . . . . . . . . . . . . . . . . . . . . . . . . . . . . . .
2-23
Brake Mechanism Check . . . . . . . . . . . . . . . . . . . . . . .
7-42
Lots . . . . . . . . . . . . . . . . . . . . . . . . . . . . . . . . . . . . . . . .
2-9
Over Things That Burn . . . . . . . . . . . . . . . . . . . . . . . .
2-27
With a Trailer . . . . . . . . . . . . . . . . . . . . . . . . . . . . . . . .
4-39
Your Vehicle, Manual Transaxle . . . . . . . . . . . . . . . . . 2-26
Passenger Position . . . . . . . . . . . . . . . . . . . . . . . . . . . . . .
1-25
Passing . . . . . . . . . . . . . . . . . . . . . . . . . . . . . . . . . . . . . . .
4-12
Passlock" . . . . . . . . . . . . . . . . . . . . . . . . . . . . . . . . . . . . .
2-9
Passlock" Warning Light . . . . . . . . . . . . . . . . . . . . . . . .
2-72
Periodic Maintenance Inspections . . . . . . . . . . . . . . . . . . 7-43
Pontiac Cares Information . . . . . . . . . . . . . . . . . . . . . . . . .
8-1
Power
DoorLocks . . . . . . . . . . . . . . . . . . . . . . . . . . . . . . . . . . .
2-4
Option Fuses . . . . . . . . . . . . . . . . . . . . . . . . . . . . . . . .
6-53
Remote Control Mirror ........................
2-43
Steering .........................
4-10?6-26
Steering Fluid . . . . . . . . . . . . . . . . . . . . . . . . . . . . . . . .
6-26
Windows . . . . . . . . . . . . . . . . . . . . . . . . . . . . . . . . . . .
2-29
Pregnancy, Use of Safety Belts ....................
1-25
Problems on the Road . . . . . . . . . . . . . . . . . . . . . . . . . . . .
5- 1
Publications, Service and Owner . . . . . . . . . . . . . . . . . . . 8- 11
R a d i o Reception . . . . . . . . . . . . . . . . . . . . . . . . . . . . . .
3-20
Radios . . . . . . . . . . . . . . . . . . . . . . . . . . . . . . . . . . . . . . . .
3-7
Rain. Driving In . . . . . . . . . . . . . . . . . . . . . . . . . . . . . . . .
4- 16
Raising the Convertible Top Manually . . . . . . . . . . . . . . 2-55
Raising Your Convertible Top .....................
2-52
Rear
2-5
Door Security Locks . . . . . . . . . . . . . . . . . . . . . . . . . . .
Outside Seat Position . . . . . . . . . . . . . . . . . . . . . . . . . . 1-26
Safety Belt Comfort Guides . . . . . . . . . . . . . . . . . . . . .
1-29
Seat Passengers . . . . . . . . . . . . . . . . . . . . . . . . . . . . . .
1-25
Window Defogger . . . . . . . . . . . . . . . . . . . . . . . . . . . . .
3-6
5-11
RearTowing . . . . . . . . . . . . . . . . . . . . . . . . . . . . . . . . . . .
Rearview Mirror, Inside Daymight . . . . . . . . . . . . . . . . . 2-42
Reclining Front Seatbacks . . . . . . . . . . . . . . . . . . . . . . . . .
1-2
Recreational Vehicle Towing . . . . . . . . . . . . . . . . . . . . . . 4-28
Refrigerants, Air Conditioning . . . . . . . . . . . . . . . . . . . .
6-58
Remote Keyless Entry System . . . . . . . . . . . . . . . . . . . . . .
2-6
Remote Trunk Release . . . . . . . . . . . . . . . . . . . . . . . . . . . .
2-8
Replacement
Bulbs . . . . . . . . . . . . . . . . . . . . . . . . . . . . . . . . . . . . . .
6-57
Parts . . . . . . . . . . . . . . . . . . . . . . . . . . . . . . . . . . . . . . .
6-59
Wheel . . . . . . . . . . . . . . . . . . . . . . . . . . . . . . . . . . . . . .
6-42
Replacing Safety Belts . . . . . . . . . . . . . . . . . . . . . . . . . . .
1-46
Reporting Safety Defects . . . . . . . . . . . . . . . . . . . . . . . . . .
8-9
Restraints
Checking . . . . . . . . . . . . . . . . . . . . . . . . . . . . . . . . . . .
1-46
Child
.......................................
1-35
Head . . . . . . . . . . . . . . . . . . . . . . . . . . . . . . . . . . . . . . . .
1-4
Replacing Parts After a Crash . . . . . . . . . . . . . . . . . . . 1-46
System Check . . . . . . . . . . . . . . . . . . . . . . . . . . . . . . . . 7-39
Reverse, Automatic Transaxle .....................
2-18
Reverse, Manual Transaxle . . . . . . . . . . . . . . . . . . . . . . .
2-22
Right Front Passenger Position ....................
1-25
Roadside Assistance . . . . . . . . . . . . . . . . . . . . . . . . . . . . . .
8-5
Roadside Assistance, Canadian .....................
8-6
Rocking YourVehicle . . . . . . . . . . . . . . . . . . . . . . . . . . .
5-33
Rotation, Tires . . . . . . . . . . . . . . . . . . . . . . . . . . . . . . . . .
6-38
9-7
Safety Belt Extender . . .
. 1-46
Manual Front . . . . . . . . . .
. . 1-1
Safety Belts . . . . . . .
...
. . 1-6
Manual Lumbar Support . . .
. . 1-2
Adults . . . . . . . . . . . . . . . . . . . . . . . . . . . . . . . . . .
1- 11
Rear . . . . . . . . . . . . . . . . . . . . . .
. . 1-5
Care .......................................
6-46
Restraint Systems . . . . . . . . . . . . . . . . . . . . . . . . . . . . 1-I
Center Rear Passenger Position . . . . . . . . . . . . . . . . . . 1-32
Seat Controls .................................
1.
1
children ......................................
1-33
securing a Child Restraint . . . . . . . . . . . . . . . . . . . . . . 1-35
Driver Pmitiorr .......................
. . . . 1-11
S ~ C OGear.
I I ~ Ar~t~rnatir:
T m ~ a x l e. . . . . . . . . . . . 2.19. 2.20
Extender ....................................
1-46
Secund Gear. Manual Transaxle . .
...
. . . . . . 2-21
How to Wear Properly .........................
1 11
Security System .................................
2-9
Incorrect Usage . . . . . . . . . . . . . . . . . . . . 1- 15, 1-44, 1-45
Service ........................................6-1
Lap Belt .................................... 1-32
Bulletins, Ordering ............................
8-11
L'ap-Shoulder ...............
. . . . . . . . 1-11. 26
Manuals, Ordering . . . . . . . . . . .
. . . . . . . . . . . 8-11
Larger Children . . . . . . . . . .
......
. . . . 1-43
Parts Identification Label . . . . . .
...
. . . . . . 6-52
Passenger Position .............................
1-25
Publications, Ordering .........................
8-11
Questions and Answers ........................
1- 10
Work, Doing Your Own . . . . . . . . . . . . . . . . . . . . . . . . . 6-1
Rear Comfort Guides ..........................
1-29
Service and Appearance Care ......................
6-1
Rear Seat Outside Passenger Positions ............ 1-26
Service and Owner Publications . . . . . . . . . . . . . . . . . . . 8-11
Rear Seat Passengers . . . . . . . . . . . . . . . . . . . . . . . . . . 1-25
Service Publications . . . . . . . . . . . . . . . . . . . . . . . . . . . . . 8-11
1-6. 2-63
Reminder Light ..........................
Servicing Your Air Bag-Equipped Pontiac . . . . . . . . . . . 1-24
Replacing After a Crash ........................
1-46
Sheet Metal Damage . . . . . . . . . . . . . . . . . . . . . . . . . . . . 6-50
Right Front Passenger Position . . . . . . . . . . . . . . . . . . 1-25
Shift Lever ...............................
2-16. 2-21
.... 1-14 Shift Light . . . . . . . . . . . .
Shoulder Belt Height Adjuster . . . .
. . . . . . . . . . 2-23
Smaller Children and Babies . . . . . . . . . . . . . . . . . . . . 1-33 Speeds
Shift
.........
...
. . . . . . . . 2-22
Use During Pregnancy .........................
1-25
Shifting
WhyTheyWork ............................... 1-7
Automatic Transaxle . . . . . . . . .
. . . . . . . . . . 2-16
Safety Chains ..................................
4-36
Into Park (P) . . . . . . .
...
. . . . . . 2-24
Safety Defects. Reporting .........................
8-9
Transaxle
.
.
.
.
.
.
.
.
.
.
.
.
.
.
. . . . . 2-21
Manual
...
Safety Wmings and Symbols .......................
HI
~ t o f ark
P .................................. 2-26
Scheduled Maintenance Services . . . . . . . . . . . . . . . . . . . .7-3
Shoulder Belt Height Adjuster .....................
1-14
Seatback
Signaling Turns . . . . . . . . . . . . . . . . . . . . . . . . . . . . . . . . 2-31
Latches . . . . . . . . . .
. . 1-4
Skidding . . . . . . . . . . . . . . . . . . .
............... 4-14
Reclining Front . . .
...
. . 1-2
Sound Equipment, Adding . . . . . . . . . . . . . . . . . . . . . . . . 3-21
Seats
Spare Tire. Compact . . . . . . . . . . . . . . . . . . . . . . . . . . . . . 5-32
EasyEntry . . . . . . . . . . . . . . . . . . . . . . . . . . . . . . . . . . . 1-5
Specifications and Capacities ......................
6-58
-
Specifications. Engine . . . . . . . . . . . . . . . . . . . . . . . . . . .
6-59
Speech Impaired. Customer Assistance . . . . . . . . . . . . . . . 8-4
Speedometer . . . . . . . . . . . . . . . . . . . . . . . . . . . . . . . . . . .
2-61
SRS . . . . . . . . . . . . . . . . . . . . . . . . . . . . . . . . . . . . . . . . .
1-19
Stains, Cleaning . . . . . . . . . . . . . . . . . . . . . . . . . . . . . . . .
6-45
Starter Switch Check . . . . . . . . . . . . . . . . . . . . . . . . . . . .
7-40
Starting Your Engine .......................
2- 12. 2- 14
Steam . . . . . . . . . . . . . . . . . . . . . . . . . . . . . . . . . . . . . . . .
5-13
Steering . . . . . . . . . . . . . . . . . . . . . . . . . . . . . . . . . . . . . .
4-10
Column Lock Check . . . . . . . . . . . . . . . . . . . . . . . . . .
7-41
In Emergencies ...............................
4- 11
Power . . . . . . . . . . . . . . . . . . . . . . . . . . . . . . . . . 4 - 1 0 .
6-26
Tips . . . . . . . . . . . . . . . . . . . . . . . . . . . . . . . . . . . . . . . .
4-10
Wheel. Tilt . . . . . . . . . . . . . . . . . . . . . . . . . . . . . . . . . .
2-30
Steering %%eelControls, Audio . . . . . . . . . . . . . . . . . . . 3- 19
Steering Wheel Controls Fuse Panel. Audio . . . . . . . . . . 6-55
2-44
Storage Compartments ...........................
Storage, Vehicle . . . . . . . . . . . . . . . . . . . . . . . . . . . . . . . .
6-32
Stuck: In Sand. Mud, Ice or Snow . . . . . . . . . . . . . . . . . . 5-33
Sunvisors ....................................
2-47
Sunroof . . . . . . . . . . . . . . . . . . . . . . . . . . . . . . . . . . . . . . .
2-47
Supplemental Restraint System ....................
1- 19
5-17
Surge Tank, Coolant .............................
Surge Tank Pressure Cap .........................
6-26
v
Symbols, Vehicle . . . . . . . . . . . . . . . . . . . . . . . . . . . . . . . . . .
Tachometer . . . . . . . . . . . . . . . . . . . . . . . . . . . . . . . . . .
2-62
Taillamp Bulb Replacement . . . . . . . . . . . . . . . . . . 6.34.6.57
Tape Player Care ...............................
3-21
Theft . . . . . . . . . . . . . . . . . . . . . . . . . . . . . . . . . . . . . . . . . .
2-8
Theft-Deterrent Feature, CD Player . . . . . . . . . . . . . . . . 3- 17
THEFTLOCK . . . . . . . . . . . . . . . . . . . . . . . . . . . .
. . . 3-1 7
TM
1.
Thermostat . . . . . . . . . . . . . . . . . . . . . . . . . . . . . . . . . . . .
6-26
Third Gear, Automatic Transaxle . . . . . . . . . . . . . . . . . . . 2-20
Third Gear, Manual Transaxle .....................
2-22
Tilt Steering Wheel . . . . . . . . . . . . . . . . . . . . . . . . . . . . .
2-30
Time, Setting the . . . . . . . . . . . . . . . . . . . . . . . . . . . . . . . .
3-7
Tire Chains . . . . . . . . . . . . . . . . . . . . . . . . . . . . . . . . . . . .
6-43
Tire Loading . . . . . . . . . . . . . . . . . . . . . . . . . . . . . . . . . . .
4-30
Tire-Loading Information Label . . . . . . . . . . . . . . . . . . . 4-32
Tires . . . . . . . . . . . . . . . . . . . . . . . . . . . . . . . . . . . . . . . . . 6-36
6-42
Alignment and Balance ........................
Buying New . . . . . . . . . . . . . . . . . . . . . . . . . . . . . . . . .
6-39
Chains . . . . . . . . . . . . . . . . . . . . . . . . . . . . . . . . . . . . .
6-43
Changing a Flat . . . . . . . . . . . . . . . . . . . . . . . . . . . . . .
5-21
Cleaning . . . . . . . . . . . . . . . . . . . . . . . . . . . . . . . . . . . .
6-50
C o m ~Sparet
...............................
5-32
Inflation . . . . . . . . . . . . . . . . . . . . . . . . . . . . . . . . . . . .
6-37
Inflation Check . . . . . . . . . . . . . . . . . . . . . . . . . . . . . . . 7-38
Inspection and Rotation ........................
6-38
Loading . . . . . . . . . . . . . . . . . . . . . . . . . . . . . . . . . . . .
4-30
Pressure . . . . . . . . . . . . . . . . . . . . . . . . . . . . . . . . . . . .
6-37
Temperature . . . . . . . . . . . . . . . . . . . . . . . . . . . . . . . . .
6-41
.
.
.
.
.
.
.
.
.
.
.
.
.
.
.
.
.
.
.
.
.
.
.
.
.
.
.
.
.
.
.
.
.
.
.
.
Traction
6-41
Treadwear . . . . . . . . . . . . . . . . . . . . . . . . . . . . . . . . . . .
6-41
Uniform Quality Grading . . . . . . . . . . . . . . . . . . . . . . .
6-40
Used Replacement Wheel ......................
6-43
Wear Indicators . . . . . . . . . . . . . . . . . . . . . . . . . . . . . .
6-39
Wheel Replacement ...........................
6-42
When It’s Time for New .......................
6-39
TopStrap . . . . . . . . . . . . . . . . . . . . . . . . . . . . . . . . . . . . .
1-36
2-26
TorqueLock . . . . . . . . . . . . . . . . . . . . . . . . . . . . . . . . . . .
Torque, Wheel Nut .........................
5-29, 6-58
Towing
F k m i t h e b n t ...............................
4-28
From the Rear . . . . . . . . . . . . . . . . . . . . . . . . . . . . . . .
4-30
Front . . . . . . . . . . . . . . . . . . . . . . . . . . . . . . . . . . . . . . . .
5-9
Rear . . . . . . . . . . . . . . . . . . . . . . . . . . . . . . . . . . . . . . .
5-11
Recreational Vehicle . . . . . . . . . . . . . . . . . . . . . . . . . .
4-28
Towing a Trailer ...........................
4.32.4.40
Towing Your Vehicle . . . . . . . . . . . . . . . . . . . . . . . . . . . . .
5-7
Trailer
Brakes .....................................
4-36
Driving on Grades . . . . . . . . . . . . . . . . . . . . . . . . . . . .
4-38
Driving with . . . . . . . . . . . . . . . . . . . . . . . . . . . . . . . . .
4-37
Hitches . . . . . . . . . . . . . . . . . . . . . . . . . . . . . . . . . . . . .
4-36
Maintenance When Towing .....................
4-40
Parking on Hills ..............................
4-39
Safety Chains . . . . . . . . . . . . . . . . . . . . . . . . . . . . . . . .
4-36
Tongueweight . . . . . . . . . . . . . . . . . . . . . . . . . . . . . . .
4-35
Total Weight on Tires . . . . . . . . . . . . . . . . . . . . . . . . . .
4-35
Towing . . . . . . . . . . . . . . . . . . . . . . . . . . . . . . . .
4.32, 4.40
TumSignals . . . . . . . . . . . . . . . . . . . . . . . . . . . . . . . . .
4-38
Weigh1 . . . . . . . . . . . . . . . . . . . . . . . . . . . . . . . . . . . . .
4-34
Transaxle
Automatic . . . . . . . . . . . . . . . . . . . . . . . . . . . . . .
6- 16. 6. 19
Manual . . . . . . . . . . . . . . . . . . . . . . . . . . . . . . . . . . . . . 6-19
Transmitters. Keyless Entry ........................
2-6
Transportation. Courtesy ..........................
8-7
Trip Odometer . . . . . . . . . . . . . . . . . . . . . . . . . . . . . . . . .
2-61
TTY Users . . . . . . . . . . . . . . . . . . . . . . . . . . . . . . . . . . . . .
8-4
Turn Signal and Lane Change Signals . . . . . . . . . . . . . . .2-31
Turn Signal/Multifunction Lever . . . . . . . . . . . . . . . . . . . 2-30
Turn Signals When Towing a Trailer . . . . . . . . . . . . . . . . 4-38
Underbody Flushing Service .....................
Underbody Maintenance .........................
9-10
7-42
6-50
Up-ShXt Light . . . . . . . . . . . . . . . . . . . . . . . . . . . . . . . . . 2-73
vehicle
Control . . . . . . . . . . . . . . . . . . . . . . . . . . . . . . . . . . . . . . 4-4
Damage Warnings . . . . . . . . . . . . . . . . . . . . . . . . . . . . . . iv
Dimensions . . . . . . . . . . . . . . . . . . . . . . . . . . . . . . . . . 6-60
Identification Number . . . . . . . . . . . . . . . . . . . . . . . . .
6-52
Loading . . . . . . . . . . . . . . . . . . . . . . . . . . . . . . . . . . . . 4-30
Storage . . . . . . . . . . . . . . . . . . . . . . . . . . . . . . . . . . . . . 6-32
Ventilation System . . . . . . . . . . . . . . . . . . . . . . . . . . . . . . .
3-5
Visors. Sun . . . . . . . . . . . . . . . . . . . . . . . . . . . . . . . . . . . . 2-47
w a r n i n g Devices . . . . . . . . . . . . . . . . . . . . . . . . . . . . . . .
5-2
Warning Lights, Gages and Indicators . . . . . . . . . . . . . . . 2-62
Washer Fluid. Windshield . . . . . . . . . . . . . . . . . . . . . . . . 6-27
Washing Your Vehicle . . . . . . . . . . . . . . . . . . . . . . . . . . . 6-47
Weatherstrips . . . . . . . . . . . . . . . . . . . . . . . . . . . . . . . . . . 6-47
Wheel
6-42
Alignment . . . . . . . . . . . . . . . . . . . . . . . . . . . . . . . . . .
Nut Torque . . . . . . . . . . . . . . . . . . . . . . . . . . . . .
5-29. 6-58
Wep-lacernenl . . . . . . . . . . . . . . . . . . . . . . . . . . . . . . . . .
6-42
Used Replacement . . . . . . . . . . . . . . . . . . . . .' . . . . . . . 6-43
Wrench . . . . . . . . . . . . . . . . . . . . . . . . . . . . . . . . . . . . . 5-21
Windows . . . . . . . . . . . . . . . . . . . . . . . . . . . . . . . . . . . . .
2-29
Windows. Power . . . . . . . . . . . . . . . . . . . . . . . . . . . . . . .
2-29
Windshield Washer . . . . . . . . . . . . . . . . . . . . . . . . . . . . .
2-33
Fluid . . . . . . . . . . . . . . . . . . . . . . . . . . . . . . . . . .
2-34. 6-27
Fluid Level Check . . . . . . . . . . . . . . . . . . . . . . . . . . . .
7-38
Windshield Wipers . . . . . . . . . . . . . . . . . . . . . . . . .
2-32. 6.53
Blade Replacement ......................
6-35. 6-58
Winter Driving . . . . . . . . . . . . . . . . . . . . . . . . . . . . . . . . .
4-24 .
Wiring, Headlamp ..............................
6-53
WreckerTowing . . . . . . . . . . . . . . . . . . . . . . . . . . . . . . . . . 5-7
Wrench. Wheel .................................
5-21
1996