1
Sun™ Integrated Lights Out
Manager (ILOM) 3.0
CLI Procedures Guide
Sun Microsystems, Inc.
www.sun.com
Part No. 820-6412-10
December 2008, Revision A
Submit comments about this document at: http://www.sun.com/hwdocs/feedback
Copyright © 2008 Sun Microsystems, Inc., 4150 Network Circle, Santa Clara, California 95054, U.S.A. All rights reserved.
Sun Microsystems, Inc. has intellectual property rights relating to technology embodied in the product that is described in this document. In
particular, and without limitation, these intellectual property rights may include one or more of the U.S. patents listed at
http://www.sun.com/patents and one or more additional patents or pending patent applications in the U.S. and in other countries.
U.S. Government Rights - Commercial software. Government users are subject to the Sun Microsystems, Inc. standard license agreement and
applicable provisions of the FAR and its supplements.
This distribution may include materials developed by third parties.
Parts of the product may be derived from Berkeley BSD systems, licensed from the University of California. UNIX is a registered trademark in
the U.S. and in other countries, exclusively licensed through X/Open Company, Ltd.
Sun, Sun Microsystems, the Sun logo, Java, Solaris, Sun Blade, Sun Fire and docs.sun.com are trademarks or registered trademarks of Sun
Microsystems, Inc., or its subsidiaries, in the U.S. and other countries.
All SPARC trademarks are used under license and are trademarks or registered trademarks of SPARC International, Inc. in the U.S. and other
countries. Products bearing SPARC trademarks are based upon architecture developed by Sun Microsystems, Inc.
Products covered by and information contained in this service manual are controlled by U.S. Export Control laws and may be subject to the
export or import laws in other countries. Nuclear, missile, chemical biological weapons or nuclear maritime end uses or end users, whether
direct or indirect, are strictly prohibited. Export or reexport to countries subject to U.S. embargo or to entities identified on U.S. export exclusion
lists, including, but not limited to, the denied persons and specially designated nationals lists is strictly prohibited.
DOCUMENTATION IS PROVIDED "AS IS" AND ALL EXPRESS OR IMPLIED CONDITIONS, REPRESENTATIONS AND WARRANTIES,
INCLUDING ANY IMPLIED WARRANTY OF MERCHANTABILITY, FITNESS FOR A PARTICULAR PURPOSE OR NON-INFRINGEMENT,
ARE DISCLAIMED, EXCEPT TO THE EXTENT THAT SUCH DISCLAIMERS ARE HELD TO BE LEGALLY INVALID.
Copyright © 2008 Sun Microsystems, Inc., 4150 Network Circle, Santa Clara, California 95054, Etats-Unis. Tous droits réservés.
Sun Microsystems, Inc. détient les droits de propriété intellectuels relatifs à la technologie incorporée dans le produit qui est décrit dans ce
document. En particulier, et ce sans limitation, ces droits de propriété intellectuelle peuvent inclure un ou plus des brevets américains listés à
l’adresse http://www.sun.com/patents et un ou les brevets supplémentaires ou les applications de brevet en attente aux Etats - Unis et dans les
autres pays.
Cette distribution peut comprendre des composants développés par des tierces parties.
Des parties de ce produit pourront être dérivées des systèmes Berkeley BSD licenciés par l’Université de Californie. UNIX est une marque
déposée aux Etats-Unis et dans d’autres pays et licenciée exclusivement par X/Open Company, Ltd.
Sun, Sun Microsystems, le logo Sun, Java, Solaris, Sun Blade, Sun Fire et docs.sun.com sont des marques de fabrique ou des marques déposées
de Sun Microsystems, Inc., ou ses filiales, aux Etats-Unis et dans d’autres pays.
Toutes les marques SPARC sont utilisées sous licence et sont des marques de fabrique ou des marques déposées de SPARC International, Inc.
aux Etats-Unis et dans d’autres pays. Les produits portant les marques SPARC sont basés sur une architecture développée par Sun
Microsystems, Inc.
Les produits qui font l’objet de ce manuel d’entretien et les informations qu’il contient sont regis par la legislation americaine en matiere de
controle des exportations et peuvent etre soumis au droit d’autres pays dans le domaine des exportations et importations. Les utilisations
finales, ou utilisateurs finaux, pour des armes nucleaires, des missiles, des armes biologiques et chimiques ou du nucleaire maritime,
directement ou indirectement, sont strictement interdites. Les exportations ou reexportations vers des pays sous embargo des Etats-Unis, ou
vers des entites figurant sur les listes d’exclusion d’exportation americaines, y compris, mais de maniere non exclusive, la liste de personnes qui
font objet d’un ordre de ne pas participer, d’une facon directe ou indirecte, aux exportations des produits ou des services qui sont regi par la
legislation americaine en matiere de controle des exportations et la liste de ressortissants specifiquement designes, sont rigoureusement
interdites.
LA DOCUMENTATION EST FOURNIE "EN L’ETAT" ET TOUTES AUTRES CONDITIONS, DECLARATIONS ET GARANTIES EXPRESSES
OU TACITES SONT FORMELLEMENT EXCLUES, DANS LA MESURE AUTORISEE PAR LA LOI APPLICABLE, Y COMPRIS NOTAMMENT
TOUTE GARANTIE IMPLICITE RELATIVE A LA QUALITE MARCHANDE, A L’APTITUDE A UNE UTILISATION PARTICULIERE OU A
L’ABSENCE DE CONTREFACON.
Contents
Preface
1.
xviii
CLI Overview
1
About the CLI
2
CLI Hierarchical Architecture
CLI Target Types
CLI Commands
3
3
4
CLI Command Options
4
CLI Command Targets
Command Properties
6
6
ILOM 3.0 Properties Versus ILOM 2.x Properties
CLI Command Syntax
8
Common CLI Command Strings
Executing Commands
7
9
14
▼
Execute Commands Individually
▼
Execute Combined Commands
14
14
2.
Prerequisites for Using the ILOM Command-Line Interface
3.
Logging In to and Out of ILOM
Before Your Initial Login
15
17
18
x
Logging In to ILOM
18
▼
Log In to ILOM Using the root User Account
▼
Set Up a User Account
▼
Log In to ILOM as a User
Recovering a Lost Password
▼
4.
21
21
Configuring ILOM Communication Settings
Configuring Network Settings
Before You Begin
25
▼
Assign Host Name and System Identifier
▼
View and Configure Network Settings
▼
Edit Existing IP Addresses in ILOM
▼
View and Configure DNS Settings
▼
View and Configure Serial Port Settings
▼
Enable HTTP or HTTPS Web Access
25
26
27
29
30
31
33
▼
Establish a Secure Remote SSH Connection
▼
Enable or Disable SSH
33
▼
View the Current Key
34
▼
Generate a New SSH Key
▼
Restart the SSH Server
Managing User Accounts
Configuring User Accounts
▼
xi
23
24
Configuring Secure Shell Settings
5.
20
21
Log Out of ILOM
What Next
19
20
Recover a Lost Password
Logging Out of ILOM
▼
19
35
36
37
39
Configure Single Sign On
Sun ILOM 3.0 CLI Procedures Guide • December 2008
39
33
19
▼
Add a User Account
▼
Change a User Account Password
▼
Assign Roles to a User Account
▼
Delete a User Account
▼
View Individual User Accounts
▼
View a List of User Accounts
▼
View a List of User Sessions
▼
View an Individual User Session
Configuring SSH Keys
39
40
41
41
42
43
43
44
45
▼
Add an SSH Key
▼
Delete an SSH Key
45
46
Configuring Active Directory
47
▼
Enable Active Directory strictcertmode
▼
Check Active Directory certstatus
▼
Remove an Active Directory Certificate
▼
View and Configure Active Directory Settings
▼
Troubleshoot Active Directory Authentication and Authorization
48
49
Configuring Lightweight Directory Access Protocol
▼
Configure the LDAP Server
56
▼
Configure ILOM for LDAP
57
Configuring LDAP/SSL
47
49
56
58
▼
Enable LDAP/SSL strictcertmode
▼
Check LDAP/SSL certstatus
▼
Remove an LDAP/SSL Certificate
▼
View and Configure LDAP/SSL Settings
▼
Troubleshoot LDAP/SSL Authentication and Authorization
Configuring RADIUS
▼
55
59
59
60
61
66
67
Configure RADIUS
67
Contents
xii
RADIUS Commands
6.
69
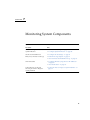
Managing System Components
73
Viewing Component Information and Managing System Components
7.
▼
View Component Information
▼
Prepare to Remove a Component
▼
Return a Component to Service
▼
Enable and Disable Components
Monitoring System Components
74
75
76
76
77
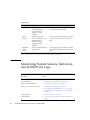
Monitoring System Sensors, Indicators, and ILOM Event Logs
8.
▼
View Sensor Readings
▼
Configure System Indicators
▼
Configure Clock Settings
▼
Filter Event Log Output
▼
View and Clear the ILOM Event Log
▼
Configure Remote Syslog Receiver IP Addresses
▼
View Fault Status
▼
Collect SP Data to Diagnose System Problems
Managing System Alerts
79
81
82
83
87
89
90
90
▼
Create or Edit Alert Rules
▼
Disable an Alert Rule
▼
Generate Test Alerts
90
91
92
CLI Commands for Managing Alert Rule Configurations
Configuring SMTP Client for Email Notification Alerts
▼
xiii
85
86
Managing Alert Rule Configurations
Before You Begin
80
Enable SMTP Client
94
Sun ILOM 3.0 CLI Procedures Guide • December 2008
92
94
78
74
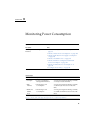
9.
Monitoring Power Consumption
97
Monitoring the Power Consumption Interfaces
Before You Begin
10.
98
▼
Monitor Total System Power Consumption
▼
Monitor Actual Power Consumption
▼
Monitor Individual Power Supply Consumption
▼
Monitor Available Power
▼
Monitor Hardware Configuration Maximum Power Consumption
▼
Monitor Permitted Power Consumption
▼
Configure Power Policy
100
▼
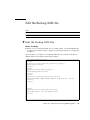
Edit the Backup XML File
104
105
107
110
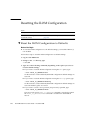
Reset the ILOM Configuration to Defaults
Updating ILOM Firmware
110
111
Updating the ILOM Firmware
Before You Begin
103
107
Resetting the ILOM Configuration
▼
101
105
Restore the ILOM Configuration
Edit the Backup XML file
101
104
Back Up the ILOM Configuration
Restoring the ILOM Configuration
▼
100
102
Backing Up and Restoring ILOM Configuration
▼
99
101
Backing Up the ILOM Configuration
11.
98
112
112
▼
Identify ILOM Firmware Version
▼
Download New Firmware on x64-Based Systems
▼
Download New Firmware on SPARC-Based Systems
▼
Update the Firmware Image
▼
Recover From a Network Failure During Firmware Update
113
113
114
114
116
Contents
xiv
Resetting ILOM SP
▼
12.
117
Reset ILOM SP
117
Managing Remote Hosts
119
Performing the Initial Setup Tasks for Storage Redirection
Before You Begin
120
120
▼
Start Storage Redirection Service
▼
Download and Install the Storage Redirection Client
121
124
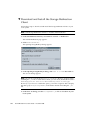
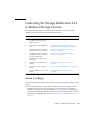
Launching the Storage Redirection CLI to Redirect Storage Devices
Before You Begin
125
▼
Launch Storage Redirection CLI Using a Command Window or
Terminal 126
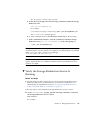
▼
Verify the Storage Redirection Service Is Running
▼
Display Storage Redirection CLI Help Information
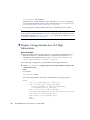
▼
Start Redirection of Storage Device
▼
View Active Storage Redirections
▼
Stop Redirection of Storage Device
▼
Change the Default Storage Redirection Network Port: 2121 131
Issuing Power State Commands
130
132
133
Configure and Run Pc-Check Diagnostics
▼
Generate a Non-Maskable Interrupt
Diagnosing SPARC Systems Hardware Issues
xv
133
134
136
136
▼
Configure Diagnostics Mode
▼
Specify the Diagnostics Trigger
▼
Specify Level of Diagnostics
▼
Specify Verbosity of Diagnostics Output
CLI Command Reference
141
Sun ILOM 3.0 CLI Procedures Guide • December 2008
128
130
▼
Before You Begin
127
129
Diagnosing x64 Systems Hardware Issues
A.
125
136
137
137
138
B.
Storage Redirection Command-Line Modes, Syntax, and Usage
Index
165
169
Contents
xvi
xvii
Sun ILOM 3.0 CLI Procedures Guide • December 2008
Preface
Sun Integrated Lights Out Manager (ILOM) 3.0 CLI Procedures Guide describes how to
perform the required ILOM setup procedures, as well as the typical configuration
procedures you might perform while accessing ILOM features and functions.
This CLI Procedures Guide is written for system administrators who are familiar
with networking concepts and basic system management protocols.
Related Documentation
To fully understand the information that is presented in this guide, use this
document in conjunction with the documents listed in the following table. These
documents are available online at:
http://docs.sun.com/app/docs/prod/int.lights.mgr30#hic
These documents are also available with you platform documentation set at:
http://docs.sun.com/app/docs/prod/servers
First read the ILOM 3.0 Concepts Guide to learn about ILOM’s features and
functionality. To set up a new system supported by ILOM, refer to the ILOM 3.0
Getting Started Guide, where you will find the procedures for connecting to the
network, logging in to ILOM for the first time, and configuring a user account or
directory service. Then, decide which ILOM interface you want to use to perform
other ILOM tasks. You can now refer to the the appropriate ILOM 3.0 Procedures
Guide for your selected interface.
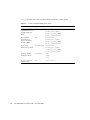
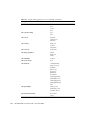
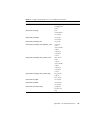
The following table lists the ILOM 3.0 Documentation Collection.
xviii
Title
Content
Part Number
Format
Sun Integrated Lights Out
Manager (ILOM) 3.0 Concepts
Guide
Information that describes
ILOM features and
functionality
820-6410
PDF
HTML
Sun Integrated Lights Out
Manager (ILOM) 3.0 Getting
Started Guide
Information and procedures
for network connection,
logging in to ILOM for the
first time, and configuring a
user account or a directory
service
820-5523
PDF
HTML
Sun Integrated Lights Out
Manager (ILOM) 3.0 Web
Interface Procedures Guide
Information and procedures
for accessing ILOM functions
using the ILOM web interface
820-6411
PDF
HTML
Sun Integrated Lights Out
Manager (ILOM) 3.0 CLI
Procedures Guide
Information and procedures
for accessing ILOM functions
using the ILOM CLI
820-6412
PDF
HTML
Sun Integrated Lights Out
Manager (ILOM) 3.0 SNMP
and IPMI Procedures Guide
Information and procedures
for accessing ILOM functions
using SNMP or IPMI
management hosts
820-6413
PDF
HTML
In addition to the ILOM 3.0 Documentation Collection, associated ILOM
Supplement documents present ILOM features and tasks that are specific to the
server platform you are using. Use the ILOM 3.0 Documentation Collection in
conjunction with the ILOM Supplement that comes with your server platform.
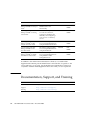
Documentation, Support, and Training
xix
Sun Function
URL
Documentation
http://docs.sun.com/
Support
http://www.sun.com/support/
Training
http://www.sun.com/training/
Sun ILOM 3.0 CLI Procedures Guide • December 2008
ILOM 3.0 Version Numbers
ILOM 3.0 has implemented a new version numbering scheme to help you identify
which version of ILOM you are running on your system. The numbering scheme
includes a five-field string, for example, a.b.c.d.e, where:
■
a - Represents the major version of ILOM.
■
b - Represents a minor version of ILOM.
■
c - Represents the update version of ILOM.
■
d - Represents a micro version of ILOM. Micro versions are managed per
platform or group of platforms. See your platform Product Notes for details.
■
e - Represents a nano version of ILOM. Nano versions are incremental
iterations of a micro version.
For example, ILOM 3.1.2.1.a would designate:
■
ILOM 3 as the major version of ILOM
■
ILOM 3.1 as a minor version of ILOM 3
■
ILOM 3.1.2 as the second update version of ILOM 3.1
■
ILOM 3.1.2.1 as a micro version of ILOM 3.1.2
■
ILOM 3.1.2.1.a as a nano version of ILOM 3.1.2.1
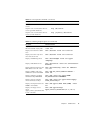
Product Identity Information
Product identity information enables a system to register itself and use certain
automated services based on the service contract associated with its identity. You can
use product identity information to uniquely identify a system. You also need to
supply the product identity information to Sun when you request service for the
system. Product identity consists of the following information:
■ product_name: Name under which a product is sold. For example, “SUN FIRE
X4100 M2.”
■ product_part_number: Namespace assigned by manufacturing within which
the product serial number is unique. A product part number never maps to more
than one product. For example, “602-3098-01.”
■ product_serial_number: Unique identity assigned to each instance of a
product by manufacturing. For example, “0615AM0654A.”
■ product_manufacturer: Manufacturer of the product. For example, ‘SUN
MICROSYSTEMS.”
Preface
xx
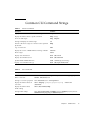
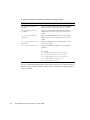
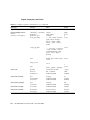
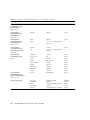
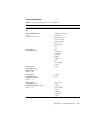
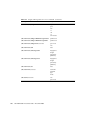
TABLE P-1 describes the common product identity information used by ILOM.
TABLE P-1
Common Product Identity Information
Required Information
xxi
Target
Minimal Properties
Basic product
/SYS
information on server
(rackmounted and
blade)
product_name
product_part_number
product_serial_number
product_manufacturer
Basic product
information on
chassis monitoring
module (CMM)
product_name
product_part_number
product_serial_number
product_manufacturer
/CH
Basic chassis
/SYS/MIDPLANE
information on blade
product_name
product_part_number
product_serial_number
product_manufacturer
Location of blade
within the chassis
/SYS/SLOTID
type
class
value
Location of chassis
within a rack
/CH
rack_location
Sun ILOM 3.0 CLI Procedures Guide • December 2008
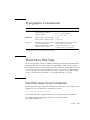
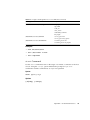
Typographic Conventions
Typeface*
Meaning
Examples
AaBbCc123
The names of commands, files,
and directories; on-screen
computer output
Edit your.login file.
Use ls -a to list all files.
% You have mail.
AaBbCc123
What you type, when contrasted
with on-screen computer output
% su
Password:
AaBbCc123
Book titles, new words or terms,
words to be emphasized.
Replace command-line variables
with real names or values.
Read Chapter 6 in the Concept’s Guide.
These are called class options.
You must be superuser to do this.
To delete a file, type rm filename.
* The settings on your browser might differ from these settings.
Third-Party Web Sites
Sun is not responsible for the availability of third-party web sites mentioned in this
document. Sun does not endorse and is not responsible or liable for any content,
advertising, products, or other materials that are available on or through such sites
or resources. Sun will not be responsible or liable for any actual or alleged damage
or loss caused by or in connection with the use of or reliance on any such content,
goods, or services that are available on or through such sites or resources.
Sun Welcomes Your Comments
Sun is interested in improving its documentation and welcomes your comments and
suggestions. You can submit your comments by going to:
http://www.sun.com/hwdocs/feedback
Please include the title and part number of your document with your feedback:
Sun Integrated Lights Out Manager (ILOM) 3.0 CLI Procedures Guide,
part number 820-6412-10.
Preface
xxii
xxiii
Sun ILOM 3.0 CLI Procedures Guide • December 2008
CHAPTER
1
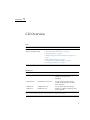
CLI Overview
Topics
Description
Links
Learn about ILOM CLI
features and functionality
•
•
•
•
“About the CLI” on page 2
“CLI Hierarchical Architecture” on page 3
“CLI Target Types” on page 3
“ILOM 3.0 Properties Versus ILOM 2.x Properties” on
page 7
• “CLI Command Syntax” on page 8
• “Common CLI Command Strings” on page 9
• “Executing Commands” on page 14
Related Topics
For ILOM
Chapter or Section
Guide
• Concepts
• ILOM Overview
Sun Integrated Lights Out Manager
(ILOM) 3.0 Concepts Guide
(820-6410)
• Web interface
• Web Interface Overview
Sun Integrated Lights Out Manager
(ILOM) 3.0 Web Interface Procedures
Guide (820-6411)
• SNMP and
IPMI hosts
• SNMP Overview
• IPMI Overview
Sun Integrated Lights Out Manager
(ILOM) 3.0 SNMP and IPMI Procedures
Guide (820-6413)
The ILOM 3.0 Documentation Collection is available at:
http://docs.sun.com/app/docs/prod/int.lights.mgr30#hic.
1
This chapter introduces the basic information you need to know before you perform
procedures using the ILOM command-line interface (CLI).
About the CLI
The ILOM CLI is based on the Distributed Management Task Force specification,
Server Management Command-Line Protocol Specification, version 11.0a.8 Draft (DMTF
CLP). You can view the entire specification at the following site:
http://www.dmtf.org/
The DMTF CLP provides a management interface for one or more servers regardless
of server state, method of access, or installed operating system.
The DMTF CLP architecture models a hierarchical namespace, a predefined tree that
contains every managed object in the system. In this model, a small number of
commands operate on a large namespace of targets, which can be modified by
options and properties. This namespace defines the targets for each command verb.
2
Sun ILOM 3.0 CLI Procedures Guide • December 2008
CLI Hierarchical Architecture
CLI Target Types
The following table lists the various hierarchy methods you can use with the ILOM
CLI, depending on the particular Sun server platform that you are using.
TABLE 1-1
ILOM Target Types
Target Type
Description
* /SP
The targets and properties below this target type are used for
configuring the ILOM service processor (SP) and for viewing
logs and consoles.
* /CMM
On blade platforms, this target type replaces /SP and is used
for configuring the ILOM chassis monitoring module (CMM).
* /SYS
The targets and properties below this target type provide
inventory, environmentals, and hardware management. The
targets directly correspond to nomenclature for all hardware
components, some of which are printed onto the physical
hardware.
* /CH
On blade platforms, this target type replaces /SYS and
provides inventory, environmentals, and hardware
management at the chassis level. The target types directly
correspond to nomenclature names for all hardware
components, some of which are printed onto the the physical
hardware.
* /HOST
The targets and properties below this target type are used for
monitoring and managing the host operating system.
Note – Your access to some of these target types within the hierarchy depends on
the Sun server platform you are using.
Service processors can access two namespaces: the /SP namespace and the overall
system namespace /SYS or /HOST. In the /SP namespace, you can manage and
configure the service processor. In the /SYS or /HOST namespace you can access
other information for managed system hardware.
Chapter 1
CLI Overview
3
CLI Commands
The ILOM CLI supports the DMTF CLP commands listed in the following table.
Note – CLI commands are case-sensitive.
TABLE 1-2
CLI Commands
Command
Description
cd
Navigates the object namespace.
create
Sets up an object in the namespace.
delete
Removes an object from the namespace.
exit
Terminates a CLI session.
help
Displays Help information for commands and targets.
load
Transfers a file from an indicated source to an indicated target.
dump
Transfers a file from a target to a remote location specified by the URI.
reset
Resets the state of the target.
set
Sets target properties to the specified value.
show
Displays information about targets and properties.
start
Starts the target.
stop
Stops the target.
version
Displays the version of service processor running.
CLI Command Options
The ILOM CLI supports the following options, but note that not every command
supports every option. The help option can be used with any command.
TABLE 1-3
CLI Options
Option Long Form
4
Short Form
Description
-default
Causes the command to perform its default functions only.
-destination
Specifies the destination for data.
-display
-d
Shows the data the user wants to display.
-force
-f
Specifies that the action will be performed immediately.
Sun ILOM 3.0 CLI Procedures Guide • December 2008
TABLE 1-3
CLI Options (Continued)
Option Long Form
Short Form
Description
-help
-h
Displays Help information.
-level
-l
Executes the command for the current target and all targets
contained through the level specified.
-output
-o
Specifies the content and form of command output. ILOM
only supports -o table, which displays targets and
properties in tabular form.
-script
Skips warnings or prompts normally associated with the
command.
-source
Indicates the location of a source image.
Chapter 1
CLI Overview
5
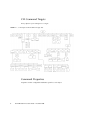
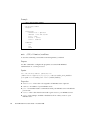
CLI Command Targets
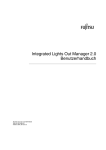
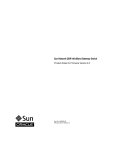
Every object in your namespace is a target.
FIGURE 1-1
/SP Example of the ILOM CLI Target Tree
Command Properties
Properties are the configurable attributes specific to each object.
6
Sun ILOM 3.0 CLI Procedures Guide • December 2008
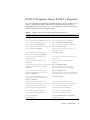
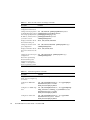
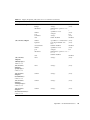
ILOM 3.0 Properties Versus ILOM 2.x Properties
If you are upgrading from ILOM 2.x to ILOM 3.0 and you want to update your 2.x
scripts, you need to be familiar with the new methods that ILOM 3.0 uses to
implement ILOM 3.0 commands. TABLE 1-4 lists ILOM 2.x properties and the new
ILOM 3.0 implementations that replace them.
TABLE 1-4
ILOM 2.x Properties and New ILOM 3.0 Implementations
ILOM 2.x Properties
ILOM 3.0 Implementation
/SP/clients/syslog/destination_ip1 /SP/clients/syslog/1/address
/SP/clients/syslog/destination_ip2 /SP/clients/syslog/2/address
/SP/clients/activedirectory/
getcertfile (load a certificate)
Use load command with this target
/SP/clients/activedirectory/cert
/SP/clients/activedirectory/getcer Use set command with
tfile (remove a certificate)
/SP/client/activedirectory/cert
clear_action=true
/SP/clients/activedirectory/
getcertfile (restore a certificate)
No longer a feature
/SP/clients/activedirectory/
certfilestatus
/SP/clients/activedirectory/cert/
certstatus
/SP/clients/activedirectory/
ipaddress
/SP/clients/activedirectory/
address
/SP/clients/activedirectory/alerna Use load command with
/SP/clients/activedirectory/
tiveservers/getcertfile (load a
alernativeservers/cert as target
certificate)
/SP/clients/activedirectory/
alernativeservers/getcertfile
(remove a certificate)
Use set command with
/SP/client/activedirectory/alernat
iveservers/cert clear_action=true
/SP/clients/activedirectory/
getcertfile/alernativeservers/
(restore a certificate)
No longer a feature
/SP/clients/activedirectory/
alernativeservers/certfilestatus
/SP/clients/activedirectory/
alernativeservers/cert/certstatus
/SP/clients/activedirectory/
alernativeservers/ipaddress
/SP/clients/activedirectory/
alernativeservers/address
/SP/clients/radius/ipaddres
/SP/clients/radius/address
/SP/clients/ldap/ipaddress
/SP/clients/ldap/address
/SP/cli/commands
Use help command with a target name
/SP/diag/state
/HOST/diag/state
Chapter 1
CLI Overview
7
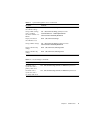
TABLE 1-4
ILOM 2.x Properties and New ILOM 3.0 Implementations (Continued)
ILOM 2.x Properties
ILOM 3.0 Implementation
/SP/diag/generate_host_nmi
/HOST/generate_host_nmi
/SP/diag/mode
/HOST/diag/mode
/SP/diag/level
/HOST/diag/level
/SP/diag/verbosity
/HOST/diag/verbosity
CLI Command Syntax
When using the ILOM CLI, information is entered in the following command syntax:
command [options] [target] [properties]
For example:
set /SP/services/https port=portnumber servicestate=enabled|disabled
Note – Syntax examples in this chapter use the target starting with /SP/, which
could be interchanged with the target starting with /CMM/ depending on your Sun
server platform. Subtargets are common across all Sun server platforms.
8
Sun ILOM 3.0 CLI Procedures Guide • December 2008
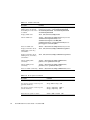
Common CLI Command Strings
TABLE 1-5
General Commands
Description
Command
Display information about commands and targets
help
Display information about a specific command
help <string>
Show all valid targets
help targets
Change and display the current target
cd
Transfer a file from a target to a remote location specified
by the URI
dump
Log out of the CLI
exit
Display the version of ILOM firmware running on ILOM
version
Reset a target
reset
Display clock information
show /SP/clock
Display active ILOM sessions
show /SP/sessions
Update ILOM and BIOS firmware
load -source tftp://newSPimage
Display a list of ILOM event logs
show /SP/logs/event/list
TABLE 1-6
User Commands
Description
Command
Add a local user
create /SP/users/user1 password=password role=a|u|c|r|o|s
Delete a local user
delete /SP/users/user1
Change a local user's properties
set /SP/users/user1 role=operator
Display information about all
local users
show -display [targets|properties|all] -level all
/SP/users
Display information about
LDAP settings
show /SP/clients/ldap
Change LDAP settings
set /SP/clients/ldap binddn=proxyuser bindpw=proxyuserpassword
defaultrole=a|u|c|r|o|s address=ipaddress
Chapter 1
CLI Overview
9
TABLE 1-7
Network and Serial Port Setting Commands
Description
Command
Display network
configuration information
show /SP/network
Change network properties
for ILOM. Changing certain
network properties, like the
IP address, will disconnect
your active session
set /SP/network pendingipaddress=ipaddress
pendingipdiscovery=dhcp|static
pendingipgateway=ipgateway
pendingipnetmask=ipnetmask
commitpending=true
Display information about
the external serial port
show /SP/serial/external
Change the external serial
port configuration
set /SP/serial/external pendingspeed=integer
commitpending=true
Display information about
the serial connection to the
host
show /SP/serial/host
Change the host serial port
configuration.
Note: This speed setting
must match the speed
setting for serial port 0,
COM1, or /dev/ttyS0 on
the host operating system
set /SP/serial/host pendingspeed=integer
commitpending=true
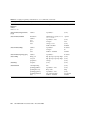
TABLE 1-8
Alert Management Commands
Description
Command
Display information about show /SP/alertmgmt/rules/1...15
alerts. You can configure up
to 15 alerts
10
Configure an IPMI PET
alert
set /SP/alertmgmt/rules/1...15 type=ipmipet
destination=ipaddress level=
down|critical|major|minor
Configure a v3 SNMP trap
alert
set /SP/alertmgmt/rules/1...15 type=snmptrap
snmp_version=3 comunity_or_username=username
destination=ipaddress level=
down|critical|major|minor
Configure an email alert
set /SP/alertmgmt/rules/1...15 type=email
destination=email_address level=
down|critical|major|minor
Sun ILOM 3.0 CLI Procedures Guide • December 2008
TABLE 1-9
System Management Access Commands
Description
Command
Display information
about HTTP settings
show /SP/services/http
Change HTTP settings,
such as enabling
automatic redirection to
HTTPS
set /SP/services/http port=portnumber
secureredirect= enabled|disabled
servicestate=enabled|disabled
Display information
about HTTPS access
show /SP/services/https
Change HTTPS settings
set /SP/services/https port=portnumber
servicestate=enabled|disabled
Display SSH DSA key
settings
show /SP/services/ssh/keys/dsa
Display SSH RSA key
settings
show /SP/services/ssh/keys/rsa
TABLE 1-10
Clock Settings Commands
Description
Command
Set ILOM clock to
synchronize with a
primary NTP server
set /SP/clients/ntp/server/1 address=ntpIPaddress
Set ILOM clock to
synchronize with a
secondary NTP server
set /SP/clients/ntp/server/2 address=ntpIPaddress2
Chapter 1
CLI Overview
11
TABLE 1-11
Description
Command
Display information about
SNMP settings. By default,
the SNMP port is 161 and v3
is enabled
show /SP/services/snmp engineid=snmpengineid
port=snmpportnumber sets=enabled|disabled
v1=enabled|disabled v2c=enabled|disabled
v3=enabled|disabled
Display SNMP users
show /SP/services/snmp/users
Add an SNMP user
create /SP/services/snmp/users/snmpusername
authenticationpassword=password
authenticationprotocol=MD5|SHA
permissions=rw|ro privacypassword=password
privacyprotocol=none|DES
Delete an SNMP user
delete /SP/services/snmp/users/snmpusername
Display information about
SNMP public (read-only)
communities
show /SP/services/snmp/communities/public
Display information about
SNMP private (read-write)
communities
show /SP/services/snmp/communities/private
Add an SNMP public
community
create /SP/services/snmp/communities/
public/comm1 permission=ro|rw
Add an SNMP private
community
create /SP/services/snmp/communities/
private/comm2 permission=ro|rw
Delete an SNMP community
delete /SP/services/snmp/communities/comm1
TABLE 1-12
12
SNMP Commands
Host System Commands
Description
Command
Start the host system or chassis power
start /SYS or start /CH
Stop the host system or chassis power
(graceful shutdown)
stop /SYS or stop /CH
Stop the host system or chassis power
(forced shutdown)
stop [-f|force] /SYS or
stop [-f|force] /CH
Reset the host system or chassis
reset /SYS or reset /CH
Sun ILOM 3.0 CLI Procedures Guide • December 2008
TABLE 1-12
Host System Commands (Continued)
Description
Command
Start a session to connect to the host
console
start /SP/console
Stop the session connected to the host
console (graceful shutdown)
stop /SP/console
Stop the session connected to the host
console (forced shutdown)
stop [-f|force] /SP/console
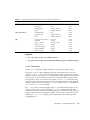
TABLE 1-13
Filtering Output Options for Commands
Description
Filtered Command
Display active ILOM sessions
that were started on July 17th
show /SP/sessions -level all starttime==
"*Jul 17*"
Display users that have admin
roles
show /SP/users -level all role=="a*"
Display users that *only* have
user and console roles
show /SP/users -level all role=="uc"
Display all SNMP trap alerts
show /SP/alertmgmt -level all type==
"snmptrap"
Display all disabled services
show /SP/services -level all servicestate==
disabled
Display NTP clients that use the
NTP address server IP 1.2.3.4
show /SP/clients/ntp -level all address==
"1.2.3.4"
Display all FRUs with serial
number that starts with 0D01B
show /SYS fru_serial_number=="0D01B*" level all
Display all memory modules
manufactured by INFINEON
show /SYS -level all type=="DIMM"
fru_manufacturer=="INFINEON"
Display all power supplies
whose alarm state is major
show /SYS -level all type=="Power Supply"
alarm_status==major
Display all components that are
DIMMs or hard disks
show /SYS type==("Hard Disk",DIMM) -level
all
Display all voltage sensors
show /SYS type==Voltage
whose
upper_nonrecov_threshold==("2.*","60.*")
upper_nonrecov_threshold value
is 2.89 or 60 Volts
Chapter 1
CLI Overview
13
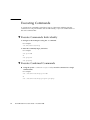
Executing Commands
To execute most commands, specify the location of the target and then enter the
command. You can perform these actions individually, or you can combine them on
the same command line.
▼ Execute Commands Individually
1. Navigate to the namespace using the cd command.
For example:
cd /SP/services/http
2. Enter the command, target, and value.
For example:
set port=80
or
set prop1=x
set prop2=y
▼ Execute Combined Commands
●
Using the syntax <command><target>=value, enter the command on a single
command line.
For example:
set /SP/services/http port=80
or
set /SP/services/http prop1=x prop2=y
14
Sun ILOM 3.0 CLI Procedures Guide • December 2008
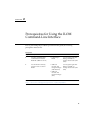
CHAPTER
2
Prerequisites for Using the ILOM
Command-Line Interface
Prior to performing the procedures presented in this guide, the following
prerequisites must be met.
Prerequisites
Steps
Description
Related Section
Related Guide
1
You must establish initial
communication with the
ILOM SP (CMM or Server)
• Connecting to
ILOM
Sun Integrated Lights Out
Manager (ILOM) 3.0
Getting Started Guide (8205523)
2
You should have already
created a user account in
ILOM
• Add User
Account and
Assign Privileges
(web interface)
• Add User
Account and
Assign Privileges
(CLI)
Sun Integrated Lights Out
Manager (ILOM) 3.0
Getting Started Guide (8205523)
The ILOM 3.0 Documentation Collection is available at:
http://docs.sun.com/app/docs/prod/int.lights.mgr30#hic.
15
16
Sun ILOM 3.0 CLI Procedures Guide • December 2008
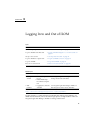
CHAPTER
3
Logging In to and Out of ILOM
Topics
Description
Links
Review the prerequisites
• “Before Your Initial Login” on page 18
Log in to ILOM for the first time
• “Log In to ILOM Using the root User Account” on
page 19
Set up a user account
• “Set Up a User Account” on page 19
Log in to ILOM as a regular user
• “Log In to ILOM as a User” on page 19
Log out of ILOM
• “Log Out of ILOM” on page 21
Recover a Lost Password
• “Recover a Lost Password” on page 20
Related Topics
For ILOM
Chapter or Section
Guide
• Getting
started
• ILOM Getting Started
Process
• Initial ILOM Setup
Procedures Using the
CLI
Sun Integrated Lights Out Manager (ILOM) 3.0
Getting Started Guide (820-5523)
• Web
interface
• Logging In to and Out
of ILOM
Sun Integrated Lights Out Manager (ILOM) 3.0
Web Interface Procedures Guide. (820-6411)
The ILOM 3.0 Documentation Collection is available at:
http://docs.sun.com/app/docs/prod/int.lights.mgr30#hic.
Use this chapter as a quick reference for ILOM login and logout procedures. For
additional information, refer to the initial login process and procedures in the Sun
Integrated Lights Out Manager (ILOM) 3.0 Getting Started Guide.
17
Before Your Initial Login
Prior to performing the procedures in this chapter, ensure that the following
requirements are met:
■
Plan how you want to set up ILOM on your server to work in your data center
environment. Refer to “Initial Setup Worksheet to Establish Communication With
ILOM” in the Sun Integrated Lights Out Manager (ILOM) 3.0 Concepts Guide.
■
Connect to ILOM over a serial port without a network connection, or log in to
ILOM over a network. To log in using a direct serial connection, attach a serial
cable to the workstation, terminal, or terminal emulator and to the SER MGT port
on the server or if you are using a modular chassis system, to the chassis
monitoring module (CMM) port. To log in using a network connection, attach an
Ethernet cable to the NET MGT port on the server or CMM. Refer to your
platform documentation for more information.
■
Configure the network settings. You can use either DHCP or a static network
connection. By default, ILOM will attempt to obtain network settings using
DHCP. Refer to “Connecting to ILOM” in the Sun Integrated Lights Out Manager
(ILOM) 3.0 Getting Started Guide.
Logging In to ILOM
Topics
18
Description
Links
Log in to ILOM and set up a user
account
• “Log In to ILOM Using the root User Account” on
page 19
• “Set Up a User Account” on page 19
• “Log In to ILOM as a User” on page 19
Sun ILOM 3.0 CLI Procedures Guide • December 2008
▼ Log In to ILOM Using the root User Account
To log in to the ILOM CLI for the first time, use SSH and the root user account.
●
To log in to the ILOM CLI using the root user account, type:
$ ssh root@system_ipaddress
Password: changeme
The ILOM CLI prompt appears (->).
▼ Set Up a User Account
Once you are logged in to ILOM, you need to create a regular (non-root) user
account. You will use this regular user account to configure ILOM settings for your
system and environment.
To set up a user account, follow this step:
●
Set up a user account in one of these five classes of users:
■
Local users
■
Active Directory users
■
LDAP users
■
LDAP/SSL users
■
RADIUS users
You can create up to 10 local user accounts or configure a directory service. For
information about setting up a user account, see “Managing User Accounts” on
page 37.
▼ Log In to ILOM as a User
Note – Use this procedure to log in to ILOM to verify that the user account or
directory service is functioning properly.
To log in to ILOM as a user, follow these steps:
1. Using a Secure Shell (SSH) session, log in to ILOM by specifying your user
name and IP address of the server SP or CMM.
Chapter 3
Logging In to and Out of ILOM
19
For example:
$ ssh username@ipaddress
Or
$ ssh -l username ipaddress
The ILOM login password prompt appears.
2. Type the user name and password for the user account.
<hostname>: username
Password: password
The ILOM CLI prompt appears (->).
Recovering a Lost Password
You can use the preconfigured default user account to recover a lost password or
to re-create the root user account. For more information about the root and
default user accounts, refer to “root and default User Accounts” in the Sun
Integrated Lights Out Manager (ILOM) 3.0 Concepts Guide.
▼ Recover a Lost Password
Before You Begin
■
You must be physically present at the server to perfom this procedure.
To recover a lost password, follow these steps:
1. Log in to an ILOM serial console using the default user account.
For example:
SUNSP-0000000000 login: default
Press and release the physical presence button.
Press return when this is completed...
2. Prove physical presence at your server.
Refer to your platform documentation for instructions on how to prove physical
presence.
3. Return to your serial console and press Enter.
You will be prompted for a password.
20
Sun ILOM 3.0 CLI Procedures Guide • December 2008
4. Type the password for the default user account: defaultpassword
Note – It is recommended that you reset your password at this time. See “Change a
User Account Password” on page 40.
Logging Out of ILOM
▼ Log Out of ILOM
To log out of ILOM, follow this step:
●
At the command prompt, type:
-> exit
What Next
After you have logged in to ILOM and set up a user account, you are now ready to
configure settings for ILOM functions. The remaining chapters in the Sun ILOM 3.0
CLI Procedures Guide provide descriptions of the tasks you can perform to access
ILOM functions.
Chapter 3
Logging In to and Out of ILOM
21
22
Sun ILOM 3.0 CLI Procedures Guide • December 2008
CHAPTER
4
Configuring ILOM Communication
Settings
Topics
Description
Links
Configure network settings
• “Assign Host Name and System Identifier” on
page 25
• “View and Configure Network Settings” on page 26
• “Edit Existing IP Addresses in ILOM” on page 27
• “View and Configure DNS Settings” on page 29
• “View and Configure Serial Port Settings” on
page 30
• “Enable HTTP or HTTPS Web Access” on page 31
Configure Secure Shell settings
• “Establish a Secure Remote SSH Connection” on
page 33
• “Enable or Disable SSH” on page 33
• “View the Current Key” on page 34
• “Generate a New SSH Key” on page 35
• “Restart the SSH Server” on page 36
23
Related Topics
For ILOM
Chapter or Section
Guide
• Concepts
• ILOM Network
Configurations
Sun Integrated Lights Out Manager (ILOM) 3.0
Concepts Guide (820-6410)
• Getting
started
• Connecting to ILOM
Sun Integrated Lights Out Manager (ILOM) 3.0
Getting Started Guide (820-5523)
• Web
interface
• Configuring ILOM
Communication
Settings
Sun Integrated Lights Out Manager (ILOM) 3.0
Web Interface Procedures Guide (820-6411)
• IPMI and
SNMP hosts
• Configuring ILOM
Communication
Settings
Sun Integrated Lights Out Manager (ILOM) 3.0
SNMP and IPMI Procedures Guide (820-6413)
The ILOM 3.0 Documentation Collection is available at:
http://docs.sun.com/app/docs/prod/int.lights.mgr30#hic.
Configuring Network Settings
Topics
24
Description
Links
Review the prerequisites
• “Before You Begin” on page 25
Assign a host name and system
identifier
• “Assign Host Name and System Identifier” on
page 25
View and configure network
settings
• “View and Configure Network Settings” on page 26
Edit existing IP Addresses
• “Edit Existing IP Addresses in ILOM” on page 27
View and configure DNS settings
• “View and Configure DNS Settings” on page 29
View and configure serial port
settings
• “View and Configure Serial Port Settings” on
page 30
Enable HTTP or HTTPS web
access
• “Enable HTTP or HTTPS Web Access” on page 31
Sun ILOM 3.0 CLI Procedures Guide • December 2008
Before You Begin
Prior to configuring ILOM communication settings, ensure that the same IP address
is always assigned to ILOM by either assigning a static IP address to ILOM after
initial setup, or by configuring your DHCP server to always assign the same IP
address to ILOM. This enables ILOM to be easily located on the network. By default,
ILOM will attempt to obtain network settings using DHCP.
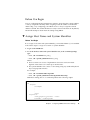
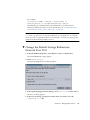
▼ Assign Host Name and System Identifier
Before You Begin
■
To assign a host name and system identifier, you need the Admin (a) role enabled.
Follow these steps to assign a host name or system identifier:
1. Log in to the ILOM CLI.
2. To set the SP host name and system identifier text, at the command prompt,
type:
-> set /SP hostname=text_string
-> set /SP system_identifier=text_string
Where:
■
The host name can consist of alphanumeric characters and can include
hyphens. Host names can contain up to 60 characters.
■
The system identifier can consist of a text string using any standard keyboard
keys except quotation marks.
For example:
-> set /SP hostname=Lab2-System1
-> set /SP system_identifier=DocSystemforTesting
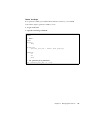
With these settings, the show command produces the following output:
-> show /SP
/SP
Targets:
alertmgmt
.
.
.
users
Properties:
check_physical_presence = false
hostname = Lab2-System1
Chapter 4
Configuring ILOM Communication Settings
25
system_contact = (none)
system_description = SUN BLADE X8400 SERVER MODULE, ILOM
v3.0.0.0, r31470
system_identifier = DocSystemforTesting
system_location = (none)
Commands:
cd
reset
set
show
version
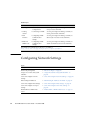
▼ View and Configure Network Settings
Before You Begin
■
To view network settings, you need the Read Only (o) role enabled. To configure
network settings, you need the Admin (a) role enabled.
Follow these steps to view and configure network settings:
1. Log in to the ILOM CLI.
2. At the command prompt, type:
—> show /SP/network
3. Use the set command and type all of the settings that you wish to change.
You can execute these commands within a combined command. See “Execute
Combined Commands” on page 14.
Note – Change a complete set of properties and commit to true only when the
pending values are all typed into the command.
Note – Settings take effect as soon you set commitpending=true. Configuring
network settings might disconnect your active session if you are connected to ILOM
over a network. Configure all your systems before you commit the changes. After
you commit the changes you will have to reconnect to ILOM.
Example
To change multiple network settings from DHCP to static assigned settings, type:
-> set /SP/network pendingipdiscovery=static pendingipaddress=
nnn.nn.nn.nn pendingipgateway=nnn.nn.nn.nn pendingipnetmask=nnn.nn.nn.nn
commitpending=true
26
Sun ILOM 3.0 CLI Procedures Guide • December 2008
Targets, Properties, and Values
The following target, properties, and values are valid for ILOM network settings.
TABLE 4-1
ILOM Target, Properties, and Values for Network Settings
Target
Property
Value
/SP/network
ipaddress
ipdiscovery
ipgateway
ipnetmask
Read-only; values are
updated by the
system
macaddress
MAC address of
ILOM
commitpending
pendingipaddress
pendingipdiscovery
pendingipgateway
pendingipnetmask
true|none
<ipaddress|none>
dhcp|static
<ipaddress|none>
<ipdotteddecimal>
dhcp_server_ip
Read-only; value is
updated when the SP
receives a DHCP
address
state
enabled|disabled
Default
none
none
dhcp
none
255.255.255.0
none
▼ Edit Existing IP Addresses in ILOM
Before You Begin
■
To edit existing IP addresses, you need the Admin (a) role enabled.
Follow these steps to edit existing IP addresses that previously have been assigned
to a server SP or CMM:
1. Log in to the ILOM CLI.
2. Type one of the following commands to set the SP working directory:
■
For a rackmount standalone server: cd /SP/network
■
For a chassis server blade server module: cd /SP/network
■
For a chassis CMM: cd /CMM/network
3. Type the show command to view the IP address assigned.
Chapter 4
Configuring ILOM Communication Settings
27
4. Type the following commands to change the existing settings.
Command
Description and Example
set pendingipaddress=
<ipaddress>
Type this command followed by the static IP address
that you want to assign to the server SP or CMM.
set pendingipnetmask=
<ipnetmask>
Type this command followed by the static Netmask
address that you want to assign to the server SP or
CMM.
set pendingipgateway=
<ipgateway>
Type this command followed by the static Gateway
address that you want to assign to the server SP or
CMM.
set pendingipdiscovery=
<ipdiscovery>
Type this command to set a static IP address on the
server SP or CMM.
set commitpending=true
Type this command to assign the network settings
specified.
For example:
set pendingipaddress=129.144.82.26
set pendingipnetmask=255.255.255.0
set pendingipgateway=129.144.82.254
set pendingipdiscovery=static
set commitpending=true
If you connected to ILOM through a remote SSH connection, the connection made to
ILOM using the former IP address will timeout. Use the newly assigned settings to
connect to ILOM.
28
Sun ILOM 3.0 CLI Procedures Guide • December 2008
▼ View and Configure DNS Settings
Before You Begin
■
To view DNS settings, you need the Read Only (o) role enabled. To configure
DNS settings, you need the Admin (a) role enabled.
Follow these steps to view and configure DNS settings:
1. Log in to the ILOM CLI.
2. At the command prompt type the following command to display settings for
the external serial port:
-> cd /SP/clients/dns
3. Use the set command to change properties and values for DNS settings. At the
command prompt type:
-> set /SP/clients/dns [propertyname=value]
For example:
-> set /SP/clients/dns searchpath=abcdefg.com
Targets, Properties, and Values
The following targets, properties, and values are valid for DNS settings.
TABLE 4-2
Valid Targets, Properties, and Values for DNS Settings
Target
Property
Value
Default
/SP/clients/dns
auto_dns
nameserver
retries
enabled|disabled
ip_address
Integer between 0 and 5
disabled
searchpath
timeout
Integer between 1 and 10
Up to six comma-separated search
suffixes
Chapter 4
Configuring ILOM Communication Settings
29
▼ View and Configure Serial Port Settings
Before You Begin
■
To view serial port settings, you need the Read Only (o) role enabled. To
configure serial port settings, you need the Admin (a) role enabled.
Follow these steps to view and configure serial port settings:
1. Log in to the ILOM CLI.
2. At the command prompt:
■
Type the following command to display settings for the external serial port:
-> show /SP/serial/external
■
Type the following command to display settings for the host serial port:
-> show /SP/serial/host
3. Use the set command to change properties and values for serial port settings.
Port settings have two sets of properties: pending and active. At the command
prompt type:
-> set target [propertyname=value] commitpending=true
Example
To change the speed (baud rate) for the host serial port from 9600 to 57600, type the
following:
■
For x64-based systems
■
For SPARC-based systems
-> set /SP/serial/host pendingspeed=57600 commitpending=true
-> set /SP/serial/external pendingspeed=57600 commitpending=true
Note – On x64-based systems, the speed of the host serial port must match the
speed setting for serial port 0, COM1, or /dev/ttys0 on the host operating system
for ILOM to communicate properly with the host.
30
Sun ILOM 3.0 CLI Procedures Guide • December 2008
Targets, Properties, and Values
The following targets, properties, and values are valid for ILOM serial port settings.
TABLE 4-3
Valid Targets, Properties, and Values for ILOM Serial Port Settings
Target
Property
Value
Default
/SP/serial/external
commitpending
flowcontrol
pendingspeed
true|(none)
software
<integer>
(none)
software
9600
speed
Read-only value;
configured via the
pendingspeed
property
commitpending
pendingspeed
true|(none)
<integer>
speed
Read-only value;
configured via the
pendingspeed
property
/SP/serial/host
(none)
(none)
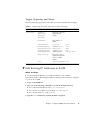
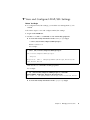
▼ Enable HTTP or HTTPS Web Access
ILOM supports both HTTP and HTTPS connections. ILOM enables you to
automatically redirect HTTP access to HTTPS. ILOM also enables you to set the
HTTP and HTTPS ports.
Before You Begin
■
To modify HTTP or HTTPS access, you need the Admin (a) role enabled.
Follow these steps to modify web access:
1. Log in to the ILOM CLI.
2. At the command prompt, type:
-> set /SP/services/http [propertyname=value]
The properties are located in /SP/services/http and /SP/services/https.
Chapter 4
Configuring ILOM Communication Settings
31
Targets, Properties, and Values
TABLE 4-4 shows the valid targets, properties, and values for HTTP and HTTPS
connections.
TABLE 4-4
Valid Targets, Properties, and Values for HTTP and HTTPS Connections
Target
Property
Value
Default
/SP/services/http
secureredirect
enabled|
disabled
enabled
servicestate
enabled|
disabled
disabled
port
<portnum>
80
servicestate
enabled|
disabled
enabled
port
<portnum>
443
/SP/services/https
TABLE 4-5 lists the possible settings for HTTP, HTTPS, and automatic redirect.
TABLE 4-5
Possible Settings for HTTP, HTTPS, and Automatic Redirect
Desired State
Target
Property
Value
Enable HTTP only
/SP/services/http
secureredirect
disabled
/SP/services/http
servicestate
enabled
/SP/services/https
servicestate
disabled
/SP/services/http
secureredirect
disabled
/SP/services/http
servicestate
enabled
/SP/services/https
servicestate
enabled
/SP/services/http
secureredirect
disabled
/SP/services/http
servicestate
disabled
/SP/services/https
servicestate
enabled
/SP/services/http
/SP/services/http
/SP/services/https
secureredirect
servicestate
servicestate
enabled
disabled
enabled
Enable HTTP and HTTPS
Enable HTTPS only
Automatically redirect
HTTP to HTTPS
32
Sun ILOM 3.0 CLI Procedures Guide • December 2008
Configuring Secure Shell Settings
Topics
Description
Links
Configure Secure Shell settings
• “Establish a Secure Remote SSH Connection” on
page 33
• “Enable or Disable SSH” on page 33
• “View the Current Key” on page 34
• “Generate a New SSH Key” on page 35
• “Restart the SSH Server” on page 36
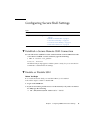
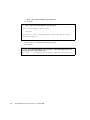
▼ Establish a Secure Remote SSH Connection
●
You will need to establish a secure connection from a remote SSH client to the
server SP. To establish a secure connection, type the following:
$ ssh -l username server_ipaddress
Password: ********
The default CLI prompt appears and the system is ready for you to run the CLI
commands to establish network settings.
▼ Enable or Disable SSH
Before You Begin
■
To restart the Secure Shell, you need the Admin (a) role enabled.
Follow these steps to enable or disable SSH:
1. Log in to the ILOM CLI.
2. If you do not want to provide access over the network, or if you do not want to
use SSH, type the following:
-> set /SP/services/ssh state=enabled | disabled
Chapter 4
Configuring ILOM Communication Settings
33
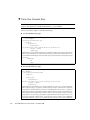
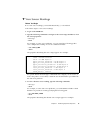
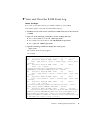
▼ View the Current Key
Note – All of the properties below /SP/services/ssh/keys/rsa|dsa are read
only. To view the key, you need the Read Only (o) role enabled.
Follow one of these steps to view the current key:
●
To view the RSA key, type:
-> show /SP/services/ssh/keys/rsa
For example:
/SP/services/ssh/keys/rsa
Targets:
Properties:
fingerprint =
ca:c0:05:ff:b7:75:15:a0:30:df:1b:a1:76:bd:fe:e5
length = 1024
publickey
AAAAB3NzaC1yc2EAAAABIwAAAIEAthvlqgXbPIxN4OEvkukKupdFPr8GDaOsKGg
BESVlnny4nX8yd8JC/hrw3qDHmXIZ8JAFwoLQgjtZCbEsgpn9nNIMb6nSfu6Y1t
TtUZXSGFBZ48ROmU0SqqfR3i3bgDUR0siphlpgV6Yu0Zd1h3549wQ+RWk3vxqHQ
Ffzhv9c=
Commands:
cd
show
●
To view the DSA key, type:
-> show /SP/services/ssh/keys/dsa
For example:
/SP/services/ssh/keys/dsa
Targets:
Properties:
fingerprint =
6a:90:c7:37:89:e6:73:23:45:ff:d6:8e:e7:57:2a:60
length = 1024
publickey =
AAAAB3NzaC1kc3MAAACBAInrYecNH86imBbUqE+3FoUfm/fei2ZZtQzqrMx5zBm
bHFIaFdRQKeoQ7gqjc9jQbO7ajLxwk2vZzkg3ntnmqHz/hwHvdho2KaolBtAFGc
fLIdzGVxi4I3phVb6anmTlbqI2AILAa7JvQ8dEGbyATYR9A/pf5VTac/TQ70O/J
AAAAFQCIUavkex7wtEhC0CH3s25ON0I3CwAAAIBNfHUop6ZN7i46ZuQOKhD7Mkj
gdHy+8MTBkupVfXqfRE9Zw9yrBZCNsoD8XEeIeyP+puO5k5dJvkzqSqrTVoAXyY
qewyZMFE7stutugw/XEmyjq+XqBWaiOAQskdiMVnHa3MSg8PKJyWP8eIMxD3rIu
PTzkV632uBxzwSwfAQAAAIAtA8/3odDJUprnxLgHTowc8ksGBj/wJDgPfpGGJHB
B1FDBMhSsRbwh6Z+s/gAf1f+S67HJBTUPsVSMz+czmamc1oZeOazT4+zeNG6uCl
34
Sun ILOM 3.0 CLI Procedures Guide • December 2008
u/5/JmJSdkguc1FcoxtBFqfO/fKjyR0ecWaU7L4kjvWoSsydHJ0pMHasEecEBEr
lg==
Commands:
cd
show
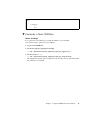
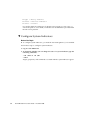
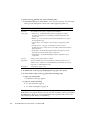
▼ Generate a New SSH Key
Before You Begin
■
To generate a new SSH key, you need the Admin (a) role enabled.
Follow these steps to generate a new SSH key:
1. Log in to the ILOM CLI.
2. Set the key type by typing the following:
-> set /SP/services/ssh generate_new_key_type=dsa|rsa
3. Set the action to true.
-> set /SP/services/ssh generate_new_key_action=true
The fingerprint and key will look different. The new key will not take effect until
the SSH server is restarted.
Chapter 4
Configuring ILOM Communication Settings
35
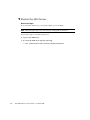
▼ Restart the SSH Server
Before You Begin
■
To restart the SSH server, you need the Admin (a) role enabled.
Note – Restarting the SSH server will end any existing SSH connections.
Follow these steps to restart the SSH server:
1. Log in to the ILOM CLI.
2. To restart the SSH server, type the following:
-> set /SP/services/ssh restart_sshd_action=true
36
Sun ILOM 3.0 CLI Procedures Guide • December 2008
CHAPTER
5
Managing User Accounts
Topics
Description
Links
Configure user accounts
•
•
•
•
•
•
•
•
•
Configure SSH host key
• “Add an SSH Key” on page 45
• “Delete an SSH Key” on page 46
Configure Active Directory
settings
• “Enable Active Directory strictcertmode” on
page 47
• “Check Active Directory certstatus” on page 48
• “Remove an Active Directory Certificate” on
page 49
• “View and Configure Active Directory Settings” on
page 49
• “Troubleshoot Active Directory Authentication and
Authorization” on page 55
“Configure Single Sign On” on page 39
“Add a User Account” on page 39
“Change a User Account Password” on page 40
“Assign Roles to a User Account” on page 41
“Delete a User Account” on page 41
“View Individual User Accounts” on page 42
“View a List of User Accounts” on page 43
“View a List of User Sessions” on page 43
“View an Individual User Session” on page 44
37
Topics (Continued)
Description
Links
Configure LDAP settings
• “Configure the LDAP Server” on page 56
• “Configure ILOM for LDAP” on page 57
Configure LDAP/SSL settings
•
•
•
•
Configure RADIUS settings
• “Configure RADIUS” on page 67
• “RADIUS Commands” on page 69
“Enable LDAP/SSL strictcertmode” on page 59
“Check LDAP/SSL certstatus” on page 59
“Remove an LDAP/SSL Certificate” on page 60
“View and Configure LDAP/SSL Settings” on
page 61
• “Troubleshoot LDAP/SSL Authentication and
Authorization” on page 66
Related Topics
For ILOM
Chapter or Section
Guide
• Concepts
• User Account
Management
• Guidelines for Managing
User Accounts
Sun Integrated Lights Out Manager (ILOM)
3.0 Concepts Guide (820-6410)
• Web
interface
• Managing User Accounts
Sun Integrated Lights Out Manager (ILOM)
3.0 Web Interface Procedures Guide. (8206411)
• IPMI and
SNMP
hosts
• Managing User Accounts
Sun Integrated Lights Out Manager (ILOM)
3.0 SNMP and IPMI Procedures Guide (8206413)
The ILOM 3.0 Documentation Collection is available at:
http://docs.sun.com/app/docs/prod/int.lights.mgr30#hic.
Note – Syntax examples in this chapter use the target starting with /SP/, which
could be interchanged with the target starting with /CMM/ depending on your Sun
server platform. Subtargets are common across all Sun server platforms.
38
Sun ILOM 3.0 CLI Procedures Guide • December 2008
Configuring User Accounts
Topics
Description
Links
Configure user accounts
•
•
•
•
•
•
•
•
“Configure Single Sign On” on page 39
“Add a User Account” on page 39
“Assign Roles to a User Account” on page 41
“Delete a User Account” on page 41
“View a List of User Accounts” on page 43
“View an Individual User Session” on page 44
“View a List of User Sessions” on page 43
“View an Individual User Session” on page 44
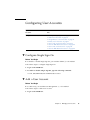
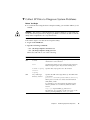
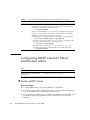
▼ Configure Single Sign On
Before You Begin
■
To disable or enable Single Sign On, you need the Admin (a) role enabled.
Follow these steps to configure Single Sign On:
1. Log in to the ILOM CLI.
2. To enable or disable Single Sign On, type the following command:
—> set /SP/services/sso state=disabled|enabled
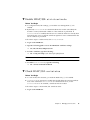
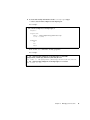
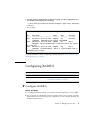
▼ Add a User Account
Before You Begin
■
To add a user, you need the User Management (u) role enabled.
Follow these steps to add a user account:
1. Log in to the ILOM CLI.
Chapter 5
Managing User Accounts
39
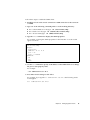
2. To add a local user account, type the following command:
—> create /SP/users/username password=password
For example:
-> create /SP/users/user5
Creating user...
Enter new password: ********
Enter new password again: ********
Created /SP/users/user5
Note – When adding a user account, it is unnecessary to provide a role or password
property. The role will default to Read Only (o), and the CLI will prompt you to
provide and confirm a password.
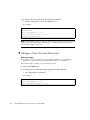
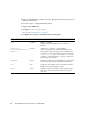
▼ Change a User Account Password
Before You Begin
■
To change a user account password, you need the Admin (a) role enabled. To
modify your own password, you need the Read Only (o) role enabled.
Follow these steps to change a user account password.
1. Log in to the ILOM CLI.
2. To change a user account password, type the following command:
—> set /SP/users/user password
For example:
-> set /SP/users/user5 password
Enter new password: ********
Enter new password again: ********
40
Sun ILOM 3.0 CLI Procedures Guide • December 2008
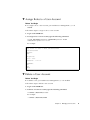
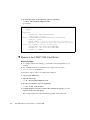
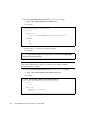
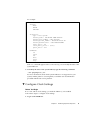
▼ Assign Roles to a User Account
Before You Begin
■
To assign roles to a user account, you need the User Management (u) role
enabled.
Follow these steps to assign a role to a user account:
1. Log in to the ILOM CLI.
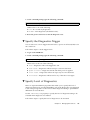
2. To assign roles to a user account, type the following command:
—> set /SP/users/<username> password=<password> role=
<administrator|operator|a|u|c|r|o|s>
For example:
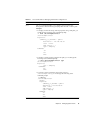
-> set /SP/users/user5 role=auc
Set ’role’ to ’auc’-> show /SP/users/user5
/SP/users/user5
Targets:
ssh
Properties:
role = auco
password = ********
Commands:
cd
set
show
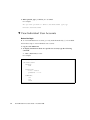
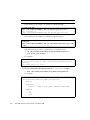
▼ Delete a User Account
Before You Begin
■
To delete a user, you need the User Management (u) role enabled.
Follow these steps to delete a user account:
1. Log in to the ILOM CLI.
2. To delete a local user account, type the following command:
—> delete /SP/users/username
For example:
-> delete /SP/users/user5
Chapter 5
Managing User Accounts
41
3. When queried, type y to delete, or n to cancel.
For example:
Are you sure you want to delete /SP/users/user5 (y/n)? y
Deleted /SP/users/user5
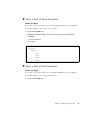
▼ View Individual User Accounts
Before You Begin
■
To view individual user accounts, you only need the Read Only (o) role enabled.
Follow these steps to view individual user accounts:
1. Log in to the ILOM CLI.
2. To display information about one specific user account, type the following
command:
—> show /SP/users/username
For example:
-> show /SP/users/user1
/SP/users/user1
Targets:
ssh
Properties:
role = aucros
password = *****
Commands:
cd
set
show
42
Sun ILOM 3.0 CLI Procedures Guide • December 2008
▼ View a List of User Accounts
Before You Begin
■
To view a list of user accounts, you only need the Read Only (o) role enabled.
Follow these steps to view a list of user accounts:
1. Log in to the ILOM CLI.
2. To display information about all local user accounts, type the following
command:
—> show /SP/users
For example:
-> show /SP/users
/SP/users
Targets:
user1
user2
user3
user4
▼ View a List of User Sessions
Before You Begin
■
To view a list of user sessions, you only need the Read Only (o) role enabled.
Follow these steps to view a list of user sessions:
1. Log in to the ILOM CLI.
Chapter 5
Managing User Accounts
43
2. To display information about all local user sessions, type the following
command:
—> show /SP/sessions
For example:
-> show /SP/sessions
/SP/sessions
Targets:
12 (current)
Properties:
Commands:
cd
show
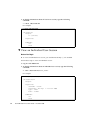
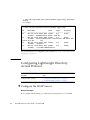
▼ View an Individual User Session
Before You Begin
■
To view an individual user session, you need the Read Only (o) role enabled.
Follow these steps to view an individual session:
1. Log in to the ILOM CLI.
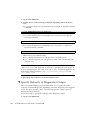
2. To display information about an individual user session, type the following
command:
—> show /SP/sessions/session_number
For example:
-> show /SP/sessions/12
/SP/sessions/12
Targets:
Properties:
username = user4
starttime = Mon Apr
type = shell
mode = normal
Commands:
cd
show
44
Sun ILOM 3.0 CLI Procedures Guide • December 2008
7 21:31:22 2008
Configuring SSH Keys
Topics
Description
Links
Configure SSH host key
• “Add an SSH Key” on page 45
• “Delete an SSH Key” on page 46
You can use SSH keys to automate password authentication. The following
procedures describe how to add and delete SSH keys.
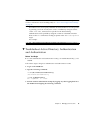
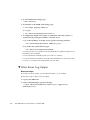
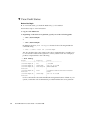
▼ Add an SSH Key
Before You Begin
■
To add an SSH key, you need the Admin (a) role enabled.
Follow these steps to add an SSH key:
1. Log in to the ILOM CLI.
2. To change to the directory location of a user’s SSH key, type:
-> cd /SP/users/user1/ssh/keys/1
3. To add a key to the user’s account, type:
-> set load_uri=
transfer_method://username:password@ipaddress_or_hostname/directorypath/filename
Where:
■
transfer_method can be tftp, ftp, sftp, scp, http, or https.
■
username is the name of the user account on the remote system. (username is
required for scp, sftp, and ftp. username is not used for tftp, and is optional for
http and https.)
■
password is the password for the user account on the remote system. (password
is required for scp, sftp, and ftp. password is not used for tftp, and is optional
for http and https.)
■
ipaddress_or_hostname is the IP address or the host name of the remote system.
■
directorypath is the location of the SSH key on the remote system.
Chapter 5
Managing User Accounts
45
■
filename is the name assigned to the SSH key file.
For example:
-> set load_uri=scp://adminuser:[email protected]/keys/sshkey_1.pub
Set ’load_uri’ to ’scp://adminuser:[email protected]/keys/sshkey_1.pub’
▼ Delete an SSH Key
Before You Begin
■
To delete an SSH key, you need the Admin (a) role enabled.
Follow these steps to delete an SSH key:
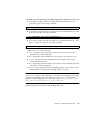
1. Log in to the ILOM CLI.
2. To change to the directory location of a user’s SSH key, type:
-> cd /SP/users/user1/ssh/keys/1
3. To delete a key from the user’s account, type:
-> set clear_action=true
The following confirmation prompt appears:
Are you sure you want to clear /SP/users/user1/ssh/keys/1
(y/n)?
4. Type y.
The SSH key is deleted and the following message appears to confirm the
deletion.
Set ’clear_action’ to ’true’
46
Sun ILOM 3.0 CLI Procedures Guide • December 2008
Configuring Active Directory
Topics
Description
Links
Configure Active Directory
settings
• “Enable Active Directory strictcertmode” on
page 47
• “Check Active Directory certstatus” on page 48
• “Remove an Active Directory Certificate” on
page 49
• “View and Configure Active Directory Settings” on
page 49
• “Troubleshoot Active Directory Authentication and
Authorization” on page 55
▼ Enable Active Directory strictcertmode
Before You Begin
■
To configure Active Directory settings, you need the User Management (u) role
enabled.
■
By default, strictcertmode is disabled. When this variable is disabled, the
channel is secure, but limited validation of the certificate is performed. If
strictcertmode is enabled, then the server’s certificate must have already been
uploaded to the server so that the certificate signatures can be validated when the
server certificate is presented.
■
Data is always protected, even if strictcertmode is disabled.
■
You can use TFTP, FTP, or SCP to load a certificate.
■
You can load a SSL certificate for Active Directory using the load -source
command from anywhere on the CLI. For example:
-> load -source URI_to_SSL_certificate target
Follow these steps to enable strictcertmode:
1. Log in to the ILOM CLI.
2. Type the following path to access the Active Directory certificate settings:
->cd /SP/clients/activedirectory/cert
Chapter 5
Managing User Accounts
47
3. To load a certificate, type the following:
-> set load_uri=tftp://IP address/file-path/filename
4. To enable strictcertmode, type the following:
-> set strictcertmode=enabled
▼ Check Active Directory certstatus
Before You Begin
■
To configure Active Directory settings, you need the User Management (u) role
enabled.
■
certstatus is an operational variable that should reflect the current certificate
state. Neither is required to exist if strictcertmode is disabled. However, for
the strictcertmode to be enabled, a certificate must be loaded.
Follow these steps to check an Active Directory certificate status:
1. Log in to the ILOM CLI.
2. To check the status of the certificate, type the following:
-> show /SP/clients/activedirectory/cert
For example:
-> show /SP/clients/activedirectory/cert
Targets:
Properties:
certstatus = certificate present
clear_action = (none)
issuer = /DC=com/DC=sun/DC=east/DC=sales/CN=CAforActiveDirectory
load_uri = (none)
serial_number = 08:f3:2e:c0:8c:12:cd:bb:4e:7e:82:23:c4:0d:22:60
subject = /DC=com/DC=sun/DC=east/DC=sales/CN=CAforActiveDirectory
valid_from = Oct 25 22:18:26 2006 GMT
valid_until = Oct 25 22:18:26 2011 GMT
version = 3 (0x02)
Commands:
cd
load
reset
set
show
48
Sun ILOM 3.0 CLI Procedures Guide • December 2008
▼ Remove an Active Directory Certificate
Before You Begin
■
To configure Active Directory settings, you need the User Management (u) role
enabled.
■
The Authentication Server Certificate can be removed only when
strictcertmode is disabled.
Follow these steps to remove an Active Directory certificate:
1. Log in to the ILOM CLI.
2. Type the following:
-> cd /SP/clients/activedirectory/cert
3. To remove a certificate, type one of the following commands:
■
-> set clear_action=true
■
-> reset <target>
For example:
-> reset /SP/clients/activedirectory/cert
4. Confirm whether you want to remove the certificate by typing y or n in
response to the on-screen query.
The existing certificate file that had been uploaded will be removed.
▼ View and Configure Active Directory Settings
Before You Begin
■
To configure Active Directory settings, you need the User Management (u) role
enabled.
Follow these steps to view and configure active directory settings:
1. Log in to the ILOM CLI.
2. Use the show and set commands to view and modify properties.
■
To view and modify information in the admingroups target:
Chapter 5
Managing User Accounts
49
-> show /SP/clients/activedirectory/admingroups/n
Where n can be 1 to 5.
For example:
-> show /SP/clients/activedirectory/admingroups/1
/SP/clients/activedirectory/admingroups/1
Targets:
Properties: name = CN=SpSuperAdmin,OU=Groups,DC=sales,DC=
east,DC=sun,DC=com
Then use the set command to modify properties.
For example:
-> set /SP/clients/activedirectory/admingroups/1/ name=CN=
spSuperAdmin,OU=Groups,DC=sales,DC=sun,DC=com
Set 'name' to 'CN=spSuperAdmin,OU=Groups,DC=sales,DC=sun,DC=com'
■
To view and modify information in the opergroups target:
-> show /SP/clients/activedirectory/opergroups/1
For example:
-> show /SP/clients/activedirectory/opergroups/1
/SP/clients/activedirectory/opergroups/1
Targets:
Properties: name = CN=SpSuperOper,OU=Groups,DC=sales,DC=
east,DC=sun,DC=com
Then use the set command to modify properties.
For example:
-> set /SP/clients/activedirectory/opergroups/1 name=CN=
spSuperOper,OU=Groups,DC=sales,DC=sun,DC=com
Set 'name' to 'CN=spSuperOper,OU=Groups,DC=sales,DC=sun,DC=com'
50
Sun ILOM 3.0 CLI Procedures Guide • December 2008
■
To view and modify information in the customgroups target:
-> show /SP/clients/activedirectory/customgroups/1
For example:
-> show /SP/clients/activedirectory/customgroups/1
/SP/clients/activedirectory/customgroups/1
Targets:
Properties:
name = custom_group_1
roles = aucro
Then use the set command to modify properties.
For example:
-> set /SP/clients/activedirectory/customgroups/1 name=CN=
spSuperCust,OU=Groups,DC=sales,DC=sun,DC=com
Set 'name' to 'CN=spSuperCust,OU=Groups,DC=sales,DC=sun,DC=com'
-> set /SP/clients/activedirectory/customgroups/1 roles=au
Set 'roles' to 'au'
■
To view and modify information in the userdomains target:
-> show /SP/clients/activedirectory/userdomains/1
For example:
-> show /SP/clients/activedirectory/userdomains/1
/SP/clients/activedirectory/userdomains/1
Targets:
Properties:
domain = <USERNAME>@sales.example.sun.com
Then use the set command to modify properties.
For example:
-> set /SP/clients/activedirectory/userdomains/1 domain=
<USERNAME>@sales.example.sun.com
Set 'domain' to '<username>@sales.example.sun.com'
Chapter 5
Managing User Accounts
51
Note – In the example above, <USERNAME> will be replaced with the user’s login
name. During authentication, the user’s login name replaces <USERNAME>. Names
can take the form of Fully Qualified Distinguished Name (FQDN), domain\name
(NT), or Simple Name.
■
To view and modify information in the alternateservers target:
-> show /SP/clients/activedirectory/alternateservers/1
For example:
-> show /SP/clients/activedirectory/alternateservers/1
/SP/clients/activedirectory/alternateservers/1
Targets:
cert
Properties:
address = 10.8.168.99
port = 0
52
Sun ILOM 3.0 CLI Procedures Guide • December 2008
Note – address can either be the IP address or DNS (host name). If using DNS,
DNS must be enabled. For more information on enabling DNS, see “View and
Configure DNS Settings” on page 29.
Then use the set command to modify properties.
For example:
-> set /SP/clients/activedirectory/alternateservers/1 port=636
You can also use the show command to view the alternate server certificate
information.
For example:
-> show /SP/clients/activedirectory/alternateservers/1/cert
/SP/clients/activedirectory/alternateservers/1/cert
Targets:
Properties:
certstatus = certificate present
clear_action = (none)
issuer = /DC=com/DC=sun/DC=east/DC=sales/CN CAforActiveDirectory
load_uri = (none)
serial_number = 08:f3:2e:c0:8c:12:cd:bb:4e:7e:82:23:c4:0d:22:60
subject = /DC=com/DC=sun/DC=east/DC=sales/CN=CAforActiveDirectory
valid_from = Oct 25 22:18:26 2006 GMT
valid_until = Oct 25 22:18:26 2011 GMT
version = 3 (0x02)
Type the following to copy a certificate for an alternate server:
-> cd /SP/clients/activedirectory/alternateservers/1
-> set load_uri=
<tftp|ftp|scp>:[//<username:password>]@//<ipAddress|HostName>/<filepPath>/
<fileName>
The following is an example of a certificate copied using tftp:
-> set load_uri=tftp://10.8.172.152/sales/cert.cert
Set ’load_uri’ to ’tftp://10.8.172.152/sales/cert.cert’
Chapter 5
Managing User Accounts
53
Note – The TFTP transfer method does not require a user name and password.
The following is an example of a certificate copied using tftp:
-> set load_uri=
ftp://sales:[email protected]/8275_put/cert.cert
Set ’load_uri’ to
’ftp://sales:[email protected]/8275_put/cert.cert’
The following is an example of a certificate copied using scp:
> set
load_uri=
scp://sales:[email protected]/home/dc150698/8275_put/cert
.cert
Type the following to remove a certificate for an alternate server:
-> cd /SP/clients/activedirectory/alternateservers/1
-> set clear_action=true
For example:
-> set clear_action=true
Are you sure you want to clear /SP/clients/activedirectory/cert
(y/n)? y
Set ’clear_action’ to ’true’
■
To view and modify information in the dnslocatorqueries target:
-> show /SP/clients/activedirectory/dnslocatorqueries/1
For example:
-> show /SP/clients/activedirectory/dnslocatorqueries/1
/SP/clients/activedirectory/dnslocatorqueries/1
Targets:
Properties:
service = _ldap._tcp.gc._msdcs.<DOMAIN>.<PORT:3269>
Commands:
cd
set
show
54
Sun ILOM 3.0 CLI Procedures Guide • December 2008
Note – DNS and DNS Locator Mode must be enabled for DNS Locator Queries to
work. For information about enabling DNS, see “View and Configure DNS Settings”
on page 29.
The DNS Locator service query identifies the named DNS service. The port ID
is generally part of the record, but it can be overridden by using the format
<PORT:636>. Also, named services specific for the domain being
authenticated can be specified by using the <DOMAIN> substitution marker.
Then use the set command to modify properties in the dnslocatorqueries
target:
For example:
-> set /SP/clients/activedirectory/dnslocatorqueries/1 service=<string>
▼ Troubleshoot Active Directory Authentication
and Authorization
Before You Begin
■
To view authentication and authorization events, you need the Read Only (o) role
enabled.
Follow these steps to diagnose authentication and authorization events:
1. Log in to the ILOM CLI.
2. Type the following commands:
-> cd /SP/clients/activedirectory
/SP/clients/activedirectory
-> set logdetail=trace
Set ’logdetail’ to ’trace’
3. Perform another authorization attempt by logging out, then logging back in to
the ILOM CLI and typing the following command:
Chapter 5
Managing User Accounts
55
-> show /SP/logs/event/list Class==(ActDir) Type==(Log) Severity==
(Trace)
For example:
-> show /SP/logs/event/list Class==(ActDir) Type==(Log)
ID
----26
Date/Time
Class
Type
Severity
------------------------ -------- -------- -------Thu Jul 10 09:40:46 2008 ActDir
Log
minor
(ActDir) authentication status: auth-OK
25
Thu Jul 10 09:40:46 2008 ActDir
Log
minor
(ActDir) server-authenticate: auth-success idx 100/0 dnsserver 10.8.143
.231
24
Thu Jul 10 09:40:46 2008 ActDir
Log
debug
(ActDir)
custRoles
23
Thu Jul 10 09:40:46 2008 ActDir
Log
debug
(ActDir)
role-name administrator
For more information on configuring event log detail, see “View and Clear the ILOM
Event Log” on page 83.
Configuring Lightweight Directory
Access Protocol
Topics
Description
Links
Configure LDAP settings
• “Configure the LDAP Server” on page 56
• “Configure ILOM for LDAP” on page 57
▼ Configure the LDAP Server
Before You Begin
■
56
To configure LDAP settings, you need the User Management (u) role enabled.
Sun ILOM 3.0 CLI Procedures Guide • December 2008
1. Ensure that all users authenticating to ILOM have passwords stored in "crypt"
format or the GNU extension to crypt, commonly referred to as "MD5 crypt."
ILOM only supports LDAP authentication for passwords stored in these two
variations of the crypt format.
For example:
userPassword: {CRYPT}ajCa2He4PJhNo
or
userPassword: {CRYPT}$1$pzKng1$du1Bf0NWBjh9t3FbUgf46.
2. Add object classes posixAccount and shadowAccount, and populate the
required property values for this schema (RFC 2307).
Required Property
Description
uid
User name for logging in to ILOM
uidNumber
Any unique number
gidNumber
Any unique number
userPassword
Password
homeDirectory
Any value (this property is ignored by ILOM)
loginShell
Any value (this property is ignored by ILOM)
3. Configure the LDAP server to enable LDAP server access to ILOM user
accounts.
Either enable your LDAP server to accept anonymous binds, or create a proxy
user on your LDAP server that has read-only access to all user accounts that will
authenticate through ILOM.
See your LDAP server documentation for more details.
▼ Configure ILOM for LDAP
Before You Begin
■
To configure LDAP settings, you need the User Management (u) role enabled.
Follow these steps to configure ILOM for LDAP:
1. Enter the proxy user name and password. Type:
—> set /SP/clients/ldap binddn="cn=proxyuser, ou=people, ou=sales,
dc=sun, dc=com" bindpw=password
2. Enter the IP address of the LDAP server. Type:
Chapter 5
Managing User Accounts
57
—> set /SP/clients/ldap address=ldapipaddress |DNS name
Note – If using a DNS name, DNS must be configured and functioning.
3. Assign the port used to communicate with the LDAP server; the default port is
389. Type:
—> set /SP/clients/ldap port=ldapport
4. Enter the Distinguished Name of the branch of your LDAP tree that contains
users and groups. Type, for example:
—> set /SP/clients/ldap searchbase="ou=people, ou=sales, dc=sun,
dc=com"
This is the location in your LDAP tree that you want to search for user
authentication.
5. Set the state of the LDAP service to enabled. Type:
—> set /SP/clients/ldap state=enabled
6. To verify that LDAP authentication works, log in to ILOM using an LDAP user
name and password.
Note – ILOM searches local users before LDAP users. If an LDAP user name exists
as a local user, ILOM uses the local account for authentication.
Configuring LDAP/SSL
Topics
58
Description
Links
Configure LDAP/SSL settings
•
•
•
•
“Enable LDAP/SSL strictcertmode” on page 59
“Check LDAP/SSL certstatus” on page 59
“Remove an LDAP/SSL Certificate” on page 60
“View and Configure LDAP/SSL Settings” on
page 61
• “Troubleshoot LDAP/SSL Authentication and
Authorization” on page 66
Sun ILOM 3.0 CLI Procedures Guide • December 2008
▼ Enable LDAP/SSL strictcertmode
Before You Begin
■
To configure LDAP/SSL settings, you need the User Management (u) role
enabled.
■
By default, strictcertmode is disabled. When this variable is disabled, the
channel is secure, but limited validation of the certificate is performed. If
strictcertmode is enabled, then the server’s certificate must have already been
uploaded to the server so that the certificate signatures can be validated when the
server certificate is presented.
Follow these steps to enable LDAP/SSL strictcertmode:
1. Log in to the ILOM CLI.
2. Type the following path to access the LDAP/SSL certificate settings:
-> cd /SP/clients/ldapssl/cert
3. To load a certificate, type the following:
-> set load_uri=tftp://IP address/file-path/filename
Note – You can use TFTP, FTP, or SCP to load a certificate.
4. To enable strictcertmode, type the following:
-> set strictcertmode=enabled
▼ Check LDAP/SSL certstatus
Before You Begin
■
To view LDAP/SSL certstatus, you need the Read Only (o) role enabled.
■
certstatus is an operational variable that should reflect the current certificate
state of the certificate if strictcertmode is disabled. However, for the
strictcertmode to be enabled, a certificate must be loaded.
Follow these steps to check LDAP/SSL certificate status:
1. Log in to the ILOM CLI.
Chapter 5
Managing User Accounts
59
2. To check the status of the certificate, type the following:
-> show /SP/clients/ldapssl/cert
For example:
-> show /SP/clients/ldapssl/cert
Targets:
Properties:
certstatus = certificate present
clear_action = (none)
issuer = /C=US/O=Entrust PKI Demonstration Cerificates
load_uri = (none)
serial_number = 08:f23:2e:c0:8c:12:cd:bb:4e:7e:82:23:c4:0d:22:60
subject = /C=US/O=Entrust PKI Demonstration Cerificates/OU=Entrust/Web
Connector/OU=No Liability as per http://freecerts.entrust
valid_from = Oct 25 22:18:26 2006 GMT
valid_until = Oct 25 22:18:26 2011 GMT
version = 3 (0x02)
▼ Remove an LDAP/SSL Certificate
Before You Begin
■
To configure LDAP/SSL settings, you need the User Management (u) role
enabled.
■
The Authentication Server Certificate can only be removed when
strictcertmode is disabled.
Follow these steps to remove an LDAP/SSL certificate:
1. Log in to the ILOM CLI.
2. Type the following:
-> cd /SP/clients/ldapssl/cert
3. To remove a certificate, type the following:
-> set clear_action=true
4. Confirm whether you want to remove the certificate by typing y or n in
response to the on-screen query.
The existing certificate file that had been uploaded will be removed.
60
Sun ILOM 3.0 CLI Procedures Guide • December 2008
▼ View and Configure LDAP/SSL Settings
Before You Begin
■
To configure LDAP/SSL settings, you need the User Management (u) role
enabled.
Follow these steps to view and configure LDAP/SSL settings:
1. Log in to the ILOM CLI.
2. Use the show and set commands to view and modify properties.
■
To view and modify information in the admingroups target:
-> show /SP/clients/ldapssl/admingroups/n
Where n can be 1 to 5.
For example:
-> show /SP/clients/ldapssl/admingroups/1
/SP/clients/ldapssl/admingroups/1
Targets:
Properties: name = CN=SpSuperAdmin,OU=Groups,DC=sales,DC=
east,DC=sun,DC=com
Then use the set command to modify properties.
For example:
-> set /SP/clients/ldapssl/admingroups/1/ name=CN=
spSuperAdmin,OU=Groups,DC=sales,DC=sun,DC=com
Set 'name' to 'CN=spSuperAdmin,OU=Groups,DC=sales,DC=sun,DC=com'
■
To view and modify information in the opergroups target:
Chapter 5
Managing User Accounts
61
-> show /SP/clients/ldapssl/opergroups/1
For example:
-> show /SP/clients/ldapssl/opergroups/1
/SP/clients/ldapssl/opergroups/1
Targets:
Properties: name = CN=SpSuperOper,OU=Groups,DC=sales,DC=
east,DC=sun,DC=com
Then use the set command to modify properties.
For example:
-> set /SP/clients/ldapssl/opergroups/1 name=CN=spSuperOper,OU=
Groups,DC=sales,DC=sun,DC=com
Set 'name' to 'CN=spSuperOper,OU=Groups,DC=sales,DC=sun,DC=com'
62
Sun ILOM 3.0 CLI Procedures Guide • December 2008
■
To view and modify information in the customgroups target:
-> show /SP/clients/ldapssl/customgroups/1
For example:
/SP/clients/ldapssl/customgroups/1
Targets:
Properties:
name = <fully qualified distinguished name only>
roles = (none)
Commands:
cd
set
show
Then use the set command to modify properties.
For example:
-> set /SP/clients/ldapssl/customgroups/1 name=CN=
spSuperCust,OU=Groups,DC=sales,DC=sun,DC=com
Set 'name' to 'CN=spSuperCust,OU=Groups,DC=sales,DC=sun,DC=com'
-> set /SP/clients/ldapssl/customgroups/1 roles=au
Set 'roles' to 'au'
Chapter 5
Managing User Accounts
63
■
To view and modify information in the userdomains target:
-> show /SP/clients/ldapssl/userdomains/1
For example:
/SP/clients/ldapssl/userdomains/1
Targets:
Properties:
domain = uid=<USERNAME>,ou=people,dc=sun,dc=com
Commands:
cd
set
show
Then use the set command to modify properties.
For example:
-> set SP/clients/ldapssl/userdomains1 domain=uid=<USERNAME>,
ou=people,dc=sun,dc=sun
Note – In the example above, <USERNAME> will be replaced with the user’s login
name during authentication. Names can take the form of Fully Qualified
Distinguished Name (FQDN).
■
To view and modify information in the alternateservers target:
-> show /SP/clients/ldapssl/alternateservers/1
For example:
-> show /SP/clients/ldapssl/alternateservers/1
/SP/clients/activedirectory/alternateservers/1
Targets:
cert
Properties:
address = 10.8.168.99
port = 0
64
Sun ILOM 3.0 CLI Procedures Guide • December 2008
Note – In the example above, address can either be the IP address or DNS name.
If using DNS, DNS must be enabled. For more information on enabling DNS, see
“View and Configure DNS Settings” on page 29.
Then use the set command to modify properties.
For example:
-> set /SP/clients/ldapssl/alternateservers/1 port=636
You can also use the show command to view the alternate server certificate
information.
For example:
-> show /SP/clients/ldapssl/alternateservers/1/cert
/SP/clients/ldapssl/alternateservers/1/cert
Targets:
Properties:
certstatus = certificate present
clear_action = (none)
issuer = /C=US/O=Entrust PKI Demonstration Cerificates
load_uri = (none)
serial_number = 08:f23:2e:c0:8c:12:cd:bb:4e:7e:82:23:c4:0d:22:60
subject = /C=US/O=Entrust PKI Demonstration Cerificates/OU=Entrust/Web
Connector/OU=No Liability as per http://freecerts.entrust
valid_from = Oct 25 22:18:26 2006 GMT
valid_until = Oct 25 22:18:26 2011 GMT
version = 3 (0x02)
Type the following to copy a certificate for an alternate server:
-> set load_uri=
<tftp|ftp|scp>:[<username:password>]@//<ipAddress|HostName>/<filepPath>/
<fileName>
The following is an example of a certificate copied using tftp:
-> set load_uri=tftp://10.8.172.152/sales/cert.cert
Set ’load_uri’ to ’tftp://10.8.172.152/sales/cert.cert’
Chapter 5
Managing User Accounts
65
Note – The TFTP transfer method does not require a user name and password.
The following is an example of a certificate copied using tftp:
-> set load_uri=
ftp://sales:[email protected]/8275_put/cert.cert
Set ’load_uri’ to
’ftp://sales:[email protected]/8275_put/cert.cert’
The following is an example of a certificate copied using scp:
> set
load_uri=
scp://sales:[email protected]/home/dc150698/8275_put/cert
.cert
Type the following to remove a certificate for an alternate server:
-> set clear_action=true
For example:
-> set clear_action=true
Are you sure you want to clear /SP/clients/ldapssl/cert (y/n)? y
Set ’clear_action’ to ’true’
▼ Troubleshoot LDAP/SSL Authentication and
Authorization
Before You Begin
■
To view authentication and authorization events, you need the Read Only (o) role
enabled.
Follow these steps to troubleshoot LDAP/SSL authentication and authorization:
1. Log in to the ILOM CLI.
2. Type the following commands:
-> cd /SP/clients/ldapssl
/SP/clients/ldapssl
-> set logdetail=trace
Set ’logdetail’ to ’trace’
66
Sun ILOM 3.0 CLI Procedures Guide • December 2008
3. Perform another authorization attempt by logging out, then logging back in to
the ILOM CLI and typing the following:
-> show /SP/logs/event/list Class==(ldapssl) Type==(Log) Severity=
=(Trace)
For example:
-> show /SP/logs/event/list Class==(ldapssl) Type==(Log)
ID
----3155
Date/Time
Class
Type
Severity
------------------------ -------- -------- -------Thu Nov 13 06:21:00 2008 LdapSsl
Log
critical
(LdapSSL) authentication status: auth-ERROR
3154
Thu Nov 13 06:21:00 2008 LdapSsl
Log
major
(LdapSSL) server-authenticate: auth-error idx 0 cfg-server
10.8.xxx.xxx
3153
Thu Nov 13 06:21:00 2008 LdapSsl
Log
major
(LdapSSL) ServerUserAuth - Error 0, error binding user to
ActiveDirectory server
For more information about configuring event log detail, see “View and Clear the
ILOM Event Log” on page 83.
Configuring RADIUS
Topics
Description
Links
Configure RADIUS settings
• “Configure RADIUS” on page 67
• “RADIUS Commands” on page 69
▼ Configure RADIUS
Before You Begin
■
To configure RADIUS settings, you need the User Management (u) role enabled.
■
If you need to provide ILOM access beyond the 10 local user accounts, and after
the RADIUS server has been properly configured, you can configure ILOM to use
RADIUS authentication.
Chapter 5
Managing User Accounts
67
■
Before completing this procedure, collect the appropriate information about your
RADIUS environment.
Follow these steps to configure RADIUS settings:
1. Log in to the ILOM CLI.
2. Navigate to /SP/clients/radius.
See “RADIUS Commands” on page 69.
3. Configure the settings as described in the following table.
Property (CLI)
Default
Description
state
Disabled
Enabled | Disabled
Specifies whether the RADIUS client is enabled or
disabled.
defaultrole
a|u|c|r|s|Administrator|
Operator
Operator
Administrator | Operator | Advanced Roles
Access role granted to all authenticated RADIUS users.
This property supports the legacy roles of Administrator
or Operator, or any of the individual role ID combinations
of ’a’, ’u’, ’c’, ’r’, ’o’ and ’s’. For example, aucros, where
a=Admin, u=User Management, c=Console, r=Reset and
Host Control, and s=Service.
ipaddress
0.0.0.0
IP address or DNS name of the RADIUS server. If the DNS
name is used, DNS must be configured and functional.
port
1812
Specifies the port number used to communicate with the
RADIUS server. The default port is 1812.
secret
(none)
Specifies the shared secret that is used to protect sensitive
data and to ensure that the client and server recognize
each other.
68
Sun ILOM 3.0 CLI Procedures Guide • December 2008
RADIUS Commands
This section describes the RADIUS commands.
show /SP/clients/radius
To use this command, you need the Admin (a) role or Operator role enabled.
Purpose
Use this command to view the properties associated with RADIUS authentication.
Syntax
show /SP/clients/radius
Properties
■
defaultrole – This is the role assigned to all RADIUS users: Operator.
■
address – IP address of your RADIUS server.
■
port – Port number used to communicate with your RADIUS server. The default
port is 1812.
■
secret – This is the shared secret used to gain access to your RADIUS server.
■
state – This setting is enabled or disabled to allow or deny access to your
RADIUS users.
Chapter 5
Managing User Accounts
69
Example
-> show /SP/clients/radius
/SP/clients/radius
Targets:
Properties:
defaultrole = Operator
address = 129.144.36.142
port = 1812
secret = (none)
state = enabled
Commands:
cd
set
show
set /SP/clients/radius
To use this command, you need the User Management (u) enabled.
Purpose
Use this command to configure the properties associated with RADIUS
authentication on a service processor.
Syntax
set /SP/clients/radius [defaultrole=
[Administrator|Operator|a|u|c|r|s] address=radius_server_IPaddress
port=port# secret=radius_secret state=[enabled|disabled]]
Properties
70
■
defaultrole – This is the role assigned to all RADIUS users: Operator.
■
address – IP address of your RADIUS server.
■
port – Port number used to communicate with your RADIUS server. The default
port is 1812.
■
secret – This is the shared secret used to gain access to your RADIUS server.
■
state – This setting is enabled or disabled to allow or deny access to your
RADIUS users.
Sun ILOM 3.0 CLI Procedures Guide • December 2008
Example
-> set /SP/clients/radius state=enabled address=10.8.145.77
Set 'state' to 'enabled'
Set 'address' to '10.8.145.77
Chapter 5
Managing User Accounts
71
72
Sun ILOM 3.0 CLI Procedures Guide • December 2008
CHAPTER
6
Managing System Components
Topics
Description
Links
Manage system components
•
•
•
•
“View Component Information” on page 74
“Prepare to Remove a Component” on page 75
“Return a Component to Service” on page 76
“Enable and Disable Components” on page 76
Related Topics
For ILOM
Chapter or Section
Guide
• Concepts
• About Fault Management
Sun Integrated Lights Out Manager (ILOM)
3.0 Concepts Guide (820-6410)
• Web
interface
• Managing System
Components
Sun Integrated Lights Out Manager (ILOM)
3.0 Web Interface Procedures Guide (8206411)
• IPMI and
SNMP
hosts
• Inventory and Component
Management
Sun Integrated Lights Out Manager (ILOM)
3.0 SNMP and IPMI Procedures Guide (8206413)
The ILOM 3.0 Documentation Collection is available at:
http://docs.sun.com/app/docs/prod/int.lights.mgr30#hic.
Note – Syntax examples in this chapter use the target starting with /SP/, which
could be interchanged with the target starting with /CMM/ depending on your Sun
server platform. Subtargets are common across all Sun server platforms.
73
Viewing Component Information and
Managing System Components
Topics
Description
Links
Manage system components
• “Prepare to Remove a Component” on page 75
• “Return a Component to Service” on page 76
• “Enable and Disable Components” on page 76
▼ View Component Information
Before You Begin
■
To view information about a system component, you need the Read Only (o) role
enabled.
Follow these steps to view component information:
1. Log in to the ILOM CLI.
2. At the prompt, type:
-> show component_name type
For example:
-> show /SYS/MB type
Properties:
type = Motherboard
Commands:
show
The properties that display inventory information are listed below. The properties
that you are able to view depend on the target type you use.
■ fru_part_number
■ fru_manufacturer
■ fru_serial_number
■ fru_name
■ fru_description
■ fru_version
74
Sun ILOM 3.0 CLI Procedures Guide • December 2008
■
■
■
■
■
■
chassis_serial_number
chassis_part_number
product_name
product_serial_number
product_part_number
customer_frudata
▼ Prepare to Remove a Component
Before You Begin
■
To modify a component, you need the Reset and Host Control (r) role enabled.
Follow these steps to prepare a component for removal:
1. Log in to the ILOM CLI.
2. At the ILOM command prompt, type:
—> set target prepare_to_remove_action=true
For example:
-> set /CH/RFM0 prepare_to_remove_action=true
Set ’prepare_to_remove_action’ to ’true’
After you prepare the component for removal, you can verify that it is ready to be
physically removed.
3. At the ILOM command prompt, type:
—> show target prepare_to_remove_status
For example:
-> show /CH/RFM0 prepare_to_remove_status
Properties:
prepare_to_remove_status = Ready|NotReady
Commands:
cd
set
show
start
stop
The Ready|NotReady statement in the example shows whether the device is
ready to be removed.
Chapter 6
Managing System Components
75
▼ Return a Component to Service
Before You Begin
■
To modify a component, you need the Reset and Host Control (r) role enabled.
Follow these steps to return a component to service:
Note – If you have already prepared a component for removal, and you wish to
undo the action, you can do so remotely.
1. Log in to the ILOM CLI.
2. At the ILOM command prompt, type:
—> set target return_to_service_action=true
For example:
-> set /CH/RFM0 return_to_service_action=true
Set ’return_to_service_action’ to ’true’
▼ Enable and Disable Components
Before You Begin
■
To enable or disable a component, you need the Reset and Host Control (r) role
enabled.
Follow these steps to enable and disable components:
1. Log in to the ILOM CLI.
2. At the ILOM command prompt, type:
—> set <target> component_state=enabled|disabled
For example:
-> set /SYS/MB/CMP0/P0/C0 component_state=enabled
Set ‘component_state’ to ‘enabled’
76
Sun ILOM 3.0 CLI Procedures Guide • December 2008
CHAPTER
7
Monitoring System Components
Topics
Description
Links
View and configure LEDs and
system indicators
• “View Sensor Readings” on page 79
• “Configure System Indicators” on page 80
Set the clock and timezone
• “Configure Clock Settings” on page 81
Filter, view, and clear event logs
• “Filter Event Log Output” on page 82
• “View and Clear the ILOM Event Log” on page 83
View fault status
• “Configure Remote Syslog Receiver IP Addresses”
on page 85
• “View Fault Status” on page 86
Collect data for use by Sun
Services personnel to diagnose
system problems
• “Collect SP Data to Diagnose System Problems” on
page 87
77
Related Topics
For ILOM
Chapter or Section
Guide
• Concepts
• System Monitoring and
Alert Management
• Collect SP Data to
Diagnose System
Problems
Sun Integrated Lights Out Manager (ILOM)
3.0 Concepts Guide (820-6410)
• Web
interface
• Monitoring System
Sensors, Indicators, and
ILOM Event Log
• Collect SP Data to
Diagnose System
Problems
Sun Integrated Lights Out Manager (ILOM)
3.0 Web Interface Procedures Guide (8206411)
• IPMI and
SNMP
hosts
• Inventory and Component
Management
Sun Integrated Lights Out Manager (ILOM)
3.0 SNMP and IPMI Procedures Guide (8206413)
The ILOM 3.0 Documentation Collection is available at:
http://docs.sun.com/app/docs/prod/int.lights.mgr30#hic.
Monitoring System Sensors, Indicators,
and ILOM Event Logs
Topics
78
Description
Links
View and configure LEDs and
system indicators
• “View Sensor Readings” on page 79
• “Configure System Indicators” on page 80
Set the clock and timezone
• “Configure Clock Settings” on page 81
Filter, view, and clear event logs
• “Filter Event Log Output” on page 82
• “View and Clear the ILOM Event Log” on page 83
• “Configure Remote Syslog Receiver IP Addresses”
on page 85
View fault status
• “View Fault Status” on page 86
Collect SP Data
• “Collect SP Data to Diagnose System Problems” on
page 87
Sun ILOM 3.0 CLI Procedures Guide • December 2008
▼ View Sensor Readings
Before You Begin
■
To view sensor readings, you need the Read Only (o) role enabled.
Follow these steps to view sensor readings:
1. Log in to the ILOM CLI.
2. Type the following commands to navigate to the sensor target and then to view
the sensor properties:
->cd target
->show
For example, on some server platforms, you can specify the following path to
view a temperature reading of a server’s ambient air intake:
->cd /SYS/T_AMB
->show
The properties describing the sensor target appear. For example:
type = Temperature
class = Threshold Sensor
value = 27.000 degree C
upper_nonrecov_threshold = 45.00 degree C
upper_critical_threshold = 40.00 degree C
upper_noncritical_threshold = 35.00 degree C
lower_noncritical_threshold = 10.00 degree C
lower_critical_threshold = 4.00 degree C
lower_nonrecov_threshold = 0.00 degree C
alarm_status = cleared
For specific details about the type of threshold sensor targets you can access, as
well as the paths to access them, consult the user documentation provided with
the Sun server platform.
3. To view a discrete sensor reading, type the following commands:
->cd target
->show
For example, on some Sun server platforms, you can determine whether a hard
disk drive is present in slot 0 by specifying the following path:
->cd /SYS/HDD0_PRSNT
->show
The properties describing the discrete sensor target appear. For example:
Chapter 7
Monitoring System Components
79
■
Type = Entity Presence
■
Class = Discrete Indicator
■
Value = Present
For specific details about the type of discrete sensor targets you can access, as
well as the paths to access them, consult the user documentation provided with
the Sun server platform.
▼ Configure System Indicators
Before You Begin
■
To configure system indicators, you need the User Management (u) role enabled.
Follow these steps to configure system indicators:
1. Log in to the ILOM CLI.
2. To determine whether you can change the state of a system indicator, type the
following commands:
->cd /SYS or cd /CH
->show
Targets, properties, and commands associated with the system indicator appear.
80
Sun ILOM 3.0 CLI Procedures Guide • December 2008
For example:
/SYS
Targets:
BIOS
OK2RM
SERVICE
Properties:
type = Host System
chassis_name = SUN BLADE 8000 CHASSIS
chassis_part_number = 602-3235-00
chassis_serial_number = 00:03:BA:CD:59:6F
chassis_manufacturer = SUN MICROSYSTEMS
fault_state = OK
clear_fault_action = (none)
power_state = Off
Commands:
cd
reset
set
show
start
stop
If the set command appears in the Commands list, you can modify the state of the
system indicator.
3. To modify the state of the system indictor, type the following command:
->set property=state_name
For more information about which system indicators are supported on your
system, and the paths for accessing them, consult the user documentation
provided with the Sun server platform.
▼ Configure Clock Settings
Before You Begin
■
To view and set clock settings, you need the Admin (a) role enabled.
Follow these steps to configure clock settings:
1. Log in to the ILOM CLI.
Chapter 7
Monitoring System Components
81
2. To view ILOM clock settings, type:
->show /SP/clock
3. To manually set the ILOM clock settings, type:
-> set target property_name=value
For example:
-> set /SP/clock datetime=MMDDhhmmYYYY
4. To configure the ILOM clock settings to synchronize with other systems on
your network by setting an IP address of an NTP server:
a. To set the IP address of an NTP server, type the following command.
->set /SP/clients/ntp/server/1 address=ip_address
b. To enable NTP synchronization, type:
->set /SP/clock usentpserver=enabled
Consult your Sun server platform user documentation for platform-specific clock
information about whether:
■
The current time in ILOM persists across reboots of the SP.
■
The current time in ILOM can be synchronized with the host at host boot time.
■
There is a real-time clock element that stores the time.
▼ Filter Event Log Output
Before You Begin
■
To filter event log output, you need the Read Only (o) role enabled.
Follow these steps to filter event log output:
1. Log in to the ILOM CLI.
2. At the command prompt, type the following:
-> show /SP/logs/event/list Class==(value) Type==(value)
Severity==(value)
82
Sun ILOM 3.0 CLI Procedures Guide • December 2008
▼ View and Clear the ILOM Event Log
Before You Begin
■
To view or clear the event log, you need the Admin (a) role enabled.
Follow these steps to view and clear the ILOM event log:
1. Establish a local serial console connection or SSH connection to the server SP
or CMM.
2. Type one of the following commands to set the working directory:
■
For a rackmounted server SP: cd /SP/logs/event
■
For a blade server SP in chassis: cd /CH/BLn/SP/logs/event
■
For a CMM: cd /CMM/logs/event
3. Type the following command to display the event log list:
->show list
The contents of the event log appear.
For example:
ID
----578
Date/Time
Class
Type
Severity
------------------------ -------- -------- -------Wed Jun 11 06:39:47 2008 Audit
Log
minor
user1 : Open Session : object = /session/type : value = shell
: success
577
Wed Jun 11 06:34:53 2008 Audit
Log
minor
user1 : Set : object =
/clients/activedirectory/userdomains/3/domain : value =
<USERNAME>@joe.customer.example.sun.com : success
576
Wed Jun 11 06:25:06 2008 Audit
Log
minor
user1 : Open Session : object = /session/type : value = www
: success
575
Wed Jun 11 06:07:29 2008 Audit
Log
minor
user1 : Close Session : object = /session/type : value = www
: success
574
Wed Jun 11 06:02:01 2008 Audit
Log
minor
root : Set : object =
/clients/activedirectory/dnslocatorqueries/2/service : value =
_ldap._tcp.pc._msdcs.<DOMAIN>.<PORT:636> : success
573
Wed Jun 11 06:01:50 2008 Fault
Fault
critical
Fault detected at time = Wed Jun 11 06:01:41 2008. The suspect
component:/CH/PS3/EXTERNAL/AC_INPUT has fault.powersupply.no_ac
with probability=100 Please consult the Sun Blade 8000 Fault
Diagnosis Document (Document ID: 85878) at http://sunsolve.sun.com
to determine the correct course of action.
Chapter 7
Monitoring System Components
83
4. In the event log, perform any of the following tasks:
■
Scroll down the list to view entries – Press any key except ‘q’. The following
table provides descriptions about each column appearing in the log.
.
Column Label
Description
Event ID
The number of the event, in sequence from number 1.
Class/Type
• Audit/ Log – Commands that result in a configuration change.
Description includes user, command, command parameters, and
success/fail.
• IPMI/Log – Any event that is placed in the IPMI SEL is also put in
the management log.
• Chassis/State – For changes to the inventory and general system
state.
• Chassis/Action – Category for shutdown events for server
module/chassis, hot insert/removal of a FRU, and Reset Parameters
button pushed.
• Fault/Fault – For Fault Management faults. Description gives the
time fault was detected and suspect component.
• Fault/Repair – For Fault Management repairs. Description gives
component.
Severity
Debug, Down, Critical, Major, or Minor
Date/Time
The day and time the event occurred. If the Network Time Protocol
(NTP) server is enabled to set the ILOM time, the ILOM clock will use
Universal Coordinated Time (UTC).
Description
A description of the event.
5. To dismiss the event log (stop displaying the log), press the ‘q’ key.
6. To clear entries in the event log, perform the following steps:
a. Type: set clear=true
A confirmation message appears.
b. Type one of the following:
■
To clear the entries, type: y.
■
To cancel clearing the log, type: n.
Note – The ILOM event log accumulates many types of events, including copies of
IPMI entries. Clearing the ILOM event log will clear all entries in the log, including
the IPMI entries. However, clearing the ILOM event log entries will not clear the
actual entries posted directly to an IPMI log.
84
Sun ILOM 3.0 CLI Procedures Guide • December 2008
▼ Configure Remote Syslog Receiver IP Addresses
Before You Begin
■
To configure remote syslog receiver IP addresses, you need the Admin (a) role
enabled.
Follow these steps to configure remote syslog receiver IP addresses:
1. Establish a local serial console connection or SSH connection to the server SP
or CMM.
2. Type one of the following commands to set the working directory:
■
For a rackmounted server SP: cd /SP/clients/syslog
■
For a blade server SP in chassis: cd /CH/BLn/SP/clients/syslog
■
For a CMM: cd /CMM/clients/syslog
3. Type the show command to display the syslog properties.
The properties appear. For example, accessing the syslog properties for the first
time on an SP would appear as follows:
/SP/clients/syslog/1
Targets:
Properties:
address = 0.0.0.0
Commands:
cd
set
show
4. Use the set command to identify a destination IP address for IP 1 (and, if
applicable, IP 2).
For example, to set an IP destination to IP address 111.222.33.4, you would type:
->set destination_ip1=111.222.33.4
5. Press Enter for the setting to take effect.
The results of setting the IP address appear. For example, if you set the
destination IP address to 111.222.33.4, the following would appear:
Set ‘destination_ip1’ to ‘111.222.33.4’
Chapter 7
Monitoring System Components
85
▼ View Fault Status
Before You Begin
■
To view fault status, you need the Read Only (o) role enabled.
Follow these steps to view fault status:
1. Log in to the ILOM CLI.
2. Depending on the Sun server platform, specify one of the following paths:
-> show /SP/faultmgmt
or
-> show /CH/faultmgmt
In addition, the alias, show faulty, is a shortcut for the following ILOM CLI
command string:
-> show -o table -level all /SP/faultmgmt
The alias produces the same output as the above command. Thus, it enables you
to view all active faults in the system in a concise, tabular form. For example, it
produces output similar to the folllowing:
-> show faulty
Target
| Property
| Value
-----------------+-------------+------------------/SP/faultmgmt/0 | fru
| /SYS/MB
/SP/faultmgmt/0 | timestamp
| Jan 16 12:53:00
/SP/faultmgmt/0/ | sunw-msg-id | NXGE-8000-0U
faults/0
|
|
/SP/faultmgmt/0/ | uuid
| e19f07a5-580e-4ea0-ed6a-f663aa61
faults/0
|
| 54d5
/SP/faultmgmt/0/ | timestamp
| Jan 16 12:53:00
faults/0
|
|
For more information about the ILOM fault management features offered on your
system, consult the user documentation provided with the Sun server platform.
86
Sun ILOM 3.0 CLI Procedures Guide • December 2008
▼ Collect SP Data to Diagnose System Problems
Before You Begin
■
To collect SP data using the Service Snapshot utility, you need the Admin (a) role
enabled.
Caution – The purpose of the ILOM Service Snapshot utility is to collect data for
use by Sun Services personnel to diagnose problems. Customers should not run this
utility unless requested to do so by Sun Services.
Follow these steps to run the Service Snapshot utility:
1. Log in to the ILOM CLI.
2. Type the following commands:
->set /SP/diag/snapshot dataset=data
->set /SP/diag/snapshot dump_uri=URI
Where data and URI are one of the following:
Variable
Option
Description
data
normal
Specifies that ILOM, operating system, and hardware
information is to be collected.
full
Specifies that all data is to be collected ("full" collection).
Note - Using this option may reset the running host.
normal-logonly
or fulllogonly
Specifies that only log files are to be collected.
Any valid target
directory location
Specifies the URI of the target directory. The URI format
is as follows:
protocol://username:password@host/directory
Where protocol can be one of these transfer methods:
SFTP, TFTP, or FTP.
For example, to store the snapshot information in the
directory named data on the host, define the URI as
follows:
ftp://joe:mypasswd@host_ip_address/data
The directory data is relative to the user’s login, so the
directory would probably be /home/joe/data.
URI
Chapter 7
Monitoring System Components
87
88
Sun ILOM 3.0 CLI Procedures Guide • December 2008
CHAPTER
8
Managing System Alerts
Topics
Description
Links
Review the prerequisites
• “Before You Begin” on page 90
Manage alert rule configurations
• “Create or Edit Alert Rules” on page 90
• “Disable an Alert Rule” on page 91
Generate test alerts to confirm
alert configuration is working
• “Generate Test Alerts” on page 92
Review the CLI commands you
need to use when managing alert
rule configurations
• “CLI Commands for Managing Alert Rule
Configurations” on page 92
Notify recipient of system alerts
using email
• “Enable SMTP Client” on page 94
Related Topics
For ILOM
Chapter or Section
Guide
• Concepts
• System Monitoring
and Alert
Management
Sun Integrated Lights Out Manager (ILOM) 3.0
Concepts Guide (820-6410)
• Web
interface
• Managing System
Alerts
Sun Integrated Lights Out Manager (ILOM) 3.0
Web Interface Procedures Guide (820-6411)
• IPMI and
SNMP hosts
• Inventory and
Component
Management
Sun Integrated Lights Out Manager (ILOM) 3.0
SNMP and IPMI Procedures Guide (820-6413)
The ILOM 3.0 Documentation Collection is available at:
http://docs.sun.com/app/docs/prod/int.lights.mgr30#hic.
89
Managing Alert Rule Configurations
Topics
Description
Links
Review the prerequisites
• “Before You Begin” on page 90
Configure alert configurations
• “Create or Edit Alert Rules” on page 90
• “Disable an Alert Rule” on page 91
Generate test alerts to confirm
alert configuration is working
• “Generate Test Alerts” on page 92
Notify recipient of system alerts
via email
• “Enable SMTP Client” on page 94
Before You Begin
■
If you are defining an Email Notification alert, the outgoing email server that will
be used to send the email notification must be configured in ILOM. If an outgoing
email server is not configured, ILOM will not be able to successfully generate
Email Notification alerts.
■
If you are defining an SNMP Trap alert with the version set to SNMP v3, the
SNMP user name must be defined in ILOM as an SNMP user. If the user is not
defined in ILOM as an SNMP user, the receiver of the SNMP alert will be unable
to decode the SNMP alert message.
■
Review the CLI commands for managing alert rule configurations. See “CLI
Commands for Managing Alert Rule Configurations” on page 92.
▼ Create or Edit Alert Rules
Before You Begin
■
To create or edit alert rules, you need the Admin (a) role enabled.
Follow these steps to configure an alert rule:
1. Establish a local serial console connection or SSH connection to the server SP
or CMM.
2. Type one of the following command paths to set the working directory:
90
Sun ILOM 3.0 CLI Procedures Guide • December 2008
■
For a rackmounted server: cd /SP/alertmgmt
■
For a blade server module: cd /SP/alertmgmt
■
For a chassis CMM: cd /CMM/alertmgmt
3. Type the show command to view properties associated with an alert rule.
For example, to view the properties associated with the first alert rule, you would
type one of the following:
■
For a rackmounted server: show /SP/alertmgmt/rules/1
■
For a blade sever module: show /CH/BLn/SP/alertmgmt/rules/1
■
For a chassis CMM: show /CMM/alertmgmt/CMM/rules/1
4. Type the set command to assign values to properties associated with an alert
rule.
For example, to set IPMI PET as the alert type for rule 1, you would type the
following command path:
->set /SP/alertmgmt/rules/1 type=ipmipet
Note – To enable an alert rule configuration, you must specify a value for the alert
type, alert level, and alert destination. If you are defining an SNMP alert type, you
can optionally define a value for authenticating the receipt of SNMP Trap alerts.
▼ Disable an Alert Rule
Before You Begin
■
To disable an alert rule, you need the Admin (a) role enabled.
Follow these steps to disable an alert rule:
1. Establish a local serial console connection or SSH connection to the server SP
or CMM.
2. Type one of the following command paths to set the working directory:
■
For a rackmounted server SP, type: cd /SP/alertngnt/rules/n
■
For a blade server SP, type: cd /CH/BLn/SP/alertmgmt/rules/n
■
For a chassis CMM, type: cd /CMM/alertmgmt/CMM/rules/n
Where n equals a specific alert rule number, which can be 1 to 15.
[BLn refers to the server module (blade) slot number.]
3. To disable the alert rule, type the following command:
Chapter 8
Managing System Alerts
91
->set level=disable
▼ Generate Test Alerts
Before You Begin
■
To generate test alerts, you need the Admin (a) role enabled.
■
You can test each enabled alert rule configuration by sending a test alert.
Follow these steps to generate test alerts:
1. Establish a local serial console connection or SSH connection to the server SP
or CMM.
2. Type one of the following command paths to set the working directory:
■
For a rackmounted server SP, type: cd /SP/alertmgmt/rules
■
For a blade server SP, type: cd /CH/BLn/SP/alertmgmt/rules
■
For a chassis CMM, type: cd /CMM/alertmgmt/CMM/rules
3. Type the following command to generate a test alert for each enabled alert rule
configuration:
->set testalert=true
CLI Commands for Managing Alert Rule
Configurations
The following table describes the CLI commands that you will need to use to
manage alert rule configurations using the ILOM CLI.
92
Sun ILOM 3.0 CLI Procedures Guide • December 2008
TABLE 8-1
CLI Commands for Managing Alert Rule Configurations
CLI Command
Description
show
The show command enables you to display any level of the alert
management command tree by specifying either the full or relative path.
Examples:
• To display an alert rule along with its properties using a full path, you
would type the following at the command prompt:
-> show /SP/alertmgmt/rules/1
/SP/alertmgmt/rules/1
Properties:
community_or_username = public
destination = 129.148.185.52
level = minor
snmp_version = 1
type = snmptrap
Commands:
cd
set
show
• To display a single property using the full path, you would type the
following at the command prompt:
-> show /SP/alertmgmt/rules/1 type
/SP/alertmgmt/rules/1
Properties:
type = snmptrap
Commands:
set
show
• To specify a relative path if the current tree location is
/SP/alertmgmt/rules, you would type the following at the
command prompt:
-> show 1/
/SP/alertmgmt/rules/1
Targets:
Properties:
community_or_username = public
destination = 129.148.185.52
level = minor
snmp_version = 1
type = snmptrap
Commands:
cd
set
show
Chapter 8
Managing System Alerts
93
TABLE 8-1
CLI Commands for Managing Alert Rule Configurations (Continued)
CLI Command
Description
cd
The cd command enables you to set the working directory. To set alert
management as a working directory on a server SP, you would type the
following command at the command prompt:
-> cd /SP/alertmgmt
set
The set command enables you to set values to properties from any place
in the tree. You can specify either a full or relative path for the property
depending on the location of the tree. For example:
• For full paths, you would type the following at the command prompt:
-> set /SP/alertmgmt/rules/1 type=ipmipet
• For relative path (tree location is /SP/alertmgmt), you would type the
following command path at the command prompt:
-> set rules/1 type=ipmipet
• For relative path (tree location is /SP/alertmgmt/rules/1), you
would type the following command path at the command prompt:
-> set type=ipmipet
Configuring SMTP Client for Email
Notification Alerts
Topics
Description
Links
Notify recipient of system alerts
using email
• “Enable SMTP Client” on page 94
▼ Enable SMTP Client
Before You Begin
94
■
To enable SMTP Clients, you need the Admin (a) role enabled.
■
To generate configured Email Notification alerts, you must enable the ILOM client
to act as an SMTP client to send the email alert messages.
■
Prior to enabling the ILOM client as an SMTP client, determine the IP address and
port number of the outgoing SMTP email server that will process the email
notification.
Sun ILOM 3.0 CLI Procedures Guide • December 2008
Follow these steps to enable the SMTP client:
1. Establish a local serial console connection or SSH connection to the server SP
or CMM.
2. Type one of the following command paths to set the working directory:
■
For a rackmounted server SP, type: cd /SP/clients/smtp
■
For a blade server SP, type: cd /CH/BLn/SP/clients/smtp
■
For a chassis CMM, type: cd /CMM/clients/smtp
3. Type the show command to display the SMTP properties.
For example, accessing the SMTP properties for the first time on an SP would
appear as follows:
-> show
/SP/clients/smtp
Targets
Properties
address = 0. 0. 0. 0
port = 25
state = enabled
Commands:
cd
set
show
4. Use the set command to specify an IP address for the SMTP client or to change
the port or state property value.
For example:
->set address=222.333.44.5
5. Press Enter for the change to take effect.
For example, if you typed set address=222.333.44.5 the following result
would appear:
Set ‘address=222.333.44.5’
Chapter 8
Managing System Alerts
95
96
Sun ILOM 3.0 CLI Procedures Guide • December 2008
CHAPTER
9
Monitoring Power Consumption
Topics
Description
Links
Monitor power consumption
interfaces
• “Monitor Total System Power Consumption” on
page 99
• “Monitor Actual Power Consumption” on page 100
• “Monitor Individual Power Supply Consumption”
on page 100
• “Monitor Available Power” on page 101
• “Monitor Hardware Configuration Maximum
Power Consumption” on page 101
• “Monitor Permitted Power Consumption” on
page 101
• “Configure Power Policy” on page 102
Related Topics
For ILOM
Chapter or Section
Guide
• Concepts
• Power Consumption
Management Interfaces
Sun Integrated Lights Out Manager (ILOM)
3.0 Concepts Guide (820-6410)
• Web
interface
• Monitoring Power
Consumption
Sun Integrated Lights Out Manager (ILOM)
3.0 Web Interface Procedures Guide (8206411)
• IPMI and
SNMP
hosts
• Monitoring Power
Consumption
Sun Integrated Lights Out Manager (ILOM)
3.0 SNMP and IPMI Procedures Guide (8206413)
The ILOM 3.0 Documentation Collection is available at:
http://docs.sun.com/app/docs/prod/int.lights.mgr30#hic.
97
Monitoring the Power Consumption
Interfaces
Topics
Description
Links
Monitor power consumption
interfaces
• “Monitor Total System Power Consumption” on
page 99
• “Monitor Actual Power Consumption” on page 100
• “Monitor Individual Power Supply Consumption”
on page 100
• “Monitor Available Power” on page 101
• “Monitor Permitted Power Consumption” on
page 101
• “Configure Power Policy” on page 102
This chapter describes how to use available power consumption interfaces to
monitor power consumption. Terms that pertain to power consumption monitoring
are defined in the section “Power Monitoring Terminology” in the Sun Integrated
Lights Out Manager (ILOM) 3.0 Concepts Guide.
Note – The power consumption interfaces described in this chapter might or might
not be implemented on the platform that you are using. See the platform-specific
ILOM Supplement or Product Notes for implementation details. You can find the
ILOM Supplement and Product Notes within the documentation set for your system.
Before You Begin
To monitor the power consumption of the system or of an individual power supply,
you need the Read Only (o) role enabled.
98
Sun ILOM 3.0 CLI Procedures Guide • December 2008
▼ Monitor Total System Power Consumption
1. Log in to the ILOM CLI.
2. Type the show command to display the total power consumption.
For example:
-> show /SYS/VPS
-> show /SYS/VPS property
The following table lists and describes the properties of the Total Power
Consumption sensor for CLI.
Property
Value
type
Threshold values are platform specific. Refer
to your platform documentation for details.
class
value
upper_nonrecov_threshold
upper_critical_threshold
upper_noncritical_threshold
lower_noncritical_threshold
lower_critical_threshold
lower_nonrecov_threshold
The total power consumption property actual_power can also be accessed by
typing the following command:
-> show /SP/powermgmt actual_power
actual_power is the same as /SYS/VPS. actual_power is the value returned by
the sensor.
Chapter 9
Monitoring Power Consumption
99
▼ Monitor Actual Power Consumption
1. Log in to the ILOM CLI.
2. Type the show command to display the actual power consumption.
For example:
-> show /SP/powermgmt actual_power
▼ Monitor Individual Power Supply Consumption
1. Log in to the ILOM CLI.
2. Type the show command to display the individual power supply consumption.
For example:
■
For CLI on rackmounted system:
-> show /SYS/platform_path_to_powersupply/INPUT_POWER|OUTPUT_POWER
■
For CLI on CMM:
-> show /CH/platform_path_to_powersupply/INPUT_POWER|OUTPUT_POWER
The following table lists and describes the properties of the CLI sensors. Both
sensors, INPUT_POWER and OUTPUT_POWER, have the same properties.
Property
Value
type
Power Unit
class
Threshold Sensor
value
<total consumed power in watts, for example
"1400">
upper_nonrecov_threshold
N/A
upper_critical_threshold
N/A
upper_noncritical_threshold
N/A
lower_noncritical_threshold
N/A
lower_critical_threshold
N/A
lower_nonrecov_threshold
N/A
Note – Power sensors are not supported on server modules (blades).
100
Sun ILOM 3.0 CLI Procedures Guide • December 2008
▼ Monitor Available Power
1. Log in to the ILOM CLI.
2. Type the show command to display the available power.
For example:
■
For CLI on a rackmounted system:
-> show /SP/powermgmt available_power
■
For CLI on a CMM:
-> show /CMM/powermgmt available_power
▼ Monitor Hardware Configuration Maximum
Power Consumption
1. Log in to the ILOM CLI.
2. Type the show command to display the hardware configuration maximum
power consumption.
For example:
-> show /SP/powermgmt hwconfig_power
▼ Monitor Permitted Power Consumption
1. Log in to the ILOM CLI.
2. Type the show command to display the permitted power consumption.
For example:
■
For CLI on a rackmounted system:
-> show /SP/powermgmt permitted_power
■
For CLI on a CMM:
-> show /CMM/powermgmt permitted_power
Chapter 9
Monitoring Power Consumption
101
▼ Configure Power Policy
Before You Begin
■
To set power policy, you need the Admin (a) role enabled.
■
Refer to your platform ILOM documentation for information about power policy
implementation on a specific platform.
Note – The power policy described in this chapter might or might not be
implemented on the platform that you are using. See the platform-specific ILOM
Supplement or Product Notes for implementation details. You can find the ILOM
Supplement and Product Notes within the documentation set for your system.
Follow these steps to configure power policy:
1. Log in to the ILOM CLI.
2. Type the set command to set the power policy:
-> set /SP/powermgmt policy=Performance|Elastic
3. Type the show command to display the power policy:
-> show /SP/powermgmt policy
102
Sun ILOM 3.0 CLI Procedures Guide • December 2008
CHAPTER
10
Backing Up and Restoring ILOM
Configuration
Topics
Description
Links
Back up the ILOM configuration
• “Back Up the ILOM Configuration” on page 104
Restore the ILOM configuration
• “Restore the ILOM Configuration” on page 105
Edit the backup XML file
• “Edit the Backup XML File” on page 107
Reset ILOM configuration to
default settings
• “Reset the ILOM Configuration to Defaults” on
page 110
Related Topics
For ILOM
Chapter or Section
Guide
• Concepts
• Configuration
Management and
Firmware Updates
Sun Integrated Lights Out Manager (ILOM)
3.0 Concepts Guide (820-6410)
• Web
interface
• Backing Up and Restoring
ILOM Configuration
Sun Integrated Lights Out Manager (ILOM)
3.0 Web Interface Procedures Guide (8206411)
• IPMI and
SNMP
hosts
• Managing the ILOM
Configuration
Sun Integrated Lights Out Manager (ILOM)
3.0 SNMP and IPMI Procedures Guide (8206413)
The ILOM 3.0 Documentation Collection is available at:
http://docs.sun.com/app/docs/prod/int.lights.mgr30#hic.
103
Backing Up the ILOM Configuration
Topics
Description
Links
Back up your ILOM configuration
• “Back Up the ILOM Configuration” on page 104
▼ Back Up the ILOM Configuration
Before You Begin
■
Log in to the ILOM CLI as a user assigned the Admin, User Management,
Console, Reset and Host Control, and Read Only (a,u,c,r,o) roles. These roles
are required in order to perform a complete backup of the ILOM SP configuration.
■
If you use a user account that does not have the roles listed above, the
configuration backup file that is created might not include all of the ILOM SP
configuration data.
Follow these steps to back up the ILOM configuration:
1. Log in to the ILOM CLI.
2. Change to the /SP/config directory. Type:
-> cd /SP/config
3. If you want sensitive data, such as user passwords, SSH keys, certificates, and
so forth, to be backed up, you must provide a passphrase. Type:
-> set passphrase=passphrase
4. To initiate the Backup operation, type the following command from within the
/SP/config directory:
-> set dump_uri=
transfer_method://username:password@ipaddress_or_hostname/directorypath/filename
Where:
104
■
transfer_method can be tftp, ftp, sftp, scp, http, or https.
■
username is the name of the user account on the remote system. (username is
required for scp, sftp, and ftp. username is not used for tftp, and it is optional
for http and https.)
Sun ILOM 3.0 CLI Procedures Guide • December 2008
■
password is the password for the user account on the remote system. (password
is required for scp, sftp, and ftp. password is not used for tftp, and it is optional
for http and https.)
■
ipaddress_or_hostname is the IP address or the host name of the remote system.
■
directorypath is the storage location on the remote system.
■
filename is the name assigned to the backup file.
For example:
-> set dump_uri=
scp://adminuser:[email protected]/Backup/Lab9/SP123.config
The Backup operation executes and you will be prompted when the operation
completes. A Backup operation typically takes two to three minutes to complete.
Note – While the Backup operation is executing, sessions on the ILOM SP will be
momentarily suspended. The sessions will resume normal operation once the
Backup operation is complete.
Restoring the ILOM Configuration
Topics
Description
Links
Restore the ILOM configuration
• “Restore the ILOM Configuration” on page 105
▼ Restore the ILOM Configuration
Before You Begin
■
Log in to the ILOM CLI as a user assigned the Admin, User Management,
Console, Reset and Host Control, and Read Only (a,u,c,r,o) roles. These roles
are required to perform a complete restore of the ILOM SP configuration.
■
When executing a Restore operation, use a user account that has the same or more
privileges than the user account that was used to create the backup file;
otherwise, some of the backed up configuration data might not be restored. All
configuration properties that are not restored appear in the event log. Therefore,
one way to verify whether all the configuration properties were restored is to
check the event log.
Chapter 10
Backing Up and Restoring ILOM Configuration
105
Follow these steps to restore the ILOM configuration:
1. Log in to the ILOM CLI.
2. Change to the /SP/config directory. Type:
-> cd /SP/config
3. If a passphrase was specified when the backup file was created, you must
specify the same passphrase to perform the Restore operation. Type:
-> set passphrase=passphrase
The passphrase must be the same passphrase that was used when the backup file
was created.
4. To initiate the Restore operation, type the following:
-> set load_uri=
transfer_method://username:password@ipaddress_or_hostname/directorypath/filename
Where:
■
transfer_method can be tftp, ftp, sftp, scp, http, or https.
■
username is the name of the user account on the remote system. (username is
required for scp, sftp, and ftp. username is not used for tftp, and it is optional
for http and https.)
■
password is the password for the user account on the remote system. (password
is required for scp, sftp, and ftp. password is not used for tftp, and it is optional
for http and https.)
■
ipaddress_or_hostname is the IP address or the host name of the remote system.
■
directorypath is the storage location on the remote system.
■
filename is the name assigned to the backup file.
For example:
-> set load_uri=
scp://adminuser:[email protected]/Backup/Lab9/SP123.config
The Restore operation executes. The XML file is parsed. A Restore operation
typically takes two to three minutes to complete.
Note – While the Restore operation is executing, sessions on the ILOM SP will be
momentarily suspended. The sessions will resume normal operation once the
Restore operation is complete.
106
Sun ILOM 3.0 CLI Procedures Guide • December 2008
Edit the Backup XML file
Topics
Description
Links
Edit the backup XML file
• “Edit the Backup XML File” on page 107
▼ Edit the Backup XML File
Before You Begin
■
Before you use a backed up XML file on another system, you should edit the file
to remove any information that is unique to a particular system, for example, the
IP address.
The following is an example of a backed up XML file. The contents of the file are
abbreviated for the example used in this procedure.
<SP_config version="3.0">
<entry>
<property>/SP/check_physical_presence</property>
<value>false</value>
</entry>
<entry>
<property>/SP/hostname</property>
<value>labysystem12</value>
</entry>
<entry>
<property>/SP/system_identifier</property>
<value>SUN BLADE X8400 SERVER MODULE, ILOM v3.0.0.0, r32722
</value>
</entry>
.
.
.
<entry>
<property>/SP/clock/datetime</property>
<value>Mon May 12 15:31:09 2008</value>
</entry>
.
.
.
Chapter 10
Backing Up and Restoring ILOM Configuration
107
<entry>
<property>/SP/config/passphrase</property>
<value encrypted="true">89541176be7c</value>
</entry>
.
.
.
<entry>
<property>/SP/network/pendingipaddress</property>
<value>1.2.3.4</value>
</entry>
.
.
.
<entry>
<property>/SP/network/commitpending</property>
<value>true</value>
</entry>
.
.
.
<entry>
<property>/SP/services/snmp/sets</property>
<value>enabled</value>
</entry>
.
.
.
<entry>
<property>/SP/users/john/role</property>
<value>aucro</value>
</entry>
<entry>
<entry>
<property>/SP/users/john/password</property>
<value encrypted="true">c21f5a3df51db69fdf</value>
</entry>
</SP_config>
1. Consider the following in the example XML file:
108
■
The configuration settings, with exception of the password and the passphrase,
are in clear text.
■
The check_physical_presence property, which is the first configuration
entry in the file, is set to false. The default setting is true so this setting
represents a change to the default ILOM configuration.
Sun ILOM 3.0 CLI Procedures Guide • December 2008
■
The configuration settings for pendingipaddress and commitpending are
examples of settings that should be deleted before you use the backup XML file
for a Restore operation because these settings are unique to each server.
■
The user account john is configured with the a,u,c,r,o roles. The default
ILOM configuration does not have any configured user accounts so this
account represents a change to the default ILOM configuration.
■
The SNMP sets property is set to enabled. The default setting is disabled.
2. To modify the configuration settings that are in clear text, change the values or
add new configuration settings.
For example:
■
To change the roles assigned to the user john, change the text as follows:
<entry>
<property>/SP/users/john/role</property>
<value>auo</value>
</entry>
<entry>
■
To add a new user account and assign that account the a,u,c,r,o roles, add the
following text directly below the entry for user john:
<entry>
<property>/SP/users/bill/role</property>
<value>aucro</value>
</entry>
<entry>
■
To change a password, delete the encrypted=”true” setting and the
encrypted password string and enter the password in plain text. For example,
to change the password for the user john, change the text as follows:
<entry>
<property>/SP/users/john/password</property>
<value>newpassword</value>
</entry>
3. After you have made the changes to the backup XML file, save the file so that
you can use it for a Restore operation on the same system or a different system.
Chapter 10
Backing Up and Restoring ILOM Configuration
109
Resetting the ILOM Configuration
Topics
Description
Links
Reset the ILOM configuration to
the default settings
• “Reset the ILOM Configuration to Defaults” on
page 110
▼ Reset the ILOM Configuration to Defaults
Before You Begin
■
To reset the ILOM configuration to the default settings, you need the Admin (a)
role enabled.
Follow these steps to reset the ILOM configuration to default settings:
1. Log in to the ILOM CLI.
2. Change to the /SP directory, type:
-> cd /SP
3. Type one of the following commands, depending on the option you select to
reset the default settings.
■
If you want to reset the ILOM configuration using the all option, type:
-> set reset_to_defaults=all
On the next reboot of the ILOM SP, the ILOM configuration default settings are
restored.
■
If you want to reset the ILOM configuration using the factory option, type:
-> set reset_to_defaults=factory
On the next reboot of the ILOM SP, the ILOM configuration default settings are
restored and the log files are erased.
■
If you want to cancel a reset operation just previously specified, type:
-> set reset_to_defaults=none
The previously issued reset_to_defaults command is canceled provided
the reset_to_defaults=none command is issued before the ILOM SP
reboots.
110
Sun ILOM 3.0 CLI Procedures Guide • December 2008
CHAPTER
11
Updating ILOM Firmware
Topics
Description
Links
Review the prerequisites
• “Before You Begin” on page 112
Update ILOM firmware
• “Identify ILOM Firmware Version” on page 113
• “Download New Firmware on x64-Based Systems”
on page 113
• “Download New Firmware on SPARC-Based
Systems” on page 114
• “Update the Firmware Image” on page 114
Troubleshoot network problem
during firmware update
• “Recover From a Network Failure During Firmware
Update” on page 116
Reset the ILOM SP
• “Reset ILOM SP” on page 117
Related Topics
For ILOM
Chapter or Section
Guide
• Concepts
• Configuration
Management and
Firmware Updates
Sun Integrated Lights Out Manager (ILOM)
3.0 Concepts Guide (820-6410)
• Web
interface
• Updating ILOM Firmware
Sun Integrated Lights Out Manager (ILOM)
3.0 Web Interface Procedures Guide (8206411)
• IPMI and
SNMP
hosts
• Configuring ILOM
Firmware Settings
Sun Integrated Lights Out Manager (ILOM)
3.0 SNMP and IPMI Procedures Guide (8206413)
The ILOM 3.0 Documentation Collection is available at:
http://docs.sun.com/app/docs/prod/int.lights.mgr30#hic.
111
Updating the ILOM Firmware
Topics
Description
Links
Review the prerequisites
• “Before You Begin” on page 112
Identify the current ILOM
firmware version
• “Identify ILOM Firmware Version” on page 113
Download the firmware for your
system
• “Download New Firmware on x64-Based Systems”
on page 113
• “Download New Firmware on SPARC-Based
Systems” on page 114
Update the firmware image
• “Update the Firmware Image” on page 114
Troubleshoot network problem
during firmware update
• “Recover From a Network Failure During Firmware
Update” on page 116
Before You Begin
Prior to performing the procedures in this section, the following requirements must
be met:
112
■
Identify the version of ILOM that is currently running on your system.
■
Download the firmware image for your server or CMM from the Sun platform’s
product web site.
■
Copy the firmware image to a server using a supported protocol (TFTP, FTP,
HTTP, HTTPS). For a CLI update, copy the image to a local server. For a web
interface update, copy the image to the system on which the web browser is
running.
■
If required by your platform, shut down your host operating system before
updating the firmware on your server SP.
■
Obtain an ILOM user name and password that has Admin (a) role account
privileges. You must have Admin (a) privileges to update the firmware on the
system.
■
The firmware update process takes about six minutes to complete. During this
time, do not perform other ILOM tasks. When the firmware update is complete,
the system will reboot.
Sun ILOM 3.0 CLI Procedures Guide • December 2008
▼ Identify ILOM Firmware Version
Before You Begin
■
To identify the firmware version, you need the Read Only (o) role enabled.
Follow these steps to identify the ILOM firmware version:
1. Log in to the ILOM CLI.
2. At the command prompt, type version.
The following information appears:
SP
SP
SP
SP
firmware 3.0.0.1
firmware build number: #####
firmware date: Fri Nov 28 14:03:21 EDT 2008
filesystem version: 0.1.22
▼ Download New Firmware on x64-Based Systems
1. Navigate to http://www.sun.com/download/
2. Click the View by Category tab.
3. Locate the Hardware Drivers section.
4. Click the X64 Servers and Workstations.
5. Click the link for the Integrated Lights Out Manager (ILOM) Server software
release version that you want to download.
6. Click Download.
7. Select the Platform and Language for your download.
8. Enter your Username and Password.
If you do not have a Username and Password, you can register free of charge by
clicking Register Now.
9. Click Accept License Agreement.
10. Click the appropriate firmware image file name:
ilom.firmware.xxx
For example:
■
ilom.X6220-2.0.3.2-r26980.ima
■
ilom.X6220-2.0.3.2-r26980.pkg
11. Go to “Update the Firmware Image” on page 114.
Chapter 11
Updating ILOM Firmware
113
▼ Download New Firmware on SPARC-Based
Systems
1. Navigate to http://sunsolve.sun.com
2. Click Accept to accept the License Agreement.
3. Click on Patches and Updates.
4. Under the heading Download Product-Specific Patches, click on Product
Patches.
5. Under the heading Hardware, in the PROM row, click on Sun System
Firmware.
6. Select the latest firmware update for your server. Confirm your choice by
clicking on the associated Readme link and read the patch update information.
7. Click HTTP to download the zip file package.
8. Put the zip package on a TFTP server that is accessible from your network.
9. Unzip the package.
10. Go to “Update the Firmware Image” on page 114.
▼ Update the Firmware Image
Before You Begin
■
To update the ILOM firmware, you need the Admin (a) role enabled.
■
If required by your platform, shut down your host operating system before
updating the firmware on your server SP.
■
To gracefully shut down your host operating system, use the Remote Power
Controls -> Graceful Shutdown and Power Off option in the ILOM web
interface, or issue the stop /SYS command from the ILOM CLI.
Follow these steps to update the firmware image:
1. Log in to the ILOM CLI.
2. Verify that you have network connectivity to update the firmware.
For example:
■
To verify network connectivity on a server SP, type:
-> show /SP/network
114
Sun ILOM 3.0 CLI Procedures Guide • December 2008
■
To verify network connectivity on a CMM, type:
-> show /CMM/network
3. Type the following command to load the ILOM firmware image:
-> load -source <supported_protocol>://<server_ip>/<path_to_firmware_image>/
<filename.xxx>
A note about the firmware update process followed by message prompts to load
the image are displayed. The text of the note depends on your server platform.
4. At prompt for loading the specified file, type y for yes or n for no.
The prompt to preserve the configuration appears.
For example:
Do you want to preserve the configuration (y/n)?
5. At the preserve configuration prompt, type y for yes or n for no.
Type y to save your existing ILOM configuration and to restore that configuration
when the update process completes.
Note – Typing n at this prompt will advance you to another platform-specific
prompt.
6. Perform one of the following actions:
■
If you have a 2.x firmware release installed on your system, the system loads
the specified firmware file then automatically reboots to complete the firmware
update. Proceed to Step 7.
■
If you have a 3.x firmware release installed on a SPARC system, the system
loads the specified firmware file then automatically reboots to complete the
firmware update. Proceed to Step 7.
■
If you have a 3.x firmware release installed on an x64 system, a prompt to
postpone the BIOS update appears. For example:
Do you want to force the server off if BIOS needs to be upgraded
(y/n)?
a. At the prompt to postpone the BIOS update, type y for yes or n for no.
The system loads the specified firmware file then automatically reboots to
complete the firmware update.
Chapter 11
Updating ILOM Firmware
115
Note – The BIOS prompt only appears on x64 systems currently running a 3.x
firmware release. If you answer yes (y) to the prompt, the system postpones the
BIOS update until the next time the system reboots. If you answer no (n) to the
prompt, the system automatically updates the BIOS, if necessary, when updating the
firmware.
b. Proceed to Step 7.
7. Reconnect to the ILOM server SP or CMM using an SSH connection and using
the same user name and password that you provided in Step 1 of this
procedure.
Note – If you did not preserve the ILOM configuration before the firmware update,
you will need to perform the initial ILOM setup procedures to reconnect to ILOM.
8. Ensure that the proper firmware version was installed. At the CLI prompt, type:
-> version
▼ Recover From a Network Failure During
Firmware Update
If you were performing the firmware update process and a network failure occurs,
ILOM will automatically time-out and reboot the system.
Follow these steps to recover from a network failure during firmware update:
1. Address and fix the network problem.
2. Reconnect to the ILOM SP.
3. Restart the firmware update process.
116
Sun ILOM 3.0 CLI Procedures Guide • December 2008
Resetting ILOM SP
Topics
▼
Description
Links
Reset ILOM service processor
• “Reset ILOM SP” on page 117
Reset ILOM SP
If you need to reset your ILOM service processor (SP), you can do so without
affecting the host OS. However, resetting an SP disconnects your current ILOM
session and renders the SP unmanageable during reset.
Before You Begin
■
To reset the SP, you need the Reset and Host Control (r) role enabled.
■
After updating the ILOM/BIOS firmware, you must reset the ILOM SP.
After updating the ILOM/BIOS firmware, follow these steps to reset the SP:
1. Log in to the ILOM CLI.
2. Type the following command:
-> reset /SP
The SP resets and reboots.
Chapter 11
Updating ILOM Firmware
117
118
Sun ILOM 3.0 CLI Procedures Guide • December 2008
CHAPTER
12
Managing Remote Hosts
Topics
Description
Links
Review the prerequisites
• “Before You Begin” on page 120
Set up storage redirection to
redirect storage devices
• “Performing the Initial Setup Tasks for Storage
Redirection” on page 120
• “Launch Storage Redirection CLI Using a
Command Window or Terminal” on page 126
Control the power state of a
remote server module
• “Issuing Power State Commands” on page 132
Run diagnostic tests
• “Diagnosing x64 Systems Hardware Issues” on
page 133
• “Diagnosing SPARC Systems Hardware Issues” on
page 136
Related Topics
For ILOM
Chapter or Section
Guide
• Concepts
• Remote Host Management
Options
Sun Integrated Lights Out Manager (ILOM)
3.0 Concepts Guide (820-6410)
• Web
interface
• Managing Remote Hosts
Sun Integrated Lights Out Manager (ILOM)
3.0 Web Interface Procedures Guide (8206411)
The ILOM 3.0 Documentation Collection is available at:
http://docs.sun.com/app/docs/prod/int.lights.mgr30#hic.
119
Performing the Initial Setup Tasks for
Storage Redirection
The following table presents an ordered list of tasks that you must perform to set up
the Storage Redirection CLI feature in ILOM.
Step
Task
Description
1
Ensure that all requirements are met
prior to performing the initial setup
procedures in this section.
• “Before You Begin” on page 120
2
Install (or open) the Storage Redirection • “Start Storage Redirection Service” on
page 121
Service and specify how to you want to
access this service in the future.
3
Download and install the Storage
Redirection Client.
• “Download and Install the Storage
Redirection Client” on page 124.
Note – The Storage Redirection CLI in ILOM 3.0 is supported on all Sun x64
processor-based servers and some Sun SPARC processor-based servers. This feature
is not supported on chassis monitoring modules (CMMs) or x64 processor-based
servers running ILOM 2.0.
Before You Begin
Prior to setting up your system for storage redirection, the following prerequisites
must be met.
■
A connection is established from your local system to a remote host server SP
ILOM web interface.
■
Server module SP must be running ILOM 3.0 or later.
Note – The Storage Redirection CLI is not supported in ILOM 2.0. It is also not
supported on CMMs running ILOM 2.0 or 3.0.
■
120
The Java runtime environment (1.5 or later) is installed on your local system. To
download the latest Java runtime environment, see http://java.com.
Sun ILOM 3.0 CLI Procedures Guide • December 2008
Note – If you do not have JAVA_HOME environment configured on your desktop,
you might need to enter the full path
■
Any user with a valid user account in ILOM can start or install the Storage
Redirection Service or Client on his or her local system. However, after the initial
setup for the Storage Redirection CLI is complete, you will be required to enter a
valid Admin (a) or Console (c) role account to start or stop the redirection of a
storage device (CD/DVD, or ISO image) on a remote server.
■
The default network communication port provided for Storage Redirection CLI is
2121. This default socket port enables the Storage Redirection CLI to
communicate over the network with a remote host server SP. If you need to
change the default network port, you must edit the Jnlpgenerator-cli file to
manually override the default port number (2121). For instructions for changing
this port, see “View and Configure Serial Port Settings” on page 30.
▼ Start Storage Redirection Service
Before You Begin
■
A single session of the Storage Redirection Service must be started on your local
system prior to launching the Storage Redirection CLI.
Follow these steps to start the Storage Redirection Service and to specify whether
you want to start this service in the future from the ILOM web interface or from a
command window or terminal:
1. Log in to the SP ILOM web interface.
2. Select Remote Control --> Redirection.
The Launch Redirection page appears.
3. Click Launch Service.
The Opening Jnlpgenerator-cli dialog appears.
Chapter 12
Managing Remote Hosts
121
4. In the Opening Jnlpgenerator-cli dialog, perform one of the following actions:
■
To save the jnlpgenerator-cli file on your local system and run the service
directly from a command line, select Save it to disk then click OK.
If you select this option, you will not need to subsequently sign in to the ILOM
web interface to start the service. You will be able to start the service directly
from a command window or terminal.
■
To run the service directly from the ILOM web interface, select Open it with
the default application then click OK.
If you select this option, the jnlp file is not saved on your local system and
you will need to subsequently sign in to the ILOM web interface to start the
service prior to launching the Storage Redirection CLI.
Note – If you do not want the Opening Jnlpgenerator-cli dialog to reappear
each time you start the service from the ILOM web interface, you can select (enable)
the check box for Always perform this action when handling files of this
type. However, if you choose to enable this option, you will no longer be able to
display this dialog when starting the service or installing the service from the ILOM
web interface.
122
Sun ILOM 3.0 CLI Procedures Guide • December 2008
Note – If, in the future, you need to modify the default communication port number
(2121) shipped with the Storage Redirection feature, you will need to display the
Opening Jnlpgenerator-cli dialog to save and edit the jnlpgenerator-cli
file on your system. In this instance, it is not recommended that you select (enable)
the option for Always perform this action when handling files of this
type. For more information about changing the default port number, see “View and
Configure Serial Port Settings” on page 30.
Several dialogs will appear informing you that the Java Web Start application is
downloading.
5. Perform one of the following actions:
■
If you chose to save the jnlpgenerator-cli file in Step 4, perform these
steps.
a. In the Save As dialog, save the jnlpgenerator-cli file to a location on
your local system.
b. To start the service from the command line, open a command window or
terminal.
c. Navigate to the location where the jnlpgenerator-cli file is installed,
then issue the javaws rconsole.jnlp command to start the service.
For example:
-> cd <jnlp file location>javaws rconsole.jnlp
■
If you chose to run the service directly from the web interface (you selected
Open with default application), perform the following step:
a. In the Warning Security dialog, click Run to start the Storage Redirection
service.
Note – If the Storage Redirection service fails to start, an error message appears
informing you of an error condition. Otherwise, if an error message did not appear,
the service is started and is waiting for user input.
Chapter 12
Managing Remote Hosts
123
▼ Download and Install the Storage Redirection
Client
Follow these steps to download and install the Storage Redirection client on your
local system:
Note – The Storage Redirection client is a one-time client installation.
1. In the SP ILOM web interface, select Remote Control --> Redirection.
The Launch Redirection page appears.
2. Click Download Client.
The Opening StorageRedir.jar dialog appears.
3. In the Opening StorageRedir.jar dialog, click Save it to Disk then click OK.
The Save As dialog appears.
Note – If you do not want the Opening StorageRedir dialog to reappear when
installing the .jar file on other remote clients, you can select (enable) the check box
for Always perform this action when handling files of this type.
However, if you choose to enable this option, you will no longer be able to display
this dialog (Opening StorageRedir) in the future when downloading the .jar
file.
4. In the Save As dialog, save the StorageRedir.jar file to a location on your
local system.
124
Sun ILOM 3.0 CLI Procedures Guide • December 2008
Launching the Storage Redirection CLI
to Redirect Storage Devices
The following table presents an ordered list of tasks that you must perform to
redirect storage media from the Storage Redirection CLI.
Step
Task
Links
1
Ensure that all requirements are
met before using the Storage
Redirection CLI
• “Before You Begin” on page 125
2
Launch the Storage Redirection
CLI
• “Launch Storage Redirection CLI Using a
Command Window or Terminal” on page 126
3
If applicable, verify that Storage
Redirection Service is running
• “Verify the Storage Redirection Service Is
Running” on page 127
4
If applicable, display command
line Help; or learn more about
the Storage Redirection
command line modes, syntax,
and usage
• “Display Storage Redirection CLI Help
Information” on page 128
5
Redirect a storage device from
the CLI
• “Start Redirection of Storage Device” on
page 129
6
View a list of active storage
devices
• “View Active Storage Redirections” on page 130
7
Stop the redirection of a storage
device
• “Stop Redirection of Storage Device” on
page 130
Before You Begin
The following requirements must be met prior to performing the procedures in this
section.
■
The Storage Redirection Service must be started on your local system. If you
installed the service on your local system, you can start it from a command
window or terminal. If you did not install the service on your local system, you
must start it from the ILOM web interface. For information about how to start or
install the Storage Redirection service, see “Start Storage Redirection Service” on
page 121.
Chapter 12
Managing Remote Hosts
125
■
The Storage Redirection client (StorageRedir.jar) must be installed on your
local system. For more information about how to install the Storage Redirection
Client, see “Download and Install the Storage Redirection Client” on page 124.
■
The Java Runtime Environment (1.5 or later) must be installed on your local
system. To download the latest Java runtime environment, see
http://java.com.
■
A valid Admin (a) or Console (c) role account in ILOM is required to start or stop
the redirection of a storage device (CD/DVD, or ISO image) on a remote server.
For more information about user accounts and roles, see “Assign Roles to a User
Account” on page 41.
Note – Any user with a valid user account in ILOM can launch the Storage
Redirection CLI (from a command window or terminal) and verify the status of the
the service, or view the occurrence of an active storage redirection.
■
For more information about the Storage Redirection command-line modes, syntax
and usage, see “Storage Redirection Command-Line Modes, Syntax, and Usage”
on page 165.
▼ Launch Storage Redirection CLI Using a
Command Window or Terminal
Before You Begin
■
Prior to launching the Storage Redirection CLI, you must have started the Storage
Redirection service. For instructions for launching the service, see “Start Storage
Redirection Service” on page 121.
Follow these steps to launch the Storage Redirection CLI from a command window
or terminal:
1. Open a command-line interface.
For example:
■
Windows systems: Click Run from the Start menu and type cmd then click OK.
■
Solaris or Linux systems: Open a terminal window on the desktop.
2. Perform one of the following actions:
■
To enter commands from an interactive shell mode, do the following:
a. In the command-line interface, navigate to the directory where the Storage
Redirection client (StorageRedir.jar) was installed using the cd
command.
For example:
126
Sun ILOM 3.0 CLI Procedures Guide • December 2008
cd <my_settings>/<storage_redirect_directory>
b. At the directory prompt, enter the following command to launch the Storage
Redirection CLI.
java -jar StorageRedir.jar
For example:
C:\Documents and Settings\<redirectstorage>java -jar StorageRedir.jar
The <storageredir> prompt appears.
■
To enter commands from an non-interactive shell mode, do the following:
a. In the command-line interface, enter the command to launch the Storage
Redirection CLI (java -jar StorageRedir.jar) at the shell prompt ($).
$ java -jar StorageRedir.jar
Note – If you do not have a JAVA_HOME environment configured, you might need to
use the full path to your Java binary. For example, if your JDK package was installed
under /home/user_name/jdk then you would type:
/home/user_name/jdk/bin/java -jar ...
Note – If the Storage Redirection CLI fails to launch, a detailed error message
appears explaining the error condition. Otherwise, the Storage Redirection CLI is
ready for user input.
▼ Verify the Storage Redirection Service Is
Running
Before You Begin
■
The following procedure assumes that you have already launched the Storage
Redirection CLI from a command window or terminal. For instructions for
launching the Storage Redirection CLI, see “Launch Storage Redirection CLI
Using a Command Window or Terminal” on page 126.
Follow this step to verify whether the Storage Redirection service is active.
●
At the <storageredir> prompt, type the following command to verify that
the Storage Redirection service is active:
test-service
For example:
Chapter 12
Managing Remote Hosts
127
<storageredir> test-service
Alternatively, you could enter this same command (test-service) using the
non-interactive shell mode syntax. For more information, see “Storage Redirection
Command-Line Modes, Syntax, and Usage” on page 165.
A message appears stating whether the service connection passed or failed.
Note – If the service connection fails, you will need to start the Storage Redirection
Service from the ILOM web interface or from a command window (if the service was
installed) by issuing the javaws rconsole.jnlp command. For details, see “Start
Storage Redirection Service” on page 121.
▼ Display Storage Redirection CLI Help
Information
Before You Begin
■
The following procedure assumes that you have already launched the Storage
Redirection CLI from a command window or terminal. For instructions for
launching the Storage Redirection CLI, see “Launch Storage Redirection CLI
Using a Command Window or Terminal” on page 126.
Follow this step to display the Storage Redirection CLI Help information.
●
At the <storageredir> prompt, type the following command to display the
command-line help:
help
For example:
<storageredir> help
The following information about the command syntax and usage appears:
Usage:
list [-p storageredir_port] [remote_SP]
start -r redir_type -t redir_type_path
-u remote_username [-s remote_user_password]
[-p storageredir_port] remote_SP
stop -r redir_type -u remote_username
[-s remote_user_password] [-p storageredir_port] remote_SP
stop-service [-p storageredir_port]
test-service [-p storageredir_port]
help
version
128
Sun ILOM 3.0 CLI Procedures Guide • December 2008
quit
Alternatively, you could enter this same command (help) using the noninteractive shell mode syntax. For more information, see “Storage Redirection
Command-Line Modes, Syntax, and Usage” on page 165.
▼ Start Redirection of Storage Device
Before You Begin
■
To start the redirection of a storage device, you need the Admin (a) or Console (c)
roles enabled.
■
The following procedure assumes that you have already launched the Storage
Redirection CLI from a command window or terminal. For instructions for
launching the Storage Redirection CLI, see “Launch Storage Redirection CLI
Using a Command Window or Terminal” on page 126.
■
Commands shown in the following procedure should be entered as one
continuous string.
Follow this step to start the redirection of a storage device from the Storage
Redirection CLI:
●
At the <storageredir> prompt, type the start command followed by the
commands and properties for the redirection device type, path to device, remote
SP user_name and password, and the IP address of the remote SP.
For example:
<storageredir> start -r redir_type -t redir_type_path -u remote_username [s remote_user_password] [-p non_default_storageredir_port] remote_SP_IP
Alternatively, you could enter this same command (start) using the noninteractive shell mode syntax. For more information, see “Storage Redirection
Command-Line Modes, Syntax, and Usage” on page 165.
Note – You must specify a valid Admin or Console role account (-u remote_username
[-s remote_user_password]) to start the redirection of a storage device on a remote
server. If you do not specify the password command (-s remote_user_password), the
system will automatically prompt you for it.
Chapter 12
Managing Remote Hosts
129
▼ View Active Storage Redirections
Before You Begin
■
The following procedure assumes that you have already launched the Storage
Redirection CLI from a command window or terminal. For instructions for
launching the Storage Redirection CLI, see “Launch Storage Redirection CLI
Using a Command Window or Terminal” on page 126.
Follow this step to view the active storage redirections on one or more remote host
server SPs:
●
At the <storageredir> prompt, type the list command followed by the
sub-commands and properties for any non-default storage redirection port(s)
and the IP address(es) of the remote host server SP.
For example:
<storageredir> list [-p non_default _storageredir_port] remote_SP
Alternatively, you could enter this same command (list) using the noninteractive shell mode syntax. For more information, see “Storage Redirection
Command-Line Modes, Syntax, and Usage” on page 165.
A list appears identifying the active storage redirections for each server SP
specified.
▼ Stop Redirection of Storage Device
■
To stop the redirection of a storage device, you need the Admin (a) or Console (c)
role enabled.
■
The following procedure assumes that you have already launched the Storage
Redirection CLI from a command window or terminal. For instructions for
launching the Storage Redirection CLI, see “Launch Storage Redirection CLI
Using a Command Window or Terminal” on page 126.
■
Commands shown in the following procedure should be entered as one
continuous string.
Follow this step to stop the redirection of a storage device on a remote server:
●
130
At the <storageredir> prompt, type the stop command followed by the
commands and properties for the: storage device type, remote SP user name and
password, storage redirection port and the IP address of the remote host server
SP.
Sun ILOM 3.0 CLI Procedures Guide • December 2008
For example:
<storageredir> stop -r redir_type -u remote_username [-s
remote_user_password] [-p non_defult_storageredir_port] remote_SP
Alternatively, you could enter this same command (stop) using the noninteractive shell mode syntax. For more information, see “Storage Redirection
Command-Line Modes, Syntax, and Usage” on page 165.
Note – You must specify a valid Admin or Console role account (-u remote_username
[-s remote_user_password]) to stop the redirection of a storage device on a remote
server. If you do not specify the password command (-s remote_user_password) the
system will automatically prompt you for it.
▼ Change the Default Storage Redirection
Network Port: 2121
1. In the SP ILOM web interface, select Remote Control --> Redirection.
The Launch Redirection page appears.
2. Click Launch Service.
The Opening Jnlpgenerator-cli dialog appears.
3. In the Opening Jnlpgenerator-cli dialog, select Save it to disk then click OK.
The Save As dialog appears.
4. In the Save As dialog, specify the location where you want to save the
jnlpgenerator-cli file.
Chapter 12
Managing Remote Hosts
131
5. Open the jnlpgenerator-cli file using a text editor and modify the port
number referenced in this file.
For example:
<application-desc>
<argument>cli</argument>
<argument>2121</argument>
</application-desc>
In the <application-desc> you can change the second argument to any port
number that you want to use.
6. Save the changes you made and close the jnlpgenerator-cli file.
7. Use the javaws to start the Storage Redirection service from your local client.
For example:
javaws jnlpgenerator-cli
Note – If you do not use the default port number provided, you must always
identify the non-default port number in the Storage Redirection command-line
interface when starting, stopping or viewing storage redirections.
Issuing Power State Commands
From a command window or terminal, you can issue the following commands to
remotely control the power state of a host server:
■
start. Use the start command to turn on full power to the remote host server.
Example: -> start /SYS
■
stop. Use the stop command to shut down the OS gracefully prior to powering
off the remote host server.
Example: -> stop /SYS
■
stop -f. Use the stop -f command to immediately turn off the power to the
remote host server.
Example: -> stop -f /SYS
■
Reset. Use the reset command to immediately reboot the remote host server.
Example: -> reset /SYS
132
Sun ILOM 3.0 CLI Procedures Guide • December 2008
For information about connecting to a host server or issuing commands from the
ILOM CLI, see “Configuring ILOM Communication Settings” on page 23.
Diagnosing x64 Systems Hardware
Issues
Task
Link
Ensure that the requirements
for configuring and running
diagnostic tests are met
“Configure and Run Pc-Check Diagnostics” on page 133
Configure and run Pc-Check
diagnostic tests
“Configure and Run Pc-Check Diagnostics” on page 133
Generate a NMI to a host
“Generate a Non-Maskable Interrupt” on page 134
▼ Configure and Run Pc-Check Diagnostics
Before You Begin
■
To configure Pc-Check Diagnostics, you need the Reset and Host Control (r) role
enabled.
Follow these steps to configure and run Pc-Check Diagnostic tests:
1. Log in to the ILOM CLI.
2. Type the following commands to enable the diagnostic tests:
Chapter 12
Managing Remote Hosts
133
-> cd /HOST/diag/
/HOST/diag
-> show /HOST/diag
Targets:
Properties:
state = disabled
Commands:
cd
set
show
-> set state=extended This will enable Pc-Check to run a 20-40 minute test suite
OR
-> set state=enabled This will enable Pc-Check to run a 4-5 minute test suite
OR
-> set state=manual This will enable you to select specific Pc-Check tests to run
-> show
Targets:
Properties:
state = enabled
Commands:
cd
set
show
3. Reset the power on the host to run the PC diagnostic tests.
▼ Generate a Non-Maskable Interrupt
Caution – Depending on the host OS configuration, generating a non-maskable
interrupt (NMI) may cause the OS to crash, stop responding, or wait for external
debugger input.
134
Sun ILOM 3.0 CLI Procedures Guide • December 2008
Before You Begin
■
To generate a NMI, you need the Reset and Host Control (r) role enabled.
Follow these steps to generate a NMI to a host:
1. Log in to the CLI.
2. Type the following commands:
-> cd /HOST
/HOST
-> show
/HOST
Targets:
diag
Properties:
generate_host_nmi = (Cannot show property)
Commands:
cd
set
show
-> set generate_host_nmi=true
set ‘generate_host_nmi’ to ‘true’
Chapter 12
Managing Remote Hosts
135
Diagnosing SPARC Systems Hardware
Issues
Task
Link
Ensure that the requirements
for configuring and running
diagnostic tests are met
“Before You Begin” on page 136
Configure the system to run
diagnostic tests
“Configure Diagnostics Mode” on page 136
Specify which diagnostic
triggers to activate
“Specify the Diagnostics Trigger” on page 137
Specify the level of
diagnostics that you want to
execute
“Specify Level of Diagnostics” on page 137
Specify the verbosity output
of the excuted diagnostic
tests
“Specify Verbosity of Diagnostics Output” on page 138
Before You Begin
Prior to performing the procedures in this section, the following requirement must
be met:
■
To configure and run diagnostic tests on a SPARC system, you need the Reset and
Host Control (r) role enabled.
▼ Configure Diagnostics Mode
Use the /HOST/diag host mode property to control whether diagnostics are enabled
and to specify which diagnostic mode is enabled.
Follow these steps to configure the diagnostic mode:
1. Log in to the ILOM CLI.
136
Sun ILOM 3.0 CLI Procedures Guide • December 2008
2. At the command prompt, type the following command:
-> set /HOST/diag mode=value
Where value is one of the following:
■
off – Do not run any diagnostics.
■
normal – Run diagnostics (the default value).
3. Reset the power on the host to run the diagnostic tests.
▼ Specify the Diagnostics Trigger
You can select one or more triggers that will cause a power-on self-test (POST) to be
run on the host.
Follow these steps to set the trigger levels:
1. Log in to the ILOM CLI.
2. At the command prompt, type the following command:
-> set /HOST/diag trigger=value
Where value can be one of the following:
■
none – Diagnostics will not be triggered to run.
■
user-reset – Diagnostics will be run upon a user-invoked reset.
■
power-on-reset – Diagnostics will be run when power is applied.
■
error-reset – Diagnostics will be run upon any error-invoked reset.
■
all-resets – Diagnostics will be run for any of the above reset types.
▼ Specify Level of Diagnostics
There are separate ILOM CLI properties that enable you to specify the level of
diagnostic testing to be executed, depending on how the diagnostics were triggered
to run. This gives granular control of how much diagnostic testing is performed in
different host reset situations.
Use the /HOST/diag level property to specify the level of diagnostic testing to be
executed when diagnostics are enabled.
Follow these steps to specify the level of diagnostics to be executed:
Chapter 12
Managing Remote Hosts
137
1. Log in to the ILOM CLI.
2. Perform the one of the following commands, depending on how the host is
reset:
■
To specify the diagnostic level when the host is powered on, type the following
command:
-> set /HOST/diag power_on_level=value
■
To specify the diagnostic level when the host is reset by the user, type the
following command::
-> set /HOST/diag user_reset_level=value
■
To specify the diagnostic level when the host is reset due to a system error,
type the following command:
-> set /HOST/diag error_reset_level=value
Where value is one of the following:
■ min – Run the minimum level of diagnostics to verify the system.
■
max – Run the maximum set of diagnostics to fully verify system health (the
default value).
Note – For backward compatibility with ILOM 2.x, the former property
/HOST/diag level is still supported as a shorcut for specifying the same diagnostic
level for all trigger types. Any value set to /HOST/diag level will be applied to all
three trigger-specific properties: power_on_level, user_reset_level, and
error_reset_level.
3. Reset the power on the host to run the diagnostic tests.
▼ Specify Verbosity of Diagnostics Output
There are specific ILOM CLI properties that enable you to specify the output
verbosity of executed diagnostics, depending on how the diagnostics were triggered
to run. This gives granular control of how much diagnostics output is given in
different host reset situations.
Follow these steps to specify the verbosity of the diagnostics output:
1. Log in to the ILOM CLI.
138
Sun ILOM 3.0 CLI Procedures Guide • December 2008
2. Perform one of the following commands, depending on how the host was reset:
■
To specify the output verbosity for diagnostics executed when the host is
powered on, type the following command:
-> set /HOST/diag power_on_verbosity=value
■
To specify the output verbosity for diagnostics executed when the host is reset
by the user, type the following command:
-> set /HOST/diag user_reset_verbosity=value
■
To specify the output verbosity for diagnostics executed when the host is reset
due to a system error, type the following command:
-> set /HOST/diag error_reset_verbosity=value
Where value is one of the following:
■
none – Diagnostics do not print any output on the system console when
running, unless a fault is detected.
■
min – Diagnostics print a limited amount of output on the system console.
■
normal – Diagnostics print a moderate amount of output on the system
console (the default value).
■
max – Diagnostics print full output on the system console, including the name
and results of each test being run.
■
debug – Diagnostics print extensive debugging output on the system console,
including devices being tested and debug output of each test.
Note – For backward compatibility with ILOM 2.x, the former property
/HOST/diag verbosity is still supported as a shorcut for specifying the same output
verbosity for all trigger types. Any value set to /HOST/diag verbosity will be
applied to all three trigger-specific verbosity properties: power_on_verbosity,
user_reset_verbosity, and error_reset_verbosity.
3. Reset the power on the host to run the diagnostic tests.
Chapter 12
Managing Remote Hosts
139
140
Sun ILOM 3.0 CLI Procedures Guide • December 2008
APPENDIX
A
CLI Command Reference
CLI Command Reference
This section provides reference information about the CLI commands.
cd Command
Use the cd command to navigate the namespace. When you cd to a target location,
that location then becomes the default target for all other commands. Using the
-default option with no target returns you to the top of the namespace. Typing
cd -default is the equivalent of typing cd /. Typing just cd displays your
current location in the namespace. Typing help targets displays a list of all
targets in the entire namespace.
Syntax
cd target
Options
[-default] [-h|help]
Targets and Properties
Any location in the namespace.
Examples
To create a user named emmett, cd to /SP/users, then execute the create command
with /SP/users as the default target.
141
-> cd /SP/users
-> create emmett
To find your location, type cd.
-> cd /SP/users
create Command
Use the create command to set up an object in the namespace. Unless you specify
properties with the create command, they are empty.
Syntax
create [options] target [propertyname=value]
Options
[-h|help]
Targets, Properties, and Values
TABLE 12-1
Targets, Properties and Values for create Command
Valid Targets
Properties
Values
/SP/users/username
password
role
<string>
(none)
administrator o
|operator|a
|u|c|r|o|s
/SP/services/snmp/communities permissions
/communityname
/SP/services/snmp/user/
username
authenticationprotocol
authenticationpassword
permissions
privacyprotocol
privacypassword
Example
-> create /SP/users/susan role=administrator
142
Sun ILOM 3.0 CLI Procedures Guide • December 2008
Default
ro|rw
ro
MD5
<string>
ro|rw
none|DES
<string>
MD5
(null string)
ro
DES
(null string)
delete Command
Use the delete command to remove an object from the namespace. You will be
prompted to confirm a delete command. Eliminate this prompt by using the
-script option.
Syntax
delete [options] [-script] target
Options
[-h|help] [-script]
Targets
TABLE 12-2
Targets for delete Command
Valid Targets
/SP/users/username
/SP/services/snmp/communities/communityname
/SP/services/snmp/user/username
Examples
-> delete /SP/users/susan
-> delete /SP/services/snmp/communities/public
dump Command
Use the dump command to transfer a file from a target to a remote location specified
by the URI.
Syntax
dump -destination <URI> target
Options
[-destination]
Appendix A
CLI Command Reference
143
exit Command
Use the exit command to end a CLI session.
Syntax
exit [options]
Options
[-h|help]
help Command
Use the help command to display Help information about commands and targets.
Using the -o|output terse option displays usage information only. The
-o|output verbose option displays usage, description, and additional
information including examples of command usage. If you do not use the
-o|output option, usage information and a brief description of the command are
displayed.
Specifying command targets displays a complete list of valid targets for that command
from the fixed targets in /SP and /SYS. Fixed targets are targets that cannot be
created by a user.
Specifying command targets legal displays copyright information and product use
rights.
Syntax
help [options] command target
Options
[-h|help] [-o|output terse|verbose]
Commands
cd, create, delete, exit, help, load, reset, set, show, start,
stop, version
144
Sun ILOM 3.0 CLI Procedures Guide • December 2008
Examples
-> help load
The load command transfers a file from a remote location specified
by the URI and updates the given target.
Usage: load [-script] -source <URI> [target]
-source: Specify the location to get a file.
-> help -output verbose reset
The reset command is used to reset a target.
Usage: reset [-script] [target]
Available options for this command:
-script: Do not prompt for yes/no confirmation and act as if yes
were specified.
load Command
Use the load command to transfer an image file from a source, indicated by a
Uniform Resource Indicator (URI), to update ILOM firmware. The URI can specify a
protocol and credentials used for the transfer. The load command supports multiple
protocols (TFTP, SCP, FTP). If credentials are required and not specified, the
command prompts you for a password. Using the -script option eliminates the
prompt for a yes or no confirmation and the command acts as if yes were specified.
Note – Use this command to update your ILOM firmware and BIOS.
TABLE 12-3
Targets, Properties, and Values for load Command
Valid Targets
Properties
Values
Default
/SP/users/username
password
role
<string>
administrator|operator
|a|u|c|r|o|s
(none)
o
Syntax
load -source URI
Options
[-h|help] [-script]
Appendix A
CLI Command Reference
145
Example
-> load -source tftp://ip_address/newmainimage
Note – A firmware upgrade will cause the server and ILOM to be reset. It is
recommended that a graceful shutdown of the server be done prior to the upgrade
procedure. An upgrade takes about five minutes to complete. ILOM will enter a
special mode to load new firmware. No other tasks can be performed in ILOM until
the firmware upgrade is complete and ILOM is reset.
-> load -source tftp://ip_address/newmainimage
Are you sure you want to load the specified file (y/n)? y
File upload is complete.
Firmware image verification is complete.
Do you want to preserve the configuration (y/n)? n
Updating firmware in flash RAM:
.
Firmware update is complete.
ILOM will not be restarted with the new firmware.
reset Command
Use the reset command to reset the state of the target. You will be prompted to
confirm a reset operation. Eliminate this prompt by using the -script option.
Note – The reset command does not affect the power state of hardware devices.
Syntax
reset [options] target
Options
[-h|help] [-script]
(The -f|force option is supported on SPARC-based systems.)
146
Sun ILOM 3.0 CLI Procedures Guide • December 2008
Targets
TABLE 12-4
Targets for reset Command
Valid Targets
/SP
/SYS
Examples
-> reset /SP
-> reset /SYS
set Command
Use the set command to specify the properties of the target.
Syntax
set [options] target [propertyname=value]
Options
[-h|help]
Appendix A
CLI Command Reference
147
Targets, Properties, and Values
TABLE 12-5
Targets, Properties, and Values for set Command
Valid Targets
Properties
Values
Default
/SP/alertmgmt/rules
testalert
true
(none)
/SP/alertmgmt/rules/
rulename
(rulename = 1 through 15)
community_or_username
destination
destination_port
event_class_filter
<string>
email_address
<integer>
“ “ | Log | Email | Internal |
Captive Shell | Backup |
Restore | Audit | IPMI |
Chassis | Fault | System |
ActDir
public
(none)
0
(none)
event_type_filter
level
snmp_version
type
“ “ | Developer | Connection
| Send | Product | Chassis |
Command Entered | State |
Action | Fault | Repair |
Warning
(none)
disable|down|critical|major
|minor
(none)
1|2c|3
3
email | ipmipet | snmptrap
(none)
/SP/clock
datetime
timezone
usentpserver
current date and time
EST | PST8PDT
enabled|disabled
<string>
GMT
disabled
/SP/services/http
port
secureredirect
servicestate
<integer>
enabled|disabled
enabled|disabled
80
enabled
disabled
/SP/services/https
port
servicestate
<integer>
enabled|disabled
443
disabled
/SP/services/ipmi
servicestate
enabled|disabled
enabled
/SP/services/kvms
mousemode
servicestate
absolute|relative
enabled|disabled
absolute
enabled
148
Sun ILOM 3.0 CLI Procedures Guide • December 2008
TABLE 12-5
Targets, Properties, and Values for set Command (Continued)
Valid Targets
Properties
Values
Default
/SP/services/snmp
engineid
port
sets
v1
v2c
v3
servicestate
<hexadecimal>
<integer>
enabled|disabled
enabled|disabled
enabled|disabled
enabled|disabled
enabled|disabled
IP address
161
disabled
disabled
disabled
enabled
enabled
/SP/services/snmp/
communities/private
permission
ro |rw
rw
/SP/services/snmp/
communities/public
permission
ro|rw
ro
/SP/services/snmp/user
/username
authenticationprotocol
authenticationpassword
permissions
privacyprotocol
privacypassword
MD5
<string>
ro|rw
none|DES
<string>
MD5
(null string)
ro
DES
(null string)
/SP/services/ssh
external_host
generate_new_key_action
generate_new_key_type
restart_sshd_action
state
true
rsa|dsa
true
enabled|disabled
(none)
(none)
(none)
enabled
/SP/services/sso
state
enabled|disabled
enabled
/SP/users/username
role
administrator|operator|a|u| (none)
c|r|o|s
<string>
(none)
password
/SP/clients/
activedirectory
/SP/clients/
activedirectory/
admingroups/n
where n is 1-5
state
certfilestatus
defaultrole
disabled
(none)
dnslocatormode
address
port
strictcertmode
timeout
enabled | disabled
<string>
administrator|operator|a|u|
c|r|o|s
enabled|disabled
<ip address>
<integer between 0-65535>
enabled | disabled
<integer>
name
<string>
(none)
Appendix A
o
(none)
(none)
disabled
(none)
CLI Command Reference
149
TABLE 12-5
Targets, Properties, and Values for set Command (Continued)
Valid Targets
Properties
Values
Default
/SP/clients/
activedirectory/
opergroups/n
where n is 1-5
name
<string>
(none)
/SP/clients/
activedirectory/
userdomains/n
where n is 1-5
domain
<string>
(none)
/SP/clients/
activedirectory/
customgroups/n
where n is 1-5
name
roles
<string>
(none)
a|u|c|r|o|s|administrator| o
operator
/SP/clients/
activedirectory/
alternateservers/n
where n is 1-5
address
port
<string>
(none)
a|u|c|r|o|s|administrator| o
operator
/SP/clients/
activedirectory/
cert/
certstatus
clear_action
issuer
load_uri
serial_number
subject
valid_from
valid_until
version
<string>
true
<string>
tftp|ftp|scp
<string>
<string>
<string>
<string>
<string>
(none)
(none)
(none)
(none)
(none)
(none)
(none)
(none)
(none)
/SP/clients/
activedirectory/
dnslocatorqueries/n
where n is 1-5
service
<DOMAIN>
(none)
/SP/clients/dns
auto_dns
nameserver
retries
searchpath
timeout
enabled|disabled
<string>
<integer between 0 and 5>
<string>
<integer between 1 and 10>
disabled
(none)
(none)
(none)
(none)
150
Sun ILOM 3.0 CLI Procedures Guide • December 2008
TABLE 12-5
Targets, Properties, and Values for set Command (Continued)
Valid Targets
Properties
Values
Default
/SP/clients/ldap
binddn
bindpw
defaultrole
<username>
<string>
administrator|operator|a|u|
c|r|o|s
<ipaddress>|none
<integer>
<string>
enable|disabled
(none)
(none)
(none)
(none)
state
<ip address> or <DNS name>
none|high|medium|low|
trace
enabled|disabled
<ipaddress>|none
<integer>
administrator|operator|a|u|
c|r|o|s
enabled|disabled
/SP/clients/
ldapssl/
admingroups/n
where n is 1-5
name
<string>
(none)
/SP/clients/
ldapssl/
opergroups/n
where n is 1-5
name
<string>
(none)
/SP/clients/
ldapssl/
userdomains/n
where n is 1-5
domain
<string>
(none)
/SP/clients/
ldapssl/
customgroups/n
where n is 1-5
domain
<string>
(none)
/SP/clients/
ldapssl/
alternateservers/n
where n is 1-5
domain
<string>
(none)
address
port
searchbase
state
/SP/clients/ldapssl
address
logdetail
strictcertmode
address
port
defaultrole
Appendix A
o
(none)
389
(none)
disabled
disabled
(none)
389
o
disabled
CLI Command Reference
151
TABLE 12-5
Targets, Properties, and Values for set Command (Continued)
Valid Targets
Properties
Values
Default
/SP/clients/
ldapssl/
cert/n
where n is 1-5
domain
<string>
(none)
/SP/clients/ntp/server/
[1|2]
address
<ipaddress>
(none)
/SP/clients/radius
defaultrole
address
port
secret
state
administrator|operator|a|u|
c|r|o|s|none
<ipaddress>|none
<integer>
<string>|none
enable|disabled
operator
/SP/clients/smtp
address
port
state
<ipaddress>
<integer>
enabled | disabled
IP address
25
enabled
/SP/clients/syslog[1|2]
address
<ipaddress>
IP address
/SP/config
dump_uri
load_uri
passphrase
tftp|ftp|sftp|scp|http|https
tftp|ftp|sftp|scp|http|https
<string>
(none)
(none)
(none)
/SP/diag
snapshot
(none)
(none)
/SP/network
commitpending
pendingipaddress
pendingdiscovery
pendingipgateway
pendingipnetmask
state
true
<ipaddress>|none
dhcp|static
<ipaddress>|none
<IP dotted decimal>
enabled | disabled
(none)
(none)
dhcp
(none)
10.8.255.255
enabled
152
Sun ILOM 3.0 CLI Procedures Guide • December 2008
(none)
1812
(none)
disabled
TABLE 12-5
Targets, Properties, and Values for set Command (Continued)
Valid Targets
Properties
Values
Default
/SP/serial/external
commitpending
flowcontrol
pendingspeed
speed
true
none
<integer from list>
<integer from list>
(none)
none
9600
9600
/SP/serial/host
commitpending
pendingspeed
speed
true
<integer from list>
<integer from list>
(none)
9600
9600
/SP/
check_physical_presence
hostname
reset_to_defaults
system_contact
system_description
system_identifier
system_location
true|false
<string>
all|factory|none
<string>
<string>
<string>
<string>
(none)
(none)
(none)
(none)
(none)
(none)
(none)
Examples
-> set /SP/users/susan role=administrator
-> set /SP/clients/ldap state=enabled binddn=proxyuser bindpw=ez24get
show Command
Use the show command to display information about targets and properties.
Using the -display option determines the type of information shown. If you
specify -display targets, then all targets in the namespace below the current
target are shown. If you specify -display properties, all property names and values
for the target are shown. With this option you can specify certain property names,
and only those values are shown. If you specify -display all, all targets in the
namespace below the current target are shown, and the properties of the specified
target are shown. If you do not specify a -display option, the show command acts
as if -display all were specified.
The -level option controls the depth of the show command and it applies to all
modes of the -display option. Specifying -level 1 displays the level of the
namespace where the object exists. Values greater than 1 return information for the
target's current level in the namespace and the <specified value> levels below. If the
argument is -level all, it applies to the current level in the namespace and
everything below.
Appendix A
CLI Command Reference
153
The -o|output option specifies the output and form of command output. ILOM
only supports -o table, which displays targets and properties in tabular form.
The alias, show components, is a shortcut for the following CLI command:
-> show -o table -level all /SYS component state
The show components alias produces the same output as the above command.
Thus, it enables you to restrict the table output to a single property below each
target.
Syntax
show [options] [-display targets|properties|all] [-level value|all] target
[propertyname]
Options
[-d|-display] [-l|level] [-o|output]
154
Sun ILOM 3.0 CLI Procedures Guide • December 2008
Targets and Properties
TABLE 12-6
Targets and Properties for show Command
Valid Targets
Properties
/SYS
/SP
/SP/alertmgmt/rules/
rulename
(rulename = 1 through 15)
community|username
destination
destination_port
event_class_filter
event_type_filter
level
snmp_version
type
/SP/clients/
activedirectory
state
certfilestatus
defaultrole
getcertfile
address
logdetail
port
strictcertmode
timeout
/SP/clients/
activedirectory/
admingroups/n
where n is 1-5
name
/SP/clients/
activedirectory/
alternateservers/n
where n is 1-5
address
port
/SP/clients/
activedirectory/
alternateservers/n/cert
where n is 1-5
clear_action
issuer
load_uri
serial_number
subject
valid_from
valid_until
version
Appendix A
CLI Command Reference
155
TABLE 12-6
156
Targets and Properties for show Command (Continued)
Valid Targets
Properties
/SP/clients/
activedirectory/cert
certstatus
clear_action
issuer
load_uri
serial_number
subject
valid_from
valid_until
version
/SP/clients/
activedirectory/
customgroups/n
where n is 1-5
name
roles
/SP/clients/
activedirectory/
opergroups/n
where n is 1-5
name
/SP/clients/
activedirectory/
userdomains/n
where n is 1-5
domain
/SP/clients/dns
auto_dns
nameserver
searchpath
/SP/clients/ldap
binddn
bindpw
defaultrole
address
port
searchbase
state
/SP/clients/ldapssl
defaultrole
address
logdetail
port
state
strictcertmode
timeout
Sun ILOM 3.0 CLI Procedures Guide • December 2008
TABLE 12-6
Targets and Properties for show Command (Continued)
Valid Targets
Properties
/SP/clients/
ldapssl/
admingroups/n
where n is 1-5
name
/SP/clients/
ldapssl/
alternateservers/n
where n is 1-5
address
port
/SP/clients/
ldapssl/
alternateservers/n/cert
where n is 1-5
cert_status
clear_action
issuer
load_uri
serial_number
subject
valid_from
valid_until
version
/SP/clients/ldapssl/cert
certstatus
clear_action
issuer
load_uri
serial_number
subject
valid_from
valid_until
version
/SP/clients/
ldapssl/
customgroups/n
where n is 1-5
name
roles
/SP/clients/
ldapssl/
opergroups/n
where n is 1-5
name
/SP/clients/
ldapssl/
userdomains/n
where n is 1-5
domain
/SP/clients/ntp/server/[1|2]
address
Appendix A
CLI Command Reference
157
TABLE 12-6
158
Targets and Properties for show Command (Continued)
Valid Targets
Properties
/SP/clients/radius
address
port
secret
state
/SP/clients/smtp
port
state
/SP/clock
datetime
usentpserver
timezone
/SP/config
dump_uri
load_uri
passphrase
/SP/console
escapechars
/SP/diag/snapshot
dataset
dump_uri
result
/SP/firmware
load_uri
/SP/logs/event
clear
/SP/network
commitpending
dhcp_server_ip
ipaddress
ipdiscovery
ipgateway
ipnetmask
macaddress
pendingipaddress
pendingdiscovery
pendingipgateway
pendingipnetmask
state
/SP/powermgmt
actual_power
permitted_power
available_power
/SP/serial/external
flowcontrol
speed
Sun ILOM 3.0 CLI Procedures Guide • December 2008
TABLE 12-6
Targets and Properties for show Command (Continued)
Valid Targets
Properties
/SP/serial/host
commitpending
pendingspeed
speed
/SP/services/http
port
secureredirect
servicestate
/SP/services/https
cert_status
servicestate
/SP/services/https/ssl
cert_status
/SP/services/https/ssl/default_cert
issued_by
issuer
serial_number
subject
valid_from
valid_until
version
/SP/services/https/ssl/custom_cert
clear_action
issuer
load_uri
serial_number
subject
valid_from
valid_until
version
/SP/services/https/ssl/custom_key
key_present
load_uri
clear_action
/SP/services/ipmi
servicestate
/SP/services/kvms
mousemode
servicestate
/SP/services/servicetag
passphrase
product_urn
state
Appendix A
CLI Command Reference
159
TABLE 12-6
160
Targets and Properties for show Command (Continued)
Valid Targets
Properties
/SP/services/snmp
engineid
port
sets
v1
v2c
v3
servicestate
/SP/services/snmp/communities/private
permissions
/SP/services/snmp/communities/public
permissions
/SP/services/snmp/users/username
password
role
/SP/services/ssh
state
/SP/services/ssh/keys/dsa
fingerprint
length
privatekey
publickey
/SP/services/ssh/keys/rsa
fingerprint
length
privatekey
publickey
/SP/services/sso
state
/SP/sessions/sessionid
username
starttime
type
mode
/SP/users/username
role
password
Sun ILOM 3.0 CLI Procedures Guide • December 2008
TABLE 12-6
Targets and Properties for show Command (Continued)
Valid Targets
Properties
/SP/users/username/ssh/keys/1
fingerprint
algorithm
load_uri
clear_action
embedded_comment
bit_length
/SP/users/username/service
service_password
service_password_expires
/SP/users/username/escalation
escalation_password
escalation_password_expires
Examples
-> show /SP/users/user1
-> show /SP/clients -level2
-> show components
start Command
Use the start command to turn on the target or to initiate a connection to the host
console. Using the -script option eliminates the prompt for a yes or no
confirmation and the command acts as if yes were specified.
Syntax
start [options] target
Options
[-h|help] [-script]
Appendix A
CLI Command Reference
161
Targets
TABLE 12-7
Targets for start Command
Valid Targets
Description
/SYS or /CH
Starts (powers on) the system or chassis.
/SP/console
Starts an interactive session to the console stream.
Examples
-> start /SP/console
-> start /SYS
stop Command
Use the stop command to shut down the target or to terminate another user's
connection to the host console. You will be prompted to confirm a stop command.
Eliminate this prompt by using the -script option. The -f|force option specifies
that the action will be performed immediately.
Syntax
stop [options] [-script] target
Options
[-f|force] [-h|help]
Targets
TABLE 12-8
Targets for stop Command
Valid Targets
Description
/SYS or /CH
Perform an orderly shutdown, followed by a power off of the
specified system or chassis. Use the -f|-force option to skip the
orderly shutdown and force an immediate power off.
/SP/console
Terminate another user's connection to the host console.
Examples
-> stop /SP/console
-> stop -force /SYS
162
Sun ILOM 3.0 CLI Procedures Guide • December 2008
version Command
Use the version command to display ILOM version information.
Syntax
version
Options
[-h|help]
Example
-> version
version SP firmware version: 3.0.0
SP firmware build number: 4415
SP firmware date: Mon Mar 28 10:39:46 EST 2008
SP filesystem version: 0.1.9
Appendix A
CLI Command Reference
163
164
Sun ILOM 3.0 CLI Procedures Guide • December 2008
APPENDIX
B
Storage Redirection Command-Line
Modes, Syntax, and Usage
The Storage Redirection CLI supports both an interactive and non-interactive mode
for entering commands. The interactive mode is useful when you need to enter a
series of Storage Redirection commands. The non-interactive mode is useful when
you need to run a batch procedure or script. The syntax required for entering the
Storage Redirection commands in either of these modes is as follows.
■
Interactive shell mode syntax
<storageredir> <command> <command options> <sub-commands> <sub-command
options>
To launch the Storage Redirection CLI and execute the commands directly from
an interactive shell, you must first navigate to the location where the Storage
Redirection Client was installed and launch the Storage Redirection CLI by
issuing the java -jar StorageRedir.jar command. For instructions, see
“Launch Storage Redirection CLI Using a Command Window or Terminal” on
page 126.
■
Non-interactive shell mode syntax
$ java -jar StorageRedir.jar <command> <command options> <sub-commands>
<sub-command options>
To launch the Storage Redirection CLI and execute the commands directly from a
non-interactive shell, you must enter the Storage Redirection command (java
-jar StorageRedir.jar) at the shell prompt ($) followed by the commands you
want to execute. For instructions, see, “Launch Storage Redirection CLI Using a
Command Window or Terminal” on page 126.
165
Supported Storage Redirection Commands and Options
The following tables describe the supported commands and options you can issue in
the Storage Redirection CLI.
■
TABLE 12-9 Storage Redirection Command
■
TABLE 12-10 Storage Redirection Command Options
■
TABLE 12-11 Storage Redirection Sub-Commands
■
TABLE 12-12 Storage Redirection Sub-Command Options
TABLE 12-9
Storage Redirection Command
Command Name
Description
java -jar StorageRedir.jar The java -jar command is used to launch the Storage
Redirection client (StorageRedir.jar) from a
command window or terminal.
storageredir
TABLE 12-10
166
The storagedir command performs all storage
redirection operations.
Storage Redirection Command Options
Option Name
Description
- h
The - h command option displays the command-line
Help information.
- v
The -v command option displays the Java command
version information.
Sun ILOM 3.0 CLI Procedures Guide • December 2008
TABLE 12-11
Storage Redirection Sub-Commands
Sub-Command
Name
Description
list
The list sub-command provides a list of the currently active storage
redirections on one or all remote SPs.
Syntax usage example:
storageredir list [-p storageredir_port] [remote_SP]
start
The start sub-command invokes the specified redirection between the
local host and the remote host server. If the authentication password is not
provided, the system will prompt for it.
Syntax usage example:
storageredir start -r redir_type -t redir_type_path -u
remote_username [-s remote_user_password]
[-p storageredir_port] remote_SP
Note - You must specify a valid Admin or Console role account in ILOM
to start the redirection of storage device on a remote server.
stop
The stop sub-command stops the specified redirection between the local
host and the remote host server. If the authentication password is not
provided, the system will prompt for it.
Syntax usage example:
storageredir stop -r redir_type -u remote_username
[-s remote_user_password] [-p storageredir_port]
remote_SP
Note - You must specify a valid Admin or Console role account in ILOM
to stop the redirection of storage device on a remote server.
test-service The test-service sub-command verifies whether the storage redirection
service connection is active on the local host.
Syntax usage example:
storageredir test-service [-p storageredir_port]
stop-service The stop-service sub-command stops the storage redirection service
connection to the remote host server.
Syntax usage example:
storageredir stop-service [-p storageredir_port]
Appendix B
Storage Redirection Command-Line Modes, Syntax, and Usage
167
TABLE 12-12
168
Storage Redirection Sub-Command Options
Sub-Command Option Name
Description
-r redir_type
The -r redir_type identifies the type of storage media being
redirected.
Valid device values for redir_type include:
• CD-ROM device
Syntax: -r cdrom
• CD-ROM image:
Syntax: -r cdrom_img
• Floppy device:
Syntax: -r floppy
• Floppy image:
Syntax: -r floppy_img
-t redir_type_path
The -t redir_type_path identifies the full path to where the
storage redirection media is stored or mounted.
Example:
-t /home/username/JRC_Test_Images/CDROM.iso
-u remote_username
The -u remote_username identifies the user name required to
log in to the ILOM SP.
Example:
-u john_smith
Note - Any valid user account in ILOM can install or launch
the Storage Redirection service or client on their local system.
However, a valid Admin or Console role account in ILOM is
required to start or stop the redirection of a storage device on
a remote server.
-s remote_user_password
The -s remote_user_password identifies the password required
to log in to the ILOM SP.
If this password command is not specified at the command
line, the system will automatically prompt you for it.
-p storageredir_port
The -p storageredir_port identifies the storage redirection
communication port on the local host. The default port
provided is 2121.
Example:
-p 2121
Sun ILOM 3.0 CLI Procedures Guide • December 2008
Index
editing, example of, 108
editing, passwords, 109
editing, roles, 109
example contents, 107
prerequisites for editing, 107
Symbols
/SYS, 3
A
Active Directory
certstatus, 48
removing certificate, 49
strictcertmode, 47
troubleshooting, 55
viewing and configuring settings, 49
alert rules
CLI commands, 92
configuring, 90
disabling, 91
alert tests
generating, 92
alerts
CLI commands for managing alerts, 92
email notification
configuring the SMTP client, 94
generating email notification, 94
B
back up ILOM configuration
prerequisites for, 104
procedure for, 104
roles required, 104
time required, 105
Backup operation
CLI command, 104
backup XML file
editing, adding a user account, 109
C
certificate authentication, 47
certificate state, 48
CLI command syntax
cd command, 141
create command, 142
delete command, 143
dump command, 143
exit command, 144
help command, 144
load command, 145
reset command, 146
set command, 147
show command, 153
start command, 161
stop command, 162
version command, 163
CLI command types
alert management commands, 10
clock settings commands, 11
general commands, 9
host system commands, 12
network and serial port commands, 10
SNMP commands, 12
system management access commands, 11
user commands, 9
CLI commands
169
executing combined, 14
executing individually, 14
reference for, 141
CLI target types
/CH, 3
/CMM, 3
/HOST, 3
/SP, 3
/SYS, 3
clock settings, 81
command properties, 6
for ILOM 2.x, 7
for ILOM 3.0, 7
command strings, 9
command-line interface (CLI)
command syntax, 8
filtering output options for commands, 13
overview, 2
prerequisites for using, 15
target tree, 6
using hierarchical architecture, 3
communication settings
configuring, 23
prerequisites for configuration, 25
component information, 74
components
enabling and disabling, 76
managing, 74
monitoring, 77
removing, 75
returning to service, 76
D
default settings
reset options, 110
defaultuser account
using for password recovery, 20
diagnosing SPARC systems, 136
diagnosing x64 systems, 133
Distributed Management Task Force CommandLine Protocol (DMTF CLP), 2
documentation, xviii
Domain Name Service (DNS)
configuring, 29
locator service, 55
targets, properties, and values for, 29
DSA key
170
Sun ILOM 3.0 CLI Procedures Guide • December 2008
viewing, 34
E
event logs
contents of, 84
filtering output, 82
viewing and clearing, 83
F
fault management
viewing faulted components, 86
firmware
prerequisites for updating, 112
recovery during update, 116
troubleshoot update session, 116
update prerequisites, 113
updating image, 114
H
host name
assigning, 25
HTTP or HTTPS settings
enabling, 31
targets, properties, and values for, 32
I
ILOM 2.x
properties compared to ILOM 3.0, 7
updating 2.x scripts, 7
ILOM configuration
backing up, 103
resetting, 110
restoring, 103, 105
IP address assignment
editing using the CLI, 27 to 28
J
Java runtime environment
downloading, 120
Jnlpgenerator, 121
L
LDAP server
configuring, 56
LDAP/SSL, 58
certstatus, 59
removing a certificate, 60
strictcertmode, 59
troubleshooting, 66
viewing and configuring settings, 61
Lightweight Directory Access Protocol (LDAP), 56
configuring, 57
overview, 56
log in
first time, 19
prerequisites for, 18
regular user, 19
using root user account, 19
log out, 21
power consumption management
monitoring power
show command, 101
power policy
configuring, 102
power state commands, 132
power-on self-test
diagnostic trigger for, 137
prerequisites for using CLI, 15
product identity information, xx
properties
ILOM 3.0 versus ILOM 2.x, 7
N
R
namespaces
accessed by SP, 3
network port 2121
default storage redirection port, 131
network settings, 24
DNS, 29
editing IP address, 27
host name, 25
pending and active properties, 25
serial port, 30
system identifier, 25
targets, properties, and values for, 27
viewing and configuring, 26
non-maskable interrupt (NMI), 134
P
passphrase
used to backup ILOM configuration, 104
used to restore ILOM configuration, 106
password
changing, 40
lost password recovery, 20
Pc-Check diagnostic tests, 133
physical presence
proving, 20
power consumption
monitoring, 97
monitoring actual power, 100
monitoring available power, 101
monitoring individual power supply, 100
monitoring permitted power, 101
monitoring total system power, 99
terminology, 98
RADIUS
commands, 69
configuration prerequisites, 67
configuring, 67
configuring settings, 68
server default port, 69
recover lost password, 20
redirecting storage media
prerequisites for, 125
tasks required, 125
remote host
managing, 119
power state commands, 132
redirecting storage devices, 125
starting redirection of storage device, 129
stopping redirection of storage device, 130
storage redirection, 120
changing default network port, 131
Storage Redirection CLI, 125
remote power control
CLI commands, 132
remote syslog receiver, 85
requirements for using CLI, 15
resetting ILOM, 117
Restore operation
CLI command, 106
passphrase requirements, 106
sensitive data requirements, 104
sessions momentarily suspended, 106
time required, 106
user roles required, 105
restoring ILOM configuration, 103
Index
171
rootuser account, 19
RSA key
viewing, 34
S
Secure Shell (SSH)
enabling or disabling, 33
establishing remote connection, 33
generating new key, 35
settings for, 33
using to log in, 19
viewing current key, 34
sensor readings, 79
serial port settings
pending and active properties, 30
targets, properties, and values for, 31
viewing and configuring, 30
service processor
resetting, 117
Service Snapshot utility, 87
show faulty command, 86
sign-in authentication
required for Storage Redirection CLI, 121
Single Sign On, 39
SMTP client
configuring, 94
SNMP Trap alert, 90
SP reset, 117
SPARC diagnostics
levels of, 137
mode for, 136
trigger for POST, 137
verbosity of output, 138
ssh command (Solaris)
connecting to a SP, 33
SSH connection, 33
enabling and disabling, 33
key encryption using the CLI, 34
new key, 35
restarting, 36
SSH key, 45
adding, 45
deleting, 46
Storage Redirection CLI
default communication port, 121
displaying command-line help, 128
172
Sun ILOM 3.0 CLI Procedures Guide • December 2008
initial setup, 120
installing client, 124
launching, 126
modes for, 165
sign-in authentication, 121
start service, 121
starting device redirection, 129
starting service, 121
supported commands and options, 166
supported ILOM versions, 120
verify service status, 127
verifying service status, 127
viewing active redirections, 130
strictcertmode, 47
system alerts
commands for managing, 92
configuration prerequisites, 90
configuring, 90
configuring SMTP client, 94
deleting, 91
generating, 92
system components
viewing and managing, 74
system identifier
assigning, 25
system indicators
viewing, 80
system problems
diagnosing, 87
T
target tree, 6
troubleshooting, 87
typographic conventions, xxii
U
user accounts
adding, 39
configuring, 39
deleting, 41
password, 40
roles, 41
setting up, 19
viewing individual session, 44
viewing individual user account, 42
viewing list of user sessions, 43
V
version information for ILOM
viewing, 113
X
x64 systems diagnostics
Pc-Check diagnostic tests, 133
Index
173
174
Sun ILOM 3.0 CLI Procedures Guide • December 2008