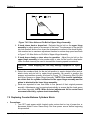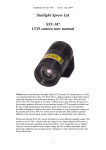
1
206507 NA.AF.10.0813.2.U Alpha Fuzion Sauna Body POD Owner’s, Installation and Service Manual Voice Direct Dial: (952) 888-2088 Toll Free: (877) 818-9988 Fax: (952) 888-8887 Web Site: http://www.nuagebeauty.com E-mail : [email protected] NUAGE BEAUTY 9220 James Avenue South Minneapolis, MN 55431 USA NuAge Beauty 9220 James Avenue South, Minneapolis, MN 55431 USA To the New Owner of a Alpha Fuzion Sauna Body POD: Congratulations! We at NuAge Beauty welcome you as a new owner of an Alpha Fuzion Sauna Body POD. Enclosed you’ll find your Alpha Fuzion Sauna Body POD Owner’s, Installation and Service Manual. In it, you’ll find set-up and operating instructions, as well as service and troubleshooting tips. If you have questions, please feel free to contact your NuAge Beauty Sales Representative or our Customer Service Department. We look forward to the opportunity of offering additional products and services to you. Please forward all inquiries to the address listed above or visit us at www.nuagebeauty.com. In order to offer the highest quality products and services to our customers, we welcome your feedback regarding your new Alpha Fuzion Sauna Body POD. Thank you for your business! Very truly yours, NuAge Beauty Voice Direct Dial: (952) 888-2088 Toll Free: (877) 818-9988 Fax: (952) 888-8887 E-mail: [email protected] Web Site: http://www.nuagebeauty.com TABLE OF CONTENTS TABLE OF CONTENTS Page Section 1 Introduction 1.1 Purpose of the Manual 1.2 Customer Service 1.3 Disclaimer 1.4 Copyright 1 1 1 2 Section 2 Safety and Quality Assurance 2.1 Precautionary Safeguards 2.2 Important Safety Instructions 3 3 Section 3 Electrical Requirements 3.1 Electrical Power Requirements 3.2 ETL Grounding Standards 5 5 Section 4 Product Introduction 4.1 Alpha Fuzion System Introduction 4.2 Alpha Fuzion System Features 4.3 Beauty Services 4.4 Alpha Fuzion System Contraindications 4.5 Water Intake 7 8 9 10 10 Section 5 Installation 5.1 Opening Shipping Container 5.2 Installing Aroma System 5.3 Installing Bed 5.4 Installing Supplied Accessories 5.5 Connecting the Power Cord 5.6 Radio and Television Reception 11 12 14 14 15 16 Section 6 Operation 6.1 Operational Safety 6.2 Preparation for Operation 6.3 Initialization 6.4 Preprogrammed Session 6.5 Personalized Session 6.6 Ending the Session 6.7 Turning Off Your Alpha Fuzion Sauna Body POD 17 17 18 22 27 31 32 TABLE OF CONTENTS (Continued) Section 7 Service 7.1 Removing the Hood 7.2 Replacing the Hood onto Base Chassis 7.3 Replacing the Heater Assembly 7.4 Adjusting Counter-Balance Cylinders Struts 7.5 Replacing Counter-Balance Cylinders Struts 7.6 Replacing Hinge Assembly 7.7 Removing Bed Assembly from Base Chassis 7.8 Replacing Bed Assembly onto Base Chassis 7.9 Replacing Vibration Motor(s) 7.10 Replacing Main Power Supply Box 7.11 Replacing Aroma Pump(s) 7.12 Replacing Aroma Oil Bottles 7.13 Removing/Replacing/Cleaning Brass Aroma Nebulizer(s) 7.14 Replacing Sanitary Lamp Assembly 7.15 Replacing Sanitary Lamp Ballast 7.16 Replacing Face Air Vent(s) 7.17 Replacing Face Fan Assembly 7.18 Replacing Speaker(s) 7.19 Replacing Display/Control Panel 7.20 Replacing Radio/CD Player 7.21 Replacing Program Chip 7.22 Replacing the Heat Sensor Assembly 7.23 Replacing Wiring Harnesses 33 35 36 38 40 42 44 46 47 49 52 55 55 56 58 58 59 61 62 64 65 67 69 Section 8 Troubleshooting 8.1 Troubleshooting 80 Section 9 Maintenance 9.1 Preventative Maintenance 9.2 General Cleaning & Mandatory Use of Pre-Approved Solution 9.3 Cleaning the Shell 9.4 Cleaning the Underbed Area 9.5 Cleaning Contact Surfaces (Bed, Head Pillow, Interior of Shell) 89 89 90 91 91 Section 10 Specifications and Supplied Accessories 10.1 Precautionary Safeguards 10.2 Alpha Fuzion Spa Machine Specifications 10.3 Supplied Accessories 92 92 93 APPENDICES Owner Record Owner’s Registration Form Warranty A B C Section 1 Introduction SECTION 1: INTRODUCTION 1.1 Purpose of the Manual This manual explains how to correctly install, operate, and get the best performance from your Alpha Fuzion Sauna Body Pod. It may be used as a guide, suitable for all levels of technical expertise, in determining and servicing mechanical and electrical difficulties. This owner’s manual is organized as a quick reference guide. Any additional updated or supplemental information for this reference guide may be distributed to you as needed. Please read this owner's manual carefully before installing your machine. Keep your manual near your machine for quick reference. 1.2 Customer Service We welcome and appreciate your comments, questions, and suggestions in order to continually offer the highest quality products, accessories, and services to our customers. Our qualified professional teams are ready to assist you with a prompt response to any question communicated to us by telephone, computer, and/or fax. 1.3 Disclaimer While every attempt is made to ensure the accuracy and completeness of the information in this document, some errors may exist. NuAge Beauty does not accept responsibility of any kind for customer loss due to use of or reliance upon this document. NuAge Beauty reserves the right to make changes without notice in the product described or contained herein in order to improve design and/or performance. NuAge Beauty assumes no responsibility or liability for the use of the product, conveys no license or title under any patent, copyright, or trademark right to this product or processes and makes no representation or warranty that this product is free from patent, copyright, or trademark right infringement, unless otherwise specified. Applications that are described herein for the product are for illustrative purposes only. NuAge Beauty makes no representation or warranty that such applications are suitable for the specified use without further testing or modification. Alpha Fuzion Sauna Body Pod 1 Section 1 Introduction 1.4 Copyright This manual is protected by copyrights. All rights are reserved. No part of this publication may be reproduced, stored in a retrieval system, or transmitted in any form or by any means: electronic, mechanical, photocopying, recording, or otherwise without the prior written permission from the author and publisher. All inquiries should be addressed to Alpha Fuzion Sauna Body Pod Owner’s, Installation, and Service Manual, NuAge Beauty, at the headquarters address listed inside the front cover of this manual, along with a date from a copy of the original purchase receipt of the Alpha Fuzion Sauna Body Pod. No attempt has been made to designate as trademarks or service marks all words or terms in which proprietary rights might exist. The inclusion, exclusion, or definition of a word or term is not intended to affect, or to express a judgment on, the validity or legal status of the word or term as a trademark, service mark, or other proprietary term. Alpha Fuzion Sauna Body Pod 2 Section 2 Safety and Quality Assurance SECTION 2: SAFETY AND QUALITY ASSURANCE 2.1 Precautionary Safeguards Strictly observe the following instructions for safety: • • • • • • Do not modify Alpha Fuzion Sauna Body Pod. Prevent flammables, water, and metallic objects from entering it. Do not use it when there is lightning in the vicinity. Disconnect the power cable of connected equipment. Check the voltage before operation. It must be identical with that of your local power supply. If any liquid falls into the display CONTROL PANEL or the MAIN POWER BOX, unplug it and have it checked by qualified personnel before operating it. If Alpha Fuzion Sauna Body Pod unit will not be used for an extended period of time (two weeks or more), it should be disconnected from the wall outlet AFTER the heating unit cools down and the main breaker switch (under the bed) is turned to OFF. NOTE: Always turn the main breaker switch (under the bed) to OFF prior to disconnecting plug from wall plug. Avoid using Alpha Fuzion Sauna Body Pod under the following conditions: • • • • • • Excessive humidity or dust. Near appliances generating strong magnetic or electric fields, such as speakers and broadcasting antennas. Excessive soot or steam, such as near a cooking stove. Excessive shock or vibration. Near a television set. Extremely hot places. 2.2 Important Safety Instructions Prior to using an electrical appliance, basic precautions need to always be followed, including reading all instructions before using this appliance. DANGER: To reduce the risk of burns, fire, electric shock, or injury: 1. Allow for a three-minute cooling period before unplugging Alpha Fuzion Sauna Body Pod after every session end. An appliance may not be left unattended when plugged in accordance with ETL safety standards. Additionally, unplug it when not in use, before putting on or taking off parts and performing preventative maintenance, Alpha Fuzion Sauna Body Pod 3 Section 2 Safety and Quality Assurance or cleaning. If it is continuously left ON, the Welcome Screen is displayed. If it will not be used for more than two weeks, turn the OFF switch on the electrical box cover under the bed to OFF by pressing the “0” side of the switch. Then unplug it from the electrical wall outlet. 2. Close supervision is necessary when this appliance is used by or near vulnerable persons, such as children, invalids, and elderly. 3. Use this appliance only for its intended use as described in this manual. Do not use attachments and accessories not recommended by the manufacturer. 4. Never operate this appliance if it has a damaged cord or plug, if it is not working properly, or if it has been damaged. 5. Keep the cord away from heated surfaces. 6. Do not use outdoors. 7. Do not operate where aerosol products are being used or where oxygen is being administered. 8. To disconnect, turn power control to the OFF position, then remove plug from outlet. 9. DANGER: Never use pins or other metallic fasteners with this appliance. Carefully examine the bed covering before each use. Do not use the appliance if the bed covering shows any sign of deterioration. Keep dry – do not operate in a wet or moist condition. 10. WARNING: Temperatures high enough to cause burns may occur regardless of the control setting. Do not use on an infant, invalid, sleeping, or unconscious person. Do not use on sensitive skin or on a person with poor blood circulation. Frequently check the skin in contact with the heated area of the appliance. 11. WARNING: Only connect this appliance to a properly grounded outlet. Please refer to “Grounding Instructions” in SETUP. Please note that the rating plate/serial number plate and safety caution are under bed near the head area. 12. CAUTION: To reduce the risk of electric shock, do not remove power box or control panel cover. There are no user-serviceable parts inside. Refer to qualified personnel only for service. Alpha Fuzion Sauna Body Pod 4 Section 3 Electrical Requirements SECTION 3: ELECTRICAL REQUIREMENTS 3.1 Electrical Power Requirements • Electrical Requirements: 220-240 Volt, 10 Amps, 50/60 Hz. • Because of the nature of this device, each individual Alpha Fuzion Sauna Body Pod needs an entire dedicated circuit breaker for operation. CAUTION: To prevent electric shock and fire hazard, do NOT use any other power source. 3.2 ETL Grounding Standards: According to ETL standards for Motor Operated Massage and Exercise Machines, in category 89, the Grounding Instructions are: Grounding Instructions (Save These Instructions) This product must be grounded. If it malfunctions or breaks down, grounding provides a path of least resistance for electric current to reduce the risk of electrical shock. This product is equipped with a cord having an equipment-grounding conductor and grounding plug. The plug must be plugged into an appropriate outlet that is properly installed and grounded in accordance with all local codes and ordinances. Make absolutely sure that the product is connected to an outlet having the same configuration as the plug. No adapter should be used with this product. If the product must be reconnected for use on a different type of electric circuit, qualified service personnel must make the reconnection. CAUTION: Improper connection of the equipment-grounding conductor can result in a risk of electric shock. Check with a qualified electrician if you are in doubt as to whether the product is properly grounded. Do not modify the plug provided with the product – if it will not fit the outlet, have a proper outlet installed by a qualified electrician. CAUTION: To prevent electric shock, do not use the polarized plug with an extension cord, receptacle or other outlet unless the blades can be fully inserted to prevent blade exposure. Alpha Fuzion Sauna Body Pod 5 Section 3 Electrical Requirements For installation, strictly observe the following instructions: • • Place Alpha Fuzion Sauna Body Pod on a level surface, preferably on soft carpet. Make sure the cover can be opened without hitting anything. Please refer to the SPECIFICATIONS for details on the actual dimensions. Avoid using Alpha Fuzion Sauna Body Pod under the following conditions: • • • Do not install near heat sources, such as radiators, or in places subject to excessive dust, mechanical vibration, shock, and heat. Do not block the air inlet of the face fan located at the base. If it is located in a cold location, the supporting hood struts may decrease pressure in the strut chambers, which may cause the hood to drop sharply. For the struts, the operating temperature range is from 50°F to 180°F (15°C to 80°C). Alpha Fuzion Sauna Body Pod 6 Section 4 Product Introduction SECTION 4: PRODUCT INTRODUCTION 4.1 Alpha Fuzion Sauna Body Pod Introduction: The Alpha Fuzion Sauna Body Pod offers a dynamic balance for optimum health and beauty. It provides relaxation and wellness to produce beneficial results. The Alpha Fuzion Sauna Body Pod synergistic sessions are a culmination of extensive scientific research. Worldwide patents protect the unique functions and features of its state-of-the-art technology in a futuristic controlled environment capsule. Alpha Fuzion Sauna Body Pod taps the body’s inner resources to improve over-all well being along with other holistic techniques. The Alpha Fuzion Sauna Body Pod dry heat sauna adjustable settings, ergonomically-contoured vibratory bed and heated back and thigh pads offer effective spa services, along with aroma, sound/music and cool face air for superior spa treatment results. Clients may expect top-of-theline well being and beauty protocols. Alpha Fuzion Sauna Body Pod technology is the most versatile and effective system available. The marketable services offered may be enhanced and customized with innovative beauty and health services. A personalized program may be created according to specific needs. The following product features and benefits provide effective results for your clientele. Alpha Fuzion Sauna Body Pod 7 Section 4 Product Introduction 4.2 Alpha Fuzion Sauna Body Pod Features: Aroma System The Alpha’s unique Aroma System allows a choice of four Pure Essential Oils. At a touch of the AROMA key, you can select the desired aroma to enhance each session. Cool Face Air Cool airflow lightly upon your face refreshes and relaxes. A continuous stream of adjustable cool air movement from the lowest level (one) to the highest level (seven) enhances the pleasurability of each session. Dry Heat Sauna Dry heat cleanses your skin. This feature allows for immediate relaxation with your body bathed in a warm flow of heated air. The temperature is displayed and adjustable to allow for preprogrammed temperatures ranging from 110ºF to 180ºF (30ºC to 82ºC). The heat is controlled by patented computer microchip technology to allow for even distribution. A session with this feature offers relaxation, cleansing, and numerous other benefits. Ergonomic Contour Bed The massage bed is contoured to the most comfortable fit for your body. Evenly distributed cushioned support eliminates pressure points to allow for the feeling of relaxed air suspension. The contoured shape evenly delivers vibration to all parts of your body. Stereo Sound System Listen to relaxing music or a motivational message on CD delivered through a high fidelity stereo sound system, with the choice of speakers or headphones for your listening pleasure. Vibratory Bed Individualized variable massage motors utilizing two rheostat controls allow for customized massage vibration settings. The adjustable pulsating harmonic rhythms range from rapid strokes to long and deep waves. The undersurface transducers can be controlled from the Display/Control Panel as well, to allow a range of vibration from delicate to deep penetration for relaxation. Wake-up Chime A pleasing wake-up chime sounds at a preprogrammed time, such as two minutes prior to the session end. Sanitary Lamp In the base of the Alpha Fuzion Sauna Body Pod, the dry air is exposed to a sanitary lamp that is located under the bed, deodorizes, disinfects, and helps to purify the air in the chamber. Alpha Fuzion Sauna Body Pod 8 Section 4 Product Introduction 4.3 Beauty Services Alpha Fuzion Sauna Body Pod offers many enhanced and beneficial programs. The following spa services may be offered to personalize any session. Table 2.4.1 Spa Services. Body Care Body Wraps and Masks: Clay/Mud Herbal Bandage Wrap Mineral Paraffin Thalasso Services (Seaweed, Algae) Aroma Alpha Fuzion Sauna Body Pod Skin Care Deep Pore Cleaning Dry Brushing Exfoliation Facials Hand or Foot Services Parisian Body Polish Salt Glow Skin Cleansing Skin Moisturizing 9 Section 4 Product Introduction 4.4 Alpha Fuzion Sauna Body Pod Contraindications: Knowledge of your client’s contraindications requires a thorough client analysis. Being unaware of their medical history may cause problems. Active cancer Recommend no treatment Epilepsy Recommend no treatment Broken bones/slipped disk Recommend no treatment Infectious or contagious skin conditions Recommend no treatment Low blood pressure Recommend no treatment Pregnancy Recommend no treatment during pregnancy Lactation (breast feeding) Recommend no treatment during lactation Heart disease Obtain written consent from client’s physician Diabetes Obtain written consent from client’s physician Cardio-vascular conditions Obtain written consent from client’s physician and use very light compression. Severe open abrasions Recommend no treatment Inflamed areas Avoid area(s) Varicose veins Recommend no treatment Allergies to clay products, aroma oils or ingredients If in doubt, perform a patch test at the back of knee listed on products (see product labels) and wait for 24 hours. 4.5 Water Intake: Drinking lots of water is integral to our health and well being. It is estimated that the body will lose from 64-80 ounces (1.8-2.3 liters) per day through perspiration, breathing, and elimination. To replace this outflow, the average person should consume six to eight 8-ounce glasses of water per day. Alpha Fuzion Sauna Body Pod 10 Section 5 Installation SECTION 5: INSTALLATION 5.1 Opening Shipping Container Strictly observe the following instructions for safety: • • Do not stand the Alpha Fuzion Sauna Body Pod on end. Do not drop or tip it on its side. It is recommended that at least two people lift Alpha Fuzion Sauna Body Pod. Each person must be able to lift 120 Pounds or 56 Kilograms. Once assembled, it does not fit through a standard doorway. The hood may be removed to transport it. Please refer to the exterior packing materials instruction sheet to assemble or disassemble. Instructional steps for opening shipping container are as follows: 1. Cut straps restraining the Alpha Fuzion Sauna Body Pod carton with utility tool. 2. Save exterior packing materials instruction sheet. 3. Lift top off carton. 4. Remove pieces of cardboard support bridge. 5. Remove triangle packing from corners. 6. Lift large middle sleeve with one person at each end. 7. Stand at each end of the Alpha Fuzion Sauna Body Pod and locate hand holds at the base. 8. Lift Alpha Fuzion Sauna Body Pod from pallet. 9. Position in location of operation on a carpeted or padded surface. 10. Remove plastic wrapping from bed assembly and release accessories box. 11. Remove power cord from accessories box. 12. Plug cord into Alpha Fuzion Sauna Body Pod at foot base and into wall outlet after verification of power requirements. 13. Unwrap head pillow from plastic material on the Alpha Fuzion Sauna Body Pod hood and position in Alpha Fuzion Sauna Body Pod. Alpha Fuzion Sauna Body Pod 11 Section 5 Installation 5.2 Installing Aroma System For safety, please make absolutely sure Alpha Fuzion Sauna Body Pod is turned OFF (“0”) at main switch on power box cover before proceeding. As shown in Figure 4.3.1 Preliminary Installation of Aroma System and Figure 4.3.2 Installation of Aroma System, the instructional steps are: 1. Raise hood to fully open position. 2. Raise head area of contour bed to lift and prop stand into position. NOTE: The brass nebulizers and plastic drawtubes have been preinstalled at factory. Figure 4.3.1 Preliminary Installation of Aroma System. 3. Carefully remove the four O-rings, glass expansion chambers, and 1/3 oz. aroma bottles from their packaging. 4. Remove brass nebulizer from mounting clip and turn over to view bottom (tube and filter are attached to bottom). 5. Install one O-ring inside bottom of nebulizer by sliding it over the draw tube and filter. Seat O-ring securely around brass protrusion. (This is not a snug fit.) 6. Remove lid from appropriate aroma bottle and place under brass nebulizer. Turn nebulizer over bottle slowly (so O-ring doesn’t fall off) and screw bottle in snugly. NOTE: Tube and filter are now inside aroma oil bottle. Alpha Fuzion Sauna Body Pod 12 Section 5 Installation 7. Return nebulizer to appropriate mounting clip. 8. Position one expansion chamber over top of nebulizer and tighten by gently turning clockwise. Do not force into place. Glass chamber should position effortlessly. 9. Repeat for three remaining oils. 10. Lower the contour bed into position. Figure 4.3.2 Installation of Aroma System. WARNING: The glass expansion chambers should always be screwed in before you start using the Alpha Fuzion Sauna Body Pod. Failure to do so will cause spillage of essential oils. Only use Pure Essential Oils and Blends in your diffuser. Low-grade oils or “perfume essences” may clog the jets of the nebulizers and invalidate your warranty. Alpha Fuzion Sauna Body Pod 13 Section 5 Installation 5.3 Installing Bed It is recommended that at least two people perform this task. Instructional steps for installing the bed: 1. Open hood. 2. Remove bed. 3. Carefully remove the protective plastic from the bed. 4. Locate the electrical cords for the motors and heat pad. 5. Read the label on the electrical box cover for the location of the motors and heat pad outlets. 6. Set six (6) balls in ball holes. 7. Stand at the opposite side of the bed facing each other. 8. Set bed gently on the six supporting balls. 9. Lift the head area of the bed and locate the bed prop. Lift the bed prop into position and lower bed onto it. 10. Plug the cords into the outlet according to the label while the bed prop is holding the bed up. 11. Make sure the vibration motors are not touching the aroma hoses or the electrical cords. 12. Lower bed back onto the six supporting balls. 13. Make sure all six balls remain in place for support. 5.4 Installing Supplied Accessories Instructional steps for installing Supplied Accessories: Installing Neck Drape: 1. Locate the velcro strip inside the hood of the Alpha Fuzion Sauna Body Pod above the neck opening. 2. Take the neck drape out of its bag. 3. Place the velcro end of the neck drape over the velcro strip inside the unit. 4. Apply pressure to the velcro strip. 5. Repeat Step 3 and Step 4 stated above for adjustments. Alpha Fuzion Sauna Body Pod 14 Section 5 Installation Installing Pillows: Note: The pillows are used as part of the protective packaging materials. 1. 2. Take pillows out of plastic bags. Set pillows at the end of Alpha Fuzion Sauna Body Pod in the head area. Please note that the pillows are used for different purposes, as follows: • The higher portion of the Low Profile Pillow may support the neck. • The Adjustable Profile Pillow may be used under the contour head pillow as a height adjustment to enhance the view of the display screen. • The Therapy Pillow is designed for shorter persons to support hips and buttocks. Place this cushion at the curvature of the contour bed to prevent body movement. Installing Headphones: 1. Locate the headphone jack next to speakers. 2. Plug the headphones into jack. 3. When the headphones are plugged in, the built-in stereo speakers will not play. 4. Hang headphones on hook mounted on the Alpha Fuzion Sauna Body Pod base under headrest area when not in use. 5.5 Connecting the Power Cord For safety, please check the operating voltage before proceeding to install the power. It must be identical with that of your local power outlet. The voltage tag is located on the vertical wall between the bed and the pillow area. Figure 4.7.1 Connection of Power Cord Alpha Fuzion Sauna Body Pod 15 Section 5 Installation Instructions for Connection of Power Cord as shown in Figure 4.7.1 Connection of Power Cord. 1. Locate the power cord in the component box and plug the square connector into the base. Tighten the screw in the plug-retaining ring to hold plug firmly in place. 2. Plug the power cord into wall outlet. 3. Turn on the ON/OFF switch located on the electrical box cover, under the bed, by pressing minus (“-”) side of switch. 4. Confirm that the power is turned ON by checking that the LCD (Liquid Crystal Display) screen is on and the colored lights on the CONTROL PANEL are working. 5. Please refer to the TROUBLESHOOTING section if any problems arise. 5.6 Radio and Television Reception This equipment generates and uses radio frequency energy. If not installed and used properly in strict accordance with the manufacturer’s instructions, it may cause interference with radio and television reception. It has been type tested and found to comply with the limits for a Class B computing device in accordance with the specifications in Subpart J of Part 15 of FCC Rules, which are designed to provide reasonable protection against such interference in a residential installation. However, there is no guarantee that interference will not occur. If this equipment does cause interference to radio or television reception, which can be determined by turning the equipment OFF and ON, the user is encouraged to try to correct the interference by: • • • Adjust the receiving antenna of any other electrical inference. Move Alpha Fuzion Sauna Body Pod to different location. Plug the equipment into a different outlet. If necessary, the user should consult the dealer or an experienced radio or television technician for additional suggestions. The user may find the following booklet prepared by the Federal Communications Commission helpful: "How to identify and Resolve Radio-TV Interference Problems" US Government Printing Office Washington, DC, 20402 Stock Number: 004-000-00345-4. Alpha Fuzion Sauna Body Pod 16 Section 6 Operation SECTION 6: OPERATION 6.1 Operational Safety CAUTION: If you have health concerns, such as asthma, problems with breathing, heart disease, high blood pressure or if you are pregnant, please consult your physician prior to using this machine. Children under the age of 16 must have adult guidance. Recommended session duration is 90 minutes or less. To avoid high temperature contact, use wooden handle above hand ports to open and close device. Please remove any metal items, such as rings and jewelry, before beginning a session. Please read “Owner‟s Manual” before using. Heating Pad burns will result from improper use. Do not submerge bed in water. Do not use sharp objects, which will penetrate the bed. Never remove hood unless it is being disassembled. If you have any questions, concerns and/or problems, please contact your nearest dealer immediately. For operational safety, strictly observe the following instructions: Do not sit or place heavy objects on top of the hood. Do not sit on the contour bed when hood is opened half way. 6.2 Preparation for Operation Check to see if the power cord plug is plugged into the appropriate electrical wall outlet. Please refer to Installing Bed in SETUP for further details. Open the hood fully, then partially raise the contour bed to locate the ON/OFF switch under the contour bed. Turn ON by pressing minus (“-”) side of the ON/OFF switch on the electrical box cover. Please refer to Installing Bed in SETUP for further details. Sit on the contour bed. Then move slowly to recline. Grasp handle inside the hood and gradually pull it downward. Adjust the velcro closure of the neck drape to cover opening completely. Push hands through the hand ports to operate the Control Panel Keys. Alpha Fuzion Sauna Body Pod 17 Section 6 Operation 6.3 Initialization After you have turned on the Alpha Fuzion Sauna Body Pod, the Welcome Screen appears on the Liquid Crystal Display (LCD) for the initialization process for the computer program software as follows: WELCOME TO THE ALPHA You will experience natural energy, fitness and relaxation > (press) PROGRAM OPTIONS to select a program Please be aware that the actual displays may vary due to the regional default settings of the software and hardware version issued at purchase date. Control Keys: The following are the Control keys on the Control Panel for initializing each session with an explanation of each key. The initialization process described in the Setup key will need to be performed before beginning the first session, changing a previous session, or after power is removed. ENTER START INCREASE DECREASE STOP SETUP PROGRAM OPTIONS Please refer to the Control keys and Feature keys on the Control Panel as shown in Figure 5.3.1 Control Panel. For additional information, please refer to the adjustable features selection in the Preprogrammed Session and the Feature keys in the Personalized Session. When the keys are active, the red Light Emitting Diodes (LED) on the key plate will be lit. The numbers on the Control Panel correspond with the list of Control keys and Feature keys as follows: Alpha Fuzion Sauna Body Pod 18 Section 6 Operation Figure 6.3.1 Control Panel. 1. 2. 3. 4. 5. 6. 7. 8. Setup Light Aroma Stop Options Wake up Timer Enter 9. 10. 11. 12. 13. 14. 15. 16. Increase Temp Face Air Disengaged Decrease Vibration Bed Heat * (Asterisk) Enter Start, Increase, Decrease, Asterisk and Stop Keys The ENTER START, INCREASE, DECREASE, ASTERISK, and STOP keys control the modification of the Preprogrammed Session and Personalized Session. Press the PROGRAM OPTIONS key to select a session. Scroll through the PROGRAM OPTIONS by using the INCREASE or DECREASE keys and press the ENTER START key for session to begin. In any session, the INCREASE or DECREASE Keys may change a program, the ASTERISK Key may turn ON or OFF the aromatic pump, and the ENTER START key continues to modify a session. For additional information, please refer to an explanation of the adjustable features selection in the Preprogrammed Session and the Feature keys in the Personalized Session. Alpha Fuzion Sauna Body Pod 19 Section 6 Operation Stop Key To pause a session, press the STOP key once, which will result in the message below. Press the ENTER START key to resume. End a session by pressing the STOP key twice. After pressing the STOP key twice, the Welcome Screen will appear. Your SESSION has been halted > (press) ENTER to resume > (press) STOP to end your session Setup Key By pressing the SETUP key on the Control Panel, it will produce the Setup display as follows: ALPHA Copyright 2013, NuAge Beauty Minneapolis, Minnesota, USA > (press) SETUP to continue By pressing the SETUP key again, the next screen will display the appropriate system of optional measure of temperature type of F or C and unit of weight of pounds (LB) or kilograms (KG). Press the INCREASE Key to change the temperature and the DECREASE key to select appropriate unit of weight. Please refer to TEMPERATURE key and YOUR WEIGHT key in the Feature keys, and Degree of Temperature for additional information. When power is turned off, all programs will default to the original regional settings. When power remains ON, the temperature and weight units of measure remain same for that session. To advance to the next screen, press the SETUP key. > (press) INCREASE to select C/ F… F > (press) INCREASE to select KG/LB…LB > (press) SETUP to continue The Firmware Part Number may be programmed in the version of the software and hardware purchased. Again, to advance to the next screen press the SETUP key. Alpha Fuzion Sauna Body Pod 20 Section 6 Operation ALPHA Firmware Part Number 410059A > (press) SETUP to continue The Identification Numbers may not be programmed in the version of the software and hardware purchased. If the PC ID and MICRO CONTROLLER ID NUMBERS are shown on the screen, (depending on the hardware and software issued at purchase date) enter these numbers and return to the OWNER’S RECORD in IMPORTANT DOCUMENTATION of Appendix B. PC IDENTIFICATION NUMBER: PRESS SET-UP TO CONTINUE COPYRIGHT 2013, NUAGE BEAUTY MPLS, MINNESOTA, USA Next, press the SETUP key again to advance to the next screen, which will identify the version of software installed. BACKLIT DISPLAY VERSION SOFTWARE REV 1.07/NSA; HARDWARE REV 7. (press) SETUP KEY to continue From this point on, press the SETUP key and the Welcome Screen will appear as follows: WELCOME TO THE ALPHA FUZION SAUNA BODY POD > (press) PROGRAM OPTIONS to select a program. Alpha Fuzion Sauna Body Pod 21 Section 6 Operation Program Options Key Press the PROGRAM OPTIONS key to preview the available sessions. Under the PROGRAM OPTIONS, the Preprogrammed Sessions are listed including the Customized Session. Scroll through the PROGRAM OPTIONS by using the INCREASE or DECREASE keys and press the ENTER START key to select either a Preprogrammed Session or Customized Session. When the keys are active, the red LED (Light Emitting Diodes) on the key plate will be lit. Any session may be changed initially or during a session, but how the modification is done differs in function. There are three basic methods for operating the Alpha Fuzion Sauna Body Pod after choosing either a Preprogrammed Session or Customized Session from Program Options key: The Preprogrammed Session is already preset for a session. There are thirteen different programs to choose from including a Customized Session. For specific instructions see below. To program Customized Session, select from the following adjustable features: aroma, heat, etc. Any program may become a Personalized Session. The Preprogrammed Session and a Customized Session may be modified with the Feature keys. For additional information on a program, please refer to an explanation of the adjustable features selection in the Preprogrammed Session and the Feature keys in the Personalized Session. 6.4 Preprogrammed Session Press the PROGRAM OPTIONS key to display Session Menu. Scroll through Preprogrammed Session by pressing the DECREASE or INCREASE key. Press the ENTER START key to begin selected session. The available Preprogrammed Sessions are as follows: Preprogrammed Sessions: 1. 2. 3. 4. 5. 6. 7. RELAXATION PRE/POST MASSAGE PREHEAT HIGH HEAT SLEEP SKIN CARE RELIEF Alpha Fuzion Sauna Body Pod 8. CLEANSING 9. BODY WRAP 10. MEDITATION 11. ENERGY 12. WELLNESS 13. CUSTOMIZED 22 Section 6 Operation The Preprogrammed Sessions from the above list are shown on the Liquid Crystal Display (LCD) for each session as follows: 1. RELAXATION SESSION RELAXATION Temp…110 F (or 43 C) Aroma…R Wake-up…0:02 Time Remaining: 0:30 Face Air…3 Heat Pad…ON Vibration…UPPER 2. PRE/POST MASSAGE SESSION PRE/POST MASSAGE Temp…135 F (or 55 C) Aroma…F Wake-up…0:02 Time Remaining: 0:15 Face Air…4 Heat Pad…ON Vibration…BOTH 3. PREHEAT SESSION PREHEAT Temp…125 F (or 50 C) Aroma…R Wake-up…0:02 Time Remaining: 0:30 Face Air…OFF Heat Pad…OFF Vibration…OFF 4. HIGH HEAT SESSION HIGH HEAT Temp…180 F (or 82 C) Aroma…FC Wake-up…0:02 Alpha Fuzion Sauna Body Pod Time Remaining: 0:45 Face Air…6 Heat Pad…ON Vibration…BOTH 23 Section 6 Operation 5. SLEEP SESSION SLEEP Temp…95 F (35 C) Aroma…R Wake-up…0:02 Time Remaining: 1:00 Face Air…2 Heat Pad…OFF Vibration…LOWER 6. SKIN CARE SESSION SKIN CARE Temp…145 F (or 62 C) Aroma…FC Wake-up…0:02 Time Remaining: 0:30 Face Air…4 Heat Pad…ON Vibration…BOTH 7. RELIEF SESSION RELIEF Temp…140 F (or 60 C) Aroma…FR Wake-up…0:02 Time Remaining: 0:30 Face Air…5 Heat Pad…ON Vibration…BOTH 8. CLEANSING SESSION CLEANSING Temp…155 F (or 68 C) Aroma…FC Wake-up…0:02 Time Remaining: 0:30 Face Air…4 Heat Pad…ON Vibration…BOTH 9. BODY WRAP SESSION BODY WRAP Temp…125 F (or 58 C) Aroma…C Wake-up…0:02 Alpha Fuzion Sauna Body Pod Time Remaining: 0:30 Face Air…3 Heat Pad…OFF Vibration…BOTH 24 Section 6 Operation 10. MEDITATION SESSION MEDITATION Temp…100 F (or 40 C) Aroma…VR Wake-up…0:02 Time Remaining: 0:30 Face Air…2 Heat Pad…OFF Vibration…LOWER 11. ENERGY SESSION ENERGY Temp…150 F (or 65 C) Aroma…V Wake-up…0:02 Time Remaining: 0:30 Face Air…4 Heat Pad…ON Vibration…BOTH 12. WELLNESS SESSION WELLNESS Temp...155 F (or 68 C) Aroma…F Wake-up…0:02 Time Remaining: 0:30 Face Air…3 Heat Pad…ON Vibration…BOTH 13. CUSTOMIZED SESSION - DEFAULT CUSTOMIZED Temp…OFF F ( C) Aroma… Wake-up…0:00 Time Remaining: 0:00 Face Air…OFF Heat Pad…OFF Vibration…OFF The Customized Session is listed as a Preprogrammed Session under the PROGRAM OPTIONS key. After preview of PROGRAM OPTION key, select the Customized Session by pressing the DECREASE key, and then press the ENTER START key. To program your Customized Session, press the INCREASE or DECREASE keys and the ENTER START key to continue. To demonstrate the selection of adjustable features in the Customized Session, the next series of frames are shown in bold: Alpha Fuzion Sauna Body Pod 25 Section 6 Operation CUSTOMIZED SESSION - SESSION TIME Session Time…0:30 > (press) INCREASE or DECREASE to change > (press) ENTER to continue CUSTOMIZED SESSION - TEMPERATURE Temperature…100 F (or 40 C) > (press) INCREASE or DECREASE to change > (press) ENTER to continue CUSTOMIZED SESSION - VIBRATION PATTERN Vibration Pattern…BOTH > (press) INCREASE or DECREASE to change > (press) ENTER to continue CUSTOMIZED SESSION - FACE AIR Face Air Level…7 > (press) INCREASE or DECREASE to change > (press) ENTER to continue CUSTOMIZED SESSION - HEAT PAD Heat Pad…ON > (press) INCREASE or DECREASE to change > (press) ENTER to continue Alpha Fuzion Sauna Body Pod 26 Section 6 Operation CUSTOMIZED SESSION - SOUND ALARM OF WAKE-UP CHIME Sound alarm when 0:02 (minutes) remain > (press) INCREASE or DECREASE to change > (press) ENTER to continue CUSTOMIZED SESSION - AROMA AROMA VIGOR OFF FITNESS ON RELAXATION ON CLEANSING OFF > (press) INCREASE or DECREASE to select > (press) * to select ON/OFF > (press) ENTER to continue CUSTOMIZED SESSION - SUMMARY CUSTOMIZED Temp…100 F (40 C) Aroma…FR Wake-up…0:02 Time Remaining: 0:30 Face Air…7 Heat Pad…ON Vibration…BOTH 6.5 Personalized Session Personalization of any session may modify a program for individual preference. To modify a Preprogrammed Session, use the Feature keys. Feature Keys: TEMPERATURE AROMA WAKE-UP CHIME SESSION TIMER – Time Remaining in a Session FACE AIR HEAT PAD VIBRATION MASSAGE Alpha Fuzion Sauna Body Pod 27 Section 6 Operation YOUR WEIGHT ION/UV – Ultraviolet Sanitary Lamp Temperature Key for the Dry Heat Sauna Press the TEMPERATURE key to select sauna temperature from a minimum of 80 F (26 C) to a maximum of 180 F (82 C). For the desired benefits of the dry heat sauna, press the INCREASE or DECREASE keys to select the actual temperature desired and the ENTER START key to set. The warm airflow of the dry heat sauna is gently directed over the body and controlled by the patented computer microchip technology. TEMPERATURE KEY Temperature…110 F (or 43 C) > (press) INCREASE or DECREASE to change > (press) ENTER to continue Aroma Key The Alpha‟s unique aroma system allows a choice of four Pure Essential Oils. You can choose between the following aromas: Vigor Pure Essential Oil Blend Fitness Essential Oil Blend Relaxation Pure Essential Oil Blend Cleanse Pure Essential Oil Blend They are arranged in four independent nebulizers, from one through four, respectively. Press the AROMA key to change scent(s). Press the INCREASE or DECREASE keys to select the desired scent(s). The ASTERISK key will turn ON or OFF the pump and the ENTER START key will continue to modify the session. AROMA KEY AROMA VIGOR OFF FITNESS OFF RELAXATION ON CLEANSING OFF Alpha Fuzion Sauna Body Pod > (press) INCREASE or DECREASE to select > (press) * to select ON/OFF > (press) ENTER to continue 28 Section 6 Operation NOTE: Based on the frequency of use or on a daily basis, check the Pure Essential Oil Blends and refill as needed. As needed, or at least every sixty days, replace the plastic drawtube and filter. Please refer to SERVICE for instructions on replacing and refilling aromatic scents. Wake-Up Chime Key The WAKE-UP key allows for a pre-designated number of minutes before session end to sound the wake-up chime. In the Preprogrammed Session, it is already preset to sound the wake-up chime at two minutes prior to session end. Press the INCREASE or DECREASE keys to program the time from a minimum of 2 minutes to a maximum of 15 minutes to sound the wakeup chime. WAKE-UP CHIME KEY Sound alarm when 0:02 remains > (press) INCREASE or DECREASE to change > (press) ENTER to continue Session Timer Key for Time Remaining in a Session The SESSION TIMER key may be used to set or adjust the duration in minutes for each session. An actual session may vary in length from a minimum of 15 minutes to a maximum of 3 hours. An average session is approximately thirty minutes. The recommended maximum session is ninety minutes. Press the INCREASE or DECREASE key to change the TIME REMAINING from a minimum of 15 minutes to a maximum of 3 hours. The TIME REMAINING in a session appears on the display screen after the SESSION TIMER key has been set. Press the INCREASE or DECREASE keys to select the time and the ENTER START key to continue to modify selection. The SESSION TIME feature is displayed prior to the TIME REMAINING in the Preprogrammed Session, such as in the Relaxation Session as shown in the next two frames. SESSION TIMER KEY – One of Two Frames Session Time…0:30 > (press) INCREASE or DECREASE to change > (press) ENTER to continue Alpha Fuzion Sauna Body Pod 29 Section 6 Operation RELAXATION – TIME REMAINING – Second Frame RELAXATION Temp….110 F (or 43 C) Aroma…R Wake-up…0:02 Time Remaining: 0:30 Face Air…3 Heat Pad…ON Vibration…UPPER Face Air Key for Cool Airflow The FACE AIR key controls the cool airflow directed toward the face. There are seven levels, ranging from a low level (one) to a high level (seven), or OFF if preferred. Press the INCREASE or DECREASE key to change the level of cool, purified airflow. When the face air feature is turned ON, the cool airflow refreshes the client‟s face and head. FACE AIR KEY Face Air Level…3 > (press) INCREASE or DECREASE to change > (press) ENTER to continue Heat Pad Key for Back and Thigh The HEAT PAD key allows for comfortable, targeted warmth to be either ON or OFF the back and thighs. Press the INCREASE or DECREASE key to select the heat pad to be ON or OFF, and then press the ENTER START key to continue. HEAT PAD KEY Heat Pad…ON > (press) INCREASE or DECREASE to change > (press) ENTER to continue Vibration Massage Key The VIBRATION MASSAGE key may allow for vibration as follows: UPPER – vibrates upper back LOWER – vibrates lower back BOTH – vibrates upper and lower back Alpha Fuzion Sauna Body Pod 30 Section 6 Operation Press the VIBRATION MASSAGE key to select VIBRATION. Press the INCREASE or DECREASE keys to select the specific area(s) of massage desired and the ENTER START key to continue. NOTE: It is important to note that two controls, located on the right side in the middle of the massage bed, may be used to control the intensity and wave pattern of vibration from within the unit. VIBRATION MASSAGE KEY Vibration Pattern…UPPER > (press) INCREASE or DECREASE to change > (press) ENTER to continue WARNING: Do not look directly at the ultraviolet lamp (located underneath the contour bed) for more than fifteen seconds as it may damage your eyes. ION/UV KEY PREPROGRAMMED SESSION The ION/UV is ON CUSTOMIZED SESSION The ION/UV is OFF 6.6 Ending the Session To pause a session, press the STOP key once. Press the ENTER key to resume. End a session by pressing the STOP key twice. After pressing the STOP key twice, the Welcome Screen displays for the next session. The session ends automatically when the TIME REMAINING on the session display screen from the SESSION TIME has expired. When the time expires from the session end, the End Screen is displayed followed by the Welcome Screen as shown in the next two frames. Alpha Fuzion Sauna Body Pod 31 Section 6 Operation END SCREEN YOUR SESSION HAS ENDED. THANK YOU FOR USING ALPHA FUZION SAUNA BODY POD. ENJOY YOUR NATURAL FITNESS. PLEASE LIFT COVER AND EXIT. WELCOME SCREEN WELCOME TO THE ALPHA FUZION SAUNA BODY POD > (press) PROGRAM OPTIONS to select a program. After ending a session, the Welcome Screen will display. Press the PROGRAM OPTIONS to select a new program session if there are no initialization changes from the previous session. If there are initialization changes, please refer to 6.3 Initialization. 6.7 Turning Off Your Alpha Fuzion Sauna Body Pod Alpha Fuzion Sauna Body Pod may be left ON („-„) after a session and the „WELCOME‟ screen will be constantly displayed. If desired, Alpha Fuzion Sauna Body Pod may be turned OFF („0‟), using the main breaker switch, which is located on the deck of the unit, under the bed, near the bed power receptacles. If the Alpha Fuzion Sauna Body Pod unit will not be used for an extended period (two weeks or more), it is recommended that the unit be disconnected from the wall outlet AFTER the heating unit cools down and the main breaker switch (under the bed) is turned to OFF. Likewise, unplug the unit before performing maintenance or repairs. NOTE: Always turn the main breaker switch (under the bed) to OFF prior to disconnecting plug from wall power. Alpha Fuzion Sauna Body Pod 32 Section 7 Service CHAPTER 7: SERVICE 7.1 Removing the Hood • Precautions: 1. Disconnect Alpha Fuzion Sauna Body Pod from the power source before beginning this procedure. 2. Two people are needed to perform this procedure. • Tools Required: Adjustable or ½ inch wrench • Preliminary Procedures: 1. Release Electrical Connectors: Raise the hood fully. Rotate the threaded rings counterclockwise at the bottom of each of the electrical connectors, located on either side of the main hinge/strut assembly. Next, pull the connectors up and away from fixed receptacles of base chassis as shown in Figure 7.1.1 Releasing Electrical Connectors. 2. Removal of Flange Bolt: By using wrench at ½” setting, remove the center bolt from hood hinge plate and set aside as shown in Figure 7.1.2 Removing Flange Bolt. Figure 7.1.1 Releasing Electrical Connectors. Figure 7.1.2 Removing Flange Bolt. Alpha Fuzion Sauna Body Pod 33 Section 7 • Service Hood Removal Steps: 1. With two people on opposite sides of the system, grasp the bottom edge of the hood to lift as shown in Figure 7.1.3 Removing the Hood. To evenly distribute the weight of the hood, place hands approximately 15 - 20 inches from each end of the hood. 2. The hood should be gently lifted upward and forward until the hinge slide pins are free as shown in Figure 7.2.1 Hood Alignment of Pins and Hinge Assembly. If the slide pins resist movement, gently rock the hood side-to-side while lifting upward. 3. When slide pins are disengaged, carefully tilt hood forward and lift off the hinge. Move hood to a safe area. 4. Carefully place edge of the hood on a carpeted or padded floor as shown in Figure 7.1.4 The Hood. If service is to be performed inside the hood, place exterior shell curved side down on a foam-cushioned surface. Figure 7.1.3 Removing the Hood. Figure 7.1.4 The Hood. Alpha Fuzion Sauna Body Pod 34 Section 7 Service 7.2 Replacing the Hood onto Base Chassis • Precautions: 1. Disconnect from power source before beginning this procedure. 2. Two people are needed to perform this procedure. • Tools Required: Adjustable or ½ inch wrench • Hood Replacement: 1. With two people on opposite sides of the hood, grasp the lower edge to lift as shown in Figure 7.1.3 Removing the Hood. To evenly distribute the weight of the hood, place hands approximately 15 - 20 inches from each end of the hood. 2. Carefully lift hood over base chassis and align hinge plate with hinge assembly as shown in Figure 7.1.3 Removing the Hood. 3. Align hinge plate pins with slots on hinge assembly. Gently allow hood to slide down onto hinge assembly until the hood pins are fully seated in slots as shown in Figure 7.2.1 Hood Alignment of Pins and Hinge Assembly. Hole in hinge assembly above struts should align with hole in hinge plate. Insert black flange bolt, but do not tighten completely (95%). 4. Slowly lower the hood down to meet the base and verify proper alignment and seating of the hood/base contact area. 5. Slowly raise hood to full open position, maintaining alignment. Tighten flange bolt. 6. Re-connect harnesses from hood to base as shown in Figure 7.1.1 Releasing Electrical Connectors. • Align grooves/slots on each half of the electrical connector, so they fit together. • When electrical connector halves are seated, tighten threaded rings at bottom of the connectors in a clockwise rotation until locked. Figure 7.2.1 Hood Alignment of Pins and Hinge Assembly. Alpha Fuzion Sauna Body Pod 35 Section 7 Service 7.3 Replacing the Heater Assembly • Precautions: 1. Turn OFF main power switch located under contour bed on top of power box, or disconnect from main power source. 2. Two people are needed to perform parts of this procedure (hood removal). One person can perform heater exchange. • Tools Required: Adjustable wrench, ½ inch wrench, medium/large Phillips Head screwdriver • Preliminary Procedures: 1. Prepare work area: Place a large, soft, cushioned pad on the floor or an elevated platform next to the Alpha Fuzion Sauna Body Pod for easier work access. 2. Remove hood: (See Section 7.1) Place exterior shell of the hood curved side down on cushioned pad to prevent damage as shown in Figure 7.3.1 Upside Down Hood Position. Figure 7.3.1 Upside Down Hood Position. • Removing the Heater Assembly: 1. To release heater assembly from hinge plate, use a Phillips Head screwdriver or screw gun to release the heater assembly bracket by removing the center screws and nuts positioned on each side of the strut opening. Place hand inside opening, beneath bolt position, to catch nut as it releases. CAUTION: Do not drop screws or nuts into heater channel of hood. Alpha Fuzion Sauna Body Pod 36 Section 7 Service 2. Removal of hinge plate Remove the five screws and nuts that attach the hinge plate to the hood as shown in 7.3.2 Removing Hinge Plate. Account for all five screws and nuts. CAUTION: Do not drop any parts into the heat duct or the heater. Remove hinge plate and set aside. 3. Removal of heater air intake screen On the side through which the heater harness cable protrudes, straighten black tabs on the screen inside heater cavity, and remove screen as shown in Figure 7.3.3 Removing Heater Intake Screens. 4. Removal of heater harness Loosen strain relief bushing by turning plastic nut from the outside of the duct with a wrench as shown in Figure 7.3.4 Removing Heater Harness. NOTE: It may be necessary to use a second wrench to hold nut inside the heater cavity, as well. Grasp the harness and slide out of notch in screen opening. Push harness and connector through the vacant screen opening and into the heat duct. Next, pull the harness up through the hinge plate opening. 5. Removal of heater Grasp heater brackets and pull heater assembly straight up toward you, tilting slightly to prevent any damage to the wires, connectors, or terminals located on either side of heater as shown in Figure 7.3.5 Removing Heater. 2 Center Screw 3 4 Figure 7.3.2 Removing Hinge Plate. Alpha Fuzion Sauna Body Pod Figure 7.3.3 Removing Heater Intake Screens. 37 Section 7 Figure 7.3.4 Removing Heater Harness. • Service Figure 7.3.5 Removing Heater. Heater Replacement Steps: 1. Grasp the replacement heater by the heater brackets as shown in Figure 7.3.5 Removing Heater. 2. Carefully lower the heater into the hood duct by tilting slightly to the side when inserting as shown in Figure 7.3.5 Removing Heater. As heater is inserted into hood duct, use caution to prevent pinched or chafed heater wires. Position insulating tape surrounding heater assembly appropriately to cover the duct opening. 3. Pull harness and connector through screen opening. Reconnect strain relief bushing nut and heater screen reversing Step 4 in Removing the Heater Assembly immediately above. 4. Replace the hinge plate and secure with five screws and nuts. 5. Re-attach heater assembly bracket to center holes of hinge plate using appropriate screws and nuts. 6. Re-attach hood to base chassis (See Section 7.2). 7. Re-attach heater connection to base. Confirm proper alignment of connector holes and twist lock in place. 7.4 Adjusting Counter-Balance Cylinders Struts • Precautions: 1. Turn OFF main power switch located under contour bed on top of power box or disconnect Alpha Fuzion Sauna Body Pod from power source before beginning this procedure. 2. Two people are needed to perform portions of this procedure (hood removal and attachment). • Tools Required: Two wrenches with ½ inch capability Alpha Fuzion Sauna Body Pod 38 Section 7 Service • Preliminary Procedures: Remove hood (See Section 7.1) per instructions above and carefully set aside by placing edge of the hood on a carpeted or padded floor as shown in Figure 7.3.1 Upside Down Hood Position. • Strut Adjustment: 1. Due to a variety of factors, it may be necessary to adjust the position of the struts to make the hood drop faster or more slowly. 2. The struts are adjusted by repositioning the pin bolt on the upper hinge assembly. As shown in Figure 7.4.1 Pin Bolt on Upper Hinge Assembly. The factory generally sets the position of the pin bolt at hole number six. 3. Use the wrenches to loosen the nut on the pin bolt, as shown in Figure 7.6.1 Removing Strut Pin Bolt and Nylon Spacers on Upper Hinge Assembly, and remove the bolt, grasping the spacers and washers so they do not fall through lower hinge opening into base of Alpha Fuzion Sauna Body Pod. Note the position of the spacers and washers surrounding the struts, for use in reinstallation. Figure 7.4.1 Pin Bolt on Upper Hinge Assembly. Alpha Fuzion Sauna Body Pod 39 Section 7 Service 8 5 9 1 6 2 7 3 4 Figure 7.4.2 Nine Holes on Pin Bolt of Upper Hinge Assembly. 4. If hood closes hard or drops fast: Relocate the pin bolt on the upper hinge assembly to adjust speed of movement of the hood. The placement of the pin bolt into hole number three or four slows the downward movement of the hood slightly. Hole number two is maximum adjustment location to reduce drop speed as shown in Figure 7.4.2 Nine Holes on Pin Bolt of Upper Hinge Assembly. 5. If hood drops slowly or rises when in operation: Adjust the pin bolt on the upper hinge assembly to hole number eight or nine for the hood to drop faster. Holes five and nine may be used to increase the lowering speed to maximum. CAUTION: users. Hood dropping too fast may damage equipment or injure 6. Select the numbered hole for the pin bolt position to create desired effect and reattach struts and pin bolt to upper hinge assembly. Be careful to position the spacers and washers correctly as shown in Figure 7.6.1 Removing Strut Pin Bolt and Nylon Spacers on Upper Hinge Assembly. NOTE: Prior to strut installation, be certain that the cylinder is attached to the upper hinge assembly and the piston is attached to the lower hinge assembly. 7. Struts are expected to lose from three to five percent of their original pressure annually. Adjustments may be required periodically to ensure that the hood opens and closes smoothly. NOTE: When the strut adjustments fail to control hood movement effectively, replace struts immediately. 7.5 Replacing Counter-Balance Cylinders Struts • Precautions: 1. Turn OFF main power switch located under contour bed on top of power box or disconnect Alpha Fuzion Sauna Body Pod from power source before beginning this procedure. Alpha Fuzion Sauna Body Pod 40 Section 7 Service 2. Two people are needed to perform portions of this procedure (hood removal and attachment). • Tools Required: Two wrenches with ½ inch capability, medium/large Phillips Head screwdriver • Preliminary Procedures: 1. Remove hood (See Section 7.1) and carefully set aside by placing edge of the hood on a carpeted or padded floor as shown in 7.3.1 Upside Down Hood Position. 2. Use wrenches for the pin bolt, washer, and nylon spacer removal as shown in Figure 7.6.1 Removing Strut Pin Bolt and Nylon Spacers on Upper Hinge Assembly. 3. Remove five screws from the hinge plate attached to the base chassis as shown in Figure 7.6.2 Removing Hinge Plate Screws on Base Chassis. 4. Carefully lift the hinge assembly up and out of the base chassis and set on prepared work surface. • Strut Removal Steps: 1. Use wrenches to remove pin bolt and nylon spacers from lower hinge area. Note the position of the spacers and washers for proper replacement. 2. Remove the struts. • Strut Replacement Steps: 1. Replacement struts are connected to the lower hinge mount by using pin bolt and nylon spacers as shown in Figure 7.5.1 Lower End Hinge Location. Pin bolt should be firm, but not too tight, to allow struts to pivot on bolt. NOTE: Prior to strut installation, be certain that the cylinder is attached to the upper hinge mount and the piston is attached to the lower hinge mount. 2. Reposition hinge assembly on base chassis. Affix to surface using the five screws and nuts previously removed as shown in Figure 7.6.2 Removing Hinge Plate Screws on Base Chassis. 3. Struts are reconnected to the upper hinge mount by using the pin bolt, nylon spacers and washer from removal procedure as shown in Figures 7.6.1 Removing Strut Pin Bolt and Nylon Spacers on Upper Hinge Assembly and Figure 7.6.3 Pin Bolt Position on Hinge Assembly. 4. Re-assemble unit (See Section 7.2). Alpha Fuzion Sauna Body Pod 41 Section 7 Service Figure 7.5.1 Lower End Hinge Location. 7.6 Replacing Hinge Assembly • Precautions: 1. Turn OFF main power switch located under contour bed on top of power box or disconnect Alpha Fuzion Sauna Body Pod from power source before beginning this procedure. 2. Two people are needed to perform portions of this procedure (hood removal and attachment). • Tools Required: Two wrenches with ½ inch capability, medium/large Phillips Head screwdriver • Preliminary Procedures: Remove hood (See Section 7.1) and carefully set aside by placing edge of the hood on a carpeted or padded floor as shown in 7.3.1 Upside down Hood Position. • Hinge Removal Steps: 1. Use the wrenches to loosen the nut on the pin bolt as shown in Figure 7.6.1 Removing Strut Pin Bolt and Nylon Spacers on Upper Hinge Assembly. Remove the bolt, grasping the spacers and washers so they do not fall through lower hinge opening into base of Alpha Fuzion Sauna Body Pod. Note the position of the washers, spacers, and mounting hole of pin bolt for re-installation. Alpha Fuzion Sauna Body Pod 42 Section 7 Service 2. Open hinge and remove five screws from the hinge plate attached to the base chassis as shown in Figure 7.6.2 Removing Hinge Plate Screws on Base Chassis. Grasp each nut as it releases from the screw to avoid dropping into cavity of base. 3. Carefully lift the hinge assembly up and out of the base chassis and set on prepared work surface. 4. Use the wrenches to remove pin bolt and nylon spacers from the lower hinge mount. Remove the struts. Note the hole in which the pin bolt was originally mounted. Figure 7.6.1 Removing Strut Pin Bolt and Nylon Spacers on Upper Hinge Assembly. Figure 7.6.2 Removing Hinge Plate Screws on Base Chassis. • Hinge Replacement Steps: (Keep cylinder up, piston down as shown in Figure 7.6.2 Removing Hinge Plate Screws on Base Chassis) 1. Connect the struts to new lower hinge mount (See Section 7.5). NOTE: It is important to use the same mounting hole as the previous hinge. 2. Position new hinge assembly on base chassis and affix to surface using the five screws and nuts previously removed as shown in Figure 7.6.1 Removing Strut Pin Bolt and Nylon Spacers on Upper Hinge Assembly. Alpha Fuzion Sauna Body Pod 43 Section 7 Service 3. Reconnect the struts to the upper hinge mount with the pin bolt, spacers and washer (See Section 7.5). NOTE: It is important use the same mounting hole as the previous hinge. Figure 7.6.3 Pin Bolt Position on Hinge Assembly. 7.7 Removing Bed Assembly from Base Chassis • Precautions: 1. Turn OFF main power switch located under contour bed on top of power box or disconnect Alpha Fuzion Sauna Body Pod from power source before beginning this procedure. 2. Two people may be needed to perform this procedure, as bed may be awkward to handle alone. • Bed Assembly Removal Steps: 1. Raise hood to a fully opened position. 2. Raise shoulder end of the contour bed. Locate black bed prop stand in base of Alpha Fuzion Sauna Body Pod under contour bed. Raise bed enough to allow bed prop stand to be lifted and inserted into brackets attached to under side of contour bed (near upper vibration motor as shown in Figure 7.7.1 Bed Stand Bracket). Lower the bed onto bed prop stand as shown in Figure 7.7.2 Bed Assembly from Base Chassis. Alpha Fuzion Sauna Body Pod 44 Section 7 Service Bracket Figure 7.7.1 Bed Stand Bracket. 3. Disconnect the electrical cords from the three receptacles on the power box as shown in Figure 7.7.3 Disconnect Electrical Cords from Power Box Cover. Figure 7.7.2 Bed Assembly from Base Chassis. 4. Carefully lift contour bed to disengage bed prop stand from brackets. Lower bed prop stand and continue to lift bed until it is free of the base chassis. The contour bed weighs approximately 60 pounds or 15 kilograms. NOTE: It is suggested to Alpha Fuzion Sauna Body Pod 45 Section 7 Service have two people lift the contour bed from the base chassis, as it may be awkward to handle alone. Figure 7.7.3 Disconnect Electrical Cords from Power Box Cover. 7.8 Replacing Bed Assembly Onto Base Chassis • Precautions: 1. Turn OFF main power switch located under contour bed on top of power box or disconnect Alpha Fuzion Sauna Body Pod from power source before beginning this procedure. 2. Two people may be needed to perform this procedure. Bed weighs approximately 60 lbs (27 kg), and may be awkward to handle alone. • Bed Assembly Replacement Steps: 1. Raise hood until it reaches fully-open position. 2. Set six (6) bed support balls in recesses in base chassis. 3. Gently set contour bed onto the six (6) bed support balls (balls should fit into bed support cups on underside of bed). 4. Raise the head area of the bed. Locate black bed prop stand. Raise bed to allow bed prop stand to be raised up and inserted into brackets (near upper vibration motor) underneath bed as shown in Figure 7.7.1 Bed Stand Bracket. 5. Lower contour bed onto bed prop stand as shown in Figure 7.7.2 Bed Assembly from Base Chassis. Alpha Fuzion Sauna Body Pod 46 Section 7 Service 6. While the bed prop stand is holding the bed up, plug electrical cords into electrical outlets in accordance with the label on the electrical box cover as shown in Figure 7.7.3 Disconnect Electrical Cords from Power Box Cover. 7. Carefully lift head end of contoured bed to disengage prop stand. While continuing to hold the head end of the bed up, remove bed prop stand from brackets and lower to base. 8. Slowly lower the contour bed back onto the six (6) bed support balls making sure the balls remain in place for support. 9. Make sure the vibration motors do not come in contact with electrical cords or aroma hoses. 7.9 Replacing Vibration Motor(s) • Precautions: Turn OFF main power switch located under contour bed on top of power box or disconnect Alpha Fuzion Sauna Body Pod from power source before beginning this procedure. • Tools/Supplies Required: Phillips Head screwdriver, ½ inch socket wrench, Heat gun (or other heat source), Loctite Removable Threadlocker (service removable) • Preliminary Steps: 1. Remove bed assembly from lower chassis (See Section 7.7). 2. Place bed upside down on soft, clean work surface. 3. Remove screws from motor guard. Set screws and guard aside. • Vibration Motor Removal Steps: 1. Remove screws from wire supports connected to cord of vibration motor(s) being replaced as shown in Figure 7.9.1 Screws on Wire Connected to Vibration Motor. 2. Release bed support cup(s) housing the vibration control rheostats by removing mounting screws as shown in Figure 7.9.2 Bed Support Cup. 3. Pull black control knob to remove, exposing retaining ring which mounts the control to the bed support. 4. Use wire cutter or similar tool to cut the retaining ring, releasing the vibration control. Remove the control from bed support cup as shown in Figure 7.9.3 Removing Rheostat Control. 5. Use wrench to remove mounting bolts of vibration motor as shown in Figure 7.9.4 Removing Flange Bolt Attaching Motors. NOTE: Motor mounting bolts have been secured with Loctite thread locking compound. Slight heating of these bolts may aid in loosening them for removal. 6. Remove all strain reliefs from the vibration assembly power cord for use in new assembly installation. Alpha Fuzion Sauna Body Pod 47 Section 7 Service Figure 7.9.1 Screws on Wire Connected to Vibration Motors. Figure 7.9.3 Removing Rheostat Control. Figure 7.9.2 Bed Support Cup. Figure 7.9.4 Removing Flange Bolt Attaching Motors. Vibration Motor Replacement Steps: 1. Install replacement vibration motor(s) using two (2) flange bolts. Apply Loctite threadlocker or similar product to threads prior to insertion. 2. Reinstall rheostats inside bed support cup(s). Affix rheostat to support cup with new retaining ring. Attach black knob. 3. Affix bed support cup to bottom of bed with four Phillips Head screws. 4. Reinstall strain relief on vibrator motor power cord and affix to bottom of bed in appropriate pattern with screws. 5. Re-install motor guards. Check to be sure motor can spin freely within motor guard. Alpha Fuzion Sauna Body Pod 48 Section 7 Service 7.10 Replacing Main Power Supply Box • Precautions: Be sure unit is disconnected from power source before beginning this procedure. • Tools/Supplies Required: Phillips Head screwdriver, 12” x 12” foam pad (or heavy cloth) • Preliminary Steps: 1. Raise hood until it reaches fully-open position. 2. Remove bed assembly from base chassis (See Section 7.7). 3. Set 12” x 12” foam pad (or heavy cloth) alongside main power supply box as shown in Figure 7.10.2 Disconnecting Transformer from Power Box. • Main Power Supply Box Removal Steps: 1. Release main power supply box cover by removing four screws which hold cover and power supply box to base chassis. 2. Remove cover plate and set aside. 3. Gently lift power supply box as show in Figure 7.10.1 Main Power Supply Box out of recess in base chassis and set carefully on foam pad (or heavy cloth) to prevent scratching base chassis. Be careful not to pinch or chafe wires on outside of power supply box as box is lifted out of the base chassis. Lift front end first, per picture. Figure 7.10.1 Main Power Supply Box. Alpha Fuzion Sauna Body Pod 49 Section 7 Service 4. Disconnect wires from input power receptacle (lug type connectors) inside of base chassis. Note the wire position for reconnection as shown in Figure 7.10.2 Input Power Lug Type Connector. Figure 7.10.2 Input Power Lug Type Connector. 5. Disconnect cable to transformer in base chassis (black/red connector) as shown in Figure 7.10.3 Disconnecting Transformer from Power Box. 6. Disconnect four aroma pump plugs and sanitary lamp plug from the side of the power supply box as shown in Figure 7.10.4 Aroma Pump Wiring Connection. 7. Disconnect two pin and six pin connectors from the outside rear of the power supply box as shown in Figure 7.10.5 Connector Diagram. 8. Disconnect cable wires to heater harness (5 lug-type connectors: 2 brown, 2 blue, 1 green/yellow). 9. Use Phillips Head screwdriver to remove screws holding the ballast transformer for the sanitary lamp as shown in Figure 7.14.1 Male & Female Terminals of Sanitary Lamp Ballast. 10. Remove main power supply box from base chassis and set aside. Alpha Fuzion Sauna Body Pod 50 Section 7 Service Figure 7.10.3 Disconnecting Transformer from Power Box. • Main Power Supply Box Replacement Steps: 1. Set replacement power supply box on foam pad (or heavy cloth) on base chassis. 2. Connect aroma pumps as follows: • Pump one: upper left outlet. • Pump two: lower left outlet. • Pump three: upper right outlet. • Pump four: lower right outlet. 3. Connect sanitary lamp to single receptacle on box as shown in Figure 7.10.4 Aroma Pump Wiring Connection. 4. Connect ballast transformer (still connected to wiring harness) to side of box. 5. Connect two-pin and six-pin connectors to power supply box as shown in Figure 7.10.5 Connector Diagram. 6. Connect black/red connector to transformer in cavity of base. 7. Connect heater output wires (5) to heater harness (blue to blue, brown to brown, ground to ground). 8. Connect input power connection: • Green wire attaches to ground terminal. • Blue wire attaches to top right terminal. • Brown wire attaches to top left terminal. 9. Carefully place power box in base chassis. (Be careful not to pinch or chafe wires.) 10. Replace cover and install screws. CAUTION: Overtightening may cause cracking in chassis. Alpha Fuzion Sauna Body Pod 51 Section 7 Figure 7.10.4 Aroma Pump Wiring Connection. Service Figure 7.10.5 Connector Diagram. 7.11 Replacing Aroma Pump(s) • Precautions: After you have determined which pump(s), if any, need to be replaced, be sure to turn unit OFF at main switch or disconnect from power source before going any further with this procedure. • Tools/Supplies Required: Phillips Head screwdriver, 12” x 12” foam pad (or heavy cloth), Pliers or vise grip pliers • Preliminary Steps: Remove main power box (See Section 7.11). • Replacing Aroma Pumps: 1. Raise bed prop stand out of the way. Remove the four screws that affix the aroma pump cover to the base chassis. Also remove the two screws which affix the sanitary lamp assembly to the pump cover. Remove the aroma oil bottles from brass Nebulizer. 2. Carefully tilt pump cover sideways and place on soft towel on lower base area, exposing aroma pumps as shown in Figure 7.11.1 Removing Aroma Assembly Strain Relief. Alpha Fuzion Sauna Body Pod 52 Section 7 Service Figure 7.11.1 Removing Aroma Assembly Strain Relief. • Aroma Pump(s) Removal Steps: 1. See pumps 1, 2, 3 and 4 as shown in Figure 7.11.2 Aroma Pump(s) Location. 2. Once you have determined which pump(s) need to be removed, disconnect the air flow by gently pulling and twisting at the same time. Then remove the two screws affixing the pump to the pump cover. 3. Next, remove the black strain relief bushing from the center of the aroma pump well by pulling up on the bushing at the same time as you squeeze the bushing (with pliers) at the center as shown in Figure 7.11.1 Removing Aroma Assembly Strain Relief. 4. Cut the cable tie around pump wire harness. 5. Disconnect plug(s) from power box corresponding to pump(s) you are replacing as shown in Figure 7.11.3 Pump Plug Location and in accordance with the illustration shown in Figure 7.10.4 Aroma Pump Wiring Connection. Remove corresponding cord(s) from strain relief, pull plug and cord through opening in plug well and remove old pump. • Aroma Pump(s) Replacement Steps: Reverse the steps outlined above to install the new aroma pump(s). Alpha Fuzion Sauna Body Pod 53 Section 7 Service 2 1 4 3 Figure 7.11.2 Aroma Pump(s) Location. 1 3 2 4 Figure 7.11.3 Pump Plug Location. Alpha Fuzion Sauna Body Pod 54 Section 7 Service 7.12 Replacing Aroma Oil Bottles • Precaution: Be sure unit is turned OFF at main switch (on main power supply box cover) before proceeding. • Preliminary Steps: 1. Raise hood to fully-open position. 2. Raise head end of the contour bed and rest on prop stand as shown in Figure 7.7.2 Bed Assembly from Base Chassis. For units without prop stand, remove contour bed (See Section 7.7). • Aroma Oil Bottle Removal Steps: 1. Remove brass nebulizer with attached glass oil bottle from black metal clip attached to aroma system cover 2. Carefully unscrew oil bottle from brass nebulizer and set aside. • Aroma Oil Bottle Replacement Steps: 1. Remove cap from new oil bottle and use to replace the bottle just removed. NOTE: Be careful to use the same exclusive oil blend. 2. Screw aroma bottle into lower threads of brass nebulizer. NOTE: Be certain rubber O-ring is in place between bottle and nebulizer. 7.13 Removing / Replacing / Cleaning Brass Aroma Nebulizer(s) • Precaution: Be sure unit is turned OFF at main switch (on main power supply box cover) before proceeding. • Preliminary Steps: 1. Raise hood to fully-open position. 2. Raise head end of the contour bed and rest on prop stand as shown in Figure 7.7.2 Bed Assembly from Base Chassis. For units without prop stand, remove contour bed (See Section 7.7). • Aroma Brass Nebulizer Removal Steps: 1. Remove brass nebulizer with attached glass oil bottle from black metal clip attached to aroma system cover. 2. Disconnect plastic air flow tube from brass nebulizer. 3. Carefully unscrew oil bottle from brass nebulizer and set aside. • Aroma Nebulizer Replacement Steps: Alpha Fuzion Sauna Body Pod 55 Section 7 • Service 1. Replace brass nebulizer with replacement part as shown in Figure 7.11.3 Pump Plug Location (See No.3). 2. Reverse the process outlined above to reinstall the aroma system. Aroma System Maintenance / Cleaning Steps: 1. Remove brass nebulizer. Remove plastic tube nebulizer. 2. Clean nebulizer thoroughly by soaking in alcohol, dish soap solution, or special cleaners for brass or metal. NOTE: Be sure to remove and set aside black rubber O-ring. 3. Allow nebulizer to dry completely before reconnecting and using again. NOTE: Do not forget to reconnect the rubber O-ring. 4. Replace plastic “dip tube” (attached to white filter) to nebulizer. NOTE: If you suspect that a nebulizer jet is plugged, before or after following the steps outlined above, try blocking the upper jets of the brass nebulizer with your finger with the aroma pump turned on for approximately 15 seconds. This will cause air to flow backward in the inner oil jet and clean the inside jet. 7.14 Replacing Sanitary Lamp Assembly • Precautions: Be sure to turn unit OFF at main switch or disconnect from power source before going any further with this procedure. • Tools/Supplies Required: Phillips Head screwdriver, 12” x 12” foam pad (or heavy cloth), Pliers or vise grips • Preliminary Steps: 1. Remove main power box (See Section 7.9). 2. Remove the four screws that affix the aroma pump cover to the base chassis. Also remove the two screws which affix the sanitary lamp assembly to the pump cover. Disconnect the tubes from the aroma nebulizers. Remove the nebulizers from the pump cover by lifting from their position. Gently set them down inside base of chassis. 3. Slide the four aroma tubes back through hole into pump area, until only 1½” (34cm) protrude through pump cover. 4. Carefully tilt pump cover forward and place on soft towel on lower base area, exposing aroma pumps. Alpha Fuzion Sauna Body Pod 56 Section 7 Service Figure 7.14.1 Male & Female Terminals of Sanitary Lamp Ballast. • Sanitary Lamp Assembly Removal Steps: 1. Remove large strain relief from center of aroma pump well as shown in Figure 7.11.1 Removing Aroma Assembly Strain Relief. 2. Unplug lamp assembly electrical plug from main power supply box. Unplug the female terminals on the electrical cord from the male terminals on the cord from ballast as shown in Figure 7.11.3 Pump Plug Location and Figure 7.14.1 Male & Female Terminals of Sanitary Lamp Ballast. 3. Pull lamp assembly electrical cord through hole in aroma pump well. • Sanitary Lamp Assembly Replacement Steps: To install the replacement sanitary lamp assembly, reverse the removal steps outlined above. Figure 7.14.2 Removing Sanitary Lamp Assembly. Alpha Fuzion Sauna Body Pod 57 Section 7 Service 7.15 Replacing Sanitary Lamp Ballast • Precautions: Be sure to turn unit OFF at main switch AND disconnect from power source before going any further with this procedure. • Tools/Supplies Required: Phillips Head screwdriver, 12” x 12” foam pad (or heavy cloth) • Preliminary Steps: Remove main power supply box (See Section 7.10). • Ballast Removal/Replacement Steps: 1. Locate ballast on exterior of Power Box as shown in Figure 7.14.1 Male & Female Terminals of Sanitary Lamp Ballast. 2. Disconnect two female terminals of lamp assembly from ballast as shown in Figure 7.14.1 Male & Female Terminals of Sanitary Lamp Ballast. 3. Loosen two Phillips Head screws attaching ballast to power box and remove ballast. 4. Replace ballast by inserting the new ballast and reversing the procedures above. 7.16 Replacing Face Air Vent(s) • Tools Required: Small flat blade screwdriver, small Phillips Head screwdriver • Face Air Vent(s) Replacement Steps: Note: The louver insert of the face air vent is generally the only part which needs to be replaced. To replace the louver insert, follow these steps: 1. Using screwdriver, carefully pry louver insert away from the mounting ring as shown in Figure 7.16.1 Removing Face Air Vent(s). 2. Replace louver insert with new part and snap into place. Note: If mounting ring appears to be damaged, follow these steps: 1. 2. 3. 4. Remove louver insert as described above. Remove two (2) screws from face of mounting ring. Remove mounting ring. Replace with new part and reverse above steps to install. Alpha Fuzion Sauna Body Pod 58 Section 7 Service Figure 7.16.1 Removing Face Air Vent(s). 7.17 Replacing Face Fan Assembly • Precautions: Be sure to turn unit OFF at main switch AND disconnect from power source before going any further with this procedure. • Tools Required: Phillips Head screwdriver • Face Fan Assembly Removal Steps: 1. Remove four (4) screws affixing grill and face fan assembly to unit as shown in Figure 7.17.2 Face Fan Grill. 2. Carefully pull face fan assembly out of unit as shown in Figure 7.17.4 Inserting/Removing Face Fan Assembly. 3. Separate fan from harness at two pin connector as shown in Figure 7.17.3 Pin Connector to Face Fan Motor. Alpha Fuzion Sauna Body Pod 59 Section 7 Service Figure 7.17.1 Face Fan Assembly. Figure 7.17.2 Face Fan Grill. Figure 7.17.3 Pin Connector to Face Fan Motor. Alpha Fuzion Sauna Body Pod 60 Section 7 Service Figure 7.17.4 Inserting/Removing Face Fan Assembly. • Face Fan Replacement Steps: Install replacement face fan by reversing the steps set forth above. NOTE: Use flat blade screwdriver to hold grill and fan in place while inserting mounting screws. 7.18 Replacing Speaker(s) • Precautions: Be sure to turn unit OFF at main switch and disconnect from power source before going any further with this procedure. • Tools Required: Phillips Head screwdriver • Speaker Removal Steps: 1. Remove four screws holding speaker(s) and grills in place. Remove speaker grill(s) and speaker(s) as shown in Figure 7.18.1 Removing Speaker(s) Cover and Figure 7.18.2 Removing Speaker(s). 2. Disconnect speaker wires by firmly, but carefully, pulling female connectors. • Speaker Replacement Steps: Install replacement speaker(s) by reversing the steps set forth above. Alpha Fuzion Sauna Body Pod 61 Section 7 Service Figure 7.18.1 Removing Speaker(s) Cover. Figure 7.18.2 Removing Speaker(s). 7.19 Replacing Display/Control Panel • Precautions: Be sure to turn unit OFF at main switch and disconnect from power source before going any further with this procedure. • Tools Required: Phillips Head screwdriver • PC Display/Control Panel Removal Steps: 1. Remove three screws holding PC display/control panel in place. 2. Gently pull top half of panel toward you as shown in Figure 7.19.1 Removing the Display / Control Panel. 3. Next, pull bottom edge of panel out toward you and continue pulling panel out until it is in the position shown in Figure 7.19.2 Back of the Display/Control Panel. Alpha Fuzion Sauna Body Pod 62 Section 7 Service 4. Carefully remove the connections for the antenna, radio, data harness, and heat sensor from the control panel as shown in Figure 7.19.3 Harness Location from Display/Control Panel. a. From the PC board: 1. Data harness (five pin connector) 2. Heat sensor (four pin connector-red) b. From the radio 1. Input power 2. Antenna • Display/Control Panel Replacement Steps: Install replacement Display/Control Panel by reversing the process outlined above. Refer to Figure 7.19.3 Harness Location from Display/Control Panel to ensure that wiring harnesses are installed properly. NOTE: Install connectors correctly, with locking tabs in proper position (where applicable). Improper connector installation will result in damage to Alpha Fuzion Sauna Body Pod™. CAUTION: 1. Plugs for wiring harnesses have locking tabs; extreme care must be taken in releasing and inserting connectors. 2. The plug for the heat sensor harness must be installed properly or damage to the heat sensor will occur. 3. Be certain wires/harnesses are not crimped during re-installation. 4. Install display panel screws in a rotational pattern, only partially tightening each one until all are snug. DO NOT OVERTIGHTEN. Figure 7.19.1 Removing the Display/Control Panel. Alpha Fuzion Sauna Body Pod 63 Section 7 Service Figure 7.19.2 Back of the Display/Control Panel. Figure 7.19.3 Harness Location from Display/Control Panel. 7.20 Replacing Radio/CD Player • Precautions: Be sure to turn unit OFF at main switch or disconnect from power source before going any further with this procedure. • Tools/Supplies Required: Phillips Head screwdriver, DIN mount release tools/hook plates as shown in Radio Owner’s Manual, small/medium flat blade screwdriver • Preliminary Steps: Remove display panel assembly (See Section 7.19) Alpha Fuzion Sauna Body Pod 64 Section 7 • Service Stereo Radio Removal Steps: * Refer to stereo radio information sheet included with this manual. 1. Carefully unsnap and remove outer plate to expose mounting bracket. 2. Insert hook plates into sides of mounting bracket along the sides of the radio. NOTE: This area is very tight, and the hook plates will not insert easily. Please be patient, yet firm. The hook plates are used to depress the small spring clips on the sides of the radio for release from the bracket as shown in Radio Owner’s Manual. If hook plates fail to work properly, the small flat blade screwdriver may be used to depress the spring clips, working side to side, while gentle pressure is applied to the rear of the stereo radio. WARNING: Pressing too hard may damage the display panel and/or mounting bracket. 3. When spring clips are successfully depressed and released, assert pressure on rear of radio unit and remove through front of display panel. • Stereo Radio Replacement Steps 1. Check mounting bracket for firm connections/crimps to display panel of upper and lower mounting tabs. 2. Remove lock screw (if applicable) from top of radio unit. 3. Be certain that stereo radio is in proper vertical position (right-side up), and insert rear of radio into mounting bracket through front of display panel. When fully inserted, the spring clips will ‘click’, indicating connection. 4. Snap escutcheon plate (frame) in place around perimeter of stereo radio. 5. Make proper connections of wiring harnesses A. To PC board 1. Power input (5 pin connector) 2. Heat sensor (4 pin connector-red) B. To stereo radio 1. Power input 2. Antenna 6. Install display panel in Alpha Fuzion Sauna Body Pod (See Section 7.19) 7.21 Replacing Program Chip • Precautions: Be sure to turn unit OFF at main switch or disconnect from power source before going any further with this procedure. • Tools Required: Phillips Head screwdriver, small/medium flat blade screwdriver or similar tool Alpha Fuzion Sauna Body Pod 65 Section 7 Service • Preliminary Procedures: Remove display panel (See Section 7.19). • Program Chip Removal Steps: 1. Use head pillow, or a similar item, covered with soft cloth as work table to set Display Panel/Radio Assembly on during this procedure as shown in Figure 7.19.2 Back of the Display/Control Panel. 2. Remove three screws holding Display/Control Panel in place. 3. Gently pull top half of panel toward you as shown in Figure 7.19.1 Removing the Display/Control Panel. 4. Next, pull bottom edge of panel out toward you and continue pulling panel out until it is in the position shown in Figure 7.19.2 Back of the Display/Control Panel. 5. Using a flat tool (such as a screwdriver or flat wooden stick), carefully lift or pry program chip (identified by tool shown in Figure 7.21.1 Removal Program Chip) upward until all prongs disengage from the mount on the PC board. CAUTION: DO NOT USE EXCESSIVE FORCE. EXCESSIVE FORCE MAY DAMAGE CHIP AND/OR RECEPTACLE. • Program Chip Replacement Steps: 1. Note that one end of the replacement chip has a small notch in the center. NOTE: Be certain the chip is installed with this notch toward the TOP of the control panel. If chip is installed upside down, the LCD display will be blank when power is turned ON, and the chip will be destroyed. 2. Replace the chip very carefully, making sure that all prongs fit into their proper receptacles and that none of the prongs are bent or touching each other. 3. When you are certain that all prongs of the replacement chip are in their proper receptacles, carefully press the chip firmly into place with finger or thumb and continue pressing until chip is properly seated in PC board receptacle. 4. Carefully reinstall display/control panel into position in the hood of the Alpha Fuzion Sauna Body Pod, being cautious not to pinch or crimp any harness wires (See Section 7.20). 5. Replace three screws in appropriate holes in display/control panel and tighten gently but firmly in a rotational pattern until all screws are snug. DO NOT OVERTIGHTEN. 6. Plug unit into power supply, turn unit ON at main switch and test display/control panel for proper function. Note that if the LCD display is blank, program chip was likely installed upside down. Alpha Fuzion Sauna Body Pod 66 Section 7 Service Figure 7.21.1 Removal Program Chip. 7.22 Replacing the Heat Sensor Assembly • Precautions: Be sure to turn unit OFF at main switch or disconnect from power source before going any further with this procedure. • Tools/Supplies Required: Phillips Head screwdriver, two adjustable Pliers or wrenches, ruler or tape measure Heat Sensor connector is attached to rear of display panel. Sensing unit is located inside sauna chamber (above wooden handle, near air shower holes), as shown in Figure 7.19.3 Harness Location from Display/Control Panel and Figure 7.22.1 Heat Sensor Location Inside the Hood. Carefully measure and write down the length that the sensing unit extends through the mounting nut into the sauna chamber. When the replacement sensor is installed, the sensor should initially extend the same distance into sauna chamber. Sensor may be moved further into chamber or closer to strain relief nut as determined by temperature test. Alpha Fuzion Sauna Body Pod 67 Section 7 Service Figure 7.22.1 Heat Sensor Location inside the Hood. • Preliminary Procedures: Remove display/control panel (See Section 7.19). • Heat Sensor Removal Steps: 1. Note the manner in which the connector of the heat sensor cable fits into the control panel receptacle so that you can insert the replacement cable correctly (locking tabs). 2. Disconnect heat sensor assembly cable from control panel (4 pin connector), as shown in Figure 7.19.3 Harness Location from Display/Control Panel. 3. Carefully loosen Strain Relief Collar as shown in Figure 7.22.1 Heat sensor Location Inside the Hood. Loosen by hand or with wrench, if necessary, until sensor can be removed from Strain Relief nut by pulling back into display panel area. • Heat Sensor Assembly Replacement Steps: 1. Carefully insert replacement heat sensor cable through hole in hood into sauna chamber. Adjust location of sensor so it extends the same distance into the chamber as sensor assembly just removed (refer to earlier measurement). This measurement should be approximately ½ - ¾ inch or 1.25 - 1.90 cm. 2. Tighten strain relief nut by hand until snug. 3. Insert 4 pin connector from the heat sensor cable into the control panel receptacle as discussed above. NOTE: The locking clip must lock on the plastic slide on the control panel plug. If the connector is installed incorrectly, the heat sensor will be damaged. 4. Replace display/control panel (See Section 7.19), plug unit into power supply and turn unit ON at main switch. Alpha Fuzion Sauna Body Pod 68 Section 7 Service 5. Seal unit at neck area with a towel. Test operation of new sensor by selecting and starting a program to make sure the operating temperature (red LED on left of display panel) reaches and maintains designated program temperature on LCD screen. NOTE: Alpha Fuzion Sauna Body Pod temperature can be calibrated using the following procedure: 6. If the Alpha Fuzion Sauna Body Pod Display Panel Temperature (red LED) indicates an actual chamber temperature that is higher than that determined by a separate temperature gauge or thermometer, loosen the strain relief collar and adjust heat sensor so it extends into the chamber LESS. If the opposite is true, CAREFULLY pull heat sensor so it extends into the chamber MORE (several mm.). 7.23 Replacing Wiring Harnesses • Precautions: Be sure unit is turned OFF at main switch AND disconnected from power source before proceeding any further. • Tools/Supplies required: Phillips Head screwdriver, wire cutter, small needlenose/pointed Pliers, wire puller (7’-8’ or 1-2.5 m. length of stiff wire with a small, tight, hook bent into one end) NOTE: This is a four step process: 1. Remove and Install the Power Box Extension Cable 2. Remove and Install the Lower Harness (Base Chassis) 3. Remove and Install the Headphone PC Board Extension Cable 4. Remove and Install the Upper Chassis Data Harness • Power Box Extension Cable Removal as shown in Figure 7.23.1 Power Box Extension Cable 1. Remove main power box (See Section 7.10). 2. Disconnect extension cable from main power box by disengaging the five lug-type connectors (two blue, two brown, and one green/yellow) from power box cable. 3. Disengage heater cable connector from mounted end of extension cable, located on base chassis at the left of the main hinge assembly, by turning outer ring of connector fitting counter-clockwise, and pull apart. 4. Remove four screws using Phillips Head screwdriver. Lift connector away from base chassis and pull harness through hole. Alpha Fuzion Sauna Body Pod 69 Section 7 Service Figure 7.23.1 Power Box Extension Cable. Figure 7.23.2 Removing Power Box Extension Cable. Figure 7.23.3 Inserting Extension Cable in base Chassis. • Power Box Extension Cable Installation: Reverse removal steps as explained in 1-4 above. 1. Insert end of cable with five lug connectors through hole in base chassis to left of main hinge assembly as shown in Figure 7.23.3 Inserting Extension Cable in Base Chassis. 2. Connect to main power box cable at lug connectors (blue/blue, brown/brown, ground/ground). 3. Attach connector to base chassis with four Phillips screws. Alpha Fuzion Sauna Body Pod 70 Section 7 Service 4. Replace and secure main power box (See Section 7.10) and contour bed assembly (See Section 7.7). 5. Reconnect heater to base connector. NOTE: When reconnecting heater cable, be certain insertion is correct and connector is locked tightly. • Lower Harness (Base Chassis) Removal Steps: 1. Remove main power box (See Section 7.10). 2. Disconnect six pin connector of lower harness from rear of power box as shown in Figure 7.10.5 Connector Diagram. 3. Disconnect two spade type terminals from lower harness to telephone/computer jack as shown in Figure 7.23.4 Position of Telephone/Computer Jack inside base chassis chamber, near power input receptacle. 4. Remove face fan assembly from its position at front of base chassis (See Section 7.17). 5. Remove stereo speaker and grill from left side (headphone jack side) of base 6. Remove headphone jack. Place fingers through vacated opening of left speaker and behind small PC board of headphone jack to support this part as shown in Figure 7.23.10 Removing/Installing Headphone Jack. Loosen mounting ring of headphone jack using a needle-nose pliers or similar tool. When ring is off, remove headphone jack PC board and pull through speaker opening, bringing sixpin connector with it. 7. Disengage six-pin connector segments. Drop the connector from lower harness down into face fan area. NOTE: Prevent headphone jack harness and six-pin connector from dropping back into base. Save for reconnection. 8. Locate other end of harness, which is attached to the data connector mounted on the deck of the base chassis area, to the right of the main hinge as shown in Figure 7.1.1 Releasing Electrical Connectors. Disengage lower harness by turning outer lock ring counterclockwise to release. Separate connector. 9. Remove four screws fastening lower harness to base chassis using a Phillips Head screwdriver. 10. Remove harness from base chassis by CAREFULLY pulling entire harness assembly out through 1” opening. Or, if harness is to be discarded, harness wires can be cut and portions removed from both ends of base chassis. CAUTION: Connectors may become lodged in narrow lower channel of base chassis when attempting to pull through during removal OR installation. Harness movement may need to be guided by hand to run through upper part of chassis cavity just under the surface of the deck to avoid getting caught in lower area. Alpha Fuzion Sauna Body Pod 71 Section 7 Service Figure 7.23.4 Position of Telephone / Computer Jack. Figure 7.23.5 Lower Harness Inserting. Figure 7.23.6 Lower Harness Terminals. Alpha Fuzion Sauna Body Pod 72 Section 7 • Service Lower Harness (Base Chassis) Installation: The lower harness is comprised of three main wires: two with six-pin connectors on the end (one long and one short) and one short wire with spade type terminals. These wires will be inserted separately during installation. 1. Insert six-pin connector of short wire through 1” hole in base chassis, and feed through until it can be grasped and pulled through into base cavity (power box area) as shown in Figure 7.23.5 Lower Harness Inserting. CAUTION: Leather work gloves are recommended when working inside tight spaces of unit’s cavity to avoid scratches from sharp fiberglass ends. 2. Next, insert six-pin connector of long wire, and feed through until it can be grasped and pulled through into base cavity (power box area). 3. Insert wire with spade connectors through hole, and feed along the other two wires until it can be grasped from within the cavity and pulled through. 4. With all three wires inserted and extended, affix black harness connector to base with four small Phillips screws as shown in Figure 7.23.6 Lower Harness Terminals. NOTE: Position black connector with largest (widest) notch on inner ring toward end of Alpha Fuzion Sauna Body Pod. 5. Insert wire with loop hook into cavity of base chassis through uncovered face fan opening as shown in Figure 7.23.7 Insetting Hook to the Face Fan Opening and feed hook end through to power box area. Figure 7.23.7 Inserting Hook to the Face Fan Opening. Alpha Fuzion Sauna Body Pod 73 Section 7 Service Figure 7.23.8 Lower Harness to Hook Loop. 6. Attach six-pin connector of long harness wire through hook loop as shown in Figure 7.23.9 Pulling Wires through Base Chassis. CAREFULLY pull this assembly through cavity of lower chassis toward face fan opening. Pull through upper area of cavity, just below deck surface, to avoid getting stuck in narrow lower area. DO NOT FORCE this procedure. If you become stuck, reverse the process to free the assembly and try again. When the hook with wire ends reaches the face fan opening, release the wire from the hook loop. Figure 7.23.9 Pulling Wires through Base Chassis. 7. Insert wire loop hook through left speaker opening down toward face fan opening. Alpha Fuzion Sauna Body Pod 74 Section 7 Service 8. Attach six-pin connector to loop and draw up through speaker opening. Detach connector from loop. 9. Make all connections as follows: • Six-pin connector of long wire to matching receptacle of headphone jack harness. • Six-pin connector of short wire to rear of main power box. • Two spade terminals to screws of telephone/computer jack in cavity of Lower Chassis Power Box area, near power input IEC plug as shown in Figure 7.23.7 Inserting Hook to the Face Fan Opening. 10. Affix black connector to base chassis in 1” hole to the right of main hinge using four screws and a Phillips Head screwdriver. DO NOT OVERTIGHTEN. 11. Connect Quick-Connect end of Display Harness (from hood) to base chassis connector, and turn outer ring to lock in place. 12. Reinstall: • Headphone jack with PC board • Left side speaker and grill • Face fan assembly • Main power box 13. Select and initiate any program to test Alpha Fuzion Sauna Body Pod for proper function. • Headphone PC Board Extension Cable Removal Steps: 1. Remove face fan assembly (See Section 7.17). 2. Remove stereo speakers and grills (See Section 7.18). 3. Disconnect wire connectors from speaker terminals (2 each). 4. Place fingers through vacated opening of left speaker and behind small PC board of headphone jack to support this part. Loosen mounting ring of headphone jack using a needle-nose pliers or similar tool. When ring is off, remove headphone jack PC board and pull out through speaker opening, pulling entire harness along with it. Disengage headphone harness six-pin connector from lower harness. Prevent lower harness six-pin connector from dropping down into base cavity. Save for reconnection. Take care not to lose small mounting ring. 5. Grasp headphone jack PC board and pull away from unit, pulling all speaker wires through left speaker opening. Alpha Fuzion Sauna Body Pod 75 Section 7 Service Figure 7.23.10 Removing / Installing Headphone Jack. • Head Phone PC Board Extension Cable Installation Steps: (Installation will be through face fan opening) 1. Insert wire loop hook through left speaker opening down toward face fan opening. 2. Carefully attach PC board, six pin connector, and short speaker wires in loop and pull up through speaker opening, leaving longer speaker wires dangling below. 3. Remove harness from wire loop. Install headphone jack with PC board into mounting hole, using small retaining ring. Tighten snugly with needle-nose pliers or similar tool. DO NOT OVERTIGHTEN as finish may crack. 4. Insert six-pin connector of headphone jack to connector of lower harness. 5. Connect speaker wires to left speaker. 6. Insert wire loop hook through right speaker opening down toward face fan opening. 7. Insert long speaker wires into loop and pull up through speaker opening. 8. Connect wires to right speaker. 9. Reinstall: a. Speakers and grills b. Face fan assembly 10. Turn power to ON and test Alpha Fuzion Sauna Body Pod and headphone for proper function. Alpha Fuzion Sauna Body Pod 76 Section 7 • Service Upper Chassis Data Harness Removal: 1. Remove display/control panel (See Session.7.19), carefully disengage cables from PC board and radio, and carefully set aside. 2. Remove Alpha Fuzion Sauna Body Pod hood section (See Session 7.1) and place upside-down on padded work surface (floor, cart, etc.). 3. Disengage main heater assembly from hinge plate (See Session 7.3, Step 1) and let it rest within the heat channel, giving access to the upper data harness. 4. Release black screen on data harness side by straightening tabs within heat chamber and remove. 5. Using wrench, release cable as shown in Figure 7.23.11 Removing/Installing Upper Harness Cable from heat chamber area by loosening plastic nut of strain relief and sliding out of slot. Push harness and connector through heater vent opening and pull through opening in hinge plate. 6. Remove upper chassis harness by grasping the black connector and CAREFULLY pulling entire assembly from its channel in the hood. Pull it through the opening vacated by the heater assembly (in the foot end of the hood) and out through the hinge plate. If cable is to be discarded, it can be cut and resulting segments can be pulled through each end of hood. Figure 7.23.11 Removing/Installing Upper Harness Cable. Alpha Fuzion Sauna Body Pod 77 Section 7 Service Figure 7.23.12 Inserting 8-10 foot Wire with Hook. • Upper Chassis Data Harness Installation 1. Insert 8-10 foot long wire with hook in the end through display/control panel opening as shown in Figure 7.23.12 Inserting 8-10 Foot Wire With Hook. Feed it through the hood channel to heater opening at hinge plate. NOTE: Heater must be removed for installation. 2. Attach new data harness connectors for display/control panel to hook end of wire as shown in Figure 7.23.13 Connecting Upper Harness to Hook Loop. CAREFULLY draw wire back through harness channel in hood (NOT THROUGH HEAT DUCT) as shown in Figure 7.23.14 Keeping Harness in Hood. DO NOT FORCE. If resistance is met, work wire around channel to find path of least resistance. 3. Draw display/control connectors through to area behind panel. Leave approximately 1 foot (30 cm) of the harness to make connection to panel as shown in Figure 7.23.15 Pulling Harness through Channel. Remove harness connections from hook. 4. Attach other end of data harness to hood at heater vent opening by sliding harness into slot as shown in Figure 7.23.11 Removing/Installing Upper Harness Cable. Tighten plastic nut of strain relief. 5. Reattach heater vent screen. 6. Reattach main heater assembly to hinge plate (See Section 7.3). 7. Replace hood onto Alpha Fuzion Sauna Body Pod base chassis (See Section 7.2). 8. Re-install display/control panel (See Section 7.14). 9. Reconnect upper data harness connector to base chassis. Assume proper connection by twisting locking connector in place. 10. Select and initiate any program to test Alpha Fuzion Sauna Body Pod for proper function. Alpha Fuzion Sauna Body Pod 78 Section 7 Service Figure 7.23.13 Connecting Upper Harness to Hook Loop. Figure 7.23.14 Keeping Harness in Hood. Figure 7.23.15 Pulling Harness through Channel. Alpha Fuzion Sauna Body Pod 79 Section 8 Troubleshooting SECTION 8: TROUBLESHOOTING 8.1 Troubleshooting The following ‘Quick Reference’ Troubleshooting Guide may assist in discovering and eliminating the cause of possible trouble in your Alpha Fuzion Sauna Body Pod. Before using the following checklist, please review SETUP and/or OPERATION procedures for resolving problems. If problems continue after going through the following ‘check points’, please refer to SERVICE, electrical schematics and diagrams, or contact your supplier for additional technical assistance. Table 8.1.1. Troubleshooting Guide. Problem Possible Cause Bad power connection No Electrical Power Remedy • • • Incorrect power source Blown fuse or circuit breaker Machine not turned ON Display Screen Lockup • • Secure power connections Please refer to Section I, No Power to wall receptacle and to the Alpha Fuzion. unit. Check connection of Data Harness from Hood to Base (located to the right of the Main Hinge). This is a common problem after installation re-assembly. Check for proper source voltage(220-240Volts). Check amperage of breaker controlling power outlet. Turn ON using main switch on top of Main Power Box, under contour bed. Electrical Noise / Interference • Reset by lifting up the bed, then press ON/OFF switch to OFF, then ON. Damaged Program Chip • Replace Program Chip. Alpha Fuzion Sauna Body Pod Cross Reference Please refer to Section III, No Power to Display Screen / Control Panel. 80 Section 8 Problem No power to Display Panel (stereo power OK) Noise from Vibration No Heat Troubleshooting Possible Cause Remedy • Replace fuse. 3 pin connector loose in main power box • Examine and tighten connector. Loose voltage regulator screw • Tighten screw on top of power box. F1 fuse blown Uneven surface Cross Reference Refer to Section III. • Move the Unit to a level padded or carpeted surface. Missing or mis-aligned balls • Make sure all balls are in place. • Tighten loose bolts on the Loose motor base of the motor assembly clockwise with an adjustable wrench. • Loosen and adjust guard to Motor cam hitting motor eliminate cam contact. guard Retighten guard. • Fasten the face panel down Loose face panel with a screwdriver. DO NOT OVERTIGHTEN. 1. Raise hood. Hood/base offset 2. Slightly loosen black bolt in center of main hinge plate. 3. Lower hood and center on base. 4. Slowly raise hood, maintaining centering. 5. Tighten black bolt in hinge plate. Loose power connector Alpha Fuzion Sauna Body Pod Secure the heater connector to the left of main hinge. Refer to Section II, Inoperative Heater. 81 Section 8 Troubleshooting Problem Possible Cause Heater Remains On Won't reset Damaged temperature sensor Power box relay Remedy • Reset by lifting up the bed, press ON/OFF switch to OFF and wait for 20 seconds before turning ON again. • Replace temperature sensor. Cross Reference Refer to Section II. Inoperative Heater. • Replace main power box. Inaccurate Mis-aligned or damaged • Re-position or replace temperature sensor Temperature temperature sensor. Reading (Red LED) I. No Power to Alpha Fuzion Sauna Body Pod A. Check plug connection into the electrical wall outlet. B. Check plug connection into receptacle at base of Alpha Fuzion Sauna Body Pod. C. Check proper power (220-240V) at wall receptacle. D. Check connection of the upper chassis data harness between hood and base to the right of main hinge/strut assembly. This is a common problem in re-assembly of the unit after installation. E. Check Circuit Breaker Fuse to wall receptacle. F. Use voltmeter to check for proper voltage at wall receptacle. G. Disconnect the unit from power. Remove Main Power Box (See Section 7.10). Check all Wiring Harness connections. Reinstall Power Box, reconnect power and check operation. H. Replace Main Power Box. I. Replace Control Panel. II. Inoperative Heater Note if all other systems are OK. A. Verify that the temperature indicated by red LED on left side of display panel approximates room temperature. Heater will not activate unless temperature setting of program (LCD display) is greater than actual temperature reading (red LED). If temperature reading is grossly inaccurate, heat sensor may require adjustment or replacement. If OK, move to next step. B. With power shut off, check connection of the heater harness from hood to base, located to the left of main hinge/strut assembly. Verify 5 pins in hood harness connector and 5 receptacles in base connector. Alpha Fuzion Sauna Body Pod 82 Section 8 C. D. Troubleshooting If connection is correct, turn power ON, select and start program. If heat does not come on in 1-2 minutes, go to next step. Verify power and viability of heater and circuit using volt/ohm meter. 1. Disconnect heater harness from base. CAUTION: High Voltage in this area. 2. Check across male pins number 9 & 14 of connector for reading of 26-27 Ohms to validate circuitry of heater core. If no Ohms reading, heater core may be bad. Replace main heater assembly. If Ohms OK, go to next step. 3. With heater still disconnected, select and start a program. CAUTION: High Voltage in this area. E. Carefully check for voltage across female pins of heater connector as follows: a. Pins 1 & 2 110/120 Volts b. Pins 9 & 14 220/240 Volts If either of these voltages is not present, go to next step. Disconnect unit from power and carefully remove main power box (See Section 7.10). 1. Check connector lugs (5) from main box to extension harness from main heater for good connection. NOTE: Verify good connection of all other connectors into main box, as well. Re-install main power box, being careful not pinch any wires. Re-power unit. 2. Select program and start, waiting 1-2 minutes for heater to initiate, or repeat voltage check (Step D-3 above). If heat or voltage still not present, consult supplier for additional technical assistance. III. No Power to Display Screen / Control Panel. A. Check plug connection into wall receptacle B. Check plug connection into receptacle in base of Alpha Fuzion Sauna Body Pod. C. Verify proper incoming power (220-240 Volts) from wall. D. Check breaker switch on main power box on deck of base, under the contour bed. Switch should be in ON position. E. Display panel out, but stereo still has power. Possible blown fuse in F1 position of Main Power Box: • WITH POWER DISCONNECTED, unplug and remove bed assembly from the unit. • Remove the four screws holding down the Main Power Box and cover plate (see service Chapter 7.10). • In the fuse block on the bottom of the power box, observe the fuse in the F1 position, which is on the end nearest the terminal block, next to the empty fuse space. (See diagram A-1 in this manual). If this fuse is blown, replace with a 4 Amp 250v Slow-blow type fuse. • If this does not resolve the problem, check additional items below. Alpha Fuzion Sauna Body Pod 83 Section 8 Troubleshooting F. Check for low voltage power loss as follows: 1. Check data harness connection between hood and base to right of Main Hinge/Strut Assembly as shown in Figure 7.10.5 Connector Diagram. Must be aligned correctly and twist-locked in place. 2. Check the low voltage regulator screw. This screw is near the main breaker switch on top of the main power box as shown in Appendix A Figure A–1 Power Supply Box, and is accessible by unplugging and removing the contour bed and the four screws holding the main box protective cover in place. When exposed, tighten screw firmly using small Phillips screwdriver. Do not over-tighten. 3. Low voltage power connector inside Main Box as shown in Appendix A Figure A–2 Power Supply Box PCB Layout. DANGER-High Voltage in this area. a. WITH POWER DISCONNECTED, check for firm contact of 3-pin connector to printed circuit board of main box. (This connection supplies all low voltage to the unit. Only two wires are in this connector.) Re-install main power box and re-assemble. Turn power ON. If display panel still will not light, re-check DATA HARNESS connection to right of main hinge. This connection is a common problem area, especially re-assembly following installation. G. If display is still inoperative: 1. Carefully remove three screws, holding display panel in place. 2. Carefully remove display assembly from hood. 3. Verify firm connection of five-pin power connector to PC board from upper harness. 4. Re-install display panel assembly. Take care to tighten screws partially, in a rotational pattern, until all are snug. Do not over-tighten. H. If display is still inoperative, consult supplier for additional technical assistance. IV. Intermittent Operation (runs a few minutes and quits, then resets) A. Check and tighten the small screw next to the main switch on top of the main power box. 1. Remove the 4 screws from the power box cover and use a small Phillips Head screwdriver to check this screw, which attaches to the 12V regulator underneath. 2. Tighten as needed, but DO NOT OVERTIGHTEN. V. Face Fan Inoperative A. Select and start a program and adjust face fan setting to level five. If no response, then refer to the following: 1. If fan frame is binding, slightly loosen screws in mounting of face fan. If no improvement, go to next step. 2. Disconnect Alpha Fuzion Sauna Body Pod from power source. 3. Remove main power box (See Section 7.10). 4. Check for appropriate contact of two-pin connector from face fan harness to rear side of power box, as shown in Figure 7.10.5 Connector Diagram. At Alpha Fuzion Sauna Body Pod 84 Section 8 Troubleshooting 5. 6. 7. 8. 9. this time, verify all other connectors into main box are firmly connected, as well. Re-install main box, re-power, initiate program and re-test fan. If no response, go to next step. Allow heater fan to shut down, if applicable, and turn main power to OFF. Remove face fan assembly (See Section 7.17). Check for appropriate connection of face fan to two-pin connector of wiring harness. Set fan on floor, and re-power Alpha Fuzion Sauna Body Pod. Initiate a program and check for fan operation. If no function, go to next step. Disconnect fan unit from harness and, using the voltmeter, check for 12-18 Volt power to face fan at the end of face fan harness. If power is present, replace face fan assembly. If power is not present, then use the voltmeter to carefully check for 12-18 Volts at two-pin receptacle in rear of power box. If power is present, replace face fan harness. NOTE: If power is not present, consult your supplier for further troubleshooting advice or replacement of main power box. VI. Aroma Pump(s) Inoperative A. Check Liquid Crystal Display (LCD) indicator on display screen CONTROL PANEL to verify appropriate aromatic pump is activated. B. With aroma pump(s) activated, disconnect direct air line to brass nebulizer to determine if air is being pumped. If no air is being pumped, then continue, as follows: 1. Disconnect Alpha Fuzion Sauna Body Pod from Power Source. 2. Remove main power box (See Section 7.10). CAUTION: High Voltage in this area. C. 3. Check aroma pump power cord connections to power box. 4. Re-power Alpha Fuzion Sauna Body Pod, then: a. Select and start a program. b. Manually activate ALL aroma pumps at display panel. c. Use voltmeter to check for 110 - 120 Volts at each aroma pump receptacle. 5. If power is present and connection is firm, but pump does not operate, replace aroma pump. If all aroma pumps fail to operate (cord connections to power box are firm, but no power to receptacles), check data harness connection to right of main hinge assembly again. NOTE: If still no power, consult your supplier for further troubleshooting advice or replacement of main power box. Alpha Fuzion Sauna Body Pod 85 Section 8 Troubleshooting VII. Aroma Oil not being Dispersed A. Check LCD indicator on display screen CONTROL PANEL to verify if aroma is ON. B. Check corresponding aroma nebulizer for actual amount of oils. Please keep aroma oil bottles completely full with Pure Essential Oils and Blends for optimal performance. C. Properly functioning nebulizer assembly should evidence mist of oil spraying from small orifice in top of brass nebulizer into glass chamber. If this is not present, got to next step. D. Check small plastic capillary tube connected to under-side of brass nebulizer. If loose, clogged or collapsed, replace. E. Verify appropriate connection of air hose to nebulizer and aroma pump. F. Verify air flow through hose to brass nebulizer. G. Verify O-ring present between oil bottle and brass nebulizer. H. Nebulizer orifice may be clogged. Clean as follows: 1. Remove nebulizer from system. 2. Rinse/soak in alcohol or hot soapy water to loosen clog. 3. Re-install nebulizer in system. 4. Activate pump, blocking small orifice on top with finger, using air to ‘backflush’ the nebulizer. 5. If air or oil still do not flow through orifice of nebulizer, insert a very, very fine wire into the orifice to penetrate the clog and clear a pathway. 6. If air and oil still do not flow through orifice into glass chamber when system is activated, replace brass nebulizer. VIII. Ultraviolet Sanitary Lamp Inoperative A. Select a program from display screen CONTROL PANEL. Set ultraviolet lamp to ON position. B. Check lamp under the contour bed for operation. If bulb is not operating, then check the following: 1. Signs of burnout, such as filament inside lamp and discoloration of bulb glass. If lamp appears to be burned out, replace. If lamp appears undamaged or replacement does not resolve the problem, go to next step. 2. Disconnect Alpha Fuzion Sauna Body Pod from power source. Remove main power box (See Section 7.10) and check for firm plug connection of lamp assembly cord into outlet on side of power box and firm terminal connection to ballast attached to side of power box. If connections are firm, go to next step. 3. Re-power Alpha Fuzion Sauna Body Pod. Select and start a program. Manually check display panel LCD to ensure the UV lamp is in the ON position. CAUTION: High Voltage in this area. Use a voltmeter to check the receptacle of lamp plug for 110-120 Volts. If correct voltage is present, move to next step. NOTE: If no voltage is present, verify that the display board indicates this apparatus is ON. Then consult your supplier for additional troubleshooting assistance or replacement parts, or go to next step. Alpha Fuzion Sauna Body Pod 86 Section 8 Troubleshooting 4. Use an Ohmmeter to check resistance across output terminals of ballast as shown in Figure 7.14.1 Male & Female Terminals of Sanitary Lamp Ballast. If 26-28 Ohms are not present, replace ballast. 5. If appropriate Ohms resistance is present, replace Lamp Assembly. IX. Vibration Bed Inoperative A. Select and start a preprogrammed session and adjust vibration to level three. B. Raise contour bed onto prop stand. Verify motor cords are plugged into appropriate receptacles of main power source. C. Check rheostat motor control on right side of bed to ensure ON position of both motors. Turn rheostat through full range of motion to verify operation. D. If motors do not respond, use a voltmeter to test for 110-120 Volts power at power box vibration motor receptacle. E. If no power is present at the power box receptacles, check wall receptacle, base cord connections and data harness connector to right of main hinge. If connections are firm, replace main power box. F. If power is available at all power box receptacles, and only one motor fails to operate, unplug all plugs from top of power box and remove contour bed assembly (See Section 7.7). G. Place contour bed upside down on floor. Use a Phillips Head screwdriver to remove the center ball socket and rheostat control for inoperative motor. Check for firmness of the wire crimps and connections. If the wire crimps are loose, this component should be re-installed by a technician. If all connections are firm, replace vibrator motor (See Section 7.9). NOTE: If vibration problems persist, consult your supplier for additional troubleshooting assistance or replacement parts. X. Stereo Radio, Compact Disk (CD) Player Problems A. If no power to radio or compact disk player, check the following: 1. ON/OFF power switch of the Stereo Radio. 2. Connection of hood to base data harness to the right of the main hinge/strut assembly. 3. Access interior of Main Power Box as follows: a. Disconnect Alpha Fuzion Sauna Body Pod from power supply. b. Remove contour bed assembly. c. Remove protective cover from Main Box (remove four Phillips Head screws). CAUTION: High Voltage in this area. d. Check fuse at F5 position. Replace as necessary with a 4A 250V fuse. e. Check audio power supply within main power box as shown in Figure 6.1.1 Power Supply Box (See No.3) for: • Good contact at input and output connections. Tighten connectors as necessary. Alpha Fuzion Sauna Body Pod 87 Section 8 Troubleshooting • Burned fuse. Replace as necessary. 4. Remove display screen CONTROL PANEL (See Section 7.19). Check 12pin terminal connection to stereo radio system. a. Re-power Alpha Fuzion Sauna Body Pod using voltmeter, check for 12 volts at red and black wires of this connector. It power is OK, go to next step. 5. Replace CD player as required(See Section 7.20). B. If radio reception is fuzzy or poor: 1. Reposition Alpha Fuzion Sauna Body Pod in room differently, if possible, to allow for a better signal reception. 2. Remove display screen CONTROL PANEL (See Section 7.19). Check for firm connection of antenna to back of stereo radio unit. NOTE: Because no outside antenna is available to the radio, it is difficult to achieve high quality radio reception in many areas. NuAge Beauty recommends use of CDs rather than using the radio. XI. Sound from Stereo Headphones is Erratic. A. Headphones do not operate appropriately. 1. Check connection in headphone jack. 2. Check stereo system for proper speaker balance (See Radio Owner’s Manual). 3. Test system with different headphones. If operative, replace original headphones. If not, go to next step. 4. Replace Headphone Jack Harness (See Section 7.23) Alpha Fuzion Sauna Body Pod 88 Section 9 Maintenance SECTION 9: MAINTENANCE 9.1 Preventative Maintenance CAUTION: Unplug from the electrical wall outlet before cleaning. Face Fan Cleaning Deposits of dust and dirt are accumulated on the fan blades and grill from the airflow of the face fan. As needed, or at least every 60 days, clean this area with a medium soft-bristle brush and/or vacuum cleaner. Heater Intake Screens Cleaning The screens located on each side of the airflow channel above the main hinge remove dust and dirt from the air that flows through the heat chamber. The screens become clogged and the efficient use of the sound chamber is reduced, along with life expectancy of the heater. The accumulated dirt on the screens may be oily from the aromatic oils. As needed, or at least every 60 days, clean the screens to remove the accumulated soil with a medium-soft bristle brush and/or vacuum cleaner. 9.2 General Cleaning & Mandatory Use of Pre-Approved Solution Pre-trained personnel must do all cleaning via NuAge Beauty’s written instructions. All plastics and poly carbonate surfaces including the inside and outside of system hood, underbed area and poly carbonate shell, as well as accessories in your Alpha Fuzion must be cleaned and disinfected using a pre-tested, pre-approved cleaning solution sold by NuAge Beauty called Accel TB .05% solution. Accel offers a new technology within this disinfectant, based on an active ingredient known as “Accelerated Hydrogen Peroxide (AHP)” or ”Stabilized Hydrogen Peroxide (SHP)” for hard-surface antimicrobial applications. AHP is a cleaner and disinfectant designed for high risk areas such as health care facilities but is safe, effective and environmentally friendly. Facts about ACCEL TB: a. Effective cleaner b. Effective disinfectant c. Highly efficient (only requires soaking on the material for 1 minute as opposed to traditional cleansers whose warnings require up to 10 minutes for total disinfecting) d. Non-toxic e. Non-corrosive ( this relates to the skin, eye, as well as surfaces) f. Biodegradable Alpha Fuzion Sauna Body Pod 89 Section 9 Maintenance Certifications for the Product: Active Ingredient: Accelerated Hydrogen Peroxide MSDS Specification: See below EPA: 74559-1 OSHA: The product meets the U.S. Occupational Heath and Safety Administration (OSHA) blood-borne pathogen standards for cleaning blood and bodily fluids. Average Product Usage: Each 32oz. bottle should provide a minimum of 30 full unit cleanings. Product Ordering Procedure: The product is available in 32oz. bottle size and is sold in a case of 12 bottles. You will place all reorders with any NuAge Beauty Consultant. Just call 1-800445-8418 and ask for your NuAge Beauty Territory Manager to place your order. Cleaning instructions using Accel Solution are as follows: There is no product dilution with this solution. 1. Spray desired area/surface with Accel TB .05% disinfecting solution. 2. Let solution sit for 30 seconds. 3. Wipe surface dry and clean with a soft cloth or paper towel. Note: Rinsing is not allowed on the exterior hood or on the side panels of the Alpha Fuzion. Note: Abrasive detergents and scrubbing must not be used to clean the unit. This may result in serious damage to the plastic surfaces of the unit. In addition to abrasive detergents, it is strictly forbidden to use cleaning agents containing acetone, ammonia, petrol, benzene, window/glass cleaners or varnish removers. WARRANTY NOTICE: CUSTOMER’S RESPONSIBILITIES: The Customer is responsible to: Use ONLY the NB approved Accel TB Cleaning Solution. Use of any and all other cleaning products for cleaning and disinfecting your unit will immediately void your product warranty covering the Polycarbonate material on the machine. 9.3 Cleaning the Shell Your Alpha Fuzion is shipped to you wrapped carefully in clear plastic wrap. The plastic wrap will keep your Alpha Fuzion clean and safe during its journey, but the plastic causes one minor side effect—it leaves a slight film on the shell. We recommend that you wipe down your machine as soon as you uncrate it. To clean the inside and outside of the shell: 1. Spray on Accel TB .05% disinfecting solution. 2. Let solution sit for 30 seconds. 3. Wipe surface dry and clean with a soft cloth or paper towel. Alpha Fuzion Sauna Body Pod 90 Section 9 Maintenance Note: Do not use any type of abrasive pad or scouring powder as they may scratch the surface finish. 9.4 Cleaning the Underbed Area The following should be done after every Alpha Fuzion session: a. Carefully remove bed sections from unit, unplug vibratory bed motor chords from the unit if necessary. b. Clean dirt, dust and perspiration from underbed surfaces following directions below. c. Spray desired surface/area with Accel .05% TB Disinfectant. d. Let solution sit for 30 seconds. e. Wipe surface dry and clean with a soft cloth or paper towel. 9.5 Cleaning Contact Surfaces (Bed, Head Pillow, Interior of Shell) 1. Use Accel TB .05% Disinfectant on all contact surfaces AFTER EACH USE to present a clean, sanitary appearance and feel for each new client. 2. Let solution sit for 30 seconds. 3. Wipe dry and clean with paper or soft cloth towel. 4. Bed and head pillow could stain over time. For light staining, we recommend using “Soft Scrub” cleaner and isopropyl alcohol. Spread “Soft Scrub” and alcohol on the bed surface, let it sit for 5 minutes, then dampen a soft cloth with water and gently rub the area in circles. NOTE: Cleaning after each use removes oils, perspiration, and cosmetics. It will also prolong the material life of the accessories and bed. CAUTION: Do not spray cleaning solvent on the electrical box cover or power connectors as it could cause a short circuit. Alpha Fuzion Sauna Body Pod 91 Section 10 Specifications and Supplied Accessories SECTION 10: SPECIFICATIONS AND SUPPLIED ACCESSORIES 10.1 Precautionary Safeguards The Alpha Fuzion Sauna Body Pod is an appliance. Avoid rough handling, direct sunlight and high temperature or humidity. Mishandling will result in damage to the Alpha Fuzion Sauna Body Pod. Wipe it with a damp, clean cloth moistened with water or mild detergent. 10.2 Alpha Fuzion Sauna Body Pod Specifications Model Number _______________________________ Color of Shell: Soft White. Measure Method and Measurement Range: Degree of Temperature: 80°F to 180°F (26°C to 82°C). Accuracy: Temperature within plus or minus five degrees. Displays: Liquid Crystal Digital (LCD) and Light Emitting Diodes (LED) Keys Struts: Expected to lose three to five percent of their original air pressure annually. Electrical Power Requirements of Regional Setting in United States and Canada: 220/240 VAC, 15A, 50/60 Hz. Power Source Requirements of Regional Setting in United States and Canada: 2200/2400 WATTS, 15 Amps, 220/240 VAC. Operating Environment: 50°F to 104°F (10°C to 40°C), less than 85% RH. Storage Environment: -4°F to 131°F (-20°C to 55°C), less than 95% RH. Dimension: Opened: W = 35 inches (88.9 cm), H = 84 inches (214 cm), L = 89 inches (227 cm) Closed: W = 35 inches (88.9 cm), H = 39 inches (100 cm), L = 89 inches (227 cm) Specifications are subject to change without notice. Alpha Fuzion Sauna Body Pod 92 Section 10 Specifications and Supplied Accessories 10.3 Supplied Accessories System Pedestal 4 Glass Expansion Chambers Headphones 2 Neck Drapes 4 Filter/Pick-up Tubes 4 O-Rings 2 Cleansing Pure Essential Oil Blend 2 Relaxation Pure Essential Oil Blend 2 Fitness Pure Essential Oil Blend 2 Vigor Pure Essential Oil Blend 1 Alpha Fuzion Sauna Body Pod Owner’s Manual NOTE: Supplied accessories are subject to change. Contact your supplier with questions. Alpha Fuzion Sauna Body Pod 93 Owner Record The model and serial numbers are located at the base of the unit under the bed. Record these numbers in the spaces provided below. Refer to these numbers whenever you call your dealer regarding this product. Model No.: ALPHA FUZION SAUNA BODY POD Serial No.: Micro Controller Identification No.: MANUFACTURED BY: DISTRIBUTED BY: NUAGE BEAUTY 9220 JAMES AVENUE SOUTH MINNEAPOLIS, MN 55431 USA Tel: (952) 888-2088 Fax: (952) 888-8887 WARNING TO PREVENT FIRE OR SHOCK HAZARD: 1. DO NOT EXPOSE UNIT TO RAIN. 2. DO NOT PLACE THE UNIT IN A SHOWERING AREA OR STEAM ROOM. CAUTION TO REDUCE RISK OF ELECTRICAL SHOCK, DO NOT REMOVE COVER OF THE ELECTRICAL BOX INSIDE UNIT OR THE FACE PANEL. (NO USER-SERVICEABLE PARTS ARE INSIDE.) REFER SERVICING TO QUALIFIED SERVICE PERSONNEL. CONTACT DEALER, DISTRIBUTOR OR: NuAge Beauty 9220 James Avenue South Minneapolis, MN 55431 (952) 888-2088 Alpha Fuzion Sauna Body Pod A Alpha Fuzion Sauna Body Pod Owner’s Registration Form Please FAX or SEND this Registration Form to NuAge Beauty. Cut out along this line NuAge Beauty 9220 James Avenue South Minneapolis, MN 55431 USA Tel: (952) 888-2088; (877) 818-9988 Fax: (952) 888-8887 Serial Number: Date of Purchased: Model Number: Business Name: Owner's Name: Mailing Address: City: State: Country: Telephone: Fax: Purchased From: Name: Mailing Address: City: State: Country: Telephone: Fax: Alpha Fuzion Sauna Body Pod B Standard Warranty Alpha Fuzion Sauna Body Pod Product Warranty Term This One Year Product Warranty will expire 24 months from the Original Purchase Invoice Date. General Terms and Conditions NuAge Beauty (hereinafter “NB”) agrees to provide warranty service according to the terms and conditions set forth in this document. 1. ACTIVATION: This Product Warranty shall become effective upon the original purchase date on the invoice. 2. SERVICES INCLUDED IN THIS AGREEMENT ARE: a) Telephone support from NB Technical Service Team between the hours of 7:30 A.M. through 5:30 P.M. CST Monday through Friday. b) Labor, Parts and Travel with the exception of Consumables and Accessories. c) Covered Parts: Display Assembly, Main Power Box, Aroma Nebulizer Pump, Audio Power Supply, Display PC Board, Heater - Main Assembly and Face Fan. d) Any damage to the unit incurred as a result of abuse, misuse, will not be covered under any warranty agreement. e) Product Warranty Owner must provide NB with reasonable opportunity (as determined by a NB Technical Representative) for verbal troubleshooting with the Owner or Owner’s Representative prior to assignment of an on-site Technician or shipment of any parts. It is at the discretion of NB Technical Services Management to make the determination to either assign an on-site Technician or require the equipment to be returned to NB for evaluation and/or repair. f) Parts are provided on an Exchange Basis. Defective parts must be returned to NB. Shipping costs reimbursement will be determined by NB Technical Management. NB Technical Service will provide Owner with a Return Goods Authorization Number *** Return parts not received by NuAge Beauty, Inc. within 30 Days will constitute cause for invoicing of the replacement parts to the Product Warranty Owner at list price. Product Warranty Owner agrees to pay these costs, as assessed. 3. SERVICES NOT INCLUDED BUT NOT LIMITED TO IN THE PRODUCT WARRANTY ARE: a) Service resulting from operator misuse, abuse, unreasonable wear and tear, negligence, error due to the customer’s prior refusal to perform a recommended repair. b) Items considered normal “Operator” functions. c) Service due to modifications made by the customer that were not approved by NB. d) Service resulting from facility caused malfunctions including environmental conditions. e) Service resulting from any acts of war, terrorism, natural disaster or other force majeure. f) This Product Warranty does not cover consumable items, including Oils, Lamps, StrutHydrolift and Display Face. g) If a product is not covered by warranty, customer will sign an Authorization Repair Work Order of the evaluated findings and estimation of required work to bring the equipment up to manufacturer specifications. 4. COVERAGE HOURS: The service hours covered under this agreement are 7:30 A.M. to 5:30 P.M. Monday through Friday local time, excluding holidays and weekends. Any service that is performed Alpha Fuzion Sauna Body Pod C outside of the normal service hours will be billable at the NB published Time and Materials Rates when the service is rendered. 5. RESPONSIBILITY: NB is not responsible for acts of war, terrorism, natural disaster or other force majeure or failure of services supplied by third party contracted or other sources. NB agrees to respond in a timely manner, but cannot be held responsible for transportation delays. Furthermore, NB cannot be held responsible for interruption of business of either party due to any other causes beyond NB’s control or revenue lost down to downtime of equipment. 6. CUSTOMER’S RESPONSIBILITES: The Customer is responsible to: a) Maintain the equipment in an environment suitable for the operation of the equipment as instructed in the applicable Operator’s Manual. b) Maintain the proper electrical power requirements as recommended by NB. c) Follow all operating instructions as indicated in the applicable Operator’s Manual supplied by NB. d) Make the equipment available for service within 1 hour after the arrival of the NB Technical Service Representative. e) Pay all charges incurred by NB due to delays in equipment access or refusal of service after a Technical Service Representative has been dispatched and is either in-transit or on-site. f) Maintain a safe and accessible environment for the Service Personnel to service the equipment. g) Allow NB to implement any recommended engineering change deemed necessary by NB. h) Not make any modifications to the equipment that are not approved by NB. rd i) Customer agrees not to employ or engage a direct or 3 party service technician or organization that is not certified to service NB Equipment. Customer further agrees that any rd needed NB service resulting from the unauthorized repairs performed by a direct or 3 party technician or organization not certified by NB, will be billed to Customer at the current NB published Time and Materials Rates and will not be covered under this Product Warranty. j) Use ONLY the SYB approved Accel TB Cleaning Solution. Use of any and all other cleaning products for cleaning and disinfecting your unit will immediately void your product warranty covering the Polycarbonate material on the machine. 7. USE OF SUB-CONTRACTORS: Service provided under this Product Warranty may at NB’s option, be performed by either NB or its authorized Technical Representatives or Sub-Contractors at the direction of NB. 8. PARTS REPLACEMENT: Repair materials and parts used to perform service pursuant to this Product Warranty will be replaced only as deemed necessary by NB. NB may use repaired, rebuilt or refurbished parts as necessary in making repairs under this Product Warranty. All parts will be furnished on an Exchange Basis, with the replaced parts becoming the property of NB. 9. FREIGHT COSTS: In-bound freight costs for warranty repairs are incurred by the Customer. All freight costs on out-bound warranty repaired equipment is paid by NB will be shipped via UPS Ground Services only. Any upgrades to Express Overnight are the responsibility of the Customer. Under this Product Warranty Policy Customs Clearance, Duties or Taxes are not part of the freight expense cost. This warranty policy considers freight costs as transportation expense only, not administrative or government fees mandated by local governments. ***If it is determined the equipment is not covered under warranty due to misuse, the customer incurs all freight charges. 10. LIMITATION OF LIABILITY: The liability of NB hereunder is agreed to be limited to the amount equal to the total amount of all payments made by Customer pursuant to this Product Warranty Agreement and by acceptance of the Product Warranty Agreement. Customer hereby waives any and all claims for incidental, special, consequential or punitive damages. Customer agrees to hold NB harmless and indemnified from any and all such claims by Customer and its agents, servants, employees and its successors and assigns. Alpha Fuzion Sauna Body Pod D 11. FORCE MAJEURE: Neither party shall be liable for any failure or delay in performance under this Agreement (other than for delay in the payment of money due and payable hereunder) to the extent said failures or delays are proximately caused by causes beyond that party's reasonable control and occurring without its fault or negligence, or party to substantially meet its performance obligations under this Agreement, provided that, as a condition to the claim of non-liability, the party experiencing the difficulty shall give the other prompt written notice, with full details following the occurrence of the cause relied upon. Dates by which performance obligations are scheduled to be met will be extended for a period of time equal to the time lost due to any delay so caused. 12. ENTIRE AGREEMENT: This agreement contains the whole agreement between the parties in regards to extended warranties. There are no other terms, obligations, covenants, representations, statements, or conditions, oral or otherwise, of any kind whatsoever regarding this Product Warranty. 13. JURISDICTION AND GOVERNING LAW: Disputes arising under this Extended Warranty Agreement shall be exclusively subject to the jurisdiction of the federal courts of the United States and/or the state courts of Hennepin County, State of Minnesota and jurisdiction therefore shall rest solely in Minnesota, without regard to principles of conflicts of law that would require or permit the application of the substantive law of any other jurisdiction. 14. ASSIGNMENT OF BINDING AGREEMENT: Customer shall not assign or transfer its rights under this Product Warranty without the prior written consent of NB. The provisions of this Product Warranty are binding upon all successors, administrators, trustees and permitted assigns of Customer. This Product Warranty may be amended, altered or changed at any time by NB only. How to Obtain Product Warranty Service Contact NuAge Beauty Customer Service Department at: Tel: 877-818-9988 or 952-888-2088 Fax: 952-888-8887 E-mail: [email protected] Mail: NuAge Beauty, 9220 James Avenue S., Bloomington, MN. 55431 USA NA.AF.21.0413.1.U Alpha Fuzion Sauna Body Pod E