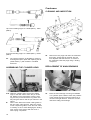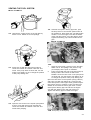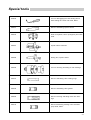
1
Workshop Manual
Engine unit
A
2(0)
MD11C, D, MD17C, D
Contents
Safety precautions ............................................................................................................. 2
General Information .......................................................................................................... 5
Repair instructions ............................................................................................................ 6
Component guide .............................................................................................................. 8
DISMANTLING
Cylinder head ..................................................................................................................... 10
Cylinder liner ...................................................................................................................... 11
Pistons, con-rods .............................................................................................................. 11
Timing gear ........................................................................................................................ 12
Flywheel ............................................................................................................................. 13
Crankshaft ......................................................................................................................... 14
Camshaft ........................................................................................................................... 14
OVERHAULING
Dismantling cylinder head ................................................................................................. 15
Cleaning, inspection .......................................................................................................... 15
Valve guides ...................................................................................................................... 15
Valve seats ........................................................................................................................ 16
Valves ................................................................................................................................ 16
Valve springs ..................................................................................................................... 16
Rocker mechanism ........................................................................................................... 16
Valve tappets .................................................................................................................... 16
Injector sleeve ................................................................................................................... 17
Injector ............................................................................................................................... 17
Assembling cylinder head ................................................................................................. 18
Cleaning, checking crankcase .......................................................................................... 18
Replacing main bearings ................................................................................................... 18
Centrifugal governor .......................................................................................................... 19
Pistons, liners .................................................................................................................... 19
Connecting rods ................................................................................................................. 20
Crankshaft ......................................................................................................................... 20
Camshaft ........................................................................................................................... 20
Oil pump ............................................................................................................................ 20
Feed pump ......................................................................................................................... 21
Thermostat ........................................................................................................................ 21
Sea water pump ................................................................................................................. 21
Hand start .......................................................................................................................... 23
ASSEMBLING
Crankshaft ......................................................................................................................... 24
Flywheel ............................................................................................................................. 25
Timing gear ........................................................................................................................ 25
Cylinders, cylinder liners ................................................................................................... 27
Pistons and liners .............................................................................................................. 28
Cylinder head ..................................................................................................................... 29
Adjusting valve clearance ................................................................................................. 30
Injection pump ................................................................................................................... 31
Checking control rod travel ............................................................................................... 32
Venting the fuel system .................................................................................................... 33
Checking injections angle ................................................................................................. 34
Adjusting engine speed ..................................................................................................... 34
Electrical system ............................................................................................................. 35
Wiring diagram ................................................................................................................ 35
Fault finding chart ........................................................................................................... 36
Special tools .................................................................................................................... 37
Technical data .................................................................................................................. 39
Cooling system, diagrammatic sketch ......................................................................... 43
1
Safety Precautions
Introduction
This Workshop Manual contains technical data, descriptions and repair instructions for Volvo Penta
products or product versions contained in the contents list. Ensure that the correct workshop literature
is being used.
Read the safety information and the Workshop
Manual “General Information” and “Repair Instructions” carefully before starting work.
Important
In this book and on the engine you will find the following special warning symbols.
WARNING! If these instructions are not followed there is a danger of personal injury, extensive damage to the product or serious mechanical malfunction.
IMPORTANT! Used to draw your attention to
something that can cause damage, product
malfunction or damage to property.
Check that the warning or information decals on
the product are always clearly visible. Replace
decals that have been damaged or painted
over.
Never use start spray or similar to start the engine. The starter element may cause an explosion in the inlet manifold. Danger of personal injury.
Avoid opening the filler cap for engine coolant
system (freshwater cooled engines) when the
engine is still hot. Steam or hot coolant can
spray out. Open the coolant filler cap carefully
and slowly to release pressure before removing
the cap completely. Take great care if a cock,
plug or engine coolant line must be removed
from a hot engine. It is difficult to anticipate in
which direction steam or hot coolant can spray
out.
NOTE! Used to draw your attention to important infor
mation that will facilitate work or operations.
Below is a summary of the risks and safety precautions you should always observe or carry out when
operating or servicing the engine.
Immobilize the engine by turning off the power
supply to the engine at the main switch (switches) and lock it (them) in the OFF position before
starting work. Set up a warning notice at the engine control point or helm.
Generally, all servicing should be carried out
with the engine switched off. Some work (carrying out certain adjustments for example) requires the engine to be running. Approaching a
running engine is dangerous. Loose clothing or
long hair can fasten in rotating parts and cause
serious personal injury.
If working in proximity to a running engine, careless movements or a dropped tool can result in
personal injury. Avoid burns. Take precautions
to avoid hot surfaces (exhausts, turbochargers,
charge air pipes and starter elements etc.) and
liquids in supply lines and hoses when the engine is running or has been turned off immediately prior to starting work on it. Reinstall all
protective parts removed during service operations before starting the engine.
2
Hot oil can cause burns. Avoid skin contact
with hot oil. Ensure that the lubrication system
is not under pressure before commencing work
on it. Never start or operate the engine with the
oil filler cap removed, otherwise oil could be
ejected.
Stop the engine and close the sea cock before
carrying out operations on the engine cooling
system.
Only start the engine in a well-ventilated area. If
operating the engine in an enclosed space, ensure that exhaust gases and crankcase ventilation emissions are ventilated out of the working
area.
Always use protective goggles where there is a
danger of pieces of metal, sparks from grinding,
acid or other chemicals being thrown into your
eyes. Your eyes are very sensitive, injury can
lead to loss of sight!
Avoid skin contact with oil. Long-term or repeated contact with oil can remove the natural oils
from your skin. The result can be irritation, dry
skin, eczema and other skin problems. Used oil
is more dangerous to health than new oil. Use
protective gloves and avoid using oil-soaked
clothes and rags. Wash regularly, especially before meals. Use the correct barrier cream to
prevent dry skin and to make cleaning your skin
easier.
Most chemicals used in products (engine and
transmission oils, glycol, petrol and diesel oil)
and workshop chemicals (solvents and paints)
are hazardous to health Read the instructions
on the product packaging carefully! Always follow safety instructions (using breathing apparatus, protective goggles and gloves for example). Ensure that other personnel are not
unwittingly exposed to hazardous substances
(by breathing them in for example). Ensure that
ventilation is good. Handle used and excess
chemicals according to instructions.
All fuels and many chemicals are inflammable.
Ensure that a naked flame or sparks cannot ignite fuel or chemicals. Combined with air in certain ratios, petrol, some solvents and hydrogen
from batteries are easily inflammable and explosive. Smoking is prohibited! Ensure that ventilation is good and that the necessary safety precautions have been taken before carrying out
welding or grinding work. Always have a fire extinguisher to hand in the workplace.
Store oil and fuel-soaked rags and fuel and oil
filters safely. In certain conditions oil-soaked
rags can spontaneously ignite. Used fuel and oil
filters are environmentally dangerous waste and
must be deposited at an approved site for destruction together with used lubricating oil, contaminated fuel, paint remnants, solvent, degreasing agents and waste from washing parts.
Never allow a naked flame or electric sparks
near the batteries. Never smoke in proximity to
the batteries. The batteries give off hydrogen
gas during charging which when mixed with air
can form an explosive gas - oxyhydrogen. This
gas is easily ignited and highly volatile. Incorrect connection of the battery can cause a
spark which is sufficient to cause an explosion
with resulting damage. Do not disturb battery
connections when starting the engine (spark
risk) and do not lean over batteries.
Never mix up the positive and negative battery
terminals when installing. Incorrect installation
can result in serious damage to electrical equipment. Refer to wiring diagrams.
Always use protective goggles when charging
and handling batteries. The battery electrolyte
contains extremely corrosive sulfuric acid. If
this comes into contact with the skin, wash immediately with soap and plenty of water. If battery acid comes into contact with the eyes, immediately flush with copious amounts of water
and obtain medical assistance.
Turn off the engine and turn off power at main
switch(es) before carrying out work on the electrical system.
Use the lifting eyes mounted on the engine/reverse gear when lifting the drive unit.
Always check that lifting equipment is in good
condition and has sufficient load capacity to lift
the engine (engine weight including reverse gear
and any extra equipment installed).
To ensure safe handling and to avoid damaging
engine components on top of the engine, use a
lifting beam to raise the engine. All chains and
cables should run parallel to each other and as
perpendicular as possible in relation to the top
of the engine.
If extra equipment is installed on the engine altering its center of gravity, a special lifting device is required to achieve the correct balance
for safe handling.
Never carry out work on an engine suspended
on a hoist.
3
Never remove heavy components alone, even
where secure lifting equipment such as secured
blocks are being used. Even where lifting equipment is being used it is best to carry out the
work with two people; one to operate the lifting
equipment and the other to ensure that components are not trapped and damaged when being
lifted. When working on-board ensure that there
is sufficient space to remove components without danger of injury or damage.
Components in the electrical system, ignition
system (gasoline engines) and fuel system on
Volvo Penta products are designed and constructed to minimize the risk of fire and explosion. The engine must not be run in areas
where there are explosive materials.
4
Always use fuels recommended by Volvo Penta. Refer to the Instruction Book. The use of
lower quality fuels can damage the engine. On
a diesel engine poor quality fuel can cause the
control rod to seize and the engine to overrev
with the resulting risk of damage to the engine
and personal injury. Poor fuel quality can also
lead to higher maintenance costs.
General information
About the workshop manual
This workshop manual contains technical specification, descriptions and instructions for repairing the
standard versions of the following engines MD11C, D,
MD17C, D. The workshop manual displays the operations carried out on any of the engines above. As a
result the illustrations and pictures in the manual that
show certain parts on the engines, do not in some
cases apply to all the engines listed above. However
the repair and service operations described are the
same in all essential details. Where they are not the
same this is stated in the manual and where the difference is considerable the operations are described
separately. Engine designations and numbers are
given on the number plate (See page 9). The engine
designation and number should be given in all correspondence about the engine.
This Workshop Manual has been developed primarily
for Volvo Penta service workshops and qualified personnel. Persons using this book are assumed to have
a grounding in marine drive systems and be able to
carry out related mechanical and electrical work.
Volvo Penta is continuously developing their products. We therefore reserve the right to make changes.
All the information contained in this book is based on
product data available at the time of going to print.
Any essential changes or modifications introduced
into production or updated or revised service methods
introduced after the date of publication will be provided in the form of Service Bulletins.
Replacement parts
Replacement parts for electrical and fuel systems are
subject to statutory requirements (US Coast Guard
Safety Regulations for example). Volvo Penta Genuine parts meet these requirements. Any type of damage which results from the use of non-original Volvo
Penta replacement parts for the product will not be
covered under any warranty provided by Volvo Penta.
5
Repair instructions
The working methods described in the Service Manual apply to work carried out in a workshop. The engine has been removed from the boat and is installed
in an engine fixture. Unless otherwise stated reconditioning work which can be carried out with the engine
in place follows the same working method.
Warning symbols occurring in the Workshop Manual
(for their meaning see Safety information)
WARNING!
IMPORTANT!
NOTE!
are not in any way comprehensive since it is impossible to predict every circumstance under which service work or repairs may be carried out. For this reason we can only highlight the risks that can arise
when work is carried out incorrectly in a well-equipped
workshop using working methods and tools developed
by us.
All procedures for which there are Volvo Penta special tools in this Workshop Manual are carried out
using these. Special tools are developed to rationalize working methods and make procedures as safe
as possible. It is therefore the responsibility of any
person using tools or working methods other than the
ones recommended by us to ensure that there is no
danger of injury, damage or malfunction resulting from
these.
In some cases there may be special safety precautions and instructions for the use of tools and chemicals contained in this Workshop Manual. These special instructions should always be followed if there
are no separate instructions in the Workshop Manual.
Certain elementary precautions and common sense
can prevent most risks arising. A clean workplace
and engine eliminates much of the danger of injury
and malfunction.
It is of the greatest importance that no dirt or foreign
particles get into the fuel system, lubrication system,
intake system, turbocharger, bearings and seals
when they are being worked on. The result can be
malfunction or a shorter operational life.
6
Our joint responsibility
Each engine consists of many connected systems
and components. If a component deviates from its
technical specification the environmental impact of an
otherwise good engine may be increased significantly. It is therefore vital that wear tolerances are maintained, that systems that can be adjusted are adjusted properly and that Volvo Penta Genuine Parts as
used. The engine Maintenance Schedule must be followed.
Some systems, such as the components in the fuel
system, require special expertise and special testing
equipment for service and maintenance. Some components are sealed at the factory for environmental
reasons. No work should be carried out on sealed
components except by authorized personnel.
Bear in mind that most chemicals used on boats are
harmful to the environment if used incorrectly. Volvo
Penta recommends the use of biodegradable degreasing agents for cleaning engine components, unless otherwise stated in a workshop manual. Take
special care when working on-board, that oil and
waste is taken for destruction and is not accidentally
pumped into the environment with bilge water.
Tightening torques
Tightening torques for vital joints that must be
tightened with a torque wrench are listed in workshop
manual “Technical Data”: “Tightening Torques” and
are contained in work descriptions in this Manual. All
torques apply for cleaned threads, screw heads and
mating surfaces. Torques apply for lightly oiled or dry
threads. If lubricants, locking fluid or sealing compound are required for a screwed joint this information
will be contained in the work description and in
“Tightening Torques” Where no tightening torque is
stated for a joint use the general tightening torques
according to the tables below. The tightening torques
stated are a guide and the joint does not have to be
tightened using a torque wrench.
Dimension
Tightening Torques
Nm
lbt.ft
M5
M6
M8
M10
M12
M14
6
10
25
50
80
140
4.4
7.4
18.4
36.9
59.0
103.3
Tightening torques-protractor (angle)
tightening
Tightening using both a torque setting
and a protractor angle requires that
first the recommended torque is applied using a torque wrench and then
the recommended angle is added according to the protractor scale. Example: a 90° protractor tightening
means that the joint is tightened a
further 1/4 turn in one operation after
the stated tightening torque has been
applied.
Locknuts
Do not re-use lock nuts that have been removed during dismantling as they have reduced service life
when re-used - use new nuts when assembling or reinstalling. For lock nuts with a plastic insert such as
Nylock® the tightening torque stated in the table is reduced if the Nylock ® nut has the same head height as
a standard hexagonal nut without plastic insert. Reduce the tightening torque by 25% for bolt size 8 mm
or larger. Where Nylock® nuts are higher, or of the
same height as a standard hexagonal nut, the tightening torques given in the table apply.
Tolerance classes
quired.
In this Volvo Penta Service Manual the user will find
that each section where these agents are applied in
production states which type was used on the engine.
During service operations use the same agent or an
alternative from a different manufacturer.
Make sure that mating surfaces are dry and free from
oil, grease, paint and anti-corrosion agent before applying sealant or locking fluid. Always follow the manufacturer’s instructions for use regarding; temperature
range, curing time and any other instructions for the
product.
Two different basic types of agent are used on the
engine and these are:
RTV agent (Room temperature vulcanizing). Use for
gaskets, sealing gasket joints or coating gaskets.
RTV agent is clearly visible when a component has
been dismantled; old RTV must be removed before
the joint is resealed. Old sealant can be removed using methylated spirits in all cases.
Anaerobic agents. These agents cure in an absence
of air. They are used when two solid parts, for example cast components, are installed face-to-face
without a gasket. They are also commonly used to
secure plugs, threads in stud bolts, cocks, oil pressure switches and so on. The cured material is glasslike and it is therefore colored to make it visible.
Cured anaerobic agents are extremely resistant to
solvents and the old agent cannot be removed. When
reinstalling the part is carefully degreased and then
new sealant is applied.
Screws and nuts are divided into different strength
classes, the class is indicated by the number on the
bolt head. A high number indicates stronger material,
for example a bolt marked 10-9 indicates a higher tolerance than one marked 8-8. It is therefore important
that bolts removed during the disassembly of a bolted
joint must be reinstalled in their original position when
assembling the joint. If a bolt must be replaced check
in the replacement parts catalogue to make sure the
correct bolt is used.
Sealants
A number of sealants and locking liquids are used on
the engines. The agents have varying properties and
are used for different types of jointing strengths, operating temperature ranges, resistance to oil and other
chemicals and for the different materials and gap
sizes in the engines.
To ensure service work is correctly carried out it is
important that the correct sealant and locking fluid
type is used on the joint where the agents are re-
7
Component guide
MD11C and D
1.
2.
3.
4.
5.
6.
7.
8.
9.
10.
11.
12.
13.
14.
15.
16.
17.
18.
19.
20.
21.
22.
23.
24.
25.
26.
Stop device
Air bleed screw, injection pump
Injector
Delivery pipe nut
Temperature sender
Lock-screw, crankshaft centre bearing
Drain cocks, cooling water
Inspection cover
Oil drain plug, engine
Oil dipstick, reverse gear
Oil filler, reverse gear
Oil drain plug, reverse gear
Water drain plug, reverse gear
(MD11D, connection hose)
Decompression handle
(certain models)
Air filter
Oil filler, engine
Pressure equalizing valve (certain models)
Air bleed screw
Fine filter
Feed pump
Engine speed sender
Oil filter
Oil pressure sender
Oil strainer and oil dipstick (MD11C)
Oil pump
Oil dipstick, MD11D
MD11C
MD11D
8
MD17C and D
1. Fuse box
2. Decompression handle, certain models
3. Air filter
4. Oil filler
5. Air bleed screw
6. Fine filter
7. Feed pump
8. Engine speed sender
9. Oil filter
10. Stop device
11. Adjustment screw - high idle speed
12. Adjustment screw - low idle speed
13. Leak-off pipe
14. Lifting eye
15. Delivery pipe
16. Injector
17. Thermostat housing
18. Oil dipstick
19. Drain cocks, cooling water
20. Engine type and number plate
21. Cooling water pump
MD17C
MD17D
9
Dismantling
Drain off the engine cooling water, lubricating oil and
any fuel in the fuel filter and fuel injection pump.
Clean the outside of the engine.
1.
A fixture for securing the engine in the engine
stand 9992520 may be used to advantage.
MD11: 884604. MD17: 884581.
2B.
The picture shows later type of injector from and
including engine no. 50989 (MD11) and 16622
(MD17).
3.
Take off the coolant pipe between the sea water
pump and the exhaust manifold. Remove the
exhaust manifold (wrench width 13 mm).
4.
Remove the valve covers. Undo the oil pipes on
the rocker arm shafts and dismantle the rocker
arm bearing brackets. Take out the push rods.
CYLINDER HEAD
2A.
10
Take off the air cleaner, the leak-off oil pipe and
the delivery pipes. Fit protective caps.
The picture shows earlier type of injector up to
and including engine no. 50988 (MD11) and
16621 (MD17).
CYLINDERS, CYLINDER LINERS
5.
Remove the eyebolt (or eyebolts) and nuts holding the cylinder heads (wrench width 19 mm).
Straighten out the oil pipes slightly and lift the
cylinder heads off.
7.
Lift the cylinders out. Remove the cylinder liners
by placing the cylinder with the bottom of the
liner on a flat support and strike the top face of
the cylinder with a rubber mallet.
PISTONS AND CONNECTING RODS
6A.
6B.
Disconnect the cables from the engine speed
sender, the oil pressure switch and the alternator. MD11: Remove the alternator bracket together with the alternator. The picture shows the
earlier model MD11C up to and including engine
no. 52480 and MD11D from production start.
MD17: Remove the cover (earlier models) over
the V-belt and remove the alternator.
MD11C: The picture shows the later models
from and including engine no. 52481.
8.
MD11: Remove the inspection covers on the
crankcase (6 mm socket head). MD17: Remove
the oil sump and strainer. NOTE! Remove the
sealing rings in the ends of the oil pump suction
pipe.
9.
Remove the big-end bearing caps and take out
the connecting rods (and pistons). Mark the connecting rods (if this has not already been done).
Remove the valve tappets.
11
TIMING GEAR
Remove the crankcase breather/hand starter.
13A. MD11C and MD17C. Remove the carrier on the
crankshaft (engines with RB-reverse gear have
a carrier drive, use a distance piece to protect
the shaft. Take care of the key.
11.
Remove the injection pump, sea water pump,
feed pump and the fuel filter.
The D-engines have leak-off oil return pipes connected to the inlet union (see also page 27).
13B. MD11D and MD17D. Remove the carrier on the
crankshaft. Use puller 884078 (for the flywheel),
use a distance piece to protect the shaft. Take
care of the key. Earlier types of puller 884078
can be modified by drilling three Ø 8.5 mm holes
(use the spline flange as a template).
12.
Take off the timing gear cover.
10.
12
14.
Pull off the crankshaft gear with the aid of tool
884078. Remove the key, the spacing washer
and the thrust washer.
15.
Unscrew the left handed carrier screw/nut on the
camshaft. Pull out the cam disc and the gearwheel together. (On MD11, the crankshaft can
be dismantled without taking off the camshaft
gearwheel).
16.
MD11, certain models: Remove the belt pulley
that is mounted on the flywheel. MD17: Remove
the bearing shield.
18.
Remove the starter motor and its bracket.
19.
Remove the oil pump.
20.
MD11: Remove the front engine brackets. Remove the bearing shield.
FLYWHEEL
17.
Bend out the lock washer and unscrew the central nut. Pull off the flywheel using the puller
884078. Take care of the key. NOTE! The nut is
pulled using 500 Nm (50 kpm = 369 lbf.ft.)
13
CRANKSHAFT
21.
Remove the locating screw for the crankshaft
centre bearing (two in the case of MD17). Pull
the crankshaft out.
23B. MD11C.
Tool 884714.
23C. MD11D.
Hexagon, 30 mm.
CAMSHAFT
22.
Remove the thrust washer and lift the camshaft
out. MD17: Check that the oil hole is correctly
located when re-assembling.
23A. Remove the oil filter, the oil pressure switch and
the oil pipes for the rocker arm mechanism.
MD11: Remove the oil strainer. MD11C: Use tool
884714 (see 23B). MD11D: 30 mm hexagon (see
23C).
14
24.
Loosen the lock screw and remove the centrifugal governor.
25.
Unscrew the centre bearing (MD17, two bearings). NOTE! Mark them so that they can be
re-fitted in the same positions.
Overhauling
Cylinder head
DISMANTLING
VALVE GUIDES
26.
Remove the injectors and fit protective caps on
the tips of the nozzles.
29.
27.
Remove the wear caps from the valve stems.
Remove the valve springs with the aid of a
valve spring compressor. Place the valves in order in a valve stand. Take off the sealing rings
that are fitted on the valve guides.
Check the valve guides for wear by inserting a
new valve. Measure the clearance with the aid of
a dial gauge. Replace the guides if necessary.
Wear limits:
Inlet valve,
max. clearance .................. 0.15 mm (0.00591")
Exhaust valve,
max. clearance .................. 0.17 mm (0.00669")
CLEANING, INSPECTION
A = 18 mm (0.709")
30.
28.
Press out the valve guides using drift 9991459.
Oil the new guides externally and press them
into position with tool 884499. The tool should
be pressed right down against the cylinder head.
Ream the guides if necessary with broach
9994128.
Clean all parts. Pay particular attention to coolant passages. In case of doubt, check for leakage by pressure testing. Water pressure 0.3
MPa (3 kg/cm2 = 43 p.s.i.).
15
VALVE SEATS AND VALVES
ROCKER ARM MECHANISM
A = max 2.5 mm (0.10")
C = 45°
33.
B = 1±0.1 mm (0.040±0.004")
D = 44,5°
31.
Mill or ream the valve seats, the angle (C)
should be 45°. Check the valve guides and replace them if necessary before machining the
seats, see point 29. The width (B) of the sealing
surface should be 1±0.1 mm (0.040"±0.004").
Grind the valves in the valve grinding machine.
The angle (D) should be 44.5°. If the thickness
of the edge of the disc after grinding is less than
1.5 mm (0.059"), the valve should be rejected.
Discard also valves with bent stems or if the dimension (A) exceeds 2.5 mm (0.10"). If necessary grind the surface on which the rocker arm
bears. Grind the valves in using grinding compound and check the surface contact using
marking blue.
VALVE SPRINGS
32.
Check the valve spring lengths both loaded and
unloaded.
L
L1
Length unloaded ...................................... 50 mm (1.969")
Length when loaded with
300±20 N (30±2 kp = 66.6±4.41 lbf) ....... 39 mm (1.535")
Length when loaded with
560±30 N (56±3 kp = 123.5±6.6 lbf) ......... 32 mm (1.26")
L2
16
Dismantle the rocker arm mechanism and clean
the parts. Check the shaft and the bushes for
wear. If the bushes need to be replaced, the tool
884560 is used for pressing out and in. (Ensure
that the oil hole in the bush coincides with that
in the rocker arm). After having been pressed in,
the bushes should be reamed to give an accurate running fit. Check whether the rocker arm
surface which bears on the valve is worn. Minor
adjustments can be made with the valve grinding machine. Oil the shaft and fit the parts.
NOTE! Fit the wear caps on the valve stems.
VALVE TAPPETS
34.
Check the valve tappets for wear. The cylindrical surface should not be scored or porous. The
surface bearing on the camshaft should not be
rough or worn unevenly. Replace the tappets if
necessary.
correctly). Place nuts or washers on the stud
bolts so that the yoke can be clamped tightly
with the nuts. Screw the tool down as far as the
shoulder in the sleeve permits, thus flaring the
sleeve. Remove the tool.
INJECTOR SLEEVE
Drain the engine cooling water, if this has not already
been done.
35.
Remove the sleeve using the tool 884081. Push
the expanding screw down into the sleeve and
screw anti-clockwise so that the screw expands
and grips the sleeve. Tighten until the threads
bite into the copper material. Fit the yoke onto
the stud bolts which hold the injector. Screw on
the nut and rotate until the sleeve is removed.
38.
Adjust the length of the sleeve outside the plane
of the cylinder head (dimension 0.9 mm,
0.035"). Also check that the sleeve is correctly
fitted (dimension 19.5 mm, 0.768").
INJECTORS
36.
Remove the O-ring and carefully clean the hole
in which the sleeve is to fit. Grease and fit the
new O-ring. Oil the new sleeve and fit it using
tool 884077. Knock the sleeve in until it bottoms.
39.
17.0
Check the spray pattern at the correct opening
pressure. Up to and including engine no. 50988
(MD11), 16621 (MD17):
+ 114
+ 0.8
+ 0.8
MPa (170
kp/cm2 = 2418 – 0 p.s.i.)
–0
–0
From and including engine no. 50989 (MD11), 16622
(MD17):
24.5 + 0.8 MPa (245 + 0.8 kp/cm2 = 3485 + 114 p.s.i.)
–0
–0
–0
37.
Oil-in the flaring tool 884085 and push it into the
sleeve (make sure that the pin is screwed back
Also check that the fuel jets cease simultaneously at
all four holes and that there is no “dribble” afterwards.
17
Crankcase
CLEANING AND INSPECTION
Up to and including engine no. 50988 (MD11), 16621
(MD17).
From and including engine no. 50989 (MD11), 16622
(MD17).
40.
42.
The opening pressure is adjusted by means of
screwing the injector apart and replacing the adjusted washer (1) with a washer of suitable
thickness.
Remove all core plugs and clean the crankcase
thoroughly. Check that all channels are free
from deposits and that there are no cracks in
the crankcase. Refit the plugs using a sealing
compound.
ASSEMBLING THE CYLINDER HEAD
REPLACEMENT OF MAIN BEARINGS
41A. Clean the cylinder head. Oil the new sealing
rings for the inlet valves. Place the pin of tool
No. 884497 in the valve guide. Push the seal
ring over the pin and knock the ring down carefully using the sleeve until the pin bottoms in the
sleeve.
B.
Oil the valve stems and smear a little grease in
the inlet valve collet grooves. Place the valves
in their respective guides, screw the inlet valves
in carefully so as to avoid damaging the sealing
rings. Fit the valve springs with the aid of a
valve spring compressor.
43.
18
Press the main bearings out using tool 884489
or a hydraulic press. NOTE! Check the positions
of the locking tongues so that the bearing is removed in the right direction. Clean the oil channels before fitting new bearings.
PISTONS, LINERS
46.
A = 1.5 mm (0.06")
44A. Fit the two halves of the new bearing together
with an elastic cord and turn them so that the
locking tongues after pressing in fit into the appropriate recess. NOTE! The halves should be
slightly staggered, see the diagram.
A.
B.
Check the pistons and liners for damage and
wear.
Measure the cylinder liners diameter at a
number of points round the circumference and at
several different heights between the top and
bottom dead centre positions. (B and C). Replace the pistons and the liners if the wear
amounts to 0.25 mm (0.01") or more.
Measure the piston diameter (A) at right angles
to the gudgeon pin hole and 7 mm from the bottom edge. Calculate the maximum and minimum
piston clearance (the maximum and minimum
liner diameter minus the piston diameter).
Piston clearance (new): 0.09-0.13 mm
(0.0035"-0.005").
44B. Press the bearings in with tool 884489 or using
a hydraulic press.
CENTRIFUGAL GOVERNOR
45.
Clean the governor. Check that the weights (2)
do not bind on the shaft or that there is excessive clearance between the shaft and the governor weights. Check that the pin (1) slides freely in the shaft. Finally, inspect both the ball
bearings (3).
Replace the ball bearings if they bind. Check
that all moving parts are oiled and move freely
before assembling in reverse order.
47.
Measure the piston ring gap with the new rings.
If the cylinder liner is not new the measurement
should be made below the bottom dead centre
position. For dimension, see “Technical Data’’.
48.
Measure the piston ring clearances in the piston
ring grooves. For dimensions, see “Technical
Data”.
19
CONNECTING RODS
CAMSHAFT
52.
49.
Check the connecting rods for straightness and
twist.
Check the camshaft for wear on the cams and
bearing journals. Also check the wear on the
bearings. The bearings are pressed into their recesses and must be line milled after pressing in.
The maximum allowable wear on journals or
bearings is 0.05 mm (0.002").
OIL PUMP
53.
50.
Check the connecting rod bushings, using the
gudgeon pins as gauges. There should be no
noticeable play. If it is necessary to replace the
bushings a suitable drift should be used for
pressing in and out. Ensure that the oil hole in
bushings coincides with that in the connecting
rod.
Ream the new bushings. The correct fit is
achieved when an oiled gudgeon pin slides slowly through the bushing under its own weight.
Remove the cover, retaining the old gasket. Remove the gearwheels, the spring and the piston.
Clean all parts. Check the reducing valve spring,
see “Technical Data”. Replace any worn or damaged parts.
CRANKSHAFT
51.
20
Measure the big end journals and the main bearing journals. The out-of-round should not exceed
0.06 mm (0.0024") and the taper should not exceed 0.05 mm (0.002"). If these values are exceeded, the crankshaft should be ground to a
suitable undersize (see “Technical Data”).
54A. Check the axial play of the gearwheels. NOTE!
The old gasket should be included in the measurement. If necessary, the number of gaskets
may be increased or reduced so as to obtain a
clearance of 0.03-0.15 mm (0.001"-0.006"). The
thickness of a new gasket is 0.10 mm (0.004").
Also inspect the cover, repair or replace as necessary if badly worn. Coat the gasket(s) with
sealant and refit the parts. Pour a little oil into
the pump before mounting onto the engine.
B.
Check the gear backlash, which should be
0.15-0.35 mm (0.006-0.014"), using a feeler
gauge. Worn gears must be replaced.
FEED PUMP
SEA WATER PUMP
Replacing the impeller
55.
Undo the central screw in the cover, lift out the
strainer and clean it. Take out the six screws
holding the upper and lower parts of the pump
together. Take out the lever spring (1), also remove the screw (2).
56.
Remove the lever shaft using a pair of
fine-nosed pliers. Pull out the lever and the diaphragm. Fit new parts from the repair kit and reassemble the pump.
58.
Remove the cover. Watch out for water pouring through the pump. With the aid to two
screwdrivers prise the shaft with the impeller out
of the housing sufficiently for the screw which
holds the impeller to be undone. NOTE! Lay
some kind of protection under the screwdrivers
so that the housing is not damaged.
59.
Take the screw out and pull the impeller off the
shaft. Clean the housing internally and check
that the carrier (MD17) is free from defects and
fit the new impeller. Fit the cover together with a
new gasket.
60.
MD11: Engine no. 46159-46175 and from and
including engine no. 46214. Remove the cover. The impeller can be pulled out as shown in
the picture or by using suitable pliers. NOTE!
Protect the edge of the pump housing. The shaft
follows with the impeller but is stopped by a pin
behind the seals.
THERMOSTAT
57.
The thermostat is accessible after the thermostat housing on the front on the exhaust manifold has been taken off. Watch out for water
pouring into the boat. Check the opening and
closing temperatures with hot water. These
should be as given in “Technical Data”. If the
thermostat is faulty it should be discarded. Use
new sealing rings when refitting (MD17 has only
one sealing ring). The picture shows the earlier
type (bellows thermostat). Later engines are fitted with a wax thermostat.
21
61.
MD17 from and including engine no. 17973
and MD17 - HD - HE from production start.
The impeller is removed as shown in picture 60.
The pump is fitted with two ball bearings (3).
When disassembling, loosen the lock ring (2)
and press out the shaft (the bearings following
with the shaft). Press the bearings from the
shaft using a suitable drift. When assembling,
the bearings are pressed onto the shaft using
drift 884742 until the shaft bottoms in the drift.
The seals (1) are replaced according to point 63.
Smear the shaft with grease and screw it carefully through the sealing rings so as not to damage them. Press in the shaft until the bearing
bottoms and fit the lock ring (2).
Replacing the sealing rings
62.
22
Remove the sea water pump. Watch out for water pouring into the boat. Take off the cover and
press out the shaft and the impeller.
63.
Remove the sealing rings (1) and the O-rings (2)
(earlier engines) and clean the pump housing
and shaft. Replace the impeller if necessary.
Check that the shaft is free from burrs or
scratches. Inspect the carrier (MD17). NOTE! A
new O-ring (2) shall not be fitted.
Fit new sealing rings. NOTE! Turn the sealing
rings the right way round and ensure that they
do not block the drainage hole in the pump
housing. Smear the shaft with grease and fit it
carefully into the housing, screwing it through
the sealing rings to avoid damaging them.
Locate the shaft in the housing so that the
screw hole lies outside: Fit the impeller and the
screw.
Pump having open shaft. The shaft has a
groove which is open at the front which is why
the impeller is assembled with the screw fitted.
Push the impeller in until bottoms.
Fit a new gasket into the cover and secure it
with the screws.
Also check the carrier screw on the camshaft.
HAND STARTER, MD17
64.
Remove the cover (1) together with the drive
and shaft. Knock out the pin (2) and press the
shaft out. Remove the sealing ring (3).
Remove the cover (4) and the screws (9), take
off the gearwheel. Remove the bearing housing
(8), knock out the pin (6) and pull out the sleeve
(5). Take out the locking screw (7) and press out
the shaft, the bearings, the spacer sleeve and
the sealing rings.
Fit new sealing rings and replace any parts that
are worn or damaged. Pack the bearings in with
grease and refit the parts.
HAND STARTER, MD11
65.
Remove the oil filler pipe (2). Undo the screws
and take the gearwheel off. Knock out the locking pin (3) and take off the sleeve (4). Take out
the locking screw (1) and press out the shaft,
the bearings, the spacer sleeve and the sealing
rings.
Fit the new sealing rings and replace any parts
that are worn or damaged. Pack the bearings in
with grease and refit the parts.
23
Assembling
Use new gaskets, sealing rings, sealing washers and
lock washers. Grease or oil the sealing rings and oil
moving parts before fitting.
CRANKSHAFT
66.
67.
24
Fit the centre bearing (or bearings) on the crankshaft. NOTE! Turn the bearing the right way
round so that the locating screw in the crankcase fits into the hole (2) in the centre bearing.
“1” oil passage, “2” hole for locating screw.
MD11. Smear the two thrust washers with
grease and fit one of them on the crankshaft
turning the flat side towards the rear main bearing (timing gear side). The other washer is fitted
in point 74.
68.
Fit the crankshaft in the crankcase. Ensure that
the hole for the centre bearing locating screw
lines up with the hole in the crankcase. MD11:
Make sure that the lug on the thrust washer fits
into the recess in the crankcase.
69.
Replace the O-ring on the centre bearing locating screw. Wind-on a little thread-sealing tape
and apply Permatex to the outside. Screw the
locating screw in so that it bottoms properly and
then loosen it by half a turn.
70.
MD11: Replace both O-rings on the bearing
shield, see illustration. Replace the crankshaft
sealing ring. Stick a small piece of tape over the
keyway in the crankshaft and fit the bearing
shield.
MD17: Stick a small piece of tape over the keyway in the crankshaft and fit a new sealing ring.
71.
74.
Place the engine so that it is resting on the flywheel. Make sure that the inner thrust washer is
correctly located. Place the outer thrust washer
on the crankshaft with the flat surface towards
the main bearing. Fit the distance washer with
the flat surface toward the thrust washer.
75.
Fit the key for the crankshaft drive. Heat the
gearwheel to about 100°C (212°F) and fit it onto
the crankshaft. Check to make sure that the inner thrust washer does not move from its correct position.
76.
Fit the camshaft and ensure that the oil pump
shaft fits into the slot in the camshaft. Lock the
screws with the lock washers. MD17: Note the
location of the oil passage.
Fit the starter motor and the oil pump. NOTE!
Put a little oil into the pump before fitting.
MD11: Fit the front engine brackets.
FLYWHEEL
72.
Fit the key and the flywheel (the taper must be
perfectly clean). Tightening torque 500 Nm (50
kpm = 369 lbf.ft). Lock the nut by bending up
the washer.
TIMING GEAR
73.
MD17: Smear both thrust washers with grease
and place one of them on the inner side of the
bearing shield, turning the flat side towards the
main bearing. Ensure that the lug on the washer
fits into the recess in the shield. Fit the bearing
shield onto the engine and tighten the screws.
25
77.
Fit the camshaft drive key. Heat the gearwheel
to about 100°C (212°F) and fit it so that the
markings coincide. Fit the camshaft key.
78.
Fit the cam disc and the left hand threaded
screw/nut to the camshaft. Tightening torque: 70
Nm (7 kpm = 50 lbf.ft.) for MD11 and 320 Nm
(32 kpm = 231 lbf.ft.) for MD17. Check the end
play. This should be: 0.05-0.15 mm
(0.002"-0.006").
80.
Fit the centrifugal governor. Tighten the
socket-head screw on the side. NOTE! Make
sure that the screw locates in the groove. Check
that the pin (1) slides freely in the shaft. MD17:
Fit the sea water pump carrier.
81A. MD11C and MD17C. Fit the timing gear cover.
79.
26
Fit the key for the reverse gear carrier/carrier
drive in crankshaft keyway on the reverse gear
side. Heat the carrier/carrier drive to about
150°C (302°F) and fit it onto the crankshaft. Fit
the large washer and the lock washer and
tighten the screw with a torque wrench. Use a
counterhold (in the flywheel).
Tightening torque:
MD11C and D ............ 70 Nm (7 kpm = 50 lbf.ft.)
MD17C ................... 120 Nm (12 kpm = 87 lbf.ft.)
MD17D ................... 110 Nm (11 kpm = 80 lbf.ft.)
NOTE! At this torque the crankshaft drive is
also completely tightened. Check the crankshaft
axial play which should be 0.08-0.35 mm
(0.003"-0.014"). Bend the lock washer against
the head of the screw. C-engines, see 81A. Dengines, see 81 B.
81B. MD11D and MD17D. Fit the timing gear cover.
82.
Fit the oil pipes for the rocker arm mechanism.
Fit the oil pressure switch and a new oil filter.
MD11: Fit the oil strainer. NOTE! Apply Permatex to the filter’s sealing surface and threads
and tighten the cover firmly (use a torque
wrench), so that no air can get in and upset the
lubrication. NOTE! Don’t forget the gasket.
Tightening torque:
MD11C, 70 Nm (7 kpm = 50 lbf.ft.), tool 884714
“A”.
MD11D, 120 Nm (12 kpm = 87 lbf.ft.), wrench
width 30 mm “B”.
84.
Place the sealing rings into the cylinder grooves
and under the liner collar. “1” yellow O-ring, “2”
black O-ring and “3” black O-ring (narrow).
Smear the rings with grease.
85.
Place the liner with the collar against a support
and put the cylinder onto the liner. Press down
by hand until the collar rests against the counter
bore in the cylinder. Make sure that the sealing
rings are not forced out of position during this
operation.
CYLINDERS AND CYLINDER LINERS
83.
Grease and fit the sealing ring (yellow O-ring) for
each respective cylinder liner in the groove in
the crankcase (1). Place new shims on the
crankcase face. If the cylinder liners are not
being replaced, the equivalent shim thickness,
which corresponds to the figure stamped on the
crankcase surface for each respective cylinder
(2) can be selected. The marking can be in the
form of punch marks or figures which represent
1/10 mm (0.004"). If new cylinder liners are fitted, fit one 0.2 mm (0.008") and one 0.3 mm
(0.012") shim for each cylinder. Later (when
carrying out control measurements) one of the
shims may be removed, if necessary, after
having been clipped. Fit the valve tappets.
27
PISTONS AND LINERS
86.
87.
28
88.
Heat the pistons to about 100°C (212°F). Assemble the pistons and connecting rods as
shown in the illustration.
89.
Fit the piston rings using piston ring pliers. It is
immaterial which way up the upper ring and the
oil scraper ring are fitted, but the other rings are
marked “Top”.
Turn the rings so that the gaps are staggered.
90.
Fit the pistons with the special tool 2823. This is
the same as that used for the B20 and B30 engines. Fit piston No. 1 nearest to the timing
gear. NOTE! The recess in the top of the piston
must come immediately under the nozzle.
Fit the sealing rings for the push-rods and oil
pipe channels. The rings should be turned so
that the narrow edges seal against the crankcase. Smear a little grease on the rings.
Place the cylinders on the crankcase.
94.
91.
Fit the big-end bearing caps so that the engine
markings agree. NOTE! New nuts and bolts
should be used when assembling.
Tightening torque: 65 Nm (6.5 kpm = 47 lbf.ft.).
The value of 0.25 mm, (0.0098"), corresponding
to t-k in the illustration is added to the dimension “A”. Dimension “B” is subtracted from the
result of this addition. The clearance “S” obtained should be 0.8-0.9 mm, (0.0315-0.0354").
If necessary, adjust the clearance with the
shims under the cylinder.
Example:
A = 4.40 mm, (0.173")
B = 3.53 mm, (0.139")
S = A+0.25-B, (A+0.01"-B)
S = 4.40+0.25-3.53 = 1.12 mm
(0.173+0.01-0.139 = 0.044")
Allowable clearace = 0.8-0.9 mm,
(0.0315 to 0.0354").
In this case a shims of 0.3 mm (0.012") is removed
so that: “S’’ becomes 1.12-0.3 = 0.82 mm
(0.044-0.012 = 0.032").
CYLINDER HEAD
92.
93.
Press the cylinder liner down with tool 884622
and measure the distance “A” from the liner collar to the piston in the top dead centre position.
See also Point 94.
Measure the distance “B” from the downward
projecting part of the cylinder head to the sealing plane. See also Point 94.
95.
Fit new cylinder head gaskets. Make sure that
the stud bolts are screwed in properly.
96.
Put the cylinder heads on and fit new nuts but
do not tighten them.
29
ADJUSTING THE VALVE CLEARANCE
97.
Fit the exhaust manifold but only tighten it up
enough to align the cylinder heads. NOTE!
Make sure that the gaskets are the right way
round.
Valve clearance with the engine hot:
Inlet 0.30 mm, (0.0118")
Exhaust 0.35 mm, (0.0138")
100. Turn the engine over in the correct direction of
rotation until the valves for one cylinder “rock”.
Then turn through a further revolution and adjust
the valves for this cylinder. Do the same for the
other cylinders. After a trial run, the valves
should be readjusted whilst the engine is still
hot.
98.
99.
30
Tighten the cylinder head nuts in stages of 30,
80 and 110 Nm (3, 8, 11 kpm = 22, 58, 80
lbf.ft.). Tighten the exhaust manifold.
Check the straightness of the push rods.
Roll the rods on a flat surface. Bent push rods
must be replaced.
Fit the push rods and the rocker arm bearing
brackets. Connect the oil pipes to the rocker
arm shafts.
101. Fit the rocker arm covers and check the decompression device as follows:
A.
Remove the oil filler plugs.
B.
Turn the engine over so that the exhaust valve
is closed.
C.
Place the handle so that it points upwards.
D.
Loosen the lock nut and screw the adjusting
screw upwards. Screw the adjusting screw down
again so that it touches the rocker arm. Screw
down a further half turn and tighten the lock nut.
Replace the oil filler plugs.
NOTE! The decompression device is not adjustable
on the D-engines.
FUEL INJECTION PUMP
102. Fit the crankcase breather and the hand starter
where applicable.
NOTE! After fitting the hand starter, check that
there is backlash between its gearwheel and the
drive on the camshaft (in the case of MD17, the
check is made through the cover on the hand
starter.) If there is no clearance, the number of
gaskets under the hand starter is increased until
a noticeable clearance is obtained.
104A. Clean the mating surfaces on the pump and the
timing gear cover. Remove the plastic foil from
the new gasket and place the gasket on the
cover.
B.
Measure the distance from the timing gear cover
to the base circle of the pump cam (the cam
should be turned towards the crankshaft). It is
important that the distance should be 82.8±0.2
mm (3.26"±0.008") inclusive of gasket to ensure
correct injection angle setting. If the distance is
too small increase the number of gaskets. Each
gasket is 0.20 mm (0.0079" thick).
If the distance is too great, larger rollers must
be fitted to the pump element lifters. These rollers are available in sizes differing by 0.12 mm
(0.0047") in diameter. NOTE! If a pump has rollers of different sizes, the diameter of each roller
should be increased by the same amount.
103. MD11: Fit the inspection covers on the crankcase.
MD17: Fit the oil strainer. NOTE! Oil the sealing
rings and place them on the ends of the pipe as
shown in the illustration. Press the oil pipe into
the strainer housing first and then into the crankcase. Fit the oil sump. Tighten the plug “1” (on
certain engines).
105. Remove the inspection cover on the timing gear
cover and fit the injection pump. Make sure that
the pin on the control rod is correctly fitted in the
governor lever.
31
CHECKING THE CONTROL ROD TRAVEL
106. A rough adjustment of the injection quantity can
be made as follows:
A.
Measure the distance (A) from the timing gear
cover to the control rod when this is completely
pressed in (towards the front of the engine).
B.
Repeat the measurement with the control rod in
the backward position. NOTE! The cold starting
device must not be engaged when taking this
measurement. With the MD17, the cold starting
device is disengaged by placing the tool 833839
on the pin (C) and pushing forward.
C.
The difference between the two dimensions should
be:
MD11 7.1±0.1 mm (0.280±0.004")
MD17 6.7±0.1 mm (0.264±0.004")
If there is a dimension stamped on the pump
flange, this applies. If necessary adjust by means
of the screw (B). Replace the inspection cover.
109. MD11: Fit the belt pulley on the flywheel (certain
models).
MD11, MD17: Fit the alternator and the V-belt.
Connect all electrical cables. MD17: Fit the belt
guard (earlier models).
110. Close the cooling water draincocks. Fit the air
cleaner.
107. Fit the feed pump and the sea water pump.
NOTE! Don’t forget to fit the carrier for the sea water pump on MD17. Mount the coolant pipe between the pump and the exhaust manifold.
108. Replace the fuel filter. Fit the injectors, tightening
torque: 20 Nm (2 kpm = 14.5 lbf.ft.). Fit all fuel
pipes and the lifting eyebolts.
To prevent the injectors seizing it is advisable to
spray them with anti-rust agent prior to fitting.
32
111. Fill with lubricating oil to the correct level. See
“Technical Data” for quantity and grade. NOTE! Do
not fill so quickly so as to cause blockage of the
ventilation hole (1), (later models).
VENTING THE FUEL SYSTEM
MD11C and MD17C
112. Unscrew the venting screw on the fuel filter by
about 4 turns. Watch out for fuel spillage.
115. Unscrew the injector delivery pipe nuts, push
the stop control in and set the speed control to
full revolutions. Press down the cold start button
on MD11. Turn the engine over with the starter
motor until fuel comes out of the delivery pipes.
Tighten the delivery pipe nuts and start the engine.
MD11D and MD17D
116A.
113. Pump fuel out with the hand pump until fuel
comes out without air bubbles. Close the vent
screw. If the pump does not work well, turn the
engine over slightly so as to change the position
of the pump driving cam.
1.
Open the vent screw (1 above) on the fine filter.
Watch out for fuel spillage. Use pieces of rag
(for example) at the point of ventilation.
2.
Pump out fuel with the help of the hand pump (2
below) until the fuel comes out without air
bubbles. Close the vent screw. If the pump does
not work well, turn the engine over slightly so as
to change the position of the pump driving cam.
Open the vent screw on the injection pump (3 above)
and pump out clean fuel without air. Close the vent
screw and open the return pipe screw (pressure equalizing valve) one turn (4 above). Pump out clean fuel
without air and close the return pipe screw. Loosen
each injector delivery pipe nut and turn the engine
over with the starter motor until fuel comes out.
Tighten the delivery pipe nut. Start the engine.
114. Open the vent screw on the injector pump about
2 turns. Pump with hand pump until the fuel
comes out without air bubbles. Close the vent
screw while pumping.
116B. Feed pump, 2 hand pump.
33
CHECKING THE INJECTION ANGLE
ADJUSTING ENGINE SPEED
117. Unscrew the rear delivery pipe on the injection
pump (nearest the reverse gear) and fit a Wilbär
pipe or the level pipe 9993197.
118. MD11: Set the speed control to max. NOTE!
The cold start device must not be engaged.
MD17: Remove the inspection cover on the timing gear cover. Push the cold start pin forward
using the tool 833839 at the same time as the
speed control is set to max.
119. Turn the engine over in the direction of rotation
until the level pipe is filled with air-free fuel.
Open the level screw on the Wilbär pipe so that
the level lies at 25-30 mm (1-1.2") measured upwards. Turn the engine over slowly until the fuel
just begins to rise in the pipe. The angle markings on the flywheel should now be at 24-26°
B.T.D.C. Adjust the injection angle if necessary
by increasing or reducing the number of gaskets
under the injection pump.
MD11, use tool 884595. MD17, mark on the belt
guard or use tool 884741.
34
120A. Allow the engine to warm up and then set the
low idling speed adjusting screw (2) so that dimension A in the diagram is 14 mm (0.551").
B. Start the engine and loosen the lock screw
(1) on the lever.
C. Turn the lever against the stop (2). Then, using a screwdriver, turn the governor shaft so as
to obtain a speed of 12.5-13.5 r/s (750-810 r/
min). Tighten the levers’ lock screw in this position.
D. Turn the lever up to the adjusting screw (3)
and check the high idling speed, which should
be MD11C, 17C: 44 r/s (2640 r/min) MD11D,
17D: 46 r/s (2760 r/min) for pleasure use and 42
r/s (2520 r/min) for HD variant. Adjust the speed
if necessary.
Electrical system
3.
IMPORTANT
The following applies to engines fitted with alternators.
1.
2.
Never interrupt the circuit between the alternator
and the battery while the engine is running.
Otherwise the charging regulator will be ruined.
If a main switch is fitted, it must not be
switched off until the engine has stopped. Otherwise no cable must be disconnected while the
engine is running, since this can also ruin the
charging regulator.
Check regularly the battery, battery cables and
cable terminals. The battery poles should be
well cleaned and the terminals tightened and
well-greased to ensure continuous function. All
cables in general must be well-tightened and dry
and sprayed with moisture inhibiting spray.
NOTE! On no account must the battery’s positive and negative poles be mixed up when the
battery is fitted.
4.
5.
6.
When starting with the aid of an auxiliary battery, first check to make sure that the auxiliary
battery has the same rated voltage as the
standard battery. Connect the auxiliary battery
to the standard battery with positive to positive
and negative to negative. Remove the auxiliary
battery when the engine has started. NOTE! On
no account must the cables to the standard battery be disconnected in this operation.
When carrying out electrical welding on the engine or installation components, the charging
regulator cables must first be disconnected and
insulated. Both the battery cables must also be
disconnected.
Before carrying out any repairs on the alternator
equipment, always first disconnect both the battery cables. The same applies if the battery has
to be rapidly charged.
Never test any of the components with a screwdriver or similar tool against a connection to see
if there is any spark.
WIRING DIAGRAM
POSITION LIST
1.
2.
3.
4.
5.
6.
7.
8.
9.
10.
11.
12.
13.
14.
15.
16.
Temperature gauge
Revolution counter
Charging warning lamp
Oil pressure warning lamp
Key switch
Switch, instrument lighting
Switch, extra equipment
Connector
Starter motor
Alternator
Fuse box
Main switch
Engine speed sender
Oil pressure sender
Temperature sender
Battery
WIRING CODE
Symb. Colour
mm 2
AWG
A
White
6
9
B
Black
1.5
15
B’
Black
0.6
19
C
Red
6
9
C’
Red
35
1
C’’
Red
0.6
19
C’’’
Red
2.5
13
D
Grey
1.5
15
F
Yellow
1.5
15
G
Brown
1.5
15
H
Blue
4
11
H’
Blue
35
1
H’’
Blue
1.5
15
J
Green
1.5
15
J’
Green
0.6
19
35
Fault finding table
Engine
does
not start
Engine
stops
Engine does not
reach correct
working
speed on full
throttle
Engine runs
irregularly
or vibrates
abnormally
Engine
becomes
abnormally
hot
X
Stop control not pressed in.
Main switch not closed. Battery
discharged. Break in cable or
main fuse block.
X
X
X
X
Fuel tank empty. Fuel cock
closed. Fuel filter blocked.
X
Water or impurities in fuel.
Faulty injectors. Air in fuel system.
X
X
Faulty rev. counter. Boat loaded
abnormally. Air cleaner
blocked. Fouling on boat bottom.
X
Incorrect engine aligning. Propeller damaged.
X
36
CAUSE OF TROUBLE
Obstruction in cooling water intake or cooling jackets.
Sea-water pump impeller fault.
Thermostat faulty.
Special tools
833839
Tool for disengaging the cold starting device
when setting the control rod travel, MD17.
884077
Drift for assembling injector sleeve.
884078
Puller for flywheel, carrier (D-engines) and crankshaft
884081
Injector sleeve extractor
884085
Flaring tool, injector sleeve.
884489
Tool for removing and fitting of main bearings.
884497
Drift for assembling valve sealing rings.
884499
Drift for assembling valve guides.
884560
Drift for removing and fitting rocker arm bearings.
884742
Drift for assembling bearings onto sea water
pump shaft, MD17.
37
884714
Key for oil strainer MD11C.
884581
Fixture for attaching engine to stand, MD17.
Use together with engine stand 9992520 and attachment flange 884583.
884604
Fixture for attaching engine to stand, MD11.
Use together with engine stand 9992520, attachment flange 884583 and attachment screw
884623.
884579
Tool for dismantling oil filter.
884595 (MD11)
Tool for checking injection pump setting.
884741 (MD17)
38
884622
Pressing tool for fitting of cylinder liners.
9991459
Drift for removing valve guides.
9992823
Piston assembly ring (standard dimension).
9993197
Level tube for injection pump setting.
9994128
Valve guide reamer.
Technical Data
GENERAL
Type designation .............................................................
Output1) at 41.7 r/s (2500 r/min) ......................................
at 50 r/s (3000 r/min) .......................................................
...............................................................................
Output2) at 38.3 r/s (2300 r/min) HD-engine ....................
...............................................................................
MD11D/MSB Output2) at 41,7 r/s (2500 r/min) ...............
Number of cylinders ........................................................
Bore mm (in) ....................................................................
Stroke mm (in) .................................................................
Displacement, dm3 (cu.in) ...............................................
...............................................................................
Compression ratio ...........................................................
Compression pressure at starter motor speed
3.3-4.2 r/s (200-250 r/min) ...............................................
Direction of rotation viewed from flywheel ......................
High speed idling (overspeed) .........................................
...............................................................................
Heavy duty engine ...........................................................
...............................................................................
Low speed idling ..............................................................
CYLINDER LINERS
Material ............................................................................
Diameter ..........................................................................
MD11C
MD11D
MD17C
MD17D
17 kW (23 hp)
26 kW (35 hp)
18.4 kW
26.5 kW
(25 hp)
(36 hp)
15 kW
15 kW
22 kW
22 kW
(20 hp)
(20 hp)
(30 hp)
(30 hp)
17 kW (23 hp)
2
2
3
3
88.9 mm (3.5")
90 mm (3.54")
1.12 dm3
1.68 dm3
(68.35 cu.in)
(102.51 cu.in)
17.5:1
2-2.5 MPa (20-25 kp/cm2 = 284-355 p.s.i.)
Clockwise
27003300270033002800 r/min
3350 r/min
2800 r/min
3350 r/min
25002800250028002600 r/min
2900 r/min
2600 r/min
2900 r/min
750-810 r/min
Cast iron
+0.005
88.90 mm
mm
–0.010
3.54 +0.0002")
–0.0004")
PISTONS
Material ............................................................................
Diameter, cylinder bore ...................................................
Height total mm (in) .........................................................
Height from centre of gudgeon pin to top of piston mm (in)
Piston clearance in cylinder liner mm (in) ......................
Aluminium
88.78-88.80 mm (3.4953"-3.4961")
98 mm (3.858")
65 mm (2.559")
0.09-0.13 mm (0.00354-0.00512")
GUDGEON PINS
Diameter mm (in) .............................................................
Gudgeon pin bearing diameter mm (in) ...........................
Clearance gudgeon pin - bearing ....................................
28.00-28.004 mm (1.10236-1.10252")
28.014-28.025 mm (1.10291-1.10334")
Close running fit
PISTON RINGS
Compression rings, number ............................................
Oil rings, number .............................................................
The upper compression ring is chrome plated.
Piston ring axial clearance in groove:
1st compression ring .......................................................
2nd ...............................................................................
3rd
...............................................................................
Oil ring ..............................................................................
0.08-0.11 mm (0.00315-0.00433")
0.06-0.092 mm (0.00236-0.00362")
0.03-0.062 mm (0.00118-0.00244")
0.03-0.062 mm (0.00118-0.00244")
Piston ring gap measured in cylinder liner:
1st compression ring .......................................................
2nd and 3rd ......................................................................
Oil ring ..............................................................................
0.40-0.55 mm (0.0157-0.0217")
0.30-0.45 mm (0.0118-0.0177")
0.25-0.40 mm (0.0100-0.0157")
1)
2)
3
1
Propeller shaft output, DIN 6270 Leistung B für Dauerbetrieb.
Propeller shaft output for “run-in” engines with reverse gear. DIN 6270 Leistung B für Dauerbetrieb.
39
MD11C
MD11D
MD17C
MD17D
CYLINDER HEAD
Material ............................................................................
Specially alloy cast-iron
CRANKSHAFT AND BEARINGS
Crankshaft axial clearance mm (in) ................................
Main bearings radial clearance mm (in) ..........................
Big-end bearings radial clearance mm (in) .....................
0.08-0.35 mm (0.00315-0.01378")
0.038-0.100 mm (0.00150-0.00394")
0.054-0.099 mm (0.00213-0.00390")
MAIN BEARING JOURNALS
Diameter
standard ...........................................................................
0.254 mm undersize (0.010") ..........................................
0.508 mm undersize (0.020") ..........................................
0.762 mm undersize (0.030") ..........................................
66.646-66.665 mm (2.62386-2.62461")
66.392-66.411 mm (2.61386-2.61461")
66.138-66.157 mm (2.60386-2.60461 ")
65.884-65.903 mm (2.5939-2.5946")
MAIN BEARING SHELLS
Thickness
standard mm (in) .............................................................
0.254 mm oversize (0.010") ............................................
0.508 mm oversize (0.020") ............................................
0.762 mm oversize (0.030") ............................................
2.136-2.145 mm (0.08409-0.08445")
2.263-2.272 mm (0.08909-0.08945")
2.390-2.399 mm (0.09409-0.094449")
2.517-2.526 mm (0.09909-0.09945")
BIG-END BEARING JOURNALS
Diameter
standard mm (in) .............................................................
0.254 mm undersize (0.010") ..........................................
0.508 mm undersize (0.020") ..........................................
0.762 mm undersize (0.030") ..........................................
53.966-53.985
53.712-53.731
53.458-53.477
53.204-53.223
BIG-END BEARING SHELLS
Thickness
standard mm (in) .............................................................
0.254 mm oversize (0.010") ............................................
0.508 mm oversize (0.020") ............................................
0.762 mm oversize (0.030") ............................................
1.384-1.391
1.511-1.518
1.638-1.645
1.765-1.772
CONNECTING ROD
Axial clearance at crankshaft mm (in) ............................
CAMSHAFT
Axial clearance ................................................................
Radial clearance in bearing .............................................
Bearing journals, diameter
No. 1 ...............................................................................
No. 2 ...............................................................................
No. 3 ...............................................................................
No. 4, (MD17) ..................................................................
The bearings are reamed after pressing in
Cam lift mm (in) ...............................................................
VALVE SYSTEM
Inlet
Valve disc diameter .........................................................
Stem diameter mm (in) ...................................................
Valve seat angle ..............................................................
Cylinder head seat angle .................................................
Seat width in cylinder head mm (in) ...............................
Clearance, engine warm mm (in) ....................................
40
mm
mm
mm
mm
mm
mm
mm
mm
(2.12465-2.12539")
(2.11465-2.11539")
(2.10465-2.10539")
(2.09465-2.09539")
(0.05449-0.05476")
(0.05949-0.05976")
(0.06449-0.06476")
(0.06949-0.06976")
0.05-0.25 mm (0.00197-0.00984")
0.05-0.15 mm (0.00197-0.00591")
0.03-0.09 mm (0.00118-0.00354")
31.700-31.725
46.975-47.000
48.975-49.000
54.970-55.000
mm
mm
mm
mm
(1.2480-1.2490")
(1.8494-1.8504")
(1.9281-1.9291")
(2.1642-2.1654")
5.75-5.85 mm (0.22638-0.23032")
38 mm (1.49606")
7.955-7.970 mm (0.31319-0.31378")
44.5°
45.0°
ca 1.0 mm (0.03937")
0.30 mm (0.0118")
Exhaust
Valve disc diameter mm (in) ...........................................
Stem diameter mm (in) ...................................................
Valve seat angle ..............................................................
Cylinder head seat angle .................................................
Seat width in cylinder head mm (in) ...............................
Clearance, engine warm mm (in) ....................................
MD11C
DECOMPRESSION DEVICE
Max. downward pressing of exhaust valve
(not adjustable on D-engines) mm (in) ............................
0.5 mm (0.01969"
VALVE GUIDES
Length, inlet mm (in) .......................................................
exhaust mm (in) ...............................................................
Bore diameter after assembly and reaming mm (in) ......
Height above cylinder head spring surface ....................
Clearance valve stem-guide
inlet .........................................................................
exhaust ..................................................................
59 mm (2.32283")
52 mm (2.04724")
8.0 mm-8.015 mm (0.31496-0.31555")
18 mm (0.70866")
0.03-0.06 mm (0.00118-0.00236")
0.03-0.07 mm (0.00118-0.00276")
VALVE SPRINGS
Free length, unloaded ......................................................
loaded with 300±20 N (30±2 kp) (66.139±4.41 lbf). .......
560±30 N (56±3 kp) (123.5±6.6 lbf) ......................
LUBRICATING SYSTEM
Oil capacity, engine inclination 0°
(For inclined engines fill oil to the upper mark on dipstick)
Engine excl. filter .........................................................
MD11D
MD17C
MD17D
34 mm (1.33858")
7.950-7.965 mm (0.31299-0.31358")
44.5°
45.0°
ca 1.0 mm (0.03937")
0.35 mm (0.0138")
50 mm (1.96850")
39 mm (1.535432")
32 mm (1.25984")
2.6 dm3
4.4 dm3
(0.7 US galls 0.6 UK galls)
incl. filter .........................................................
(1.16 US galls 0.96 UK galls)
2.85 dm3
4.65 dm3
(0.75 US galls 0.63 UK galls) (1.23 US galls 1.02 UK galls)
Engine incl. RB reverse gear, excl. filter ........................
3.0 dm3
4.8 dm3
(0.79 US galls 0.66 UK galls) (1,27 US galls 1.05 UK galls)
incl. filter .............................................................
3.25 dm3
5.05 dm3
(0.86 US galls 0.71 UK galls) (1.33 US galls 1.1 UK galls)
Oil quality ace. to API-system, diesel lubricating oil,
service .............................................................................
Viscosity
over +10°C (50°F) Volvo Penta CD oil Double grade .....
under +10°C (50°F) Volvo Penta CD oil Single grade ....
Oil pressure, warm engine idle speed .............................
full speed .........................................................................
LUBRICATION OIL PUMP
Type ...............................................................................
Spring for reducing valve:
Free length, unloaded ......................................................
loaded with 25±2 N (2.5±0.2 kp) (5.5±0.44 lbf) ..........
35±2 N (3.5±0.2 kp) (7.7±0.44 lbf) ..........
Axial gear clearance incl. gasket ....................................
FUEL SYSTEM
Injection pump manufacturer, Bosch
Injector manufacturer, Bosch hole diameter ..................
opening pressure ..................................................... MPa
(kp/cm2)
(p.s.i.)
Injection angle B.T.D.C ...................................................
Injection quantity .............................................................
HD-variant ........................................................................
CD (DS)
SAE 20W/30
SAE 10W
0.1-0.2 MPa (1-2 kp/cm2) (14-28 p.s.i.)
0.2-0.3 MPa (2-3 kp/cm2) (28-43 p.s.i)
Gear
40 mm (1.58")
34 mm (1.34")
31.5 mm (1.24")
0.03-0.15 mm (0.00118-0.00591")
4 st 0.27 mm (0.01063")
17.0 +0,8
24.6 +0.8
17.0 +0.8
–0
–0
–0
+8
+8
(170
)
(245
)
(170 +8 )
–0
–0
–0
+114
+114
+114
(2418
) (3485
) (2418–0 )
–0
–0
24-26°
24.5-26.5°
24-26°
35-36 mm3/stroke at 20°C (68°F) and 16.5
(1000 r/min) pump speed
33-34 mm3/stroke at 20°C (68°F) and 16.5
(1000 r/min) pump speed
24.5 +0.8
–0
+8
(245 )
–0
+114
(3485
)
–0
24.5-26.5°
r/s
r/s
41
FINE FILTER
Type .................................................................................
Earlier type ......................................................................
FEED PUMP
Feed pressure at 42 r/s (2520 r/min) ..............................
ELECTRICAL SYSTEM
Battery voltage ................................................................
Battery capacity, pleasure use (starter motor battery) ..
HD variant (starter motor battery) ...................................
Starter motor output
pleasure use ................................................................
HD variant ....................................................................
Alternator
Output MD11C, MD17C ..................................................
MD11D, MD17D, ................................................
Battery electrolyte, specific gravity:
Fully charged battery ...................................................
Battery to be recharged at ...........................................
COOLING SYSTEM
Thermostat, type .............................................................
WAX from and including engine no ............
Begins to open at .........................................................
Fully open at ................................................................
HDHE engine
Begins to open at .........................................................
Fully open at ................................................................
MD11C and D
MD17C and D
Spin-on
Filter insert
65-85 kPa (0.65-0.85 kp/cm2) (9.25-12.1 p.s.i.)
12 V
max 70 Ah
max 90 Ah
max 90 Ah
max 90 Ah
1.1 kW (1.47 hp)
1.9 kW (2.55 hp)
1.9 kW (2.55 hp)
1.9 kW (2.55 hp)
35 A (490 W)
50 A (700 W)
1.275-1.285 g/cm3 (0.0460-0.0464 lb/in3)
1.230 g/cm3 (0.0444 lb/in3)
Bellows (Replaceable with wax type)
49685
15740
60°C (140°F)
74°C (165°F)
74°C (165°F)
89°C (192°F)
WEAR TOLERANCES
Cylinder liners and pistons should be replaced when
0.25 mm (0.010") wear can be measured.
Crankshaft
Permissible out-of-round on main and big-end
bearing journals, max ......................................................
Permissible taper on main and big-end
bearing journals, max ......................................................
Max crankshaft end play .................................................
Valves
Valve stem, max permissible wear .................................
Max. clearance between valve stem and valve guides:
Inlet valves ......................................................................
Exhaust valves ................................................................
The valve disc edge shall be at least .............................
Distance from valve disc (new valve) to the cylinder
head face, max ................................................................
Camshaft
Maximum permissible wear in bearing journals
and bearings ....................................................................
42
0.06 mm (0.00236")
0.05 mm (0.00197")
0.45 mm (0.01772")
0.02 mm (0.00079")
0.15 mm (0.00591")
0.17 mm (0.00669")
1.5 mm (0.059")
2.5 mm (0.09843")
0.05 mm (0.0020")
TIGHTENING TORQUES
Cylinder head nuts* .........................................................
Centre bearing .................................................................
Big-end bearings ..............................................................
Shield for main bearings .................................................
Screw for carrier and carrier drive on crankshaft
(for reverse gear) .............................................................
.........................................................................................
Flywheel nut ....................................................................
Injectors ...........................................................................
Carrier for water pump .....................................................
Cap nuts for valve cover .................................................
Nipple for oil filter .............................................................
Cover for oil strainer MD11 C ..........................................
MD11 D ..........................................
MD11C and D
MD17C and D
110 Nm (11 kpm) (80 lbf.ft.)
70 Nm (7.0 kpm) (50 lbf.ft.)
65 Nm (6.5 kpm) (47 lbf.ft.)
40 Nm (4.0 kpm) (29 lbf.ft.)
70 Nm (7.0 kpm)
(50 lbf.ft.)
120 Nm (12.0 kpm) C-eng.
(87 lbf.ft.)
110 Nm (11.0 kpm) D-eng.
(80 lbf.ft.)
500 Nm (50 kpm) (369 lbf.ft.)
20 Nm (2.0 kpm) (14.5 lbf.ft.)
70 Nm (7.0 kpm)
320 Nm (32.0 kpm)
(50 lbf.ft.)
(231 lbf.ft.)
15 Nm (1.5 kpm) (11 lbf.ft.)
40 Nm (4.0 kpm) (29 lbf.ft.)
70 Nm (7.0 kpm)
(50 lbf.ft.)
120 Nm (12.0 kpm)
(87 lbf.ft.)
* NOTE! Tightening shall be carried out in 3 stages.
1st stage: 30 Nm (3 kpm) (22 lbf.ft.)
2nd stage: 80 Nm (8 kpm) (58 lbf.ft.)
Final stage: 110 Nm (11 kpm) (80 lbf.ft.)
COOLING SYSTEM,
DIAGRAMMATIC SKETCH
1.
2.
3.
4.
Reverse gear
Sea water pump
Thermostat
Thermostat housing
43
Notes
________________________________________________
________________________________________________
________________________________________________
________________________________________________
________________________________________________
________________________________________________
________________________________________________
________________________________________________
________________________________________________
________________________________________________
________________________________________________
________________________________________________
________________________________________________
________________________________________________
________________________________________________
________________________________________________
________________________________________________
________________________________________________
________________________________________________
________________________________________________
________________________________________________
________________________________________________
44
Report form
Do you have any complaints or other comments about this manual? Please make a
copy of this page, write your comments down and post it to us. The address is at
the bottom of the page. We would prefer you to write in English or Swedish.
From: ............................................................................
......................................................................................
......................................................................................
......................................................................................
Refers to publication: .............................................................................................................................................
Publication no.: ..................................................................... Issued: ....................................................................
Suggestion/reasons: ..............................................................................................................................................
..............................................................................................................................................................................
..............................................................................................................................................................................
..............................................................................................................................................................................
..............................................................................................................................................................................
..............................................................................................................................................................................
..............................................................................................................................................................................
..............................................................................................................................................................................
..............................................................................................................................................................................
Date: ............................................................
Name: ..........................................................
AB Volvo Penta
Customer Support
Dept. 42200
SE-405 08 Gothenburg
Sweden
7739341-1 English 09-1998