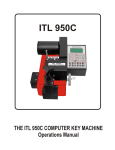
1
Automatic Cell Washing System Service Manual TM Model Version UltraCW™ B HELMER SCIENTIFIC 14400 Bergen Boulevard Noblesville, IN 46060 USA PH +1.317.773.9073 FAX +1.317.773.9082 USA and Canada 800.743.5637 360113-1/H ISO 13485:2003 CERTIFIED Contents Document History Revision Supersession Revision Description 05 SEP 2013* 8686 Supersedes A, B, C, D, E Revised layout for ease of navigation and locating information. G 07 FEB 2014* 9132 ► Defined safety statements according to ANSI Z535.4 standards. G supersedes F ► Added troubleshooting and error message statements to sections 9.3 and 9.4.1, respectively. H 05 JUN 2014* 9553 H supersedes G F Date CO Corrected mathematical example in section 7.2, and typographical error in section 8.3.1. * Date submitted for Change Order review. Actual release date may vary. 360113-1/H i Contents Contents Section I: General Information. . . . . . . . . . . . . . . . . . . . . . . . . . . . . . . . . . . . . . . . . 4 1 About this Manual . . . . . . . . . . . . . . . . . . . . . . . . . . . . . . . . . . . . . . . . . . . . . . . . . . . . . . . . . . . 4 1.1 1.2 1.3 Intended Audience. . . . . . . . . . . . . . . . . . . . . . . . . . . . . . . . . . . . . . . . . . . . . . . . . . . . . . . . . . . . . . . . . . . . . . 4 Model References. . . . . . . . . . . . . . . . . . . . . . . . . . . . . . . . . . . . . . . . . . . . . . . . . . . . . . . . . . . . . . . . . . . . . . 4 Copyright and Trademark. . . . . . . . . . . . . . . . . . . . . . . . . . . . . . . . . . . . . . . . . . . . . . . . . . . . . . . . . . . . . . . . 4 2Safety . . . . . . . . . . . . . . . . . . . . . . . . . . . . . . . . . . . . . . . . . . . . . . . . . . . . . . . . . . . . . . . . . . . . . 4 2.1 2.2 2.3 Safety Definitions . . . . . . . . . . . . . . . . . . . . . . . . . . . . . . . . . . . . . . . . . . . . . . . . . . . . . . . . . . . . . . . . . . . . . . 4 Product Labels . . . . . . . . . . . . . . . . . . . . . . . . . . . . . . . . . . . . . . . . . . . . . . . . . . . . . . . . . . . . . . . . . . . . . . . . 4 Avoiding Injury. . . . . . . . . . . . . . . . . . . . . . . . . . . . . . . . . . . . . . . . . . . . . . . . . . . . . . . . . . . . . . . . . . . . . . . . . 5 3 Configuration. . . . . . . . . . . . . . . . . . . . . . . . . . . . . . . . . . . . . . . . . . . . . . . . . . . . . . . . . . . . . . . 5 3.1 3.2 Model and Input Power. . . . . . . . . . . . . . . . . . . . . . . . . . . . . . . . . . . . . . . . . . . . . . . . . . . . . . . . . . . . . . . . . . 5 Software Version Information . . . . . . . . . . . . . . . . . . . . . . . . . . . . . . . . . . . . . . . . . . . . . . . . . . . . . . . . . . . . . 6 4 References and Compliance. . . . . . . . . . . . . . . . . . . . . . . . . . . . . . . . . . . . . . . . . . . . . . . . . . . 7 4.1 4.2 Regulatory Compliance. . . . . . . . . . . . . . . . . . . . . . . . . . . . . . . . . . . . . . . . . . . . . . . . . . . . . . . . . . . . . . . . . . 7 WEEE Compliance. . . . . . . . . . . . . . . . . . . . . . . . . . . . . . . . . . . . . . . . . . . . . . . . . . . . . . . . . . . . . . . . . . . . . 7 5Warranty . . . . . . . . . . . . . . . . . . . . . . . . . . . . . . . . . . . . . . . . . . . . . . . . . . . . . . . . . . . . . . . . . . . 7 5.1 5.2 USA and Canada. . . . . . . . . . . . . . . . . . . . . . . . . . . . . . . . . . . . . . . . . . . . . . . . . . . . . . . . . . . . . . . . . . . . . . . 7 5.1.1 Rapid Resolution . . . . . . . . . . . . . . . . . . . . . . . . . . . . . . . . . . . . . . . . . . . . . . . . . . . . . . . . . . . . . . . . 7 5.1.2Parts. . . . . . . . . . . . . . . . . . . . . . . . . . . . . . . . . . . . . . . . . . . . . . . . . . . . . . . . . . . . . . . . . . . . . . . . . . 7 5.1.3Labor . . . . . . . . . . . . . . . . . . . . . . . . . . . . . . . . . . . . . . . . . . . . . . . . . . . . . . . . . . . . . . . . . . . . . . . . . 8 5.1.4 Additional warranty information . . . . . . . . . . . . . . . . . . . . . . . . . . . . . . . . . . . . . . . . . . . . . . . . . . . . . 8 Outside of USA and Canada. . . . . . . . . . . . . . . . . . . . . . . . . . . . . . . . . . . . . . . . . . . . . . . . . . . . . . . . . . . . . . 8 Section II: Service. . . . . . . . . . . . . . . . . . . . . . . . . . . . . . . . . . . . . . . . . . . . . . . . . . . 9 6 Install and Remove the Rotor. . . . . . . . . . . . . . . . . . . . . . . . . . . . . . . . . . . . . . . . . . . . . . . . . . 9 7 Calibrate Saline Volume . . . . . . . . . . . . . . . . . . . . . . . . . . . . . . . . . . . . . . . . . . . . . . . . . . . . . . 9 7.1 7.2 7.3 Dispense and Measure Saline Volume. . . . . . . . . . . . . . . . . . . . . . . . . . . . . . . . . . . . . . . . . . . . . . . . . . . . . . 9 Determine Saline Volume Adjustment. . . . . . . . . . . . . . . . . . . . . . . . . . . . . . . . . . . . . . . . . . . . . . . . . . . . . . 10 Change the Saline Volume. . . . . . . . . . . . . . . . . . . . . . . . . . . . . . . . . . . . . . . . . . . . . . . . . . . . . . . . . . . . . . . 11 8Maintenance. . . . . . . . . . . . . . . . . . . . . . . . . . . . . . . . . . . . . . . . . . . . . . . . . . . . . . . . . . . . . . . 11 8.1 8.2 8.3 Replace the Pump Tubing. . . . . . . . . . . . . . . . . . . . . . . . . . . . . . . . . . . . . . . . . . . . . . . . . . . . . . . . . . . . . . . . 11 Replace Tube Holders. . . . . . . . . . . . . . . . . . . . . . . . . . . . . . . . . . . . . . . . . . . . . . . . . . . . . . . . . . . . . . . . . . 14 Clean the Cell Washer . . . . . . . . . . . . . . . . . . . . . . . . . . . . . . . . . . . . . . . . . . . . . . . . . . . . . . . . . . . . . . . . . 14 8.3.1Exterior. . . . . . . . . . . . . . . . . . . . . . . . . . . . . . . . . . . . . . . . . . . . . . . . . . . . . . . . . . . . . . . . . . . . . . . 14 8.3.2Interior . . . . . . . . . . . . . . . . . . . . . . . . . . . . . . . . . . . . . . . . . . . . . . . . . . . . . . . . . . . . . . . . . . . . . . . 15 8.3.3 Fill Ports. . . . . . . . . . . . . . . . . . . . . . . . . . . . . . . . . . . . . . . . . . . . . . . . . . . . . . . . . . . . . . . . . . . . . . 16 8.3.4 Flush the System. . . . . . . . . . . . . . . . . . . . . . . . . . . . . . . . . . . . . . . . . . . . . . . . . . . . . . . . . . . . . . . 17 8.4Supplies. . . . . . . . . . . . . . . . . . . . . . . . . . . . . . . . . . . . . . . . . . . . . . . . . . . . . . . . . . . . . . . . . . . . . . . . . . . . . 19 9Troubleshooting. . . . . . . . . . . . . . . . . . . . . . . . . . . . . . . . . . . . . . . . . . . . . . . . . . . . . . . . . . . . 20 9.1 9.2 9.3 General Operation Problems. . . . . . . . . . . . . . . . . . . . . . . . . . . . . . . . . . . . . . . . . . . . . . . . . . . . . . . . . . . . . 20 Performance Problems. . . . . . . . . . . . . . . . . . . . . . . . . . . . . . . . . . . . . . . . . . . . . . . . . . . . . . . . . . . . . . . . . 21 Equipment Problems. . . . . . . . . . . . . . . . . . . . . . . . . . . . . . . . . . . . . . . . . . . . . . . . . . . . . . . . . . . . . . . . . . . 22 360113-1/H ii Contents 9.4 Error Messages. . . . . . . . . . . . . . . . . . . . . . . . . . . . . . . . . . . . . . . . . . . . . . . . . . . . . . . . . . . . . . . . . . . . . . . 23 9.4.1 “CONTROL - ERROR XX” Error Message. . . . . . . . . . . . . . . . . . . . . . . . . . . . . . . . . . . . . . . . . . . . 23 9.4.2 “FU/CCI - ERROR XX” Error Message . . . . . . . . . . . . . . . . . . . . . . . . . . . . . . . . . . . . . . . . . . . . . . 24 9.4.3 “IMBALANCE” Error Message. . . . . . . . . . . . . . . . . . . . . . . . . . . . . . . . . . . . . . . . . . . . . . . . . . . . . 26 9.4.4 “LOW SALINE” Error Message . . . . . . . . . . . . . . . . . . . . . . . . . . . . . . . . . . . . . . . . . . . . . . . . . . . . 27 9.4.5 “N > MAX XX” Error Message . . . . . . . . . . . . . . . . . . . . . . . . . . . . . . . . . . . . . . . . . . . . . . . . . . . . . 28 9.4.6 “N < MIN XX” Error Message. . . . . . . . . . . . . . . . . . . . . . . . . . . . . . . . . . . . . . . . . . . . . . . . . . . . . . 29 9.4.7 “POWER INTERRUPT” Error Message. . . . . . . . . . . . . . . . . . . . . . . . . . . . . . . . . . . . . . . . . . . . . . 29 9.4.8 “SER I/O - ERROR XX” Error Message. . . . . . . . . . . . . . . . . . . . . . . . . . . . . . . . . . . . . . . . . . . . . . 30 9.4.9 “TACHO - ERROR XX” Error Message . . . . . . . . . . . . . . . . . . . . . . . . . . . . . . . . . . . . . . . . . . . . . . 31 9.4.10 “VERSION - ERROR XX” Error Message . . . . . . . . . . . . . . . . . . . . . . . . . . . . . . . . . . . . . . . . . . . . 32 10Maintenance. . . . . . . . . . . . . . . . . . . . . . . . . . . . . . . . . . . . . . . . . . . . . . . . . . . . . . . . . . . . . . . 32 10.1 10.2 10.3 10.4 10.5 10.6 10.7 Verify Rotor Speed is Within Tolerance. . . . . . . . . . . . . . . . . . . . . . . . . . . . . . . . . . . . . . . . . . . . . . . . . . . . . 32 Verify Imbalance Value is Within Tolerance. . . . . . . . . . . . . . . . . . . . . . . . . . . . . . . . . . . . . . . . . . . . . . . . . . 33 Adjust the Imbalance Microswitch. . . . . . . . . . . . . . . . . . . . . . . . . . . . . . . . . . . . . . . . . . . . . . . . . . . . . . . . . 34 Remove and Install the Front Panel . . . . . . . . . . . . . . . . . . . . . . . . . . . . . . . . . . . . . . . . . . . . . . . . . . . . . . . 35 Adjust the Display Contrast. . . . . . . . . . . . . . . . . . . . . . . . . . . . . . . . . . . . . . . . . . . . . . . . . . . . . . . . . . . . . . 36 View and Change the Fill Speed. . . . . . . . . . . . . . . . . . . . . . . . . . . . . . . . . . . . . . . . . . . . . . . . . . . . . . . . . . 36 Replace the Frequency Converter . . . . . . . . . . . . . . . . . . . . . . . . . . . . . . . . . . . . . . . . . . . . . . . . . . . . . . . . 38 10.7.1 Set Jumpers. . . . . . . . . . . . . . . . . . . . . . . . . . . . . . . . . . . . . . . . . . . . . . . . . . . . . . . . . . . . . . . . . . . 39 10.7.2 Initialize the Cell Washer . . . . . . . . . . . . . . . . . . . . . . . . . . . . . . . . . . . . . . . . . . . . . . . . . . . . . . . . . 39 10.8 Remove and Install the Bowl Assembly . . . . . . . . . . . . . . . . . . . . . . . . . . . . . . . . . . . . . . . . . . . . . . . . . . . . 40 10.9 Post-Repair Check . . . . . . . . . . . . . . . . . . . . . . . . . . . . . . . . . . . . . . . . . . . . . . . . . . . . . . . . . . . . . . . . . . . . 42 11Parts . . . . . . . . . . . . . . . . . . . . . . . . . . . . . . . . . . . . . . . . . . . . . . . . . . . . . . . . . . . . . . . . . . . . . 43 11.1 Front, Lid, and Bowl . . . . . . . . . . . . . . . . . . . . . . . . . . . . . . . . . . . . . . . . . . . . . . . . . . . . . . . . . . . . . . . . . . . 43 11.2 Rear and Bottom. . . . . . . . . . . . . . . . . . . . . . . . . . . . . . . . . . . . . . . . . . . . . . . . . . . . . . . . . . . . . . . . . . . . . . 44 11.3 Behind the Rear Panel . . . . . . . . . . . . . . . . . . . . . . . . . . . . . . . . . . . . . . . . . . . . . . . . . . . . . . . . . . . . . . . . . 45 11.4Side. . . . . . . . . . . . . . . . . . . . . . . . . . . . . . . . . . . . . . . . . . . . . . . . . . . . . . . . . . . . . . . . . . . . . . . . . . . . . . . . 45 11.5 Bowl and Rotor. . . . . . . . . . . . . . . . . . . . . . . . . . . . . . . . . . . . . . . . . . . . . . . . . . . . . . . . . . . . . . . . . . . . . . . 46 11.6 Behind the Front Panel. . . . . . . . . . . . . . . . . . . . . . . . . . . . . . . . . . . . . . . . . . . . . . . . . . . . . . . . . . . . . . . . . 47 11.7 Under the Bowl. . . . . . . . . . . . . . . . . . . . . . . . . . . . . . . . . . . . . . . . . . . . . . . . . . . . . . . . . . . . . . . . . . . . . . . 48 11.8Accessories. . . . . . . . . . . . . . . . . . . . . . . . . . . . . . . . . . . . . . . . . . . . . . . . . . . . . . . . . . . . . . . . . . . . . . . . . . 50 12Schematic. . . . . . . . . . . . . . . . . . . . . . . . . . . . . . . . . . . . . . . . . . . . . . . . . . . . . . . . . . . . . . . . . 51 360113-1/H iii General Information Section I: General Information 1 About this Manual 1.1 Intended Audience This manual is intended for use by end users of the cell washer and authorized service technicians. 1.2 Model References Generic references are used throughout this manual to group models that contain similar features. For example, “UltraCW” refers to both the 115 V and 230 V models. If a feature or procedure applies to a specific voltage, it is stated as such. 1.3 Copyright and Trademark Helmer® and UltraCW are registered trademarks or trademarks of Helmer, Inc. in the United States of America. Copyright © 2014 Helmer, Inc. All other trademarks and registered trademarks are the property of their respective owners. Helmer, Inc., doing business as (DBA) Helmer Scientific and Helmer. 2Safety The operator or technician performing maintenance or service on Helmer Scientific products must (a) inspect the product for abnormal wear and damage, (b) choose a repair procedure which will not endanger his/her safety, the safety of others, the product, or the safe operation of the product, and (c) fully inspect and test the product to ensure the maintenance or service has been performed properly. 2.1 Safety Definitions The following general safety alerts appear with all safety statements within this manual. Read and abide by the safety statement that accompanies the safety alert symbol. 2.2 WARNING The safety statement that follows this safety alert symbol indicates a hazardous situation which, if not avoided, could result in serious injury. CAUTION The safety statement that follows this safety alert symbol indicates a hazardous situation which, if not avoided, could result in minor or moderate injury. NOTICE The safety statement that follows this safety alert symbol indicates a situation which, if not avoided, could result in damage to the product or stored inventory. Product Labels The following general safety and information alerts appear on the product to identify potential hazards to the operator or service technician. Caution: Risk of damage to equipment or danger to operator 360113-1/H Caution: Biohazard 4 General Information 2.3 Avoiding Injury ► Review safety instructions before installing, using, or maintaining the equipment. ► Do not move or bump the cell washer during operation. ► Before moving unit, disconnect the AC power cord and secure the cord. ► Never physically restrict any moving component. ► Avoid removing electrical service panels and access panels unless so instructed. ► Use supplied power cords only. ► Using the equipment in a manner not specified by Helmer may impair the protection provided by the equipment. ► Decontaminate parts prior to sending for service or repair. Contact Helmer or your distributor for decontamination instructions and a Return Authorization Number. 3 Configuration 3.1 Model and Input Power NOTE Service information varies depending on the model and power requirements. This information is shown on the product specification label, located on the right side of the cell washer. A Type: UltraCW B Serial Number: 000000 C Volts 110-127 Vac D Kinetic Energy 250 Nm Freq 60 Hz 14400 Bergen Boulevard Noblesville, IN USA www.helmerinc.com Amps 2.5 Power 200 Watts 2014 Max. Density 1.2 Kg/dm³ RPM 3500 R/min Made in Switzerland Product Specification label. 360113-1/H Label Description A Model (REF) B Serial number (SN) C Power requirements D Operational information 5 General Information 3.2 Software Version Information The software version is displayed when the cell washer is powered on. Additional information is available through the Global menu, as follows: Parameter Meaning CONTROL: XXX h Number of operating hours VERS XX XX is the software version °C/* 00 FU/CCI - 1001 Frequency converter type FU/CCI - S. XX.XX Frequency converter software version View version information in the Global menu: 1 Ensure the screen is in Display mode. ► If the screen displays a completion message, open the lid to clear the message and return to Display mode. 2 On the control panel, view global parameters. ► Press and release the parameter selection button () for approximately eight seconds. ► The VOLUME ADJUST XX parameter is displayed. 3 Press and release the parameter selection button () to cycle through the global parameters. ► Parameter information contained within the table above is displayed. 4 Exit the Global menu. ► Press the STOP button, or ► Do not press any buttons for approximately 16 seconds. The screen returns to Display mode. 360113-1/H 6 General Information 4 References and Compliance 4.1 Regulatory Compliance Pollution degree: 2 (for use in USA and Canada only) This product is certified to applicable UL and CSA standards by a NRTL. Sound level (dependent on rotor): ≤ 44 dB(A) 4.2 WEEE Compliance The WEEE (waste electrical and electronic equipment) symbol (right) indicates compliance with European Union Directive WEEE 2002/96/EC and applicable provisions. The directive sets requirements for labeling and disposal of certain products in affected countries. When disposing of this product in countries affected by this directive: ► Do not dispose of this product as unsorted municipal waste. ► Collect this product separately. ► Use collection and return systems available locally. For more information on the return, recovery, or recycling of this product, contact your local distributor. 5Warranty 5.1 USA and Canada For technical service needs, please contact Helmer at 800-743-5637 or www.helmerinc.com. Be sure to have the model and serial number available. 5.1.1 Rapid Resolution When a warranty issue arises it is our desire to respond quickly and appropriately. The service department at Helmer is there for you. Helmer will oversee the handling of your warranty service from start to finish. Therefore, Helmer must give advance authorization for all service calls and/or parts needs relating to a warranty issue. Any repeat service calls must also be authorized as well. This allows for proper diagnosis and action. Helmer will not be responsible for charges incurred for service calls made by third parties prior to authorization from Helmer. Helmer retains the right to replace any product in lieu of servicing it in the field. 5.1.2Parts For a period of two (2) years, Helmer will supply at no charge, including freight, any part that fails due to defects in material or workmanship under normal use, with the exception of expendable items. Expendable items include specimen tubes, saline supply tubing, drain tubing, internal saline supply tubing, pump tubing, and saline supply fittings. Defective parts must be returned, prepaid, with previous return authorization. Inspection of defective parts by Helmer will be final in determining warranty status. Warranty procedures must be followed in all events. 360113-1/H 7 General Information 5.1.3Labor For a period of one (1) year Helmer will cover repair labor costs, provided the product is returned to Helmer for warranty service. Alternatively, your service staff may work with a Helmer technician to make repairs on site. Labor costs for repairs performed at a location other than Helmer, or for repairs made without the assistance of a Helmer technician, will be the responsibility of the end user. Helmer will not be responsible for charges incurred for service calls made by third parties prior to authorization from Helmer. Helmer retains the right to replace any product in lieu of servicing it in the field. 5.1.4 Additional warranty information The time periods set forth above begin two (2) weeks after the original date of shipment from Helmer. Warranty procedures set forth above must be followed in all events. THERE ARE NO WARRANTIES WHICH EXTEND BEYOND THE DESCRIPTION ON THE FACE HEREOF. THIS WARRANTY IS EXCLUSIVE AND IN LIEU OF ALL OTHER WARRANTIES, EXPRESS OR IMPLIED, INCLUDING WITHOUT LIMITATION ANY WARRANTY OF MERCHANTABILITY OR FITNESS FOR A PARTICULAR PURPOSE. NO WARRANTIES OF MERCHANTABILITY OR FITNESS FOR PARTICULAR PURPOSE SHALL APPLY. THE LIABILITY, IF ANY, OF HELMER FOR DIRECT DAMAGES WHETHER ARISING FROM A BREACH OF ANY SALES AGREEMENT, BREACH OF WARRANTY, NEGLIGENCE, OR INDEMNITY, STRICT LIABILITY OR OTHER TORT, OR OTHERWISE WITH RESPECT TO THE GOODS OR ANY SERVICES IS LIMITED TO AN AMOUNT NOT TO EXCEED THE PRICE OF THE PARTICULAR GOODS OR SERVICES GIVING RISE TO THE LIABILITY. IN NO EVENT SHALL HELMER BE LIABLE FOR ANY INDIRECT, INCIDENTAL, CONSEQUENTIAL, OR SPECIAL DAMAGES, INCLUDING WITHOUT LIMITATION DAMAGES RELATED TO LOST REVENUES OR PROFITS, OR LOSS OF PRODUCTS. This warranty does not cover damages caused in transit, during installation by accident, misuse, fire, flood, or acts of God. Further, this warranty will not be valid if Helmer determines that the failure was caused by a lack of performing recommended equipment maintenance (per Helmer manual) or by using the product in a manner other than for its intended use. Installation and calibration are not covered under this warranty agreement. 5.2 Outside of USA and Canada Consult your local distributor for warranty information. 360113-1/H 8 Service Section II: Service 6 Install and Remove the Rotor The rotor must be installed for the cell washer to operate. Rotor hub with alignment slot visible. Grasp the rotor on the grip area. Rotor installation procedure: 1 Grasp the rotor on the grip area and place the rotor over the shaft. 2 Align the markings on the top of the rotor with the slots on the rotor shaft. 3 Lower the rotor onto the shaft. Rotor removal procedure: 1 Open the lid. 2 Grasp the rotor on the grip area and lift the rotor straight up. 7 Calibrate Saline Volume 7.1 Dispense and Measure Saline Volume To calibrate the dispensed saline volume, the amount of dispensed saline must be measured and compared to the value that is displayed. The displayed value is the saline volume setting per tube multiplied by the number of places in the rotor. NOTE Refer to the operation manual for the recommended calibration interval. The following table shows the values that would be displayed if the SalWash/ml parameter were set to the recommended value: Rotor Type 12-place 24-place 12-place 24-place Tube Size Volume Setting (Per Tube) 10 mm x 75 mm 3.2 mL 12 mm x 75 mm 4.7 mL Total Saline Volume Dispensed (±5%) 38.4 mL 76.8 mL 56.4 mL 112.8 mL A volumetric measuring device (such as a graduated cylinder) of the appropriate capacity is necessary to accurately measure the amount of solution. Dispensing and measurement procedure: 1 Confirm the rotor type is set to the same as the rotor installed in the cell washer (12-place or 24-place). 2 Select the program that contains the desired saline volume value. 360113-1/H 9 Service 3 Open the lid. 4 On the control panel, press and hold the SALINE button for about four seconds. ► “CALIBRATE XXX.X ml” is displayed. ► The cell washer is now in Calibration mode. ► XXX.X represents the total saline volume that is dispensed. 5 Hold the measuring device under the nozzle in the lid of the cell washer. Use the volumetric measuring device to capture the dispensed saline solution. 6 On the control panel, press the CHECK button. The Saline lamp illuminates. The volume of saline solution that was displayed is dispensed from the nozzle into the volumetric measuring device. When the process is complete, the Saline lamp clears. 7 Observe the saline volume in the volumetric measuring device. Use this value to adjust the volume. NOTE 7.2 To stop the flow of saline solution, press the STOP button on the control panel. Determine Saline Volume Adjustment After measuring the total saline volume, compare the displayed value to the measured value. If the measured value is within ±5% of the displayed value, no change is needed. If the measured value varies more than ±5% from the displayed value, the saline volume must be calibrated. The saline volume can only be adjusted it in increments equivalent to 0.5% of the measured value. Adjustment determination procedure: 1 Compare the total volume displayed to the total volume measured. ► Example 1: A check is performed for a 12-place rotor with 10 mm x 75 mm tubes and a volume of 3.2 mL per tube. The displayed value is 38.4 mL, but the measured volume is 41.0 mL. ► Example 2: A check is performed for a 24-place rotor with 12 mm x 75 mm tubes and a volume of 4.7 mL per tube. The displayed value is 112.8 mL, but the measured volume is 106.8 mL. ► Example 3: A check is performed for a 12-place rotor with 10 mm x 75 mm tubes and a volume of 3.2 mL per tube. The displayed value is 38.4 mL, but the measured volume is 38.6 mL. 360113-1/H 10 Service 2 Determine if an adjustment is needed. If the measured volume is within ±5% of the displayed value, an adjustment is not needed. ► Example 1: ±5% of 38.4 = 1.92. 38.4 ± 1.92 = 36.5 to 40.4. Because 41.0 is above the tolerance, an adjustment is needed. ► Example 2: ±5% of 112.8 = 5.64. 112.8 ± 5.64 = 107.2 to 118.4. Because 106.8 is below the tolerance, an adjustment is needed. ► Example 3: ±5% of 38.4 = 1.92. 38.4 ± 1.92 = 36.5 to 40.4. Because 38.6 is within the tolerance, an adjustment is not needed. 3 If an adjustment is needed, determine the difference in volume. Displayed - Measured = Difference ► Example 1: 38.4 - 41.0 = -2.6 mL ► Example 2: 112.8 - 106.8 = 6.0 mL 4 Determine the adjustment value, rounded to the nearest whole number. Difference ÷ Measured × 200 = Adjustment Value ► Example 1: -2.6 ÷ 41.0 × 200 = -12.7 -13 ► Example 2: 6.0 ÷ 106.8 × 200 = 11.2 11 7.3 Change the Saline Volume After the saline adjustment volume has been determined, change the value of the VOLUME ADJUST XX global parameter by the determined amount. EXAMPLE If the VOLUME ADJUST parameter was set to 10 and the adjustment value was determined to be -1, change the VOLUME ADJUST parameter to 9. Volume change procedure: 1 Ensure the screen is in Display mode. If the screen displays a completion message, open the lid to clear the message and return to Display mode. 2 On the control panel, press and hold the parameter selection button () for about eight seconds. ► The VOLUME ADJUST XX parameter is displayed. 3 Press and release the parameter value buttons ( or ) until the desired value is displayed. 4 Press the START WASH button to save the parameter setting. 8Maintenance NOTE 8.1 Refer to the operation manual for the preventive maintenance schedule. Replace the Pump Tubing Replace the tubing at the interval specified in the operation manual to prevent failure. The tubing may need to be replaced more often than recommended if the cell washer is used frequently, or organizational requirements dictate more frequent replacement. The pump tubing assembly is required to replace the pump tubing. The pump tubing assembly may be ordered from Helmer Technical Service. NOTE 360113-1/H Refer to chapter 8.4 (Supplies) for replacement tubing part numbers. 11 Service Replace the tubing: 1 Power the cell washer off and disconnect it from AC power. 2 Disconnect the supply tubing from the saline supply. 3 On the rear of the cell washer, open the access door. Access door open with pump visible. Pump tubing detail, Pump tubing detail, tubing connected routed from pump, to flow meter. through grommet, to lid. 4 Remove the existing tubing assembly. a On the top of the pump, turn the locking lever clockwise until the tubing holder loosens. b Free the tubing and tubing holder from around the pump. c Remove the tubing from the tubing holder. d Disconnect the ends of the tubing from the fittings. e Pull the tubing through the grommet toward the pump, and remove it from the pump area. Pump with loosened tubing holder. Tubing and holder freed from pump. Tubing removed from holder. 5 Install the new tubing assembly. a Orient the tubing assembly so the middle section of tubing is aligned with the tubing holder. Press the tubing into the holder. b Wrap the tubing holder around the pump so the middle section of tubing is against the pump. c While squeezing the tubing holder around the pump, turn the locking lever counter-clockwise until it locks in position. d Thread the tubing out through the grommet, then connect it to the fitting on the back of the lid. e Connect the right side of the tubing to the fitting on the flow meter. 360113-1/H 12 Service Middle section of pump tubing oriented in tubing holder. Tubing holder wrapped around pump and held captive in position. Holder locked in position around pump. Right side of tubing connected to flow meter fitting. 6 Connect the supply tubing to the saline supply. 7 Connect the cell washer to AC power and power the cell washer on. 8 Use the Volume Calibration Check function to dispense liquid, check for leaks around the connections to the fittings. a On the control panel, press and hold the SALINE button for four seconds. ► The CALIBRATE XXX.X ml parameter is displayed. “XXX.X” is the saline volume that is dispensed. b Hold a waste container under the nozzle. c On the control panel, press the CHECK button. Solution is dispensed from the nozzle into the waste container, purging the system of air. Hold the waste container under the nozzle. 360113-1/H 13 Service 8.2 Replace Tube Holders All available places on the rotor must have tube holders installed for the rotor to be balanced. Tube holders may be ordered from Helmer Technical Service. NOTE Refer to chapter 8.4 (Supplies) for replacement tube holder part numbers. Bottom of rotor with tube holder being removed. Tube holder being installed. Remove a tube holder from the rotor: 1 Remove the rotor from the cell washer. a Open the lid. b Grasp the rotor on the grip area and lift the rotor straight up. 2 Remove all tubes from the tube holders. a Turn the rotor upside down. b Move the rotor lock so that it clears the clip. c While holding the tube holder to be removed in the vertical position, firmly press the tube holder down until the clip snaps free from the ring. Install a tube holder on the rotor: 1 Remove the rotor from the cell washer. a Open the lid. b Grasp the rotor on the grip area and lift the rotor straight up. 2 Remove all tubes from the tube holders. 3 In the appropriate position on the rotor, align the clip for the tube holder over the ring on the rotor. 4 Firmly press the tube holder down until the clip snaps into place around the ring. 8.3 Clean the Cell Washer NOTICE ► Do not use an autoclave to clean any components of the cell washer. ► Only use cleansers and disinfectants with a pH of 5 to 8. 8.3.1Exterior Clean exterior surfaces with a soft cotton cloth and non-abrasive liquid cleaner. Dry the exterior with a dry cloth. 360113-1/H 14 Service 8.3.2Interior To prevent blockages and maintain rotor balance, ensure the bowl is clean and free of debris, which may include salt crystals or broken glass. To prevent condensation that may lead to corrosion, dry the interior thoroughly after normal daily usage. Using a damp cloth or sponge, wipe the bowl, removing all debris. It is not necessary to remove the bowl or to clean under the bowl. Using a dry cloth or sponge, wipe the entire inside of the lid, including the drainage system and painted surfaces. Use the following procedures to remove and install the drainage rings. Remove drainage rings: 1 Remove the upper drainage ring (labeled “this side up”) by pulling it upward until it clears the gasket. 2 Remove the lower drainage ring by folding back the gasket to expose the edge of the ring, then gently lifting the ring. Do this in sections at a time until the entire ring is clear of the gasket and can be lifted out of the bowl. Gasket folded back and section of lower drainage ring removed. Entire lower drainage ring loosened. Install drainage rings: 1 Place the lower drainage ring in the bowl so the drain hole in the ring is directly above the drain in the bowl. Lower drainage ring placed in the bowl. 360113-1/H Drain holes aligned. 15 Service 2 Working in sections at a time around the bowl, fold back the gasket and press the ring downwards so the edge of the drainage ring rests on the lip of the bowl. The edge of the ring should slightly overlap the lip of the bowl. Lower drainage ring in the proper position in the bowl. Arrow points to the edge of the ring. 3 With the labeled side up, place the upper drainage ring into the bowl on top of the lower ring. Label on upper drainage ring. 8.3.3 Drainage rings installed. Fill Ports Clean the fill ports on the rotor regularly to remove any debris that was not removed when the system was flushed. Debris can clog the fill ports, preventing saline solution from entering the tubes. If the rotor is allowed to dry after washing or suspension processes, debris may accumulate in the fill ports more quickly. If this is the case, the rotor may need to be cleaned more frequently than is recommended in the preventive maintenance schedule. Adjust the cleaning frequency based on usage patterns. Required tools: ► A container large enough to hold the rotor. ► A source of warm water to soak or flush the rotor. ► The bypass tool. This tool is included but packaged separately from the cell washer. Bypass tool. 360113-1/H 16 Service Clean the fill ports: NOTICE Cleaning the fill ports using any method not described in this manual damage the fill ports and negatively impact the performance of the cell washer, and may void the warranty. 1 Soak the rotor in clean, warm water or run warm water directly into the top of the rotor for several minutes. Ensure water is flowing freely out of all the fill ports. 2 If a port is blocked, gently slide the bypass tool into the fill port from the outside toward the center of the rotor. Gently slide the bypass tool in and out several times to clean the port. 3 Do one of the following: ► If the rotor will not be used immediately, ensure that it is dry before returning it to the cell washer and closing the lid. ► If the rotor will be used immediately, ensure that all fresh water has been purged from the system and replaced by saline solution before processing. NOTE 8.3.4 Refer to chapter 8.3.4 (Flush the System) for instructions in purging fresh water from the rotor. Flush the System To clean and disinfect the cell washer, as well as remove blockages due to salt crystallization, use the Clean program to flush the system with bleach solution and again with distilled water. The Clean program consists of two parts: the clean sequence and the refill sequence. These sequences cannot be changed, and they cannot be stopped before completion. The Clean sequence consists of the following steps: 1Fill: Dispenses 10 mL of bleach solution per place on the rotor while spinning at 1100 RPM. For a 12-place rotor, 120 mL of bleach solution is dispensed; for a 24-place rotor, 240 mL is dispensed. The fill volume exceeds the capacity of the tube to aid in flushing the drainage system. 2Spin: Spins for 10 seconds at 1500 RPM. 3Decant: Spins in the opposite direction at 600 RPM. 4Agitation: Agitates for 5 cycles. 5Decant: Spins in the opposite direction at 600 RPM. The Refill sequence dispenses 60 mL of bleach solution to purge the system. Required supplies: ► A container filled with approximately 500 mL of fresh bleach solution. Solution is a 10% bleach solution (1:9 ratio of household bleach to water, or 1 part commercial sodium hypochlorite (NaOCl) (5%) to 9 parts water). ► A container filled with approximately 1 L of distilled water. ► An empty waste container, such as a volumetric measuring device, that has a minimum capacity of 80 mL. 360113-1/H 17 Service Flush procedure: NOTE 1 2 3 4 5 6 7 8 ► Repeat this procedure as many times as necessary according to organizational regulations. ► When the system is flushed, the rotor must be loaded with tubes. Every other position on the rotor must be empty. This allows some bleach solution to be dispensed directly into the bowl to aid with cleaning, and some bleach solution to flow into the drainage system during the Decant step. Load the rotor with tubes, leaving every other position on the rotor empty. Install the rotor and close the lid. Ensure the Lid Ready lamp is lit. Connect the supply tube to the bleach solution container. Select the Clean program. a Ensure the screen is in Display mode. ► If the screen displays a completion message, open the lid to clear the message and return to Display mode. b On the control panel, select a program. ► Press and release the parameter value buttons ( or ) until the Clean program is displayed. Press the START WASH button. ► The cleaning sequence starts. ► When the cleaning sequence is complete, “OPEN LID” is displayed and the Lid Ready lamp illuminates. Open the lid. ► The Lid Ready lamp clears and “Clean proc.DONE” is displayed. Connect the supply tubing to the distilled water container. Hold the waste container in front of the nozzle. Capture residual bleach solution and distilled water with the waste container. 9 Press and hold the SALINE button for about three seconds. ► The Saline lamp illuminated and “REFILL process” is displayed. ► 60 mL of residual bleach solution and distilled water is dispensed from the nozzle into the waste container. ► When the process is complete, the Saline lamp clears and “REFILL proc.DONE” is briefly displayed. ► The display returns to Display mode for Program 1. 10 Dispose of the purged liquid. 360113-1/H 18 Service 11 Repeat step 4 to flush the system with distilled water. 12 Connect the supply tubing to the container of saline solution. 13 Repeat step 9 to purge distilled water from the system. 8.4Supplies Tube holder insert: E2551 (1) Tube holder, 12 mm x 75 mm: E2197 (12) Tube holders, 12 mm x 75 mm: 400596-1 Pump tubing assembly: 450005-1 Drain/fill tubing assembly: 450006-1 Tubing kit (includes pump tubing assembly and drain/fill tubing assembly): 450003-1 360113-1/H 19 Service 9Troubleshooting CAUTION 9.1 Review all safety instructions prior to troubleshooting. Refer to chapter 2 (Safety). General Operation Problems Problem Cell washer is powered on, but nothing is displayed on the message screen. 360113-1/H Possible Cause Action No power to the cell washer. 1 Verify that the outlet is operational. 2 Perform the following tasks in order, testing after each to determine if the problem was addressed: a Replace the fuse. b Replace the main power switch. c Replace the transformer. d Replace the RFI filter. Display contrast is set too low. ► Adjust the display contrast. A part in the LCD circuit is faulty. ► Perform the following tasks in order, testing after each to determine if the problem was addressed: 1 Replace the control panel. 2 Replace the power supply board. A part in the pump During a saline system is faulty. check, pump is not making any sound and saline is not being dispensed. ► Remove the pump tubing from the pump. With the pump tubing removed, perform a saline check. ► If the pump does not operate, replace the pump. ► If the pump does operate, replace the pump tubing, which may have hardened over time. During a saline check, A part in the liquid pump is operating, handling system but saline is not being circuit is faulty. dispensed correctly. ► Perform the following tasks in order, testing after each to determine if the problem was addressed: 1 Replace the flow meter. 2 Replace the liquid handling board. Tubes were not decanted when they were programmed to do so. Rotor is faulty. ► Verify that all the rotor locks (decant hooks) are intact. If any are broken off or damaged, replace the rotor. A part in the motor circuit is faulty. ► Perform the following tasks in order, testing after each to determine if the problem was addressed: 1 Replace the motor. 2 Replace the frequency converter. 3 Replace the power supply board. Rotor speed seems too high or too low. A part in the speed sensor circuit is faulty. 1 Measure the rotor speed. 2 Perform the following tasks in order, testing after each to determine if the problem was addressed: a Replace the speed sensor. b Replace the motor. c Replace the frequency converter. Tubes are breaking during processes with a Decant step. Tube holder inserts were not installed correctly before processing 10 mm x 75 mm tubes. ► Install the tube holder inserts, and repeat the process to determine if the problem was solved. Top of the tube does not move freely around the fill port. ► Ensure that the height of the tubes is within the acceptable tolerance of 75 mm ± 1.5 mm. 20 Service 9.2 Performance Problems Problem Results of the wash process are not acceptable. Possible Cause Action Rotor type that is programmed does not match what is being used. ► Verify the rotor type is set correctly. Change it if necessary. One or more fill ports is clogged. ► Flush the system to clear blockages. ► Check the fill ports on the rotor for obstructions. Clean the fill ports as necessary. Saline flow is blocked, ► On the message screen, check if LOW SALINE is too low, or being displayed. Address message as necessary. sensed incorrectly. Too much or not ► Verify the saline volume is programmed correctly enough saline solution and change it if necessary. is being dispensed. ► Verify the amount of saline being dispensed is correct. Calibrate the saline volume if necessary. Drain is blocked, causing excessive saline to accumulate in the bowl and enter the tubes during the wash process. ► Inspect the drain and drain tubing for kinks and obstructions. Straighten the tubing and clear obstructions if necessary. ► Verify the drain tubing and waster container are lower than the cell washer for proper drainage. Adjust the placement if necessary. Decant speed is too high or low. ► Change the decant speed. Cell button has not 12-place rotor is being ► Verify the rotor type that is programmed matches formed or is too small. used, but a 24-place what is being used. Change it if necessary. rotor is programmed. Tube holder is stuck in ► Contact a qualified service technician. the decant position. Spin speed is too low. ► Increase the spin speed and repeat the process. Too much residual saline remains in the tube after washing. Decant speed is too low. ► Change the decant speed. Tubes were not decanted. Decant speed is too low. ► Change the decant speed. A component is faulty. ► Contact a qualified service technician. Rotor lock did not engage. ► Contact a qualified service technician. Decant speed is too high. ► Change the decant speed. After tubes are decanted, contents are streaking. 360113-1/H 21 Service 9.3 Equipment Problems Problem Nothing is displayed on the message screen. 360113-1/H Possible Cause Action Cell washer is powered off. ► Verify the cell washer is powered on. No power to the cell washer. ► Verify the power cord is connected securely to the cell washer and the outlet. Tighten the connections if necessary. ► Verify the fuse has not blown. Replace the fuse if necessary. ► Verify the outlet is operational. During a saline A component is faulty. check, pump is not making any sound and saline is not being dispensed. ► Contact a qualified service technician. The lid cannot be opened. Push the lid handle down firmly until completely latched. The lid handle is not closed correctly. 22 Service 9.4 Error Messages When the cell washer is in error mode, the cell washer is not operational. The error must be addressed and cleared. When the cell washer is in error mode, an error message is displayed and an audible alert sounds. The pattern is a beep every 30 seconds. A message also is displayed on the message screen to aid in troubleshooting and correction. Some error messages are the result of operational issues. Operational issues may be cleared by addressing the error message. If the problem remains, contact a qualified service technician to troubleshoot and address the problem. Several actions require the cell washer to be powered off and powered back on. To reset the cell washer, power the cell washer off for approximately 10 seconds before powering the cell washer back on. 9.4.1 “CONTROL - ERROR XX” Error Message When a message of this type is displayed, there is a problem with the lid closing or locking, or a problem with the control panel. Error Message Possible Cause Number 04, 06 to 09 21 to 26 360113-1/H Action Lid lock is faulty. 1 Clear the error message: Open the lid and power the cell washer off. After approximately 10 seconds, power the cell washer on. 2 Check if the lid can be opened while the cell washer is powered off. If it can, replace the lid lock. Connection in the lid lock circuit is loose. 1 Clear the error message: Open the lid and power the cell washer off. After approximately 10 seconds, power the cell washer on. 2 Check the contact connection between the lid lock and the control/display board. 3 Check that the ribbon cable between the control/ display board and the power supply board is securely connected. A part in the lid lock circuit is faulty. 1 Clear the error message: Open the lid and power the cell washer off. After approximately 10 seconds, power the cell washer on. 2 Perform the following tasks in order, testing after each to determine if the problem was addressed: a Replace the ribbon cable between the control/ display board and the power supply board. b Replace the power supply board. c Replace the control panel. The lid/handle is not closed correctly. 1 Clear the error message: Open the lid and power the cell washer off. After approximately 10 seconds, power the cell washer on. 2 Push the lid/handle down until completely latched. 3 Do not attempt to open the lid during a run/spin cycle. Control panel is faulty. 1 Clear the error message: Open the lid and power the cell washer off. After approximately 10 seconds, power the cell washer on. 2 Replace the control panel. 23 Service 9.4.2 “FU/CCI - ERROR XX” Error Message When a message of this type is displayed, there is a problem related to the frequency converter. Error Message Possible Cause Number 360113-1/H Action 60 A part in the frequency converter circuit is faulty, resulting in a false lid lock release signal. ► Perform the following tasks in order, testing after each to determine if the problem was addressed: 1 Replace the ribbon cable between the control/ display board and the power supply board. 2 Replace the ribbon cable between the frequency converter and the power supply board. 3 Replace the frequency converter. 4 Replace the power supply board. 5 Replace the control panel. 61 A part in the frequency converter circuit is faulty, resulting in a processing error. 1 Clear the error message: Open the lid and power the cell washer off. After approximately one minute, power the cell washer on. 2 Perform the following tasks in order, testing after each to determine if the problem was addressed: a Replace the ribbon cable between the control/ display board and the power supply board. b Replace the ribbon cable between the frequency converter and the power supply board. c Replace the frequency converter. d Replace the power supply board. e Replace the control panel. 62 Main supply voltage is too low, 1 Clear the error message: Open the lid and power the cell washer off. After approximately one minute, power resulting in an under-voltage condition to the frequency the cell washer on. converter. 2 Verify that the outlet in the facility is operational and supplying adequate voltage to the cell washer. 3 Perform the following tasks in order, testing after each to determine if the problem was addressed: a Replace the ribbon cable between the control/ display board and the power supply board. b Replace the ribbon cable between the frequency converter and the power supply board. c Replace the frequency converter. d Replace the power supply board. e Replace the control panel. 63 A part in the frequency converter circuit is faulty, resulting in an over-current condition in the motor. 1 Clear the error message: Open the lid and power the cell washer off. After approximately one minute, power the cell washer on. 2 Perform the following tasks in order, testing after each to determine if the problem was addressed: a Replace the motor. b Replace the ribbon cable between the frequency converter and the power supply board. c Replace the frequency converter. d Replace the power supply board. 24 Service Error Message Possible Cause Number 360113-1/H Action 64 A part in the frequency converter circuit is faulty, resulting in an overvoltage condition in the braking resistor. 1 Clear the error message: Open the lid and power the cell washer off. After approximately one minute, power the cell washer on. 2 Perform the following tasks in order, testing after each to determine if the problem was addressed: a Replace the braking resistor. b Replace the ribbon cable between the frequency converter and the power supply board. c Replace the frequency converter. d Replace the power supply board. 67 A part in the frequency converter circuit is faulty, resulting in an overtemperature condition in the motor. 1 Clear the error message: Open the lid and power the cell washer off. After approximately one minute, power the cell washer on. 2 Perform the following tasks in order, testing after each to determine if the problem was addressed: a Test the motor windings. If they are faulty, replace the motor. b Replace the ribbon cable between the frequency converter and the power supply board. c Replace the frequency converter. d Replace the power supply board. 68 A part in the frequency converter circuit is faulty, resulting in an overvoltage condition in the frequency converter. 1 Clear the error message: Open the lid and power the cell washer off. After approximately one minute, power the cell washer on. 2 Confirm that the ambient temperature during operation does not exceed 45 °C. 3 Perform the following tasks in order, testing after each to determine if the problem was addressed: a Replace the ribbon cable between the control/ display board and the power supply board. b Replace the ribbon cable between the frequency converter and the power supply board. c Replace the frequency converter. d Replace the power supply board. 69 Frequency converter is faulty. 1 Clear the error message: Open the lid and power the cell washer off. After approximately one minute, power the cell washer on. 2 Replace the frequency converter. 84 A part in the frequency converter circuit is faulty, resulting the frequency converter detecting excess rotor speed. ► Perform the following tasks in order, testing after each to determine if the problem was addressed: 1 Replace the ribbon cable between the frequency converter and the power supply board. 2 Replace the frequency converter. 3 Replace the power supply board. 25 Service Error Message Possible Cause Number 85 9.4.3 A part in the frequency converter circuit is faulty, resulting in a processing error. Action 1 Clear the error message: Open the lid and power the cell washer off. After approximately one minute, power the cell washer on. 2 Perform the following tasks in order, testing after each to determine if the problem was addressed: a Replace the ribbon cable between the frequency converter and the power supply board. b Replace the frequency converter. c Replace the power supply board. “IMBALANCE” Error Message When this message is displayed, there is a problem with the balance of the rotor. Error Message Possible Cause Number None 360113-1/H Action Imbalance initialization parameter was set to the wrong value after the frequency converter was replaced. 1 Clear the error message: Open the lid and power the cell washer off. After approximately 10 seconds, power the cell washer on. 2 Check that the Imbalance parameter is set to 2. Imbalance tolerance is set too low. 1 Clear the error message: Open the lid and power the cell washer off. After approximately 10 seconds, power the cell washer on. 2 Check the imbalance tolerance and adjust it if necessary. One or more motor mounts is worn. 1 Clear the error message: Open the lid and power the cell washer off. After approximately 10 seconds, power the cell washer on. 2 Check the motor mounts for wear. Replace them if necessary. A connection in the imbalance microswitch circuit is loose. 1 Clear the error message: Open the lid and power the cell washer off. After approximately 10 seconds, power the cell washer on. 2 Check the connection between the imbalance microswitch and the power supply board. 3 Check that the ribbon cable between the control/ display board and the power supply board is securely connected. 26 Service Error Message Possible Cause Number None 9.4.4 A part in the imbalance microswitch circuit is faulty. Action 1 Clear the error message: Open the lid and power the cell washer off. After approximately 10 seconds, power the cell washer on. 2 Perform the following tasks in order, testing after each to determine if the problem was addressed: a Check the continuity of the imbalance microswitch, which is normally closed. The resistance should be 0 Ω when the switch is closed (not activated). If there is resistance, replace the imbalance microswitch, then set the imbalance tolerance. b Replace the ribbon cable between the control/ display board and the power supply board. c Replace the power supply board. d Replace the control panel. “LOW SALINE” Error Message When this message is displayed, there is a problem with the flow of saline into the cell washer. Error Message Possible Cause Number None 360113-1/H Action A connection in the liquid handling system circuit is loose. 1 Clear the error message: Open the lid and power the cell washer off. After approximately 10 seconds, power the cell washer on. 2 Check the connection between the liquid handling board and the power supply board. A part in the pump system is faulty. 1 Clear the error message: Open the lid and power the cell washer off. After approximately 10 seconds, power the cell washer on. 2 Remove the pump tubing from the pump. With the pump tubing removed, perform a saline check. ► If the pump does not operate, replace the pump. ► If the pump does operate, replace the pump tubing, which may have hardened over time. A part in the liquid handling system circuit is faulty. 1 Clear the error message: Open the lid and power the cell washer off. After approximately 10 seconds, power the cell washer on. 2 Perform the following tasks in order, testing after each to determine if the problem was addressed: a Replace the flow meter. b Replace the liquid handling board. 27 Service 9.4.5 “N > MAX XX” Error Message When this message is displayed, the rotor speed being detected exceeds the maximum allowable speed. Error Message Possible Cause Number 05 360113-1/H Action Insulation on the speed sensor 1 Clear the error message: Open the lid and power cable is faulty. the cell washer off. After approximately 10 seconds, power the cell washer on. 2 Check the speed sensor cable for wear. If worn, replace the speed sensor. A connection in the speed sensor circuit is loose. 1 Clear the error message: Open the lid and power the cell washer off. After approximately 10 seconds, power the cell washer on. 2 Check the connection between the speed sensor and the power supply board. 3 Check that the ribbon cable between the control/ display board and the power supply board is securely connected. A part in the speed sensor circuit is faulty. 1 Clear the error message: Open the lid and power the cell washer off. After approximately 10 seconds, power the cell washer on. 2 Perform the following tasks in order, testing after each to determine if the problem was addressed: a Test the speed sensor by measuring the rotor speed. If the speed is not within the tolerance, replace the speed sensor. b Replace the ribbon cable between the control/ display board and the power supply board. c Replace the ribbon cable between the frequency converter and the power supply board. d Replace the frequency converter. e Replace the power supply board. f Replace the control panel. 28 Service 9.4.6 “N < MIN XX” Error Message When this message is displayed, the rotor is rotating too slowly. Error Message Possible Cause Number 13 9.4.7 Action A connection in the motor circuit is loose. 1 Clear the error message: Open the lid and power the cell washer off. After approximately 10 seconds, power the cell washer on. 2 Check the connection between the motor and the frequency converter. A part in the motor circuit is faulty. 1 Clear the error message: Open the lid and power the cell washer off. After approximately 10 seconds, power the cell washer on. 2 Perform the following tasks in order, testing after each to determine if the problem was addressed: a Test the motor windings. If they are faulty, replace the motor. b Replace the frequency converter. Silicone motor seal is loose. 1 Clear the error message: Open the lid and power the cell washer off. After approximately 10 seconds, power the cell washer on. 2 Check that the motor seal has been installed properly. “POWER INTERRUPT” Error Message When this message is displayed, the AC power was interrupted during operation, or was sensed as being interrupted. Error Message Possible Cause Number None 360113-1/H Action A connection between the control/display board and the power supply board is loose. 1 Clear the error message: Open the lid then press the START WASH button. 2 Check the connection between the control/display board and the power supply board. A part in the control panel and power supply circuit is faulty. 1 Clear the error message: Open the lid then press the START WASH button. 2 Perform the following tasks in order, testing after each to determine if the problem was addressed: a Replace the power supply board. b Replace the ribbon cable between the control/ display board and the power supply board. c Replace the control panel. 29 Service 9.4.8 “SER I/O - ERROR XX” Error Message When a message of this type is displayed, there is a problem with communication between components. Error Message Possible Cause Number 30 and 31 A connection in the frequency converter circuit is loose. 33, 34, and 36 360113-1/H Action 1 Clear the error message: Open the lid and power the cell washer off. After approximately 10 seconds, power the cell washer on. 2 Check the connection between the frequency converter and the power supply board. 3 Check the connections between the frequency converter and the RFI filter and braking resistor overtemperature switch. Connections between the frequency converter and the RFI filter and braking resistor over-temperature switch are wrong. 1 Clear the error message: Open the lid and power the cell washer off. After approximately 10 seconds, power the cell washer on. 2 Check that the connections on the frequency converter at connector S102 are correct. Braking resistor overtemperature switch has opened. 1 Clear the error message: Open the lid and power the cell washer off. After approximately 10 seconds, power the cell washer on. 2 Replace the braking resistor over-temperature switch. A part in the frequency converter circuit is faulty. 1 Clear the error message: Open the lid and power the cell washer off. After approximately 10 seconds, power the cell washer on. 2 Perform the following tasks in order, testing after each to determine if the problem was addressed: a Replace the frequency converter. b Replace the ribbon cable between the control/ display board and the power supply board. c Replace the ribbon cable between the frequency converter and the power supply board. d Replace the control panel. e Replace the power supply board. A part in the frequency converter and control panel circuit is faulty. 1 Clear the error message: Open the lid and power the cell washer off. After approximately 10 seconds, power the cell washer on. 2 Perform the following tasks in order, testing after each to determine if the problem was addressed: a Replace the frequency converter. b Replace the ribbon cable between the control/ display board and the power supply board. c Replace the ribbon cable between the frequency converter and the power supply board. d Replace the control panel. e Replace the power supply board. 30 Service 9.4.9 “TACHO - ERROR XX” Error Message When a message of this type is displayed, the rotor is not installed, or the speed is being controlled or sensed incorrectly. Error Message Possible Cause Number 01 02 Action A connection in the speed sensor circuit is loose, resulting in the interruption of speed sensor pulses. 1 Clear the error message by doing the following: a Open the lid and power the cell washer off. b While spinning the rotor clockwise by hand, power the cell washer on. 2 Check the connection between the speed sensor and the power supply board. A part in the speed sensor circuit is faulty. 1 Clear the error message by doing the following: a Open the lid and power the cell washer off. b While spinning the rotor clockwise by hand, power the cell washer on. 2 Perform the following tasks in order, testing after each to determine if the problem was addressed: a Test the speed sensor by measuring the rotor speed. If the speed is not within the tolerance, replace the speed sensor. b Replace the ribbon cable between the control/ display board and the power supply board. c Replace the ribbon cable between the frequency converter and the power supply board. d Replace the frequency converter. e Replace the control panel. f Replace the power supply board. A connection in the speed sensor and motor circuit is loose, resulting in no speed sensor pulses after start-up. 1 Clear the error message by doing the following: a Open the lid and power the cell washer off. b While spinning the rotor clockwise by hand, power the cell washer on. 2 Check the connection between the speed sensor and the power supply board. 3 Check the motor connections. A part in the speed sensor and 1 Clear the error message by doing the following: motor circuit is faulty. a Open the lid and power the cell washer off. b While spinning the rotor clockwise by hand, power the cell washer on. 2 Perform the following tasks in order, testing after each to determine if the problem was addressed: a Test the motor windings. If they are faulty, replace the motor. b Test the speed sensor by measuring the rotor speed. If the speed is not within the tolerance, replace the speed sensor. c Replace the ribbon cable between the control/ display board and the power supply board. d Replace the ribbon cable between the frequency converter and the power supply board. e Replace the frequency converter. f Replace the control panel. g Replace the power supply board. 360113-1/H 31 Service 9.4.10 “VERSION - ERROR XX” Error Message When a message of this type is displayed, there is a problem with the control panel. Error Message Possible Cause Number 12 Action Cell washer was not initialized after replacing the frequency converter. 1 Clear the error message: Open the lid and power the cell washer off. After approximately 10 seconds, power the cell washer on. 2 Initialize the cell washer. Reset the power to clear the error message. A component on the control panel is not compatible with the frequency converter. 1 Clear the error message: Open the lid and power the cell washer off. After approximately 10 seconds, power the cell washer on. 2 Replace the control panel. 10Maintenance NOTE 10.1 Refer to the operation manual for the preventive maintenance schedule. Verify Rotor Speed is Within Tolerance NOTE The decant speed cannot be tested, but it can be changed with a global parameter value. For instructions in changing global parameters, refer to the operation manual. The rotor speed can be measured to determine whether it is within the design tolerance. The cell washer has a sight window in the lid and an optical reference on the rotor so the speed of the rotor can be easily measured during operation. When the rotor is programmed to spin at 3500 RPM, the measured speed should be 3500 RPM ± 20 RPM. Required tools: ► Laser tachometer (calibrated and capable of measuring RPM) CAUTION Prior to using the laser tachometer, review all safety and usage instructions provided by the manufacturer. Test rotor speed: NOTE Organizational regulations may require different test methods than those included in this manual. Use the appropriate test methods if they are different than the following procedure. 1 Install the rotor. 2 Program the Spin (S) program with a spin speed of 3500 RPM and a spin time that is long enough for the speed to be measured. 3 Press the SPIN button. ► The Spin (S) program starts. 4 While the rotor is spinning and 3500 is displayed on the message screen, point the tachometer’s laser beam through the sight window on the lid. As the rotor spins, the laser momentarily reflects off the optical reference on the rotor. 5 Obtain the reading from the tachometer. NOTE 360113-1/H Refer to chapter 9 (Troubleshooting) if the speed is not 3500 RPM ± 20 RPM. 32 Service 10.2 Verify Imbalance Value is Within Tolerance The imbalance microswitch senses whether the rotor is balanced during operation. If the rotor is not balanced, an imbalance error results. The weight at which the imbalance error occurs is the imbalance value. At the factory, the microswitch is positioned to allow an imbalance value between 5 g and 10 g when the rotor is spinning at 1500 RPM. EXAMPLE If the imbalance value were 7 g (the middle of the range), an imbalance error would result only if one side of the rotor were more than 7 g heavier than the other. One gram is approximately equal to 1 mL of saline solution. Continual operation of the cell washer when the imbalance value of greater than or equal to 10 g may damage the cell washer. An imbalance value of less than or equal to 5 g is overly sensitive to the normal variations in weight that occur during operation. NOTE For information and instructions to program and use the cell washer, refer to the operation manual. Required tools/supplies: ► Tubes (enough to fill all available positions on the rotor) ► Saline solution (one test run requires 15 g / 15 mL) ► Scale (calibrated and capable of measuring 10 g) Test rotor imbalance: NOTE Organizational regulations may require different test methods than those included in this manual. Use the appropriate test methods if they are different than the following procedure. 1 Install tubes in all available positions in the rotor. If 10 mm x 75 mm tubes are installed, tube inserts must also be installed. 2 Program the Spin (S) program with a spin speed of 1500 RPM and a spin time of 20 seconds. 3 Test whether the imbalance value is below the upper limit. a With all tubes empty, add a total of 10 g of saline solution to one or more tubes on one side of the rotor. b Install the rotor. c Start the Spin (S) program. If the program completes without an imbalance error, then the imbalance value is too high and must be decreased. NOTE Refer to chapter 10.3 (Adjust the Imbalance Microswitch) for instructions in changing the imbalance microswitch value. 4 Test whether the imbalance value is above the lower limit. a With all tubes empty, add a total of 5 g of saline solution to one or more tubes on one side of the rotor. b Install the rotor. c Start the Spin (S) program. If an imbalance error occurs, the imbalance value is too low and must be increased. NOTE 360113-1/H Refer to chapter 10.3 (Adjust the Imbalance Microswitch) for instructions in changing the imbalance microswitch value. 33 Service 10.3 Adjust the Imbalance Microswitch The imbalance microswitch senses whether the rotor is balanced during operation. If the rotor is not balanced, an imbalance error results. The proximity of the microswitch to the motor shaft determines the value at which the rotor is considered to be imbalanced. The closer the motor shaft moves toward the microswitch during operation, the higher the imbalance of the rotor. The imbalance microswitch may require adjustment under the following circumstances: ► The imbalance value is outside of the permissible range. ► Imbalance errors are displayed, even after other possible causes have been addressed. ► The imbalance microswitch has been replaced. Required tools: ► 3 mm Allen wrench Adjust the microswitch: 1 Power the cell washer off and disconnect it from AC power. 2 Remove the rotor and close the lid. 3 Rotate the cell washer so that it rests on the left side. 4 On the bottom of the cell washer, use the Allen wrench to loosen the screw in the slot. This screw secures the imbalance microswitch bracket to the base. Bottom of cell washer. Imbalance adjustment screw. 5 Perform one of the following: ► Decrease the imbalance value: Slide the screw toward the center of the cell washer. The switch moves toward the motor shaft. ► Increase the imbalance value: Slide the screw away from the center of the cell washer. The switch moves away from the motor shaft. 6 Tighten the Allen screw to secure the imbalance bracket to the base. 7 Test the imbalance value to ensure that it in the permissible range. NOTE 360113-1/H Refer to chapter 10.2 (Verify Imbalance Value is Within Tolerance) for instructions in determining if the imbalance value is within the permissible range. 34 Service 10.4 Remove and Install the Front Panel Several serviceable parts are located behind the front panel. Bottom view of the cell washer (front edge shown). Front panel removed and pivoted upward. Required tools: ► 2.5 mm Allen wrench Remove the front panel: 1 Power the cell washer off and disconnect it from AC power. Open the lid. 2 Remove the three screws that secure the bottom of the front panel to the base. 3 Gently pull the bottom of the panel away from the base. 4 Lift the front panel until the groove on the panel disengages from the tongue on the housing. Install the front panel: 1 Open the lid. 2 Place the front panel on the front of the housing. Align the groove on the panel so it fits around the tongue on the housing. 3 Press front panel downward to engage the tongue and groove. 4 Press the bottom of the panel against the base. 5 Slide the front panel sideways until the sides of the panel align with the base and the screw holes are aligned. 6 Install the three screws to secure the panel to the base. 360113-1/H 35 Service 10.5 Adjust the Display Contrast The display screen contrast may be changed. Required tools: ► Small flathead screwdriver with insulated shank Control/display board display contrast potentiometer. Contrast adjustment procedure: 1 Power the cell washer off and disconnect it from AC power. Open the lid. 2 Remove the three screws that secure the bottom of the front panel to the base. 3 Gently pull the bottom of the panel away from the base. 4 Lift the front panel until the groove on the panel disengages from the tongue on the housing. 5 On the control/display board, use the screwdriver to turn the potentiometer. ► Turn the potentiometer clockwise to decrease the contrast (darker). ► Turn the potentiometer counterclockwise to increase the contrast (lighter). 6 Place the front panel on the front of the housing. Align the groove on the panel so it fits around the tongue on the housing. 7 Press front panel downward to engage the tongue and groove. 8 Press the bottom of the panel against the base. 9 Slide the front panel sideways until the sides of the panel align with the base and the screw holes are aligned. 10 Install the three screws to secure the panel to the base. 11 Connect the cell washer to AC power and power the cell washer on. Check the display contrast. 12 Repeat steps 1 through 12 as necessary until the contrast level is acceptable. 10.6 View and Change the Fill Speed The value for the Fill (rpm) parameter can be changed. The Fill (rpm) parameter controls the rotor speed during Fill and Suspension steps in non-cleaning processes. The Fill (rpm) parameter is factory preset to 1100 RPM for use in cell washing processes. This parameter should only be changed if the cell washer is being used for other applications that may require a different fill speed. Available values range from 100 to 1500. NOTE 360113-1/H Refer to the operation manual for instructions in changing the rotor speed. 36 Service Required tools: ► 2.5 mm Allen wrench ► #20 TORX® screwdriver ► Standard 2-pin jumper Change the fill speed: 1 Power the cell washer off and disconnect it from AC power. Open the lid. 2 Remove the rotor Leave the lid open. 3 Remove the front panel. a Remove the three screws that secure the bottom of the front panel to the base. b Gently pull the bottom of the panel away from the base. c Lift the front panel until the groove on the panel disengages from the tongue on the housing. 4 On the back of the front panel, locate the control/display board. 5 On the control/display board, install the 2-pin jumper. 6 Configure the jumpers for initialization mode. NOTE Refer to chapter 10.7.1 (Set Jumpers) for instructions in configuring jumpers. 7 Connect the cell washer to AC power and power the cell washer on. ► The software version is displayed on the screen and all lamps are illuminated. ► After approximately eight seconds, “ * INIT - MODE * ” is displayed on the screen. ► The cell washer is now in initialization mode. 8 Change the fill speed. a Press and release the parameter selection button () until the Fill (rpm) parameter is displayed. b Change the value of the parameter that is displayed by pressing and releasing either parameter value button ( or ) to change the value (optional). c Press and release the parameter selection button () to view the remaining initialization parameters (optional). d Press the START WASH button. ► “ ***ok*** ” is displayed on the screen to indicate that the new values were saved. ► “PARAM - INIT XYYY” is displayed on the screen to indicate the number of initializations that have been performed. e To view or change the initialization parameters again, power the cell washer off and back on, then repeat steps a through d (optional). 9 Remove the 2-pin jumper and move the original jumper to its original position to resume normal operation. 10 Install the front panel. a Open the lid. b Place the front panel on the front of the housing. Align the groove on the panel so it fits around the tongue on the housing. c Press front panel downward to engage the tongue and groove. d Press the bottom of the panel against the base. e Slide the front panel sideways until the sides of the panel align with the base and the screw holes are aligned. f Install the three screws to secure the panel to the base. 360113-1/H 37 Service 10.7 Replace the Frequency Converter The frequency converter generates and monitors the current supply for the drive motor. It also monitors the motor temperature and transfers the electrical energy produced during braking to the braking resistor. NOTE If the frequency converter is malfunctioning, it must be replaced. Required tools: ► 2.5 mm Allen wrench ► #20 TORX® screwdriver ► Standard 2-pin jumper Replacement procedure: 1 Power the cell washer off and disconnect it from AC power. Open the lid. 2 Remove the rotor Leave the lid open. 3 Remove the front panel. a Remove the three screws that secure the bottom of the front panel to the base. b Gently pull the bottom of the panel away from the base. c Lift the front panel until the groove on the panel disengages from the tongue on the housing. 4 Disconnect the wiring from the frequency converter board to the other electrical components. 5 Remove the four screws securing the frequency converter board and heat sink to the housing. 6 Remove the frequency converter and heat sink together. Left: Frequency converter. Right: One of four TORX screws that secure the frequency converter to the interior housing. 7 Install the new frequency converter. Reinstall the four TORX screws. a Ensure there is sufficient heat transfer paste between the heat sink and the interior housing. b If necessary, scrape off the paste from the old frequency converter and apply it on the new one. 8 Reconnect the wiring from the frequency converter to the electrical components. 9 On the back of the front panel, locate the control/display board. 10 On the control/display board, install the 2-pin jumper. 11 Configure the jumpers for initialization mode. NOTE Refer to chapter 10.7.1 (Set Jumpers) for instructions in configuring jumpers. 12 Initialize the cell washer. NOTE Refer to chapter 10.7.2 (Initialize the Cell Washer) for instructions in initializing the cell washer. 13 Perform a functional check of the cell washer. NOTE 360113-1/H Refer to chapter 10.9 (Post-Repair Check) for instructions in performing a post-repair check of the cell washer. 38 Service 10.7.1 Set Jumpers The jumper settings on the control/display board must be changed to enter initialization mode. 0 1 2 3 4 0 1 2 3 4 Jumpers configured for normal operating mode. Jumpers configured for initialization mode. The control/display board has one jumper installed. To set the jumpers for initialization mode, a second standard 2-pin jumper is required. Set jumpers for normal operating mode: ► Install a jumper at position 0. ► Remove jumpers from positions 1, 2, 3, and 4. Set jumpers for initialization mode: ► Install jumpers at positions 3 and 4. ► Remove jumpers from positions 0, 1, and 2. 10.7.2 Initialize the Cell Washer The cell washer must be initialized after the frequency converter is replaced. NOTE If the cell washer is not initialized after the frequency converter is replaced, the cell washer will display the “VERSION-ERROR 12” or “IMBALANCE” error message. Required tools: ► 2.5 mm Allen wrench ► #20 TORX® screwdriver ► Standard 2-pin jumper Initialization procedure: 1 On the control/display board, ensure that the jumpers are set for initialization mode. NOTE Refer to chapter 10.7.1 (Set Jumpers) for instructions in configuring jumpers. 2 Connect the cell washer to AC power and power the cell washer on. ► The software version is displayed on the screen and all lamps are illuminated. ► After approximately eight seconds, “ * INIT - MODE * ” is displayed on the screen. ► The cell washer is now in initialization mode. 3 Press and release the parameter selection button () until the IMBALANCE MODE parameter is displayed. 4 Press and release either parameter value button ( or ) until the value is set to 2. 5 Press and release the parameter selection button () to cycle through the initialization parameters (optional). 360113-1/H 39 Service 6 Press the START WASH button. ► “ ***ok*** ” is displayed on the screen to indicate that the new values were saved. ► “PARAM - INIT XYYY” is displayed on the screen to indicate the number of initializations that have been performed. 7 Power the cell washer off and disconnect it from AC power. Open the lid. Remove the rotor Leave the lid open. 8 Remove the front panel. a Remove the three screws that secure the bottom of the front panel to the base. b Gently pull the bottom of the panel away from the base. c Lift the front panel until the groove on the panel disengages from the tongue on the housing. 9 Configure the jumpers for normal operation mode. NOTE Refer to chapter 10.7.1 (Set Jumpers) for instructions in configuring jumpers. 10 Install the front panel. a Open the lid. b Place the front panel on the front of the housing. Align the groove on the panel so it fits around the tongue on the housing. c Press front panel downward to engage the tongue and groove. d Press the bottom of the panel against the base. e Slide the front panel sideways until the sides of the panel align with the base and the screw holes are aligned. f Install the three screws to secure the panel to the base. 10.8 Remove and Install the Bowl Assembly Required tools: ► Clear silicone paste ► Small flathead screwdriver ► Allen wrenches in the following sizes: 2 mm, 2.5 mm, 4 mm, 5 mm. NOTE The transport bolt removal tool is a 5 mm Allen wrench. Remove the bowl assembly: 1 Power the cell washer off and disconnect it from AC power. Open the lid. 2 Remove the rotor Leave the lid open. 3 Using the 4 mm Allen wrench, remove three screws that secure the lid hinges to the housing. 4 Pivot the lid assembly away from the cell washer. ► This provides clearance for removing the bowl assembly. Lid loosened and swung away from the cell washer. 360113-1/H 40 Service 5 Remove the rotor shaft/motor hub. a Using the flathead screwdriver, pry the black plastic cap off the top of rotor shaft. b Using the 5 mm Allen wrench, loosen bottom nut inside the shaft by turning it counterclockwise. NOTICE Do not loosen the 6 mm top nut, which may damage the rotor shaft and bowl assembly. c Lift the rotor shaft / motor hub off of the motor shaft. Rotor shaft / motor hub with black plastic cap. Rotor shaft / motor hub removed. 6 Separate the bowl assembly from the housing. a Using the 2 mm Allen wrench, remove the eight screws that secure the top of the bowl to the housing. b Fold back the gasket to access the screws. c On the rear of the cell washer, use the 2.5 mm Allen wrench to remove the two screws that secure the drain connector to the base. d Working around the hole in the bowl, gently pull the silicone motor seal toward the motor shaft. 7 Lift the gasket, drainage rings, and bowl assembly from the housing, tilting the bowl so that the drain connector clears the housing. Install the bowl assembly: 1 Lower the gasket, drainage rings, and bowl assembly into the housing. ► The drain connector should protrude through the hole in the base. ► The bowl should be centered over the motor shaft. 2 Adjust the silicone motor seal to the correct position. a Working around the hole in the bowl, gently pull the silicone motor seal toward the motor shaft so that no part of the seal is pinched under the bowl. b Working around the seal, pull the edges of the seal up and over the edge of the hole. Seal partially pinched under the bowl. 360113-1/H Seal pulled toward shaft, with edges partially pulled around edge of the center hole. Seal correctly adjusted. 41 Service 3 Secure the bowl assembly to the housing. a While folding back the gasket to access the screw holes on the rim of the bowl assembly, use the 2 mm Allen wrench to install and tighten the eight screws. NOTICE Do not overtighten the screws. Overtightening may damage the bowl assembly. b On the rear of the cell washer, use the 2.5 mm Allen wrench to install and tighten the two screws that secure the drain connector to the base. 4 Install the rotor shaft/motor hub. a Lower the rotor shaft/motor hub onto the motor shaft, aligning the slots in the hub with the tongues in the motor shaft. b Using the 5 mm Allen wrench, turn the bottom nut inside the shaft clockwise to tighten it. NOTICE Do not tighten the 6 mm top nut, which may damage the rotor shaft and bowl assembly. c Apply the clear silicone paste to the underside of the black plastic cap, then press the cap onto the top of the rotor shaft. 5 Swing the lid assembly back into position, and use the 4 mm Allen wrench to tighten the screws that secure the hinges to the housing. 10.9 Post-Repair Check Perform functional and safety checks of the cell washer after repairing or replacing parts. NOTE ► For information and instructions to program and use the cell washer, refer to the operation manual. ► Organizational regulations may require different test methods than those included in this manual. Use the appropriate test methods if they are different than the following procedure. Perform a functional check: 1 Ensure that the cell washer is connected to AC power and powered on. 2 Load the rotor with tubes and install the rotor. 3 Verify that the buttons, display, and indicator lamps are working correctly. 4 Start a multiple-cycle wash process. 5 During the Fill step, press the CHECK button to pause the process. 6 Open the lid and verify that the tubes are equally filled with the programmed amount of saline solution, within a range that is acceptable according to organizational guidelines. If too much or too little liquid is dispensed, the fill volume may need to be adjusted. 7 Press the START WASH button to resume the process. 8 During the Decant step, press the CHECK button to pause the process. 9 Open the lid and verify the following: ► The tubes are decanted equally, within a range that is acceptable according to organizational guidelines. ► The amount of liquid, if any, is within a range that is acceptable according to organizational guidelines. If too much liquid remains, the decanting speed may need to be adjusted. 10 Press the START WASH button to resume the process. 11 During the Agitation step, ensure that the tubes are being shaken. 12 Test whether the imbalance value is in the permissible range. 360113-1/H 42 Service NOTE Refer to chapter 10.2 (Verify Imbalance Value is Within Tolerance) to determine if the imbalance value is within the permissible range. 11Parts 11.1 Front, Lid, and Bowl F A B G C D H E I J Parts on the front and lid. Label Description Part Number A Outer lid E2186 (Included in the lid assembly (E2184), which includes all parts on the lid plus the hinges) B Sight window E1323 (includes gluing ring) C Lid handle E2189 (Included in the lid assembly (E2184), which includes all parts on the lid plus the hinges) D Control panel E2148 (Includes the control/display board, LCD display, and touchpad) E Front panel E2188 F Inner lid E2185 (Included in the lid assembly (E2184), which includes all parts on the lid plus the hinges) G Lid handle latch Included in the lid assembly (E2184), which includes all parts on the lid plus the hinges H Nozzle Included in the lid assembly (E2184), which includes all parts on the lid plus the hinges I Splash guard ► Included in the drainage system kit (E2535), which includes the drainage rings ► Included in the lid assembly (E2184), which includes all parts on the lid plus the hinges J Lid hinge E1563 (Included in the lid assembly (E2184), which includes all parts on the lid plus the hinges) Not Lid spring shown 360113-1/H E1565 43 Service 11.2 Rear and Bottom A B C Parts on the rear and bottom of the cell washer. Label Part Number A Rear panel E2107 - B Drain connector Included in the bowl assembly (E2104-A), which includes the bowl - C Supply connector Included with flow meter (E2103) Not Foot shown 360113-1/H Schematic Label Description 3680 B1 - 44 Service 11.3 Behind the Rear Panel C D A B E Cell washer with rear panel removed. Label Schematic Label Description Part Number A Isolation transformer E2195 B Drain connector Included in bowl assembly (E2104-A) - C Pump tubing assembly 450005-1 - D Pump E2096 M2 E Supply connector Included with flow meter (E2103) B1 T1 11.4Side A B C D Parts on the right side of the cell washer. 360113-1/H Schematic Label Label Description Part Number A Fuse (2.5 A) E2268 F2 B Main power switch E1009 Q1 C Power connector E507 X1 D Product specification label - 45 Service 11.5 Bowl and Rotor A E F B C D G H Parts on the bowl and rotor. Label Description Part Number A Drainage rings Included in drainage system kit (E2535), which includes the splash guard B Bowl Included in bowl assembly (E2104-A ), which includes the drain connector C Gasket E2105 Rotor shaft / motor hub E2370 Rotor (12-place) CW1012-A (includes 12 tube holders) F Tube holder insert E2551 G Tube holder (12 mm x 75 mm) ► E2197 (single tube holder) ► 400595-1 ((12) 10 mm x 75 mm tube holders and 12 inserts) ► 400596-1 ((12) 12 mm x 75 mm tube holders) D, H E Not Rotor, 24-place shown 360113-1/H CW1024-A (includes 24 tube holders) 46 Service 11.6 Behind the Front Panel A B G H I C D J E F K Cell washer with front panel removed and flipped upward. Label 360113-1/H Schematic Label Description Part Number A Control/display board Included with control panel (E2148), which includes the LCD display and touchpad A4 B Ribbon cable 140/16 pole E1332 C1 C Ribbon cable 130/10 pole E1333 C2 D Frequency converter board Included with frequency converter (E1184), which includes the heat sink A2 E Power supply board E1888 A1 F RFI filter E1284 Z1 G Ribbon cable 250/10 pole E1327 C3 H Interior housing - - I Lid lock E1478 Y1 J Liquid handling board E2130 A3 K Fuse (2.5 A) E2268 F2 47 Service 11.7 Under the Bowl A F G B H C D E Top view of cell washer with bowl removed. 360113-1/H Label Description Part Number Schematic Label A Flow meter E2103 (includes supply connector) B1 B Pump E2096 M2 C Braking resistor E1461 (includes braking resistor overtemperature switch) R1 D Braking resistor over-temperature switch - F3 E Motor relay E2193 K1 F Isolation transformer E2195 T1 G Motor hood E2191 - H Silicone motor seal E2690 - 48 Service M J K L I Parts on the right side, under the bowl. Label 360113-1/H Motor with motor hood removed. Motor mount. Schematic Label Description Part Number I Varistor board E1463 F1 J Speed sensor E730 B2 K Motor E823 M1 L Imbalance microswitch E2528 S1 M Motor mount E2915 - 49 Service 11.8Accessories A C B Cell washer accessories. Label 360113-1/H Description Part Number A Saline adapter ► Included in the drain/fill tubing assembly (450006-1) ► Included in the tubing kit (450003-1), which includes the drain/fill tubing assembly B Bypass tool E2287-01 C E613 Transport bolt removal tool (NOTE This tool is also used to remove the rotor shaft/motor hub) Not Power cord shown 115 V: 6083 230 V: 120156 Not Pump tubing assembly shown ► 450005-1 ► Included in the tubing kit (450003-1), which includes the drain/fill tubing assembly Not Drain/fill tubing assembly shown ► 450006-1 ► Included in the tubing kit (450003-1), which includes the pump tubing assembly Not Tubing kit shown 450003-1 (includes fill, drain, and pump tubing) 50 Service 12Schematic MAIN POWER 100-120 V 50/60 Hz 200-240 V 50/60 Hz X5 6 -+ 1 X7 X4 1 N 1 X3 1 X1 1 (X1) POWER CONNECTOR X1 X9 1 X2 6 X3 1 1 X6 X4 1 X8 4 3 2 1 L (A1) POWER SUPPLY BOARD (A3) LIQUID HANDLING BOARD A3 A1 X4 A1 (C3) RIBBON CABLE 250/10p X1 A2 1 A2 (A4) CONTROL/DISPLAY BOARD 115 V 230 V (F3) BRAKING RESISTOR OVERTEMPERATURE SWITCH (F2) FUSE 70 Ω 130°C S501 A1 1 2 3 4 5 6 X4 1 2 3 4 A1 X3 1 2 3 4 43 13 44 14 (A2) FREQUENCY CONVERTER N U1 PE (Z1) RFI FILTER U S501 (R1) BRAKING RESISTOR P10 S102 X3 S2 (K1) MOTOR RELAY 115 V A3 M 140°C X100 4 (T1) TRANSFORMER 1.7 Ω at cold motor 2 1 X1 X101 1 3 A4 X101 (C2) RIBBON CABLE 130/10p 1 4 (M1) DRIVE MOTOR (C1) RIBBON CABLE 140/16p A4 SERVICE JUMPER 0 X2 S2 1 (Q1) MAIN POWER SWITCH X9 S101 W2 V2 U2 1 (F1) VARISTOR BOARD P1 A1 X5 1 2 3 4 5 6 A3 X1 1 2 3 4 5 6 U 130°C M 1~ 5.9 Ω (B1) FLOW METER (B2) SPEED SENSOR (S1) IMBALANCE SWITCH (Y1) LID LOCK (M2) PUMP END OF MANUAL 360113-1/H 51 HELMER SCIENTIFIC 14400 Bergen Boulevard Noblesville, IN 46060 USA PH +1.317.773.9073 FAX +1.317.773.9082 www.helmerinc.com