1
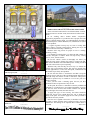
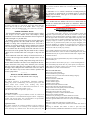
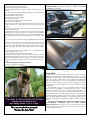
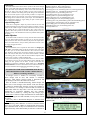
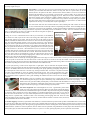
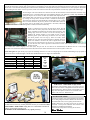
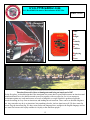
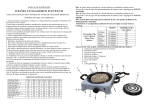
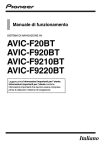
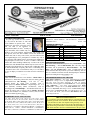
OUR 16th YEAR
MAY – JUNE 2006
OUR 92nd ISSUE
JAPAN-1, MALTA-1, NETHERLANDS-10, NEW ZEALAND-2,
NORWAY-4, SAUDI ARABIA- 1, SOUTH AFRICA-1, SWEDEN-24,
SWITZERLAND-1
TOTAL 749
NEW FROM THE DIRECTOR
20 years ago (1986) the first Cadillac
Day was held at the home of Joan and
Everett Hudson in Ipswich, MA. Every
Cadillac Day since then, except the one in
2000 was held at the Museum of
Transportation (MOT) on the 3rd Sunday of
May in Brookline, MA. Cadillac Day was
started by one of our members, Paul Stephen, who owned a ‘58
Sixty Special, and a few other Cadillac owners who founded the
Cadillac Past Club in early 1986. In the years that followed the
New England Region CLC participated in Cadillac Day and in
1991 when the 1958 Cadillac Owners Association was founded our
club participated. At that time we had a “Cadillac Connection”
with the three clubs attending Cadillac Day. As time went on, the
Cadillac Past club disbanded and Cadillac Day has since been cosponsored by the NE Region CLC and our club. Cadillac Day 2000
was held at Marina Bay in Quincy, MA due to a scheduling error
by the MOT. Since 1991 our club had as many as 12 ‘58s and as
few as 2 on display. I would like to see that record of 12 beaten on
the 21st.
++++++++++
MODELS IN THE CLUB
Eldorado Biarritz
Convertible
Coupe
Eldorado Seville
Coupe deVille
Sedan
Sedan deVille
Sixty Special
81
67
81
49
96
67
68
107
Extended Deck Sedan
Eldorado Brougham
Fleetwood Sedan
Imperial Sedan (Limo)
Commercial Chassis
Total Models
Models Unknown
Members “Looking”
42
20
16
10
11
717
3
144
++++++++++
NEWSLETTER SPONSORS
This issue of our Newsletter is sponsored by: Chris Bruno – CA,
Bob Steinberg – NJ and Bill Refakis, NY. The July-August
Newsletter will be sponsored by: Brent Hockman – TN, Bill
Wine – VA and Virginia Vance – CO. I would appreciate an
article from the three of you about your 1958 Cadillac by June 20.
This is a members Newsletter and all should participate. Members
appreciate reading about other member’s cars.
++++++++++
++++++++++
NEW MEMBERS
A BIG welcome aboard to our 5 new members – Chuck Schiel – 2
Dickinson Cir., Shrewsbury, MA 01545 (508) 363-4940, Code M,
[email protected]; Jim Breitling – 2711 N.E. 11th Ave.,
Pompano Beach, FL 33064 (754) 214-8502, Code F,
[email protected]; Robert Schoberl – Regensburger Str., 2 A,
93107 Weillohe, Germany (0049) 170-4012393, Code K,
[email protected]; Wolf Rudolph – 4675 Robin Hood Trail E,
Sarasota, FL 34232, (941) 371-2332, Code X; Schelley & Omega
Brown – 807 Claiborne Ave., Minden, LA 71055, (318) 371-2913,
Code K, [email protected];
MEMBERSHIP DIRECTORY CHANGES
Arild Kolnes, NORWAY - New email: [email protected]; Keith
Johnson, IL - Change Code to X; Arjan Massar, NETHERLANDS –
New add., phone and email: Violierlaan 44, 6841 CS Amhem,
Netherlands, [email protected]; Jody Dimick, CA – Delete; Juergen
Vieth, GERMANY – New email: [email protected]; Duane
Goodell, NH - Change Code to L,M; Sandy Edelstein, CA – Change
Code to G; Ray Koziol, NJ Change Code to X: Dan Pascucci, MA –
Change Code to X; Dan Petersen, MN – New add and phone: 1101 3rd St.
N. St. Cloud, MN 56303, (320) 215-6567; Dick Bennett, AR – Add
email: [email protected].
.++++++++
++++++++++
MEMBERS BY STATE AND COUNTRY
THE CLUB’S POSTAGE POT
As you all know, the $22.00 membership fee you paid when you
joined this great club is for a lifetime. We do not have annual dues
like all other car clubs. We depend on the generosity of our
members who donate to the Pot to keep the club functioning, as
ads do not bring in that much. I want to take this opportunity to
thank all the members who have made donations in the past. Dave
AL-6, AK-1, AZ-8, AR-5, CA-74, CO-12, CT-9, DE-1, DC-1, FL-32,
GA-12, HI-3, ID-4, IL-27, IN-4, IA-6, KS-7, KY-8, LA-6, ME-2, MD-9,
MA-54, MI-22, MN-11, MS-6, MO-9, MT-8, NE-1, NV-0, NH-8, NJ-20,
NM-7, NY-60, NC-9, ND-1, OH-28, OK-4, OR-13, PA-27, RI-14, SC-2,
SD-1, TN-10, TX-27, UT-7, VT-1, VA-16, WA-18, WV-1, WI-7, WY-1,
AUSTRALIA-11, AUSTRIA-1, BELGIUM-4, BRAZIL-1, CANADA-29,
COSTA RICA-1, CUBA-1, CZECH REPUBLIC-1, DENMARK-2,
ENGLAND-7, FINLAND-2, FRANCE-3, GERMANY-10, IRELAND-1,
1
POSTAGE POT DONATIONS
Gaston Marcoux, CANADA; Jody Dimick, CA; Patricia
Ardito, MA; Schelley Brown, LA; Dick Bennett, AR. Thank
you all for your support of our great club.
REPLACING SEALS CAN BE MAJOR REPAIR
Front and rear main bearing oil seals are commonly referred to
as engine seals. These seals keep oil from leaking past the bearings
on the crankshaft.
When an oil leak occurs, it’s usually from the rear main bearing
oil seal. Leaks result from wear and tear, improper installation or
an overdose of old, contaminated oil. Not changing your oil will
accelerate the demise of the seals.
While replacing a main real oil bearing seal isn’t exactly a
major job, it isn’t a piece of cake either.
Many engines use a split, two-part upper and lower oil seal
made of fabric and cork. Changing only the lower half of the rear
seal will usually stop oil leakage. (The upper half of this seal
seldom causes problems.)
While the upper half can be replaced without removing the
crankshaft, as a rule the crankshaft must be removed to install it
properly.. So replacing both the lower and upper halves will raise
the cost of the repair into the “major” category.
Other engines use a one-piece rubber oil seal, which some
mechanics find easier and less expensive to replace than the twopart fabric and cork type.
++++++++++
WE GET EMAILS AND LETTERS
2/13/06 snail mail
Dear Dave,
I have enclosed a check for my continuing support of the work
you do for us at the ‘58 owner’s club. You are doing a fine job, and
I know I speak for a lot of the others when I say I really appreciate
you and your leadership.
Some of us are a Little less inclined to venture into some of the
Yahoo Group issues, either because we are still new to the club or
new to the cars. And yet, the newsletter and the troubleshooting
ideas are perfect for guys like me who get a thrill just from reading
about what others are dealing with.
I have included an article written for anyone who is thinking
about re-doing their Cad’s interior.
One last thing, I bought my car from an 80-year old fellow
named Wolf Rudolph down in Sarasota, FL. Wolf owned her for
40+ years and he misses his car something fierce.
Sincerely Yours,
Doug Bailey – Roswell, GA. (Doug’s article appears on Page 8 and
++++++++++
Wolf has recently joined our club.)
++++++++++
PLEASE PATRONIZE OUR ADVERTISERS
When you patronize one of our advertisers, please tell them
specifically that you saw their ad in the Newsletter of Motordom’s
Masterpiece. Then they know that their ad is working for them.
Consequently, their continued advertising helps us to provide you
with the quality Newsletter that you want.
++++++++++
FOR SALE
Fleetwood 60 Special
++++++++++
Just a little reminder:
Looking for that special part? Call our Advertisers first!
They provide fast and friendly service.
++++++++++
WORST CITIES IN THE U.S. FOR TRAFFIC
NEW YORK - The worst traffic in the U.S. is getting even worse. It
pollutes as the vehicles idle. It wastes the time of trucks and passenger
cars. The annual delay per driver is in excess of 47 hours per year. It
creates delayed shipments. It wastes more than 2.3 billion gallons of fuel
each year.
The cost of U.S. traffic delays is, conservatively, $63.1 billion a year,
based on 2003 figures, the Texas Transportation Institute says. And it's not
getting any better.
"We would think that today the figure might be $2 billion to $3 billion
more with the rise in fuel prices,” says David Schrank, author of the 2005
Urban Utility Report for the Texas Transportation Institute. He suggests
further that despite this escalating problem, the commuting public has not
changed its driving habits all that much. People have done some chaining
of chores and shared driving to malls and offices. But the driving has
continued, and the delays continue to get worse.
"In L.A. the traffic delay problem extends from sunup to sundown,"
says Schrank. "There is really no letup between.”
By the Texas Transportation Institute's reckoning, the cities having the
worst traffic problems are:
1-Los Angeles, Long Beach, Santa Ana, CA. 2-San Francisco, Oakland,
CA. 3-Washington, D.C. 4-Atlanta, GA. 5-Houston, TX. 6-Dallas, Fort
Worth, Arlington, TX. 7-Chicago, IL. 8-Detroit,, MI. 9. Riverside, San
Bernardino, CA. 10-Orlando, FL. 11-San Jose, CA.12-San Diego, CA.
Extremely original and complete car. 52,000 indicated miles.
Engine number matches. Factory Prestwick Gray paint shows
primer in areas. Virtually everything works. Silver/gray interior
Seats and carpet show almost no wear. Has a couple spots of rust,
but hardly noticeable on body. Super straight and solid. Asking
$20K Please email or call for details: [email protected]
Member Charles Petty – Blairstown, NJ (908) 362-5362
++++++++++
Cadillac LaSalle Club, Southern California Region, Inc.
Grand National 2006 – Orange, CA – June 14 – 17, 2006
MEET HEADQUARTERS
Double Tree Hotel Anaheim/Orange County
100 The City Dr. , Orange, CA 92868
Phone: (714) 634-4500
Fax: (714) 978-2370
ALTERNATE HOTEL
Ayers Inn Anaheim/Orange, 3737 W. Chapman Ave., Orange CA 92868
Reservations (800) 706-4885 or (714) 978-9168
++++++++++
2
The hub cap house – Peoria, Illinois
++++++++++
KEEP YOUR CAR CLEAN, CLEANSED AND WAXED
In the real estate business there’s an old maxim about “location,
location, location!” In other words, the location will often sell the
house.
In car washing, there’s another maxim. “Preparation,
preparation, preparation!” If you take the time to prepare, the result
will be a smooth, flawless finish, says Chuck Bennett, president of
Zymol Enterprises of North Branford, CT, manufacturer of Zymol
car care products.
“A regular regimen can keep any car, from a recently built
family sedan to a freshly restored classic, looking the way it did
when it rolled out of the shop.” Bennett says.
Bennett’s three step process for proper car care is: washing,
cleansing, waxing.
Cars should be washed with a very mild soap that contains no
solvents, detergents or sodium. These can strip off any existing
wax or, worse, etch the surface.
Be sure the vehicle’s surface is thoroughly wet before you
apply the soap, using a silicone-free sponge or cotton wash mitt.
The surface should be rinsed immediately after washing and dried
with soft cotton towels to prevent spotting.
With the body clean and dry, the next step is to cleanse the
surface with a good surface cleaner. This step may actually take
several applications to remove the dead paint, contaminants and
the residue of previously used products.
Be sure that the cleaner is non-abrasive and that it stops the
cleaning process when all of the old, dead pigment and paint are
removed.. Wipe the cleanser off with a clean towel. This process
should be repeated every six months or so to be sure your car’s
finish is renewed.
Once you have used a cleansing agent, the area you have
cleansed will have no protection of any sort left.
At this point, the surface is vulnerable to attack by oxidanta and
pollutants so you should use a wax product immediately to protect
it. The best waxes are those that contain Carnuba wax, Bennett
says. The higher the content, the better the wax.
To apply this type of wax correctly, the surface should be
warm, but not hot. The warmth allows the wax to bond more
firmly to the paint. You can also apply the wax with your hand to
provide the necessary warmth.
Once the wax is applied to the surface, it should be left to stand
for about a minute and then slowly buffed out with a flat towel
folded once. The buffing can be repeated until a brilliant luster is
obtained.
– Marc Stern
++++++++++
Not ‘58 Cadillacs but ‘58 Red wagons spend the last of their days at a
Radio Flyer graveyard.
++++++++++
New Members Schelley and Omega Brown’s 1958 Sedan-Model 6239,
Minden, LA.
++++++++++
++++++++++
Make plans now for Cadillac Day
3
mechanics are not in need of reconditioning. The interior would be
in excellent condition. Note: This value does not represent a "100
Point" or "# 1"
* "100 Point" or "# 1" vehicle is not driven. It would generally be
in a museum or transported in an enclosed trailer to concourse
judging and car shows. This type of car would be stored in a
climate-regulated facility.
++++++++++
FIN JOKE
Jack's mother had four children. The first was called North, the
second was called South and the third was called East. What was
the fourth called?
(Answer elsewhere in Newsletter)
Here is one of the 730 Cadillac Fleetwood Imperial limousines which
were built in 1958 and it’s a total wreck. If this limo looks small, the
reason is that its body is bent in the middle. Make a “big” safety
contribution – drive your old limos safely. (Photo submitted by Chris Wutz)
++++++++++
INTERESTING INFORMATION!
WD-40, bet you learn to use it, read it all –
Water Displacement #40.
The product began from a search for a rust preventative solvent and
degreaser to protect missile parts. WD-40 was created in 1953 by three
technicians at the San Diego Rocket Chemical Company. Its name comes
from the project that was to find a "water displacement" compound. They
were successful with the fortieth formulation, thus WD-40. The Corvair
Company bought it in bulk to protect their atlas missile parts. The
workers were so pleased with the product, they began smuggling (also
known as "shrinkage" or "stealing") it out of the plant to use at home. The
executives decided there might be a consumer market for it and put it in
aerosol cans. The rest, as they say, is history.
++++++++++
POWER STEERING FLUID
Like the brake hydraulics, your power steering system is subject
to the ravages of time. Rubber hoses and complex sealing
mechanisms can break down and contaminate the steering fluid. It
should be changed every 40,000 miles
To flush the system, first locate the power-steering pump lines.
Usually a high-pressure line takes fluid from the pump and is
attached to a fitting with a crimped-on steel sleeve. You want to
detach the low-pressure return line, which is usually hose clamped
to the return nipple. While adding steering fluid at the reservoir,
have an assistant turn the steering wheel back and forth. Get the
front wheels clear of the ground with jack stands for this. Continue
to drain off the old fluid until clean oil begins to drip from the
pump.
Then reattach the return line and top off the fluid reservoir. A
few turns of the steering wheel should be enough to force out the
air bubbles.
Another way to help extend pump and steering rack life is to
install an inline fluid filter. The filter is hose-clamped into the lowpressure return line to the pump. First, drain the power steering
fluid, then cut the rubber hose line within an inch or two of the
inlet nipple. Hose-clamp the after market filter to the free ends of
the hose. The filter’s tiny screens remove abrasive particles that
can cause pump failure.
It is a carefully guarded recipe known only to four people. Only one of
them is the "brew master." There are about 2.5 million gallons of the stuff
manufactured each year. It gets its distinctive smell from a fragrance that
is added to the brew.
Ken East (one of the original founders) says there is nothing in WD-40
that would hurt you.
When you read the "shower door" part, try it. It's the first thing that has
ever cleaned that spotty shower door. If yours is plastic, it works just as
well as glass. It's a miracle! Then try it on your stovetop...Voila! It's now
shinier than it's ever been. You'll be amazed.
Here are some of the uses:
Protects silver from tarnishing.
Cleans and lubricates guitar strings.
Gives floors that 'just-waxed' sheen without making it slippery.
Keeps flies off cows.
Restores and cleans chalkboards.
Removes lipstick stains.
Loosens stubborn zippers.
Untangles jewelry chains.
Removes stains from stainless steel sinks.
Removes dirt and grime from the barbecue grill.
Keeps ceramic/terra cotta garden pots from oxidizing.
Removes tomato stains from clothing.
Keeps glass shower doors free of water spots.
Camouflages scratches in ceramic and marble floors.
Keeps scissors working smoothly.
Lubricates noisy door hinges on vehicles and doors in homes.
Gives a children's play gym slide a shine for a super fast slide.
Lubricates gearshift and mower deck lever for ease of handling on riding
mowers.
Rids kids rocking chairs and swings of squeaky noises.
Lubricates tracks in sticking home windows and makes them easier to
open.
Spraying an umbrella stem makes it easier to open and close.
Restores and cleans padded leather dashboards in vehicles, as well as vinyl
++++++++++
WHAT IS YOUR CADILLAC WORTH?
Go to: http://www.oldcartrader.com/events.php
Low Retail Value
This vehicle would be in mechanically functional condition,
needing only minor reconditioning. The exterior paint, trim, and
interior would show normal wear, needing only minor
reconditioning. May also be a deteriorated restoration or a very
poor amateur restoration. Most usable "as-is."
Note: This value does not represent a "parts car."
Average Retail Value
This vehicle would be in good condition overall. It could be an
older restoration or a well-maintained original vehicle. Completely
operable. The exterior paint, trim, and mechanics are presentable
and serviceable inside and out. A "20-footer."
High Retail Value
This vehicle would be in excellent condition overall. It could be a
completely restored or an extremely well maintained original
vehicle showing very minimal wear. The exterior paint, trim, and
4
bumpers.
Restores and cleans roof racks on vehicles.
Lubricates and stops squeaks in electric fans.
Lubricates wheel sprockets on tricycles, wagons, and bicycles for easy
handling.
Lubricates fan belts on washers and dryers and keeps rust from forming on
saws and saw blades, and other tools.
Removes splattered grease on stove.
Keeps bathroom mirror from fogging.
Lubricates prosthetic limbs.
Keeps pigeons off the balcony (they hate the smell).
Removes all traces of duct tape.
Folks even spray it on their arms, hands, and knees to relieve arthritis pain.
Florida's favorite use is: "cleans and removes love bugs from grills and
bumpers."
The favorite use in the state of New York--WD-40 protects the Statue of
Liberty from the elements.
WD-40 attracts fish. Spray a LITTLE on live bait or lures and you will be
catching the big one in no time. Also, it's a cheaper than the chemical
attractants that are made for just that purpose. Keep in mind though, using
some chemical laced baits or lures for fishing are not allowed in some
states.
Use it for fire ant bites. It takes the sting away immediately and stops the
itch.
WD-40 is great for removing crayon from walls, spray on the mark and
wipe with a clean rag. Also, if you've discovered that your teenage
daughter has washed and dried a tube of lipstick with a load of laundry,
saturate the lipstick spots with WD-40 and re-wash. Presto! Lipstick
gone.
If you sprayed WD-40 on the distributor cap, it would displace the
moisture and allow the car to start.
It removes black scuff marks from the kitchen floor!
Use WD -40 for those nasty tar and scuff marks on flooring. It doesn't
seem to harm the finish and you won't have to scrub nearly as hard to get
them off. Just remember to open some windows if you have a lot of marks.
Bug guts will eat away the finish on your car if not removed quickly! Use
WD-40!
P.S. The basic ingredient of WD 40 is FISH OIL
(Now aren't you glad you read it all?)
These two ‘58s seen at the North California Region, Cadillac
LaSalle Club Meet. (Courtesy the CML) I wonder if the owners
are members of our club?
I’m pretty sure this is member Mike Gonzales’ Sixty Special
++++++++++
and this could be member Don Barnes’ Biarritz, but I’m not sure.
++++++++++
Brake Fluid
Brake fluid is a special oil that has specific properties. It is designed to
withstand cold temperatures without thickening as well as very high
temperatures without boiling. (If the brake fluid should boil, it will cause
you to have a spongy pedal and the car will be hard to stop.) Brake fluid
must meet standards that are set by the Department of Transportation
(DOT). The current standard is DOT-3 which has a boiling point of 460º
F. But check your owner’s manual to see what your vehicle manufacturer
recommends.
The brake fluid reservoir is on top of the master cylinder. The brake
fluid level will drop slightly as the brake pads wear. This is a normal
condition and no cause for concern. If the level drops noticeably over a
short period of time or goes down to about two thirds full, have your
brakes checked as soon as possible. Keep the reservoir covered except for
the amount of time you need to fill it and never leave a can of brake fluid
uncovered. Brake fluid must maintain a very high boiling point .Exposure
to air will cause the fluid to absorb moisture which will lower that boiling
point.
NEVER PUT ANYTHING BUT APPROVED BRAKE FLUID IN
YOUR BRAKES. ANYTHING ELSE CAN CAUSE SUDDEN
BRAKE FAILURE! Any other type of oil or other fluid will react with
the brake fluid and very quickly destroy the rubber seals in the brake
system causing brake failure.
++++++++++
Have you thought about joining the
Cadillac LaSalle Club?
5
Brake Lines
be a member of the Group all over again.
kalittlebreck@ntlwor, dale57-300chrysler@at,
[email protected], [email protected],
[email protected], [email protected], michaelj@austarmetro,
[email protected], [email protected],
[email protected], [email protected],
[email protected], [email protected],
[email protected], [email protected],
[email protected], [email protected],
[email protected], martyntimmings@yahoo,
[email protected], janethazeldene@yahoo, daleskelton2002@yahoo,
cjac6239@yahoo, [email protected], [email protected],
[email protected], markcapetowncapetownm,
[email protected], [email protected],
[email protected].
The brake fluid travels from the master cylinder to the wheels through
a series of steel tubes and reinforced rubber hoses. Rubber hoses are only
used in places that require flexibility, such as at the front which move up
and down as well as steer and rear wheels, The rest of the system uses
non-corrosive seamless steel tubing with special fittings at all attachment
points. If a steel line requires a repair, the best procedure is to replace the
complete line. If this is not practical, a line can be repaired using special
splice fittings that are made for brake system repair. You must never use
brass "compression" fittings or copper tubing to repair a brake system.
They are dangerous and illegal.
Proportioning valve
This valve is designed to adjust the pressure between the front and
rear brakes depending on how hard you are stopping. The shorter you stop,
the more of the vehicle's weight is transferred to the front wheels, in some
cases, causing the rear to lift and the front to dive. These valves are
designed to direct more pressure to the front and less pressure to the rear
the harder you stop. This minimizes the chance of premature lockup at the
rear wheels.
++++++++++
Brake Adjuster
For the drum brakes to function correctly, the brake shoes must remain
close to the drum without touching it. If they get too far away from the
drum (as the shoes wear down, for instance), the piston will require more
fluid to travel that distance, and your brake pedal will sink closer to the
floor when you apply the brakes.
Servicing
The most common service required for drum brakes is changing the
brake shoes. Some drum brakes provide an inspection hole on the back
side, where you can see how much material is left on the shoe. Brake
shoes should be replaced when the friction material has worn down to
within 1/32 inch (0.8 mm) of the rivets. If the friction material is bonded
to the backing plate (no rivets), then the shoes should be replaced when
they have only 1/16 inch (1.6 mm) of material left.
Deep scores sometimes get worn into brake drums. If a worn-out brake
shoe is used for too long, the rivets that hold the friction material to the
backing can wear grooves into the drum. A badly scored drum can
sometimes be repaired by refinishing. Drum brakes have a maximum
allowable diameter. Since the contact surface is the inside of the drum, as
you remove material from the drum brake the diameter gets bigger.
Desert Valley Auto Parts, AR. - Model 6239EDX
++++++++++
++++++++++
INFORMATION FOR THOSE MEMBERS WHO HAVE
BEEN BOUNCED ON THE CLUB’S YAHOO GROUP
What are "bouncing" members?
If messages sent to a member are consistently returned to
Yahoo! Groups with an error, that member is considered
"bouncing." Their Yahoo! Groups account is deactivated, and
group messages will not be delivered to the account.
Once an account is considered bouncing, Yahoo! Groups will
send a series of test messages to the member. If the test messages
are returned as undeliverable, then the account will continue to
bounce. However, if a message is delivered and not returned as
undeliverable within five days after it was sent, the account will
automatically be reactivated. Members may also manually
reactivate their accounts by visiting their My Groups page.
Please note: If Yahoo! Groups determines that an email address
has been bouncing for more than 6 months, we may remove it from
our system.
Users may make a "Reactivation Request" to unbounce their
account.
The following email addresses are listed as bounced. Please
look to see if your email address is listed and take the necessary
steps to unbounce them. If they are not unbounced in a reasonable
length of time they will be deleted and you will have to subscribe to
Member Sandy Edelstein, CA recently purchased this Coupe from
member Ray Koziol, NJ
++++++++++
Member Duane Goodell, NH recently purchased this Sedan deVille from
member Dan Pascucci, MA who had purchased it from member Nils
Sjulander, ME.
++++++++++
6
1958 Camino DeVille
Old car demise isn't final.
Spring is here in Boston, but the 60 Special is entering its last
remaining days of winter. Too rusty to save, but the many donor parts will
sustain yet another great '58 Cad. Car has 114,200 miles on it, black ext.,
B+W cloth int., air ride, power vents and fogs. Previous owner put it out to
pasture 30+ years ago - a poison ivy pasture 200 yards from the ocean in
Rhode Island. Rust was up to the Sixty Special script on the tailfins,
crankshaft pulley had rusted off, Fred Flintstone floors, gas tank reduced
to "gas pan".
(It used to be a Sedan DeVille. The original name for the project
was Ranch deVille, which was later changed.)
This idea was born simply because I wanted a way to haul my ‘53
Sunbeam motorcycle. Chevy El Caminos and Ford Rancheros do not have
a long enough bed to carry a full size cruiser like a Harley or my
Sunbeam. Since I loved the Caddys, I began taking some measurements
and doing some sketches. It turned out that a ‘58 Cad Sedan DeVille had
the right stuff. So I found this blue one in Texas—and was it solid! I’m
always asked why I didn’t start with a ‘58 flower car. But the truth is they
are very ugly, they have a horrible roof line, they have four doors and
their wheelbase is, if I remember right, 156 inches (yikes!). So once the
car from Texas arrived I began visualizing it in 3D. After a good while
eyeballing the project and building it in my minds eye, I began cutting the
roof and the rear trunk section out of the car. A new Coupe front
windshield frame (lower dog leg pillars) and glass were installed to give
the old four door a lower profile (a sedan windshield is about 2’’ taller but
miraculously the same upper outline and profile shape as a coupe!).
The result is it almost looks chopped. Taking the idea from the El Camino
I left the rear floor and trunk pan in place. However instead of a fold
down tailgate a rear swing out door was fabricated to be sure it would not
interfere with the loading and unloading of the motorcycle. But now I
wanted a really cool and easy way to ramp the bike up in and back out of
the bed. So I built a hidden ramp assembly under the rear floor of the bed.
It is a very complicated set up with cam followers and tracks, limit
switches, solenoids, and relays. Yet I’m proud to say that with over 100
runs it has performed flawlessly.
But how could I refuse? Now stripping car at home. (Photo by D. Becker)
Both front fenders lifted off without unbolting (easy to remove engine
parts). Car up in the air to reach the air-ride components and free the
scrunched front air bags. About half the original mass will soon be off to
the great crusher (towering) up in the sky, only to be reincarnated as Kias
and Hyundais. Old car demise isn't final. Thank goodness. –
Member Joe Gildea - Dorchester, Massachusetts
+++++++
FOR SALE - 1958 CADILLAC COUPE DE VILLE
Asking $12,500. (Negotiable)
It is an automated one button operation to deploy the ramps down on the
ground via a linear actuator. The rear half of the bed floor is hinged and
opens up via hydraulic cylinders for storage underneath. This is where the
Air Ride pump, tank, and hydraulic pump is also located (in the modified
spare tire well). This allows for the look of a stock bed but with the ease of
loading and unloading the bike with no “loose traveling ramps”. Other
features include a power rear bed window, Custom wheel treatments, a tripower Cad motor, and of course PW, PS, PB, A/C, and all the other
options you’d expect on a Cadillac, including power rear quarter windows
(hand fabricated with cut down OEM frames). Not even the El Camino had
that! And by widening the rear OEM wheel wells to 49 1/2” I can even
haul my sheet metal.
Member Ken Caskey – Palm Bay, Florida
Body off frame restoration 70% complete. Need to sell due to medical
reasons. Body, doors & fenders acid dipped. New Primer and Paint. Dent
on front center of hood. Rt. ft. fender has a small scratch in the front.
Frame has been sandblasted and coated inside and out. Some new
weatherstripping. New floor pans have been installed. Rebuilt motor (all
new parts $3,600) & rebuilt transmission (all new parts$1,600). New
windshield still in box. New A/C compressor and condenser. New
radiator. All chrome parts including bumpers that have been removed and
are still with the car. Interior still with the car & needs to be replaced.
Wire harness still with car, Clear title & copies of title search. I have new
service manual, owners manual, other books & pictures showing progress
of restoration from start to present. $12,500.invested
Member Dick Bennett – (501) 759-2342 AR.
++++++++++
Trivia
160 cars can drive side by side on the
Monumental Axis in Brazil?
It’s the world’s widest road.
I wonder if that applies to ‘58 Cadillacs?
++++++++++
A FIN FACT
Did you know a car uses 1.6 ounces of gas idling for 1 minute?
7
Refreshing theTurk’s Interior
By: member Doug Bailey
Wolf-man pushed the huge sedan hard through a right turn onto the not-so-gritty streets of Sarasota. Naturally, she swung
wildly left, so I hung on to the roof rail for dear life. Wolf gave it heavy right foot. She sat down and roared, 310 horses pushing just
shy of 5,000 pounds through the gears. Composing my thoughts (okay, I was wrangling for a lower price), I shouted over her throaty
exhausts, “Wolf, this rubber’s breaking up in my hand. It’s gotta go, and SOON!” Eyes wide, hands clutching her titanic 17” wheel,
Wolf shouted back, “Naght eef you nevair drive her in der RAIN!”
Sold American! I was now the third owner of Wolf Rudolph’s turquoise and white 1958 Extended Deck sedan
(Model 6239E). The Turk (short for turquoise) is a straight, black-tagged California car, all original, with
turquoise (28) and alpine white (12) paint, turquoise and black Morrocan interior (36) with aqua headliner and
dash paint. She’s got four doors – which makes her a driver. She is not a convertible, not even a Coupe de Ville.
And not all that rare: number 14,571 of 20,952 made that year, according to the build sheet. Not a highly
desirable Caddie to collectors, but exactly like the one I learned to drive in back in ’65. So, two more decisions
for day one: I would replace her rubber and refresh her interior, but I would not try to restore her completely – at
least not now.
I had never re-done an interior. But I’ll try anything once. Here’s how I did it, in case you’re next. First off, note
that most guys would rather hoist the engine with a cotton rope and grind the heads with sandpaper than mess with an interior. When I mentioned my
plan to replace the headliner to Denny Sanford my interior guru, he laughed out loud. “You don’t have enough hours in a weekend, man…” Then he said,
ominously, “Better you than me, Hoss.” He knew what I was about to find out: Most cars of the ’Fifties have headliners hung from four to six steel rods.
The ’58 Cadillac sedans used nine. Standard of the World… To me that was just a few more kinks to get wrinkled up and
ironed out.
The seats: The front seat came out with four ½” bolts on each side. Bolts and brackets went straight into labeled baggies,
because it would be two months before they went back in. My son and I, all six hundred pounds of us, lugged the seat to
Denny’s workshop. The seat is a beast… Denny fabricated two new springs, installed new foam cushioning and re-sewed
the separated seams on the corners. Miraculously, he made the ripped seam in the middle of the vinyl upholstery
disappear. The $375 Denny charged me was a bargain; no way I could have done this. I installed a new ground line for
the cigar lighter then put the seat aside for later. The back seat was good to go, as is.
The carpet: I ordered the molded carpet replace-ment from Stock Interiors online ($157)
The Turk required two pads at $50 each. Seats out, I spent a day removing the door sills
and original carpet. It took a while to wire-brush the remaining horsehair padding from
the floors, where it had been glued since 1957.
I expected to find a treasure trove of nearly fifty-year-old
geegaws. Instead I found only a ’64 penny, some screws, and
a bunch of hairpins in the rear passenger-side corner, no doubt
left from the original owner. Turk’s paperwork says that had been Sylvia Goldstein, a patron of the musical arts in the LA area.
She had ordered it delivered to LA in ’58, then sold it to Wolf in 1962. I also found an original Cadillac medallion, which had
been there from the beginning I suspect. That’s it on the Joey Jesser key chain at right.
I inspected the floorboards for rust. Finding none I installed the new pad with scissors
and duct tape. You know, the stuff’s not only great for hanging pictures and fixing the
plumbing, it’s great for the seams in a Cadillac’s floor insulation! Next, the front
carpeting. It’s simply a trim-and-fit operation, using scissors and a razor knife and
being careful not to trim too much at a time. I worked from the center tunnel toward
the back seat, then out to each side, duct-taping it to hold it in place as I worked. No
glue! There are clips under the dash to clamp the leading edges. The toughest tasks?
Locating the hole for the dimmer switch and working the carpet over the accelerator pedal without making a mess.
Installing the rear carpet was much harder because the molded piece was not well fitted to the deep wells of the rear
floor. I had to cut in places I wish I had not, and I had to use spray-on upholstery glue in order for it to conform to the
wells. Once I had the rear pieces in place I could see why Cadillac used separate pieces in the original install:
The rear carpet did not meet the front piece under the front seat and over at the sides near the doors. My solution? I
ordered more carpet at $89 from Stock Interiors to cover under the front seat over to the doors. It supplied enough extra
for trim and for the trunk.
I had to have a shoe repair shop sew on vinyl edging ($20 from Stock Interiors) for two small pieces fitted to the center
door posts, down near the floor. (I glued this piece in instead of removing the old pieces from the posts; the old carpeting
was sewn to the vinyl of the original.) While I was at it I had the shoe guy trim out the carpet for the trunk using the
leftover edging. I polished and re-installed the door sills, careful not to cause the carpet to run as I inserted the screws.
The package shelf: I took a piece of the new carpet and edging to a local Benjamin Moore Paint Store. They mixed up a
quart of turquoise oil-based paint for the shelf ($20). I masked off the glass, weather seal and seatback and brushed on
8
two coats of thinned paint. It takes time to get the straw-like material well coated, but it’s worth the extra effort. I think this little change looks great –
very nearly original to my eye.
The headliner: I took a day just to look it over and to think about what I was about to do. For $250 I had
ordered a pre-sewn header from SMS Auto Fabrics of Canby, OR. This was a perfect match for the old
material, down to the pattern in the fabric. (Stock Interiors could not match it.) You can see below how
discolored the old header was, even though it was still intact. It took me half a day to remove all the
interior brightwork, carefully tagging and bagging the pieces. What was left was a fiberboard tack strip
that ran the perimeter of the compartment. Cadillac’s builders used narrow ¼”-long staples every quarter
inch or so to hold the liner at its edges. I pulled the liner away from the tack strip with a pair of needlenose pliers. Most of the tack strip stayed in place, but I had to glue a few pieces back in. (I could not find a
replacement for this strip, so I was lucky mine stayed in good shape.)
As I removed the nine steel rods I worked from back to front, labeling each with a marker on duct tape
(#1-#9). I marked each hole on the body with the corresponding rod’s number. There are multiple holes for
each rod, and getting the right rod back in the right holes is crucial for an easy installation. As the liner dropped down I withdrew the rods from the liner.
Later I cleaned them up before inserting them into the rod pockets of the freshly ironed, new headliner – in order. The roof’s insulation was nearly
perfect, so I had nothing to fix there. The rubber on the front and rear glass was perfect as
well. This is the time to fix those if they need it.
Front of car is to the
Metal tabs for
right. Here’s the
grabbing the #6 rod
dome light’s mount
pocket
Installing the new liner: I learned that rod #6 is the key. You start there, in the middle! It
has no hooks on its ends; it just fits into a slot in the roofing, and is held in place with four
metal tabs that grab the #6 rod pocket. Once all the rods were in the pockets of the new
headliner I measured the distance from the center line on the roof to the first tab-grabber on
either side and transferred that measure to the #6 pocket on the liner. I then started by
hanging #6, which is right behind the front seat and just ahead of the dome light. The entire
liner can hang there from the two central tabs on #6, hanging down behind the front seat
Tack
while you get the tabs hooked into the #6 pocket, grabbing the #6 rod. From there you work
Numbered
strip
your way forward to #7, #8 and #9 – then backward to #5, #4, #3, #2 and #1. Be sure you
holes for rods
are working with the liner centered on the rod, inserting each rod into its proper hole in the
body. Each rod will start out flexed and out of vertical. Work them forward or back until
they fit into place; mine sort of snapped into a proper slot. When all nine rods are in their
holes you’ll have the front and rear flaps hanging down, and the sides will all be loose,
waiting for you to draw out the wrinkles and insert the staples.
First the wrinkles, which are caused by not being fully pulled down to the edges: You have to use a knife to reach up to each rod end and snip a notch
into the rod pocket so that the liner can come down closer to where the rod rests in its hole in the body. Be careful! A slip will cost you your $250
investment. Work one rod at a time, both ends, and complete this step for all nine rods. When that’s done go back over all nine again, snipping where you
find wrinkles and pulling the liner down on the sides toward the rod’s installation holes.
Now, for the final fastening: I used an Arrow stapler with ¼” light staples. They are wider than the originals, but they
worked fine. They will penetrate the tack strip and hit the metal roof, bending back and securing them firmly. Begin at
the front, in the middle, ahead of the rearview mirror’s mounting holes. Spray upholstery glue (lightly) along the tack
strip. Then staple the center of the liner to the tack strip, working toward the sides. You’ll have to nip and tuck around
the corners of the windshield. Go to the rear window and repeat this process. Now, work up both sides: spray, pull,
tack. Give it a chance to rest a while as you admire your work. You might have to go back and tighten a few wrinkles.
Then reinstall the interior brightwork. Lookin’ good! Installing the headliner and trim took me about six hours to
accomplish.
The sun visors: These are a challenge. The original pieces have a single swath of fabric wrapped around the fiberboard
core, stitched along their margins to two pieces of matching vinyl, and all fitted to the visor with a vinyl edging – which is
machine-sewn. The good news: SMS provided plenty of extra material from the headliner at no charge! The bad: I had to
find someone who could do this complicated sewing with a heavy sewing machine. A home machine was not heavy-duty
enough. I tried the shoe repair guy, but settled on doing it myself by hand.
The interior brightwork: The overhead light has five wires: a ground and a positive and a
negative for each of two lamps in the housing. Mine were fine without re-fitting the plugs. I
screwed the trim pieces from the roof line, windshield and rear glass to boards to keep them from being bent or damaged
as I worked on them. I decided not to have them polished or re-chromed professionally at this time. If I ever want to
restore the Turk I can do that then. So, I just cleaned and polished as best I could, using soap and water, cleaning wax, a
buffing wheel on a portable drill, a Dremel tool with a wire brush fitting, and fine-gauge steel wool. There was some
pitting, but nothing a good re-chroming wouldn’t cure one day. I tried to find new stainless or chrome screws, but no luck,
so I just polished the old ones and re-used them.
New weather-stripping: I ordered my replacements from SoffSeal, a Cincinnati outfit that represents Steele products. Richard Merz there convinced me
they were the guys to deal with, and he did, in fact, help iron out a problem with a short trunk seal. I began with the roof rails ($152). The old ones came
off with a putty knife and elbow grease. Moving slowly I popped the old wire retainers and stripped as I went. Removing the residue was fairly easy with
household cleaners. (I didn’t use solvent as planned.) The new rubber went on as planned, using 3M adhesive for this purpose from AutoZone ($3.00). I
used the yellow glue, but wish I had found the black. Just lay in a yard or so at a time, pressing the plastic pins in to replace the wire fasteners.
9
Next, I did the rear doors’ weather stripping ($122). The rubber was mostly fastened with wire tabs; only about four inches near the doors’ locks were
glued. But the lower edges of all the Turk’s doors (below) were beginning to show some light rust around the holes where the rubber seals are mounted. I
took the time to wire brush the mounting holes with the Dremel, swabbed on and wiped off naval jelly to neutralize the rust, then sprayed on Rustoleum
before installing the new rubber. It wasn’t a great fix, but this is an unseen location and it may hold off the need for body repairs a little while longer.
The front edges of the rear windows have seals that seat with the front windows. On the Turk these were hard, crispy
and breaking away. I had replacement parts from SoffSeal ($22/pair). The rubber has a metal strip embedded, and
getting the old piece out of its slot was hard. The builders had crimped the slot
with a hammer blow. The only way to reverse this was to destroy the old rubber
by working the crimp with a screwdriver until it released the old fitting. I
sprayed the new rubber insert with WD40 and it slid right back in. I’ll re-crimp
IF it ever slides downward. By the way, Steele’s Lock Pillar Fillers ($28) are
the wrong parts for the 6239E. They are labeled for ’58 Pontiac, Buick and
Cadillac, but don’t bother. Richard made good on a refund, but Steele was little help.
Finally, I replaced the long seals on the front doors ($146). The old
rubber comes off with a putty knife, and all surfaces are cleaned as
before, including rust treatment for the lower edges of the doors. The
leading edge of the doors is hard to access for removing and reinstalling the weather stripping. If your hands are like a former
offensive guard’s you’ll need a long screwdriver. One more thing:
The Steele products were too long by about two inches, which
wouldn’t be a big issue except that both ends are finished. There are
metal screw holders at the front end, and an angled bracket at the
door’s lock end. That forced me to snip out a 2” section at an angle
up near the door locks, where I figured it would wreak less havoc with leaking. I glued it there and will
monitor for leaks.
I also installed new weather stripping to the trunk ($25). The part was 30” too short for the extended deck, but Richard sent me a cut-to-length
replacement. New under-hood insulation set me back $45, but with new rubber all around I swear it rides as quiet as a new one!
On the road again! This great winter project gave me something constructive to work on in the garage for two months while adding to my enjoyment of
the Turk. The interior is MUCH brighter, and the seals should hold if I am ever caught out in DER RAIN!
Carpet:
Headliner:
Weather strip:
Paint, glue, misc:
Denny’s seat fixes
TOTAL
Total cost:
$ 367.00
$ 250.00
$ 515.00
$ 100.00
$ 375.00
$1,607.00
Total Labor
Carpet
Headliner
Metal Trim
Weather strip
Misc, cleanup
TOTAL
16 hours
12 hours
4 hours
8 hours
8 hours
48 hours
Answer
To
Turk
FIN
JOKE
on
Page 4.
“Jack”
FOR SALE - 1958 Cadillac Coupe deVille
All original. Great restoration project. Too good to part out.
Hasn’t run since the 80s. Garaged most of the time. Has rust
in all normal places. Steering wheel, seats and dash in great
shape. Ran when parked. $1,995 or best reasonable offer.
Marlin (585) 593-5797- Wellesville, NY..
LAST BUT NOT LEAST
++++++++++
An email was received very recently from the secretary of our member Ziad
Zein El Abdin in Saudi Arabia stating that since a month Mr. Ziad Zein El
Abdin is not physically keeping well.
The members of the club wish him a very speedy recovery.
10
It seems my messages aren’t getting through to the members
As I’m still getting Newsletters returned to me from the P.O.
.as undeliverable. Also, I’m not getting articles from the
members about their ‘58s when its their turn to sponsor a
Newsletter. I wish you all would take more interest in the
club than just reading the Newsletters?
Until next time, keep cruisin’ and enjoy the car shows.
Dave Becker.
recovery
Disclaimer notice: The acceptance and printing of ads offered through this newsletter does not imply Club endorsement for any advertiser, product or service. The 1958
Cadillac Owners Association can not give endorsements. It is impossible for the club to check “For Sale” items, therefore we ask all advertisers to please observe the
“Golden Rule.”
11
www.1958cadillac.com
P.O. Box 850029, Braintree, Massachusetts 02185 USA
FIRST CLASS
Come
And
Delight
In
Leisurely
Looking
At
Cadillacs
Displaying
All
Years
CADILLAC DAY – 2001 – Museum of Transportation, Brookline, Massachusetts
Photo by: Pete Scavone
++++++++++++++++++++++++++++++++++++++++++++++++++++++++++
Theodore Roosevelt's ideas on Immigrants and being an American in 1907.
"In the first place, we should insist that if the immigrant who comes here in good faith becomes an American and
assimilates himself to us, he shall be treated on an exact equality with everyone else, for it is an outrage to
discriminate against any such man because of creed, or birthplace, or origin. But this is predicated upon the
person's becoming in every facet an American, and nothing but an American. There can be no divided allegiance
here. Any man who says he is an American, but something else also, isn't an American at all. We have room for
but one flag, the American flag. We have room for but one language here, and that is the English language and we
have room for but one sole loyalty and that is a loyalty to the American people."
12