1
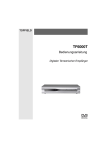
High Q20 D
User’s Guide
Mode d’emploi
Gebruiksaanwijzing
Bedienungsanleitung
Manual de instrucciones
Manual do utilizador
ENGLISH
BEFORE USE
Check if the following parts are included in the package of the main
unit:
•
•
•
•
•
•
•
Turntable platter
Slipmat
Counterweight
45-rpm adaptor
Headshell
Dust cover
Operating instructions
Do not connect the AC power plug before assembly has been
completed. Before turning on the power, check that the voltage
setting is correct. Read this manual carefully before using the unit.
High Q20 D
2
NAME OF PARTS
1.
2.
3.
4.
5.
6.
7.
8.
9.
10.
11.
12.
13.
14.
15.
16.
17.
18.
19.
20.
21.
3
45-rpm Adaptor
Slipmat
Center Spindle
Strobe Dots
Power Switch / Strobe
Start/Stop Button
Beat Out
Frequency output of beat out is 675 Hz while pitch is in
middle position 0%.
Target Light
Remote Control
This jack can be connected with an external switch to
perform the Start/Stop operation.
Headshell
Speed Select Button
LED Display for speed indication
Green LED: the pitch control slider is in center click position
and the speed is quartz controlled.
Red LED: the speed was changed with the pitch control
slider.
Pitch Control Slider
Tone arm
Trim Control for changing the range of the Pitch Control
Arm Rest
Cueing Lever
Anti-skating Knob
Counterweight
Position for preparing Cartridge
Hinge for Dust Cover
High Q20 D
SPECIFICATIONS
Power supply ......................AC 230V—50Hz
Power consumption .............12 Watts
Dimensions .........................450 x 350 x 145 mm
Weight ...............................8,6 Kgs
ASSEMBLY
•
•
•
•
•
•
•
•
•
Take the main unit out of the box and remove the packing.
Set the 45-rpm adaptor on the main unit.
Insert the turntable onto the center spindle.
Put the slipmat on the turntable.
Connect the lead wires to the cartridge terminals. Connect
each lead wire to the terminal of the same color:
White (L+) = Left channel +
Blue (L-) = Left channel Red (R+) = Right channel +
Green (R-) = Right channel Install the cartridge to the headshell and tighten it with the
screws provided with the cartridge.
Insert the headshell into the front end of the tone arm, turn
the locking nut clockwise with the headshell firmly held
horizontally.
Slide the counterweight onto the tone arm. Twist it lightly and
it will screw onto the rear shaft of the tone arm.
Adjustment of horizontal zero (0) balance and stylus pressure:
• Remove the stylus protector, do not touch the stylus tip
during the adjustment.
• Set the cueing lever to the lower postion.Release the arm
clamp and lift the tone arm from the arm rest to free it.
• Rotate the counterweight until the tone arm is
approximately balanced horizontally (floats freely).
• Refasten the tone arm with the arm clamp.
High Q20 D
4
• Hold the counterweight stationary with one hand and
•
•
rotate only the stylus pressure ring to bring the number
‘0’ of the ring into alignment with the center line on the
tone arm rear shaft.
• Rotate the counterweight clockwise until the scale shows
the value corresponding to the pressure of the used
stylus. The stylus pressure for the installed pick-up
system is 2 gramms. If you use a seperate pick-up
system, please follow the manufacturer’s instructions.
Set the anti-skating control knob to the same value as the
stylus pressure for replay purpose and set it between 0 and 1
for scratch and back-cue application.
Install the dust cover on the main unit.
PLACEMENT
•
•
•
•
5
Do not place the unit in a location where it will be exposed to
direct sunlight or near a heating appliance.
Do not place the unit in a location where there is high humidity
or a lot of dust.
Cartridge may pick up slight sound pressures or vibrations from
the speakers coming along the floor or through the air,
resulting in howling. Find a location which is very stable and
free of vibrations.
The legs have functions for adjusting the heigt of the unit
itself. Adjust the legs to stabilize the main body horizontally.
High Q20 D
CONNECTIONS
•
•
Connect the power cord to the auxiliary power outlet on the
rear panel of your amplifier or receiver or to a household AC
outlet.
Connect the unit output terminals to the Phono jack of your
amplifier or receiver.
Output terminals
Amplifier
Left Channel
L (White)
Right Channel
R (Red)
GND
GND (Spade)
Note: Be sure to connect the ground terminal firmly to the
amplifier or receiver. If this connection is not made or is loose,
a power source ‘HUM’ will result.
OPERATION
•
•
•
•
•
•
•
•
•
Push the power button to turn on the power, the speed
indicator and the strobe illuminator will light up.
Place a record on the slipmat, when playing a 45 rpm record
with a large center hole, place the 45 rpm adaptor on the
center spindle.
Set the speed to match the record.
Remove the stylus protector, release the arm clamp.
Set the cueing lever to the up postion.
Press the start/stop button, the turntable platter will start to
rotate.
Move the tone arm over the desired groove.
Set the cueing lever to the down position, the tone arm will
descend slowly onto the record and play begins.
When play is finished, raise the cueing lever, move the tone
arm to the arm rest, secure the tone arm with the arm clamp.
High Q20 D
6
•
•
•
Press the start/stop button to stop the platter rotating, push
the power button to turn of the power.
Suspend play:
Set the cueing lever to ‘up’ postion during play, the stylus tip of
the cartridge will be lifted from the record.
Target light:
This unit is provided with a target light for illuminating the
stylus tip during play. Push the target light button, the target
light will be raised into position for illuminating the stylus tip.
When not in use, keep the target light lowered.
CHANGING THE SPEED
As long as the pitch control slider is in center click position, the
turntable is operated with quartz controlled rated speed. The green
LED (12) will then be lit. The speed can be increased or decreased
with via the pitch control slider. The red LED (12) will then be lit.
If the change of the speed does not correspond to the pitch control
change, it is possible to correct this with the trim control (15).
An incorrect adjustment done on purpose can also be used to have
the turntable rotate extremely slow or fast. The strobe dots (4) at
the edge of the turntable issued for speed monitoring.
MAINTENANCE
•
•
•
•
7
Clean the stylus periodically with a soft brush to prevent the
accumulation of dust.
When the sound becomes distorted or noisy, check the stylus.
If worn out, replace it with a new one.
From time to time, the dust cover and turntable cabinet should
be wiped with a soft, dry cloth.
Do not use any volatile materials as alcohol, thinner, benzine,
etc… they may remove the paint or damage the lustre.
High Q20 D
FRANÇAIS
AVANT L’UTILISATION
Les pièces suivantes doivent être présentes dans l’emballage:
Plateau
Feutrine
Contre-poids
Adaptateur 45 tours
Porte cellule avec cellule et aiguille
Couvercle plexi
Mode d’emploi
Avant de brancher l’appareil, vérifiez que le montage soit terminé.
Avant la mise en marche, contrôlez la tension du secteur.
Lisez très attentivement ces instructions et conservez soigneusement ce mode d’emploi.
•
•
•
•
•
•
•
High Q20 D
8
DÉNOMINATION DES COMPOSANTS
1.
2.
3.
4.
5.
6.
7.
8.
9.
10.
11.
12.
13.
14.
15.
16.
17.
18.
19.
20.
21.
9
Adaptateur 45 tours
Feutrine
Axe central
Repaires stroboscopiques
Interrupteur principal - Lampe stroboscopique
Bouton marche/arrêt
Beat Out
La fréquence de sortie du beat out est de 675 Hz lorsque le
curseur ‘Pitch’ se trouve en position milieu (0%)
Éclairage de l’aiguille
Commande à distance
Ce jack mono peut être relié à un interrupteur externe pour
faire l’opération marche/arrêt.
Porte cellule
Sélecteur de vitesse
Afficheur LED - indicateur de vitesse
LED vert: la vitesse est contrôlée par Quartz si le curseur se
trouve en position centrale.
LED rouge: la vitesse a été modifiée par le curseur.
Curseur pour réglage de vitesse
Réglage fin pour ajuster l’amplitude de la variation de vitesse.
Bras
Porte-bras
Lève-bras
Bouton anti-skating
Contre-poids
Guide d’assemblage pour aiguille
Charnière pour couvercle
High Q20 D
SPÉCIFICATIONS
Alimentation .......................AC 230V—50Hz
Consommation ....................12 Watts
Dimensions .........................450 x 350 x 145 mm
Poids ..................................8,6 Kg
MONTAGE
•
•
•
•
•
•
•
•
Déballez tous les éléments.
Placez l’adaptateur 45 tours à sa propre place.
Placez le plateau sur l’axe central.
Placez la feutrine sur le plateau.
Montage de la cellule: suivez les instructions jointes à la
cellule. Pendant le montage: pour éviter les dégâts, placez la
cache de protection sur l’aiguille.
Connectez les fils à l’aide des couleurs:
Fil blanc = Canal gauche +
Fil bleu = Canal gauche Fil rouge = Canal droit +
Fil vert = Canal droit A l’aide des vis adéquates, fixez la cellule sur la porte-cellule.
Serrez le porte-cellule sur l’avant parti du bras en le tenant
bien horizontal.
Glissez le contre-poids sur la partie arrière du bras (partie
chiffrée vers l’avant de la platine).
Ajuster l’équilibre et la pression de l’aiguille:
•
Retirez la cache de protection de l’aiguille
•
Descendez le lève-bras
•
Retirez le crochet de blocage du bras
•
Positionnez le contre-poids pour un parfait équilibre du
bras
•
Déposez le bras sur son support
•
Bloquez d’une main la partie arrière du contre-poids,
ajustez de l’autre la partie chiffrée pour aligner le ‘0’
dans l’axe du bras.
High Q20 D
10
•
•
•
Faites tourner maintenant tout le contre-poids pour ajouter le
poids nécessaire à l’aiguille. Pour l’aiguille d’origine la pression
est de 2 grammes. Si vous employez une autre cellule, suivez
les instructions de cette dernière.
Ajuster le bouton anti-skating pour une valeur identique au
poids de l’aiguille.
Placez maintenant le couvercle plexi sur l’appareil.
PLACEMENT
•
•
•
•
Evitez d’exposer la platine au soleil ou à proximité d’une source
de chaleur.
En outre, évitez les endroits humides ou poussiéreux.
Un ronflement dû à une interaction entre les enceintes acoustiques et l’aiguille peut avoir lieu (propagation des ondes au sol).
Placez la platine sur un socle stable et exempt de vibrations.
A l’aide des pieds réglables, placez l’appareil à niveau.
RACCORDEMENTS
•
•
Raccordez le câble d’alimentation au réseau.
Connectez les fiches RCA Cinch sur une entrée phono de votre
table de mixage.
High Q20 D
L (blanc)
R (rouge)
GND
•
11
Table de mixage
Canal L
Canal R
GND (masse)
Si vous ne faites pas bien la connection, vous aurez un
ronflement.
High Q20 D
FONCTIONNEMENT
•
•
•
•
•
•
•
•
•
•
•
•
Actionnez l’interrupteur principal pour activer l’appareil.
L’indicateur de vitesse et la lampe stroboscopique s’allumeront.
Placez un disque sur la feutrine. Pour un disque 45 tours avec
un grand trou ou milieu, mettez l’adaptateur 45 tours sur l’axe
central.
Choisissez la vitesse désirée (33 ou 45).
Retirez la cache de protection de l’aiguille ainsi que le crochet
du porte-bras.
Montez le lève-bras.
Pressez le bouton marche/arrêt, le plateau tourne.
Positionnez le bras à l’endroit voulu.
Abaissez le lève-bras. Le bras descend en douceur et le disque
commence à jouer.
La lecture terminée, remontez le bras et déposez-le sur sa
potence.
Appuyez sur le bouton marche/arrêt pour arrêter le plateau.
Actionnez l’interrupteur principal pour éteindre l’appareil.
Pause
Pendant la lecture, soulevez le lève-bras, l’aiguille s’écartera du
disque.
Eclairage de l’aiguille
Cette unité est équipée d’un éclairage d’aiguille. En position
haute le système s’allume, enfoncée le système s’éteint.
High Q20 D
12
RÉGLAGE DE VITESSE
•
•
•
LED vert: la vitesse est verrouillée par Quartz.
LED rouge: la vitesse peut croître ou diminuer de 10% à l’aide
du curseur (13).
Un réglage fin (14) est prévu pour ajuster la symétrie entre la
vitesse maximum et minimum. La visualisation s’effectue grâce
aux repaires stroboscopiques (4).
ENTRETIEN
•
•
•
•
13
Nettoyez fréquemment l’aiguille avec une brosse douce pour
enlever la poussière.
S’il y a trop de souffle ou distorsion du son, contrôlez ou
remplacez l’aiguille.
Nettoyez le couvercle et le plateau de temps à temps à l’aide
d’un tissu doux et sec.
Les produits volatils tels que l’alcool et l’essence peuvent
endommager la peinture. Ne vous en servez pas.
High Q20 D
NEDERLANDS
VOOR GEBRUIK
Kijk na of volgende onderdelen in de verpakking aanwezig zijn:
•
•
•
•
•
•
•
Draaitafel plateau
Slipmat
Tegengewicht
45-toeren adaptor
Celhouder
Stofkap
Handleiding
Sluit de AC-stekker nooit aan alvorens het geheel volledig is
geïnstalleerd. Alvorens het toestel te activeren, nakijken of het
voltage juist is afgesteld. Lees deze handleiding aandachtig
alvorens het toestel te gebruiken.
High Q20 D
14
BENAMING VAN DE ONDERDELEN
1.
2.
3.
4.
5.
6.
7.
8.
9.
10.
11.
12.
13.
14.
15.
16.
17.
18.
19.
20.
21.
15
45-toeren adaptor
Slipmat
Centrale as
Strobopunten
Aan/uit toets - Strobo
Start/Stop toets
Beat Out
Frequentie van de beat out is 675 Hz, terwijl de snelheidsregelaar zich in de middelste positie bevindt (0%).
Naaldverlichting
Afstandsbediening
Deze uitgang kan verbonden worden met een externe
schakelaar om het toestel aan- of uit te zetten.
Celhouder
Snelheidskeuzeknop
LED voor snelheidscontrole
Groene LED: de snelheidsregelaar staat in centrale positie en
de snelheid is quartz geregeld.
Rode LED: de snelheid werd gewijzigd met de snelheidsregelaar.
Fader voor snelheidsregeling
Fijnregeling voor het aanpassen van het bereik van de
snelheidsregeling.
Toonarm
Armsteun
Toonarmlift
Anti-skating knop
Tegengewicht
Hulp bij montage van naald
Scharnier voor montage stofkap
High Q20 D
TECHNISCHE GEGEVENS
Stroomtoevoer ....................AC 230V—50Hz
Verbruik .............................12 Watts
Afmetingen .........................450 x 350 x 145 mm
Gewicht ..............................8,6 Kg
INSTALLATIE
•
•
•
•
•
•
•
•
Neem alle delen uit de doos.
Plaats de 45-toeren adaptor op de daartoe voorziene plaats.
Plaats de draaiplateau op de centrale as.
Plaats de slipmat op de plateau.
Installatie van de cel:
Volg de instructies die samen met de cel werden geleverd.
Gedurende de celinstallatie de naalbeschermer op de naald
plaatsen om schade te voorkomen.
Verbind de draden volgens de kleurcodes:
Witte draad = Links kanaal +
Blauwe draad = Links kanaal Rode draad = Rechts kanaal +
Groene draad = Rechts kanaal Installeer de cel op de celhouder en span aan met de bijgeleverde schroefjes.
Steek de celhouder in het voorste gedeelte van de toonarm en
draai de spanschroef met de wijzers mee, terwijl de celhouder
horizontaal wordt gehouden.
Schuif het tegengewicht op de toonarm. Draai het zachtjes
zodat het vast komt te zitten op het achterste gedeelte van de
toonarm (cijfers naar voren gericht).
Regelen van horizontale balans en naalddruk:
• Verwijder de naaldbeschermer zonder de naald aan te
raken.
• Zet de toonarmlift op de laagste positie.
• Verwijder de armklem en hef de toonarm op.
High Q20 D
16
• Beweeg het tegengewicht tot de toonarm min of meer
horizontaal hangt (zweeft vrij).
• Hou het tegengewicht stabiel met de ene hand en draai
•
•
enkel de naalddrukring om het getal ‘0’ op één lijn te
brengen met de centrale lijn van het achtereind van de
toonarm.
• Draai het tegengewicht met de wijzers mee tot de
schaalverdeling de waarde toont die overeenstemt met
de gebruikte naald. De naalddruk van het geïnstalleerde
pick-up systeem is 2 gram. Wanneer u een ander
systeem gebruikt, gelieve dan de daar bijgeleverde
instructies te volgen.
Zet de anti-skating knop op een even grote waarde als de
naalddruk.
Monteer de stofkap op het toestel.
PLAATSING
•
•
•
•
Plaats het toestel nooit rechtstreeks in het zonlicht of in de
nabijheid van een verwarmingstoestel.
Vermijd vochtige en stoffige plaatsen.
De cel kan geluidsdruk of trillingen opnemen via de vloer of de
lucht. Zorg dus voor een stabiele omgeving zonder al te veel
trillingen.
De poten kunnen in lengte worden aangepast. Stabiliseer ze
zodat het toestel zich in horizontale toestand bevindt.
AANSLUITINGEN
•
•
17
Sluit de voedingskabel aan op het net.
Verbindt de audio-terminals van het toestel met de phono
aansluiting van uw mengpaneel.
High Q20 D
Mengpaneel
L kanaal
L (wit)
R kanaal
R (rood)
GND
GND
High Q20 D
•
Zorg ervoor dat alles zeer stevig is aangesloten. Indien dit niet
het geval is zal dit resulteren in een ‘brom’ van de voedingsbron.
BEDIENING
•
•
•
•
•
•
•
•
•
•
•
•
Draai aan de aan/uit knop om de stroomtoevoer te activeren.
De snelheidsregelaar en de strobolamp zullen oplichten.
Leg een plaat op de slipmat. Wanneer u een 45-toerenplaat
met groot centraal gat afspeelt, plaats dan de 45-toeren
adaptor om de centrale as.
Pas de snelheid aan aan de plaat (33 of 45).
Verwijder de naaldbescherming, en maak de armklem los.
Zet de toonarmlift in de hoogste positie.
Druk op de start/stop toets, het draaitafelplateau begint nu te
draaien.
Beweeg de toonarm tot aan de gewenste groef.
Zet de toonarmlift in lage positie; de toonarm zal zachtjes
zakken tot op de plaat en deze begint te spelen.
Wanneer het spelen beëindigd is, laat de toonarm omhoog
gaan, beweeg de arm tot op de armsteun en zet de arm vast
met de armklem.
Druk op de start/stop toets om het draaien te beëindigen en
draai vervolgens aan de aan/uit schakelaar om het toestel uit
te schakelen.
Verkorte weergave
Zet de toonarmlift in de hoogste positie gedurende het spelen,
de naald zal van de plaat omhoog gelift worden.
Naaldverlichting
Dit toestel is uitgerust met een naaldverlichting, zodat tijdens
het spelen de naald constant belicht wordt.
Duw op de naaldverlichtingsknop om het in positie te brengen.
Duw opnieuw om het lichtje te laten zakken.
High Q20 D
18
SNELHEIDSREGELING
•
•
Groene LED: snelheid is quartz gecontroleerd.
Rode LED: de snelheid kan met behulp van de fader met
maximum 10% toe– of afnemen. Een fijnregeling (14) is
voorzien om de samenhang tussen minimum en maximum
snelheid te regelen. Dit wordt zichtbaar dankzij de stroboscopische lampjes.
ONDERHOUD
•
•
•
•
19
Reinig de naald regelmatig met een zacht borsteltje om stofvorming te vermijden.
Indien de klank vervormt of veel ruis meebrengt, gelieve de
naald te vervangen.
Af en toe de stofkap en de draaitafel afnemen met een droge,
zachte doek.
Materialen zoals alcohol, verdunner, benzine, enz… kunnen de
verf verwijderen of het toestel beschadigen.
Gelieve deze niet te gebruiken.
High Q20 D
DEUTSCH
VOR GEBRAUCH
Folgende Zubehörteile müssen sich in der Geräteverpackung
befinden:
•
Plattenteller
•
Slipmat
•
Abdeckhaube
•
Singlepuck
•
Kontergewicht
•
Headshell Systemträger
•
Bedienungsanleitung
Verbinden Sie den Netzstecker erst mit der Steckdose wenn alles
montiert ist. Prüfen Sie om dei Spannungseinstellung der Netzversorgung der in Ihrem Land entspricht. Lesen Sie diese Anleitung
sorgfältig durch.
High Q20 D
20
BEDIENELEMENTE
1.
2.
3.
4.
5.
6.
7.
8.
9.
10.
11.
12.
13.
14.
15.
16.
17.
18.
19.
20.
21.
21
Single Puck
Slipmat
Führungsachse
Stroboskop Punkte
Ein/Aus Schalter - Stroboskoplampe
Start/Stop Taste
Beat Out
Geschwindigkeits Fixierung
Nadelbeleuchtung
Fernstartanschluβ
Nadelhalter (Headshell)
Geschwindigkeitswahlschalter
LED für Geschwindigkeitskontrolle.
Grüne LED: Pitchregler befindet sich in der Mittelposition und
die Geschwindigkeit ist quartzstabilisiert.
Rot LED: die Geschwindigkeit wird mittels des Pitchfadres
verändert.
Geschwindigkeitsregler (Pitchfader)
Anpassung des Geschwindigkeitsregelbereiches
Tonarm
Tonarmauflage
Tonarmlift
Anti-Skating Regler
Kontergewicht
Montagehilfe für die Nadel
Scharnier für Abdeckhaube
High Q20 D
TECHNISCHE DATEN
Stromzufuhr ........................AC 230V—50Hz
Leistungsaufnahme .............12 Watts
Maβe ..................................450 x 350 x 145 mm
Gewicht ..............................8,6 Kg
INSTALLATION
•
•
•
•
•
•
•
•
Entnehmen Sie alle Teile aus der Verpackung.
Plazieren Sie den Plattenpuck in die dafür vorgesehene
Halterung.
Drücken Sie den Plattenteller auf die Tellerachse.
Plazieren Sie die Slipmat auf den Plattenteller.
Installation des Tonabnehmersystems:
Befolgen Sie die Anweisungen, die dem System beiliegen.
Lasssen Sie den Nadelschutz auf dem System um dieses vor
Schaden zu bewahren.
Verbinden Sie die Anschluβdrähte nach dem folgenden Farbcode:
Weiβes Kabel = Linker Kanal +
Blaues Kabel = Linker Kanal Rotes Kabel = Rechter Kanal +
Grünes Kabel = Rechter Kanal Befestigen Sie nun das Tonabnehmersystem am Headshell mit
den beigepackten Schrauben.
Stecken Sie das Headshell nun in das offene Ende des Tonarms
und ziehen es mit der Überwurfmutter fest. Achten Sie darauf,
daβ Sie den Tonarm waagerecht halten.
Schieben Sie nun das Kontergewicht auf das hintere Ende des
Tonarms und drehen es sachte bis es fest sitzt.
Einstellung der Tonarmbalance und des Auflagegewichts.
• Entfernen Sie den Nadelschutz ohne die Nadel zu
berühren.
• Senken Sie den Tonarmlift auf die niedrigste Position.
High Q20 D
22
• Bewegen Sie das Kontergewicht bis der Tonarm frei
schwebt.
• Halten Sie das Kontergewicht stabil und drehen den Ring
für das Auflagegewicht bid die Zahl ‘0’ and er oberen
Markierung ausgerichtet ist.
• Drehen Sie nun das gesamte Kontergewicht nach vorne
bis das gewünschte Auflagegewicht an der Markierung
angezeigt wird. Für das beigepackte System empfehlen
wir 2 gr. Für ein anderes System beachten Sie bitte die
Hinweise des Herstellers.
• Setzen Sie den Anti-Skating Regler auf eine ebenso hohe Einstellung, die dem des Auflagegewichtes entspricht.
• Montieren Sie nun die Abdeckhaube.
AUFSTELLHINWEISE
•
•
•
•
Setzen Sie das Gerät keiner stetigen Sonnenstrahlung und
groβer Hitze aus (Heizung).
Meiden Sie feuchte– und staubige Plätze.
Um das Gerät gegen Vibrationen und Rückkopplungen zu
schützen, stellen Sie das Gerät bitte unbedingt auf einen
festen, stabilen Untergrund.
Mittels der variablen Füβe muβ der Plattenspieler unbedingt
horizontal ausgerichtet werden.
ANSCHLUβ DES GERÄTES
•
•
23
Verbinden Sie die Netzzuleitung mit Ihrer Schukodose 230V.
Verbinden Sie die Cinchanschlusse und die Masse des Plattenspielers mit dem Phono Eingang Ihres Mischpults oder des Hifi
Verstärkers.
High Q20 D
Mischpults
links
L (weiβ)
rechts
R (rot)
GND
GND
High Q20 D
BEDIENUNG
•
•
•
•
•
•
•
•
•
•
•
•
Durch drehen des Ein-/Ausschalters können Sie das Gerät aktivieren. Die Geschwindigkeitslampen und die Stroboskop Lampe
wird aufleuchten.
Legen Sie eine Schallplatte auf die Slipmatte des Plattentellers,
für eine Single 45 rpm benutzen Sie bitte den mitgelieferten
Single-Adapter Puck.
Stellen Sie die nötige Abspielgeschwindigkeit ein (33 oder 45).
Entfernen Sie den Nadelschutz und lösen Sie die Tonarmsicherung.
Stellen Sie den Tonarmlift auf seine höchste Position.
Drücken Sie die Start/Stop Taste, der Plattenteller beginnt zu
drehen.
Schieben Sie den Tonarm an die gewünschte Stelle oder den
Anfang der Platte.
Senken Sie den Tonarmlift, der Tonarm wird nun sanft
herunter gleiten.
Wenn die Nadel am Ende der Platte angelangt ist, heben Sie
den Tonarm mit dem Lift hoch und führen Sie diesen auf seine
Auflage zurück. Zum sichern können Sie die Tonarmklemme
benutzen.
Drücken Sie die Start/Stop Taste um die Rotation des Tellers
zu beenden. Mit dem Ein-/Ausschalter können Sie das Gerät
falls gewünscht ausschalten.
Verkürzte Wiedergabe
Setzen Sie den Tonarmlift während der Wiedergabe in dei
höchste Position. Die Nadel wird angehoben.
Nadelbeleuchtung
Dieses Gerät ist mit einer Nadelbeleuchtung ausgerüstet.
Drücken Sie den Knopf neben der Nadelbeleuchtung und die
Leuchte wird heraus fahren. Drücken Sie auf die Leuchte um
die Lampe zu versenken und auszuschalten.
High Q20 D
24
GESCHWINDIGKEITSREGELUNG
•
•
Grüne LED: Der Antrieb ist Quartz geregelt.
Rote LED: Die Geschwindigkeit kann im Bereich von ±10%
verändert werden. Die Veränderung wird auch am Rand des
Plattentellers durch die Stroboskop Beleuchtung sichtbar
(Stroboskoppunkte).
REINIGUNG UND WARTUNG
•
•
•
•
25
Reinigen Sie die Nadel reglemäβig mit einer speziellen Nadelbürste um Staubansammlungen zu entfernen.
Wenn die Klangqualität nachläβt, kontrollieren Sie die Nadel,
ggfs. Muβ diese erneuert werden.
Der Plattenspieler und die Haube sollten nur mit einem
weichen Tuch gereinigt werden. Bitte keinen scharfen
Haushaltreiniger verwenden!
Halten Sie Alcohol, Benzin, Verdünner oder andere
Lösungsmittel vom Gerät fern, diese können die Oberfläche
und die Farbe des Gerätes angreifen.
High Q20 D
ESPAGŇOL
ANTES DEL USO
Comprobar que los componentes siguientes estén incluidos :
•
•
•
•
•
•
•
Platillo
Patinador
Tapa anti-polvo
Adaptador 45 RPM
Contra peso
Porta capsula con capsula y aguja
Instrucciones de funcionamiento
Terminar totalmente la instalación antes de enchufar. Comprobar la
tensión de la fuente antes de enchufar. Leer antentamente estas
instrucciones y conservarlas.
High Q20 D
26
DENOMINACIÓN DE LOS COMPONENTES
1.
2.
3.
4.
5.
6.
7.
8.
9.
10.
11.
12.
13.
14.
15.
16.
17.
18.
19.
20.
21.
27
Adaptador 45 RPM
Patinador
Eje central
Indicación estroboscopica
Interruptor principal de encendido/ lámpara estroboscopica
Botón START/ STOP
BEAT OUT
La frecuencia de salida del ‘beat out’ es de 675 Hz cuando el
deslizante ‘Pitch’ está en posición 0%.
Alumbrado de la capsula
Mando a distancia
Este jack mono puede ser conectado a un interruptor externo
de puesta en marcha (START/ STOP).
Porta capsula
Selector de velocidad
Indicador (LED) de velocidad
LED verde: deslizante en el centro y velocidad controlada por
Quartz
LED rojo: velocidad modificada con el deslizante
Deslizante de control de velocidad
Ajuste preciso de la variación de velocidad
Brazo
Soporte del brazo
Elevacíon del brazo
Control anti deslizante (Anti-skating)
Contra peso
Emplazamiento para capsula
Bisagra para tapa
High Q20 D
ESPECIFICACIONES TECNICAS
Alimentación .......................AC 230V—50Hz
Consumición .......................12 Watts
Dimensiones .......................450 x 350 x 145 mm
Peso ...................................8,6 Kg
INSTALACIÓN
•
•
•
•
•
•
•
•
Desembalar todos los elementos.
Colocar el adaptador 45RPM.
Colocar el platillo en el eje central.
Colocar el patinador sobre el platillo.
Instalación de la capsula: Referirse a las instrucciones de la
capsula. Dejar la protección sobre la capsula durante la
instalación para evitar daños.
Seguir los colores para conectar los hilos:
Canal izquierdo+
BLANCO+
Canal izquierdoAZUL
Canal derecho+
ROJO+
Canal derechoVERDEFijar la capsula al porta capsula con los tornillos adequados.
Fijar el porta capsula al brazo manteniendolo horizontal.
Instalar el contra peso en la parte trasera (dirigir las cifras
hacia delante).
Ajustar el equilibrio y la presión de la capsula:
• Quitar la protección
• Bajar el brazo
• Apartar el cerrojo de fijación del brazo
• Posicionar el contra peso para un equilibrio perfecto
• Volver a colocar el brazo en su soporte
• Con una mano, bloquear la parte trasera del contra peso,
con la otra mano ajustar la parte cifrada para alinear el
‘0’ en el eje del brazo.
High Q20 D
28
•
•
•
Girar todo el contra peso para obtener el peso correspondiente
a capsula (referirse a sus instrucciones).
La presión de la capsula de origen es de 2 gramos.
Ajustar el control anti deslizante de equivalente valor al peso
de la capsula (9).
Colocar la tapa anti-polvo.
COLOCACIÓN
•
•
•
Evitar la exposición al pólvo, zonas de alta temperatura,
humedad, etc,…
Zumbido devido a una interacción (feed-back) entre los
alta-voces y la capsula puede ocurrir. Para evitar este problema,
colocar la platina sobre un zócalo fijo y sin vibraciones.
Regulár los pies de soporte para poner la unidad a nivel.
CONEXIONES
•
•
Enchufar la platina a la red.
Conectar las clavijas RCA (Cinches) a una entrada PHONO de la
mezcladora.
HIGH Q 20 D
L (blanco)
R (rojo)
GND
•
29
->
->
->
MESA MEZCLADORA
Canal L (izqu.)
Canal R (der.)
GND (masa)
Si la conexión no es correcta, puede aparecer un zumbido.
High Q20 D
FUNCIONAMIENTO
•
•
•
•
•
•
•
•
•
•
•
•
Poner el interruptor principal de encendido sobre ON, el
indicador de velocidad y la indicación estroboscopica se
encienden.
Colocar un disco sobre el patinador. Para utilizár un disco
45 rpm, coloquese el adaptador el el eje central.
Elijase la velocidad (33/45) según el disco.
Soltar el cerrojo del brazo y quitar la protección de la capsula.
Poner la palanca del eleva brazo en posición alta.
Pulsar el boton STRAT/STOP y el platillo empezará a girar.
Disponga el brazo sobre la posición deseada.
Poner la palanca del eleva brazo en posición baja, el brazo
descenderá lentamente sobre el disco.
Cuando se acabe la lectura, levante el brazo con la palanca,
lleve el brazo hasta el soporte.
Pulsar el boton START/STOP para parar la rotacion del platillo.
Poner el interruptor principal de encendido sobre OFF.
Pausa
Durante la lectura, levantar el eleva brazo.
Allumbrado de la capsula
Esta unidad está equipada de una luz de capsula.
En posición sacada, la luz se enciende, pulsar para apagarla.
CÁMBIO DE VELOCIDAD
•
•
•
LED verde: velocidad controlada por Quartz.
LED rojo: velocidad modificada (+/- 10%) con el deslizante
(13).
Reglaje preciso (14) y visualización estroboscopica (4).
High Q20 D
30
MANTENIMIENTO
•
Con un cepillo suave, limpiar la capsula para quitar el polvo.
•
Controlar y remplazar la aguja si ruido o distorsión.
•
Limpiar la tapa y el platillo de vez en cuando con un trapo
suave y seco.
•
No utilizar productos abrasivos (alcohol,…) que puedan dañar la
pintura.
High Q20 D
31
PORTUGUÊS
ANTES DE USAR
Verifique se as seguintes partes se encontram dentro da
embalagem:
•
Prato do Gira-discos
•
Slipmat
•
Contra Peso
•
Adaptador 45 RPM
•
Cabeça de Leitura
•
Tampa
•
Manual de Instruções
Não conectar á corrente antes de a montagem estar concluída.
Antes de ligar a energia, verifique se a voltagem é a correcta.
Leia este manual cuidadosamente antes de usar a unidade e
guarde o manual num lugar seguro para referência futura.
High Q20 D
32
DESCRIÇÃO DE PARTES
1.
2.
3.
4.
5.
6.
7.
8.
9.
10.
11.
12.
13.
14.
15.
16.
17.
18.
19.
20.
21.
Adaptador 45 RPM
Slipmat
Fuso Central
Pontos Estroboscópicos
Botão De Energia - Strobe
Botão Start/Stop
Saída de Batida
Frequência de saída da batida é 675 Hz enquanto o pitch está
na posição 0 %
Luz
Controlo Remoto
Este jack pode ser conectado com um interruptor externo
para executar a operação Start/Stop
Cabeça De Leitura
Botão De Selecção De Velocidade
Led´s Indicativos De Velocidade:
LEL Verde: O controlo deslizante de pitch está na posição
central e a velocidade é controlada por quartz.
LED Vermelho: A velocidade mudou com o controlo deslizante
do pitch
Slider De Controlo De Pitch
Braço
Controlo para alterar o alcance do controlo de pitch.
Apoio Do Braço
Alavanca De Cueing
Botão Anti-Deslizante
Contra Peso
Posição De Preparação Do Cartucho
Dobradiça Para A Tampa Anti Pó
High Q20 D
33
ESPECIFICAÇÕES GERAIS
Alimentação ........................AC 230V—50Hz
Consumo ............................12 Watts
Dimensões ..........................450 x 350 x 145 mm
Peso ...................................8,6 Kg
MONTAGEM
•
•
•
•
•
•
•
•
Retire a unidade principal com a embalagem da caixa e retire a
embalagem.
Coloque o adaptador de 45 RPM na unidade principal.
Insira o prato do gira-discos no fuso cental.
Coloque o slipmat no prato.
Instalação da cabeça de leitura:
Quando estiver a instalar uma cabeça de leitura, tenha atenção
ás instruções de montagem. Durante a instalação, coloque a
protecção da agulha para evitar que a ponta da agulha seja
danificada. Conecte os fios aos terminais da cabeça de leitura.
Os terminais de muitas da cabeças de leitura são coloridos.
Conecte cada fio ao terminal da mesma cor.
Canal Esquerdo +
Branco (L+)
Canal Esquerdo –
Azul (L-)
Canal Direito +
Vermelho (R+) Canal Direito –
Verde(R-) Instale a cabeça de leitura no cartucho e aparafuse-a com os
parafusos que vêm incluídos.
Insira o cartucho na parte da frente da braço, depois rode o
fecho para a direita com o cartucho firmemente segurado na
horizontal.
Deslize o contra peso para o braço do gira-discos.
Torcer ligeiramente o contra peso e ele irá enroscar na parte
traseira do braço.
High Q20 D
34
•
•
•
Ajuste do balanço e da pressão da agulha (zero horizontal):
• Retire a protecção da agulha, não toque na ponta da
agulha durante o ajuste.
• Coloque a alavanca de Cueing na posição baixo.
• Liberte a braçadeira do braço e eleve o braço do apoio
para libertá-lo
• Rode o contra peso até que o braço se encontre em
equilíbrio horizontalmente.
• Aperte o braço com a braçadeira.
• Aguente o contra peso estacionário com uma mão e rode
apenas o anel que regula a pressão da agulha para que
o numero zero (0) fique alinhado com a linha central na
parte de trás do braço.
• Rode o contra peso até que a escala mostre o valor
correspondente da pressão da agulha a ser usada. A
pressão da agulha do sistema de pick-up é 2 G.
Se usar um sistema de pick-up diferente, deverá seguir as
instruções do fabricante.
Coloque o controlo anti-deslizamento no mesmo valor que a
pressão da agulha.
Instale a protecção anti-pó.
COLOCAÇÃO
•
•
•
•
Não coloque a unidade onde possa ficar exposta á luz directa
do sol ou junto a uma fonte de calor.
Não coloque a unidade onde exista muita humidade ou muito
pó.
A cabeça de leitura poderá captar pressão do som ou
vibrações das colunas vindas pelo chão ou pelo ar resultando
no efeito de “uivo”. Procure uma localização estável e livre de
vibrações.
As pernas tens funções para ajustar a altura da própria
unidade. Ajuste as pernas para estabilizar a unidade
horizontalmente.
High
35 Q20 D
35
CONEXÕES
•
•
Conecte o cabo de alimentação á saída auxiliar de corrente do
amplificador ou receptor ou então a uma tomada de energia.
Conecte os terminais de saída da unidade á entrada PHONO da
mesa de mistura ou do amplificador.
Esquerda (Branco)
Direita (Vermelho)
GND (Terra)
•
Canal Esquerdo
Canal Direito
GND
Certifique-se que conecta o terminal GND (Terra) firmemente
ao amplificador ou mesa de mistura. Se esta ligação ficar mal
feita ou se desligar, irá provocar o efeito de “HUM”.
OPERAÇÃO
•
•
•
•
•
•
•
•
•
Pressione o botão de ligar/desligar para ligar o aparelho, o
indicador de velocidade e o iluminador de strobe irão acender.
Coloque um disco no slipmat, quando estiver a tocar um disco
de 45 rpm com um orifício central grande, coloque o
adaptador de 45 rpm no fuso central.
Seleccione a velocidade do prato de modo a igualar a
velocidade do disco.
Retire a protecção da agulha, liberte a braçadeira do braço.
Coloque a alavanca de Cueing na posição cima.
Pressione o botão Start/Stop, o prato do gira-discos irá
começar a rodar.
Mova o braço para o encaixe desejado.
Coloque a alavanca para o posição baixo, o braço irá descer
lentamente até ao disco e começara a tocar.
Quando acabar de tocar, coloque a alavanca na posição cima,
mova o braço para o descanso do braço, tranque o braço com
a braçadeira.
High Q20 D
36
•
•
•
Pressione o botão Start/Stop para parar a rotação do prato,
pressione o botão de ligar/desligar para desligar o aparelho.
Suspender a reprodução de um disco
Coloque a alavanca de Cueing na posição cima durante a
reprodução, a ponta da agulha será levantada do disco.
Luz
Este aparelho está equipado com uma luz para iluminar a
agulha durante a reprodução.
Pressione o botão correspondente á luz, a luz será levantada
até á posição para iluminar a ponta da agulha. Quando não
estiver a ser usada, mantenha a luz na posição mais baixa.
ALTERAR A VELOCIDADE
•
•
•
37
Durante o tempo que o controlo do pitch estiver na posição
central, o gira discos é operado com um controlo de velocidade
de quartzo. O Led verde estará aceso.
A velocidade poderá ser aumentada ou diminuída em 10%
através do controlo de pitch. O Led vermelho (12) irá então
acender. Se a mudança de velocidade não corresponder á
mudança no controlo de pitch, é possível corrigir esta situação
através do controlo de alcance do pitch (15).
Um ajuste incorrecto feito de propósito pode ser usado para
fazer rodar o gira discos extremamente lento ou rápido.
Os pontos estroboscópicos nas extremidades do gira discos
são usados para monitorizar a velocidade.
High Q20 D
MANUTENÇÃO
•
•
•
Limpe a agulha periodicamente com uma escova suave para
evitar a acumulação de pó.
Quando o som se tornar distorcido ou barulhento, verifique a
agulha. Se esta se encontrar gasta, substitua-a.
De tempos a tempos, limpe o gira-discos e a tampa de
protecção com um pano seco. Não deverão ser usados
produtos voláteis tais como álcool, benzina, etc. pois estes
produtos poderão remover a pintura ou danificar o lustre.
High Q20 D
38