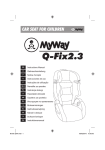
1
INSTALLAZIONE USO E MANUTENZIONE
INSTALLATION, USE AND MAINTENANCE
INSTALLATION, UTILISATION ET ENTRETIEN
INSTALLATIONS-, GEBRAUCHS- UND WARTUNGSANLEITUNG
INSTALACIÓN, USO Y MANTENIMIENTO
INSTALAÇÃO, USO E MANUTENÇÃO
INSTALLATIE, GEBRUIK EN ONDERHOUD
ÜZEMBEHELYEZÉS, HASZNÁLAT ÉS KARBANTARTÁS.
PWN
4
DICHIARAZIONE DI CONFORMITÀ
La Galletti S.p.A. con sede in via Romagnoli 12/A, 40010 Bentivoglio (BO)
- Italia, dichiara, sotto la propria responsabilità, che le unità canalizzabili
della serie PWN, apparecchi per il riscaldamento ed il condizionamento,
per impianti con distribuzione dell’aria mediante canali, sono conformi
a quanto prescritto dalle Direttive CEE:
73/23, 89/392, 91/368, 93/44, 93/68, 98/37 e 89/336.
Bologna li, 08/03/2005
Luigi Galletti
Presidente
I
DATI DIMENSIONALI
FIGURA 2 unità PWN:
1
uscita acqua, 3/4" femmina gas
2
ingresso acqua, 3/4" femmina gas
3
scatola elettrica
4
pressacavi alimentazione elettrica
5
scarico condensa,φ17 mm
FIGURA 3 filtro aria
5
INSTALLAZIONE
ATTENZIONE: Installare l'unità canalizzabile, l'interruttore di linea (IL), e/o
gli eventuali comandi a distanza in una posizione non raggiungibile da persone
che si trovino nella vasca da bagno o nella doccia.
SIMBOLI DI SICUREZZA
FIGURA 4- esploso dell'unità
Leggere attentamente
il manuale
1
ATTENZIONE
1.
2.
3.
4.
5.
6.
7.
PERICOLO
TENSIONE
PRIMA DI INIZIARE L’INSTALLAZIONE
Leggere attentamente questo manuale.
L’installazione e la manutenzione dell’apparecchio devono essere effettuati
esclusivamente da personale tecnico qualificato per questo tipo di macchina, in
conformità con le normative vigenti.
Al ricevimento dell’apparecchio, controllarne lo stato verificando che non abbia
subito danni dovuti al trasporto. Per l’installazione e l’uso di eventuali accessori,
si rimanda alle relative schede tecniche.
2
E’ consigliabile installare gli eventuali accessori sull’apparecchio standard, prima di
provvedere al posizionamento dello stesso, riferendosi alle schede tecniche.
L’aspirazione e la mandata sono a sezione rettangolare, con foratura predisposta per
il fissaggio degli accessori disponibili.
UTILIZZO PREVISTO E LIMITI DI FUNZIONAMENTO
La Galletti S.p.A. si ritiene sollevata da eventuali responsabilità nei casi in cui
l’apparecchio sia installato da personale non qualificato, venga utilizzato
impropriamente o in condizioni non ammesse, non venga effettuata la
manutenzione prevista dal presente manuale, non siano stati utilizzati ricambi
originali. I limiti di funzionamento sono riportati in fondo al presente capitolo; ogni
altro uso è considerato improprio.
Conservare l’apparecchio nell’imballo fino al momento dell’installazione, in
modo da evitare infiltrazioni di polvere al suo interno.
Nel caso di fermo invernale, scaricare l’acqua dall’impianto al fine di evitare
danneggiamenti dovuti a formazione di ghiaccio; se vengono utilizzate soluzioni
antigelo, verificare il punto di congelamento.
Non modificare i cablaggi elettrici interni o altri particolari dell’apparecchio.
9
Per realizzare la connessione mediante canali a sezione rettangolare, è
suggerito l'utilizzo dell’accessorio RD o RDC, che possono essere montati
in aspirazione o in mandata rispettivamente.
NOTA: per realizzare sia l’aspirazione sia la mandata con canali, occorrono
1 accessorio RD (aspirazione) ed 1 accessorio RDC (mandata).
9
Se si desidera realizzare la connessione mediante tubi flessibili (φ 200),
è necessario prevedere gli accessori PMA o PMAC, che possono essere
montati in aspirazione o in mandata rispettivamente.
NOTA: per realizzare sia l’aspirazione sia la mandata con flessibili (φ 200),
occorrono 1 accessorio PMA (aspirazione) ed 1 accessorio PMAC
(mandata).
E’ possibile orientare gli attacchi dello scambiatore sul lato opposto operando,
come segue (FIGURA 5):
Fluido termovettore : acqua
Temperatura acqua: + 5°C / +95°C
Temperatura aria: -20°C / + 40°C
Tensione di alimentazione: 230 V +/-10 %
Max. pressione fluido primario 10 bar
3
vasca raccolta condensa
modulo batteria di scambio termico
scatola elettrica
morsettiera di collegamento
antivibrante
motore elettrico a 7 velocità
gruppo motoventilante
- smontare la vasca di raccolta condensa.
- smontare il modulo batteria agendo sulle viti di fissaggio (2 per ogni fiancata + 3
nulla parte superiore) e 2 nella parte inferiore
- ruotare il modulo batteria di 180° (sull'asse verticale) e fissarla nuovamente al
modulo ventilatore.
- Traslare la vasca di raccolta condensa in modo che la parte sporgente si prolunghi
sotto gli attacchi idraulici, e fissarla.
DESCRIZIONE DELL’APPARECCHIO
- FISSAGGIO dell’unità
inserire gli antivibranti forniti a corredo nelle 4 asole individuate per il fissaggio al
soffitto.
Fissare l’unità base al soffitto o alla parete utilizzando almeno 4 fra le 8 asole
predisposte;
9
Si consiglia di utilizzare barre filettate 8MA, tasselli adeguati al peso della
macchina stessa, e di preparare il posizionamento della macchina utilizzando
3 bulloni 8MA (2 nella parte inferiore, 1 nella parte superiore come indicato
in FIGURA 6) ed due rondelle per ciasuna barra.
Prima di stringere il controdado, regolare la chiusura del dado principale in modo
da dare all’apparecchio una pendenza corretta, tale cioè da agevolare lo scarico
della condensa (FIGURA 7).
Una pendenza corretta si ottiene inclinando verso il basso l’aspirazione rispetto
alla mandata, fino ad ottenere un dislivello di circa 10 mm fra le due estremità.
Realizzare i collegamenti idraulici alla batteria di scambio termico e, nel caso
di funzionamento in fase di raffreddamento, allo scarico condensa.
Utilizzare uno dei due scarichi della vasca, che si vedono all’esterno delle
fiancate dell’unità.
9
Per collegare l’unità alla linea di scarico condensa, utilizzare tubo flessibile in
gomma e fissarlo al tubo di scarico prescelto (Φ 3/8’’) mediante una fascetta
metallica (utilizzare lo scarico che si trova sul lato attacchi idraulici).
Per favorire il drenaggio della condensa inclinare la tubazione di scarico verso
il basso di almeno 30 mm/m evitando che sul suo percorso si formino anse o
strozzature.
La gamma di unità canalizzabili PWN è stata realizzata per la climatizzazione di
ambienti ove sia richiesta l’installazione di unità ad incasso a soffitto.
I componenti principali sono i seguenti:
9
Struttura realizzata in lamiera di acciaio zincata di adeguato spessore,
debitamente coibentata con materiale antirumore/anticondensa,
autoestinguente in Classe 1. L'unità è provvista di asole per il fissaggio e
4 antivibranti in gomma per evitare la trasmissione di vibrazioni.
9
Modulo elettroventilante a singola, doppia girante o tripla girante, di tipo
centrifugo a doppia aspirazione, con ventole bilanciate staticamente e
dinamicamente, accoppiate direttamente al motore elettrico a 7 velocità,
dotato di condensatore permanentemente inserito e protettore termico.
9
Scatola cablaggi posta sul lato degli attacchi idraulici per limitare gli spazi
di installazione con morsettiera a vite per il collegamento elettrico.
9
Modulo batteria di scambio termico: a 3,4 o 6 ranghi, ad alta efficienza, in
tubo di rame ed alette in alluminio bloccate ai tubi mediante espansione
meccanica. Sono corredate di collettori in ottone e valvola di sfiato. La
batteria, normalmente fornita con attacchi a sinistra, può essere ruotata di
180°.
9
ampia vasca di raccolta condensa che si estende oltre gli attacchi idraulici
con possibilità di raccolta della condensa proveniente da eventuali valvole
di regolazione; Il posizionamento decentrato riduce notevolmente gli spazi
di installazione.
9
Filtro aria in fibra acrilica, classe di filtrazione G2, posto sull’aspirazione
dell’aria, estraibile a cassetto dal basso.
FIGURA 1 - esempio di installazione
SM
Serranda motorizzata di presa aria esterna
SIL
Plenum silenziatore per mandata/aspirazione
PWN
Unità canalizzabile
MDF
Modulo batteria addizionale per funzionamento con acqua calda
PMAC Plenum di mandata aria coibentato con collari φ 200
UT66000455 - 00
2
È severamente vietata la riproduzione anche parziale di questo manuale / All copying, even partial, of this manual is strictly forbidden
- Alcune Regole da seguire
9
Effettuare lo sfogo dell’aria dallo scambiatore, a pompe ferme, agendo sulle
valvole di sfiato poste a fianco agli attacchi della batteria stessa.
9
Le canalizzazioni, in particolare quella di mandata, dovranno essere coibentate
con materiale anticondensa.
9
Prevedere in prossimità dell’apparecchio un pannello di ispezione per le
operazioni di manutenzione e pulizia.
9
Installare il pannello di comando sulla parete; scegliere una posizione
facilmente accessibile per l’impostazione delle funzioni e, se prevista,
efficace per la rilevazione della temperatura. Evitare posizioni esposte
direttamente all’irraggiamento solare, posizioni soggette a correnti dirette
di aria calda o fredda e di interporre ostacoli che impediscano la rilevazione
corretta della temperatura.
6
COLLEGAMENTI ELETTRICI
Effettuare i collegamenti elettrici in assenza di tensione, secondo le normative di
sicurezza vigenti.
I cablaggi dovranno essere eseguiti esclusivamente da personale qualificato.
Per ogni unità termoventilante prevedere sulla rete di alimentazione un
interruttore (IL) con contatti di apertura con distanza di almeno 3mm e un
fusibile (F) di protezione adeguato.
Gli assorbimenti elettrici sono riportati sull'etichetta dei dati di targa applicata sull'unità.
In corso di installazione, seguire scrupolosamente lo schema elettrico relativo alla
combinazione unità-pannello di comando.
8
MANUTENZIONE
Le unità canalizzabili PWN richiedono operazioni di manutenzione limitate alla
pulizia periodica del filtro aria, dello scambiatore di calore ed il controllo
dell’efficienza dello scarico condensa.
La manutenzione può essere effettuata solamente da personale specializzato.
E’ necessario prestare attenzione durante le operazioni di manutenzione: il
contatto accidentale con alcune parti metalliche può provocare ferite; dotarsi di
guanti protettivi.
Ad ogni avviamento seguente una lunga sosta, assicurarsi che non sia presente
aria nello scambiatore di calore.
Il motore non necessita di manutenzione in quanto dotato di cuscinetti autolubrificanti.
Per motivi di sicurezza, prima di compiere qualsiasi operazione di
manutenzione o pulizia, spegnere l’apparecchio e togliere tensione agendo
sull’interruttore di linea.
9.
PULIZIA DEL FILTRO ARIA
Togliere tensione all’unità, ponendo l’interruttore di linea su 0 (OFF).
- Accedere all’apparecchio attraverso il pannello di ispezione ed estrarre il filtro aria
come indicato in FIGURA 20.
- Se invece il filtro si trova all’interno della griglia di aspirazione, rimuovere
quest’ultima e procedere alle operazioni descritte in seguito.
Per eseguire i collegamenti elettrici è necessario smontare il pannello di chiusura della
scatola elettrica (figura 4) per accedere alla morsettiera.
Pulire il filtro con acqua tiepida o, nel caso di polveri secche, con aria compressa.
Reinserire il filtro dopo averlo lasciato asciugare.
I cavi elettrici (alimentazione e comando) devono essere portati in morsettiera
attraverso il pressacavo che si trova sulla fiancata della scatola elettrica, lato attacchi
idraulici.
PULIZIA DELLA BATTERIA DI SCAMBIO TERMICO
Schemi elettrici:
- fig. 8 PWN + commutatore ad incasso CD
- fig. 9: PWN + commutatore a parete CDE
- fig.10: PWN + pannello di comando TD
- fig.11: PWN + pannello di comando TDC, inversione riscaldamento/a
raffreddamento centralizzata.
- fig.12: PWN + TD4T con 1 valvola
- fig.13: PWN + TD4T con 2 valvole
- fig.14: PWN+MICROPROD (modelli PWN 1x e 2x)
- fig.15: PWN+MICROPROD con scheda di potenza IPM ( modelli PWN 3x)
- fig.16: PWN+MICROPROD con interfaccia di potenza KP
- fig.17: PWN+MICRO D+KP
- fig.18: PWN+MICRO D (modelli PWN 1x e 2x)
- fig.19: PWN+MICRO D+IPM (modelli PWN 3x)
I collegamenti tratteggiati sono a carico dell’installatore
I motori delle unità sono a 7 velocità di rotazione.
ATTENZIONE:
Il cavo COMUNE del motore é quello di colore BIANCO: il suo errato
collegamento provoca danni irreparabili al motore.
Con riferimento alle figure da 8 a 19, la legenda è la seguente:
IL
Interruttore di linea (non fornito)
F
Fusibile di protezione (non fornito)
3/7
3 velocità sulle 7 disponibili
M
Motore
WH
Bianco = comune
BK
Nero = velocità massima
BU
Blu
BN
Marrone
GY
Grigio
GN
Verde
YE
Giallo
RD
Rosso = velocità minima
GNYE Giallo/verde = terra (PE)
SF
Selettore di funzionamento centralizzato
VK
Valvola acqua (230V ON-OFF)
VKC
Valvola acqua fredda (230V ON-OFF)
VKH
Valvola acqua calda (230V ON-OFF)
KP
Interfaccia di potenza per la connessione in parallelo di 4 PWN
IPM
Scheda di potenza
EXT
Contatto ausiliario esterno
RHC
Selettore riscaldamento-raffreddamento remoto (centralizzato)
7
VERIFICA FUNZIONALE
Verificare che l’apparecchio sia installato in modo da garantire l’inclinazione richiesta.
Verificare che lo scarico condensa non sia ostruito (da depositi di calcinacci ecc.).
Controllare la tenuta dei collegamenti idraulici.
Controllare che i cablaggi elettrici siano ben saldi (eseguire il controllo in assenza di
tensione).
Assicurarsi che sia stata eliminata l’aria dallo scambiatore di calore.
Dare tensione all’apparecchio e verificarne il funzionamento.
E’ consigliabile controllare lo stato dello scambiatore prima di ogni stagione estiva,
verificando che le alette non siano ostruite dall’impurità. Per accedere alla batteria
di scambio termico, occorre rimuovere il pannello di mandata (sia esso a collari oppure
a flangia rettangolare) così come la vasca di raccolta condensa. Una volta raggiunta
la batteria, effettuare la pulizia con aria compressa o con vapore a bassa pressione,
senza danneggiare le alette dello scambiatore.
Prima di ogni inizio del funzionamento estivo, verificare che lo scarico condensa
avvenga regolarmente.
Una manutenzione adeguata e periodica si traduce in risparmio
energetico ed economico.
10
RICERCA DEI GUASTI
Se l’apparecchio non funziona correttamente, prima di richiedere l’intervento del
servizio assistenza, eseguite i controlli riportati nella tabella sotto riportata.
Se il problema non può essere risolto, rivolgetevi al rivenditore o al centro assistenza
più vicino.
Problema
Causa
Soluzione
L'unità non funziona
1 Manca corrente
1 Ridare corrente
2 E’ scattato il salvavita
2 Chiedere l’intervento del
3 L'interruttore di
3 Avviare la macchina
servizio assistenza
avviamento è posto su 0.
L'unità riscalda o raffresca
poco
1 Il filtro aria è sporco o
ponendo l'interruttore su I
1 Pulire Il filtro aria
otturato
2 C’e un ostacolo vicino
2 Rimuovere l’ostacolo
all’aspirazione o all’uscita
dell’aria
3 E’ presente dell’aria
all’interno dello
3 Chiedere l’intervento
dell’installatore
scambiatore di calore
4 Le finestre e le porte sono
4 Chiudere porte e/o finestre
aperte
5 E’ selezionata la velocità
minima di funzionamento
L'unità “perde” acqua
1 L’apparecchio non è
installato con la giusta
5 Selezionare la velocità
media o massima
1 Chiedere l’intervento
dell’installatore
inclinazione
2 Lo scarico condensa è
ostruito
2 Chiedere l’intervento
dell’installatore
UT66000455 - 00
3
È severamente vietata la riproduzione anche parziale di questo manuale / All copying, even partial, of this manual is strictly forbidden
PWN
4
DECLARATION OF CONFORMITY
Galletti S.p.A., whose main office is in Via Romagnoli, 12/a Bentivoglio (BO)
- Italy, hereby declares, under its sole responsibility, that the PWN duct
units, devices for air conditioning systems, suitable for duct type air
distribution installations, conform to the specifications of EEC Directives
73/23, 89/392, 91/368, 93/44, 93/68, 98/37 and 89/336.
Bologna, 08.03.2005
Luigi Galletti
President
FIGURE 2 PWN unit:
1
Water outlet, ¾" female gas
2
water inlet, ¾" female gas
3
Electric box
4
Electric supply cable holder
5
Water drip system, Ø 17 mm
FIGURE 3 air filter
5
1
WARNING
FIGURE 4 - exploded view of the unit
1. Water drip tray
2. Heat exchanger module
3. Electric box
4. Terminal board
5. Vibration damper
6. 7 speed electric motor
7. Fan drive assembly
DANGER
LIVE PARTS
BEFORE INSTALLATION
Carefully read this manual
Installation and maintenance may be carried out solely by qualified technicians
specifically trained for this type of equipment, in conformity with current regulations.
On receiving the equipment, check that it has not undergone any damage during
transport. For installation and use of accessories, please refer to the relative technical
sheets.
2
It is advisable to install any accessories on the standard unit prior to positioning the
latter, making reference to the technical sheets. . The air intake and outlet have a
rectangular cross-section, with pre-cut holes for fastening the available accessories.
INTENDED USE AND OPERATING LIMITS
Galletti S.p.A. will not accept any liability for damage or injury caused as a result of:
nstallation by non-qualified personnel; improper use or use in conditions not allowed
by the manufacturer; failure to perform the maintenance prescribed in this manual;
use of spare parts other than original factory parts. The operating limits are specified
at the end of this chapter; usage outside the stated limits is to be considered improper.
Store the unit in its packing container until you are ready to install it to prevent dust
from infiltrating inside it.
During wintertime periods of quiescence, drain water from the system, to prevent
ice from forming. If anti-freeze solutions are used, check for their freezing point.
Do not attempt to modify the internal wiring or other parts of the unit.
9
If you wish to make the connections using flexible circular ducts (Ø 200), it will
be necessary to use accessories PMA ot PMAC, which can be fitted respectively
on the intake or outlet section.
NOTE: to install flexible ducts (Ø 200), on both the inlet and outlet sides, you
will need 1 PMA accessory (intake) and 1 PMAC accessory (outlet).
-
UNIT DESCRIPTION
-
Remove the drip tray
Remove the exchanger module by taking out the fastening screws (2 per side
+ 3 on the upper part) and 2 in the lower part
Turn the exchanger module 180° (on the vertical axis) and screw it back onto the
fan module.
Adjust the position of the drip tray so that the projecting part extends below the
plumbing connection and fasten it in place
MOUNTING the unit
Insert the vibration dampers provided in the 4 slots indicated for ceiling installation.
Fasten the base unit to the ceiling or wall using at least 4 of the 8 slots provided.
9
It is recommended to use 8MA threaded bars plus screw anchors of adequate
capacity to bear the weight of the unit, and to prepare the positioning of the unit
using 3 8MA bolts (2 in the lower part, 1 in the upper part as shown in FIGURE
6) and two washers for each bar
Before tightening the lock nut, adjust the main nut so as to assure that the unit
is properly inclined so as to facilitate condesate drainage (FIGURE 7).
To obtain the proper inclination, tilt the unit so that the intake side is slightly lower
(approximately 10 mm) than the outlet side. Make the plumbing connections
to the heat exchanger and, where the cooling function is to be used, to the
condensate drainage outlet.
Use one of the two tray drain outlets, which can be seen on the outside of the
unit side panels.
9
To connect the unit to the drainage line, use a flexible rubber hose and secure
it to the pre-selected drain pipe (Ø 3/8'') using a metal clamp (use the drain outlet
situated on the plumbing connection side).
To favour the drainage of condensate, the drain hose should be inclined
downward, at least 30 mm/m; make sure that no loops or bends form along its
path.
1- example of installation
Motor driven external air intake louver
Plenum silencer for air intake/outlet
Duct unit
Additional heat exchanger module for hot water operation
Insulated air outlet plenum with Ø 200 collars
UT66000455 - 00
To make connection using rectangular ducts it is recommended to use
accessories RD or RDC, which can be fitted respectively on the intake or outlet
section.
NOTE: to install ducts on both the inlet and outlet sides, you will need 1 RD
accessory (intake) and 1 RDC accessory (outlet).
-
The new range of PWN duct units has been designed to air condition rooms where
the ceiling recess installation of duct units is required. Main components:
9
Bearing structure built from thick galvanised steel sheet, insulated with sound
proof/condensation proof, self-extinguishing material in Class 1. The unit has
slots for installation and 4 rubber vibration dumpers to reduce propagation of
vibrations.
9
Electric fan module with single, double or triple double suction centrifucal fan,
with statically and dynamically balanced blades, directly mounted on a 7 speed
electric motor, with permanently activated capacitor and thermal protection.
9
Wiring box on the hydraulic connection side in order to reduce installation
clearance requirements. Electric connection by means of screw terminal
block.
9
High efficiency, 3, 4 or 6 row heat exchanger module with copper piping and
aluminium fins blocked to pipings by mechanical expansion. It is equipped with
brass manifolds and vent valve. The heat exchanger usually comes with water
connections mounted on the left, but it can be turned by 180°.
9
Capacious drip tray extending beyond the plumbing connections, enabling
collection of condensate from adjustment valves where present; the off-centre
position considerably reduces the space required for installation.
9
Air filter made of acrylic fibre, filtration class G2, applied on the air intake; may
be pulled out from below
FIGURE
SM
SIL
PWN
MDF
PMAC
9
The exchanger connections can be switched over to the opposite side by carrying
out the following steps (FIGURE 5):
Thermal carrier fluid: water
Water temperature: + 5°C to +95°C
Air temperature: -20°C to +40°C
Supply voltage: 230 V+/-10 %
Max. primary fluid pressure 10 bar
3
INSTALLATION
WARNING: Install the duct unit, circuit breaker (IL) and/or any remote
controls in a place out of reach of persons who may be taking a bath or shower.
SAFETY SYMBOLS
Carefully read
this manual
DIMENSIONS
4
È severamente vietata la riproduzione anche parziale di questo manuale / All copying, even partial, of this manual is strictly forbidden
Some rules to follow
9
Vent air from the exchanger while the pumps are off. For this purpose use the
air vent valves situated next to the exchanger connections.
9
All ducts, especially the outlet ducts, must be insulated with anti-condensation
material.
9
An inspection panel must be provided in proximity to the unit to enable
maintenance and cleaning operations.
9
Install the control panel on the wall; choose an accessible position from where
functions may be easily set and which is suitable for taking temperature
readings, where applicable. Avoid positions directly exposed to sunlight or direct
currents of hot or cold air and make sure there are no obstacles which may
preclude a correct temperature reading.
6
ELECTRICAL CONNECTIONS
8
MAINTENANCE
The maintenance requirements of PWN duct units are limited to periodic cleaning of
the air filter and heat exchanger and checks on the efficiency of condensate drainage.
Maintenance may be performed only by specialised personnel Due caution must be
taken while carrying out maintenance: accidental contact with some metal parts may
cause injury; wear protective gloves.
Whenever starting up the unit after it has not been used for a long time, check that
there is no air in the heat exchanger.
The motor requires no maintenance since it has self-lubricating bearings For
safety reasons, before undertaking any maintenance or cleaning operations
turn off the unit and disconnect it from the power supply using the circuit
breaker.
Make the electrical connections with the power supply disconnected, in accordance
with current safety regulations.
All the wiring must be done by qualified personnel.
For each thermal ventilating unit provide a mains circuit breaker (IL), with
opening contacts separated by at least 3 mm and an adequate protection fuse
(F).
Electrical intakes are shown on the rating labels on the units. During installation, strictly
abide by the indications on the wiring diagram for the unit-control panel combination
9
To make the electrical connections, remove the panel covering the electric box (figure
4) to access the terminals.
Clean the filter with warm water or, in the event of dry dust build-up, using compressed
air. Allow the filter to dry and then fit it back in place.
The electric wires (power and control circuits) must be pulled in through the gland on
the side of the electric box where the plumbing connections are located and then
connected to the terminals.
CLEANING THE HEAT EXCHANGER
Wiring diagrams:
fig. 8: PWN + recess mounted selector switch CD
fig. 9: PWN + wall mounted selector switch CDE
fig.10: PWN + control panel TD
fig.11: PWN + control panel TDC, centralised heating/cooling selection.
fig.12: PWN + TD4T with 1 valve
fig.13: PWN + TD4T with 2 valves
fig.14: PWN+MICROPROD (models PWN 1x and 2x)
fig.15: PWN+MICROPROD with circuit board IPM ( models PWN 3x)
fig.16: PWN+MICROPROD with power interface KP
fig.17: PWN+MICRO D+KP
fig.18: PWN+MICRO D (models PWN 1x and 2x)
fig. 19 PWN+MICRO D+IPM (models PWN 3x)
The connections indicated must be made by the installer,
Units are equipped with 7 speed motors.
WARNING:
Motor COMMUN wire = WHITE Wrong connection may cause serious damages
to the motor.
Legend referred to figures from 8 to 9:
IL
Circuit breaker (not supplied)
F
Safety fuse (not supplied)
3/7
3 out of 7 speeds
M
Motor
WH
White =commun
BK
Black = maximum speed
BU
Blue
BN
Brown
GY
Grey
GN
green
YE
Yellow
RD
Red = minimum speed GNYE Yellow/green=earth(PE)
SF
Centralised operation selector switch
VK
Water valve (230V ON-OFF)
VKC
Cold water valve (230V ON-OFF) VKH Hot water valve (230V ON-OFF)
KP
Power interface for connecting in parallel 4 PWN units
IPM
Circuit board
EXT
External auxiliary contact
RHC
Remote heating/cooling selector switch (centralised)
7
CLEANING THE AIR FILTER
Disconnect the unit from the power supply by setting the main switch on 0 (OFF).
-
Access the unit via the inspection panel and take out the air filter as shown in
FIGURE 20.
If the filter is on the inside of the intake grille, remove the latter and then proceed
to carry out the steps described below
-
It It is advisable to check the condition of the exchanger before the start of every
summer season to make sure that the fins are not obstructed by dirt. To access the
heat exchanger, remove the outlet panel (whether of the type with collars or a
rectangular flange) and the drip tray. On reaching the exchanger, clean it with
compressed air or low-pressure steam taking care not to damage the fins.
Before the start of every summer season, check the efficiency of condensate
drainage.
Adequate periodic maintenance will ensure save
both energy and cost savings.
10
TROUBLESHOOTING
If the unit is not working properly, before calling a service engineer carry out the checks
indicated in the table below. If the problem cannot be solved, contact your dealer or
the nearest service centre.
Problem
Cause
Solution
The unit fails to work
1 No power supply
1 Restore the power supply
2 The automatic safety cutout
2 Call a service centre for
has tripped
3 Start the unit by moving the
1 The air filter is dirty or
1 Clean the air filter
switch to I
The unit provides insufficient
cooling or heating
clogged
2 An obstacle is obstructing
2 Remove the obstacle
the air intake or outlet
3 Air is trapped inside the heat
exchanger
4 There are open windows and/
3 Call the installer for
assistance
4 Close windows and/or doors
or doors
PERFORMANCE CHECK
5 The minijum speed has been
Check that the unit is installed in such a way as to guarantee the required inclination.
Check that the drainage outlet is not clogged (by masonry debris etc.). - Check the
tightness of the plumbing connections.
Make sure the electric wires are tightly connected (carry out this check with the power
supply OFF).
Make sure that air has been eliminated from the heat exchanger. Power the unit and
check its performance.
assistance
3 The on/off switch is on 0.
selected
The unit "leaks" water.
1 The unit has not been
installed with the correct
5 Select medium or maximum
speed
1 Call the installer for
assistance
inclination
2 The drainage outlet is
clogged
2 Call the installer for
assistance
UT66000455 - 00
5
È severamente vietata la riproduzione anche parziale di questo manuale / All copying, even partial, of this manual is strictly forbidden
GB
PWN
4
DÉCLARATION DE CONFORMITÉ
Galletti S.p.A. dont le siège est à via Romagnoli 12/a, 40010 Bentivoglio (BO)
- Italie - certifie, en engageant sa seule responsabilité, que les unités
gainables de la Série PWM, appareils pour installations de chauffage et de
conditionnement, pour distribution de l'air sous gaines , sont conformes aux
Directives CEE
73/23, 89/392, 91/368, 93/44, 93/68, 98/37 et 89/336
Bologne, le 08/03/2005
Luigi Galletti
ENCOMBREMENT
FIGURE 2 unité PWN:
1
Sortie d'eau, 3/4" femelle gaz
2
Entrée d'eau, 3/4" femelle gaz
3
Boîtier électrique
4
Serre-câbles alimentation électrique
5
Écoulement des condensats, Ø 17 mm
FIGURE 3 filtre à air
Président
5
INSTALLATION
ATTENTION: Installer l'unité gainable, l'interrupteur de ligne (IL) et/ou les
commandes à distances éventuelles dans une position non accessible par les
personnes se trouvant dans la baignoire ou dans la douche.
SYMBOLES DE SÉCURITÉ
F
FIGURE 4 - vue éclatée de l'unité
Lire attentivement
le présent manuel
1
ATTENTION
1.
2.
3.
4.
5.
6.
7.
DANGER - SOUS
TENSION
AVANT DE COMMENCER L'INSTALLATION
Bac de collecte des condensats
Module batterie d'échange thermique
Boîtier électrique
Bornier de branchement
Antivibratoire
Moteur électrique à 7 vitesses
Groupe moto-ventilateur
Lire attentivement le présent manuel.
L'installation et les interventions d'entretien doivent être confiées à des techniciens
qualifiés pour ce type d'appareil, conformément aux réglementations en vigueur.
Lors de la réception de l'unité, contrôler son état et vérifier qu'elle n'ait pas subi de
dommages durant le transport. Pour l'installation et l'utilisation d'éventuels accessoires
faire référence aux fiches techniques correspondantes.
Il est recommandé d'installer les accessoires éventuels sur l'appareil standard avant
son positionnement. Voir les fiches techniques. L'aspiration et le refoulement sont
à section rectangulaire, avec éléments prédécoupés pour fixer les accessoires
2
9
Pour le raccordement par gaine à section rectangulaire, il est recommandé
d'utiliser l'accessoire RD ou RDC, pouvant être monté sur l'aspiration ou sur
le refoulement RESPECTIVEMENT.
NOTE: Pour obtenir l'aspiration et le refoulement sous gaine, sont nécessaireS
1 accessoire RD (aspiration) et 1 accessoire RDC (refoulement).
9
Pour le raccordement par tuyaux flexibles (Ø 200), il faut prévoir l'accessoire
PMA ou PMAC, pouvant être monté sur l'aspiration ou sur le refoulement
respectivement.
NOTE: Pour obtenir l'aspiration et le refoulement par tuyaux flexibles (Ø 200),
sont nécessaire 1 accessoire PMA (aspiration) et 1 accessoire PMAC (refoulement).
UTILISATION PRÉVUE ET LIMITES DE FONCTIONNEMENT
Galletti S.p.A. décline toute responsabilité dans les cas suivants: l'appareil a été
installé par des techniciens non qualifiés; il a été utilisé de manière impropre ou dans
des conditions non admises; il n'a pas été soumis aux opérations d'entretien figurant
dans le présent manuel; n'ont pas été utilisées des pièces de rechange d'origine. Les
limites de fonctionnement sont indiquées à la fin de ce chapitre; toute utilisation
différente sera considérée comme utilisation impropre.
Conserver l'appareil dans son emballage jusqu'au moment de l'installation, évitant
ainsi l'infiltration de poussière.
En cas d'arrêt pendant l'hiver, évacuer l'eau de l'installation pour prévenir les
dommages que provoquerait la formation de glace. En cas d'utilisation d'un antigel,
veiller à contrôler le point de congélation.
Ne pas modifier les connexions électriques internes ni autres parties de l'appareil.
Les raccords de l'échangeurs peuvent être montés sur l'autre côté, en procédant
comme suit (FIGURE 5):
Fluide caloporteur: eau
Température eau: + 5°C à +95°C
Température air: -20°C à +40°C
Tension d'alimentation: 230 V+/-10 %
Max. pression fluide primaire 10 bar
3
-
DESCRIPTION DE L'APPAREIL
La nouvelle gamme d'unités gainables PWN a été étudiée et conçue pour la
climatisation de locaux exigeant l'installation d'unités encastrées en plafonnier.
Composants principaux:
9
Structure de support en tôle d'acier zinguée d'épaisseur convenable, isolée
avec matériau insonorisant/anticondensats, autoextinguible de Classe 1.
L'unité est munie de lumières de fixation et de 4 tampons antivibratoires en
caoutchouc pour prévenir la transmission des vibrations.
9
Module d'électroventilation à turbine simple, double ou triple, de type
centrifuge, à double aspiration, avec ventilateurs à équilibrage statique et
dynamique, accouplement direct au moteur électrique à 7 vitesses, équipé
de condensateur permanent et de protection thermique.
9
Boîtier des connexions situé sur le côté des raccords hydrauliques pour limiter
les espaces nécessaires à l'installation. Bornier à vis pour le branchement
électrique.
9
Module Batterie d'échange thermique: à 3, 4 ou 6 rangs, haut rendement,
tube en cuivre et ailettes en aluminium bloquées sur les tubes moyennant une
expansion mécanique. Elle est équipée de collecteurs en laiton et d'une purge.
La batterie, normalement livrée avec des raccords à gauche, peut être tournée
de 180°.
9
Ample bac de collecte des condensats s'étendant au delà des raccords
hydrauliques, pouvant ainsi récupérer les condensats provenant des vannes
de réglages éventuelles. Le positionnement déporté permet une réduction
considérable des espaces nécessaires à l'installation.
9
Filtre à air en fibre acrylique, classe de filtrage G2, logé sur l'aspiration de l'air,
démontable à tiroir, par le bas.
FIGURE
SM
SIL
PWN
MDF
PMAC
Démonter le bac de collecte des condensats
Démonter le module batterie en enlevant les vis de fixation (2 sur chaque flasque
+ 3 sur la partie supérieure) et 2 sur la partie inférieure.
tourner de 180° (sur l'axe vertical) le module batterie et le fixer de nouveau sur
le module ventilateur,
transférer le bac des condensats, la partie saillante devant se prolonger au
dessous des raccords hydrauliques. Le fixer.
FIXATION de l'unité
Introduire les tampons antivibratoires fournis dans les 4 lumières prévues pour la
fixation au plafond.
Fixer l'unité de base au plafond ou à la paroi. Utiliser au moins 4 des 8 lumières prévues.
9
Il est recommandé d'utiliser des barres filetées 8MA, des chevilles de fixation
adéquates au poids de l'appareil et de préparer le positionnement de l'appareil
en utilisant 3 boulons 8MA (2 en partie basse, 1 en partie haute comme indiqué
sur la FIGURE 6) et deux rondelles pour chaque barre.
Avant de serrer le contre-écrou, régler le serrage de l'écrou principal de manière
à donner à l'appareil une inclinaison permettant l'écoulement correct des
condensats (FIGURE 7).
L'inclinaison est correcte si la différence de niveau entre l'aspiration en partie
basse et le refoulement est de 10 mm entre les deux extrémités. Effectuer les
raccordements hydrauliques à l'échangeur thermique, pour la modalité chauffage
et à l'écoulement des condensats, pour la modalité rafraîchissement.
Utiliser un des deux points d'écoulements du bac, apparaissant à l'extérieur des
flasques de l'unité.
9
Pour le raccordement de l'unité à la ligne d'écoulement des condensats, utiliser
un tuyau flexible en caoutchouc et le fixer au tuyau d'écoulement CHOISI (Ø
3/8'') au moyen d'un collier en métal (utiliser le point d'écoulement se trouvant
sur le côté raccordements hydrauliques)
Pour faciliter l'évacuation des condensats, incliner le tuyau vers le bas d'au
moins 30 mm/m. Éviter la formation d'anses ou d'étranglements.
1- exemple d'installation
Volet motorisé de prise d'air frais
Gaine insonorisante de soufflage/aspiration
Unité gainable
Module batterie additionnelle pour fonctionnement à l'eau chaude
Gaine de soufflage/aspiration calorifugé, avec colliers Ø 200
UT66000455 - 00
6
È severamente vietata la riproduzione anche parziale di questo manuale / All copying, even partial, of this manual is strictly forbidden
Quelques règles à suivre
9
Purger l'air de l'échangeur lorsque les pompes sont à l'arrêt. Pour cela, utiliser
les vannes de purge à côté des raccords de l'échangeur.
9
Les conduites devront être protégées avec des matériaux anti-condensats, en
particulier la conduite de soufflage d'air.
9
Près de l'appareil prévoir un panneau de visite pour les opérations d'entretien
et de nettoyage.Installer l'éventuel panneau de commande sur la paroi dans
une position facile d'accès, aussi bien pour faciliter l'utilisation que pour garantir
une mesure fiable de la température. Éviter les positions directement exposées
aux rayons du soleil, aux courantS directs d'air chaud ou froid et la présence
d'obstacles empêchant une lecture exacte de la température.
6
BRANCHEMENTS ÉLECTRIQUES
Les branchements électriques devront être effectués avec l'appareil hors tension
et conformément aux dispositions de sécurité en vigueur.
Les branchements électriques devront être effectués uniquement par des techniciens
qualifiés.
Pour chaque unité de thermoventilation prévoir sur le réseau d'alimentation
un interrupteur (IL) avec contacts d'ouverture à une distance d'au moins 3 mm
et un fusible (F) de protection adéquat.
Les intensités électriques sont indiquées sur la plaque signalétique de l'unité. Lors
de l'installation, suivre scrupuleusement le schéma électrique de la combinaison unitépanneau de commande.
8
ENTRETIEN
Les unités gainables PWN ne nécessitent que des opérations d'entretien périodique
du filtre à air, de l'échangeur de chaleur et du contrôle de l'efficacité de l'écoulement
des condensats.
L'entretien ne peut être confié qu'à un personnel spécialisé. Durant les opérations
d'entretien il faudra faire attention à éviter: le contact accidentel avec les parties
métalliques pouvant provoquer des blessures; se munir de gants de protection.
Chaque fois que l'appareil est remis en marche après une longue période à l'arrêt,
veiller à ce qu'à l'intérieur de l'échangeur thermique il n'y a pas d'air.
Le moteur ne nécessite aucun entretien, étant doté de roulements autolubrifiants.
Pour des raisons de sécurité, avant toute opération d'entretien ou de
nettoyage, éteindre l'appareil et le mettre hors tension au moyen de l'interrupteur
de ligne.
9.
NETTOYAGE DU FILTRE À AIR
Porter l'interrupteur de ligne sur 0 (OFF) et mettre ainsi l'appareil hors tension.
-
Avoir accès à l'appareil par le panneau de visite. Enlever le filtre à air, comme
indiqué sur la FIGURE 20.
Si le filtre est monté à l'intérieur de la grille d'aspiration, enlever la grille et procéder
aux opérations décrites ci-dessous.
-
Pour les branchements électriques, démonter le panneau de fermeture du boîtier
électrique (Fig. 4) pour avoir accès au bornier.
Nettoyer le filtre à l'eau tiède. Dans le cas de poussière sèche, utiliser l'air comprimé.
Laisser sécher le filtre et le remonter.
Les câbles électriques (alimentation et commande) doivent être portés au bornier en
passant pour le serre-câble situé sur le côté du boîtier électrique, et raccords
hydrauliques.
NETTOYAGE DE LA BATTERIE D'ÉCHANGE THERMIQUE
Schémas électriques
fig. 8: PWN + commutateur encastré CD
fig. 9: PWN + commutateur - installation murale CDE
fig.10: PWN + panneau de commande TD
fig.11: PWN + panneau de commande TDC, commutation centralisée chauffageraffraîchissement.
fig.12: PWN + TD4T avec 1 vanne
fig.13: PWN + TD4T avec 2 vannes
fig.14: PWN+MICROPROD (modèles PWN 1x et 2x)
fig.15: PWN+MICROPROD avec carte de puissance IPM ( modèles PWN 3x)
fig.16: PWN+MICROPROD avec interface de puissance KP
fig.17: PWN+MICRO D+KP
fig.18: PWN+MICRO D (modèles PWN 1x et 2x)
fig. 19: PWN+MICRO D+IPM (modèles PWN 3x)
Les branchements hachés doivent être effectués par l'installateur. Les moteurs des
unités sont à 7 vitesses de rotation.
ATTENTION:
Câble COMMUN du moteur: BLANC Un branchement incorrect provoque des
dommages irréparables au moteur.
Légendes, faisant référence aux figures de 8 à 19:
IL
Interrupteur de ligne (non fourni)
F
Fusible de protection (non fourni)
3/7 3 vitesses des 7 disponibles
M
Moteur
WH Blanc = commun
BK Noir = Grande vitesse
BU Bleu
BN Marron
GY Gris
GN Vert
YE Jaune
RD Rouge = petite vitesse CNYE Jaune/vert = terre (PE)
SF Sélecteur de fonctionnement centralisé
VK Vanne eau (230V ON-OFF)
VKC Vanne eau froide (230V ON-OFF) VKH Vanne eau chaude (230V ON-OFF)
KP Interface de puissance pour branchement en parallèle de 4 PWN
IPM Carte de puissance
EXT Contact auxiliaire externe
RHC Sélecteur chauffage-rafraîchissement à distance (centralisé)
7
Contrôler l'état de l'échangeur avant chaque saison d'été. Vérifier si les ailettes sont
libres d'impuretés. Pour avoir accès à l'échangeur thermique, démonter le panneau
de sortie (de type à colliers ou à bride rectangulaire) et le bac de récupération des
condensats. Après avoir atteint l'échangeur, nettoyer à l'air comprimé ou à la vapeur
à basse pression, sans endommager les ailettes.
Avant le début du fonctionnement d'été, vérifier si l'écoulement des condensats est
correct.
Un entretien périodique correct se traduit
par économie d'énergie et de coûts
10
RECHERCHE DES CAUSES D'ANOMALIE
Si l'appareil ne fonctionne pas correctement, avant de s'adresser au service
d'assistance, effectuer les contrôles indiqués sur le tableau ci-dessous. Si le problème
ne peut pas être résolu, s'adresser au distributeur ou au centre d'assistance le plus
proche.
Problème
Cause
Solution
L'unité ne fonctionne pas
1 Pas de courant
1 Remettre sous tension
2 Disjoncteur déclenché
2 Demander l'intervention du
3 L'interrupteur de mise en
marche est sur 0.
en marche l'unité en portant
l'interrupteur sur I
Chauffage/ rafraîchissement
insuffisant
1 Filtre à air encrassé ou
1 Nettoyer le filtre à air
bouché
2 Un obstacle se trouve près
2 Éliminer l'obstacle
de l'aspiration ou de la sortie
d'air
3 Présence d'air à l'intérieur
de l'échangeur de chaleur
4 Les fenêtres et/ou les portes
3 Demander l'intervention de
l'installateur
4 Fermer portes et/ou fenêtres
sont ouvertes
CONTRÔLE DU FONCTIONNEMENT
Vérifier que l'appareil a été installé dans le respect de l'inclinaison spécifiée. Vérifier
que l'écoulement des condensats n'est pas bouché (gravats ou autres). Contrôler
l'étanchéité des raccordements hydrauliques.
Vérifier si les circuits électriques sont bien fixés (mettre l'appareil hors tension).
Vérifier si l'air de l'échangeur de chaleur a été purgé. Mettre l'appareil sous tension
et vérifier le fonctionnement.
centre d'assistance3 Mettre
5 Petite vitesse de
5 Sélectionner la MV ou la GV.
fonctionnement sélectionnée
L'unité a des pertes d'eau.
1 Inclinaison d'installation non
correcte
2 Écoulement des condensats
bouché
1 Demander l'intervention de
l'installateur
2 Demander l'intervention de
l'installateur
UT66000455 - 00
7
È severamente vietata la riproduzione anche parziale di questo manuale / All copying, even partial, of this manual is strictly forbidden
PWN
4
KONFORMITÄTSERKLÄRUNG
Die Firma Galletti S.p.A. mit Sitz in 40010 Bentivoglio (BO), via Romagnoli
12/A, - Italien, erklärt auf eigene Verantwortung, dass die kanalisierbaren
Geräte der Serie PWN, Heiz- und Klimageräte, für Anlagen mit Luftverteilung
durch Kanäle, mit den Vorschriften der folgenden EWG-Richtlinien konform
sind:
73/23, 89/392, 91/368, 93/44, 93/68, 98/37 und 89/336.
Bologna, 08.03.05
Luigi Galletti
ABBILDUNG 2 Gerät PWN:
1
Wasserauslauf ¾ " Innengewinde Gas
2
Wassereinlauf ¾ " Innengewinde Gas
3
Schaltkasten
4
Kabelschelle Stromzufuhr
5
Kondenswasserablauf, Ø 17 mm
ABBILDUNG 3 Luftfilter
Präsident
5
1
ACHTUNG
ABBILDUNG 4 - Explosionszeichnung des Geräts
1.
Kondenswassersammelbecken
2.
Wärmetauscher
3.
Schaltkasten
4.
Anschlussklemmleiste
5.
Schwingungsdämpfer
6.
Elektromotor mit 7 Geschwindigkeiten
7.
Lüftergruppe
GEFÄHRLICHE
SPANNUNG
VOR INSTALLATIONSBEGINN
Lesen Sie dieses Handbuch aufmerksam durch.
Die Installation und Wartung des Geräts gemäß den geltenden Vorschriften darf
ausschließlich durch Fachleute erfolgen, die für diese Art Maschinen qualifiziert sind.
Bei Erhalt prüfen Sie das Gerät auf seinen Zustand und eventuelle Transportschäden.
Für die Installation und die Benutzung eventueller Zubehörteile wird auf die
entsprechenden Datenblätter verwiesen.
2
Es empfiehlt sich, eventuelle Zubehörteile vor der Montage in der Decke in das
Standardgerät einzubauen (siehe Technische Angaben). Die Ansaugung und Ausblasung
sind rechteckig und die Löcher zur Montage der verfügbaren Zubehörteile ausgelegt.
9
Für die Erstellung von Verbindungen mit rechteckigen Kanälen wird die
Verwendung der Zubehörteile RD oder RDC empfohlen, die sowohl in der
Ansaugung als auch in der Ausblasung montiert werden können.
ANMERKUNG: Soll sowohl die Ansaugung als auch die Ausblasung mit Kanälen
erstellt werden, werden 1 Zubehörteil RD (Ansaugung) und 1 Zubehörteil RDC
(Ausblasung) benötigt.
9
Wird die Verbindung mit Schlauchleitungen (Ø 200) gewünscht, müssen die
Zubehörteile PMA oder PMAC vorgesehen werden, die sowohl in der Ansaugung
als auch in der Ausblasung montiert werden können.
ANMERKUNG: Für die Erstellung mit Schlauchleitungen (Ø 200) sowohl der
Ansaugung als auch der Ausblasung, werden 1 Zubehörteil RD (Ansaugung) und
1 Zubehörteil PMAC (Ausblasung) benötigt.
EINSATZBEREICH UND BETRIEBSGRENZWERTE
Die Firma Galletti S.p.A. lehnt jegliche Haftung ab, falls das Gerät von nicht
qualifiziertem Personal installiert, unsachgemäß oder unter unzulässigen Umständen
verwendet, die in diesem Handbuch vorgesehene Wartung unterlassen und keine
Originalersatzteile verwendet wurden. Die Betriebsgrenzwerte sind am Schluss dieses
Kapitels aufgeführt. Jeder andere Gebrauch gilt als unsachgemäß.
Das Gerät bis zur Installation in der Verpackung aufbewahren, damit kein Staub
eindringen kann.
Falls das Gerät im Winter nicht verwendet wird, muss das Wasser aus der Anlage
entleert werden, um Frostschäden zu vermeiden; werden Frostschutzlösungen
verwenden, den Gefrierpunkt überprüfen.
Die Verkabelungen im Gerät oder andere Geräteteile dürfen nicht geändert werden.
Die Anschlüsse des Wärmetauschers können auf die gegenüberliegende Seite
gerichtet werden, siehe dazu in ABBILDUNG 5:
Wärmeträgerflüssigkeit: Wasser
Wassertemperatur: + 5°C / +95°C
Lufttemperatur: -20°C / +40°C
Versorgungsspannung: 230 V+/-10 %
Max. Druck Primärflüssigkeit 10 bar
3
- Das Kondenswassersammelbecken abmontieren.
- Die Befestigungsschrauben (2 pro Seite + 3 auf der Oberseite) und 2 auf der
Unterseite ausdrehen und den Wärmetauscher abmontieren
- Den Wärmetauscher um 180° (um die senkrechte Achse) drehen und wieder an
der Lüftergruppe montieren.
- Das Kondenswassersammelbecken verschieben bis sich der vorstehende Teil
unter den Wasseranschlüssen befindet und wieder befestigen.
GERÄTEBESCHREIBUNG
Die Serie kanalisierbarer Geräte PWN wurde zur Klimatisierung von Räumen
entwickelt, in denen die Unterputzinstallation in Hängedecken benötigt wird. Die
Hauptkomponenten sind:
9
Struktur aus verzinktem Stahlblech mit geeigneter Dicke, geräuschdämmender/
kondensationshemmender Isolation, selbstlöschend in Klasse 1. Das Gerät
verfügt über Befestigungsschlitzlöcher und 4 Schwingungsdämpfer aus Gummi,
die die Übertragung der Schwingungen verhindern.
9
Lüftergruppe mit einzelnem, doppeltem oder dreifachem Fliehkraft-Laufrad
mit doppelter Ansaugung, statisch und dynamisch ausgewuchtetem Lüfter,
direkt an den Elektromotor mit 7 Geschwindigkeiten gekoppelt, ausgerüstet
mit dauernd eingeschaltetem Kondensator und Wärmeschutz.
9
Schaltkasten auf der Seite der Wasseranschlüsse zur Verringerung des
Installationsplatzbedarfs mit Schraubklemmbrett für die elektrischen
Anschlüsse.
9
Wärmetauscher: 3-, 4- oder 6-reihiger Hochleistungstauscher mit Kupferrohren
und Aluminiumrippen, die im Treibverfahren an den Rohren befestigt sind. Sie
sind ausgestattet mit Messing-Einlasskrümmern und Entlüftungsventil. Der
Wärmetauscher, der normalerweise mit Anschlüssen links montiert wird, kann
um 180° geschwenkt werden.
9
Großes Kondenswassersammelbecken, das über die Wasseranschlüsse
hinaus reicht und auch eventuelles Kondenswasser von den Regelventilen
auffangen kann; die dezentralisierte Position verringert den Platzbedarf
wesentlich;
9
Luftfilter aus Acrylfasern, Filterklasse G2, in der Luftansaugung, von unten
BERFESTIGUNG des Geräts
Die mitgelieferten Schwingungsdämpfer in die 4 Schlitzlöcher zur Befestigung an der
Decke einsetzen.
Das Grundgerät an mindestens 4 der 8 vorhandenen Schlitzlöcher an die Decke oder
Wand befestigen.
9
Es empfiehlt sich Gewindestangen 8MA, für das Gerätegewicht angemessene
Dübel zu verwenden und das Gerät mit 3 Mutterschrauben 8MA (2 im unteren
Teil, 1 im oberen Teil, siehe ABBILDUNG 6) und zwei Unterlegscheiben für jede
Stange zur Positionierung vorzubereiten.
Bevor die Gegenmutter angezogen wird, die Hauptmutter so eindrehen, dass
das Gerät die richtige Neigung für den Ablauf des Kondenswassers aufweist
(ABBILDUNG 7).
Die richtige Neigung wird erreicht, indem die Ansaugung gegenüber der
Ausblasung nach unten geneigt wird, bis ein Höhenunterschied von ca. 10 mm
zwischen den beiden Enden entsteht. Die Wasseranschlüsse an den
Wärmetauscher und, bei vorgesehenem Kühlbetrieb, an den
Kondenswasserablauf ausführen.
Einen der beiden Abläufe des Sammelbeckens, die außen an den Geräteseiten
sichtbar sind, verwenden.
9
Für den Anschluss des Geräts an die Kondenswasser-Ablaufleitung einen
Gummischlauch verwenden und diesen mit einer Metallschelle an den gewählten
Ablauf (Ø 3/8'') anschließen (den Ablauf auf der Seite der Wasseranschlüsse
verwenden).
Damit das Kondenswasser besser ablaufen kann, die Ablaufleitung um
mindestens 30 mm/m nach unten neigen und dabei über die ganze Länge
Windungen oder Drosselstellen vermeiden.
herausziehbar.
ABBILDUNG 1- Installationsbeispiel
SM
Motorisierte Frischluftjalousie
SIL
Schalldämmende Mischkammer Ansaugung und Ausblasung
PWN
Kanalisierbares Gerät
MDF
Modul zusätzlicher Wärmetauscher für Betrieb mit Heißwasser
PMAC
Ansaugmischkammer isoliert mit Bünden Ø 200
UT66000455 - 00
INSTALLATION
ACHTUNG: Das kanalisierbare Gerät, den Hauptschalter (IL) und/oder die
eventuellen Fernsteuerungen so installieren, dass sie von der Badewanne
oder der Dusche aus nicht erreichbar sind.
SICHERHEITSSYMBOLE
Lesen Sie dieses Handbuch
aufmerksam durch
ABMESSUNGEN
8
È severamente vietata la riproduzione anche parziale di questo manuale / All copying, even partial, of this manual is strictly forbidden
Einige Regeln, die zu befolgen sind
9
Der Wärmetauscher muss bei stillstehenden Pumpen entlüftet werden. Die
Entlüftungsventile befinden sich neben den Anschlüssen des Wärmetauschers.
9
Die Kanäle, besonders der Ausblaskanal, müssen mit kondensationshemmendem
Material gedämmt werden.
9
In der Nähe des Geräts eine Inspektionsklappe für Wartungs- und
Reinigungsarbeiten vorsehen.
9
Die Steuertafel an der Wand installieren. Der Installationsort ist so zu wählen,
dass die Funktionen leicht eingestellt werden können und die
Temperaturerfassung, wenn vorgesehen, wirksam ist. Direkte
Sonneneinstrahlung, kaltem oder warmem Luftzug augesetzte Stellen, sowie
Hindernisse für eine einwandfreie Temperaturerfassung sind zu vermeiden.
6
STROMANSCHLÜSSE
Die Stromanschlüsse müssen in spannungslosem Zustand gemäß den geltenden
Vorschriften ausgeführt werden.
Die Verkabelungen dürfen nur von qualifiziertem Personal ausgeführt werden.
Für jedes Klimagerät im Stromnetz einen Schalter (IL) mit Öffnungskontakten
mit einem Mindestabstand von 3 mm und eine angemessene Schmelzsicherung
(F) vorsehen.
Die Stromaufnahmen sind auf dem Datenschild des Geräts aufgeführt. Bei der
Installation die im Schaltplan enthaltenen Angaben zur Kombination von GerätSteuertafel genau befolgen.
8
WARTUNG
Die Wartung der kanalisierbaren Geräte PWN besteht aus der periodischen Reinigung
des Luftfilters und des Wärmetauschers, sowie der Kontrolle des
Kondenswasserablaufs.
Die Wartung darf nur von Fachpersonal durchgeführt werden. Bei den Wartungsarbeiten
vorsichtig zu Werke gehen: Der zufällige Kontakt mit manchen Metallteilen kann
Verletzungen hervorrufen; daher Schutzhandschuhe anlegen.
Sich bei jedem Start nach längerer Pause vergewissern, dass sich keine Luft im
Wärmetauscher befindet.
Der Motor ist wartungsfrei, da er selbst schmierende Lager besitzt. Aus
Sicherheitsgründen vor Beginn irgendwelcher Wartungs- oder
Reinigungsarbeiten das Gerät ausschalten und mit dem Leitungsschalter
spannungsfrei machen.
9.
REINIGUNG DES LUFTFILTERS
Das Gerät durch Stellen des Hauptschalters auf 0 (OFF) spannungslos schalten.
- Das Gerät durch die Inspektionsplatte öffnen und den Luftfilter wie in ABBILDUNG
20 gezeigt herausnehmen.
- Befindet sich der Filter hingegen im Ansauggitter, muss dieses abgenommen und
dann wie nachstehend beschrieben vorgegangen werden.
Für die elektrischen Anschlüsse muss die Abdeckung des Schaltkastens (Abbildung
4) für den Zugang zur Klemmleiste abmontiert werden.
Den Filter mit lauwarmem Wasser, oder bei Verschmutzung durch trockenen Staub
mit Druckluft reinigen. Nach dem Trocknen den Filter wieder einsetzen.
Die elektrischen Kabel (Stromzufuhr und Steuerung) müssen durch den Kabeldurchgang
auf der Wasseranschlussseite des Schaltkastens zur Klemmleiste geführt werden.
REINIGUNG DES WÄRMETAUSCHERS
Schaltpläne:
- Abb. 8: PWN + Unterputzumschalter CD
- Abb. 9: PWN + Wandumschalter CDE
- Abb.10: PWN + Steuertafel TD
- Abb.11: PWN + Steuertafel TDC, zentrale Umschaltung Heizung/Kühlung.
- Abb.12: PWN + TD4T mit 1 Ventil
- Abb.13: PWN + TD4T mit 2 Ventilen
- Abb.14: PWN+MICROPROD (modelle PWN 1x und 2x)
- Abb.15: PWN+MICROPROD mit Leistungsplatine IPM ( Modelle PWN 3x)
- Abb.16: PWN+MICROPROD mit Leistungsschnittstelle KP
- Abb.17: PWN+MICRO D+KP
- Abb.18: PWN+MICRO D (Modelle PWN 1x und 2x)
- Abb.19: PWN+MICRO D+IPM (Modelle PWN 3x)
Es empfiehlt sich, vor jeder Sommersaison zu kontrollieren ob der Wärmetauscher
sauber und die Rippen nicht durch Schmutz verstopft sind. Für den Zugang zum
Wärmetauscher die Ausblasplatte (mit Bund oder rechteckigem Flansch) und das
Kondenswassersammelbecken entfernen. Nun den Tauscher mit Druckluft oder
Niederdruckdampf reinigen, ohne dabei die Rippen des Wärmetauschers zu
beschädigen.
Vor jeder Sommersaison auch kontrollieren, dass das Kondenswasser unbehindert
ablaufen kann.
Eine gute und regelmässige Wartung hilft mit,
Geld und Energie zu sparen
Die gestrichelten Anschlüsse müssen vom Installateur vorgenommen werden. Die
Gerätemotoren verfügen über 7 Drehgeschwindigkeiten.
10
ACHTUNG:
Der WURZELKONTAKT des Motors ist WEISS: Ein falscher Anschluss kann den
Motor zerstören.
Funktioniert das Gerät nicht richtig, führen Sie die in der nachstehenden Tabelle
aufgeführten Kontrollen durch, bevor Sie den Kundendienst rufen. Kann das Problem
nicht gelöst werden, wenden Sie sich an Ihren Händler oder das Kundendienstcenter.
Für die Abbildungen 8 bis 19 gilt die folgende Legende:
IL
Hauptschalter (nicht mitgeliefert)
F
Sicherung (nicht mitgeliefert)
3/7
3 der 7 verfügbaren Geschwindigkeiten
M
Motor
WH
Weiß = Wurzelkontakt
BK
Schwarz = Max. Geschw.
BU
Blau
BN
Braun
GY
Grau
GN
Grün
YE
Gelb
RD
Rot = Min. Geschw.
GNYE
Gelb/grün = Erde (PE)
SF
Zentraler Betriebswählschalter
VK
Wasserventil (230V On-Off)
VKC
Kaltwasserventil (230V ON-OFF)
VKH
Warmwasserventil (230V ON-OFF)
KP
Leistungsschnittstelle für Parallelschaltung von 4 PWN
IPM
Leistungsplatine
EXT
Externer Hilfskontakt
RHC
Fernwählschalter Heizung-Kühlung (zentral)
7
STÖRUNGSSUCHE
Störung
Ursache
Behebung
Das Gerät funktioniert nicht
1 Kein Strom
1 Strom einschalten
2 Der Schutzschalter hat
2 Kundendienst rufen
angesprochen
3 Der Einschalter steht auf 0
Das Gerät heizt oder kühlt
wenig
des Einschalters starten
1 Den Luftfilter reinigen
oder verstopft
2 In der Nähe der Luftansaugung
2 Hindernis entfernen
oder -ausblasung hat es ein
Hindernis
3 Es hat Luft im
3 Installateur rufen
Wärmeaustauscher
4 Die Fenster und Türen sind
offen
FUNKTIONSPRÜFUNG
Überprüfen, dass das Gerät mit der verlangten Neigung installiert und der
Kondenswasserablauf nicht mit Mörtelschutt usw. verstopft ist. Die Dichtheit der
Wasseranschlüsse kontrollieren.
Kontrollieren, dass die Kabelanschlüsse fest angezogen sind (Kontrolle in
spannungslosem Zustand durchführen).
Kontrollieren, dass der Wärmeaustauscher entlüftet ist. Die Spannung zum Gerät
einschalten und die Funktionsweise überprüfen.
1 Der Luftfilter ist schmutzig
3 Das Gerät durch Stellen auf I
5 Die niedrigste
Betriebsgeschwindigkeit ist
4 Fenster und/oder Türen
schliessen
5 Mittlere oder höchste
Geschwindigkeit wählen
ausgewählt
Das Gerät "leckt"
1 Das Gerät ist nicht mit der
1 Installateur rufen
richtigen Neigung installiert
2 Der Kondenswasserablauf ist 2 Installateur rufen
verstopft
UT66000455 - 00
9
È severamente vietata la riproduzione anche parziale di questo manuale / All copying, even partial, of this manual is strictly forbidden
D
PWN
4
DECLARACIÓN DE CONFORMIDAD
DATOS DIMENSIONALES
Galletti S.p.A. domiciliada en via Romagnoli 12/A, 40010 Bentivoglio (BO),
Italia, declara bajo su propia responsabilidad que las unidades canalizables
de la serie PWN, aparatos para calefacción y acondicionamiento, para
instalaciones con distribución del aire mediante canales, reúnen los
requisitos establecidos por las Directivas CEE:
73/23, 89/392, 91/368, 93/44, 93/68, 98/37 y 89/336.
FIGURA 2 - unidad PWN:
1
salida agua, ¾" hembra gas
2
entrada agua, ¾" hembra gas
3
caja eléctrica
4
prensacables alimentación eléctrica
5
descarga condensación, Ø 17 mm
Bolonia, 08/03/2005
Luigi Galletti
Presidente
FIGURA 3 filtro aire
5
INSTALACIÓN
ATENCIÓN: Instalar la unidad canalizable, el interruptor de línea (IL) y/o
los eventuales mandos a distancia en una posición fuera del alcance de
personas que se encuentren en la bañera o en la ducha.
SÍMBOLOS RELATIVOS A LA SEGURIDAD
FIGURA 4- despiece de la unidad
Leer atentamente
el presente manual
1
E
ATENCIÓN
1.
2.
3.
4.
5.
6.
7.
PELIGRO
TENSIÓN
ANTES DE EFECTUAR LA INSTALACIÓN
Leer atentamente el presente manual.
La instalación y el mantenimiento del aerotermo deben ser efectuados única y
exclusivamente por personal técnico especializado y de conformidad con lo dispuesto
por las normativas vigentes.
Al recibir el aparato verificar su estado, controlando que no haya sufrido daños durante
el transporte. Para efectuar la instalación y utilizar eventuales accesorios, se
recomienda consultar las respectivas fichas técnicas.
2
Se aconseja instalar los posibles accesorios en el equipo estándar antes de montar
este último y tomando como referencia las fichas técnicas. La aspiración y la
impulsión son de sección rectangular, con perforación prevista para fijar los
accesorios.
USO PREVISTO Y LÍMITES DE FUNCIONAMIENTO
Galletti S.p.A. declina toda eventual responsabilidad cuando el aparato ha sido
instalado por personal no especializado, se ha efectuado un uso impropio del aparato
o en condiciones no admitidas, no se ha efectuado el mantenimiento previsto en el
presente manual, no se han utilizado recambios originales. Los límites de funcionamiento
se indican al final del presente capítulo; cualquier otro uso deberá considerarse como
impropio.
Mantener el aparato en su embalaje hasta el momento de efectuar la instalación, a
fin de evitar filtraciones de polvo en su interior.
En caso de inactividad durante la temporada de invierno, descargar el agua del sistema
a fin de evitar daños ocasionados por la formación de hielo; cuando se utilicen
soluciones anti-hielo, controlar el punto de congelamiento.
No modificar el cableado eléctrico interno ni otras piezas del aparato.
9
Si se desea realizar la conexión mediante tubos flexibles (Ø 200) es necesario
instalar los accesorios PMA y PMAC que, respectivamente, pueden ser
montados en aspiración y en impulsión.
NOTA: Para realizar aspiración e impulsión con tubos flexibles (Ø 200), es
necesario utilizar un accesorio PMA (aspiración) y un accesorio PMAC
(impulsión).
-
La nueva línea de unidades canalizables PWN ha sido fabricada para climatizar
ambientes en los cuales se requiere la instalación de unidades a empotrar en techo.
Los principales componentes son los siguientes:
9
Estructura realizada en chapa de acero galvanizada de adecuado espesor,
debidamente aislada con material antirruidosidad/anticondensación, autoextintor
de Clase 1. La unidad está provista de ranuras para su fijación y de cuatro
antivibratorios en goma que impiden la transmisión de vibraciones.
9
Módulo electroventilador de único, doble o triple rotor, del tipo centrífugo
de doble aspiración, con ventiladores equilibrados estática y dinámicamente,
acoplados directamente al motor eléctrico de 7 velocidades, provisto de
condensador permanentemente conectado y protector térmico.
9
Caja cableados instalada al costado de las conexiones hidráulicas, para reducir
los espacios de instalación, con bornera de tornillo para la conexión eléctrica.
9
Módulo batería de intercambio térmico de 3, 4 ó 6 rangos, de alta eficiencia,
fabricado en tubo de cobre con aletas de aluminio fijadas a los tubos mediante
expansión mecánica. Equipado con colectores de latón y válvula de desahogo.
La batería, normalmente suministrada con las conexiones situadas en el lado
izquierdo, puede girar 180°.
9
Amplia cubeta colectora de condensación que se extiende hasta superar
las conexiones hidráulicas con posibilidad de recoger la condensación proveniente
de eventuales válvulas de regulación. Su posicionamiento descentrado reduce
notablemente los espacios requeridos para su instalación.
9
Filtro aire en fibra acrílica, clase de filtración G2, situado en la aspiración del
aire, con extracción a caja por la parte inferior.
desmontar la cuba receptora de condensación;
desmontar el módulo batería operando para ello con los tornillos de fijación (2
por cada lado + 3 en la parte superior y 2 en la parte inferior);
girar el módulo batería en 180° (sobre el eje vertical) y fijarlo nuevamente al
módulo ventilador;
situar la cuba receptora de condensación de manera que la parte sobresaliente
quede situada debajo de las conexiones hidráulicas y fijarla.
FIJACIÓN DE LA UNIDAD
Instalar los antivibratorios suministrados adjuntos en las cuatro ranuras elegidas para
efectuar la fijación.
Fijar la unidad base al techo o a la pared utilizando al menos cuatro de las ocho ranuras
disponibles.
9
Se aconseja utilizar barras roscadas 8MA y tacos adecuados para el peso de
la máquina misma; preparar el posicionamiento de la máquina utilizando tres
pernos 8MA (dos en la parte inferior y uno en la parte superior tal como se indica
en FIGURA 6) y dos arandelas para cada barra.
Antes de apretar la contratuerca se deberá regular el cierre de la tuerca principal
a fin de conferir al aparato una inclinación adecuada para facilitar la descarga
de la condensación (FIGURA 7).
Una inclinación adecuada se obtiene bajando la aspiración respecto de la
impulsión, hasta obtener un desnivel de aproximadamente 10 mm entre ambos
extremos. Efectuar las conexiones hidráulicas a la batería de intercambio
térmico y, en caso de funcionamiento de refrigeración, a la descarga de
condensación. Utilizar una de las dos descargas de la cuba que se ven fuera
de los dos costados de la unidad.
9
Para conectar la unidad a la línea de descarga condensación, utilizar tubo flexible
de goma fijándolo al tubo de descarga elegido (Ø 3/8'') mediante una abrazadera
metálica (utilizar la descarga que se encuentra en el lado de las conexiones
hidráulicas).
Para favorecer el drenaje de la condensación inclinar la tubería de descarga
en la medida de al menos 30 mm/m hacia abajo, evitando que en su trayecto
se formen curvas o estrangulamientos.
- Ejemplo de instalación
Caja motorizada de toma de aire exterior
Plenum silenciador de impulsión/aspiración
Unidad canalizable
Módulo batería adicional para funcionamiento con agua caliente
Plenum de impulsión de aire aislado con collares Ø 200
UT66000455 - 00
Para realizar la conexión mediante canales de sección rectangular es
necesario utilizar los accesorios RD y RDC los que, respectivamente, pueden
ser montados en la aspiración y en la impulsión.
NOTA: Para realizar tanto la aspiración como la impulsión con canales, se
requieren un accesorio RD (aspiración) y un accesorio RDC (impulsión).
-
DESCRIPCIÓN DEL APARATO
FIGURA 1
SM
SIL
PWN
MDF
PMAC
9
Es posible orientar las conexiones del intercambiador hacia el lado opuesto
operando de la siguiente forma (FIGURA 5):
Fluido termovector: agua
Temperatura agua: + 5°C / +95°C
Temperatura aire: -20°C / +40°C
Tensión de alimentación: 230 V+/-10 %
Máx. presión fluido primario 10 bares
3
cuba de recepción condensación
módulo batería de intercambio térmico
caja eléctrica
bornera de conexión
antivibratorio
motor eléctrico de 7 velocidades
unidad motoventiladora
10
È severamente vietata la riproduzione anche parziale di questo manuale / All copying, even partial, of this manual is strictly forbidden
Algunas normas a respetar
9
Efectuar la purga de aire del intercambiador con bombas detenidas, operando
con las válvulas de desahogo situadas al costado de las conexiones de la batería
misma.
9
Los conductos, en particular aquéllos de impulsión, deberán ser aislados con
material anticondensación.
9
Instalar en proximidad del aparato un panel de inspección para las operaciones
de mantenimiento y limpieza.
9
Instalar el panel de mando en la pared; elegir una posición de fácil acceso para
la programación de las funciones y, si está prevista, eficaz para efectuar la
medición de la temperatura. Evítense posiciones expuestas directamente a la
luz solar o a corrientes de aire caliente o frío, así como interponer obstáculos
que impidan la correcta medición de la temperatura.
6
CONEXIONES ELÉCTRICAS
Efectuar las conexiones eléctricas interrumpiendo previamente la tensión, de
conformidad con lo establecido por las normativas de seguridad vigentes.
El cableado deberá ser efectuado única y exclusivamente por personal especializado.
Para cada unidad termoventiladora instalar en la red de alimentación un
interruptor (IL) con contactos de apertura con distancia mínima de 3 mm y un
adecuado fusible (F) de protección.
Los consumos eléctricos aparecen entre los datos de la placa presente en la unidad.
Durante la instalación respetar rigurosamente el esquema eléctrico relativo a la
combinación unidad/panel de mando.
8
MANTENIMIENTO
Las unidades canalizables PWN requieren operaciones de mantenimiento que se
limitan a la limpieza periódica del filtro aire y del intercambiador de calor, así como
al control de eficiencia de la descarga de condensación.
El mantenimiento puede ser ejecutado sólo por personal especializado. Es necesario
prestar particular atención durante la ejecución de las operaciones de mantenimiento:
el contacto accidental con algunas partes metálicas puede provocar heridas; es
indispensable operar con guantes de protección.
Para cada arranque sucesivo a prolongado período de inactividad se debe controlar
la ausencia de aire en el intercambiador de calor.
El motor no requiere mantenimiento debido a que está provisto de cojinetes
autolubricantes. Por motivos de seguridad, antes de ejecutar cualquier
operación de mantenimiento o limpieza se debe apagar el aparato y desconectar
la alimentación eléctrica mediante el respectivo interruptor de línea.
9.
LIMPIEZA DEL FILTRO AIRE
Interrumpir la tensión de la unidad disponiendo el interruptor de línea en 0 (OFF).
-
Acceder al aparato a través del panel de inspección y extraer el filtro de aire de
la manera ilustrada en FIGURA 20.
En cambio, si el filtro se encuentra en el interior de la rejilla de aspiración,
desmontar esta última y realizar las operaciones que a continuación se indican.
-
Para efectuar las conexiones eléctricas es necesario desmontar el panel de cierre
de la caja eléctrica (Figura 4) a fin de obtener acceso a la bornera.
Limpiar el filtro con agua tibia o, en el caso de polvos secos, con aire comprimido.
Reinstalar el filtro esperando previamente que se seque.
Los cables eléctricos (de alimentación y mando) deben ser introducidos en la bornera
a través del prensacable que se encuentra al costado de la caja eléctrica, por el lado
de las conexiones hidráulicas.
LIMPIEZA DE LA BATERÍA DE INTERCAMBIO TÉRMICO
Esquemas eléctricos:
Fig. 8: PWN + conmutador a empotrar CD
Fig. 9: PWN + conmutador de pared CDE
Fig.10: PWN + panel de mando TD
Fig.11: PWN + panel de mando TDC, inversión calefacción/refrigeración
centralizada
Fig.12: PWN + TD4T con una válvula
Fig.13: PWN + TD4T con dos válvulas
Fig.14: PWN+MICROPROD (modelos PWN 1x y 2x)
Fig.15: PWN+MICROPROD con tarjeta de potencia IPM (modelos PWN 3x)
Fig.16: PWN+MICROPROD con interfaz de potencia KP
Fig.17: PWN+MICRO D+KP
Fig.18: PWN+MICRO D (modelos PWN 1x y 2x)
Fig.19: PWN+MICRO D+IPM (modelos PWN 3x)
Los enlaces indicados con línea discontinua deben ser efectuados por el instalador.
Los motores de las unidades cuentan con siete velocidades de rotación.
ATENCIÓN
El cable COMÚN del motor es aquel de color BLANCO; su errónea conexión
provoca daños irreparables al motor.
Con referencia a las figuras entre 8 y 19, la leyenda es la siguiente:
IL
Interruptor de línea (no suministrado)
F
F Fusible de protección (no suministrado)
3/7
3 velocidades sobre las 7 disponibles
M
Motor:
WH
Blanco =común
BK
Negro = velocidad máxima
BU
Azul
BN
Marrón
GY
Gris
GN
Verde
YE
Amarillo
RD
Rojo = velocidad mínima
GNYE
Amarillo/verde = tierra (PE)
SF
Selector de funcionamiento centralizado
VK
Válvula agua (230 V ON-OFF)
VKC
Válvula agua fría (230 V ON-OFF)
VKH
Válvula agua caliente (230 V ON-OFF)
KP
Interfaz de potencia para realizar la conexión en paralelo 4 PWN
IPM
Tarjeta de potencia
EXT
Contacto auxiliar exterior
RHC
Selector remoto calefacción/refrigeración (centralizado)
7
Es conveniente controlar el estado del intercambiador antes de cada temporada
estival, verificando que las aletas no estén obstruidas por presencia de suciedad.
Para obtener acceso a la batería de intercambio térmico es necesario desmontar el
panel de impulsión (tanto si es de collares como de brida rectangular) y también la
cuba receptora de condensación. Una vez alcanzada la batería, limpiarla con aire
comprimido o con vapor a baja presión, cuidando no dañar las aletas del intercambiador.
Antes de comenzar cada temporada estival controlar que la descarga de condensación
se efectúe normalmente.
Un mantenimiento adecuado y periódico se traduce
en ahorro energético y económico
10
LOCALIZACIÓN DE CAUSAS DE AVERÍA
Si el aparato no funciona correctamente, antes de solicitar la intervención del servicio
de asistencia, efectuar los controles indicados en la tabla que a continuación se
expone. Si no se logra resolver el problema, contactarse con el distribuidor o con el
centro de asistencia más próximo.
Problema
Causa
Solución
La unidad no funciona
1 Falta corriente
1 Conectar nuevamente la
2 Ha intervenido el interruptor
de seguridad
3 El interruptor de arranque se
encuentra en 0
La unidad calienta o refrigera
poco
obstruido
servicio de asistencia
3 Disponer el interruptor en I
para activar la máquina
1 Limpiar el filtro de aire
2 Presencia de un obstáculo en 2 Remover el obstáculo
proximidad de la aspiración o
de la salida del aire
3 Requerir la intervención del
instalador
3 Presencia de un obstáculo en 4 Cerrar las puertas y/o
el interior del intercambiador
de calor
4 Las ventanas y/o puertas
están abiertas
5 Se encuentra seleccionada la
CONTROL DE MONTAJE Y FUNCIONAMIENTO
Controlar que el aparato haya sido instalado garantizando la inclinación requerida.
Verificar que la descarga de condensación no esté obstruida (restos de construcción,
etc.). Controlar la estanqueidad de las conexiones hidráulicas.
Controlar que los cableados eléctricos estén firmemente fijados (efectuar este control
en ausencia de tensión).
Controlar que el aire haya sido eliminado en el intercambiador de calor. Dar tensión
al aparato y controlar su correcto funcionamiento.
1 El filtro de aire está sucio u
corriente
2 Requerir la intervención del
velocidad mínima de
funcionamiento
La unidad "pierde" agua
ventanas
5 Seleccionar la velocidad
media o máxima
1 Requerir la intervención del
instalador
2 Requerir la intervención del
instalador
1 El aparato no ha sido
instalado con la inclinación
prevista
2 La descarga condensación
está obstruida
UT66000455 - 00
11
È severamente vietata la riproduzione anche parziale di questo manuale / All copying, even partial, of this manual is strictly forbidden
PWN
4
DECLARAÇÃO DE CONFORMIDADE
A Galletti S.p.A., com sede na via Romagnoli 12/A, 40010 Bentivoglio (BO)
- Itália, declara sob a própria responsabilidade que as unidades canalizáveis
da série PWN, aparelhos de ar por canais, estão em conformidade com as
recomendações das Directivas CEE:
73/23, 89/392, 91/368, 93/44, 93/68, 98/37 e 89/336.
Bolonha, 08/03/2005
Luigi Galletti
Presidente
FIGURA 2 unidades PWN:
1
saída da água, 3/4" fêmea gás
2
entrada da água, 3/4" fêmea gás
3
caixa eléctrica
4
prendedor de cabos da alimentação eléctrica
5
descarga da condensação, Ø 17 mm
FIGURA 3 filtro de ar
5
1
ATENÇÃO
FIGURA 4 - desenho detalhado da unidade
1.
recipiente de recolhimento da condensação
2.
módulo da bateria de troca térmica
3.
caixa eléctrica
4.
bornes de conexão
5.
dispositivo anti-vibratório
6.
motor eléctrico com 7 velocidades
7.
grupo motoventilador
PERIGO TENSÃO
ANTES DE INICIAR A INSTALAÇÃO
Ler atentamente este manual.
A instalação e a manutenção do aparelho devem ser efectuados exclusivamente por
técnicos qualificados para este tipo de máquina, conforme as normas vigentes.
Ao receber o aparelho verificar o seu estado, certificando-se de que não tenha sofrido
danos durante o transporte. Para a instalação e o uso de acessórios consultar as
respectivas fichas técnicas.
2
Recomenda-se instalar os eventuais acessórios no aparelho standard antes de
posicioná-lo, consultando as fichas técnicas. A aspiração e a descarga têm secção
rectangular, com furos prontos para a fixação dos acessórios disponíveis.
USO PREVISTO E LIMITES DE FUNCIONAMENTO
A Galletti S.p.A. não se responsabiliza caso o aparelho seja instalado por pessoas
não qualificadas, seja utilizado de maneira imprópria ou em condições não admitidas,
se não for feita a manutenção prevista por este manual e se não forem utilizadas
peças de reposição originais. Os limites de funcionamento são apresentados no final
deste capítulo; qualquer uso diferente dos descritos é considerado impróprio.
Conservar o aparelho na embalagem até o momento da instalação, para evitar que
a poeira se infiltre nele.
Em caso de parada sazonal descarregar a água da instalação para evitar danos
provocados pela formação de gelo; se forem utilizadas soluções anti-gelo, verificar
o ponto de congelamento.
Não modificar as ligações dos cabos eléctricos internos ou outras peças do aparelho.
9
Para fazer a conexão com canais de secção rectangular, sugerimos usar o
acessório RD ou RDC, que podem ser montados respectivamente na aspiração
ou na descarga.
NOTA: para fazer a aspiração, assim como a descarga por canais são
necessários 1 acessório RD (aspiração) e 1 acessório RDC (descarga).
9
Caso se deseje realizar a conexão com mangueiras (Ø 200), é necessário
utilizar os acessórios PMA ou PMAC, que podem ser montados respectivamente
na aspiração ou na descarga.
NOTA: para fazer a aspiração, assim como a descarga com as mangueiras são
necessários 1 acessório PMA (aspiração) e 1 acessório PMAC (descarga).
É possível direccionar as conexões do trocador do lado oposto, tal como segue
(FIGURA 5):
Fluido termovector: água
Temperatura da água: + 5°C / +95°C
Temperatura do ar: -20°C / + 40°C
Tensão de alimentação: 230 V+/-10 %
Pressão máx. do fluido primário 10 bars
3
INSTALAÇÃO
ATENÇÃO: Instalar a unidade canalizável, o interruptor de linha (IL) e/ou
os eventuais comandos à distância numa posição que não possa ser alcançada
por pessoas que estejam na banheira ou no box do chuveiro.
SÍMBOLOS DE SEGURANÇA
Ler o manual
atentamente
DADOS DAS DIMENSÕES
- desmontar o recipiente de recolhimento da condensação.
- desmontar o módulo da bateria, soltando os parafusos de fixação (2 de cada lado
+ 3 na parte superior e 2 na parte inferior).
- rodar em 180º o módulo da bateria (no eixo vertical) e fixá-la novamente ao módulo
ventilador.
- deslocar o recipiente de recolhimento da condensação de modo que a parte saliente
se prolongue abaixo das conexões hidráulicas e fixá-lo.
DESCRIÇÃO DO APARELHO
A gama de unidades canalizáveis PWN foi realizada para a climatização de ambientes
que necessitem de instalação de unidades embutidas no tecto. Os principais
componentes são os seguintes:
9
Estrutura feita de chapa de aço zincado de espessura adequada, devidamente
revestido com material anti-ruído/anti-condensação, ignífugo de Classe 1. A
unidade é provida de orifícios para a fixação e de 4 dispositivos anti-vibratórios
de borracha para evitar a transmissão de vibrações.
9
Módulo electroventilador com rotor simples, duplo ou triplo, de tipo centrífugo
com dupla aspiração, com ventoinhas balanceadas estaticamente e
dinamicamente, acopladas directamente no motor eléctrico com 7 velocidades,
dotado de condensador permanentemente activado e protector térmico.
9
Caixa de cabos situada ao lado das conexões hidráulicas para limitar os
espaços de instalação e quadro de bornes com parafusos para a ligação
eléctrica.
9
Módulo da bateria de troca térmica: com 3, 4 ou 6 fileiras, de alta eficiência,
em tubo de cobre e aletas de alumínio fixadas aos tubos por expansão
mecânica. Possuem colectores de latão e válvula de respiro. A bateria,
normalmente fornecida com as conexões à esquerda, pode ser rodada em 180°.
9
Amplo recipiente de recolhimento da condensação, que se estende até as
conexões hidráulicas com possibilidade de recolhimento da condensação
proveniente de eventuais válvulas de regulação; o posicionamento
descentralizado reduz muito os espaços de instalação.
9
Filtro de ar de fibra acrílica, classe de filtração G2, situado na aspiração do
ar, extraível como uma gaveta em baixo.
FIXAÇÃO da unidade
Inserir os dispositivos anti-vibratórios fornecidos com o aparelho nos 4 orifícios
identificados para a fixação no tecto.
Fixar a unidade básica no tecto ou na parede, usando pelo menos 4 dos 8 orifícios
existentes;
9
Recomenda-se usar barras filetadas de 8MA, buchas adequadas ao peso da
máquina e preparar o posicionamento da máquina usando 3 parafusos 8MA (2
na parte inferior, 1 na parte superior, como indicado na FIGURA 6) e duas
arruelas para cada barra.
Antes de apertar a contraporca, regular o aperto da porca principal, de modo
que o aparelho fique com a inclinação correcta, para facilitar a descarga da
condensação (FIGURA 7).
A pendência correcta pode ser obtida inclinando a aspiração para baixo em
relação à descarga, até obter um desnível de cerca de 10 mm entre as duas
extremidades. Fazer as conexões hidráulicas à bateria de troca térmica e, no
caso de funcionamento em fase de refrigeração, à descarga da condensação.
Usar uma das duas descargas do recipiente que podem ser vistas no lado de
fora das laterais da unidade.
9
Para conectar a unidade à linha de descarga da condensação usar uma
mangueira de borracha e fixá-la ao tubo de descarga previamente escolhido
(Ø 3/8'') colocando uma braçadeira de metal (utilizar a descarga que se encontra
no lado das conexões hidráulicas).
Para facilitar a drenagem da condensação, inclinar a tubulação de descarga pelo
menos 30 mm/m para baixo, evitando que no percurso se formem dobras ou
estrangulamentos.
FIGURA 1- exemplo de instalação
SM
Comporta motorizada de tomada de ar externo
SIL
Plenum silenciador para descarga e aspiração
PWN
Unidade analisável
MDF
Módulo da bateria adicional para funcionamento com água quente
PMAC Plenum de descarga do ar revestido com luvas Ø 200
UT66000455 - 00
12
È severamente vietata la riproduzione anche parziale di questo manuale / All copying, even partial, of this manual is strictly forbidden
Algumas Regras a seguir
9
Expurgar o ar do trocador com as bombas paradas, através das válvulas de
respiro presentes do lado das conexões da própria bateria.
9
As canalizações, especialmente a de descarga, deverão ser revestidas por
material anti-condensante.
9
Providenciar um painel de inspecção para as operações de manutenção e
limpeza próximo ao aparelho.
9
Instalar o painel de comando na parede; escolher uma posição de fácil acesso
para poder definir as funções e eficaz para a medida da temperatura (se
prevista). Evitar posições expostas directamente à radiação solar, posições
sujeitas a correntes directas de ar quente ou frio e evitar colocar obstáculos
que impeçam a medição correcta da temperatura.
6
LIGAÇÕES ELÉCTRICAS
Fazer as ligações eléctricas com a tensão desligada, de acordo com as normas de
segurança vigentes.
A ligação dos cabos deverá ser feita exclusivamente por técnicos qualificados.
Para cada unidade termoventiladora preparar um interruptor (IL) na rede de
alimentação, com contactos de abertura com distância de pelo menos 3 mm
e um fusível (F) de protecção adequado.
As absorções eléctricas são apresentadas na etiqueta dos dados técnicos aplicada
na unidade. Durante a instalação seguir cuidadosamente o esquema eléctrico relativo
à associação unidade - painel de comando.
8
MANUTENÇÃO
As unidades canalizáveis PWN exigem operações de manutenção limitadas à limpeza
periódica do filtro de ar, do trocador de calor e ao controle da eficiência da descarga
da condensação.
A manutenção pode ser feita somente por técnicos especializados. É necessário
prestar atenção durante as operações de manutenção: o contacto acidental com
algumas partes metálicas pode provocar feridas; usar luvas de protecção.
Sempre que o aparelho for ligado após uma pausa prolongada, certificar-se de que
não haja ar no trocador de calor.
O motor não precisa de manutenção, pois possui mancais auto-lubrificadores.
Por motivos de segurança, antes de executar qualquer operação de manutenção
ou limpeza desligar o aparelho e cortar a tensão através do interruptor de
linha.
9.
LIMPEZA DO FILTRO DE AR
Cortar a tensão da unidade, colocando o interruptor de linha em 0 (OFF).
- Acessar o aparelho através do painel de inspecção e retirar o filtro de ar, como
indicado na FIGURA 20.
- Se o filtro estiver dentro da grade de aspiração, por sua vez, retirar a grade e
realizar as operações descritas a seguir.
Para fazer as ligações eléctricas é preciso desmontar o painel de fecho da caixa
eléctrica (figura 4) para ter acesso ao quadro de bornes.
Limpar o filtro com água morna ou, no caso de pó seco, com ar comprimido.
Recolocar o filtro depois de tê-lo deixado secar.
Os cabos eléctricos (alimentação e comando) devem ser levados ao quadro de bornes
através do prendedor de cabos que se encontra na lateral da caixa eléctrica, do lado
das conexões hidráulicas.
LIMPEZA DA BATERIA DE TROCA TÉRMICA
Esquemas eléctricos:
- fig. 8 PWN + comutador de embutir CD
- fig. 9: PWN + comutador de parede CDE
- fig.10: PWN + painel de comando TD
- fig.11: PWN + painel de comando TDC, inversão aquecimento/refrigeração
centralizada.
- fig.12: PWN + TD4T com 1 válvula
- fig.13: PWN + TD4T com 2 válvulas
- fig.14: PWN+MICROPROD (modelos PWN 1x e 2x)
- fig.15: PWN+MICROPROD com placa de potência IPM (modelos PWN 3x)
- fig.16: PWN+MICROPROD com interface de potência KP
- fig.17: PWN+MICRO D+KP
- fig.18: PWN+MICRO D (modelos PWN 1x e 2x)
- fig.19: PWN+MICRO D+IPM (modelos PWN 3x)
As ligações tracejadas são a cargo do instalador. Os motores das unidades possuem
7 velocidades de rotação.
Recomenda-se verificar o estado do trocador antes do início de cada verão,
verificando se as aletas não estão obstruídas por impurezas. Para ter acesso à
bateria de troca térmica é preciso remover o painel de descarga (seja ele com
braçadeiras ou flange rectangular), assim como o recipiente de recolhimento da
condensação. Ao chegar à bateria, limpá-la com ar comprimido ou com vapor de
baixa pressão, sem danificar as aletas do trocador.
Antes de começar a usar o aparelho em cada verão verificar se a descarga da
condensação está funcionar regularmente.
Uma manutenção adequada e periódica se traduz
em economia de energia e de gastos
10
BUSCA DOS PROBLEMAS
Se o aparelho não funciona correctamente, antes de pedir a intervenção da
assistência fazer os controlos apresentados na tabela abaixo. Se o problema não
puder ser resolvido, consultar o revendedor ou o centro de assistência mais próximo.
ATENÇÃO:
O cabo COMUM do motor é aquele de cor BRANCA: se ele for ligado de maneira
incorrecta pode provocar danos irreparáveis no motor.
As legendas relativas às figuras de 8 a 19 são as seguintes:
IL
Interruptor de linha (não fornecido)
F
Fusível de protecção (não fornecido)
3/7
3 velocidades em relação às 7 disponíveis
M
Motor
WH
Branco = comum
BK
Preto = velocidade máxima
BU
Azul
BN
Marrom
GY
Cinza
GN
Verde
YE
Amarelo
RD
Vermelho = velocidade mínima
GNYE
Amarelo/verde = terra (PE)
SF
Selector de funcionamento centralizado
VK
Válvula da água (230V ON-OFF)
VKC
Válvula da água fria (230V ON-OFF)
VKH
Válvula da água quente (230V ON-OFF)
KP
Interface de potência para a conexão em paralelo de 4 PWN
IPM
Placa de potência
EXT
Contacto auxiliar externo
RHC
Selector de aquecimento-refrigeração remoto (centralizado)
7
Problema
Causa
Solução
A unidade não funciona
1 Falta corrente
1 Fornecer corrente
2 Foi accionado o salva-vidas
2 Pedir a intervenção do serviço
3 O interruptor de partida está
3 Ligar a máquina colocando o
de assistência
em 0.
A unidade aquece ou refrigera
pouco
interruptor em I
1 Limpar o filtro de ar
obstruído
2 Há um obstáculo próximo à
2 Remover o obstáculo
aspiração ou à saída do ar
3 Existe ar dentro do trocador
de calor
4 As janelas e as portas estão
3 Pedir a intervenção do
instalador
4 Fechar portas e/ou janelas
abertas
5 Foi seleccionada a
velocidade mínima de
VERIFICAÇÃO DO FUNCIONAMENTO
Verificar se o aparelho está instalado de modo a garantir a inclinação necessária.
Verificar se a descarga da condensação não está obstruída (por depósitos de calcário,
etc.). Certificar-se de que as conexões hidráulicas estejam vedadas.
Certificar-se de que os cabos eléctricos estejam bem apertados (fazer este controle
com a tensão desligada).
Certificar-se de que tenha sido eliminado o ar do trocado de calor. Fornecer tensão
ao aparelho e verificar o seu funcionamento.
1 O filtro de ar está sujo ou
5 Seleccionar a velocidade
média ou máxima
funcionamento
A unidade está a "vazar" água
1 O aparelho não está
instalado com a inclinação
1 Pedir a intervenção do
instalador
correcta
2 A descarga da condensação
está obstruída
2 Pedir a intervenção do
instalador
UT66000455 - 00
13
È severamente vietata la riproduzione anche parziale di questo manuale / All copying, even partial, of this manual is strictly forbidden
P
PWN
4
VERKLARING VAN OVEREENSTEMMING
Galletti S.p.A., met vestiging in via Romagnoli 12/A, 40010 Bentivoglio (BO)
- Italië, verklaart op eigen verantwoordelijkheid dat de kanaliseerbare units
van de serie PWN, apparaten voor verwarming en airconditioning voor
installaties waarin de luchtverspreiding via kanalen plaatsvindt, voldoen aan
de voorschriften van de EEG-Richtlijnen:
73/23, 89/392, 91/368, 93/44, 93/68, 98/37 en 89/336.
Bologna, 08/03/2005
Luigi Galletti
AFBEELDING 2 PWN-units:
1
wateruitlaat, 3/4" vrouwtje gas
2
waterinlaat, 3/4" vrouwtje gas
3
elektriciteitskastje
4
kabelklem elektrische voeding
5
condensafvoer, Ø 17 mm
AFBEELDING 3 luchtfilter
Voorzitter
5
1
LET OP
AFBEELDING 4 - explosietekening van de unit
1.
condensopvangbak
2.
aggregaatmodule warmtewisseling
3.
elektriciteitskastje
4.
klemmenbord voor de aansluiting
5.
antitrilelement
6.
elektrische motor met 7 snelheiden
7.
gemotoriseerde ventilatiegroep
GEVAAR
SPANNING
VOORDAT U MET DE INSTALLATIE BEGINT
Lees deze handleiding met aandacht.
De installatie en het onderhoud van het apparaat moeten uitsluitend uitgevoerd worden
door technisch personeel, dat gekwalificeerd is voor dit type machine, en moeten
in overeenstemming zijn met de heersende normen.
Wanneer u het apparaat in ontvangst neemt, controleert u de staat ervan en kijkt u
na of het tijdens het transport geen schade opgelopen heeft. Voor de installatie en
het gebruik van eventuele accessoires, wordt verwezen naar de betreffende
technische kaarten.
2
NL
Er wordt aangeraden de eventuele accessoires op het standaardapparaat aan te
sluiten, voordat u dit in positie brengt, onder raadpleging van de technische kaarten.
De aanzuiging en de afgifte hebben een rechthoekige doorsnede, met een reeds
aangebrachte boring voor de bevestiging van de beschikbare accessoires.
9
Om de aansluiting via kanalen met een rechthoekige doorsnede tot stand
te brengen, wordt gesuggereerd gebruik te maken van de RD- of RDCaccessoires, die respectievelijk in de aanzuiging of in de afgifte gemonteerd
kunnen worden.
OPMERKING: om zowel de aanzuiging als de afgifte met kanalen tot stand te
brengen, heeft u 1 RD-accessoire (aanzuiging) en 1 RDC-accessoire (afgifte)
nodig.
9
Indien u de aansluiting met buigzame leidingen (Ø 200) tot stand wilt
brengen, heeft u de PMA- of PMAC-accessoires nodig, die respectievelijk in
de aanzuiging of in de afgifte gemonteerd kunnen worden.
OPMERKING: om zowel de aanzuiging als de afgifte met buigzame leidingen
(Ø 200) tot stand te brengen, heeft u 1 PMA-acessoire (aanzuiging) en 1 PMACaccessoire (afgifte) nodig.
BEDOELD GEBRUIK EN WERKLIMIETEN
Galletti S.p.A. stelt zich niet aansprakelijk wanneer het apparaat geïnstalleerd wordt
door niet gekwalificeerd personeel, wanneer het op oneigenlijke wijze gebruikt wordt,
of onder ontoelaatbare omstandigheden, wanneer het in deze handleiding voorgeschreven
onderhoud niet wordt uitgevoerd en wanneer geen originele reserveonderdelen
gebruikt worden. De werklimieten worden aan het einde van dit hoofdstuk vermeld.
Ieder ander gebruik wordt als oneigenlijk beschouwd.
Bewaar het apparaat in de verpakking tot het moment van installatie, zodat
stofinfiltratie vermeden wordt.
Wanneer het apparaat in de winter niet gebruikt wordt, voert u het water af uit de
installatie om schade door ijsvorming te voorkomen. Indien antivriesoplossingen
gebruikt worden, controleert u het vriespunt.
Wijzig niet de interne elektrische bedradingen of andere onderdelen van het apparaat.
Het is mogelijk om de aansluitingen van de warmtewisselaar op de tegengestelde zijde
te richten, door als volgt te werk te gaan (AFBEELDING 5):
Thermische vectorvloeistof : water
Watertemperatuur: + 5°C / +95°C
Luchttemperatuur: -20°C / + 40°C
Voedingsspanning: 230 V+/-10 %
Max. druk primaire vloeistof 10 bar
3
INSTALLATIE
LET OP: Installeer de kanaliseerbare unit, de lijnschakelaar (IL), en/of de
eventuele afstandsbedieningen in een positie buiten het bereik van degene
die zich in het bad of onder de douche bevindt.
VEILIGHEIDSSYMBOLEN
Lees de handleiding met
aandacht
AFMETINGEN
- Demonteer de condensopvangbak.
- Demonteer de aggregaatmodule door de bevestigingsschroeven los te draaien (2
aan iedere zijkant + 3 op de bovenkant en 2 op de onderkant)
- Draai de aggregaatmodule 180° (rond de verticale as) en bevestig hem opnieuw
op de ventilatormodule
- Verplaats de condensopvangbak zo, dat het naar buiten stekende deel onder de
hydraulische aansluitingen verlengd wordt, en zet hem vast.
BESCHRIJVING VAN HET APPARAAT
Het gamma van kanaliseerbare PWN-units is ontworpen voor de klimaatregeling van
ruimtes waarin de installatie van in het plafond ingebouwde units vereist wordt. De
voornaamste componenten zijn de volgende:
9
Structuur uitgevoerd in verzinkt staalplaat van passende dikte, naar behoren
geïsoleerd met geluid- en condenswerend materiaal, zelfblussend in Klasse 1.
De unit is voorzien van bevestigingssleuven en 4 rubber antitrilelementen om
de overdracht van trillingen te voorkomen.
9
Elektrische ventilatormodule met enkele, dubbele of driedubbele rotor, type
centrifuge met dubbele aanzuiging, met statisch en dynamisch gebalanceerde
ventilator, rechtstreeks aangesloten op de elektrische motor met 7 snelheden,
uitgerust met een permanent ingeschakelde condensator en thermische
beveiliging.
9
Bedradingskastje gesitueerd op de zijde van de hydraulische aansluitingen,
om de installatieruimte te reduceren, met klemmenbord met schroeven voor
de elektrische aansluiting.
9
Aggregaatmodule voor de warmtewisseling: met 3, 4 of 6 rijen, hoge
efficiëntie, van koperbuis en met aluminiumvinnen, die door mechanische
uitzetting op de buizen vastgezet worden. Voorzien van messing verzamelleidingen
en ontluchtingsklep. Het aggregaat, dat doorgaans met aansluitingen aan de
linkerzijde geleverd wordt, kan 180° gedraaid worden.
9
Ruime bak voor de condensopvang die voorbij de hydraulische aansluitingen
verlengd wordt en de mogelijkheid heeft om de condens op te vangen die van
eventuele regelkleppen afkomstig is. De gedecentreerde opstelling reduceert
de installatieruimte aanzienlijk.
9
Luchtfilter van acrylvezel, filterklasse G2, gesitueerd op de luchtaanzuiging,
als 'n lade van onder uittrekbaar.
BEVESTIGING van de unit
Plaats de bijgeleverde antitrilelementen in de 4 sleuven die voor de plafondbevestiging
bedoeld zijn.
Bevestig de basisunit aan het plafond of aan de muur met gebruik van minstens 4
van de 8 aanwezige sleuven;
9
Er wordt aangeraden om schroefdraadstangen 8MA te gebruiken, en pluggen
die geschikt zijn voor het gewicht van het apparaat, en om het apparaat in positie
te brengen met gebruik van 3 bouten 8MA (2 aan de onderkant, 1 op de
bovenkant, zoals AFBEELDING 6 toont) en twee ringetjes voor elke stang.
Voordat u de contramoer spant, stelt u de sluiting van de hoofdmoer zo in, dat
er het apparaat een juiste helling krijgt, waardoor de condensafvoer wordt
bevorderd (AFBEELDING 7).
De juiste helling wordt verkregen door de aanzuiging omlaag te plaatsen ten
opzichte van de afgifte, tot een niveauverschil van ongeveer 10 mm tussen
de beide uiteinden verkregen wordt. Breng de hydraulische aansluitingen op de
warmtewisselaar tot stand en ook op de condensafvoer, indien het apparaat
in de koelfase werkt.
Gebruik één van de twee afvoeren van de bak, die u aan de buitenkant van
de zijkanten van de unit ziet.
9
Om de unit op de condensafvoer aan te sluiten, gebruikt u een buigzame leiding
van rubber en bevestigt u deze aan de gekozen afvoerleiding (Ø 3/8'') met behulp
van een metalen kabelklem (gebruik de afvoer die zich aan de zijde van de
hydraulische aansluitingen bevindt).
Om de condensafvoer te bevorderen, richt u de afvoerleiding minstens 30mm/
m omlaag, waarbij u lussen of knikken in het traject vermijdt.
AFBEELDING 1- installatievoorbeeld
SM
Gemotoriseerde schuifklep voor de opname van externe lucht
SIL
Stuwkamer met geluiddemping voor afgifte/aanzuiging
PWN
Kanaliseerbare unit
MDF
Bijkomende aggregaatmodule voor de werking met warm water
PMAC Stuwkamer voor luchtafgifte, geïsoleerd met kragen Ø 200
UT66000455 - 00
14
È severamente vietata la riproduzione anche parziale di questo manuale / All copying, even partial, of this manual is strictly forbidden
Enkele regels die in acht genomen moeten worden
9
Voer de ontluchting van de warmtewisselaar uit wanneer de pompen stil
staan, door in te grijpen op de ontluchtingskleppen die naast de
aansluitpunten van het aggregaat zelf gesitueerd zijn.
9
De kanaliseringen, met name die van de afgifte, moeten geïsoleerd worden
met condenswerend materiaal.
9
Zorg voor een inspectiepaneel in de nabijheid van het apparaat voor het
onderhoud en de reiniging.
9
Installeer het bedieningspaneel op de muur. Kies een positie die gemakkelijk
toegankelijk is voor de instelling van de functies en die zonodig ook doeltreffend
is voor de meting van de temperatuur. Vermijd posities waarin rechtstreekse
blootstelling aan het zonlicht of aan warme of koude luchtstromen plaatsvindt
en verwijder obstakels die de correcte meting van de temperatuur belemmeren.
6
ELEKTRISCHE AANSLUITINGEN
Breng de elektrische aansluitingen tot stand wanneer de spanning afwezig is, en aan
de hand van de heersende veiligheidsvoorschriften.
De bekabeling mag uitsluitend door gekwalificeerd personeel tot stand gebracht
worden.
Installeer voor iedere thermoventilatie-unit een schakelaar (IL) op het
voedingsnet, waarvan de openingscontacten een afstand van minstens 3 mm
hebben, en een zekering (F) die een geschikte beveiliging biedt.
De elektrische absorptie staat op het etiket met de gegevens dat op de unit
aangebracht is. Volg tijdens de installatie strikt het elektrische schema dat betrekking
heeft op de combinatie unit-bedieningspaneel.
Om de elektrische aansluitingen tot stand te brengen, is het nodig het paneel te
demonteren, waarmee het elektrische kastje afgesloten wordt (afbeelding 4), om
toegang tot het klemmenbord te verkrijgen.
De elektrische kabels (voeding en bediening) moeten het klemmenbord ingevoerd
worden via de kabelklem die op de zijkant van het elektrische kastje gesitueerd is,
aan de zijde van de hydraulische aansluitpunten.
Elektrische schema's:
- afb. 8: PWN + ingebouwde omschakelaar CD
- afb. 9: PWN + omschakelaar op de muur CDE
- afb.10: PWN + bedieningspaneel TD
- afb.11: PWN + bedieningspaneel TDC, gecentraliseerde omkering verwarming/
koeling.
- afb.12: PWN + TD4T met 1 klep
- afb.13: PWN + TD4T met 2 kleppen
- afb.14: PWN+MICROPROD (modellen PWN 1x en 2x)
- afb.15: PWN+MICROPROD met vermogenskaart IPM ( modellen PWN 3x)
- afb.16: PWN+MICROPROD met vermogensinterface KP
- afb.17: PWN+MICRO D+KP
- afb.18: PWN+MICRO D (modellen PWN 1x en 2x)
- afb.19: PWN+MICRO D+IPM (modellen PWN 3x)
De getraceerde aansluitingen vallen onder de zorg van de installateur. De motoren
van de unit hebben 7 rotatiesnelheden.
LET OP:
De GEMEENSCHAPPELIJKE kabel van de motor is de WITTE: de verkeerde
aansluiting ervan veroorzaakt onherstelbare schade aan de motor.
Onder verwijzing naar de afbeeldingen 8 tot 19, is de legenda als volgt:
IL
Lijnschakelaar (niet bijgeleverd)
F
Veiligheidszekering (niet bijgeleverd)
3/7
3 van de 7 beschikbare snelheden
M
Motor
WH
Wit =gemeenschappelijk
BK
Zwart = maximumsnelheid
BU
Blauw
BN
Bruin
GY
Grijs
GN
Groen
YE
Geel
RD
Rood = minimumsnelheid
GNYE
Geel/groen = aarde (PE)
SF
Keuzeschakelaar voor gecentraliseerde werking
VK
Waterklep (230V ON-OFF)
VKC
Koudwaterklep (230V ON-OFF)
VKH
Heetwaterklep (230V ON-OFF)
KP
Vermogensinterface voor de parallelle aansluiting van 4 PWN's
IPM
Vermogenskaart
EXT
Extern hulpcontact
RHC
Keuzeschakelaar verwarming-koeling op afstand (gecentraliseerd)
7
FUNCTIONELE CONTROLE
Controleer of het apparaat zo geïnstalleerd is dat de vereiste helling gegarandeerd
wordt. Controleer of de condensafvoer niet belemmerd wordt (door de aanwezigheid
van puin, enz..). Controleer de afdichting van de hydraulische aansluitingen.
Controleer of de elektrische bekabelingen stevig vastgezet zijn (voer de controle uit
wanneer er geen spanning aanwezig is).
Controleer of de lucht uit de warmtewisselaar afgevoerd is. Schakel de spanning naar
het apparaat in en controleer er de werking van.
8
ONDERHOUD
De kanaliseerbare units PWN vereisen onderhoud dat beperkt wordt tot de
regelmatige reiniging van het luchtfilter en van de warmtewisselaar en de controle
van de efficiënte werking van de condensafvoer.
Het onderhoud mag uitsluitend door gespecialiseerd personeel uitgevoerd
worden. Het is noodzakelijk om tijdens het onderhoud met aandacht te werk te
gaan: het per ongeluk aanraken van enkele metalen delen kan letsel veroorzaken.
Draag veiligheidshandschoenen.
Telkens wanneer na een langdurige stilstand gestart wordt, moet men controleren of
er geen lucht in de warmtewisselaar zit.
De motor heeft geen onderhoud nodig, omdat hij zelfsmerende lagers bevat.
Om veiligheidsredenen moet u, voordat u werkzaamheden van welke aard met
betrekking tot het onderhoud of de reiniging gaat uitvoeren, het apparaat
uitschakelen of de spanning ernaartoe wegnemen door de lijnschakelaar uit
te zetten.
9.
REINIGING VAN HET LUCHTFILTER
Neem de spanning naar de unit weg, door de lijnschakelaar op 0 (OFF) te zetten.
- Verschaf u via het inspectiepaneel toegang tot het apparaat en trek het luchtfilter
naar buiten, zoals getoond wordt in AFBEELDING 20.
- Indien het filter zich binnen in het aanzuigrooster bevindt, verwijdert u dit rooster
waarna u overgaat tot het uitvoeren van de hierna beschreven handelingen.
Reinig het filter met lauw water of met perslucht indien het om droog stof gaat. Plaat
het filter terug nadat het opgedroogd is.
REINIGING VAN HET AGGREGAAT VOOR DE WARMTEWISSELING
Het is raadzaam de staat van de warmtewisselaar te controleren voordat het
zomerseizoen aanvangt, en te controleren of de vinnen niet door onzuiverheden
belemmerd worden. Om u toegang tot het aggregaat van de warmtewisseling te
verschaffen, dient u het afgiftepaneel weg te nemen (of dit nu om een paneel met
kraag of met een rechthoekige flens gaat), evenals de condensopvangbak. Is het
aggregaat eenmaal toegankelijk, dan reinigt u het met perslucht of met stoom onder
lage druk, zonder de vinnen van de warmtewisselaar te beschadigen.
Vóór ieder begin van de zomerwerking, controleert u of de condensafvoer normaal
plaatsvindt.
Een juist en regelmatig uitgevoerd onderhoud
leidt tot kosten- en energiebesparing
10
OPZOEKEN VAN DE DEFECTEN
Indien het apparaat niet correct werkt, voert u de controles uit die in onderstaande
tabel staan, voordat u de tussenkomst van de assistentiedienst aanvraagt. Mocht
het probleem niet verholpen worden, dat kunt u zich tot de dichtstbijzijnde verkoper
of assistentiedienst wenden.
Probleem
Oorzaak
Oplossing
De unit werkt niet
1 Stroom ontbreekt
1 Schakel de stroom in
2 Herstelzekering in werking
2 Vraag om de tussenkomst van
getreden
3 De startschakelaar staat op
0.
De unit verwarmt of koelt weinig
1 Het luchtfilter is vuil of
de assistentiedienst
3 Start het apparaat door de
schakelaar op I te zetten
1 Reinig het luchtfilter
verstopt
2 Er bevindt zich een obstakel
2 Verwijder het obstakel
nabij de inlaat of de uitlaat
van de lucht
3 Er bevindt zich lucht in de
warmtewisselaar
4 De ramen en de deuren zijn
3 Vraag om de tussenkomst van
de installateur
4 Sluit de ramen en/of de deuren
open
5 Er is een minimumsnelheid
voor de werking gekozen
De unit "lekt" water
1 Het apparaat is niet met de
juiste helling geïnstalleerd
2 De condensafvoer is verstopt
5 Kies de gemiddelde of de
maximumsnelheid
1 Vraag om de tussenkomst van
de installateur
2 Vraag om de tussenkomst van
de installateur
UT66000455 - 00
15
È severamente vietata la riproduzione anche parziale di questo manuale / All copying, even partial, of this manual is strictly forbidden
PWN
4
MEGFELELOSÉGI NYILATKOZAT
A via Romagnoli 12/A, 40010 Bentivoglia (BO) - Olaszország székhelyu
Galletti S.p.A. felelossége teljes tudatában kijelenti, hogy a PWN széria
csatornázási egységei, futési és légkondicionáló gépei, csatornás légelosztó
berendezésekhez tartozó gépei a CEE irányelveinek megfelelnek.
73/23, 89/392, 91/368, 93/44, 93/68, 98/37 és 89/336.
Bologna, 2005/03/08
Luigi Galletti
Elnök
MÉRET-ADATOK
2. ÁBRA PWN egység
1
vízkimenet, 3/4" anya, gáz
2
vízbemenet, 3/4" anya, gáz
3
elektromos-szekrény
4
elektromos tápvezetékek
5
kondenzátum-elvezetés, Ø 17 mm
3. ÁBRA légszuro
5
BESZERELÉS
VIGYÁZAT Szerelje a csatornaelvezeto egységet, a párhuzamos kapcsolót
(IL), valamint az esetleges vezérloegységeket olyan helyre, hogy azok könnyen
hozzáférhetok legyenek a fürdokádban, illetve a zuhany alatt tartózkodó
személyeknek.
BIZTONSÁGI SZIMBÓLUMOK
4. ÁBRA - robbantott egységábra
Kérjük, olvassa el
figyelmesen az útmutatót
1
VIGYÁZAT
MAGASFESZÜLTSÉG
1.
2.
3.
4.
5.
6.
7.
A BESZERELÉS MEGKEZDÉSE ELOTT
Kérjük, olvassa el figyelmesen a tájékoztatót.
A készülék beszerelését és karbantartását a hatályos eloírásoknak megfeleloen
kizárólag erre a gépfajtára kiképzett technikusok végezhetik.
A készülék átvételekor kérjük ellenorizze annak állapotát, valamint, hogy a szállítása
során nem sérült-e meg. Amennyiben kiegészítoket kíván beszerelni és használni,
nézze meg a megfelelo muszaki leírást.
Ajánlatos az esetleges kiegészítoket a muszaki leírásoknak megfeleloen normál
módon felszerelni, mielott véglegesítené helyüket. A bemenet és a kimenet
meroleges elhelyezkedésu, elore meghatározott furatokkal a meglévo kiegészítok
rögzítéséhez.
9
Az elvezetovel történo meroleges kapcsolás beállítása érdekében tanácsos
RD vagy RDC kiegészítoket alkalmazni, amelyek közül az RD a bemenethez,
az RDC-t kimenethez rögzítheto.
MEGJEGYZÉS: csatornaelvezetés akár bemeneti, akár kimeneti alkalmazása
esetén, szükséges egy RD kiegészíto (bemenet) és egy RDC kiegészíto
(kimenet).
2
RENDELTETÉSSZERU HASZNÁLAT ÉS A HASZNÁLAT KÖRÜLMÉNYEI
A Galletti S.p.A. a következo esetekben nem vállal felelosséget az okozott károkért:
nem megfeleloen képesített személy általi beszerelés, helytelen használat, nem
megfelelo körülmények közötti üzemeltetés, a jelen útmutatóban kituzött karbantartási
feladatok figyelmen kívül hagyása, nem eredeti alkatrészek használata. Jelen fejezet
kimerítoen írja le a használat körülményeit, ezen kívül minden más használati mód
helytelennek tekintendo.
A készüléket a beszerelésig tartsa a csomagolásában, így megelozheti a belsejének
porosodását.
Amennyiben a készüléket télen nem kívánja használni, víztelenítsen. Így elkerülheti
a jég képzodése által okozott károk kialakulását. Amennyiben fagyásgátló oldatokat
használ, ellenorizze a fagyáspontot.
A készülék belso kábelezését, illetve egyéb részleteit ne változtassa meg.
9
Hohordozó folyadék: víz
A víz homérséklete: + 5°C / +95°C
A levego homérséklete: -20°C / +40°C
Tápfeszültség: 230 V+/-10 %
A primer folyadék max. nyomása 10 bar
Amennyiben a csatlakozást hajlékony csovel (Ø 200) kívánja megoldani, be
kell szereznie a PMA vagy PMAC kiegészítok egyikét, melyek a be-, vagy
kimenetre egyaránt rögzíthetok.
MEGJEGYZÉS: hajlékony csöves (Ø 200) elvezetés akár bemeneti, akár
kimeneti alkalmazása esetén, szükséges egy PMA kiegészíto (bemenet) és egy
PMAC kiegészíto (kimenet).
A hocserélo csatlakozásait az ellenkezo oldali irányba is lehet állítani, ahogy azt az
5. ÁBRA is mutatja:
-
3
A KÉSZÜLÉK LEÍRÁSA
A PWN csatornázási egységek olyan helységek klimatizálására szolgálnak, ahol
mennyezeti beépítés szükséges. A fo részek a következok:
9
A szerkezet megfelelo vastagságú cinkezett acéllemezbol készült, amelyet
megfeleloen szigeteltek elsoosztályú hangtompító/lecsapódásgátló, öncsillapító
anyagokkal. Az egységen található lyukak a berendezés rögzítésére szolgálnak,
míg a 4 db mellékelt gumialátét a rezgéscsillapításra.
9
Centrifugális, kettos légbeszívásos elektroventilátor egység; egy, ketto
vagy három légcsavarral, statikusan és dinamikusan is kiegyenlített
terelolapátokkal, közvetlenül a 7-sebességes elektromos motorhoz kapcsolva,
beépített állandó kondenzátorral és hovédelemmel ellátva.
9
A hidraulikus csatlakozások mellett elhelyezett kábelszekrény, a beszerelés
helyigényének csökkentése érdekében; csavaros kapocsléces elektromos
csatlakoztatással.
9
Hocserélo akkumulátoregység: 3, 4 vagy 6 soros, nagy hatékonyságú,
rézcsöves kivitelben alumínium bordázattal, mechanikus tágulással a csotol
elzárva. Sárgaréz kollektorokkal és szellozoszeleppel felszerelve. Az akkumulátor
alapesetben a bal oldali csatlakozással kerül szállításra, de 180°-ban elforgatható.
9
Széles kondenzátum-tartály, amely a hidraulikus csatlakozások fölött található,
lehetové téve az esetleges további vezérloszelepek kondenzvizének
összegyujtését; A decentralizált helyzet jelentosen csökkenti a beszerelés
helyigényét.
9
Akrilrostos légszuro, G2-es szurési osztály, a levegoáramlás útjában, az alsó
fiókkal kiveheto.
-
a kondenz-gyujto tartály leszerelése.
az akkumulátor egység eltávolítása a rögzíto csavarokkal (oldalanként 2 + 3
a felso-, és 2 az alsó oldalon)
az akkumulátoregység 180°-os elforgatása (függoleges tengely mentén) és
ismételt rögzítése a ventilátoregységhez.
Helyezze be a kondenzátum-gyujto tartályt úgy, hogy a kiálló oldala a
hidraulikus csatlakozások alá kerüljön, majd rögzítse azt.
az egység RÖGZÍTÉSE
Helyezze a mellékelt 4 rezgéscsillapító alátétet a plafonra történo rögzítéshez
kiképzett 4 lyukba.
Rögzítse az egységet a mennyezethez vagy a falhoz, a 8 rögzítésre kiképzett lyukból
legalább 4 igénybevételével;
9
Tanácsos 8MA csavarmenetes rudat, a berendezés súlyának megfelelo tiplit
használni és a készülék pozícionálását a következoképpen végrehajtani: 3 db
8MA menetes csapszeggel (2 elöl, 1 felül, ahogy a 6. ÁBRA is mutatja) és
rudanként 2 csavaralátéttel.
Az ellencsavar meghúzása elott állítsa be a fo csavar feszítési pozícióját, úgy,
hogy a berendezésnek megfelelo legyen a lejtése, vagyis segítse elo a
kondenzátum elvezetését (7. ÁBRA).
A megfelelo lejtés eléréséhez a készüléket döntse meg olyan módon, hogy a
bemenet a kimenethez viszonyítva mintegy 10 mm-rel lejjebb legyen. Kösse
a hidraulikus csatlakozókat a hocserélo akkumulátorra és huto üzemmódban
történo használat esetén pedig a kondenz-elvezetésre is.
A gyujtotartály elvezetoinek egyikét használja, melyek az egység oldalán
láthatók.
9
Az egység kondenzátum-elvezetohöz való csatlakoztatásához, használjon
hajlékony gumicsövet és egy fémbilinccsel rögzítse azt a kiválasztott leengedo
csohöz (Ø 3/8'' - használja a leengedo csonkot, mely az oldalsó hidraulikus
csatlakoztatások között található).
Amennyiben inkább csatornába vezeti a kondenzátumot, hajlítsa a leengedo
csövet lefelé, legalább 30 mm/m lejtésure, vigyázva, nehogy a víz lefutása
során hurok, vagy szukület alakuljon ki.
1-es ÁBRA - beszerelési példa
SM
Gépi redony belso levegoztetéssel
SIL
Kimeneti/bemeneti kilevegozteto zajcsökkentoje
PWN
Elemezheto egység
MDF
Kiegészíto melegvizes akkumulátor egység
PMAC Szigetelt kimenolevego kilevegozteto Ø 200-as karimával
UT66000455 - 00
kondenzgyujto tartály
hocserélo akkumulátoregység
elektromos-szekrény
csatlakoztató kapocsléc
rezgéscsillapító
7-sebességes elektromos motor
motorventilációs csoport
16
È severamente vietata la riproduzione anche parziale di questo manuale / All copying, even partial, of this manual is strictly forbidden
Néhány szabály, amelyet be kell tartani
9
A levegot leállított szivattyúk mellett engedje ki a hocserélobol, ehhez az
akkumulátortartók oldalán található kiereszto szelepeket nyissa ki.
9
A csorendszert, különösen a befolyó csöveket, szigetelni kell kondenzvíz ellen.
9
A készülék közelében el kell helyezni egy ellenorzo nyílást a karbantartási és
tisztítási muveletek elvégzéséhez.
9
Szerelje fel a falra a vezérlopultot, válasszon egy könnyen hozzáférheto helyet
a funkcióknak, ahonnan, ha úgy tervezték, könnyen leolvasható a homérséklet.
Kerülje az olyan helyeket, amelyek közvetlenül ki vannak téve a napsütésnek,
vagy a közvetlen meleg vagy hideg légáramlatoknak és ne tegyen a készülék
elé olyan tárgyakat, amelyek akadályozzák a homérséklet megfelelo
leolvasását.
6
ELEKTROMOS CSATLAKOZÁS
Az érvényben levo biztonsági eloírásoknak megfeleloen végezze el a csatlakozásokat,
a készülék ilyenkor ne legyen feszültség alatt.
Kizárólag szakember végezheti el a kábelek bekötését.
Minden meleg levego cirkulátorhoz iktasson be egy kapcsolót a hálózatra (IL)
nyitható kapcsolásokkal, egymástól legalább 3mm-es távolságra és megfelelo
védelmi biztosítékkal (F).
Az áramfogyasztás az egységen elhelyezett tábla adatmatricáján szerepel. A
beszereléskor gondosan kövesse a vezérlopult-egység bekötésére vonatkozó
elektromos sémát.
8
KARBANTARTÁS
A csövekkel ellátott PWN egységeknél kevés karbantartási muveletre van szükség,
amelyek a levegoszuro és a hocserélo rendszeres tisztítására korlátozódnak és a
kondenzvíz-leengedés hatékonyságának ellenorzésére.
A karbantartást csak szakember végezheti el. A karbantartási muveletek alatt oda
kell figyelni: megsértheti magát, ha véletlenül hozzáér a fémrészekhez; gondoskodjon
a védokesztyukrol.
Minden hosszabb ideig tartó leállítást követoen indításnál gyozodjön meg róla, hogy
nincs-e levego a hocseréloben.
A motoron nem szükséges karbantartást végezni, mivel önolajozó csapágyakkal van
felszerelve. Biztonsági okokból, mielott bármilyen karbantartási vagy tisztítási
muveletet végezne, kapcsolja ki a készüléket és az elektromos sor kapcsolójával
feszültségmentesítse.
9.
A LÉGSZURO TISZTÍTÁSA
Kapcsolja ki a feszültséget, ehhez az elektromos sor kapcsolóját állítsa 0-ra (OFF).
-
Az ellenorzo nyíláson keresztül nyúljon be a készülékhez és vegye ki a légszurot,
ahogy azt a 20. ÁBRA mutatja.
Ha azonban a szuro a szívórács belsejében található, vegye le ez utóbbit és
végezze el az alábbiakban leírt muveleteket.
-
Az elektromos kapcsolások elvégzéséhez le kell venni az elektromos doboz zárólapját
(4. ábra) hogy hozzáférjen a kapcsoló táblához.
Tisztítsa meg a szurot langyos vízzel, vagy - ha száraz por van rajta - surített
levegovel. Tegye vissza a szurot, miután hagyta megszáradni.
Az elektromos kábeleket (áramellátás és vezérlés) a kábelvezeton keresztül kell a
kapcsolótábláig vinni, amely az elektromos doboz oldalán található, a hidraulikus
csatlakozások oldalán.
A HOCSERE-AKKUMULÁTOR TISZTÍTÁSA
Elektromos sémák:
8. ábra: PWN + beépítheto kapcsoló CD
9. ábra: PWN + fali kapcsoló CDE
10. ábra: PWN + vezérlopult TD
11. ábra: PWN + vezérlopult TDC, központi futés/hutés váltás.
12. ábra: PWN + TD4T egy szeleppel
13. ábra: PWN + TD4T 2 szeleppel
14. ábra: PWN+MICROPROD (PWN modellek 1x és 2x)
15. ábra: PWN+MICROPROD IPM teljesítmény rajzzal (PWN modellek 3x)
16. ábra: PWN+MICROPROD KP teljesítmény interfésszel
17. ábra: PWN+MICRO D+KP
18. ábra: PWN+MICRO D (PWN modellek 1x és 2x)
19. ábra: PWN+MICRO D+IPM (modelli PWN 3x)
A felvázolt csatlakozások elvégzése a szerelo feladata. Az egységek motorjai 7
forgási sebességgel rendelkeznek.
FIGYELEM:
A motor KÖZÖS kábele az a FEHÉR színu: helytelen bekötése a motorban
helyrehozhatatlan kárt tehet.
A 8. - 19. ábrák felirata a következo:
IL
Az elektromos sor kapcsolója (amit nem adunk a készülékhez)
F
Védelmi biztosíték (amit nem adunk a készülékhez)
3/7
A 7-bol 3 sebesség áll rendelkezésre
M
Motor
WH
Fehér = közös
BK
Fekete = maximális sebesség
BU
Kék
BN
Barna
GY
Szürke
GN
Zöld
YE
Sárga
RD
Piros = minimális sebesség
GNYE Sárga/zöld = földelés (PE)
SF
SA központi muködés kiválasztó gomb
VK
Víz szelep (230V ON-OFF)
VKC
Hideg víz szelep (230V ON-OFF)
VKH
Meleg víz szelep (230V ON-OFF)
KP
4 PWN párhuzamos kapcsolás teljesítmény interfésze
IPM
Teljesítmény rajz
EXT
Külso kiegészíto csatlakozás
RHC
Távfutés-hutés kiválasztó gombja (központi)
7
Tanácsos ellenorizni a hocserélo állapotát minden nyári szezon elott és ellenorizni,
hogy a fülek nem tömodtek-e el piszokkal. Hogy hozzáférhessen a hocsere
akkumulátorhoz, le kell venni a befolyó csövek fedolapját, (ami lehet kerek vagy
szögletes szélu) mint ahogy a kondenzvíz-gyujto edényt is. Ahogy elérte az
akkumulátort, végezze el a tisztítást surített levegovel vagy alacsony nyomású
gozzel, anélkül, hogy kárt tenne a hocserélo fülekben.
Minden nyári muködés kezdete elott ellenorizze, hogy a kondenzvizet rendszeresen
leengedjék.
A helyes és rendszeres karbantartás energia- és
pénzmegtakarítást eredményez.
10
A HIBÁK MEGKERESÉSE
Ha a készülék nem muködik megfeleloen, mielott a szerviz beavatkozását kérné,
végezze el az alábbi táblázatban feltüntetett ellenorzéseket. Ha a problémát nem lehet
megoldani, forduljon az értékesítohöz vagy a legközelebbi szervizhez.
Hiba
Ok
Megoldás
Az egység nem muködik
1 Nincs áram alatt
1 Helyezze újra áram alá
2 az életvédelmi relé
2 Kérje a szerviz segítségét3
muködésbe lépett
3 Az indító kapcsoló 0-ra van
állítsa az I-re
állítva.
Az egység nem melegít vagy
hut eléggé
1 A légszuro piszkos vagy
1 Tisztítsa meg a légszurot
eltömodött
2 A légszívás vagy kiengedés
2 Távolítsa el az akadályt
közelében akadály van
3 A hocserélo belsejében
levego van
4 Az ablakok és az ajtók nyitva
vannak
5 A minimális muködési
A MUKÖDÉS ELLENORZÉSE
Ellenorizze, hogy a készülék beszerelésekor ügyeltek-e a megfelelo dolési szögre.
Ellenorizze, hogy a kondenzvíz-leereszto cso nincs-e eltömodve (mészko lerakódás,
stb.). Ellenorizze, hogy a hidraulikus csatlakozás vízbiztos-e.
Ellenorizze, hogy az elektromos kábelek épségét (a készülék ne legyen feszültség
alatt, amikor az ellenorzést végzi).
Gyozodjön meg róla, hogy a hocserélobol kiengedték a levegot. Helyezze a készüléket
feszültség alá és ellenorizze a muködését.
Indítsa el a gépet, a kapcsolót
sebességet választotta ki
Az egységbol szivárog a víz
1 A készüléket nem a
megfelelo dolési szögben
3 Kérje a beszerelo személy
segítségét
4 Zárja be az ajtókat és/vagy az
ablakokat
5 Válassza ki a közepes vagy
maximális sebességet
1 Kérje a felszerelo személy
segítségét
szerelték fel
2 A kondenzvizet leengedo cso
eltömodött
2 Kérje a felszerelo személy
segítségét
UT66000455 - 00
17
È severamente vietata la riproduzione anche parziale di questo manuale / All copying, even partial, of this manual is strictly forbidden
H
PWN
1
SM
SIL
PWN
MDF
SIL
PMAC
2
C
40
4
3
147,5
96,5
69
36
93,5
B
16,5
239
189
66,5
550,5
16,5
2
85
158,5
1
155
5
269,5
23,5
OUT
IN
PWN 1x PWN 2x PWN 3x
A
A
1039
1389
1739
B
814
1164
1514
C
709
1059
1409
3
10
236
A
A
PWN 1x
UT66000455 - 00
709
PWN 2x
814
PWN 3x
1039
18
È severamente vietata la riproduzione anche parziale di questo manuale / All copying, even partial, of this manual is strictly forbidden
4
7
5
6
4
3
2
1
5
180°
UT66000455 - 00
19
È severamente vietata la riproduzione anche parziale di questo manuale / All copying, even partial, of this manual is strictly forbidden
PWN
6
10
7
8
4
S
1
2
RL
3
C
RD
BN
CD
7 VC VH
GNYE
50Hz
6
M
1
WH
N
4 5
GN
F
L
230V 1
3
BU
IL
2
YE
PE
N 1
GY
L
BK
3/7
9
6
S
5
4
3
2
c
1
CDE
3/7
2
3
4 5
6
7 VC VH
F
WH
N 1
BK
GY
YE
BU
GN
BN
RD
L
M
1
GNYE
IL
PE
L
N
230V 1
UT66000455 - 00
50Hz
20
È severamente vietata la riproduzione anche parziale di questo manuale / All copying, even partial, of this manual is strictly forbidden
10
TC
3/7
L
N 1
2
3
5
4
6
6
5
N
4
3
2
1
S
T
C
ACC
7 VC VH
RD
BN
GN
BU
YE
F
GY
WH
BK
SF
TD
M
IL
L
PE
GNYE
1
N
230 / 1 / 50
11
IL
F
L
SF
N
TC
230V 1 50Hz
N
5
6
1
3
4
2
9
10
S
ACC
C
T
TDC
TC
N
5
6
1
3
4
2
9
10
S
ACC
C
T
TDC
WH
BK
GY
YE
BU
GN
BN
RD
1
GNYE
M
GNYE
M
1
3/7
L N 1 2 3 4 5 6 7 vc vh
WH
BK
GY
YE
BU
GN
BN
RD
3/7
L N 1 2 3 4 5 6 7 vc vh
UT66000455 - 00
21
È severamente vietata la riproduzione anche parziale di questo manuale / All copying, even partial, of this manual is strictly forbidden
PWN
12
N
4
6
8
3
2
1
7
S
SF
ACC
C
T
3/7
L
N 1
3
4 5
6
TD4T
7 VC VH
L
RD
BN
GNYE
M
1
GN
BU
YE
BK
WH
IL
GY
VK-C-H
F
PE
2
N
230V 1 50Hz
13
N
4
6
8
3
2
1
7
S
SF
C
ACC
T
3/7
L
N 1
3
4 5
6
TD4T
7 VC VH
L
RD
BN
GN
VKC
GNYE
M
1
BU
YE
BK
WH
IL
GY
VKH
F
PE
2
N
230V 1 50Hz
UT66000455 - 00
22
È severamente vietata la riproduzione anche parziale di questo manuale / All copying, even partial, of this manual is strictly forbidden
14
MICROPROD
VH
VH
VC
7
6
5
3/7 4
3
2
1
N
L
V3
V2
V1
L
PE
N
VC
RD
BN
GN
BU
YE
GY
BK
M
1
WH
N
230V 1 50Hz
L
F
N
IL
N
RE
V
SA
F
RHC
RM
IL
L
N
RM
EX
230V 1 50Hz
EX
EXT
SW
RM
RM
RM
RM
MICROPRO
MICROPROD
CRHC
15
MICROPROD
V3
V2
V1
L
PE
N
N
N
RE
SA
V
RM
RM
EX
EXT
EX
SW
VC
7
230/1/50
IL
MICROPROD
F
MICROPRO
RHC
IL
RM
RM
C
V1
V2
V3
RM
RM
14
15
16
17
L
L
N
N
6
5
C
V3
V2
V1
25
26
27
28
3/7
1
2
3
4
CRHC
L
N
VH
VH
4
3
2
1
N
RD
VC
BN
GN
BU
YE
GY
BK
WH
M
1
L
IPM
CN
F
L
N
230/1/50
UT66000455 - 00
23
È severamente vietata la riproduzione anche parziale di questo manuale / All copying, even partial, of this manual is strictly forbidden
PWN
16
3/7
V3
V2
V1
L
PE
N
N
N
RE
V
RM
RM
EX
EX
MICROPROD
SA
2
3
4
5
C
1
2
3
RELE' DI POTENZA
POWER RELAY
4
21
20
19
22
3
25
24
23
26
2
29
28
27
30
3A 250V
EXT
RELE' DI POTENZA
POWER RELAY
3A 250V
SW
13
14
15
16
RM
RM
RM
RM
3A 250V
RD
BN
GN
BU
YE
GY
BK
WH
3/7
33
32
31
34
1
RD
BN
GN
BU
YE
GY
BK
WH
VH
VC
7
6
5
4
3
2
1
N
L
M
1
M
1
RD
BN
GN
BU
YE
GY
BK
WH
M
1
KP
3/7
L
N
F
MICROPROD
IL
MICROPRO
RHC
CRHC
RELE' DI POTENZA
POWER RELAY
L
N
L
N
3/7
VH
VC
7
6
5
4
3
2
1
N
L
VH
VC
7
6
5
4
3
2
1
N
L
VH
VC
7
6
5
4
3
2
1
N
L
230V 1 50Hz
RD
BN
GN
BU
YE
GY
BK
WH
IL
1
F
M
L
N
230V 1 50Hz
17
3/7
V3
V2
V1
L
PE
N
N
MICROD
2
3
4
5
SA
C
1
2
3
RELE' DI POTENZA
POWER RELAY
4
21
20
19
22
3
25
24
23
26
3A 250V
RELE' DI POTENZA
POWER RELAY
3A 250V
2
SW
13
14
15
16
RELE' DI POTENZA
POWER RELAY
L
N
L
N
3A 250V
1
3/7
VH
VC
7
6
5
4
3
2
1
N
L
29
28
27
30
VH
VC
7
6
5
4
3
2
1
N
L
RD
BN
GN
BU
YE
GY
BK
WH
RD
BN
GN
BU
YE
GY
BK
WH
3/7
33
32
31
34
VH
VC
7
6
5
4
3
2
1
N
L
M
1
M
1
RD
BN
GN
BU
YE
GY
BK
WH
M
1
KP
3/7
VH
VC
7
6
5
4
3
2
1
N
L
RD
BN
GN
BU
YE
GY
BK
WH
IL
1
F
M
L
N
230V 1 50Hz
UT66000455 - 00
24
È severamente vietata la riproduzione anche parziale di questo manuale / All copying, even partial, of this manual is strictly forbidden
18
MICRO D
V3
V2
V1
L
PE
N
VH
VC
7
6
5
3/7 4
3
2
1
N
L
RD
BN
GN
BU
YE
GY
BK
M
1
WH
N
230V 1 50Hz
L
F
N
IL
SA
SW
19
V3
MICROD
V2
V1
L
PE
N
N
N
RE
SA
VH
V
VC
RM
7
RM
1
2
3
4
EX
SW
14
15
16
17
IL
C
V1
V2
V3
L
L
N
N
5
C
V3
V2
V1
25
26
27
28
3/7
EX
6
4
3
2
1
N
RD
BN
GN
BU
YE
GY
BK
WH
M
1
L
IPM
9
CN
F
L
N
230/1/50
20
UT66000455 - 00
25
È severamente vietata la riproduzione anche parziale di questo manuale / All copying, even partial, of this manual is strictly forbidden
PWN
UT66000455 - 00
26
È severamente vietata la riproduzione anche parziale di questo manuale / All copying, even partial, of this manual is strictly forbidden
UT66000455 - 00
27
È severamente vietata la riproduzione anche parziale di questo manuale / All copying, even partial, of this manual is strictly forbidden
CONDIZIONI GENERALI DI GARANZIA
UNITÀ CANALIZZABILI GALLETTI
1)
Le unità canalizzabili Galletti S.p.A., sono garantiti per 24 mesi dalla data di consegna all’utilizzatore. La garanzia è relativa
alla riparazione e/o sostituzione in forma gratuita dei componenti con “vizi” o difetti di fabbricazione.
2)
Galletti vincola la concessione della garanzia alla verifica di vizi o difetti dei componenti, attraverso un Centro Assistenza Autorizzato dalla
scrivente stessa sul territorio di competenza.
3)
In conformità con la direttiva 199/44/CE attuata dal Decreto Legislativo N.24 (2 Febbraio 2002), la garanzia Galletti è applicabile esclusivamente
al prodotto non contemplando alcuna parte dell’impianto.
4)
La data di decorrenza della garanzia sarà relativa al documento fiscale di accompagnamento. In mancanza dello stesso la Galletti si riserva
di stabilire la decorrenza dalla data di fabbricazione.
5)
Scaduti i termini di garanzia, i costi relativi ai ricambi ed alla manodopera necessaria per la riparazione, sono a carico del cliente.
6)
Come specificato dai termini di legge (DL 199), l’obbligo della garanzia all’utilizzatore finale è a carico del venditore (la società presso la quale
ha effettuato l’acquisto). Galletti attiverà le procedure di garanzia su richiesta del venditore.
7)
8)
9)
La garanzia Galletti non copre:
- Controlli, manutenzioni, riparazioni dovuti a normale usura
- Installazione errata o non conforme
- Danni da trasporto e/o movimentazione non reclamati all’atto della consegna
- Uso improprio
- Alimentazione elettrica non “prevista” dai dati di targa
- Danni o manipolazioni di personale non autorizzato
- Atti vandalici e danni da agenti atmosferici.
Galletti si riserva di contestare la validità della garanzia se, da riscontri oggettivi, risulti che il prodotto abbia funzionato prima della decorrenza
della garanzia.
Le modalità delle presenti condizioni di garanzia sono valide ed applicabili esclusivamente per il territorio italiano.
ONLY FOR ITALIAN MARKET
SEULEMENT POUR LE MARCHÉ ITALIEN
NUR FÜR DEN ITALIENISCHEN MARKT
40010 Bentivoglio (BO)
Via Romagnoli, 12/a
Tel. 051/8908111
Fax 051/8908122
www.galletti.it