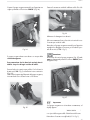
1
modello
ROYAL OFFICE
Type SUP 015V
USO E MANUTENZIONE
Distributore automatico di bevande
Italiano
INDICE
PARTI PRINCIPALI. ........................................................ 3
8
USO DEL DISTRIBUTORE. ..................................... 16
1
INTRODUZIONE AL MANUALE. ........................... 4
1.1
Premessa ......................................................... 4
1.2
Simbologia utilizzata ........................................ 4
8.1
2
INFORMAZIONI GENERALI. ................................. 4
2.1
Premessa ......................................................... 4
2.2
Destinazione d’uso del distributore .................... 4
2.3
Rischi residui .................................................... 4
2.4
Identificazione del distributore ........................... 5
2.5
Dati tecnici ...................................................... 5
8.2
3
MOVIMENTAZIONE E
IMMAGAZZINAMENTO. ....................................... 6
Movimentazione .............................................. 6
Immagazzinamento .......................................... 6
4
SICUREZZA. ............................................................ 6
4.1
Norme generali di sicurezza ............................. 6
4.2
Requisiti degli operatori .................................... 7
Manutentore tecnico ......................................... 7
Addetto al rifornimento ..................................... 7
Utilizzatore ...................................................... 7
4.3
Dispositivi di sicurezza installati ........................ 7
4.4
Controllo efficienza microinterruttore di sicurezza ... 7
8.3
5
6
7
DESCRIZIONE COMANDI E STRUMENTI . ........... 8
5.1
Comandi principali .......................................... 8
Interruttore generale ......................................... 8
Pannello di comando ........................................ 8
Fase di erogazione ........................................... 8
Fase di programmazione .................................. 8
INSTALLAZIONE. .................................................... 9
6.1
Elenco accessori in dotazione ............................ 9
6.2
Posizionamento ................................................ 9
6.3
Collegamento elettrico ...................................... 9
6.4
Montaggio targhetta adesiva “Istruzioni brevi” .. 9
PROGRAMMAZIONE. .......................................... 10
Selezione dei singoli menu .............................. 10
Struttura delle funzioni di programmazione ...... 10
7.1
Descrizione dei menu ..................................... 12
Funzioni per il Vending ................................... 12
Visualizzazione del numero dei prodotti erogati .... 13
Selezione della lingua .................................... 14
Funzione di risciacquo .................................... 14
Regolazione della durezza dell’acqua ............. 14
Regolazione della temperatura ........................ 14
Funzione di preinfusione ................................. 14
Funzione di premacinatura ............................. 14
Programmazione dose .................................... 14
Decalcificazione ............................................. 15
Segnalazione decalcificazione ........................ 15
Temporizzatore .............................................. 15
Ciclo di lavaggio ............................................ 15
8.4
8.5
9
Stati del distributore........................................ 16
Spento ed isolato elettricamente ...................... 16
Acceso .......................................................... 16
In risparmio energia ....................................... 16
Consigli e raccomandazioni ............................ 16
Inattività prolungata ....................................... 16
Controllo della temperatura ............................. 16
Mancanza caffè nel contenitore caffè in grani .. 16
Mancanza acqua nel serbatoio ....................... 16
Riempimento cassetto raccoglifondi ................. 16
Prima accensione del distributore .................... 17
Riempimento contenitore caffè ......................... 17
Riempimento serbatoio acqua ......................... 17
Montaggio piastrina serratura coperchio ......... 17
Caricamento circuito idraulico ......................... 18
Regolazione della macinatura ......................... 18
Miscele di caffè .............................................. 19
Erogazione delle bevande ............................... 19
Regolazione erogatore di caffè ....................... 19
Livello di riempimento delle tazze .................... 19
Erogazione del caffè ...................................... 20
Erogazione di acqua calda ............................. 20
Messaggi e segnalazioni di situazioni particolari ... 20
Controllo elettronico della mancanza del caffè ....... 20
Protezione contro le impurità del caffè in grani ...... 20
Controllo elettronico della mancanza di acqua ...... 20
MANUTENZIONE. ................................................ 21
9.1
Premessa ....................................................... 21
9.2
Pulizia e manutenzione ................................... 21
Gruppo erogatore .......................................... 22
Macinacaffè .................................................. 24
Decalcificazione ............................................. 25
Decalcificazione automatica ............................ 26
Eliminazione del messaggio di decalcificazione ..... 26
10 CUSTODIA. ........................................................... 27
11 DEMOLIZIONE DEL DISTRIBUTORE. .................. 27
12 GUASTI E RIMEDI. ................................................ 27
13 VARIANTI. ............................................................. 27
14 MANUTENZIONE ORDINARIA. .......................... 28
14.1 Guasti e rimedi .............................................. 28
Italiano
PARTI PRINCIPALI
21
10
12
4
11
9
20
8
14
13
15
7
6
17
16
19
3
18
2
1
5
26
24
25
22
Fig. 1
1
2
3
4
5
6
7
8
9
10
23
Cassetto raccoglifondi
Vasca raccogligocce
Griglia appoggia tazze
Interruttore generale
(parte posteriore macchina)
Cavo alimentazione
Erogatore caffè
Tubo erogazione acqua
calda
Pannello di comando
Serbatoio acqua
Indicatore di livello acqua
(all’interno serbatoio acqua)
11
12
13
14
15
16
17
18
Contenitore caffè in grani
Coperchio caffè in grani
(sotto il coperchio con serratura)
Leva di regolazione del
grado di macinatura
Leva di dosaggio del caffè
Sportello di servizio con
serratura
Tramoggia di riempimento
Maniglia del gruppo
erogatore
Gruppo erogatore
19
20
21
22
23
24
25
26
Cassetto per residui di
caffè
Microinterruttore di sicurezza
Coperchio con serratura
Piastrina per serratura
coperchio
Pennello per pulizia
Chiavi serrature (2x)
Chiave per gruppo
erogatore
Tubo in silicone
Italiano
1 - INTRODUZIONE
AL MANUALE
1.1
Attenzione
È utilizzato per evidenziare situazioni pericolose agli addetti e al distributore.
Premessa
Importante
La presente pubblicazione è parte integrante del distributore e va letta attentamente. All’interno vi sono le informazioni relative all’installazione, la manutenzione e l’uso corretto del distributore ROYAL OFFICE
Fate sempre riferimento a questa pubblicazione prima di
compiere qualsiasi operazione.
Costruttore: Saeco International Group S.p.A.
Via Panigali, 39 - 40041 GAGGIO MONTANO (Bo)
La presente pubblicazione va conservata con cura e deve
accompagnare il distributore durante tutta la sua vita operativa, compresi gli eventuali passaggi di proprietà.
In caso di smarrimento o deterioramento della presente
pubblicazione, se ne dovrà richiedere immediatamente
copia ad un Centro di Assistenza AUTORIZZATO.
Tutti i diritti di riproduzione della presente pubblicazione
sono riservati al Costruttore.
Importante
Importante
E’ utilizzato per segnalare operazioni che, se eseguite, salvaguardano il buon funzionamento del distributore.
2 - INFORMAZIONI
GENERALI
2.1
Premessa
Il distributore è destinato alla distribuzione automatica di
caffè e acqua calda, ed è programmabile per ciò che riguarda i dosaggi di ogni tipo di erogazione.
In caso di necessità rivolgersi al Distributore o all’Importatore della propria Nazione oppure direttamente al
Costruttore quando non è presente alcun importatore.
I CENTRI DI ASSISTENZA AUTORIZZATI si rendono disponibili per qualsiasi chiarimento ed informazione riguardanti il funzionamento del distributore e per esaudire richieste di fornitura di ricambi o di assistenza tecnica.
Il Costruttore si riserva il diritto di apportare eventuali
migliorie al distributore senza alcun preavviso.
La chiave per l’apertura del coperchio dei contenitori acqua e caffè, dello sportello laterale e dell’eventuale sportello gettoniera sono in dotazione solo al personale del
rifornimento e al manutentore.
2.2
1.2
Con il distributore ROYAL OFFICE è possibile ottenere l’erogazione automatica di:
- caffè e caffè espresso preparati con caffè in grani macinato all’istante;
- acqua calda per la preparazione di bevande.
Simbologia utilizzata
All’interno di questa pubblicazione sono utilizzati diversi
tipi di simboli, con lo scopo, di evidenziare i vari livelli di
pericolo o di competenze.
A completamento del simbolo è riportato un messaggio.
Le informazioni che non sono evidenziate da simboli, sono
dirette a tutti gli utenti del distributore. I simboli utilizzati sono:
Addetto al rifornimento
Personale addetto esclusivamente al rifornimento ed alla
pulizia dell’apparecchio. Non può effettuare alcuna operazione di manutenzione per le quali è previsto l’intervento di un tecnico specializzato
Destinazione d’uso del
distributore
Importante
In caso di uso improprio decade ogni forma di garanzia e il Costruttore
declina ogni responsabilità per danni a persone e/o cose.
È da considerarsi uso improprio:
- qualsiasi utilizzo diverso da quello previsto e/o con tecniche diverse da quelle indicate in questa pubblicazione;
- qualsiasi intervento sul distributore che sia in contrasto
con le indicazioni riportate in questa pubblicazione;
- qualsiasi utilizzo dopo manomissioni a componenti e/
o dopo alterazioni ai dispositivi di sicurezza;
- l’installazione all’esterno dell’distributore.
Manutentore Tecnico
È utilizzato per segnalare le operazioni di competenza del
personale specializzato addetto alla manutenzione e all’assistenza tecnica.
2.3
Rischi residui
Il vano erogazione non ha protezioni che impediscano il
contatto accidentale delle mani con caffè o acqua calda.
Italiano
2.4
Identificazione del distributore
Il distributore è identificato dal nome del modello e dal
numero di matricola rilevabili sull’apposita targhetta (Fig.
2).
Sulla targhetta sono riportate le seguenti specifiche:
-
-
Fig. 2
nome del Costruttore
marcatura CE
modello distributore
N° di matricola
anno di fabbricazione
alcune specifiche costruttive:
- tensione dell’energia elettrica di alimentazione (V)
- frequenza della corrente elettrica di alimentazione (Hz)
- potenza elettrica assorbita (W)
Importante
Per qualsiasi richiesta presso i CENTRI DI ASSISTENZA
AUTORIZZATI, far sempre riferimento a tale targhetta, riportando i dati specifici del distributore, impressi su essa.
2.5
Dati tecnici
Alimentazione .......................................................................................................... vedere targhetta dati
Potenza nominale ..................................................................................................... vedere targhetta dati
Dimensioni (lunghezza x larghezza x altezza) ................................................... 380 x 460 x 440 mm circa
Carcassa ................................................................... acciaio elettrozincato e materiale termoplastico (ABS)
Peso .................................................................................................................................... 14,5 Kg circa
Lunghezza del cavo ................................................................................................................ 1,2 m circa
Sistema di funzionamento ......................................................................... caldaia a scambiatore di calore
....................................................................................................... pompa elettromagnetica a vibrazione
Controllo della temperatura ....................................................................................................... elettronico
Regolazione del macinacaffè ................................................................................. regolazione fine a scatti
Espulsione dei fondi di caffè ..................................................................................................... automatica
Dosaggio della polvere di caffè ......................................................................................................a scatti
Programmazione delle quantità ........................................................................................ 0 - 250 ml circa
Serbatoio acqua ..................................................................................................... amovibile, trasparente
Capacità
-Serbatoio acqua .......................................................................... 6,5 litri circa
-Contenitore caffè in grani ................................... 950 gr. circa di caffè in grani
-Vasca raccogligocce..................................................................1 litro circa
Tempo di riscaldamento ....................................................................................................... 2 minuti circa
Tempo di preparazione
-espresso .................................................................ca. 20 secondi per tazzina
-caffè ......................................................................... ca. 30 secondi per tazza
-acqua calda .............................................................. ca. 60 secondi per tazza
Protezione antisurriscaldamento .............................................................................................. incorporata
Isolamento ................................................................................................................ classe di protezione I
Approvazioni ........................................................................................................... vedere targhetta dati
Conformità ...................................... norme vigenti per categorie di prodotto (vedere Dichiarazione di conformità a pag. 29)
Garanzia ..................................................................................... come da certificato di garanzia allegato
Italiano
3 - MOVIMENTAZIONE E
IMMAGAZZINAMENTO
Movimentazione
Durante la movimentazione ed il trasporto, il distributore
deve rimanere in posizione verticale secondo le indicazione stampate sull’imballo.
Effettuare con cura il sollevamento e posizionamento
Non scuotere il distributore.
Immagazzinamento
Il distributore deve essere immagazzinato rispettando le
seguenti temperature:
- temperatura minima:
superiore a 4°C.
- temperatura massima:
inferiore a 40°C.
- umidità massima:
inferiore a 95%
Il distributore è contenuto in imballi di cartone e polistirolo
espanso.
Attenzione
Dato il peso complessivo dell’imballo, è vietato sovrapporre
più di tre distributori.
Il distributore deve essere immagazzinato, nel suo imballo
originale, in luoghi non umidi e/o polverosi.
4 - SICUREZZA
4.1
Norme generali di sicurezza
Alimentazione elettrica
Non toccare mai le parti in tensione! Possono provocare
gravi lesioni. Collegare il distributore ad una presa di alimentazione adeguata. La tensione deve corrispondere a
quella indicata sulla targhetta posta all’interno del distributore (Fig. 2).
Cavo di alimentazione
In caso di danneggiamento il cavo di alimentazione deve
essere sostituito da un Centro Assistenza Autorizzato. Non
collegare il cavo in corrispondenza di spigoli e oggetti taglienti o molto caldi. Evitare di metterlo a contatto con l’olio.
Non spostare il distributore tirandolo per il cavo. Non
scollegare mai la spina tirandola per il cavo o toccandola
con le mani bagnate. Evitare che il cavo di alimentazione
penda liberamente da tavoli o scaffali.
Ubicazione
Collocare il distributore su un piano stabile dove non possa essere rovesciato. L’acqua calda potrebbe fuoriuscire:
pericolo di ustioni! Non usare l’apparecchio all’aperto o
in ambienti con basse temperature. Non posizionare il distributore su superfici molto calde o nelle vicinanze di fiamme libere per evitare che la carrozzeria possa essere danneggiata.
Pericolo di ustioni
Evitare di mettere le mani sotto il getto di acqua calda o di
caffè.
Spazio necessario all’uso
Per il corretto e buon funzionamento del distributore si consiglia quanto segue:
- scegliere un piano di appoggio ben livellato
- scegliere un ambiente sufficientemente illuminato, igienico e con l’alimentazione elettrica facilmente accessibile
- prevedere una distanza minima dalle pareti del distributore come indicato nella figura 3.
Pericolo
Non mettere mai le parti in tensione a contatto con l’acqua: può essere causa di gravi pericoli! Non dirigere mai
il getto del vapore o dell’acqua calda verso parti del corpo; manipolare con precauzione il tubo acqua calda: pericolo di ustioni!
100 mm.
Usare il distributore unicamente per lo scopo
per il quale è destinato.
Evitare assolutamente di apportare modifiche tecniche che
possono essere causa di rischi!
Avvertenza
Il distributore deve essere utilizzato solo da adulti e da
persone preventivamente istruite al suo impiego.
Accertarsi che i bambini non abbiano la possibilità di giocare con il distributore. I bambini non si rendono conto del
pericolo connesso agli apparecchi elettrici.
Fig. 3
Italiano
Pulizia
Prima di pulire il distributore è indispensabile disinserire
l’interruttore generale e staccare la spina dall’alimentazione elettrica. Aspettare quindi che il distributore si raffreddi. Non immergere mai il distributore nell’acqua! È severamente vietato smontare l’apparecchio o cercare di intervenire in qualsiasi modo all’interno dello stesso.
1
Riparazione e manutenzione
In caso di guasti, difetti o sospetto difetto dopo una caduta, staccare subito la spina dalla presa di corrente. Non
mettere mai in funzione l’apparecchio difettoso. Le riparazioni possono essere effettuate esclusivamente dai Centri
di Assistenza Autorizzati. Si declina ogni responsabilità
per eventuali danni derivanti da interventi di riparazione
eseguiti in modo non corretto.
In caso di guasto e/o cattivo funzionamento rivolgersi esclusivamente al personale qualificato del SERVIZIO ASSISTENZA.
Fig. 4
In caso di incendio utilizzare estintori ad Anidride
Carbonica (CO2). Non utilizzare acqua o estintori a polvere.
4.2
Requisiti degli operatori
Ai fini della sicurezza e del buon funzionamento del distributore sono distinti due addetti con diversi requisiti:
Manutentore tecnico
Persona specializzata e addetta alle operazioni di installazione, regolazione, manutenzione e assistenza tecnica
del distributore.
Addetto al rifornimento
Persona preposta alle normali operazioni di messa in funzione e arresto, caricamento, prelievo monete e pulizia
interna ed esterna del distributore.
Qualora rilevi malfunzionamenti del distributore deve richiedere l’intervento del manutentore tecnico.
Utilizzatore
Utente del distributore. Ad esso NON è consentito eseguire le operazioni che sono di competenza dell’Addetto al
rifornimento o del Manutentore tecnico.
Qualora rilevi malfunzionamenti del distributore può richiedere l’intervento dell’Addetto al rifornimento.
4.3
Dispositivi di sicurezza
installati
Tutti gli organi che possono essere fonte di pericolo, sono
posti all’interno del distributore.
Un microinterruttore (rif. 1 - Fig. 4) toglie automaticamente l’alimentazione elettrica in caso di apertura del sportello laterale.
4.4
Controllo efficienza
microinterruttore di sicurezza
Con il distributore acceso, aprire lo sportello laterale e controllare che si spengano il display (rif. 8 - Fig. 1) e le spie
presenti nella tastiera pannello comandi (rif.8 - Fig. 1).
Il loro spegnimento indica che il distributore non è in funzione e che il microinterruttore è efficiente.
Italiano
5 - DESCRIZIONE COMANDI
E STRUMENTI
Importante
Il distributore è fornito con i tasti erogazione già programmati su valori standard.
Fase di erogazione
In questa fase di normale funzionamento, premendo i tasti
indicati nella figura 6, si eseguono le operazioni di seguito riportate:
Tasti
,
,
Erogano le bevande programmate.
5.1
Comandi principali
Interruttore generale (Fig. 5)
È posto nella parte posteriore del distributore in centro a
sinistra.
In posizione. ”I” accende il distributore (abilitazione funzioni elettriche).
In posizione. ”O” spegne il distributore (disabilitazione
funzioni elettriche).
=
caffè espresso
=
caffè lungo
=
acqua calda
Fase di programmazione
In questa fase di servizio, premendo i tasti indicati nella
figura 6, si eseguono le operazioni di seguito descritte:
E
Tasto ENT - “Caffè espresso”
Conferma dei parametri modificati.
Consente di ritornare al livello di programmazione inferiore
C
Tasto ESC
Consente di ritornare al livello di programmazione superiore evitando la memorizzazione del nuovo parametro.
Tasto UP - “Caffè”
Consente lo scorrimento del menu e incrementa il valore visualizzato per la modifica.
Fig. 5
Pannello di comando (Fig. 6)
Si compone di 4 tasti la cui funzione cambia al variare
della fase (ordinaria o di programmazione) in cui si trova
il distributore.
SELEZ. FUNZIONE
PRONTO X L’USO
Fig. 6
Tasto DOWN - “Acqua calda”
Consente lo scorrimento del menu e decrementa il valore visualizzato per la modifica.
Spie erogazioni
Le spie di erogazione, sono situate all’interno dei tre
tasti di selezione e sono di colore verde. Durante l’erogazione, rimarrà accesa solamente la spia della bevanda selezionata. Al termine dell’erogazione si
riaccenderanno di nuovo tutte.
Display
È composto da 2 linee di 15 caratteri ciascuna e ha il
compito di fornire i messaggi relativi alle operazioni
(in svolgimento o da eseguire) e alle eventuali condizioni di fuori servizio.
Italiano
6 - INSTALLAZIONE
-
parecchio come indicato in figura 3;
il piano di appoggio non deve superare i 2° di inclinazione.
Attenzione
La presenza di campi magnetici o la vicinanza di macchine elettriche che generano disturbi, potrebbe causare
malfunzionamenti al controllo elettronico del distributore.
Importante
È vietato installare il distributore all’esterno e in ambienti
in cui sono utilizzati getti d’acqua o di vapore.
6.3
Attenzione
Operazione di competenza del Manutentore tecnico.
Il distributore è predisposto per il funzionamento con una
tensione monofase il cui valore è evidenziato nella targhetta
di identificazione (2.4 Identificazione del distributore).
Importante
Con temperature prossime a 0°C può esserci il rischio di
congelamento delle parti interne contenenti acqua.
Non utilizzare il distributore in queste condizioni.
Per garantire il corretto funzionamento dell’apparecchio
ed il mantenimento nel tempo delle sue caratteristiche si
consiglia quanto segue:
- temperatura ambiente:10°C ÷ 40°C
- umidità massima:
90%.
- accertarsi che non vi siano state manomissioni durante il trasporto controllando che l’imballo originale sia integro e chiuso;
- verificare lo stato e il modello del distributore contenuto nell’imballo;
- controllare il contenuto della busta accessori, allegata al
distributore (vedi “6.1 Elenco accessori in dotazione”);
- togliere il distributore dall’imballo originale che consigliamo
di conservare per eventuali spostamenti o trasporti successivi;
- liberare il distributore dall’imballo residuo.
Collegamento elettrico
Attenzione
Il punto di collegamento alla alimentazione elettrica deve
essere situato in un luogo facilmente raggiungibile dall’addetto al rifornimento, in modo che possa scollegare agevolmente il distributore, quando è necessario.
Prima dell’allacciamento accertarsi che:
- la tensione di rete della presa a cui è collegato il distributore corrisponda a quella indicata nella targhetta.
- l’impianto elettrico a cui è collegato il distributore sia
rispondente alle norme vigenti ed abbia le caratteristiche adeguate a per sopportare il carico massimo richiesto indicato nella targhetta.
In caso di dubbio, richiedere un controllo accurato dell’impianto da parte di personale professionalmente qualificato.
Attenzione
È vietato l’uso di prolunghe o adattatori.
Importante
L’eventuale smaltimento dei componenti dell’imballo, dovrà avvenire nel rispetto della natura e delle norme vigenti.
6.1
•
•
•
•
•
Elenco accessori in dotazione
N. 1 chiave azionamento gruppo caffè (rif. 25 - Fig. 1).
N. 1 libretto Uso e Manutenzione.
N. 1 pennello per pulizia macinacaffè (rif. 23 - Fig. 1).
N. 1 striscia di prova del grado durezza acqua.
N. 1 tubo in silicone (rif. 26 - Fig. 1).
6.2
Posizionamento
Per il corretto e buon funzionamento dell'apparecchio si
consiglia quanto segue:
- scegliere un piano d'appoggio ben livellato;
- scegliere un ambiente sufficientemente illuminato, igienico e con presa di corrente facilmente accessibile;
- prevedere una distanza minima dalle pareti dell'ap-
6.4
Montaggio targhetta adesiva
“Istruzioni brevi”
Per montare la targhetta adesiva occorre:
- togliere il coperchio superiore inserendo la chiave nell’apposita serratura;
- togliere il coperchio contenitore caffè;
- svitare le 2 viti del contenitore caffè;
- togliere il contenitore caffè
- applicare la targhetta adesiva nella parte frontale all’interno del contenitore caffè;
- reinserire il contenitore caffè;
- avvitare le 2 viti del contenitore caffè;
- reinserire il coperchio contenitore caffè;
- reinserire il coperchio superiore e bloccarlo tramite la serratura.
Importante
Questa targhetta, dovrà essere applicata solo nel caso in cui il
distributore sia provvisto di monetiera, quindi non in uso gratuito.
Italiano
7 - PROGRAMMAZIONE
Questo capitolo descrive come impostare e/o modificare i
parametri programmabili del distributore.
È quindi opportuno leggere il capitolo con attenzione, intervenendo solamente dopo aver compreso e capito l’esatta
sequenza di tutte le operazioni da compiere.
Struttura delle funzioni di programmazione
CODICE ??
RESET CONTATORE
RESET CONTATORE
>SI<
NO
Per accedere alla funzione di programmazione tenere premuti i tasti
(Acqua calda), C (Esc) e successivamente
premere l’interruttore generale
Le voci principali del menu di programmazione sono:
•
VENDING
•
LINGUA
•
RISCIACQUO
•
ESPRESSO
TOTALE
0
CAFFE
TOTALE
0
EROGAZ. ACQUA
TOTALE
0
CONTATORE
CICLI
0
DUREZZA ACQUA
CONTATORE
BLOCCO
0
•
TEMP. ESPRESSO
TOTALE CAFFE
TOTALE
0
•
TEMP. CAFFÈ
•
PREINFUSIONE
•
PREMACINATURA
•
VENDING
BEVANDE
TOTALI
0
PREZZO
1 ESPRESSO
0
PROGRAMMAZ.DOSE
PREZZO
1 CAFFE
0
•
DECALCIFIC.
PREZZO
EROGAZ.ACQUA 0
•
SEGNALE DECALC.
CODICE
•
TEMPORIZZATORE
•
CICLO LAVAGGIO
******
CAMB. CODICE
Per uscire dalla funzione di programmazione, premere il
tasto C (Esc) . Il distributore è nuovamente in funzionamento normale.
Selezione dei singoli menu
si selezionano i singoli menu e con il tasto
Con i tasti
E si attiva la selezione prescelta. All’interno di ogni menu
é quindi possibile modificare i parametri con i tasti
.
Premendo il tasto E si memorizza la programmazione deATTIVATA
siderata (ad esempio “A
A” per la
PROGRAMMAZ. DOSE
“P
E”).
Se si é modificato erroneamente un valore premendo i tasti
, si può uscire dal menu premendo il tasto C (Esc)
senza che il nuovo valore venga memorizzato.
COD. VECCHIO?
......
COD. NUOVO?
......
COD. NUOVO ......
MEMORIZZ. >SI< NO
Italiano
ITALIANO
FRANÇAIS
ATTIVATA
Deutsch
JAPAN
LINGUA
PREINFUSIONE
DISATTIVATA
LUNGA
NEERLANDAIS
ATTIVATA
PORTUGUES
PREMACINATURA
DISATTIVATA
ESPAGNOL
ATTIVATA
ENGLISH
PROGRAMMAZ. DOSE
ATTIVATA
DISATTIVATA
DISATTIVATA
DECALCIFICAZ.
IN CORSO
DUREZZA 4
DECALCIFICAZ.
TERMINATA
RISCIACQUO
DECALCIFIC.
DUREZZA 3
RISCIACQUARE
DUREZZA 2
RISCIACQUO
TERMINATO
DUREZZA ACQUA
DUREZZA 1
SEGNALE DECALC.
MINIMA
TEMPORIZZATORE
MASSIMA
TEMP. ESPRESSO
ALTA
MEDIA
BASSA
MINIMA
MASSIMA
TEMP. CAFFE
ALTA
MEDIA
BASSA
QUANTITA ACQUA
NON RAGGIUNTA
RISPARM. ENERGIA
DOPO
0:00
RISPARMIO
ENERGIA
CICLO LAVAGGIO
Italiano
7.1
Descrizione dei menu
CODICE
All’ingresso della modalità di programmazione, viene richiesto il codice impostato, che permette di proseguire nella
CODICE
programmazione. Per impostarla vedi ”C
E” nel
menu Vending.
Annotarsi il codice quando viene cambiato.
Funzioni per il Vending
La Royal Office è dotata di un contatore che, rilevando le
varie erogazioni, consente l’analisi statistica della caffettiera. Il distributore dispone inoltre di un ulteriore contatore che, dopo un certo numero, può bloccare le erogazioni.
Queste funzioni sono vincolate da un codice di accesso.
VENPremendo i tasti
portare l’asterisco sulla voce “V
G” e selezionarla con il tasto E (Ent).
DING
Appare un sottomenu sul quale é possibile scegliere una
.
delle voci che seguono tramite i soliti tasti
Sul display appare la voce:
RESET CONTATORE
Funzione che consente di azzerare tutti i contatori parziali. Premendo E (Ent) sul display apparirà:
"RESET CONTATORE
"
"
SI "
Con i tasti
si scelgono le due possibilità S I / N O e si
confermano col tasto E (Ent).
ESPRESSO
TOTALE
0
Il contatore indica la quantità di caffè espresso erogato a
partire dall’ultimo azzeramento.
Dal menu V E N D I N G
portare l’asteG, premendo i tasti
risco sul menu E S P R E S S O e confermare con il tasto E
(Ent).
Con i soliti tasti
si può modificare il valore indicato
(per eseguire l’azzeramento del contatore, ad esempio) e
con il tasto E (Ent) si memorizza il nuovo valore. Premendo
il tasto C (Esc) si interrompe invece l’inserimento del nuovo
valore e, di conseguenza, si mantiene la precedente
impostazione del contatore.
CAFFÈ
TOTALE
0
Il contatore indica la quantità di caffè erogato a partire
dall’ultimo azzeramento.
Dal menu V E N D I N G
G, premendo i tasti
portare l’asterisco sul menu C A F F È e confermare con il tasto E (Ent).
Con i tasti
si può modificare il valore indicato (per
eseguire l’azzeramento del contatore, ad esempio) e con il
tasto E (Ent) si memorizza il nuovo valore.
Premendo il tasto C (Esc) si interrompe invece l’inserimento
del nuovo valore e, di conseguenza, si mantiene la precedente impostazione del contatore.
EROGAZ. ACQUA
TOTALE
0
Il contatore indica la quantità di acqua calda erogato a
partire dall’ultimo azzeramento.
Dal menu V E N D I N G
G, premendo i tasti
portare l’asterisco sul menu E R O G A Z . A C Q U A e confermare con il
tasto E (Ent).
si può modificare il valore indicato
Con i soliti tasti
(per eseguire l’azzeramento del contatore, ad esempio) e
con il tasto E (Ent) si memorizza il nuovo valore. Premendo
il tasto C (Esc) si interrompe invece l’inserimento del nuovo
valore e, di conseguenza, si mantiene la precedente
impostazione del contatore.
CONTATORE
CICLI
e
CONTATORE
BLOCCO:
0
0
Questa funzione consente di bloccare l’erogazione del
caffè, e non quelle di acqua calda, dopo un determinato
numero di cicli e può servire, ad esempio, per programmare gli interventi di manutenzione dell’apparecchio.
Se viene inserito il valore 0 la funzione é disattivata.
Dal menu V E N D I N G
G, premendo i tasti
portare l’asterisco sul menu C O N T A T O R E e confermare con il tasto E
(Ent).
Con i soliti tasti
si può modificare il valore indicato
(per fissare un nuovo limite di intervento, ad esempio) e
con il tasto E (Ent) si memorizza il nuovo valore. Premendo
il tasto C (Esc) si interrompe invece l’inserimento del nuovo
valore e, di conseguenza, si mantiene la precedente
impostazione del contatore.
Al raggiungimento del limite impostato, l’erogazione del
caffè si blocca e sul display appariranno alternativamente
le seguenti scritte:
"EROG. CAFFÈ
"BLOCCATA
TOTALE CAFFÈ
TOTALE
"
"
0
Il contatore visualizza le erogazioni totali di caffè e non
può essere azzerato.
BEVANDE
TOTALI
0
Il contatore visualizza le erogazioni totali di tutte le bevande e non può essere azzerato.
PREZZI BEVANDA
Funzione che consente di associare ad ogni bevanda un
prezzo precedentemente impostato.
Italiano
"PREZZO
"1 ESPRESSO
"
0 "
"PREZZO
"1 CAFFÈ
"
0 "
"PREZZO
"EROGAZ. ACQUA
"
0 "
Ad esempio, se il codice 312241 deve essere impostato,
la sequenza di inserimento è la seguente:
1: Tasto 3
Acqua calda
3
2: Tasto 1 E (Ent) Caffè espresso
1
3: Tasto 2
Caffè
2
Caffè
2
4: Tasto 2
5: Tasto 4 C (Esc)
4
6: Tasto 1 E (Ent) Caffè espresso
1
Importante
Il distributore viene fornito con i prezzi impostati a 0 ,
questo significa che le bevande sono in uso gratuito.
Per impostare i prezzi 1 e 2 il distributore deve essere
fornito di gettoniera opzionale (vedere manuale Gettoniera).
Attenzione
Annotarsi la nuova password poiché, in caso di smarrimento, non sarà più possibile accedere alla programmazione.
Visualizzazione del numero dei prodotti
erogati
CODICE
111111
Consente di impostare un codice (“1
1” di default),
per evitare che persone non autorizzate accedano alla programmazione. Confermando, si accede alla voce di menu:
"CAMB. CODICE
"
"COD. VECCHIO?
"......
"
"
"COD. NUOVO?
"......
0 "
"
"COD. NUOVO ...... "
"MEMORIZZ.
SI "
Il codice sarà richiesta ogni volta che si accede alla programmazione.
Quando il distributore si trova in modalità
"SELEZ. FUNZIONE"
"PRONTO X L‘USO"
premendo contemporaneamente le combinazioni di tasti
elencate di seguito si visualizza il numero dei prodotti erogati dopo l‘ultimo azzeramento (vedi la funzione R E S E T
CONTATORI
I).
C + Caffé espresso
"ESPRESSO
"TOTALE
indica il numero di erogazioni di “C
CAFFE ESPRESO”.
SO
C + Caffé
"CAFFE
"TOTALE
Attenzione
Dopo 5 tentativi di introduzione errata del codice, il distributore richiede il PUC (Personal User Code) per accedere
alla programmazione.
Per ricevere il codice PUC contattare il CENTRO ASSISTENZA.
Se il PUC è impostato correttamente, viene richiesto di impostare un codice nuovo.
I tasti hanno i seguenti valori durante l’impostazione del
codice e del PUC:
Tasto 1 E (Ent)
Tasto 2
Tasto 3
Tasto 4 C (Esc)
Caffè espresso ............ 1
Caffè ......................... 2
Acqua calda .............. 3
................................. 4
"
4"
"
2"
CAFFE
indica il numero di erogazioni di “C
E”.
C + Caffé espresso + Caffé
"
"TOTALE
"
6"
indica la somma di erogazioni di “C
CAFFE ESPRESCAFFE
O” + “C
E”.
SO
C + Acqua calda
"EROGAZ. ACQUA "
"TOTALE
7"
ACQUA CALDA
indica il numero di erogazioni di “A
A”.
Premendo solamente il tasto C sul display si visualizza il
seguente messaggio:
"TOTALI CAFFE "
"
50"
Italiano
CAFFE
indica il numero totale di erogazioni di “C
E” e non
viene azzerato ad ogni reset contatori.
TEMP. CAFFÈ
“T
O” o “T
È” e selezioTEMP. ESPRESSO
narla con il tasto E (Ent).
Sul display appare, in funzione della scelta eseguita:
Selezione della lingua
LINPremendo i tasti
portare l’asterisco sulla voce “L
GUA
A” e selezionarla con il tasto E (Ent).
Sul display appare:
"LINGUA
"ITALIANO
"
"
Con i tasti
il valore può essere modificato:
ITALIANO
FRANÇAIS
”I
O”, ”F
S”,
D
e
u
t
s
c
h
“
N
E
DERLANDS”,
”D
h”,“
PORTUGUES
ESPAGNOL
ENGLISH
”P
S”, ”E
L”, ”,E
H”,
"TEMP. ESPRESSO
"MEDIA
"
"
"TEMP. CAFFE
"MEDIA
"
"
Con i soliti tasti
si possono poi selezionare i seguenti
valori:
MINIMA
MASSIMA
ALTA
MEDIA
“M
A”, “M
A”, “A
A”,”M
A” o
BASSA
“B
A”.
Funzione di risciacquo
Funzione di preinfusione
Se la funzione di risciacquo è attivata, il distributore, appena viene acceso dopo un periodo di inattività, inizia
automaticamente un risciacquo con acqua calda delle parti
interessate all'erogazione del caffè. Premendo i tasti
RISCIACQUO
portare l’asterisco sulla voce “R
O” e selezionarla con il tasto E (Ent).
Sul display appare:
Attivando questa funzione si interrompe brevemente il funzionamento della pompa durante l’erogazione del caffè
ottenendo, conseguentemente, un maggior sfruttamento
della polvere.
"RISCIACQUO
"ATTIVATA
"
"
Con i tasti
si possono modificare i valori impostati:
A, D I S A T T I V A T A
A.
ATTIVATA
Regolazione della durezza dell’acqua
Per regolare il grado di durezza dell’acqua é necessario
eseguire l’opportuno test di verifica impiegando l’apposita striscia in dotazione. Immergere brevemente (per 1 secondo) la striscia nell’acqua, scuoterne via l’eccesso d’acqua ed attendere un minuto circa per rilevare il risultato.
DUPremendo i tasti
portare l’asterisco sulla voce “D
A” e selezionarla con il tasto E (Ent).
REZZA ACQUA
Sul display appare:
"DUREZZA ACQUA
"DUREZZA 3
"
"
In funzione dei risultati ottenuti nel test e premendo i soliti
tasti
, si possono poi selezionare i seguenti valori:
Premendo i tasti
portare l’asterisco sulla voce
“P
E” e selezionarla con il tasto E (Ent).
PREINFUSIONE
Sul display appare:
"PREINFUSIONE
"ATTIVATA
ATCon i soliti tasti
la funzione si può modificare: “A
LUNGA
DISATTIVATA
A”, “D
A” o “L
A” (in questo
TIVATA
caso la sosta della pompa é maggiore).
Funzione di premacinatura
Attivando questa funzione si ottiene una macinatura ogni
volta che il dosatore é vuoto. È quindi sempre pronta una
porzione di caffè macinato che consente di risparmiare
tempo nei casi di impieghi frequenti del distributore. Questa funzione é invece sconsigliata negli altri casi per i vantaggi che derivano dall’impiego del caffè macinato all’istante e, quindi, fresco.
PREPremendo i tasti
portare l’asterisco sulla voce “P
A” e selezionarla con il tasto E (Ent).
MACINATURA
Sul display appare:
"PREMACINATURA
"ATTIVATA
DUREZZA 4 (dura)
DUREZZA 3 (media)
Durezza
Sehr
weiches4Wasser
DUREZZA 2 (dolce)
Durezza
3
Weiches
Wasser
Durezza
2
Mittleres
Wasser
"
"
"
"
ATCon i soliti tasti
la funzione si può modificare: “A
DISATTIVATA
A” o “D
A”.
TIVATA
DUREZZA 1 (molto dolce)
Durezza
1
Hartes
Wasser
Programmazione dose
Regolazione della temperatura
La Royal Office consente di eseguire una precisa regolazione della temperatura del caffè.
Premendo i tasti
portare l’asterisco su una delle voci
Questa funzione permette di dosare con precisione la quantità di caffè erogato utilizzando i tre tasti di selezione (Caffè Espresso, Caffè e Acqua calda).
Italiano
Premendo i tasti
portare l’asterisco sulla voce
PROGRAMMAZ. DOSE
“P
E” e selezionarla con il tasto E
(Ent).
Sul display appare:
"PROGRAMMAZ. DOSE
"ATTIVATA
"
"
Con i soliti tasti
la funzione si può modificare:
ATTIVATA
DISATTIVATA
“A
A”, “D
A” e selezionarla con
il tasto E (Ent).
Per programmare il livello di riempimento delle tazze, è
necessario tenere premuto il corrispondente tasto di selezione fino ad ottenere la quantità di caffè desiderata (massimo 250 ml circa). Durante questa operazione sul display
appare il seguente messaggio:
"ESPRESSO
"PROG. DOSE
oppure:
"CAFFE’
"PROG. DOSE
oppure:
"ACQUA CALDA
"PROG. DOSE
"
"
"
"
"
"
Decalcificazione
Usando i tasti
portare l’asterisco alla voce di menu
C.
DECALCIFIC
Per attivare la voce utilizzare il tasto E (Ent).
Sul display appare:
"DECALCIFIC.
"
Sulla decalcificazione vedi pagina 25.
l’ultima erogazione di un prodotto. Se dopo pochi secondi
viene erogato di nuovo caffè, il temporizzatore inizia da
capo. Se il valore impostato è pari a 0:00, la funzione non
è attivata.
Usando i tasti
portare l’asterisco alla voce di menu
TEMPORIZZAT
ORE
TO
E. Per attivare la voce utilizzare il
tasto E (Ent).
Sul display appare:
"RISPARM. ENERGIA "
"DOPO
0:00 "
Con i tasti
si possono impostare i tempi desiderati.
Con il tasto E (Ent) si memorizza.
Se il tempo impostato è già trascorso, sul display appare:
"RISPARMIO
"ENERGIA
"
"
e il distributore si spegne. Se necessario, il distributore si
può riaccendere usando il tasto C (Esc).
Ciclo di lavaggio
L’apparecchio è dotato di un programma di lavaggio che
completa il lavaggio usuale, quotidiano e settimanale.
Questo programma, se utilizzato regolarmente permette
di eliminare efficacemente l’untuosità del caffè in parti non
accessibili e previene alterazioni nel gusto del caffè.
A seconda dell’impiego dell’apparecchio, si consiglia di
eseguire un lavaggio mensile o al massimo dopo 250 tazze di caffè. Il programma di lavaggio dura circa 5 minuti,
ed è suddiviso in 4 cicli, compreso il risciacquo. Tra i cicli
ci sono delle brevi pause di circa 40 secondi.
Attenzione
Il programma di lavaggio non deve mai essere interrotto.
Segnalazione decalcificazione
Con questa funzione si visualizza se la quantità d’acqua è
stata raggiunta, in base al valore della durezza dell’acqua impostata.
Usando i tasti
portare l’asterisco alla voce di menu
S E G N A L E D E C A L C . e attivare la voce premendo il
tasto E (Ent).
Sul display appare :
"QUANTITÀ' ACQUA
"NON RAGGIUNTA
"
"
Questo messaggio appare nel caso in cui sia stata seleSEGNALE DECALC.
zionata la voce di menu “S
.” prima
che il distributore segnali D E C A L C I F I C A R E
E.
Premendo C (Esc) si torna al menu di programmazione.
Temporizzatore
Con questa funzione è possibile impostare il distributore
per uno spegnimento automatico dopo un certo periodo di
tempo. È possibile impostare tempi che vanno da un quarto d’ora a 13 ore circa. Il calcolo del tempo inizia con
Prima della messa in funzione del programma di lavaggio, riempire sempre il serbatoio dell’acqua completamente
e porre un contenitore capiente (min. 1 litro di contenuto)
sotto l’erogatore di caffè (l’erogatore è regolabile in altezza e può essere tolto per la pulizia). Per il lavaggio è necessario circa 1 litro d’acqua (incluso il risciacquo). Eventualmente svuotare il contenitore di raccolta di tanto in tanto.
Usando i tasti
portare l’asterisco alla voce di menu
O. Per attivare la voce utilizzare il
CICLO LAVAGGIO
tasto E (Ent).
Sul display appare:
"CICLO LAVAGGIO
"
Con questa funzione si da’ inizio ad un ciclo di lavaggio
con acqua delle parti interessate all’erogazione del caffè.
Il ciclo di lavaggio sarà terminato quando sul display apparirà:
"SELEZ. FUNZIONE
"PRONTO X L'USO
"
"
Italiano
8 - USO DEL DISTRIBUTORE
"SELEZ. FUNZIONE
"PRONTO X L'USO
Importante
Prima di utilizzare il distributore è necessario aver letto
attentamente la presente pubblicazione ed aver acquisito
una buona conoscenza generale del distributore.
Dopo un periodo di inattività del distributore è consigliabile
rileggere il punto “8.3 Prima accensione del distributore”
prima di riutilizzarlo.
8.1
Stati del distributore
In relazione all’alimentazione elettrica il distributore può
essere in uno dei seguenti stati:
Spento ed isolato elettricamente
•
•
Non appena raggiunta la temperatura necessaria, sul display appare invece:
Interruttore generale (Fig. 5) in posizione “0“.
È attiva esclusivamente la memoria di mantenimento
dei dati programmati.
"
"
Mancanza caffè nel contenitore caffè in
grani
Quando finisce il caffè in grani, il macinacaffè si arresta e
sul display appare la segnalazione:
"MANCA CAFFE
"PRONTO X L’USO
"
"
La spia di erogazione posta all‘interno del tasto di selezione del caffè richiesto si spegne.
PRONTO PER L‘USO
L‘indicazione “P
O” é riferita alla
sola possibilità di erogare acqua calda.
Riempire il contenitore con caffé in grani ed eliminare il
messaggio M A N C A C A F F E tenendo premuto per 5 secondi uno dei due tasti caffé.
Acceso
•
•
Interruttore generale in posizione “I“.
Sono attive tutte le funzioni ed il display (rif. 8 - Fig. 1)
è acceso.
In risparmio energia
È quella fase di inattività in cui il distributore può trovarsi
quando è stata impostata la funzione TEMPORIZZATORE
(vedi PROGRAMMAZIONE), il quale può regolarne l’accensione e lo spegnimento automatico.
• Interruttore generale in posizione “I“;
RISPARMIO
• Il display visualizza il messaggio “R
ENERGIA
A”.
• La memoria di mantenimento dei dati programmati è
attiva.
• Il distributore non eroga nessun tipo di bevanda.
8.2
Consigli e raccomandazioni
Mancanza acqua nel serbatoio
Quando finisce l’acqua, il programma si ferma automaticamente e sul display appare la segnalazione:
"RIEM. SERB. ACQUA "
Riempire il serbatoio e riavviare il ciclo.
Riempimento cassetto raccoglifondi
Quando nell’apposito cassetto ci sono 30 fondi, sul display appare il seguente messaggio:
"VUOTARE FONDI
"PRONTO X L'USO
Inattività prolungata
Dopo un prolungato periodo di inattività, per ragioni igieniche, si consiglia di risciacquare a fondo il circuito.
Mettere una tazza sotto il tubo acqua calda (rif. 7 - Fig. 1)
e, premendo il tasto acqua calda, riempirla di acqua.
Controllo della temperatura
Ad ogni accensione del distributore appare sul display il
messaggio:
"ATTENDERE........ "
"
"
Il distributore non può erogare caffé ma solo acqua: estrarre
il cassetto raccoglifondi e vuotarlo.
PRONTO PER L‘USO
L‘indicazione “P
O” é riferita alla
sola possibilità di erogare acqua calda.
Italiano
8.3
Prima accensione del
distributore
Riempimento serbatoio acqua
Rimuovere il serbatoio e portarlo sotto ad un rubinetto.
Riempimento contenitore caffè
Versare il caffè in grani all’interno del contenitore (Fig. 7).
Riempire il serbatoio dell’acqua (Fig. 9) con acqua potabile fresca.
Reinserire il serbatoio dell’acqua nell’apposita sede.
Fig. 7
Fig. 9
Chiudere il contenitore ponendovi sopra il coperchio (Fig.
8).
Montaggio piastrina
serratura coperchio
Montare la piastra sulla serratura del coperchio avendo
cura di posizionarla come in figura 10.
Fig. 8
Si consiglia di usare caffè fresco, non untuoso e di grana
media.
Fig. 10
Italiano
Fissata la piastrina è obbligatorio posizionare il coperchio
sopra ai contenitori di acqua e caffè prima di iniziare ad
usare il distributore (Fig. 11).
Importante
Il caricamento del circuito é da eseguirsi preliminarmente
alla prima messa in funzione, dopo un periodo prolungato di inattività, se il serbatoio acqua é stato vuotato completamente o se si sono verificati malfunzionamenti della
pompa.
Regolazione della macinatura
Se l’erogazione del caffè é troppo veloce, in caso di macinatura
troppo grossa, o se fuoriesce a gocce, nel caso di macinatura troppo fine, occorre regolare il grado di macinatura del macinacaffè la
cui posizione iniziale consigliata é quella coincidente con il punto 5.
Fig. 11
Fissare il coperchio ruotando la chiave nella serratura (Fig.
12).
In caso di macinatura troppo grossa, correggere su un
valore più basso (esempio: da 5 a 3). Nel caso contrario,
correggere invece su un valore più alto (esempio: da 5 a
7) (Fig. 13).
Fig. 12
Caricamento circuito idraulico
Mettere una tazza o un recipiente adatto sotto al beccuccio
erogazione acqua calda. Accendere il distributore ed effettuare la procedura di caricamento circuito come segue:
- Attendere che sul display appaia il messaggio:
"CARIC. CIRCUITO
"
A questo punto premere il tasto ACQUA CALDA, la pompa si avvia automaticamente e dopo pochi secondi sul
display apparirà il messaggio:
"SELEZ. FUNZIONE
"PRONTO X L’USO
"
"
indicando che il circuito é stato scaricato e il distributore é
pronto ad erogare le bevande.
Fig. 13
Importante
La regolazione del macinacaffè deve essere eseguita unicamente quando quest’ultimo é in funzione. Evitare, se possibile, la regolazione estrema nella posizione 1. In alternativa, provate preferibilmente un’altra miscela di caffè,
poiché non tutte le miscele producono risultati analoghi.
Italiano
Per regolare la macinatura procedere nel seguente modo:
- con il distributore spento, aprire lo sportello di servizio
(rif. 15 - Fig. 1) tramite la chiave in dotazione, posizionare il tubo in silicone (rif. 26 - Fig. 1) (esclusione
del microinterruttore di sicurezza), accendere l’interruttore generale e controllare che il distributore si accenda;
- premere il tasto caffé ed osservarne la fuoriuscita
dall’erogatore;
- regolare di conseguenza il grado di macinatura;
- spegnere l’interruttore generale, togliere il tubo in silicone e richiudere lo sportello di servizio con l’apposita chiave.
Per tazze alte posizionare l’erogatore come in figura 15.
Attenzione
La nuova regolazione, è apprezzabile solamente dopo le
tre macinature successive.
Fig. 15
Miscele di caffè
Livello di riempimento delle tazze
Accertarsi che il caffè sia fresco e utilizzare una miscela
per caffè espresso.
Per ottenere un espresso forte e aromatico, usare le miscele speciali per macchine espresso.
Conservare il caffè al fresco in un contenitore chiuso ermeticamente.
Con questa macchina potete dosare con precisione la quantità di caffè in funzione delle tazze impiegate.
Con i due tasti di selezione, si sceglie la quantità desiderata. Sul display appariranno i messaggi corrispondenti.
Per programmare il livello di riempimento delle tazze, é
necessario tenere premuto il corrispondente tasto di selezione fino ad ottenere la quantità di caffè desiderata (massimo 250 ml circa).
8.4
Erogazione delle bevande
Durante questa operazione sul display appare il seguente
messaggio:
Regolazione erogatore di caffè
L’erogatore di caffè può essere regolato a seconda delle
dimensioni delle tazze che si intende utilizzare.
Per tazze basse posizionare l’erogatore come in figura 14.
"1 ESPRESSO
"
"PROGRAMMAZ.DOSE
"
"1 CAFFE
"
"PROGRAMMAZ.DOSE
"
Importante
La regolazione del livello di riempimento delle tazze potrà
essere interrotta solamente dopo l‘erogazione della dose
minima. Se la funzione di preinfusione é attivata, durante
la regolazione del livello di riempimento delle tazze mantenere premuto il tasto selezionato anche durante la pausa
della pompa e fino al raggiungimento della quantità desiderata.
Fig. 14
Italiano
Durante la fase di programmazione appare sul display il
seguente messaggio:
Erogazione del caffè
"EROGAZ. ACQUA
"PROGRAMMAZ.DOSE
Mettere la tazza sulla griglia appoggiatazze (rif. 3 - Fig.
1) in corrispondenza dell’erogatore (rif. 6 - Fig. 1).
Premere il tasto di selezione corrispondente ed il distributore eroga automaticamente il caffè prescelto.
"
"
Inserire il bicchiere o la tazza sotto all’erogatore acqua
calda (rif. 7 - Fig. 1) e premere il tasto di selezione dell’acqua calda. L’erogazione si avvia automaticamente.
Attenzione
Il caffè può essere programmato solo se la relativa funzione di programmazione é attivata (vedere a pagina 14).
Erogazione di acqua calda
L’erogazione dell’acqua calda é ottenuta mediante un circuito che garantisce la giusta temperatura ed un gusto neutro per la preparazione di thé, brodo, tisane, ecc.
Premendo il tasto dell'ACQUA CALDA (Fig. 16) apparirà
sul display il seguente messaggio:
"EROGAZ. ACQUA
"
EROGAZ. ACQUA
8.5
Messaggi e segnalazioni di
situazioni particolari
Il funzionamento del distributore automatico viene bloccato completamente, o parzialmente, quando si verificano la
mancanza di acqua, caffè o condizioni anomale. Il display posto sul pannello di comando fornisce le indicazioni della causa che ha provocato l’eventuale blocco.
Quando sul display compare un messaggio di anomalia
contattare l’ADDETTO AL RIFORNIMENTO.
Controllo elettronico della mancanza del
caffè
Quando termina il caffè in grani, la macinatura si arresta
automaticamente dopo circa 20 secondi. Riempire il contenitore con caffè in grani seguendo le istruzioni riportate
a pagina 16.
Protezione contro le impurità del caffè in
grani
Anche il caffè in grani più selezionato può contenere impurità di ogni genere (sassolini, parti di metallo, ...).
Per evitare danni al macinacaffè, quest’ultimo é dotato di
una protezione contro le impurità.
Se una di queste cade nel macinacaffè, la sua presenza é
segnalata da un rumore particolare: spegnere subito il distributore!.
In ogni caso la macinatura si fermerà nel giro di 20 secondi grazie all’apposito controllo elettronico.
Fig. 16
Se durante l’erogazione dell’acqua calda la relativa programmazione é attivata, viene erogata la sola quantità
programmata. Nel caso contrario, l’erogazione deve essere invece fermata premendo nuovamente il tasto di selezione al raggiungimento della quantità desiderata.
Per programmare la quantità di acqua calda é necessario
tenere premuto il relativo tasto di selezione fino al
raggiungimento della quantità desiderata.
Attenzione
L’acqua calda può essere programmata solo se la relativa
funzione di programmazione é attivata (vedere a pagina
14).
Importante
Per non rischiare di danneggiare il motore del macinacaffè, non rimettere in funzione il distributore prima di avere
eliminato il corpo estraneo.
Procedere come indicato a pagina 24.
Controllo elettronico della mancanza di
acqua
Il distributore si arresta automaticamente non appena il
contenuto del serbatoio acqua é sceso sotto al livello minimo verificato con l’apposito indicatore galleggiante (rif.
10 - Fig. 1).
Riempire il serbatoio seguendo le istruzioni riportate a
pagina 17.
Italiano
9.2
9 - MANUTENZIONE
9.1
Premessa
Attenzione
Prima di eseguire qualsiasi operazione di manutenzione
e/o pulizia, scollegare il distributore dall’alimentazione elettrica ed attenderne il raffreddamento.
Per ottenere la massima qualità delle bevande erogate e
garantire il miglior funzionamento del distributore è necessario attenersi alle disposizioni contenute in questo libretto.
Pulizia e manutenzione
Le operazioni di manutenzione sono da eseguire almeno
ogni anno e comprendono il controllo dell’integrità del distributore e la conformità alle norme degli impianti.
Serbatoio dell’acqua / Vasca raccogligocce
/ Cassetto raccogli-fondi / Sistema
erogatore del caffè / Macchina
Per mantenere puliti il vano di servizio e il gruppo erogatore
(rif. 18 - Fig. 1), raccomandiamo di vuotare ogni giorno,
in base alle vostre esigenze, il cassetto raccoglifondi (Fig.
17).
I componenti non smontabili e il distributore stesso vanno
puliti, quando non specificato diversamente, solo con acqua fredda o tiepida, utilizzando spugne non abrasive e
panni umidi (questa operazione non è da eseguirsi su parti elettriche esposte).
•
•
•
•
•
•
•
•
Non utilizzare alcun detersivo o solvente che potrebbe
modificarne la forma o la funzionalità.
Non immergere il distributore in acqua o in altri liquidi: il distributore subirà danni.
Non lavare componenti del distributore nella lavastoviglie.
Asciugare sempre a mano i componenti del distributore, senza inserirli nel forno o nel forno a microonde.
Non utilizzare getti di acqua diretta.
Tutte le parti da pulire sono facilmente accessibili e
non richiedono l’utilizzo di attrezzi.
Una manutenzione ed una pulizia regolari preservano e mantengono efficiente il distributore per un periodo maggiore e garantiscono il rispetto delle normali
norme igieniche.
I contatori presenti sul distributore conteggiano il numero di erogazioni eseguite e consentono di programmare gli interventi di manutenzione ordinaria da parte del manutentore tecnico.
Fig. 17
Lavare periodicamente il serbatoio dell’acqua (rif. 9 - Fig.
1), il cassetto raccoglifondi, la vasca raccogligocce (Fig.
18) e la griglia appoggiatazze (Fig. 18) con un detergente
non abrasivo e asciugarli con cura.
Importante
Eseguire gli interventi di manutenzione sul distributore
seguendo le scadenze riportate al punto 14.1 del presente
manuale all’interno della tabella manutenzione ordinaria.
Attenzione
In caso di guasto e/o mal funzionamento contattare il
CENTRO DI ASSISTENZA AUTORIZZATO.
fig. 18
Italiano
L’erogatore di caffè (rif. 6 - Fig. 1) può essere smontato
per essere pulito.
Rimuovere la protezione (Fig. 19).
Lavare il canale di erogazione (Fig. 22) e risciacquare accuratamente con acqua calda.
Fig. 19
Allentare la vite zigrinata, posta sotto l’erogatore (Fig. 20).
Fig. 22
Di tanto in tanto, pulire il distributore con un panno umido,
ed asciugare.
Gruppo erogatore
Fig. 20
Il gruppo erogatore deve essere pulito ogni volta che si
riempie il contenitore di caffè in grani e comunque almeno
una volta alla settimana.
Disinserire il distributore premendo l’interruttore generale
(rif. 4 - Fig. 1) e aprire lo sportello di servizio (rif. 15 Fig. 1).
Togliere per primo il cassetto raccoglifondi (Fig. 23).
Smontare l’erogatore ruotandolo verso l’esterno (Fig. 21).
Fig. 21
Fig. 23
Italiano
Estrarre il gruppo erogatore tenendolo per l’apposita maniglia e premendo sull’iscrizione “PRESS” (Fig. 24).
Estrarre il cassetto per residui di caffè per pulirlo (Fig. 26).
Fig. 26
Utilizzare solo detergenti non abrasivi.
Pulire accuratamente il vano di servizio e inserire di nuovo
il cassetto per residui di caffè.
Fig. 24
Reintrodurre il gruppo erogatore tenendolo per l’apposita
maniglia fino ad aggancio avvenuto, poi chiudere lo sportello di servizio (rif. 15 - Fig. 1).
Attenzione
Il gruppo erogatore deve essere lavato con acqua calda
senza detergente.
Fare attenzione che la doccia in acciaio inossidabile sia priva di ogni residuo di caffè.
Al momento di inserire iI gruppo erogatore (Fig. 27), evitare assolutamente di premere l’iscrizione “PRESS” (danni
all’apparecchio)!
Estrarre la doccia superiore per pulirla. Con la chiave in
dotazione (rif. 25 - Fig. 1) svitare la vite in senso antiorario
(Fig. 25).
Lavare ed asciugare tutti gli elementi del gruppo erogatore,
rimontare la doccia e fissare la vite con la chiave.
Fig. 27
Importante
Fig. 25
Se il gruppo erogatore non è introdotto correttamente, sul
display appare:
"MANCA GRUPPO
"
non è possibile erogare caffè. Il distributore è bloccato.
Reintrodurre il cassetto raccoglifondi (rif. 1 - Fig. 1).
Italiano
Tirare con precauzione la leva verso l’alto (Fig. 30) annotandosi il grado i macinatura selezionato.
Ora il contenitore può essere tolto per essere pulito.
Macinacaffè
Attenzione
Mai immettere acqua nel macinacaffè, si potrebbero arrecare danni irreparabili all’apparecchio!
Eseguire periodicamente la pulizia del contenitore caffè in
grani. Questa operazione è riservata ad un tecnico qualificato!
Estrarre la spina d’alimentazione del distributore (rif. 5 Fig. 1) dalla presa di corrente.
Togliere il coperchio con serratura (rif. 21 - Fig. 1) ed il
coperchio contenitore caffè in grani (rif. 12 - Fig. 1).
Togliere tutti i grani di caffè dal contenitore e svitare le due
viti di fissaggio (fig. 28).
Fig. 30
Far ruotare in senso antiorario l’anello di regolazione fino
a far coincidere tra loro i riferimenti blu (Fig. 31).
Fig. 28
Togliere le due viti di fissaggio della leva di regolazione
(Fig. 29).
Fig. 29
Fig. 31
Ora è possibile estrarre l’anello di macinatura, tirandolo
verso l’alto ed agendo con movimenti leggeri (fig. 32
Fig. 32
Italiano
Ripulire con il pennello in dotazione (Fig. 33) e con un
aspirapolvere tutta la zona del macinacaffè e l’anello di
macinatura.
Procedere con la massima cautela cercando di non modificare le posizioni dei riferimenti.
Importante
Data la complessità del circuito idraulico della caffettiera, i
cicli di decalcificazione esposti di seguito (automatico e
convenzionale) non consentono di interessare tutti i condotti. Sono infatti esclusi componenti di facile accessibilità quali il gruppo erogatore (rif. 18 - Fig. 1) ed il perno/
valvola in plastica di connessione allo stesso.
L’operazione di decalcificazione deve essere eseguita regolarmente ogni 3 – 4 mesi. Nelle regioni con una durezza dell’acqua molto elevata, consigliamo una
decalcificazione più frequente.
Per evitare pericolosi ritardi dell’utente, questa macchina è
dotata di un apposito contatore di controllo che segnala,
in funzione dell’acqua impiegata, la necessità di eseguire
urgentemente l’operazione.
In questo caso apparirà nel display il messaggio:
Fig. 33
Eseguire la sequenza inversa per riassemblare il macinacaffè.
Se l’anello di regolazione si é spostato durante la pulizia,
ruotarlo fino a far coincidere il riferimento blu con uno dei
tre incavi.
Inserire quindi l’anello di macinatura assicurandosi che i
riferimenti blu coincidano.
Far ruotare in senso orario l’anello di regolazione fino a
far coincidere i riferimenti rossi.
Innestare la leva di regolazione sull’anello cercando di farla
coincidere con la posizione del grado di macinatura precedentemente annotata.
"DECALCIFICARE
"PRONTO X L’USO
"
"
Quando compare il messaggio il distributore non si blocca
ma é consigliabile eseguire la decalcificazione con tempestività. Per eliminare il messaggio, si deve procedere come
indicato a pag.15.
Il distributore è regolato inizialmente su un valore della
durezza dell’acqua di 25°fH, che provoca la segnalazione dopo 150 litri circa.
Nelle regioni con acqua dura ed in ogni caso, per migliorare la qualità del caffè, consigliamo l’impiego di un filtro
per acqua che protegge il distributore e può ridurre la frequenza degli intervalli di decalcificazione.
Importante
Reinserire il contenitore ed avvitare le viti di fissaggio.
Impiegare acqua decalcificata specifica, adatta per le macchine da caffè.
Decalcificazione
È comunque possibile regolare esattamente questa segnalazione, in funzione della durezza dell’acqua, procedendo come indicato a pagina 14.
Attenzione
Le operazioni di decalcificazione sono da eseguirsi a distributore freddo.
La decalcificazione serve per eliminare tutte le incrostazioni calcaree dalle superfici e dai fori del circuito idraulico,
garantendo così il perfetto funzionamento di valvole, comandi di riscaldamento e di altri elementi importanti.
Sono possibili le regolazioni seguenti:
- Durezza 4: acqua dura, oltre 29°fH (14°dH), corrisponde a circa 80 litri di acqua impiegata;
- Durezza 3: acqua mediamente dura, circa 2029°fH (7-14°dH), corrisponde a circa
150 litri di acqua impiegata
- Durezza 2: acqua dolce, circa 12-20°fH (4-7°dH),
corrisponde a circa 300 litri di acqua
impiegata.
- Durezza 1: acqua molto dolce, meno di 10°fH
(3°dH), corrisponde a oltre 500 litri di
acqua impiegata.
Italiano
Eliminazione del messaggio di decalcificazione
Attenzione
Non usare assolutamente l’aceto di vino, per non causare danni al distributore!
La decalcificazione si può eseguire procedendo con le due
seguenti modalità:
- DECALCIFICAZIONE AUTOMATICA;
- DECALCIFICAZIONE CONVENZIONALE.
Decalcificazione automatica
Scegliere questa modalità dal menu di programmazione
(vedere a pagina 15).
Con i tasti
portare l’asterisco a fine riga sulla voce
Decalcific. e confermare la selezione con il tasto E (Ent).
Sul display apparirà il seguente messaggio:
"DECALCIFIC.
"
Versare il decalcificante nel serbatoio acqua (rif. 9 - Fig. 1)
seguendo le istruzioni riportate sulla confezione del prodotto impiegato. Mettere un recipiente sufficientemente capace sotto il tubo erogazione acqua calda (rif. 7 - Fig. 1)
premere il tasto
(ACQUA CALDA). Inizia la
decalcificazione automatica del distributore e la pompa
immette piccole quantità di decalcificante all’interno del
sistema e poi si arresta per lasciare agire il prodotto.
Durante questa fase, sul display apparirà il seguente messaggio:
"DECALCIFIC.
"IN CORSO
"
"
Dopo circa 45 minuti, a processo terminato, sul display
apparirà il seguente messaggio:
"DECALCIFIC.
"TERMINATA
"
"
Premere il tasto E (Ent). La pompa si spegne. Appare un
messaggio che segnala che si deve procedere alla pulizia
del distributore per eliminare eventuali residui di
decalcificante.
"RISCIACQUARE
"MANCA ACQUA
"
"
Rimuovere il serbatoio dell’acqua (rif. 9 - Fig. 1) , risciacquarlo accuratamente e riempire con acqua fresca. Premere il tasto E (Ent) per fare fuoriuscire l'intero contenuto
del serbatoio. Sul display apparirà il seguente messaggio:
"RISCIACQUO
"TERMINATO
"
"
Ritornare nella funzione di programmazione premendo il
tasto E (Ent).
Nota:
Si può uscire dal processo
decalcificazione premendo C (Esc).
di
Nella funzione di programmazione, premendo i tasti
,
portare l’asterisco a fine riga sulla voce Segnal. Decalc. e
confermare la segnalazione con il tasto E (Ent).
Sul display apparirà il seguente messaggio:
"DECALCIFIC. RESET "
"NO
"
Con i soliti tasti
é possibile modificare il valore: SI o
NO.
Eseguendo questa operazione di reset, si azzerano anche
i contatori interni dell’acqua e scompare il messaggio
DECALCIFIC.
Se si seleziona la funzione
"SEGNAL. DECALC.
"
senza che sul display appaia il messaggio
D E C A L C I F I C . sul display apparirà il messaggio:
"QUANTITA ACQUA
"NON RAGGIUNTA
"
"
Italiano
13 - VARIANTI
10 - CUSTODIA
Quando non è in uso, il distributore deve essere disinserito
e la spina deve essere staccata dalla presa.
Il distributore Royal Office, può essere corredato dai seguenti componenti opzionali:
Custodire il distributore in luogo asciutto e lontano dalla
portata dei bambini.
-
Box monetiera.
Predisposizione per l’alloggiamento di una monetiera.
-
Mobiletto.
Ha la funzione di sorreggere il distributore e di contenere bicchieri, palette, zucchero ed eventuali scorte.
Se il distributore rimane inutilizzato per un lungo periodo
di tempo, proteggerlo dalla polvere e dallo sporco.
Per maggiori informazione vedere manuali corrispondenti
11 - DEMOLIZIONE DEL
DISTRIBUTORE
Lo smaltimento dei rifiuti derivanti dalla demolizione del
distributore, dovrà essere eseguito nel rispetto ambientale,
evitando di inquinare suolo, acqua ed aria.
In ogni caso dovranno essere rispettate le locali legislazioni vigenti in materia.
Rendere inutilizzabile il distributore tagliando il cavo di
alimentazione.
Consegnare il distributore fuori uso ad un centro di raccolta idoneo.
12 - GUASTI E RIMEDI
Se il distributore presenta difetti o se dopo una caduta si
sospettano guasti, staccare subito la spina dalla presa.
Se non riuscite a eliminare il guasto attenendovi alle indicazioni della tabella qui di seguito riportata, rivolgetevi
ad un CENTRO ASSISTENZA.
Importante
Durante l’utilizzo della macchina è possibile che si verifichino degli inconvenienti che possono pregiudicarne il
corretto funzionamento.
Per questo motivo al punto 14.2 del presente manuale,
all’interno della tabella guasti e rimedi, vengono riportati
i probabili casi con le relative soluzioni.
Se all’inconveniente non é stato posto rimedio é vietato
utilizzare il distributore senza prima avere contattato il
CENTRO DI ASSISTENZA.
Italiano
14 - MANUTENZIONE ORDINARIA
Per la buona efficienza dell’apparecchio è consigliabile effettuare le operazioni di pulizia e manutenzione come indicato
nella seguente tabella.
Operazioni da eseguire
Ad ogni rifornimento
Dopo 2 rifornimenti
Dopo 5-10 rifornimenti
Svuotamento e pulizia del cassetto raccoglifondi
Svuotamento e pulizia del cassetto raccogligocce
Svuotamento e pulizia del serbatoio acqua
Pulizia del gruppo erogatore di caffè
Ingrassaggio del gruppo erogatore di caffè
Pulizia del contenitore caffè in grani
14.1 Guasti e rimedi
In caso di guasti e difetti o se si sospettano inconvenienti alla caffettiera, staccare immediatamente la spina dalla presa di
corrente. Rivolgetevi al Manutentore tecnico oppure ad un Centro Assistenza Autorizzato dove potrete richiedere interventi
e riparazioni al distributore. Le riparazioni non effettuate correttamente comportano gravi rischi per l’utente. Si declina ogni
responsabilità relativa a danni causati da riparazioni non eseguite correttamente: in questi casi viene inoltre a mancare la
copertura della garanzia.
GUASTO
CAUSA
RIMEDIO
Nessun messaggio sul display.
La macchina non è alimentata.
Azionare l’interruttore generale, controllare la spina ed il fusibile.
Lo sportello di servizio è aperto.
Chiudere lo sportello di servizio.
Manca il gruppo erogatore.
Inserire il gruppo erogatore.
Gruppo bloccato.
Pulire il gruppo erogatore.
Manca acqua.
Riempire il serbatoio acqua.
Manca caffè
Riempire il serbatoio caffè.
In entrambi i casi riavviare il ciclo di
preparazione.
Manca cassetto.
Inserire correttamente il cassetto
raccoglifondi.
Macinacaffè bloccato.
Pulire il macinacaffè.
Il caffè esce troppo velocemente.
Macinatura troppo grossa.
Regolare su una macinatura più fine
(es. da 5 a 3).
Il caffè esce troppo lentamente.
Macinatura troppo fine.
Regolare su una macinatura più grossa (es. da 3 a 5).
Il caffè non ha sufficiente crema.
Miscela di caffè non adatta oppure il
caffè non è fresco di torrefazione.
Cambiare miscela di caffé.
La macchina impiega molto per riscaldarsi, o la portata è insufficiente.
Nel distributore si é formato calcare.
Decalcificare il distributore seguendo
le indicazioni riportate.
Non si riesce ad estrarre il gruppo
erogatore.
Il gruppo erogatore non é nella sua posizione
ne di base.
Accendere il distributore, chiudere lo
sportello di servizio, introdurre il cassetto raccoglifondi. Il gruppo
erogatore torna automaticamente nella posizione di base.
La preparazione automatica del caffè non inizia.
INTERNATIONAL GROUP
EC DECLARATION OF CONFORMITY
EC 73/23, EC 89/336,
EC 92/31, EC 93/68, EC 98/37
We :
SAECO INTERNATIONAL GROUP S.p.A
Via Panigali, 39
40041 GAGGIO MONTANO (BO)
declare under our responsibility that the product :
AUTOMATIC VENDING MACHINE
TYPE : SUP015V
to which this declaration relates is in conformity with the following standards or other normative
documents :
Safety of household and electrical appliances - General requirements
EN 60335-1 - 1994 + A11 / A12 / A13 / A14
Safety of household and electrical appliances - Part 2^
Particular requirements for appliances for heating liquids
EN 60335-2-15 - Edit.1996 + A1
Safety of household and electrical appliances - Part 2^
Particular requirements for coffee mills and coffee grinders
EN 60335-2-14 - Edit.1996 + A11 / A1 / A2
Safety of household and electrical appliances
Particular requirements for automatic vending machine
Document IEC 60335-2-75 - Edit.1995
Limits and methods of measurements of radio disturbance characteristics of electrical motor-operated and thermal
appliances for households and similar purposes, electric tools and similar electric apparatus
EN 55014 - 1 - Edit. 1993 + A1 / A2
Electromagnetic compatibility (EMC)
Part. 3^ Limits - Section 2 : Limits for harmonic current emissions (equipment input current ≤ 16A per phase)
EN 61000-3-2 - Edit. 1995 + A12 / A1 / A2
Electromagnetic compatibility (EMC)
Part 3^ : Limits - Section 3 : Limitation of voltage fluttuations and flicker in low-voltage supply systems for equipment with
rated current ≤ 16 A.
EN 61000-3-3 Edit. 1995
Immunity requirements for household appliances, tools and similar apparatus.
Product family standard EN 5014 - Edit. 1997
Electromagnetic compatibility (EMC)
Part 4^ : Testing and measurement technique.- Section 2 : Elelctrostatic discharge immunity test.
Basic EMC publication - EN 61000-4-2 Edit.1995 + A1 Edit. 1998
Electromagnetic compatibility (EMC)
Part 4^ : Testing and measurement technique.- Section 4 : Elelctrical fast transient/burst immunity test
Basic EMC publication - EN 61000-4-4 Edit.1995
Electromagnetic compatibility (EMC)
Part 4^ : Testing and measurement technique.- Section 5 : Surge immunity test.
EN 61000-4-5 Edit.1995
Electromagnetic compatibility (EMC)
Part 4^ : Testing and measurement technique.- Section 6 : Immunity to conduced disturbance,
inducted by radio-frequency fields. EN 61000-4-6 Edit.1996
Electromagnetic compatibility (EMC)
Part 4^ : Testing and measurement technique.- Section 11 : Voltage dips, short interruptions and voltage variations
immunity tests. EN 61000-4-11 Edit.1994
following the provisions of the Directives :
EC 73/23, EC 89/336, EC 92/31, EC 93/68.
Gaggio Montano
17/10/00
President
Sergio Zappella
Cod. 0333.952 - Ed. 03 05/01
model
ROYAL OFFICE
Type SUP 015V
OPERATION AND MAINTENANCE
Vending Machine
English
TABLE OF CONTENTS
MAIN PARTS. .................................................................. 3
1
INTRODUCTION TO THE MANUAL. ..................... 4
1.1
Foreword ......................................................... 4
1.2
Symbols used ................................................... 4
2
GENERAL INFORMATION. .................................... 4
2.1
Foreword ......................................................... 4
2.2
Intended use of the machine .............................. 4
2.3
Residual risks ................................................... 4
2.4
Machine identification ...................................... 5
2.5
Technical specifications ..................................... 5
3
HANDLING AND STORAGE. ................................. 6
Handling ......................................................... 6
Storage ........................................................... 6
4
SAFETY. .................................................................... 6
4.1
General safety norms ....................................... 6
4.2
Operators requirements .................................... 7
Maintenance technician .................................... 7
Supply operator ............................................... 7
User ................................................................ 7
4.3
Safety devices .................................................. 7
4.4
Safety microswitch efficiency test ....................... 7
5
CONTROLS DESCRIPTION. .................................... 8
5.1
Main controls ................................................... 8
Main switch ..................................................... 8
Control panel ................................................... 8
Dispensing mode .............................................. 8
Setting mode .................................................... 8
6
INSTALLATION. ....................................................... 9
6.1
List of supplied accessories ................................ 9
6.2
Positioning ....................................................... 9
6.3
Electric connection ............................................ 9
6.4
Applying the ‘Instructions in brief’
adhesive plate .................................................. 9
8
USE OF THE VENDING MACHINE. ..................... 16
8.1
Machine status ............................................... 16
Off and electrically insulated ........................... 16
On ................................................................ 16
Energy saving ................................................ 16
8.2
Recommendations .......................................... 16
Prolonged inactivity ........................................ 16
Temperature control ........................................ 16
Coffee tank empty .......................................... 16
Water tank empty ........................................... 16
Grounds drawer full ....................................... 16
8.3
First Switching on ........................................... 17
Filling the coffee bean hopper ......................... 17
Fixing the cover lock plate ............................... 17
Filling the water tank ...................................... 17
Water circuit filling ......................................... 18
Grinding adjustment ....................................... 18
Coffee blends ................................................. 19
8.4
Beverage dispensing ....................................... 19
Adjusting the coffee dispenser ......................... 19
Adjusting the cup filling level ........................... 19
Coffee dispensing ........................................... 20
Hot water dispensing ...................................... 20
8.5
Messages and special warnings ...................... 20
Coffee tank electronic control .......................... 20
Coffee beans protection against impurities ....... 20
Water level electronic control .......................... 20
9
MAINTENANCE . .................................................. 21
9.1
Foreword ....................................................... 21
9.2
Cleaning and maintenance ............................. 21
Brew group .................................................... 22
Coffee grinder ............................................... 24
Descaling ...................................................... 25
Automatic descaling ....................................... 26
Eliminating the descaling message ................... 26
10 CARE. ..................................................................... 27
11 MACHINE SCRAPPING. ....................................... 27
7
SETTINGS. .............................................................. 10
Menu selection ............................................... 10
Struttura delle funzioni di programmazione ...... 10
7.1
Menu description ........................................... 12
Vending functions ........................................... 12
Displaying the number of products dispensed ... 13
Language selection ......................................... 14
Rinse function ................................................. 14
Water hardness adjustment ............................. 14
Set Temperature ............................................. 14
Prebrewing function ........................................ 14
Pregrinding function ....................................... 14
Set dose ........................................................ 14
Descaling ...................................................... 15
Descaling warning ......................................... 15
Timer ............................................................. 15
Washing cycle ............................................... 15
12 TROUBLESHOOTING. .......................................... 27
13 ACCESSORIES. ...................................................27
14 GENERAL MAINTENANCE . ................................. 28
14.1 Troubleshooting .............................................. 28
English
MAIN PARTS
21
10
12
4
11
9
20
8
14
13
15
7
6
17
16
19
3
18
2
1
5
26
24
25
22
Fig. 1
1
2
3
4
5
6
7
8
9
23
Dump box
Drip Tray
Grill drip tray
Main switch
(rear side of the machine)
Power cord
Coffee dispenser
Hot water spout
Control panel
Water tank
10
11
12
13
14
15
16
17
Water level gauge
(inside water tank)
Coffee bean hopper
Coffee bean hopper cover
(under the cover with lock)
Grind adjustment lever
Coffee dosing lever
Service door with lock
Water hopper
Brew group handle
18
19
20
21
22
23
24
25
26
Brew group
Coffee residue drawer
Safety microswitch
Cover with lock
Cover lock plate
Cleaning panel
Locking keys (2x)
Brew group key
Silicon pipe
English
1 - INTRODUCTION TO THE
MANUAL
1.1
Warning
The symbol indicates danger for operators and the machine itself.
Foreword
Important
This manual is an integral part of the machine and must be
read carefully. It contains all the information about installation, maintenance and correct use of the ROYAL OFFICE
machine.
Important
The symbol indicates operations that contribute to keep the
machine in good working conditions.
2 - GENERAL INFORMATION
Always refer to this manual before performing any operation.
Manufacturer: Saeco International Group S.p.A.
Via Panigali, 39 - 40041 GAGGIO MONTANO (Bo) Italy
This manual must be preserved with care and must accompany the machine throughout its operational life including
changes of ownership.
If this manual is lost or damaged, request a copy from an
Approved Assistance Centre.
The manufacturer reserves all copyrights on this manual.
2.1
Foreword
This machine is an automatic coffee and hot water dispenser with programmable dosing of all beverages.
If necessary, contact the nearest Distributor or National
Importer or the Manufacturer when no importers are available.
APPROVED ASSISTANCE CENTERS are available for information and explanations about the machine, and to
provide technical assistance and spare parts supplies.
The Manufacturer reserves the right to modify the machine
without any obligation to provide advance notice.
Important
The keys to open the water and bean hoppers, the side
door and the optional coiner door are available only to
the supply operator and maintenance technician.
1.2
2.2
The ROYAL OFFICE machine automatically dispenses:
- freshly brewed coffee and espresso coffee;
- hot water for beverage preparation.
Symbols used
A number of symbols are used in this manual to indicate
danger or situations that require various degrees of expertise.
Each symbol is explained by a message.
Where no symbol is used, the information is intended for
all users of the machine. The symbols used are the following:
Supply operator
Those in charge of supplying and cleaning the machine.
Maintenance operations that require a specialized technician are not to be performed by supply operators.
Maintenance technician
The symbol indicates operations to be performed only by
specialized maintenance technicians and servicemen.
Intended use of the machine
Important
Improper use of the machine determines the immediate
warranty expiration and the Manufacturer declines responsibility for damages and personal injuries.
Improper use includes:
- using the machine for purposes other than that intended
and/or following procedures not described in this
manual;
- interventions on the machine that are against instructions included in this manual;
- using the machine after component parts have been
tampered with and/or safety devices have been altered;
- installing the machine outdoors
2.3
Residual risks
The dispensing outlet has no protections against accidental hand exposure to coffee and hot water.
English
2.4
Machine identification
The machine is identified by the model and serial numbers
outlined on the specific plate (Fig. 2).
The plate also contains the following specifications:
-
-
Fig. 2
2.5
name of Manufacturer
CE marking
machine model
serial number
manufacturing year
technical specifications
- Power supply voltage (V)
- Power supply frequency (Hz)
- Power consumption (W)
Important
When contacting APPROVED ASSISTANCE CENTERS always refer to the plate and the specific data it contains.
Technical specifications
Power supply ...................................................................................................................... see data plate
Power rating ....................................................................................................................... see data plate
Dimensions (l x w x h) ......................................................................................... ca. 380 x 460 x 440 mm
Machine case ..................................................................galvanized steel and thermoplastic material (ABS)
Weight .................................................................................................................................. ca. 14.5 kg
Cable length .............................................................................................................................. ca. 1.2 m
Operating system .................................................................................................... Heat exchanger boiler
................................................................................................................ Electromagnetic vibration pump
Temperature control ................................................................................................................... electronic
Coffeegrinder adjusting device ............................................................................................... fine-grinding
Coffee grounds ejection .............................................................................................................. automatic
Coffee powder dosing ........................................................................................................ precision doser
Quantity setting .................................................................................................................. ca. 0 - 250 ml
Water tank ............................................................................................................ removable, transparent
Capacity
-Water tank......................................................................................... ca. 6.5 l
-Coffee bean hopper ....................................................................... ca. 950 gr.
-Drip tray ................................................................ .............................. ca. 1 l
Heating time ........................................................................................................................ ca. 2 minutes
Preparation time
-espresso....................................................................... ca. 20 seconds per cup
-coffee .......................................................................... ca. 30 seconds per cup
-hot water ..................................................................... ca. 60 seconds per cup
Thermal cut-out .............................................................................................................................. built-in
Insulation ........................................................................................................................ class protection I
Approval ............................................................................................................................ see data plate
Conformity with existing product class regulations .......................... (see Declaration of Conformity page 29)
Warranty .................................................................................................see enclosed warranty certificate
English
3 - HANDLING AND
STORAGE
Handling
During handling and transport, the machine must be kept
in the upright position according to the instructions on the
packaging.
Lift and position with care.
Do not shake the machine.
Storage
The machine must be stored according to the following
temperatures:
-- minimum temperature:
4°C.
- maximum temperature:
40°C
- maximum humidity:
95%
The machine packaging consists of cardboard and expanded polystyrene.
Warning
Given the overall packaging weight, do not pile up more
than three machines.
The machine must be stored in its original packaging away
from humidity and dust.
Power cord
If damaged, the power cord must be replaced by an Approved Assistance Centre. Do not connect the cord near
corners and sharp or very hot objects. Avoid contact with
oil. Do not stretch the cord when moving the machine. Do
not unplug the machine by pulling the cord or touch it with
wet hands. The cord must not hang from tables and shelves.
Location
Place the machine on a stable surface that cannot be
knocked down. Water could pour out: danger of burns!
Do not use the appliance outdoors or in low temperature
environments. Do not place the machine on a very hot surface or near open flames to avoid damage to the machine
casing.
Danger of burns
Keep hands away from the hot water and coffee jet.
Positioning
For the correct functioning of the machine follow the indications below:
- select an even surface
- select a location that is sufficiently well-lit, clean and
near an easily reachable power source.
- the minimum distance between the wall and the machine must be in line with the indications outlined in
figure 3.
4 - SAFETY
4.1
General safety norms
Danger
100 mm.
It is extremely dangerous to put electrical parts in contact
with water! Do not direct the steam or hot water jet toward
body parts; handle the hot water pipe with care: danger of
burns!
Use the machine for its intended use only.
Do not apply technical modifications to the machine: it can
be extremely dangerous!
Warning
The machine must be used only by adults and by those
familiar with it.
Do not allow children to play with the machine. Children
are not aware of the danger of electrical devices.
Power supply
Do not touch electrical parts to avoid serious injuries. Plug
the machine in the correct socket. Voltage must correspond
to that indicated on the plate inside the machine (Fig. 2).
Fig. 3
English
Cleaning
Before cleaning the machine, turn the main switch off and
disconnect the power supply. Wait until the machine is cold.
Do not soak the machine in water! Do not disassemble the
machine or perform any operation on the internal components of the machine.
4.4
Repairing and maintenance
In case of failure or faults possibly after a fall, immediately
unplug the machine. Do not turn the faulty machine on.
The machine can be repaired only by Approved Assistance Centres. The Manufacturer declines responsibility for
damage and injuries caused by incorrect repairing of the
machine.
In case of failure and/or malfunctioning contact exclusively
qualified ASSISTANCE SERVICE repairmen.
If the display and LEDs are off the machine is turned off
and the microswitch is working correctly.
Safety microswitch efficiency
test
When the machine is on, open the side door and check
that the display (ref. 8 - Fig. 1) and LEDs on the control
panel keypad (rif.8 - Fig. 1) turn off.
1
In case of fire use Carbon Dioxide extinguishers (CO2).
Do not use water or dry-powder extinguishers.
4.2
Operators requirements
To guarantee the safety and good functioning of the machine two operators with different skills are required:
Maintenance technician
A specialized technician in charge of machine installation,
set-up, maintenance and technical assistance.
Supply operator
An operator in charge of turning the machine on/off, supplying products, removing coins and of the internal and
external cleaning of the machine.
If the machine is malfunctioning, the supply operator must
request the intervention of the maintenance technician.
User
The person who uses the machine. Users must NOT perform any of the tasks of the supply operator or the maintenance technician.
If the machine is malfunctioning, users should request the
intervention of the supply operator or the maintenance technician.
4.3
Safety devices
All the components that can be potentially dangerous are
located inside the machine.
A microswitch (ref. 1 - Fig. 4) automatically cuts the power
out if the side door is open.
Fig. 4
English
5 - CONTROLS DESCRIPTION
Important
Keys
The dispensing keys of the machine are programmed with
pre-set values.
5.1
Dispensing mode
In this normal running mode, the following operations can
be performed by pressing the keys as indicated in figure 6:
,
Dispensing programmed beverages
Main controls
Main switch (Fig. 5)
Located in the rear side of the machine, centre-left.
When in the ”I” position, the machine is on (electrical
functions on).
When in the ”O” position, the machine is off (electrical
functions off).
,
=
espresso coffe
=
light coffee
=
hot water
Setting mode
In this service mode, the following operations can be performed by pressing the keys as indicated in figure 6:
E
ENT key - “Espresso coffee”
Confirm modified parameters.
Return to lower settings level
C
ESC key
Return to higher settings level without saving new parameters.
UP key - “Coffee”
Scroll Menu and increase the displayed value for resetting.
DOWN key - “Hot water”
Scroll Menu and decrease the displayed value for resetting.
Fig. 5
Control panel (Fig. 6)
It consists of 4 keys with different functions according to
the machine mode (standard running or setting mode).
SELECT PRODUCT
READY FOR USE
Fig. 6
Dispensing LEDs
Dispensing LEDs are green LEDs located inside the three
selection keys. During beverage dispensing, only the
LED corresponding to the selected beverage remains
on. After beverage dispensing, all three LEDs turn back
on.
Display
It consists of 2 15-character lines and it displays messages about operations under way or programmed and
about the machine status.
English
6 - INSTALLATION
Warning
The presence of nearby magnetic fields or electric devices
generating interference may cause malfunctioning in the
electronic control of the machine.
-
near an easily reachable power source;
the distance from the walls must be as shown in Fig.3;
the maximum angle of inclination of the supporting
surface must not exceed 2°
6.3
Warning
Important
Do not install the machine outdoors and in environments
where water or steam jets are used.
Important
This operation must be performed by the maintenance technician.
The machine requires single-phase voltage according to
the value contained in the identification plate (2.4 Machine
identification).
When the temperature is approaching 0°C internal components containing water are subject to freezing.
Do not use the machine in such conditions.
To guarantee the correct functioning and durability of the
appliance, follow the indications below:
- room temperature:
10°C ÷ 40°C
- maximum humidity :
90%.
- make sure that the machine has not been tampered
with during transport by verifying the package sealing;
- verify the machine conditions and model inside the
packaging;
- verify the content of the accessories envelope enclosed
to the machine (see “6.1 List of supplied accessories”);
- remove the machine from the original packaging that
should be preserved for future use (e.g. change of location);
- remove all the remaining packaging.
Electric connection
Warning
The socket should be easily accessible to the supply operator, so that the machine can be easily unplugged when
necessary.
Before connecting the machine check the following points:
- the line voltage of the socket must correspond to that
indicated on the machine plate;
- the electrical system must be in line with existing laws
and regulations and must have the load capacity indicated on the plate.
When in doubt, request professional assistance to determine the characteristics of the electrical system.
Warning
The use of extensions and adapters is forbidden.
Important
Disposal of packaging should be carried out according to
existing laws and regulations and in line with environmental considerations.
6.1
•
•
•
•
•
List of supplied accessories
N. 1 brew group key (ref. 25 - Fig. 1).
N. 1 Instruction and Maintenance Manual
N. 1 cleaning brush for coffee grinder (ref. 23 - Fig. 1).
N. 1 water hardness test strip
N. 1 silicon pipe (ref. 26 - Fig. 1).
6.2
6.4
Applying the ‘Instructions
in brief’ adhesive plate
To apply the adhesive plate it is necessary to:
- remove the top cover by inserting the key in the appropriate lock;
- remove the bean hopper cover;
- unfasten the 2 screws of the bean hopper;
- remove the bean hopper;
- apply the adhesive plate in the front inside the bean hopper;
- place the bean hopper back;
- fasten the 2 screws of the bean hopper;
- reinsert the bean hopper cover;
- reinsert the top cover and lock it.
Positioning
For correct functioning of the appliance follow the indications below:
- select an even surface
- select a location that is sufficiently well-lit, clean and
Important
This plate must be applied only when the machine is
equipped with a coiner (i.e. not free-of-charge)
English
7 - SETTINGS
This chapter illustrates how to set up or modify the machine programmable parameters.
The chapter should therefore be read carefully, to fully understand the correct sequence of operations to be performed.
Structure of the programming functions.
CODE??
RESET COUNTER
RESET COUNTER
JES
NO
To access the settings function, press the
(Hot water)
and C (Esc) keys and then press the main switch.
The main settings options are the following:
SMALL COFFEE
TOTAL 0
•
VENDING
COFFEE
TOTAL 0
•
LANGUAGE
•
RINSING
•
WATER HARDNESS
•
TEMP. S. ESPRESSO
COUNTER
LOCKING:
•
TEMP. COFFEE
TOTAL COFFEE
TOTAL 0
•
PREBREWING
BEVERAGES
TOTAL 0
•
PREGRINDING
•
PROGR. QUANTITY
•
DESCALING
PRICE
1 COFFEE
0
•
SIGN. DESCAL.
PRICE
HOT WATER
0
•
TIMER
CODE
* * * * *
•
RINSING
To exit the settings menu press C (Esc). The machine is in
standard running mode.
Menu selection
keys and select opSelect menus using the various
tions by pressing the E key. The parameters of each menu
keys. To save the decan be modified by pressing
sired setting press the E key (e.g., “ O N ” for “ S E T
DOSE”
”).
If a value has wrongly been modified, the menu can be
exited by pressing the C (Esc)
key without saving the
new value.
HOT WATER
TOTAL 0
VENDING
COUNTER
CYCLES 0
0
PRICE
1 SMALL COFF 0
CHANGE CODE
OLD CODE?
. . . . . .
NEW CODE?
. . . . . .
NEW CODE.....
SAVE >JES> NO
English
ITALIANO
FRANÇAIS
ON
Deutsch
JAPAN
LANGUAGE
PREBREWING
OFF
LONG
NEDERLANDS
ON
PORTUGUES
PREGRINDING
OFF
ESPAGNOL
ON
ENGLISH
PROGR. QUANTITY
ON
OFF
OFF
MACHINE IS
DESCALING
HARDNESS 4
DESCALING
FINISHED
RINSING
DESCALING
HARDNESS 3
RINSE MACHINE
HARDNESS 2
RINSING
FINISHED
WATER HARDN.
HARDNESS 1
SIGN. DESCAL.
MINIMUM
TIMER
MAXIMUM
TEMP. S. COFFEE
HIGH
MEDIUM
LOW
MINIMUM
MAXIMUM
TEMP. COFFEE
HIGH
MEDIUM
LOW
QUANTITY WATER
NOT REACHED
STANDBY
AFTER 0:00
STANDBY
RINSING CYCLE
English
7.1
Menu description
HOT WATER
TOTAL
CODE
A pre-set code must be entered to proceed with paramCODE
eters setting in the setting menu. To set the code, see ”CODE
CODE”
in the Vending menu.
Note down the new code when modified.
Vending functions
The Royal Office is equipped with a counter that, by keeping track of dispensing operations, allows for the statistical
analysis of the coffee machine. An additional counter is
also fit to shut off dispensing after a number of operations.
To access these functions a code must be entered.
keys to position the asterisk on “V
Press the
VENDG” and select it by pressing E (Ent).
ING
A submenu appears; select one of its options using the
standard
keys.
The display shows:
RESET COUNTER
With this function all partial counters can be reset. Press E
(Ent) and the display shows:
“RESET COUNTER
“
“
“
YES
Press the keys to select one of the Y E S / N O options, confirm by pressing the E (Ent) key.
SMALL COFFEE
TOTAL
0
The counter indicates the quantity of espresso coffee dispensed since the last reset.
From the VENDING menu, press the
keys to position the
asterisk on the SMALL COFFEE menu and confirm with the E
(Ent) key.
Press the
keys to modify the value displayed (e.g., to
reset the counter) and save the new value by pressing E
(Ent). Press the C (Esc) key to interrupt the setting of the new
value and maintain the previous counter setting.
COFFEE
TOTAL
0
The counter indicates the quantity of coffee dispensed since
the last reset.
From the VENDING menu, press the
keys to position
the asterisk to the COFFEE menu and confirm with the E
(Ent) key.
Press the
keys to modify the value displayed (e.g., to
reset the counter) and save the new value by pressing E
(Ent). Press the C (Esc) key to interrupt the setting of the new
value and maintain the previous counter setting.
0
The counter indicates the quantity of hot water dispensed
since the last reset.
From the VENDING menu, press the
keys to position
the asterisk on the HOT WATER menu and confirm with
the E (Ent) key.
keys to modify the value displayed (e.g., to
Press the
reset the counter) and save the new value by pressing E
(Ent). Press the C (Esc) key to interrupt the setting of the new
value and maintain the previous counter setting.
COUNTER
CYCLES
and
COUNTER
LOCKING
0
0
With this function coffee dispensing can be shut off after a
number of cycles while the machine can still dispense hot
water. This setting can be used, for example, to plan maintenance interventions.
If the value ‘0’ is entered, this function is off.
From the VENDING menu, press the
keys to position
the asterisk on the COUNTER menu and confirm with the E
(Ent) key.
Press the
keys to modify the value displayed (e.g., to
re-plan the limit for shut-off) and save the new value by
pressing E (Ent). Press the C (Esc) key to interrupt the setting
of the new value and maintain the previous counter setting.
When the set limit is reached, coffee dispensing shuts off
and the following messages flash alternatively on the display:
“COFFEE
“BLOCKED
TOTAL COFFEE
TOTAL
“
“
0
The counter displays the total number of coffee cups dispensed and cannot be reset.
BEVERAGES
TOTAL
0
The counter displays the total number of beverages dispensed and cannot be reset.
BEVERAGE PRICE
With this function each beverage can be associated with a
previously set price.
“PRICE
“1 SMALL COFF
“
0 “
“PRICE
“1 COFFEE
“
0 “
English
“PRICE
“HOT WATER
“
“
0
Important
The pre-set prices of the machine correspond to 0 , meaning that beverages are free.
To set up prices 1 and 2 the machine must be equipped
with the optional coiner (see Coiner Manual).
For example, if the new code is 312241, the key sequence must be as follows:
1: Key 3
Hot water
3
2: Key 1 E (Ent) Small Coffee
1
3: Key 2
Coffee
2
Coffee
2
4: Key 2
5: Key 4 C (Esc)
4
6: Key 1 E (Ent) Small Coffee
1
Warning
CODE
A code can be used to avoid unauthorized access to settings (default “111111”). By confirming, the following menu
option appears:
“CHANGE CODE
“
“OLD CODE?
“......
“
“
Write down the new password because, if lost or forgotten, it will not be possible to access the settings function.
Displaying the number of products
dispensed
When the machine is in the following mode
“NEW CODE ?
“......
0
“NEW CODE ......
“SAVE
YES
“
“
“
“
To access the settings function it is now necessary to enter
the code.
Warning
After 5 unsuccessful attempts to enter the code, the machine requires that the PUC (Personal User Code) be entered to access the settings function.
To receive the PUC contact the ASSISTANCE CENTER.
If the PUC is entered correctly, a new code must then be
entered.
When setting the code and the PUC the keys have the following functions:
Key 1
Key 2
Key 3
Key 4
E (Ent) Small Coffee ............... 1
Coffee ........................ 2
Hot water ................... 3
C (Esc) ................................. 4
“SELECT FUNCTION”
“READY”
the number of products dispensed since the last reset (see
n) will be displayed afCOUNTER RESET function
ter pressing simultaneously the following key combinations:
C + Small Coffee
“SMALL COFFEE “
“TOTAL
4”
SMALL COFFEE
indicating the number of “S
E” dispensed.
C + Coffee
“COFFEE
“TOTAL
“
2”
COFFEE
indicating the number of “C
E” dispensed.
C + Small Coffee + Coffee
“
“TOTAL
SMALL
indicating the total number of “S
C
O
F
F
E
E
“C
E” dispensed.
“
6”
COFFEE
E” +
C + Hot water
“HOT WATER
“TOTAL
”
7”
HOT WATER
indicating the number of “H
R” dispensed.
By pressing the C key only, the following message appears
on the display:
“TOTAL COFFEE “
“
50”
COFFEE
indicating the total number of “C
E” dispensed, this
value is not reset when counters are.
English
Language selection
LANkeys to position the asterisk on the “L
Press the
E” option and select it by pressing E (Ent).
GUAGE
The display reads:
“LANGUAGE
“ITALIANO
“
“
Press the keys to modify the language:
ITALIANO
FRANÇAIS
”I
O”, ”F
S”,
Deutsch
NEDERLANDS
,
”D
h”,”N
S”,
PORTUGUES
ESPAGNOL
ENGLISH
”P
S”, ”E
L”, ”E
H”
“
“
keys to modify the set values O N
N, O F F
F.
Water hardness adjustment
To assess water hardness a test can be performed using
the supplied test strip. Soak the strip in water briefly (about
1 second), shake excessive water off and wait for the result
(about one minute).
WATER
Press the
keys to position the asterisk on the “W
HARDN.
.” option and select it by pressing E (Ent).
The display reads:
“ WATER HARDN.
“ HARDNESS 3
Use the standard keys to select the following values:
MINIMUM
MAXIMUM
HIGH
MEDIUM
“M
M”, “M
M”, “H
H”,”M
M” o
LOW
“L
W”.
When this function is on, the pump stops briefly when brewing coffee, using the coffee powder more effectively.
If the rinse function is on, when the machine is started following a period of inactivity an automatic rinsing cycle of
the coffee brewing components begins using hot water.
RINSPress the
keys, position the asterisk on the “R
ING
G” option and select it by pressing E (Ent).
The display reads:
Press the
“
“
Prebrewing function
Rinsing
“RINSING
“ON
“TEMP. COFFEE
“MEDIUM
Press the
keys to position the asterisk on the
PREBREWING
“P
G” option and select it by pressing E (Ent).
The display reads:
“PREBREWING
“ON
By pressing the standard
keys the function can be
ON
OFF
LONG
modified: “O
N”, “O
F” or “L
G” (in the latter case the
pump stops for a longer time).
Pregrinding function
With this function coffee is ground when the doser is empty,
so that a dose of ground coffee is always ready, saving
time when the machine is used frequently. This function is
not recommended in cases when the coffee must be freshly
brewed.
Press the keys to position the asterisk on the
PREGRINDING
“PREGRINDING
PREGRINDING” option and select it by pressing E (Ent).
The display reads:
“PREGRINDING
“ON
“
“
According to the test results, the following values can be
selected by pressing the
keys:
“
“
Press the standard
OFF
and “O
F”.
“
“
ON
keys to modify this function: “O
N”
HARDNESS 4 (hard)
HARDNESS 3 (medium)
Hardness
4
Sehr
weiches Wasser
Hardness
3
Weiches
Wasser
Hardness
2
Mittleres
Wasser
Set dose
HARDNESS 2 (soft)
With this function the quantity of coffee dispensed can be
dosed with precision by pressing the standard selection
keys (Espresso Coffee, Coffee and Hot water).
HARDNESS 1 (very soft)
Hardness
Hartes
Wasser1
Set Temperature
The Royal Office allows the setting of a specific coffee temperature.
TEMP.
Press the
keys to position the asterisk on the “T
ESPRESSO
TEMP. COFFEE
O” or “T
E” options and select
by pressing E (Ent).
According to the selection made, the display reads:
“TEMP. S. COFFEE
“MEDIUM
“
“
Press the keys to position the asterisk to the “SET DOSE”
option and press E (Ent) to select it.
The display reads:
“PROG. QUANTITY “
“ON
“
Press the standard keys to modify this function: “ON”, “OFF”
and press E (Ent) to select.
To program the cup filling level, press the corresponding
selection key until the desired quantity of coffee has been
reached (maximum ca. 250 ml). During this operation the
English
following message appears on the display:
“ SAVING
“ESPRESSO
“SET DOSE
or:
“COFFEE
“SET DOSE
or:
“HOT WATER
“SET DOSE
“
“
”
and the machine turns off. If necessary, the machine can be
turned back on by pressing C (Esc).
“
“
Rinsing cycle
“
“
Descaling
Press the
keys to position the asterisk on the
D E S C A L I N G menu option. To enter this option press E
(Ent).
The display reads:
“DESCALING
“
The machine is equipped with a washing program to be
used in addition to the standard, daily and weekly washing cycle. If used regularly, this program eliminates oily
coffee residue in components that are not accessible and
prevents alterations in the taste of coffee.
According to the use of the machine, washing cycles should
be performed monthly or after a maximum 250 cups of
coffee have been dispensed. The washing program lasts
for about 5 minutes and is divided in 4 cycles, including
rinsing. Short 40 seconds pauses occur between one cycle
and the next.
About descaling see page 25.
Warning
Descaling warning
This function indicates whether the level of water used requires descaling, according to the set value of water hardness.
Press the
keys to position the asterisk on the DESCAL.
WARNING menu option and press E (Ent) to select it.
The display reads:
“QUANTITY WATER
“NOT REACHED
“
“
This message appears when the “D
DESCAL. WARNG” menu option is set before the D E S C A L E warning
ING
appears.
Return to the settings menu by pressing C (Esc).
With this function the machine can be programmed to automatically turn off after a period of time (varying from 15
minutes to ca. 13 hours). Time counting begins with the
last product dispensed. If coffee is dispensed again after a
few seconds, the timer starts anew. If the value is set at
0:00, this function is off.
Press the
keys to position the asterisk on the T I M E R
menu option. Press E (Ent) to select it.
The display reads:
”
0:00 ”
Press the
keys to set the desired time. Press E (Ent) to
save.
If the set time has already passed, the display reads:
“ STANDBY
Before starting the washing program, fill the water tank
fully and position a large container (min. 1 l capacity) under the coffee machine (the dispenser is height-adjustable
and can be removed for cleaning). Washing requires about
1 litre of water (including rinsing). If necessary, empty the
container periodically.
Press the
keys to position the asterisk on the W A S H I N G C Y C L E option and select it by pressing E (Ent).
The display reads:
“RINSING CYCLE
”
With this function a washing cycle begins using water to
clean all the components of the brew group. The washing
cycle is over when the display reads:
Timer
“STANDBY
“AFTER
The washing program must not be interrupted.
”
“SELECT PRODUCT
“READY FOR USE
”
”
English
8 - USE OF THE VENDING
MACHINE
When the necessary temperature has been reached, the
display reads:
“SELECT PRODUCT
“READY FOR USE
Important
“
“
Read this manual in full before using the machine so as to
become sufficiently familiar with its functioning.
Bean hopper empty
Before using the machine after a period of inactivity it is
advisable to read again paragraph 8.3 “First switching
on”.
When the bean hopper is empty, the coffee grinder stops
and the display reads:
8.1
Machine status
“COF. BEANS EMPTY
“READY FOR USE
Depending on the power supply, the status of the machine
can be as follows:
Off and electrically insulated
•
•
Main switch (Fig. 5) in “0“ position.
Only the settings memory is on.
On
•
•
Main switch in “I“ position.
All functions are on and the display (ref. 8 - Fig. 1) is
lit.
“
“
The dispensing LED inside the coffee selection key turns
off.
READY
The message “R
Y” refers only to the availability of
hot water.
Fill the bean hopper and delete the B E A N H O P P E R
E M P T Y message by pressing one of the two coffee keys
for about 5 seconds.
Energy saving
Water tank empty
It indicates the energy saving of the machine when the
TIMER function is on (see SETTINGS) and automatically
turns the machine on and off.
When the water tank is empty, the program stops automatically and the display reads:
•
•
•
•
Main switch in “I“position;
ENERGY SAVThe display shows the message: “E
ING
G”.
Settings memory is on.
The machine is not dispensing beverages.
“FILL WATERTANK “
Fill the tank and restart the cycle.
Dump box full
8.2
Recommendations
Prolonged inactivity
Following a long period of inactivity, the circuit should be
fully cleaned for hygienic reasons.
Place a cup under the hot water spout (ref. 7 - Fig. 1) and
fill it with water by pressing the hot water key.
Temperature control
Every time the machine is started, the display reads:
“WARMING UP......“
When the Dump box contains 30 used coffee grounds, the
display reads:
“DREGDRAWER FULL
“READY FOR USE
“
“
The machine can dispense water only; remove and empty
the drawer.
READY
The message “R
Y” refers to hot water dispensing only.
English
8.3
First Switching on
Filling the water tank
Remove the water tank and place it under a water faucet.
Filling the bean hopper
Pour coffee beans in the hopper (Fig. 7).
Fill the tank (Fig. 9) with tap water.
Put the water tank back in place.
Fig. 7
Fig. 9
Close the hopper by placing the cover on the top (Fig. 8).
Coffee beans should be fresh, non-oily and of medium
grinding.
Fixing the cover lock plate
Put the plate on the cover lock and position it carefully as
shown in figure 10.
Fig. 8
Fig. 10
English
After fixing the plate the cover must be placed on the water
and bean hoppers before using the machine (Fig. 11).
Important
Prime the circuit before starting the machine for the first
time, following a long period of inactivity, if the water tank
has been fully emptied or if the pump has malfunctioned.
Grinding adjustment
The grind setting should be adjusted when the coffee is not
dispensed properly: If the coffee drips out slowly then your
grind is too fine. If the coffee is dispensed too quickly then your
grind is too coarse. The suggested initial position is at point 5.
Fig. 11
Secure the cover by turning the key in the lock (Fig. 12).
If grinding is too coarse and the coffee is dispensed too
rapidly, adjust the grinder to a finer setting (e.g., from 5 to
3). If the coffee drops out, select a coarser setting (e.g.,
from 5 to 7) (Fig. 13).
Fig. 12
Water circuit filling
Place a cup or other similar container under the hot water
spout. Start the machine and follow the procedure below
to fill the water circuit:
- Wait for the display to read:
“VENTILATE
“
Now press the HOT WATER key, the pump starts automatically and after a few seconds the display reads:
“SELECT PRODUCT
“READY FOR USE
“
“
indicating that the circuit is ready and the machine can
start dispensing beverages.
Fig. 13
Important
Grinding adjustments must be performed only when the
grinder is on. If possible avoid selecting position 1. Use
instead a different coffee blend, since not all blends produce the same results.
English
To adjust grinding, follow the procedure outlined below:
- when the machine is off, open the service door (ref.
15 - Fig. 1) using the supplied key, position the silicon
pipe (ref. 26 - Fig. 1) (cutting out the safety
microswitch), turn the main switch on and verify that
the machine turns on;
- press the coffee key and verify the coffee outflow from
the dispenser;
- adjust the grinding selection accordingly;
- turn the main switch off, remove the silicon pipe and
close the service door using the supplied key.
Adjusting the cup filling level
Warning
The new grinding selection can be appreciated only after the
third coffee grinding.
Fig. 15
Coffee blends
Coffee must be fresh and an espresso coffee blend must be
used.
To obtain a strong and tasty espresso, use a specific espresso machine blend. Keep the coffee in a fresh place in
a airtight sealed container.
With this machine the quantity of coffee dispensed can be
adjusted according to the cup used.
Select the desired quantity by pressing the two selection
keys. The display will show the corresponding messages.
8.4
Beverage dispensing
Adjusting the coffee dispenser
To set the cup filling level press the corresponding selection
key until the desired quantity has been reached (max. ca.
250 ml).
When performing this operation, the display reads:
The coffee dispenser is adjustable according to the cup
size.
For short cups, position the dispenser as shown in figure
14.
For tall cups, position the dispenser as shown in figure 15.
"1 SMALL COFFEE
"
"PROGR. QUANTITY
"
"1 COFFEE
"
"PROGR. QUANTITY
"
Important
This operation can be interrupted only after the minimum
quantity has been dispensed. If the pre-brewing function is
on, when adjusting the cup filling level keep the selected
key pressed also during pump pauses until the desired
quantity has been reached.
Fig. 14
English
When setting the desired quantity, the following message
appears on the display:
Coffee dispensing
“HOT WATER
“PROGR. QUANTITY
Place the cup on the Grill drip tray (ref. 3 - Fig. 1) under
the dispenser (ref. 6 - Fig. 1).
Press the corresponding selection key and the machine
automatically dispenses the selected coffee.
“
“
Place the glass or cup under the hot water spout (ref. 7 Fig. 1) and press the hot water selection key. Water is dispensed automatically.
Warning
Coffee can be programmed only if the corresponding setting is on (see page 14).
8.5
Messages and special
warnings
Hot water is dispensed thanks to a circuit that guarantees
that the water is tastefree and at the right temperature to
prepare tea and soups.
The machine shuts off automatically - partially or totally when the bean hopper is empty or the machine is malfunctioning. The cause of the shut-off appears on the display
located on the control panel.
If the display shows a warning message, contact the SUPPLY OPERATOR.
Press the HOT WATER key (Fig. 16), the display reads:
Bean hopper electronic control
Hot water dispensing
“HOT WATER
“
When the bean hopper is empty, the machines stops grinding after about 20 seconds. Fill the bean hopper following
instructions outlined on page 16.
Coffee beans protection against
impurities
HOT WATER
Even the best coffee beans may contain impurities (stones,
metallic parts, etc.)
To avoid damaging, the coffee grinder is equipped with a
protection device against impurities.
If a foreign body falls into the grinder, a special noise is
produced: turn the machine off immediately!
Grinding stops automatically in about 20 seconds thanks
to the electronic control.
Important
To avoid damaging the coffee grinder motor do not restart the machine until the foreign body has been removed.
Fig. 16
Follow the procedure outlined on page 24.
If the corresponding setting is on, only the set quantity of
hot water is dispensed. Otherwise, it is necessary to stop
water dispensing by pressing the key again when reaching the desired level of hot water.
To set the quantity of hot water, press the hot water selection key until the desired quantity has been reached.
Warning
The quantity of hot water dispensed can be programmed
only if the corresponding setting is on (see page 14).
Water level electronic control
The machine stops automatically when the water level in
the tank is below the minimum value detected by the floating indicator (ref. 10 - Fig. 1).
Fill the tank following instructions outlined on page 17.
English
9.2
9 - MAINTENANCE
9.1
Foreword
Warning
Cleaning and maintenance
Maintenance operations must be performed at least once
a year and include testing the condition of the machine
and the conformity of the electric system.
Water tank/ Drip tray/ Dump box/ Brew
group / Machine
Before performing maintenance and /or cleaning procedures, unplug the machine and wait until it is cold.
Follow the instructions contained in this manual to obtain
maximum beverage quality and guarantee the correct
functioning of the machine.
To keep the dispensing outlet and brew group (ref. 18 Fig. 1) clean, the Dump box should be emptied daily, according to needs (Fig. 17).
The machine and its non-removable components must be
cleaned with cold or warm water using non abrasive
sponges and wet cloths unless otherwise stated (this operation must not be performed on exposed electrical components).
•
•
•
•
•
•
•
•
Do not use detergents or solvents that could modify the
shape or functionality of the machine and its components.
Do not soak the machine in water or other fluids: the
machine will be damaged.
Do not wash component parts in the dishwasher.
Always hand-dry the machine components, do not
place them in the oven or microwave oven.
Do not use direct jets of water.
All the components that require cleaning are easily
accessible and do not require the use of tools.
Regular maintenance and cleaning keep the machine
in good condition and guarantee its efficiency for a
longer time while respecting standard hygienic regulations.
The machine counters keep track of the number of beverages dispensed and allow standard maintenance
interventions to be programmed by the maintenance
technician.
Fig. 17
The water tank (ref. 9 - Fig. 1), Dump box, drip tray (Fig.
18) and Grill drip tray (Fig. 18) should be washed regularly using non abrasive detergents and dried with care.
Important
When performing maintenance operations follow the timetable
outlined in section. 14.1 in the general maintenance table.
Warning
In case of failure and/or malfunctioning contact an APPROVED
ASSISTANCE CENTER.
fig. 18
English
The coffee dispenser (ref. 6 - Fig. 1) can be removed for
cleaning.
Remove the protection cover (Fig. 19).
Wash the dispensing channel (Fig. 22) and rinse carefully
with hot water.
Fig. 19
Unfasten the knurled screw under the dispenser (Fig. 20).
Fig. 22
Clean the machine periodically using a wet cloth, and then
dry it.
Brew group
The brew group must be cleaned every time the coffee
bean hopper is refilled and at least once a week.
Turn the machine off by pressing the main switch (ref. 4 Fig. 1) and open the service door (ref. 15 - Fig. 1).
Fig. 20
Remove the Dump box first (Fig. 23).
Remove the dispenser by lifting it out (Fig. 21).
Fig. 21
Fig. 23
English
Remove the brew group using the handle and pressing the
“PRESS” sign (Fig. 24).
the filter back in and fasten the screw using the key.
Remove the coffee residue drawer for cleaning (Fig. 26).
Fig. 26
Use non-abrasive detergents only.
Clean the dispensing outlet and place the coffee residue
drawer back in.
Fig. 24
The brew group must be cleaned with hot water and no
detergents.
The stainless steel filter must be free of coffee
residue.
Place the brew group back in using the handle until it locks
in place, then close the service door (ref. 15 - Fig. 1).
Warning
When placing the brew group back in, do not press the
“PRESS” sign (the machine would be damaged)!
Remove the upper filter for cleaning. Use the supplied key
(ref. 25 - Fig. 1) to unfasten the screw counterclockwise
(Fig. 25).
Wash and dry all components of the brew group, place
Fig. 27
Important
Fig. 25
If the brew group is not inserted correctly, the display reads:
“BREW UNIT MISS
“
Coffee cannot be brewed. The machine is not working.
Place the Dump box back in (ref. 1 - Fig. 1).
English
Pull up the lever carefully (Fig. 30) noting down the grinding selection.
Now the hopper can be removed for cleaning.
Coffee grinder
Warning
Never put water inside the grinder, to avoid irreparable
damage to the machine!
Clean the coffee bean hopper regularly. This operation must
be performed only by a specialized technician only.
Unplug the machine from the socket (ref. 5 - Fig. 1).
Remove the cover with the lock (ref. 21 - Fig. 1) and the
bean hopper cover (ref. 12 - Fig. 1).
Empty the bean hopper and unfasten the two fixing screws
(fig. 28).
Fig. 30
Turn the adjusting ring counterclockwise making the blue
signs coincide (Fig. 31).
Fig. 28
Remove the screws from the adjustment lever (Fig. 29).
Fig. 29
Fig. 31
Now the grinding ring can be removed, by pulling it up
gently (fig. 32).
Fig. 32
English
Clean the ring using the supplied brush (Fig. 33) and
vacuum the grinding area and ring.
Proceed carefully so as not to modify the positioning of the
reference signs.
Important
Given the complex structure of the machine hydraulic circuit, descaling cycles outlined below (automatic and standard) do not include all the channels. Easily accessible components are excluded, namely the brew group (ref. 18 Fig. 1) and the plastic pin/valve connected to it.
The descaling procedure must be performed regularly every
3 – 4 months. If the water used is particularly hard, it can
be performed more frequently.
To avoid hazardous delays, the machine is equipped with
a specific counter that, according to water hardness, signals the urgent need to perform this operation.
In this case the display will show the following message:
“DESCALING
“READY FOR USE
Fig. 33
Reassemble the coffee grinder following this procedure in
reverse order.
If the adjusting ring has turned during cleaning, reposition
it to make the blue reference sign coincide with one of the
three grooves.
Place back the grinding ring making sure that the blue reference signs coincide.
Turn the adjusting ring clockwise until the red reference
signs coincide.
Insert the adjustment lever on the ring so that it coincides
with the grind selection previously noted.
Place the hopper back in and fasten the screws.
Descaling
Warning
Descaling operations must be performed when the machine is cold.
The descaling procedure is used to eliminate limescale buildup from the surfaces and holes of the hydraulic circuit,
guaranteeing the good functioning of the valves, of the
heating controls and other important components.
“
“
When this message appears the machine does not stop but
it is advisable to perform the descaling procedure as soon
as possible. To delete the message, follow instructions outlined on page 14.
Initially the machine is set on a 25°fH hardness value, so
that the message appears after about 150 litres.
If the water is particularly hard, and to improve the quality
of coffee, a water filter should be used to protect the machine and to reduce the frequency of descaling.
Important
Use decalcified water specific for coffee machines.
This warning can however be adjusted according to water
hardness, following the instructions outlined on page 13.
The following adjustments are possible:
- Hardness 4: hard water, above 29°fH (14°dH),
corresponding to ca. 80 l of water
used;
- Hardness 3: medium-hard water, ca. 20-29°fH (714°dH), corresponding to ca. 150 l of
water used;
- Hardness 2: soft water, ca. 12-20°fH (4-7°dH), corresponding to ca. 300 l of water used;
- Hardness 1: very soft water, below 10°fH (3°dH),
corresponding to more than 500 l of
water used.
English
Eliminating the descaling message
Warning
Press the keys to position the asterisk on the Descal. Warning option from the settings menu and select it by pressing
E (Ent).
The display reads:
Never use vinegar to avoid damaging the machine!
Two descaling procedures are available:
-
“RESET DESCALING
“NO
AUTOMATIC DESCALING;
STANDARD DESCALING.
Automatic descaling
Select this option from the settings menu (see page 14).
Press the
keys to position the asterisk on the Descaling
option and select it by pressing E (Ent).
The display reads:
“DESCALING
“
Pour the descaling agent in the water tank (ref. 9 - Fig. 1)
following instructions on the product packaging. Place a
container of sufficient capacity under the hot water dispensing pipe (ref. 7 - Fig. 1) and press the HOT WATER
key. Automatic descaling begins, the pump injects small
quantities of decalcifier into the system and stops to give it
time to work.
During this phase, the display reads:
“MACHINE IS
“DESCALING
“
“
After about 45 minutes, when descaling is over, the display reads:
“DESCALING
“FINISHED
“
“
Press E (Ent). The pump stops. A message appears to signal that the machine must now be cleaned to eliminate
decalcifier residue.
“RINSE MACHINE
“FILL WATERTANK
“
“
Remove the water tank (ref. 9 - Fig. 1), rinse it with care
and fill with fresh water. Press E (Ent) to empty the tank
completely. The display reads:
“RINSING
“FINISHED
“
“
Go back to the settings function by pressing E (Ent).
Note:
Descaling can be exited by pressing C (Esc).
“
“
To modify this value YES or NO press the standard keys.
When this resetting is performed, all internal water counters
are reset and the DESCALING message disappears.
If now the following function is selected
“SIGNAL DESCAL.
“
the DESCALING message does not appear on the display,
replaced by the following message:
“QUANTITY WATER
“NOT REACHED
“
“
English
13 - ACCESSORIES
10 - CARE
When the machine is not used, it must be turned off and
unplugged from the socket.
The Royal Office machine can be equipped with the following optional components:
Keep the machine in a dry place away from children.
-
Coiner box
A coiner box can be attached to the machine.
If the machine is not used for a long period of time, it must
be protected from dust and dirt.
-
Cabinet
To support the machine and to store cups, stirrers, sugar
and stocks.
11 - MACHINE SCRAPPING
Waste disposal following machine scrapping must be carried out according to environmental considerations, so as
to prevent ground, water and air pollution.
Local environmental regulations must be complied with.
Cut the power cord so that the machine cannot be used.
Take the machine to the appropriate waste collection centre.
12 - TROUBLESHOOTING
In case of faults or damage possibly after a fall, immediately unplug the machine.
If the problem cannot be solved by following the instructions presented in the table below, contact the nearest ASSISTANCE CENTER.
Important
Problems may arise when using the machine that can cause
malfunctioning.
The possible causes are listed in par.14.2 of this manual in
the Troubleshooting table below along with the corresponding solutions.
If the problem cannot be solved, the machine must not be
used until the nearest ASSISTANCE CENTER has been contacted.
For further information see the corresponding manuals.
English
14 - GENERAL MAINTENANCE
To keep the machine in good working conditions cleaning and maintenance procedures should be performed according to
the instructions in the table below.
Operations to be performed
At each supply
After 2 supplies
After 5-10 supplies
Emptying and cleaning the Dump box
Emptying and cleaning the drip tray
Emptying and cleaning the water tank
Cleaning the coffee brew group
Oiling the coffee brew group
Cleaning the coffee bean hopper
14.1 Troubleshooting
In case of failures or faults, immediately unplug the machine. Contact the maintenance technician or an Approved Assistance Centre for interventions and repairing. Incorrect repairing can present serious hazards for users. The manufacturer
declines responsibility for incorrect repairing: the warranty also expires.
Problem
CAUSE
REMEDY
No display message.
No power supply.
Turn the main switch on, check the
socket and fuse.
The service door is open.
Close the service door.
The brew group is missing.
Insert the brew group.
The brew group is jammed.
Clean the brew group.
No water.
Fill the water tank.
No coffee.
Fill the coffee hopper.
In both cases, restart the brewing cycle.
No drawer.
Insert the Dump box correctly.
Coffee grinder jammed.
Clean the coffee grinder.
Coffee comes out too fast.
Grinding too coarse.
Adjust to a finer grinding (e.g., from 5
to 3).
Coffee comes out too slowly.
Grinding too fine.
Adjust to a coarser grinding (e.g., from
3 to 5).
Coffee has no sufficient crema.
Unsuitable coffee blend or coffee is not
freshly toasted.
Change coffee blend
It takes long for the machine to warm
up, or the load capacity is insufficient
There is limescale in the machine.
Descale the machine following instructions.
The brew group cannot be removed.
The brew group is not in the correct position.
Start the machine, close the service
door, insert the Dump box. The brew
group is automatically placed in the
correct position.
Automatic coffee brewing does not
start.
INTERNATIONAL GROUP
EC DECLARATION OF CONFORMITY
EC 73/23, EC 89/336,
EC 92/31, EC 93/68, EC 98/37
We :
SAECO INTERNATIONAL GROUP S.p.A
Via Panigali, 39
40041 GAGGIO MONTANO (BO)
declare under our responsibility that the product :
AUTOMATIC VENDING MACHINE
TYPE : SUP015V
to which this declaration relates is in conformity with the following standards or other normative
documents :
Safety of household and electrical appliances - General requirements
EN 60335-1 - 1994 + A11 / A12 / A13 / A14
Safety of household and electrical appliances - Part 2^
Particular requirements for appliances for heating liquids
EN 60335-2-15 - Edit.1996 + A1
Safety of household and electrical appliances - Part 2^
Particular requirements for coffee mills and coffee grinders
EN 60335-2-14 - Edit.1996 + A11 / A1 / A2
Safety of household and electrical appliances
Particular requirements for automatic vending machine
Document IEC 60335-2-75 - Edit.1995
Limits and methods of measurements of radio disturbance characteristics of electrical motor-operated and thermal
appliances for households and similar purposes, electric tools and similar electric apparatus
EN 55014 - 1 - Edit. 1993 + A1 / A2
Electromagnetic compatibility (EMC)
Part. 3^ Limits - Section 2 : Limits for harmonic current emissions (equipment input current ≤ 16A per phase)
EN 61000-3-2 - Edit. 1995 + A12 / A1 / A2
Electromagnetic compatibility (EMC)
Part 3^ : Limits - Section 3 : Limitation of voltage fluttuations and flicker in low-voltage supply systems for equipment with
rated current ≤ 16 A.
EN 61000-3-3 Edit. 1995
Immunity requirements for household appliances, tools and similar apparatus.
Product family standard EN 5014 - Edit. 1997
Electromagnetic compatibility (EMC)
Part 4^ : Testing and measurement technique.- Section 2 : Elelctrostatic discharge immunity test.
Basic EMC publication - EN 61000-4-2 Edit.1995 + A1 Edit. 1998
Electromagnetic compatibility (EMC)
Part 4^ : Testing and measurement technique.- Section 4 : Elelctrical fast transient/burst immunity test
Basic EMC publication - EN 61000-4-4 Edit.1995
Electromagnetic compatibility (EMC)
Part 4^ : Testing and measurement technique.- Section 5 : Surge immunity test.
EN 61000-4-5 Edit.1995
Electromagnetic compatibility (EMC)
Part 4^ : Testing and measurement technique.- Section 6 : Immunity to conduced disturbance,
inducted by radio-frequency fields. EN 61000-4-6 Edit.1996
Electromagnetic compatibility (EMC)
Part 4^ : Testing and measurement technique.- Section 11 : Voltage dips, short interruptions and voltage variations
immunity tests. EN 61000-4-11 Edit.1994
following the provisions of the Directives :
EC 73/23, EC 89/336, EC 92/31, EC 93/68.
Gaggio Montano
17/10/00
President
Sergio Zappella
Cod. 0333.964 - Ed. 00 05/01