Download MANUALE ITALIANO DEF. - TAB
Transcript
2
Ti ringraziamo per aver scelto
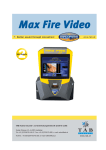
Max Fire
rispetto al vasto numero di altre macchine disponibili sul mercato.
Per trarre una maggiore soddisfazione dal tuo Max Fire, ti invitiamo a leggere le istruzioni
di utilizzo.
Conserva questo manuale in modo tale da poterlo leggere anche nella versione stampata
se necessario.
Manuale di istruzioni della macchina Max Fire Video
(MH - 26.06.2007)
I passaggi riportati nel testo e le illustrazioni contenute in questo documento sono state
stilate con la massima attenzione e cura, ciò nonostante è possibile che alcuni errori non
siano stati rilevati.
Il produttore non accetta responsabilità legali in nessuna forma relativamente a errori e ad
ogni conseguenza che possa da loro derivare.
Il produttore ringrazia per qualsiasi suggerimento volto a migliorare o a focalizzare errori.
Tutti i diritti, inclusi quelli derivanti da riproduzioni fotomeccaniche e magazzinaggio di
elettronica o qualsiasi altro mezzo sono riservati. Il programma, il manuale e tutti i
componenti sono soggetti a regolamenti di copyright internazionale.
(C) 1996-2003
TAB-Austria
A-4052 Ansfelden, Haiderstraße 40
Tel. +43 / 72 29 / 78 0 40 - 0*, Fax +43 / 72 29 / 78 6 60
Tutti i diritti sono riservati.
3
Indice
INDICE
4
PASSAGGI D'INSTALLAZIONE
5
DESCRIZIONE
6
6 – INSTALLAZIONE
8 – INSTALLAZIONE DI UN PULSANTE DI USCITA
9- CAMBIO DELLE LUCI LED DEL MAX FIRE
AVVIO
10
MODALITA' TESTMODE
11
CHAMPIONSNET
24
28 - ONLINE TERMINAL MANAGEMENT
30 - MENU MUSIC
39 - PRIMA INSTALLAZIONE DELLE CHARTS DALLA
VERSIONE V1.52
JUKE-BOX
45
49 - AGGIORNAMENTO
49 – AGGIORNAMENTO FILE MUSICALI E VIDEO
50 – PULSANTI/OPZIONI
DATI TECNICI
51
RISOLUZIONE DEI PROBLEMI
52
53 – MESSAGGI DI ERRORE
ACCESSORISTICA
55
WIRING PLAN (PIANO DI CABLAGGIO)
58
DICHIARAZIONE DI CONFORMITA’
59
GENERAL TERMS AND CONDITIONS OF TRADE – END
USERS LICENSE AGREEMENT FOR MICROSOFT
SOFTWARE – WARRANTY TERMS BY TAB AUSTRIA
NOTES
60 - 66 – 71
73
4
PASSAGGI DI INSTALLAZIONE
Regole di sicurezza per l’utilizzatore
la macchina può essere messa in funzione solamente in ambienti asciutti e collegati
in maniera sicura con una presa che risponda agli standard di sicurezza.
prima di accendere la macchina assicurarsi che abbia raggiunto la temperatura
dell’ambiente
raccomandiamo che la macchina venga installata ad un’altezza di 1.80 cm
all’angolo superiore.
controllare il voltaggio principale prima di collegare la macchina!
la macchina è programmata per un voltaggio alternante di 230 Volt (o 115 Volt se
specificato sulla piastrina), 50 Hz e 120 W di potenza.
la macchina può essere utilizzata solo con un fusibile 3.15 amp.
in caso di rottura delle parti di copertura , cavi sporgenti , incendio della macchina o
tubi scoperti la macchina deve essere immediatamente spenta e il cavo principale
rimosso.
cavi difettosi o scoperti ,soprattutto cavi di alimentazione e spine, devono essere
sostituiti.
la temperatura ambiente raccomandata è 5-35 gradi sulla scala Celsius.
IMPORTANTE!
in questi casi assicurarsi che nessun contatto venga stabilito con la macchina
e che non venga accesa!
Quando la macchina è posizionata a fianco di altre possono verificarsi interferenze
durante la normale operazione .
Fare attenzione alle condizioni di licenza Microsoft
5
Dispositivo di materiali elettrici ed elettronici vecchi (applicabile nell'Unione Europea e in altri paesi
Europei con sistemi di smaltimento separati)
Questo simbolo sul prodotto o sul suo imballaggio indica che il prodotto non deve essere trattato come un
rifiuto solido urbano. Al contrario deve essere portato al punto di smaltimento autorizzato per il riciclaggio di
materiali elettrici ed elettronici. Assicurandoti che questo prodotto venga smaltito correttamente aiuterai ad
evitare eventuali potenziali conseguenze negative per l'ambiente e la salute umana che potrebbero essere
altrimenti causate da uno smaltimento inappropriato di questo prodotto. Il riciclaggio di materiali aiuterà a
conservare le risorse naturali. Per informazioni più dettagliate riguardo al riciclaggio di questo prodotto
contattare l'ufficio locale, il servizio di smaltimento rifiuti solidi urbani, o l'azienda presso la quale il prodotto è
stato acquistato.
Descrizione
Il Max Fire è un juke box musicale dallo stile moderno, rivestito in acciaio con parti in
plastica.
Nella macchina c'è un accetta banconote elettronico, un display touch screen CC Talk, a
17’’ TFT e un Pc completo.
Installazione
Sballare la macchina
Montaggio ( 2 possibilità ):
• a muroTAB
• a muro NSM
Collegare ad una presa di corrente all'elettricità 230 V / 50 Hz (presa di corrente)
Collegare il suono. Possibilità:
• collegare le casse con l'amplificatore esterno Tab (opzionale)
• collegare con l'amplificatore (Line – IN amplificatore on Line – OUT
macchina)
• altra fonte, per esempio un lettore cd , on Line – IN e Line – OUT su
amplificatore (per musica di sottofondo --> vedere i punti file Mpeg nel
Testmode musica).
• controllo relais del lettore cd e Max sull'amplificatore (controllato tramite il
controllo I/O anche per musica di sottofondo)
6
Picture 1.0
7
Impostazione di un pulsante di uscita
E' possibile includere una serratura elettrica nel Max Fire. Collegare i fili neri e grigi già
disponibili con la serratura. Il secondo interruttore può essere coperto con una
mascherina.
Pulsante di uscita
Art.numero: 671191540
Mascherina di copertura:
Art.numero: 022080312
8
Cambio delle luci LED del MAX FIRE
• spegnere la macchina
• disconnettere i cavi delle luci RGB LED
Assicurarsi che i componenti elettronici siano stati scollegati. Maneggiare con cura in
modo tale da evitare danneggiamenti della piastrina elettronica. Osservare come sono
collegati la piastrina e i cavi.
Cavo di connessione del controllo PCI RGB LED sul PC
Art.numero:
360110783
Cavo del RGB per le piastrine LED
4 cavi
Art.numero:
360110781
Piastrina RGB LED
Art.numero:
462980010
9
Avvio
Ogni macchina è testata presso la ditta e consegnata in condizioni di pre-installazione.
Raccomandiamo di attendere 15 minuti in modo tale che lo schermo possa ottenere la
temperatura ottimale per il funzionamento.
A causa degli effetti delle differenze nella temperatura è possibile che lo schermo e le
impostazioni touch-screen non siano corrette. Quindi raccomandiamo di attenersi
SEMPRE a questa procedura quando si maneggia la macchina per la prima volta:
• Accendere la macchina (l'interruttore è posizionato sul retro della macchina)
• Dopo l'accensione scegliere qui la lingua preferita per il Max Fire
10
Modalità testmode
• Accendere la modalità testmode
Si sta entrando ora nella modalità testmode
11
Menu Generale
• Configurazione del monitor
o Prova dell'immagine
Qui si può vedere uno schermo di prova. Per cambiare le impostazioni del
monitor utilizzare la piastrina elettronica OSD all'interno della macchina.
1
12
• Impostazioni Touch-Screen
o Configurazione
Scegliere l'opzione e seguire i messaggi sullo schermo.
o Test
Qui è possibile testare il Touch Screen
• Regolazione del volume
o Gioco
Impostare il volume del suono del gioco
o Stand-By
Impostare il volume del suono nella modalità stand-by
• Cancellazione
o Cancellazione credito
Cancellare il credito/i effettivo/i della macchina
o Master Reset
Questa opzione ripristinerà le impostazioni originarie
• Altro
o Controllo del credito
Impostare prova-crediti. Ideale per testare la macchina!
13
Impostazioni base del menu
• Data e ora
Qui è possibile impostare data e ora.
Nota:
Una macchina che è attiva nella Championsnet imposterà data e ora automaticamente.
Bisognerà solo impostare la fascia corretta di fusorario.
• Lingua base
Qui si imposta la lingua che verrà automaticamente mostrata nel menu quando si accende
la macchina
• Altro
o Suono Stand-By
Selezionare la casella stand-by sound quando si vuole avere la musica in
stand-by
o Nazionalità
Selezionare la nazione di appartenenza della macchina, dopo di che la
bandiera dello stato apparirà nel menu.
14
Test del menu
Monete:
verifica se i canali delle monete funzionano correttamente
Banconote:
verifica se i canali delle banconote funzionano correttamente
Bonus card:
Verifica se la bonus card funziona.
Ultimi
impulsi:
Pulsanti:
Qui è possibile vedere la corretta distribuzione del tuo lettore
banconote e accetta monete.
Verifica se i pulsanti funzionano correttamente
Metri:
Verifica il contatore dell’hardware. Dopo aver scelto questa
opzione ci dovranno essere 10 impulsi che si aggiungeranno
al contatore.
• Music-Relais
Qui è possibile attivare la funzione music-relay e invertire il segnale di
input. I relays devono essere collegati al PIN 49 e PIN 10 (12 Volt) dell’I/O
controller.
15
Impostazioni del menu hardware:
Valuta
Scegliere la valuta programmata
Impulsi:
Configurare gli impulsi per il contatore hardware
Chiave NV7
Questa chiave è necessaria per l’avvio del lettore di banconote. Se si cambia il
lettore di banconote, assicurarsi che questa sia la stessa utilizzata per l’accettatore
di banconote.
Monete e banconote
Completare l’installazione dei canali dei lettori di banconote e monete
16
• Impostazione dell’effetto LED
Modificare le luci del Max Fire 2!
Si possono usare singoli colori o combinazioni multiple di colori
•
Servizio monete
Programmare l’accetta banconote come si preferisce! E’ supportata anche la
programmazione dei gettoni!
•
•
Procedura:
Scegliere „Run Coin service“
Si è ora nel menu con le seguenti opzioni
•
cambio del set di monete
17
•
•
•
•
o caricare alcune monete
programmazione del canale
o programmare monete e gettoni
test del canale delle monete
o verificare I canali delle monete
cancellazione del canale
o cancellare i canali delle monete
uscita
o ritorno al menu delle opzioni principale
I canali dal 6 al 15 sono liberi. Questi canali sono pronti per essere programmati.
•
•
Scegliere „Programmazione del canale“ e selezionare “start”
Si è ora nel menu delle seguenti opzioni dove si devono inserire 15 monete
•
Seguire i messaggi riportati sul monitor fino a quando non appare il messaggio
“programmazione completata”.
18
•
Selezionare la valuta ed il valore relativo. Dall'esempio si può vedere che il
canale 6 è stato programmato per una valuta croata ed il valore è 1 Kuna = 1
credito. Se si programma un canale con un gettone bisogna scegliere “gettone”!
•
Selezionare “set” ed il canale della moneta verrà programmato e sarà possibile
vederlo nella lista dei canali.
•
•
Andare “indietro” al menu principale delle opzioni
Accendere la macchina e attendere qualche secondo affinché si possa avviare
19
•
•
Attivare la modalità testmode
Nel menu “impostazioni hardware” è possibile scegliere la propria valuta
programmata
Nel menu “test macchina” è possibile testare immediatamente la stessa.
Menu contabilità
20
Qui è possibile visualizzare la contabilità completa della macchina. Volendo si può anche
selezionare la contabilità per il codice PIN supervisore.
•
Contabilità 1
Qui è possibile vedere le entrate complessive delle monete, banconote e
gli input Bonus card. E' anche possibile vedere la somma completa di tutti
i crediti e il tempo di utilizzo della macchina!
•
Contabilità 2
Qui è possibile avere una visione globale delle entrate, Test-crediti,
crediti-musicali e tempo di utilizzo della macchina!
Nota bene:
E' possibile eliminare separatamente la contabilità 1 e la 2.
Programmazione prezzi dei giochi
21
Programmazione prezzi del gioco
E’ possibile stabilire in questa sezione il valore del credito. Come standard è
impostato quanto segue: 50 cent pari ad 1 credito. Con i contatori sulla destra è
possibile cambiare le impostazioni. Nel valore standard 2 (bonus) è possibile
programmare crediti speciali per opzioni bonus.
• Modalità Free play (gratuita)
Se si attiva questa opzione la macchina ha sempre 99 crediti nel menu.
•
Pagine pubblicitarie
Impostare le proprie pagine pubblicitarie in questo menu. Le pagine verranno mostrate
automaticamente nella modalità stand-by per un tempo che è possibile impostare.
Menu PIN
22
Selezionare 3 diversi Pin supervisori. Con questi PIN si entra in una modalità test speciale
dove il supervisore può programmare menu speciali e cambiarli.
Per entrare nella schermata Login selezionare il logo Tab-Austria nel menu e poi
sul lato sinistro in basso il logo Silverball .
Stabilire un codice Pin per la modalità Testmode. Senza questo codice Pin non è
possibile entrare nella modalità testmode.
Stabilire un codice pin solo per la contabilità 2.
Championsnet
23
o Attivare il Championsnet (vedere activate nella tabella sopra)
Nota bene:
il terminale si riavvierà automaticamente dopo l'attivazione.
Scegliere “cambia-change” in “connessione-connection” e sarà possibile scegliere il tipo di
connessione ed impostare l'ora del trasferimento giornaliero!
24
o connessione Provider (provider connection)
• impostare il numero di telefono, nome utente e password per la
connessione
o inizio del trasferimento
• impostare l'ora del trasferimento giornaliero automatico dei dati
Championsnet
o tipo di connessione
• scegliere la propria connessione internet. Se si sceglie “connessione
permanente/permanent connection” la macchina è sempre connessa ad
internet.
• Rete
La connessione internet verrà stabilita con la network-card onboard. Bisogna solo seguire
le opzioni riportate a pagina 2 del menu connessione provider. Per questi parametri
(Figura/Picture 1.0 alla pagina 27 di questo manuale) contattare l'amministratore di rete
locale.
25
• Rete – VPN
Questa opzione deve essere scelta dagli utilizzatori della rete ADSL. Le informazioni circa
il tipo di connessione usato possono essere reperite presso il proprio provider. A pagina 2
(vedere figura 1.0 della pagina 27 di questo manuale) devono essere state effettuate le
seguenti scelte:
- attivare Disable DNS (cliccare su questa opzione)
- inserire il dato DNS 1
- inserire il dato DNS 2
- attivare Use DHCP
- inserire il dato indirizzo (address) IP
- inserire il dato Subnet Mask .
• Rete – PPPOE
Questa opzione deve essere scelta dagli utilizzatori della rete TSL o una rete dalla velocità
superiore. Le informazioni circa il tipo di connessione usato possono essere reperite
presso il proprio provider. A pagina 2 (vede figura 1.0 della pagina 27 di questo manuale)
devono essere state effettuate le seguenti scelte:
- attivare Disable DNS (cliccare su questa opzione)
- attivare Use DHCP
- inserire il dato indirizzo (address) IP
- inserire il dato Subnet Mask .
E' possibile collegare più macchine insieme e connetterle poi ad internet. Tutto ciò di cui si
necessita è un Router Hardware che stabilisce la connessione ad internet via Dsl. E'
inoltre possibile configurare il router con il browser web della propria macchina! Bisogna
solo collegare la macchina al router con un cavo di rete.
Pagina 2 del menu Connessione del Provider
(figura 1.0)
26
Compilare qui le impostazioni relative ad internet. In caso di problemi contattare il proprio
provider internet o amministratore di rete.
Online Terminal Management
Con ONLINE TERMINAL MANAGEMENT è possibile gestire la propria macchina da casa!
27
Caratteristiche dell' OTM:
• Online music shop
per scegliere canzoni e video musicali o completare i pacchetti e mandarli al proprio
terminale!
• Tornei Online (solo su macchine Silverball e Virtual Pinball )
per creare, gestire e giocare i propri tornei online!
• Servizio Online
per controllare l'incasso di ogni macchina con il programma contabilità e vedere le pagine
pubblicitarie dei propri terminali.
• Gestione terminali e licenze
per vedere tutte le informazioni dettagliate della propria macchine e utilizzare la versione
ONLINE PLUS! (senza mai cambiare il dongle ma stando sempre online con la versione
più nuova del software)
E' possibile registrarsi sui siti seguenti https://service.championsnet.net o www.tab.at/otm
Con la prima registrazione si ottengono licenze gratis per i primi tre mesi. Nel negozio
online di musica del proprio account OTM è possibile vedere prezzi di ogni download (di
canzoni e di video musicali)
Per informazioni dettagliate scaricare il manuale OTM completo dall'area download del
sito www.tab.at o contattare il tecnico c/o Norditalia Ricambi srl, tel. +39 031 74 65 42.
Quando tutte le impostazioni sono state programmate, bisogna registrare (cliccare su
register/registra) la propria macchina nel Championsnet.
28
Nella procedura di registrazione la macchina viene inserita nel server CHAMPIONSNET
ed ottiene un proprio numero.
Nella modalità testmode è ora possibile vedere l'opzione “Servizio Online/Online service”.
Attivare questo servizio selezionandolo ed inserendo un codice TAN.
Menu MUSIC
29
Programmazione delle impostazioni
1) Impostazioni - settings
Pulsanti - buttons:
Permette di stabilire per quanto tempo una canzone deve restare nella categoria
nuove, novità o vecchie (oldies).
o NEW - Nuova:
E’ possibile stabilire per quanto tempo una canzone rimarrà in colore diverso
selezionando NEW (nuova).
o CURRENT - Novità:
E’ possibile stabilire per quanto tempo una canzone rimarrà in colore diverso
selezionando Current (novità). La data del brano musicale è quella del formato
mp3. E’ possibile anche scegliere il mese dell’anno.
O OLDIES - Vecchie:
Impostando questa opzione, la macchina mostrerà tutte le canzoni considerate
Vecchie, per esempio di 10 anni precedenti. La data è stabilita tramite dato
interno del file mp3.
•
• Visualizzazione - display:
30
o Top select (scelta diretta):
Mostra le 13 canzoni più ascoltate nel menu principale.
o Show hints (suggerimenti/indicazioni):
Se attivato, i pulsanti “help” di aiuto appariranno nel menu principale.
o Playlist:
Questa funzione va attivata se si desidera che vengano mostrati i titoli
selezionati nel menu principale
o Priority (priorità):
Se questa funzione è attiva, puoi programmare con un credito extra che una
canzone venga lanciata per prima!
o Silverball Standby:
Quando è attivato, la macchina entra automaticamente in modalità stand-by
quindi compaiono le pagine di pubblicità ed il logo.
o Show numbers of titles on start (mostra all’accensione il numero dei brani
musicali):
E’ necessario attivare questa funzione se si desidera che compaia il numero dei
brani musicali presenti nella macchina.
o Show advertising on second screen (visualizza pubblicità sul secondo monitor):
Se si vuole che la pubblicità appaia sullo schermo secondario (Plasma,
Proiettore…), è necessario attivare questa funzione.
• Titoli che devono essere cancellati - Titles clear to delete :
Tramite questa maschera è possibile impostare quali canzoni cancellare quando lo
spazio sul disco interno è esaurito
o Delete least selections (cancella le scelte peggiori):
Se attivato, le canzoni con il minor numero di richieste saranno eliminate
automaticamente. Raccomandiamo questa opzione.
o Delete oldest selections (cancella le scelte più vecchie):
Se attivato, le canzoni più vecchie saranno eliminate automaticamente.
o Reserve (riserva)
Indica lo spazio che dovrebbe restare libero sul disco. E’ possibile anche
visualizzare lo spazio attualmente libero sul disco.
• Cancella il conta-titoli - Reset title counter
Stabilisce quando azzerare la lista delle Top hits
2) Dati Mpeg - Mpeg files
31
•
Musica di sottofondo - Background:
o Random Access (accesso):
Con questa opzione, è possibile stabilire i titoli della lista da selezionare come
background musicale. Se si imposta il valore a 0, il si attiva il titolo animato (vedi
punto “titoli animati”)
o Random title length (lunghezza della canzone):
E’ possibile stabilire la durata del background musicale
o Random volume (volume):
E’ possibile impostare, in percentuale, il volume del background musicale.
o Animation title (titoli animati):
Il valore impostato stabilisce entro quando il background musicale deve
terminare. Se la macchina è connessa a una fonte esterna (radio, lettore CD…),
il Max Fire riproduce automaticamente le canzoni presenti in questa fonte per 30
minuti; in seguito riprende una canzone dal Max e al termine della stessa, si
riconnette nuovamente alla fonte esterna e così via…
Se si attiva nelle Impostazioni Hardware il Music-Relay, quest’ultimo può
attivare un amplificatore esterno.
o Only play videos (mostra solo i video) – disponibile solo nel Max Fire Video.
Se si desidera che vengano mostrati solo i video come background musicale,
occorre attivare questa opzione .
• Dissolvenza - Fading:
o Line in volume (volume in ingresso dalla sorgente esterna):
o Imposta il volume della fonte esterna connessa alla linea d’ingresso della
scheda audio.
32
o
o
o
o
Fade Out (dissolvenza):
Stabilisce la durata della dissolvenza prima dell’avvio di una canzone o di un
video selezionato.
Max. title length (lunghezza massima dei titoli):
Stabilisce la durata massima di una canzone o di un video selezionato.
• Impostazioni per esecuzioni libere - Free title settings:
o Free titles (esecuzioni libere):
Associa il valore della moneta al numero delle canzoni selezionabili.
Se il valore è superiore a 2, sono attive le seguenti opzioni
1. Max Free titles (Numero massimo di esecuzioni libere):
Stabilisce quante canzoni è possibile riprodurre con 1 free play.
2. Wait (Ritardo/attesa):
Tempo di attesa fino al prossimo play time.
Per esempio: 5 titoli su 10 disponibile sono stati utilizzati. Dopo l’uso,
appare per 20 secondi il messaggio “Thank you for using the MAX
FIRE-grazie per aver scelto Max Fire”. Dopo questo messaggio, è
possibile utilizzare i rimanenti 5 titoli perché se ne hanno a
disposizione 10 in totale. Dopo aver usato anche questi 5 titoli, la
funzione di free play si disabilita automaticamente.
• Impostazione per i titoli scelti - Selection settings:
o Volume:
Imposta il volume per i titoli scelti
o Cancel background (cancella modalità background/casuale):
La musica di background termina dopo la selezione di un brano.
o Title lock (arresto del brano):
Se questa opzione è attivata, il brano appare solo una volta nella
playlist. Si raccomanda di selezionare questa opzione.
o 15 min. Title lock (15 min di blocco/arresto):
E’ possibile scegliere la stessa canzone solo a distanza di 15 minuti.
• Modalità di esecuzione - Play mode:
o As selected (come da scelta):
La canzone scelta viene mostrata alla fine della playlist.
o Shuffle (casuale):
La canzone scelta viene mostrata da qualche parte nella playlist.
o Mp3 and video price (costo per MP3 e costo per video):
Viene impostato in questa opzione il prezzo del singolo MP3 o video.
Il valore del credito viene invece stabilito nella sezione “Test
macchina”.
Prova volume - Test Volume:
o Selected (scelto):
Testa il volume delle canzoni/video selezionate/i
o Background (musica di sottofondo):
Testa il volume della musica di sottofondo
3) Banca Dati - Database
33
E’ possibile trovare tutte le canzoni ordinate per tipo, interprete, titolo, genere, stato
(bloccato), numero (posizione come da classificata Top Hits).
Scegliendo una di queste opzioni sarà semplice trovare la canzone desiderata. La piccola
freccia mostra l’opzione scelta dalla lista.
• Show log of selected titles (protocollo dei titoli acquistati)
Mostra tutte le canzoni scaricate sulla macchina
• Delete all locked titles (cancella tutti i titoli bloccati)
Cancella tutti i titoli bloccati presenti nella macchina
•
Edit (elabora):
34
Elabora la canzone scelta. E’ possibile inserire qui tutti i dettagli relativi alla canzone
scelta.
E’ possibile inserire il titolo nella lingua prescelta. Quando si preme il pulsante “languagelinguaggio”, è possibile cambiare il layout della tastiera nella lingua prescelta. Per esempio
selezionando “Greek-greco”, è possibile inserire il titolo nei caratteri greci.
Nota Bene:
E’ necessario completare sempre i campi relativi al nome dell’artista e al titolo della
canzone.
E’ possibile anche associare il genere alla canzone ed utilizzarlo come chiave di ricerca.
Dopo aver premuto ok, si torna al menu principale “Banca Dati”.
35
4) Durata - Playing times
E’ possibile creare fino a 5 diverse aree temporali ed inserirne i relativi dettagli (genere,
background musicale e canzoni).
Se più aree temporali si sovrappongono, la prima è quella che ha la priorità.
Premendo + è possibile aggiungere una nuova area temporale, premendo – ne viene
invece eliminata una.
Cliccando su “Edit-elabora” si cambiano le opzioni per l’area temporale selezionata.
• Durata del brano visibile nella schermata generale del test menu - Playing times
visible in the overview testmode
Attivare questa opzione per permettere l’accesso al supervisore.
5. Generi - Categories
36
Qui puoi elaborare ed aggiungere i generi musicali.
• Visualizza generi in modalità test - Show the categories in Testmode:
o Show all categories (visualizza tutti/e i/le generi/categorie):
Tutti i generi sono disponibili
o Show the categories in groups (visualizza i generi in gruppi):
I generi musicali saranno inseriti in gruppi di livello superiore, disponibili sotto
la categoria “generi speciali-special categories” nella sezione “playing
times-durata”. Per esempio, puoi scegliere quali generi inserire nella
categoria “Chistmas-natale”
• Nuovo genere:
E’ possibile inserire un genere completamente nuovo ed aggiungere canzoni in
esso.
37
6) Blocco nazione - Country Bar
E’ possibile selezionare per ogni canzone in quale paese possa essere riprodotta.
I dettagli relativi alla canzone, sono inseriti nei file ID3 Tags. In ogni file sono contenute le
informazioni quali paese, album…!
• Show international titles (mostra titoli internazionali)
Attivare questa opzione se si vuole che vengano mostrati i titoli internazionali in
tutto il mondo. Si raccomanda di attivare questa opzione.
7) Charts
38
Qui è possibile consentire o bloccare le chart lists presenti nella macchina. Ogni chart list
è stata scaricata e viene fornita automaticamente dal server TAB.
Le charts “MAX” sono le canzoni maggiormente scaricate in ogni singolo paese!
Prima installazione delle charts dalla versione V1.52
Se si è in possesso di una macchina che ha un software di una versione precedente alla
V1.52, effettuando l’update ad una versione superiore, si scaricherà automaticamente la
chart list relativa al proprio paese. Ovviamente è possibile attivare anche le altre chart
lists.
Inoltre per la prima trasmissione dati al nostro server occorrerà più tempo rispetto a quello
necessario per il normale download e l’installazione delle chart lists complete. Anche dopo
aver effettuato la modifica alle chart lists, è necessario effettuare una completa
trasmissione dati (receive all data’s)!
8) Download
39
Questa caratteristica e’ disponibile solo per le macchine iscritte alla Championsnet e
registrate con un numero seriale (vedere sezione Championsnet per maggiori
informazioni).
• Attivare la funzione necessaria per scaricare la musica - Activate music download
feature
o Credit (costo):
Si determina il costo del download per singolo MP3
• Attivare la funzione necessaria per scaricare video - Activate video download
feature
o Credit (costo):
Si determina il costo del download per singolo video
Se si attiva l’opzione “Come per titoli locali”, il prezzo sarà lo stesso di quello selezionato
nel menu “Impostazioni/settings”.
• Download titolo per mese - Download titles per month:
E’ possibile determinare il valore massimo scaricabile di canzoni per ogni mese. Una volta
raggiunto questo valore, la funzione si disabilita automaticamente e sarà di nuovo
disponibile a partire dal mese successivo.
• Ammontare del download al mese - Download amount per month:
40
Si determina il valore massimo scaricabile in un mese in Megabyte.
• Numero massimo di scelte simultanee - Maximum simultaneous choice:
Indica il numero dei titoli scaricabili nello stesso momento dal server quando si effettua il
download.
9) Download blocco artisti - Artist download bar
41
Qui è possibile inserire nella sezione “bloccato” alcuni tra gli artisti presenti nella banca
dati del download. Le canzoni che sono già presenti nella macchina o che saranno
acquistate tramite l’Online Music Shop non possono essere bloccate.
10) Download liste filtri - Download filter lists
42
Qui è possibile limitare il download solamente alle canzoni inserite nelle liste speciali
presenti nel server. Questo blocco non vale per i titoli già presenti nella macchina o per
quelli acquistati tramite l’Online Music Shop.
43
Dopo aver effettuato il Set Up, uscire dalla modalità TESTMODE. Alla nuova accensione,
comparirà ora il Menu MAX FIRE.
Jukebox
44
Cliccando sull’icona Jukebox, si ha accesso al menu MAX
• Charts
Qui compaiono le chart attivate in ogni singolo paese. E’ possibile anche scaricare
le canzoni disponibili! Le canzoni contrassegnate nella lista con “Coming soon”
sono presenti nell’elenco, ma non ancora disponibili sul server.
• Brand New
E’ possibile visualizzare le ultimissime novità.
• Playlist
Questa è la lista dove vengono mostrati i titoli selezionati e scaricati.
• Top Hits
Questa è la lista dei top 13.
• Power Search
E’ possibile cercare con una sola parola un artista o una canzone.
• Cancellazione della canzone - Skip function
E’ possibile utilizzare un software con la funzione skip. Per poterlo fare è
necessario aggiungere il codice PIN del Supervisor (modalità Testmode,
impostazioni PIN). Premendo sul display l’icona nera credit ed inserendo il codice
PIN, si annulla la canzone corrente.
• Scelta del brano - Selection
Qui è possibile effettuare la ricerca della canzone in base alle opzioni mostrate.
45
E’ possibile navigare tra le varie canzoni utilizzando le frecce in basso a sinistra. Se non si
ha a disposizione credito sufficiente per la canzone, il tasto Play/Select diventa di colore
rosso.
• Scelta – sorted by:
E’ possibile effettuare una ricerca di una canzone tramite artista, titolo, album e
genere! Anche attraverso nuove, novità e vecchie!
Premendo il tasto
46
si ha accesso alla maschera per l’invio di E-mail e la navigazione in internet.
Email
• Da:
Inserisci in questo spazio il tuo indirizzo e-mail o nome.
47
• A:
Inserisci in questo spazio l’indirizzo e-mail del destinatario. Per esempio:
[email protected]
• Cc:
Se si vuole inviare una copia dell’e-mail ad altri indirizzi, è possibile inserirli in questo
spazio. Tra le virgolette “;” è possibile inviare la mail a più indirizzi.
• Bcc:
Per inviare una copia ad un indirizzo nascosto, è necessario inserire l’indirizzo in questo
spazio.
• Subject (Oggetto):
Se si vuole indicare un oggetto come riferimento all’e-mail che si sta scrivendo, è
possibile inserirlo in questo spazio.
• Text (Testo):
In questo spazio si scrive l’e-mail.
Internet
• Browse:
Digitare l’indirizzo del sito internet che si vuole utilizzare come homepage, per esempio
www.tab.at
• Refresh - aggiorna:
Aggiorna la pagina mostrata
• Home:
Torna alla pagina iniziale (home page)
• Stop:
Interrompe il caricamento della pagina
• Back - indietro:
Visualizza la pagina precedente
• Forward - avanti:
Si visualizza in questo modo la pagina successiva
• Exit:
Chiude la connessione
• Tastiera:
Verrà visualizzata una tastiera con la quale poter immettere caratteri e visualizzare le
pagine internet, per esempio di motori di ricerca quale Google.
Nota bene:
E’ possibile inviare e-mail o navigare in internet solo se la macchina è nella Championsnet
ed ha una connessione ad internet.
Aggiornamento - Updateprocess
Il software del MAX FIRE/Video è installato sul disco interno del PC. Se si necessita un
48
aggiornamento, è necessario seguire la seguente procedura:
Procedura con Hardisk:
• Spegnere la macchina
• Collegare il disco di aggiornamento alla presa del PC
• Accendere la macchina
• Il processo ha inizio automaticamente e dura circa 30 minuti
• Dopo aver completato il processo di aggiornamento, apparirà uno schermo verde con la
dicitura “aggiornamento completato”. Ora sarà possibile spegnere la macchina e
disconnettere il disco dell’aggiornamento (update-disk)
• Accendere la macchina
• Seguire i messaggi che appaiono sullo schermo
Nota bene:
Se si effettua l’aggiornamento quando la macchina è in modalità Testmode, sarà possibile
installare opzioni speciali di aggiornamento! Si troveranno maggiori informazioni nella
pagina successive!
Aggiornamento
di
Servicedisk/stick XPE
File
musicali
e
video
tramite
Per copiare i propri file musicali nella macchina, è necessario utilizzare il Servicedisk
XPE o il Servicestick XPe. E’ possibile ordinare il disco direttamente con il codice
“831.000.075”. E’ anche possibile creare il proprio Servicedisk o Stick direttamente
utilizzando il programma “PrepDisk”. In questo caso è necessario scaricare questo
strumento dalla nostra homepage nell’account OTM. Visitare l’area download sul sito
www.tab.at e scaricare il manuale completo di informazioni tecniche chiamato
“Servicedisk / Stick XPE”.
Tutta la documentazione completa per gestire questo strumento con tutti i relativi dettagli
si trova in questa sezione.
E’ inoltre possibile codificare per proprio conto i file musicali tramite il software “TAB Mpeg
Encoder”. Contattare [email protected] per ulteriori informazioni oppure il numero +
39 031 74 65 42.
Pulsanti-opzioni
49
Accendendo la macchina in modalità testmode, le seguenti opzioni risultano disponibili:
Richiesta controllo dati/files
E’ necessario attivare questa opzione se si vuole che venga effettuato un controllo
completo dei files presenti nell’harddisk
Richiesta calibrazione Touch-screen
E’ necessario attivare questa opzione se si vuole richiedere la calibrazione del Touch
screen
Se la macchina è in modalità Testmode, prima di effettuare l’aggiornamento si ha la
possibilità di impostare le seguenti opzioni:
Formattazione/Defragmentazione
Formattazione del disco interno e delle sue singole parti
No Backup and Restore
E’ necessario attivare questa opzione quando si vuole cancellare tutti i dati dopo aver
effettuato l’aggiornamento
50
Dati tecnici
Macchina imballata:
Lunghezza – 590mm
Profondità – 460mm
Altezza – 1030mm
Peso netto: 38kg
Peso lordo: 44,5kg
51
Risoluzione dei problemi
Problema
Touch screen
funziona solo
parzialmente
Il test memoria
fallisce
all’accensione
Nessuna funzione
attiva/Il sistema non
risponde
Nessuna immagine
Nessun suono
Una o più chiavi non
funzionano
La lettura delle
monete inserite non
è corretta
Le monete non
vengono accettate
Difficoltà
nell’accettare le
monete inserite
La gettoniera non
funziona
Causa
Il cavo di connessione dal
touch screen al PC è difettoso
(la parte che è connessa al
PC)
La memoria è difettata
La presa principale non è
collegata.
L’interruttore principale non è
stato acceso.
I fusibili si bruciano.
L’alimentatore non è
connesso.
Il cavo del video non è
connesso.
Diplay difettoso.
Il volume è basso.
Il cavo dell’audio non è
connesso.
Casse difettose.
Il connettore non è collegato.
La chiave non è correttamente
assemblata o è difettosa.
Errata programmazione del
valore della moneta
Soluzione
Sostituire il cavo di
connessione
Sostituire il PC
Connettere alla presa
principale. Accendere
l’interruttore principale.
Sostituire i fusibili.
Controllare l’alimentatore
del display e le spine.
Connettere il cavo del
video.
Sostituire display.
Alzare il volume.
Connettere il cavo
dell’audio.
Sostituire le casse.
Controllare la connessione
della spina.
Controllare la chiave o
sostituirla.
Controllare le impostazioni
di sistema
Controllare l’alimentatore.
Pulire la gettoniera.
Cambiare la
programmazione.
Sostituire la gettoniera.
Non arriva corrente alla
gettoniera.
La gettoniera è sporca.
Il canale non è stato associato
a nessuna moneta.
La gettoniera è difettosa.
La gettoniera è sporca.
Pulire la gettoniera.
Gettoniera difettosa.
Sostituire gettoniera.
Messaggi di errore
52
Vari messaggi di errore possono apparire durante la procedura di copiatura. I messagi
possono essere i seguenti:
HARDLOCK DONGLE NOT CONNECTED/ LA CHIAVE DEL DONGLE NON E’ CONNESSA
Il dongle deve essere connesso prima di effettuare la copiatura. Controllare del connessione
del dongle.
WRONG DONGLE CONNECTED/DONGLE CONNESSO IN MODO ERRATO
Connessione errata del dongle
UNKNOWN CONFIGURATION/CONFIGURAZIONE SCONOSCIUTA
L’hard disk dell’aggiornamento non supporta la configurazione della macchina. Sottoporre la
macchina al controllo del rivenditore.
OVERWRITE PROTECTION/PROTEZIONE DELLA SOVRASCRITTURA
Controllare il set up dell’hard disk. In caso contrario sottoporre la macchina al controllo del
rivenditore.
PARTITION ERROR/ERRORE DI PARTIZIONE
L’hard disk che deve essere aggiornato non può essere configurato. L’hard disk o il cavo sono
difettosi.
NO TOUCH SCREEN PROGRAM/NESSUN PROGRAMMA TOUCH SCREEN
Il programma per la calibrazione dei 25-p. non è stato trovato. Effettua un nuovo
aggiornamento.
MASTERDISK ERROR/ERRORE DEL DISCO MASTER
E’ stato rilevato un errore durante il processo dell’aggiornamento dell’hard disk. Il disco di
aggiornamento o probabilmente la cartuccia dell’hard disk removibile o il cavo relativo all’hard
disk sono difettosi.
SLAVEDISK ERROR/ERRORE SLAVEDISK
E’ stato rilevato un errore durante il processo dell’aggiornamento dell’hard disk. Il disco o il
cavo sono difettosi.
MASTER COPY FILES ERROR/ERRORE NELLA COPIATURA DEL FILE MASTER
E’ stato rilevato un errore durante la lettura dell’update disk. Il disco di aggiornamento o
probabilmente la cartuccia dell’hard disk removibile o il cavo relativo all’hard disk sono
difettosi.
SLAVE COPY FILES ERROR/ERRORE NELLA COPIATURA DEL FILE SLAVE
E’ stato rilevato un errore nella scrittura dell’hard disk che deve essere aggiornato. Il disco o il
cavo sono difettosi.
NOT COMPLETELY UPDATED/INTERRUZIONE DEL PROCESSO DI AGGIORNAMENTO
La procedura di aggiornamento non è stata completata e deve essere ripetuta.
CHECK FILES ERROR/CONTROLLO DEGLI ERRORI NEI FILES
53
Il contenuto dell’hard disk non corrisponde alle specifiche. Effettuare l’aggiornamento per
la correzione. Se l’errore si rileva immediamente dopo l’aggiornamento, l’hard disk o il
relativo cavo sono difettosi.
Accessoristica
54
2
Item number
22032000
Max Fire
Front door, LCD
BG Faceplate Front down MF 2
3
373210000
Plastic Front MF 2
4
462990000
Set Front Cover Leds MF 2
6
831700033
LCD TFT 17" LTM170KT-LS19E4
7
462930202
Touch Screen 17"flat+USB C. 17-8421-117
8
464065244
Front Plate Midi for Secci RM-F6/DL
9
22082090
Bracket Display MF 2
10
22130290
Mounting Angle Ledband Top MF 2
11
22130291
Mounting Angle Ledband MF 2
12
22130500
Tin Insert f. Interlocking MF 2
13
22130510
Tin Insert f. Centring Pin MF 2
14
22082140
NIRO cover top MF 2
15
462980010
RGB Ledband
16
360110781
Connecting Cable RGB Led 15cm
17
675191766
Hinge MF 2
18
675162053
Front Tin Plate f. Coin Acceptor MF 2
19
414831001
PCB Board Display 15"/17"
20
360110702
Cable OSD Board for TFT Samsung
22
22089000
Corpus, Wiring, End-use
BG Cabinet MF 2
23
22018006
Mounting Cross TAB MAX FIRE
24
675191166
Hinge Down MAX FIRE
25
831900033
Fan 80x80mm with JST Connector
26
412120260
Loudspeaker SC 5.9 ND 8056
27
675191550
Lock C905 23mm Keyed Unlike JTIC
28
675191395
Lock 23mm Short C610-L Round
29
22083220
Counterpart f. Obstruction Cashbox Lock
Nr.
55
30
22130540
Track Stirrup MF 2
31
675196800
Lock Bar MF 2 JTIC
32
671115507
Linefilter 4A 3,15A
33
675196870
Lock Bar MF 2
34
22082109
Faceplate Card Reader
35
22050500
Mounting Bolt for Wall Unit 112462
36
360110005
Cable VDAI Strato
38
831000082
Wiring, End-use
PC TAB Micro-ATX MAX FIRE 2
39
462930117
Cable Touch Controller USB to EXII
40
464138445
Coin Acceptor SECI RM5FZC Front
41
360110724
Harness Max Fire 2
42
360110783
Connecting Cable PC RGB Ledcontroller
43
360110780
Cable Supply Display MF2
44
360110712
Cable VGA f. LCD TFT 17"
46
22080300
Option Banknote reader ASTRO
Cover Acceptor MF 2
47
22083000
BG Cashbox MF 2
48
10100523
Bill Acceptor Astro GBA HR1
49
22082806
Holder for Bill Acceptor Astro GBA
50
361110000
BG Cashbox MF 2
52
22082082
Option Amplifier
Bracket Linefilter MF 2
53
22083400
Cover for Linefilter MF 2
54
360110609
PC Cable Audio
55
210076000
BG Substruction Case MF 2
56
210076002
BG Substruction Door WF 2
58
675191940
BG Hinge Substruction MF 2
59
22083201
Cutting Cover for Linefilter MF 2
60
22083410
Cover for Linefilter Substruction MF2
56
61
285146005
Amplifier for MAX with Remote Control
63
675191395
Lock 23mm Short C610-L Round
64
675196810
Stirrup Substruction MF 2
65
22080900
Connecting Strip MF 2
66
22223730
Base Plate f. Substruction Locking MF 2
67
210076010
BG Locking Substruction MF 2
68
22082333
Centring Pin Substruction MF 2
831100002
End-control
Software-License for Windows XP Embedded
70
C- Parts
Wiring plan
57
58
EC Declaration of Conformity
59
General Terms and Conditions of Trade
of TAB-AUSTRIA Industrie- und Unterhaltungselektronik GmbH & CoKG
Haider Straße 40, A-4052 Ansfelden
1. Validity of Terms and Conditions of Trade
Deliveries, services and offers by TAB-AUSTRIA Industrie- und Unterhaltungs-elektronik
GmbH & CoKG – hereinafter called "TAB" -- are made exclusively on the basis of these
General Terms and Conditions of Trade. Consequently, they will also be applicable to all
future trade relations even if not expressly agreed upon once again. At the latest upon
receipt/acceptance of the goods or services, these Terms and Conditions will be deemed
as accepted. Deviations from these Terms and Conditions, in particular by sending of
contrary purchase terms, will be valid only if expressly accepted by TAB in writing.
2. Offers and Conclusion of Agreements
a) TAB's offers are without obligation and not binding.
b) Customer will be bound to his order for three weeks. In order to be legally valid,
orders require performance of the delivery by TAB or written confirmation by TAB, which
will be deemed as granted unless TAB refuses acceptance within three weeks after receipt
of order at Ansfelden.
c) Subsidiary agreements, modifications and amendments will be valid only if confirmed
by TAB in writing. The same will be applicable to the warranty of qualities.
3. Prices
All prices are net prices exclusive of VAT, which will have to be paid additionally by
Customer in the respective statutory amount. Prices are ex works Ansfelden, exclusive of
freight, packing, insurance and installation.
4. Delivery Time
4.1 Agreements regarding delivery dates or -periods require written form. Unless agreed
otherwise, delivery dates or -periods will not be binding.
4.2
Even with bindingly agreed deadlines and dates, TAB will not be responsible for
delays in deliveries and services due to force majeure and due to events making
delivery considerably more difficult or impossible for TAB -- including, among other
things, difficulties regarding procurement of materials occurring later, operating
troubles, strike, lockout, staff shortage, shortage in means of transport, official
orders, etc. -- even if these circumstances occur with TAB's suppliers, their subsuppliers or transport agents. Such delays will entitle TAB to postpone delivery
and/or performance for the duration of the hindrance plus an appropriate starting
time, or to wholly or partially cancel the agreement due to the part not yet performed.
4.3 Should such hindrance last for more than three months, then Customer will, after
having granted an appropriate extension of the original period, be entitled to cancel the
agreement with regard to the part not yet performed. Should the delivery period be
60
prolonged or should TAB become free of its obligation, then Customer will not be able to
derive any damage claims out of this.
4.4 TAB will at any time be entitled to make partial deliveries and part performances.
5. Venue of Performance, Dispatch and Passing of Risk
5.1 Venue of performance will be the registered seat of TAB at Haider Straße 40, 4052
Ansfelden. Packing and dispatch will be effected at Customer's expense and risk. Upon
Customer's express request and at his expense, the delivery will be insured against
breakage, transport and fire damage.
5.2 The risk will pass to Customer upon conclusion of the agreement.
6. Warranty and Liability
6.1 Seller will have to be informed in writing about defects of new pieces of equipment
delivered by TAB no later than within eight days after receipts of the goods.
6.2 In case of hidden defects, complaints may only be made immediately after detection
thereof, but no later than three months after receipt of the goods.
6.3 Should a third party have repaired, or tried to repair, the delivered goods, then any
complaint will be excluded. The same will be applicable should Customer incompetently
interfere with the delivered goods.
6.4 Complaints will have to be made in writing. Should TAB not be informed in good time
in accordance with the above paragraphs about possible defects of the goods, then all and
any warranty claims will be excluded.
6.5 Should goods delivered by TAB be defective or should faults be discovered within the
warranty period, then TAB will only have to undertake improvement or substitute delivery
within an appropriate period, whereby TAB will in any case be entitled to deliver a
replacement instead of correction. There will be no other or further claims, in particular to
diminution of price, or replacement for any repair services carried out in-house or ordered
from outside, regardless of the legal grounds, unless separately agreed upon with TAB.
Compensation of possible consequential damages will be limited to direct damages up to
half of the respective order's invoice value; Customer will only be entitled to this if TAB or
its employees can be blamed for gross negligence or wrongful intent.
6.6 The defective goods are to be surrendered to us or returned to us. Repairs at the setup
site are not possible. Transport costs and transport risk are to be borne by Customer.
6.7 Damage claims will only exist in case of wrongful intent or gross negligence and will
be limited as to their amount by the invoiced amount.
6.8
Sale of used pieces of equipment will be effected subject to exclusion of any
warranty- and liability claims of Customer's.
6.9 The name "TAB" is a registered trademark. TAB is entitled to industrial property
rights to the products delivered by TAB. Customer may use and resell such products only
61
within the scope of a proper course of business.
6.10 Possible recourse claims pursuant to Section 12 PHG (Product Liability Act), as well
as any exclusion of liability in accordance with Section 8 No. 3 PHG, are excluded.
6.11 All liability for claims stemming from or in connection with enticing to play or carrying
out games, in particular for gambling compulsions is expressly barred. Customer will hold
TAB completely harmless against all such claims brought by customers of TAB's or the
latter's affiliated companies.
6.12 All warranty and liability claims resulting from this contractual relationship are finally
settled in Item 6. Over and above that, Customer will not be entitled to any claims
whatsoever.
7. Reservation of Proprietary Rights
7.1 Until complete payment of the purchase price, TAB will reserve ownership of the
delivered goods.
7.2 Pawning or transfer of ownership by way of security of the conditional goods will not
be admissible. In case of seizure of the conditional goods by third parties, in particular in
case of levy of execution, Purchaser will immediately have to inform TAB in writing and to
inform the third party of TAB's reservation of title. Purchaser will be obligated to bear all
costs expended for defense against the seizure and for recovery of the delivered item as
far as such costs may not be attained from the third party.
7.3 Up through complete performance of Customer's obligations towards TAB, Customer
will assign for security to TAB his claim resulting from resale of goods delivered by TAB.
Upon TAB's request, Customer will have to inform TAB about the debtors of the assigned
claims, to inform debtors of such assignment, and to keep the proceeds from sale of the
conditional goods separate and in TAB's name. Provided that TAB's total claims from
such assignments are secured beyond all doubt at more than 120%, TAB undertakes to
release the surplus receivables upon Customer's request by TAB's choice.
7.4 By processing of the conditional goods, Customer will not acquire ownership of the
new goods; processing will be effected by Customer for TAB.
Customer undertakes to keep these goods free of charge. In case of processing or
mingling with goods owned by a third party, TAB will acquire co-ownership of the new
goods in proportion of the invoice value of goods delivered by TAB to the invoice value of
the remaining goods.
7.5 In case of Customer's acting in violation of the Agreement, in particular in case of
default in payment, TAB will be entitled to reclaim the provisional goods at Customer's
expense. Such recovery claim, as well as levy of execution of the goods by TAB, will not
62
constitute a cancellation of the Agreement.
7.6 As soon as he has stopped payments, in fact immediately after announcement of the
cessation of payments, Customer will be obligated to send to TAB a list of the still existing
provisional goods, even if processed, and a list of claims towards third party debtors plus
copies of invoices. Amounts received from assigned claims will have to be kept separately
until bank transfer.
8. Transfer Prohibition
All claims of Customer's resulting from this Agreement will be unassignable.
9. Payment, Default, Set-Off
9.1 Unless agreed otherwise, all payments will have to be made immediately upon
receipt of invoice without deductions.
9.2 Acceptance of cheques or bills of exchange will only be effected for payment
purposes. Discount- and bank costs as well as costs of bills of exchange will have to be
borne by Customer.
9.3 In case of default in payment, refund of all reminder- and collecting charges, as well
as interest in the amount of 10% above the applicable base interest rate will be deemed as
agreed upon. Incoming payments will be set-off first against the costs, then against the
interest and last against the main obligation to be performed.
9.4 Non-compliance with payment conditions or circumstances suitable to impair
Purchaser's credit worthiness will result in maturity of all of Seller's claims. It will
furthermore entitle Seller to perform outstanding deliveries against advance payment only
or to cancel the Agreement, and/or to demand compensation for damage due to nonperformance.
9.5 Customer will not be entitled to withhold payment or a part thereof for counterclaim
reasons or to set-off counterclaims, including such resulting from complaints.
10. Exchange Equipment/Trade-In
63
Should used pieces of equipment be traded in by TAB for complete or partial covering of
the purchase price, then Purchaser will be obligated to inform TAB of any defects of the
pieces of equipment traded in. Purchaser guarantees that the pieces of equipment only
have such defects as expressly announced.
Should it turn out within a six-month-period that the pieces of equipment have defects not
announced to TAB, then TAB will be entitled to return such pieces of equipment and to
invoice Customer the trade-in value thereof.
11. General provisions
11.1 The laws of the Republic of Austria will be applicable to all legal relationships of the
parties; application of international agreements, in particular of the UN Convention on the
International Sale of Goods of 14 April 1980 is expressly barred.
11.2 The respective court having jurisdiction over the subject-matter in Linz, Austria, is
agreed upon as exclusive venue of jurisdiction.
11.3 The contract merchandise consists exclusively of electric or electronic equipment for
commercial purposes within the meaning of section 3 Z 9 of the Used Electric Equipment
Ordinance, Federal Gazette II, 121/2005.
The marketing partner will assume the obligation incumbent on the manufacturer under
section 10 of the Used Electric Equipment Ordinance, Federal Gazette II, 121/2005 and
will by contract grant his customers the right to return the contract merchandise to him and
hereby puts himself under an obligation to retake the contract merchandise.
If the contract merchandise is returned directly to TAB by the customers, the marketing
partner is responsible for pick-up of the contract merchandise from TAB and for legally
proper treatment of the contract merchandise. If the marketing partner fails to comply with
his obligation to retake the merchandise, then TAB must be compensated for costs and
damages connected with retaking and treatment of the contract merchandise.
11.4 The marketing partner will participate in a collection and recycling system within the
meaning of section 11 of the Packaging Ordinance, Federal Gazette 648/1996 that
ensures retaking and treatment of packaging for the contract merchandise. TAB is to be
given written certification of its legally effective participation in a collection and recycling
system. Certification will either occur by means of submission of the contractual
agreements or on the order documents.
The marketing partner must compensate TAB for all damages and costs incurred by TAB
due to the fact that the marketing partner fails to comply with his obligations assumed
under the Packaging Ordinance such as, in particular, the terms for participation in a
collection and recycling system.
11.5 Customer must assert any eventual claims stemming from or in connection with its
legal relations with TAB within six months in writing or risk default.
64
11.6 Should one or several of the above provisions be or become invalid or
impracticable, then the validity of the remaining provisions will remain unaffected. Rather,
the invalid and/or impracticable provision will have to be replaced by such valid or
practicable provision as will realize to the widest possible extent the economic purpose
pursued by the former.
As amended on 13 Mai 2005
65
END-USER LICENSE AGREEMENT FOR
MICROSOFT SOFTWARE
IMPORTANT - READ CAREFULLY: This End-User License Agreement ("EULA") is a
legal agreement between you (either an individual or a single entity) and the
manufacturer ("Manufacturer") or the special purpose computing device
("SYSTEM") you acquired which includes certain Microsoft software product(s)
installed on the SYSTEM ("SOFTWARE PRODUCT" or "SOFTWARE"). The
SOFTWARE includes computer software, the associated media, any printed
materials, and any "online" or electronic documentation. By installing, copying or
otherwise using the SOFTWARE, you agree to be bound by the terms of this EULA.
If you do not agree to the terms of this EULA, Manufacturer and Microsoft
Corporation ("Microsoft") are unwilling to license the SOFTWARE to you. In such
event, you may not use or copy the SOFTWARE, and you should promptly contact
Manufacturer for instructions on return of the unused product(s) for a refund.
SOFTWARE LICENSE
The SOFTWARE is protected by copyright laws and international copyright treaties, as
well as other intellectual property laws and treaties. The SOFTWARE is licensed, not sold.
1. GRANT OF LICENSE. This EULA grants you the following rights:
• Software. You may use the SOFTWARE as installed on the System.
• Application Sharing. The SOFTWARE may contain technology that enables
applications to be shared between two or more SYSTEMS, even if an application is
installed on only one of the SYSTEMS. You should consult your application license
agreement or contact the application licensor to determine whether sharing the application
is permitted by its licensor.
• Storage/Network Use. If the SOFTWARE PRODUCT is installed on the SYSTEM over
an internal network from a server, you must acquire and dedicate a license for the
SOFTWARE PRODUCT for each SYSTEM on which the SOFTWARE PRODUCT is used
or to which it is distributed. A license for the SOFTWARE PRODUCT may not be shared or
used concurrently on different SYSTEMS.
• Back-up Copy. If MANUFACTURER has not included a copy of the SOFTWARE on
separate media with the SYSTEM, you may make a single copy of the SOFTWARE for
use solely for archival purposes with the SYSTEM.
2. DESCRIPTION OF OTHER RIGHTS AND LIMITATIONS.
• Limitation on Reverse Engineering, Decompilation and Disassembly. You may not
reverse engineer, decompile, or disassemble the SOFTWARE, except and only to the
extent that such activity is expressly permitted by applicable law notwithstanding this
limitation.
• Single SYSTEM. The SOFTWARE is licensed with the SYSTEM as a single integrated
product. The SOFTWARE may only be used with the SYSTEM.
66
• Rental. You may not rent or lease the SOFTWARE.
• Software Transfer. You may permanently transfer all of your rights under this EULA only
as part of a sale or transfer of the SYSTEM, provided you retain no copies, you transfer all
of the SOFTWARE (including all component parts, the media, any upgrades or backup
copies, and this EULA, and if applicable, the Certificate(s) of Authenticity), and the
recipient agrees to the terms of this EULA. If the SOFTWARE is an upgrade, any transfer
must include all prior versions of the SOFTWARE.
• Termination. Without prejudice to any other rights, Manufacturer or Microsoft may
terminate this EULA if you fail to comply with the terms and conditions of this EULA. In
such event, you must destroy all copies of the SOFTWARE and all of its component parts.
• Single EULA. The package for the SOFTWARE may contain multiple versions of this
EULA, such as multiple translations and/or multiple media versions (e.g., in the user
documentation and in the software). In this case, you are only licensed to use one (1) copy
of the SOFTWARE PRODUCT.
3. UPGRADES AND RECOVERY MEDIA.
• If the SOFTWARE is provided by Manufacturer on media separate from the SYSTEM
and is labeled "For Upgrade Purposes Only" (Upgrade SOFTWARE), you may install one
copy of the Upgrade SOFTWARE onto the SYSTEM as a replacement copy for the
SOFTWARE originally installed on the SYSTEM and use it in accordance with Section 1 of
this EULA. You may also install additional copies of the Upgrade SOFTWARE as
replacement copies onto additional SYSTEMS which are the same brand and model as
the SYSTEM and contain a duly licensed copy of the same version and language release
of the SOFTWARE ("ADDITIONAL SYSTEMS"), provided that (1) Manufacturer has
supplied a corresponding serialised sticker for each additional copy of the Upgrade
SOFTWARE, and (2) you affix a serialised sticker per Manufacturer’s instructions for each
unit of Upgrade SOFTWARE you install.
• If the SOFTWARE is provided by Manufacturer on separate media and labeled as
"Recovery Media", you may not make a copy of the SOFTWARE as described in Section 1
for archival purposes. Instead, you may use the Recovery Media solely to restore or
reinstall the same version and language release of the SOFTWARE as originally installed
on the SYSTEM and thereafter use the SOFTWARE as restored or reinstalled in
accordance with Section 1 of this EULA. A single unit of Recovery Media may be used by
you to restore or reinstall the SOFTWARE on ADDITIONAL SYSTEMS.
4. COPYRIGHT.
• All title and copyrights in and to the SOFTWARE (including but not limited to any images,
photographs, animations, video, audio, music, text and "applets," incorporated into the
SOFTWARE), the accompanying printed materials, and any copies of the SOFTWARE,
are owned by Microsoft or its suppliers. You may not copy the printed materials
accompanying the SOFTWARE. All rights not specifically granted under this EULA are
reserved by Microsoft.
67
5. PRODUCT SUPPORT.
• Product support for the SOFTWARE is not provided by Microsoft or its subsidiaries. For
product support, please refer to Manufacturer's support number provided in the
documentation for the SYSTEM. Should you have any questions concerning this EULA, or
if you desire to contact Manufacturer for any other reason, please refer to the address
provided in the documentation for the SYSTEM.
6. LIMITED WARRANTY.
• Limited Warranty. Manufacturer warrants that the SOFTWARE will perform substantially
in accordance with the accompanying written materials for a period of ninety (90) days
from the date of receipt. Any implied warranties on the SOFTWARE are limited to ninety
(90) days. Some states/jurisdictions do not allow limitations on duration of an implied
warranty, so the above limitation may not apply to you.
• Customer Remedies. Manufacturer's and its suppliers' entire liability and your exclusive
remedy shall be, at Manufacturer's option, either (a) return of the price paid, or (b) repair or
replacement of the SOFTWARE that does not meet the above Limited Warranty and which
is returned to Manufacturer with a copy of your receipt. This Limited Warranty is void if
failure of the SOFTWARE has resulted from accident, abuse, or misapplication. Any
replacement SOFTWARE will be warranted for the remainder of the original warranty
period or thirty (30) days, whichever is longer.
• No Other Warranties. EXCEPT AS EXPRESSLY PROVIDED IN THE LIMITED
WARRANTY SECTION ABOVE, THE SOFTWARE IS PROVIDED TO THE END USER
"AS IS" WITHOUT OF ANY KIND, EITHER EXPRESSED OR IMPLIED, INCLUDING,
BUT
NOT
LIMITED
TO,
WARRANTIES
OF
NON-INFRINGEMENT,
MERCHANTABILITY, AND/OR FITNESS FOR A PARTICULAR PURPOSE. THE
ENTIRE RISK OF THE QUALITY AND PERFORMANCE OF THE SOFTWARE IS WITH
YOU.
• No Liability for Consequential Damages. MANUFACTURER'S SUPPLIERS SHALL
NOT BE HELD TO ANY LIABILITY FOR ANY DAMAGES SUFFERED OR INCURRED
BY THE END USER (INCLUDING, BUT NOT LIMITED TO, GENERAL, SPECIAL,
CONSEQUENTIAL OR INCIDENTAL DAMAGES INCLUDING DAMAGES FOR LOSS
OF BUSINESS PROFITS INTERRUPTION, LOSS OF BUSINESS INFORMATION AND
THE LIKE), ARISING FROM OR IN CONNECTION WITH THE DELIVERY, USE OR
PERFORMANCE OF THE SOFTWARE.
7. NOTE ON JAVA SUPPORT.
THE SOFTWARE PRODUCT MAY CONTAIN SUPPORT FOR PROGRAMS
WRITTEN IN JAVA. JAVA TECHNOLOGY IS NOT FAULT TOLERANT AND IS NOT
DESIGNED, MANUFACTURED, OR INTENDED FOR USE OR RESALE AS ONLINE CONTROL EQUIPMENT IN HAZARDOUS ENVIRONMENTS REQUIRING
FAIL-SAFE PERFORMANCE, SUCH AS IN THE OPERATION OF NUCLEAR
FACILITIES, AIRCRAFT NAVIGATION OR COMMUNICATION SYSTEMS, AIR
68
TRAFFIC CONTROL, DIRECT LIFE SUPPORT MACHINES, OR WEAPONS
SYSTEMS, IN WHICH THE FAILURE OF JAVA TECHNOLOGY COULD LEAD
DIRECTLY TO DEATH, PERSONAL INJURY, OR SEVERE PHYSICAL OR
ENVIRONMENTAL DAMAGE.
69
Attachment 1
70
Warranty terms by TAB-AUSTRIA Industrie und
Unterhaltungselektronik GmbH & Co KG
(TAB hereinafter)
We are granting a warranty for this machine under the following conditions:
11. Insofar as the “General Terms of Business of TAB-AUSTRIA Industrie- und
Unterhaltungselektronik GmbH & Co KG” are not modified by the following which sets out
the conditions and scope of our warranty performance, these terms will continue to apply
without change.
12. The warranty period for our products from delivery is:
• 24 months for all Silverball Terminals (Silverball Strato, Silverball Strato Max,
Silverball Cosmo, Silverball Cosmo Max, Silverball Pro, Silverball Max Pro,
Silverball Beetle Pro, Silverball Beetle Max Pro)
• 24 months for Max Fire, Max Fire Video, Virtual Pinball, Golden Island
• 12 months for all other products, particularly betting terminals
• Six months for all spare parts; however, if a warranty period of more than six months
still obtains for the machines, this period will apply in its entirety to the spare part.
3. The warranty will only be granted for new products by TAB, not for their spare parts, not
for products of different brands and manufacturers and corresponding spare parts. No
warranty is granted for used products either.
14. In accordance with the following provisions, we shall repair defects to the machine that
have been demonstrably caused by a material and/or manufacturing fault which already
existed at the time the product was handed over, and which was reported within 14 days of
it becoming apparent to our sales partner or the first end user while still within the warranty
period. No warranty is assumed for used machines.
15. The warranty exclusively covers such components that are essential to operating the
product. It does not include easily damaged parts or wearing parts, such as, for example,
glass, plastic or light bulbs. Minor deviations from the desired composition insignificant to
the value and usability of the machine will not result in any warranty obligations. Damage
caused by physical, chemical, electrical or electrochemical or other effects not related to
the customary dedicated use will not result in any warranty obligations; neither does
damage caused by water or abnormal environmental conditions or inappropriate operating
conditions. Also, no warranty can be assumed for machine defects caused by transport
71
damage for which we are not responsible, incorrect installation and assembly, incorrect
use, non-observance of operating or assembly instructions or lack of care.
16. The warranty claim becomes void if repairs or interventions have been carried out by
the customer himself/herself or by persons who were not accordingly authorized or who
were not authorized by us or in the event of our machines being fitted with spare,
supplementary or accessory parts that are not original parts, or if parts have been
removed.
17. The warranty performance will be made in such a way that defective components will
at our discretion be repaired or replaced with faultless components free of charge unless
improvement or exchange are impossible or would result in for us unreasonable cost. In
such cases, a reduction in price or, in the event of not only a minor defect, cancellation of
sale may be claimed.
18. Machines for which a warranty performance is being claimed on the basis of this
warranty must be handed over or sent to us. Repairs at the installation site are not
possible. The customer will bear transport costs and the transport risk.
19. Exchanged parts will become our property.
110. Warranty performances will neither result in an extension of the warranty period nor
will they initiate a new warranty period.
111. Further or other claims (in particular claims for damages suffered beyond the
machine) are excluded insofar as liability is not mandatory by law.
212. These warranty terms apply to machines purchased and operated in Austria. They
apply to machines conveyed to other countries only insofar as they possess the technical
requirements (e.g. voltage, frequency, etc.) for the corresponding country, have been
officially approved for use there and are suited to the individual climate and environmental
conditions.
313. The TFT LCD display consists of more than 1,000,000 Thin-Film Transistors (TFT). A
small amount of missing, black, or luminous points is characteristic for TFT LCD
technology. The warranty performance will be granted if more than 15 missing, black, or
luminous points are present.
Version dated 25 April 2005
72
Notes
73


